Spring Ornaments with Baking Soda Clay

A few weeks ago, my daughter's preschool class made "fossils" out of baking soda clay. The teacher brought in plastic dinosaurs and seashells so the kids could mark tracks in the clay. After I grilled the teacher about how she made the clay, she gave me a bag of the leftover clay and our family had the best time making spring ornaments.
Baking soda clay is awesome in that it feels like playdough, so you can bend and mold it as you please. But it dries hard, allowing you to create long lasting heirlooms. It's really the perfect project for kids' of different ages because my toddler could just squish and roll it while the girls created ornaments.
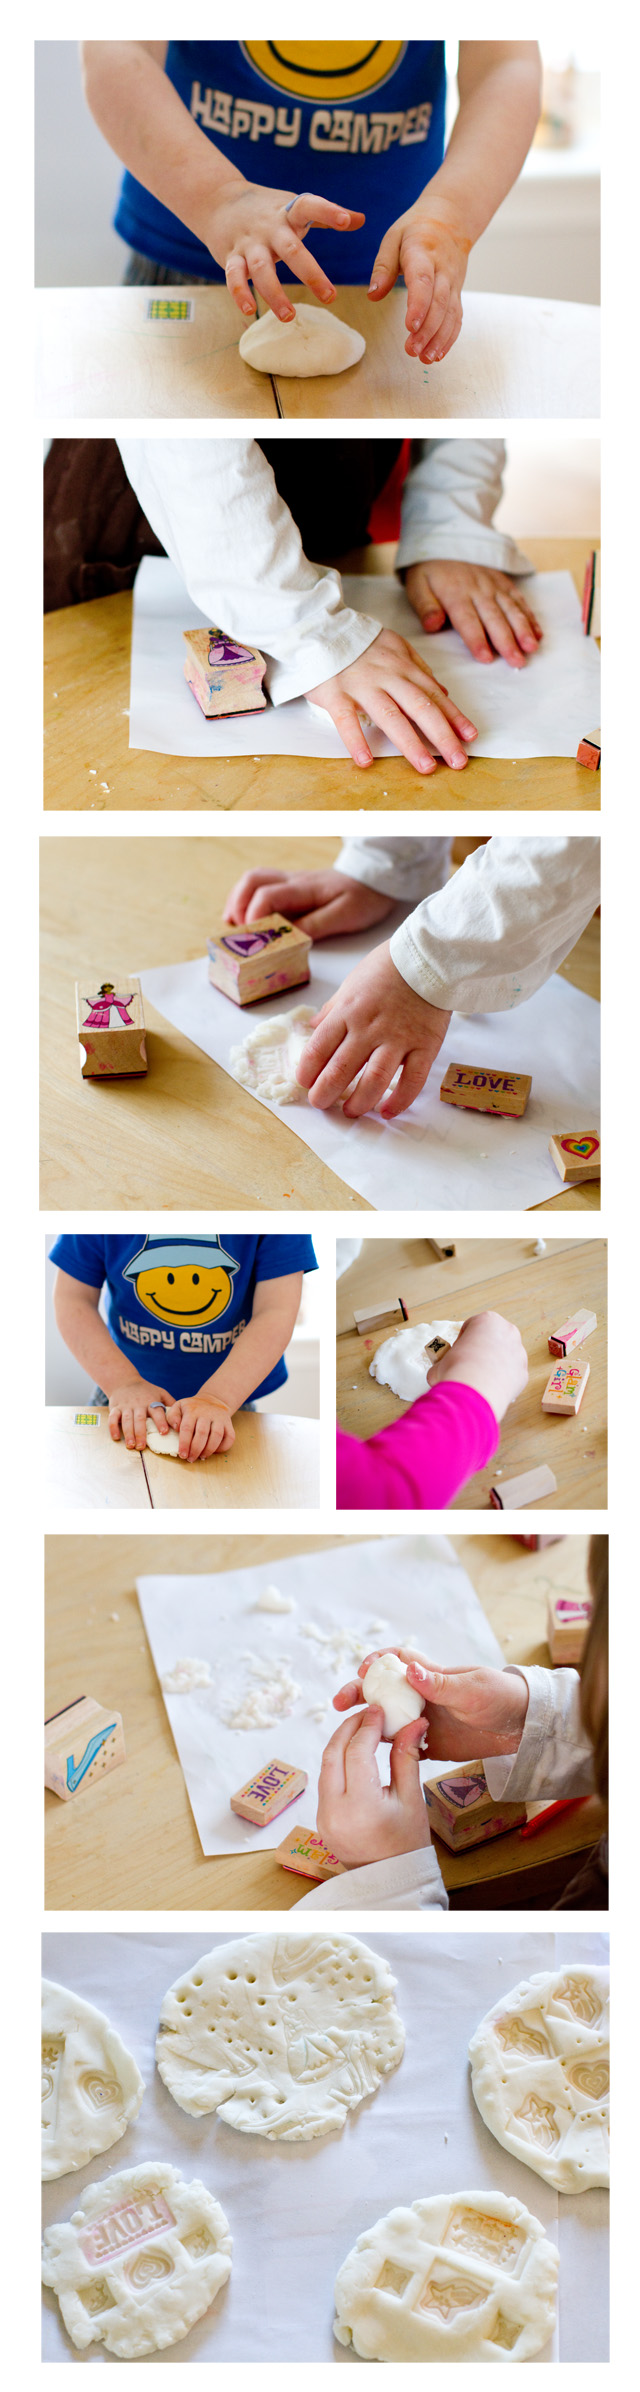
To make the ornaments we rolled the clay into balls and then flattened the balls with our palms. I gave the kids a bunch of stamps to create with, then I used a pen to make sure each "ornament" had a hole for hanging.
After the ornaments dried, I used string to attach them to tree branches. I thought the whole thing came out pretty classy looking for a kids' art project (living room worthy) and was feeling pretty proud of myself, but when the kids came home from school they were horrified that I planned on leaving their ornaments "plain and white." So we spent the afternoon painting them and now the whole thing looks much "louder" than anticipated. Oh well, color is good.
Here's the scoop:
BAKING SODA CLAY:
1. Mix 1 cup corn starch, 2 cups baking soda, and 1.25 cups cold water in a non-stick pot, stir until smooth.
2. Cook over medium-low heat until the mixture becomes somewhat "gunky" and thick.
3. Remove from the heat and let cool while covered. Once dry, the clay stores well for a few days in sealed ziplock bags.
4. After you finish creating your ornaments, you can let them air dry to hardness at room temperature over 2-3 days OR speed up the process in a 350 degree oven with the heat turned off.

Post by Darcy : bedtimemonsters.blogspot.com