Close

Blog

Laundry Hamper DIY

January 17, 2017

Post by Colleen of Lemon Thistle

Laundry Hamper DIY on blog.landofnod.com

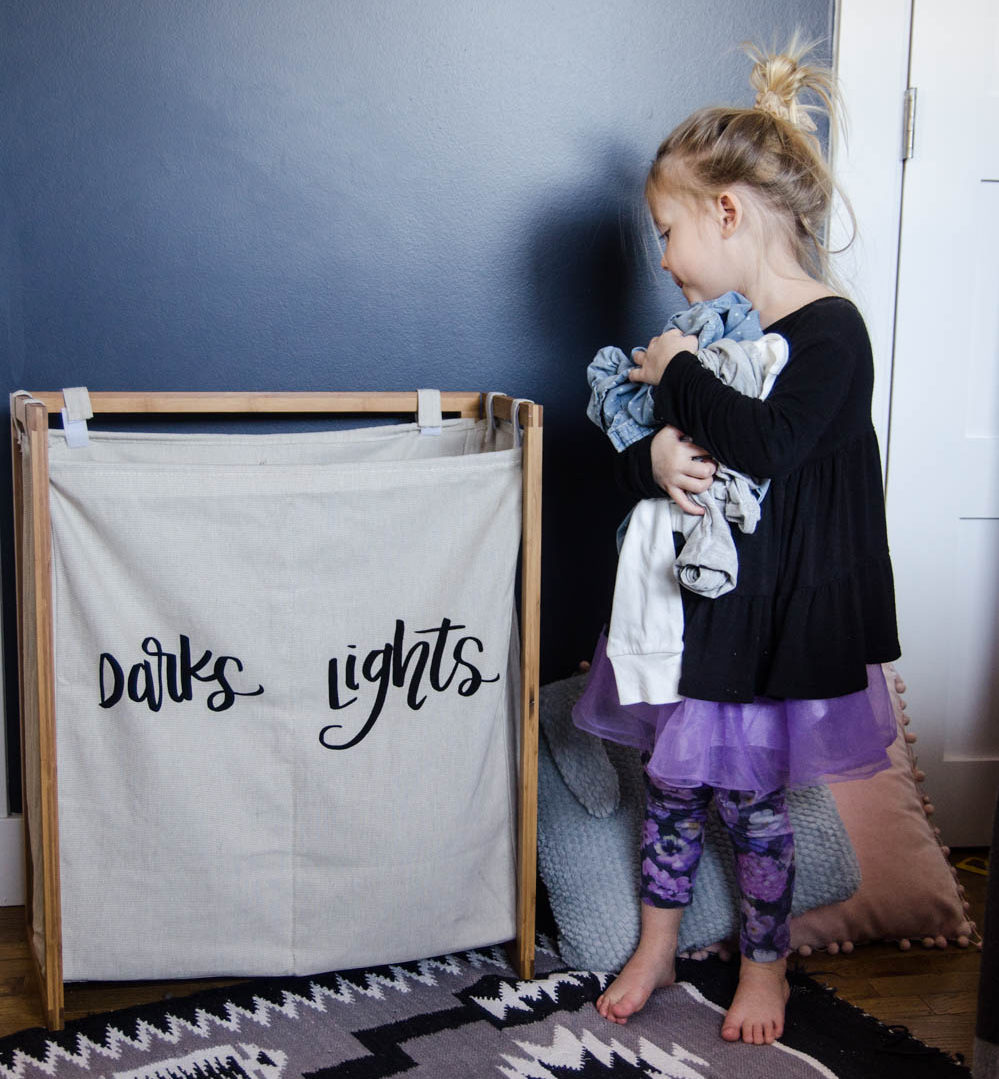
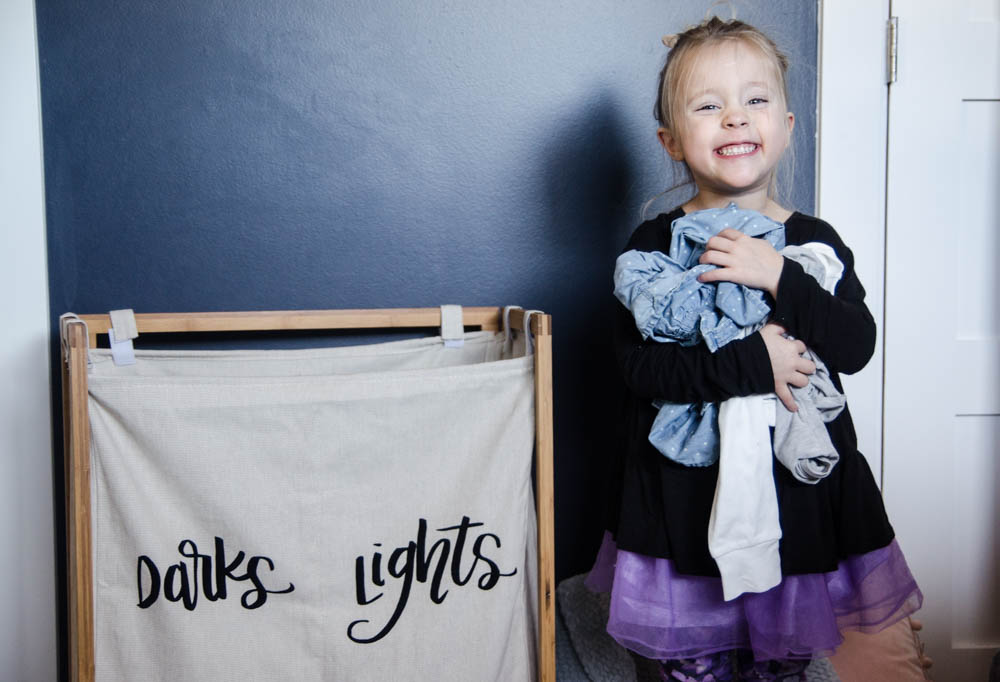
Do you ever have an idea that you *think* will be rad but then it turns out even more wonderful than you’d expected? That’s this DIY for me. I have been slowly but surely adding hand-lettered touches to every space in our home and when we got the Clean and Simple Double Hamper for our kids room, we LOVED the two separate bins to teach them sorting, but wanted to add a bit of a playful touch to it. They’re kiddos after all!

Laundry Hamper DIY on blog.landofnod.com

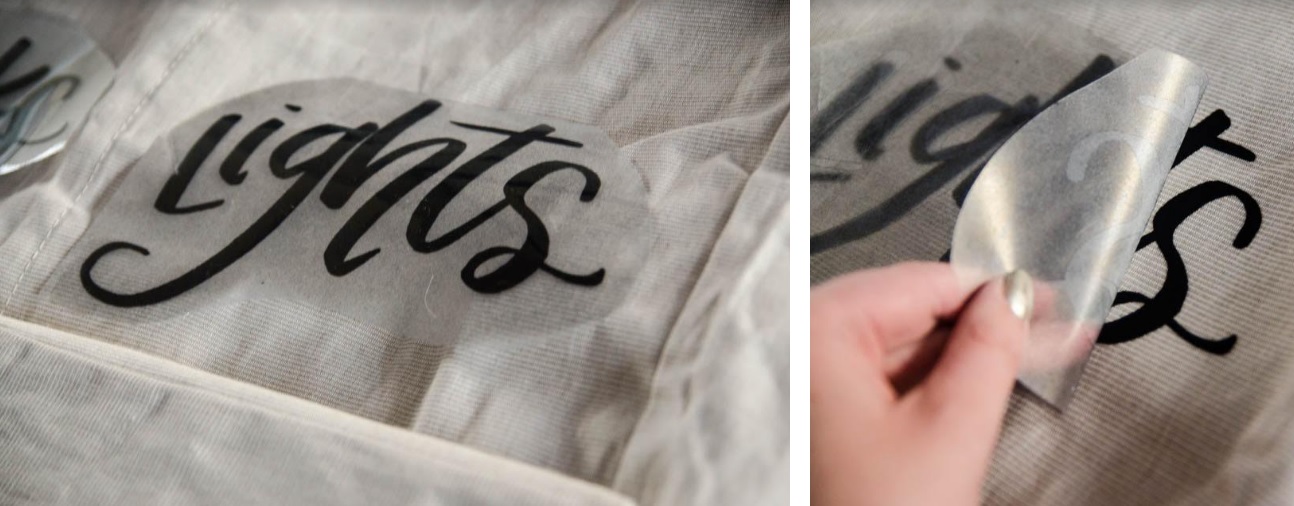
I hand-lettered ‘Lights’ and ‘Darks’ and used my Cricut to cut them out of flocked vinyl to iron on. I am completely in love with how they turned out- they play off the clean lines of the hamper in such a great way. I made sure the first letter of each word was super legible for little ones- my kiddos aren’t reading words yet (3 years old), just letters so as long as they know ‘L’ is for lights and ‘D’ is for darks, we’re good to go.

Laundry Hamper DIY on blog.landofnod.com

So far, we are having so much fun with the sorting! It makes putting away dirty laundry a little more fun if it’s a challenge for them to solve.

If you’d like to make your own sorting laundry hamper, today I’m excited to be sharing my hand-lettered digital files with you. These are for personal use only. Just download them right HERE and cut them out with any cutting machine, then iron on according to instructions.

Then, I dare you not to steal this hamper from your kiddos!

Colleen is a wife, Mama to twins with one on the way, and the DIY and lifestyle blogger behind Lemon Thistle where she shares printable art and hands on tutorials for DIY home decor, parties and gifts. Colleen believes you can have a beautiful life, home, and party without spending a lot- we’re keeping it real on a budget so everyone can join in on the fun.

DIY Paper Snowflakes

January 13, 2017

Post by Rae Ann Kelly

DIY Paper Snowflakes

The holidays might be over but winter has just begun and with it, lots of time indoors with wiggly kids. Some of my favorite ways to keep mine busy is with simple paper projects like paper airplanes or snowflakes! If it’s been awhile since you’ve made some, here’s the most kid friendly way I’ve found to do it…

DIY Paper Snowflakes

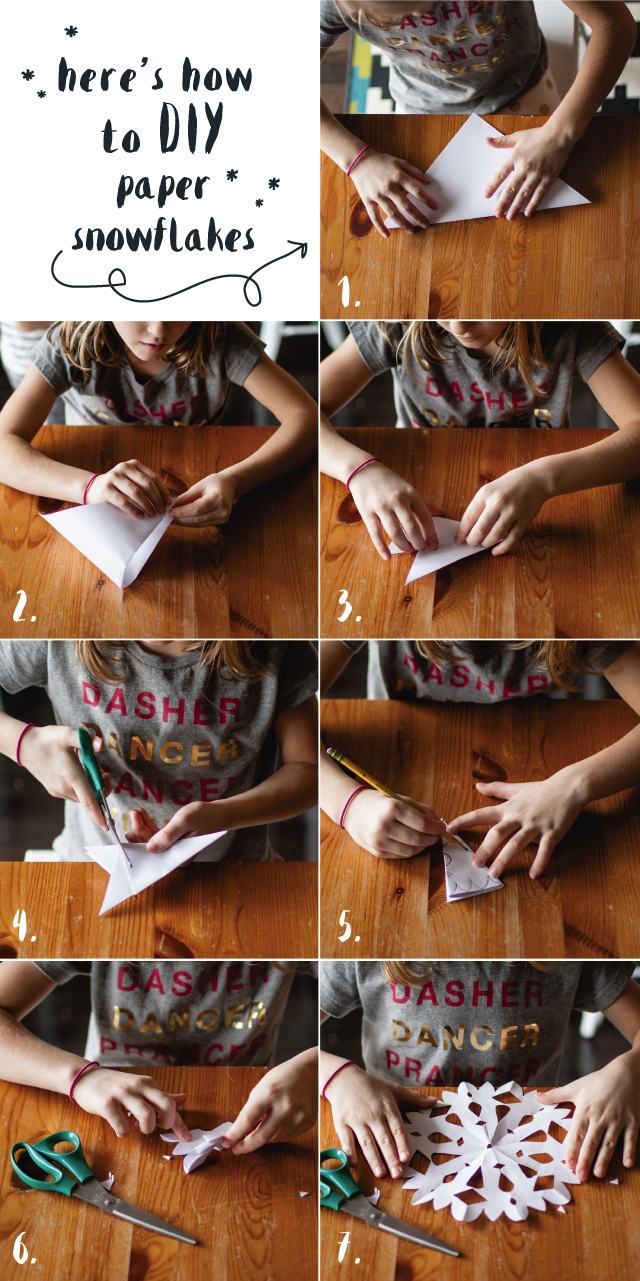
Here’s How:

  1. Take a square piece of text weight paper and fold it in half diagonally to make a triangle. We used 8.5 and 6 inch squares.
  2. Fold in half, making a triangle again.
  3. Next fold into thirds.
  4. Cut points to make a triangle.
  5. Draw your design along the outside edges. Have fun with different triangle or scalloped shaped so each snowflake is a little different.
  6. Cut along the lines you just made. (Do this step for the younger kids as safety scissors won’t work very well.
  7. Carefully unfold your paper snowflake. Optional: lay under a heavy book to flatten some of the creases.

The best part is that they double as darling accessories. Hang from the ceiling, on a window, tie to a gift or send as happy mail. Add some paper chains or garland and you have instant winter wonderland vibes or decor for a party or play date.

DIY Paper Snowflakes

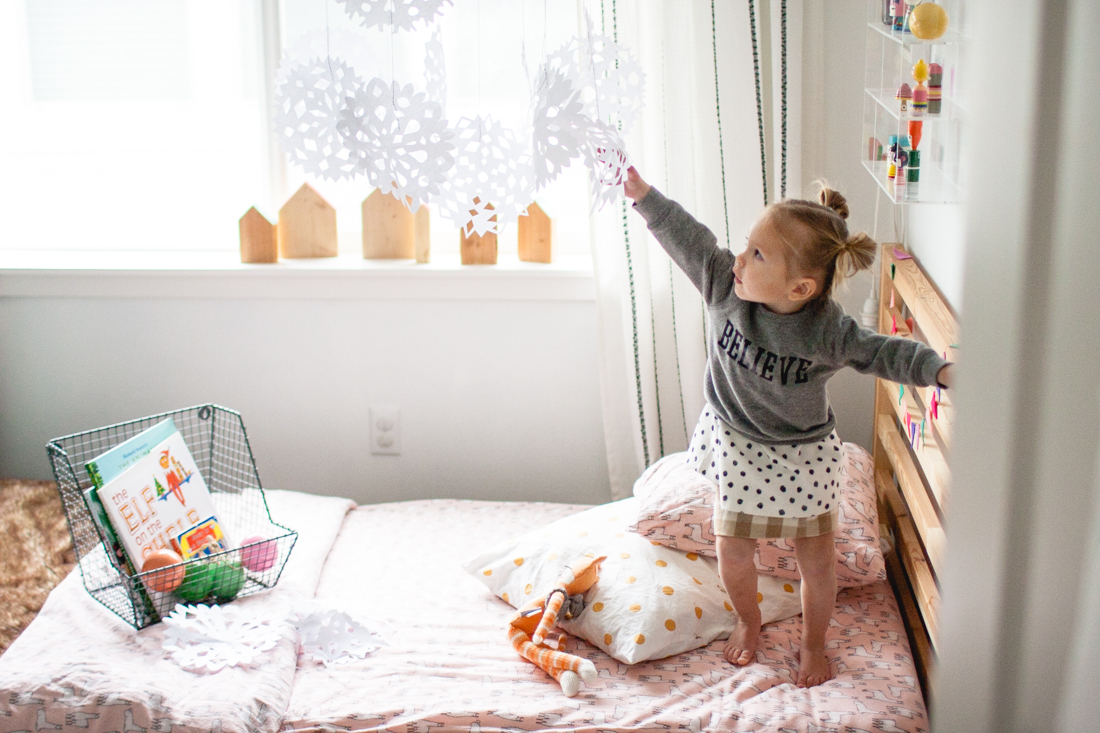
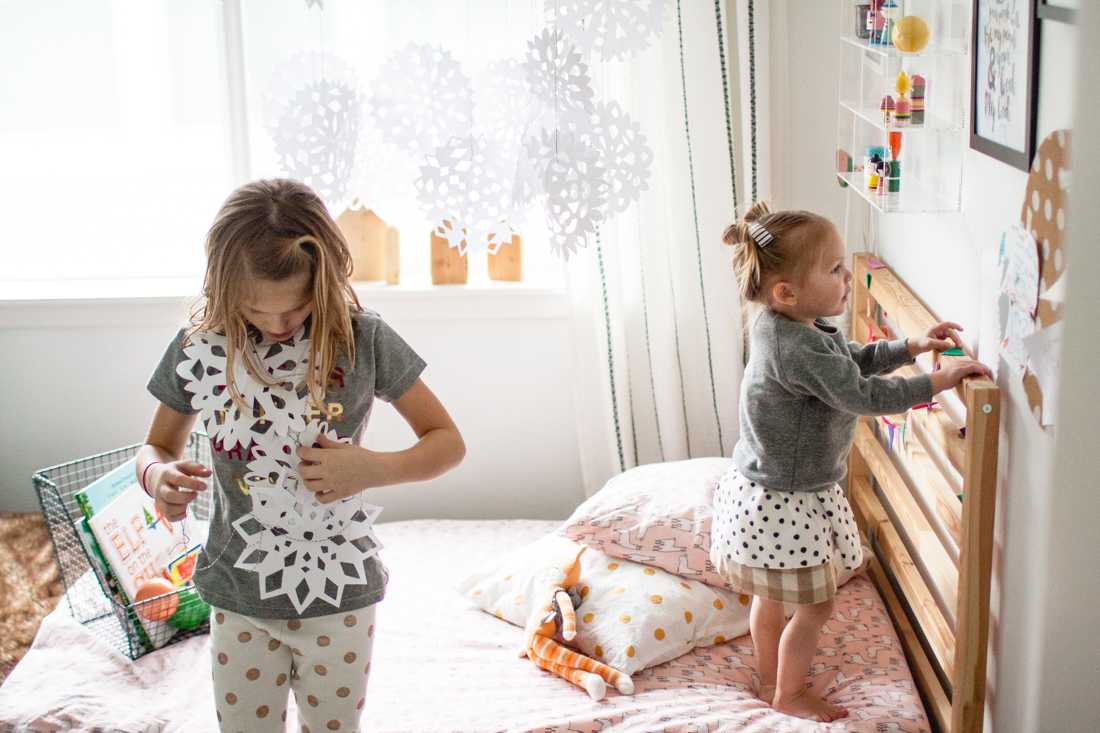
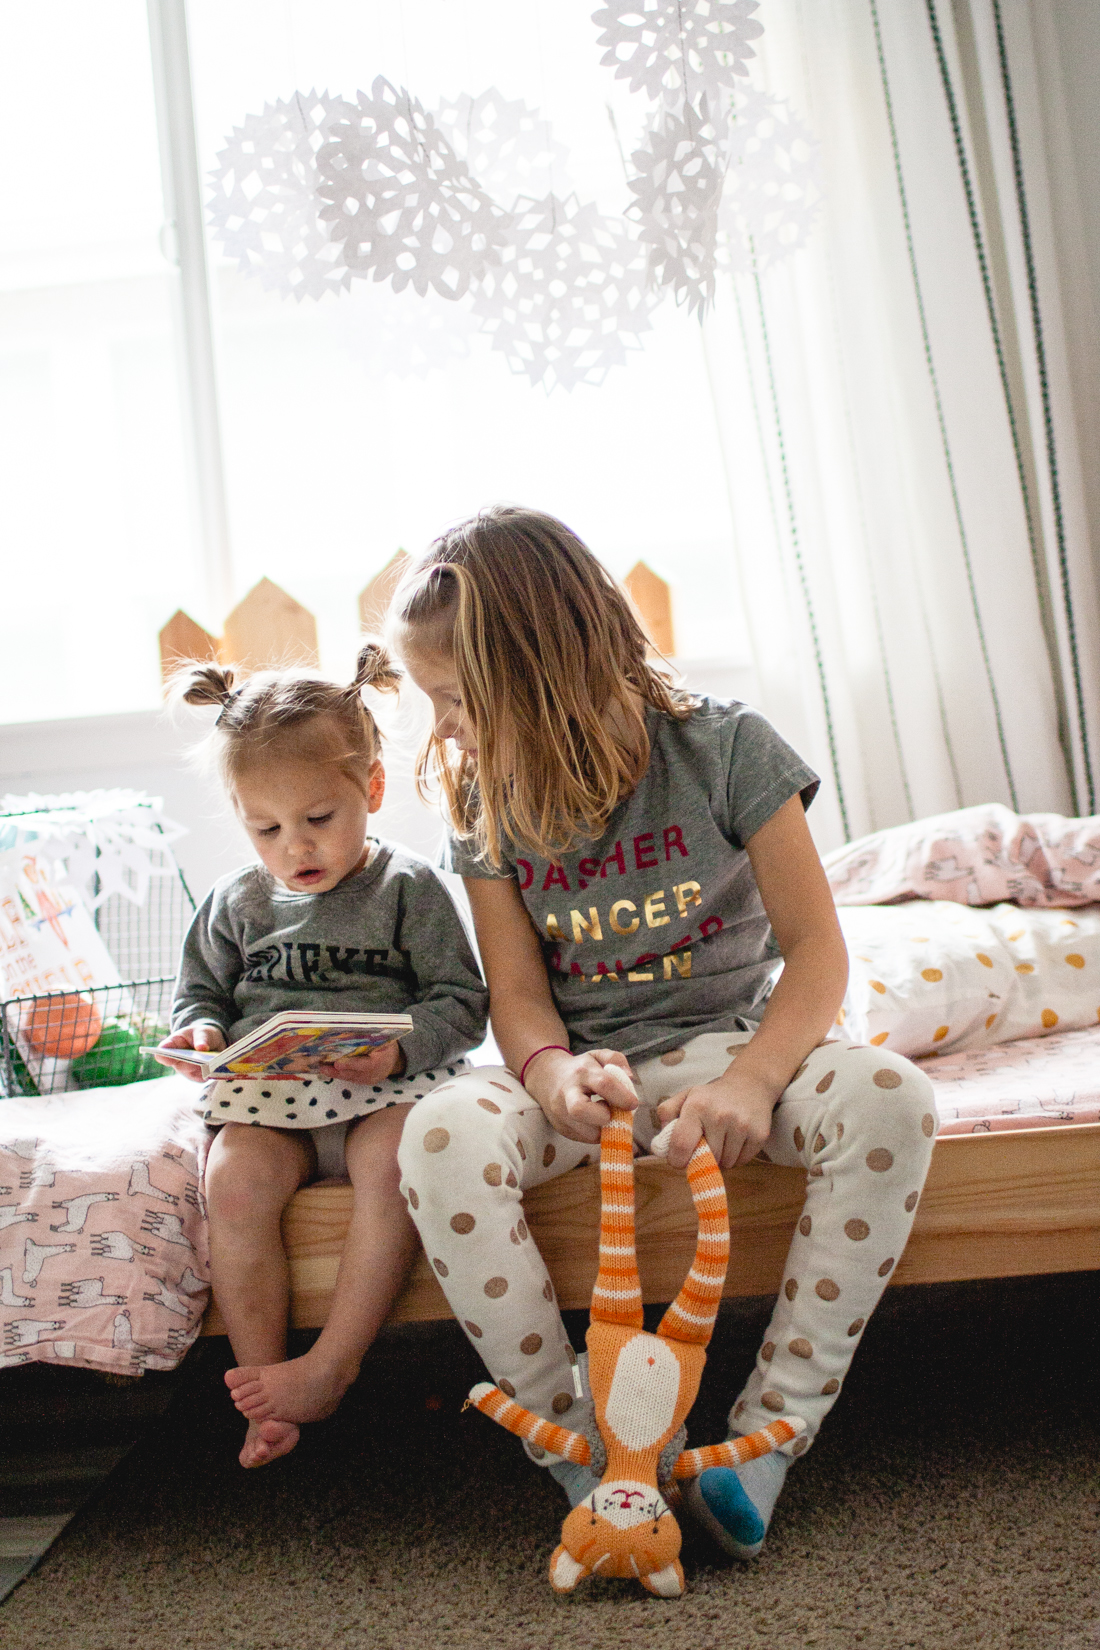
We decided to hang ours from the ceiling in the girl’s room using tape and twine. Ta-da! Sleeping under snowflakes!

What I love most about these is that they keep the older kids occupied for an hour or so while the little ones tag along, cost almost nothing and require simple supplies.

DIY Paper Snowflakes

How have you been keeping the kids busy indoors during the colder months?

XO, Rae

Rae Ann blogs at Rae Ann Kelly and is a kid wrangler, graphic designer, food & craft nut. Her blog features little tidbits about her day to day life & design projects, tutorials for DIY’s, free downloads, yummy recipes, lots of kid friendly ideas and outfit inspiration.  

Baby Shower Gifts

January 11, 2017

Post by Rachel, Nod’s Brand Marketing Manager 

With an almost 10 month old at home and more pregnant friends than I can count, I’ve become an expert on baby stuff. Oh, there is so much baby stuff.

Your pregnant friends likely have a registry for the practical stuff like car seats and diapers. And maybe a fun one from The Land of Nod with beautiful nursery furnishings. But if they’re a new mom, their registry may be missing a few must-haves they didn’t even know they needed. Until it’s 11pm on Tuesday and you need it to survive the night.

To avoid those late-night trips to the store, I’ve compiled a few of my go-to baby shower gifts are below. Everything here was used (and is still being used) over and over again at my house.

My Go-To Baby Shower Gifts:

  • Aden & Anais Swaddle Blankets – A new mom can never have too many swaddle blankets. I use them as burp cloths, car seat covers to encourage a nap (wishful thinking) and even on the airport floor for a play space while waiting for a flight. They seem to get softer with each wash and haven’t shown any signs of wear after 10 months of constant use.
  • Playmats & Activity Gyms – Every stage of having a baby has been fun so far, but I really loved when my son started to explore and play. Our playmats and activity gyms are perfect for dreaded tummy time and fun when babies start holding things and sitting up.
  • Teething Toys – Perfect for when your that sweet baby becomes a teething monster. They will put everything in their mouth, so it might as well be something you want in there.
  • Toys for Later – One thing I’ve recently noticed is we were stocked for the newborn and baby phases. Tons of rattles and onesies. But as my son is beginning to move and grow, I’m again looking for toys that fit his quickly-changing needs. Think pull toys, rockers and blocks.

Ever wonder who’s behind The Land of Nod social media accounts? That’s Rachel! When she’s not telling anyone who will listen that she’s not meant to live in cold, snowy Chicago, you will find Rachel hanging out with her husband and new baby and binge-watching Netflix after baby’s bedtime. Or starting crafting projects that never get finished.

Weaving Workshop

January 10, 2017

Post by Joslyn of J. Villa Workshop

I have created small, handheld mini looms to teach even the youngest of weavers and have discovered that even those kiddos who aren’t inclined to spend much time painting or drawing LOVE weaving. The simple over-under-over process of adding fiber to the warped loom is wonderfully relaxing and gratifying. Any fiber can be added to the weaving so the final piece can be full of scraps of old t-shirts, blankets, and other materials that add meaning to the finished weaving.

In the Chicago area? Join me on January 16th at The Land of Nod’s North and Clybourn location from 10am-12pm for a weaving gathering! Children ages 6 and up welcome. You’ll leave with your own mini loom and toolset to keep and a finished mini weaving. Feel free to bring in your own materials for adding to the weaving, but plenty of material will be provided.

Here are the steps to completing a weaving using her mini looms:

Weaving Workshop

Step one:
Peel the tape off the back of your mini loom to free the needle inside. The middle piece can be discarded. Note: Mini looms for children only have the small wooden needle, not the other tools shown here.

Weaving Workshop

Step two, warping your loom: 
Using any strong string or yarn, tape one end to the back and bottom of the loom (bottom is where the J.Villa Workshop logo is).

Weaving Workshop
Bring the string around to the front of the loom and go up to the adjacent groove at the top. Wrap around the tooth next to it and go back down to the adjacent groove at the bottom. Each time you get ready to go back up or down, wrap around the next tooth of the loom. These strings that go up and down are called the warp.

Weaving Workshop

When you are done with the warp, cut the string and tape the end to the bottom.
Weaving Workshop

Step three, adding the weft:
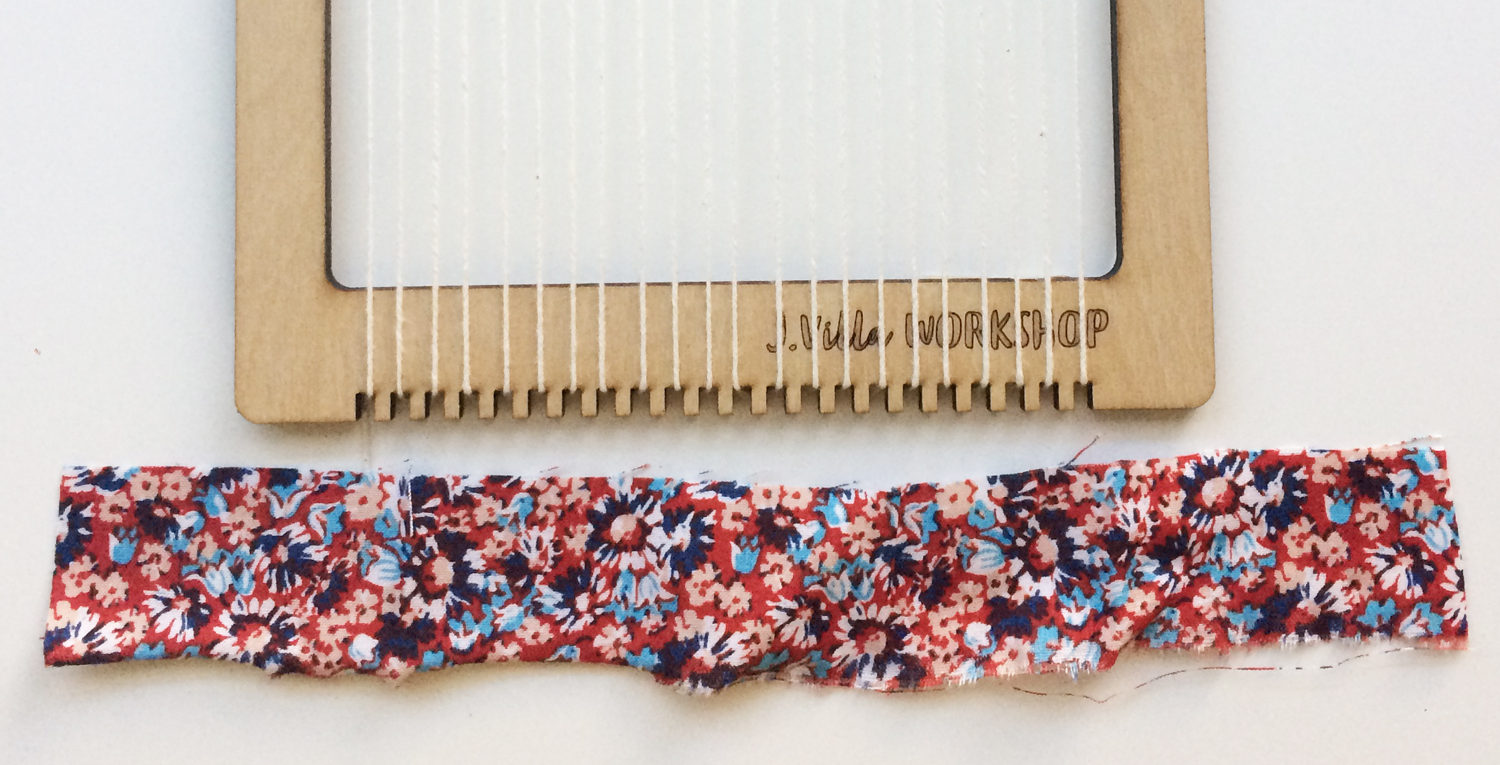
Cut strips of any material slightly wider than your loom. You can use fabric, yarn, string, pipe cleaners, natural materials, etc. These materials are called the weft.
Weaving Workshop

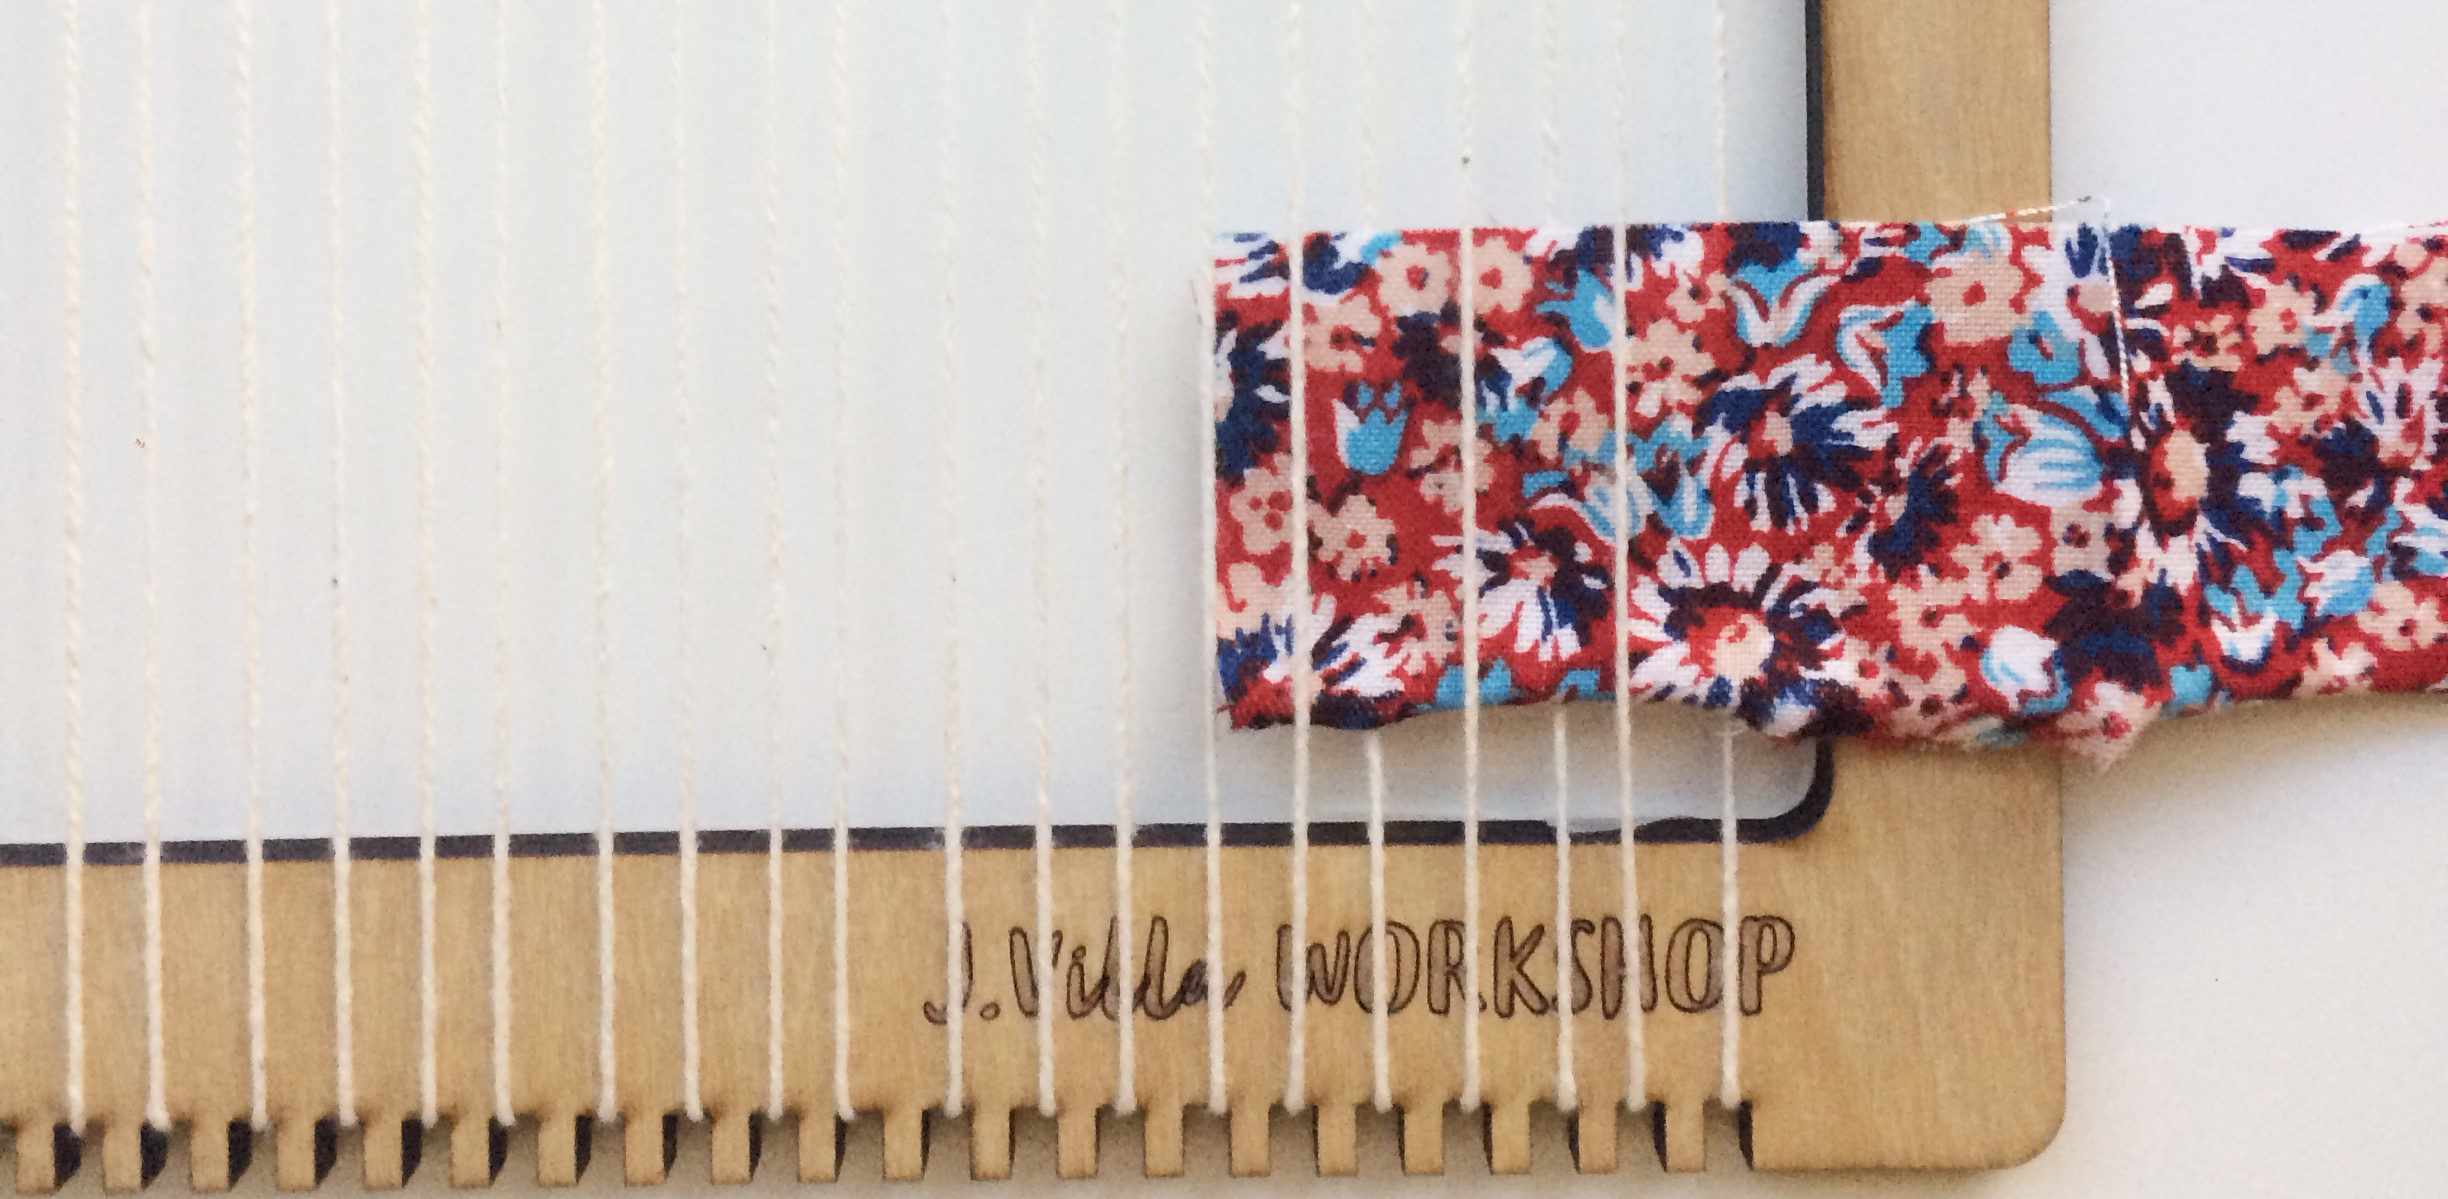
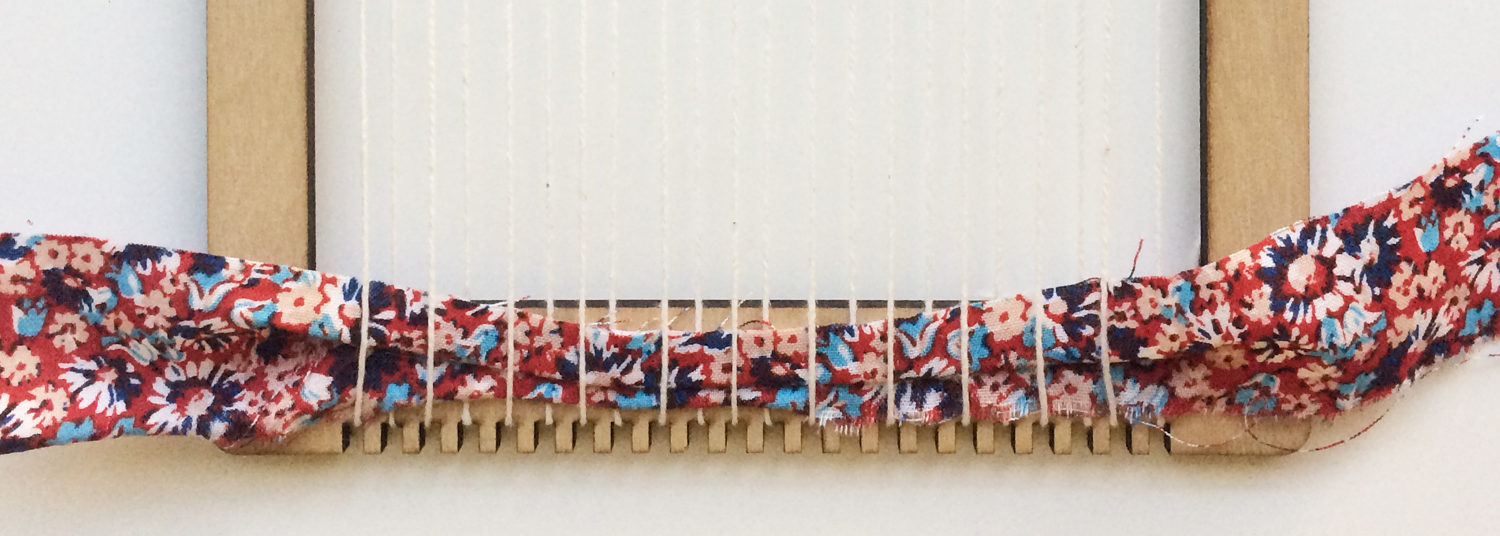
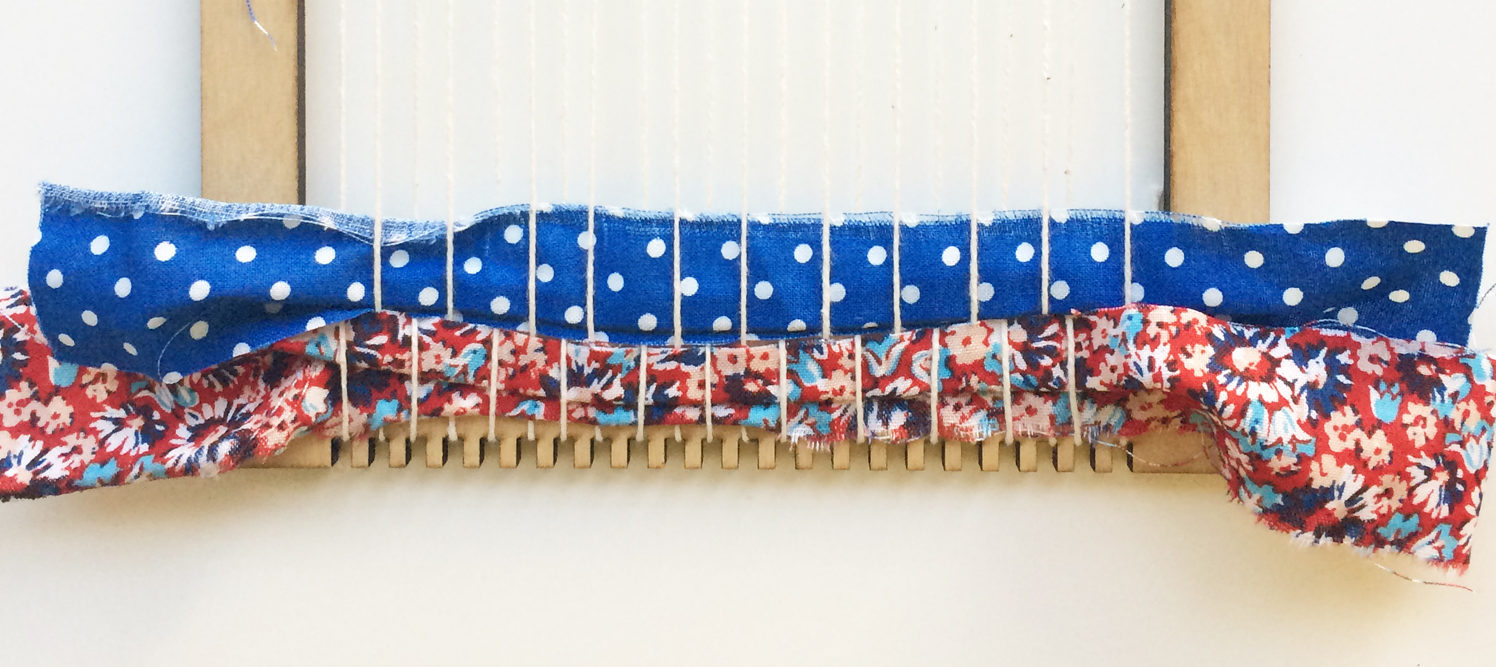
To start weaving, you can begin on either the right or left side. Begin feeding the material in going over the first warp string, under the next. Repeat until the whole piece of material is woven in.
Weaving Workshop

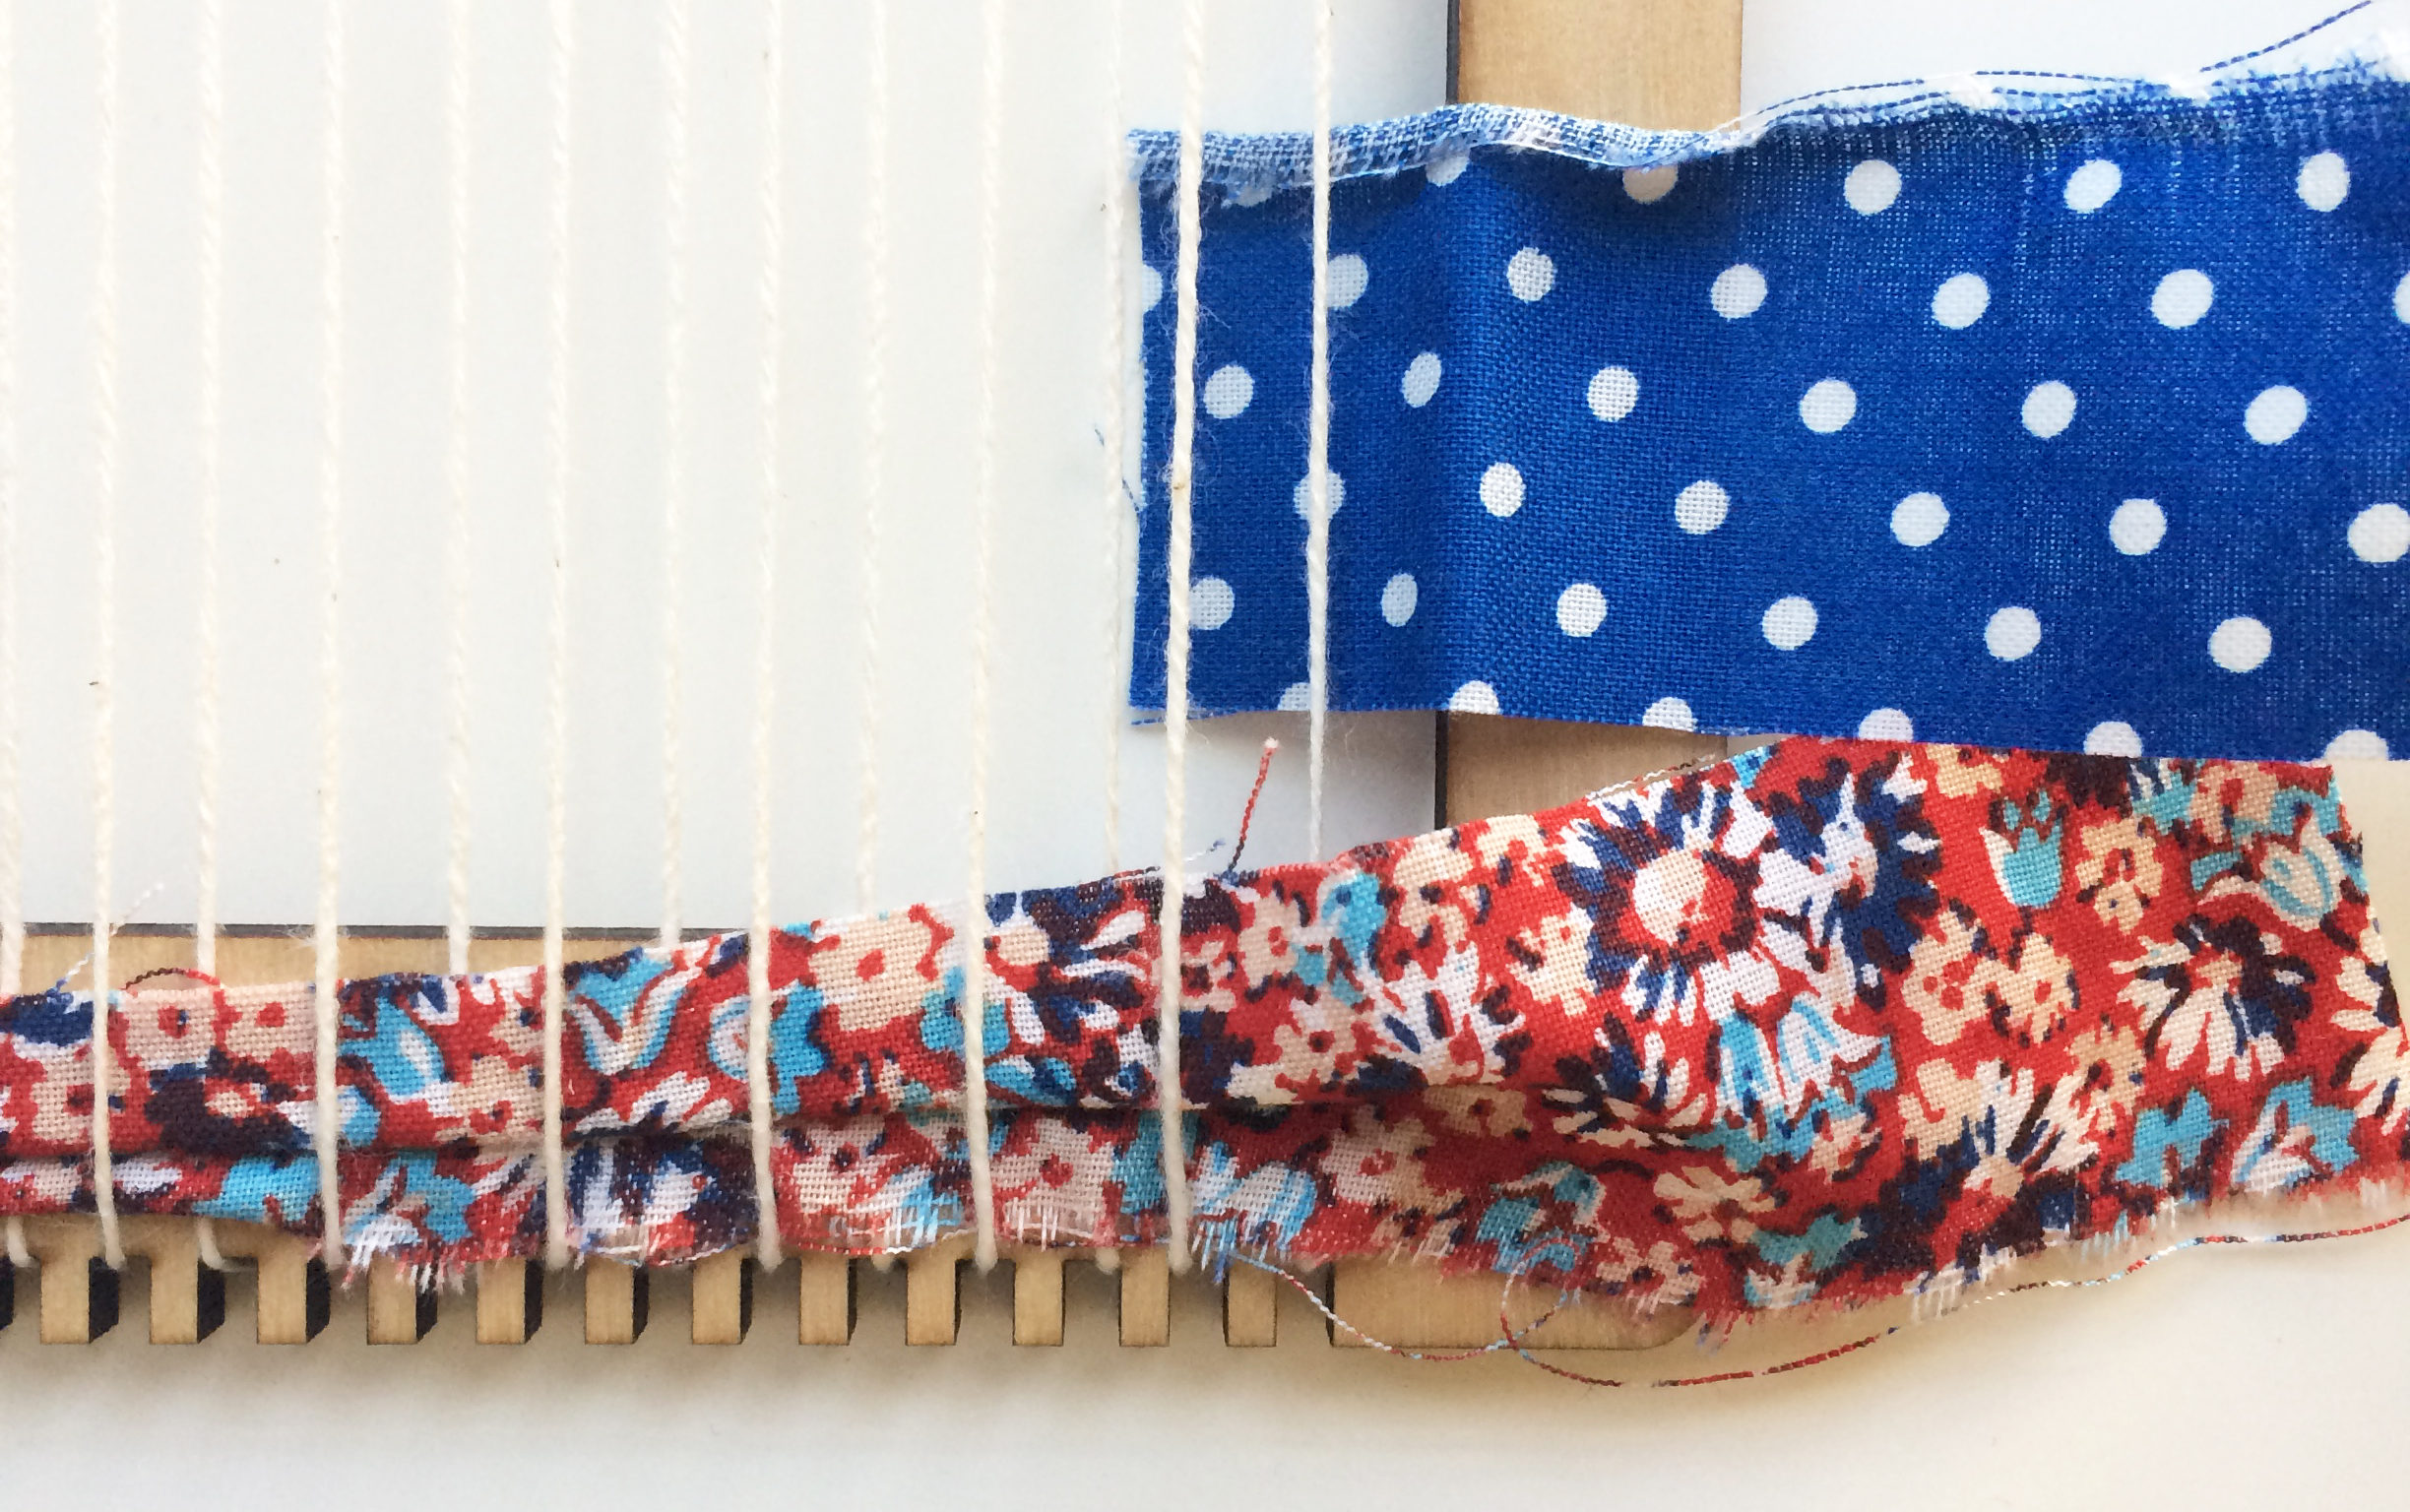
To add the next piece of material, weave it in the opposite way you started the first piece. If your first piece went over-under, your next piece will start under-over. Each new piece you add is doing the opposite of the one below.
Weaving Workshop

Weaving Workshop

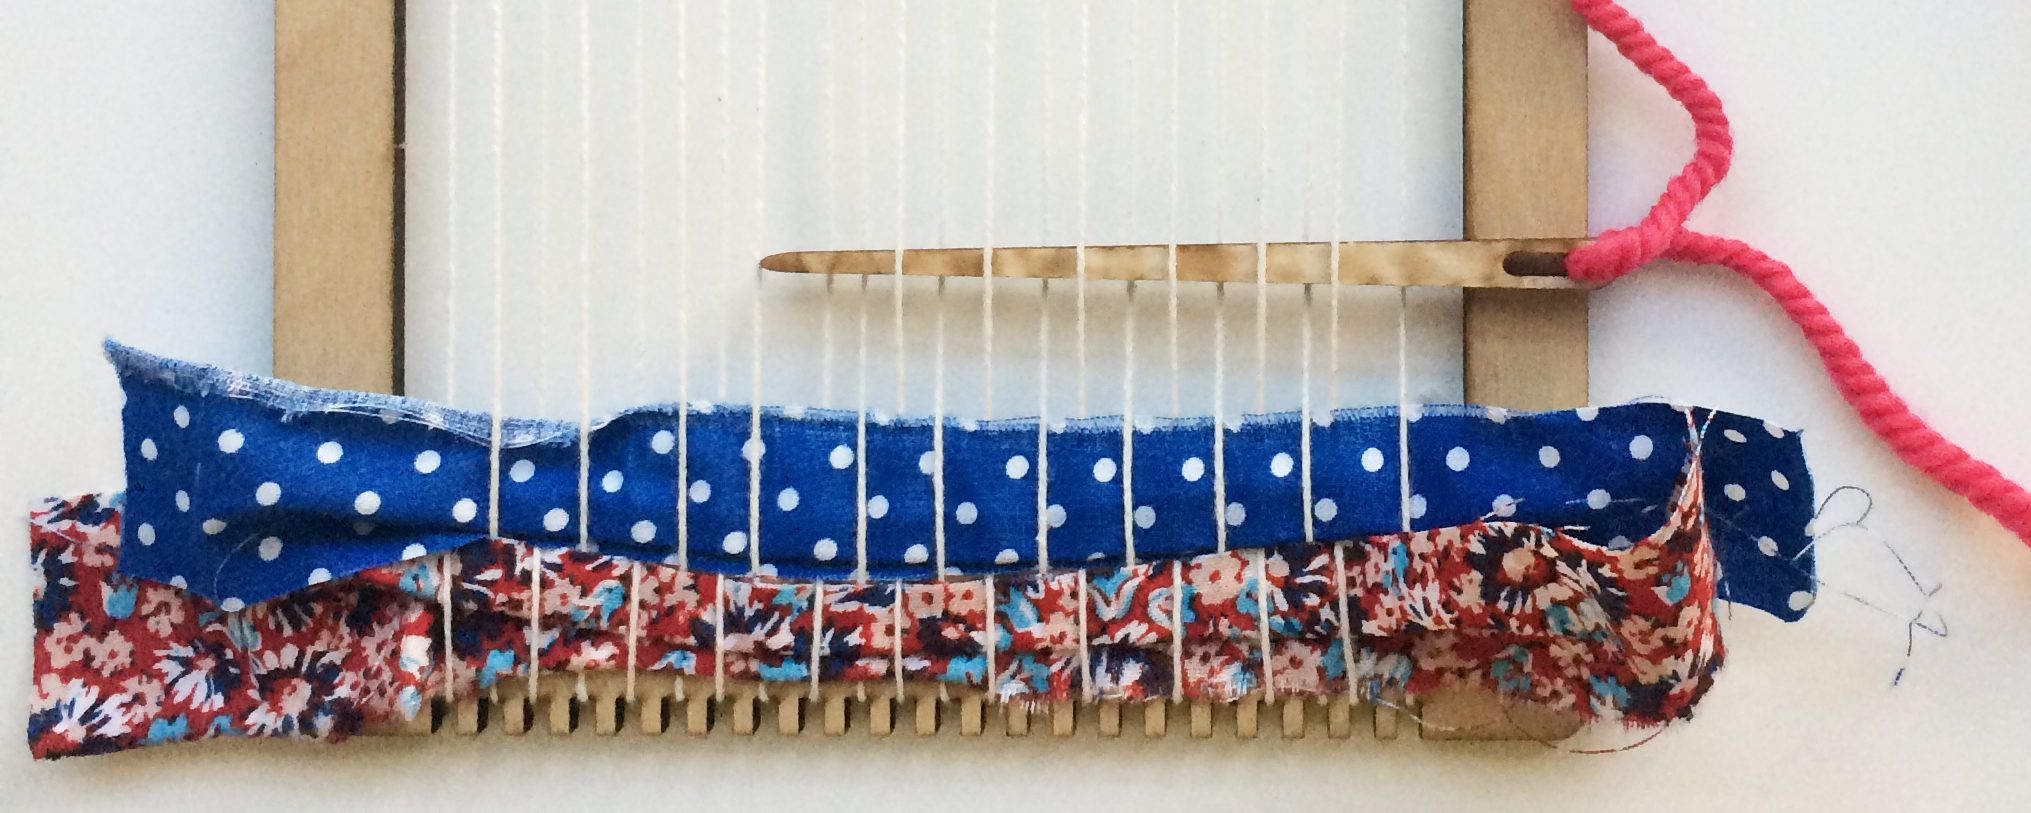
You can use your needle when weaving with string and yarn. Simply put the piece of yarn through the eye of the needle and tie a small knot to keep the yarn from coming out of the needle, if need be.
Weaving Workshop

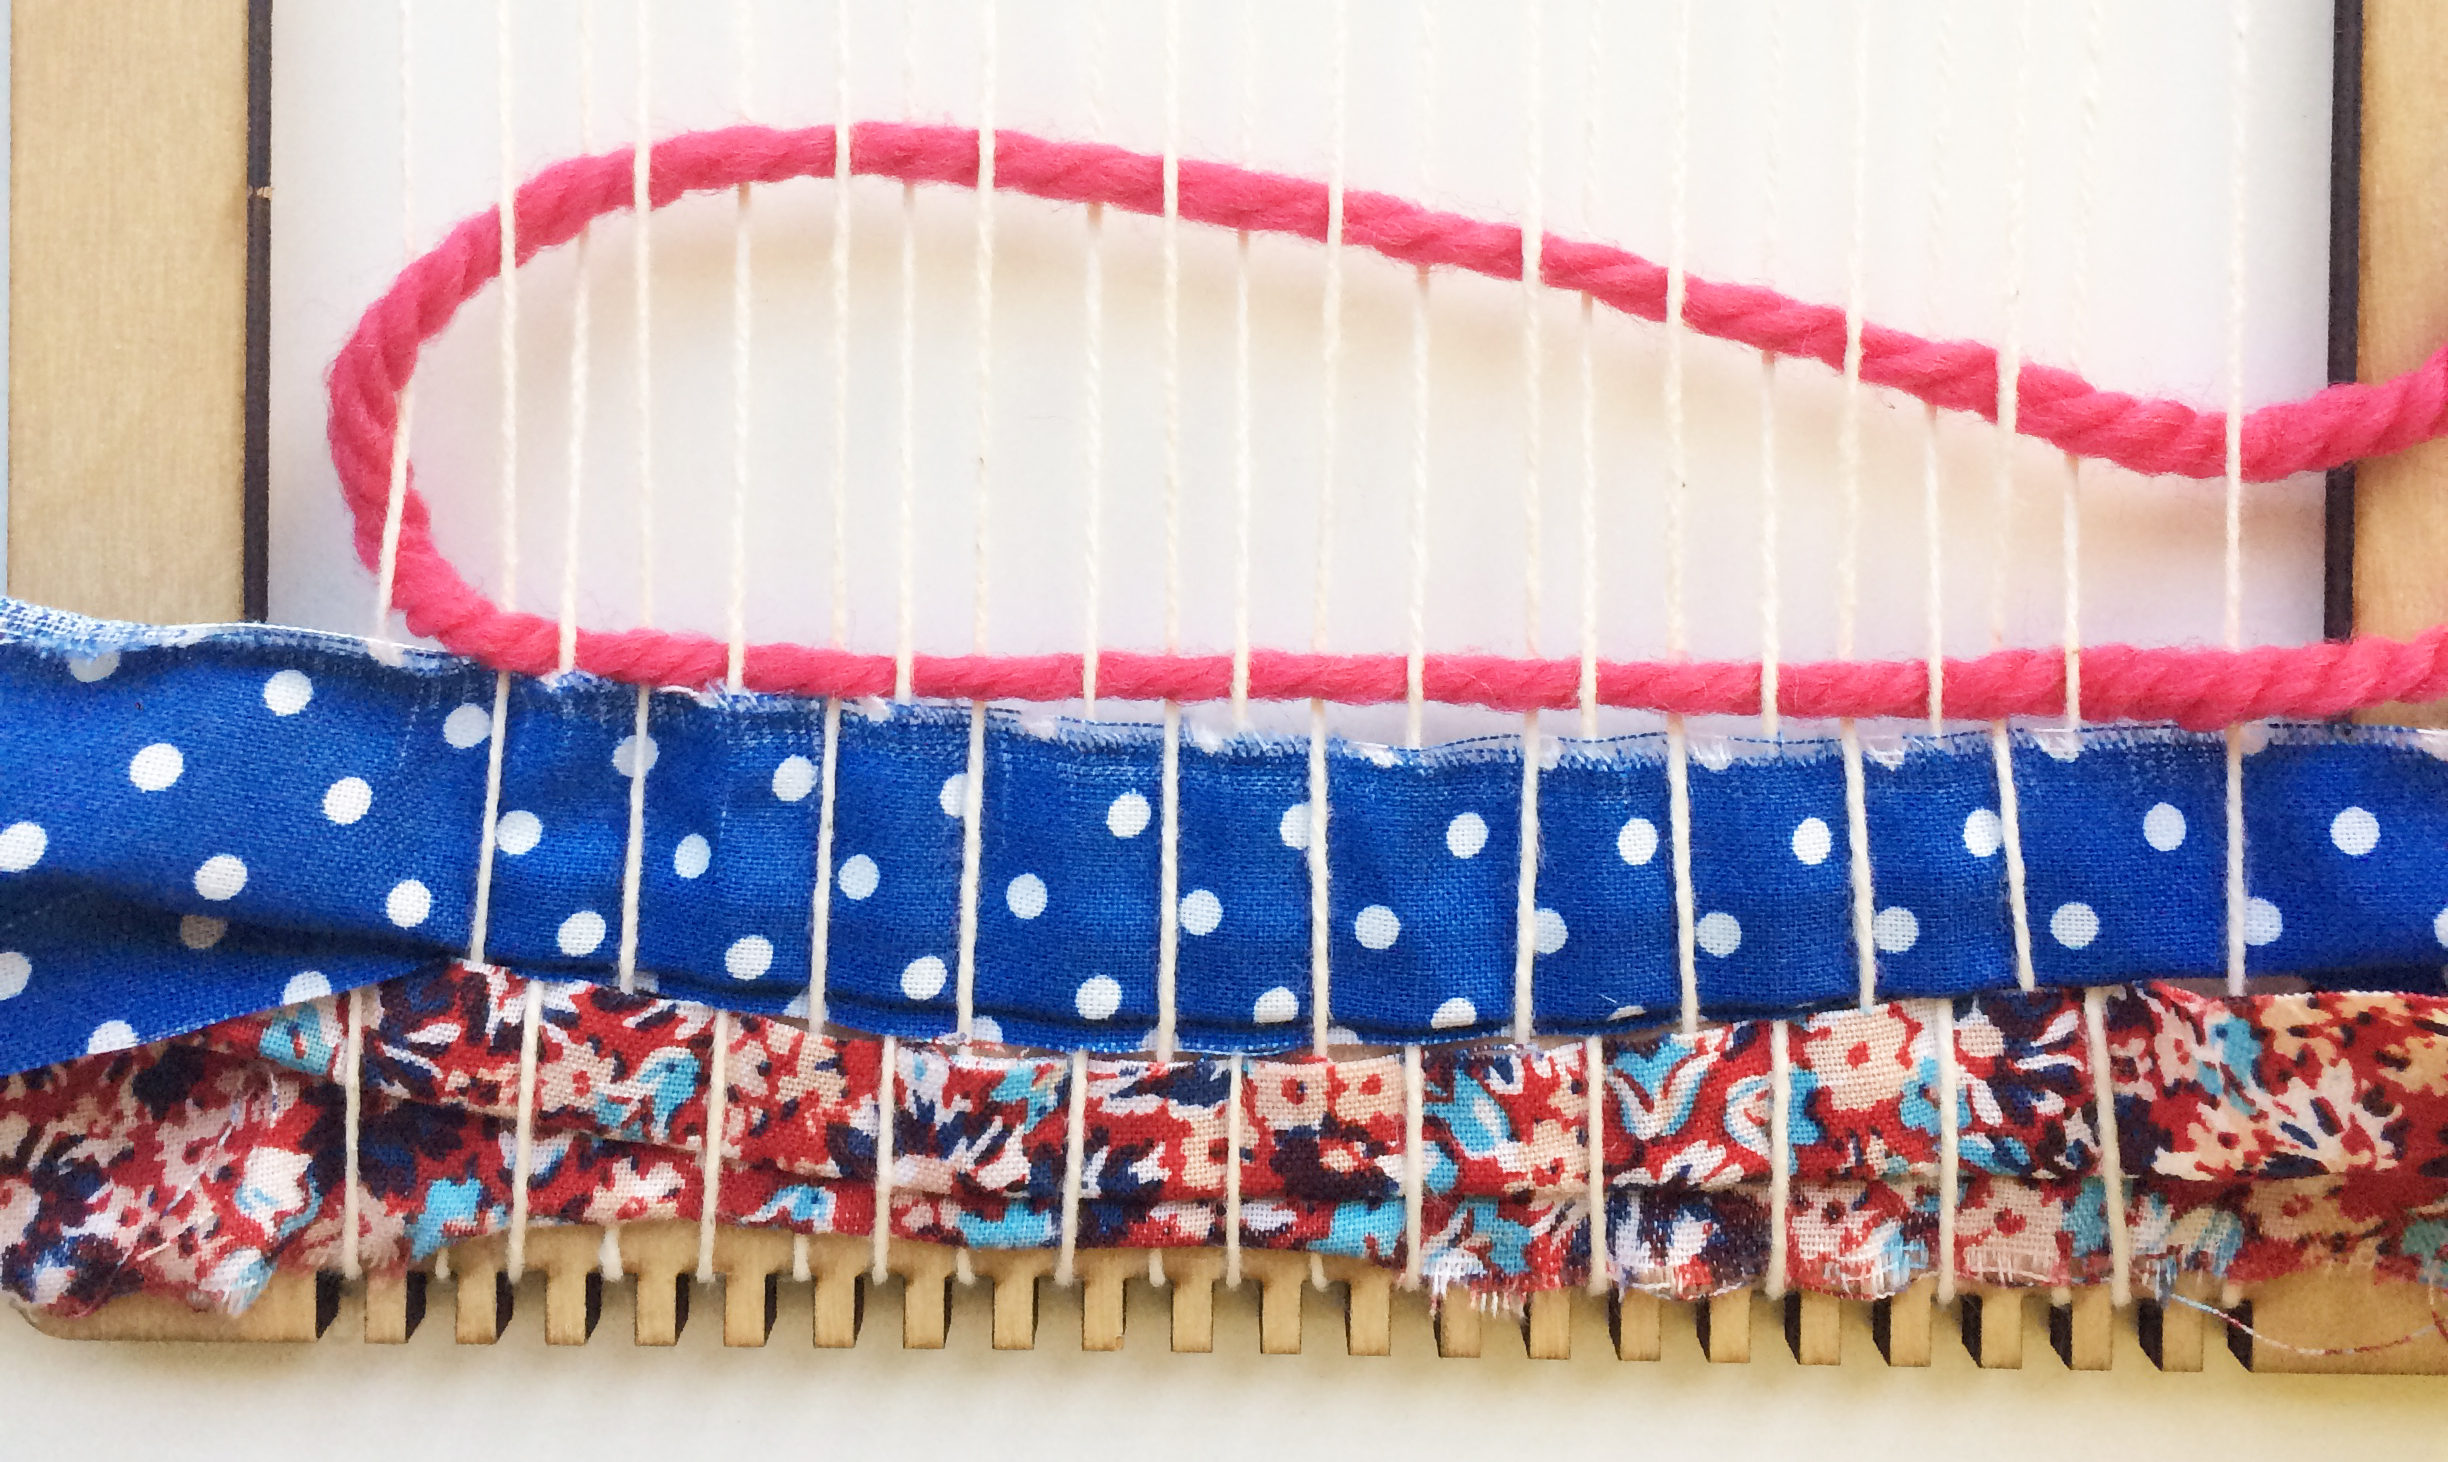
If your string is long enough, you can turn around and go back the other way. Remember to do the opposite of the row below.
Weaving Workshop

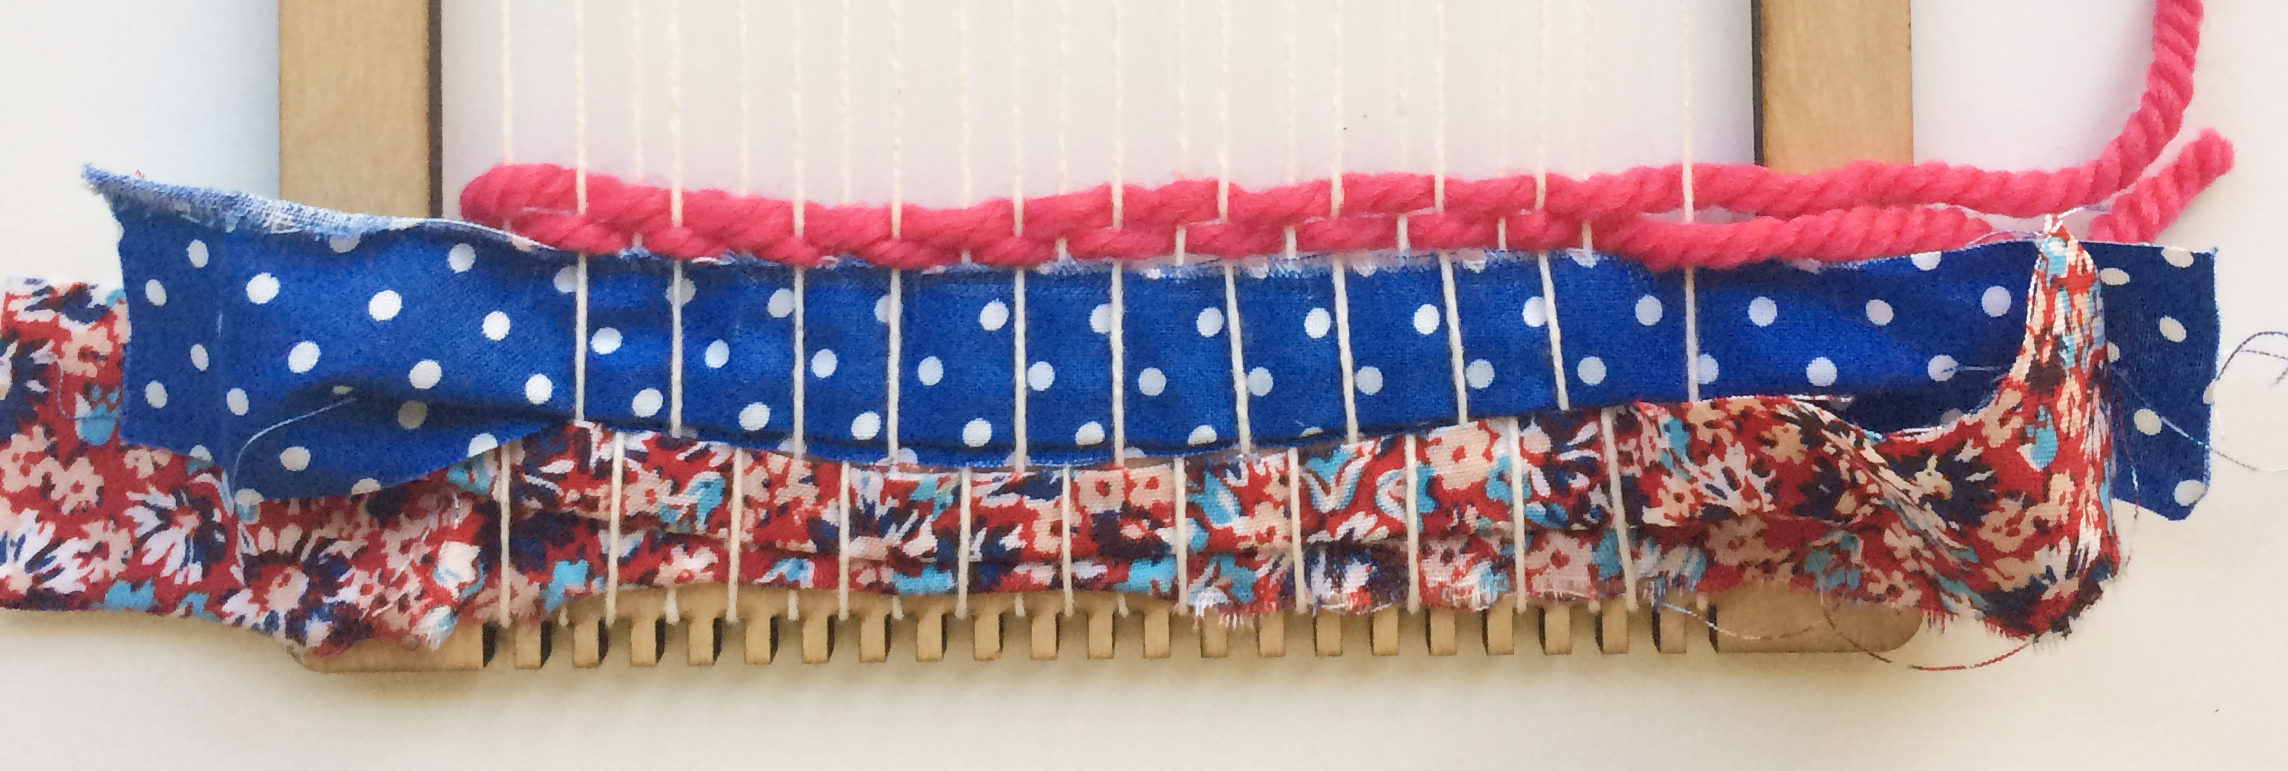
Push the material down as you continue to weave. Keep adding your weft material until you are at the top of the loom.

Step four, finishing your weaving:

Weaving Workshop

When you are done with your weaving, pop each warp string off the bottom of the loom. The two end pieces can be taped to the back of your weaving to secure them. Then, carefully lift your weaving off the top of the loom and place a dowel rod through the warp strings at the top. Add a piece of yarn to the ends of the dowel rod and hang your weaving in your favorite spot!

Joslyn Villalpando of J. Villa Workshop, is a working artist and art educator in Chicago. She spent 8 years teaching elementary art in Chicago Public Schools. While teaching, she completed a master’s degree at the School of the Art Institute of Chicago (SAIC), studying the impact of craft and fiber art on art education. Her small research group of young participants grew into a little community while learning to weave, sew, embroider, spin, and dye; sharing the stories, memories, thoughts, and ideas that arise when creating together.
Birthday Party DIY Balloon Arch

January 9, 2017

Post by Morgan Hutchinson, founder of BURU

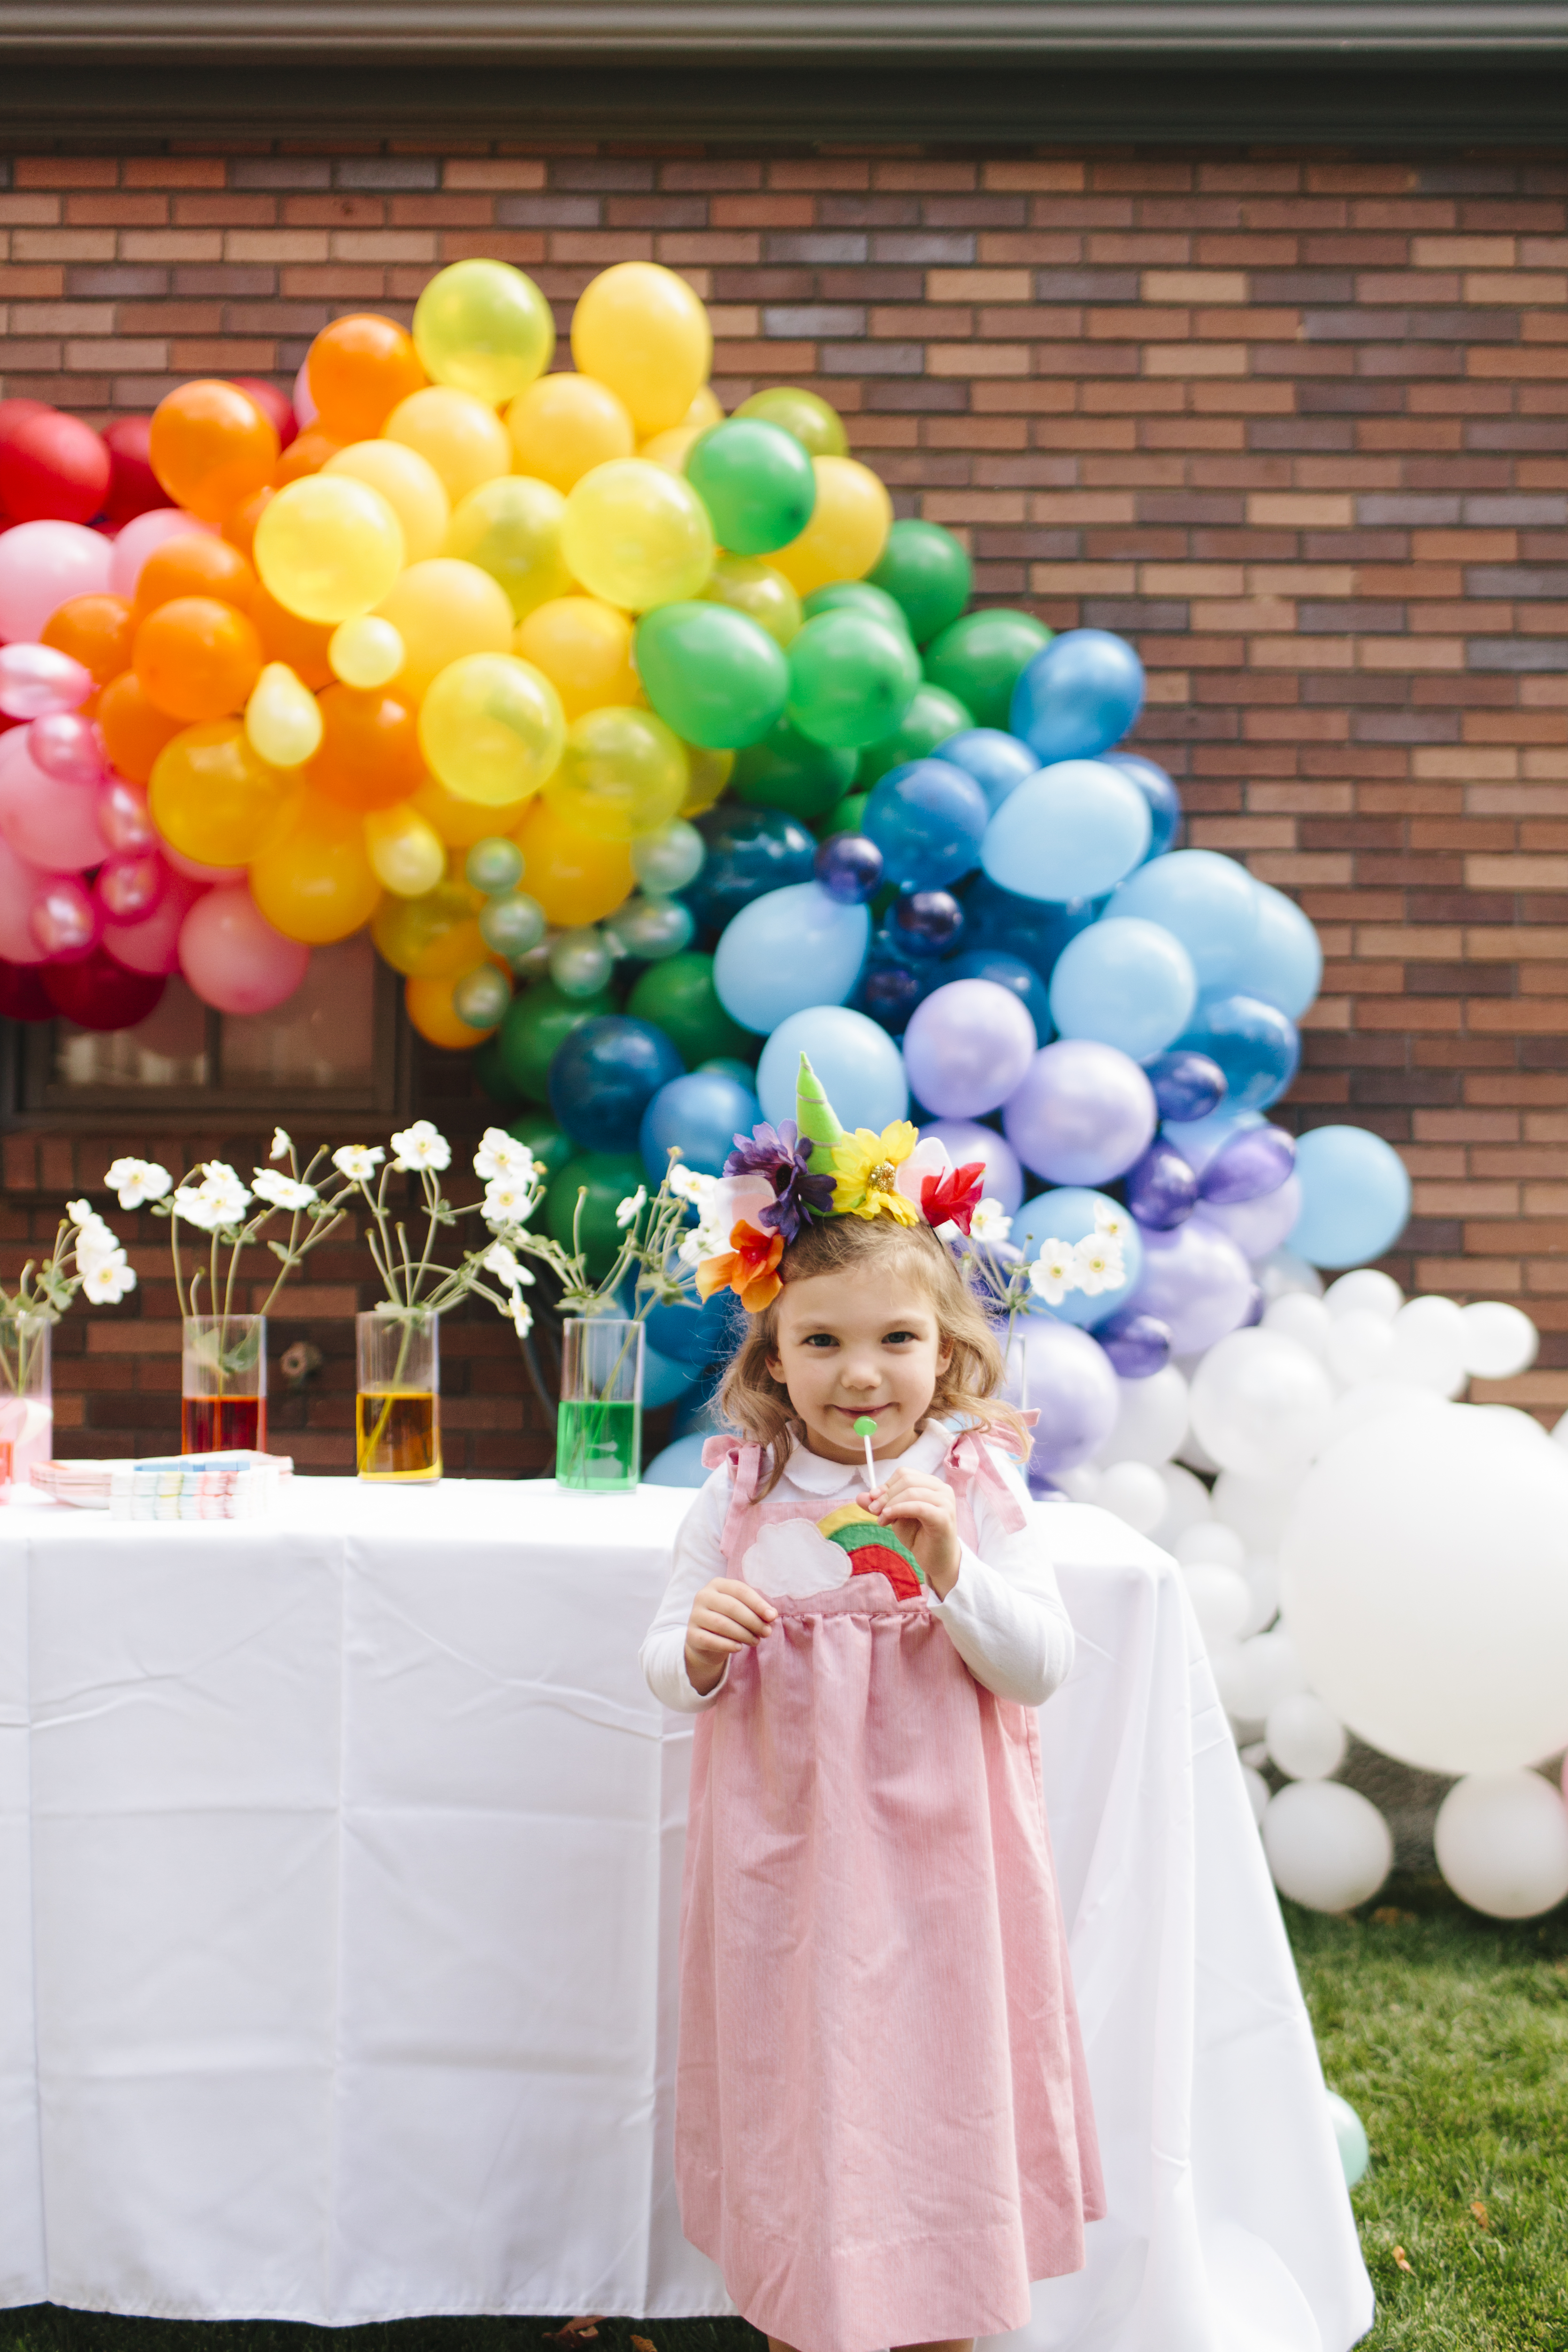
Birthday Party DIY Balloon Arch

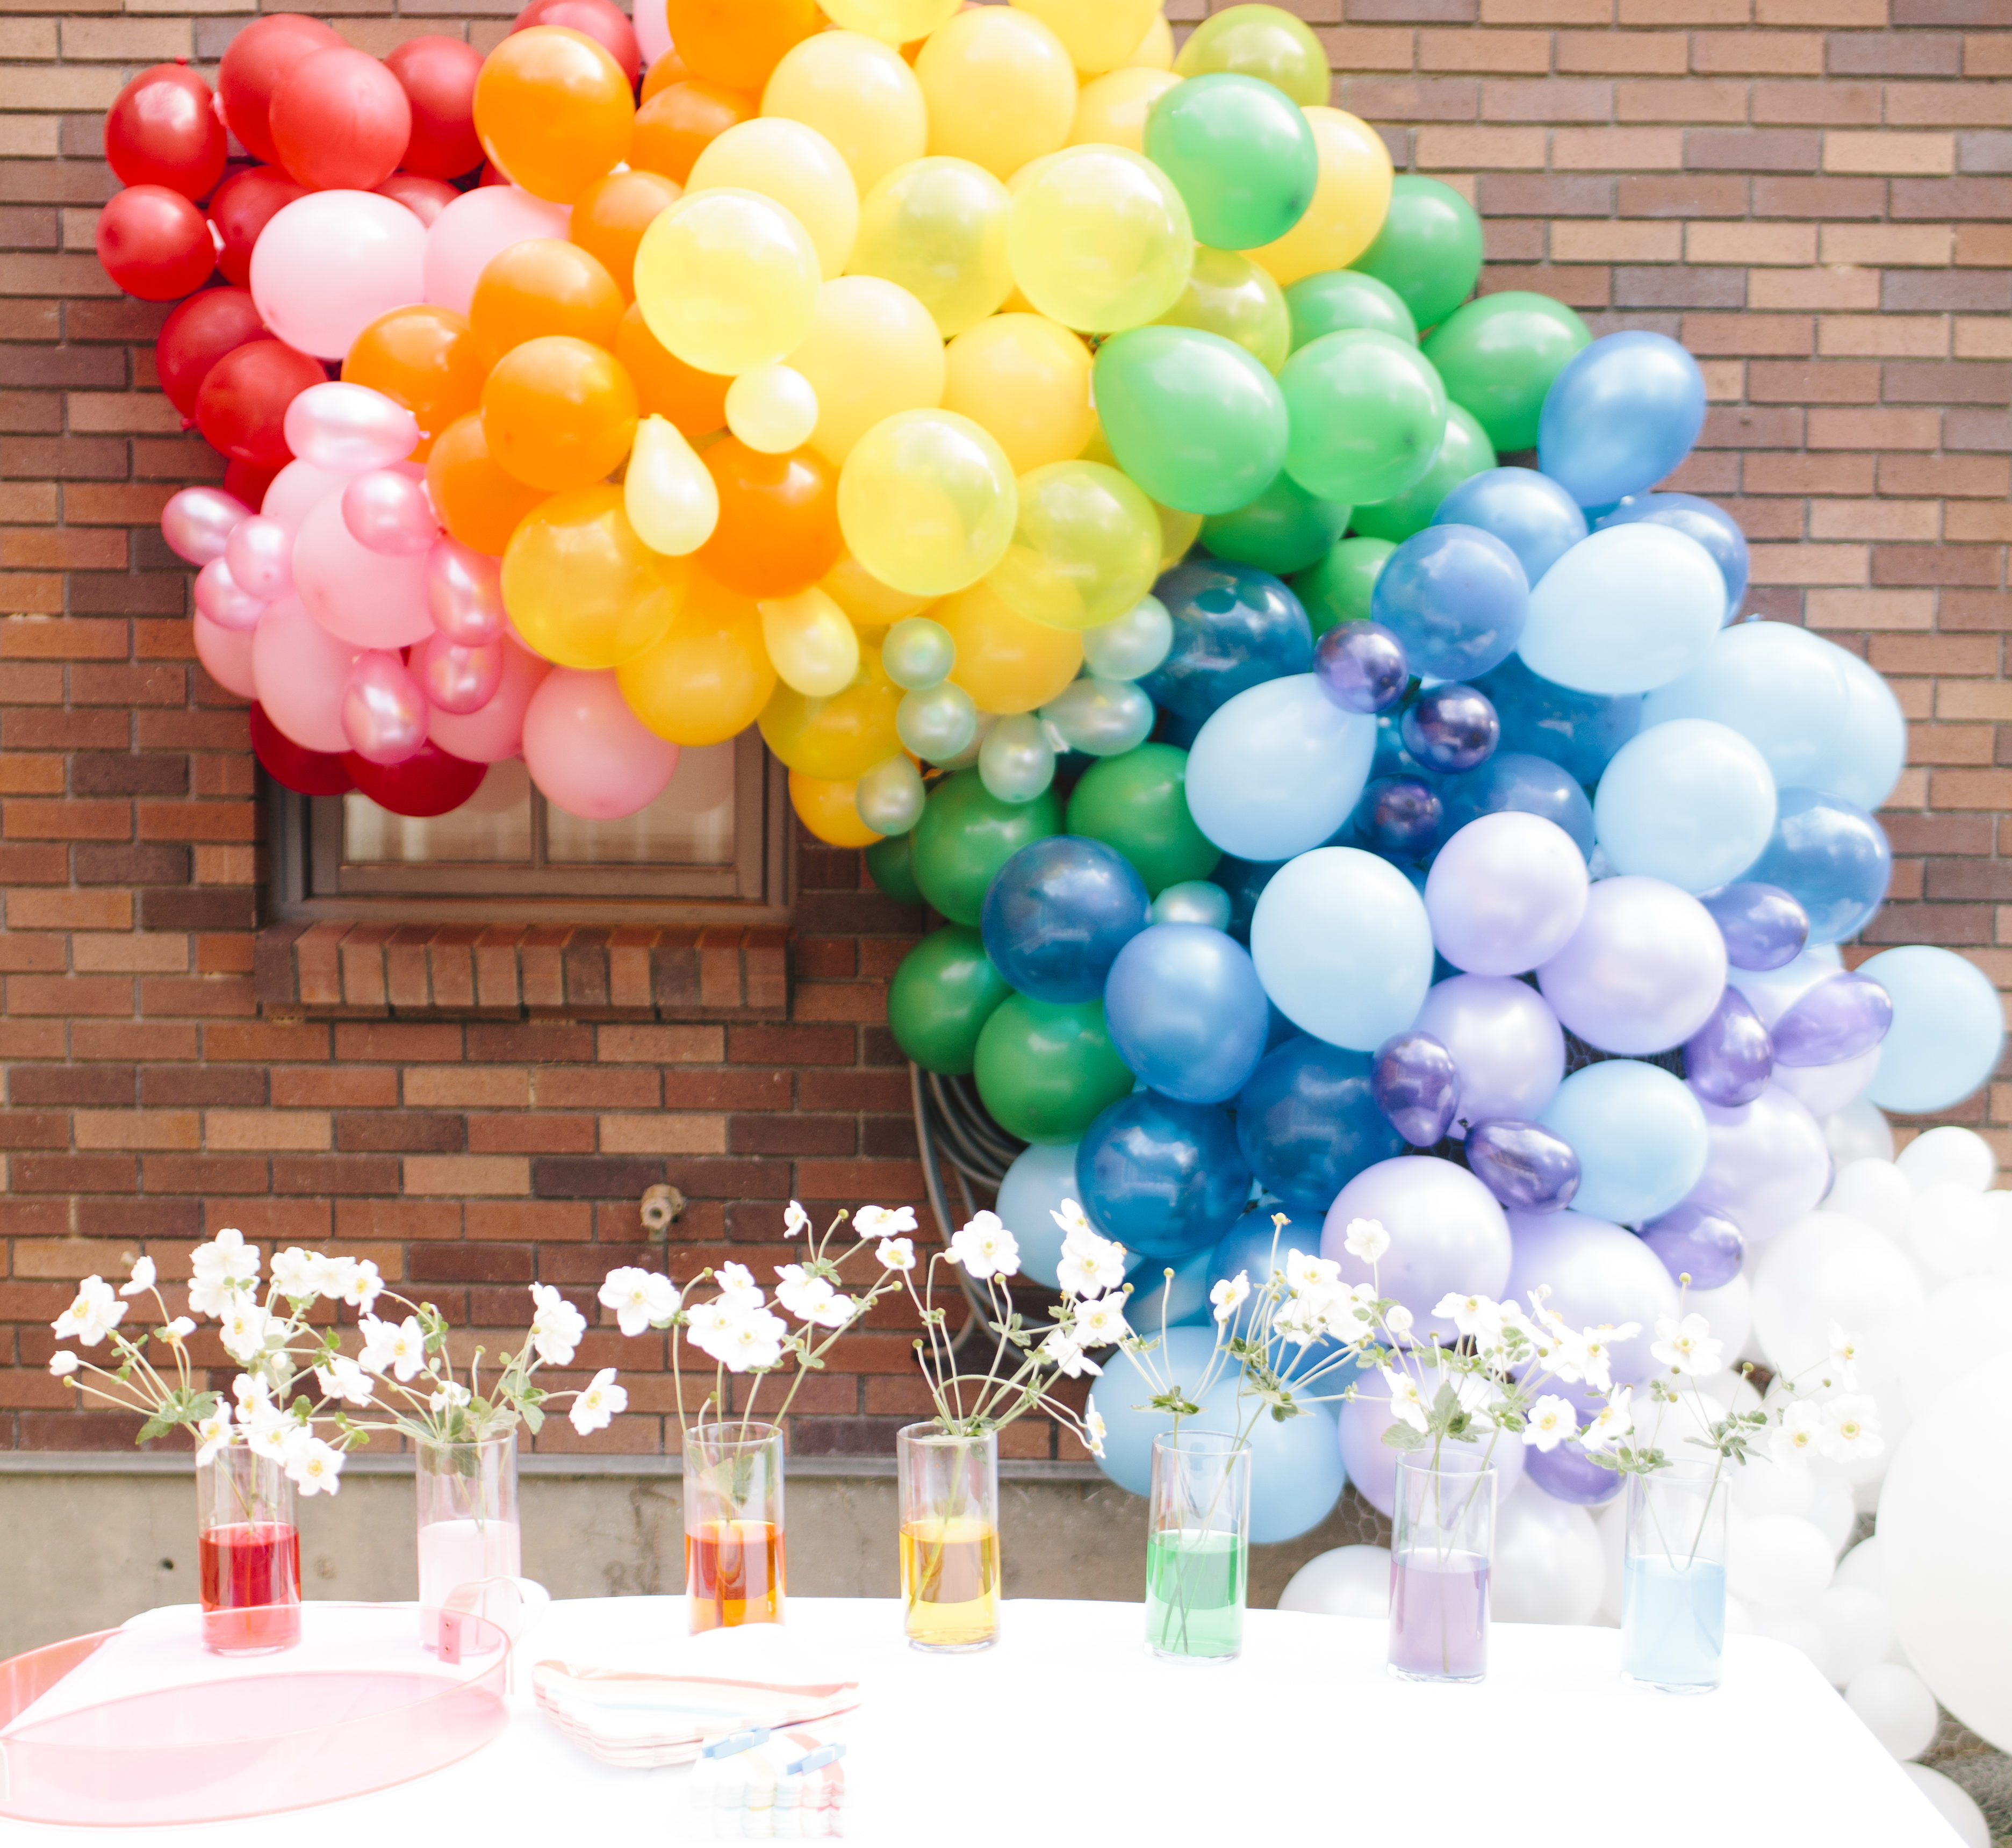
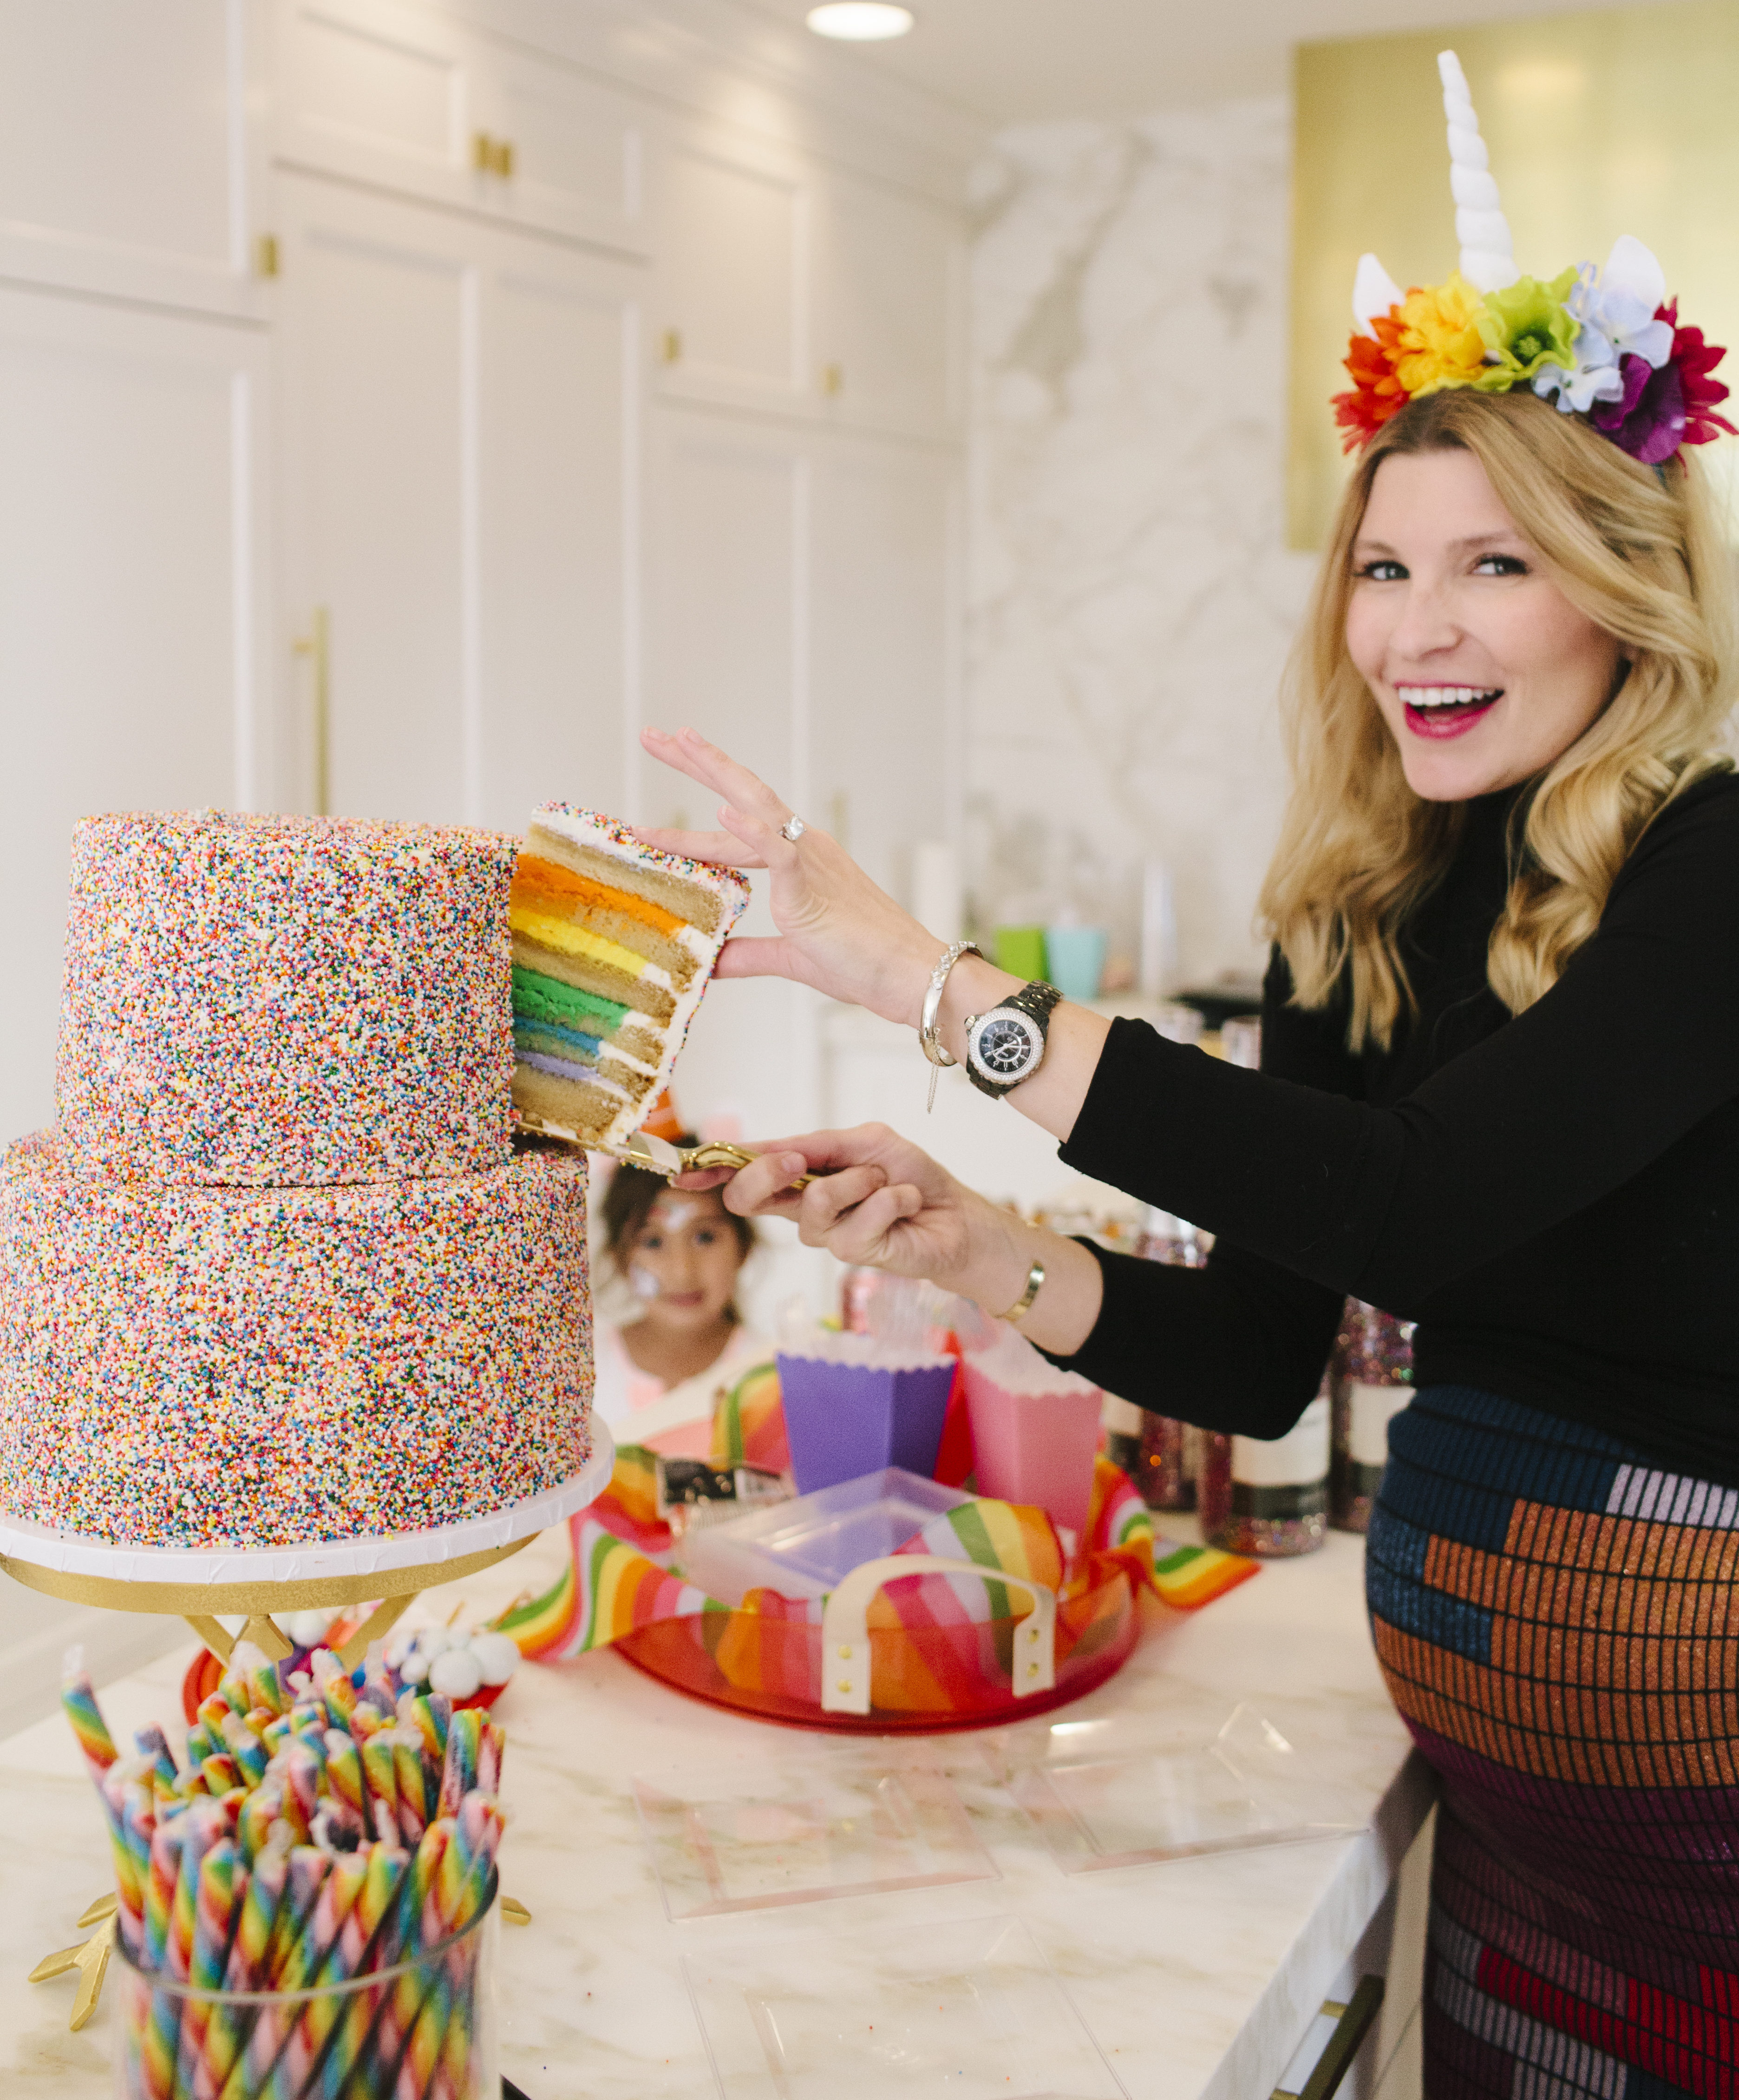
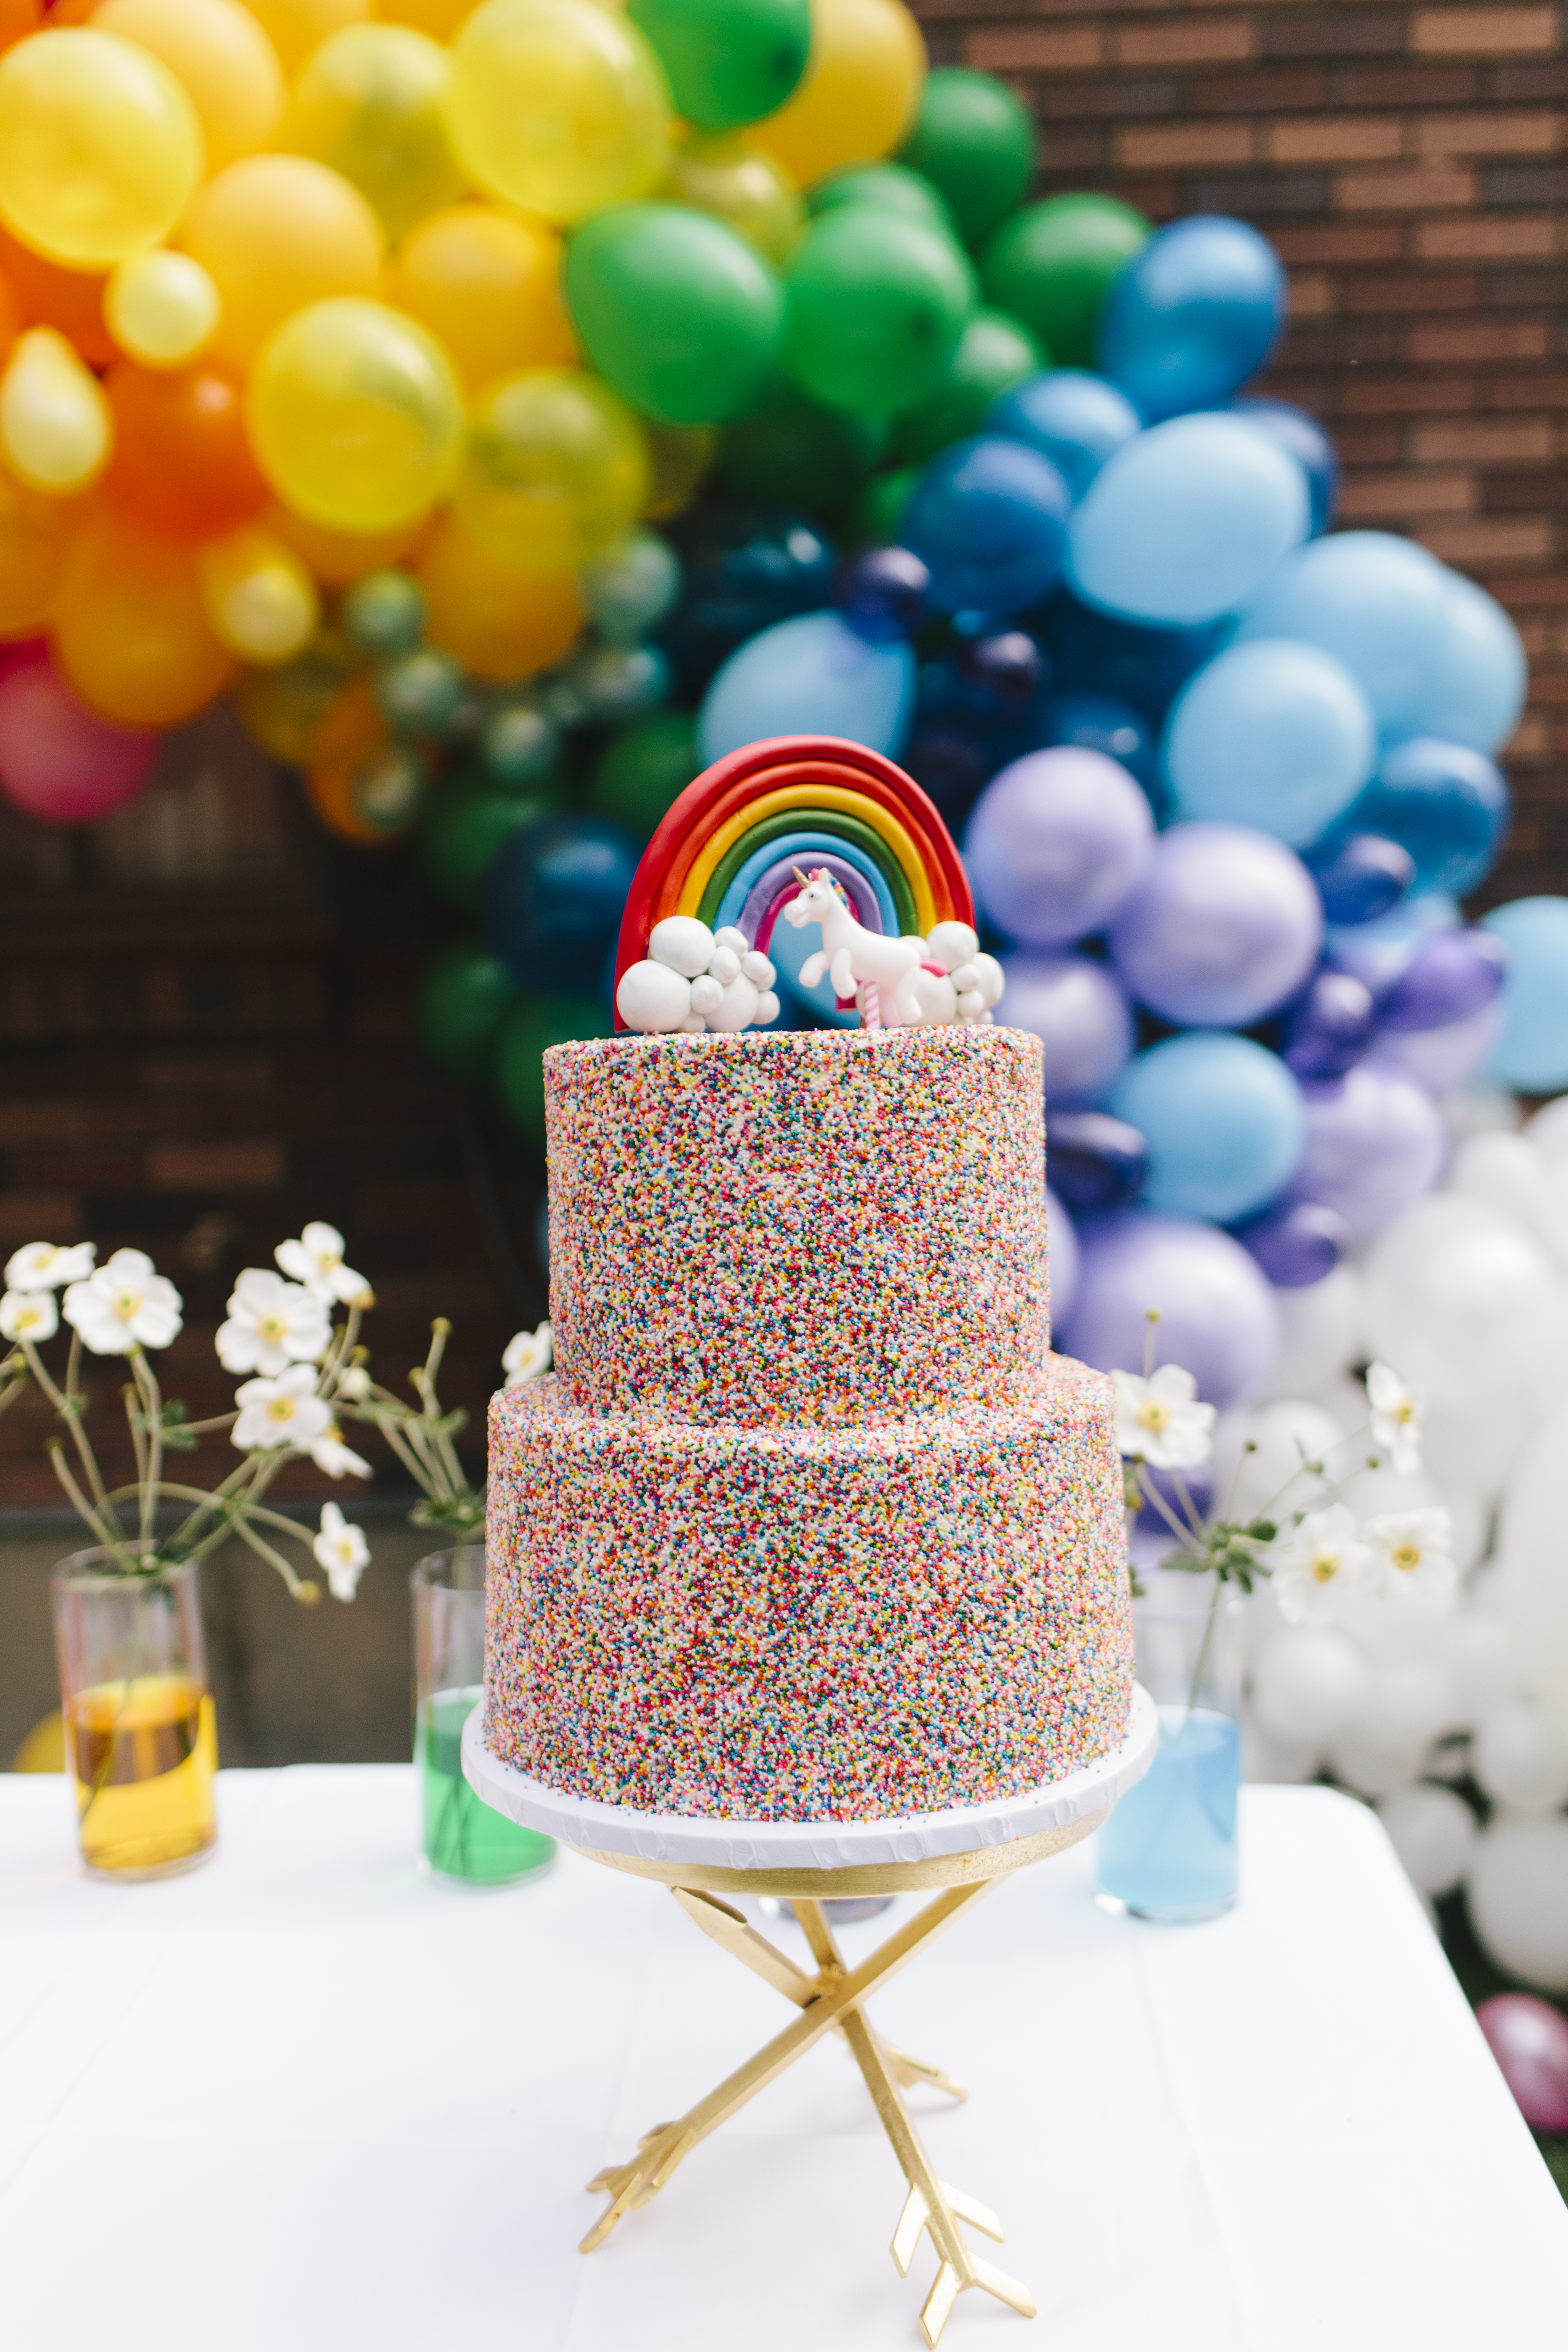
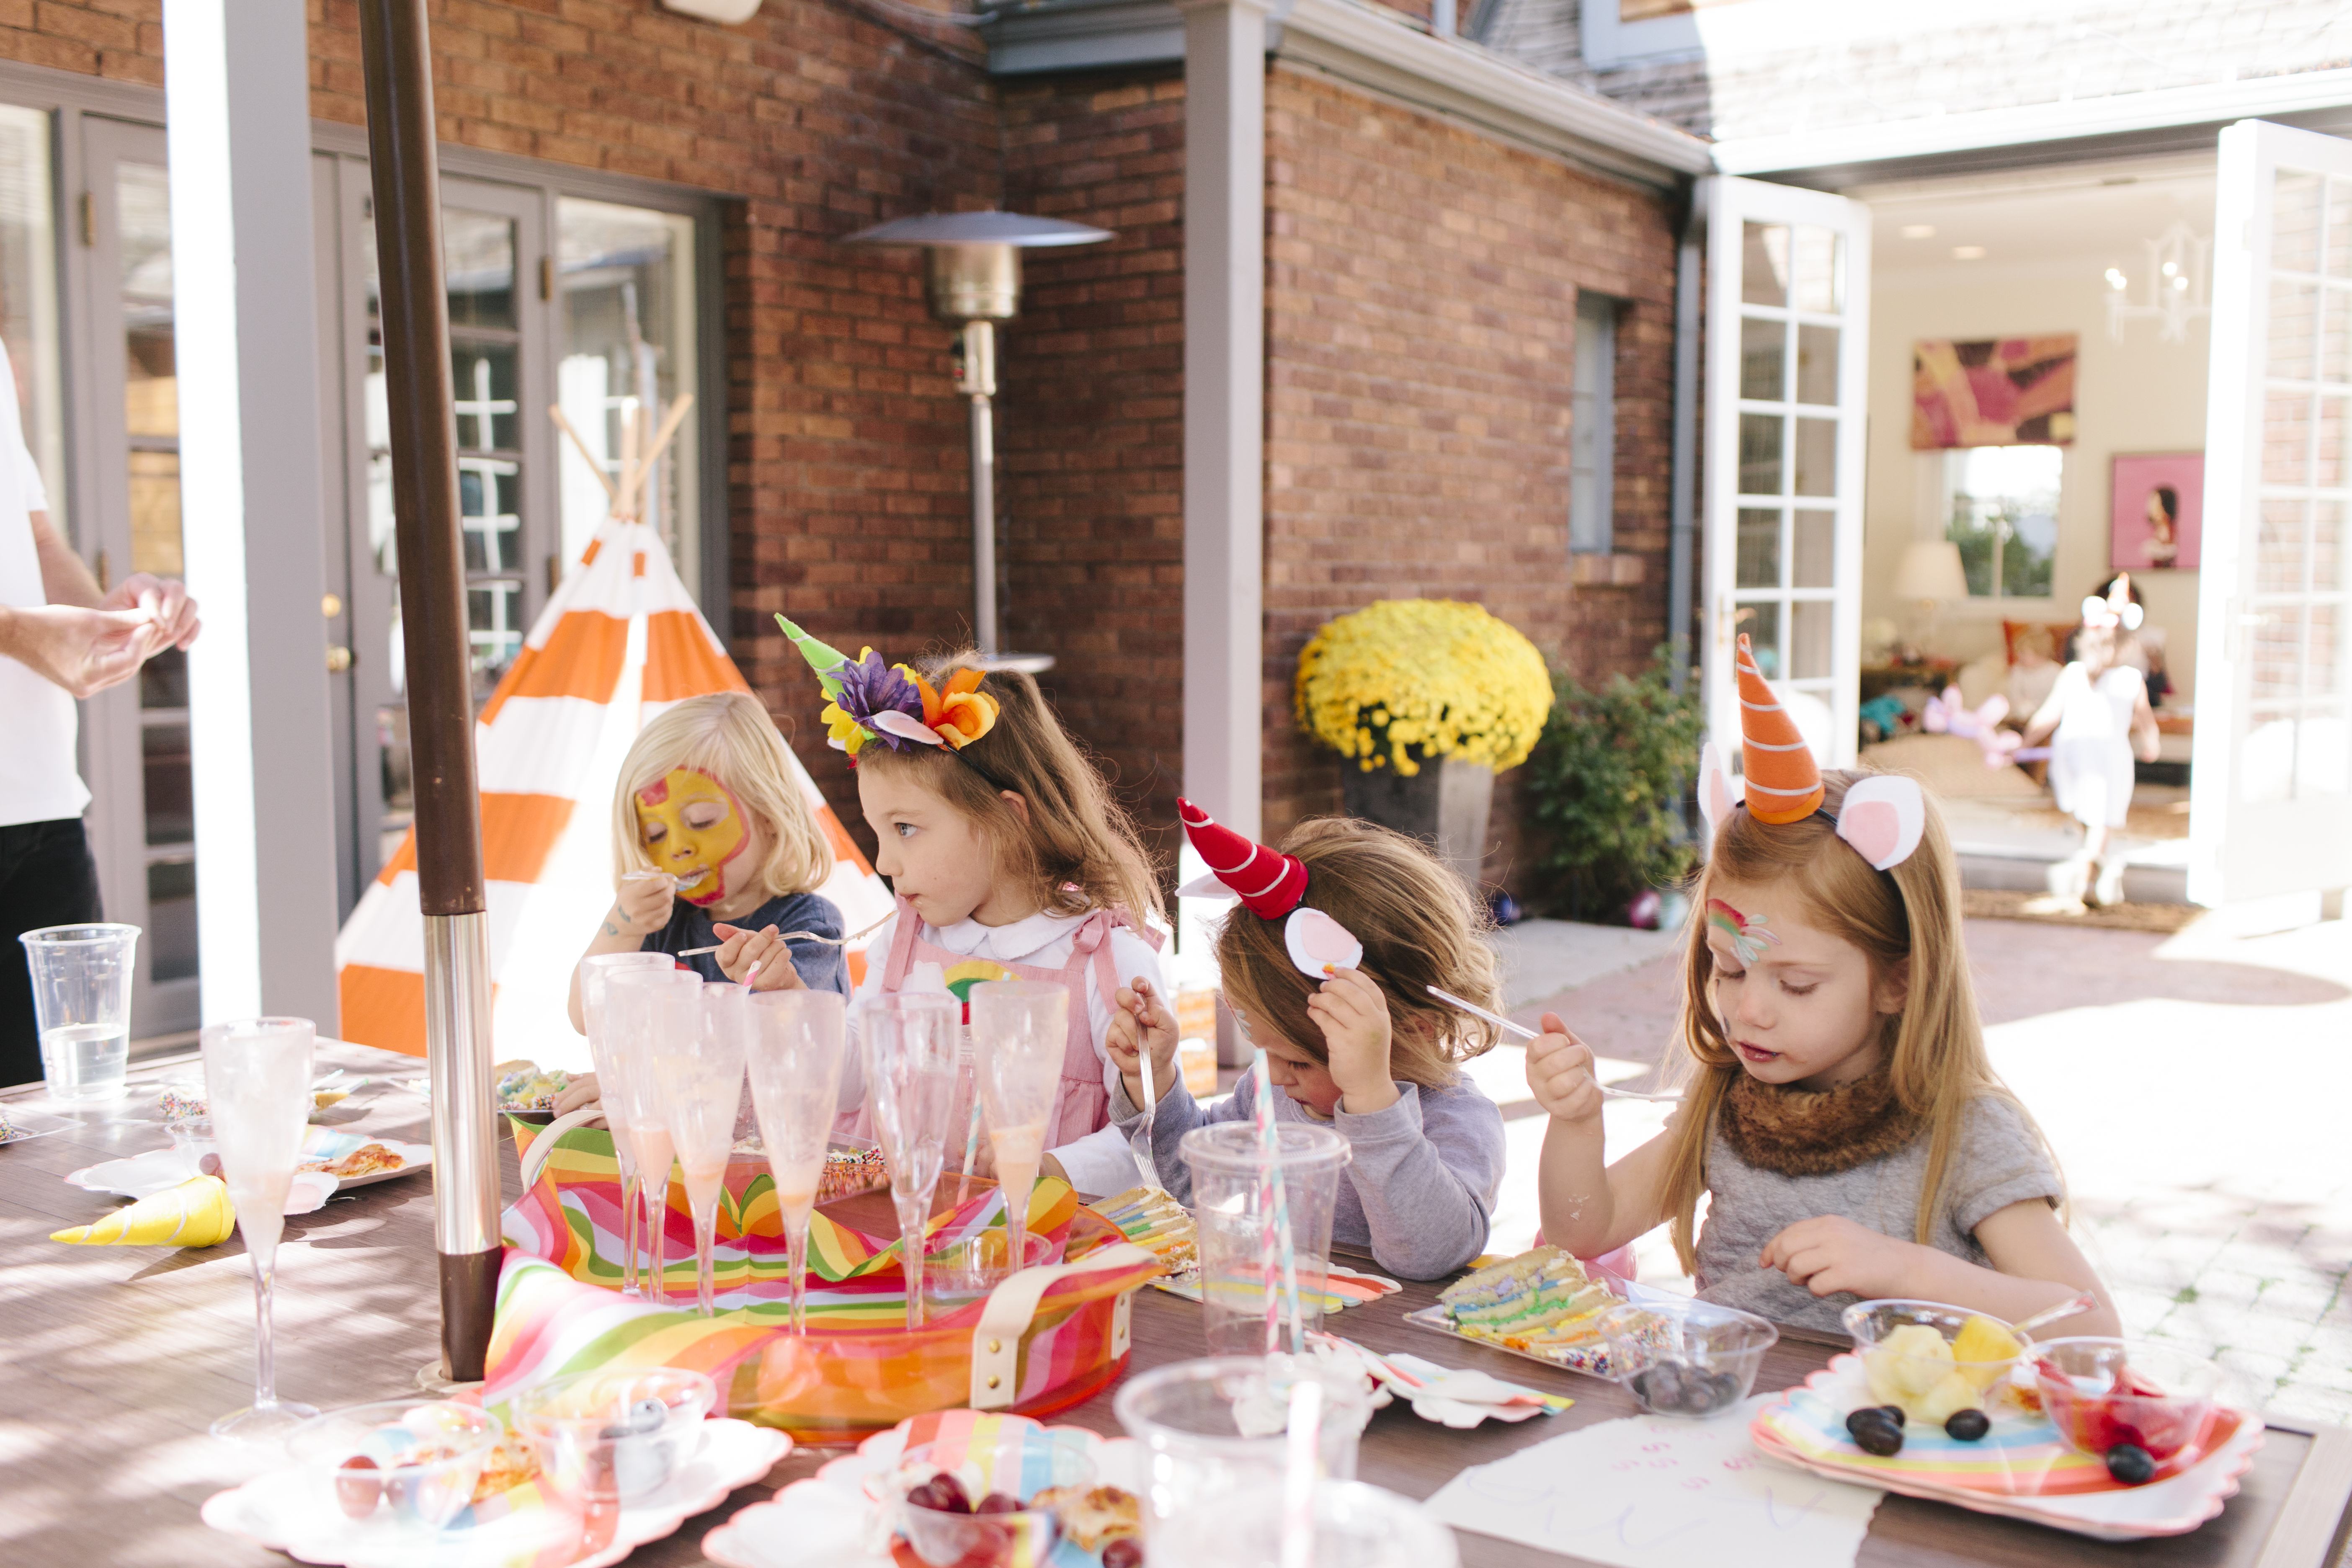
For my daughter’s 4th birthday, I wasn’t going to forgo a big celebration – even though I was 37 weeks pregnant (!!). As the founder of a shopping & style site curated for all phases of motherhood, I have a keen eye for design and a love of color. At my Salt Lake City, UT home, we created a rainbow-inspired party complete with a pony, a massive DIY balloon arch, and one very pregnant mama.

Birthday Party DIY Balloon Arch

What You’ll Need

  • Balloons (lots and lots of balloons)
  • Low Heat Hot Glue Gun
  • White Duck Tape or Heavy Packing Tape
  • Chicken Wire

Birthday Party DIY Balloon Arch

Perfection is boring and doing something identical to someone else is too! I like Pinterest for inspiration, but it’s important to put you own twist on it. For starters, this will make it easier to accept your work when it looks nothing like the Pin :)!

How to Create

  1. If you have an easy way to hang chicken wire, use it to form a full rainbow shape. For our arch, we didn’t have an easy way to create and hang the chicken wire in a full rainbow shape, so we went with a more abstract approach. Symmetry is TOUGH so if you can avoid it, I say go for it!
  2. We started the arch using a low heat glue gun to attach the first layer of the balloons. We had crazy wind that day and it was drying the glue too fast for the balloons to stick (and taking forever!!).  Rather than keep trying because “that’s what Pinterest said “, I said forget it (or something like that) and starting using white duck tape and heavy packing tape that I had on hand.  As I wrote above, consider a back up plan (especially if you are making the project in your robe only a few hours before guests arrive like me!)
  3. Give your toddler assistant a project that makes her feel important during the process (so you can actually finish!).  While Brett (my fab hubby who supports all my ridiculous ideas) and I blew up all the balloons a few days ahead of time, we had Olive sort them by color and place in plastic bags. And, while I climbed up and down the ladder attaching the balloons with tape, Olive decorated the step ladder with said tape. Okay—so this wasn’t a productive task, but it kept her busy and I actually finished with enough time to throw on a dress before the first guest arrived!

 Birthday Party DIY Balloon ArchBirthday Party DIY Balloon Arch

Frustrated with the lack of stylish nursing wear and the time drain of finding workable ready-to-wear, founder Morgan Hutchinson created BURU—an online destination that stocks high fashion designer wares hand-selected for motherhood. She brings her talents as a former stylist to the site with seasonal look books, playtime and office appropriate attire, and a peek into her own wardrobe as a new mother.  

Chuck Close Self-Portrait Kids Craft

January 6, 2017

Post by Rebecca of Not-So-SAHM

Chuck Close Self-Portrait Kids Craft

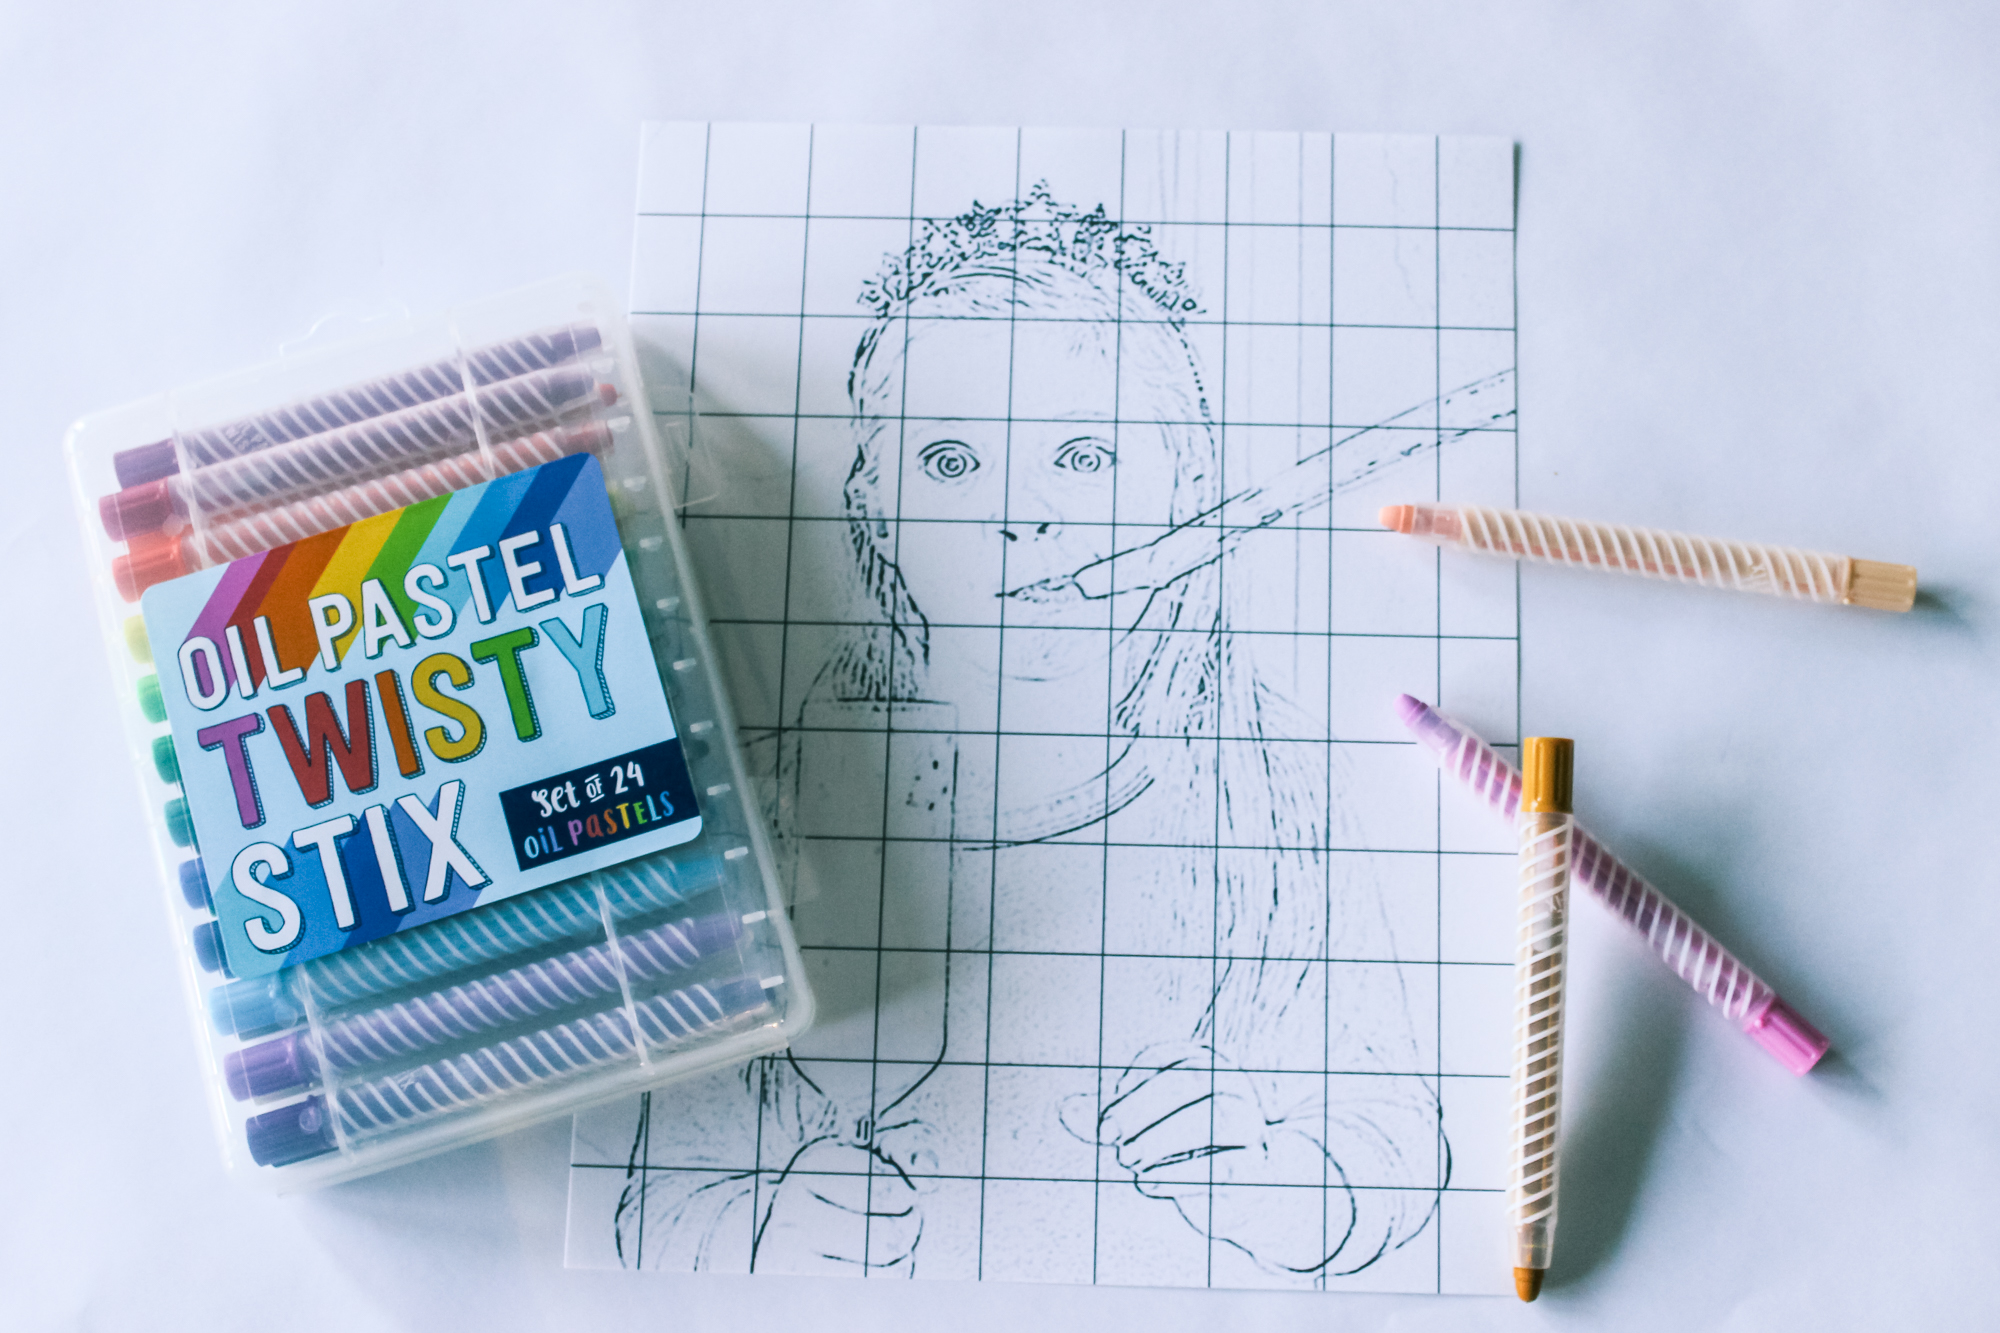
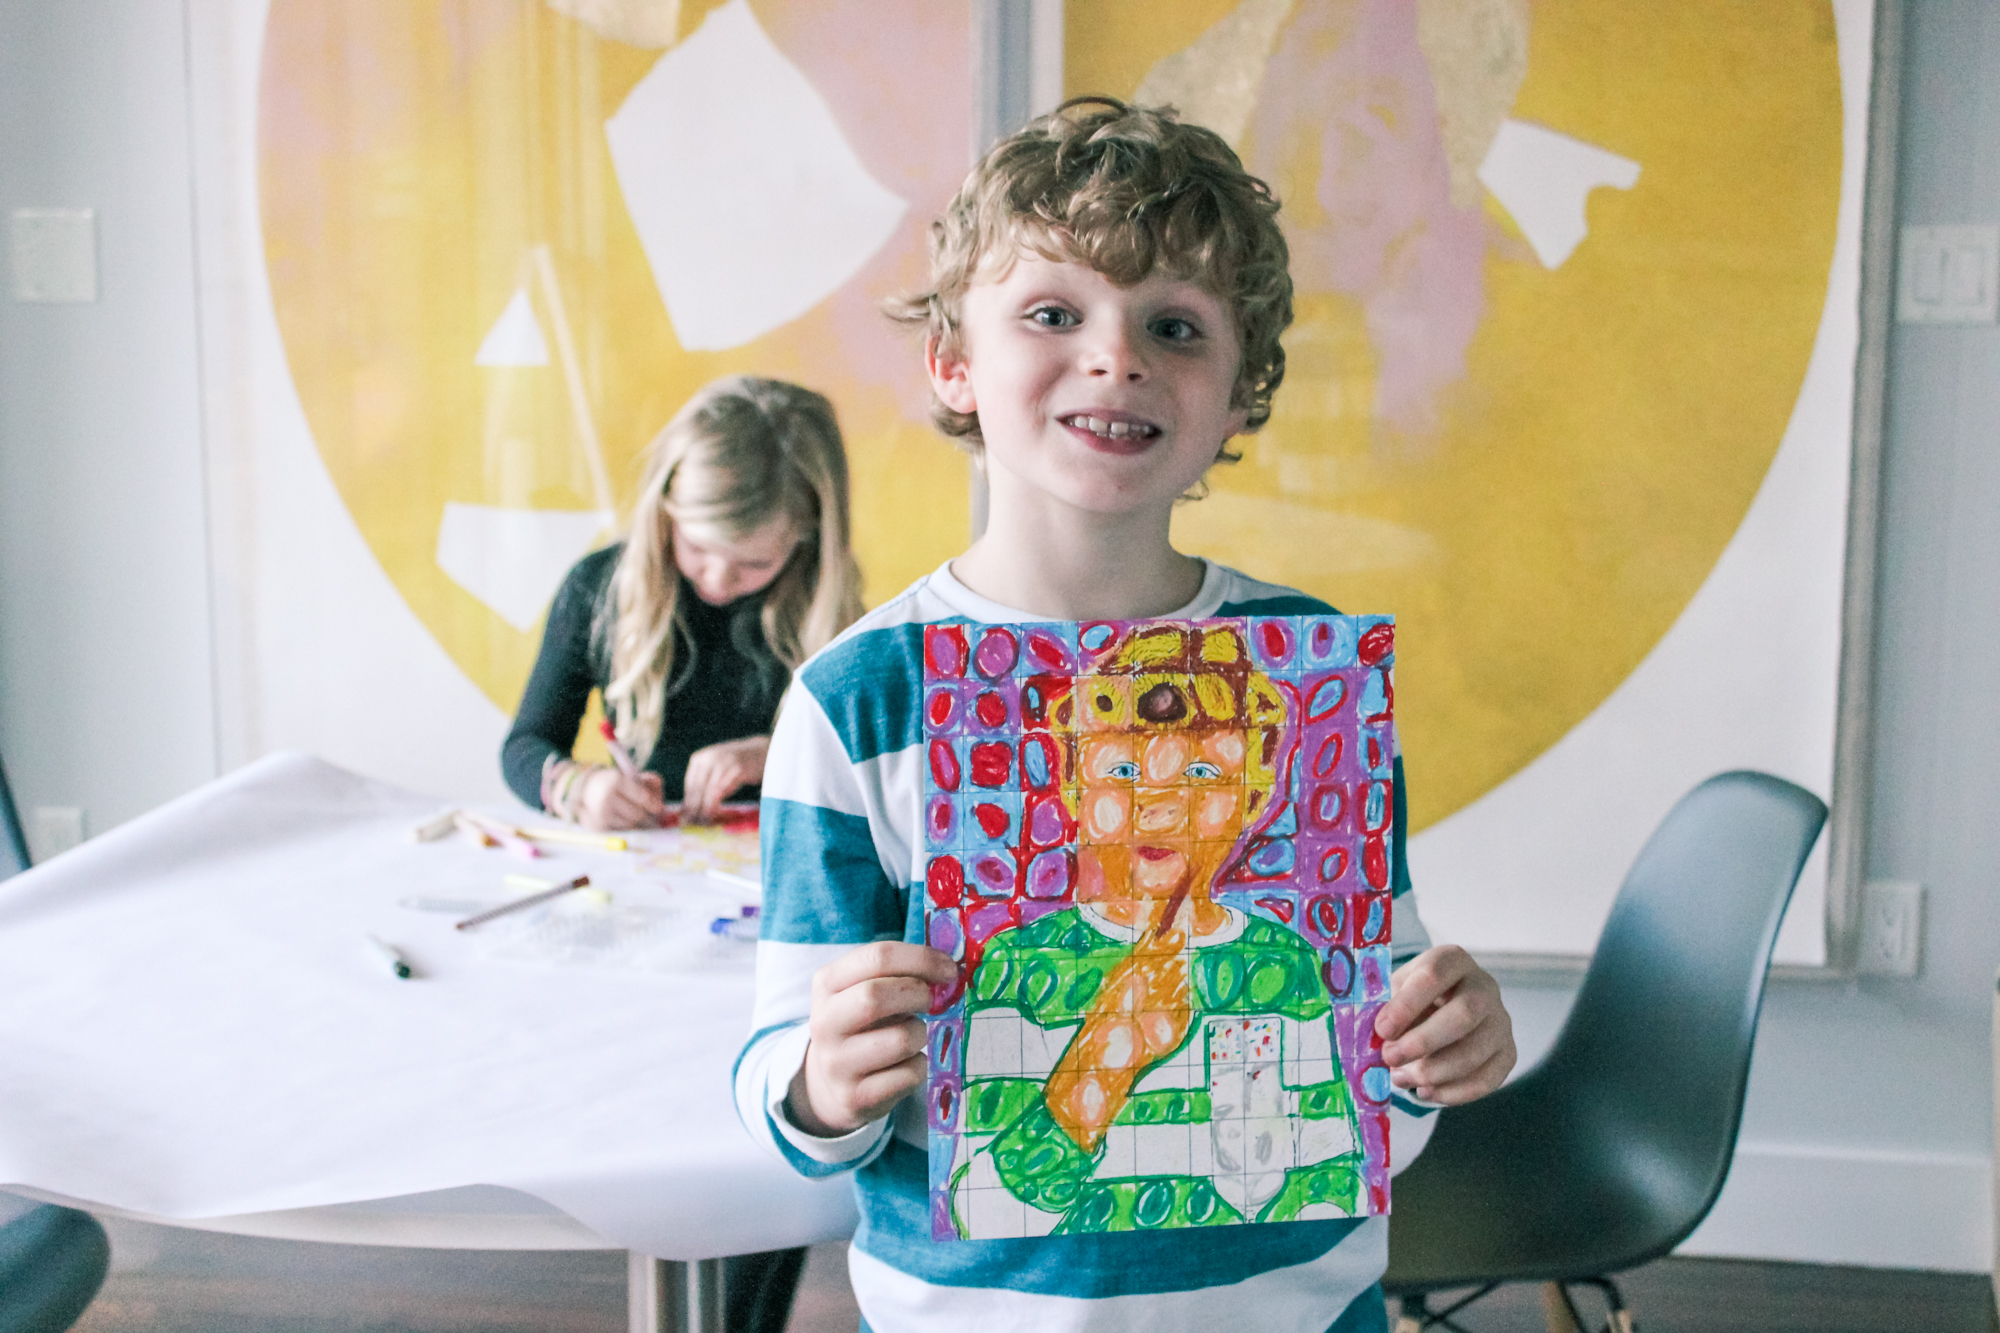
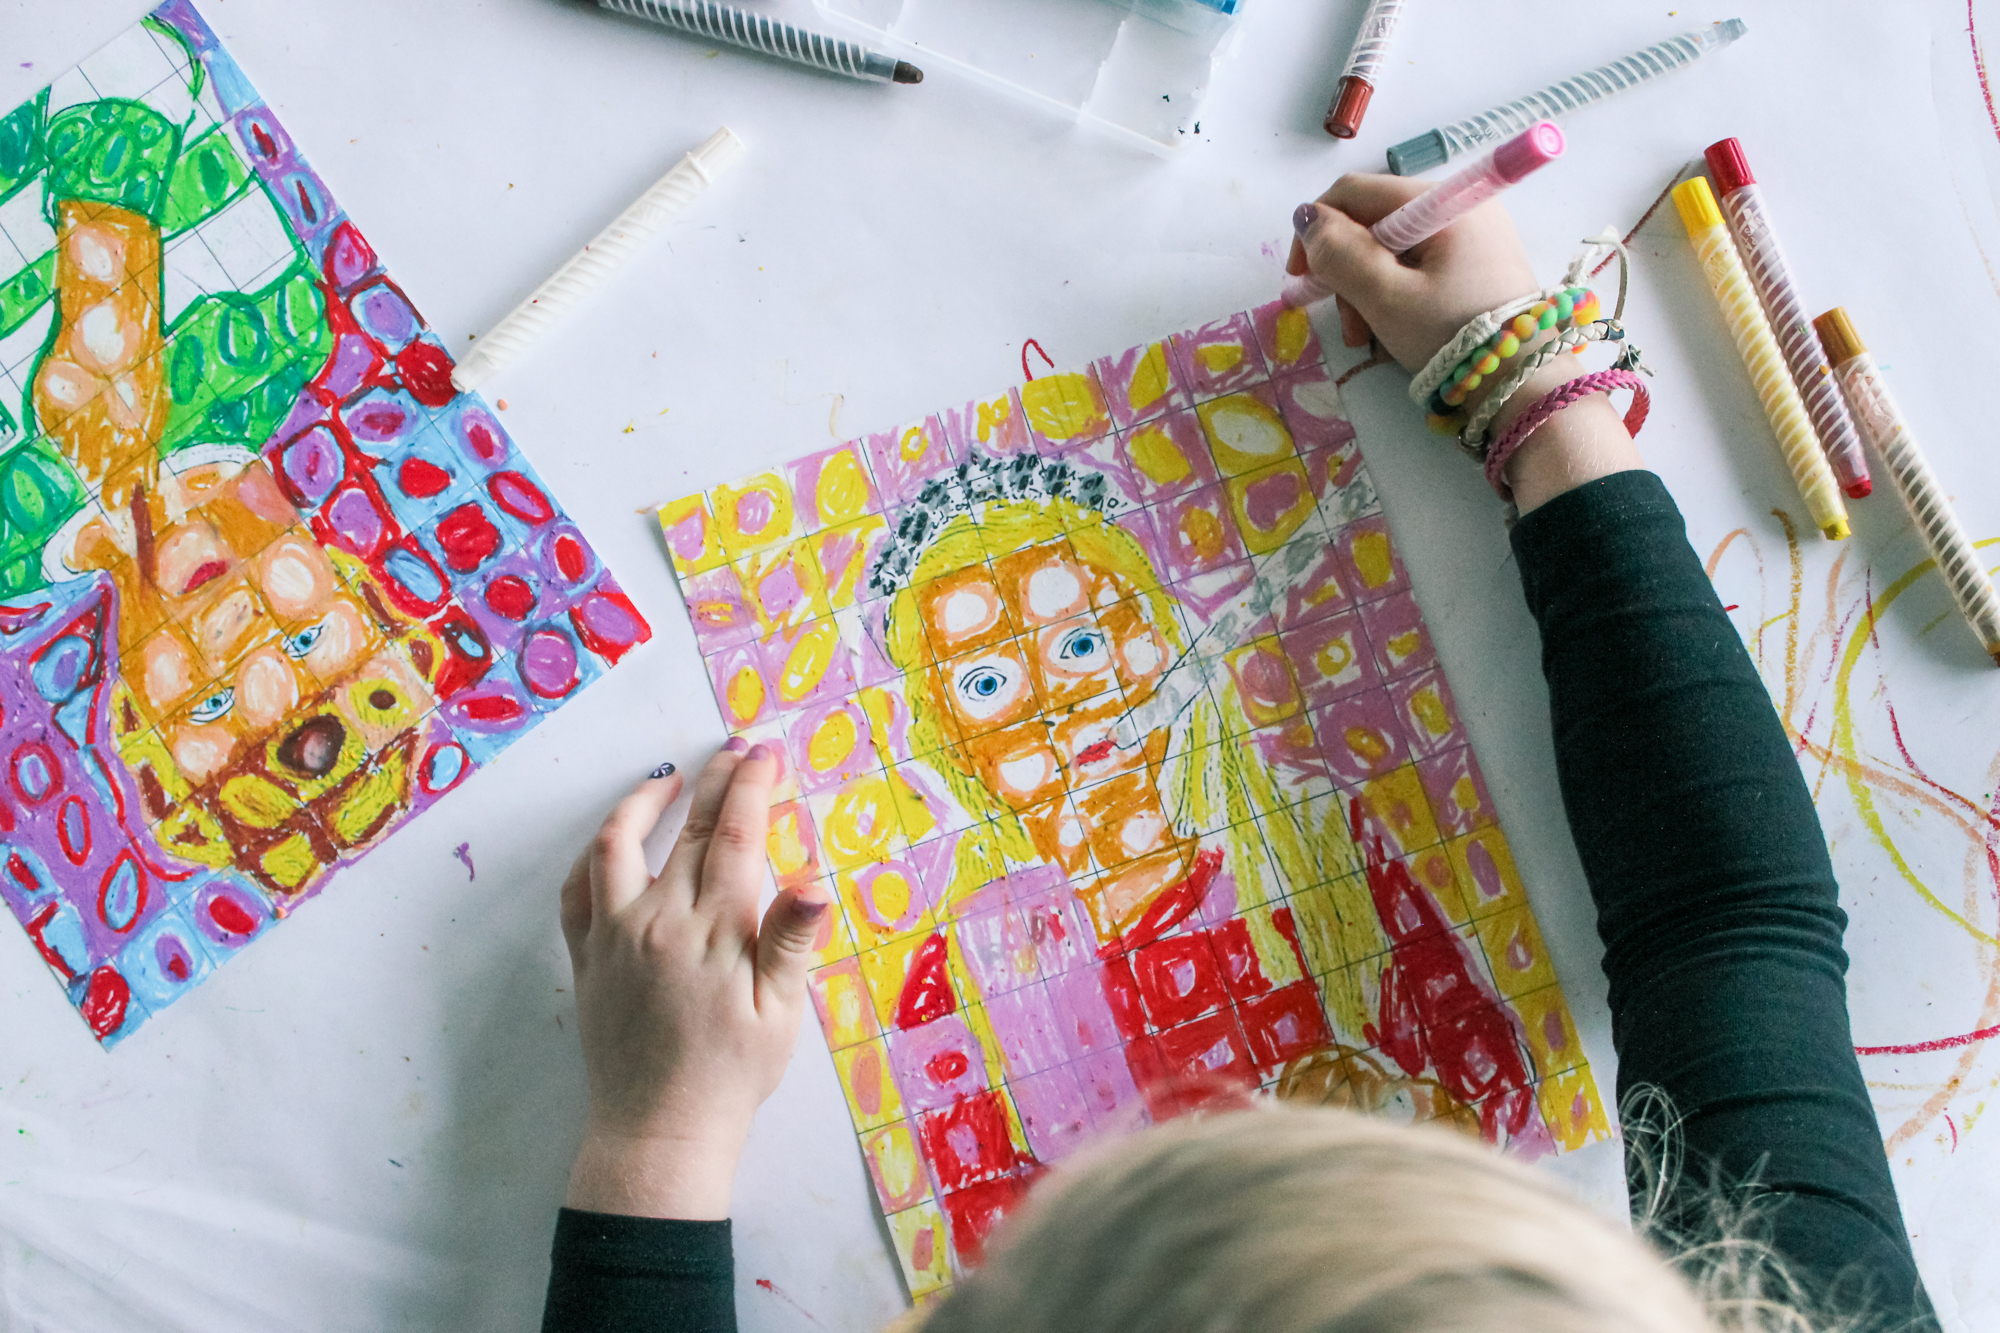
One of our most favorite art museums in D.C. is the National Portrait Gallery—I’ve mentioned before in our Food Face Collage project just how much we love the great family programming. So when I was talking with the kids recently about self-portraits, Kane brought up how much he liked the portraits at the America’s Presidents exhibit there, particularly the “swirly one.” It took me a while to figure out what he was talking about, but when I showed him Chuck Close’s portrait of Bill Clinton, he confirmed that was it! So we decided to take a go at making our own Chuck Close style self-portraits with the awesome Oil Pastel Twisty Stix, which have just enough range of colors to make skin tones work and keep fingers from getting messy!

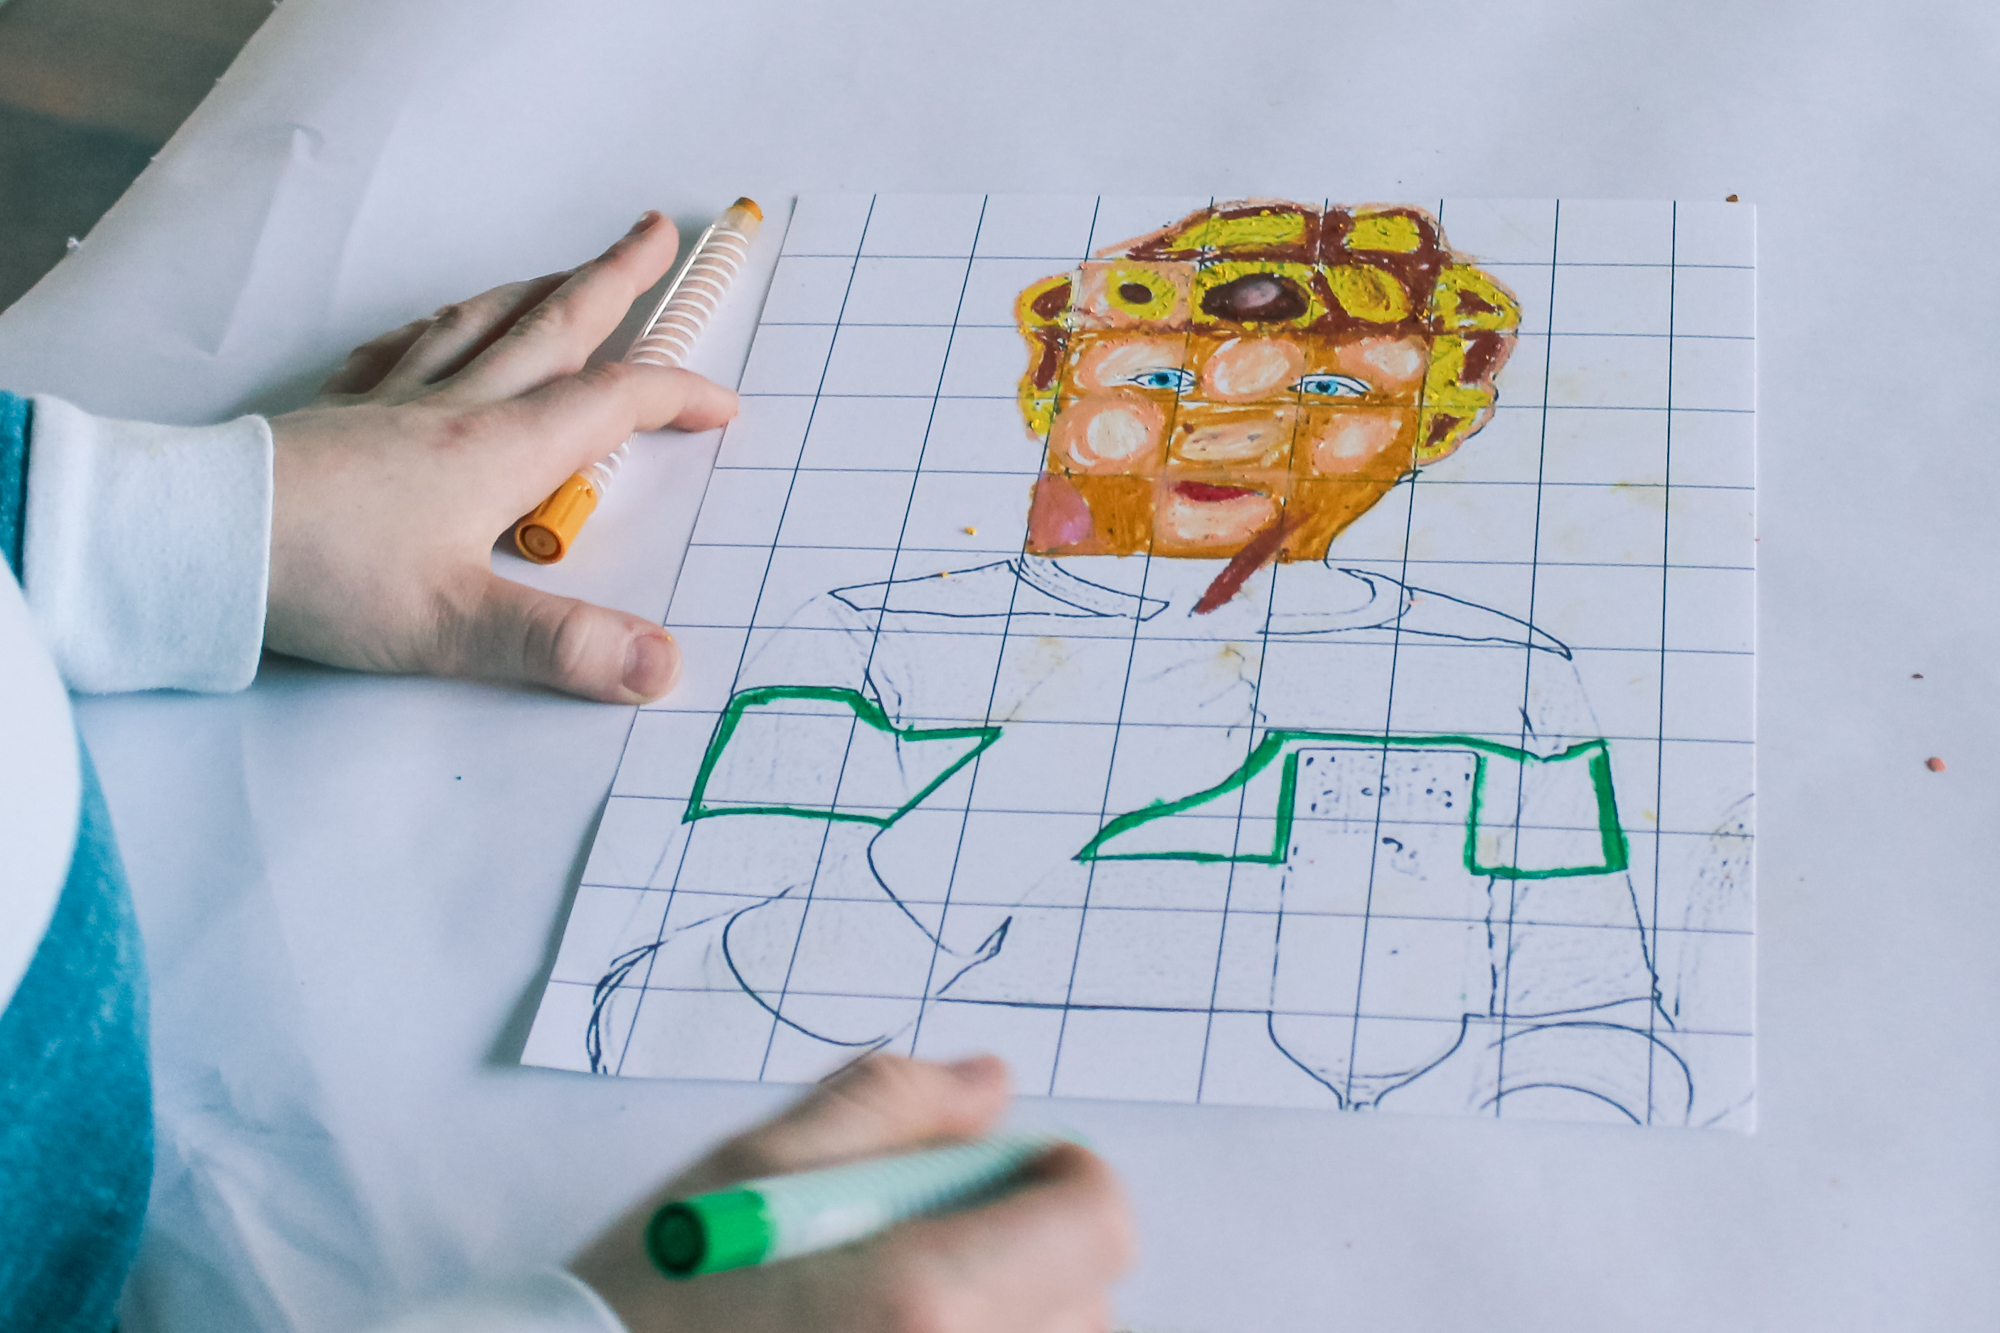
We started out by reading a bit about Chuck Close and his art online. And then we looked at many examples of his photorealist works and I pointed out how he used different colors to create shades inside a grid. Up close, you see a grid filled with blobs of color, but when you step back, you see the portrait emerge. Cami said it reminded her of what pool tiles look like under water. I agree! We discovered a whole other layer of interestingness when we read that Chuck Close suffers from face blindness and painting portraits helps him remember faces.

I have to say, this was a little bit of a challenging project for the kids. We rarely do an art project following another artist’s technique, so they aren’t used to not just doing whatever they want. Kane really caught on quickly, but it took Cameron a little longer. And I helped both of them out, following their directions of course. But we all loved the project!

Chuck Close Self-Portrait Kids Craft

Materials

  • A close-up portrait photo—you can convert this to a sketch outline with a free online program like Snaptouch (what I did) or another photo editing program like Photoshop if you have it.
  • Gridded paper—you can print onto graph paper or download are grid design HERE.
  • Oil pastels

Chuck Close Self-Portrait Kids Craft

Chuck Close Self-Portrait Kids Craft

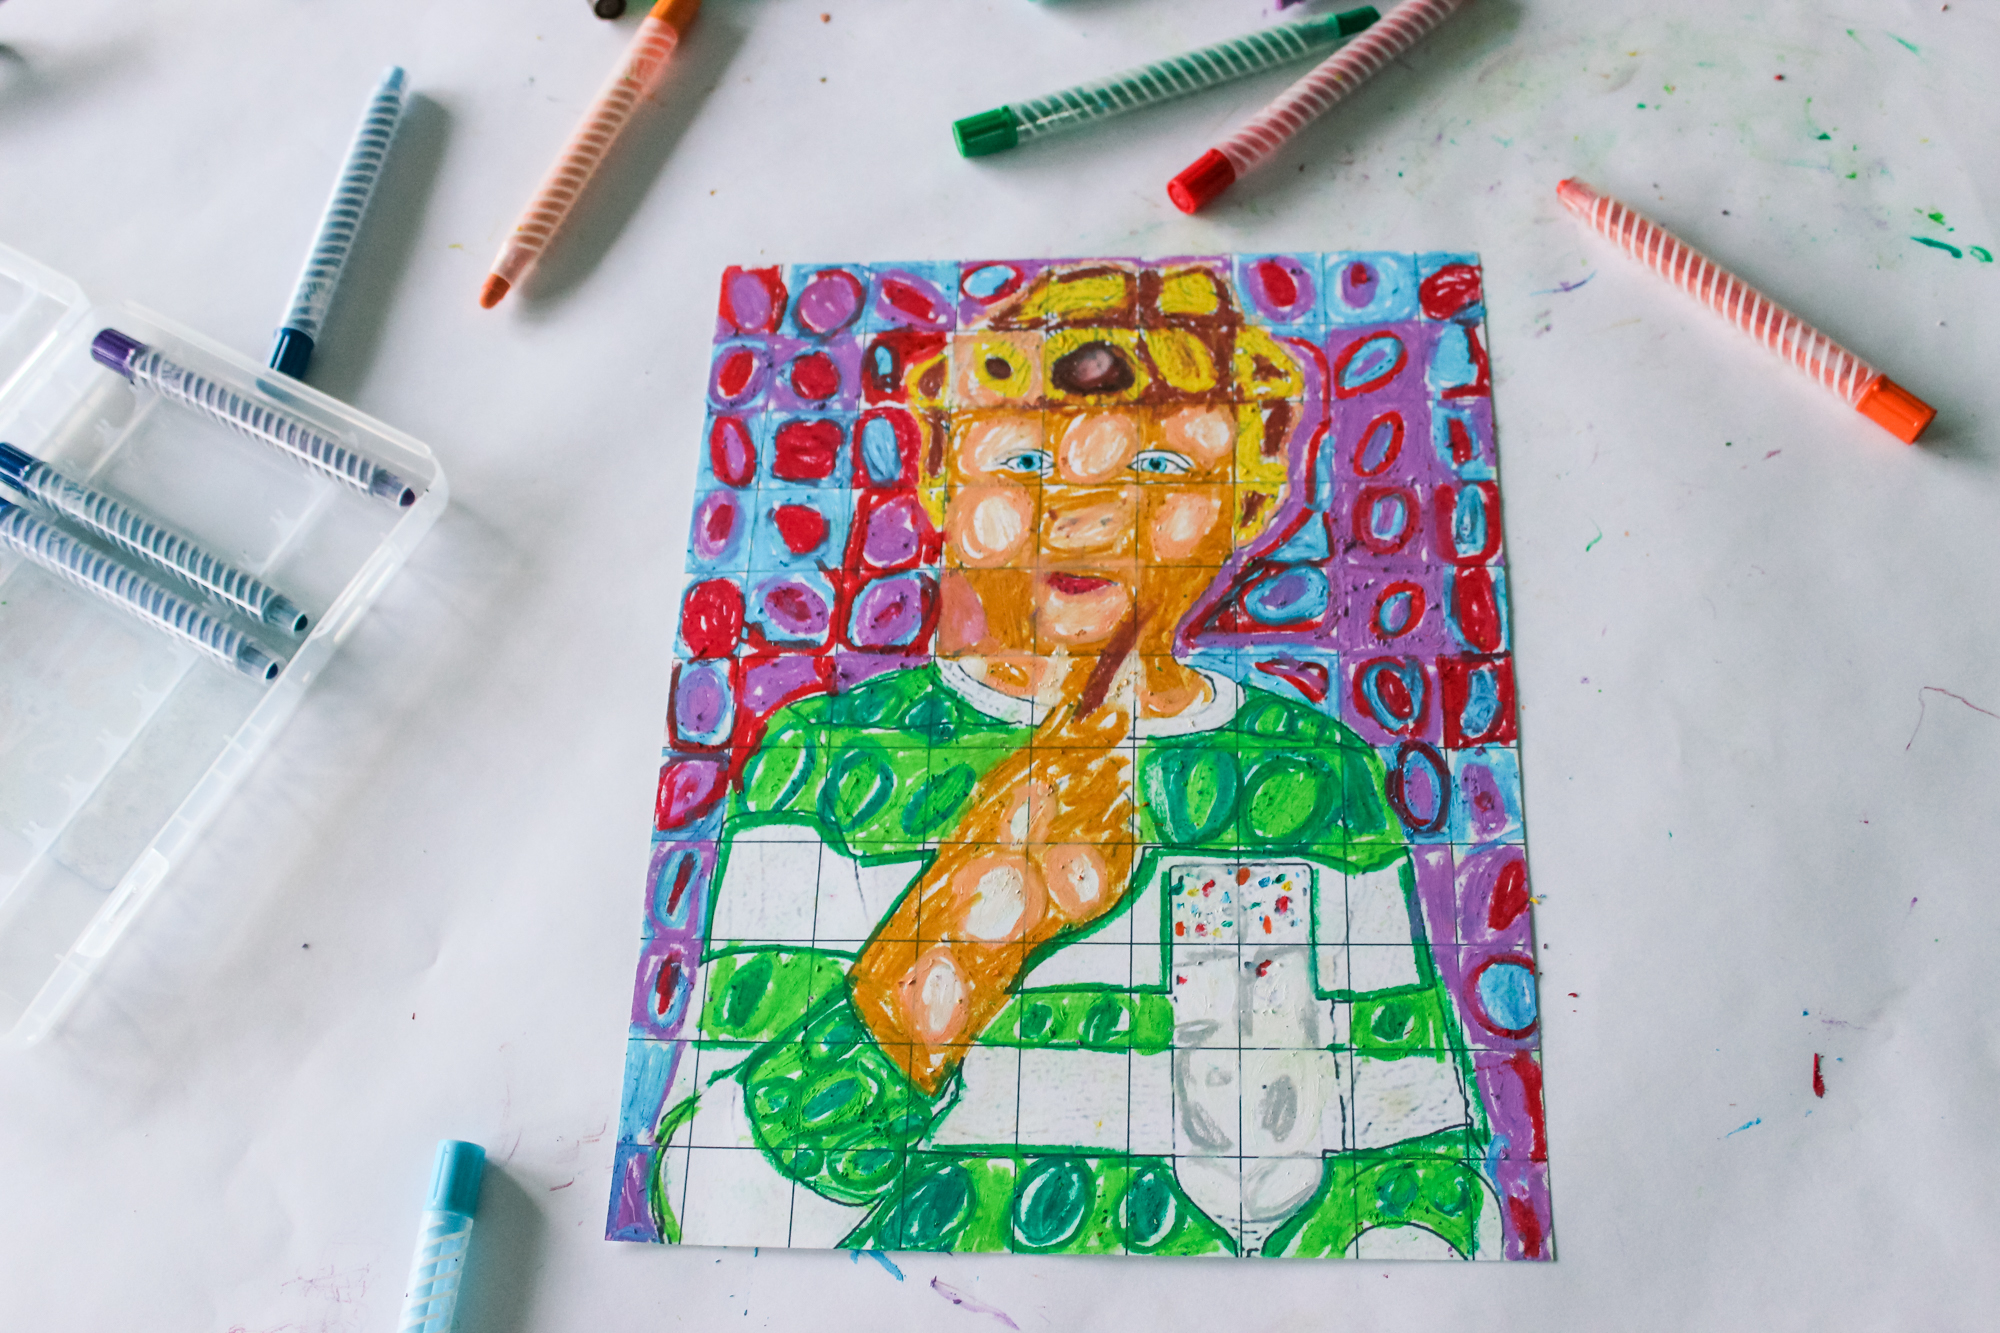
Once you’ve converted your photo to a sketch outline, print it out onto gridded paper. I used some of the photos I snapped of the kids for our Kiddie Mocktail post. We started out by coloring in some of the more important face details and accessories (eyes, mouth, tiaras). Then we outlined the different parts of the body just to help keep track of where we needed to change colors. The kids picked between 2 and 3 colors to use for each object (e.g., three greens for the stripes on Kane’s shirt; tan, brown, and white for skin areas, etc.). And then we got to coloring.

Chuck Close Self-Portrait Kids Craft

Chuck Close Self-Portrait Kids Craft

Cameron wanted to stay true to the actual photo whereas Kane wanted to change up what he was wearing and what the background color was. Both turned out amazing!

Rebecca is a mom to two young kiddos and, in her spare time (ha!), likes to pretend she’s a back-up dancer, craft cocktails, and run long distances. A relatively recent SAHM, she blogs family-friendly activities, DIYs and celebration fun at Not-So-SAHM.


Grey & Pink Nursery Inspiration

January 5, 2017

Post by Danielle, Home Stylist from The Land of Nod’s Design Services Team

When creating a sweet, feminine nursery for your little one, you can’t get much girlier than using soft shades of pink with floral accents. The perfect complimentary color to this palette is grey, with smaller gold and white accents to keep everything feeling very soft and serene.

The grey balances out the blush color and provides a classic, neutral foundation that can be easily swapped out for other colors when the nursery transitions to a big girl room. One of our favorite wall colors to use for a nursery is Benjamin Moore Graytint because it is so versatile.

Mixing various shades of pink and grey is a great way to give the room a more layered look–don’t stress about finding pieces that are the exact same hue, just make sure they are similar in tone. For example, the pink used here is a soft, blush shade and would not pair well with a bright, bubble gum pink.

When incorporating touches of color, don’t overlook the smaller details such as toys and storage systems–sometimes a hamper or pair of shoes on a floating shelf makes for the ideal accent piece.

Grey & Pink Nursery Inspiration

Post by Danielle Reidy, Home Stylist  from The Land of Nod’s Design Services Team. Our Design Services team offers free one-on-one design advice, mood boards and space planning. You have a room to decorate? They’d love to hear from you. Visit The Land of Nod’s Design Services page to get started today.

Modern & Adventurous, Bohemian Boys Bedroom

January 4, 2017

Post by Shawna, Home Stylist from the Land of Nod’s Design Services Team

As a stylist, it’s important to me that I create looks that aren’t “pre-packaged”, but appear to be collected over time. Where do I begin?

  • The first step is to be fearless!
  • The second step would be to find a common denominator. In the case of this curated, bohemian-style bedroom, I focused on the idea of a little explorer.
  • The third step? Color is key. Notice how the cobalt blue tones bring vibrancy, the orange – warmth, while the greys and touches of light Mango Wood bring balance. Add a few low-maintenance, indoor plants to complete this look!

Post by Shawna, Home Stylist from The Land of Nod’s Design Services Team. Our Design Services team offers free one-on-one design advice, mood boards and space planning. You have a room to decorate? They’d love to hear from you. Visit The Land of Nod’s Design Services page to get started today.

Mint Nursery Inspiration for Baby Girl

January 3, 2017

Post by Danielle, Home Stylist from The Land of Nod’s Design Services Team

Mint is one of those colors that can be either invigorating or soothing depending on how you use it. It can be paired with bright, lively colors to create a playful space or with softer, delicate tones for a more serene feel. When decorating with mint, it’s fun to pick a complimentary color or two, or even start with patterned wallpaper for inspiration.

For this little girl’s nursery, we chose a sweet floral pattern as the backdrop and paired with furniture and accessories that tied in with the different shades of mint, peach and coral. If wallpapering feels like too big of a project, a coat of Benjamin Moore’s Irish Mint makes a great foundation for designing your mint nursery.

Mint Nursery Inspiration for Baby Girl

Post by Danielle Reidy, Home Stylist  from The Land of Nod’s Design Services Team. Our Design Services team offers free one-on-one design advice, mood boards and space planning. You have a room to decorate? They’d love to hear from you. Visit The Land of Nod’s Design Services page to get started today.

Winter White Nursery Inspiration

December 30, 2016

Post by Shawna, Home Stylist from the Land of Nod’s Design Services Team

The snow is finally falling here in Chicago! Doesn’t the cold, fresh air and the scent of evergreen trees bring about a warm, simple comfort?

Invite this same sense of comfort in your little one’s nursery with gentle tones in winter white, not-so-boring-beige and natural woods. I’m calling this simple, chic look the “Modern Pioneer”.

Winter White Nursery Inspiration

Post by Shawna, Home Stylist from The Land of Nod’s Design Services Team. Our Design Services team offers free one-on-one design advice, mood boards and space planning. You have a room to decorate? They’d love to hear from you. Visit The Land of Nod’s Design Services page to get started today.


Navy & Grey Nursery Inspiration

December 29, 2016

Post by Danielle, Home Stylist from The Land of Nod’s Design Services Team

Bedding is often where I like to start when designing a room. With this little boy’s nursery, the Make a Splash bedding has the classic navy and grey colors that are always so versatile, and the various crib sheet options add a playful touch.

When working with primarily navy and grey, I believe it’s good to bring in shades of lighter blues that have the same tones to use in the decor and accessories. Wood and wicker are also nice to pair with these colors to add texture and variety to the space. If you’re looking for a moody wall color that makes a statement, try Benjamin Moore Polo Blue.

Navy & Grey Nursery Inspiration

Post by Danielle Reidy, Home Stylist  from The Land of Nod’s Design Services Team. Our Design Services team offers free one-on-one design advice, mood boards and space planning. You have a room to decorate? They’d love to hear from you. Visit The Land of Nod’s Design Services page to get started today.

From Inspiration to Nursery Design: Caterpillar Tummy Toy

December 28, 2016

Post by Danielle Kurtz, Creative Director at The Land of Nod

As soon as I saw our new Caterpillar Tummy Toy, I knew it would be the perfect inspiration for a nursery design. I always love a good dose of black and white in the spaces I create, and I’m a sucker for bold, graphic patterns. Plus, this little guys has so many cute playful elements (his sweet face, that bug on his back, a MUSHROOM!!) that are great inspiration for a nursery. So, I use the colors, patterns and playfulness to put together a room that is modern and lighthearted. Just enough white to keep it calm, but a riot of color mixed in to keep it cheerful.

From Inspiration to Nursery Design: Caterpillar Tummy Toy

Danielle is the Creative Director at Nod and an over-protective mother of two. She’s also completely obsessed with Pinterest, Twitter, Instagram and her Kindle, but not necessarily in that order. Danielle loves to craft, sew and crochet. Her current craft of choice is weaving tiny wall tapestries.

Tween Bedroom Makeover

December 27, 2016

Post by Stephanie, Home Stylist from the Land of Nod’s Design Services Team

Far and away, my favorite design projects are the ones I get to put together for my Nod family. When my teammate Donna needed help putting together some ideas for turning her 12-year-old daughter Maddie’s shared bedroom into her own private tween hang out space, I couldn’t wait to get started making her room feel personal and special.

To help give me some direction for the new design, Donna gave me some insight into Maddie’s personality and interests. Turns out, Maddie is a gal after my own heart. She loves baking and is obsessed with the show Cake Boss. She considers herself to be a bit Bohemian, and is far too laid back to be a girl who follows whatever is trendy.  Maddie loves gymnastics, science (specifically astronomy) and has a heart for dolphins and Beluga whales (the Blackfish documentary is one of her favorite movies). For a color scheme, she requested either mint or aqua (she couldn’t decide which she wanted more for her new room).

Armed with this information, I set about putting together a Pinterest board with product recommendations. I also thought a moodboard showing a few of the major bedding and décor suggestions would help Maddie and Donna visualize how the new items would look paired together.
Tween Bedroom Makeover

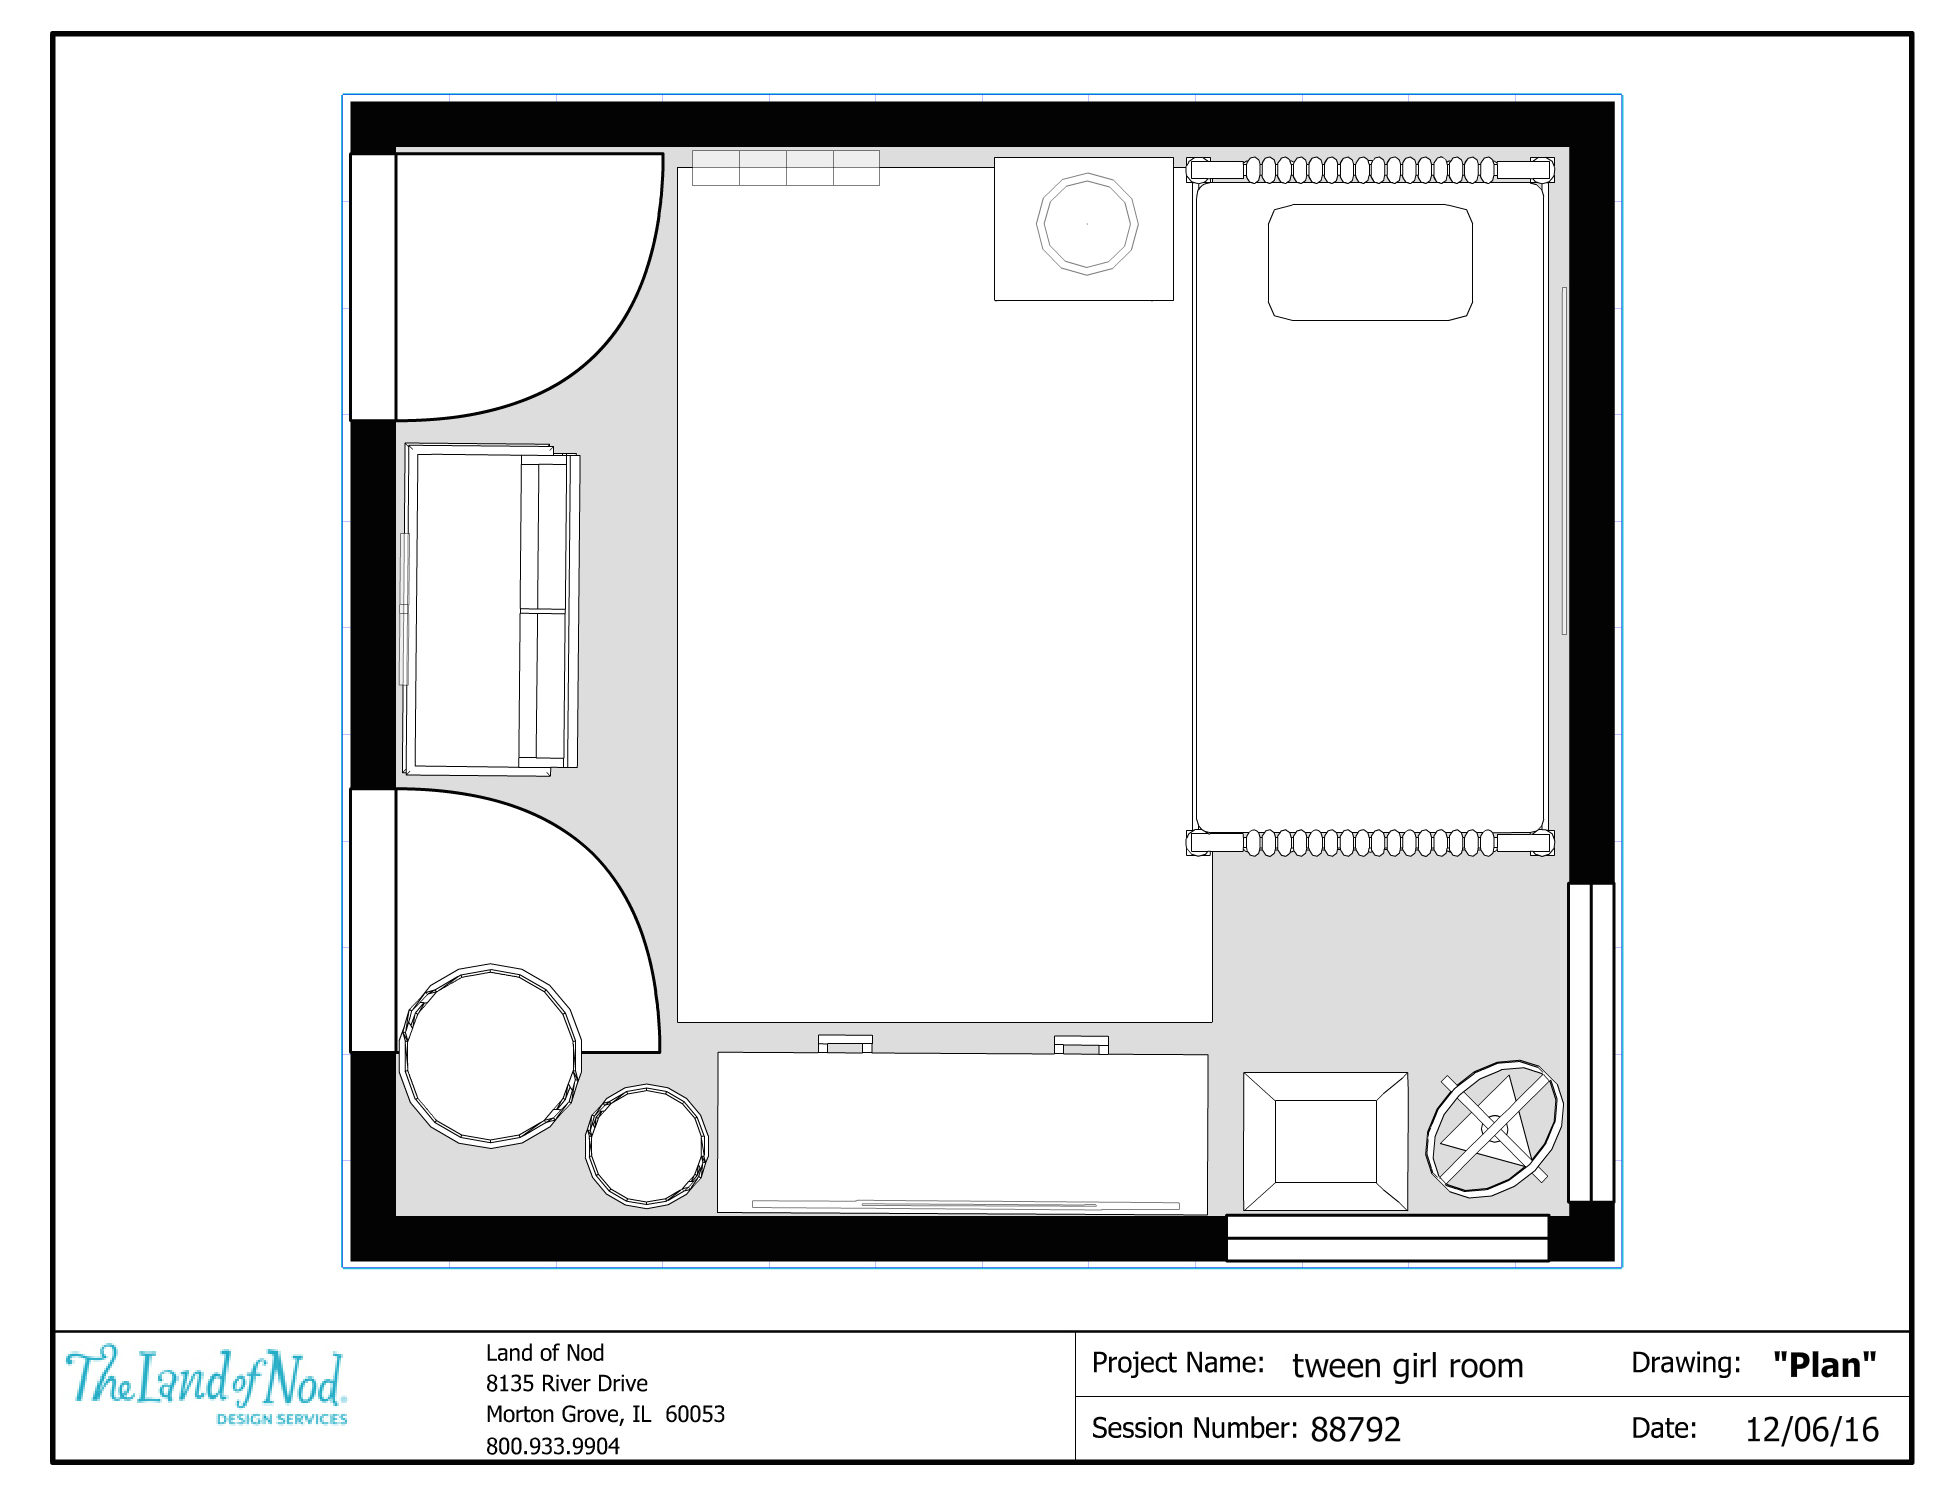
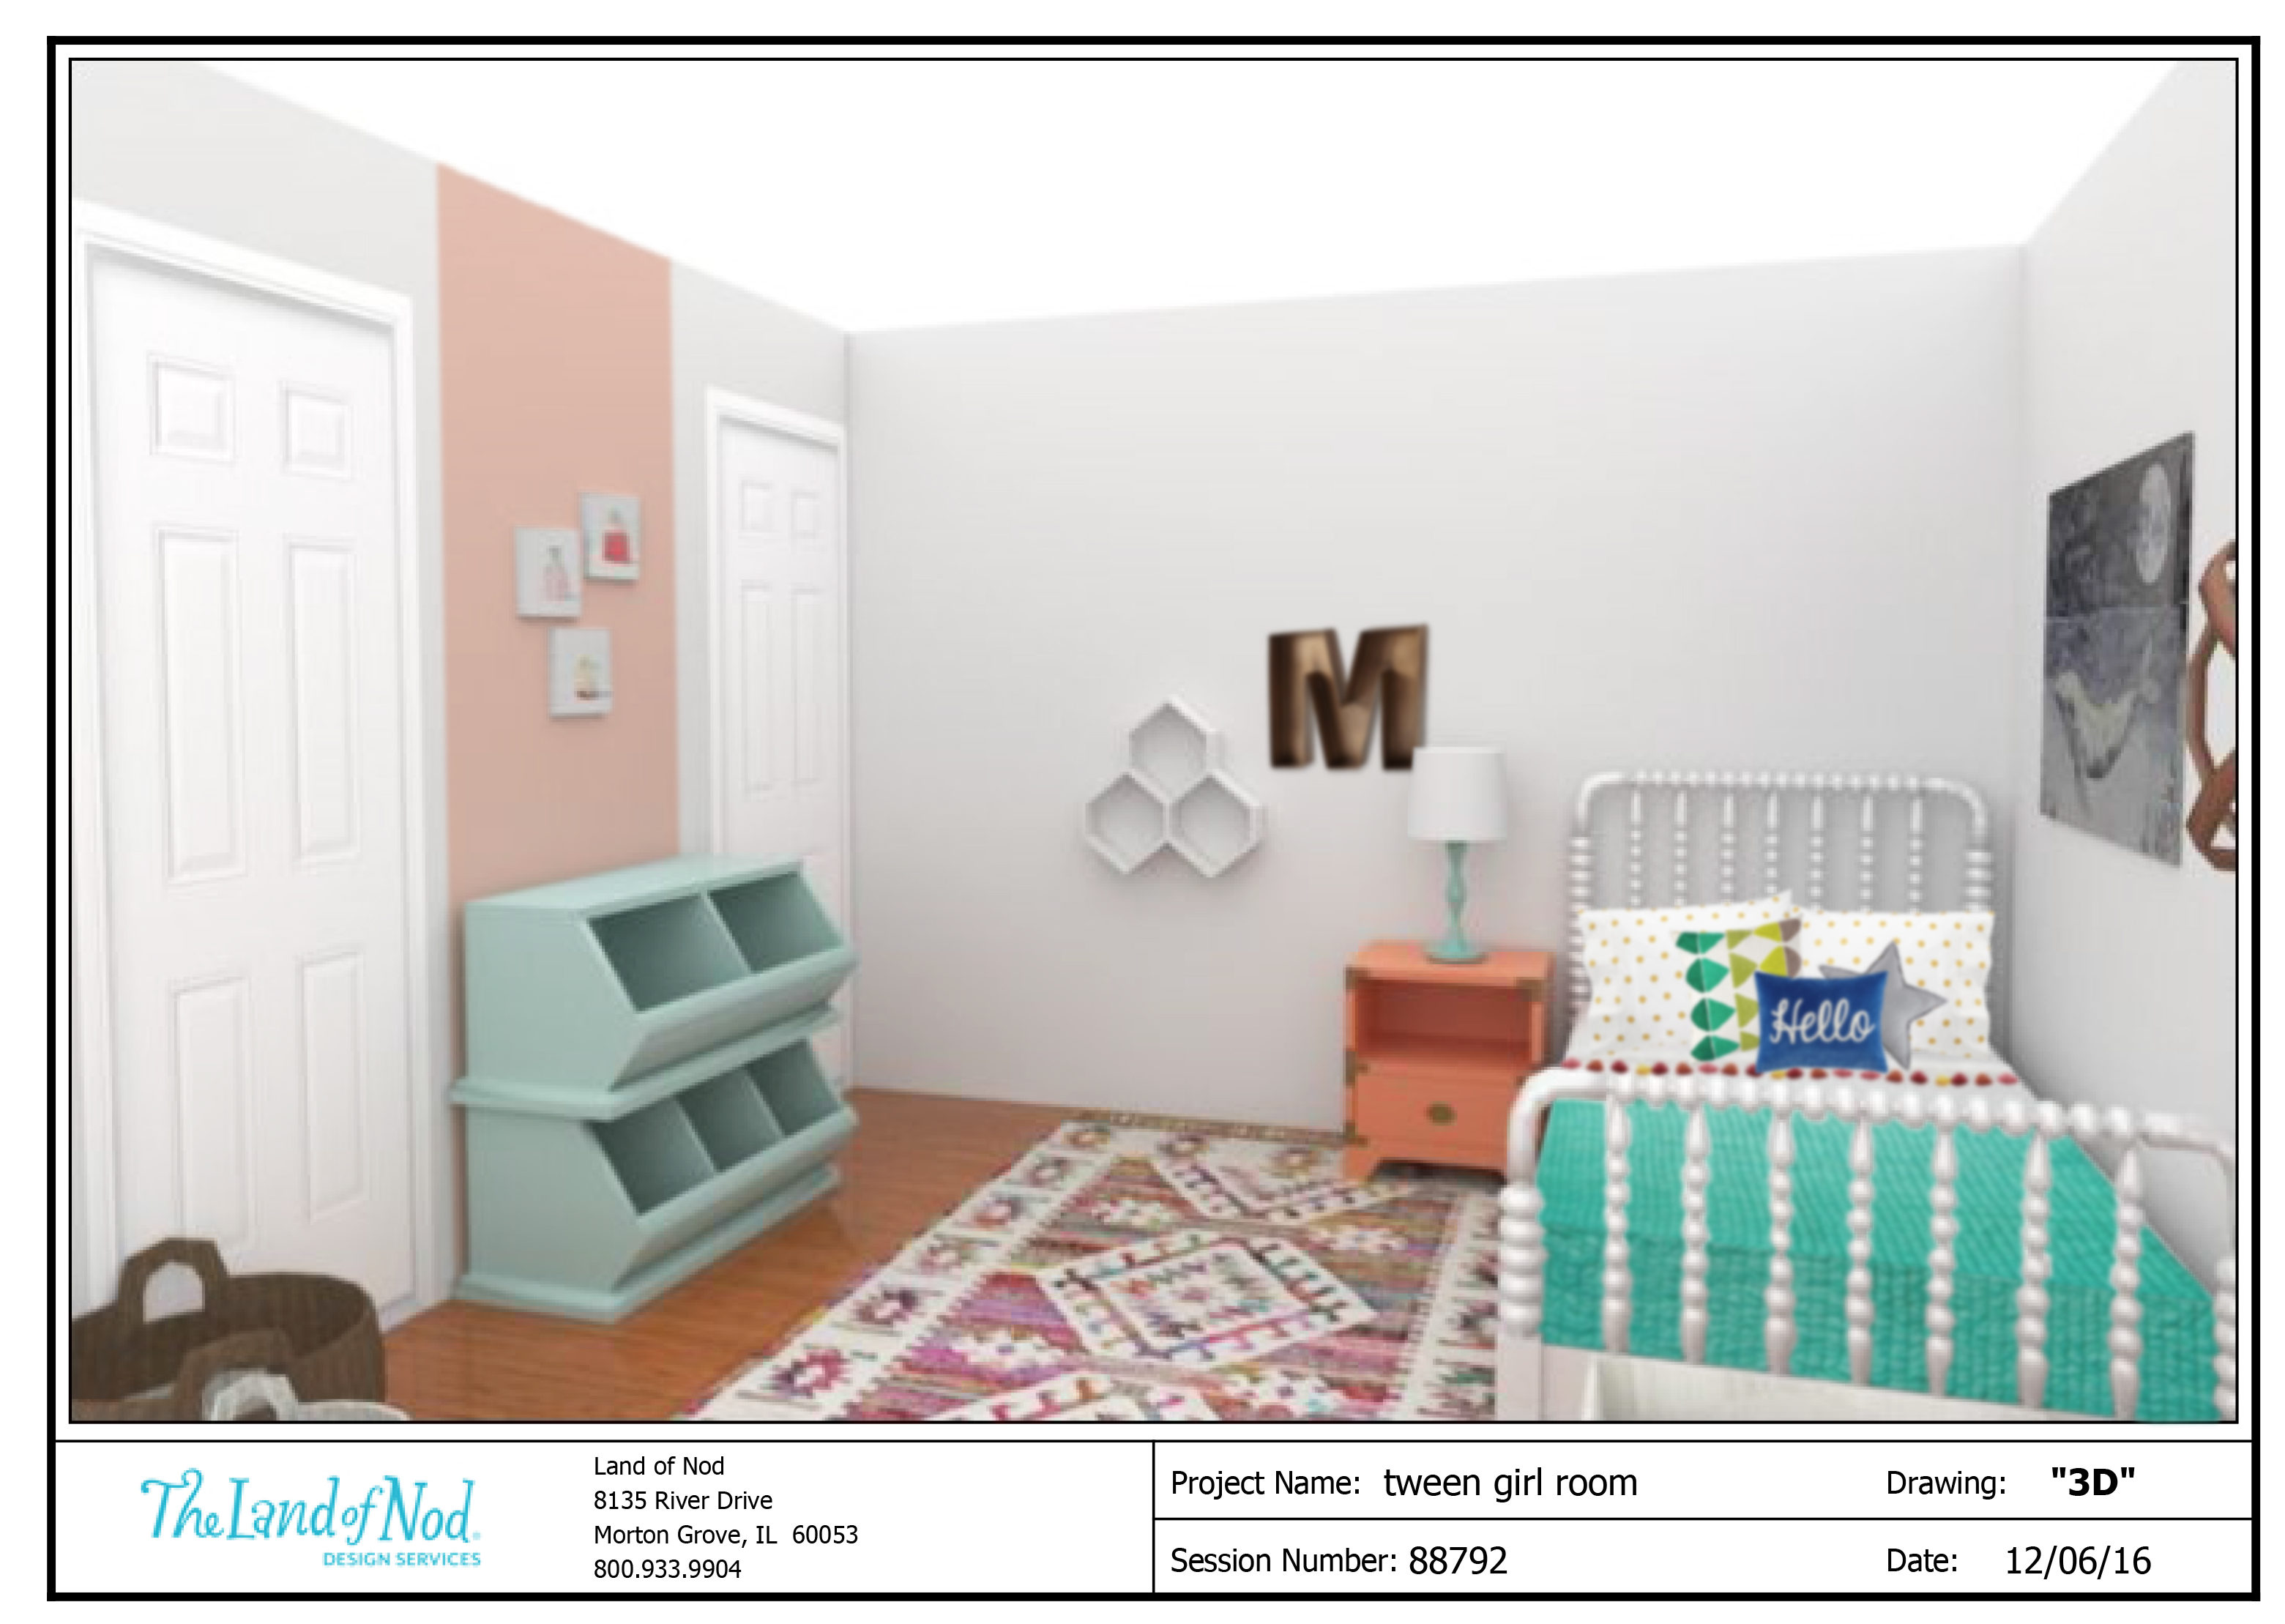
From here, we took the design one step further. Donna sent me room measurements and photos of Maddie’s bedroom so that I could create a floor plan layout and 3D renderings of the new design. These additional design components are a great way to preview the new look and make sure the furniture recommendations will actually fit in the space. It also makes it easier for Donna to know where to hang wall art, which is often a huge design challenge.

Tween Bedroom Makeover

I am not normally a fan of pushing all of the furniture in a space up against the wall, but this layout gave Maddie ample space to lounge, craft, and play with her toys.

Tween Bedroom Makeover

The Watercolor Whale Night Banner felt so perfect for Maddie’s room, as did the set of three Sweet Treats canvas prints. One of my favorite décor items was the spunky Hello Throw pillow, which added an unexpected pop of blue to tie in with the over-sized Color Dipped Weaving.

Tween Bedroom Makeover

As if moving out of a shared bedroom and into her own space wasn’t exciting enough, now Maddie can look forward to having a big kid bedroom that has been custom designed just for her.

Post by Stephanie Geurkink, Home Stylist & Event Planner  from The Land of Nod’s Design Services Team. Our Design Services team offers free one-on-one design advice, mood boards and space planning. You have a room to decorate? They’d love to hear from you. Visit The Land of Nod’s Design Services page to get started today.

New Year’s Resolution: to Eat Family Dinner

December 26, 2016

Post by Alexandra Hedin of Weeknight Society

Thai Chicken Wraps Recipe

New Year’s Resolutions are the worst. There are times when I’m sure they were created to make people feel bad about themselves just in time for giant box of chocolates to flood the stores. There is a way to successfully make it past chocolate season while sticking to your resolution – it comes with planning.

If you haven’t already made your resolutions, think about making “Eat regular family dinners” one of them. Did you know that children who eat dinner with their family are more likely to do well in school and in life? Children who eat family dinner start using a bigger vocabulary at a younger age, they learn how to have a conversation with adults, and as they get into school they get better grades. Middle-school children who eat dinner with their family are more likely to get good grades and are less likely to try drugs or drink alcohol than children who don’t regularly eat a family dinner.

Last year I launched my app, Weeknight Society, to help families eat dinner together. Every week I load up five recipes for you to add to your menu, shop from the grocery list, and cook along with step-by-step instructions. Every recipe on the app is designed to take about a half an hour AND each recipe has been cooked for my own children, there are always easy ways to make everything ‘kid friendly.’
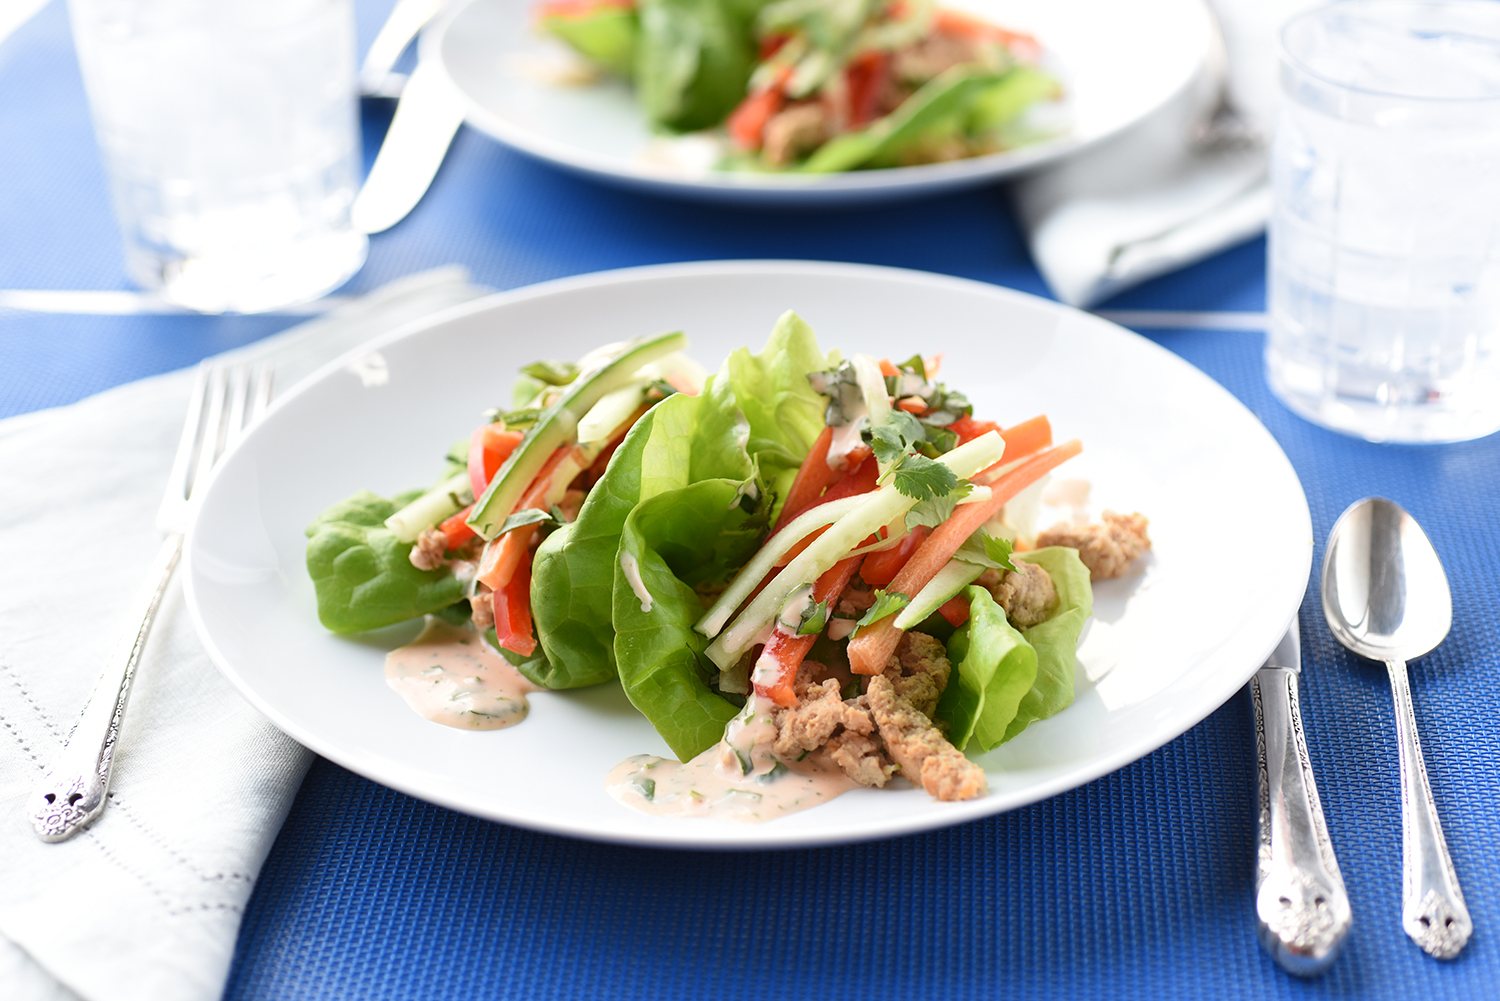
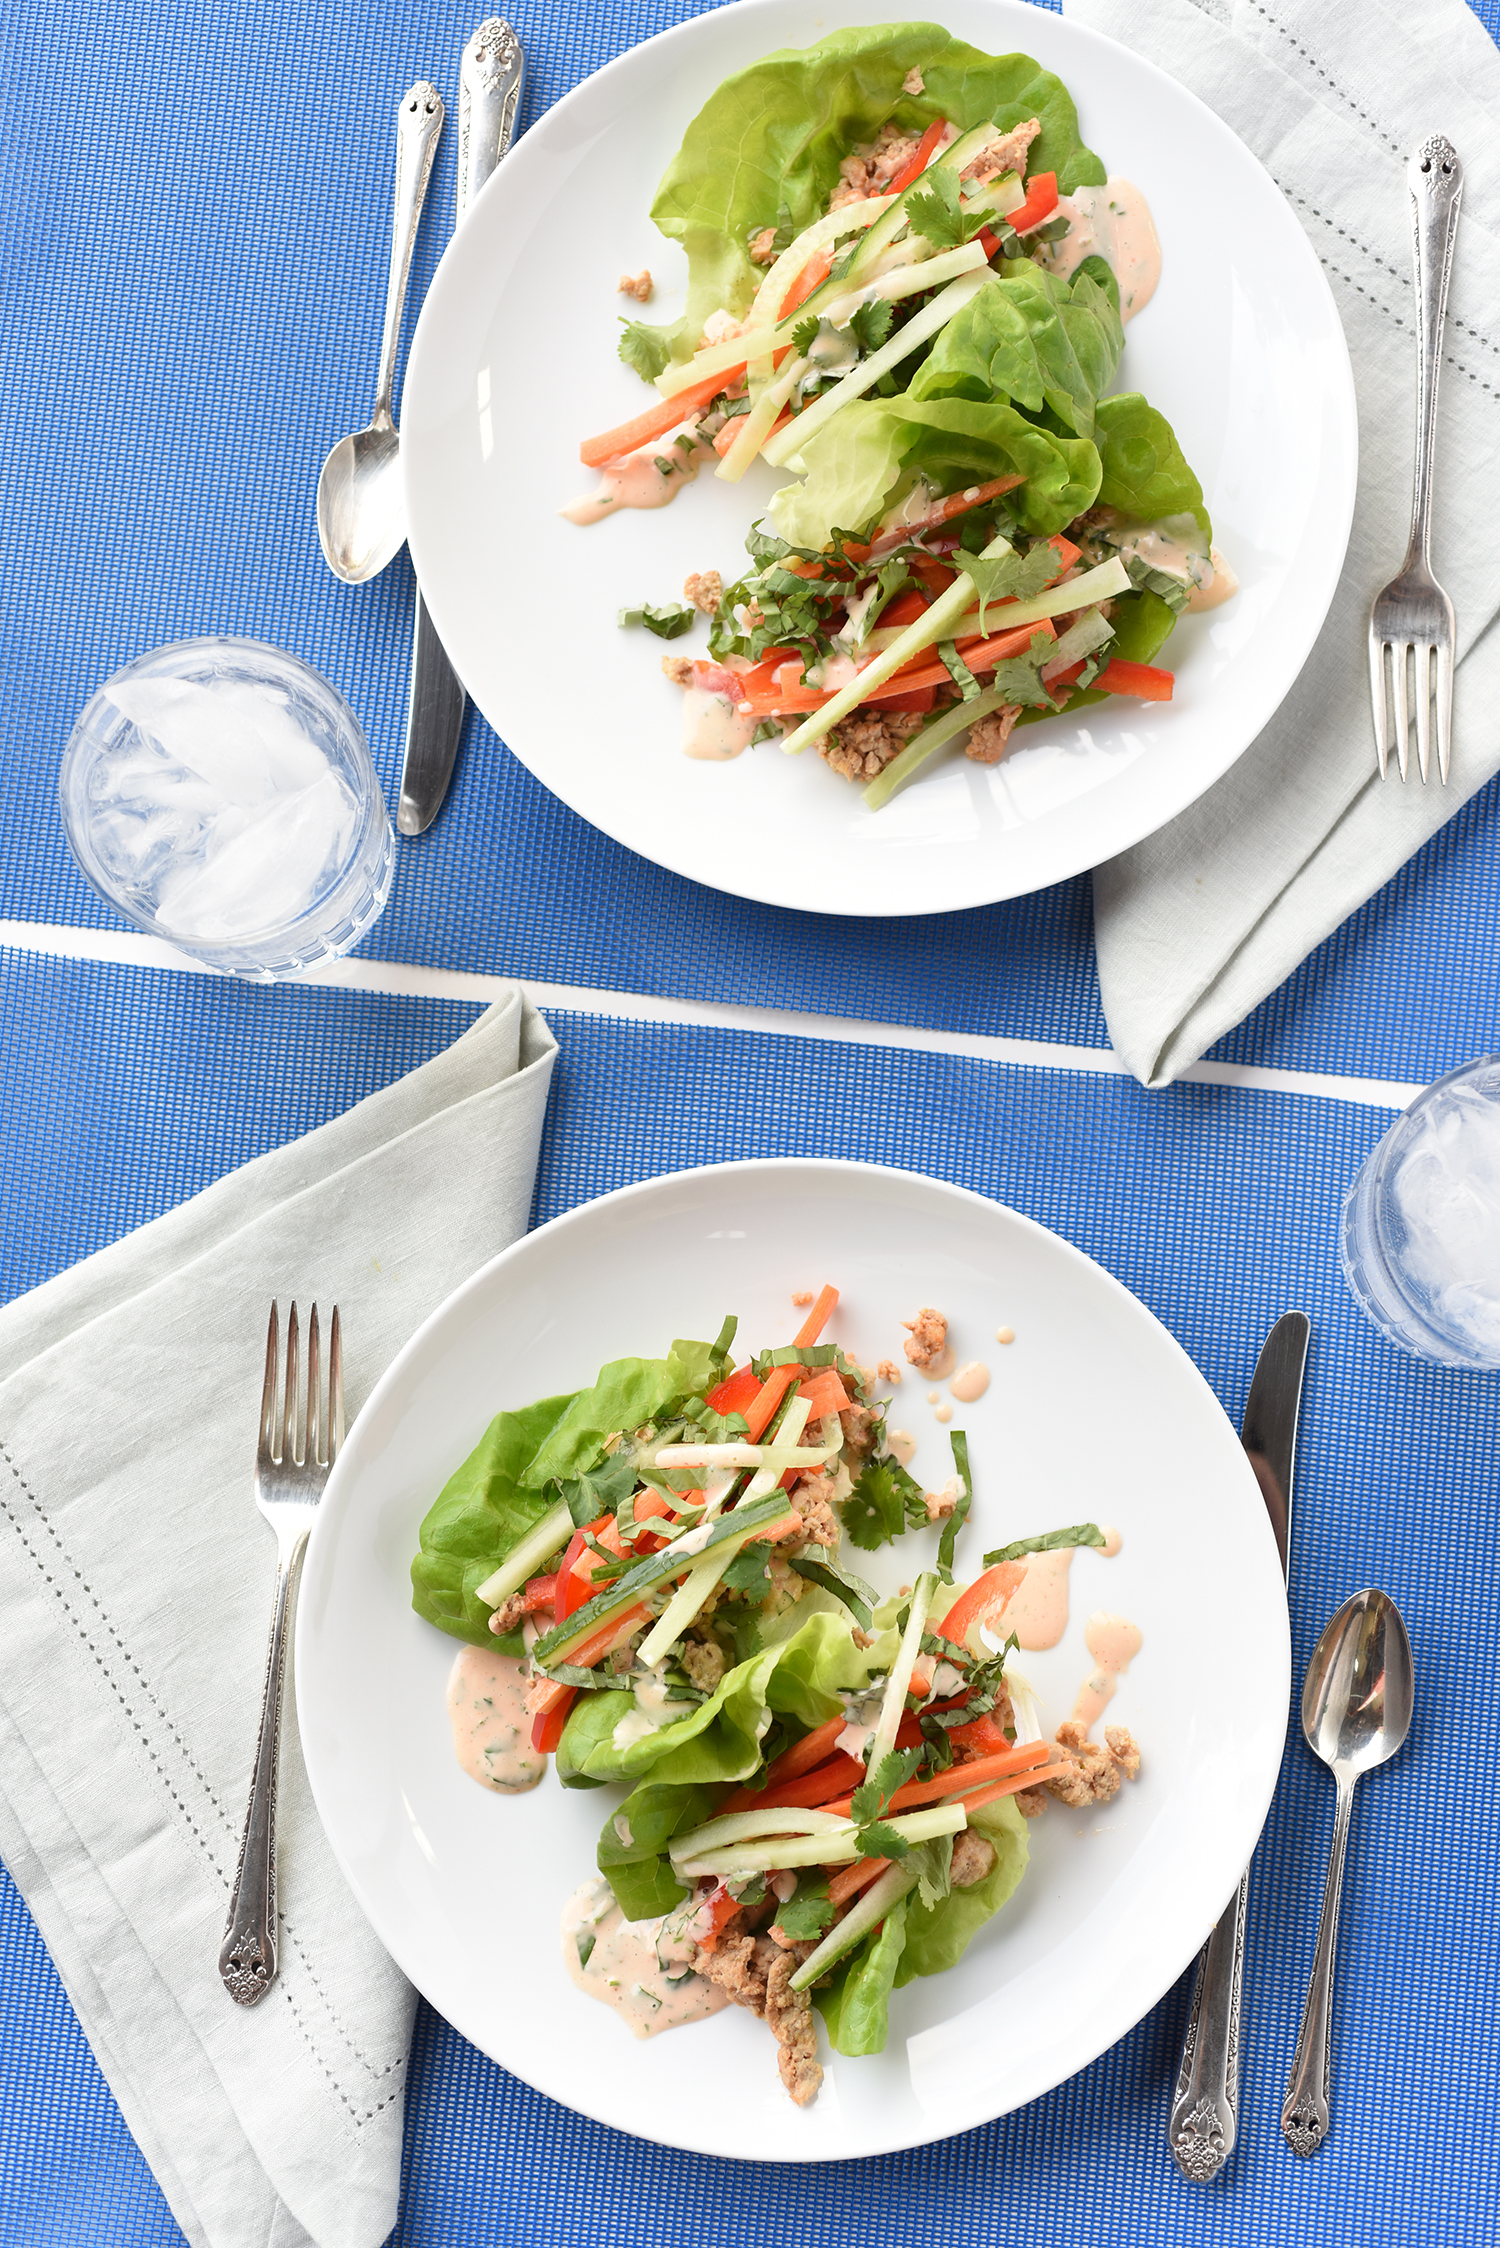
This time of year, something healthy seems appropriate too (Two resolutions! One recipe!). Thai Chicken Wraps are a light and refreshing dinner full of vegetables, lean ground chicken, and just a little mayonnaise. For my children I serve them the spiced ground chicken (they say it tastes like sausage!) and all of the vegetables. If it’s been a busy day, a bowl of rice goes perfectly with this dinner too – and fills up athletic children!

Thai Chicken Wraps Recipe

Thai Chicken Wraps – Serves 4

  • 2 lb ground chicken
  • 1 tbs sriracha
  • 1 lime – zested and juiced
  • 1 tbs rice vinegar
  • 1 clove garlic
  • 1 tbs ginger
  • 2 tbs soy
  • 1 carrot
  • 1 bell pepper
  • 1 cucumber
  • 1 cup basil
  • 1 head butter lettuce
  • ½ cup mayo
  • 1 tsp sriracha
  • 1 tsp cilantro
  • 1 tsp honey

Step 1

Mix the chicken with 1 tbs sriracha, the juice of ½ lime and the lime zest, rice vinegar, garlic, ginger, and soy sauce. Let it sit for a few minutes.  (5 mins)

  • 2 lb ground chicken
  • 1 tbs sriracha
  • 1 lime – zested and ½ juiced
  • 1 tbs rice vinegar
  • 1 clove garlic
  • 1 tbs ginger
  • 2 tbs soy

Step 2

Mix together mayo, 1 tsp sriracha, 1 tsp chopped cilantro, 1 tsp honey, the juice of ½ lime. (5 mins)

  • ½ cup mayo
  • 1 tsp sriracha
  • 1 tsp cilantro
  • 1 tsp honey
  • ½ lime, juiced

Step 3

Cook the meat over high heat until browned.  (10 mins)

Step 4

Serve in butter lettuce cups with vegetables on top + dressing on the side.

  • 1 carrot, sliced
  • 1 bell pepper, sliced
  • 1 cucumber, sliced
  • 1 cup basil, chopped
  • 1 head butter lettuce

For more weeknight dinner inspiration, menu planning, recipes, and shopping lists subscribe to the Weeknight Society mobile app in the iTunes store. Every recipe is cooked by families for families. Www.weeknightsociety.com

Bold Yellow and Pink Nursery

December 22, 2016

Post by Shawna, Home Stylist from the Land of Nod’s Design Services Team

I remember being so excited at the thought of decorating the nursery for my first born. It would be white with pale blue accents. A soothing oasis for me to sing lullabies and gently rock my sweet baby boy to sleep. It would be like a little piece of heaven!

My son was born, the year passed like lightening, and I quickly realized that it doesn’t take long for baby to become big boy and need a big boy room. It would have been so nice if I’d created a more playful nursery that, with a few minor tweaks, could easily transition into a toddler room when the time was right.

Bold Yellow and Pink Nursery

That is this inspiration behind this bold, vibrant, Yellow and Pink Nursery theme. I highly recommend starting with our long-lasting Carousel Crib in Blush. It has just a touch of pink and easily transitions from a crib to a toddler bed!

Post by Shawna, Home Stylist from The Land of Nod’s Design Services Team. Our Design Services team offers free one-on-one design advice, mood boards and space planning. You have a room to decorate? They’d love to hear from you. Visit The Land of Nod’s Design Services page to get started today.

Product Spotlight: Street Vendor Cart

December 21, 2016

Post by Danielle Kurtz, Creative Director at The Land of Nod

From a very young age, I should’ve known I was destined for a career in retail. I’ve literally been coming up with shop ideas my whole life. Let’s see, there was the painted rocks shop I setup in my front yard. There was the time my sister and I recorded a cassette tape of ourselves singing We are the World and tried to sell copies to our neighbors, boy I hope those have all been destroyed. There were countless Saturdays spent with my best friend turning her parents’ spare bedroom into a clothing boutique, complete with signage, price tags and compelling visual displays. Honestly, how did I not know someday I’d be designing real stores as my job?

street-vendor-cart-_2

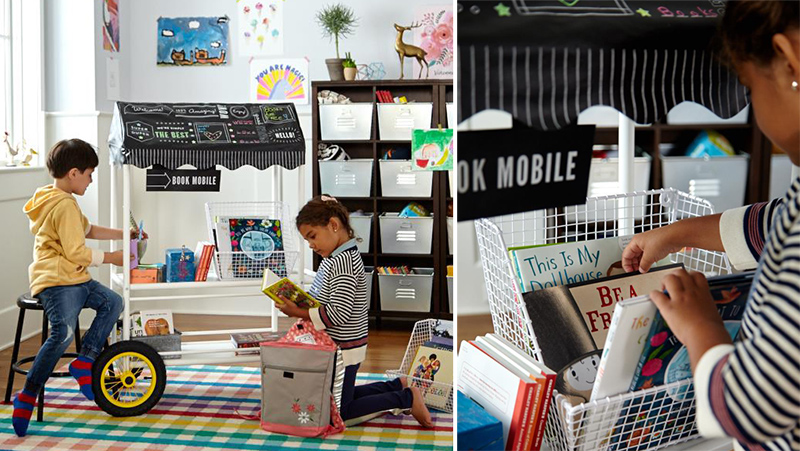
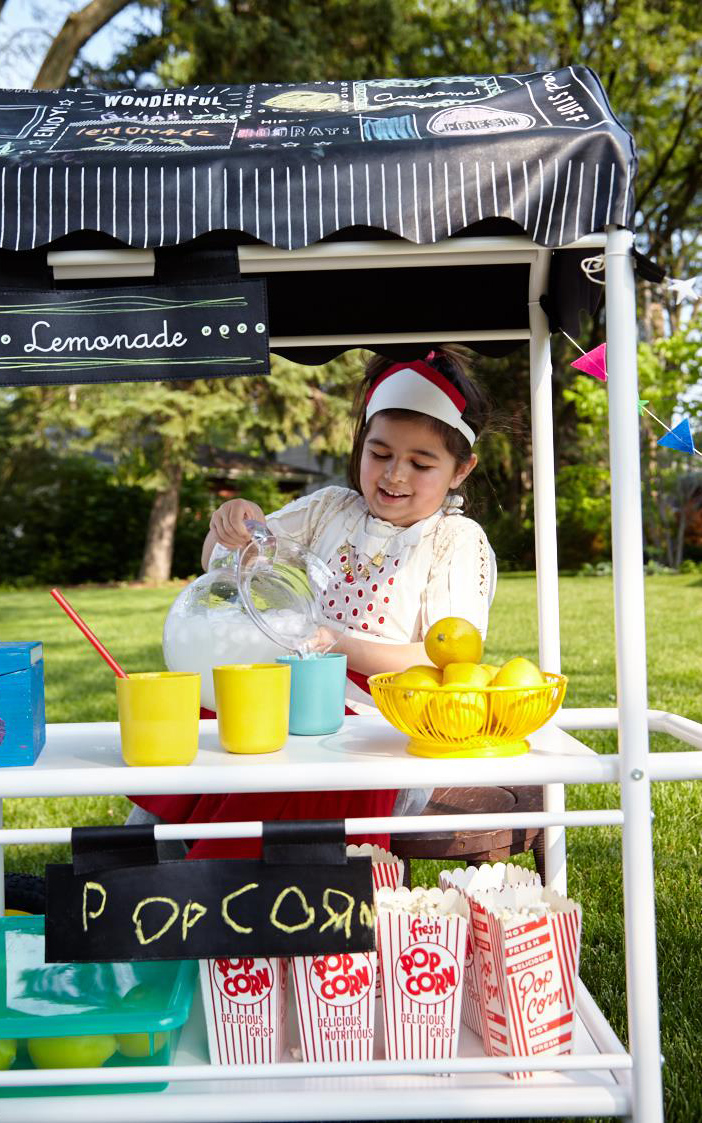
So, needless to say, I’ve past some of that entrepreneurial spirit onto my daughter, Lottie. Which is exactly why our Street Vendor Cart is at the top of my list for her this holiday. This thing is bananas, and I would’ve gone crazy for it as a kid. Sure, a cardboard box is effective, but when you have a kid that’s constantly creating retail scenarios, you may want to opt for something more permanent.

street-vendor-cart-_3

street-vendor-cart-_4

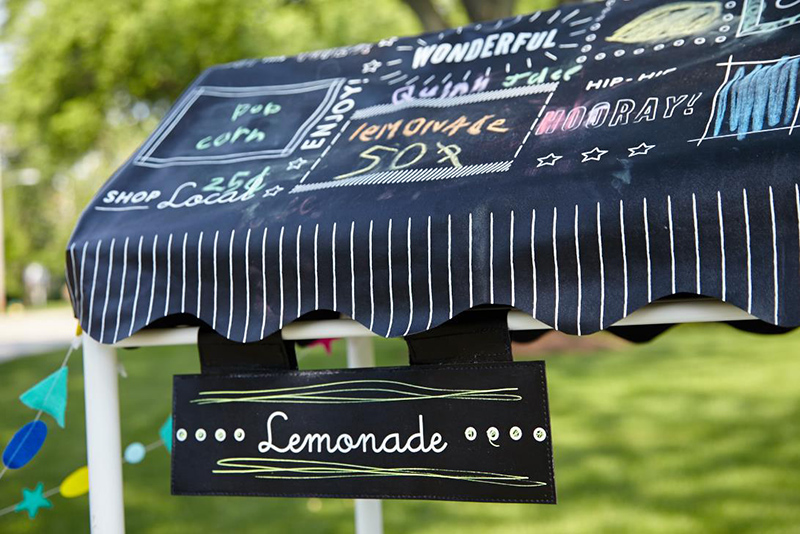
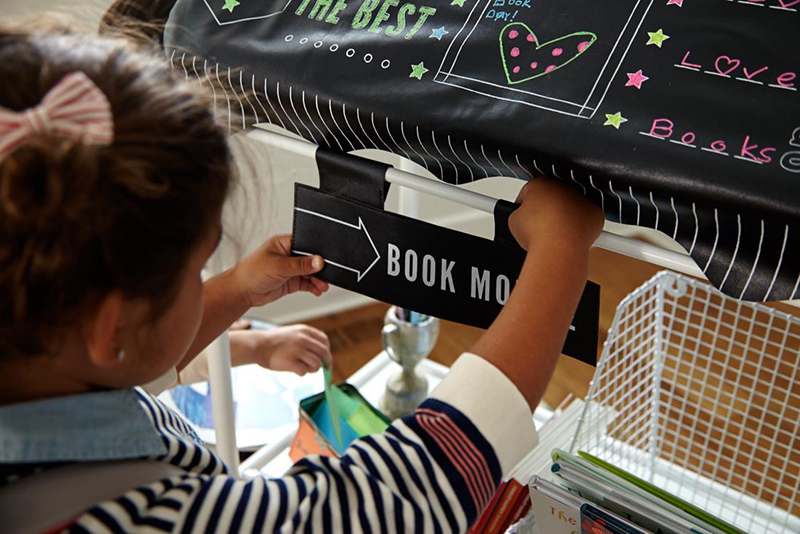
The cart comes with an awesome chalkable awning, complete with a bevy of signage options. And, some blank ones so you can create your own. It’s also made to be indoor-outdoor. So, lemonade stand in the front yard during the summer, craft bazaar in the living room during winter break. Can you tell I’m obsessed with this product? I just hope Lottie let’s me get in on the fun of bringing some more retail dreams to life!

street-vendor-cart-_5

Danielle is the Creative Director at Nod and an over-protective mother of two. She’s also completely obsessed with Pinterest, Twitter, Instagram and her Kindle, but not necessarily in that order. Danielle loves to craft, sew and crochet. Her current craft of choice is weaving tiny wall tapestries.

Gift Ideas: Nod-Exclusive Games

December 20, 2016

Post by Stephanie, Home Stylist from the Land of Nod’s Design Services Team

With all the high-tech, battery-operated gadgets and gizmos making their way into toy aisles, trying to find the right holiday gift amidst the din of flashing lights and sound effects can be a little overwhelming. If sensory-overload is giving you gift-giving creative block, why not opt for toys and games that take a more hands-on approach to playtime?

If you’re looking for a unique, batteries not required, interactive gift for the kiddo on your list this year, here is an assortment of Nod-exclusive games sure to spark their imagination.

Gift Ideas: Nod-Exclusive Games

Happy Styling!

Post by Stephanie Geurkink, Home Stylist & Event Planner  from The Land of Nod’s Design Services Team. Our Design Services team offers free one-on-one design advice, mood boards and space planning. You have a room to decorate? They’d love to hear from you. Visit The Land of Nod’s Design Services page to get started today.

Pretend Play Dress Up Gift Ideas

December 19, 2016

Post by Stephanie, Home Stylist from the Land of Nod’s Design Services Team

Every kiddo knows that part of the fun of creating imaginary adventures is having the right outfit to go with it. Whether you’re an aspiring sleuth on a hot case, or conducting a marching band through a holiday parade, having the right props is essential.

Equally as important as the actual pretend-play accouterments is a way to organize and store away all the bits and pieces when not in use. Hookstoy boxes, baskets, and shelving are the weapons of choice for keeping potential costume chaos in check.

Whether you’re looking to create a complete dress up station on your kiddo’s playroom, or just add a few new pieces to their collection, we’ve put together a moodboard of dress up gift ideas to help inspire your holiday shopping list.

Pretend Play Dress Up Gift Ideas

Happy Styling!

Post by Stephanie Geurkink, Home Stylist & Event Planner  from The Land of Nod’s Design Services Team. Our Design Services team offers free one-on-one design advice, mood boards and space planning. You have a room to decorate? They’d love to hear from you. Visit The Land of Nod’s Design Services page to get started today.

Children’s DIY Holiday Wrapping Paper

December 16, 2016

Post by Colleen of Lemon Thistle

DIY Children's Holiday Wrapping Paper

There’s something about letting kids create that gives such joy and confidence. It’s one of my favorite things to do with my children and if I ask them, they say it’s one of their favorites as well. I give them the basic supplies, sometimes some direction, and let them loose! My daughter could create for hours, while my son powers out after about half an hour. They’re three years old so the activities aren’t too complicated (yet!), but I’m always so impressed with how they each create something so unique.

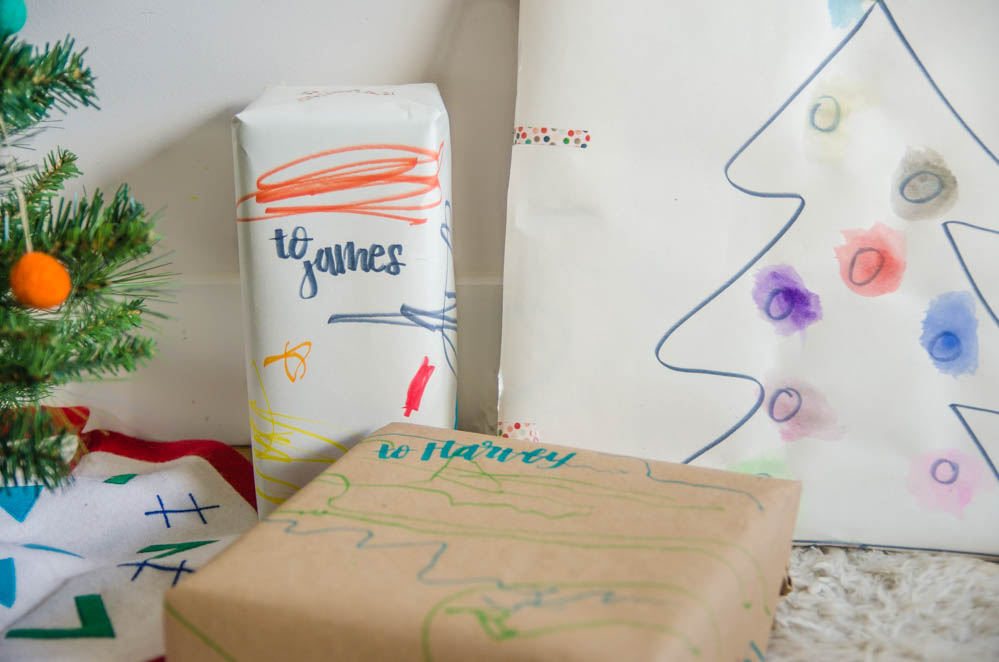
Since it’s one of the values we’re working to share with our kids, we try incorporate it into every occasion. I’m a big fan of making gifts for the holidays, but kids crafts aren’t the best gift for everyone on your list. But crafty wrap? That’s a big YES, I don’t care who is on your list!

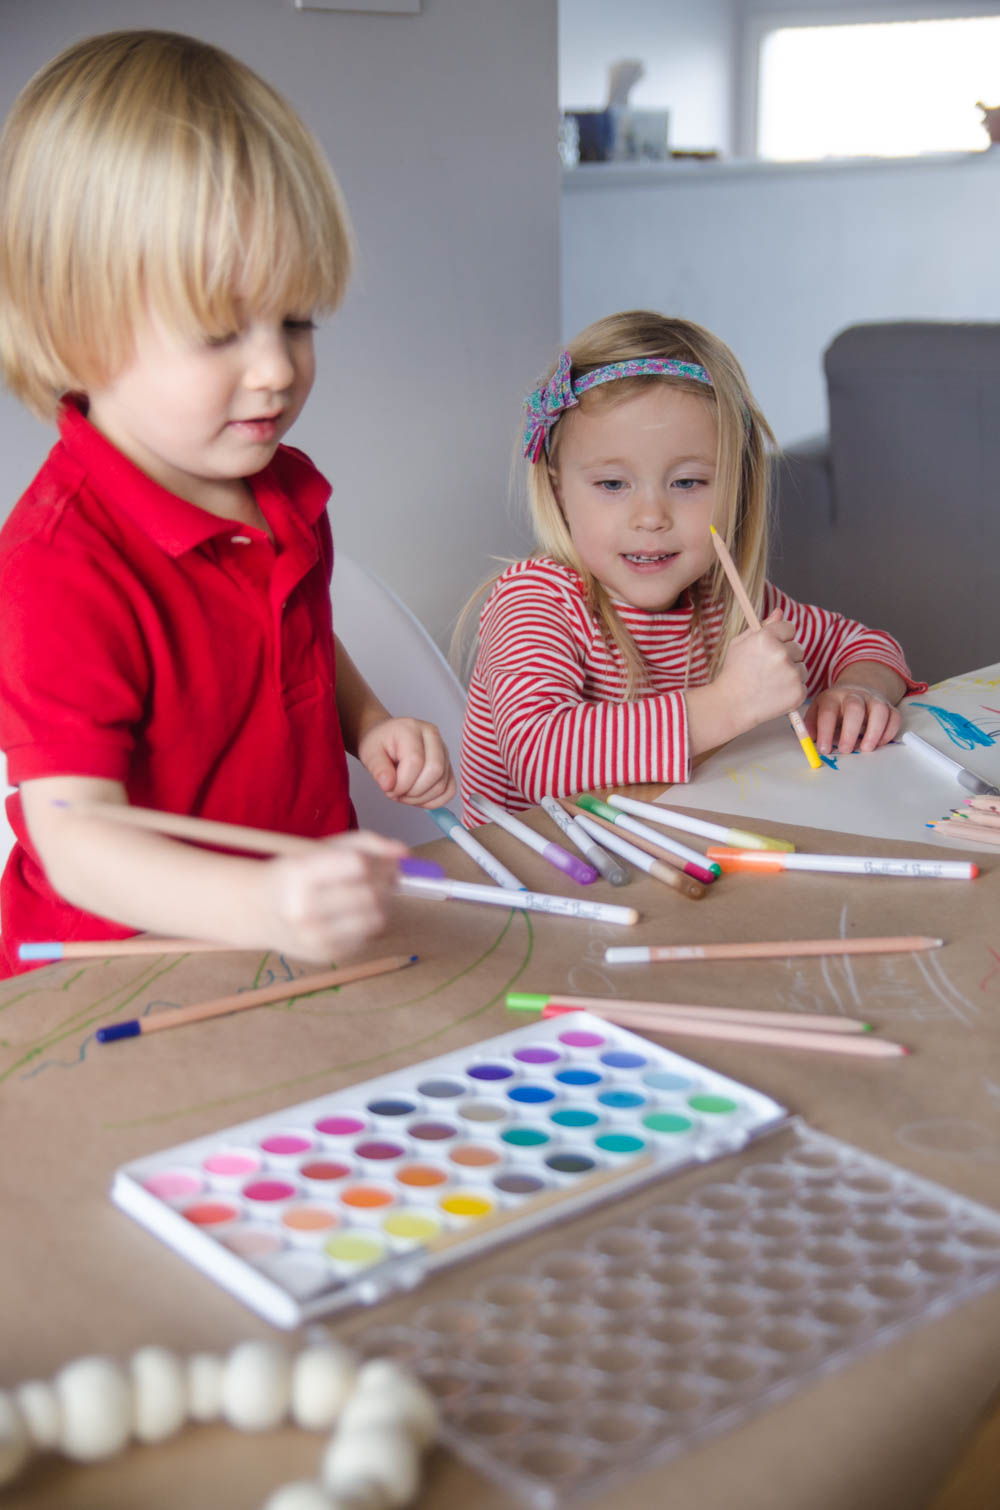
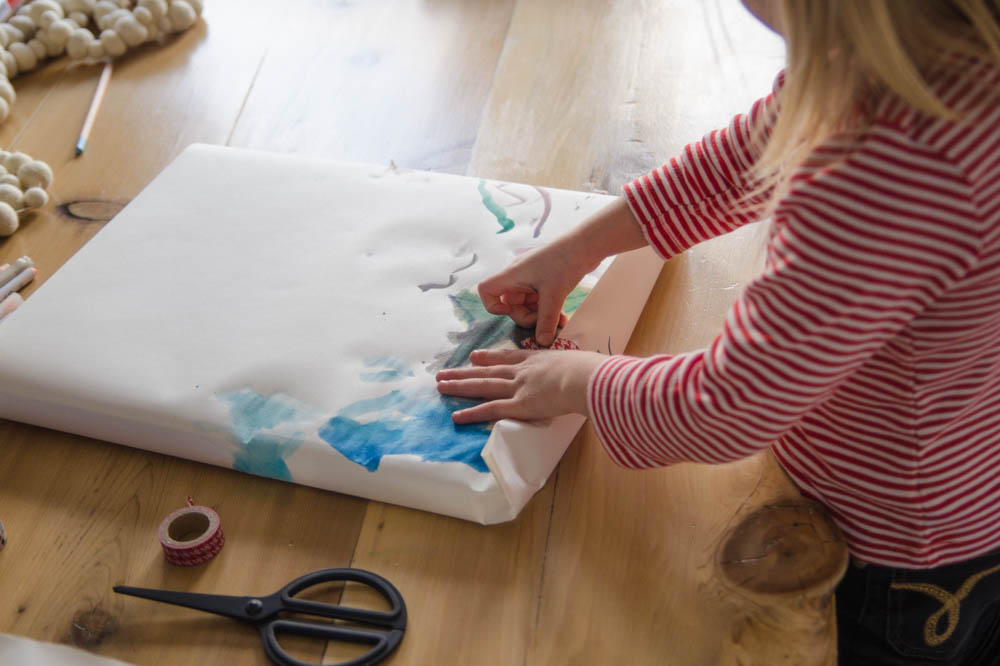
My kids had so much fun creating special wrapping paper to wrap gifts- and were even more excited to have some special new art supplies to create it with.

DIY Children's Holiday Wrapping Paper

Here’s the supplies we used:

DIY Children's Holiday Wrapping Paper

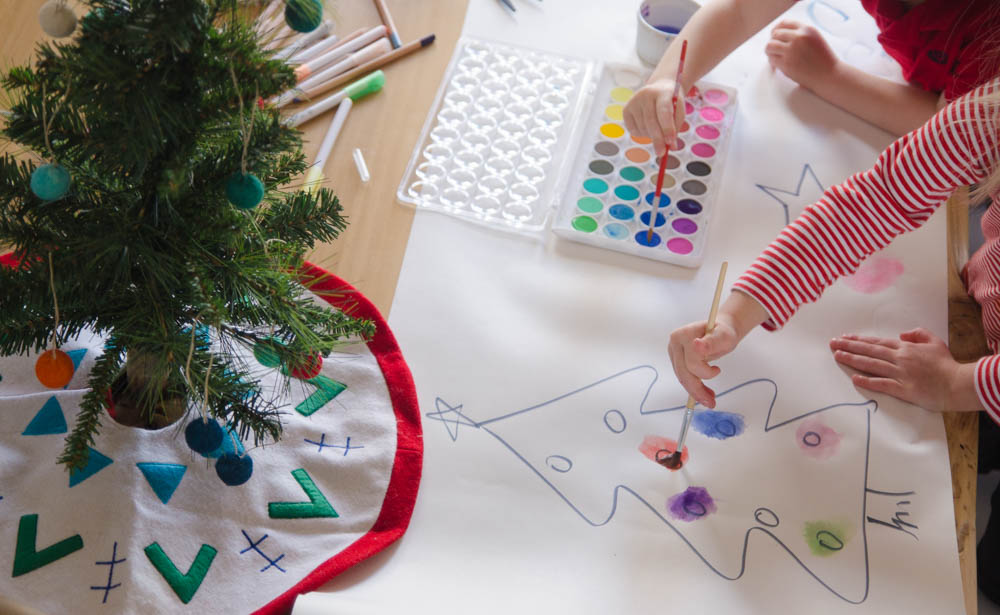
We did two separate ‘activities’: the first was just to let them go wild and doodle as they pleased – they started this before I’d even finished putting out all the supplies anyway. Speaking of supplies, can we talk about those paint brush markers for a minute? I use brush pens for my hand lettering all the time, and these work just like the brush pens I love (they’re just a bit softer) BUT they’re so durable, my kids smashed them around the paper and the tips didn’t fray. Plus, my kids felt so special when they got their very own ‘paintbrush markers’… they showed every adult that came to our house for the next week.

DIY Children's Holiday Wrapping Paper

DIY Children's Holiday Wrapping Paper

Once they were ready for some direction, I used one of the brush markers and drew out some holiday shapes (trees and stars) then they had fun using the watercolor paint pods to fill them. It’s such a simple project and an easy way to let kids explore their creativity and feel like they’re giving a special gift- even if it’s something you ordered online (like that rad Nod Bingo game!).

DIY Children's Holiday Wrapping Paper

I’m sure if you kids are older (ahem, not three) you’d have some gorgeous looking winter scenes and patterns on your wrap. You could even get crazy and give them pom poms with glue to add on… or ribbon!

DIY Children's Holiday Wrapping PaperDIY Children's Holiday Wrapping Paper

Colleen is a wife, Mama to twins with one on the way, and the DIY and lifestyle blogger behind Lemon Thistle where she shares printable art and hands on tutorials for DIY home decor, parties and gifts. Colleen believes you can have a beautiful life, home, and party without spending a lot- we’re keeping it real on a budget so everyone can join in on the fun.


Noddie Baby Names

December 15, 2016

Forget picking out the ideal nursery theme, safest car seat or ideal stroller. Moms and dads everywhere know one of the hardest parenting decisions can be what to name your new bundle of joy. Picking the right name for your child can be an overwhelming decision, but selecting a baby name doesn’t have to be! We’ve found that sometimes all you need is a little inspiration to get your own creative naming juices flowing.

One of the interesting things about baby names is how the popularity of certain names changes over time. When you view the names of The Land of Nod employees, you’ll likely see a lot of names you’re familiar with that you or friends of yours might have.

Land of Nod Employee Baby Names

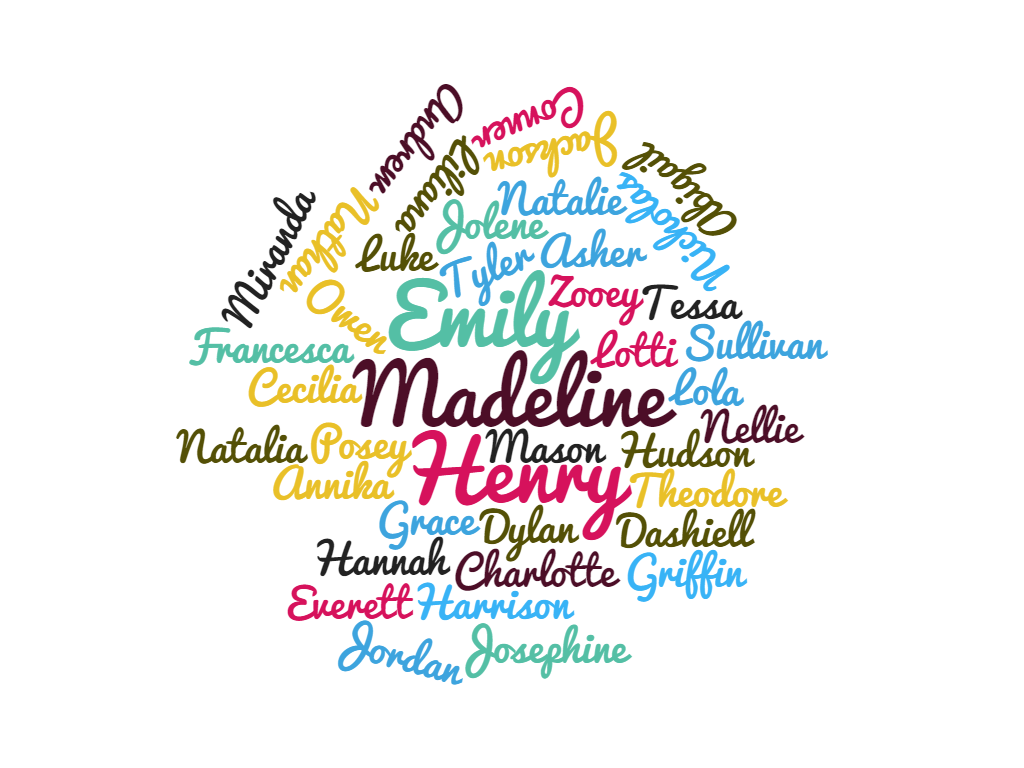
But when you look at a word cloud of the baby names The Land of Nod employees have chosen for their children, it paints a much different picture!

Land of Nod Kids Baby Names

Recently we asked The Land of Nod employees to share the heartwarming or hilarious stories about how their name or their children’s names were chosen. Enjoy the stories below, and most of all don’t stress. Everyone decides on a name eventually.


Jennifer – Planner

  • Child’s Name: Jordan– We wanted a gender neutral name, and also had a slight influence from the Chicago Bulls.
  • Story Behind My Name – My parents wanted to keep my father’s initials, J.A.Y., so my brother and I were both given names with this in mind.


Ashley – Campaign Manager

  • Child’s Name: Nellie Elizabeth – My husband was very close with his Aunt Nellie.
  • Story Behind My Name – My name was chosen because my mother’s favorite character on General Hospital was named Ashley. My sister, however, is named “Emmaly” with the spelling to include the name “Emma” as a nod to our grandmother. Clearly one of our names had more thought put into it than the other!
 

Lauren – Events Manager

  • Furry Child’s Name: Lola – Named after Barry Manilow’s Copacabana (My favorite TV movie as a kid).
  • Story Behind My Name – My sister and I were named after the girls who lived next door to my Dad while he was growing up.


Matt – CRM and Analytics Manager

  • Furry Child’s Name: Jolene – Named after my wife and I’s favorite Dolly Parton song.


Donna – Campaign Coordinator

  • Child’s Name: Madeline – Even when I was in high school I always knew that if I had a daughter her name would be Madeline because I just always loved the name.
  • Child’s Name: Abigail – We had so many different choices before Abigail (Abigail, Emma, Olivia, Charlotte, etc), but I let my husband be the one to decide baby #2’s name and he said Abigail because it wasn’t a name you heard often.
  • Story Behind My Name – I’m a twin and my mom wanted to name me Amanda, but my Dad wanted Donna to match with my brother’s name David.


Denisse – Photo Producer

  • Child’s Name: Natalia – A name that is easily pronounced in both English and Spanish! All throughout my pregnancy we had planned on naming our daughter Olivia. At our baby shower we were gifted a bunch of stuff with “Olivia” personalized on it. The month leading up to her birth, we knew three other newborns named Olivia and it turned us off.  We still hadn’t made up our minds when I went into labor but, when we saw her for the first time, we both agreed that she looked like a Natalia Lucia (and it definitely fits). For a couple years she still had stuff with “Olivia” monogrammed on it and it became a running joke in my family. Lesson: Don’t share your baby names with people!


Marivi – Customer Service Supervisor

  • Child’s Name: Miranda Grace – I wanted her initials to be “MGM” inspired by a visit to Las Vegas just before I found out I was pregnant.  Miranda was inspired by the mom in Mrs. Doubtfire and Grace from Princess Grace.
  • Child’s Name: Andrew – The youngest son on the TV show Family Ties was named Andrew and I loved the name.
  • Story Behind My Name – My name is the combination of my maternal grandparents – Mariano and Victoria.  Additionally, the valedictorian from my father’s medical school’s name was named Marivi.


Molly – Director of Stores

We are close to 100% Irish so our minis have Irish first names for good luck, and their middle names all have a special meaning.

  • Child’s Name: Hannah Matilda – Matilda was my great-grandmother’s name. She hated it, but we loved her.
  • Child’s Name: Emily Finn – My husband received his PhD in English and was supposed to be walking in his graduation ceremony the day Emily was born, but instead spent the day at the University of Washington Hospital so we went with Finn as a middle name – a Nod to our Irish heritage and his favorite character, Huck Finn.
  • Child’s Name: Owen Arthur – Arthur is a tribute to his grandfather who was taken from us too soon.  Owen’s middle name is a bright spot and like having a piece of Grandpa Art with us each and every day.


Shawna Smith – Home Stylist

  • Child’s Name: Jackson Clark – Jackson is a very common name these days, I know. When I was younger and managing a paper goods store though, this little boy named Jackson would always come in with his mom and help me with various craft projects. He stole my heart, so I snagged his name! 🙂 Clark is my Grandfather-In-Law’s last name.
  • Child’s Name: Sullivan Crosby – Sullivan’s name was inspired by one of my favorite Counting Crows songs, “Sullivan Street”. While we think his middle name is just as cool, Crosby was picked after perusing the eyeglasses online at Warby Parker.


Franci – HR Generalist at Land of Nod

  • Child’s Name: Harrison – Being Jewish, we have the tradition of naming our children with the first letter of the last person who has passed on. My grandfather died shortly before I was married and his name was Harry. Also, my mom grew up in Park Ridge, IL and went to grade school and high school with Harrison Ford! I loved Star Wars so Harrison was the name I chose!
  • Story Behind My Name – My mom originally named me Felicia after my Great Grandma Fanny. At the hospital, my Bubby hated the name Felicia and made my mom change the name. Later, my mom saw a commercial on the TV in her hospital room for the Francie Barbie doll and it stuck! This was the 60’s after all.


Jaime – Product Manager, Home Decor

  • Child’s Name: Dashiell Lawrence – My husband always liked the author Dashiell Hammett who wrote The Thin Man and The Maltese Falcon.  Of course there is a Dashiell in the movie The Incredibles, but even though that isn’t what inspired his name, that is the reference people are most familiar with.  Lawrence was selected because my husband is a KU alum and the university is in Lawrence, Kansas.  I hope my son decides to go there!
  • Child’s Name: Liliana Grace – We came up with the name Liliana because my husband’s grandmother was named Lillian.  We wanted a slight spin on Lillian, so we discovered Liliana.  We love the name Liliana, but every time my daughter sees or hears of a Lillian, she says she wants to change her name.  So much for being unique!


Gaycel – Furniture Specialist

  • Child’s Name: Tyler – The name Tyler was chosen regardless of gender just because I liked the way it looked written out… Mainly the “y” and the “r.”
  • Story Behind My Name – I am addressed as “Gaycel” even though it is actually my middle name. I’m named after my Aunt Gloria Gayle and Mother Cecilia, making my first name consist of 12 letters; which was just too long! Even I couldn’t spell it by Kindergarten! I wasn’t going to make Tyler go through the same hardship as I did so I made sure to pick a nice short first name!


Emily Nicole Seymour – Home Decor Merchandise Assistant

  • Story Behind My Name – My mom is an accountant so it was completely ironic my sister was born on the deadline for taxes, April 15th! My dad thought this would be hilarious to name her Irene Renee Seymour, initials IRS. My mom was none too amused so she talked him into Katherine Elizabeth instead. When I was born, my dad had another grand plan to name me Emily Gene. He made the mistake of leaving the room before the paperwork came around so my mom took the liberty of vetoing Gene and opting for Emily Nicole. See, mothers DO know best!


Martha Lenor – Customer Service

  • Story Behind My Name – My mother loves The Beatles and named me after the song “Martha My Dear”. She likes to joke that she would have named all of her children after Beatles songs if she could have; my sisters would have been Vera, Prudence, and Sadie. My Grandfather suggested my middle name be Lenore and my mom decided to drop the second E to make it an anagram for his name, Loren.


Marina – Furniture Expert

  • Story Behind My Name – My mom was watching a cooking show and the chef’s name was Marina and she liked the way it sounded!


Deneane – Executive Assistant to Michelle Kohanzo

  • Child’s Name: Francesca aka “Frankie” – My husband and I spent 2 glorious weeks in Italy. One of my favorite parts of our trip was a quaint, delicious lunch at a small restaurant nestled in a hill in beautiful Siena. While we were eating, I remember hearing a local woman call for a sweet little girl to come to her. That little girl’s name was Francesca… And I remember thinking to myself, that will be my first born daughter’s name, and it is.
  •  Child’s Name: Nicholas – My son is named after my husband, Nick- womp!


Shamieka – Furniture Team Lead

  • Child’s Name: Mason – I was introduced to a family friend for the first time at 7 months pregnant. I was convinced that I was having a girl. She looked at my tummy and said,  “That is a BOY!” She said name him “Ma-son”. So I decided to name him Mason. She and I shared a special bond in the brief time I spent with her and she will always be remembered.


Stefanie Ricciardi – Soft Goods Product Manager

  • Child’s Name: Dylan Joseph – The name Dylan was picked because my husband always wanted to name a girl Dylan (if we had one).  However, when we found out we were having a boy, we both loved the name so much that it stuck.  His middle name, Joseph, was selected after my husband’s grandmother, Josephine, who passed away six months before he was born.  We both loved her very much and know she would have loved having her great grandson named after her.
  • Story Behind My Name – The spelling of my name is after Stefanie Powers, a popular actress from the 80’s.


Renee – Business Sales/Design Concierge

  • Story Behind My Name – My parents chose my name because it wasn’t very common.  They also did not want a name that could be shortened to a nickname and Renee fit that bill, too!

—————

Hearing the stories of how names are chosen for children can be such a heartwarming, inspiring, and sometimes humorous experience. We’d love to hear how your name came to be, or how you chose the names for your littles in the comments.

And for those of you still on the fence, good luck!