Close

Blog

Baby’s First Christmas – Top Gift Ideas

November 15, 2016

Post by Danielle Kurtz, Creative Director at The Land of Nod

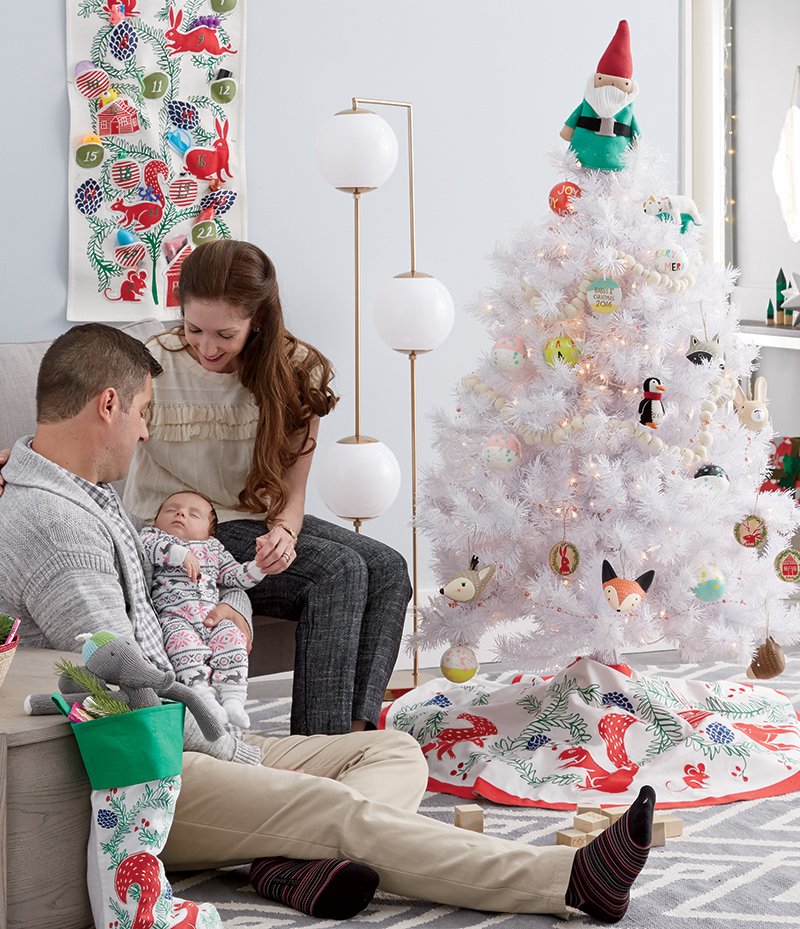
In baby’s first year there are so many awesome milestones, not the least of which is Baby’s First Christmas. It’s an opportunity for a young family to continue long-time traditions, and create some new ones. And, it’s a chance for friends and relatives to shop for super cute keepsake gifts for baby. I mean, who doesn’t love shopping for a baby!?

Here are some of my top gift ideas for new babies.
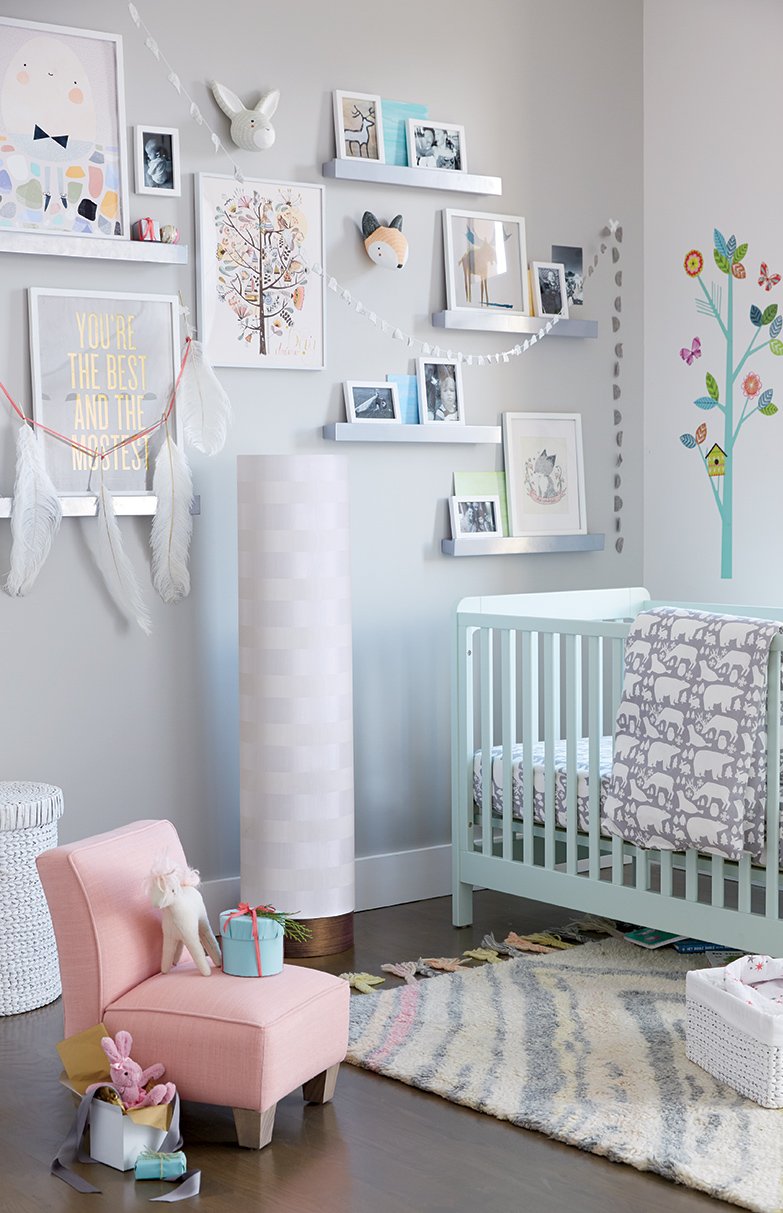
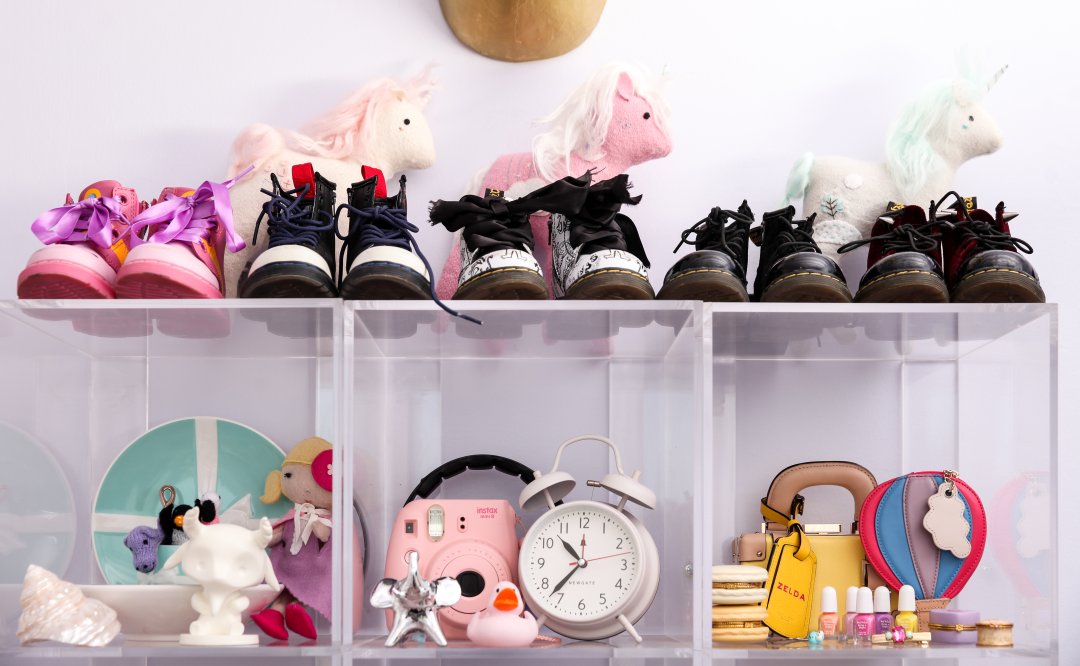
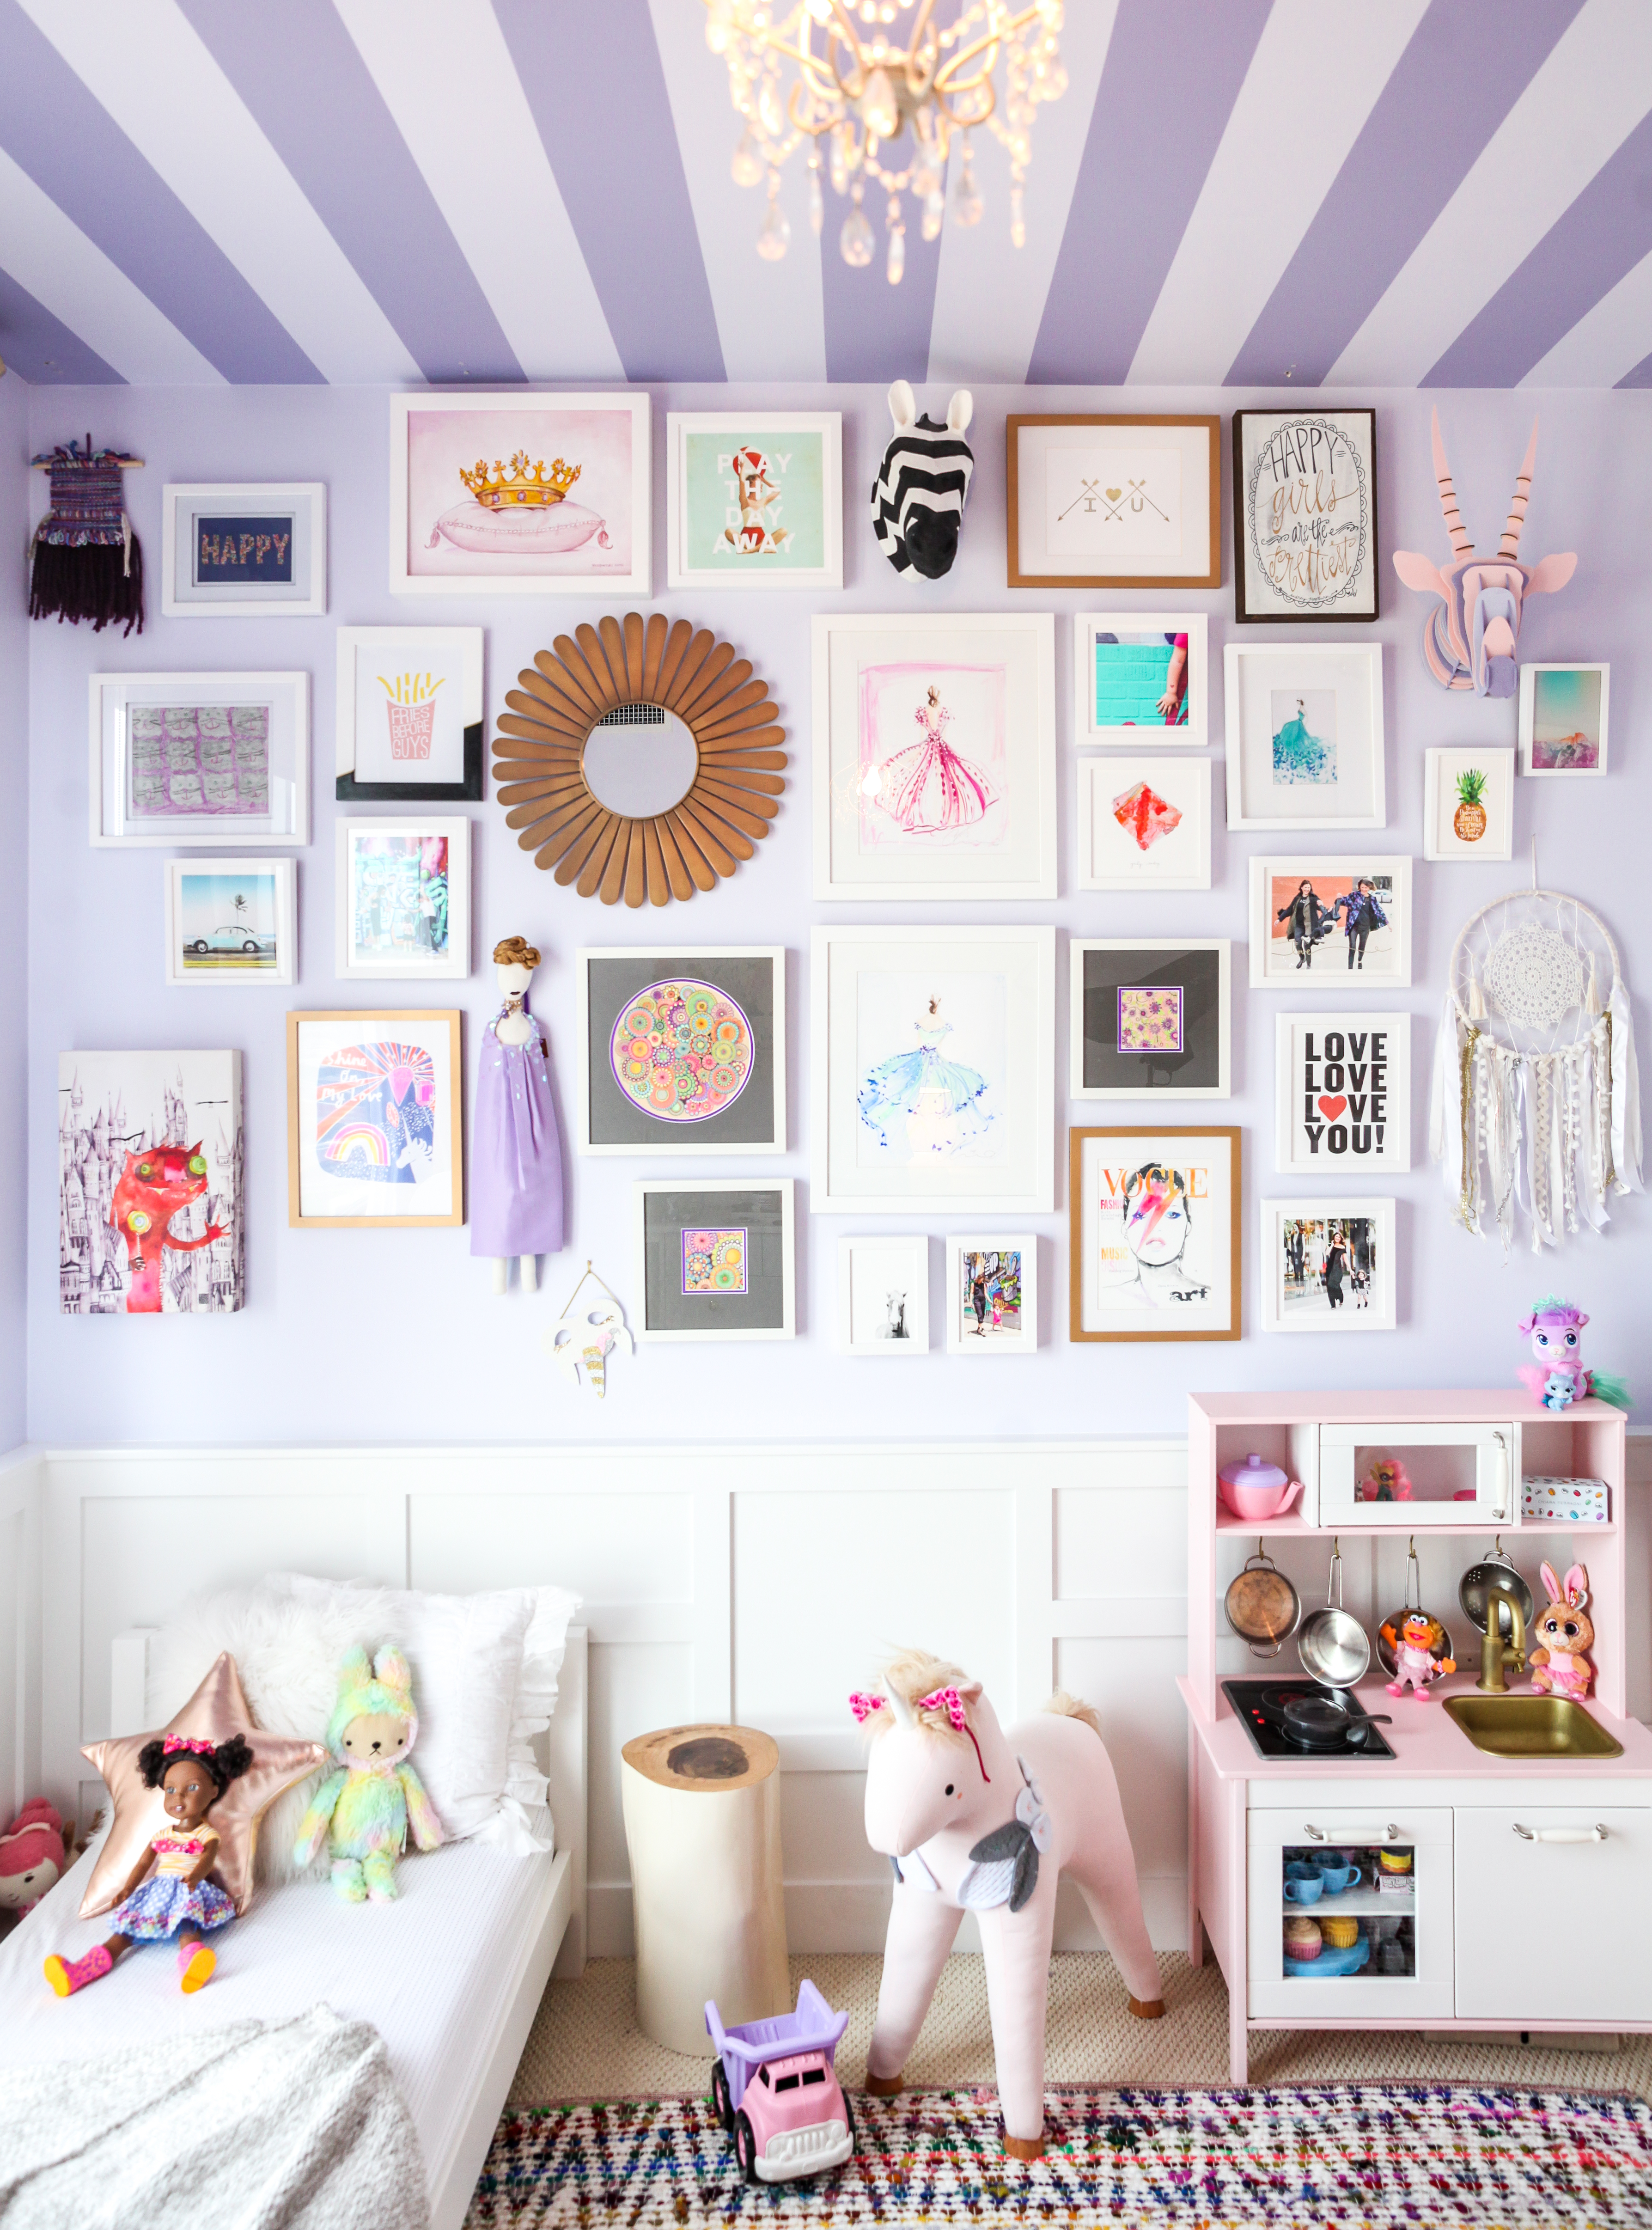
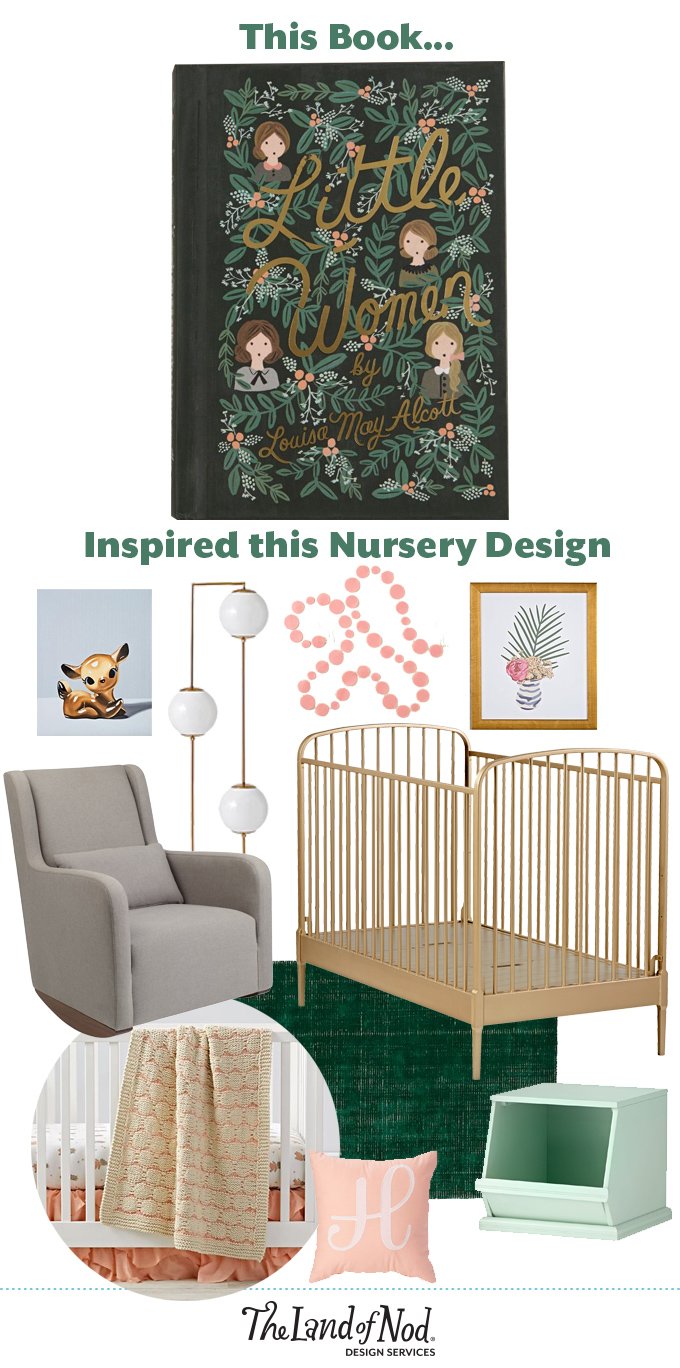
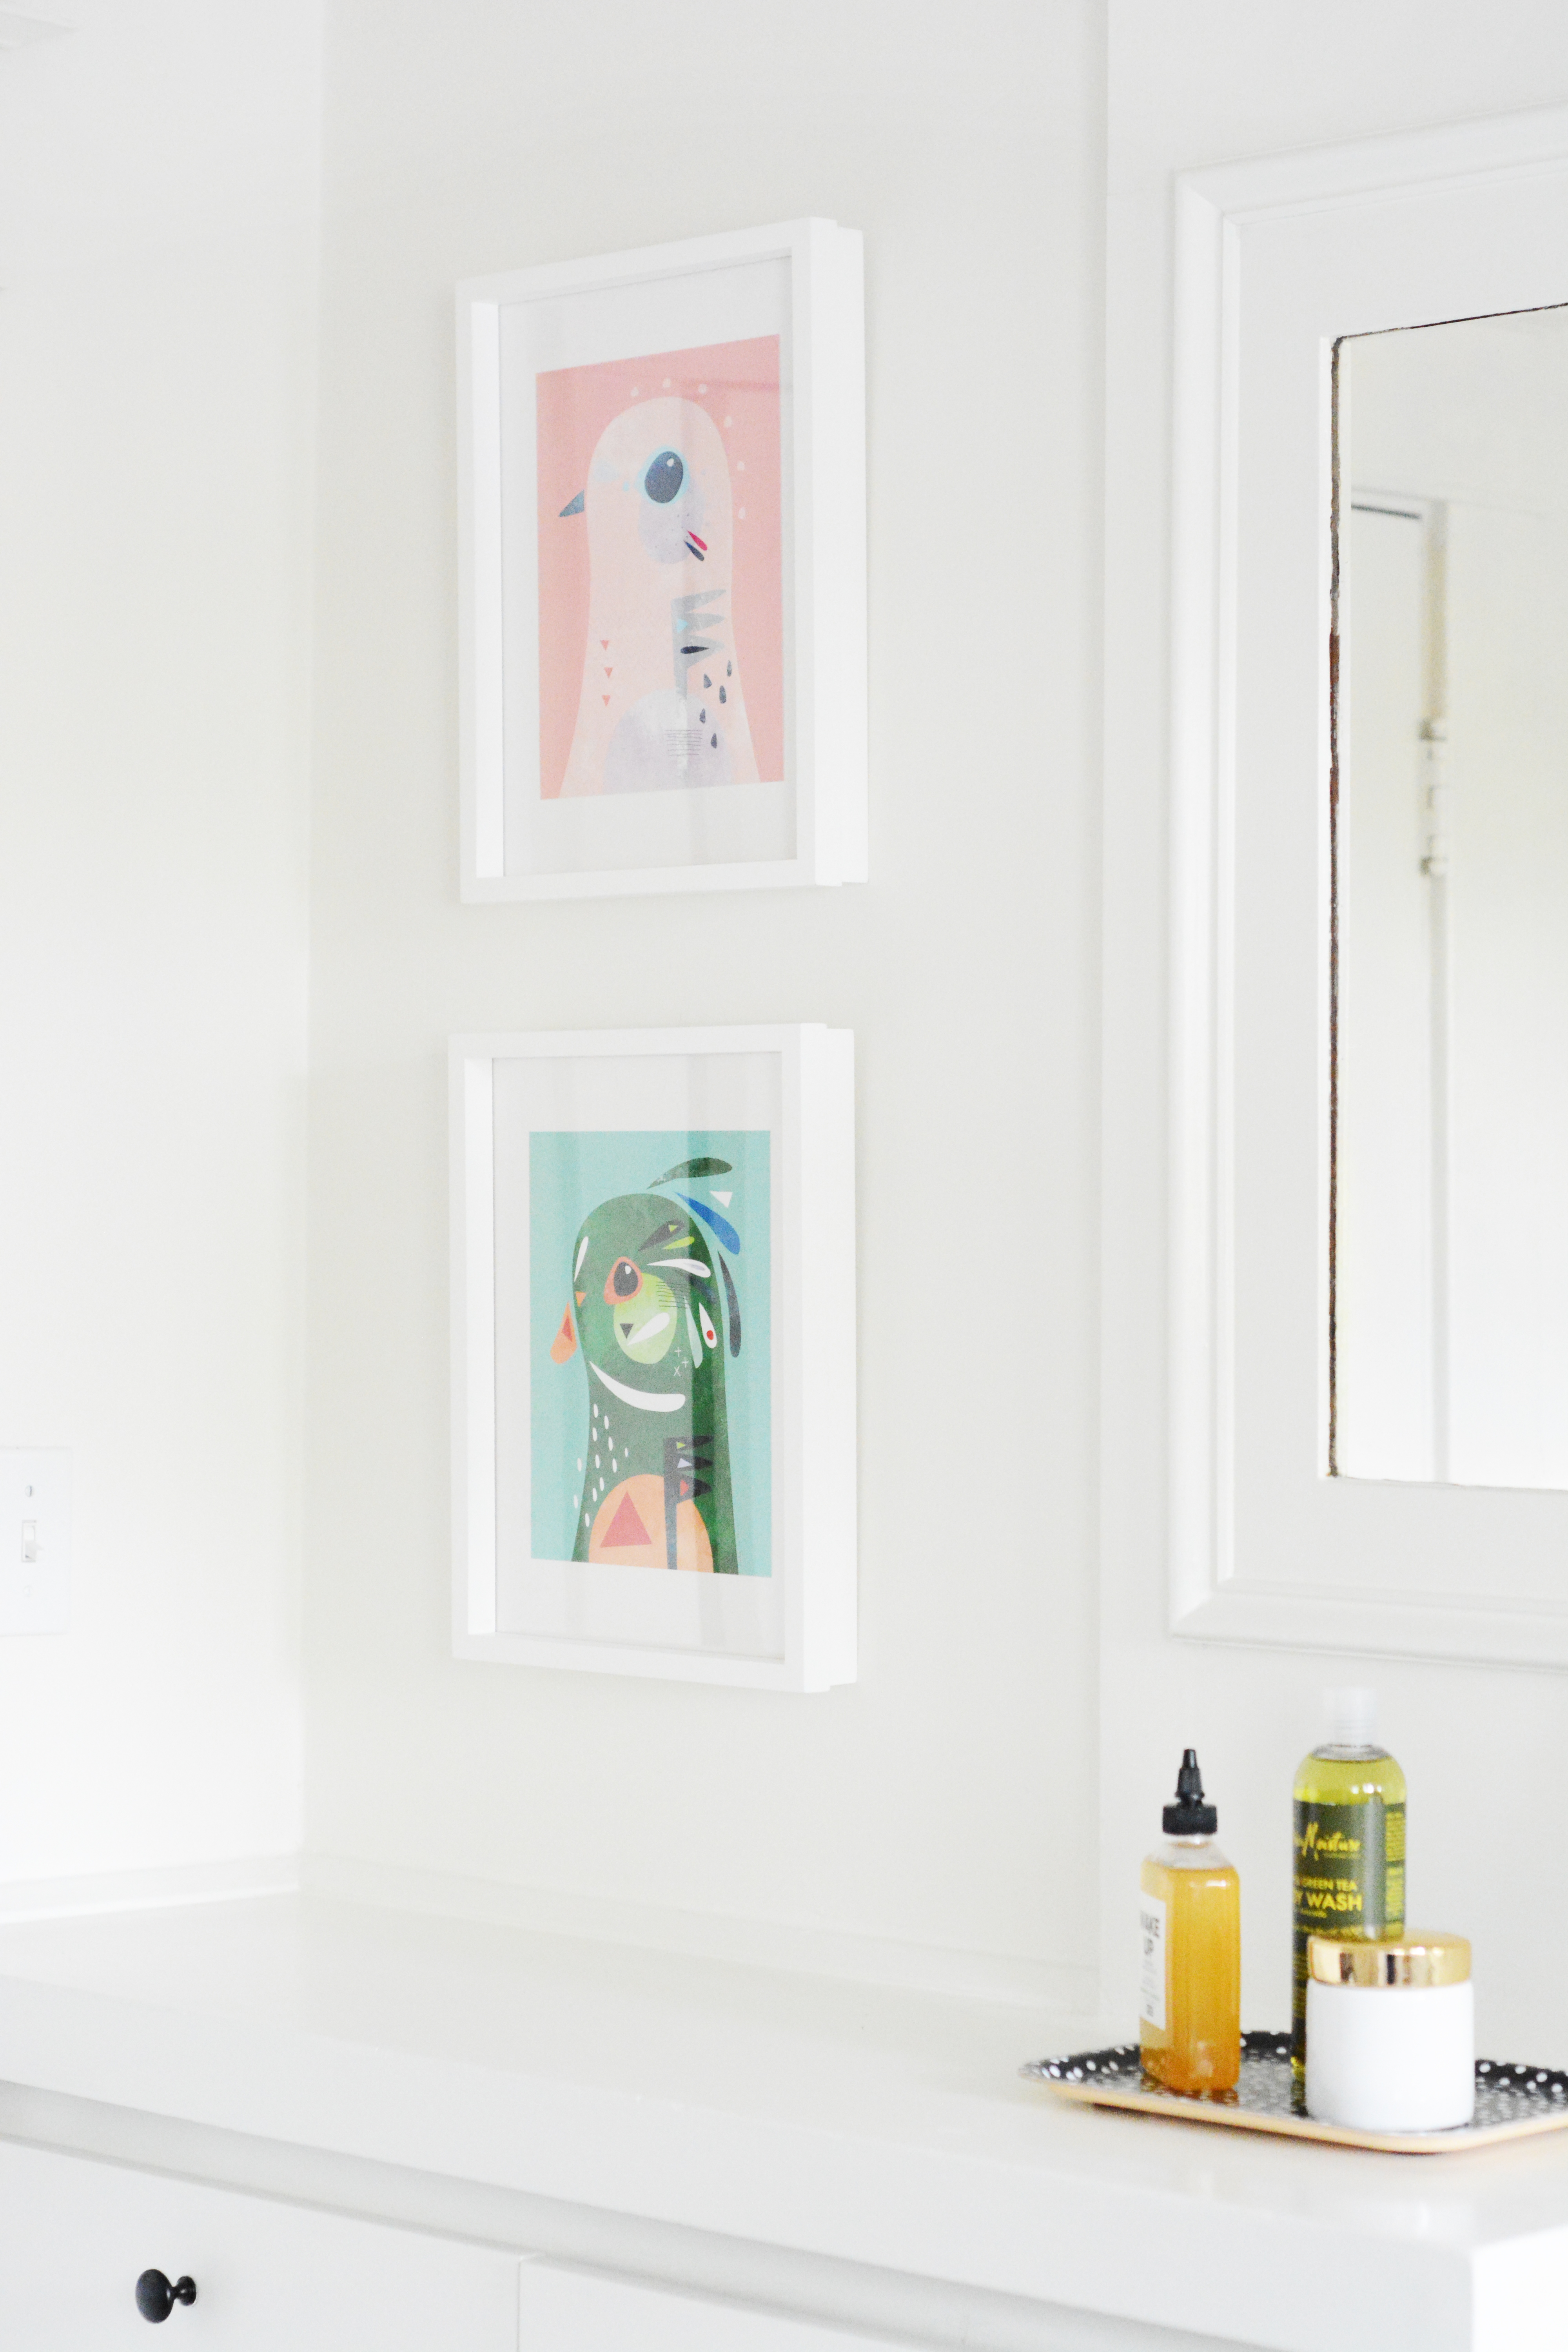
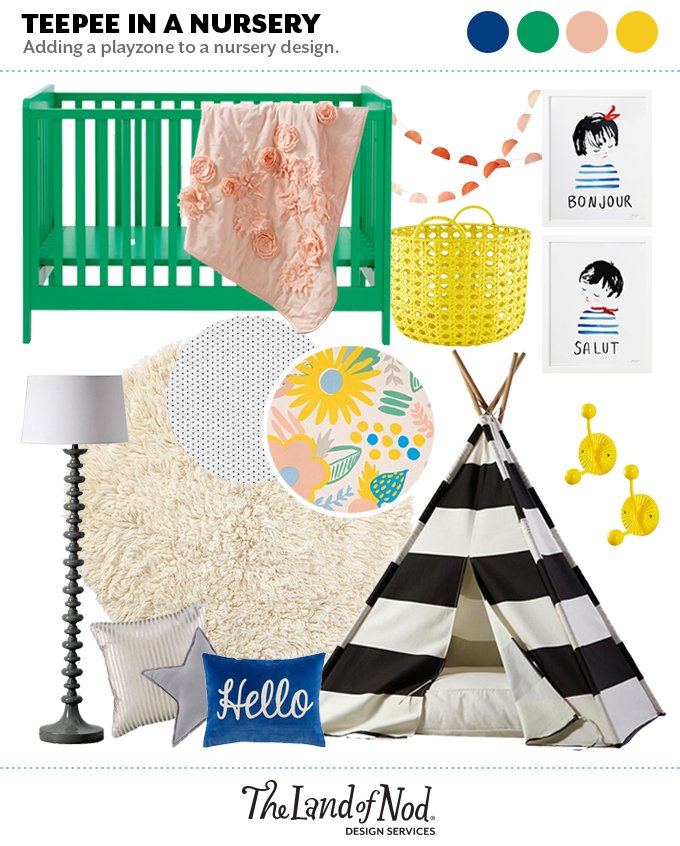
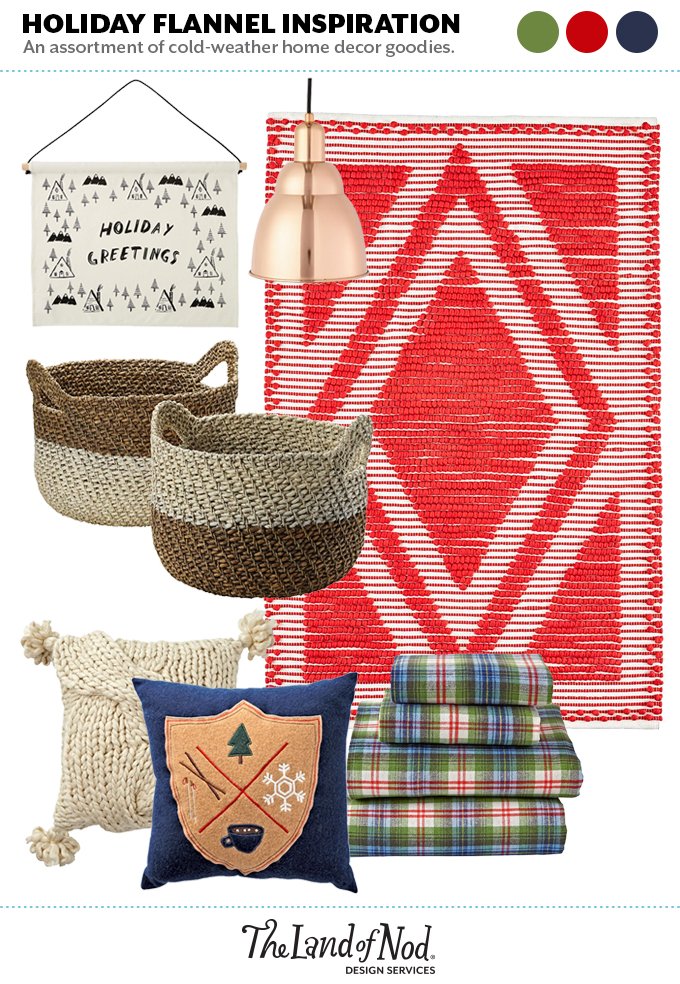
Décor

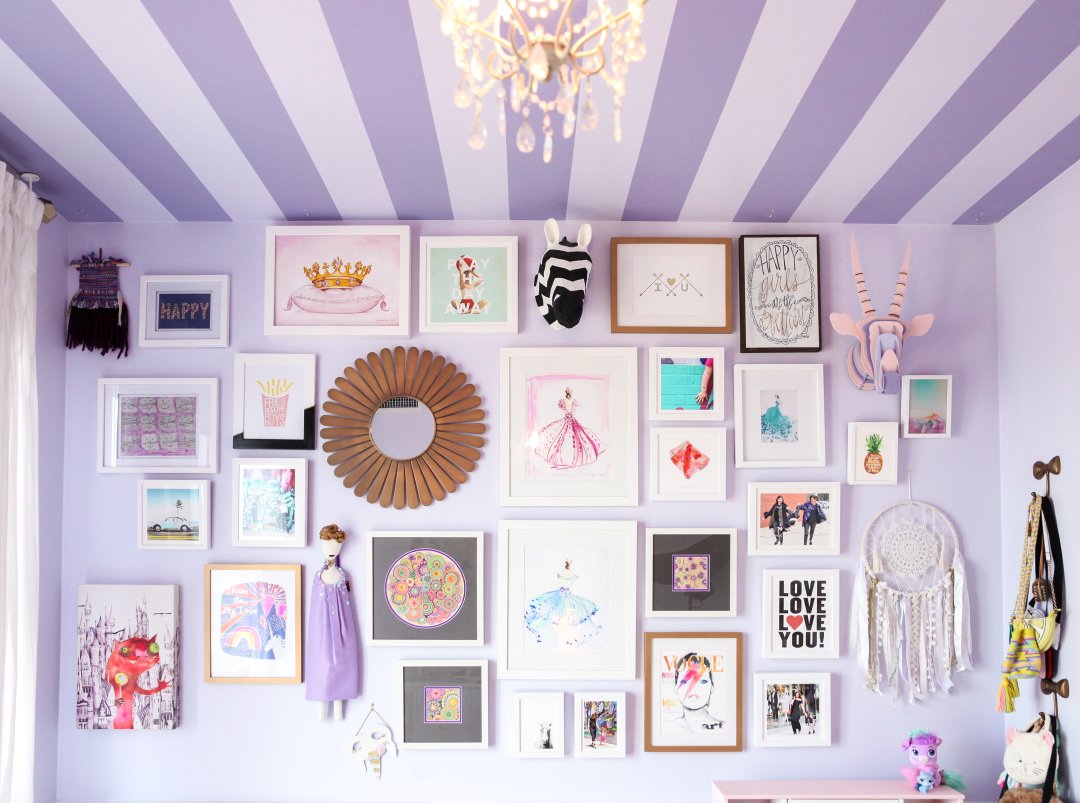
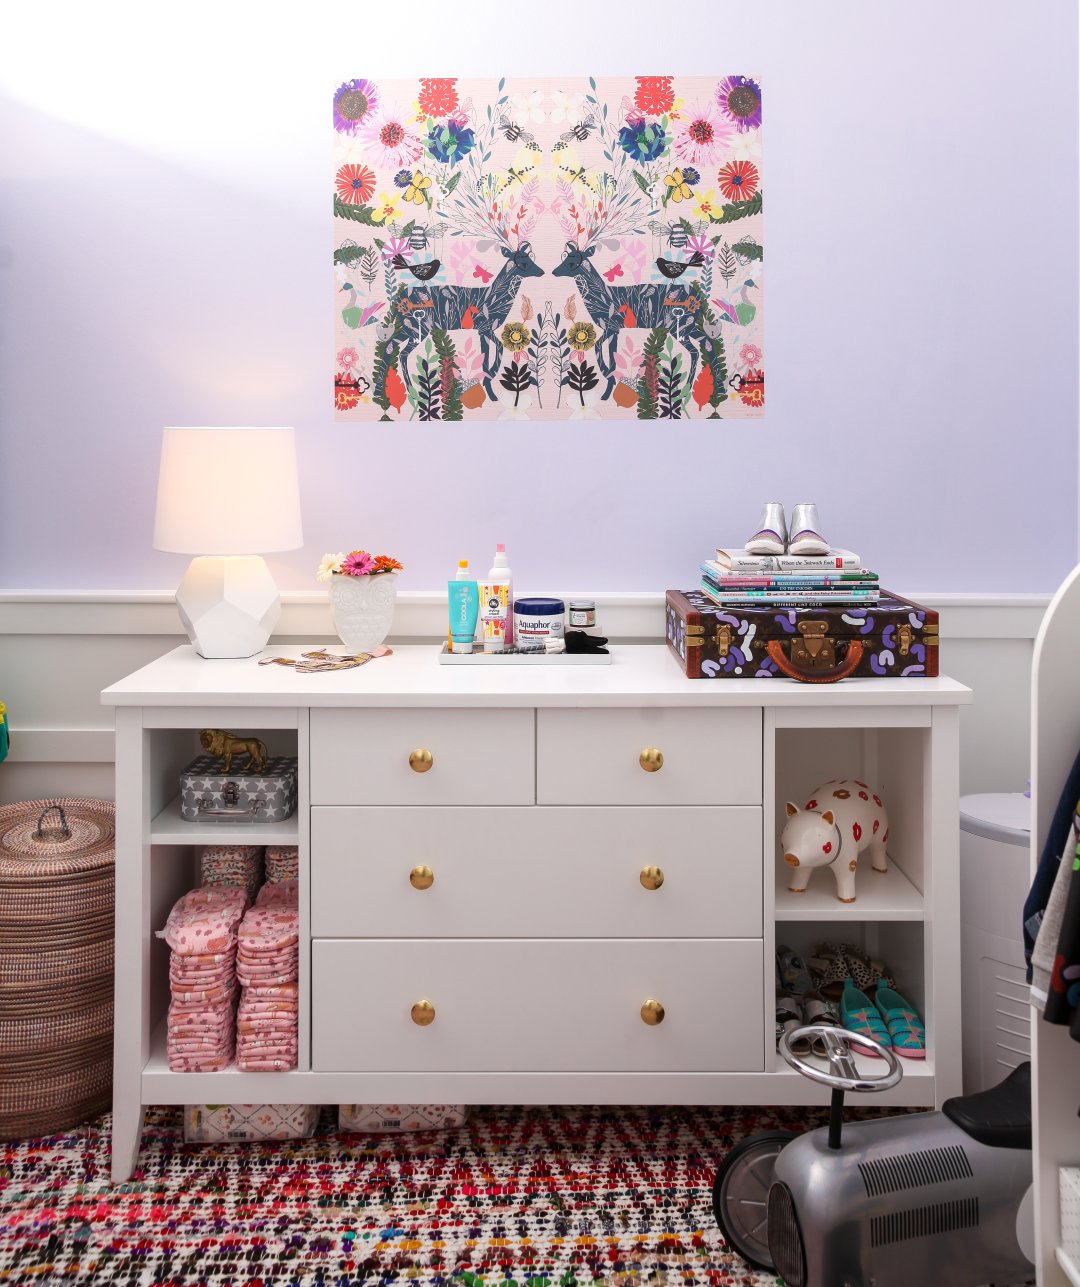
With so much going on with a new baby, it’s possible mom and dad are still putting the finishing touches on their nursery. So, consider adding some décor to the mix. Wall décor is a great option, whether it’s a framed print or a paper maiche animal head, it’ll become a keepsake reminder of their first Christmas as a family.

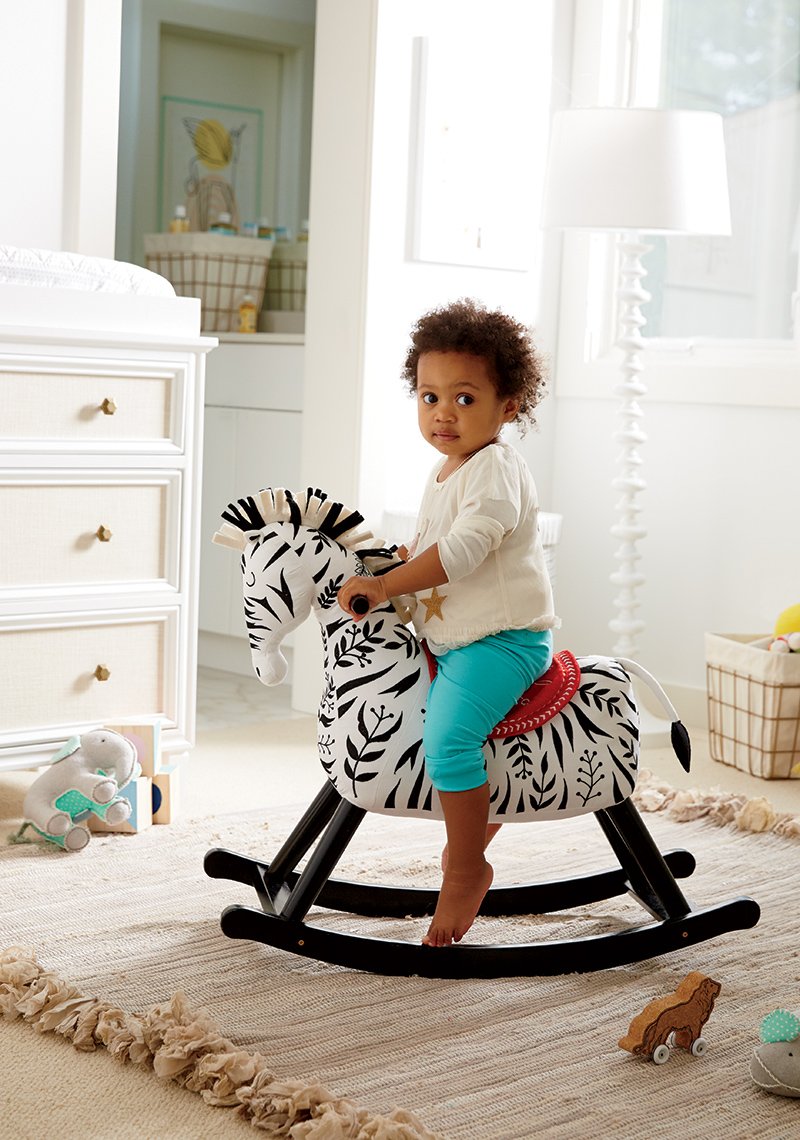
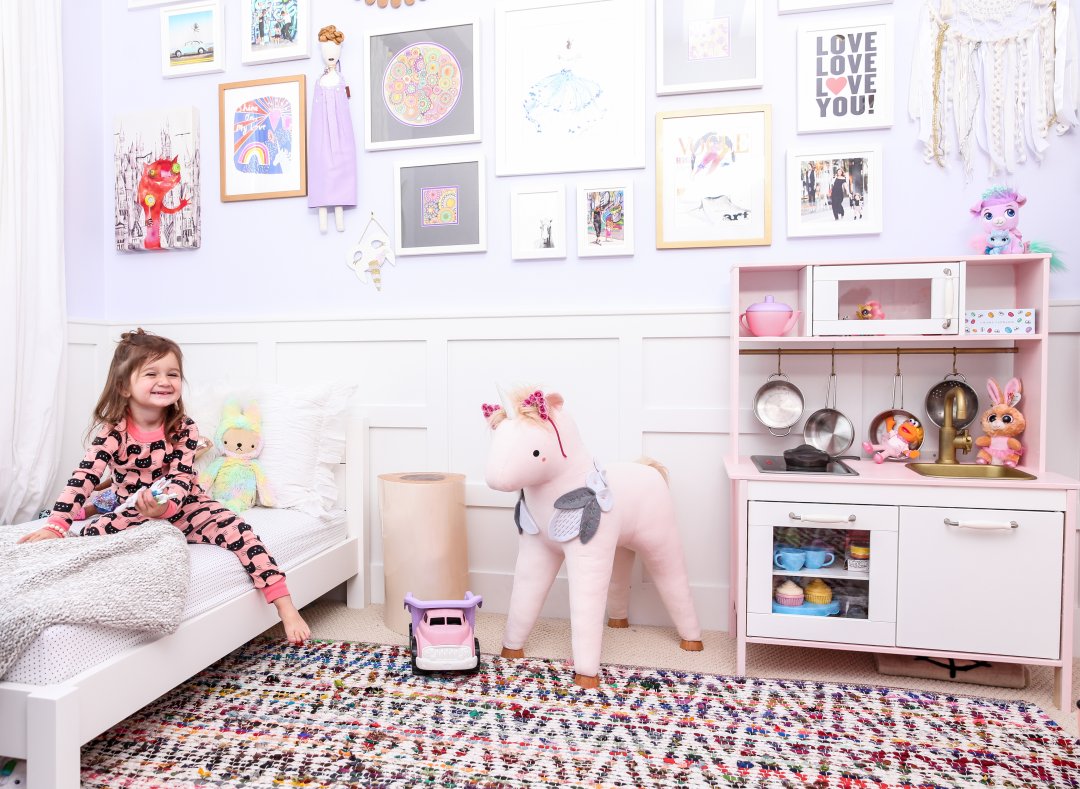
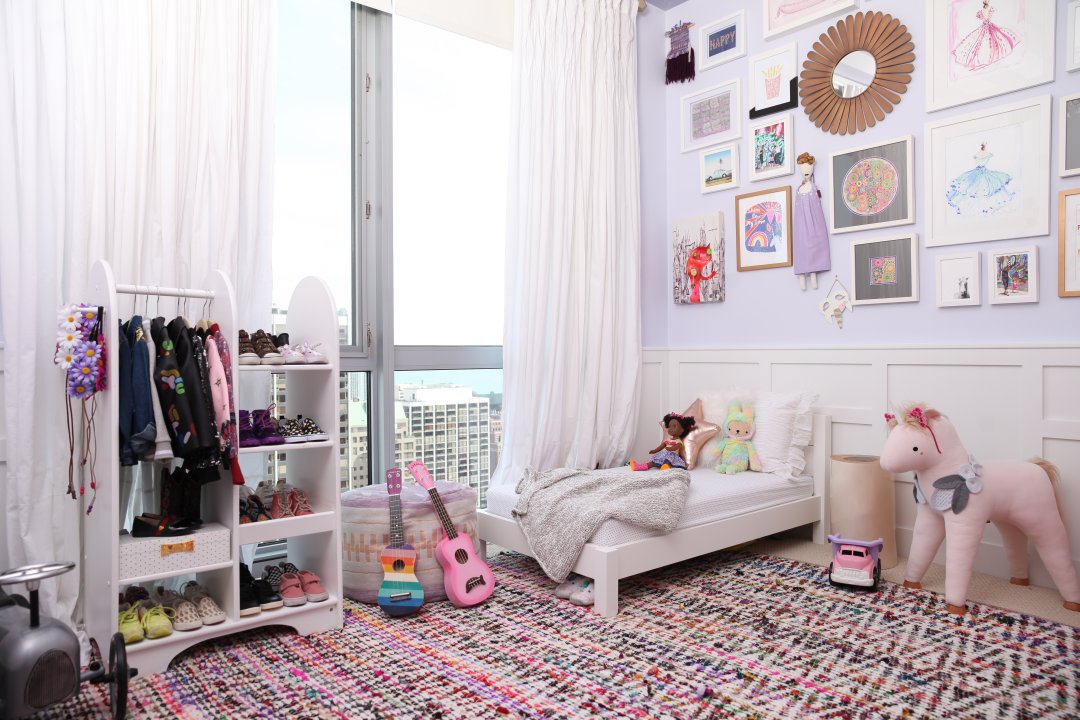
Rocking Horse (or Lion or Polar Bear)

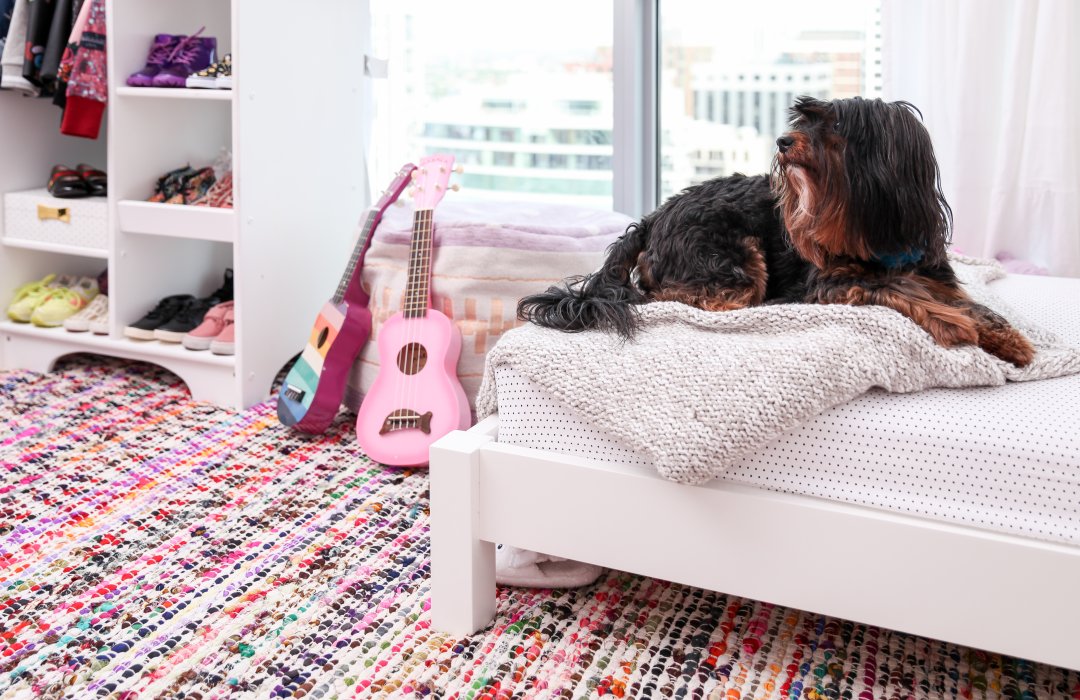
A classic gift, I just adore the idea of a rocking horse for baby’s first Christmas. Of course they aren’t yet able to use it. But until then, it’ll add some whimsy to the nursery. And, if you purchase one of good quality, they may just hand it down to their own baby someday.
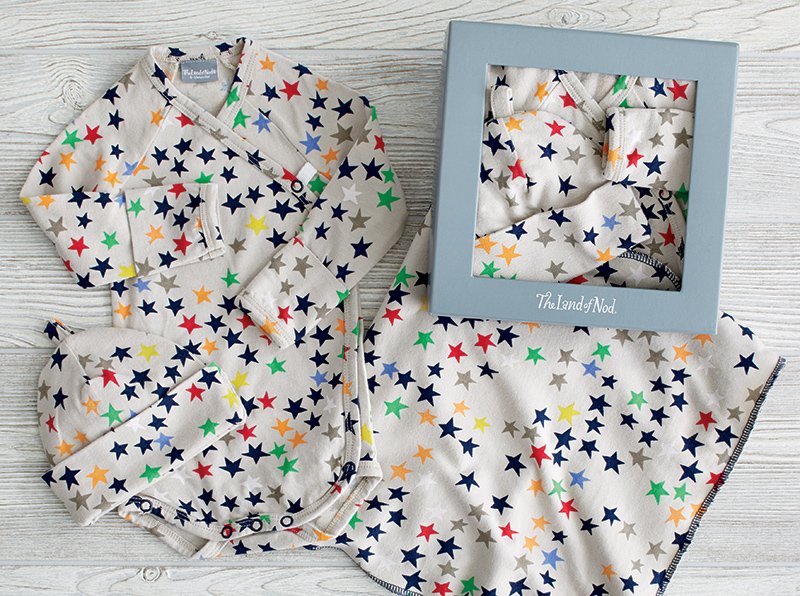
Pre-Packaged Gifts

I don’t know about you, but my Christmas shopping list can get a bit unruly. So, ease of giving can definitely play into my shopping decisions. If you’re in the same boat, consider a gift that comes packaged in a beautiful gift box. Not only will it make your life easier, but the recipient can hang onto the box to save your gift down the line as a momento of this first Christmas.

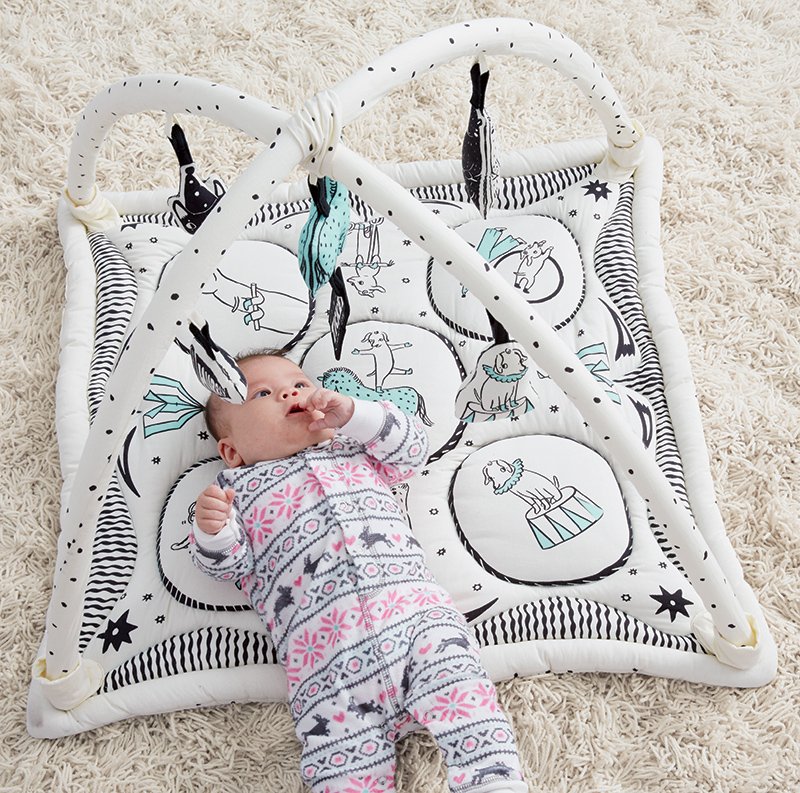
Toys for the Next Stage    

Everyone registers for the newborn stuff, but sometimes parents forget that their newborn will become an infant, then a toddler. So, rather than buying toys they can use now, consider a beautifully designed baby gym or activity chair that’ll come in handy in a few months. That way mom and dad won’t feel compelled to grab the first one they see on a harried trip to their local big box store.
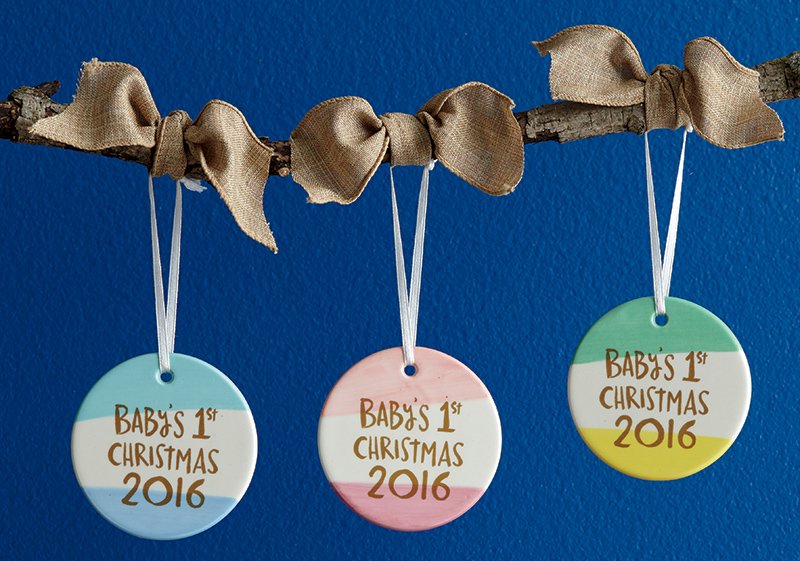
Keepsake Ornaments

Finally, one of my favorite family traditions since my childhood is getting a new Christmas ornament each year to add to our tree. My kids love looking at all the ornaments I received as a kid, and look forward to receiving a new one of their own each year. I love the idea of passing that tradition along starting with a Baby’s First Christmas ornament for the new little one.

No matter how you choose to commemorate, the first Christmas with a new baby is an incredible occasion. So, if nothing else, give mom and dad a moment to kick back, relax and soak it all in.  Merry (First) Christmas!

Danielle is the Creative Director at Nod and an over-protective mother of two. She’s also completely obsessed with Pinterest, Twitter, Instagram and her Kindle, but not necessarily in that order. Danielle loves to craft, sew and crochet. Her current craft of choice is weaving tiny wall tapestries.


DIY Rainbow Hair Chalk

November 14, 2016

Post by Rebecca of Not-So-SAHM

diy-rainbow-hair-6

When I read Ashley Goldberg’s post on Honest to Nod about how she collaborated to create the new Friend Indeed Dolls, I was smitten. I love the idea of giving kids fashion dolls with distinct personalities that encourage kids to be their unique selves. The Charlie doll looked so right up Cam’s alley — fashionable, but funky. Into roller skating, stuffed animals, and music. Plus, aqua hair. Cami has been after me to dye her hair for forever and we’ve occasionally added a few pink strands in the summer. But I took this opportunity to help her go a bit bolder — at least temporarily.

With the help of a few colors of hair chalk, we gave Cam some spirals of bright colors that would make Charlie proud.

DIY Rainbow Hair Chalk
Here’s what we used: 

DIY Rainbow Hair Chalk

Directions:

  1.  I used the setting spray and my wavy curling wand to create loose wavy curls in Cami’s hair. This isn’t a necessary step, but I’ve found that the colors just look better on waves. If you don’t have a curling wand, you can try it with a curling iron or simply braid wet hair the night before and shake out more mermaid-like waves the next day.
  2.  Next, spray a curly section again with setting spray (hair spray works too, I just happened to have the setting spray).
    DIY Rainbow Hair Chalk
  3. Hold the hair chalk pod and pull it down the length of the strand, holding the strand on top of the pod with your thumb. Repeat until you get the desired amount of color on the strand. Do the same with the other colors until you’ve added as much as you want.
  4. Then spray again with setting spray or hair spray. Boom. Rainbow hair until the next wash!

DIY Rainbow Hair Chalk

p.s. the chalk does rub off a bit if you don’t really spray it well. It came off of everything easily, but you probably wouldn’t want to do this right before letting your kiddo cuddle up on your new white couch.

DIY Rainbow Hair Chalk

Rebecca is a mom to two young kiddos and, in her spare time (ha!), likes to pretend she’s a back-up dancer, craft cocktails, and run long distances. A relatively recent SAHM, she blogs family-friendly activities, DIYs and celebration fun at Not-So-SAHM.

Kids Thanksgiving Table Moodboard

November 10, 2016

Post by Stephanie, Home Stylist from the Land of Nod’s Design Services Team

If your home is the destination for Thanksgiving this year, then you have probably already been working on a scheme for styling your dining table to celebrate the occasion. It’s been my experience that the main table gets a lot of press on the big day. After all, it’s the primary landing pad for all the good grub, so it’s probably a safe bet that the “good china” is going to be making an appearance. This is why, growing up, being stuck at the kids’ table was always such a drag. Not only were you miles away from the mashed potatoes, but there was virtually nothing in the way of pomp and circumstance with regard to the tablescape. Maybe a stray paper pumpkin, but definitely none of that fancy dishware used at the main table. While I totally understand not risking the safety of great-grandma’s heirloom china in the hands of a five-year-old, there are plenty of opportunities to bring the kiddos into the fun of the feast.

Whether you’re game for a bold and bright color scheme, or something more muted and traditional, here are two different takes on a kid-friendly Turkey Day tablescape to help spark some festive décor planning.

Kids Thanksgiving Table Moodboard

Never underestimate the power of garland to make a party feel festive. Swag a banner proclaiming a Thanksgiving greeting in a doorway or over a fireplace mantle to spread some cheer to your guests.

Kids Thanksgiving Table Moodboard

Turkey-printed melamine plates and acrylic cups are perfect for a brightly-colored kids’ table. If you’re the sort who likes easy clean-up then you could also opt for the neutral Meri Meri rose gold stripped paper plate set. Either option is more festive than the standard grocery store paper plates and is sure to make the kiddos at your party feel special and included.

Happy Styling!

Post by Stephanie Geurkink, Home Stylist & Event Planner  from The Land of Nod’s Design Services Team. Our Design Services team offers free one-on-one design advice, mood boards and space planning. You have a room to decorate? They’d love to hear from you. Visit The Land of Nod’s Design Services page to get started today.

Autumn-Themed Care Package

November 9, 2016

Post By Michelle of Avery and Augustine

Autumn-Themed Care Package

If your child has a friend who’s about to move away, why not make them a correspondence kit so that they can keep in touch?  (Did we mention that it’s a great way to practice writing and spelling skills as well?)  Or your child can make one and give it to one of their friends as a thoughtful and homemade birthday gift.

Here’s what you’ll need from Paper Source to make a correspondence kit.  We made ours fall-themed:

Autumn-Themed Care PackageAutumn-Themed Care Package

  1. Cut the note cards into the shapes of leaves and use the woodgrain stamp to create faux bois envelopes.
  2. Pack your new stationery set in a box mailer finished with some ivory shredded paper.
  3. Feel free to add a few extra surprises that you know the recipient will love!  We threw in fox and acorn stickersgelly roll pens, a set of the loveliest autumn hair clips from Mini Marche and a bookmark by one of our favorite illustrators.

Autumn-Themed Care Package

There are so many ways to personalize your kit and show your friend that you’re thinking of them and that you remember their favorite things!

You can see Michelle’s work and read about her two young children and their first forays in cooking, art, reading and everything in between at Avery and Augustine.  You can also find her sharing the latest in children’s books on Instagram at @averyandaugustine.


From Inspiration to Nursery: Gilded Flora

November 8, 2016

Post by Danielle, The Land of Nod’s Creative Director

Illustrations from books are a great place to draw inspiration for nursery design. I love the whimsy and sophistication of this Little Women book cover illustrated by Rifle Paper Company. And, the color palette isn’t your stereotypical girls nursery palette, but the deep greens mixed with pale peaches, plenty of neutrals and that pop of gold is nothing short of divine.

Inspiration to Nursery

Danielle is the Creative Director at Nod and an over-protective mother of two. She’s also completely obsessed with Pinterest, Twitter, Instagram and her Kindle, but not necessarily in that order. Danielle loves to craft, sew and crochet. Her current craft of choice is weaving tiny wall tapestries.

Toasted Marshmallow Sweet Potatoes

November 7, 2016

Post by Corri of Glitter & Bubbles

Toasted Marshmallow Sweet Potatoes

It’s hard to believe I’ve already started menu planning for the holidays, but I can’t resist, especially now that Zelda can really enjoy the food this year. Toasted Marshmallow Sweet Potatoes are a kid-friendly upgrade to traditional mashed potatoes and I love having them on our Thanksgiving table! We started this tradition a few years ago (lucky for Z) and this recipe gets major bonus points for being super easy. Someday Zelda will be in charge of creating it!

Toasted Marshmallow Sweet Potatoes

Little babes are immediately attracted to the marshmallows (can you blame them?) and it is so important to involve them in the kitchen. It gives them a sense of ownership over the meal! There’s nothing sweeter than seeing how proud they are of their culinary contribution when it comes time to eat. What’s your favorite kid friendly dish to make with your babes during the holiday?

Toasted Marshmallow Sweet Potatoes

Ingredients

  • 4 Sweet Potatoes
  • 1/4 Cup Brown Sugar
  • 3 Tablespoons Vanilla Extract
  • 2 Teaspoons Cinnamon
  • 1/4 Cup Milk
  • 1/4 Cup Butter
  • 2 Eggs
  • 2 Tablespoons Flour
  • 1 Teaspoon Salt
  • 1 – 2 Cups Mini Marshmallows

Toasted Marshmallow Sweet Potatoes

Directions

  1.  Preheat the oven to 375 degrees.
  2.  Peel the sweet potatoes and bring a pot of water to boil on the stove. Add the sweet potatoes and boil for 20-30 minutes; drain.
  3.  Peel the sweet potatoes and bring a pot of water to boil on the stove. Add the sweet potatoes and boil for 20-30 minutes; drain.
  4.  Divide the mixture evening among 2-3 small glass dishes. Cover the tops of each mix with mini marshmallows and bake for 10-15 minutes, or until the marshmallows are golden brown.
  5.  Serve to littles!

Corri McFadden is the Owner/Founder of eDrop-Off luxury consignment and creator of Glitter and Bubbles, a modern-day moms guide for those looking for inspiration through fashion, décor and food.  The site was launched in honor of her daughter and muse, Zelda and gives daily doses of stylish “must haves”, easy recipes and unique décor that are suited to inspire even the busiest of Moms!

Easy Mom Hacks

November 4, 2016

Post by Vanessa Quigley of Chapbooks

Vanessa Quigley  is a mom of seven, wife, trained opera singer and most recently Chatbooker-­in­-Chief. Chatbooks’ affordable, automatic and simple photo books were Vanessa’s brain­child after realizing her youngest son didn’t have his own childhood scrapbook. So Vanessa’s the best person to give us a few of her favorite easy Mom Hacks.

Stop by our South Coast location this Saturday, November 5th, from 10 a.m.- 12 p.m. to meet Vanessa, learn more about ChatBooks and hear some of her favorite Mom Hacks! She’s sharing a few of her favorites below too. 

  • Instant Pot – Everyone needs one of these. it’s an electric pressure cooker, rice maker, crock pot all in one! And makes cooking super fast and easy. My favorite thing to make with it now is rice and beansred-beans-and-rice-instant-pot-rawvia A Pinch of Healthy
  • Veggie bags – Chop a bunch of veggies when you get home from the grocery store and freeze in baggies. This makes vegetable omelets (among other things) a snap!
  • Double batch EVERYTHING!! And freeze one batch for later. That way you always have a backup for when you are low on time or low on energy!
  • Smoothie bags – Sock your freezer with premade smoothie bags. Instead of taking 5 bags out of the freezer when making a smoothie, you’ll only have to take out one! This saves me time in the mornings when I’m in a hurry and need breakfast on the go.

smoothie-packs-i-howsweeteats-com-3-2via How Sweet Eats

Vanessa Quigley is a mom, wife, trained opera singer and most recently Chatbooker-­in­-Chief. Chatbooks gives Vanessa the ideal place to combine her big picture vision, desire to hold onto what matters, and “get it done” attitude that raising seven children has instilled in her.

Bathroom Makeover

November 3, 2016

Post by Jeran of Oleander + Palm

Bathroom Makeover

Hi there, it’s Jeran from Oleander + Palm. I’m excited to share with you a room from our new (very old) house.  We just moved 2 months ago into our new house.  It’s a very fabulous 1918 2-story Craftsman with large living areas, original built-ins and hardwood floors throughout. One of the first rooms I tackled was the upstairs bathroom, which is the kid’s bathroom.  The kid’s bedrooms are both upstairs. the girls have one room and my son has the other. And yes, my daughters (ages 15 and 5) still share a bedroom (you may recall their room from our previous house).

This bathroom needed a little refresh. The tile and fixtures are all in pretty good condition, but there was some very dated wallpaper and wallpaper border and no shower (that was a biggy – 2 teenagers need to have a shower they can use).  There was a nice big bathtub, so to avoid major construction and remodeling, we opted to add a simple shower curtain surround and retro-fit the existing hand-held shower nozzle to the shower curtain.

I also stripped all the wall paper and gave all the trim, walls and cabinets a fresh coat of white paint. I kept with the black and white theme, but to give the room a little life, we added some fun accessories for The Land of Nod.

Bathroom Makeover

Here’s are look at the room before. Beautiful tile, cute windows, but really terrible toile wallpaper. Fresh white paint also gave the trim and cabinets a fresh new look.  The grey/tan they were painted felt dingy and worn.

Bathroom MakeoverBathroom Makeover Bathroom Makeover

Instead of towel bars, we decided to add a big hook for each kid’s towel. They save space and everyone has their own hook.

Bathroom Makeover

I brought in an old dresser to serve as a linen cupboard. Extra towels, sheets and blankets are stored in it. Baskets on top hold regularly uses washcloths and hand towels for quick and easy access.

Above the small dresser I hung one of our favorite paintings that we bought in Rome and a little shelf (which I painted black) to hold a few little plants.

Bathroom Makeover

Bathroom Makeover

I added color in just a couple strategic places. And these adorable bird prints were perfect for the little wall space between the door and the mirror.

Bathroom Makeover

Every mom’s dream is floors in bedrooms and bathrooms that aren’t littered with dirty clothes. A big laundry hamper right beside the shower helps encourage kiddos to pick up the dirties and throw them in the basket.

Bathroom MakeoverBathroom Makeover

Because the room was mostly white on white, I decided to give the windows a little definition by painting the frames black. It made such a huge difference. I also added simple black knobs to all the cupboard doors and drawers. This room is really so bright and airy, so I added a couple hanging plants because I knew they’d love being in front of this window.

Bathroom Makeover

And to tie all the black and white together and keep the space playful and young, this giant black polka-dot shower curtain did the trick.

Bathroom Makeover

A former elementary school teacher, Jeran has added her unique voice to the modern maker culture through her blog, Oleander + Palm.  Now a mother of three, settled in sunny California,  her focus is Simple California Living: designing and making livable spaces that incorporate vintage finds, handmade/DIY pieces and global inspiration. She loves helping people find attainable beauty in the lives they live.

Nod’s Opening a New Store…

November 2, 2016

Post by Rachel, Nod’s Brand Marketing Manager

Nod in Boston

We’ve been keeping a big secret from you all – Nod is opening a store right outside of Boston this month! Starting November 22nd, you can come see us at the Natick Mall.

To celebrate, we asked one of our pals, Sarah Cincotta to share her favorite kid-friendly spots. Sarah is the head of stylists at Mac & Mia, a company that provides online personal stylists for children’s clothing. Have any other must visit places in Boston? Share them in the comments!

Where to Play
  • The Children’s Piazza – It’s a great play space that was thoughtfully designed with early childhood development in mind. It’s the perfect space to let your little one’s creativity drive the play.  And a refreshing alternative to all the big, noisy, bouncy house places!
  • Imagine That – It has something for everyone. My son prefers their quiet activities, loves playing in the “grocery store” and creating a play for me on their stage, while my daughter goes nuts in the jungle gym. It’s on the river in an old mill building and I love the history of the area and the building. (My Dad worked as a shoemaker in those buildings when he first came to the US, so I have a total soft spot for them!)
  • Mayor Menino Park – A new, inclusive park with the most beautiful views of Boston from across the harbor.
Where to Eat
  • Union Square Donuts – The perfect spot for a sweet treat, but show up early before they sell out.
  • Life Alive – Serves up the most delicious vegetarian meals. We love to sneak downstairs and get a table under the stairs. The kids feel like it’s an adventure, and they have toys available to keep kiddos busy when they’re done eating and you’re not!
  • Flatbread Company – One of our favorites for family dinner. They source their ingredients locally, the menus are all hand drawn by kiddos, and kids can watch their pizza being cooked in their clay oven! And the brownie is not to be missed! Warmed in the pizza oven and topped with ice cream. It’s amazing.
And Don’t Forget
  • Smolak Farms – A must for farm fun and cider donuts. Visit the animals, pick whatever fruit is in season, and leave with a dozen donuts!
  • Rose Kennedy Greenway – Splashing around here in the summer is amazing.
  • Boston Fire Museum – A hidden gem perfect for the future firefighter.
  • DeCordova Sculpture Park – An awesome spot for a picnic, running around and taking in some really impressive art.

Ever wonder who’s behind The Land of Nod social media accounts? That’s Rachel! When she’s not telling anyone who will listen that she’s not meant to live in cold, snowy Chicago, you will find Rachel hanging out with her husband and new baby and binge-watching Netflix after baby’s bedtime. Or starting crafting projects that never get finished.

Teepee in a Nursery

November 1, 2016

Post by Stephanie, Home Stylist from the Land of Nod’s Design Services Team

When putting together a nursery design, the fundamentals always apply: crib, changing table, rocking chair, dresser, and a bookshelf. These core items are what make a nursery function so that adapting to life with a new baby can flow as seamlessly as possible. If, once these essentials have been nailed down, you find there is still space left in the room to add more details, why not opt for a teepee for your kiddo to crawl around and play in?

A teepee is a great way to add a little playfulness to your nursery design. Best of all, it’s one item that will grow along with your kiddo long after they have outgrown their changing table. As soon as they are able to crawl and explore, the teepee is sure to be a go-to destination. For added coziness, a few decorative throw pillows make it feel like a secret hideaway perfect for naps and bedtime stories. Garland adds an extra special finishing touch to complete the design.

Happy Styling!

Post by Stephanie Geurkink, Home Stylist & Event Planner  from The Land of Nod’s Design Services Team. Our Design Services team offers free one-on-one design advice, mood boards and space planning. You have a room to decorate? They’d love to hear from you. Visit The Land of Nod’s Design Services page to get started today.

Halloween Candy Bark Recipe

October 31, 2016

Post by Giulia, photographer and blogger at Giulia Doyle

Halloween Candy Bark Recipe

During Halloween we receive a lot of candy and while the rush of gathering it is fun and exciting, we might get to a point where we don’t quite know what to do with it anymore. A fun activity is to make a batch of candy bark. It’s easy to whip up, you can involve the kids, and I think it just looks really cute.

Because candy at this time of the year is often colorful, I like to work with a white chocolate base so the colors can really pop. For it to be most pleasing to the eye, I also find it helpful to keep a rough color palette. Here I chose only to use purple and orange Smarties to play off the orange in the candy corn.

Halloween Candy Bark Recipe

You’ll need:

  • 2 cups of white chocolate chopped, or white chocolate disks
  • Selection of candy and sprinkles
  • Mini semi-sweet chocolate chips
  • Pretzels

Halloween Candy Bark Recipe

Directions:

  1. Melt chocolate in 30 seconds intervals in the microwave, stir after each interval until smooth and melted.
  2. Spread melted chocolate over a parchment lined cookie sheet with a spatula. I use a silicon baking sheet, which works really well. You can spread the chocolate quite thin like I’ve done, or thicker, as you please.
  3. Immediately sprinkle with large pretzel pieces and larger candy. Sprinkle with mini chocolate chips and finish off with small sprinkles.
  4. Let it harden in the fridge and break into pieces. Enjoy!

Giulia Doyle concentrates on food photography and travel photography – using the full color spectrum. She tries to live life to its fullest and will take every opportunity to travel or entertain. With her lovely family, she has big dreams of cottages by the ocean, boutique bed and breakfasts, brick and mortar stores or possibly moving back to Europe – if only she could make up her mind!


Free Printable Halloween Coloring Page

October 29, 2016

Nod Fun Pages designed by Michelle Romo

It’s almost Halloween and, parents, we know your day is probably going to be pretty wild. Between the dressing up, classroom party, trick-or-treating, AND the candy eating madness that is bound to take place, we want to make sure there is some quiet time as well. So bring out the crayons and convince the little ones to partake in the calm activity that is coloring.

Download the full size printable HERE, then share the finished product on Instagram (use hashtag #landofnod) or our Facebook page and we may feature it! We’re dying to know:  What color will they color their ghosts? Is that a tail on that cat or a piece of candy corn? Did someone paint the pumpkin?

Free Printable Halloween Coloring Page

LOOKING FOR MORE FREE PRINTABLE COLORING PAGES? CHECK OUT ALL OUR OTHER NOD PRINTABLE COLORING PAGES!

All of us at Nod wish you and yours a happy Halloween. May it be filled with adorable decorations, sweet treats, laughter, and maybe some coloring fun. Also, is this not one of the cutest little ghosts you ever did see? It’s not often you see a ghoul sporting a bow tie.

Michelle Romo is a self-taught illustrator and designer fueled by cookies and naps. Her influences include Mid-Century, Japanese and Scandinavian design, along with pretty much anything cute. When she isn’t working she spends her time eating good food, hugging her friends, playing video games and crafting.

Get Cold Weather Ready with Flannel

October 28, 2016

Post by Stephanie, Home Stylist from the Land of Nod’s Design Services Team

Now that the crisp, cold air is here to stay (and now that I am willing to acknowledge this reality), it is time to pack up the light, cotton bedding of summertime in favor of something a little more substantial. That’s right, it’s flannel season. There is nothing I love more than being warm and cozy in my home when it is blustery and unwelcoming outside. I say, bring on the baskets filled with wool blankets. Bring on the soft fleece and knitted throw pillows! Bring on the cedar scented candles and hot cocoa! I am more than willing to trade my summer freckles and sunburns for buffalo check prints and pumpkin pie.

Just in case you’re still not quite ready to embrace the end of summer, I’ve put together a few of my favorite Fall items to help get you inspired.

Get Cold Weather Ready with Flannel

Happy Styling!

Post by Stephanie Geurkink, Home Stylist & Event Planner  from The Land of Nod’s Design Services Team. Our Design Services team offers free one-on-one design advice, mood boards and space planning. You have a room to decorate? They’d love to hear from you. Visit The Land of Nod’s Design Services page to get started today.

Glow in the Dark Halloween Slime DIY

October 27, 2016

Post by MJ of Pars Caeli

Glow in the Dark Halloween Slime DIY
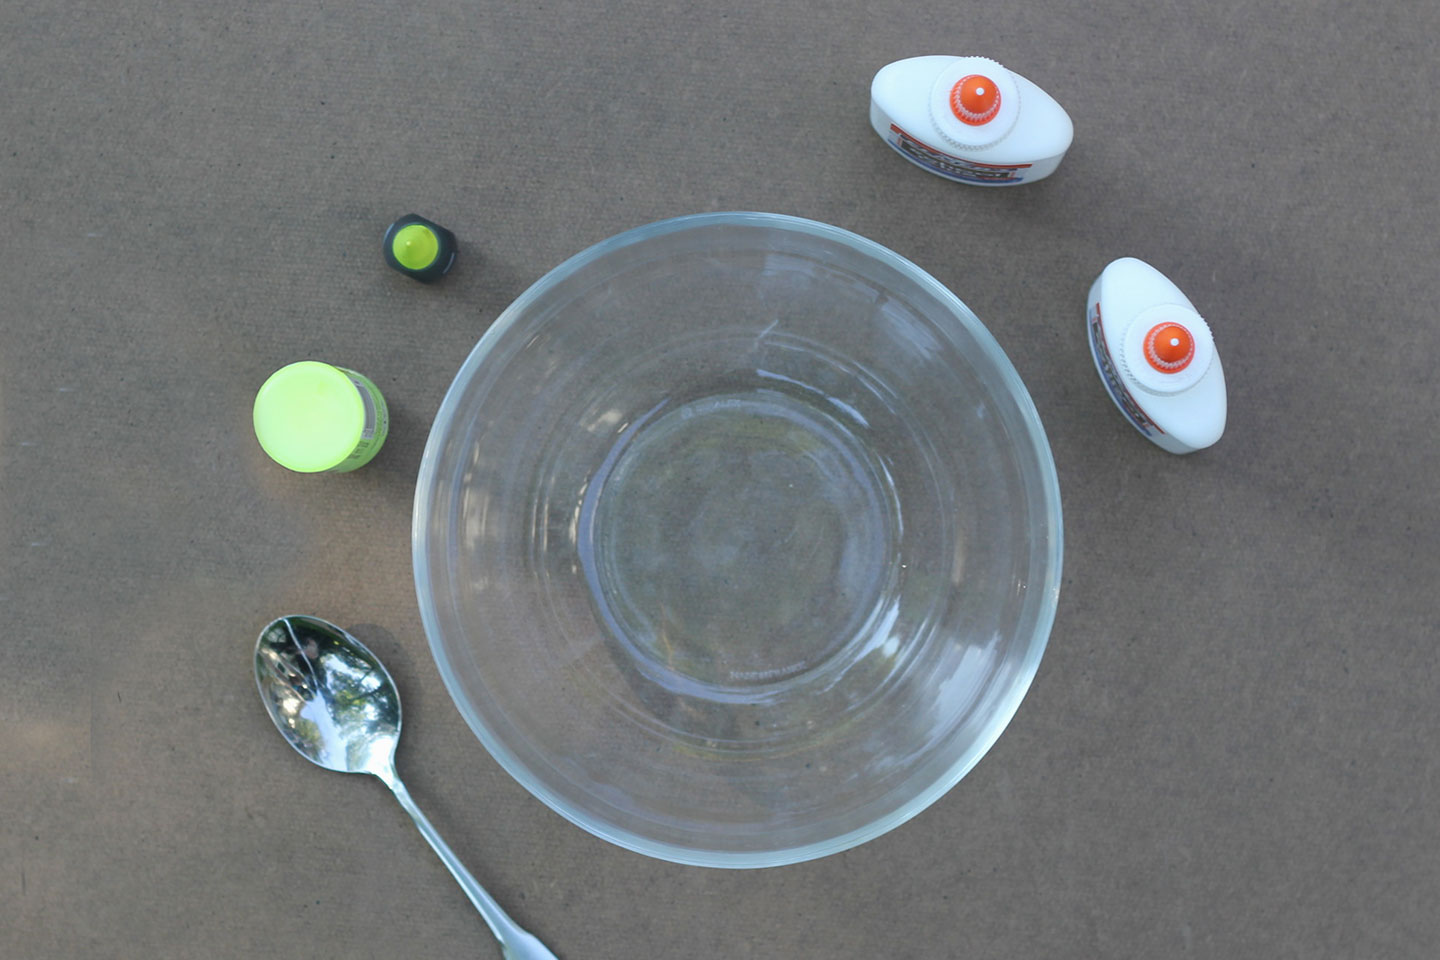
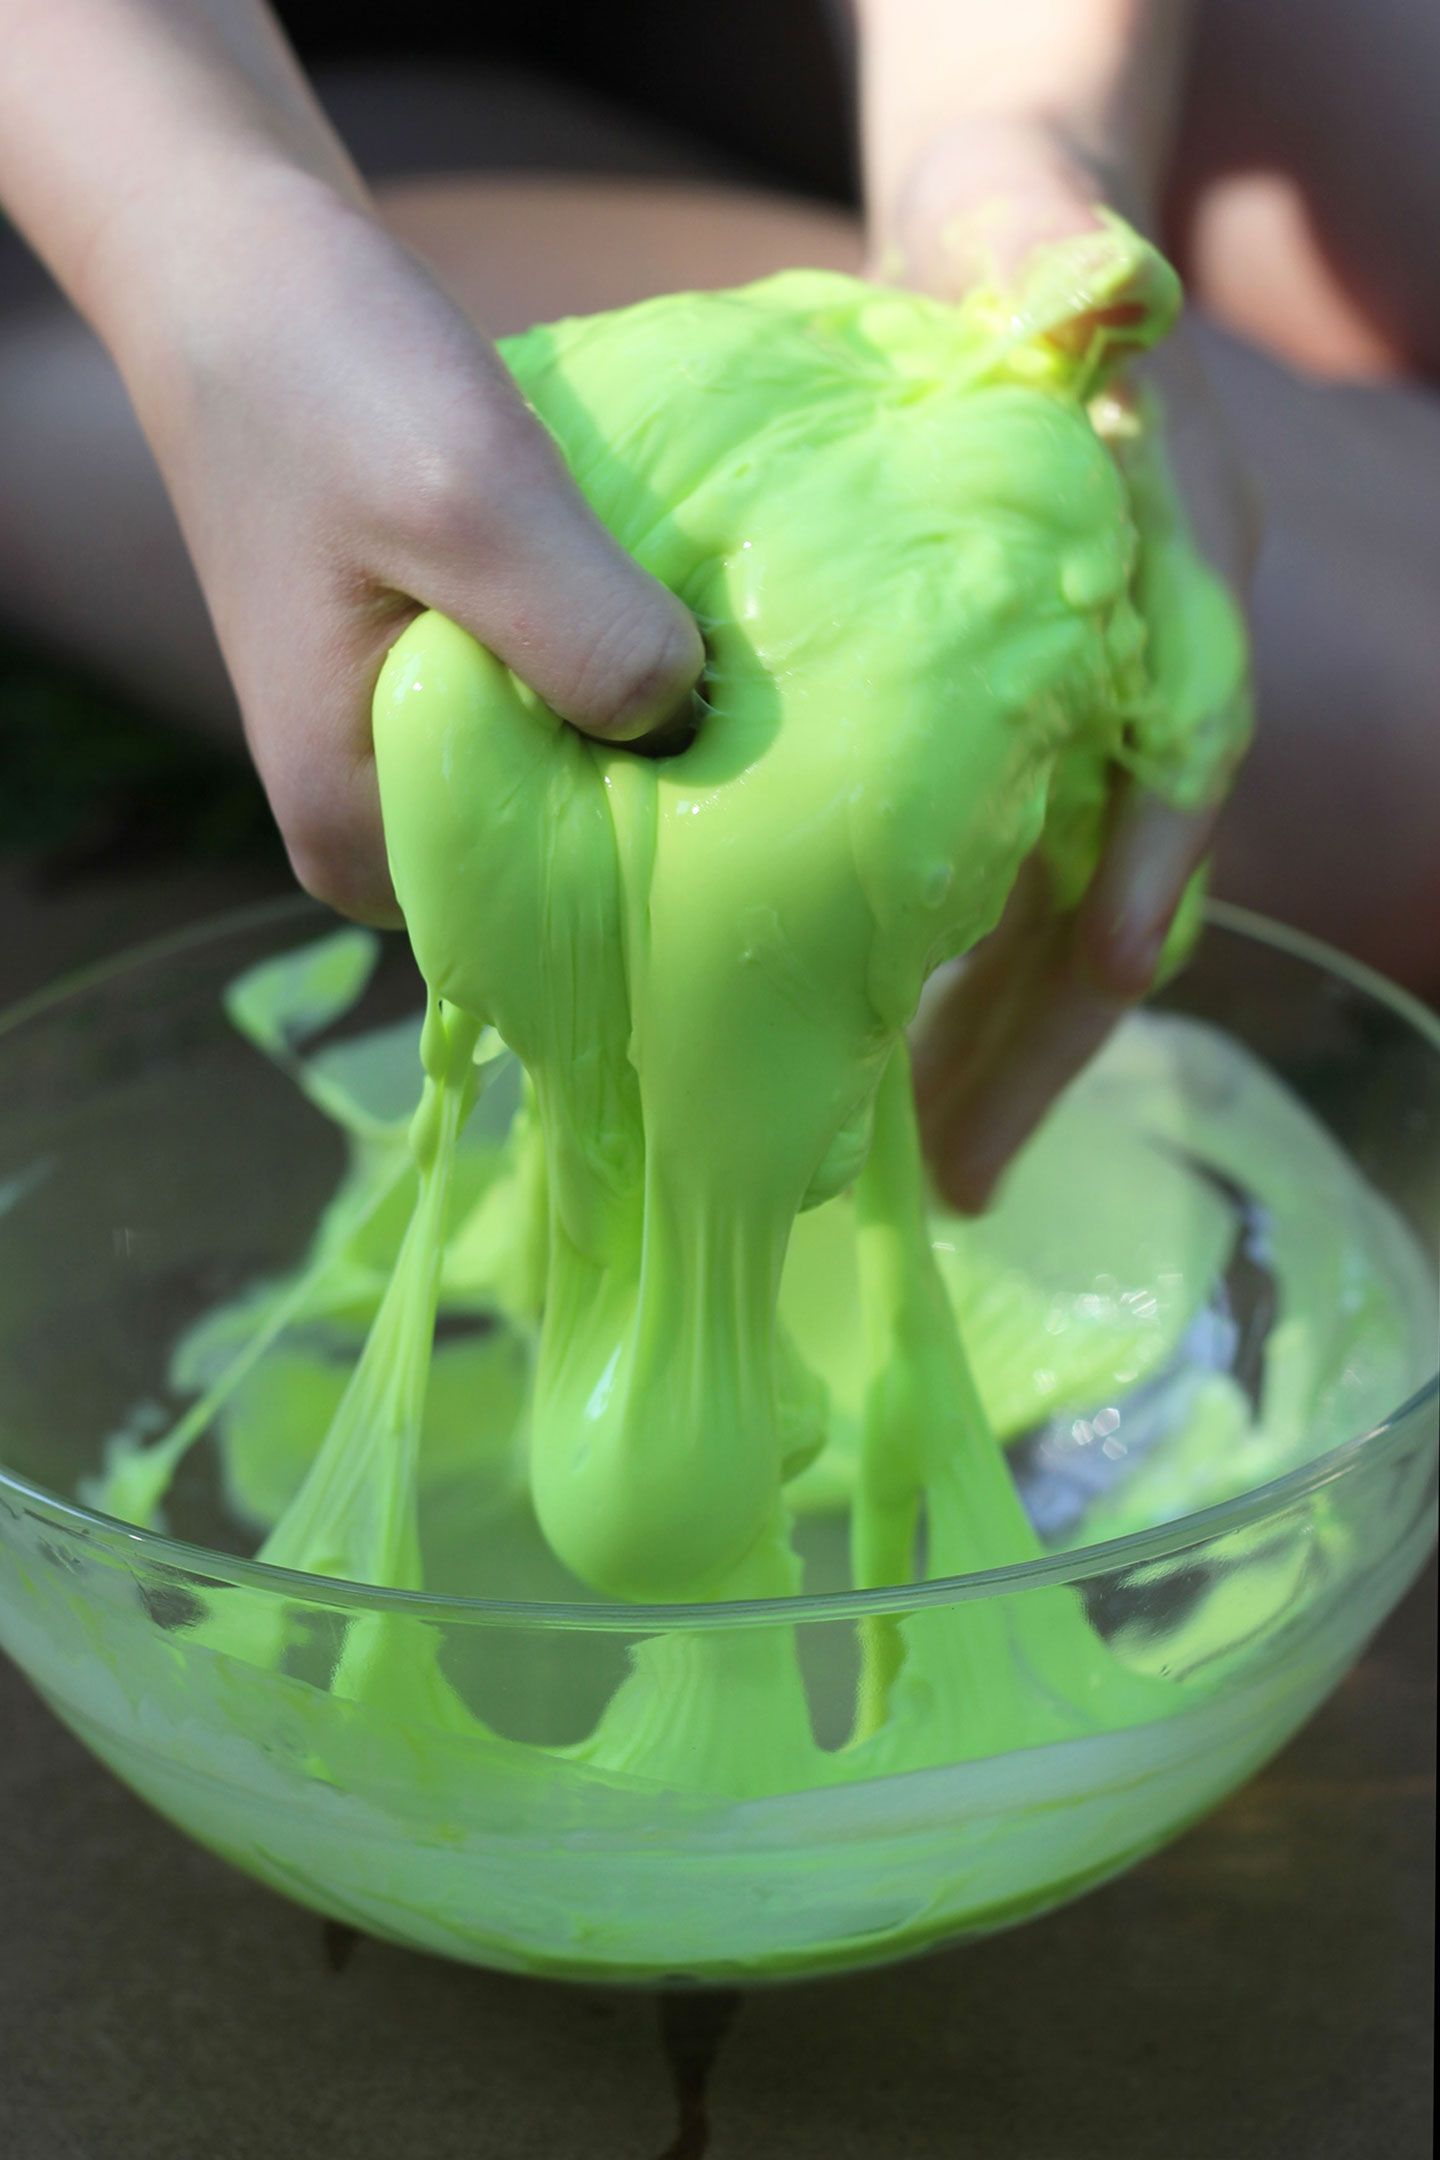
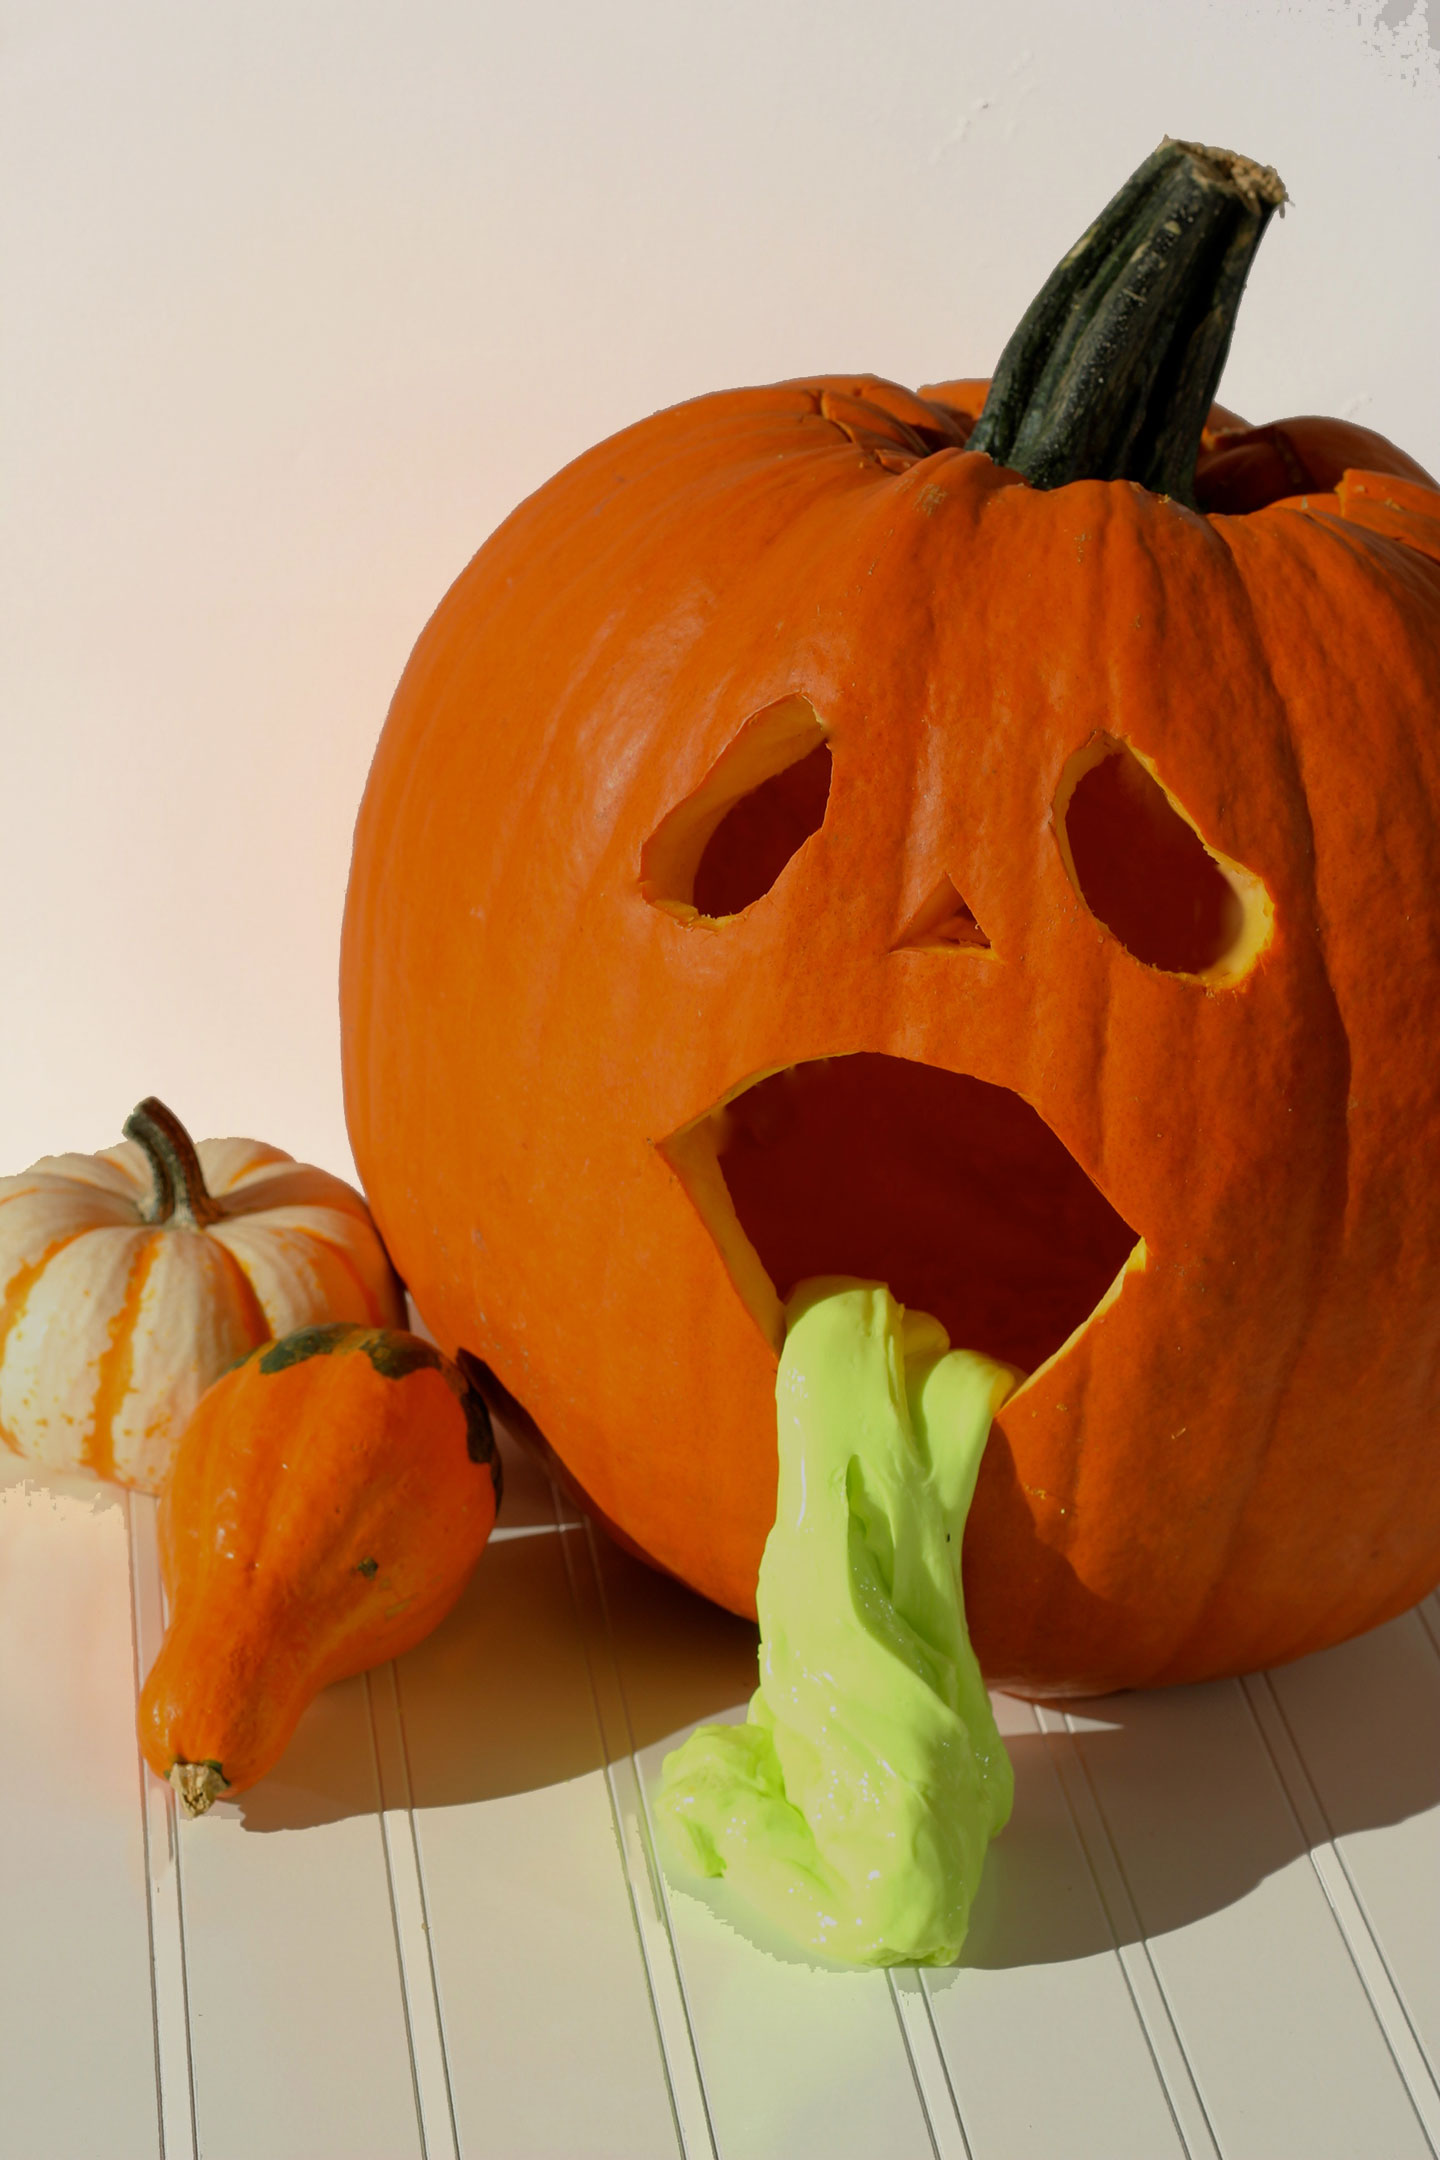
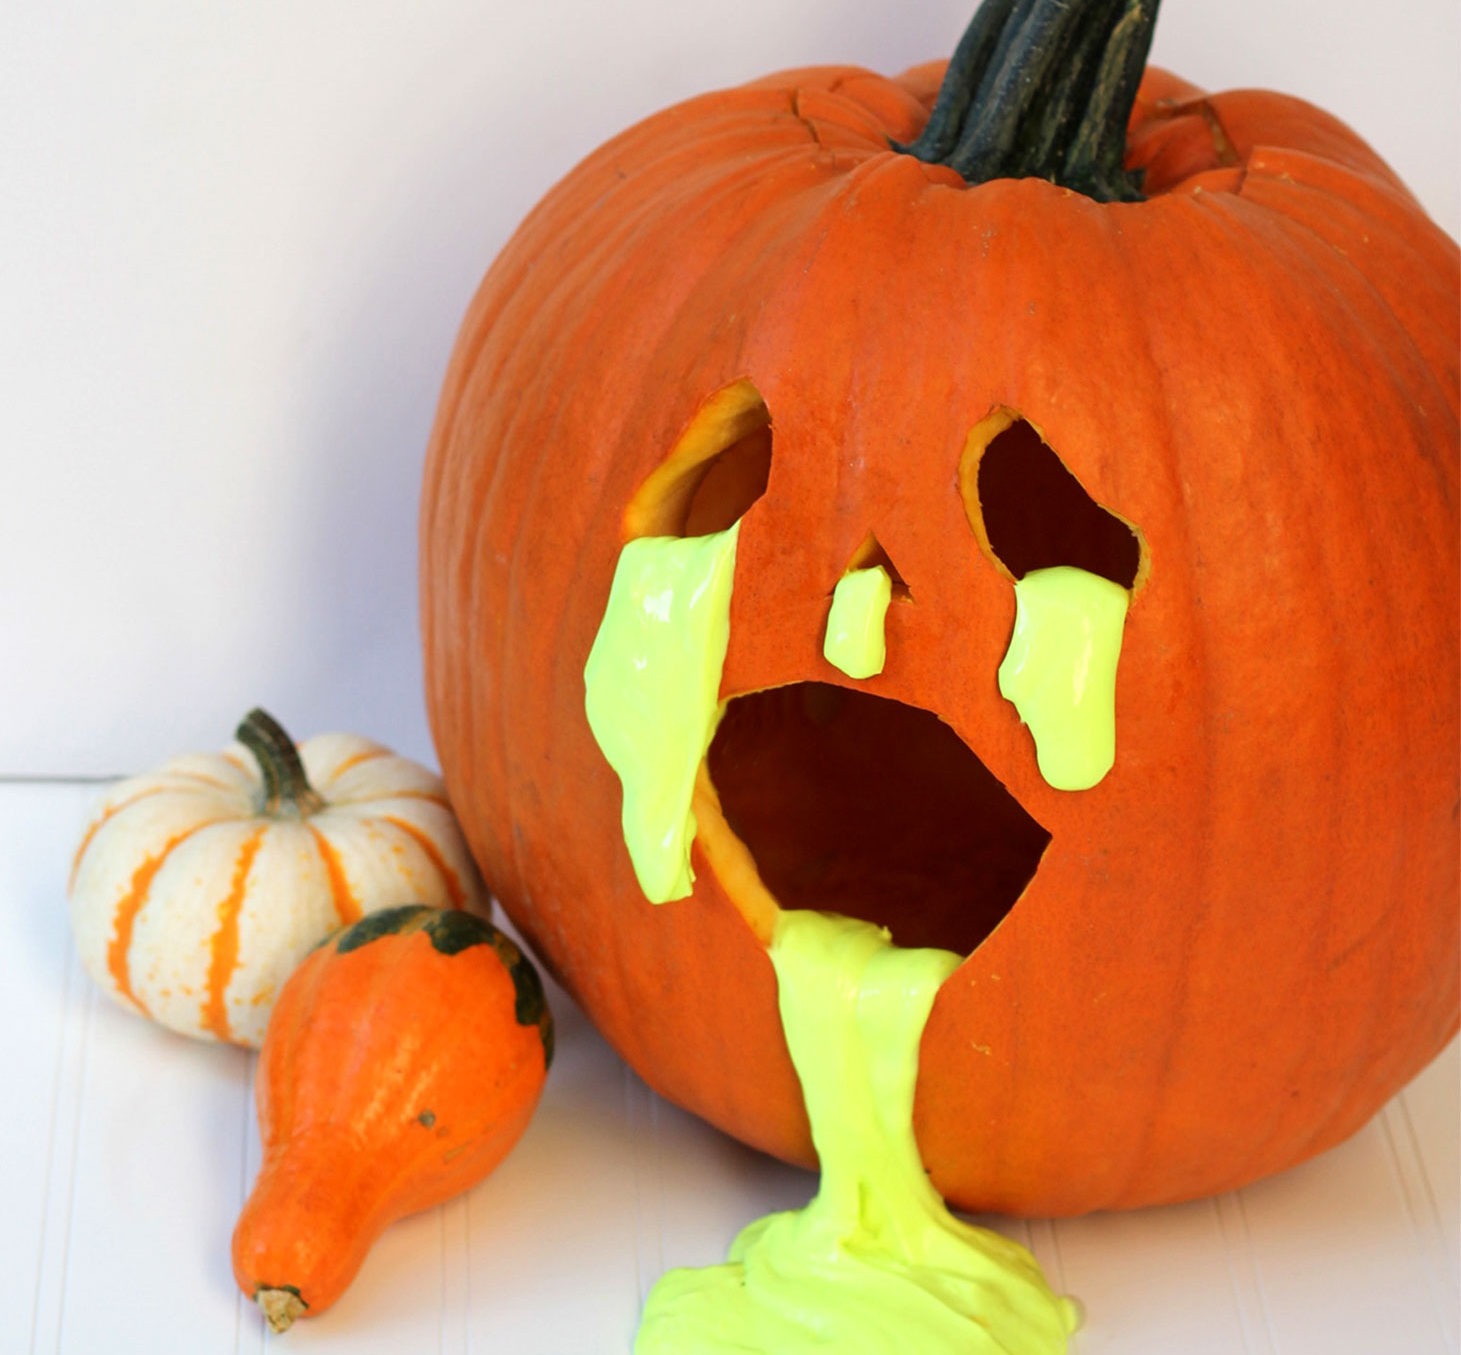
If you’ve ever created slime, you know the joy that the texture brings to your senses! Combining this process with the fun of the holiday makes for a perfectly gross way to decorate for Halloween.

We’ve seen a lot of recipes for slime or similar creations like goop, ooze, and gak. We decided to try this one from A Pumpkin and A Princess because all of the ingredients are easily available. In fact, we had all of them on hand (the Borax is awesome for making crystals)! Once you try making this at home, you’ll likely fall in love with the process because getting your hands on the creation is the best part.

Glow in the Dark Halloween Slime DIY

You’ll need:

  • 8 oz White Glue
  • 4 oz Glow-in-the-Dark Paint
  • Neon Food Coloring
  • 1 tsp Borax
  • Water

Glow in the Dark Halloween Slime DIY

Directions:

  1.  Pour the white glue into a mixing bowl. To empty the contents of the glue bottles completely, add 1/2 cup of warm water to the bottle(s). Pour that glue water into the bowl as well.
  2.  Add the food coloring. We wanted a strong neon color and added 8 drops of bright green. Mix the color through with a spoon.
  3.  Add the glow-in-the-dark paint to the mix. I thought we had a bright slime before but the paint took it to the next level! Mix again with a spoon.
  4.  In another bowl, mix together 1 teaspoon of Borax with 1/2 cup of warm water. Stir the water and Borax together until all the lumps are dissolved. Pour the soapy water bowl into the glue mixture and stir again.
  5.  Here’s where the real fun begins! Use your hands to combine the ingredients. Have your kids reach right in! If you want slime that is more runny, reduce the amount of Borax. Remember that we’re going to add the slime to a jack o’lantern so you might want really liquidy ooze or a more solid glob that stays together.

Glow in the Dark Halloween Slime DIY

Stretch it, pull it, smash it back together. The longer it sits, the more the slime will set up. You can add water right to the slime if you want to re-wet it.

Glow in the Dark Halloween Slime DIY

We wanted the slime to add a gross factor to our jack o’lantern. I carved up a face that seemed a little sick with drooping eyes and a wide open mouth.

The slime is easy to pull apart, and the kids broke it into four pieces. We added them to the eyes and mouth as well as a small piece in the nose.

As the slime sits, it will stretch, making the gross effect even better! Add it in before a party and watch it change through the celebration. Or leave it out on your front porch to glow and delight Halloween visitors!

Glow in the Dark Halloween Slime DIY

MJ is a graphic and product designer, wife, and proud momma to three. She founded Pars Caeli (meaning a piece of heaven), a delightful blog and shop, to add more creative to the everyday. MJ worked with our team to bring her lunchbox jokes to life in our product Lunchtime LOL Notes, now available at The Land of Nod to bring on a case of the giggles! 


Maple Brown Butter Popcorn Recipe

October 26, 2016

Post by Michelle of Avery and Augustine

Maple Brown Butter Popcorn Recipe

We recently discovered that you can make popcorn in the microwave with two things: popcorn kernels and a brown paper bag.  You know, the kind you pack your lunch in.  Here’s an article about it on The Kitchn because of course, they are such a great, practical resource for all things culinary.

Maple Brown Butter Popcorn Recipe

We also found a recipe for honey brown butter popcorn but changed it up a little based on ingredients that we had in our pantry.  Thus, maple brown butter popcorn was born.  Here’s our (very simple) recipe for maple brown butter popcorn, inspired by The Kitchn’s recipe.

You’ll Need:

  • 1/2 cup of popcorn kernels (or microwavable popcorn)
  • 1/4 cup of unsalted butter
  • 1/4 cup of maple syrup
  • 1/2 teaspoon of salt

Maple Brown Butter Popcorn Recipe

Directions:

  1. Use 1/2 cup of kernels to make approximately 10 cups of popcorn in the microwave. If you prefer, you can make it in the air popper or use your favorite brand of packaged plain microwave popcorn.
  2. Brown 1/4 cup of unsalted butter in a small pan.  If it’s your first time, here’s a tutorial.
  3. Take the pan off the heat and whisk in 1/4 cup of maple syrup (or a little less if you want to reduce the sweetness) and 1/2 teaspoon of salt.
  4. Drizzle the liquid over the bowl of popcorn and toss/stir until the popcorn is coated well.

And because crunchy snacks and movies seem to go hand in hand, that’s what our maple brown butter popcorn ended up being used for: movie night.  Cheers to winding down!

Maple Brown Butter Popcorn Recipe

You can see Michelle’s work and read about her two young children and their first forays in cooking, art, reading and everything in between at Avery and Augustine.  You can also find her sharing the latest in children’s books on Instagram at @averyandaugustine.

Halloween Headbands Craft

October 25, 2016

Post by Rae Ann Kelly

Halloween Headbands Craft

There’s so much to love about Halloween; Pumpkins, pumpkin patches, and pumpkin spice, to name a few (ha!), but my favorite part has to be the costumes! If you or your little ones are like me, then you’ll enjoy this Halloween headbands craft. I’ve put together these fun bat, pumpkin, and cat headbands that are as much fun to make as they are to wear. Keep scrolling for the supply list and instructions!

Halloween Headbands Craft

You’ll Need:

  • Halloween Headband PDF Template
  • Scissors
  • Black +/ or white poster board (or other craft paper)
  • Black + white card stock
  • Pencil + ruler
  • Glue or double stick tape
  • Stapler (optional)
  • 1.5″ or .75″ circle punch

Halloween Headbands Craft

Here’s How:

  1. Cut poster board into 22 x 3″ strips for the headbands
  2. Download template, print, and cutout. Trace onto card stock and cutout.
  3. Let the kids use glue or double sided tape to add ears, eyes, fangs, etc. to the middle of the headbands. For the bat wings, make a fold along the straight edge to add the glue to so they pop out from the side of the headbands.
  4. Finish by closing the headbands to the size of the child’s head with a stapler or tape.

Halloween Headbands Craft

Rae Ann blogs at Rae Ann Kelly and is a kid wrangler, graphic designer, food & craft nut. Her blog features little tidbits about her day to day life & design projects, tutorials for DIY’s, free downloads, yummy recipes, lots of kid friendly ideas and outfit inspiration.  

Toddler Halloween Party

October 21, 2016

Post by Lunches + Littles

Toddler Halloween Party

These days, Halloween parties aren’t just for adults. Kids of all ages can dress up, gather with friends and have fun. Think: simple DIY games, painting pumpkins, and dancing to the Monster Mash! For food, the adults and kids alike, can also enjoy a festive Halloween feast that is all sorts of spooky, edible fun! And… The best part? – Parents can pull together a Toddler (or Kid’s) Halloween Party spread without it being too dreadful to plan! Our easy, and dare I say, spooktacular Toddler Halloween Party Menu and simple instructions for each item in the lineup, is below!

Toddler Halloween Party

Mummy Dogs

What you need: 

  • Hot dogs
  • Crescent roll dough (we used @pillsbury brand)
  • Googly eyes
  • Honey

How to make themUnroll crescent roll dough and cut it into strips of varying sizes. Wrap hot dogs with strips until the dog is mostly covered. Line “mummies” on foil-wrapped pan and bake at 375 degrees for approximately 15 minutes or until “mummies” are lightly browned! Once slightly cooled, attach eyes using a drop of honey on the back of each one. Serve warm with a side of ketchup or mustard for dipping, if desired.

Toddler Halloween Party

Bowls of Zombie Brains (Macaroni & Cheese with Broccoli)

What you need:

  • Macaroni and cheese (we used @annieshomegrown Organic Classic Macaroni and Cheese)
  • Fresh broccoli (1 head of broccoli per 1 box of macaroni)

How to make it: Prepare macaroni and cheese as detailed on package. While macaroni is cooking, steam chopped broccoli. Once steamed, run under cool water, then shake off as much excess water as possible. Using a food processor or blender, fine chop/blend the broccoli until it reaches a very fine consistency. Once macaroni and cheese is fully cooked, scoop broccoli into the same pot as the macaroni. Stir until broccoli and macaroni are well blended. Add salt and pepper to taste. Fresh grated parmesan cheese and a few eyeballs were a couple of fun optional extras for this side!

Toddler Halloween Party

Oreo Spiders

What you need:

  • Oreo cookies
  • Pretzel sticks
  • Candy for eyes (we used mint @mmschocolate)
  • Icing or honey

How to make them: Cut pretzel sticks in half with kitchen scissors. Push pretzel sticks into the cookies; 4 half sticks per side, for legs. Using a drop of icing or honey attach two small candies per cookie for eyes.

Toddler Halloween Party


Dipped and Decorated Caramel Apples

What you need:

  • Medium-sized apples
  • Caramel and or chocolate for dipping
  • Various toppings

How to make them: Prepare/melt caramel and/or chocolate. Dip apples into melted caramel/chocolate and let excess drip off. Once coated immediately top with various toppings (we used sprinkles, chopped almonds and nonpareils). Let dipped apples set in refrigerator for approximately 1 hour before serving. (For some of our youngest guests, we cut additional apples into thin slices, and dipped and decorate those, as seen below).

Toddler Halloween Party

String Cheese Witch Brooms

What you need:

  • Mozzarella cheese sticks (we used @horizonorganic brand)
  • Pretzel sticks
  • Chives

How to make them: Cut string cheese into 2” strips. Insert a pretzel stick into one end of the string cheese. Carefully pull or cut the bottom half of the string cheese into little strips. Tie on a chive as seen in photos to finish.

Toddler Halloween Party


The Ooze (Punch)

What you need:

  • 1 large bottle of green sports drink OR a large bottle of Hawaiian Punch Green Berry Punch
  • 3 cups lemon lime soda
  • 1 cup orange juice
  • A few scoops of sherbet ice cream

How to make it:Prepare green sports drink as directed on package. Then, combine sports drink or Hawaiian Punch, soda and orange juice in a large punch bowl and stir. Add sherbet prior to serving. We also added in some ice cubes that had frozen plastic spiders in them. Spooky!

Toddler Halloween Party

This Toddler Halloween Party spread is hauntingly simple. The Oreo Spiders, Dipped and Decorated Caramel Apples, and String Cheese Witch Brooms can even be made a day ahead of time! For added variety, we also sliced up some strawberries and bananas and served them alongside some blueberries on a spooky fruit platter, as seen above. And, we used some of our extra melted chocolate and extra apple toppings to transform plain Oreos into festive, chocolate-dipped treats, and even a few little spooky monsters (all you need is Oreos, melted chocolate, candy shred and the same googly eyes used for the mummy dogs)!

Toddler Halloween Party

Your guests will get all wrapped up with their mummy-inspired hot dogs, and other fun food! … Just beware! All the little goblins will want seconds so make sure you make enough! Happy Halloween!

Special thanks to The Land of Nod for supplying the fun Halloween decorations and plates & utensils!

Lunches + Littles focuses on quick, healthy and fun meal options for little ones. One of the goals of Lunches + Littles is to share practical tips and tricks on how to make meals fun, all the while keeping things simple. A lover of colorful plates, and an advocate for getting kids in the kitchen, Lunches + Littles is also a great resource for parents of picky eaters, parents looking for healthy family and toddler recipes and those mamas (dads too!) who are short on time. A mantra of sorts: Making meals fun doesn’t have to be hard! With 3 little ones (3 and under) it can’t be! Follow @lunchesandlittles for all of the above… And more!


DIY Halloween Glow Stick Lanyards

October 20, 2016

Post by Youth Independent Party, aka YIP

DIY Halloween Glow Stick Lanyards

We love a good upcycling project that brings new life to things that might otherwise end up in a landfill, so we came up with this easy DIY Halloween Glow Stick Lanyards using old t-shirts that are the perfect add to any Halloween costume for fun and safe trick-or-treating.

What You’ll Need 

  • Old t-shirts and/or fabric loops
  • Glow sticks with lanyard hook
  • Beads
  • Scissors or rotary cutter and matDIY Halloween Glow Stick Lanyards

How to Make

  1. Take your old t-shirts and cut them across the body widthwise into approximately 1-inch strips. (It doesn’t have to be exact.)DIY Halloween Glow Stick Lanyards
  2. Stretch the strips until they become rounded loops.DIY Halloween Glow Stick Lanyards
  3. Twist two loops together and insert into glow stick lanyard hook. This is your lanyard.
  4. String beads onto other fabric strips and tie onto the lanyard to customize the look.DIY Halloween Glow Stick Lanyards
  5. To adjust the length of lanyard, tie a small strip of fabric at desired length and cut excess at back.

Keep celebrating this spectacularly spooky holiday with our fun Halloween decorations!

Youth Independent Party (or YIP, like our friends call us) is all about easy-to-wear, sustainable kids’ basics, many of which are made with fabrics created from 100% recycled materials.

Nursery to Toddler Room Transition

October 18, 2016

Post by Corri of Glitter and Bubbles

Nursery to Toddler Room Transition

When I originally designed Zelda’s nursery I made selections that I knew would easily transition into her “big girl” aka toddler years. What I didn’t know was how quickly that day would arrive! It sounds so cliché, but it really feels like yesterday that I was designing her nursery alongside the LON Design Services Team.  When I noticed that Zelda wasn’t as stimulated in her room as she once was I knew it was time to amp up the space a bit to really match her personality. I wanted a functional interior that she could easily destroy and then put back together again (twenty three times a day!). If you have a toddler I know you feel me!

Nursery to Toddler Room Transition
  1. We swapped out the crib for the cutest little bed there ever was, it seriously looks like a doll bed! It’s a great transition bed because it sits low to the ground and is easy for her to get in and out of. The best part is that I was able to use her crib mattress and bedding, so there was no need to invest in new sheets and blankets. (Even though I ended up doing it anyway because I wanted to…we were really going for it!)
Nursery to Toddler Room Transition
  1. I’m a sucker for a good gallery wall and I couldn’t wait to add to hers! Originally the crib was centered to the gallery wall with curtains on each side to warm up the space. I wanted to open up the room so I removed the curtains and expanded her gallery wall to take up the entire main wall. The wall is made from love with pieces created by my second grade self, my mother, friends, unicorns and treasures from around the world. It was fun to add texture and dimension to the wall with a doll or weaving.
Nursery to Toddler Room Transition
  1. I wanted to bring some brighter colors into the room without changing the wall color so I swapped out her rug from this to this.Updating the rug had the same impact as adding new carpet or a new paint color with a lot less work!
Nursery to Toddler Room Transition
  1. When I purchased this dresser my plan was to have it in her room through her teen years. With great clean lines it’s easy to swap out the hardware or refinish it to give it a new look. Still loving the hardware and color, I simply removed the changing table and swapped out her wall decal to give the wall a refresh and more functionality.

Transitioning an interior should be fun and it doesn’t mean starting over. Updating a few key focal points refreshes the room. Since changing her bedroom she spends more time alone in it entertaining herself and has taken ownership over the space.

zeldas-room_the-land-of-nod-7

Corri McFadden is the Owner/Founder of eDrop-Off luxury consignment and creator of Glitter and Bubbles, a modern-day moms guide for those looking for inspiration through fashion, décor and food.  The site was launched in honor of her daughter and muse, Zelda and gives daily doses of stylish “must haves”, easy recipes and unique décor that are suited to inspire even the busiest of Moms!

Free Printable Coloring Page: Doodles

October 17, 2016

Nod Fun Pages designed by Michelle Romo

Sometimes you just need to doodle. Which is where our free printable coloring page come in.

Download the doodle coloring page and share a pic of your little one with the finished product on Instagram (use hashtag #landofnod) or our Facebook page. We may feature your child’s masterpiece!

Free Printable Coloring Page: Doodles

Looking for some more crafty inspiration?

Michelle Romo is our newest Nod illustrator, she’s a self-taught illustrator and designer fueled by cookies and naps. Her influences include Mid-Century, Japanese and Scandinavian design, along with pretty much anything cute. When she isn’t working she spends her time eating good food, hugging her friends, playing video games and crafting.