Close

Blog

Bringing the Outdoors in with Camp Wandawega for Nod

May 9, 2016

Post by Danielle Kurtz, Creative Director at The Land of Nod 

Bringing the Outdoors in with Camp Wandawega for Nod

We here at Nod have had a long-standing love affair with an idyllic summer camp in a small town in southeastern Wisconsin. It started with a photo shoot there several years back. Which lead to a product collaboration. And, then a beautiful parent-child event called The Nod Family Makerie. We simply can’t get enough of this camp that transports us back to childhood, away from technology and amenities of any sort. Back to catching frogs in a pond, roasting marshmallows on a campfire and just spending quiet time with family in nature. And, if that’s not enough to make you fall in love with Camp Wandawega, you should read the history of the camp…to say it has a storied past is an understatement.

Bringing the Outdoors in with Camp Wandawega for Nod

Given this slight obsession, it should come as no surprise that we’ve continued to partner with the folks up at Camp to bring new products into the collection. The most recent addition is our Explorer Playhouse based off of the vintage scout tents that sit atop a hill at Wandawega.

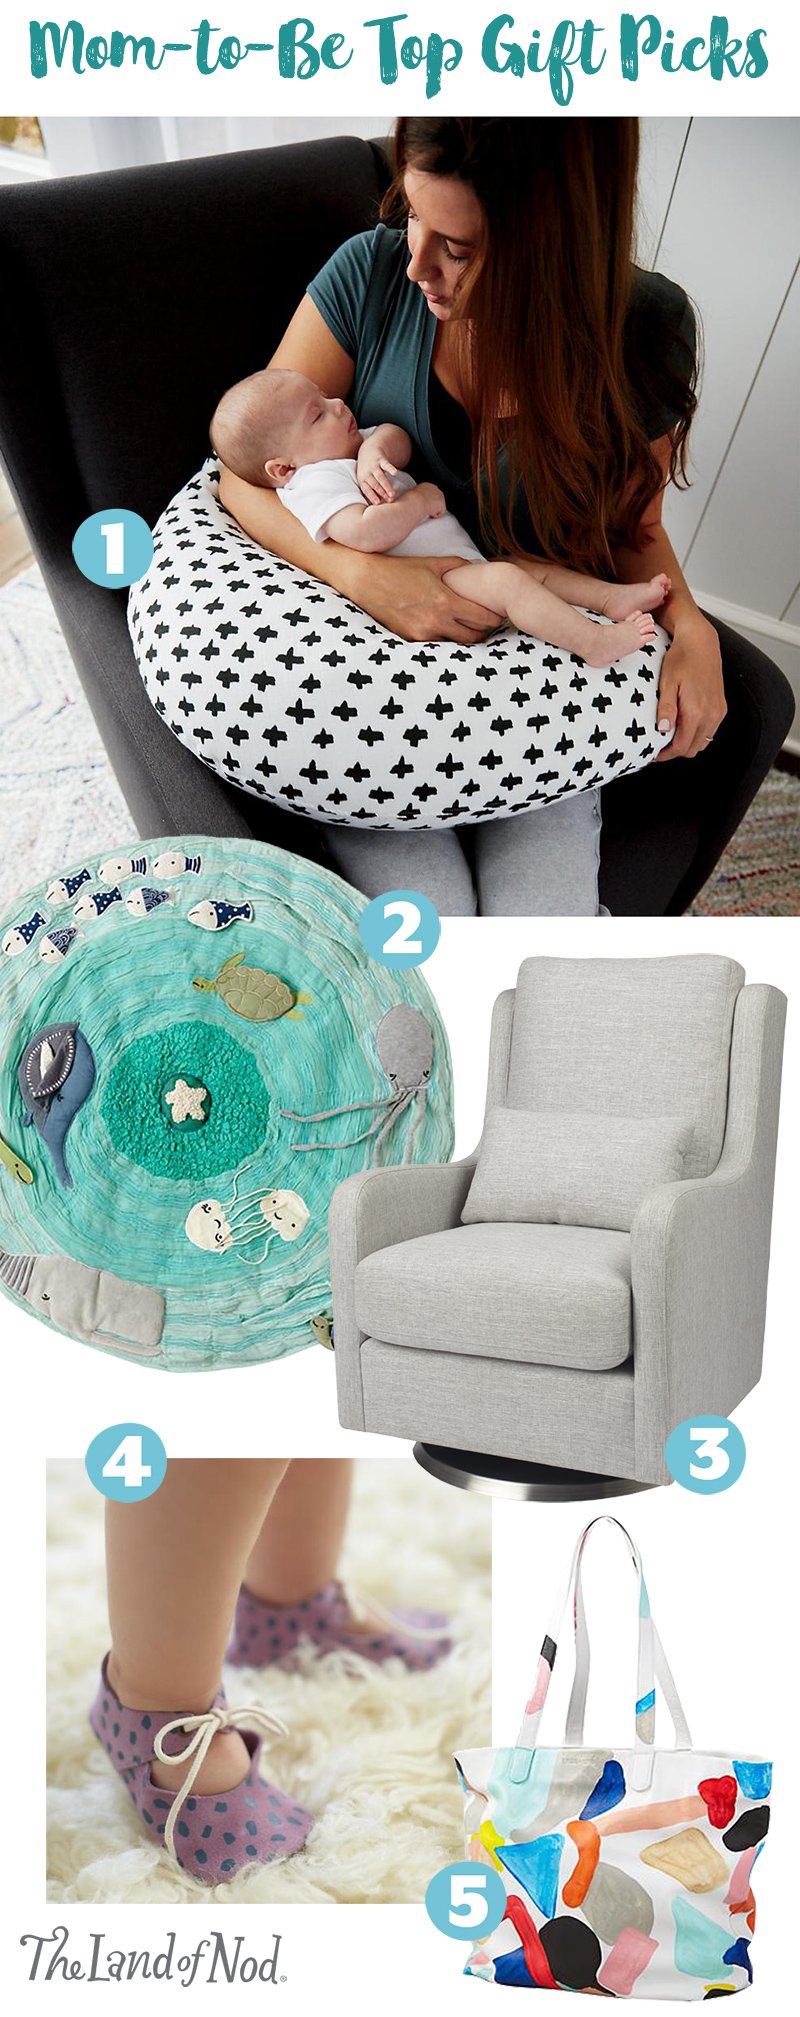
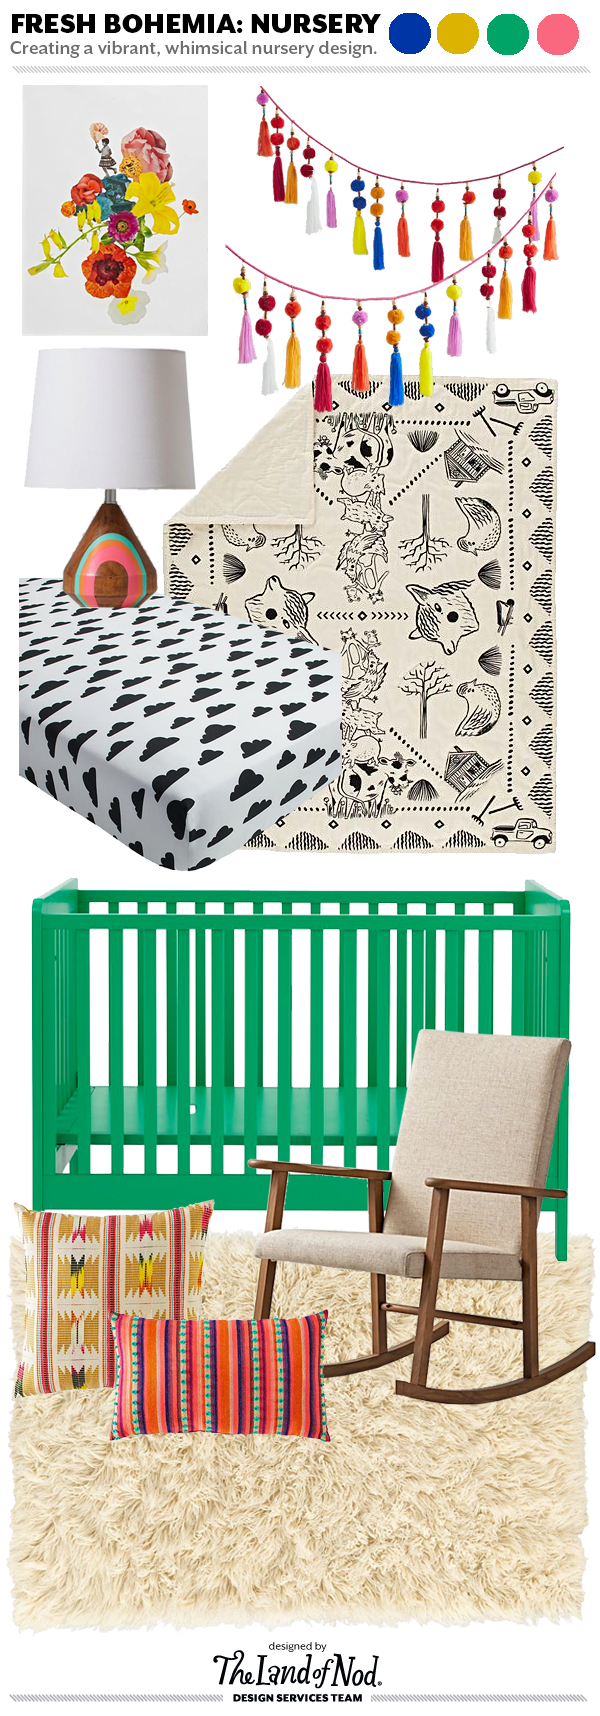
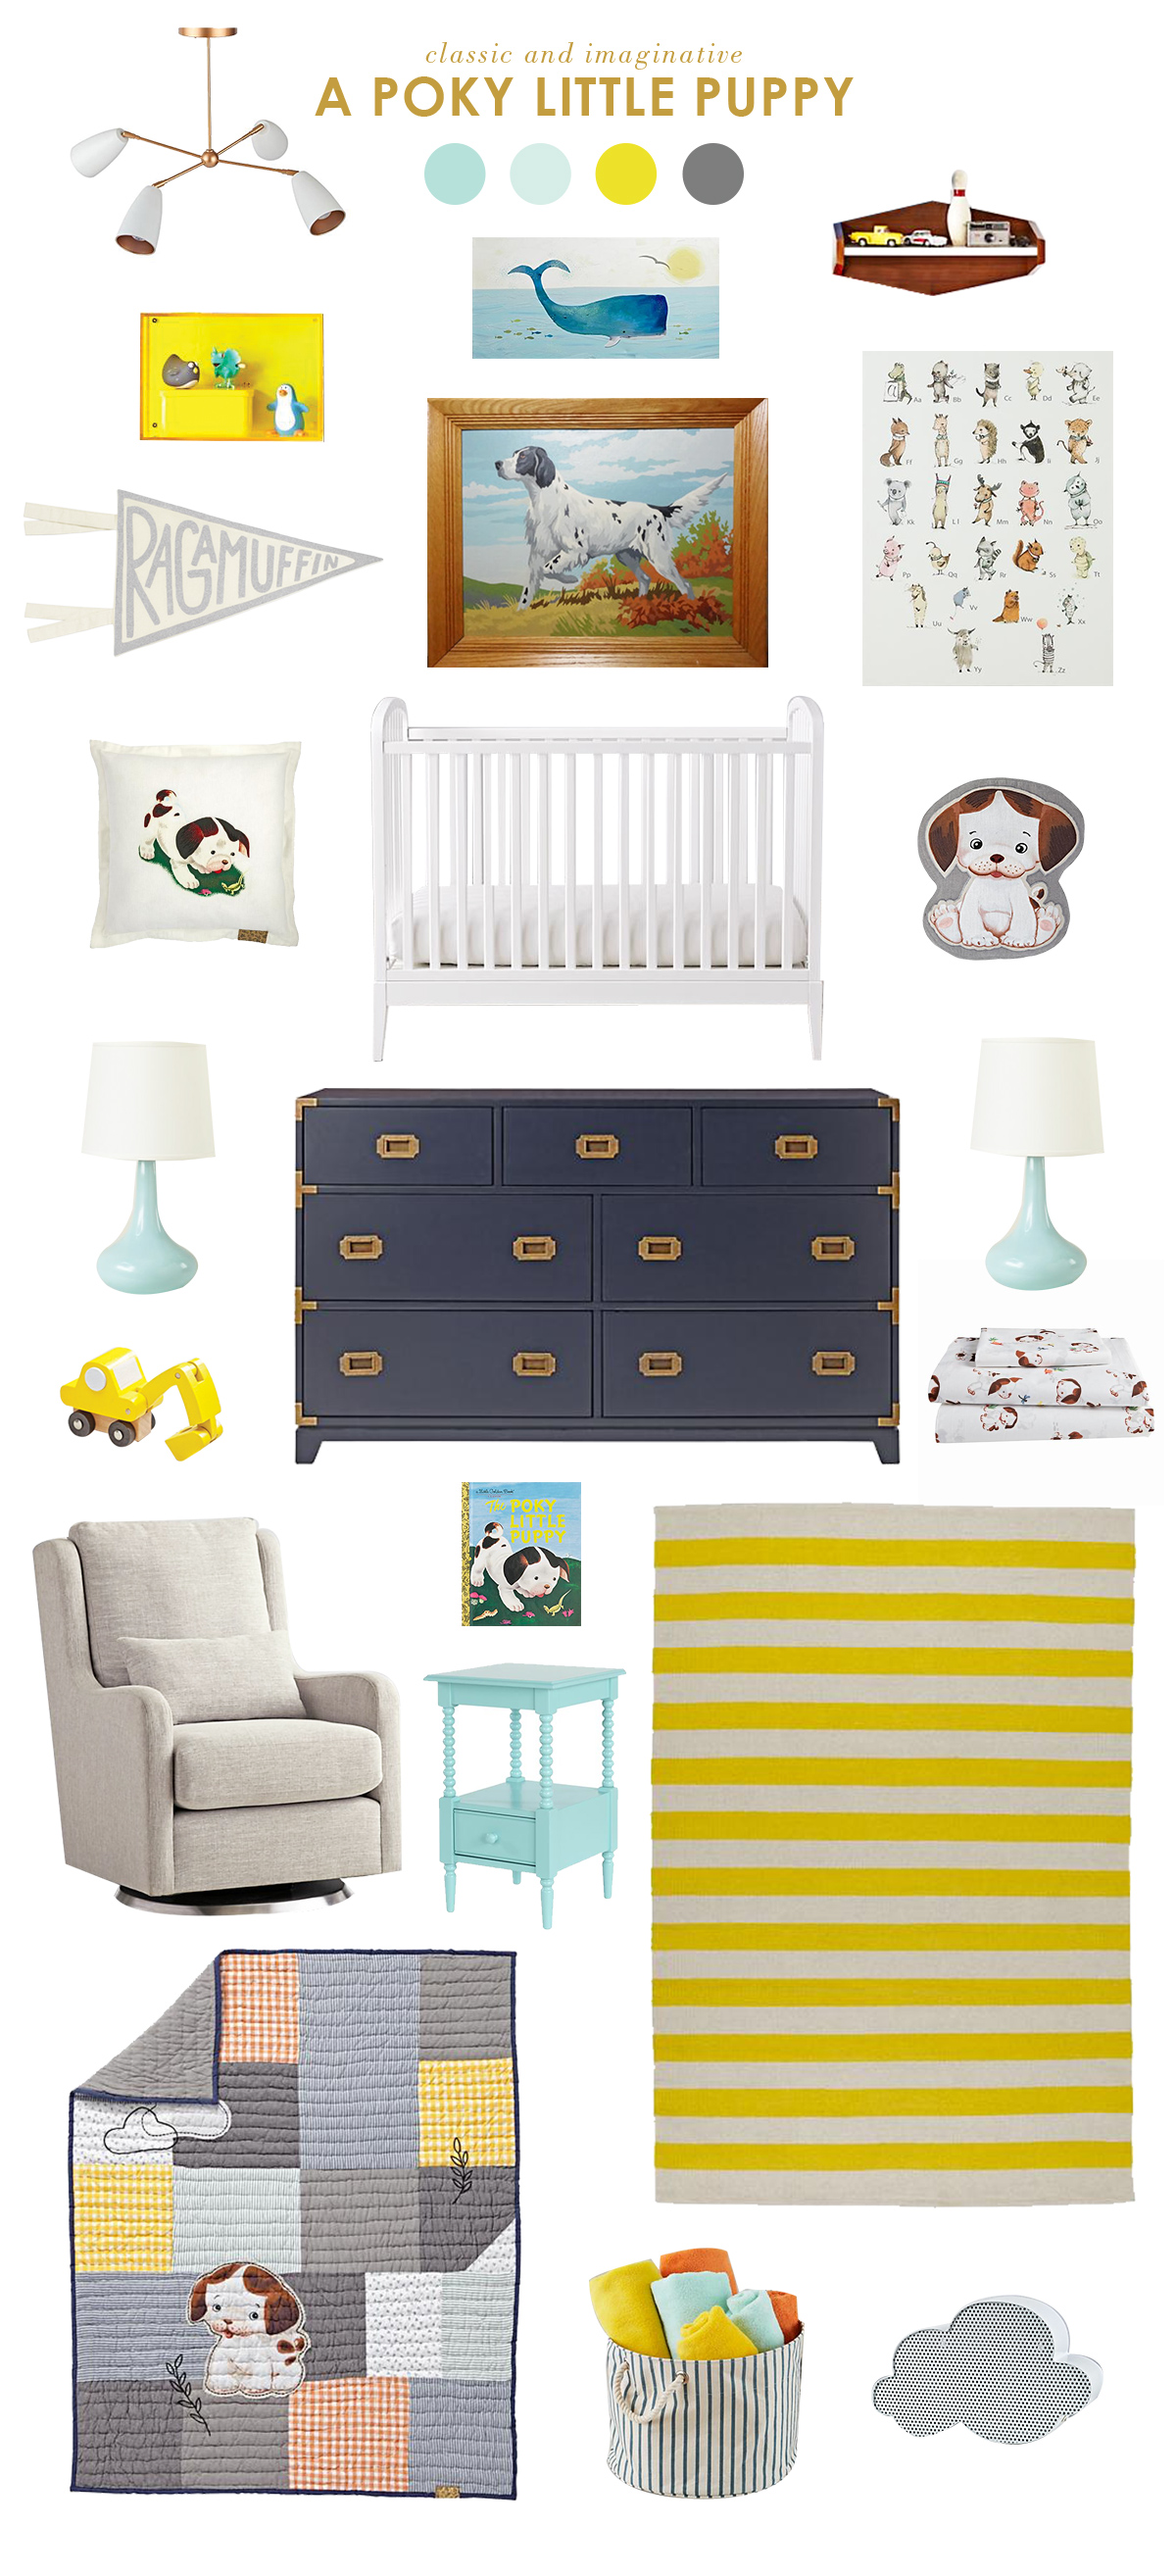
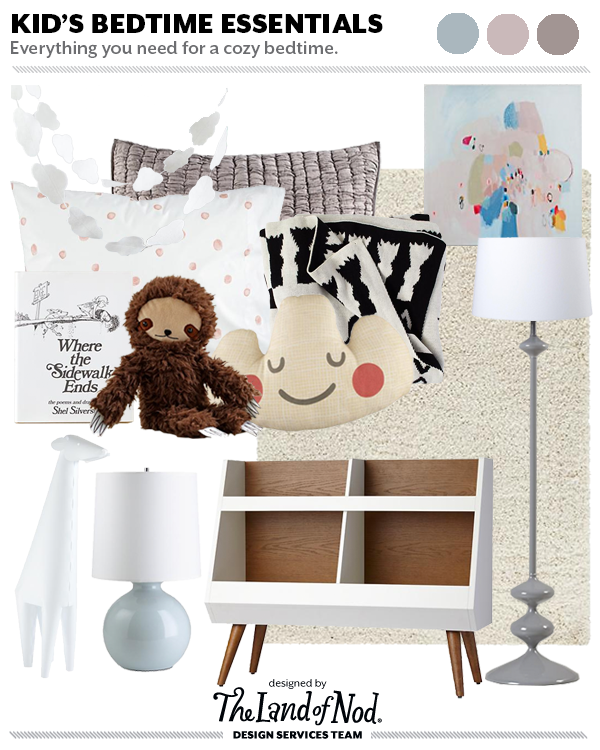
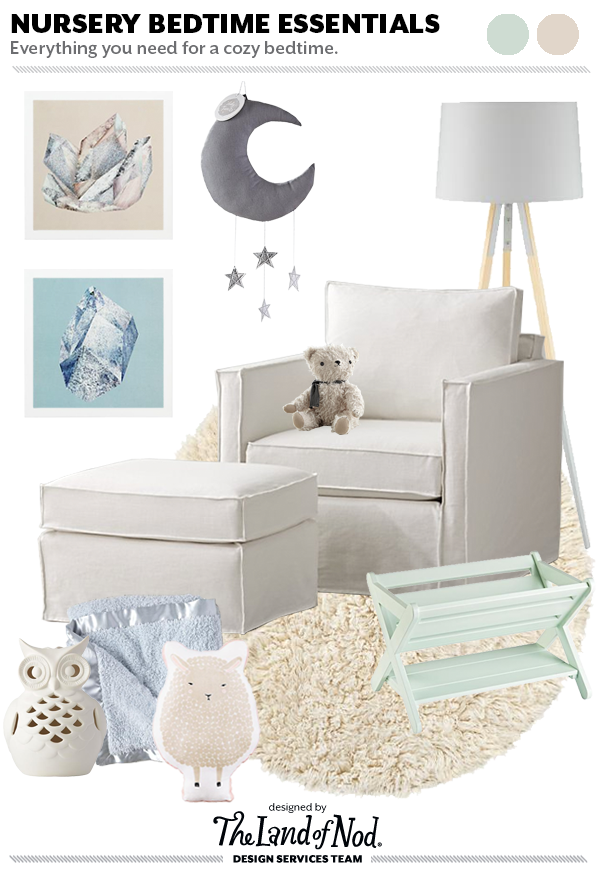
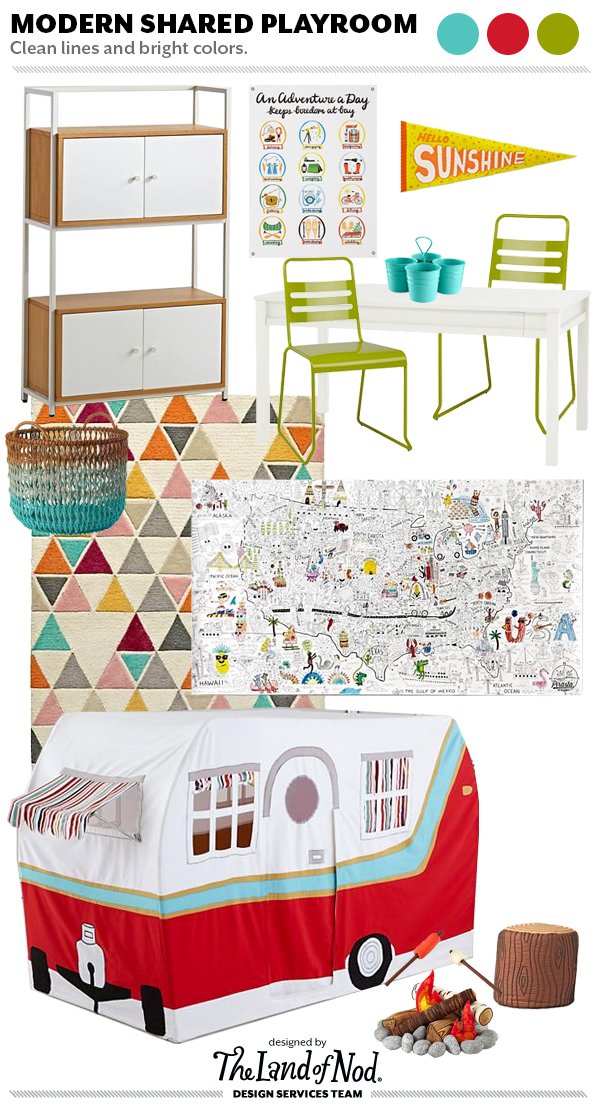
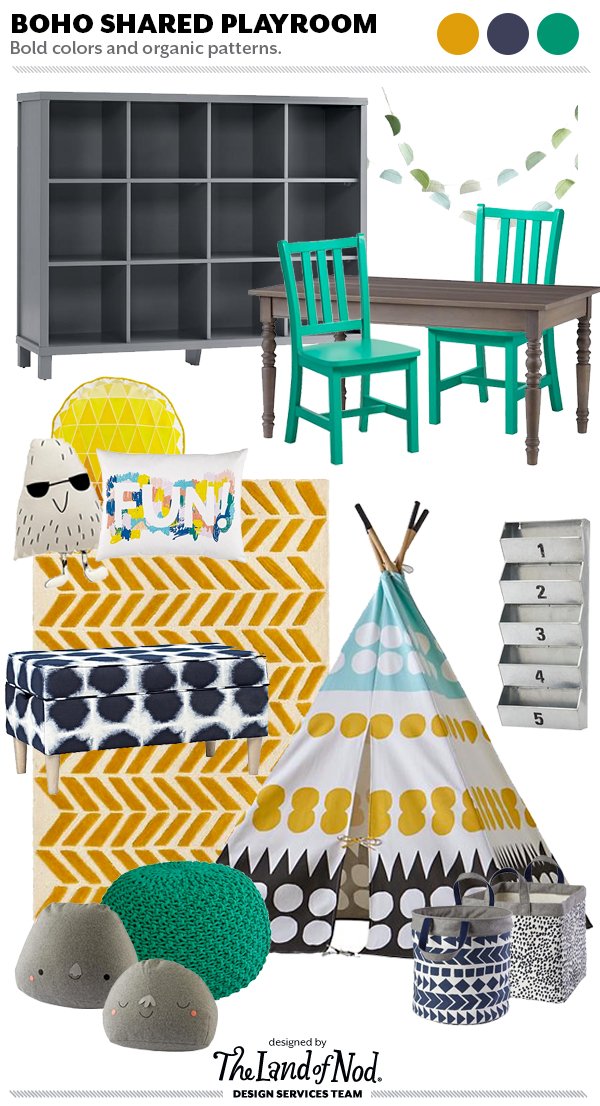
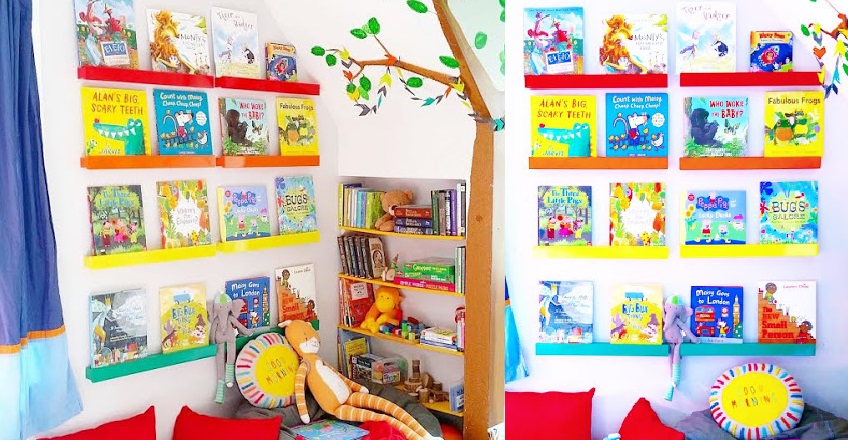
Living in Chicago, where the weather is barely tolerable for the greater part of the year, I just love the idea of creating a year-round camping experience indoors for me and my kids. So, I’ve put together a quick moodboard of camping essentials. Hope it inspires you and your kids to share a few camp stories, get a bit crafty, eat marshmallows and just generally slow down for a moment and enjoy all the good vibes of summer camp.

Bringing the Outdoors in with Camp Wandawega for Nod

Danielle is the Creative Director at Nod and an over-protective mother of two. She’s also completely obsessed with Pinterest, Twitter, Instagram and her Kindle, but not necessarily in that order. Danielle loves to craft, sew and crochet. Her current craft of choice is weaving tiny wall tapestries. 

Shared Space Playroom Design -Tips & Essentials

May 6, 2016

Post by Stephanie, Home Stylist from The Land of Nod’s Design Services Team

Designing a shared playroom that fits the personality and interests of each of your kiddos may seem like an overwhelming task, not to mention finding a way to corral an ever-expanding collection of toys and books. To help you create a personal and stylish space for your kiddos, here is a breakdown of a few go-to tips and essentials.

For a boy-girl shared playroom, stick to a color palette that feels gender-neutral. This doesn’t mean you have to shy away from color, just try to avoid anything that feels skewed toward a particular gender. I like the combination of orange, turquoise, and yellow found in our Totally Triangular and XO rugs.

Ample storage options are a must. More kids means more stuff. Stay organized and clutter-free with a variety of storage bins, bookcases, and toy boxes.

Shared Space Playroom Design -Tips & Essentials


Create different “activity zones” in the space. If boy kiddo wants to craft and girl kiddo wants to read, having separate areas for them to do their own thing will not only help keep the room organized, but will also allow them to share the space even when they’re not playing together. I like to use rugs when possible to demarcate zone “boundaries”. The bright Jellybean rug works perfectly under a play table to create a “craft zone”, while a fluffy flokati rug is a great choice for a cozy reading nook.

Happy Styling!

Post by Stephanie, Home Stylist from The Land of Nod’s Design Services Team. Our Design Services team offers free one-on-one design advice, mood boards and space planning. You have a room to decorate? They’d love to hear from you. Visit The Land of Nod’s Design Services page to get started today.

DIY Puppet Show Theater Sign

May 5, 2016

Post by Colleen of Lemon Thistle

puppet theatre nod-16031610

This DIY is so simple, it’s the perfect afternoon craft to take an Off-Broadway Puppet Theater to a personalized dream for kiddos. We have had so much fun putting on shows with this hanging puppet theater since we received it, I’m thrilled that my kids are learning to explore their imaginations with the shows and I love even more that I can pack it all up before dinner time.

To make a personalized sign, it’s pretty simple but there’s some tips I have to make it look fantastic without much effort.

puppet theatre nod-1603141

Here’s what you’ll need to make your own:

  • Stiff Felt (or stiffen your own using starch)
  • Fabric Scissors
  • Fabric Pencil (wax pencil, I used white)
  • Contrasting paint
  • Fine point squeeze bottle
  • Coordinating thread and needle to attach

Alright, my biggest tip is to get high quality felt. This stuff is thick and scratchy and doesn’t flop around. It’s perfect for a sign and durable too. I found mine by the meter (or partial) at my local fabric store.

puppet theatre nod-1603142

  1. Use your quilters pencil to sketch out a banner. To do this I start by sketching a rectangle, then sketch the ends afterwards.puppet theatre nod-1603143
  2. Cut out your shape with fabric scissors to get clean edges, then flip it over.puppet theatre nod-1603145puppet theatre nod-1603146
  3. Time to start writing! I chose to freehand the wording after practicing on scrap paper, but you could choose to use your fabric pencil to make an outline first. The BEST way that I’ve found to paint on felt is by using a fine tip squeeze bottle. It makes such a nice clean line compared to using a paint brush. The paint brush pulls up fibers from the felt and makes it fuzzy and messy looking. Trust me on this one- and you can get them from the dollar store in the craft section.puppet theatre nod-1603167
  4. Attach it to your puppet theater using a couple stitches in each corner then get ready for play! We’ve left some hooks up in our hallway to make for easy set up and tear down and my kids think it’s the best thing that everyone will sit and watch them while they perform! They don’t totally understand that they’re supposed to hide and only show the puppets… but it’s coming, I’m sure! In the meantime- it lets me drink my coffee without being jumped on and I consider that a big WIN.

puppet theatre nod-16031612

Colleen is a wife, Mama to twins with one on the way, and the DIY and lifestyle blogger behind Lemon Thistle where she shares printable art and hands on tutorials for DIY home decor, parties and gifts. Colleen believes you can have a beautiful life, home, and party without spending a lot- we’re keeping it real on a budget so everyone can join in on the fun. 

How To Create A Colorful Reading Nook For Kids

May 4, 2016

Post by Nicki of Little Island Studios

How To Create A Colorful Reading Nook For Kids

Summer is nearly here and, to me, color is an essential part of this time of year. Color always makes me happy, but it seems especially happy in warmer temperatures. That’s why when I designed a reading nook for my son, I went out of my way to make it as vibrant and cheerful as possible to bring that warmth indoors.

I have been creating book nooks and children’s play spaces for kiddos for years and no matter what your style preference, there are some basic necessities you’ll want to include in your space. Here are some must-haves for a colorful reading nook that will inspire even the pickiest of readers! What kid wouldn’t want a spectacular reading space – just for them?
How To Create A Colorful Reading Nook For Kids

Picture Books – Is there anything more colorful and creative than picture books? Even if your little is onto chapter books and becoming an adult before your eyes, throw in some picture books for light reading. Some of my son’s favorites are: Over The Hills and Far Away by Elizabeth Hammill, a new version of The Three Little Pigs by Nosy Crow, and Where’s The Elephant? by Barroux.

How To Create A Colorful Reading Nook For Kids

Rainbow Book Ledges – Books make all the difference and books that are front facing, as opposed to just title out on a regular book shelf, make all the difference.  We absolutely love The Land of Nod’s Color Bar Ledges and they definitely make the room pop, even before the books are up.

How To Create A Colorful Reading Nook For Kids

Soft Seating – A large bean bag, abundant pillows and a kid-sized chair are all great ways to entice your little one to sit and read.  When my first was young and we were low on money, I was even known to use a snow blow-up tube! Let’s just say he’s very happy with my upgraded soft seating selection.

Lighting – When picking your reading space for kids, choose a spot with great natural lighting.  If natural lighting is not a option for your space, make sure you add some bright sources.  Overhead lights usually do not light well enough for reading so add in a lamp, always making sure to place it in a safe area, away from hazards.

How To Create A Colorful Reading Nook For Kids

Extras – Don’t forget about what your kiddo may want. Get the kids involved and let them choose a special reading lovie, blanket or other reading essentials!  If kids are involved in the process of creating their space, they are more likely to use it often.

Nicki is the eco-conscious mom blogger at Little Island Studios where she writes about family travel, fun, healthy living, eating, yoga and playroom designing –  everything for MOMS! 

DIY Finger Knit Octopus Kids Craft

May 2, 2016

Post by MJ or Pars Caeli

DIY Finger Knit Octopus Kids Craft

Hi friends! This is MJ from Pars Caeli, and I’m delighted to share a craze that has hit our house hard. Thanks to an awesome book by my friend, Anne Weil, called Knitting Without Needles, my 11-year old daughter spent all winter and now a lot of spring knitting. I’m not a knitter, and I find working with knitting needles more cumbersome than I’d like so I assumed that knitting would be too much for my daughter. However, finger knitting is approachable, quick, and offers a ton of great project ideas like the one I want to show you today!

DIY Finger Knit Octopus Kids Craft
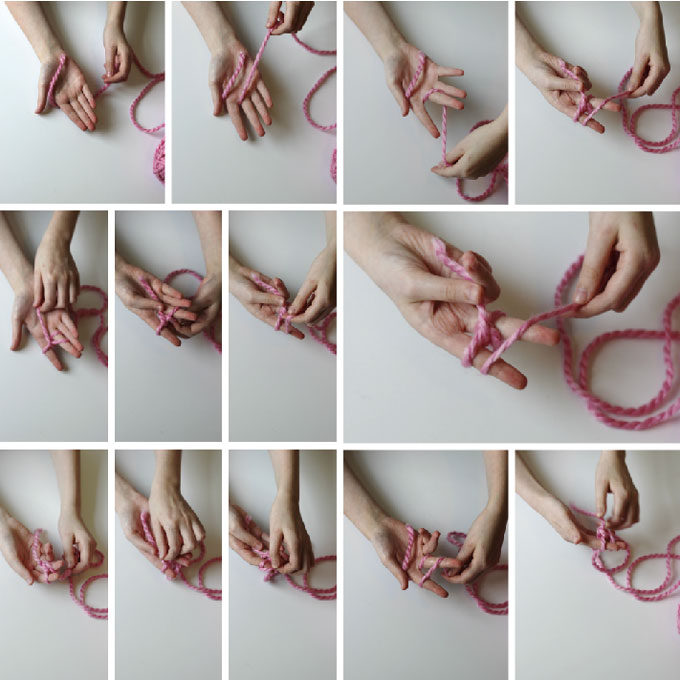
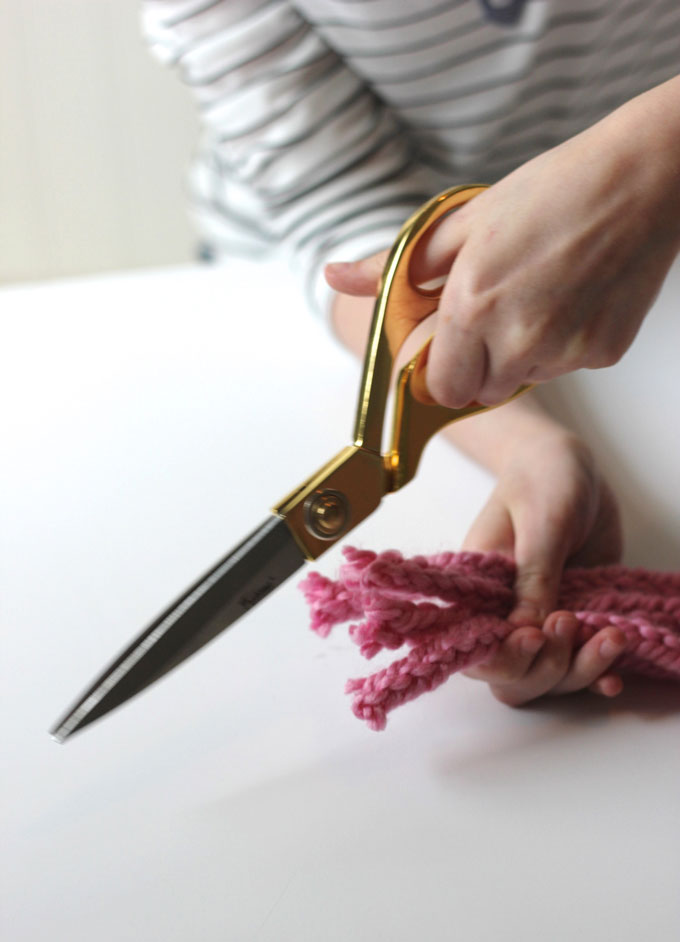
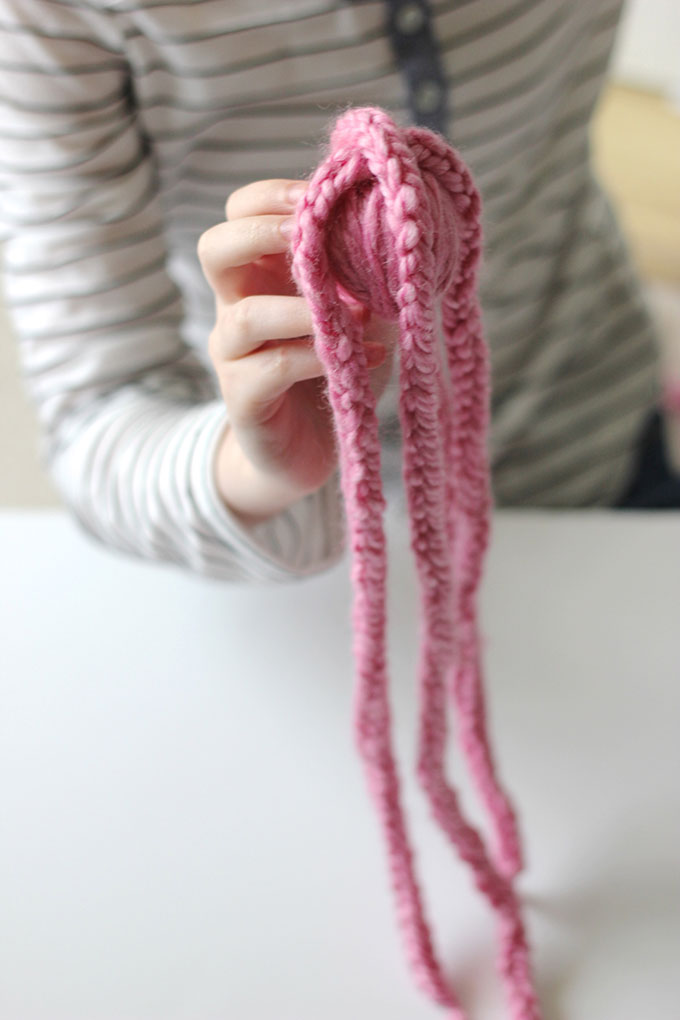
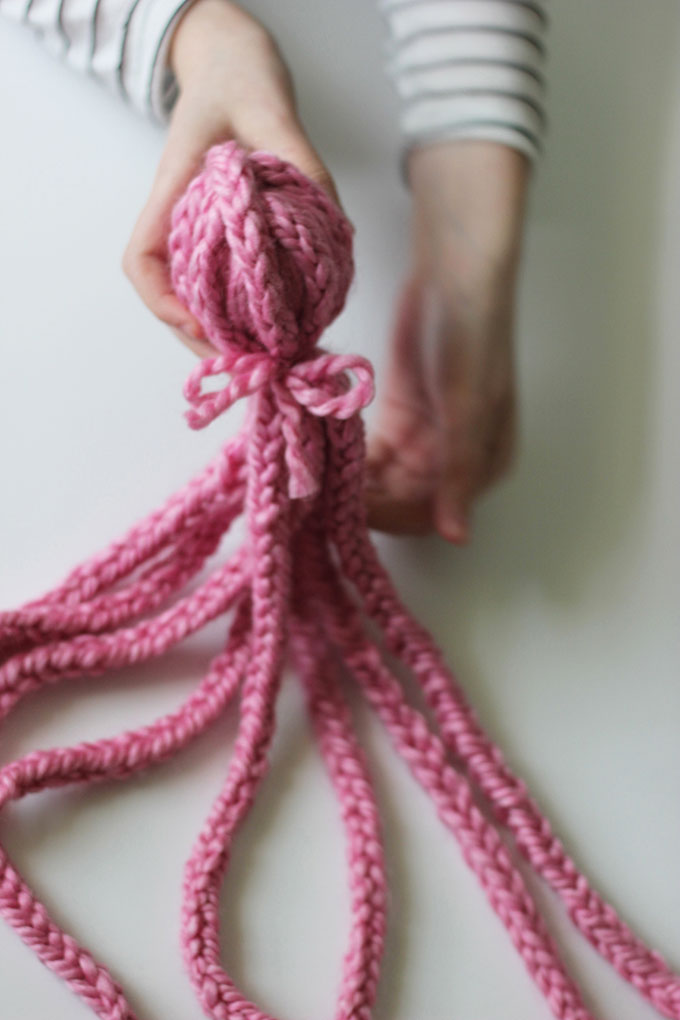
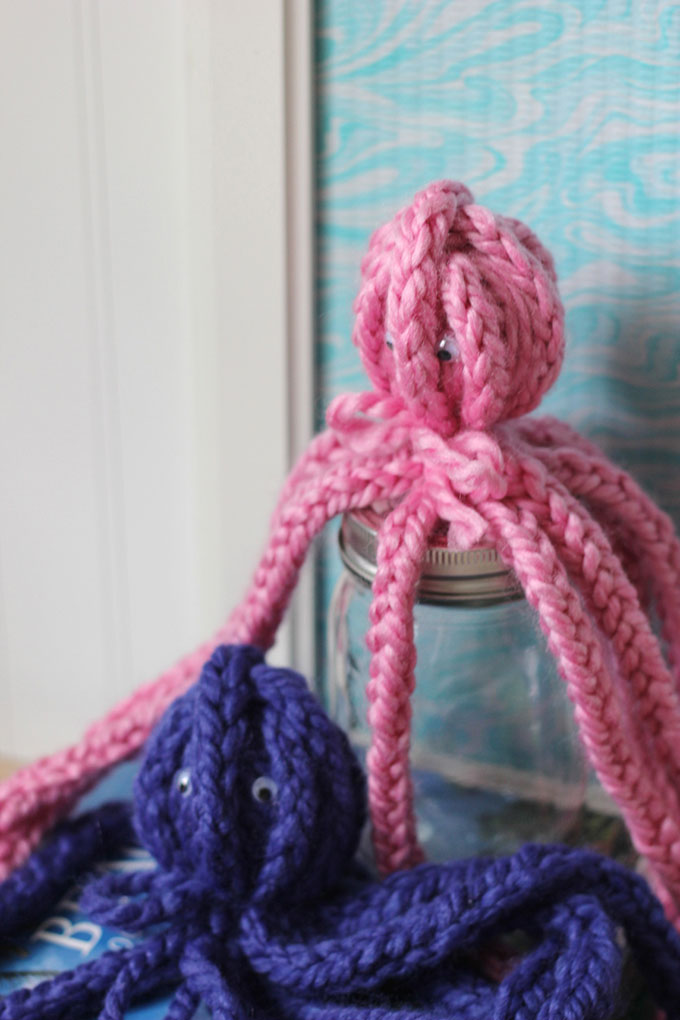
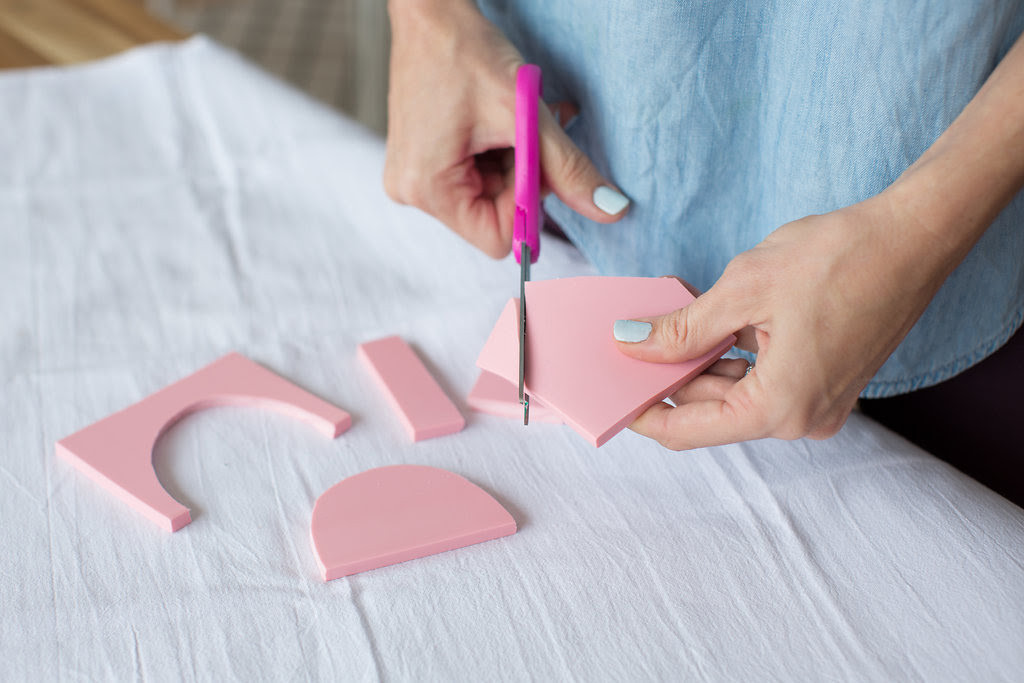
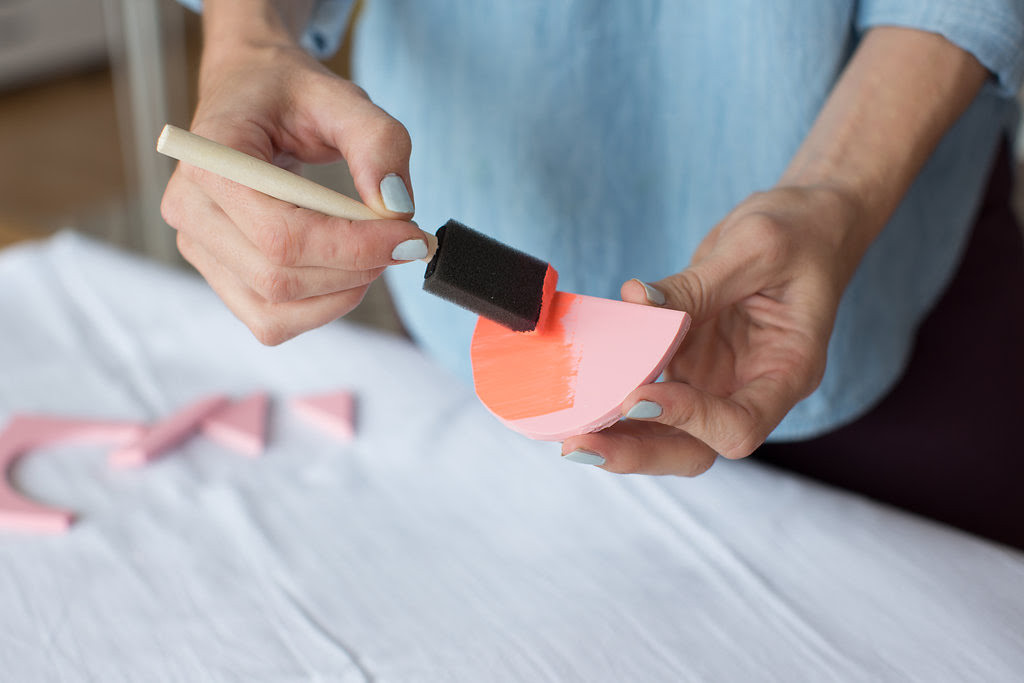
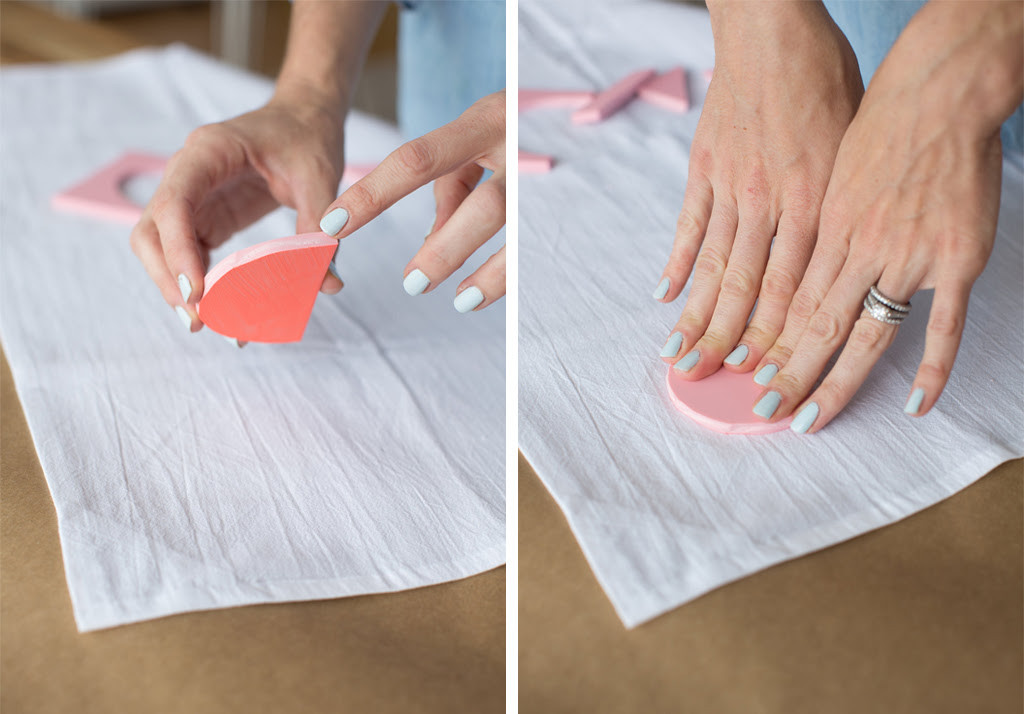
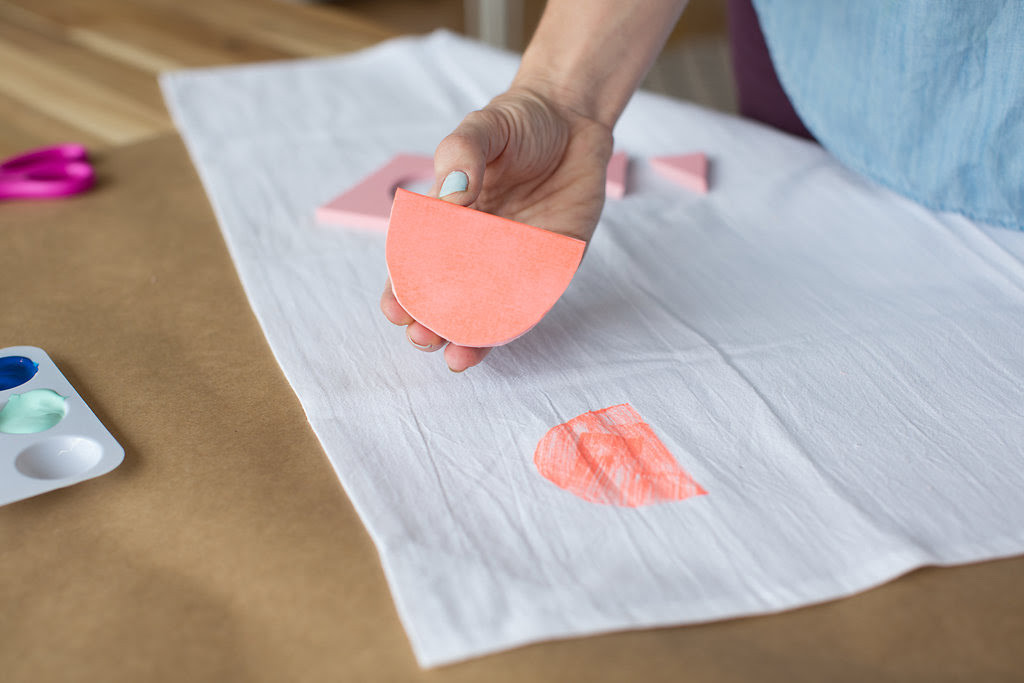
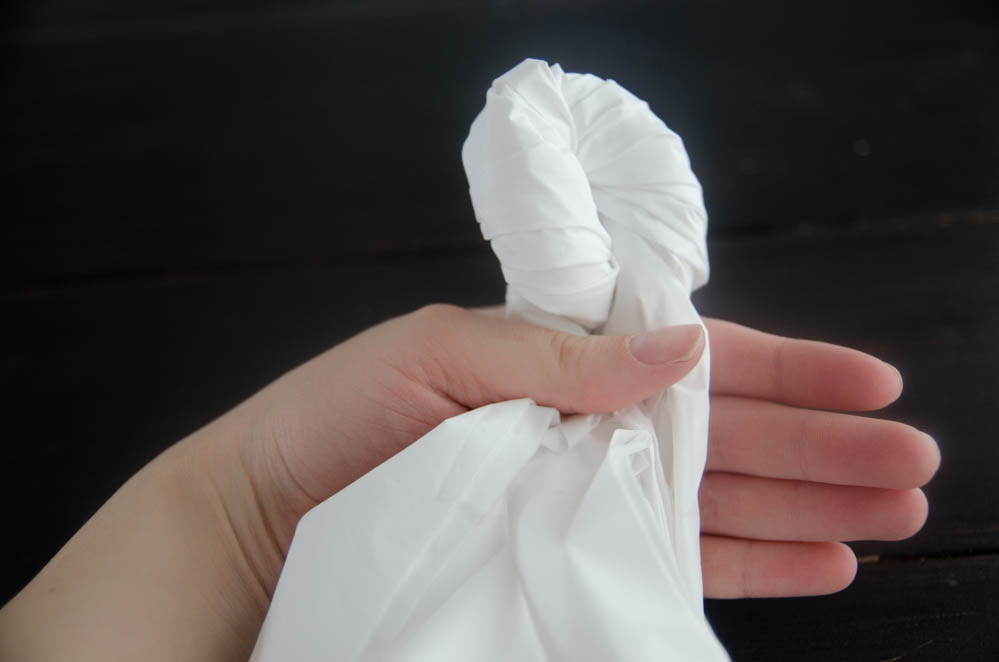
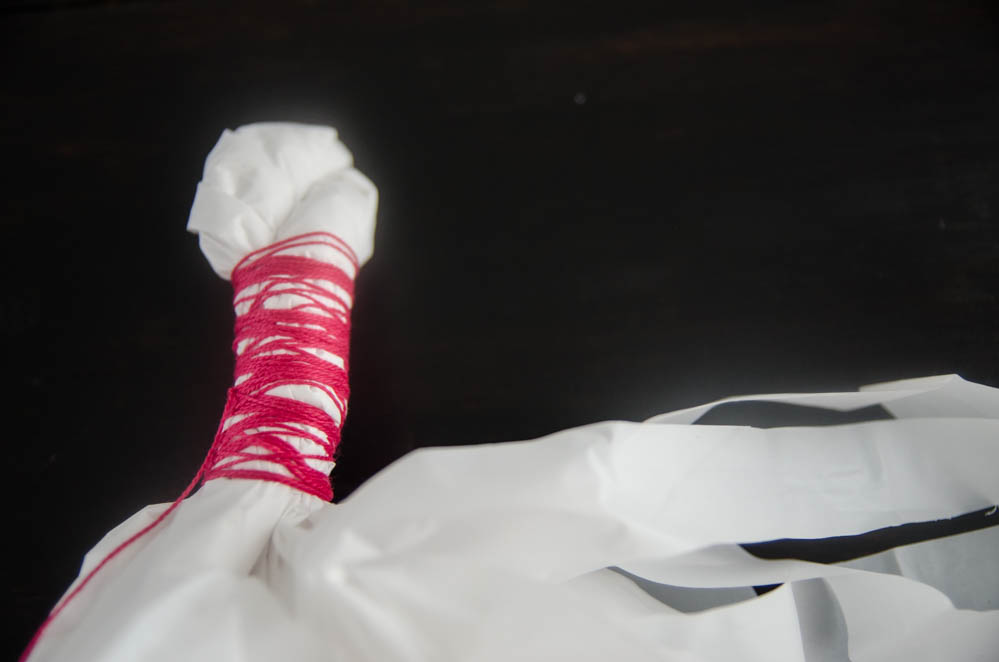
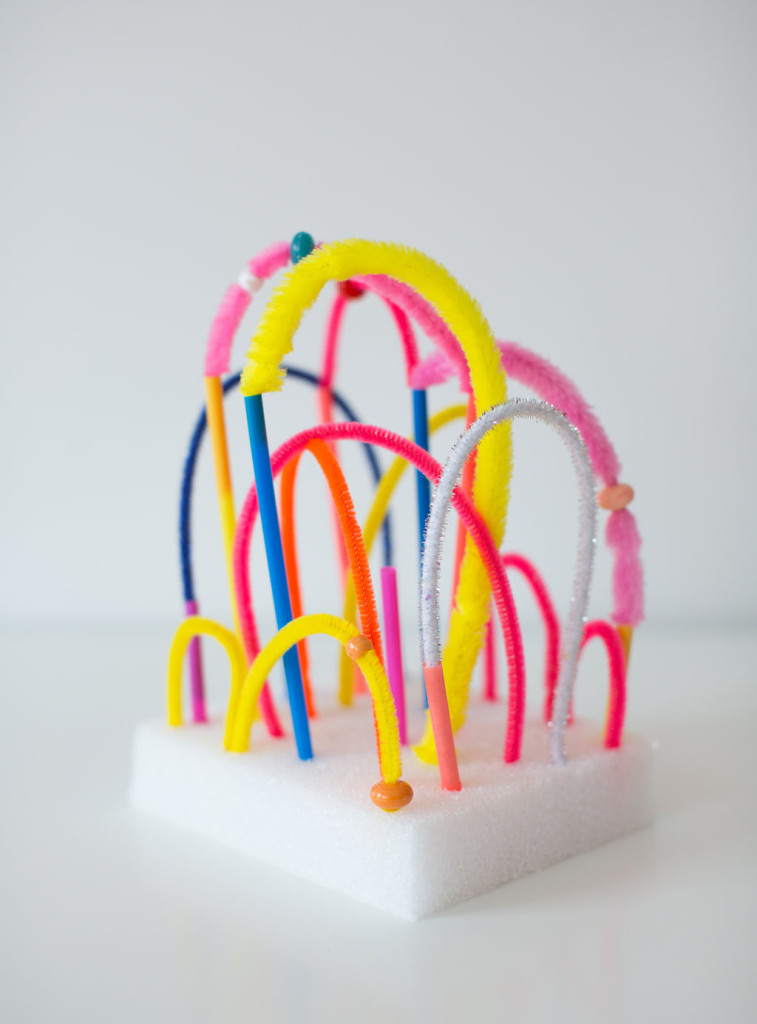
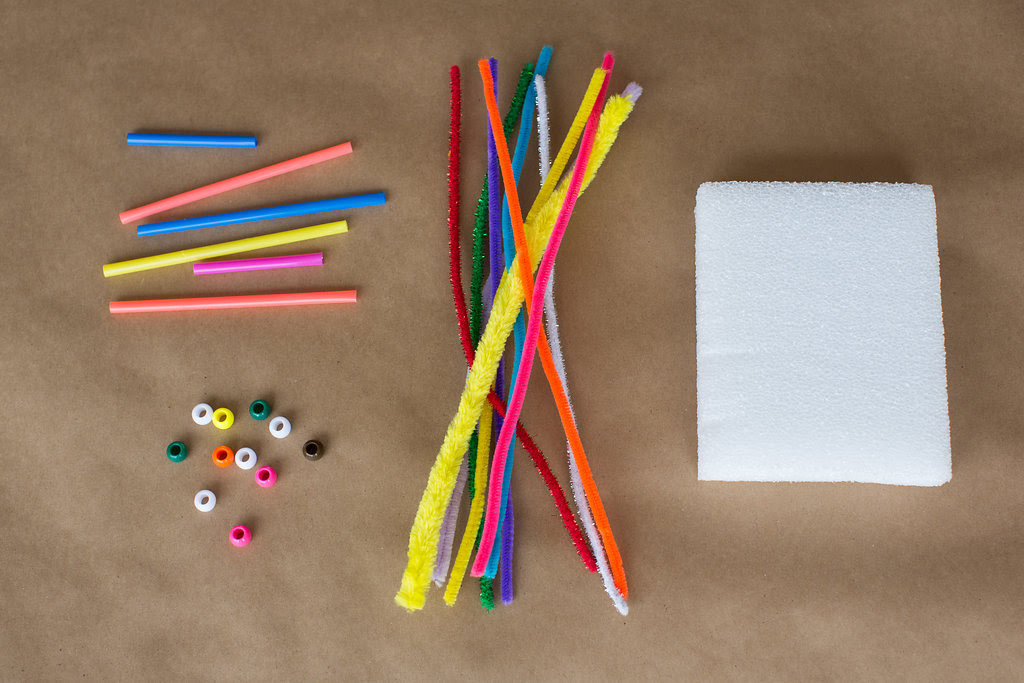
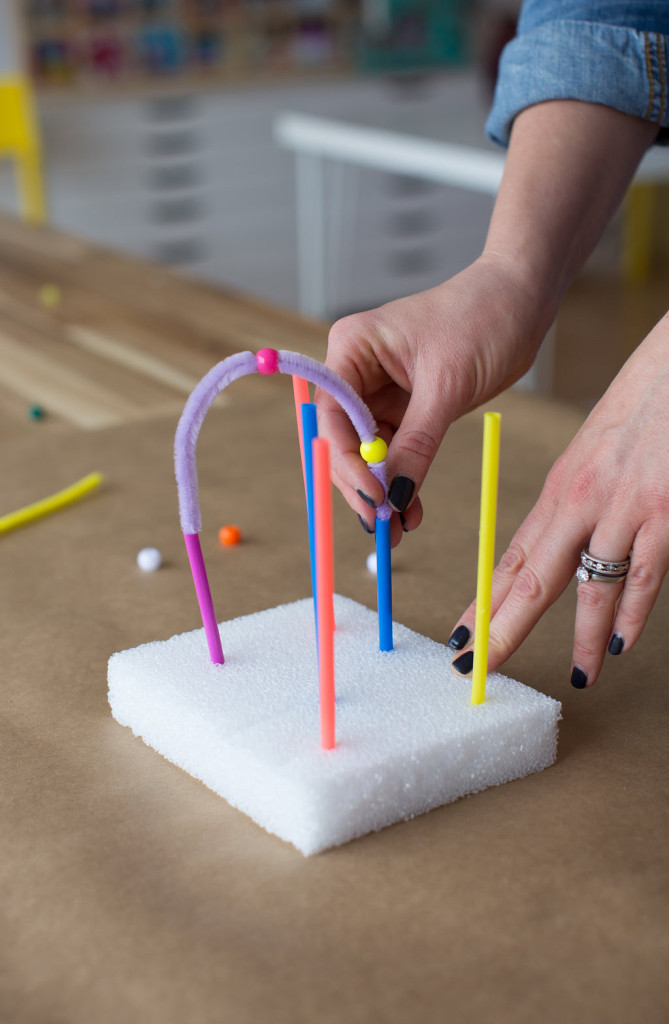
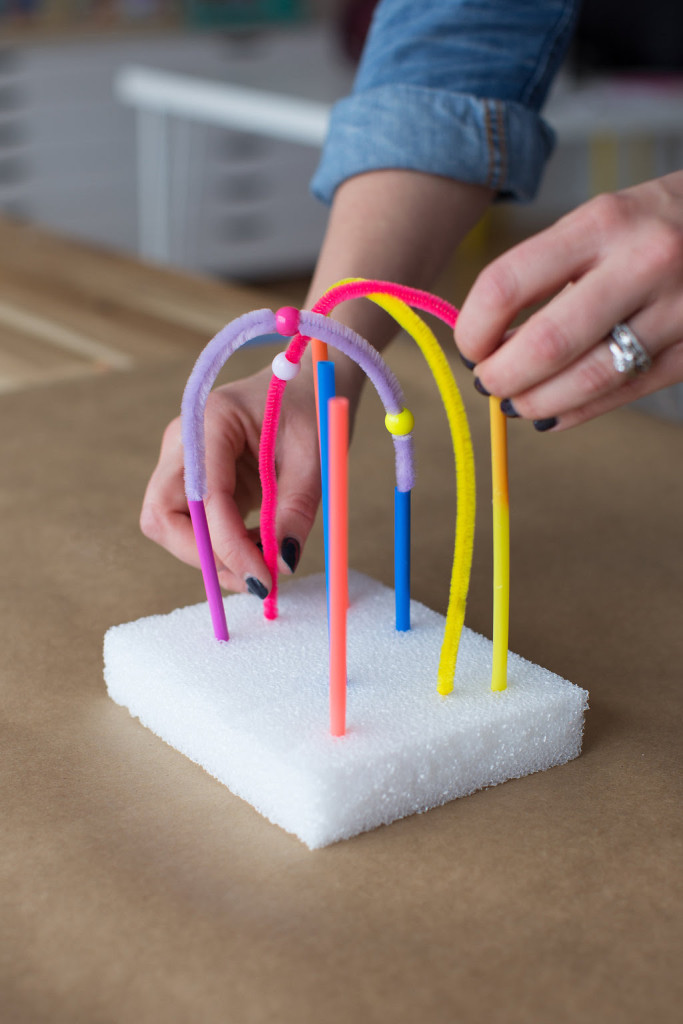
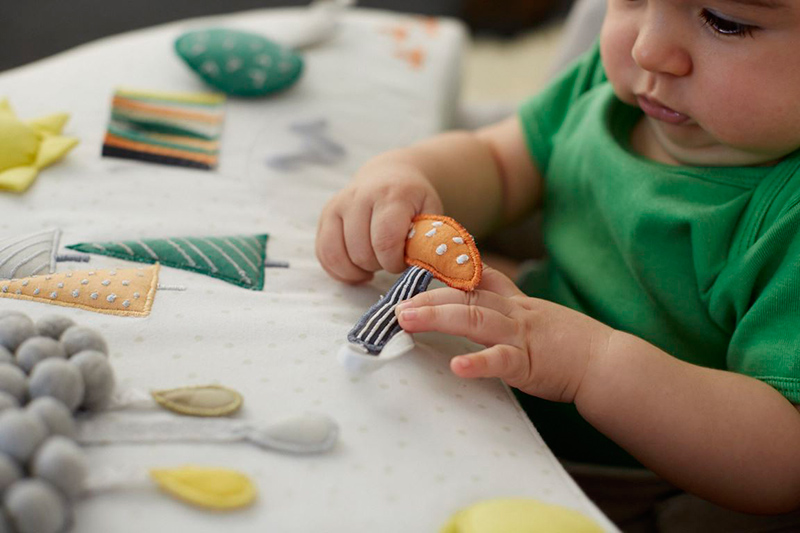
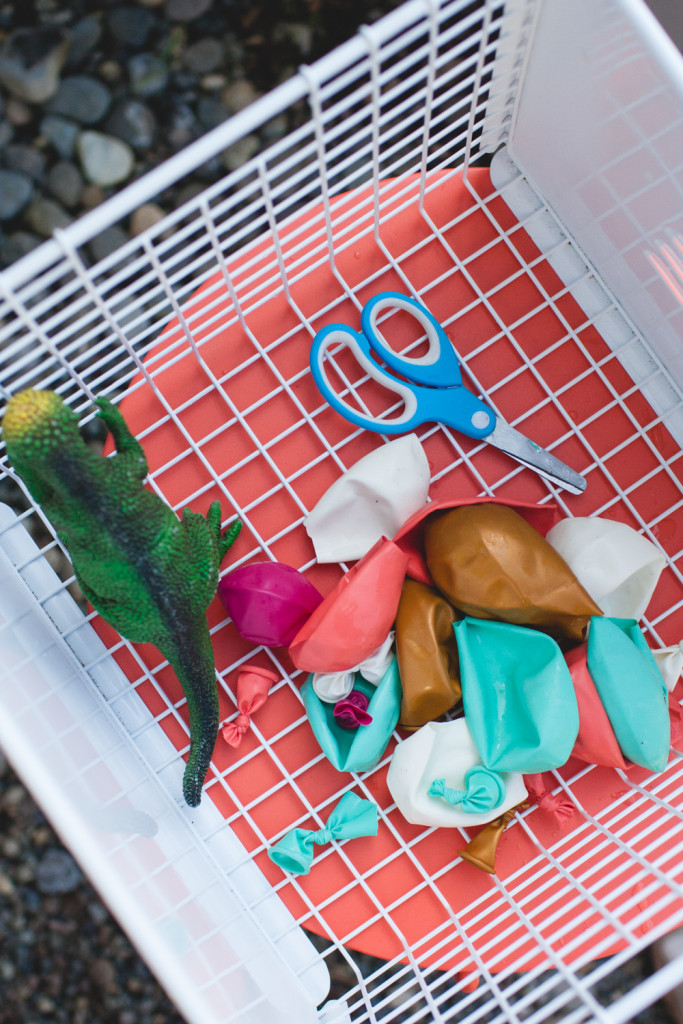
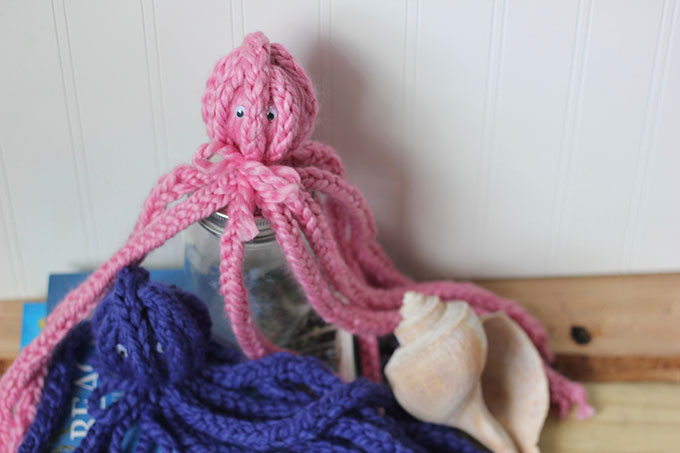
To make this adorable sea creatures, you’ll need:

  • 38 yds of super bulky yarn (number 6 on package)
  • Scissors
  • Buttons or googly eyes
  • Your fingers

DIY Finger Knit Octopus Kids Craft

  1. If you haven’t tried finger knitting, the concepts are similar to traditional knitting, with your fingers acting as the needles. In this project, we used a two-finger knitting process. You can follow our sequence above or check out this simple video to see it in action. Finger knit a
    strand until it’s about 2.5 yards long.

    DIY Finger Knit Octopus Kids Craft
  2. Cut the very long strand into four equal pieces. Pull off the small pieces that remain at the ends and tie off the remaining ends.
  3. With the remaining yarn, make a ball for the interior of the octupus head. Depending on the final size you’d like for your creature, create the ball the approximate size you’d like. We made ours about 3 inches in diameter.DIY Finger Knit Octopus Kids Craft
  4. Carefully place each of the four pieces in overlapping and crisscrossed pattern around the ball so that an equal amount of each strand flows down each side of the ball.DIY Finger Knit Octopus Kids Craft
  5. Secure all of the strands with another piece of yarn at the base of the ball.
  6. Add eyes. We choose googly but buttons are a fun addition, too!

Your octopus tentacles can be as long (ours are really generous) or short (cute for a baby octopus look) as you’d like. You can also choose a ribbon instead of yarn to tie the strands at the base of the head for a bow tie look!

DIY Finger Knit Octopus Kids Craft

Give finger knitting a try; there a ton of variations and possibilities! And you likely have everything you need right at your fingertips. For more great project ideas, check out Knitting with Needles and share your projects in the comments below!

Happy creating! Xoxo, MJ

MJ is a graphic and product designer, wife, and proud momma to three. She founded Pars Caeli (meaning a piece of heaven), a delightful blog and shop, to add more creative to the everyday. MJ worked with our team to bring her lunchbox jokes to life in our product Lunchtime LOL Notes, now available at The Land of Nod to bring on a case of the giggles! 

Mother’s Day Gift Ideas for the Mom-to-Be

April 29, 2016

Post by Danielle Kurtz, Creative Director at The Land of Nod 

Mother’s Day is on the horizon, and it got me thinking about gift ideas for the new moms and moms-to-be in my life. On my first Mother’s Day my son was just a couple weeks old so I was still very much in the haze of new motherhood. And, I definitely had a handful of items that were invaluable in those early days and beyond, in addition to some items that were simply so special and precious to me, that they’re still tucked away in a closet somewhere 9 years later.

So here are some of my favs for the moms-to-be in your life for this Mother’s Day. (And, if you ARE a mom-to-be, consider treating yourself. You’ll learn eventually that taking care of you is just as important as taking care of your bundle of joy…but I know it took me a while to get there!)

Mother's Day Gift Ideas for the Mom-to-Be


  1. Nursing Pillow – Whether you’re breastfeeding or bottle-feeding, a nursing pillow is essential to everyone’s comfort. It helps support your elbow and gives baby somewhere soft to rest. Plus, with a removable cover, it’s easy to clean. I just love this one that was designed by Ashley Goldberg and made by Aden + Anais. It’s chic and simple design works in any nursery, and will look great hanging out on your couch, too.
  2. Baby Play Mat – There will likely be times when you’ll want/need to put your baby down. Whether for tummy time, or just to give your weary arms a break, a play mat is an invaluable toy. Our Be on the Sea Play Mat was designed by Michelle Jewel of Finkelstein Center and aside from featuring the most adorable sea life, it also has tons of features like squeaks, crinkles and mirrors to keep baby entertained.
  3. Upholstered Glider – Obviously this is a big splurge for the nursery, but I’ll tell you that my nursery chair was the most important purchase I made. I literally spent years of my life sitting in that chair rocking my babies to sleep, reading to them, cuddling with them and sometimes even dozing off in the wee hours. So, a comfortable, durable, high quality chair is super important. I love the Milo Glider by Monte not only for its quality and comfort, but also because it’s so beautifully designed that it can easily transition into the living room once baby outgrows the nursery.
  4. Baby ShoesOkay, let’s face it, babies can’t walk so they don’t need shoes. But, they need shoes! I mean, honestly, is there anything more adorable than a pair of sweet little baby shoes. All the tiny shoes my kiddos wore are still some of my favorite mementos from back in the day. Trust me, someday you’ll look back at those tiny shoes and wonder how your 9 year old was ever that small, and how you got here so fast. These Zuzii booties are crafted of the softest Italian suede and were designed just for us by Dusen Dusen. A beautiful keepsake of a moment that’s frankly too fleeting.
  5. Un-Diaper BagI’m a total handbag addict. So, I was super excited that becoming a mom meant an excuse to get even more bags. I think I owned at least 10 diaper bags, most of which weren’t even all actually diaper bags. Just ‘cause I was becoming a mom didn’t mean I was going to ditch my fab bags for something with duckies on it. I LOVE this Baggu for so many reasons. First, this one is handpainted by STATE so it’s truly a work of art. Second, it looks like a regular handbag, but has all the functionality of a diaper bag, with plenty of compartment, and it’s fully lined for easy cleanup.

So, Happy Mother’s Day to all the moms out there! Hope you enjoy your day, I’ll be spending mine digging in the dirt in my garden.

Danielle is the Creative Director at Nod and an over-protective mother of two. She’s also completely obsessed with Pinterest, Twitter, Instagram and her Kindle, but not necessarily in that order. Danielle loves to craft, sew and crochet. Her current craft of choice is weaving tiny wall tapestries.

Design Spotlight: Outer Space Themed Nursery

April 28, 2016

Post by Stephanie, Home Stylist from The Land of Nod’s Design Services Team

Having a baby is an out-of-this-world experience, so why not style your nursery to match? Whether you’re looking to make a bold statement or just add a few subtle touches, here are some intergalactic-inspired designs to help launch your space themed nursery into orbit.

Design Spotlight: Outer Space Themed Nursery


How adorable is this Deep Space Baby quilt? This one statement piece packs enough of a punch to carry an outer space theme throughout the entire room. Simply pull a few supporting colors from the cheerful planetary characters and voila! Your cosmic-inspired nursery design is complete!

Design Spotlight: Outer Space Themed Nursery


Our Nightfall crib sheet is perfect for styling a more subdued celestial theme. As an added bonus, the teal, gray, and yellow color scheme is ideal for creating a gender-neutral nursery design. Add some starry wall décor and sweet statement rug to complete the look.

Happy Styling!

Post by Stephanie, Home Stylist from The Land of Nod’s Design Services Team. Our Design Services team offers free one-on-one design advice, mood boards and space planning. You have a room to decorate? They’d love to hear from you. Visit The Land of Nod’s Design Services page to get started today. 

DIY Hand Printed Tea Towels

April 26, 2016

Post by Morgan & Carrie of Ampersand Design Studio

DIY Hand Printed Tea Towels

Hi everyone! It’s Morgan & Carrie from Ampersand Design Studio here and we’ve got a really fun kids craft project to share with you today: Hand-Printed Tea Towels! We had the absolute pleasure to host a Mom’s Night Out workshop at Studio Nod in Chicago, but just in case you couldn’t be there, we thought we’d share the craft tutorial with you right here! We’re going to walk you through the super-easy steps to hand print your own tea towels! Using your choice of colors of fabric paint and tea towels, you can easily make your own custom design! Let’s do it!

DIY Hand Printed Tea Towels

Here are the supplies you’ll need:

  • White Tea Towel
  • Rubber Carving Block
  • Scissors
  • Fabric Paint
  • Foam Brush

DIY Hand Printed Tea Towels

Step 1: First, use the scissors to cut out shapes from the rubber carving block. The shapes can be anything you want! You can cut lots of different shapes or just one and repeat it over and over. The possibilities are endless!

DIY Hand Printed Tea Towels

Step 2: Use the foam brush to paint one side of your rubber shape.

DIY Hand Printed Tea Towels

DIY Hand Printed Tea Towels

Step 3: Press the painted side of your shape onto the tea towel. Once it is positioned, make sure to press down on all sides to ensure an even transfer.

DIY Hand Printed Tea TowelsDIY Hand Printed Tea Towels

Step 4: Repeat! That’s all there is to it! Pick another shape…or the same shape…a new paint color…or repeat the same! The shapes can overlap or never touch. Play around with what you like best!

DIY Hand Printed Tea Towels

See! It’s easy, right? We sure hope you have fun with this! Grab some friends and put together your own craft night! Tag @thelandofnod so we can see what you come up with!

(All photos above by Kyndall Durkee)

DIY Hand Printed Tea Towels

DIY Hand Printed Tea Towels

Ampersand Design Studio specializes in surface pattern design, identity design and stationery products, with clients in the home décor, fashion and baby and kids industries. Their clients include respected big names like Land of Nod, Tiny Prints, Papyrus, Minted and Giggle,  as well as great small, local businesses around the country, including cafés, bakeries, wineries, photo studios and fashion boutiques.

Design Spotlight: Fresh Bohemia Styled Three Ways

April 25, 2016

Post by Stephanie, Home Stylist from The Land of Nod’s Design Services Team 

The vibrant, imaginative, and seemingly carefree vibe indicative of the Bohemian design style is a perfect fit for curious youngsters. Pops of green, yellow, indigo, and magenta find their balance when paired with flokati rugs and rattan accent chairs. Whether putting together a nursery for your new arrival or styling a big-kid bedroom for your son or daughter, adding a twist of Bohemian flare is fun, easy way to bring youthful personality to the space.


An edgy black lacquer Jenny Lind daybed is the quintessential base for a boho-styled bedroom. Pair it with a folksy-patterned duvet cover and hand-woven kilim rug to create a space perfect for an artsy tween.

Is there anything more Bohemian than a rattan rocking chair? Especially the high-backed Veranda rocking chair, which pairs perfectly with the Folk Denim rug and white shaggy pouf to create a space that feels perfect for any kiddo at any age – boys, girls, infants, or big kids!

Boho style is all about colorful pops of painted furniture. Why not bring some of that flair to your nursery with a kelly green Carousel crib? Add a touch of tassel fringe and whimsical cloud bedding for just the right amount of youthful charm. To balance the bold color palette, bring in some neutral tones like a fluffy white flokati rug and an oak-framed Mid-Century rocking chair.

Post by Stephanie Geurkink, Home Stylist from The Land of Nod’s Design Services Team. Our Design Services team offers free one-on-one design advice, mood boards and space planning. You have a room to decorate? They’d love to hear from you. Visit The Land of Nod’s Design Services page to get started today. 

Free Printable Coloring Page: Earth Day

April 22, 2016

Coloring Page designed by Michelle Romo

We’re celebrating the planet today with this fun and free printable Earth Day coloring page. Although your kiddo is probably getting all the details on Earth Day at school, remember to take a moment out of your day to discuss why it’s important to you and your community. Then, whip out this coloring page and enjoy a few moments of peace and quiet as your child creates a fridge-worthy masterpiece.

Download the free Earth Day printable coloring page here and share a pic of your little one with the finished product on Instagram (use hashtag #CrateKids) or our Facebook page. We may feature it!

Looking for other Earth Day activities?

  • We love these 2-step Healthy Earth Day Snack Cups from Simple as That.
  • Let your child’s creativity flow with a fun watercolor craft from The Classroom Creative.
  • Maybe baking is more your thing? These Earth Day Cupcakes from Recipe by Photo are sure to hit the spot.

Michelle Romo is a self-taught illustrator and designer fueled by cookies and naps. Her influences include Mid-Century, Japanese and Scandinavian design, along with pretty much anything cute. When she isn’t working she spends her time eating good food, hugging her friends, playing video games and crafting. 

DIY Giant Tassel Party Decor

April 21, 2016

Post by Colleen of Lemon Thistle

giant tassels NOD-16032316

I know that the world of blogging has been obsessed with doughnuts for what feels like forever… but my friends in real life? This is all new to them. Last year our town got a new doughnut shop that makes the most amazing, mouthwatering confections. They have every flavor and one by one, I’ve been introducing my friends to the addiction. So when I saw the doughnut party plates and napkins… I knew they’d be the perfect excuse to order more doughnuts.

giant tassels NOD-16032317

I wanted to make a fun backdrop to match the plates and napkins, but didn’t want to blow my budget. These giant tassels are so much fun, they definitely make a statement- and they’re made from dollar store tablecloths! Want to learn how?

To make these, you’ll need:

  • Large rectangular plastic table cloths (the kind found at the dollar store)
  • Scissors
  • Embroidery thread or bakers twine
  • Spray paint to add color

giant tassels NOD-1603231

  1. Start by folding your table cloth into long rectangles. They should be as long as you would like your tassel to be. You’ll need to cut the end closest to you so there is no folds. Then, cut fringe into the rectangle, leaving a few inches at the top.
    giant tassels NOD-1603232
  2. Now, take your rectangle and unfold it once, bunching the uncut part of the fringe and twist it to make a tassel as shown. Use your embroidery thread or string to wrap the tassel and tie off.
    giant tassels NOD-1603233
  3. Now it looks like you’re done but this next part really makes a huge difference. ‘Fluffing’ the tassel will take it from the size of the tassel on the left to the one on the right… like double! Just make sure you pull each piece apart to separate the ones that were cut together.
    giant tassels NOD-1603234

When you’re all done, lay them on a drop cloth and use spray paint to mist the bottom of the tassel to add a touch of color. My favorite ones are by far that mint color! It’s so soft that it blends to the white really nicely.

giant tassels NOD-16032311

giant tassels NOD-1603239

Ta-Da! I love how big of an impact these are. They are all that you need for a party backdrop. I added this teeny garland to the front of the table as a contrast to all things giant that were happening behind it. And they make stinkin’ cute room decor as well. I loved the mint ones so much I kept them and they’re hanging in my office right now.

Colleen is a wife, Mama to twins with one on the way, and the DIY and lifestyle blogger behind Lemon Thistle where she shares printable art and hands on tutorials for DIY home decor, parties and gifts. Colleen believes you can have a beautiful life, home, and party without spending a lot- we’re keeping it real on a budget so everyone can join in on the fun. 

A Poky Little Puppy Boys Nursery

April 20, 2016

Post by Joni of Lay Baby Lay

The latest addition to the Little Golden Books for Nod bedding collection is absolutely adorable and perfect for styling a nursery for a little boy. For a balanced look, anchor the Poky Little Puppy prints with complimentary yellow, navy, and baby blue supporting pieces.

poky-little-puppy

TM and © 2016 by Random House, Inc. Under license to Classic Media, LLC.

Spotlights Pendant / Whale Wall Art / Mid Century Shelf / Square Away Acrylic Cube Shelf / Vintage Dog Painting – Check Etsy for similar pieces / A to Zebra Wall Art / Roxy Marj Ragamuffin Pennant Flag / Poky Little Puppy Square Throw Pillow / Archway Crib / Poky Little Puppy Throw Pillow / Eden Table Lamp / Campaign Wide Dresser / Toy Digger Vehicle / Poky Little Puppy Toddler Sheet Set / Milo Glider / The Poky Little Puppy Book / Jenny Lind Nightstand / Big Band Rug / Poky Little Puppy Baby Quilt / Pinstripe Storage Bin / Pop Icon Nightlight /

FOR EVEN MORE KIDS ROOM DESIGN IDEAS, CHECK OUT OUR KIDS ROOM PINTEREST BOARD.

Lay Baby Lay started in 2011 shortly after the arrival of my first baby as a place to provide fresh and unique nursery inspiration with a little dose of motherhood experience. This site is my creative outlet and the place where I am able to express all the ideas running around in my head. It is my hope that you will also be inspired to create spaces for your little ones that are full of imagination, color, and delight and maybe find a little encouragement in this crazy but wonderful journey of having babies and watching them grow.


Kid’s Bedtime Essentials

April 19, 2016

Post by Stephanie, Home Stylist from The Land of Nod’s Design Services Team

When it comes to creating a cozy sleep space for busy kiddos, there are a few go-to pieces I find are essential to setting the mood. Arguably the most important item is your kiddo’s favorite stuffed animal companion. Sleep is just not going to happen if Mr. Bear is MIA. For bigger kids, a nightlight is the weapon of choice for fighting off those nighttime monsters. I love using our Giraffe nightlight because the modern style is perfect for new babies and big kids alike. Book storage, like our Good Read Book Caddy or Next Chapter Bookcase, is also a must for keeping favorite bedtime stories at the ready. In nurseries, a soft blanket and a big comfy rocking chair or glider create the perfect spot for lulling your new baby to sleep.

Kid's Bedtime Essentials


Fair Weather Garland / Modern Chic Sham / Washed Dot Pillowcase / Where the Sidewalk Ends BookPocketful of Rings Wall Art / Plush SlothHead in the Clouds Throw Pillow / Campground Throw BlanketWalk Softly Rug / Giraffe Nightlight / Gumball Table Lamp / Next Chapter Bookcase / Checkmate Floor Lamp Base /

Kid's Bedtime Essentials


Gem Wall Art / Luxe Moon Mobile / Cinema Floor Lamp / Slipcovered Glider and Ottoman / Bestie Bear / Wide Eyed Nightlight / Cuddly Me Softly Baby Blanket / Sheepish Throw Pillow / Flokati Fluff Rug / Good Read Book Caddy /

Whatever the age of your tiny human, these bedtime essentials are sure to help send your kiddo off to Slumbertown.

Happy Styling!

We’ve teamed up with Brightly to give one luck winner the best bedtime. Enter for the chance to win a dream bedroom and a library of books perfect for bedtime. Sweet dreams guaranteed! Click here for details.

Post by Stephanie Geurkink, Home Stylist from The Land of Nod’s Design Services Team. Our Design Services team offers free one-on-one design advice, mood boards and space planning. You have a room to decorate? They’d love to hear from you. Visit The Land of Nod’s Design Services page to get started today. 

DIY Pipe Cleaner & Straw Sculptures

April 18, 2016

Post by Morgan & Carrie of Ampersand Design Studio 

DIY Pipe Cleaner & Straw Sculptures

Hi everyone! It’s Morgan & Carrie from Ampersand Design Studio here and we’re stopping by today to share one of our very favorite kids crafts with you: Pipe Cleaner & Straw Sculptures!  We always love a craft that is great for a wide range of ages and has no mess!! Of course, it doesn’t hurt that it’s super colorful, fun to do, and ends up being one of those projects you want to save!

DIY Pipe Cleaner & Straw Sculptures

Supplies:

  • A styrofoam block
  • Various colors of pipe cleaners
  • Plastic beads

DIY Pipe Cleaner & Straw Sculptures

DIY Pipe Cleaner & Straw Sculptures

Step 1: Punch the straws or pipe cleaners right into your styrofoam block. The straws can act as a base for the pipe cleaners or the pipe cleaners can go directly into the styrofoam!

DIY Pipe Cleaner & Straw Sculptures

Step 2 (optional): String the plastic beads onto the pipe cleaners.

DIY Pipe Cleaner & Straw Sculptures

Step 3 (optional): Using the straws as a base, push the pipe cleaner into the straw.

DIY Pipe Cleaner & Straw Sculptures

After that, just let your kids play around! Your kids may loop the pipe cleaners from straw to straw or simply continue to build from the styrofoam block. No two sculptures will turn out alike, and after all, that is our favorite thing about art!

(All photos above by Kyndall Durkee)

DIY Pipe Cleaner & Straw Sculptures

Ampersand Design Studio specializes in surface pattern design, identity design and stationery products, with clients in the home décor, fashion and baby and kids industries. Their clients include respected big names like Land of Nod, Tiny Prints, Papyrus, Minted and Giggle,  as well as great small, local businesses around the country, including cafés, bakeries, wineries, photo studios and fashion boutiques. 

Acrylic Trend Roundup

April 15, 2016

Post by Stephanie, Home Stylist from The Land of Nod’s Design Services Team

Acrylic Trend Roundup

It is no surprise that acrylic has made such a huge comeback in furniture design. From coffee tables to bookshelves to nightstands and beyond, acrylic can do it all. It has even proven to be a viable contender in crib design! Just check out the chic new Panorama Crib and see for yourself.

Acrylic Trend Roundup

Wrightwood 3-Drawer Dresser / Luxe Star Cloud Mobile / Spotlights Pendant / Pennywood Crib Bedding / Unicorn Cloud Wall Art / Panorama Acrylic Crib / Wee Workout Baby Gym / Shaggy Pouf /

Acrylic is such a versatile material and can easily fit in among different themes, finishes, and room types, whether you’re designing a modern playroom or a cozy nursery. Personally, I love contrasting an acrylic piece with a natural wood finish or a fluffy shag material because I think it brings balance to the overall style of a space.

Acrylic Trend Roundup

Square Away Acrylic Cube Shelves / Wiry Pendant / Block Tower Bookcase / Fun Zone Team Spirit PennantClear Space Desk / Little Felix Chair / Color Theory Rug / Super Duper Wall Art / Abstract Throw Pillow / Fun Throw Pillow / Upholstered Settee /

It’s amazing how such simple, seamless construction can create a sense of modern elegance in a space. It’s the perfect choice for adding an artsy punch to a playroom. In smaller spaces, a larger acrylic storage piece like the Block Tower Bookcase is a perfect solution for organizing books and toys without making the space feel overcrowded with furniture.

Acrylic Trend Roundup

Baseball Sports Wall Art / Up and Atom Chandelier / Clash of the Century Poster Decal / Now You See It Acrylic Bookcart / Rad Rag / Milo GliderNatural Color Table Lamp Base / Paradise Nightlight / Crystal Clear Nightstand /

Acrylic can be a great choice for either a boys room or girls room. I like to think of it as the chameleon of furniture materials. Whatever the color scheme or coordinating furniture items, you can throw an acrylic bookcart or nightstand into the mix and it will fit right in. Also, this is a material that has been around since the late 1930’s, so while it feels very modern, it’s a time-tested design style. Unlike other trends, these pieces aren’t going to start feeling dated in a few short years. So dive into the trend and snag an acrylic treat for your space!

Happy Styling!

Post by Stephanie Geurkink, Home Stylist from The Land of Nod’s Design Services Team. Our Design Services team offers free one-on-one design advice, mood boards and space planning. You have a room to decorate? They’d love to hear from you. Visit The Land of Nod’s Design Services page to get started today.

Bedtime Story Prompts

April 14, 2016

Post by The Land of Nod and Brightly

Bedtime Story Prompts

Have you ever experienced a bit of stage fright or writer’s block when your little one asks you to tell them a story at bedtime? No worries, our pals at Brightly have you covered. They’ve put together a great set of bedtime story writing prompts to give your storytelling a kickstart. Your kids will be super impressed, and they never need to know you got a little help. Happy storytelling!

Bedtime Story Prompts

Bedtime Story Prompts

You can download a printable version of the bedtime story prompts here. 

We’ve teamed up with Brightly to give one luck winner the best bedtime. Enter for the chance to win a dream bedroom and a library of books perfect for bedtime. Sweet dreams guaranteed! Click here for details.

Brightly is a new resource to help moms and dads raise lifelong readers. Brightly features book recommendations for every age and stage, reading tips and insights, seasonal inspirations, author essays, contests, gift guides, and more. 

Party On: A Baby Sprinkle

April 13, 2016

Post by Becca of CAKE

Most of my friends are done having babies, which is really a shame considering that the Land of Nod is killin’ it with the baby gifts this spring and I’m dying to throw a baby sprinkle!  I’ve also had these ideas for a bright and colorful baby ‘sprinkle’ on my mind for months.  So instead of acting like a crazy person and accosting pregnant strangers with party ideas, I’m putting out the inspiration into Nod land.  I can’t wait to see what all of you virtual party and baby loving friends decide to make of this fun theme… it could so easily be turned into a nursery theme too.
Party On: A Baby Sprinkle

 1 // 2 // 3 // 4 // 5 // 6 // 7


Color Palette: fuchsia // strawberry // lilac // cobalt

Invitation: options here or here

Here’s how to host a modern baby sprinkle, including my personal favorite baby gifts:

  • I envision this as a brunch event, so let’s start with the obvious. Donut bar. Homemade or store bought really doesn’t matter, as long as they include plenty of colorful sprinkles. And naturally, these donut napkins to coordinate.
  • It somehow feels acceptable to sprinkle all sorts of breakfast foods these days, so how about whipping up funfetti waffles or pancakes while you’re at it?  
  • Mimosas (or faux-mosas) are always a perfect accompaniment to brunch. Rim the glassware with a sugar glaze and dip in sprinkles for an extra festive touch.
  • Frame out a special area for food or gifts with a curtain backdrop.  These sweet champagne dots are a nice neutral backdrop with a hint of bronze sprinkled in.
  • Garlands, garlands, garlands. Sprinkle your space with tassles, poms and strings of circles. Bunch them together for lots of playful texture.
  • Punchy Pillows. I’m always an advocate for coordinated pillows as a thoughtful way to spread your color palette throughout a party.  
  • If you want to splurge a bit on the theme, perhaps even a sprinkled rug that can be gifted to help decorate baby’s nursery.
  • For a baby girl, this quilt is my absolute fave as a gift, either for the crib or as a tummy time blanket. Such modern and happy colors!
  • Other perfect gifts include something for baby to wear (omg tiny shoes), something to read (I mean chew on) and something to play with (again, chew on).
  • If you need an invitation to get your party started, I have both a baby sprinkle and a donut shop option that you may find useful.

Becca Gorski lives in the SF Bay Area, is a working mother of two, and moonlights as an occasional designer / blogger / celebration maker. You can find her creative ideas at CAKE. and her line of party printables on Etsy. The Party On series offers inspiration for family friendly parties, featuring items from The Land of Nod that can be incorporated into both your event and your home.

DIY Pop Art Portrait Kids Craft

April 12, 2016

Post by Rebecca of Not-So-SAHM

DIY Pop Art Portraits

Last weekend, we took a day trip up to Philadelphia to check out the International Pop exhibit at the Philadelphia Museum of Art. The kids were so inspired by all the art that they wanted to try and make pop art portraits of themselves. I was thrilled! I’ve had a few sets of printable transparency paper in my arts and crafts stash for a while just waiting for the perfect project. We brainstormed a bit and came up with these awesome portraits. They are so much fun to make and turned out as frame worthy pieces!

We spent a lot of time at the exhibit talking about what makes something pop art: bold colors, popular and commercial images, cultural critique, etc. We also have this Go Fish for Modern Artists Card Game, which does a great job of illustrating pop art’s characteristics. So the kids had a few ideas in mind of how they wanted to make a pop art painting that would serve as the first layer of their portrait.

DIY Pop Art Portraits

To get started on making your own, you’ll need:

  • printable transparent paper
  • a portrait photo (preferably with a white background to make the person pop)
  • neon tempera paints (we love these)
  • heavyweight paper
  • graphic or bold-colored washi tape

DIY Pop Art Portraits DIY Pop Art PortraitsPop Art 2DIY Pop Art PortraitsDIY Pop Art Portraits

First review a bit about pop art with your kiddos. Then let them paint a pop art style painting on the heavyweight paper. We found that the paintings worked best paired with the portraits when the kids left some white space on the painting. Otherwise, the photo doesn’t stand out enough. While the painting is drying, print your portrait onto the photo paper. Our artists were a little impatient, so we helped the paintings a long with a hair dryer too.

DIY Pop Art Portraits

DIY Pop Art PortraitsDIY Pop Art Portraits

Once the painting has fully dried, layer the transparent photo on top and secure along the top and bottom edges with washi tape. Boom. Pop Art Portraits!

DIY Pop Art PortraitsDIY Pop Art Portraits

The kids love them so much that we are working on portraits of their favorite stuffed animals next. Because who doesn’t need a pop art portrait of their favorite sloth Shlomo?!

Thanks to The Land of Nod for the fabulous On Display desk accessories. They were the perfect interplay between transparency and bold colors to assist in our pop project!

Rebecca is a mom to two young kiddos and, in her spare time (ha!), likes to pretend she’s a back-up dancer, craft cocktails, and run long distances. A relatively recent SAHM, she blogs family-friendly activities, DIYs and celebration fun at Not-So-SAHM.

Busy Baby Activity Chair

April 11, 2016

Post by Danielle Kurtz, Creative Director at The Land of Nod

Busy Baby Activity Chair

First off, where was this baby activity chair when my kids were babies? (I know, so cliché, but so true!) In a world of plastic baby gear, I love seeing beautifully designed and functional alternatives. We introduced our Be on the Sea and Shape Up Baby Activity Mats last year and have loved seeing all the Instagram snaps of babies living it up on them (checkout #landofnod and see for yourself). So, it got us thinking, how are we going to see pics of your adorable babies being so stinkin’ cute once they outgrow the activity mats? Enter the Busy Baby Activity Chair.

Busy Baby Activity Chair

First off, let’s discuss the color palette. It’s really so lovely. I like that it has a sweet soft look, but with a sophisticated vibe. The colors were chosen so the chair looks equally as good in your nursery as it will in your living room. That way, no matter where in your house your family is hanging out, your baby can play in style.

Busy Baby Activity Chair

Aside from looking good, it’s also super functional. The quilted seat is soft and cozy for your little one, especially as they’re learning to sit up. And it features a lap belt to keep baby safe and secure. (Safety is our TOP priority, so I’d like to mention that this seat should ONLY be used on the floor.)

Busy Baby Activity Chair

Not only that, there are tons of features to keep your baby entertained. This is especially important if you ever want to make dinner, brush your teeth or even use the bathroom again without holding a baby in your arms (As the Mom of two, trust me, this is very important. The struggle is real.).  The baby activity seat has tons of textures, sounds and hidden surprises to keep your little one busy.

So, while I’m slightly jealous that I didn’t have one of these when my kids were babies, I’m also totally looking forward to seeing all your little ones playing away at #landofnod.

Danielle is the Creative Director at Nod and an over-protective mother of two. She’s also completely obsessed with Pinterest, Twitter, Instagram and her Kindle, but not necessarily in that order. Danielle loves to craft, sew and crochet. Her current craft of choice is weaving tiny wall tapestries. 

DIY Dinosaur Excavation Sensory Activity

April 8, 2016

Post by Rae Ann Kelly

DIY Dinosaur Excavation Sensory Activity

The spring sunshine has been showing off lately which means two things in this family 1.) our playtime moves outside and 2.) the kids are constantly wanting to play in the water and sand. My answer (when they asked) was sadly almost always no. A few weeks ago however, we set up the Sand and Surf Table which let’s the kids play with their favorite warm weather things (sand and water) without getting drenched and filthy and requiring an extra bath time and outfit change. It’s like bringing the beach to your backyard!

They’ve been spending so much time playing at the table that we’ve come up with a few fun activities and thought we would share the most popular one so far, Dinosaur Ice and Sand Excavation. Take a peek below for a supply list and details for how to DIY at home!

DIY Dinosaur Excavation Sensory Activity

ICE & SAND DINO EXCAVATION

You’ll Need:

  • Balloons (regular party ones)
  • Squirt Bottles
  • Surf and Sand table (or large bins)
  • Sand
  • Little plastic dinosaurs
  • Paint brushes
  • Scissors

Here’s How to Play:

DIY Dinosaur Excavation Sensory Activity

1. Put one dinosaur into each balloon (we used 12 but 8 would have been enough), fill with water and tie a knot. Place in the freezer for a few hours or over night. Once frozen, over the water side of the table, cut the balloons open (I helped the kids, carefully extending the balloon and letting them do the snipping) then remove the ice.

DIY Dinosaur Excavation Sensory Activity

(The kids were obsessed with these little dino eggs!)

DIY Dinosaur Excavation Sensory Activity

2. Bury the remaining dinosaurs in the sand and fill the squirt bottles with warm water.

DIY Dinosaur Excavation Sensory Activity DIY Dinosaur Excavation Sensory Activity

3. Now your ready to hand over the squirt bottles and paint brushes to let the kids ‘excavate’ the dinosaurs while you enjoy an iced coffee and enjoy the view. (That last part is optional but highly recommended!)

DIY Dinosaur Excavation Sensory Activity DIY Dinosaur Excavation Sensory ActivityDIY Dinosaur Excavation Sensory ActivityDIY Dinosaur Excavation Sensory Activity

This activity occupied my three youngest (20 months, 4 years and 7 years) for a solid 45 minutes which is not an easy task given their age differences and my 4 year old stayed at the table for even longer. Clean up was a cinch too, just toss all your supplies into a cute bin for later use, discard balloons and tidy up and cover the table

DIY Dinosaur Excavation Sensory Activity

The playtime possibilities are endless with the Sand and Surf Table. The kids love using it and I love that it engages their senses and fine motor skills and adds to the design of our backyard. Win, win, win!

XO, Rae

Rae Ann blogs at Rae Ann Kelly and is a kid wrangler, graphic designer, food & craft nut. Her blog features little tidbits about her day to day life & design projects, tutorials for DIY’s, free downloads, yummy recipes, lots of kid friendly ideas and outfit inspiration.