Close

Blog

An Autumn Themed Lunch for Kids

November 13, 2015

Post by Michelle of Avery and Augustine

An Autumn Themed Lunch for Kids

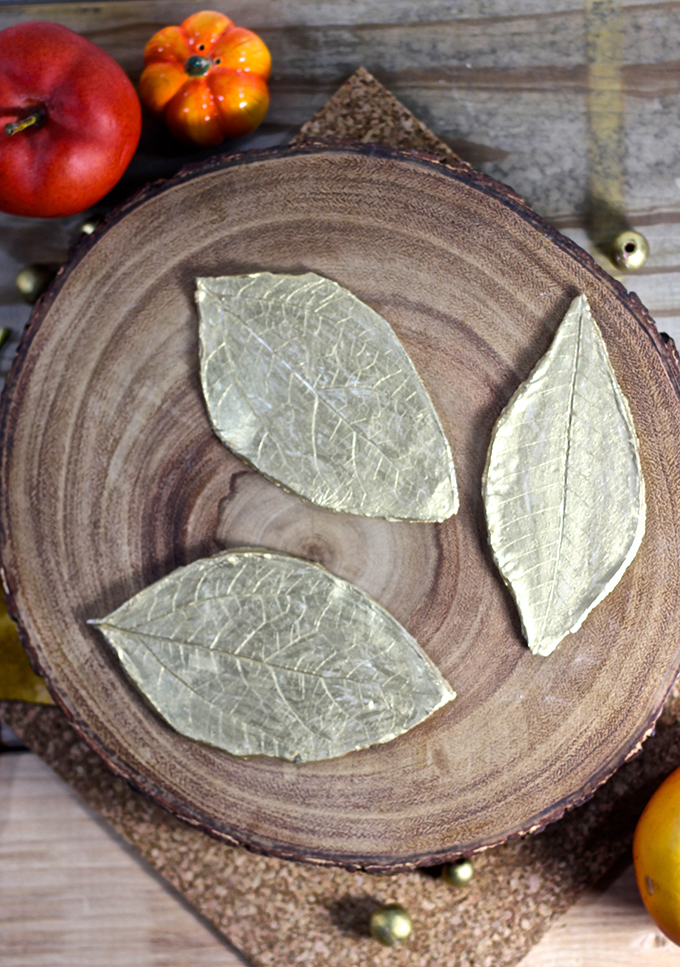
Ahhhh, fall.  My favorite season.  Creating an Autumn-themed lunch is one of Avery’s favorite things these days—a sandwich with cheese in the shape of autumn leaves, thinly-sliced honeycrisp apples and a little surprise message inside.An Autumn Themed Lunch for Kids

I absolutely adore these hilarious Lunchtime Lol Notes.  They make lunch a little more special and remind Avery that we’re thinking about her.  Avery’s been into learning jokes lately, so these are right up her alley.  It’s so great how there’s some space on each note to personalize it.  I like writing little messages of encouragement, like “Making mistakes means you’re doing a good job of learning!” or “Name three things that you are thankful for today,” or “Do something kind for two classmates today.”  I find that using specific statements or questions rather than general ones is more effective in helping the message resonate with Avery and be more effective.  The message sticks with her and is easier to remember.An Autumn Themed Lunch for Kids

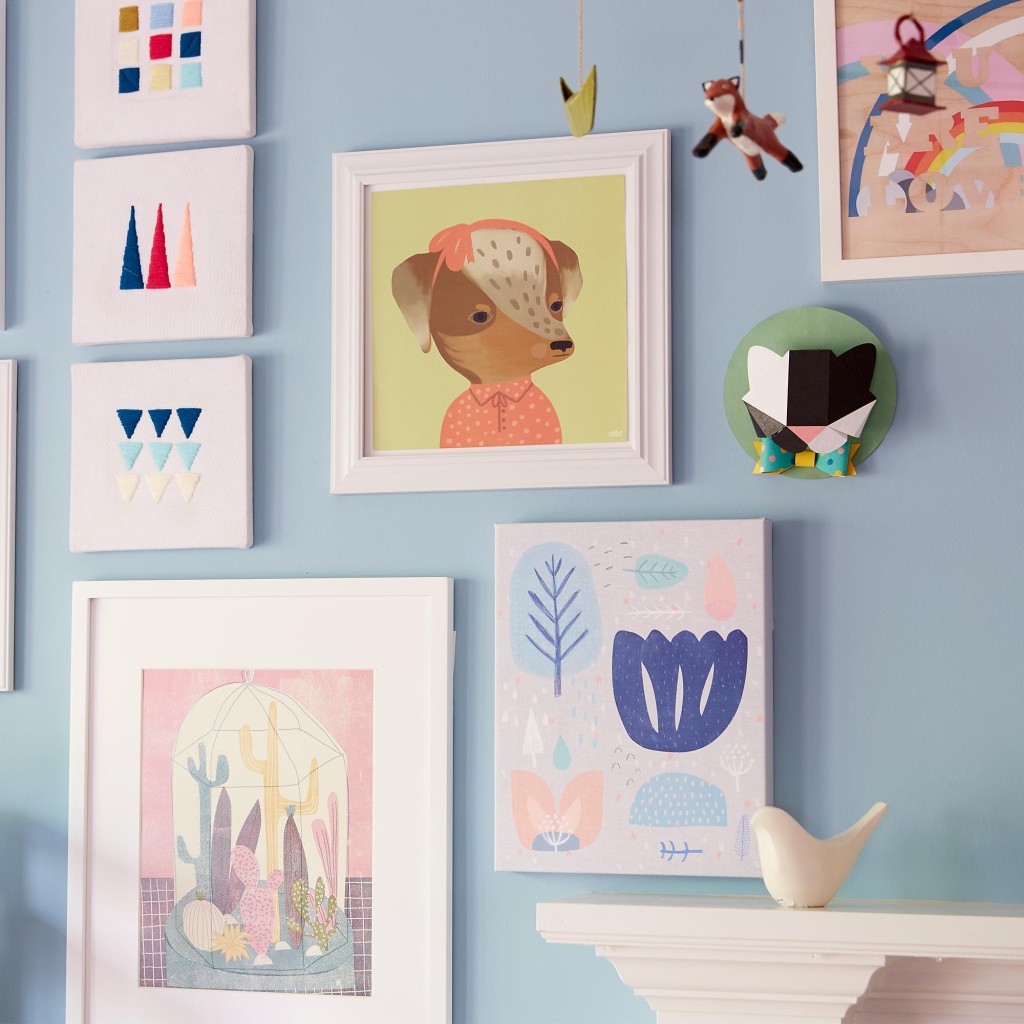
Colorful, sturdy lunch boxes also make school lunches something to look forward to.  If you need any ideas for your own food art adventures, do check out How About Cookie.  Selena’s jovial work always inspires me to make my kids’ meals more fun!

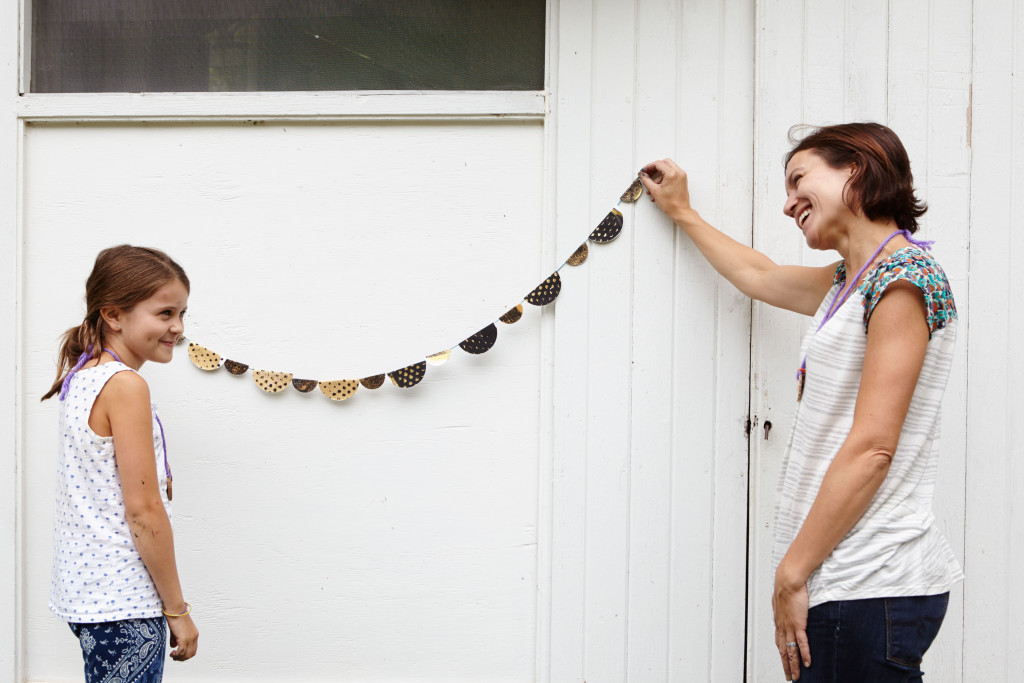
Thanks to The Land of Nod and Sweet Estelle for sending the items for this post.

You can see Michelle’s work and read about her two young children and their first forays in cooking, art and everything in between at Avery and Augustine.

Kids Thanksgiving Themed Free Printable Coloring Page

November 10, 2015

Nod Fun Pages designed by Michelle Romo

Turkey Day is right around the corner and we’re all excited to get our turkey on! But what do you do with your kiddos when they’re ready to eat and you’re still cooking? Set up a space specifically for your kids – full of activities like interactive games, toys and printable coloring pages. Our new Happy Thanksgiving printable can be downloaded HERE.Make sure to share the finished product on Instagram with hashtag #landofnod. A few of our other favorite kid-friendly Thanksgiving activities are below too.

Kids Thanksgiving Themed Free Printable Coloring Page

Looking for more free printable coloring pages? Check out all our other Nod Printable Coloring Pages!

Michelle Romo is our in-house Nod illustrator, she’s self-taught and fueled by cookies and naps. Her influences include Mid-Century, Japanese and Scandinavian design, along with pretty much anything cute. When she isn’t working she spends her time eating good food, hugging her friends, playing video games and crafting.

Thanksgiving Table DIY Place Card Leaves

November 6, 2015
Post by M.J. of Pars Caeli
Thanksgiving Table DIY Place Card Leaves
As a child, it was the presents and festivity of Christmas. As a teenager, it transferred to the lovestruck Valentine’s Day. And now, as the hostess and mom of three, Thanksgiving is easily my favorite holiday. Since we were first married, we have been the hosts for the feast! My husband and I share the cooking responsibilities (he’s a master at the turkey, and I serve up a mean cornbread). And our kids always want in on the action, too. This year they’re in charge of setting the table and decorating the feast so we decided to make some special place cards.
Thanksgiving Table DIY Place Card Leaves
Using fall leaves from the backyard, air dry clay, and a gold leaf marker, the kids and I created beautiful place card leaves. These were simple for small hands and got a lot of wows from the rest of the family!
To make yours, roll out white air dry clay. We used a play dough rolling pin to make it easy for everyone to do it themselves. Roll the clay so that it is even and about a quarter of an inch think. Using a leaf with a simple shape (like an elm or sycamore), roll the same clay with the leaf on top. Press as you roll to make sure to get all the veining pressed into the clay. Trim off the excess clay and smooth the edges with your fingers.
Thanksgiving Table DIY Place Card Leaves
Let the clay dry overnight, making sure to turn over the leaves carefully and dry the backside.
Next, take a goldleaf marker and paint the top and side surfaces. We found markers very easy to work with for this projects and fun to use for tracing over the lines on the leaf. The paint will dry almost instantly, and your leaf place card is ready to use!
Thanksgiving Table DIY Place Card Leaves
These are not recommended for food, but they do make a great focal point on your dinner plate or across the center of the Thanksgiving table. The veining comes through beautifully, making these kids creations a timeless family heirloom to bring back out every Thanksgiving.
Thanksgiving Table DIY Place Card Leaves
M.J. is a graphic and product designer, wife, and proud momma to three. She founded Pars Caeli (meaning a piece of heaven), a delightful blog and shop, to add more creative to the everyday. M.J. worked with our team to bring her lunchbox jokes to life in our product Lunchtime LOL Notes, now available at Land of Nod to bring on a case of the giggles!

DIY Straw Cake Topper

November 4, 2015

Post by Sara Walk of Tell Love and Chocolate

Cake toppers are my favorite.  You can take a completely boring cake and make it into something unique and colorful, and, no one wants a boring cake for their birthday.  I am super excited to share TWO fun DIY straw cake toppers.  They are inexpensive and give such a fun and playful look to any birthday cake.

DIY Straw Cake Topper DIY Straw Cake Topper

DIY Straw Cake Topper Materials
  • Colorful plastic straws (Mine are from IKEA)
  • Scissors
  • Heavy duty circle punch
  • Twine
  • Wood Skewers
    DIY Straw Cake Topper
How to Make DIY Straw Cake Toppers
  1. Cut up various sizes and colors of the plastic strawsDIY Straw Cake Topper
  2. Punch holes into the straws.  For the wood skewers punch the hole in the middle.  If you are hanging them on the twine punch the holes toward the top.DIY Straw Cake Topper DIY Straw Cake Topper
  3. ​String the straws onto the skewers and or twine. DIY Straw Cake TopperDIY Straw Cake Topper DIY Straw Cake Topper
​Now go have a party!  Because these are too cute not to make!
DIY Straw Cake Topper DIY Straw Cake Topper
Sara Walk is the face behind the DIY blog, Tell Love and Chocolate, a colorful blog focusing on easy, DOable, DIY’s for life, home and parties.  Sara believes that life should be fun and colorful and is a big fan of simple DIYs.  She also LOVES parties.  She lives in California with her husband and two boys.

Loog Guitars – Nod Artist Interview

November 3, 2015
Interview with Rafael Atijas of Loog Guitars
Loog Guitars - Nod Artist Interview

Tell us a bit about yourself…

  • HOMETOWN & CURRENT TOWN: Montevideo, Uruguay
  • FAVE ICE CREAM FLAVOR: Caramel Cone
  • FAVE BREAKFAST FOOD: chocolate croissants
  • FAVE HOLIDAY: Summer holiday with the kids!
  • FAVE COLOR: Blue
  • FAVE MOVIE: The Godfather (part II)
  • FAVE DECADE: This oneLoog Guitars - Nod Artist Interview

TELL US HOW YOU STARTED YOUR COMPANY: My niece, who was 6 at the time, got one of those cheap toy kids guitars and I, being the musician in the family, would try to tune it and show her how it works. That’s when I realized that it was absolutely impossible for a kid to learn music with an instrument like that. And I also realized that pretty much all guitars for kids were like that: just a small, cheap replica of a standard guitar. That’s when I knew we could do better and that we could design that was actually meant to make it fun, easy and stimulating for kids to play music. And it was good timing too: at that time I had to come up with a business idea for my thesis at NYU, so it all worked quite well for me. I then took the idea to Kickstarter and was lucky enough to find people around the world who also thought that a small, well-designed 3-string guitar kit was a good idea and something that deserved to exist.

Loog Guitars - Nod Artist Interview

IS THERE A STORY BEHIND THE NAME? Yes. It’s my subtle but very meaningful homage to Andrew Loog Oldham, the first manager and producer of The Rolling Stones. I always found him to be a fascinating character (I’m a bit of a Stones nerd) and back when I had a band I had a chance to meet him and he was super kind to us.

HOW WOULD YOU DESCRIBE YOUR STYLE? I would describe it as classic, based on my own taste for classic design, I guess.

IF YOU COULD TRAVEL ANYWHERE, WHERE WOULD IT BE? I always go back to NYC and that’s where I always want to go. Although last year we did a trip through Italy and it was not to shabby!Loog Product Acoustic Loog Apart

IF YOU COULD POSSESS A SUPERPOWER, WHAT WOULD IT BE? Tel- transportation! Or the super power to always be upgraded to business class, if that’s too much to ask.

TELL US ABOUT YOUR PARTNERSHIP WITH THE LAND OF NOD. Our very talented friend Lucky Diaz told us that The Land of Nod would be a great place for us to sell our guitars. We were of course already fans of The Land of Nod, so it was easy to agree with that. We took it from there!

———-

Shop Loog Guitars at The Land of Nod & browse our collection of kids musical instruments.

UP-Cycle Your Art

October 30, 2015

Post by Kim of Beehive Art

Up-Cycled Art

I know for a fact that children love to paint and print up a storm! As a parent and educator, I know it is hard to part with any of it. Below are some ideas I suggest to parents when they have a stack of beautiful paintings and have run out of wall space.

  • Make a book: I love this because it keeps the collection together and protected. Arrange paintings in a neat stack, have your paper fastener or other hardware ready, and punch holes through the stack.  It’s simple and sweet. You and your child can revisit the paintings until you are ready to set them free.

Up-Cycled Art2

  • Wrap a present: This is truly the best wrapping paper ever.  You’ll never need to go out to buy a cheap roll again. Besides, it makes the gift you are giving even more special.  I love that.

Up-Cycled Art5

  • Make cards + gift tags: Create a card or tag for the gift you just wrapped.  Or you can get busy and collage a few paintings to make a set of note cards. Keep a set for yourself and give one as a gift.

Up-Cycled Art6
Up-Cycled Art7

  • Sew a garland: This is a favorite of mine. We have flag garlands hanging in the studio made from assorted paintings. I cut the paintings in triangles and use a long stitch with a heavy colored thread. You can make little teeny garlands or great big ones, depending on where you want to put them. Decorate your child’s room or classroom or at a birthday party.

Up-Cycled Art11

Up-Cycled Art8

Up-Cycled Art12

  • Frame it:  Find a simple frame large enough to fit your painting. I buy several, so I can display several together. Your child will be so proud to see their artwork framed.

Up-Cycled Art14

  • Collage:  Cut up paintings, drawings, doodles and prints, even samples of your handwriting. Create a collage from these cut-ups, and use paint, watercolor or markers to enhance your design. Make new art from art.

Up-Cycled Art13

  • Mail it: When my kids were little I’d roll up their favorite paintings and send them off to their artist grandmothers. Roll them up and put a stamp on it!  Best mail delivered, I guarantee!

Up-Cycled Art15

Kim Poler is queen bee of beehive ART. She lives for inspiring visual expression, explosions of colors, forms and exciting combinations of mixed-media art. She creates, designs art projects, teaches children art and blogs at Beehive Art

The Nod Makerie at Camp Wandawega – Creating Stuffed Creatures

October 29, 2015
Post by Michelle Kohanzo
The Nod Makerie at Camp Wandawega – Creating Stuffed Creatures
Our last workshop as part of our Nod Makerie at Camp Wandawega event was stuffed animal making with Michelle Jewell – which was our most anticipated event of the weekend.  Throughout the whole weekend, more and more kiddos were walking around camp with their own homemade stuffed animals and Everett was getting really antsy to make his own.
The Nod Makerie at Camp Wandawega – Creating Stuffed Creatures
Finally it was time, and per usual, we weren’t going to create anything that was planned for us to create.  We decided we would make a black wolf and name him Wolfie, and he had to be much bigger than the others.  I had brought along an old t-shirt of Everett’s to dress Wolfie in – it’s a great t-shirt that says “If you can read this, make me a sandwich”.
The Nod Makerie at Camp Wandawega – Creating Stuffed Creatures
We set about constructing Wolfie, which was super fun and much easier than I expected.  Of course, Michelle has all sorts of tips and tricks and she’s just a joy – so I’m sure that had something to do with it.
The Nod Makerie at Camp Wandawega – Creating Stuffed CreaturesEverett came around often to critique my craftsmanship and add elements – like a snaggletooth, until he finally gave him the seal of approval and ran off with his new friend.  Wolfie is now Ev’s go to nighttime friend and such a sweet and adorable reminder of our wonderful trip to camp.

All photos provided by: THUSS + FARRELL

Michelle is the mother to four kids (yes, FOUR!), a gourmet cook and a retail junky. She’s painted her dining room countless times and changes rugs like most people change their bedsheets. When she’s not living and breathing retail, she’s weaving amazing works of art with her sister for Bourbon+Gin Weaving.

Spooky Halloween Smoothie Bar

October 27, 2015

Post by Christina of Christina Williams Blog

Spooky Halloween Smoothie Bar

My favorite party of Halloween is the candy! By the time Halloween actually gets here, I feel like we’ve been celebrating all month. Neighborhood parties, school celebrations, family festivities, Boo-ing our friends, trick-or-treating and of course, we have a Halloween birthday in our family… so there’s cake, too. Despite my high junk food tolerance, by Halloween night I always feel a little gross because of all the sweets. This year I devised a plan to sneak a little more real food into our diets this Halloween.

This Spooky Halloween Smoothie Bar is super quick to throw together, and I had most of the ingredients handy. I printed up some simple labels that could work for just about any smoothie ingredient, and attached them to the different containers. The kids came through and chose their own yucky ingredients, we blended them up and stuck a few wiggle eyes on some paper cups, and had a spooky, healthy snack.

Since Halloween falls on a Saturday this year, Spooky Smoothies would be a great breakfast before all the festivities begin. I love lots of spinach blended with frozen pineapple chunks and pineapple juice – bonus: It looks green and icky, but the pineapple totally overshadows the spinach flavor and my kids don’t have a clue they’re drinking spinach! Spooky Halloween Smoothie Bar

You can download the ingredient labels here. You can also find adorable Halloween decorations to add to the festivities.

Now visit my blog to see a more daring take on the smoothie bar for the bigger kids + adults. Happy Halloween!

Christina Williams is a blogger and graphic designer living in Salt Lake City, Utah. She’s a night owl and a bookworm, as well as a mother to three children ranging in age from two to eight. She shares her latest DIY and design projects along with her adventures in parenting on her self-named blog, Christina Williams.  

BOO Baskets : A New Halloween Tradition

October 26, 2015
Post by Rae Ann of Rae Ann Kelly
BOO Baskets : A New Halloween Tradition

One night last year, about a week before Halloween, we heard the doorbell ring. As the kids do anytime they think someone is there to see them they raced to the door, flung it open and found a basket overflowing with Halloween knickknacks, treats and instructions for passing on the Halloween fun.

Honestly they were so excited about their basket and the process of putting a couple of their own together to surprise neighbors and friends you would have thought it was Christmas, and just like that a new Halloween tradition was made.

This year, in addition to all the usual treats and toys the kids pick out for their friends, I wanted to include Halloween decorations and activities that the moms would appreciate just as much as the kids in our Halloween Boo Baskets.

BOO Baskets : A New Halloween Tradition

So the kids helped me pick out several Halloween decor items from the Land of Nod including these cute felt snap bins to hold everything, Halloween banner, cat napkins, mini garland, hanging bats, cupcake kit, finger flashlights and vampire props, then we filled it in with some stickers (festive sticker printable available on my blog), tattoos, candy, vampire teeth, glow sticks and goo from the store by our house.

I also made these “We’ve Been Boo’d” signs and instructions for how to play along to include in each basket. (You can CLICK HERE TO DOWNLOAD).

BOO Baskets : A New Halloween Tradition

Once the baskets were filled we waited until it was dark enough (the waiting is the hardest part!) to ring a doorbell and sneak away. The kids always like to hide in a nearby bush. I think it adds to the excitement and the rest of the night they giggle and talk about how things went down and what their friends said when they opened the door.

BOO Baskets : A New Halloween Tradition BOO Baskets : A New Halloween Tradition

Honestly, dropping off a Halloween Boo Basket is almost more fun than trick-or-treating and we’re looking forward to seeing the fun spread through the neighborhood again this year.

Have you guys “BOO’D” your neighbors before? Tell us about it and let me know if you have any questions.

XO, Rae

Rae Ann blogs at Rae Ann Kelly and is a kid wrangler, graphic designer, food & craft nut. Her blog features little tidbits about her day to day life & design projects, tutorials for DIY’s, free downloads, yummy recipes, lots of kid friendly ideas and outfit inspiration. 

How the Jealous Curator Met Michelle from Nod

October 24, 2015

Post by Michelle Kohanzo

I stumbled upon The Jealous Curator via some rabbit hole I had fallen into online about 3 years ago.  I immediately emailed Danielle, also known as The Jealous Curator, and told her we needed to get together.  I met her months later at Alt Summit and again expressed my fondness for her blog and all she was doing.

jealous curator

Fast forward a couple years, I am at an awesome Nod party in LA at The Fig House and finding myself utterly mesmerized by a photograph of a beautiful woman, as well as blown away by the overall art in the space – oh really, Danielle from The Jealous Curator curated this collection – of course she did.  I went home to Chicago, but couldn’t get my mind off this photo and Danielle.

STEPHANDMAX_steph11

Photo via: The Jealous Curator / Stephanie Vovas

Needless to say, that visit to The Fig House was the catalyst for Danielle curating an amazing collection of Nod art over the past several seasons and for a lovely long distance friendship that I have really enjoyed.  I have since met so many talented and lovely artists through Danielle, including that photographer, Stephanie Vovas, from The Fig House. And yes, I did get that mesmerizing photo of that beautiful woman and we did an amazing collaboration together, but you’ll have to listen to Art for Your Ear to hear about that.  Oh and I can’t believe Danielle asked me to be on her podcast, totally geeking out!  Take a listen and check out our Jealous Curator collection HERE.

stella-wall-art

Michelle is the mother to four kids (yes, FOUR!), a gourmet cook and a retail junky. She’s painted her dining room countless times and changes rugs like most people change their bedsheets. When she’s not living and breathing retail, she’s weaving amazing works of art with her sister for Bourbon+Gin Weaving.

Halloween Kids Craft: DIY Jack Jar Lanterns

October 23, 2015

Post by Kim of Beehive Art

Halloween Kids Craft: DIY Jack Jar Lanterns

These not-so-scary Jack Jar lanterns are an annual Halloween kids craft at beehive art. Every year, I love them more! It’s a simple, festive and really fun project that will light up your Halloween!

Materials needed:

  • Jars (we used mason jars, you can use whatever you’d like)
  • Glue
  • Glue brush
  • Orange + Yellow + Black tissue paper
  • Scissors
  • Candle
  1. Halloween Kids Craft: DIY Jack Jar Lanterns

    Cut up the orange and yellow tissues into small strips or squares. The idea is to have many tissue pieces overlapping the surface of the jar.

    Halloween Kids Craft: DIY Jack Jar Lanterns

  2. Get your glue and glue brush. I thin the glue with a little water so it is easier to brush on the surface of the jar. Cover the entire jar with the tissue pieces. Overlap as you go and brush a thin layer of glue of the tissues so they sit flat on the jar.

    Halloween Kids Craft: DIY Jack Jar Lanterns

  3. Once you’ve covered your jar, it’s time to think about the kind of face you want your jack-o-lantern to have. Spooky, silly, ghostly, jolly. You can draw the face on the tissue with a pencil, and cut it out. Glue the Jack’s face onto the jar. Apply another thin coat of glue over face. Apply another thin coat of glue over face.

We use small votive candle (with parent’s supervision) to light the Jack Jars up!

Halloween Kids Craft: DIY Jack Jar Lanterns

Happy Jack Jars and happy Halloween decorating!

Kim Poler is queen bee of beehive ART. She lives for inspiring visual expression, explosions of colors, forms and exciting combinations of mixed-media art. She creates, designs art projects, teaches children art and blogs at Beehive ART

The Nod Makerie at Camp Wandawega – How to Jelli Print

October 22, 2015
Post by Michelle Kohanzo
ThussFarrell-NOD-Makerie_4212 ThussFarrell-NOD-Makerie_4172

At our Camp Wandawega Makerie, you could only attend 3 of the 4 weekend classes, and, seriously, this is not fair – there is no way to choose!  Because I’m such a pain and because I love Ashley, we got a little private gelli-printing workshop during the lunch break of the first day.

ThussFarrell-NOD-Makerie_4683

If you’ve never gelli-printed you are totally missing out.  This is messy good fun and you end up with loveliest, most unexpected, designs.  Seriously, run to your nearest craft store and buy a gelli-plate, roller, and acrylic paint – you’ll be hooked!

ThussFarrell-NOD-Makerie_3884ThussFarrell-NOD-Makerie_4611

So anyway Everett, Emily and I got to spend our lunch hour with Ashley rolling out gelli’s.  It’s so easy, you put acrylic paint on the plate, roll it out consistently and press and remove your paper, voila!  You can also use stencils to create patterns and then you can cut them into garlands and decorations and make anything imaginable.

ThussFarrell-NOD-Makerie_3388

It’s also a fun thing to do in a little art journal, but nothing beats having Ashley Goldberg as your teacher.  She has the best colors, has a no rules approach to crafting, and she’s really just hilarious.  Thanks Ashley for letting us make some art!

ThussFarrell-NOD-Makerie_3456 ThussFarrell-NOD-Makerie_3420

All photos provided by: THUSS + FARRELL

Michelle is the mother to four kids (yes, FOUR!), a gourmet cook and a retail junky. She’s painted her dining room countless times and changes rugs like most people change their bedsheets. When she’s not living and breathing retail, she’s weaving amazing works of art with her sister for Bourbon+Gin Weaving.

DIY Mono Marble Printing

October 21, 2015

Post by Rebecca of Not So SAHMDIY Mono Marble Printing

Our kids have always loved mono printing with paint. It’s a really basic printing technique that lets your kiddo transfer an image of their painting from one surface to a piece of paper. We’ve used all kinds of surfaces to paint, including a tabletop, a sheet pan, and even a styrofoam plate. But when we spotted The Land of Nod’s Acrylic Play Table Mat, I knew we’d have to give that a try. I figured it would be a super fun way to try printing that would also be easy to clean up!

The kids and I went back and forth over what kind of image we wanted to make, but ended up being inspired by the marbled balloons from Kane’s recent board game birthday party and decided to try marble printing. It took a little bit of practice and a deft hand, but we loved pulling print after print of marbled paint. A win!

To try our mono marble prints, you’ll need:

  • An acrylic mat (you can use any flat surface that’s easy to clean)
  • A few colors of tempera paint (we love Bicolor Paint because the colors stay separate instead of mixing all together to make brown. We also added in a metallic color for a fabulous effect.)
  • A scraper tool (we have this one, but you can also use an old credit card or thin piece of sturdy cardboard)
  • White paper

DIY Mono Marble Printing

Place a few drops and swirls of each paint color on the acrylic mat — resist adding too much paint, you want to be able to spread the colors around in a thin layer. Using your scraper, very lightly swirl the colors into each other. Place the piece of white paper on top of your painting to transfer the marbled image. Let it dry!

As usual, we ended up making a ridiculous number of prints. So we’re brainstorming ways to use them. I’m thinking of cutting them into pennant pieces to make a party garland!

DIY Mono Marble Printing
DIY Mono Marble Printing DIY Mono Marble Printing DIY Mono Marble Printing DIY Mono Marble Printing
Rebecca is a mom to two young kiddos and, in her spare time (ha!), likes to pretend she’s a back-up dancer, craft cocktails, and run long distances. A relatively recent SAHM, she blogs family-friendly activities, DIYs and celebration fun at Not-So-SAHM.

Kids Playroom Design in a Shared Small Space

October 20, 2015

Design by Tim Whitworth of The Land of Nod’s Design Services Team

Living in New York City, you’re bound to be short on space. Now add three little kids to the mix. Which is why Brianne Manz, blogger at Stroller in the City, asked our design services team for help creating a shared space that her family could use for work and play.

A Few Key Tips for Creating a Kids Playroom Design in a Shared Small Space Are: 
  • Utilize vertical space by adding storage on the wall such as book ledges, shelves, wall bins, etc.
  • Choose pieces of furniture that are designed for small spaces.  Our Sloane Desk and Bookcase add a work area and storage without taking up much space.
  • Pick a clear element to add furniture or storage without adding much visually. Try our Acrylic Desk Chair, Acrylic Bookcase or Acrylic Shelves.
  • Pops of black adds dimension and texture to the space.
  • Keep it light and airy, don’t use fabrics that are heavy.
  • Add additional lighting (think floor lamps and table lamps) to make the space feel larger.

Kids Playroom Design in a Shared Small Space

White Stripe Corkboard / Cactus Wall Hook / Sloane Leaning Desk and Bookshelf / 3D Paper Wall Art / Teal Mixed Media Desk Lamp / Mint Candy Stick Play Chairs / White Here, There, Anywhere Playtable / Water Lily Rug / Cascade Floor Lamp / Soft Blend Rose Wall Art / Littlest Big Deal Art / Acrylic Desk Chair / Silver Art Caddy /

And now for the stunning before & after pictures of our small shared space kids playroom design.

Before

Kids Playroom Design in a Shared Small Space - BEFORE AfterKids Playroom Design in a Shared Small Space - AFTER

Head over to Stroller in the City for more details on the playroom shared space makeover.

Design by Tim Whitworth of The Land of Nod’s Design Services Team. Our Design Services team offers free one-on-one design advice, mood boards and space planning. You have a room to decorate? They’d love to hear from you.

Halloween Candy Bark Recipe

October 19, 2015

Post by Michelle of Avery and Augustine

Halloween Candy Bark Recipe

Halloween Candy Bark RecipeHalloween Candy Bark Recipe

Halloween Candy Bark RecipeHalloween Candy Bark Recipe

If you’re looking for something to do with your leftover Halloween candy, making Halloween candy bark could not be easier.  It was our first time making it this year, and we used posts on Just a Taste and Food Network as references.  Here’s how to make Halloween Candy Bark:

  1. Break up two bags of Hershey’s Milk Chocolate Snack Size Bars (or whatever leftover chocolate you have on hand) into squares, combine them with squares of bittersweet and dark chocolate (about a 1:1 ratio) and place into a bowl.  We did this in order to reduce the sweetness of the chocolate.
  2. Microwave the bowl of chocolate chunks for one minute, stir and then microwave again for 30 seconds.  Stir until all the chocolate is melted.
  3. Pour the melted chocolate onto a baking sheet lined with parchment paper.  Let the melted chocolate sit on the sheet for a few minutes and then gently place various candy of your choice all over (we used candy corn, MnMs, Nerds, pretzel sticks and spooky sprinkles).
  4. Put the bark in the refrigerator to harden for approximately 30-45 minutes before breaking it up using a knife or your hands.

Halloween Candy Bark RecipeHalloween Candy Bark RecipeHalloween Candy Bark Recipe

We stashed each piece in treat bags (putting each piece first into a plastic bag so it the bark wouldn’t grease up the paper bag).  These would be great as favors for Halloween classroom parties or pass out to friends.  Variations of candy bark include adding cornflakes, crispy rice cereal or small chunks of your favorite cookie to the melted chocolate before pouring it onto the baking sheet.Halloween Candy Bark RecipeHalloween Candy Bark RecipeHalloween Candy Bark Recipe

If you still haven’t decided on kids costumes for Halloween this year, do check out the beautifully designed collection available at The Land of Nod (10/19 is the last day to guarantee delivery by Halloween!).  What I love about them is that they’re well-constructed and are unique designs that you can’t find anywhere else.  And they last well after Halloween is over and are terrific additions to your kids’ dress-up collection!

Thanks to The Land of Nod and Sweet Estelle for sending items for this post.

You can see Michelle’s work and read about her two young children and their first forays in cooking, art and everything in between at Avery and Augustine.

DIY Plastic Cup Pumpkin Planter

October 16, 2015

Post by Amy of Delineate Your Dwelling 

We love to bring the outdoors inside and I recently found a fun way to add a little pumpkin into your indoor plants! There are endless designs you could make with this and it’s fun to let your children’s imagination run wild with it. Today, I am sharing how to create this DIY Plastic Cup Pumpkin Planter!

DIY Plastic Cup Pumpkin Planter

Supplies for your DIY Plastic Cup Pumpkin Planter:

  • Scissors
  • Black Vinyl
  • Orange Plastic Cups
  • Small Ivy PlantDIY Plastic Cup Pumpkin Planter - Supplies

How to Make Your DIY Plastic Cup Pumpkin Planter:

  1. You could get fancy if you have a vinyl cutting machine but for my pumpkin, I went the old fashion way and used scissors to cut out my pumpkin face.
  2. Once your face is cut out, remove the backing and place on your plastic cup.
  3. Pop your plant into the cup.
  4. And add in a curled gold pipe cleaner for the stem!

DIY Plastic Cup Pumpkin Planter - Steps

You’re left with a fun pumpkin plant that can grow all Fall season inside your home!

DIY Plastic Cup Pumpkin Planter - Finished!

I think I might create a black cat next, what will you make?

Amy creates other colorful projects like this at Delineate Your Dwelling, a creative craft blog. She is naturally drawn to graphic patterns and cheerful colors, while using natural elements with a modern twist. Amy believes everyone can be creative, sometimes you just need a good tutorial to get you started!

The Nod Makerie at Camp Wandawega – Diorama Workshop

October 15, 2015

Post by Michelle Kohanzo

Follow along as Michelle recaps our parent and child creative workshop, The Makerie at Camp Wandawega. Read other posts about our weekend in the woods HERE.
The Nod Makerie at Camp Wandawega – Diorama Workshop

In Michelle Romo’s class we made an entire world out of paper!  The concept was to create a camp scene during the day on one side and a night scene on the other.  Of course, we couldn’t do that – we made both sides night and covered the dark sky in stars.  I’ll tell you, 3D paper worlds are tough and so is working with a glue stick.  Am I the only one who gets covered in glue, dirt and paper and then can’t make anything stick?  Yuck!

The Nod Makerie at Camp Wandawega – Diorama Workshop The Nod Makerie at Camp Wandawega – Diorama Workshop The Nod Makerie at Camp Wandawega – Diorama Workshop The Nod Makerie at Camp Wandawega – Diorama Workshop

So anyway, we managed to get the tent pitched and plant our little trees in the 3D scene.  And because we like to color outside the lines, we didn’t want a bear and had to make a wolf.  So we ended up with the most amazing diorama of a nighttime camp scene, a la Michelle Romo.  Though I struggled to stay glue-free, I must admit that Michelle did all the work ahead of time and had every piece of paper pre-cut for us.  Because, she’s awesome!

The Nod Makerie at Camp Wandawega – Diorama Workshop The Nod Makerie at Camp Wandawega – Diorama Workshop

Everett really loved this craft and especially more because his best camp friend, Cooper, was also taking the workshop at the same time.

All photos provided by: THUSS + FARRELL

Michelle is the mother to four kids (yes, FOUR!), a gourmet cook and a retail junky. She’s painted her dining room countless times and changes rugs like most people change their bedsheets. When she’s not living and breathing retail, she’s weaving amazing works of art with her sister for Bourbon+Gin Weaving.

Bloggers Show Off Their Kids’ Halloween Costumes

October 13, 2015

We asked a few of our favorite bloggers to pick a Land of Nod Halloween kids costume of their choice and share how their kiddos would wear them. We can’t believe the results – each one is so uniquely their own and perfect for a ghoulish night of trick-or-treating.

Lay Baby Lay

Bloggers Show Off Their Halloween CostumesJoni’s daughters felt strong enough to take on their playhouse nemesis while wearing their Super Sidekick costume and Butterfly Princess costume.

Live Sweet Photography

Bloggers Show Off Their Halloween CostumesDoes your little want to be a detective for Halloween just like Lindsey’s sweet daughter Libby? Libby and her pet pig Pearl were a mystery solving duo in our Detective Dress Up kids costume.

Not So SAHM

Bloggers Show Off Their Halloween CostumesPlan a bank heist with your pixie sidekick while wearing our Petite Pixie kids costume and our Bandit kids costume.  Rebecca of Not So SAHM and her pixie and bandit really got into character before their heist by making DIY wooden bead gems to sweeten the pot.

Avery and AugustineBloggers Show Off Their Halloween Costumes

Wander the wild playroom frontier with our  Frontier Cap & Walking Stick.


If your kiddos haven’t decided what they want to be for Halloween yet, don’t fret! We’re guaranteeing Halloween delivery for our kids costumes if you order by Monday, October 19th.

Big Boy Bedroom Makeover

Post by Kim Doren of The Land of Nod’s Design Services Team

Erin wanted to redo her son’s room for his 6th birthday. The room was in need of an update, as it hadn’t had much change since her son, Hudson, was a baby. So, she came to The Land of Nod’s Design Service team for help. She was open to all suggestions, with her guidance being that Hudson loves green, she wanted to include a reading area, a desk and some bed options that made it easy to host sleepovers.

Our design services team started by creating a Pinterest board, which Erin looked over and provided her feedback on. The final look that Erin decided on is shown in the boys bedroom design moodboard below.

Big Boy Bedroom Makeover

Periodic Table Science Banner / Cargo Twin Over Full Bunk Bed in Charcoal / Orange Sidebar Rug / Yellow Good Read Book Caddy / Green Pure Jersey Pillowcase / Orange Zig Zag Sham / Black and White Stripe Pillowcase / Pure Jersey Duvet Cover / New School Grey Dot Sheet Set / Tawny Scrawny Lion Sham / Orange Zig Zag Sham / New School Grey Dot Pillowcase / Green Pure Jersey Pillowcase / Hexagon Throw Pillow / Grey Stripe Duvet Cover / Pure Jersey Sheet Set

After she implemented the design, Erin said, “Kim really wanted to put together a room that was unique and perfect for my son. She not only chose the furniture, but provided paint colors, curtains, wall art, throw pillows, and all the little details that really make the room perfect – many things that I never would have thought to combine, and that look great. And best of all, Hudson loves it. He used to wake up and head into the playroom, and now he stays in his room until we dynamite him out in the morning.” Pictures of the full boys bedroom design refresh are below. Thank you, Erin, for sharing your boys bedroom makeover with us!

Big Boy Bedroom Makeover

Green Surplus Wall Shelves / Wow, That’s a Big White Lamp / White Cargo Four Drawer Dresser

Big Boy Bedroom Makeover

Yellow Color Edge Curtains / White Leather Desk Chair

Design by Kim Doren of The Land of Nod’s Design Services Team. Our Design Services team offers free one-on-one design advice, mood boards and space planning. You have a room to decorate? They’d love to hear from you.

DIY Wooden Bead Gems

October 9, 2015

Post by Rebecca of Not So SAHM

You might remember from our last dress-up post, but our entire family loves a good story playing session! We decided to combine our dress up with a fun DIY this fall and make some DIY dyed wooden gems. The kids got so into the story development – they started coming up with their tale while dip dying the beads and had many, many scenes ready by the time dress up rolled around. And they loved that we got to add another set of The Land of Nod’s costumes to our dress up. As usual, these kids costumes are incredibly comfortable and work so well with the kids’ existing clothes.

Check out how to make our dip-dyed gems and then see if you can figure out their story!

Kids Craft: DIY Wooden Bead Gems
To make these fun DIY wooden bead gems, you’ll need:
  • Faceted wooden beads (we got ours here)
  • Several colors of Rit Dye (we like the powder and used several fall jewel tones)
  • Embroidery floss or baker’s twine
  • Large-eyed needle
  • Glass jars for dying the beads
  • Tape
  • Gold liquid watercolor (we like this one) and paint brush

How to make the gems:

Mix a bit of each color dye with water in your glass jar — we didn’t follow a precise amount, but you want to have just enough colored water to cover the beads. Too much water mean the beads will all float and prevent even dying. We did about 1 tbs of color powder with 1/3 cup water per jar.

Kids Craft: DIY Wooden Bead GemsHelp your kiddos thread the needle and then let them string a bunch of beads onto the embroidery floss. Tie the threaded strand and loop it over the top of the glass, making sure the all of the beads are submerged into the colored water. Tape the strand to the outside top of the glass to hold it in place.

Kids Craft: DIY Wooden Bead Gems Kids Craft: DIY Wooden Bead GemsLet the beads sit in the colored water for about 45 – 1 hr, mixing them up every once in awhile. Then remove from jar, rinse well under cool water, and lay out to dry overnight. Once dry, brush some of the beads with the gold liquid watercolor – it adds a nice dimension to the gems!

Kids Craft: DIY Wooden Bead GemsKids Craft: DIY Wooden Bead Gems Kids Craft: DIY Wooden Bead Gems

Once the beads have all dried completely, thread them back onto embroidery floss or sparkly baker’s twine to make a gorgeous strand of gems… And then use them in whatever creative play you want! These two had a serious story of robbery happening, but the pixie prevailed!

Kids Craft: DIY Wooden Bead GemsKids Craft: DIY Wooden Bead GemsKids Craft: DIY Wooden Bead GemsKids Craft: DIY Wooden Bead GemsKids Craft: DIY Wooden Bead GemsKids Craft: DIY Wooden Bead GemsKids Craft: DIY Wooden Bead GemsKids Craft: DIY Wooden Bead GemsKids Craft: DIY Wooden Bead GemsKids Craft: DIY Wooden Bead GemsKids Craft: DIY Wooden Bead Gems

Thanks to The Land of Nod for gifting us the fabulous Bandit costume and the Petite Pixie costume!

Rebecca is a mom to two young kiddos and, in her spare time (ha!), likes to pretend she’s a back-up dancer, craft cocktails, and run long distances. A relatively recent SAHM, she blogs family-friendly activities, DIYs and celebration fun at Not-So-SAHM.