Close

Blog

The Nod Makerie at Camp Wandawega – Weaving Workshop

October 7, 2015

Post by Michelle Kohanzo

Follow along as Michelle recaps our parent & child creative workshop, The Makerie at Camp Wandawega. Read other posts about our weekend in the woods HERE.
The Nod Makerie at Camp Wandawega - Weaving Workshop The Nod Makerie at Camp Wandawega - Weaving Workshop

Mine and Everett’s first workshop of camp was weaving with the amazing Dee Clements of Herron Clothier.

Everybody got a cool flouro acrylic loom and made potholders out of their old t-shirts.  Everett directed me very specifically on the order of and thickness of each color.  He (I) made an amazing little potholder that now hangs on his wall, holding no pots.  I love that Dee used old t-shirts for this project.  It’s a brilliant idea, because who doesn’t have some old clothes lying round that no longer fit, or have become torn and worn.  Why not turn them in to a little bit of art  you can make with your kids?

The Nod Makerie at Camp Wandawega - Weaving Workshop The Nod Makerie at Camp Wandawega - Weaving Workshop

Dee is such a wonderful and patient teacher and, as always happens with her workshops, she got everyone hooked on weaving.  Everyone was making such beautiful, interesting pieces.  I even got a chance to make my own after finishing Everett’s, and mine actually holds pots!  How amazing that after this workshop we all went home with a useful little potholder and a pretty loom to make many more creations.

The Nod Makerie at Camp Wandawega - Weaving Workshop The Nod Makerie at Camp Wandawega - Weaving Workshop

All photos provided by: THUSS + FARRELL

Michelle is the mother to four kids (yes, FOUR!), a gourmet cook and a retail junky. She’s painted her dining room countless times and changes rugs like most people change their bedsheets. When she’s not living and breathing retail, she’s weaving amazing works of art with her sister for Bourbon+Gin Weaving.

Back To School Lunch Planning 101

October 6, 2015

Post by Michelle of Avery and Augustine

Back To School Lunch Planning 101

Now that the whirlwind of getting ready for the start of another school year has come and gone, it’s a good time to establish a regular routine for your kids’ lunches with some basic back to school lunch planning.

I thought it would be great to get Avery involved in the planning, with hopes that it would get her excited about trying new foods and eventually get her ready to pack her own lunch (maybe in a couple of years—just planting seeds here!).  Children really seem to take ownership and become more enthusiastic about what they’re eating when they’re involved in the planning and/or prep process.

What we did first was to have a discussion about what goes into a healthy meal and we decided on: one protein, one grain, one vegetable and one fruit per meal.  Together, we drew a picture for each food and labeled it (also a great opportunity for writing and spelling practice!).  We sorted the foods into cups for each category: proteins, grains, vegetables and fruits.   Avery chose which foods she wanted in her lunch for each day of the week and stuck them onto the chart using washi tape.

Once Avery filled in all of the spaces on the chart, she was able to see that she was eating a variety of fruits and vegetables, just by looking at the rainbow of colors in those two columns.  This fed into a conversation about the importance of eating a diverse mix of fruits and vegetables every week (not just the same ones every day), so that she would benefit from the different vitamins and minerals that each one provided.  We also began to talk a little about the seasonality of fruits and vegetables, which ones were available each season and when they were at their peak.  These are all all great conversations to start with children, which will hopefully sow seeds for healthy, mindful patterns of eating in the future as they become more independent and have to make their own choices about what they eat.

Back To School Lunch Planning 101

Back To School Lunch Planning 101

Back To School Lunch Planning 101

Back To School Lunch Planning 101
Hope everyone’s school year is off to a terrific start!

Thank you to The Land of Nod for sending the Easel, Paper Roll & Paint Cups for this post.

You can see Michelle’s work and read about her two young children and their first forays in cooking, art and everything in between at Avery and Augustine.

Misha and Puff – Nod Artist Interview

September 30, 2015

Interview with Anna Wallack of Misha and Puff

Misha and Puff - Nod Artist InterviewMy son & me when he was little and wearing the first season’s pointy peak hat

Tell us a bit about yourself…

  • CURRENT TOWN: Brookline, MA
  • FAVE ICE CREAM FLAVOR: Chocolate, always
  • FAVE BREAKFAST FOOD: All of them; it’s my favorite meal. I have an amazing popover recipe that was my dads.  This is my favorite thing to make.
  • FAVE HOLIDAY: Thanksgiving and Passover.  Both are good excuses to get together with large group of friends and family and sit around the table for hours.
  • FAVE COLOR: Red-orange
  • FAVE MOVIE: It’s so hard to choose one.  Right now this is my list: I love Jacques Tati – faves are Les Vacances de M. Hulot and Mon Oncle, and Woody Allen.  The early, funny ones.  And lastly, I could watch The Shining and Rosemary’s Baby a million times!
  • FAVE DECADE: 1970s. movies, music, clothes.  All good.

TELL US HOW YOU STARTED YOUR COMPANY: I had been working as a stylist for 10 plus years when I had my son (5 years ago) and wanted to take a year off to be with him.  I had been knitting for him all his first fall and winter (he was such a cute, big baby that looked adorable in knits!) and by summer, I decided to start Misha and Puff.

IS THERE A STORY BEHIND THE NAME? It’s me and my husband!! I know everyone names their companies for their kids, I mean I LOVE my kids, but it’s Mike and I who run this business! The truth is, the name came long before the company. I always thought it sounded cute, like two Russian woodland animals.

WHAT ARE THE MOST REWARDING AND THE MOST DIFFICULT PARTS OF RUNNING YOUR OWN BUSINESS? I love being my own boss but I hold myself to really high standards!  A blessing and a curse.  I have learned what matters and what to relax a bit on, for sure.  I really love making things, and always have.  I can’t believe I get to do it for work now.

Misha and Puff - Nod Artist Interview

My daughter, Izzy, in this year’s zigzag cardigan with the same colorwork motif that I used for Nod

HOW WOULD YOU DESCRIBE YOUR STYLE? Messy, artsy, mom-wear. And then a statement earring. Everything I own needs to be washable.  Best if it hides dirt.

IF YOU COULD TRAVEL ANYWHERE, WHERE WOULD IT BE? I’m dying to take the kids to see Machu Picchu in Peru.

IF YOU COULD POSSESS A SUPERPOWER, WHAT WOULD IT BE? Stop time. I would stop time and have a nap.

Misha and Puff - Nod Artist InterviewSwatch board

TELL US ABOUT THE RAINBOW POMPOM HAT & BOOTIES YOU DESIGNED FOR THE LAND OF NOD. HOW DID IT COME ABOUT? The hat silhouette has been a signature piece since our first collection, so I thought it would be nice to use that one, but really impart some of that Mod whimsy.  The zigzag and pompom motif is one that features in our Autumn/Winter 2015 collection.  The tall booties are a total favorite for us.  This was a style I found when researching vintage knitting patterns, and I thought how cute and practical!  It serve the purpose of a bootie and a legwarmer in one, and is so great for babies in carriers whose pants tend to always ride up.  It’s really cold her in Boston in the winter, but we are always out walking around, so it’s important to have the right gear.  Booties and hats are a total must have!

Misha and Puff - Nod Artist InterviewSketch of the Pompom Hat & Booties for Nod

rainbow-pompom-hat-and-booties
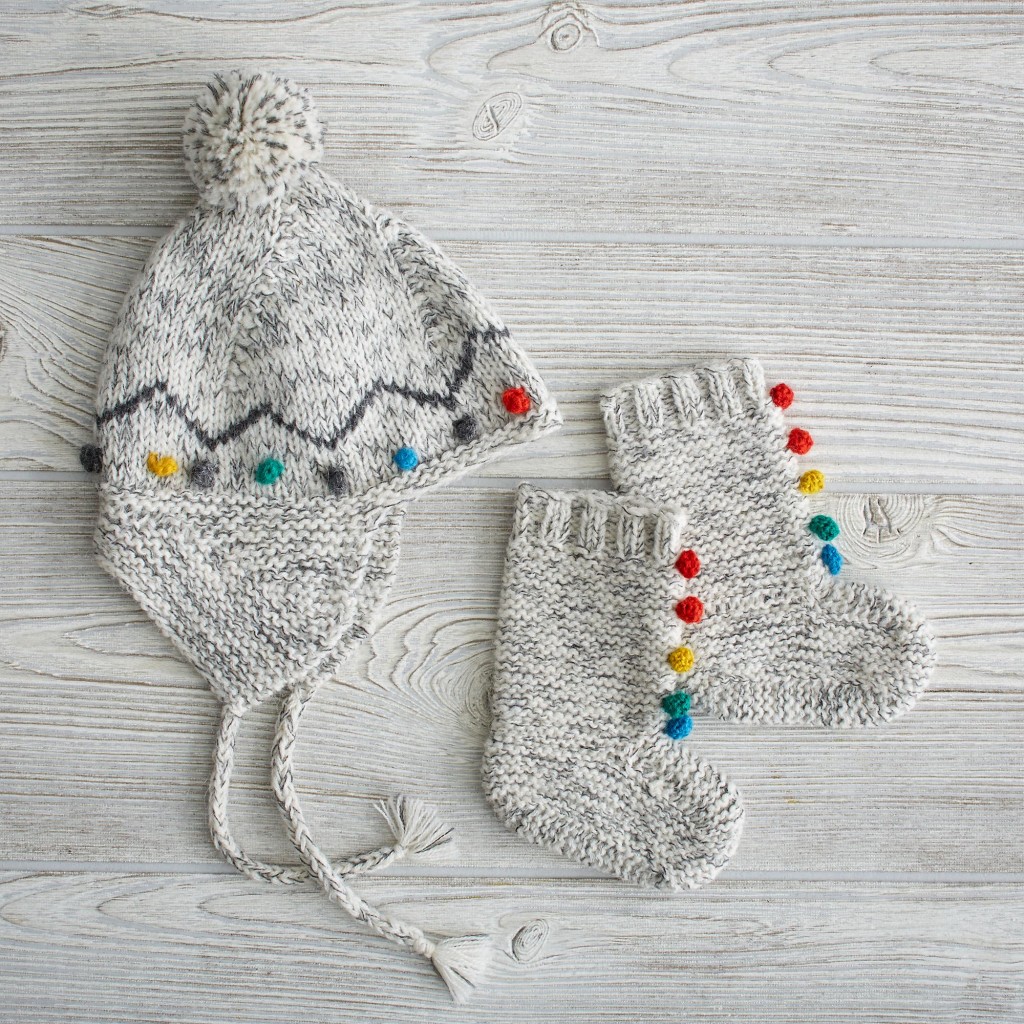
Final version of Pompom Hat & Booties for Nod

———-

Shop Misha and Puff’s Pompom Hat & Booties for The Land of Nod & browse our collection of baby & kids apparel.

Halloween Themed Free Printable Coloring Page

September 29, 2015

Nod Fun Pages designed by Michelle Romo

Get ready to spook the whole neighborhood with our Halloween printable coloring page. Sit your little ones down (HA!) to draw their favorite jack-o-lantern face on a pumpkin while they’re wearing their Halloween costume.  Download the full size printable HERE. Share the finished product on Instagram (use hashtag #landofnod) or our Facebook page and we may feature it!

COLORING-PAGES
Check out a few of the finished coloring pages, colored by some of our Nod employee kids.

  IMG_1073 IMG_1074 IMG_1072

Looking for more free printable coloring pages? Check out all our other Nod Printable Coloring Pages!

Michelle Romo is our newest Nod illustrator, she’s a self-taught illustrator and designer fueled by cookies and naps. Her influences include Mid-Century, Japanese and Scandinavian design, along with pretty much anything cute. When she isn’t working she spends her time eating good food, hugging her friends, playing video games and crafting.


DIY Felted Stones

September 28, 2015

Post by Rebecca of Not So SAHM

DIY Felted Stones

Making felted stones was pretty high up on our summer bucket list, but despite having all the supplies in hand, we just didn’t get around to making it happen. But I’m so glad we finally pulled it together because everyone absolutely loved both the project and the result. There is something about the interplay between the hardness of the stones and the fragile softness of the wool roving that makes for an incredibly interesting process. And don’t be intimated — we aren’t super experienced in textile crafts, but this was really quite easy for the kids to do with a little adult supervision.

Here’s what you’ll need to make our DIY felted stones:

  • Wool roving for wet felting (we purchased ours online here) — an ounce of a few colors each is plenty to make more than a dozen stones
  • Smooth river stones — you want to pick stones that are about the size of your child’s palm and without rough edges
  • A piece of tulle (we had a roll of tulle netting, so that’s what we used; but, a square shape would be the easiest. The tulle isn’t necessary, but it helps protect the fragile roving until you get a good felt going)
  • Bowl of hot soapy water (use dish soap liberally — we found the more suds, the easier it was to felt)
  • Cool water, to rinse

DIY Felted Stones - Supplies Needed

First, have your kiddos help pull tufts of roving a few inches longer than your rock. Lay them in a row just slightly wider than the width of your rock. Repeat layering in an alternating criss-cross pattern layer by layer. Three to four layers worked well for us. You can work with one color or mix a few together — we tried both!

DIY Felted Stones - Step 1 DIY Felted Stones - Step 1

Then wrap the roving around your stone, making it as tight and smooth as you can. If you find that the roving is too bulky, remove some from one end and re-wrap. Carefully wrap the piece of tulle around the bundled stone, pulling it taut.

DIY Felted Stones - Step 2 DIY Felted Stones - Step 2

Submerge the wrapped stone into the bowl of hot soapy water and hold it there until it stops bubbling. Remove it from the water and carefully start packing the wool around the stone, pressing and turning as if you were packing a snow ball. If the wool starts to get dry, dip it back into water and continue. Check periodically to make sure that your tulle isn’t getting incorporated into the wool.

DIY Felted Stones - Step 3 DIY Felted Stones - Step 3

You’ll see that the wool starts to felt together, but still looks a little lumpy and uneven. That means you need to roll it back up in the tulle and keep packing.

DIY Felted Stones - Step 4

When the wool fibers appears to have a good hold on each other and the covering has evened out, you are ready to start the rubbing process. Keeping the stone wrapped in tulle, dip it back into the soapy water. Remove it and squeeze out some of the excess water. Start rubbing the stone back and forth in your hands — just like you’d rub a bar of soap. Continue to rub, flipping it around to get an even felt. Once it feels less fragile (you’ll get a good sense of this by the second or third stone you make), you can remove the tulle and simply rub the felted stone in your hand.

DIY Felted Stones - Step 4 DIY Felted Stones - Step 4

You want to continue for about 5 – 10 minutes, re-submerging it when it starts to dry out. Once you feel like it’s sufficiently felted, rinse it in a bowl of cold water or under running cold water for a bit. Squeeze gently and then place it on a paper towel to dry overnight.

Kids Craft - DIY Felted Stones Kids Craft - DIY Felted Stones Kids Craft - DIY Felted Stones

Both Kane and Cam LOVED making these and talked the whole time about what they could use them for. There are so many possibilities, but we initially came up with using them to design mosaics, stacking them to build like blocks, counting them for math, and endless options for open-ended creative play. We started there and used them with our Nod Plush-a-Saurs (who happen to have felted teeth!) for so much fun. The kids used the felted stones to make nests, roller-skates, backpacks, hats, food, and on and on. All for their dinos (whose home was an upside down felt Quartz Floor Bin). I have a feeling we’re going to start felting everything.

Kids Craft - DIY Felted Stones

Kids Craft - DIY Felted Stones

Thanks to The Land of Nod for the Plush-a-Saurs and Quartz Floor Bin!

Rebecca is a mom to two young kiddos and, in her spare time (ha!), likes to pretend she’s a back-up dancer, craft cocktails, and run long distances. A relatively recent SAHM, she blogs family-friendly activities, DIYs and celebration fun at Not-So-SAHM.

DIY Pumpkin Magnets

September 25, 2015

Post by MJ of Pars Caeli

DIY Pumpkin Magnets

Pumpkins of all colors and shapes have arrived in all of our local stores, next to the mums and the shelves of Halloween candy! And one of our favorite Halloween activities is carving jack-o’lanterns. That time will be on its way fast enough, and until then, we’re finding ways to incorporate that fun without the mess (and smell) of the holiday gourd.

To add some fall spirit to our home in the meantime, we created these DIY Pumpkin Magnets to sit on our fridge and magnetic spaces! They require few supplies – likely a ton of which you have around from other craft projects – and can be created in a few minutes. The simplicity of this project and the sweetness factor make this an ideal Halloween craft for kids!!

DIY Pumpkin Magnets

To make the pumpkin magnets, you’ll need:

  • Orange yarn of any kind
  • Half foam balls (I cut three inch foam balls in half with a kitchen knife)
  • Scissors
  • Black felt
  • White crayon or chalk
  • Glue
  • Magnet
  • Pipe cleaners in green, brown, or black

DIY Pumpkin Magnets - Step 1

Step One: Wrap the ball with yarn. Hold the foam ball with one hand as you wrap the yarn over and over around the ball. This process is the same as rolling a ball of yarn, and you don’t have to be particular about keeping all of the strands going in any particular direction. Continue to wrap at all angles until all of the white is covered.

DIY Pumpkin Magnets - Step 3

Step Two: Secure the loose end of the yarn by interweaving it through the back threads and secure with glue (craft or hot glue will work well here).

Step Three: Make a face for your jack-o’lantern. We made ours pretty jolly, but you can make yours any way you’d like. These are small faces so I had our kids draw with white crayon on the black felt. I first traced the circle shape of the foam ball so they could see how small the face needed to be, and then they drew the features. With a little assistance from me, we had eyes, nose, and a toothy grin ready to go.

Step Four: Cut a one-inch piece of pipe cleaner for the stem. Cut away a bit of the fuzz from one end and stick it into the foam ball. Twist it into a spiral for a fun finish to your pumpkin!

DIY Pumpkin Magnets - Steps

Step Five: Glue the face on the front (again using craft or hot glue) and then turn over to the back and glue on your magnet!

DIY Pumpkin Magnets - Finished Project

These pumpkins turned out so well that we went a little overboard and decided to use them in other Halloween projects. With an entire skein of yarn, you can easily create two dozen of pumpkins! So, why not?

Happy crafting!

M.J. is a graphic and product designer, wife, and proud momma to three. She founded Pars Caeli (meaning a piece of heaven), a delightful blog and shop, to add more creative to the everyday. M.J. worked with our team to bring her lunchbox jokes to life in our product Lunchtime LOL Notes, now available at Land of Nod to bring on a case of the giggles!

DIY Leaf Dream Catcher

September 24, 2015
 Post by Amy of Delineate Your Dwelling
DIY Leaf Dream Catcher
The weather has finally just started to cool and it’s time to start enjoying that wonderful autumn weather!  I’ve enjoyed taking walks around our neighborhood with my kids and noticed a few leaves have even begun to fall.  Today I am sharing how to create this fun fall inspired DIY Leaf Dream Catcher with your children!


DIY Leaf Dream Catcher Supplies

  • Acrylic Paints
  • Leaves, assorted sizes
  • Small Embroidery Hoop
  • Yarn
  • Ribbon

How to Make Your DIY Leaf Dream Catcher

Start by placing your leaves on a clean flat surface and painting stripes, polka dots and bold color blocking patterns on them.  It’s best to paint on the leaves before they dry out too much, as they become more brittle when dry.

DIY Leaf Dream Catcher - Painting Leaves

Using two colors of yarn, wrap the embroidery hoop.  I used a few small dots of hot glue to keep the yarn in place.

DIY Leaf Dream Catcher - Dream Catcher Loop

Then, tie the leaves to your hoop at various lengths.  I added in a few other ribbons and tassels to mix up the textures and patterns a bit.

DIY Leaf Dream Catcher - Leaves
 These colorful DIY Leaf Dream Catchers are a great way to bring the outdoors inside, while having fun with color!
DIY Leaf Dream Catcher

Amy creates other colorful projects like this at Delineate Your Dwelling, a creative craft blog.  She is naturally drawn to graphic patterns and cheerful colors, while using natural elements with a modern twist. Amy believes everyone can be creative, sometimes you just need a good tutorial to get you started!

The Nod Makerie at Camp Wandawega

September 22, 2015
Post by Michelle Kohanzo
The Nod Makerie at Camp Wandawega

The weekend began with our soon to be friends arriving two-by-two. Upon arrival everyone made a good old-fashioned camp name tag, got a sleeping bag and was shown to their room (tent or camper) by yours truly to settle in. After a couple of hours of exploring, the chow bell was wrung and we all headed over to the Underground Food Collective food truck for some delicious tacos. Day one came to a close with camp fire songs from Little Miss Ann and a massive bonfire, complete with s’mores and bread on a stick. And off to bed!

The Nod Makerie at Camp Wandawega

Day two we were awoken by a rousing round of Revelry blasted through the PA. Breakfast was the yummiest homemade sausage and skillet potatoes, served off the food truck of course! We all ate up and got right to crafting. The crafts were put on by four of my favorite people in the world – Michelle Romo, Ashley Goldberg, Dee Clements, and Michelle Jewell. These are four of Nod’s amazing artists and everyone at camp got to make with them over the next two days, dream come true. Stay tuned for more on each individual workshop.

The Nod Makerie at Camp Wandawega

Me and my cutest, Everett, got to weave first with Dee. It turns out Everett is more an art director than artist. So, he left me with very clear instructions and went off to hunt for frogs. I wove two awesome potholders out of recycled t-shirts. Next we headed over to Michelle Romo’s paper camp world. Everett decides to customize every element of the pre-cut project and when I say customize I mean – he decides I will do it. At least this time around he stayed and kept me company.

The Nod Makerie at Camp Wandawega

After crafting we all head down to the lake for some canoeing and swimming. I think mainly only the kids swam, but us grown-ups were put in charge of canoe rowing, which we did to varying degrees of success. Happily no one capsized and we did find some snails and a toad – so, fun was had by all.

The Nod Makerie at Camp Wandawega

After swimming we all got together and took a big group photo and headed inside to get ready for dinner. We had a really special dinner Saturday night, of course fed by our friends from the food truck. Everyone lingered around the tables and we all just laughed and enjoyed each other and the beautiful weather. It was really magical. Once it got dark enough it was time for “Honey I Shrunk the Kids” under the stars. And I even snuck in a midnight boat trip with a friend, perfect day at camp.

The Nod Makerie at Camp Wandawega

Our third and final day again began with Revelry and a delicious donut breakfast. On this morning we were all business, because our time was short. So, we quickly made our way to our last workshop. Mine and Everett’s was stuffed animal making with Michelle Jewell of Finklestein. Of course, we could not follow the pattern provided by Michelle – we made a big black wolf, rather than a medium sized white or brown bear, but he’s pretty awesome and has become a favorite at our house.

The Nod Makerie at Camp Wandawega

We had a final lunch, with campfire songs by one of our little guests and then we said our good-byes. We were all so sad to leave. We had all become friends in just 2 ½ short days and we were already missing each other and Camp Wandawega. It was truly the most magical weekend, and I will always be thankful for it. Thank you to David and Tereasa for so graciously hosting us at Camp Wandawega, to Ali from The Makerie for creating such a warm, comfortable weekend, to all of our lovely artists for being there and teaching us, and to everyone at Nod who worked so hard to make the weekend so special.

The Nod Makerie at Camp Wandawega

All photos provided by: THUSS + FARRELL

Michelle is the mother to four kids (yes, FOUR!), a gourmet cook and a retail junky. She’s painted her dining room countless times and changes rugs like most people change their bedsheets. When she’s not living and breathing retail, she’s weaving amazing works of art with her sister for Bourbon+Gin Weaving.

Outer Space Themed Family Game Night

September 21, 2015

Post by Michelle of Avery & Augustine

Outer Space Themed Family Game Night

Family game night is a great way to connect with your kids and unwind from a busy week.  It’s so much fun to theme your game nights.  Food makes every event more memorable and the prep doesn’t have to be too elaborate or time-consuming.  Some menu ideas for game nights include: pie nightfavorite appetizersa crostini barcookies + hot chocolate and a popcorn party.

Outer Space Themed Family Game Night

Outer Space Themed Family Game NightOuter Space Themed Family Game NightOuter Space Themed Family Game NightOuter Space Themed Family Game NightOuter Space Themed Family Game Night

For our outer space-themed game night, we put together astronaut snacks—cheese in the shapes of rockets, stars, the moon and the sun—on a platter filled with round crackers in various sizes to represent planets.  We used cookie cutters from Sweet Estelle and Sur La Table to make outer space shapes.

Tic-tac-toe and card games are wonderful opportunities to practice early strategy, thinking and planning skills.  Games like Where is Piou Piou? are enjoyable exercises in visual discrimination.  At the end of the night, make clean-up time a game, too, and you won’t hear any complaints!

Thank you to The Land of Nod for sending the items for this post.

You can see Michelle’s work and read about her two young children and their first forays in cooking, art and everything in between at Avery and Augustine.

Solly Baby – Nod Artist Interview

September 17, 2015

Interview with Elle Rowley of Solly Baby

Solly Baby - Nod Artist Interview

Tell us a bit about yourself…

Hi! My name is Elle Rowley. My husband, Jared, and I run Solly Baby alongside our three little ones, Lucy (6.5, don’t forget the half;), Solomon (4), and Frances (1). We just moved from a little beach town in San Diego to a ten acre farm in Oregon. We are having fun being together and spreading the joy of wearing babies and everywhere.

  • HOMETOWN: Bridge City, Texas
  • CURRENT TOWN: McMinnville, Oregon
  • FAVE ICE CREAM FLAVOR: Cookies and Cream
  • FAVE BREAKFAST FOOD: Yogurt and chocolate granola (or French toast if I’m feeling crazy)
  • FAVE HOLIDAY: Thanksgiving
  • FAVE COLOR: White
  • FAVE MOVIE: So many! But Avalon and Pride and Prejudice top the list.
  • FAVE DECADE: 30’s

TELL US HOW YOU STARTED YOUR COMPANY: I started Solly Baby while my babies napped and my husband was in school 4 years ago. I knew I could make a better carrier for my own babies and then friends and friends of friends started asking for them so it blew up from there.Solly Baby - Nod Artist Interview

IS THERE A STORY BEHIND THE NAME? I made my first wrap for my son, Solomon. We called him Solly (Saw-lee) and when I would wear him, I would look down at him and say, “Sooolly babeee” like only a mama can get away with. It just seemed like a natural fit, capturing some of the fun and a lot of the love that comes from wearing your little ones.Solly Baby - Nod Artist Interview

WHAT ARE THE MOST REWARDING AND THE MOST DIFFICULT PARTS OF RUNNING YOUR OWN BUSINESS? I cannot get enough of caregivers sending us pics and sharing their beautiful stories of wearing their wraps and running businesses or taking care of their toddler or just bonding with their little ones. I also love that it allows Jared and me to spend so much time with our babies and each other. We feel so incredibly blessed. The hard parts lie somewhere in the details of balance and doing it “all”. But no complaints here. We know how lucky we are.

HOW WOULD YOU DESCRIBE YOUR STYLE? Basic, minimalist, quality.     Solly Baby - Nod Artist InterviewIF YOU COULD TRAVEL ANYWHERE, WHERE WOULD IT BE? Back to this little archipelago we stayed at in Stockholm last year. The Baltic Sea surrounding us and fall leaves covering the island. It was pure magic.

IF YOU COULD POSSESS A SUPERPOWER, WHAT WOULD IT BE? Extending the hours in each day. Every day goes by too quickly!

Solly Dolly Wrap - Nod Artist Interview

TELL US ABOUT YOUR PRODUCT BEING SOLD AT THE LAND OF NOD. HOW DID IT COME ABOUT? The Land of Nod has always played a part in our family. The products represent all the fun things about being a kid while still having the sophistication for shared spaces. We don’t take on many retailers because we do most of our business through our own online shop, but Nod has always felt like a natural home for our products so when the opportunity arose to sell our Solly Dolly Wrap, we jumped on it!

———-

Shop the Solly Dolly Wrap for The Land of Nod & check out our collection of dolls and stuffed animals.

Camp Crafts, Not Just for Summer

September 16, 2015
Post by Danielle Kurtz, Creative Director at The Land of Nod

Kids Camp Crafts, Not Just for Summer

Classic kids camp crafts are a great way to keep the kids busy indoors on rainy days. Here’s a roundup of some of our favorite camp craft projects that require just a few, inexpensive materials, and are fun for adults and kids alike.

God’s Eyes

Kids Camp Crafts - God's Eyes

With just a few skeins of yarn and a couple dowel rods (or even sticks from your yard), you can make dozens of these beauties. The technique is simple, here’s one of our favorite DIY’s from the ladies at Pretty Prudent. We love this craft because it’s fairly easy to master, but the design options are limitless. It’s a great way to get your kids playing with color combinations. And, when you’re done, you can hang a cluster of them together to add a pop of color to your space.

Yarn Bombing

Kids Camp Crafts - Yarn Bombing

If you’re feeling adventurous, let your kids “yarn bomb” something in your house. A support pole in your basement would be ideal. Or, consider the railing on your stairs or even a chair or table leg. There’s two ways to do this, you can stitch together patches and strips of knit or crocheted fabric. (You can make the patches, or buy old blankets at goodwill to repurpose). Or, you can simply wrap the yarn around the item. What a fun way to add some color into a rainy day.

Pompom Pine Cones

Kids Camp Crafts - Pompom Pine Cones

All these require are pine cones, a bag of mini colorful pompoms you can buy at any craft store and glue. (You can use a hot glue gun or craft glue.) Simply glue pompoms at random to the pine cones. They nestle perfectly on the little scales. These make a great addition to a Thanksgiving centerpiece or use them as place cards. They’d also look great on a mantle all decked out for the holiday, or tied onto Christmas packages. For that matter, they’d even make lovely homemade ornaments for all the grandparents, aunts, uncles and neighbors, just tie on a length of yarn to hang them.

Hula Hoop Weavings

Kids Camp Crafts - Hula Hoop Weavings

We love the playful large scale of these hula-hoop weavings. There’s a great step-by-step tutorial at Flax & Twine. If you’re not up for a hula-hoop sized weaving, you can also use embroidery hoops of all sizes. It’s a great camp craft that will get kids working with their hands, and exploring color and pattern. You can even create these using strips of old t-shirts and make a rug or potholder out of the weavings. They’d make awesome teacher gifts!

Hand-Painted Sticks & Rocks

Kids Camp Crafts - Hand Painted Sticks & Rocks

Last, but definitely not least, is hand painting rocks and sticks. We love this camp craft because it’s truly perfect for all ages. All you need are paints, brushes and plenty of rocks and sticks. We’d suggest making this a two-part project, starting with a little backyard exploration to gather rocks and sticks to paint. But, if the weather isn’t accommodating, or you live in the city, there are also tons of sources on Etsy to order drift wood and river rocks, so you always have some at hand.

Encourage kids to explore all sorts of ideas from patterns and letters to paint swirls and motifs, the options are endless. Consider turning this into a collection, your kids can bring home a rock from family vacations or adventures, paint them and display them all in their room. A fun an inexpensive memento.

So, as thoughts turn away from summer, don’t forget about all the fabulous camp inspired crafts of the season. You might just need them in your back pocket for that first snow day!

Photos provided by: THUSS + FARRELL 

Danielle is the Creative Director at Nod and an over-protective mother of two. She’s also completely obsessed with Pinterest, Twitter, Instagram and her Kindle, but not necessarily in that order. Danielle loves to craft, sew and crochet. Her current craft of choice is weaving tiny wall tapestries.

Printable Coloring Page – Rocket in Space

September 14, 2015

Coloring Pages designed by Michelle Romo

Blast off to space this weekend with this out-of-this-world printable coloring page.  Download the full size printable HERE. Share the finished product on Instagram (use hashtag #CrateKids) or our Facebook page and we may feature it!Nod Printable Coloring Page - Rocket in Space

Looking for more free printable coloring pages? Check out all our other Printable Coloring Pages!

Michelle Romo is a self-taught illustrator and designer fueled by cookies and naps. Her influences include Mid-Century, Japanese and Scandinavian design, along with pretty much anything cute. When she isn’t working she spends her time eating good food, hugging her friends, playing video games and crafting.

Big Girl Room Moodboard

September 10, 2015

Post by Lindsay of Lindsay Saccullo Interiors

Being a mom to toddler Avery, 19 months, isn’t always easy, but it always fills my heart – and home! I often try to imagine the day when she will become a big sister, and I can’t even picture it. She’s our baby! I have hardly wrapped my mind around the fact that this little human being is ours, yet I know that Avery becoming a Big Girl is just around the corner.

“They grow so fast!” everyone says. And I know it’s true. The days fly, but the hours can drag. It’s in these hours while Avery is entertaining herself by banging on pots and pans with a wooden spoon and pretending to feed soup to our rescue mutt, that I often find myself drifting into a state of what I call “Design Dreaming”. I’ve finished her nursery, so now, like any designer, it’s on to the next project! Here is what I came up with for her Big Girl Room Moodboard. What do you think?

Big Girl Room Moodboard

Shape Shifter Wall Shelves / Falling Bear Wall Art / Love Framed Wall Art / Falling Fox Wall Art / Gold Confetti Curtain Panels / Gold Rock Lamp / Radiant Dresser / Upholstered Settee in Petal Linen / Ombre Throw Pillow / Cinema Floor Lamp / Color Blocks Rug / Gold Dot Sheet Set / Aqua Scallop Throw Pillow / Typeset Throw Pillow / Gold Pinstripe Pillow / Gold Pouf / Mint Pouf


Lindsay Saccullo is an Interior Designer and Blogger based in Brooklyn, NY. When she isn’t sharing her knowledge and passion for all things design, she’s spending time with her husband, daughter, and dog. For more decorating, home decor, and organizational tips, follow her on Instagram @LindsaySacculloInteriors

Fika — A Swedish Tradition

September 9, 2015

Post by Michelle Sterling of Avery & AugustineFika: A Swedish Tradition

In honor of Swedish designer Lotta Jansdotter’s new collection for Nod, we’re having fika today!  It’s a traditional coffee break people usually take at least once a day in Sweden.  It’s a chance to relax, chat and catch up a friend or colleague.  Fika also involves some treat or sweet along with your coffee, like kannelbullar (cinnamon rolls), semlor (cardamom buns filled with cream) or äppelkaka (Swedish apple cake).

Fika: A Swedish TraditionFika: A Swedish TraditionFika: A Swedish TraditionFika: A Swedish Tradition

Our fika today consists of chokladbollar with babyccinos.  Here is a recipe for chokladbollar, also known as Swedish chocolate balls, reprinted with permission from Fika: The Art of The Swedish Coffee Break by Anna Brones and Johanna Kindvall.

Chokladbollar (Chocolate Balls)

Makes 20 to 25 balls

Ingredients

  • 2 cups (7 ounces, 198 grams) rolled oats
  • ½ cup (4 ounces, 113 grams) unsalted butter, room temperature
  • ¼ cup (1.75 ounces, 50 grams) natural cane sugar
  • ¼ cup (.75 ounce, 21 grams) unsweetened cocoa powder
  • 1 teaspoon pure vanilla extract
  • ½ teaspoon salt
  • About ½ cup (1.5 ounces, 42 grams) shredded coconut

How to Make

  1. In a food processor, pulse the oats into a coarse meal. You want just a little bit of texture, so don’t grind them all the way.  If you don’t have a food processor, use the smallest oats you can find, as they are better for the final texture of the chocolate balls.
  2. In a bowl, cream together the butter and sugar.  Add the cocoa powder and vanilla and cream together until well blended; then add the oats and the salt. Using your hands, mix all of the ingredients together.
  3. Roll the mixture into small balls, about a tablespoon for each one. Roll each ball in the shredded coconut until fully coated.
  4. Store in an airtight container in the refrigerator, or in the freezer for longer periods.
For the babyccino, I melted a square of dark chocolate in the bottom of a cup in the microwave, poured warm milk over that and then topped it with foamed milk (I used this electric frother to foam the milk).  Instead of melted chocolate, you can pour a little ganache or nutella into the bottom of the cup (or use all milk with no chocolate).  To finish off the babyccino, I dusted cocoa powder over a latte stencil to create a design in the foam.  If you don’t have latte stencils, sprinkling some cocoa powder or chocolate sprinkles on the foam would also make it pretty special.  It’s the little things that get kids excited!  For another reference on how to make a babyccino, head over to this post.

Fika is usually about being social and having good conversation, but sometimes we like to do a little reading aloud during our fika.  Do yourself a favor and take a few moments to fika in the morning or afternoon.  Make it a habit and you’ll be glad you did.

Thank you to The Land of Nod for sending the rug for this post.  Many thanks to Anna Brones and Johanna Kindvall for providing the chokladbollar recipe from their lovely book about fika.

You can see Michelle’s work and read about her two young children and their first forays in cooking, art and everything in between at Avery and Augustine.

Camp Wandawega & Nod – Stories Behind the Products

September 8, 2015
Post by Tereasa of Camp Wandawega

I’ve written a few posts so far about the magic of Camp Wandawega. You can learn about the history of Camp Wandawega here and more about how our Camp Wandawega for Nod collection came to be here, and you can shop the entire collection at Land of Nod.

I’ve said it before, but our partnership with The Land of Nod is a dream. So we were honored when The Land of Nod came to shoot the collection at Camp. This video above is a behind-the-scenes look at the collaboration. And here are a few behind-the-product stories of some of the new products.Camp Wandawega & Nod - Camp Kids Rug
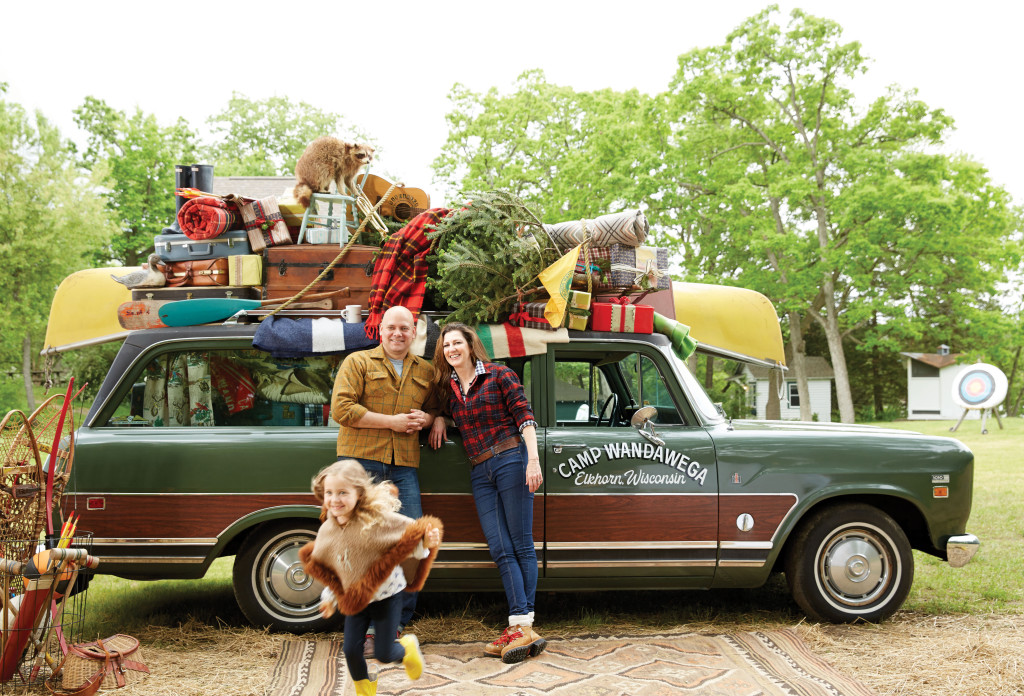
The Camp Map Rug is a 3-dimensional kid’s dream come true. It’s sculpted hills are a racetrack for Charlie’s HotWheels, it’s lake a swimming pool for her dolls. She has more than once fallen asleep in it’s grassy field — under the ‘stars’ of Camp Wandawega.Camp Wandawega & Nod - Camp Kids Flannel BeddingCharlie loves wrapping herself & Frankie up in her Camp Sheets – she’ll spend the last half hour before she nods off showing us where she found the frog in the teepee… where she and Frankie had the adventure with the turtle on the beach. It’s a map for the imagination, and the pillowcase alone is the key for us to take Camp wherever we go.

Camp Wandawega & Nod - Frankie the Dog Throw Pillow6 years ago, we rescued Frankie from a high-kill shelter and since the night we brought him home in our laps, he’s been our loyal camp security guard/face licker/hot dog stealer/couch snuggler/guest greeter. And now, he’s immortalized as a Throw Pillow. You can’t tell us dogs don’t have soul. And he even saved our family once, read about it here.

On weekends, Tereasa Surratt is the proprietor of Camp Wandawega  – during the week- she is a SVP/Creative Director at ad agency, Ogilvy.  In her spare time, she’s a contributing stylist to a handful of lifestyle mags, just signed her third book with Random House – and lives in Chicago with her husband, 4 year old daughter Charlie and mutt Frankie.

Back To School Book Exchange Party

September 4, 2015

Post by Kara Woolery of Lillian Hope Designs

I am excited to share these great party ideas, including FREE Printables, to help you host your own book exchange party. This party is a fabulous way to celebrate your kiddos going back to school. It is perfect for a play date with young ones, middle of the school year blues, a birthday party for a book lover, or an end of school party to get ready for reading through the summer!
Back To School Book Exchange Party
The idea behind a book exchange party is for every kid to bring 3-5 books they no longer want. They will drop them in the “Library” once they arrive to the party or playdate, and then they will get to pick out 3-5 new books to take home!Back To School Book Exchange Party

Back To School Book Exchange Party - Book Themed Cake

Using your children’s books as part of the decorations helps save on cost, and gives a fun Library feel, and thankfully The Land Of Nod carries a large variety of classic children’s books. I purchased an already made cake at my local grocery store; then added a mini book bunting to top it off! The adorable book banner and mini book cake banner were EASY to make!

DIY BOOK BANNER:

  1. Cut a rectangle from construction paper.
  2. Cut two of the same size rectangles from some old book pages.
  3. Place the book pages inside your construction paper and fold in half.
  4. You can now set the paper books around for decor. Or use an office hole punch at the top corner and then loop through some ribbon or twine to create a banner.
  5. Repeat to make as many as you need. You can create these in any size you want!

Back To School Book Exchange Party

Search your pantry first when hosting a party or play date gathering! Kool-Aid and popcorn are some common pantry items! You can melt some bakers chocolate and drizzle it on the popcorn; then add some fun sprinkles to the top! YUMMY and cute. Try to be resourceful and use food and drinks you already have.

Back To School Book Exchange Party
This READ Banner is part of the FREE Printables I mentioned at the beginning of this post. Print, Cut, Hole Punch, and loop through ribbon or twine! EASY!

Back To School Book Exchange Party - Book Nook
This Land Of Nod Grey Dot Teepee was PERFECT for our reading nook! The kids absolutely loved it, and using the FREE Printables you can turn it into a nice little reading nook.Back To School Book Exchange Party
Back To School Book Exchange Party - Book Nook
Back To School Book Exchange Party
When the kids arrive they can drop off their books to exchange in the Library! I used this fun Stripes Around the Floor Bin for our library drop off!
Back To School Book Exchange Party
Let the kids take turns picking out one book at a time until they have all of the books they are taking home. You can use the free printable library cards to track how many books they have selected. Stamp the squares each time they pick out a book.Back To School Book Exchange Party
Back To School Book Exchange Party
Back To School Book Exchange Party - Book Cookies

Now it is time for them to have fun reading some of their new books! Head over to my blog to download all the free printables I mentioned in this post.

A special thanks to:
Photography – Heather Carpenter Photography
Printables and Party Styling – Lillian Hope Designs
Cookies – Sugar Coma Cookies
Popcorn Cups, Plastic Milk Bottles, Gable Boxes, Gumball Tubes – Hoopla Events

Lillian Hope Designs is the creation of designer and party stylist Kara Woolery; who has a passion for designing beautiful parties of all types and themes. Kara specializes in creating Printables and Brand/Product styling for companies.

DIY Paper Dolls Craft

September 2, 2015

Post by Todder RoyaltyPaper Dolls CraftA little over a month ago, The Land of Nod and Toddler Royalty teamed up for a creative day of Paper Doll making fun! A fashion-inspired activity that you might end up enjoying more than your little ones do.  You can create so many different fun characters; from mermaids to superheroes to mini runway fashionistas. All you need is a small list of craft supplies, imagination and you’re ready to create.

Paper Dolls Craft

Paper Dolls Craft

Paper Doll Craft Supplies:

  • 8.5×11 card stock (try different colors for each character- blue mermaids, pink princesses, green super heroes)
  • ⅛” hole punch
  • Small brads, to put dolls together
  • Fabric glue
  • Markers, pencils, or crayons
  • Googly eyes
  • Yarn
  • Fabric (you can buy great fabric quarters individually or by the bundle at JoAnn Fabrics)
  • Paper doll template (download it HERE)
  • Anything else you want to use to accessorize your character (buttons, flowers, bows, soccer balls, skateboards, etc.)

DIY Paper Dolls Instructions

  1. Start by printing out your paper doll template on card stock.
  2. Cut out all pieces and punch holes at the shoulders, hips, arms and legs.
  3. Place brads in holes to attach all paper doll parts. Using brads allows your paper dolls to have movement, which equals more fun for the kids.DIY Paper Dolls Craft
  4. Now it’s time to get creative and let their imaginations run wild. Take your fabric and cut out different clothing pieces. I know my girls like to look through my fashion magazines for inspiration and try to recreate the clothing shapes they see.
  5. Hole punch the fabric in the areas that the brads will go.
  6. Take the brads out of the doll before you glue.
  7. Glue your dolls where clothing will be placed and put clothing on. Once the glue is dry and clothing is in place, you can then place the brads back in their holes.DIY Paper Dolls Craft
  8. Cut your yarn and make any kind of fun and crazy hairstyle you want. Use different colors, adorn the hair with bows, pom poms, braids, etc.

  9. Take your googly eyes and glue them in place. Draw on your nose and mouth or use beads, pom poms or yarn for these as well!DIY Paper Dolls Craft DIY Paper Dolls Craft

  10. Wait for your dolls to dry and be prepared for hours of endless fun!

You can so create many different characters, put together a Paper Doll Runway Show (this is my girl’s favorite), a Paper Doll Theatre, Paper Doll Rock Concert. Not only does it challenge their imagination, it helps assist them in creating their own unique wardrobe style!

DIY Paper Dolls Craft

Photography: Olive And Honey Photography

Toddler Royalty is a high fashion children’s clothing line that breathes creativity, uniqueness and individuality of today’s children.  Custom-made, by hand, in Chicago, IL. Edgy yet sweet, soft yet punk-rock. Toddler Royalty strives to create children’s clothing that gives them the choices and opportunity to be whoever they want to be.  They want kids to know that it’s ok to mix stripes and polka dots, or flowers and stars. Toddler Royalty encourages kids to show their own unique style, be confident, and take on the day with a smile.

Camp Wandawega & Nod – Behind the Collaboration

September 1, 2015
Post by Tereasa of Camp Wandawega

Camp Wandawega & Nod - Behind the Collaboration

At Camp Wandawega, we strive to create a magical place that will be the backdrop for amazing sun-soaked memories. Likewise, Land of Nod has been helping families create magical places in their own homes: intimate, thoughtful environments where imaginations and creativity soar with wild abandon. Together, we were able to take the magic of Camp Wandawega, and enable The Land of Nod fans to bring it into their homes. Our partnership with The Land of Nod is literally a dream – and a place- come true. We are kindred spirits in all the best ways: geeking out on the details, the storytelling behind every little thing, and the value of making memories that last.
Wanda2
The designers at The Land of Nod truly appreciated all the little details at Camp, from tiny rustic cottages, to our time-worn canoes, to salvaged tents & teepees, to Charlie’s favorite overstuffed lounge chair, to a magical treehouse and even our first-born child (mutt) Frankie. Not only did these become the inspiration for the collaboration, they also became the literal subject matter of it. As the design process unfolded, it was a labor of love for both of us to stay true to the original details of the camp, while adding even more whimsy, magic and playfulness to the details in ways that only Land of Nod knows how.

On weekends, Tereasa Surratt is the proprietor of Camp Wandawega  – during the week- she is a SVP/Creative Director at ad agency, Ogilvy.  In her spare time, she’s a contributing stylist to a handful of lifestyle mags, just signed her third book with Random House – and lives in Chicago with her husband, 4 year old daughter Charlie and mutt Frankie.

Strawberry Pie Popsicle Recipe

August 28, 2015

Post by Michelle Sterling of Avery and Augustine

Strawberry Pie Popsicles

Here’s an easy popsicle recipe to make during the last days of summer.  You might already have all of the ingredients at home.

Here’s what you need to make Strawberry Pie Popsicles:

  • Plain yogurt
  • 1 jar of jam (smooth seems to work better than chunky)
  • 12 graham cracker sheets
  • 1 stick of butter
  • 1/4 teaspoon of salt
  • Popsicle molds and sticks

Strawberry Pie Popsicle Ingredients

I used this recipe from Food52 to make a graham cracker crust.  It was simple — I used a blender to grind up 12 graham cracker sheets into fine crumbs.  In addition, I browned the butter on the stove before combining it with the graham cracker crumbs.  I then added 1/4 teaspoon of salt to the crust mixture.

Strawberry Pie Popsicle Recipe

Browning butter takes a little more time but is well worth it—browning intensifies the butter’s beautiful flavor and adds some nuttiness.  After your crust is baked, cool it and crumble it up into a bowl.  Spoon in a thin layer of jam, a thicker layer of yogurt and a thin layer of graham cracker crust crumble into each popsicle mold.  Repeat until you fill up each popsicle mold then insert a flat popsicle stick, freeze until firm, then enjoy!

Strawberry Pie Popsicle Recipe

May these last days of summer be slow and enjoyable for you and your family before the fall rush begins!

Thank you to The Land of Nod for sending the Farmer’s Market duvet cover for this post.

Strawberry Pie Popsicle Recipe

You can see Michelle’s work and read about her two young children and their first forays in cooking, art and everything in between at Avery and Augustine.

DIY Parade Flags

August 26, 2015

Post by Kim of Beehive Art

Kids Craft: DIY Parade Flags

We love a parade and these happy canvas flags are perfectly perfect for a summer parade, party, of picnic!

Supplies Needed:

  • Canvas
  • Dowels
  • Tissue paper
  • Fabric paint or acrylic paint
  • Paint Brushes
  • Glue + glue brush
  • Glue gun
  • Fun extras – pompoms + ribbons + tassels

How to Create Your DIY Parade Flags:

Kids Craft: DIY Parade Flags Supplies

  1. With fabric scissors, cut out as many flags as you want in varying sizes. We like to mix them up, wide + narrow, short + long.
  2. Paint your flags with bright colors, bold stripes and dots, or fun shapes. I encourage kids to cover the entire surface of the canvas.Kids Craft: DIY Parade Flags
  3. While the flags are drying, cut up the tissue paper into small strips or pieces. If you have one or two flags, cut your dowel in half. We recently used the entire length of the dowel for 7-8 flags and it looked really great.Kids Craft: DIY Parade Flags
  4. Brush white glue onto the dowel and cover it with the tissue pieces. If you’d rather paint your dowel, we’ve had great success with watercolor paint or acrylic paint (recommended for older kids).Kids Craft: DIY Parade Flags
  5. When your dowel and flags are completely dry, add hot glue to the dowel and gently wrap flags around it.Kids Craft: DIY Parade Flags
  6. Now add your pompoms, tassels, and ribbons for fun and extra festive flags!

Kids Craft: DIY Parade Flags

Kim Poler is queen bee of beehive ART. She lives for inspiring visual expression, explosions of colors, forms and exciting combinations of mixed-media art. She creates, designs art projects, teaches children art and blogs at Beehive Art.