Close

Blog

Squirrelly Minds Gender Neutral Nursery

August 25, 2015

Post by Tan of Squirrelly Minds

When designing our first baby’s nursery (lovingly nicknamed squirrelly baby), I didn’t know what theme I wanted. What I did know was that it had to be gender neutral as we haven’t found out the sex and that I wanted the room to be filled with items from The Land of Nod to make it the perfect oasis for our little baby… and us too, because who am I kidding. I decided on a color scheme of white, gold, grey and mint, and put together our dream nursery from there.

This nursery hails from north of the border, and truth be told our options are kinda limited up here, so I was thrilled when I first realized Land of Nod ships to Canada. It was important to me that the nursery feel cozy and unique rather than filling it with stock items from a big box store. Little touches like the planets poster and the overcast shelf gave the room those special details that help it stand out.Squirrelly Minds Gender Neutral Nursery

While we started out with just a color scheme, we ended up with a very subtle ‘stars and space’ theme as well, and it all started with the planets banner. This eventually grew into a constellation changing pad and a gold wall hanging saying “I love you to the moon and back”. While not strictly space related, the overcast wall shelf works with the theme, keeping up with an ‘up in the sky’ kind of feel. I’m not one for very obvious themes that occur consistently throughout a room, so these little touches were just perfect.

Squirrelly Minds Gender Neutral Nursery

I’m loving the practical details too. The flokati rug is SO SOFT both to the touch and visually, bringing in added coziness to the room. We’ve laid down on it quite a few times now, imagining squirrelly baby playing with a bunch of toys or learning to crawl on the soft wool. The kneatly knit baskets are perfect for storing toys in and come in small, medium and large. It sits right by the entrance within arms reach of the rug, so once squirrelly baby is big enough, he/she can reach over and grab a favorite toy to play with. The stylish grey laundry hamper is fantastic too. No ugly white plastic here! And when it comes time to change baby’s diaper, the hamper will collapse when I walk right up against the dresser, then I can pop it open again to place dirty onesies and other items to be laundered. I envision this item getting a whole lotta use in the coming months.

Squirrelly Minds Gender Neutral Nursery

The nursing/play area is my favorite in the room. Every day I sit and relax in that rocker with my feet up on the gold leather pouf. It’s so comfy as a foot rest and as a chair! It’ll act as great extra seating once squirrelly baby is older and has friends over to play.

Squirrelly Minds Gender Neutral Nursery - Teepee

And of course, what kids aren’t going to want to play in this gold striped teepee? I put a couple sheepskins inside to make it the perfect reading/playing hideaway. Our cat Lucy loves it too and sits in there whenever she can. Sorry kitty, squirrelly baby has first dibs.

I can’t wait to spend a bunch of time in here with our first little babe. I just know he/she will love it too. A huge thank you to Land of Nod for making squirrelly baby’s gender neutral nursery possible!

Meet Tan, during the day she teaches elementary (while downing coffee with coconut milk) and spends evening and weekends with her friends, husband, kitty, and of course, Squirrelly Minds.

DIY Sprinkle Cones

August 24, 2015

Post by Rebecca of Not So SAHM

DIY Sprinkle Cones

Oh, August. You get us every year. We are tired of summer’s heat, but not yet ready to go back to school (well, I’m kind of ready. The kids are not). We all needed a little pick-me-up and I could think of nothing better to help sprinkle a little happiness around then, well, sprinkles. Inspired by The Land of Nod’s super fabulous Ice Cream Party Collection, we came up with a little sprinkle DIY. Because the only thing better than ice cream is ice cream with sprinkles!

Here’s how to make our fun end-of-the-summer (!) treat. You’ll need:

  • 1 package of sugar cones (this makes 8 cones)
  • 1, 1.45 oz chocolate bar (we prefer dark chocolate!)
  • Candy sprinkles

DIY Sprinkle Cones

DIY Sprinkle ConesDIY Sprinkle Cones

DIY Sprinkle Cones

  1. Break the chocolate bar into pieces and melt it over a double boiler — you don’t need a fancy one, a glass bowl atop a small pot of water does the trick. Just make sure to heat the chocolate slowly and stir constantly to avoid burning it.
  2. Once it’s melted, dip the top of a sugar cone into the chocolate and twirl a bit to coat the top.
  3. Let the chocolate-dipped cone cool for about 30 seconds — you want the chocolate sticky, but not too runny.
  4. Carefully roll the chocolate-dipped cone in candy sprinkles.
  5. Set upright to dry for about 20 minutes.

Scoop your ice cream in and see the end of summer coming your way!

DIY Sprinkle ConesDIY Sprinkle Cones DIY Sprinkle ConesDIY Sprinkle ConesDIY Sprinkle ConesDIY Sprinkle Cones

Rebecca is a mom to two young kiddos and, in her spare time (ha!), likes to pretend she’s a back-up dancer, craft cocktails, and run long distances. A relatively recent SAHM, she blogs family-friendly activities, DIYs and celebration fun at Not-So-SAHM.


Back to School Organization Must-Haves

August 21, 2015

Styleboard by The Land of Nod’s Design Services Team

Back to school season is the perfect time to get organized. To get you prepared for the flood of papers and art projects that will start to flow in soon, we put together a few of our favorite back to school organization must-haves. From art rails for displaying your kiddos art to hooks for those book bags, we’ve got all your organization needs covered.

Back to School Organization Must-Haves

A to Z Wall Art / Gallery Art Rail (Aqua & Black) / Chalk About It Wall Hook (Square, Triangle, Circle) / Touch Tone Wall Hanger / Natural Cargo Desk / Panda Backpack / Navy Sidebar Rug / Blue Floor Bin / Green Color Pop Storage Bin / Red Homeroom Metal Desk Chair / Acrylic Drawers / Acrylic Double Cup

The Land of Nod’s Design Services Team offers free one-on-one design advice, mood boards and space planning. You have a room to decorate? They’d love to hear from you.

DIY Bug Hotels

August 20, 2015

Post by Kim of Beehive Art

DIY Bug Hotels

What’s a “bug hotel” you ask? A bug hotel is a summer essential when you’re out and about in the garden, meadow or strolling the sidewalk. Beetles, insects and fireflies will have a swell place to visit for your brief observation.

Bug Hotel Supplies needed:

  • paper or cardboard container with a lid
  • paint
  • paint brush
  • window screen
  • masking tape
  • sharpie marker
  • x-acto knife – parents only

1.   Peel off all labels from container before drawing windows and doors. We up-cycled coffee containers for our bug hotels, oatmeal containers work great too.

DIY Bug Hotels - Step 1

2.   Once the outlines for windows and doors are in place, get out your paints and a medium sized brush. Paint the entire surface, painting around each window and door.We applied a second coat of paint AFTER windows and doors were cut out.

DIY Bug Hotels - Step 2


3.   This step is for PARENTS: After paint has dried, use an x-acto knife and cut out all windows and doors. Cut a circle out of the lid for roof top ventilation.

DIY Bug Hotels - Step 3

4.   The screen is easier than you’d think. Cut one piece that fits snug inside the container. It easily rolls up and fits into place, a little of the screen might overlap.

DIY Bug Hotels - Step 4

5. Flip the lid over and cover the lid with a piece of screen to fit. We used small pieces of masking tape to secure the screen.

DIY Bug Hotels - Step 5

6. Adding details like window boxes and funny bug drawings are the cherry on top!

DIY Bug Hotels - Step 6 DIY Bug Hotels

Kim Poler is queen bee of beehive ART. She lives for inspiring visual expression, explosions of colors, forms and exciting combinations of mixed-media art. She creates, designs art projects, teaches children art and blogs at Beehive Art

DIY Personalized Pencil Bags

August 19, 2015

Post by Kacia of Coconut Robot
PErsonalized Pencil Bags

I’m super excited about this project today!  If I’m honest with you, after doing this project, I want to embroider just about everything Harlow writes or draws!  I love how it captures a moment in time: there will be a time when she writes all of her letters the same size, and I’ll miss this sweet season of “creative” letters.

I love when I try to correct her writing of a specific letter, and her response is always, “I’m just writing it fancy and different, mommy!”

Let’s jump right into it!

IMG_0070 (1)

Begin by cutting a front piece, back piece and 2 lining pieces.  I made my pouch pieces 11″ by roughly 5″.  Grab a zipper as well – I like using one just a bit longer, so for this, I used a 14″ zipper.  Don’t worry, you’ll trim it down to size. 🙂

IMG_0057

Using a fabric pen, mark your handwriting page lines.  I made the top and bottom lines 1.5 inches apart with the middle line in the middle (3/4″ from each).

IMG_0059IMG_0135

Next, also using a fabric pen or marker, have your child write their name, draw a picture, or whatever you’d like to embroider on the bag!

IMG_0060 IMG_0061

Next, we will start embroidering!  You can get embroidery thread at any hobby shop — grab a needle if you don’t have one handy.

IMG_0149

After the lines and text are written, we will sew the lines using a sewing machine.  You can hand embroider these if you’d like to or don’t have a sewing machine handy, but I would use a single thread, so that the name/drawing stands out the most.

For the top and bottom line, I used a stitch length of 2.  For the center line, to give it a “dotted line” feel, I used a stitch length of 5.

Now comes the fun part!

IMG_0142 (1)

There are SO many fun embroidery stitches, but for this project, we’ll do a basic split stitch.

To do this stitch, bring your needle up about 1/8″ from your last stitch.  Bring your needle and thread back down through the previous stitch by splitting the thread down the middle – as seen in the 2 photos below.  Continue doing this, keeping your stitch length as consistent as possible.

I think you’re technically supposed to bring your needle up through the previous stitch, but this is my favorite way to achieve this look.

IMG_0144 (1)IMG_0145IMG_0148IMG_0151

Grab a good movie or binge watch your favorite show on Netflix while you continue stitching!

IMG_0093

For the smaller text, I chose to use a simple backstitch.  It’s similar to the split stitch, but bring your thread back down at the end point of the previous stitch, instead of splitting the threads.

IMG_0082 (1)

When you’ve finished embroidering, we will create the zipped bag!

IMG_0072 (1)

We will create a “zipper sandwich” using the front of your bag and one lining piece.  Zippers are so fun to sew into place — a bit of magic is involved – just watch!

Place the front of your bag right-side-up.

Next place your zipper right-side-down.

IMG_0073 (1)

Next, place the lining on top of the zipper.  If there is a right side, place it down. 

Pin in place!

IMG_0074 (1)

Next, sew along the edge where you pinned.  Sewing about 1/4″ from the edge will land you in a good spot.

IMG_0075 (1)

Press the seams back to reveal the zipper perfectly in place!  For a finished look, top stitch as you see above.  It’ll help the fabric stay away from the zipper teeth, and it just looks nice!

Repeat the previous zipper steps on the other side.

IMG_0076 (1)

You’ll be left with something that looks like the above photo.

Next, open your zipper so that it’s about 1.5″-2″ from the edge of your fabric.  You’ll need the zipper open when we finish sewing and turn the bag right-side out, but you don’t want to sew the zipper foot outside of your bag!

I drew some really pretty purple lines for you – haha! – but hopefully these will help you understand where to sew.  Starting at the bottom of your lining, sew around the perimeter of your entire bag, leaving a 2″-3″ gap at the bottom of the lining.  Be sure to backstitch at the start and stop, so you don’t pull your stitches out when we turn the bag right-side out.

When you finish sewing, turn your bag out through that hole in the lining…..and voila!  Load up some school supplies and let the days begin!

IMG_0084 (1)IMG_0091IMG_0086 (1)name

Kacia is a natural blonde, type-A and an artist: proof that God has a sense of humor.  Kacia writes Coconut Robot about her city-living family, motherhood, fashion, DIYs and really anything else that makes her smile.  She is a published quilt designer and loves dreaming up new projects and tutorials to share with her readers.  Addicted to coffee and Instagram. (@CoconutRobot)

Lotta’s Perfect Pair Matching Game

August 18, 2015

Post by Michelle Sterling of Avery & Augustine

image001

I remember the first time I walked past Lotta Jansdotter’s storefront in San Francisco over ten years ago.  I was drawn to her beautiful organic patterns and shapes and loved the fresh and effortless qualities they had about them.  Her inspiration is steeped in the ethereal Scandinavian landscape and the beauty of everyday things.

image002

Today I’m still a big fan of Lotta’s textile designs and art, and am thrilled to be able to share them with my children.  The patterns, animals and plant illustrations in her perfect pair matching game bear her bright and modern aesthetic and are a great introduction to her work for little ones.

image003

image004image005image006

Thanks to The Land of Nod for sending the matching game for this post.

You can see Michelle’s work and read about her two young children and their first forays in cooking, art and everything in between at Avery and Augustine.

Back to School Organization Tips and Tricks

August 17, 2015

Post by Christina of Christina Williams Blog

School starts here in less than a week; and I’m trying my hardest to get my act together so we’ll be able to handle whatever the new year throws at us. I’ve got a few tricks up my sleeve and some must-have items that help organize the whole family and their stuff so mornings aren’t a complete circus.

Take a look at some of my favorite school year organization items:

School Organization-01 (1)

  1. Take Five Wall Bin: Perfect for corralling all those permission slips and school calendars. Everyone gets their own pocket so don’t waste time looking for everyone’s stuff.
  2. Wrightwood Toy Box: We don’t have much closet space near the front or back door, so we created our own by using a storage bench to hold backpacks. Everyone comes home, empties their backpacks and puts them in the bench; then we know exactly where they are during the morning scramble. Plus this one is sleek and stylish and looks great in grownup spaces.
  3. Lunchbox Notes: Every year I swear I’m going to do a cute lunchbox note every day. And then I don’t. So here’s an easy shortcut…just buy them pre-made, and all you have to do is throw one in while you’re packing lunch. Plus, my friend MJ made these for Nod, and nobody does lunchbox notes better.
  4. Wall Hooks: This has been one of my favorite organizational tricks ever. Each of my kids has a hook (or two) in their closets that is specifically for their coat/jacket. For some reason, their jackets become invisible when hanging on a hanger with the rest of their clothes. Before the hooks, it went something like this: “Moooom! I can’t find it!” I trudge up the stairs and point out the missing jacket hanging right in front of their face. They look surprised. We repeat the whole scenario every single day. After I installed the hooks, I just say, “grab your jacket. it’s on your hook.” Even my 3-year-old gets this concept; and it saves me multiple trips (and lots of frustration) retrieving “missing” items.
  5. I Could’ve Been An Art Caddy: I keep plenty of freshly-sharpened pencils and a good assortment of unbroken crayons in ours on the kitchen table. Then when homework time rolls around everyday, we don’t have to rummage through our drawers for a sharp pencil or that red crayon. Plus, since it’s a cute container I totally don’t mind having it as a centerpiece on our table.
  6. Storage Bins: This is another one of my better organizational moments. Each kid has a bin for each of their extracurricular activities. All the gear for one activity goes in the same bin. Then we don’t have to turn the house upside-down for one missing cleat; or that non-itchy pair of ballet tights. It took a little practice; but now my kids are pretty good at keeping their stuff together…so worth the effort!
  7. & 8. Homework Desk + Chair: Having a place dedicated to homework makes concentrating a little easier; and it doesn’t hurt when they’re stylish and fun to look at, too!

One lesson I learned the hard way, is LABEL EVERYTHING! We have lost so much stuff over the years; and the only things that consistently make their way home are the ones with labels. To help the labeling process go smoother, I’ve made a printable label for you. Use them as bookplates, or in lunch boxes; just hop over to my blog and download your favorite color. Print them out on a full sheet label, and trim them to size. Then stick them everywhere. I mean EVERYWHERE.

Printable School Labels

My final back-to-school trick: Have a great backpack! Make sure it’s not too big; and the more unique, the better so your kid can easily spot it at school and so it doesn’t get it mixed up with another student’s. This pink unicorn backpack does just the trick! And it’s a great size for my kindergartener.

Unicorn Backpack

Here’s hoping we all adjust to structured days and practicing our times tables quickly and painlessly. Happy School Year!

Christina Williams is a blogger and graphic designer living in Salt Lake City, Utah. She’s a night owl and a bookworm, as well as a mother to three children ranging in age from two to eight. She shares her latest DIY and design projects along with her adventures in parenting on her self-named blog, Christina Williams

DIY Paint Can Stilts for Kids

August 13, 2015

Post by Rae Ann of RaeAnnKelly.com

DIY Paint Can Stilts for Kids

Want a kid friendly craft project that will keep little ones busy long after the craft supplies have been put away? Then you are in for a treat because these DIY paint can stilts are a cinch to make and provide hours of entertainment. To make your own…

You’ll need:

  • Pint sized paint cans, from the hardware store
  • 10 feet of paracord per set of stilts, from the craft store
  • Duct tape
  • Scissors
  • These patterned paper templates

Here’s how to make DIY Paint Can Stilts for Kids:

  1. Download template and print 2 per stilt on white text weight or card stock paper and cut along the dashed lines. OR, cut paper to the size of can and let your child decorate.
  2. Tape one end of the paracord to the outside of paint can. Decide how long you want the handle to be, tape the other end of cord to the opposite side of the paint can and trim. Repeat with other can and remaining paracord.
  3. Cover can and paracord ends with decorative (or decorated) paper and secure with double-sided tape.
  4. Time to play! The grass or carpet is a great place to practice walking on stilts while getting the hang of it. Easy and amusing, right!?

DIY Paint Can Stilts for Kids

My 6 year old Tilly (pictured above) said, “These are so cool, mom! Feels like I’m so tall!”

DIY Paint Can Stilts for Kids
They are fun for parents too…. Enjoy!

Rae Ann blogs at Rae Ann Kelly and is a kid wrangler, graphic designer, food & craft nut. Her blog features little tidbits about her day to day life & design projects, tutorials for DIY’s, free downloads, yummy recipes, lots of kid friendly ideas and outfit inspiration. 

Nod Printable Coloring Page – Back to School

August 12, 2015

Nod Fun Pages designed by Michelle Romo

Get your little ones excited for heading back to school with this free back-to-school themed printable coloring page. Download it HERE & share a pic of your little one with the finished product on Instagram (use hashtag #landofnod) or our Facebook page. We may feature it!

Nod Printable Coloring Page - Back to School

Looking for other back to school ideas?

Michelle Romo is our newest Nod illustrator, she’s a self-taught illustrator and designer fueled by cookies and naps. Her influences include Mid-Century, Japanese and Scandinavian design, along with pretty much anything cute. When she isn’t working she spends her time eating good food, hugging her friends, playing video games and crafting.

Kids Reading Corner & Workspace by Lay Baby Lay

August 11, 2015

Post by Joni of Lay Baby Lay

Every little kiddo needs a quiet space to read and do homework once school starts. This kids reading corner and workspace encourages the imagination and is cozy too.

Kids Reading Corner & Workspace by Joni of Lay Baby Lay

Hangin’ Around Lt. Pink Ceiling Lamp / White Shape Shifter Wall Shelf / Day Dreamer Framed Wall ArtCloud Corkboard / You Look Marvelous Circle Mirror / Pink Fine Feathered Wall Hook / Swedish Tower Wall Art I Heart Happy Throw Pillow / White Cubby Cups / Gold Domino Desk Chair  / White Campaign Desk / Cascade Floor Lamp / Urban Design Playhouse / Campground Throw Blanket / Twinkle Rug / Pink Triangle Go Lightly Blackout CurtainsAntique Chic Floral Throw Pillow / Walnut and White Next Chapter Bookcase /

For even more kids room design ideas, check out our kids room Pinterest board.

Lay Baby Lay started in 2011 shortly after the arrival of my first baby as a place to provide fresh and unique nursery inspiration with a little dose of motherhood experience. This site is my creative outlet and the place where I am able to express all the ideas running around in my head. It is my hope that you will also be inspired to create spaces for your little ones that are full of imagination, color, and delight and maybe find a little encouragement in this crazy but wonderful journey of having babies and watching them grow.

How Camp Wandawega Came to Be

August 7, 2015

Post by Tereasa of Camp Wandawega

One day we woke up and decided to rescue my husband’s Childhood summer camp.

How Camp Wandawega Came to Be

It was originally a 20’s-era speakeasy that had concurrently lived lives as a modest Midwestern vacation resort, and later church camp for refugee Latvians. David had grown up dreaming of making it his ‘home’, and had asked the managing priest to let him know if he ever decided to sell. Flash forward 35 years – we got the call that ‘it was time’… and there was no time to waste. Within days, we became the proud new owners of a near-condemned summer camp.

How Camp Wandawega Came to Be

It had been colossally neglected by the time we started the resurrection (picture Camp Crystal Lake meets Blair Witch). Throwing all rationale thought to the wind, we began the biggest undertaking we could never have imagined.  A short 6 months after buying camp, we would get married in the old chapel between the pines. It rained all day, (to the cheers of a ‘woodstock-esque’ group of friends, I wore my yellow rubber wellies down the muddy aisle, tying a wet knot destined to be bound for a lifetime).

How Camp Wandawega Came to Be

Then the real work began.

We would spend the next dozen years of our lives joyfully researching and resurrecting every possible historic detail. We would scavenge every barn sale, yard sale, flea market and tag sale within 50 miles of camp. All in an effort to bring back the summer camp of our (and our grandparent’s) childhood. Room by room, building by building it started to take shape – proof positive that nothing is ever too far gone.

How Camp Wandawega Came to Be

But what happened next was a gift that could only have come to be by the power and will of a creative community. Quite organically, Camp Wandawega would draw more artists, makers and nature lovers. Chefs would collaborate with furniture builders. Jewelry makers with florists. And photographers and filmmakers would capture it all, rebuilding a new generation of unlikely camp-goers. The culmination is a current-day creative retreat for young and old.

How Camp Wandawega Came to Be - Teepee on the Lake

The end result is not the end, it will continue to be a labor of love until our four year old Charlie is in retirement herself, and hopefully beyond. If all goes as planned, it will be a place for new friends to come create, share and let their inner creative child streak with wild abandoned.

How Camp Wandawega Came to Be - Treehouse

We like to say that we aren’t the owners of this place, just the current caregivers in a long and strange line of innkeepers – all who had one timeless thing in common; To reconnect by disconnecting on a little summer-camp on a tiny lake called Wandawega.

How Camp Wandawega Came to Be - Pool Hall

In June of 2015, The United States Department of the Interior placed Camp Wandawega on the list of National historic Places. An honor we are dedicated to live up to with 100% of our hearts.

On weekends, Tereasa Surratt is the proprietor of Camp Wandawega  – during the week- she is a SVP/Creative Director at ad agency, Ogilvy.  In her spare time, she’s a contributing stylist to a handful of lifestyle mags, just signed her third book with Random House – and lives in Chicago with her husband, 4 year old daughter Charlie and mutt Frankie.

Sail Away with Wooden Boat Puzzle Blocks

August 5, 2015

Post by Michelle Sterling of Avery and Augustine 

Sail Away with Wooden Boat Puzzle Blocks

When you first hold a set of Grimm’s toys in your hands, you know you’ve got something special. These wooden boat puzzle blocks are perfect for little hands—they’re sturdy in case they get dropped or thrown around, and they’ll last so you can pass them on to the next generation. One morning with these and your little ones will be imagining what life is like out on the sea.

Sail Away with Wooden Boat Puzzle Blocks

And while we’re thinking about traveling and maritime adventures (because it is summer and all), here’s a fun alliteration game to play. It’s similar to games you probably played as a kid, and is great for supporting phonemic awareness, which is an essential pre-reading skill.

You start off with the sentence “If I had a boat, I’d sail to ________ and bring a picnic of ________ and ________, picking up ________ on the way.” Fill in the blanks with a place, some delicious things to eat and the name of a friend, all starting with the same letter of the alphabet. Here’s the first one we did with the letter A, courtesy of Avery.

“If I had a boat, I’d sail to Alaska and bring a picnic of apple slices and animal crackers, picking up Anna on the way.”

Bon voyage!

Sail Away with Wooden Boat Puzzle Blocks Sail Away with Wooden Boat Puzzle Blocks

You can see Michelle’s work and read about her two young children and their first forays in cooking, art and everything in between at Avery and Augustine.

9 Ways to Connect With Your Kids During the School Year

August 4, 2015

Post by M.J. of Pars Caeli

9 Ways to Connect With Your Kids During the School Year

The store shelves are stocked with folders and notebooks, and the camps and vacations are coming to a close. We’re all soaking up the last nuggets of summer before the school schedules, activities, and homework begin again! Every year the relaxing family time seems to go faster and faster, and I will miss the sweet moments, connecting with my three kids, learning more about the incredible people they’re becoming.

But the quality time together doesn’t have to be limited to summer fun, we can make it last throughout the year, too, with a little extra planning and patience. We try these nine easy ways to connect with your kids during the school year. See what think of these playful and practical suggestions:

9 Ways to Connect With Your Kids During the School Year

1. Spend time together before school – I am not a morning person so getting out of bed to be cheerful and/or excited for a new day is not my strength. However, I love having small moments with my children every morning. Some days that’s an extra snuggle and chat before changing out of PJs or lip syncing a Taylor Swift tune to bring on some giggles.

If you’re off to work before the kids, consider leaving them a note to read at breakfast or the comics to bring a smile. Days are so much better when they start off on the right foot (for us all)!

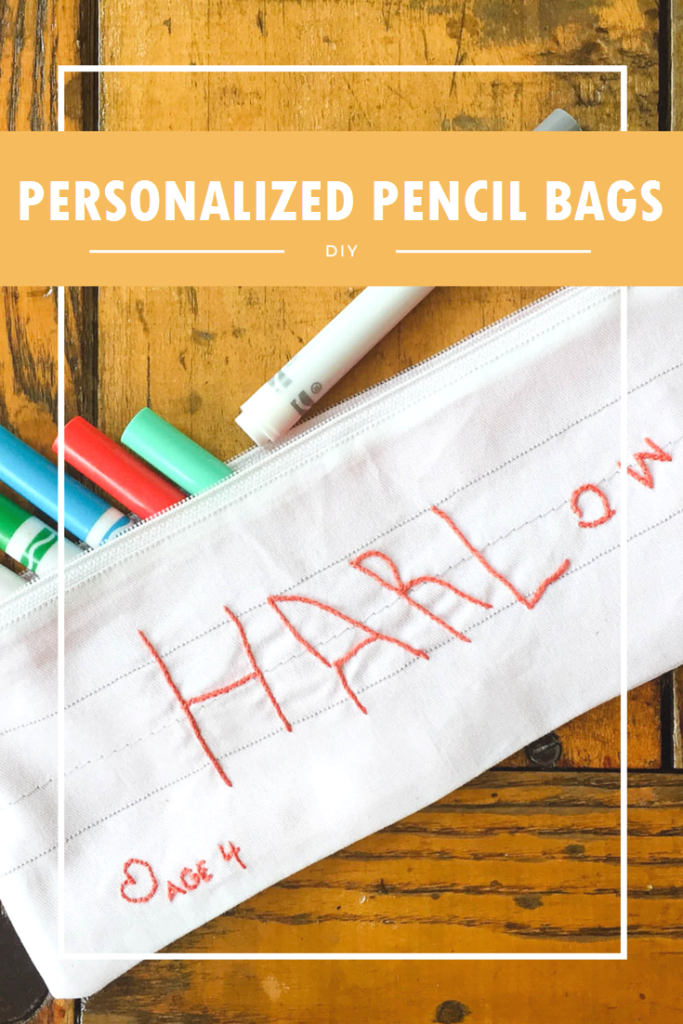
2. Send a little home with them to school – Since full-day kindergarten began for our family, five years ago, we’ve been sending lunchbox notes with our children. After hearing from my daughter about quiet lunch times and wanting to have something to chat about with friends, I decided to add a joke and doodle to these notes. Teachers and lunch helpers would read them to the kids as they were learning to read, and everyone got a kick out the silly pictures and corny jokes.

I started sharing these notes on Instagram and hearing from other moms and teachers who would reuse them with their kids! I loved the idea that I could help other parents connect (in the middle of the day or on a long drive or in a doctor’s office) with their children.

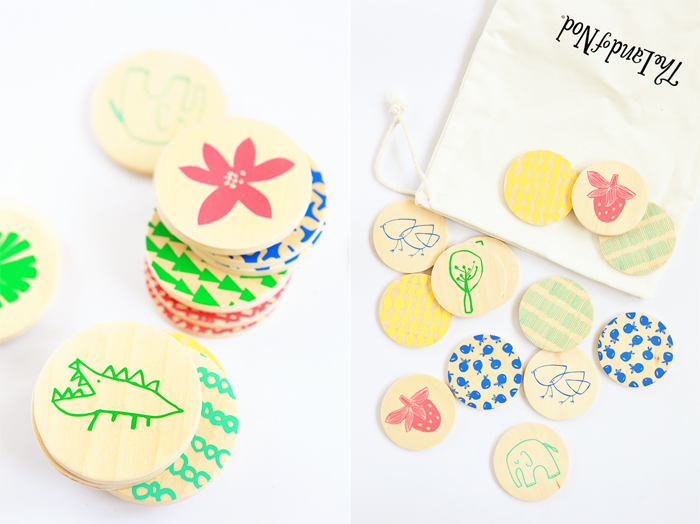
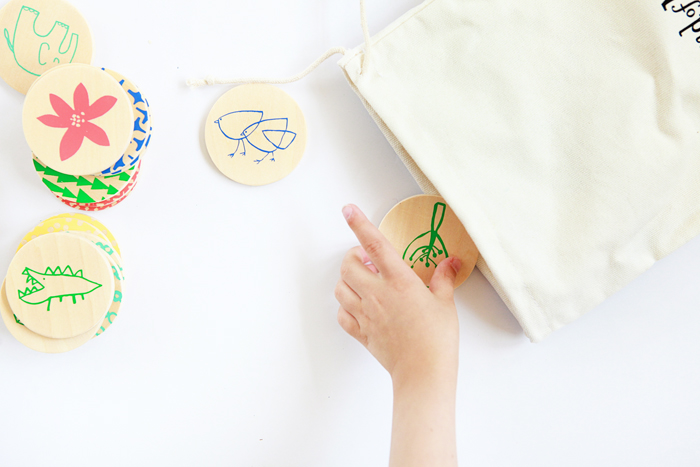
The seeds of Lunchtime LOL Notes were born! I’m so delighted to partner with the Land of Nod to bring these jokes to life in a pack of 180 (the whole school year!). I wanted to make it easy for parents to send their love so one side is blank for your message with the other side bringing the silly along! And now you can… so go grab your family a pack.

9 Ways to Connect With Your Kids During the School Year - Lunchtime LOL Notes

3. Coach, lead, assist – Not all of us can fit it in, but if you can, I’ve heard it from the mouths of my own babes, coaching your kids can be a great way to connect with them. In coaching or leading an activity, or volunteering in the classroom, you establish a new context for your relationship as a parent and not only get to see your child in a new light, but also get to know their friends, too. . . which leads me to #4

4. Get to know their friends – Where you can, be the parent who drives the carpool, goes on the field trip, watches the games. Get to know your children’s friends. The older your kids get, the more insight this will provide into who they are becoming! It also lets your children know that you’re really interested in their lives, even the nitty gritty details. This comes in very handy when you hear the stories come home and know who’s who to ask your children the right questions. 🙂

9 Ways to Connect With Your Kids During the School Year

5. Be goofy – There’s a time for antics and a time for. . . yada, yada, yada. We all know that adults and parents need to be mature. The work conference call, the brilliant tweet, the email – sometimes they have to wait. Make sure to spend some all-out-silly time with your kids, too!! Whether it’s dance parties, wrestling, or silly string fights, let them see that you’re still a kid, and that you can laugh until you snort, too!

6. Listen (and fall in love with) their music – For those of us who live and die by our favorite tunes, this can be a challenge. However, sometimes it’s the nonverbal communications that can speak the loudest. We spend a decent amount of time in transit, in the car, listening to music. Sing your heart out to their favorite tune (even if the words make no sense) and drum along to the weird beat. Showing a love and an embrace for what they love, let’s them know you’re trying.

7. Talk over the day – How was your day? Answering this question goes really well with some children and not so well with others! In our house, it completely depends on the day who wants to share happy/good/sad/surprising news. Some days there’s silence. But I do want there still to be a space (usually over dinner) where we all talk about the latest. Sometimes I have to talk about my weird day at work to prime the pump, and sometimes I’m inspired by their insights and observations. Ultimately, I want them to know that we’re interested and listening – always.

8. Read what they’re reading – Enjoying books with my children has been a total unexpected highlight of motherhood! We read together at bedtime with our youngest, exploring our favorite picture and chapter books. But we’ve also started a kids bookclub with our 8 and 10 year olds to read along with our children and their friends – some long-time favorites like The Lion, The Witch, and The Wardrobe and new ones like Wonder. It has elevated our conversations and broadened our understandings of one another. Reading together has also been truly beneficial to their reading confidence and interest.

9. Go on dates together – We are a mix of introverts and extroverts in our house, and, at times, it can be hard to get everyone engaged as a full group of five. My husband and I make it a priority to go on “dates” with each of our kids. They used to get jealous when we’d leave on a date together. Why don’t we get to have a special time with you? Well, now they do. Often these take the simple form of a trip to the bookstore or library or playground. Other times the dates can be a special shopping trip or dinner out. Bonus: my children have a new level of understanding of Mommy and Daddy needing one-on-one time together, too!

Here’s hoping we get a few more weeks of summer to squeeze in all the fun we can. And once school begins again, we’ll be ready to dig into some other ways to stay connected with our kids, too. How do you do it? How do you stay close when schedules leave you spending so much time apart?

9 Ways to Connect With Your Kids During the School Year

M.J. is a graphic designer and illustrator and proud momma to three. She founded Pars Caeli (meaning a piece of heaven), a happy blog and shop on the web, three years ago to share projects for kids, parents, and home to add a little creative to the everyday. She worked with our team to bring her lunchbox jokes to life in our product Lunchtime LOL Notes, now available to kick off the school year!

Bedtime Routines for Babies

August 3, 2015

Post by Corri McFadden of corrimcfadden.com and Glitter and Bubbles.

Bedtime Routines for Babies

Bedtime with Zelda is one of my favorite hours of the day. There’s nothing like winding down and getting ready for some relaxation time with your babes! For all you Mama’s out there, determining a bedtime routine for your baby is extremely important to develop good sleeping habits. (Moms—we know that a baby with bad sleep is an extremely cranky one!)

A calming routine that follows a pattern every night helps give your little a head up that it’s bedtime, which will help him or her transition more easily. Even more so, bedtime is an amazing way to bond with your babes at the end of a long day. I’ve used some of Zelda’s very favorite Land of Nod products to help put her down at bedtime.

Bedtime Routines for Babies

BATH TIME WITH BABES
A soothing bath is great for your little in terms of help calming them down for bedtime. (This totally works for us adults, too!) Make sure the water is warm to the touch and not too cold. This will create a cuddly-like, warm atmosphere that will put your babe in a calm mood. Zelda loves splashing around with her monster rubber duck before we end her bath with a gentle massage to help relax her little muscles.

Bedtime Routines for Babies - Reading

READY TO READ
Just the sound of your voice can help lull your little one to sleep! Spending time with them while you read one of their favorite books is a great way to bond and help establish a bedtime routine. It also familiarizes them with more words and numbers, so you can totally credit yourself with being a multitasking Mama as you put your babe to bed and lend them a little knowledge. One of Zelda’s favorite books includes The Saggy Baggy Elephant, which she loves to read in her hooded elephant towel right after bath time!

Bedtime Routines for Babies - Hooded Bath Towel

ROCK’N’SLEEP
This is usually my last step before I put Zelda down to bed. Rocking your babe in your arms or a rocking chair is a great soothing technique to lull them to sleep. After I rock Zelda in her favorite rocking chair, I put her down in a dark room, with the exception of a night-light, and secure her in her baby blanket. It’s great to put your little to bed while they are still awake so they know how to soothe themselves to sleep.

I’ve found that each bedtime routine depends on your little’s personality. For example, bath time before bed may turn into a rowdy activity instead of a calming one–once they learn how to splash, there’s no going back! In that case, you’d ditch the tub and skip straight to a massage. It’s all about how you and your babe connect and what methods work best to put them to sleep!

Corri McFadden is the owner and founder of eDrop-Off Luxury Consignment. As a style expert and successful blogger, she hosts a weekly fashion segment on Chicago’s “You and Me This Morning” and features more tips and tricks on her website, Corri McFadden. She also recently launched Glitter and Bubbles, a savvy site for modern-day moms looking for inspiration through fashion, décor and food.

Friends & Family Sale – This Weekend Only! (UPDATE – Sale has now ended)

July 31, 2015

It’s the greatest time of the year! Our Friends & Family sale is here. Save 15% off everything with code BUDDY. Sale ends Monday, August 3rd!
Friends & Family Sale - This Weekend Only!

Shop some of our favorites below:

Friends & Family Sale - This Weekend Only!

Woodstock Play Table & Bench

Friends & Family Sale - This Weekend Only!

Color Pop Cube Bins

Friends & Family Sale - This Weekend Only!

Elevate Mini Crib & Mattress Set

Friends & Family Sale - This Weekend Only!

Campground Bedding (designed for us by Roxy Marj)

Friends & Family Sale - This Weekend Only!

Rock Lamps (available in white, gold, black, wood & silver)

Pink Chicken – Nod Artist Interview

July 30, 2015
Pink Chicken - Nod Artist Interview

Tell us a bit about yourself…

HOMETOWN: Alexandria, VA
CURRENT TOWN: NYC!
FAVE ICE CREAM FLAVOR: mint chocolate chip! (hagen daz)
FAVE BREAKFAST FOOD: I usually don’t eat breakfast but if I am going to treat myself, nothing like a bacon, egg and cheese sandwich.
FAVE HOLIDAY: Thanksgiving!   All about family and friends and food. . . being grateful and giving back. No presents getting in the way.
FAVE COLOR:  So hard to choose!  I love all colors.
FAVE DECADE:  The 70’s – love the bohemian vibe and hippy clothes.

HOW WOULD YOU DESCRIBE YOUR STYLE?  I have always been a dress girl… You can find me in a dress and flip flops every day.  At Pink Chicken, we say our clothes are ‘no fuss and always stylish’.

IMG_5801

WHAT ARE THE MOST REWARDING AND MOST DIFFICULT PARTS OF RUNNING YOUR OWN BUSINESS? One of the most rewarding things is seeing kids wearing your clothes… I am surprised and so excited in the best way every time! And the most difficult, I would say, is all the hats you have to wear, the creative, brand development and customers I love. But a lot of my time is spent in production, finance, shipping, technology issues, etc.

IMG_2350

TELL US ABOUT YOUR KIDS AND HOW YOU BALANCE WORK/MOM LIFE.  My girls have always been a big part of the business, they are my little muses. They tell me what they and their friends love and what they don’t. they love working/playing in the stores and being a part of the photo shoots. I think they are proud of me which makes it all worth it.

IF YOU COULD TRAVEL ANYWHERE, WHERE WOULD IT BE? I LOVE India and Tulum, Mexico, probably my two favorite places ever.   I have never been to Morocco though, and I think that would be amazing and inspiring!

IF YOU COULD POSSESS A SUPERPOWER, WHAT WOULD IT BE?  I’m not sure it’s a super power but I would love to be able to eat whatever I wanted, whenever I wanted to stay healthy and strong!  Donuts and BBQ ribs, bring it on!

Pink Chicken - Nod Artist Interview

TELL US ABOUT YOUR COLLABORATION WITH THE LAND OF NOD. WHAT DO YOU LOVE MOST ABOUT IT?  We are so excited about this collaboration. To be in the company of such incredible brand is amazing, I’m still pinching myself. It’s amazing to see what we do every day for clothing come to life in a room.  I learned so much from Jason, Nod’s head of merchandising, and he was amazing to work with.

Pink Chicken - Nod Artist Interview

HOW WOULD YOU STYLE IT IN A ROOM? Well I love how Nod styled the crib… the mix of patterns is everything. Our crib bedding with the Ashley Goldberg graphic rug is perfect! Pink Chicken - Nod Artist Interview

ANY HOBBIES & INTERESTS?  I love to go listen to live music, I used to do it a ton living in the city in my 20’s … and I’m making an effort to get out more now too!

Check out the full Pink Chicken for Nod collection HERE.

Stacey Fraser created Pink Chicken in Amagansett, New York. Taking a break from corporate life and finding her footing as a new mother, Stacey used her daughter’s naptime to sew clothes from the fabrics she’d collected over the years. She whipped up little sundresses for her daughters, tunics for herself, simple dressing for each. She knew she’d tapped into something people wanted and something that she, as a designer, loved. And thus, Pink Chicken was born.

Nod Printable Coloring Page – Instruments for Musical Kiddos

July 29, 2015

Nod Fun Pages designed by Michelle Romo

Are your kiddos aspiring musicians? Keep the noise level down for a few minutes with this free instrument printable coloring page HERE. Share a pic of your little one with the finished product on Instagram (use hashtag #landofnod) or our Facebook page. We may feature it!

Nod Printable Coloring Page - Instruments for Musical Kiddos

Michelle Romo is our newest Nod illustrator, she’s a self-taught illustrator and designer fueled by cookies and naps. Her influences include Mid-Century, Japanese and Scandinavian design, along with pretty much anything cute. When she isn’t working she spends her time eating good food, hugging her friends, playing video games and crafting.

50 Summer Art Projects For Kids

July 27, 2015

Post by Christina of Christina Williams Blog

50 Summer Art Projects For Kids

We’ve still got about a month of summer vacation, and despite my best efforts, we need some new ideas. I have a summer goal of doing more art projects with the kids. Especially the messy, memorable ones; and now is the perfect time to get cracking on our list. Most of our summer camps have dwindled down; swimming lessons are over; as is our family vacation; so now I’m pulling out the (washable!!!) paint.

I’m planning on inviting friends, family and neighbors to the back yard at the end of summer for a gallery walk where the kids can show off the projects art projects they’ve completed this summer.

50 Summer Art Projects For Kids Checklist

For easy reference, I made a list of 50 Art Projects for Kids; and you can print it out here. My kids really liked painting with race cars and bouncy balls, and I have to admit that I gave it a whirl, too. If you’re going to paint with bouncy balls, or other projectiles, for that matter, here are a few tips: 1. Use washable paint. Obviously. 2. Wear old clothes 3. Work outside. Cover the ground or a table with a drop cloth; or use a table you can easily wipe down when the fun is over.

50 Summer Art Projects For Kids - Painting with Bouncy Balls

50 Summer Art Projects For Kids - Race Car Painting

50 Summer Art Projects For Kids - Salt Painting

I think my favorite summer art project though, was the salted watercolor paintings. The example above is my 9-year-old’s masterpiece. Even he isn’t too cool for most of these projects. (Hooray!) Simply “draw” a picture with Elmer’s glue, sprinkle liberally with salt; shake off the excess. While the glue is still wet, use watercolor paints and just touch the salt gently with your paintbrush. It’s so much fun to see the salt absorb the color; and it’s also a great exercise in color mixing.

I’m sharing our 50 summer art projects for kids over on Instagram, so feel free to follow me there @christinawilliamsblog; and if want to play along, use that hashtag #cwsummerart so we can create a virtual gallery walk for our kids! I hope you’ll join in the fun!

50 Summer Art Projects For Kids - Bouncy Ball Painting Project

Christina Williams is a blogger and graphic designer living in Salt Lake City, Utah. She’s a night owl and a bookworm, as well as a mother to three children ranging in age from two to eight. She shares her latest DIY and design projects along with her adventures in parenting on her self-named blog, Christina Williams. 

Bedtime with Little Golden Books for Nod

July 24, 2015

Post by Rebecca Green of Not So SAHM

Bedtime with Little Golden Books for Nod

Our kiddos were not good sleepers when they were little. So although I tried to remain slightly flexible when parenting, bedtime was one of those areas in which I established a routine and then clung to it for the sake of sleep. Since they’ve been just a few months old, it’s been dinner, bath, books + bed. Nothing complicated, just consistent.

As they’ve gotten older, bath time has become a drawn out ritual. Kane will listen to books on tape in the tub like its his job, constructing elaborate toyscapes as he soaks. Cam likes her bath products and arting in the tub. I let them have at it because it means I get the dinner dishes done before I have to tuck them in (is there anything worse than finally getting your children to sleep and then dragging yourself back to the kitchen to wash the dishes!?). But even as they’ve grown up, they’ve both insisted on keeping their baby bath hooded towels — those super soft, hooded towels you bought when the baby was just the size of a pea. So cute, but so don’t cover their butts anymore.

Bedtime with Little Golden Books for Nod - Bath SetsBedtime with Little Golden Books for Nod - Bath SetsBedtime with Little Golden Books for Nod - Bath Sets

It was time to move on and when they spied the Little Golden Books for Nod collaboration at the Nod Tour Bus’ trip to DC, they begged for the adorable character towels (which, thankfully are generously sized and cover their tushes with insanely cute tails too). Kane picked the Tawny Scrawny Lion set and Cam went straight for the Shy Little Kitten (both happened to pick books that jibe with their personalities). After a recent bath time, they curled up in their jammies, re-donned the adorable towels and we read the accompanying books.

Bedtime with Little Golden Books for Nod - Shy Little Kitten

Bedtime with Little Golden Books for Nod - Tawny Scrawny LionBedtime with Little Golden Books for Nod - Tawny Scrawny Lion

It’s been our routine, at least since Cam got her new big girl bed (you can read all about her new big girl room right here), to alternate reading time between each of their rooms every night. They each pick out a book or two and we curl up to read. They are both beginning readers, so sometimes they help sounds words out and sometimes they just make up a story they see to match the illustrations. Then either their dad or I read a bit as well. Whoever is reading, including their stuffed animals is always a must.

These gift sets would be a fabulous way to help a new parent get that consistency started and, hopefully(!!!!), get their kiddos set on a good path to sleep. Thanks to The Land of Nod for helping keep our bedtime routine a success!!

Bedtime with Little Golden Books for Nod - Tawny Scrawny Lion

Rebecca is a mom to two young kiddos and, in her spare time (ha!), likes to pretend she’s a back-up dancer, craft cocktails, and run long distances. A relatively recent SAHM, she blogs family-friendly activities, DIYs and celebration fun at Not-So-SAHM. 

Summer Lawn Games – Multi Uses for Lawn Bowling

July 22, 2015

Post by Nicki of Little Island Studios

It’s mid-summer, my children’s activities have slowed down, and I thought I over-heard the word “bored” last week. So, I think it’s time to pull out our classic summer lawn games and get out our Inflata-Bowl bowling pins!

Summer Lawn Games for Kids - Lawn Bowling

Here are some ways we played with the pins by using our imagination and thinking outside of the box.

Lawn Bowling Soccer Goals:

  • Place two large bowling pins on one end of the lawn and two on the other end. You don’t want them so far apart where the kids get discouraged, but enough to tire them out!
  • Put the ball in the middle and have one side, usually the youngest, kick off.
  • Have the kids try to kick the ball into opposing goals.
  • Play up to five points/goals and mix up players for the next game to make things fun and fair.

Lawn Bowling In and Out:

  • Place all of your pins in a line approximately three feet apart.
  • Have the kids line up at one end and start kicking the ball in-and-out through the pins, around the last pin, and back again. For an easier approach – have them run the ball in-and-out until  they reach the end of the pins.

The laughing, pins toppling over, and kids getting mixed-up on whether they were in or out, will be enough to make them want to play this game over and over!

Classic Lawn Bowling:

  • Place the pins in a triangle and have the kids throw the ball to roll over the pins and for a fun twist – kick the ball into the pins!

Lawn Bowling Tag A Pin – One of our Favorites from my teen! (this is fun for all ages):

We made colored bracelets for each child using construction paper. We cut the paper into strips and colored them to match each pin’s color – orange, blue, yellow, pink, green, purple – then provided each child a colored bracelet to coordinate with a pin that will be considered their “home base.”

  • Place the pins all around your yard or desired play area.
  • Choose a child to be “it”.
  • The child who is “it” is in charge of tagging someone else.
  • Children can avoid being “it” next if they reach their home base (same color as their bracelet).
  • Once a child is tagged outside of their home base, they are “it.”

Summer Lawn Games for Kids - Lawn Bowling

Happy summer and happy summer lawn games!

Nicki Bradley is the mom behind Little Island Studios, a blog dedicated to family travel, fun, healthy living, eating, yoga, and playroom designing – everything MOM.