Close

Blog

Guggenheim Learning Through Art – Spotlight on PS 48 in Staten Island

June 16, 2015

Written by Rachel, Nod’s PR & Social Media Lead

Today’s post is a continuation of a series on The Land of Nod’s sponsorship of the Guggenheim’s A Year with Children 2015, which features art created by the Guggenheim’s artist-in-residence program, Learning Through Art. Learning Through Art teaching artists partner with classroom teachers in each of the city’s five boroughs to design collaborative projects that explore art and ideas related to the classroom curriculum.

Each Tuesday in June we’re highlighting one of the school’s projects.  Today’s spotlight is on PS 48 in Staten Island.

Throughout the year, fourth grade student artists learned about kinetic energy and discovered ways to make moving sculptures. Combining 3-D design principles (balance, texture, form, and space) with scientific concepts (mechanical, gravitational, electrical, and magnetic energies), students created diagrams and step-by-step instructions for their sculptures.

The residency culminated by building automatas, handmade toys powered by a simple mechanism. Student artists confronted their essential question “What moves us?” on a more personal level when they utilized both their artistic and scientific knowledge to develop unique ways to make their sculptures move.

Guggenheim Learning Through Art – Spotlight on PS 48 in Staten Island

LTA students in the classroom

Fourth grade, PS 48, Staten Island, 2015

© 2015 Solomon R. Guggenheim Foundation, New York

Guggenheim Learning Through Art – Spotlight on PS 48 in Staten Island

Kris McKay © 2015 Solomon R. Guggenheim


Rose Nestler, Teaching Artist said that, “visual thinking brings out the inherent genius in students, whether they are looking closely at a work of art, drawing from observation, or building a sculpture. As a teaching artist I enable students to envision limitless possibilities in art making; this process opens new channels for students, where they feel empowered to transport their artistic brilliance, imagination, and problem-solving abilities into all aspects of their lives.”

This spring, we were honored to be one of the sponsors of  A Year with Children 2015, which features art created by the Guggenheim’s artist-in-residence program, Learning Through Art. This program has been serving New York City public school students for more than forty years. Learning Through Art teaching artists partner with classroom teachers in each of the city’s five boroughs to design collaborative projects that explore art and ideas related to the classroom curriculum.

Introducing Studio Nod

June 15, 2015

Post by Michelle Kohanzo

It has always been at the heart of the Nod brand to collaborate with and celebrate artists and makers.  Without this amazingly talented community our brand would not be whole and so it was quite organically that Studio Nod came to be.  Introducing Studio Nod - One of a Kind Art by Nod Artists

Often times, Nod will commission art, to be translated into product.  For example, an abstract Oil Landscape from Emily Jeffords, destined to become a gorgeous crib quilt, (coming soon).Introducing Studio Nod - One of a Kind Art by Nod Artists

I started to wonder where all of this beautiful art was going, once the product it inspired had come to life.  The answer was, storage.  The thought of this was heartbreaking; there is nothing more beautiful and personal then these pieces our artists were making with their own two hands, gorgeous one of a kind items and we were not sharing them.  Not because we didn’t care, but because there was no avenue to get these things into the world.  And so, this is how Studio Nod was born.  The idea of sharing these inspiring, one of a kind pieces from our most lovely family of artists with all of you.

Introducing Studio Nod - One of a Kind Art by Nod Artists

Studio Nod is a many faceted idea, with one overarching goal – to celebrate the creativity, beauty and talent of our family of artists.  So what is it – Studio Nod is both an Online and Physical gallery space where you can purchase these one of a kind pieces.  If you happen to be in Chicago, we would be delighted to take you through the studio space and share with you the stories of the pieces and their makers.  If you are anywhere else, just shoot us a note – we would love to tell you everything about all of the work.  Because the purpose of Studio Nod is to celebrate our artist family, we have decided that all profit from Studio Nod sales will be returned to our artists in the form of a fund awarded to an artist to further studies, or fund a project, (more details to come).  The Studio Nod space will also be utilized as a residency space for Nod artists to come and collaborate with our designers, have workshops with all of you, and maybe even a party or two.

Introducing Studio Nod - One of a Kind Art by Nod Artists

The art from the studio will be changing all the time, so check back often.  And if you fall in love with a piece, remember there is only one!  I am excited to see this idea to grow and evolve over time and I hope that you all find the work as inspiring as I do.


XO,

Michelle

Michelle is the mother to four kids (yes, FOUR!), a gourmet cook and a retail junky. She’s painted her dining room countless times and changes rugs like most people change their bedsheets. When she’s not living and breathing retail, she’s weaving amazing works of art with her sister for Bourbon+Gin Weaving.

DIY Pinball Machine

June 12, 2015

Post by Candice Blansett-Cummins of The Wishcraft WorkshopKids Craft - DIY Pinball Machine

Our Wishcraft Workshop team had full-tilt fun launching into summer with little Chicagoans at the Land of Nod store this past weekend and the kiddos did too! We used mechanical “pinball machines” to play with fancy topics like gravity and conservation of momentum in a colorful and playful way.

Let’s keep this fun going and turn stuff from around your own house into a STEAM learning and playing adventure by making your very own DIY pinball machines, shall we?

But first, what is STEAM? STEAM stands for: Science, Technology, Engineering, Art and Math. Wishcraft Workshop makes it their job to make STEAM stylish and fun all year long.


To make your very own DIY Pinball machines, the first thing you’ll need to do is grab an Art Jar from The Land of Nod. Inside you’ll have just about everything you need in one (cheery) reusable plastic jar. This project uses small parts and little-littles should be supervised when building and playing.

Kids Craft - DIY Pinball Machine

DIY Pinball Machine Supplies

  • Corrugated cardboard (we suggest a rectangle at least 8” x 12”)
  • Sticky glue
  • A clothespin, popsicle stick and two spools (or two things of equal size about 1” tall)
  • Some push-pins and rubber-bands
  • Something small and round like a large bead or a marble
  • Stuff! Bottle-caps, pom-poms, pipe-cleaners, buttons, wooden spools, googly eyes, sequins, small toys,
    caps from old colored-marker pens.
  • Optional- plain or pretty paper to cover the cardboard and popsicle sticks to make a decorative backboard.

Make It Up

  1. Prepare the base – draw on the cardboard or cover it with colored paper.
  2. Build the launcher – clip a clothespin to a rubber-band stretched between two spools (glue these on to the
    base) and held in place with a popsicle stick affixed to the top of the spools. Done!
  3. Install the edges – gently stretch rubber-bands between push-pins inserted around the perimeter of the base. Use a little glue if needed to hold the push-pins in place.
  4. Add fun stuff against which the ball will bounce, travel around or pass under.
  5. Give your machine a name and make a backboard with popsicle sticks and paper.
  6. Play!wishcraft

Add To The Learning!

  • Assign numbers to the machine’s parts: how many points does each launched ball earn?
  • Elevate the back end of the base using objects of different heights: how does this change the speed of the ball when it launches and returns?

Kids Craft - DIY Pinball Machine
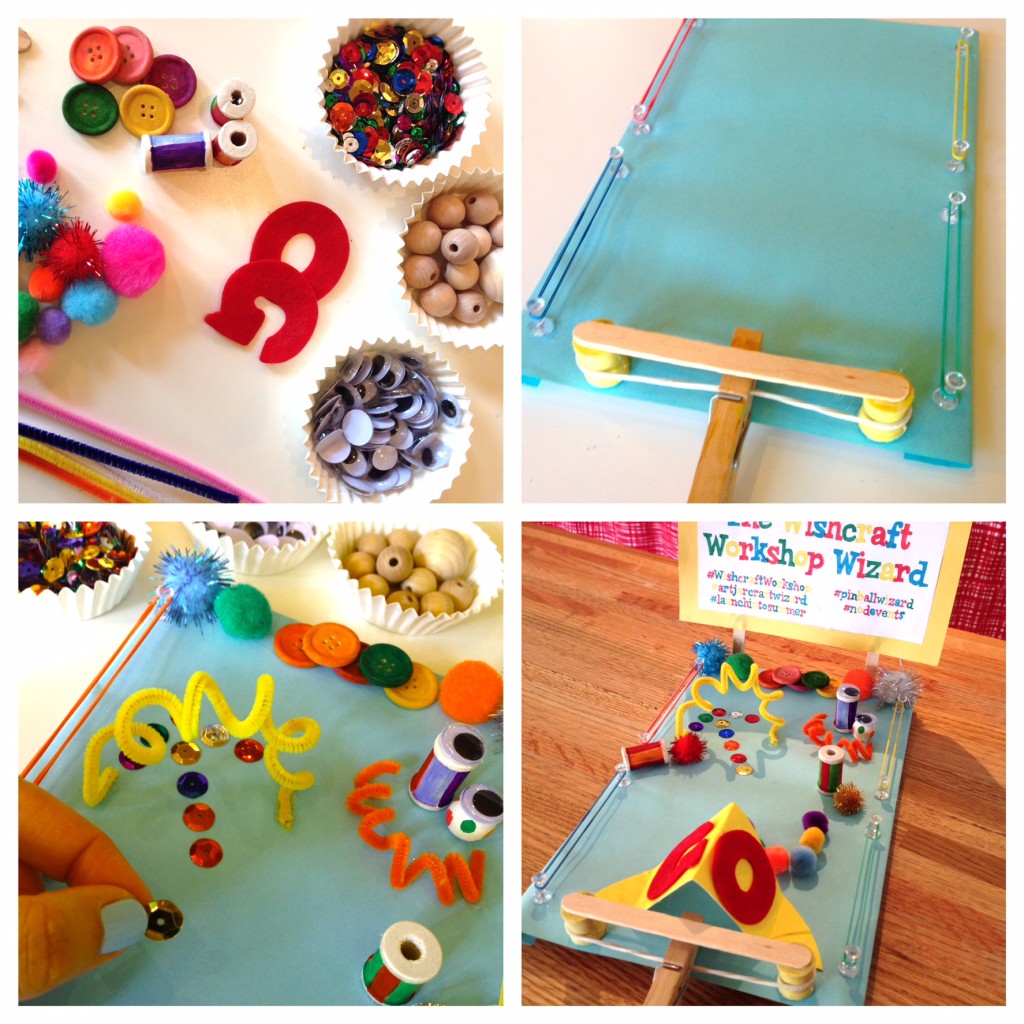
Interested in even more STEAM activities for your and your kids? Check out Wishcraft Workshop’s summer programs here.

Candice Blansett-Cummins is the Founder and Chief Giggle Officer of The Wishcraft Workshop. Candice is a parent, wife, friend, artist, teacher, and student.

Father’s Day DIY – Minimal Geometric Clock

June 11, 2015

Post by Lidy of Hello Lidy

Father's Day DIY - Minimal Geometric Clock

With Father’s Day just around the corner, we are thinking of ways to create handmade pieces that are truly one-of-a-kind for all the dads out there. Like this geometric walnut clock, which is just one of those ‘timeless’ gifts that last year after year. (Did you catch that?!)

Father’s Day DIY – Minimal Geometric Clock

Materials

  • Walnut Plywood
  • Oak block
  • Table Saw
  • Drill
  • Sand Paper
  • Clear Acrylic Spray
  • Clock Works

Directions

  1. Cut a block of wood or buy from a craft store. Setting your table saw blade to a height of half the thickness of your board, cut a kerf down the center of the block. It might take a couple passes until you reach the thickness of your clock face. Sand, wipe clean and set aside.Father's Day DIY - Minimal Geometric Clock
  2. Use a 1/4″ plywood and cut to shape and size you want for the clock face. Sand, wipe clean.Father's Day DIY - Minimal Geometric Clock
  3. Drill  a hole in the center of your clock face where you want the clock works to go.Father's Day DIY - Minimal Geometric Clock Father's Day DIY - Minimal Geometric Clock
  4. Spray the stand and clock face with clear acrylic spray and allow to dry in between coats.
  5. You may choose to spray paint your clock works (we chose black). Place the clock works onto the clock face according to package directions.Father's Day DIY - Minimal Geometric Clock
  6. Place your clock face into the block stand and enjoy!

Father's Day DIY - Minimal Geometric Clock

I love the minimalist look with this clock. It’s also a sculptural piece that adds a nice touch to any shelf or desktop – don’t you think? I don’t know about you, but I have the hardest time finding things for the men in my life because they either have more than they need and never hint at anything which would make things so much easier!! But this clock Father’s Day DIY gift is truly sentimental, based solely on the fact that we took some time to make it by hand for a very special guy. And I think he is going to love it!

XOXO, Lidy

Lidy is the face behind Hello Lidy: a blog focusing on creating and cultivating unique spaces that integrate original handmade designs and vintage pieces while keeping up on current trends and designs. Lidy and her husband have three adopted toddlers.

Guggenheim Learning Through Art – Spotlight on PS 88 in Queens, NY

June 9, 2015

Written by Rachel, Nod’s PR & Social Media Lead

This spring, we were honored to be one of the sponsors of  A Year with Children 2015, which features art created by the Guggenheim’s artist-in-residence program, Learning Through Art. This program has been serving New York City public school students for more than forty years. Learning Through Art teaching artists partner with classroom teachers in each of the city’s five boroughs to design collaborative projects that explore art and ideas related to the classroom curriculum.

Each Tuesday over the next few weeks, we’ll highlight a different class project featured in the Guggenheim’s A Year With Children 2015. This week’s spotlight features PS 88 in Ridgewood, Queens.

Third graders created an animal mask with similar character traits to themselves.  While making the masks, student artists discovered how color, shape, line, and texture can be used to communicate emotions. The project gave students the opportunity to imagine “How does character develop over time?”Guggenheim Learning Through Art - Spotlight on PS 88 in Queens, NYGuggenheim Learning Through Art - Spotlight on PS 88 in Queens, NY

Kris McKay © 2015 Solomon R. Guggenheim Foundation

Jessica Bottalico, who was the Teaching Artist for this project, says that visual art promotes critical thinking through questions and collaboration. She notes that, “Children develop confidence, an awareness of self, and an understanding of the world around them. Witnessing their energy and vivid imaginations, I am encouraged to approach my own studio practice with a similar sense of discovery and wonder.”

This spring, we were honored to be one of the sponsors of  A Year with Children 2015, which features art created by the Guggenheim’s artist-in-residence program, Learning Through Art. This program has been serving New York City public school students for more than forty years. Learning Through Art teaching artists partner with classroom teachers in each of the city’s five boroughs to design collaborative projects that explore art and ideas related to the classroom curriculum.

Small Room Bedroom Inspiration

June 8, 2015

Post by Christina of Christina Williams Blog

I’ve avoided taking on this room for two years. The previous owners used silicone caulking around the baseboards; and it’s been a mess to remove it and prep the walls properly. My youngest, naturally, got stuck with the smallest bedroom, which is proving tricky for furniture arrangement and storage. It’s on the north side of the house, so it tends to be a bit darker than the other rooms, too. It probably doesn’t help that he’s also inherited a mashup of all the leftover furniture, which isn’t working so well at the moment. All these things have been working against me, plus, I’m a superbly talented procrastinator. But it’s high time I get to work. Without further ado, here’s what I’m envisioning for our small room bedroom inspiration.

Small Room Bedroom Inspiration | Honest to Nod

Here’s my plan for Nolan’s Room:

  • I’m going to start by painting the walls a really light minty green/blue color to add just a wash of color to the walls. He’s the proud owner of a really great vintage bed that once belonged to my mother. His big sister has one that I painted turquoise. I’m going to paint Nolan’s bed red for one big burst of color. And I’ll use this great black and white geometric quilt for some pattern.
  • As for the furniture pieces; I’m going with a tall, skinny dresser to maximize both storage AND floor space. A toy box can act as a bench/play table; but most importantly, it will hide all the junk he drags into his room.
  • I’m going to use a wall mirror to reflect more light into the space.
  • The nightstand can also double as a chair; and the numbered wall bin will be a great place to store books up on the wall.
  • I’ll round the space out with some great pillows (Dark Wash Sham, Modern Misfit Sham, ‘N’ Throw Pillow), some artwork (album tricycle, Old Captain Redbeard), a nightlight to keep the boogeyman away, and a cute anchor hook to hang his backpack/jacket.

Now it’s time to put my painting shirt back on! Can’t wait to show you how it turns out.

Christina Williams is a blogger and graphic designer living in Salt Lake City, Utah. She’s a night owl and a bookworm, as well as a mother to three children ranging in age from two to eight. She shares her latest DIY and design projects along with her adventures in parenting on her self-named blog, Christina Williams.

Nod Bookmobile Tour Recap

June 5, 2015

Post by Lauren Baker, our fearless marketing events manager

After logging over three thousand miles on the road this spring, the #nodtourbus has arrived back home in Chicago!

It’s been an amazing adventure – we visited 7 cities over two months and met so many of our fun customers on the road. This was our third tour with the #nodtourbus, and a really special one at that! When we heard we would be turning the bus into a bookmobile with our Little Golden Books collaboration, we couldn’t be more excited! We all loved the idea that we would be bringing the nostalgia of a bookmobile back from our childhood. And even better, we would be able to support our friends at Milk+Bookies. For every Little Golden Book sold at The Land of Nod through the end of June, our pals at Random House Children’s Books will donate one to Milk+Bookies, to help a child in need.

The bus is a terrific way for us to find some of the local favorites in new cities we’ve never traveled to before. We love finding all the hidden gems and sharing them with our customers. It’s so fun to bring Land of Nod products along with us to bring our store experience to life. Each of our stops in this tour included books, storytime, bookmark crafting, and, of course, play time!

Land of Nod Bookmobile Tour Recap - Atlanta

Hodgepodge Coffee

The bus first made its stop at Atlanta back in early April. We stopped for delicious ice cream at Jeni’s Ice Cream in Decatur. Then we headed to the creative space of Hodgepodge Coffee. Next up was the very fun art playground Farmhouse in the City before we headed to Avalon for a busy stop in front of our friends at Crate and Barrel. That Sunday, we spent the morning at our pal Lay Baby Lay’s home for a play date with friends, before we ended our tour at Yeah Burger (and what a great burger it was!).

Land of Nod Bookmobile Tour Recap - Charlotte

Charlotte Farmer’s Market

The second weekend, the bus traveled to Charlotte, N.C. Our first stop was at Small Hands Big Art, where the kiddos were treated to crafts inspired by Little Golden Books, played in teepees and enjoyed storytime! We spent a beautiful Saturday morning at the Charlotte Regional Farmer’s Market before heading to Discovery Place in the afternoon. The rain couldn’t stop our fun on Sunday at the Daniel Stowe Botanical Garden, and our final stop at Imagination Children’s Theatre in downtown Charlotte.

Land of Nod Bookmobile Tour Recap - DC

&Pizza

Next up for the bookmobile was our nation’s capital, Washington, D.C. We started in D.C. at &Pizza in Brookland. Saturday was spent at the adorable neighborhood art space, The Little Loft. We continued onto the Torpedo Factory Art Center with special guest storyteller, Rebecca from Not So SAHM. Sunday began with a delicious stop at Uprising Muffin before our final stop at Market Common with our friends at Crate and Barrel.

Land of Nod Bookmobile Tour Recap - Philly

Smith Playground

We continued on to Philadelphia for our fourth city on the tour. Friday, we made out first stop at the magical space of Baldwin’s Book Barn with special storyteller Susan Hutchinson from the blog fleurishing. Saturday, the bus was downtown for a stop at the activity center Nest Philly before a fun filled afternoon at Sister Cities Park. On our final day in Philadelphia, we stopped at America’s oldest confectionery, Shane’s Confectionery on Market Street, before ending our weekend with an amazing stop at Smith Memorial Playground.

Land of Nod Bookmobile Tour Recap - NYC

Brooklyn Central Library

Next up was the exciting weekend we spent in New York City! (Yes, we drove a big bus around New York City!) Friday, the bus stopped for a visit at our friends Crate and Barrel on Madison Avenue. Saturday morning, we visited the lovely Textile Arts Center in Manhattan before heading over to the Brooklyn Central Library to take part in their Bike the Branches event. Sunday was a beautiful day spent at the Brooklyn Flea in Willamsburg. Our awesome pal, designer Erin Jang from Indigo Bunting, joined us for an extra special afternoon of crafting in the sunshine.

Land of Nod Bookmobile Tour Recap - Boston

Beehive Art

The following weekend we headed on up to Boston, MA. We visited the awesome folks at Mucky Kids Art Studio in Cambridge on Friday. Saturday was a busy morning spent at Flour Bakery in Boston, before heading over to Beehive Art Studio in Wayland. On Sunday, we ended our weekend at the delicious and hilarious Cupcake Mojo in Weymouth.

Land of Nod Bookmobile Tour Recap - Pittsburgh

The Picket Fence Boutique

Our final weekend on the tour was in Pittsburgh, PA. The bookmobile first stopped over in the Shadyside neighborhood at The Picket Fence Boutique. Saturday morning we headed over to the beautiful and creative space of The Mattress Factory Museum, before a delicious afternoon spent at Le Cupcake Shoppe on Capital Ave. Sunday, we headed on over to Wexford, PA for a stop at Soergel Orchards, before our final stop at the Children’s Museum of Pittsburgh.

Thank you to everyone that came out to visit us and helped us work toward our final goal of donating 5,000 books to Milk+Bookies. You can still be a part of our tour by purchasing a Little Golden Book from our website and stores. Don’t forget for every Little Golden Book purchased from Nod, Random House Children’s Books will donate one to Milk+Bookies! Help us reach our final goal of 5,000 books!

Have an idea for a great location for the #nodtourbus this fall? Email us at nodevents@landofnod.com.

When Lauren isn’t planning ridiculously awesome #nodevents for The Land of Nod, she spends her time putting up with the crazy antics of her English Bulldog, Lola. She also loves searching for treasures in vintage stores and summer antique markets. Due to her previous adventure living in Canada, she has a strong obsession to Hudson Bay stripes, as well as the fine cuisine of poutine (Don’t make her choose between the two…that’s like choosing between Ryan Gosling and Jason Bateman for her!).

Outdoorsy Boy’s Room Ideas by Lay Baby Lay

June 4, 2015

Post by Joni of Lay Baby Lay

This room design is for the little boy who loves all things outdoors. These outdoorsy boy’s room ideas mix natural finishes like wood with unexpected finishes like copper. The outdoors element is limited to art and sheets, which are easy to switch as little ones grow and find new interests.

Outdoorsy Boy's Room Ideas by Lay Baby Lay | Honest to Nod

Fine Alloy Pendant / Surplus Wall Shelf / Pinecone Print / Falling Bear Print / Belle Svezia Tapestry / Wood Shelves / Eclipse Banner / Moon Wall Art / Wood Lamps / California Pennant / Stone Larkin Bed / Honors Sheets / Foundry Nightstands / Artful Raccoon / Natural Dresser / Hedgehog Nightlight / Mountain Pillows / Chalkboard Globe / Hiding Bear Art / Ukelele / Aqua Half Stripe Rug / Drafter’s Play Table / Walnut Little Felix Chairs / Quartz Cube Bin

For even more kids room design ideas, check out our kids room Pinterest board.

Lay Baby Lay started in 2011 shortly after the arrival of my first baby as a place to provide fresh and unique nursery inspiration with a little dose of motherhood experience. This site is my creative outlet and the place where I am able to express all the ideas running around in my head. It is my hope that you will also be inspired to create spaces for your little ones that are full of imagination, color, and delight and maybe find a little encouragement in this crazy but wonderful journey of having babies and watching them grow. 

A Year with Children 2015 – A Land of Nod Guggenheim Partnership

June 2, 2015

Written by Rachel, Nod’s PR & Social Media Lead

This spring, we were honored to be one of the sponsors of  A Year with Children 2015, which features art created by the Guggenheim’s artist-in-residence program, Learning Through Art. This program has been serving New York City public school students for more than forty years. Learning Through Art teaching artists partner with classroom teachers in each of the city’s five boroughs to design collaborative projects that explore art and ideas related to the classroom curriculum. A Year with Children 2015 - A Land of Nod Guggenheim Partnership

Kris McKay © 2015 Solomon R. Guggenheim Foundation

Each Tuesday over the next few weeks, we’ll highlight a different class project featured in the Guggenheim’s A Year With Children 2015. The works we’ll feature are selected projects by student artists in grades two through six who worked throughout the year to explore materials and techniques, develop personal sketchbooks, and express their unique perspectives. Classroom teachers and teaching artists used essential questions such as, “What happens when ‘worlds collide’?” and “How does time shape our lives, and how do we shape time?” to guide the yearlong curriculum. The result is pieces of art that test traditional limits of in-school artistic exploration by stepping into realms such as kinetic sculpture, digital media, and installation, and pushing the boundaries of elementary school art making.

A Year with Children 2015 kicked off a few weeks back with a reception at the Guggenheim for the student artists and their families. We’re excited to share a few of the photos and a sneak peek of the finished pieces of art.

A Year with Children 2015 - A Land of Nod Guggenheim Partnership

Kris McKay © 2015 Solomon R. Guggenheim FoundationA Year with Children 2015 - A Land of Nod Guggenheim Partnership

Kris McKay © 2015 Solomon R. Guggenheim Foundation

Ever wonder who’s behind The Land of Nod social media accounts? That’s Rachel! When she’s not telling anyone who will listen that she’s not meant to live in cold, snowy Chicago, you will  probably find Rachel binge-watching Netflix, reading blogs or in her kitchen making guacamole. Or starting crafting projects that never get finished.

Etsy Wholesale Open Call – Last Week to Enter!

June 1, 2015

Post written by Rachel, our PR & Social Media lead

It’s no secret that we love collaborating with artists to create new Nod products. We’re always so inspired by artists because they challenge us to reimagine what kids products can be.  We’re constantly on the lookout for new artists, often finding them via Etsy, blogs, Instagram and Pinterest. Which is why we are so excited to partner with Etsy for Etsy Wholesale Open Call.

OpenCall_badgeVB
Etsy Open Call is a way for Etsy sellers to pitch their lines to large retailers, including us, Nordstrom, Lou&Grey, Walker Art Museum and Clementine. Entries are open until June 4th, so head over to the Etsy Wholesale blog to learn how to apply. Hint: it involves Instagram, where we’re always finding inspiration. Chosen Etsy sellers will be able to pitch their lines to the retailers and a Refinery29 editor at the Etsy Headquarters in Brooklyn, NY this July.To celebrate Etsy Open Call, designer Krissy Callahan of Earth Cadets sat down with Stefanie Cohn Ricciardi, Nod’s soft-goods buyer, to talk about successful partnerships, what retailers are looking for and offer feedback and advice. A few pictures of the meeting are below and you can read all about it in the Etsy Seller Handbook.

LandofNod_productroomWEB Stef_Krissy_rugroomWEB LandofNod_brandedwallWEB
Ever wonder who’s behind The Land of Nod social media accounts? That’s Rachel! When she’s not telling anyone who will listen that she’s not meant to live in cold, snowy Chicago, you will  probably find Rachel binge-watching Netflix, reading blogs or in her kitchen making guacamole. Or starting crafting projects that never get finished.

#NodTourBus Welcome Home Bash!

May 29, 2015

Post by Lauren Baker, our fearless marketing events manager

We turned our #NodTourBus into a brand-spanking-new bookmobile, packed it with tons of our favorite Little Golden Books and hit the road this spring. After almost 3,000 miles and stops everywhere from Atlanta to Washington D.C. to Boston and Pittsburgh and a few other cities, the #NodTourBus is headed home!

To celebrate the return of our a-little-less-brand-spanking-new bookmobile, we’re throwing a Welcome Home Bash at our North & Clybourn store this Saturday from 10:00am-1:00pm. Join us for magic, music, face painting, snacks and so much more! Don’t forget to RSVP to nodevents@landofnod.com.

Check out all the fun we had on our tour on Instagram with #NodTourBus. And here’s a few of our favorite snaps.

#NodTourBus Welcome Home Bash!

#NodTourBus Welcome Home Bash! #NodTourBus Welcome Home Bash! 3 #NodTourBus Welcome Home Bash! 4 #NodTourBus Welcome Home Bash! 5

When Lauren isn’t planning ridiculously awesome #nodevents for The Land of Nod, she spends her time putting up with the crazy antics of her English Bulldog, Lola. She also loves searching for treasures in vintage stores and summer antique markets. Due to her previous adventure living in Canada, she has a strong obsession to Hudson Bay stripes, as well as the fine cuisine of poutine (Don’t make her choose between the two…that’s like choosing between Ryan Gosling and Jason Bateman for her!).

Nod Printable Coloring Page – Sailing Away

May 28, 2015
Nod Fun Pages designed by Michelle Romo


We’re sailing away this summer with a kitten in tow.  Download this free sailing themed printable coloring page HERE. Share a pic of your little one with the finished product on Instagram (use hashtag #landofnod) or our Facebook page. We may feature it!
Nod Printable Coloring Page - Sailing Away
Michelle Romo is our newest Nod illustrator, she’s a self-taught illustrator and designer fueled by cookies and naps. Her influences include Mid-Century, Japanese and Scandinavian design, along with pretty much anything cute. When she isn’t working she spends her time eating good food, hugging her friends, playing video games and crafting.

Kids Craft – Painted Photo Cubes

May 27, 2015
Post by Kim of Beehive Art

Kids Craft - Painted Photo Cubes I love to incorporate photographs in children’s art work. This is a great kids craft that enables you to use your favorite photos… they can be of your family, your class, your pets or even YOU. Here I’m using head shots of the kids that I took, reduced and sized so they fit the sides of the cubes.

Painted Photo Cubes Supplies Needed:

  • Wooden cubes
  • Sandpaper if needed
  • Tempera or acrylic paint
  • Brushes
  • Photographs
  • White glue

How to Create:

Kids Craft - Painted Photo Cubes 1

  1. Depending on where you get your cubes, you may need to smooth the edges sandpaper. Kids Craft - Painted Photo Cubes 3
  2. Paint your cube using any color combination you like. Leave one side unpainted for the photo.If it gets a little tricky holding onto the cube while painting the sides, let it dry in stages and continue. Kids Craft - Painted Photo Cubes 6
  3. Once the paint has dried and you can handle the cube it’s time to add the photograph. Trim the photo to fit the side of the cube you want to glue it to. With a glue brush, apply a thin coat of glue to the cube side. Gently place the photograph on the center of  the side. Flip the cube over and press evenly to secure the photo to the wood. Make sure to wipe the edges of any excess glue.

Kids Craft - Painted Photo Cubes 5 Kids Craft - Painted Photo Cubes 7

Kim Poler is queen bee of beehive ART. She lives for inspiring visual expression, explosions of colors, forms and exciting combinations of mixed-media art. She creates, designs art projects, teaches children art and blogs at Beehive Art.

DIY Toddler Finger Painting Geometric Art

May 22, 2015

Post by Colleen of Lemon Thistle

DIY Toddler Finger Painting Geometric Art

I’m such an advocate for children creating art – no matter how young. My kids started finger painting when they could sit up (I use a recipe that’s edible) and now that they’re officially toddlers, they’ve graduated to real paint. I love having their artwork in our home, but there’s two of them – and that would mean a lot of paintings on the wall. I was wanting to have some more art in our house when I thought of this idea and I’m so glad that I did.

This toddler finger painting geometric art is made by combining two finger paintings for a big impact. You need to get up close to even realize that it’s made by toddlers.

The first step is getting your toddlers, kids, or babies creating. I like to tape down my paper (this time I used poster boards) and put them in a seat they can’t get out of on their own (save the couches!). Since I wanted two distinct paintings, I gave them each different colors. This time I gave them some paint brushes and then showed them that they could also use their hands. They were really excited when we showed them they could use their hands so I would probably skip the brushes next time.

DIY Toddler Finger Painting Geometric Art - Painting DIY Toddler Finger Painting Geometric Art - Painting 1DIY Toddler Finger Painting Geometric Art - Painting 2  DIY Toddler Finger Painting Geometric Art - Painting 3

I use the tape that the poster boards are taped down with to hang them high on a wall to dry (anything to save the couches, I tell ya!). When they were dry, I used a craft knife on a cutting mat to cut the painted area into 5 cm strips (about 2.5”). I then, using my straight edge, cut my strips into triangles. I cut them on an angle 2.5 cm between the top and bottom lengthways, so my triangles were as tall as they were wide.

DIY Toddler Finger Painting Geometric Art - CuttingDIY Toddler Finger Painting Geometric Art - Cutting 2 DIY Toddler Finger Painting Geometric Art - Cutting 3

When my triangles were all cut, I took a piece of yardstick cut to 8×10 (the size of my photo frame) and played out the pieces in a geometric pattern, alternating the blue and purple designs. When it was all laid out, I took one piece at a time and adhered it to the paper with double sided tape.

DIY Toddler Finger Painting Geometric Art - Setting DIY Toddler Finger Painting Geometric Art - Finishing

I’m so happy with how it turned out! It adds such a fun pop of color to their bedroom, I’m already dreaming up what other patterns I could create! I’d love to hear if you do art with your children and any tips you might have!

DIY Toddler Finger Painting Geometric Art - Finished Piece

Colleen is a wife, mama to 20 month old twins, and the DIY and lifestyle blogger behind Lemon Thistle where she shares printable art and hands on tutorials for DIY home decor, parties and gifts. Colleen believes you can have a beautiful life, home, and party without spending a lot- we’re keeping it real on a budget so everyone can join in on the fun. Find her on Pinterest & Instagram.

Pack Your Bags – Kids’ Road Trip Essentials

May 21, 2015

Post by Michelle of Avery & Augustine

Pack Your Bags - Kids' Road Trip Essentials Pack Your Bags - Kids' Road Trip Essentials  2 Pack Your Bags - Kids' Road Trip Essentials 3

Pack Your Bags - Kids' Road Trip Essentials - 4Pack Your Bags - Kids' Road Trip Essentials - 5Pack Your Bags - Kids' Road Trip Essentials - 6Pack Your Bags - Kids' Road Trip Essentials - 7Pack Your Bags - Kids' Road Trip Essentials - 8Pack Your Bags - Kids' Road Trip Essentials - 9Pack Your Bags - Kids' Road Trip Essentials - 10

Summers are nothing if not one long road trip after another.  We’re starting to think about what we would pack Avery and Nate for some of our upcoming trips (or long meals with friends in restaurants or any time they have to be stuck in one place for awhile).  These adorable dog and unicorn backpacks will definitely fuel the excitement for any trip.  Here are some fun little games and activities to include in your kids’ road trip essentials packs:

  • Tic-Tac-Toe — A beautiful and sturdy version of the classic game we know and love, perfect for sharpening those early strategy skills.  This version is wonderful to take along with you!
  • Books — Always a great idea for the road.  Kids will read a good story over and over again.  They get repeated practice sounding out new words or learning to recall and retell the important parts of the story.  Some of our current faves include The Little Train by Lois Lenski, Spring is Here and My Friends by Taro Gomi.  Countablock, by the brilliant duo Christopher Franceschelli and Peskimo, is an extremely fun, colorful and tactile counting experience and is one to be flipped through many times over.  It’s a wonderful book for teaching rote counting and naming numbers.
  • Spinny Speller — A toy that plays with sounds in words and helps promote phonemic awareness, an important skill for emerging readers.
  • Wooden Pull-Back Car — Anything with wheels is popular with the younger set.
  • Yarn—Finger crocheting and finger knitting are activities that occupy busy hands for a good long while, and they’re quiet tasks, too!  Older kids can use yarn to play string games like Cat’s Cradle.
  • Sketch book, stickers and multi-ink pen — Blank books with hard covers seem to work best for drawing and doodling while out and about.  What I like about multi-ink pens is that they provide a lot of color options in one pen, so there’s no fumbling around to look for the color that you want in your backpack—they’re all contained in one pen, in your hand.
  • My Road Trip Book A-Z — Take any little notebook and turn it into an alphabetic memoir of your trip.  Children can draw a picture of something they see out their window that begins with each letter of the alphabet.  You can make a book for each trip taken over the summer and start an archive!
  • Sunglasses — an essential for any jaunt!

There are so many ideas for things and activities to bring on a road trip.  It’s good to have a variety of options, so kids can go back and forth between all of them.  Eventually, you find what works for your family.  Happy traveling this summer!

Thanks to The Land of Nod for sending the items this post.

You can see Michelle’s work and read about her two young children and their first forays in cooking, art and everything in between at Avery and Augustine.

DIY Seashell Art

May 19, 2015

Post by Kim of Beehive Art

DIY Seashell Art

Next time you’re off to the beach, be sure to bring a bag and fill it with seashells. At the studio we always have a table set with watercolors and a basket full of shells to paint. There’s just something magical about painting along the smooth surface and watching the paint absorb into the shell. We also love to collage with colored tissues which is how this project came to be. I like to wash the shells and dry them in the sun before I work with them. While the shells are drying gather your supplies and cover your work surface with newspaper or kraft paper.


Supplies for DIY Seashell Art

  • Seashells
  • Colored tissue papers cut into small pieces
  • Mod podge or white glue
  • Glue brush
  • Typewriter and paper
  • Scissors

DIY Seashell Art 2

DIY Seashell Art Directions

  1. Brush the glue to your shell and add tissue pieces. You can overlap the pieces, make a pattern or create a specific color combo. Be sure that your pieces of tissue lay flat. You can gently brush a thin layer of glue over the entire surface for a smooth finish.
  2. While the tissue is drying, set up your typewriter with paper. Have fun composing your message… it can be a riddle, a poem or you can tell a story. If you’ve never used a typewriter you’re in for a treat, we can’t get enough of it! IF you don’t have a typewriter a hand printed message is really cool and fun too.
  3. DIY Seashell Art 3DIY Seashell Art 4Cut out your words or you can get fancy and cut out individual letters… just keep track of the tiny pieces! Arrange them as you like on top of the tissue and secure with a teeny dot of glue.
  4. Let your shell message dry completely.
    DIY Seashell Art 5DIY Seashell Art 6

Kim Poler is queen bee of beehive ART. She lives for inspiring visual expression, explosions of colors, forms and exciting combinations of mixed-media art. She creates, designs art projects, teaches children art and blogs at Beehive Art.

Nod Printable Coloring Page – Vroom Vroom

May 18, 2015
Nod Fun Pages designed by Michelle Romo


Cars, a truck & a bus! What more could a kiddo obsessed with anything-that-moves want?  You can download the free printable coloring page HERE. Share a pic of your little one with the finished product on Instagram (use hashtag #landofnod) or our Facebook page. We may feature it!
Nod Printable Coloring Page - Cars
Michelle Romo is our newest Nod illustrator, she’s a self-taught illustrator and designer fueled by cookies and naps. Her influences include Mid-Century, Japanese and Scandinavian design, along with pretty much anything cute. When she isn’t working she spends her time eating good food, hugging her friends, playing video games and crafting.

PBJ Sushi Roll-Ups

May 15, 2015

Post by Corri McFadden of Glitter & Bubbles

PBJ Sushi Roll-Ups

Traditional sandwiches? Boring! We’re shaking up the sandwich game with a fun alternative, PBJ Sushi Roll-Ups! These roll-ups are the perfect size for packing in a bento box and your little one is going to LOVE this customized lunch made especially for them!

PBJ Sushi Roll-Ups 2

To make the “pbj sushi” you will need:

  • Wheat Bread
  • Grape Jelly
  • Peanut Butter

Start by cutting the crusts off the bread and flattening each slice with a rolling pin. Then, use a knife to spread peanut butter and jelly on each slice. Be careful not to use too much– you don’t want to stuff your roll or things will get messy! Use your fingers to roll up the bread, just as if you rolling up sushi, and then slice into four pieces.

PBJ Sushi Roll-Ups 3

Place your “pbj sushi” rolls in your kid-friendly bento box and send them off! Those tiny fingers will enjoy a sweet surprise when lunchtime rolls around.

PBJ Sushi Roll-Ups 5

Corri McFadden is the owner and founder of eDrop-Off Luxury Consignment.  As a style expert and successful blogger, she hosts a weekly fashion segment on Chicago’s “You and Me This Morning” and features more tips and tricks on her website, Corri McFadden. She also recently launched Glitter and Bubbles, a savvy site for modern-day moms looking for inspiration through fashion, décor and food.

Tips for Moving with Kids

May 14, 2015

Post by Rebecca of Not So SAHM

Tips for Moving with Kids

(goofing on the front porch of our ol’ condo)

Our kids are still fairly young (6 and 5 years-old), but they spent those years growing up in one place — our beloved city condo. My husband and I had been wrestling with the decision to move for a long time, mostly unbeknownst to the kids. So when we sort of randomly found our perfect house, we’d already thought about moving quite a bit. But the kids hadn’t. So they really were not excited about the prospect of moving. And that sort of caught me off guard.

Given that experience and the fact that spring ’tis the season for moving, I thought it would be helpful to share with you some of the tips for moving with kids that helped us get through the process. Moving is a TON of work, but also an exciting adventure. I wouldn’t say that we made it through the feat unscathed, but since I’m never. moving. again., here are my tips (and quickly snapped photos from my phone) for you!

Tips for Moving with Kids 2

Tips for Moving with Kids — Involve your kids with packing up the old place in a fun and lighthearted way. Moving is an excellent opportunity to get rid of things and our kids really helped in that process. They sorted through their toys — tossing broken things, donating things they’d outgrown, and just generally organizing them. It’s time consuming, but it helped tremendously at the unpacking stage as well — things were already set up to be put away neatly. It meant I had their rooms mostly unpacked before they got home from school on moving day. We also had them do fun things like check the expiration dates on toiletries and medicines, and decorate our moving boxes. Try to emphasize the positive and downplay the fact that you’re likely getting rid of a lot of their stuff.Tips for Moving with Kids - Get them Involved in Packing Tips for Moving with Kids - Get them Involved in Packing 3

Tips for Moving with Kids — If you can, start making memories together in your new home before you move in. The timing doesn’t work for everyone, I know, but we did some work on the new house before moving and made sure the kids spent time there as well. It doesn’t need to be elaborate we found a few family pizza picnic dinners on the floor before moving did the trick. And the kids spent a few trips iPad’ing on the floor while I supervised some of the construction work. It helped get them comfortable and familiar with the new place, which at first seemed a little sterile and hotel’ish because it just wasn’t the source yet of memories for us.image005

Tips for Moving with Kids —  Think of fun things for them to do at the new home during the transition. Our kids were in charge of making sure all the bathrooms had toilet paper, swiffering within an inch of their lives, and counting all windows and stairs in a necessary and very serious inventory of the house. And they loved, loved helping put things together. It really helped them to feel like they were in charge of something related to the moving and got them exploring their new home. Plus, it meant I could put the dishes away without them so helpfully dropping plates.

Tips for Moving with Kids —  Think of fun things for them to do

Tips for Moving with Kids —  Let the kids say goodbye to your old home. I was wary of unnecessarily dramatizing the move, but then I felt like I underestimated their emotions about leaving the only home they’d known. So we spent some time sharing our favorite things about the house and writing thank you letters to it. We left them at the old house and then moved on. I didn’t draw the process out, but it seemed to help them sort of close that loop. Tips for Moving with Kids —  Let them say goodbye

Tips for Moving with Kids —  Involve your kids in planning their new rooms and/or decor for the rest of the new home. It was important to me to give the kids familiar but new rooms when we moved. I was worried that setting up an identical version of their old room would work against me in the transition. Plus, they were more excited about the move once they learned they could help plan their new rooms! Sort of surprisingly, they were also very into helping pick out furniture for the rest of the house… to a point. If you’re planning on furniture shopping with your kids, try to stay flexible and perhaps bend the rules a bit our guys got much more iPad time than they normally would’ve, but they were such good sports! (p.s. stay tuned for their room re-do’s, which we couldn’t have done without help from our buddies at The Land of Nod!)

Rebecca is a mom to two young kiddos and, in her spare time (ha!), likes to pretend she’s a back-up dancer, craft cocktails, and run long distances. A relatively recent SAHM, she blogs family-friendly activities, DIYs and celebration fun at Not-So-SAHM.

Childhood Wonder

May 13, 2015

Post by Michelle of Avery & Augustine

I love books that inspire wonder in children.  They are an essential part of every family’s library because wonder is an important element of childhood.  They are good springboards to start interesting discussions, questions and dialogue with young thinking minds and budding imaginations.

Children's Books Inspiring WonderChildren's Books Inspiring Wonder 2Children's Books Inspiring Wonder 3Children's Books Inspiring Wonder 4

Children's Books Inspiring Wonder 5

How To, written and illustrated by Julie Morstad, offers playful and curious ways of how to do different things like “how to see the wind” or “how to wash your socks.”  The take-home message of this charming book?  There’s more than one way to get something done and there’s always a fresh and inventive idea out there.  It’s just waiting to be dreamt up!

In When You Were Small,  by Sara O’Leary and illustrated by Julie Morstad, Henry’s father tells nightly bedtime stories to his son about when he was small.  Literally small enough to wear a thimble for a hat and have his hair brushed with a toothbrush.

In When I Was Small, also by the same author and illustrator, Henry wonders what his mother was like when she was younger.  “What was it like when you were small?”  She tells him about how when she was small, she slept in a mitten and played jump rope with a piece of yarn.

Poignant, otherworldly and sweet, When I Was Small and When You Were Small will enthrall sleepy-eyed readers at bedtime as they listen and imagine what you, as parents, were like when you were oh so tiny like them.  And you can tell them all sorts of things you did as a kid, your perspective of the world when you were their age and the kinds of things you wondered about, were curious about, imagined, dreamt about and more.  Happy reminiscing and wondering!

Also featured in this post are these colorful boat puzzle blocks.  Thanks to The Land of Nod for sending the items for this post.

You can see Michelle’s work and read about her two young children and their first forays in cooking, art and everything in between at Avery and Augustine.