Close

Blog

End of Year Teacher Gifts

May 12, 2015

 Written by Becca of CAKE. | events + design

End of Year Teacher Gifts
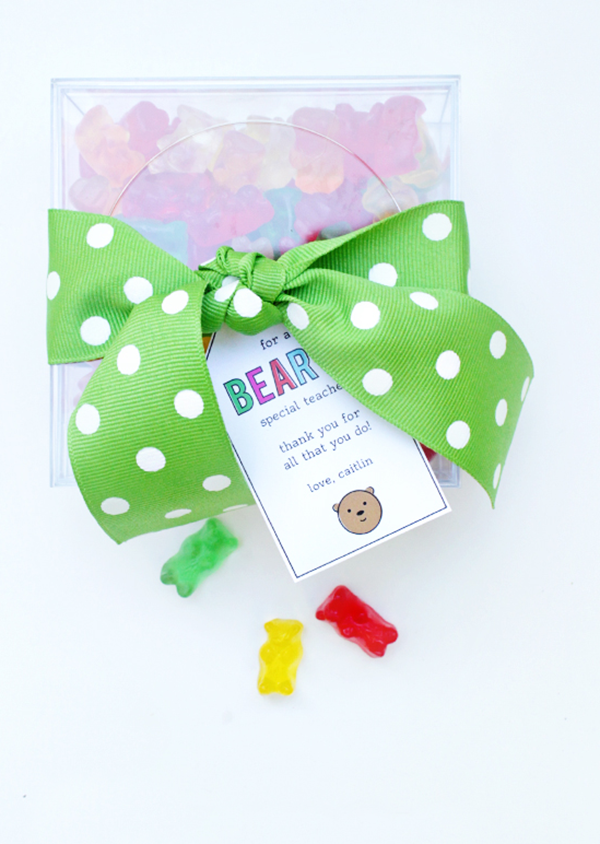
The school year is quickly coming to an end. Here’s a sweet and simple end of year teacher gift to show your favorite teachers some love…

  1. Purchase clear containers
  2. Fill them with gobs of gummy bears
  3. Tie on a pretty ribbon
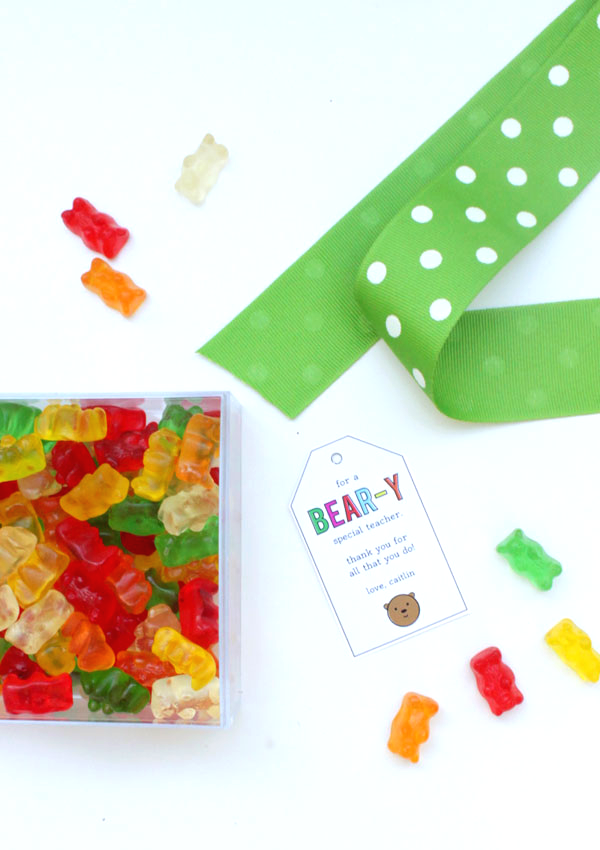
  4. Download, trim and attach this free printable tag (don’t forget to have your child sign it first)
  5. And you’re done! Now go out and make a teacher’s day.

 If you’d rather go BIG… gift the tags with a giant gummy bear instead!End of Year Teacher Gifts 2

Becca Gorski lives in the SF Bay Area, is a working mother of two, and moonlights as an occasional designer / blogger / celebration maker. You can find her creative ideas at CAKE. and her line of merry happy party printables on Etsy.

A Kids Room at Grandma’s House

May 11, 2015

Post by Joni of Lay Baby Lay
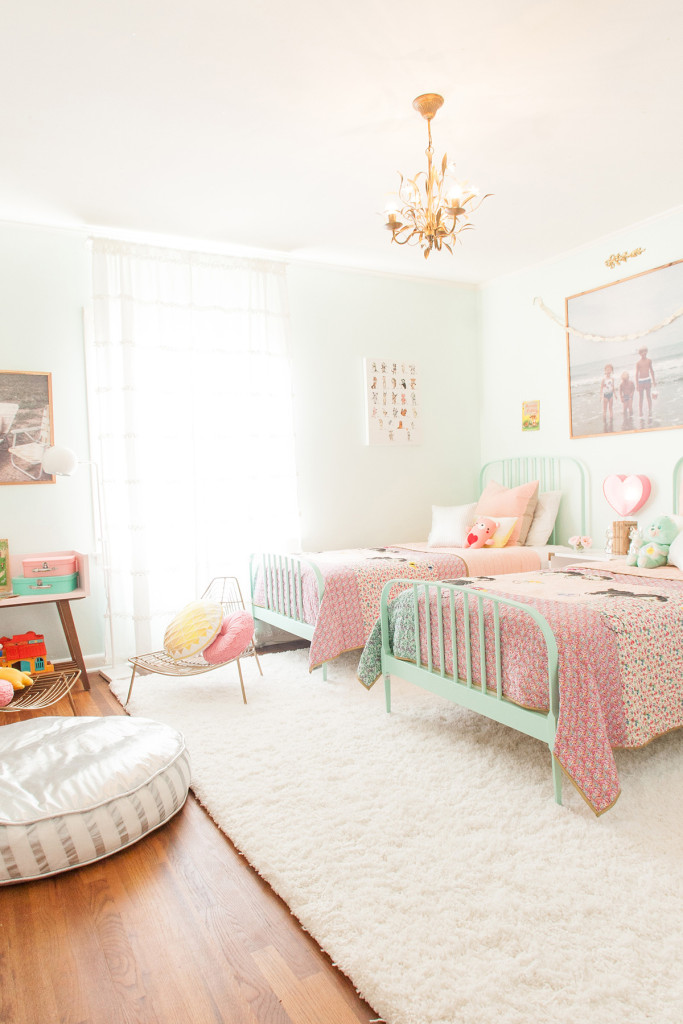
A Kids Room at Grandma's House

I am so excited to share this room we put together with The Land of Nod for the guest room at my girls’ Nana’s house. We talked with her about doing a little room redo, since she raised two boys, and has now found herself to be a grandmother of three little girls. We spend a good bit of time at their house, and so we began planning a space that would be light, bright, and imaginative, while also meaningful to their family and also hopefully something that will last quite awhile. Of course, Nana and GDaddy’s is already special, but it was fun to tailor something especially for them and the girls. Today, I’m sharing a few tips on how to successfully put together a kids room at Grandma’s house that hopefully the grandparents and kids alike will love and enjoy.

Here is the style board we started with. My goal was to lighten things up, but to use pieces that would transition well over the years.

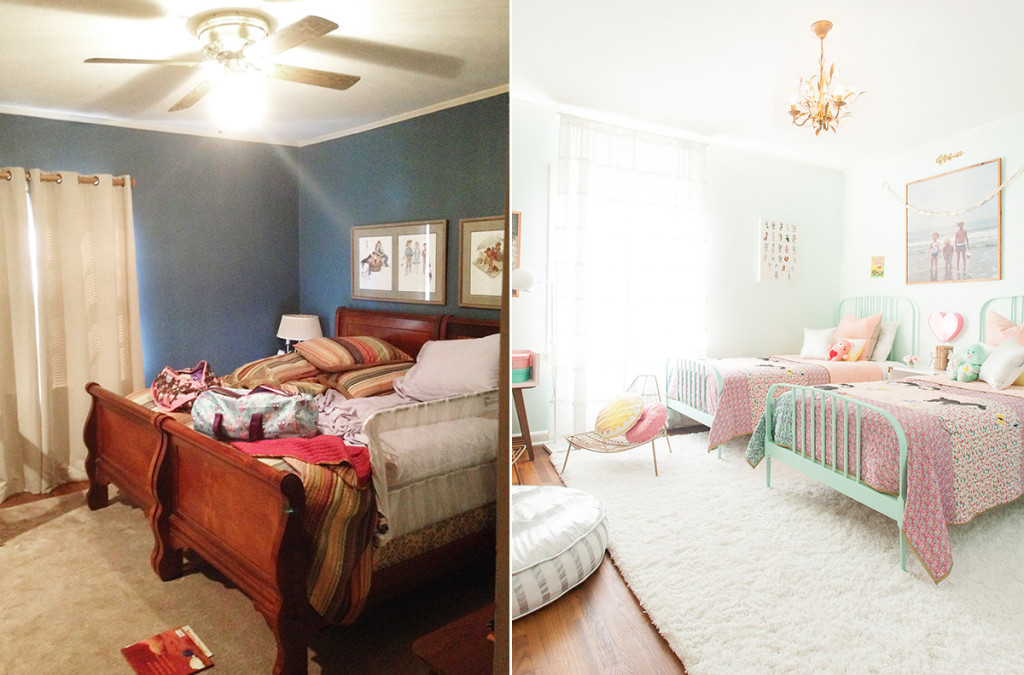
First, here is a little before and after. Please know I snapped the before pic as we were leaving one weekend, so the girls’ bags are on the beds, and so this is not a completely accurate representation of the before; hopefully, though you can get a sense of how the space changed.
A Kids Room at Grandma's House - Before & After

To start with, we went with a lighter paint color to make the room feel more spacious. Irish Mint by Benjamin Moore is the new color, and it is so happy and calming! I think such a bright color wasn’t something Nana would normally choose, but I’m glad she went out on a limb with me to try something different. I think it’s good to keep in mind that paint colors are such an easy thing to change! It’s never permanent, and it’s always a fun and easy way to refresh a space. We also went with the neutral Walk Softly Rug, which gives the space a little more sophistication and balances out the splashes of pink here and there. It’s also so comfy, like walking on a cloud!
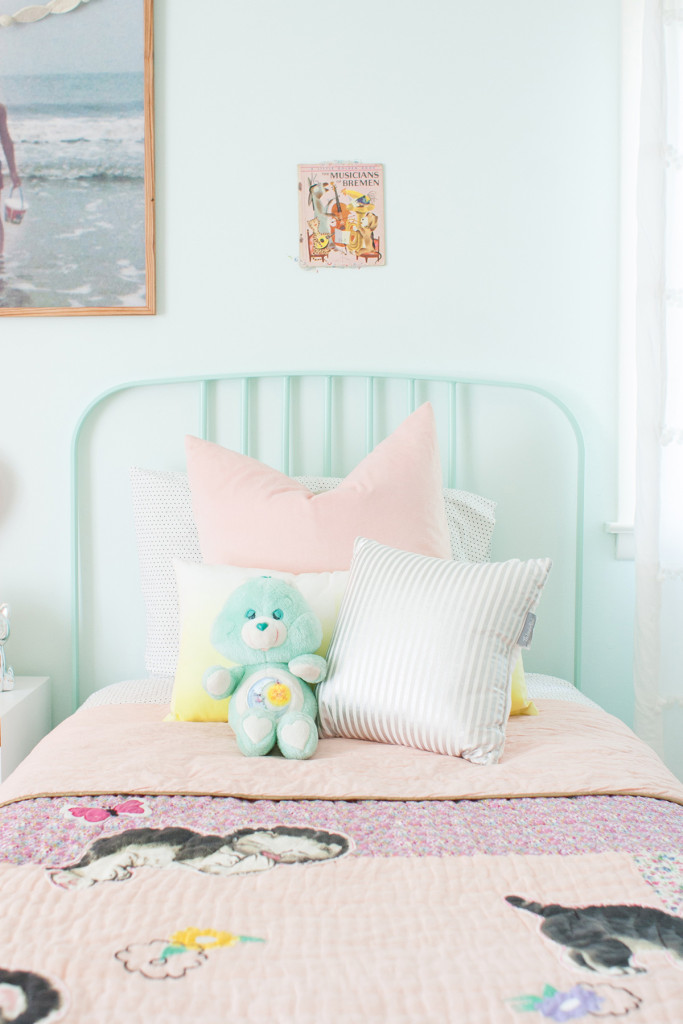
A Kids Room at Grandma's House - 1

Mint Twin Larkin Bed / Geo Throw Pillow / Pinstripe Pillow / Shy Little Kitten Quilt / Swiss Dot Sheets

Another great thing to keep in mind when putting together a kids room at Grandma’s house is choosing furniture that will grow as the children grow. I love these twin Larkin beds, and while they do look more juvenile when paired with pink bedding and such, they will look grown up and sophisticated when used with some more simple, solid bedding in the future. The campaign furniture also has a timeless feel, and these beautiful pieces will be applicable even when the girls are teenagers and beyond, or when the grandparents have more grown up guests.
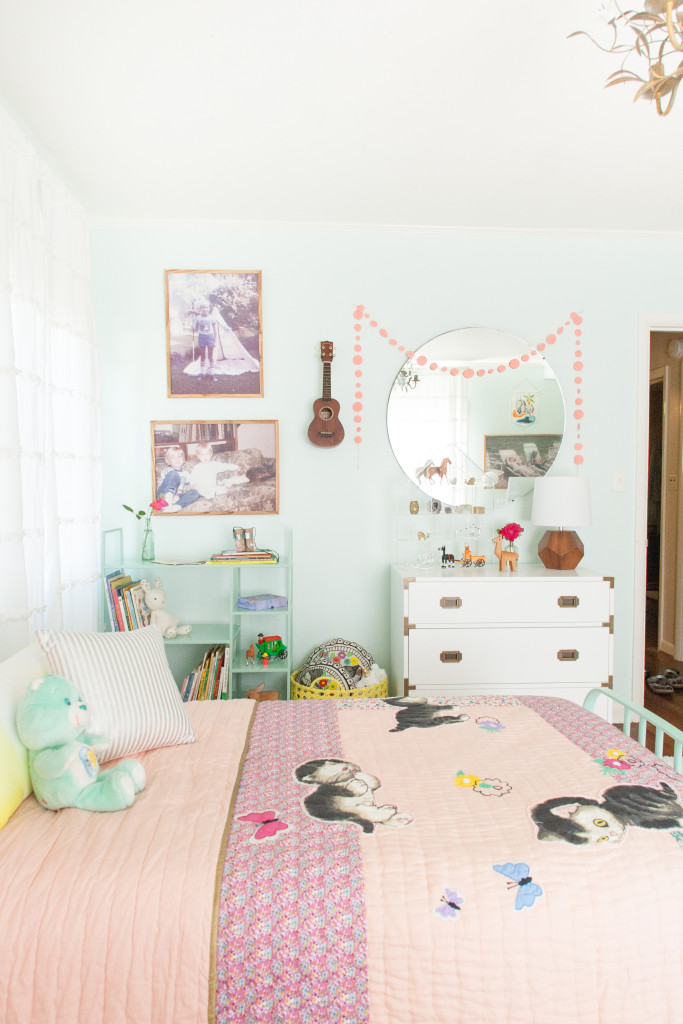
A Kids Room at Grandma's House - 19

White Campaign Dresser / Wood Rock Lamp / Mint Metalwork Bookshelf / Yellow Lattice Bin

I also paired the campaign dresser with a vintage round mirror for an eclectic feel, and I can see these details easily lasting years without feeling dated.
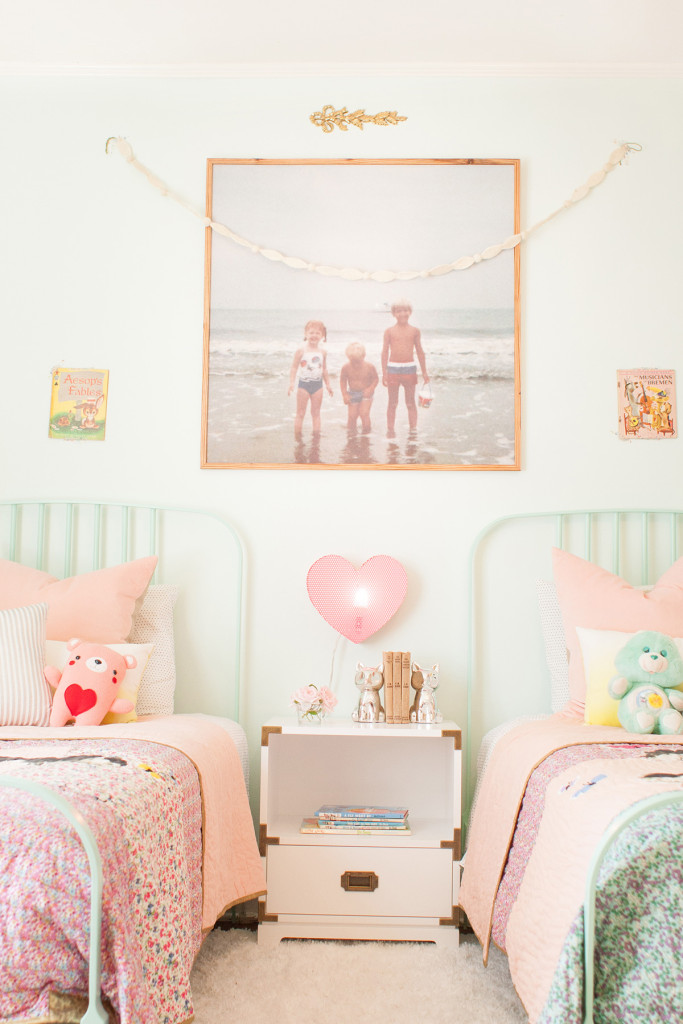
A Kids Room at Grandma's House - 3

Campaign Nightstand / Heart Nightlight

To make this space feel extra special, I included several photos of the boys when they were little. I pored over Nana’s albums and selected a few that I thought were sweet and that would work well. They are just little snapshots and small slices of childhood but I love how they are such sweet captures of casual, everyday moments. I printed them out large scale, and they have turned into works of art. I also love including little mementos and pieces from their growing up; those books on the nightstand were their grandaddy’s as well as those vintage books over the headboards. I also adore that sweet little heart nightlight! It’s the perfect glow.
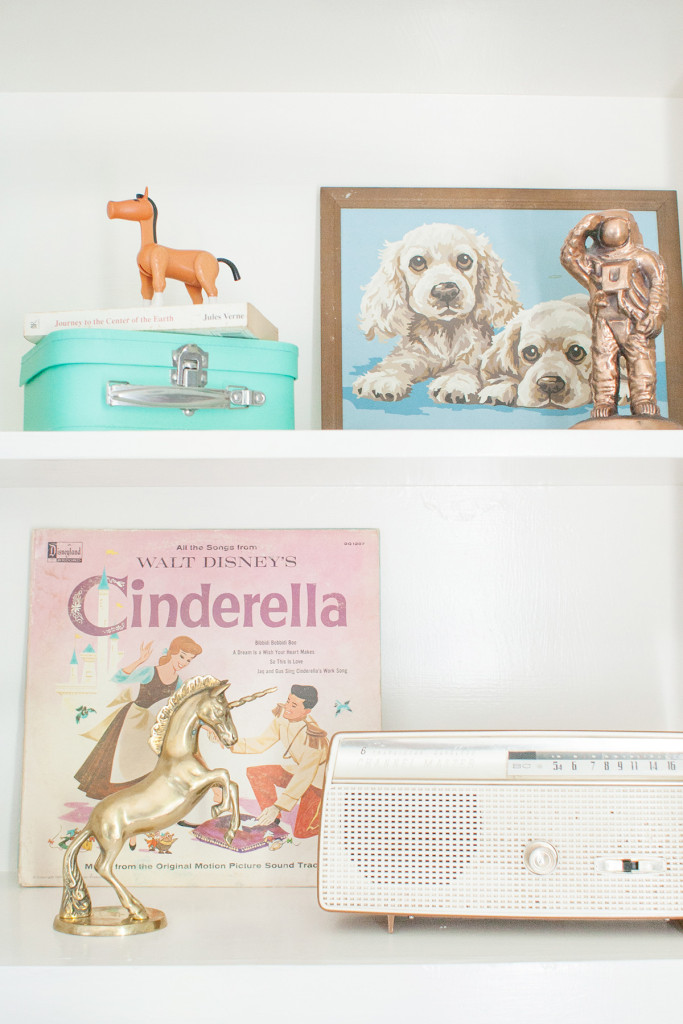
A Kids Room at Grandma's House - 61

Bon Voyage Suitcase Set

I also love that astronaut statue Chip got at space camp one year, and that little horse from one of his playsets. Several of he and his brother’s childhood toys are scattered throughout the room.
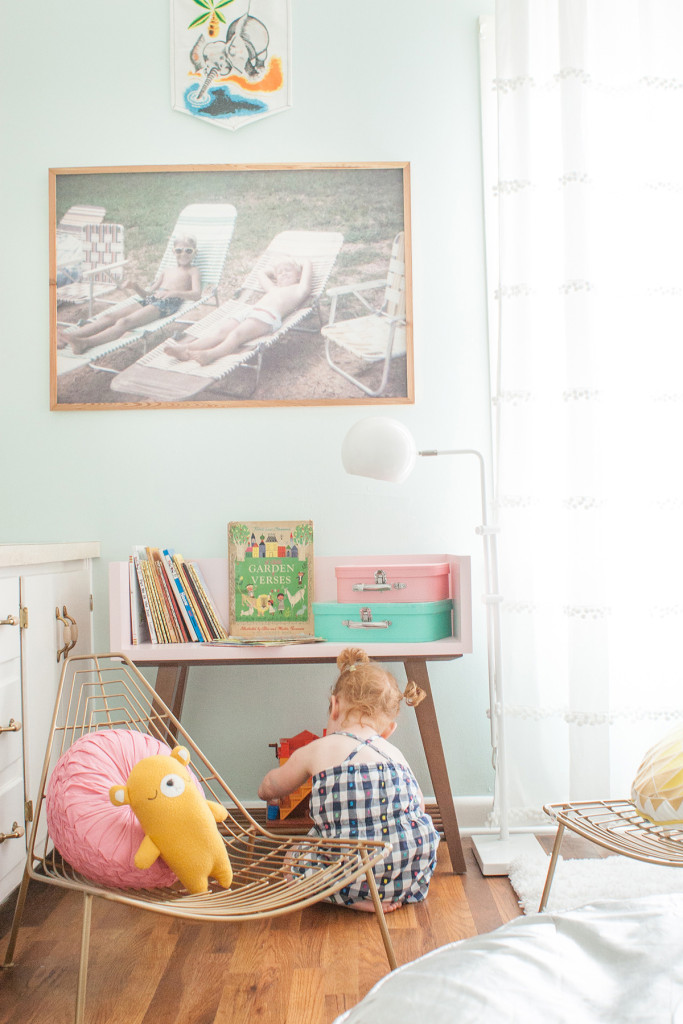
A Kids Room at Grandma's House - 28

Saggy Baggy Elephant Banner / Hemisphere Floor Lamp / Alto Bookcase / Gold Domino Lounge Chairs / Ruched Throw Pillows

Nana also has a really great book collection that the girls always love delving into, and she spends lots of time reading to them, so I wanted to make certain there was plenty of book storage. Between the alto bookcase, the mint metalwork bookcase, and the campaign nightstand, there is ample space for a library, and we added the domino lounge chairs for the girls to comfortably browse. I also love how all the books so sweetly tie into the Little Golden Books bedding!
A Kids Room at Grandma's House - 2

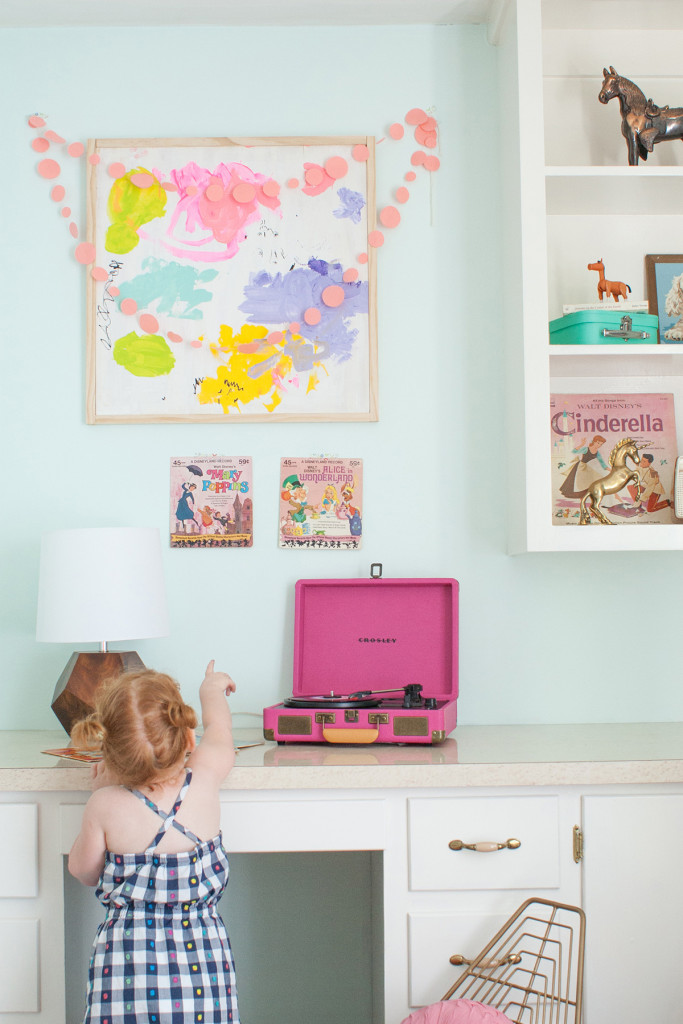
I also included this little masterpiece by Brigette; it’s the perfect punch of color, and a sweet little handmade piece in the room. This plus the photos of the boys and the childhood mementos add some nostalgia to the room and make it feel special. I love helping the girls feel connected to their heritage and where they came from; it’s so sweet to share stories of our childhood and their grandparents!

Here is one more before and after. I really love the built in desk and shelves!
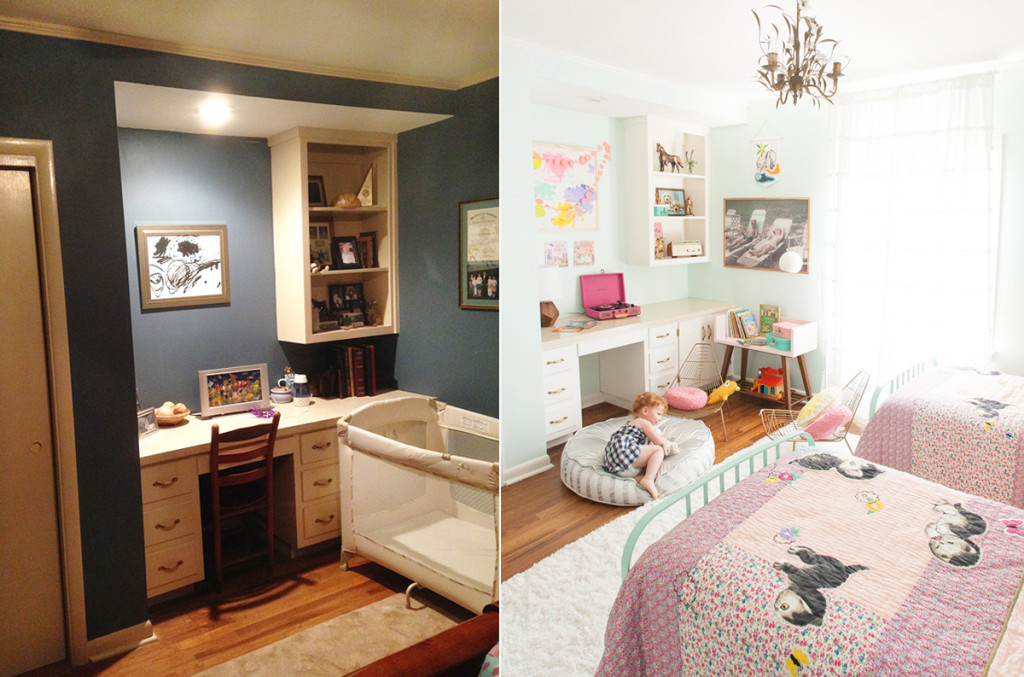
A Kids Room at Grandma's House - Before & After 2

The girls are perfectly smitten with the room and I think Nana is really happy with it, too. I’m so glad she trusted me enough to let me put this together, and especially thankful to The Land of Nod for working with us on creating the perfect kids room at Grandma’s house.

A Kids Room at Grandma's House - 11

Lay Baby Lay started in 2011 shortly after the arrival of my first baby as a place to provide fresh and unique nursery inspiration with a little dose of motherhood experience. This site is my creative outlet and the place where I am able to express all the ideas running around in my head. It is my hope that you will also be inspired to create spaces for your little ones that are full of imagination, color, and delight and maybe find a little encouragement in this crazy but wonderful journey of having babies and watching them grow.
DIY Fingerprint Charm Necklace

May 8, 2015

Post by Christina of Christina Williams Blog

DIY Fingerprint Charm Necklace

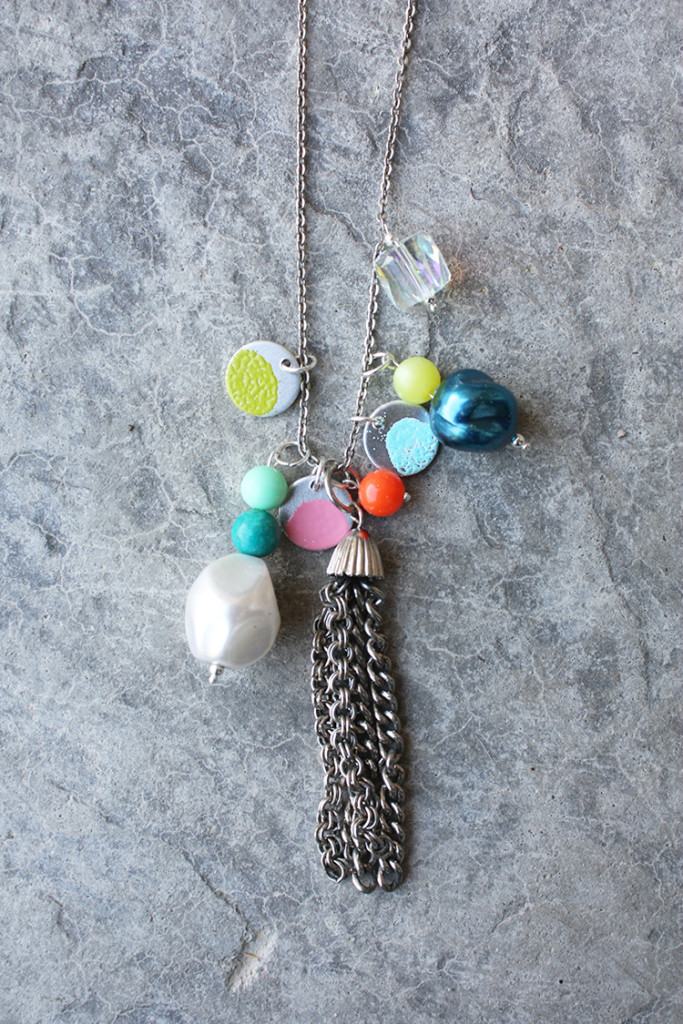
I’ve got one more last-minute project you can make for a quick Mother’s Day gift. When my grandmother passed away, my sister and I were given a bunch of her old costume jewelry. We’ve saved it knowing we’d use it someday; but I wanted to do something extra special with it because I have a lot of fond memories of dressing up in that jewelry as a kid. For this colorful necklace, I paired some beads from my grandma’s jewelry with some new charms I made with my kids’ fingerprints.

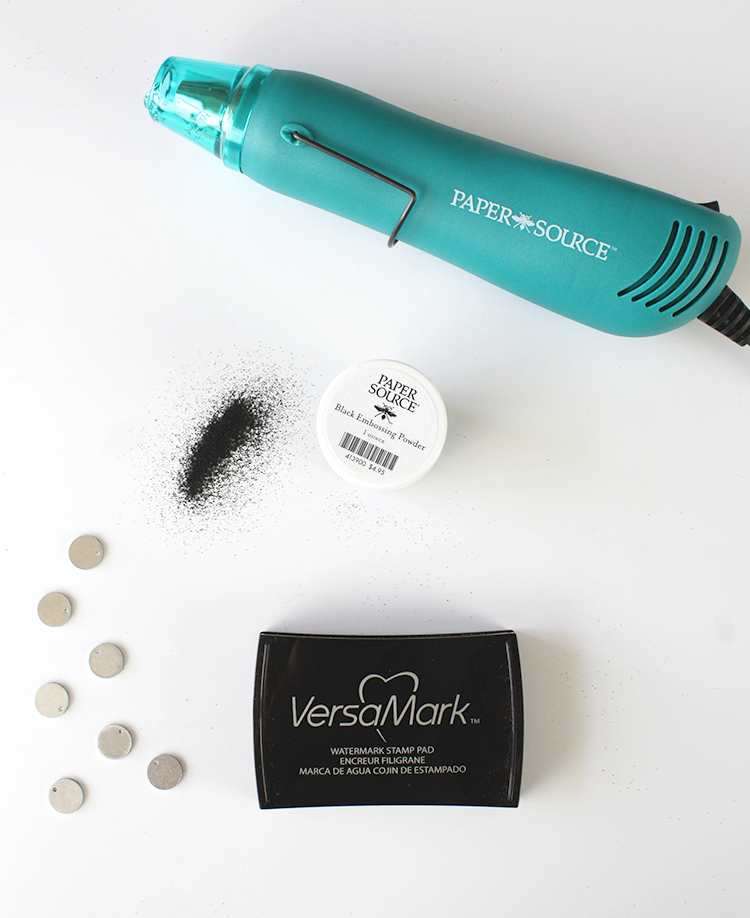
Here’s what you’ll need to make your own DIY Fingerprint Charm Necklace:

  • Blank stamping charms
  • Heat embossing tool
  • Watermark ink pad
  • Embossing powder
  • Chain
  • Beads (optional)
  • Jewelry tools

Embossing Supplies

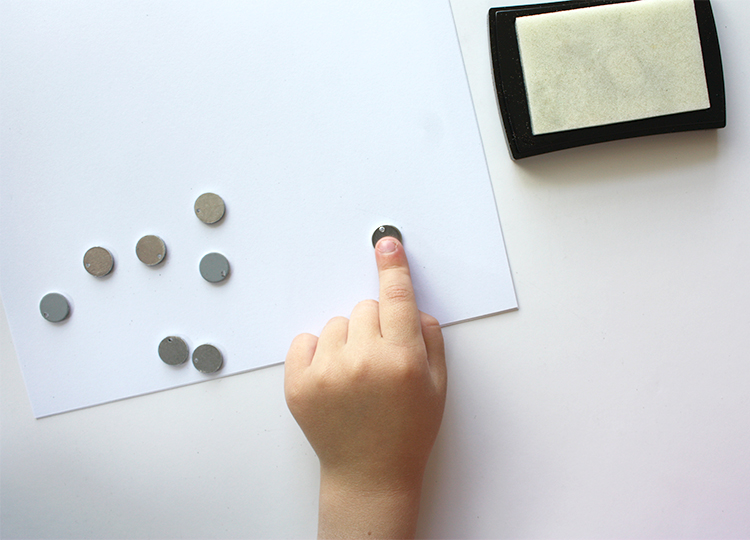
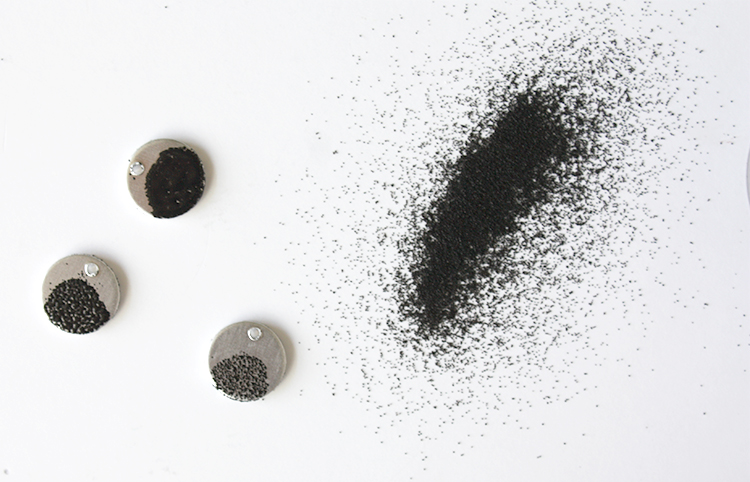
Now grab the heat embossing tool, the blank charms, embossing powder and watermark ink. Holler for your kids to come help. Have them smoosh a finger into the ink pad, blot it once on some scrap paper, then put their fingerprint onto the blank charm.

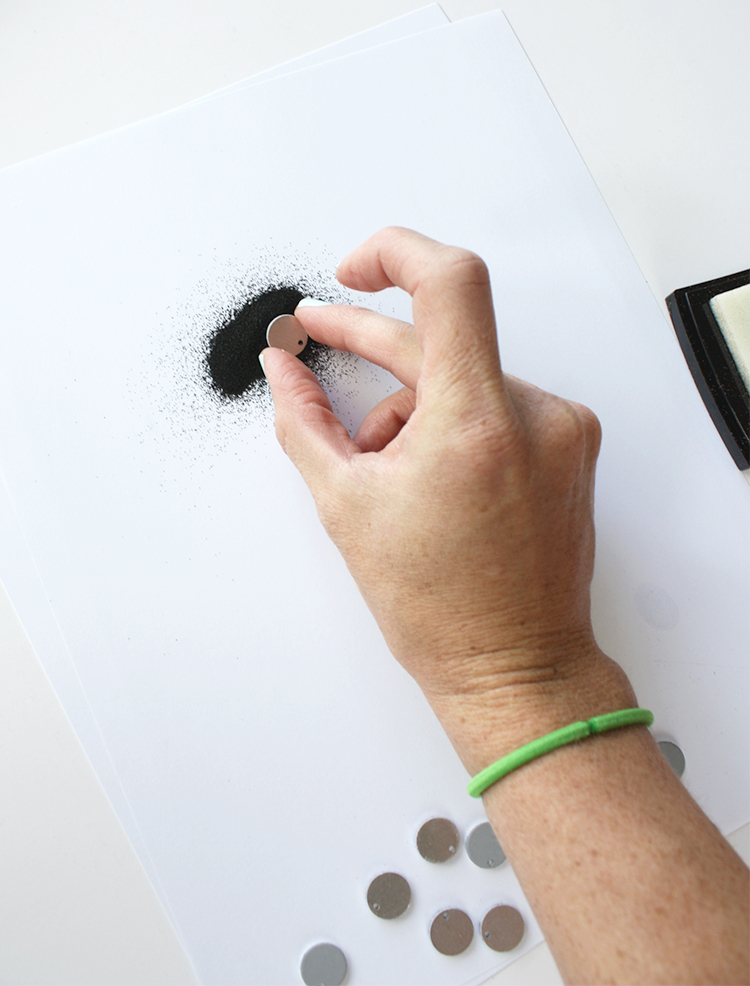
DIY Fingerprint Charm Necklace - FingerprintDIY Fingerprint Charm Necklace - Embossing Powder

Pour out a small pile of embossing powder onto some scratch paper, and gently dip the stamped side down into the powder. Tap off the excess powder, and set aside. Take care not to touch the powder on the charm, so the fingerprint stays in tact. Now repeat these steps for each kid or charm you’d like to make.

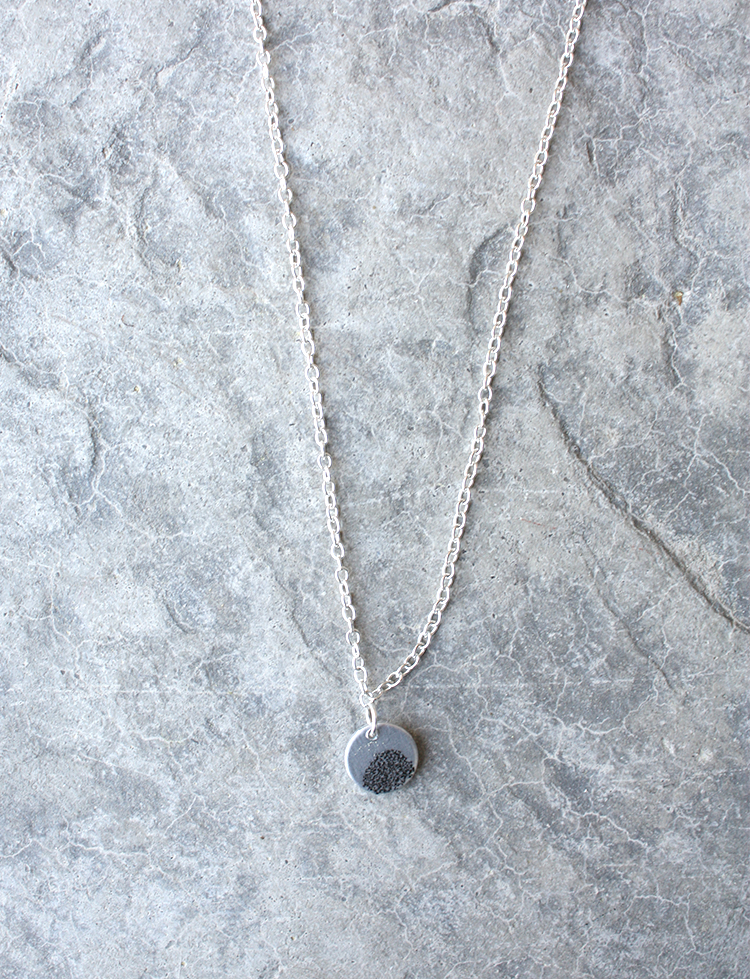
Once your charms are fingerprinted, use the heat tool to melt the powder. Don’t pick them up yet…they’ll be really hot! While you’re waiting for them to cool, grab your jewelry-making supplies, and start planning your necklace.DIY Fingerprint Charm Necklace - FingerprintsDIY Fingerprint Charm Necklace - Fingerprint Necklace

You could do just a simple charm on a chain, without the beads for a more understated look.

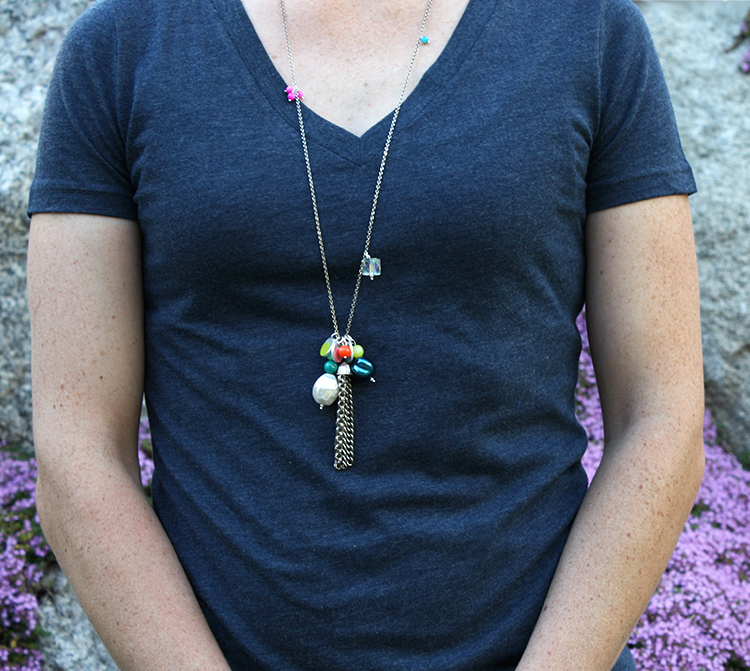
But if you have some of Grandma’s old jewelry laying around, now is the time to put it to use! Use a combination of large and small beads, and alternate them with the fingerprint charms. Now, just attach them all to the chain and you’re in business. This is one Mother’s Day gift that is both sentimental and stylish; and I’m bet she’ll wear this new necklace with pride.

DIY Fingerprint Charm Necklace - Mother's Day Necklace

Happy Mother’s Day Weekend!

And just in time for Mother’s Day, all our Honest to Nod readers can receive 20% off  any order at Paper Source (in stores & online). The offer is valid through May 10th, and the code is MOM20. Terms & conditions apply.*

*This 20% off discount is valid April 21, 2015 through May 10, 2015 and is good toward purchases of regular price and sale items at our stores or online. Discount will become void at 11:59 p.m. on May 10, 2015. Discount may not be used in combination with other discount codes. Discount is not applicable toward past purchases, returned merchandise, special orders, floor samples, Gift Cards, eGift Cards, workshops or employee purchases. Discount is also not applicable toward purchases of third party custom orders (Vera Wang, William Arthur, Elum, Checkerboard). Discount applies to merchandise only and cannot be applied toward shipping and handling charges, taxes or fees. Offer has no cash value, is nontransferable and may not be auctioned or sold. No cash/credit back. Paper Source reserves the right to modify or discontinue this offer at any time. Void where prohibited by law.
Christina Williams is a blogger and graphic designer living in Salt Lake City, Utah. She’s a night owl and a bookworm, as well as a mother to three children ranging in age from two to eight. She shares her latest DIY and design projects along with her adventures in parenting on her self-named blog, Christina Williams.

The Nod Bookmobile is Heading to NYC

May 7, 2015
Written by Lauren, our fearless marketing events manager
Week5_NY_Flyer_NodBustour_DWA

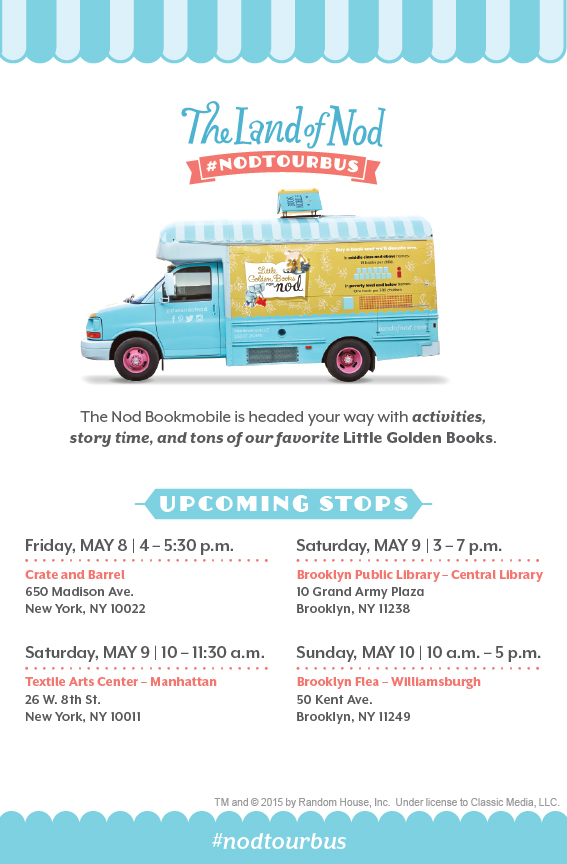
The #nodtourbus bookmobile is headed to NYC this weekend, and we are very excited to partner up with some awesome businesses on our stops around the city! Be sure to come join us for books, story time and activities around the Big Apple. For every Little Golden Book purchased from us, Random House Children’s Books will donate one to Milk + Bookies. Dedicated to promoting the joys of reading and literacy, Milk + Bookies is a charitable organization that provides books to those who can’t afford their own.

On Friday, May 9, join us at Crate and Barrel on Madison Ave. from 4 p.m. – 5:30 p.m. After that, join us on Saturday, May 9, at the Textiles Arts Center in Manhattan from 10 a.m. – 11:30 a.m. Textile Arts Center aspires to empower and unify the textile community, and advocate for the handmade.

Next we will be headed to the Brooklyn Central Public Library from 3 p.m. – 7 p.m. on Saturday, May 9, to take part in Bike the Branches. Explore the borough and the BPL branches by bike while supporting the library, ending the day at the Block Party at Central Library. Find out more and register at bklynlibrary.org/bikethebranches and enter code LON2015 to receive 25% off adult registration.

Finally, join us for our last stop on Sunday, May 10, from 10 a.m. – 5 p.m. at the Brooklyn Flea – Williamsburgh. Our pal, designer and illustrator Erin Jang of Indigo Bunting, will be joining us from 11 a.m. – 1 p.m. to help us celebrate Mother’s Day with the bus at the Flea! You can purchase her book Make & Give, and chat with her about the simple and modern craft ideas in the book!

Come out and see us, and help us spread the joy of reading!

When Lauren isn’t planning ridiculously awesome #nodevents for The Land of Nod, she spends her time putting up with the crazy antics of her English Bulldog, Lola. She also loves searching for treasures in vintage stores and summer antique markets. Due to her previous adventure living in Canada, she has a strong obsession to Hudson Bay stripes, as well as the fine cuisine of poutine (Don’t make her choose between the two…that’s like choosing between Ryan Gosling and Jason Bateman for her!)

Designing With Special Needs In Mind

May 6, 2015

Post by Amy of This Little Miggy Stayed Home

Designing With Special Needs In Mind

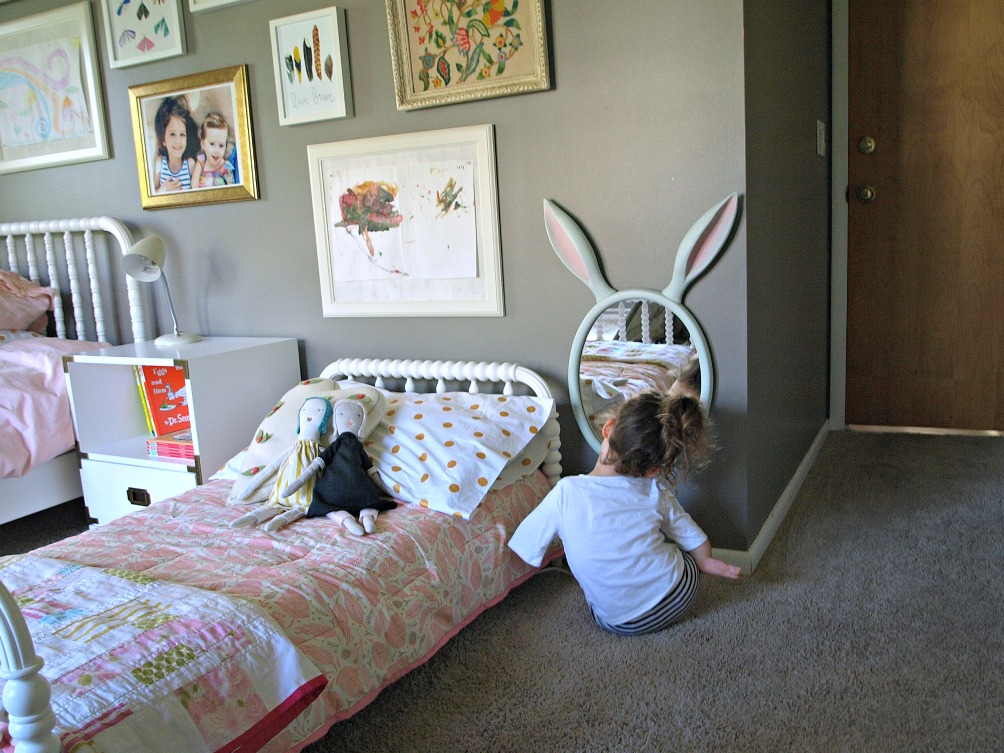
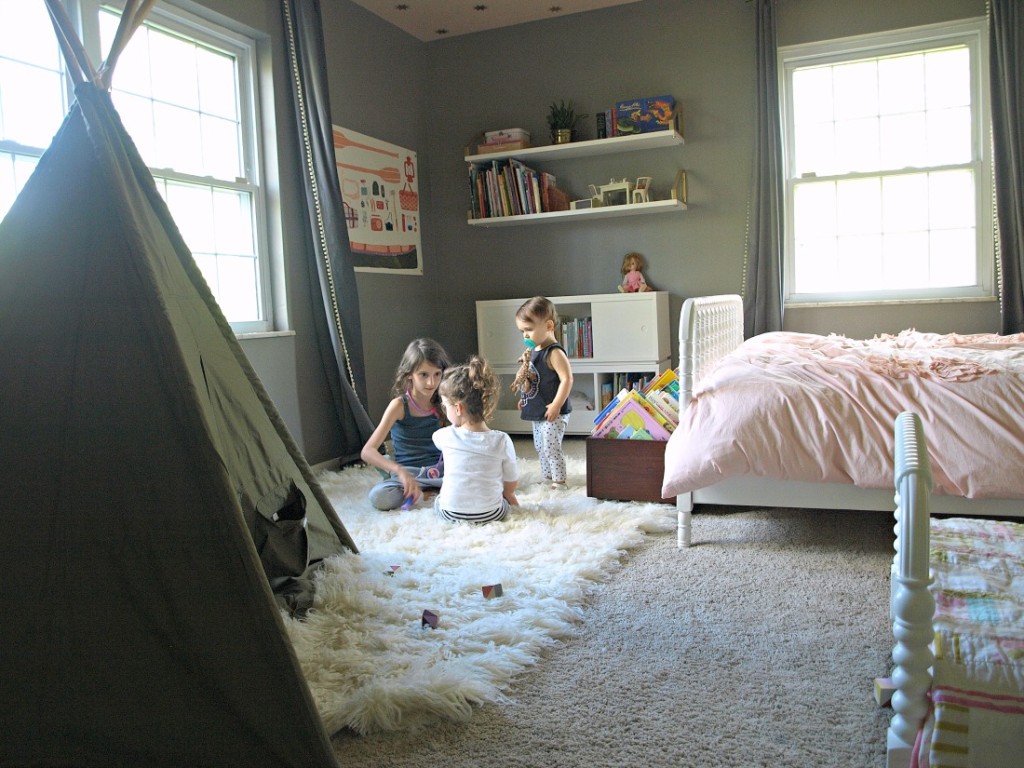
I approached The Land of Nod last fall to help me design a room for my 2 daughters who would be sharing a room for the first time.  The main catch?  One daughter has special needs.  They happily accepted the challenge!  Designing with special needs in mind is a common concern for a lot of parents, and often one that is much more about functionality than fun.  Whether there is extra medical equipment in the room, sensory issues to take into consideration, or in my case, physical limitations to work around, special needs families often have more problems than solutions when it comes to room design.  Our daughter, who goes by Lamp on my blog, was born with limb differences on all 4 limbs and therefore she doesn’t have long arms or ‘grabbing hands’ as she says, and can’t stand or walk independently.  What she lacks in limbs she makes up for with a spitfire personality and a strong desire for independence.  Designing a room that will be accessible and foster this independence while also serving the needs of our older daughter was the challenge.  Creativity and good design can often save the day and luckily The Land of Nod has them both in spades.

Designing With Special Needs In Mind

District Storage Cube / Flokati Rug / Outdoors Banner / Cargo Teepee

First I connected with Tim, one of designers on the The Land of Nod’s Design Services team.  Tim was so great to work with–SUPER patient with me (coughcoughfickelcough), a great designer and his mom also has a limb difference, which probably doesn’t usually get the reaction that it did from me which was, No way!  That is so cool!  And it is.  Tim really gets what it is like to work around a physical disability and helped think up some great solutions for the room.

Going into the design process, there were three things I had already done with the room that I wanted to keep including:

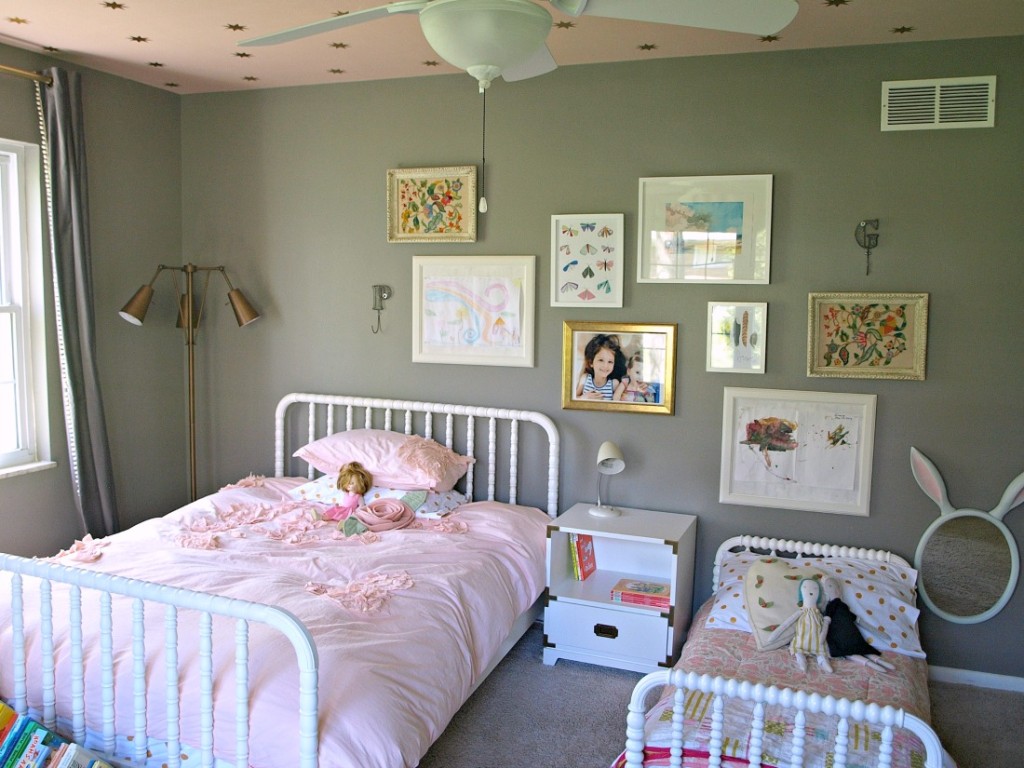
  1. The paint colors: the walls are a medium grey with a nude pink on the ceiling.
  2. Matching Jenny Lind beds: one a vintage full size we refinished and the other is a Land of Nod toddler bed.
  3. A star wallpaper hack that I DIYed on the ceiling.

I loved all three elements of the room, but I needed help creating a cohesive look and finding storage solutions to accommodate both girls.  With the stars on the ceiling as my inspiration, I pitched the idea of doing a camping/outdoorsy themed room.  Tim liked the idea and we ran with it.

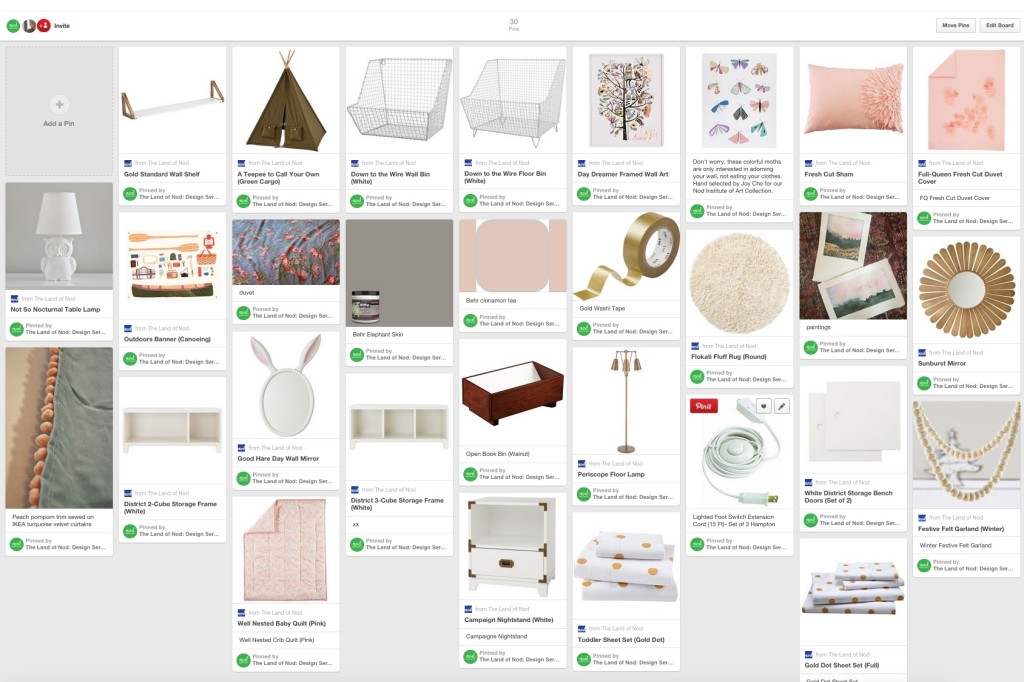
I wanted to include my girls in the process, but not too much or we’d still be at square one.  Ya feel me, moms?  So I asked them if they liked the idea of having an outdoor theme and both girls loved it. Yay! Second, I asked them each to pick out three different bedding choices and we would use one of their choices for the room.  We all loved this idea since bedding feels like the most personal part of the room.  And, of course, it was still hard for them to narrow it down to just three–ha!  Then I went through the catalog and made a list of various items that I thought might work well for the room. At this point Tim asked for room dimensions, window sizes and got to work putting together a couple of different Pinterest boards for me to check out.  He actually made 3 separate boards. 3 boards ya’ll.  I told you he was patient.  We landed on the second board pretty early on and made some tweaks here and there.

Designing With Special Needs In Mind - Pinterest Inspiration Board

The great thing about working with Tim is that he would often check with me to see if I thought a certain product would work for the girls–especially Lamp–but he also had some great ideas in terms of accessibility that I wouldn’t have thought of.  Together we aced this room.  For example, I knew that the floor book bin would be a great option since finding stylish, low-laying book storage is like finding a golden unicorn, while Tim came up with the idea of hanging the Good Hare Day Wall Mirror low next to Lamp’s bed so it would be just for her.  He also found an extension cord for the periscope lamp that has a push button on the floor.  You guys, she can now turn a light on and off all by herself!  For our family, this is just plain genius.

Designing With Special Needs In Mind

Periscope Floor Lamp / Fresh Cut DuvetGold Dot Sheet Set / White Campaign Nightstand / Well Nested Toddler Quilt / Good Hare Day Mirror

I wanted this space to be functional for two little girls of differing ages, sizes and abilities, but I also wanted it to be beautiful. And it is. Accessibility is important, but just is important is how they feel when they’re in that room. A beautiful room feels like love and love wins every time.

See more pictures and the full reveal on my blog This Little Miggy Stayed Home.

Amy writes This Little Miggy Stayed Home. She likes to blog about life, special needs, her artwork, the occasional DIY, and whatever strikes her fancy.  She also blog a lot about her family–her husband B and their three daughters.  Her daughter, blog name Lamp, was born with a condition that falls under the umbrella term of limb differences and basically means that her limbs are, you guessed it, different.  Coincidentally she was also born with extra awesome.  You can read more about our journey under Lamp Links.  About a year after Lamp was born, Amy started a series on my blog called The Special Needs Spotlight where she interview other families and individuals about their special needs situations. 

DIY Mother’s Day Gift – Ring Dishes

May 5, 2015
Post by Christina of Christina Williams Blog
DIY Mother's Day Gift - Ring Dishes

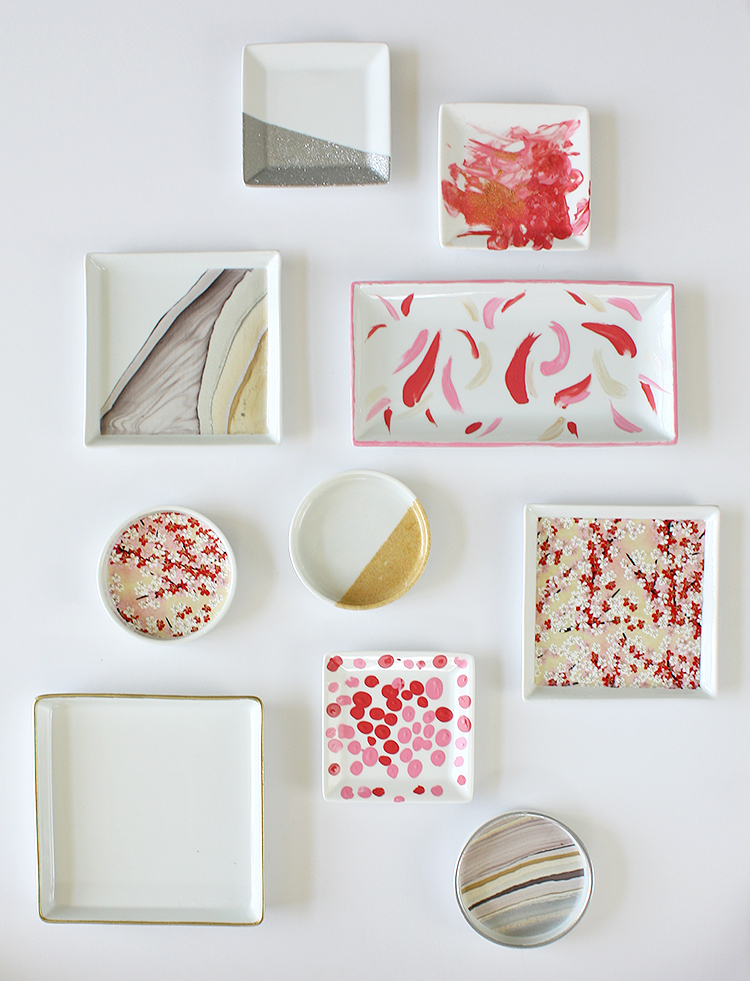
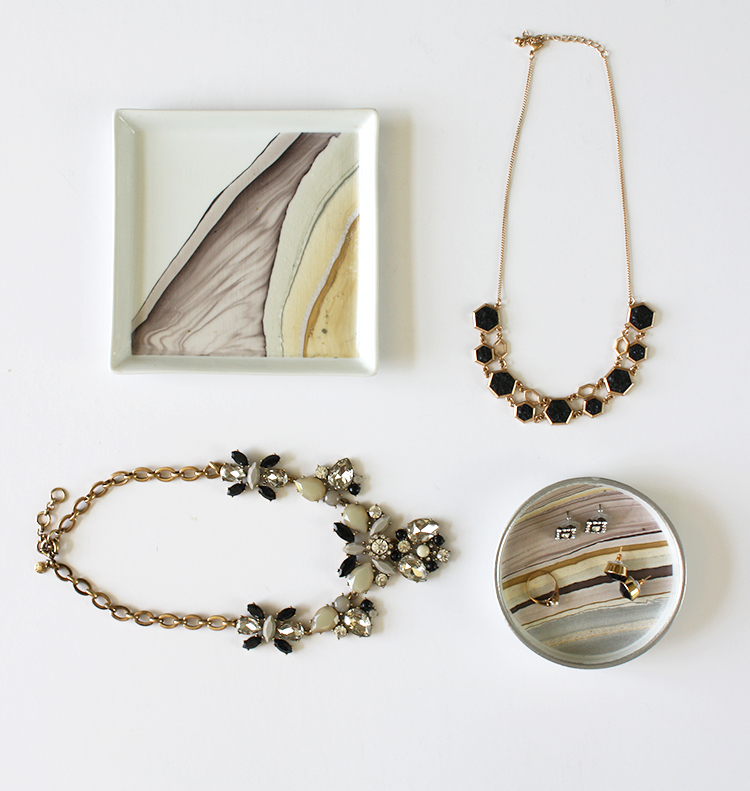
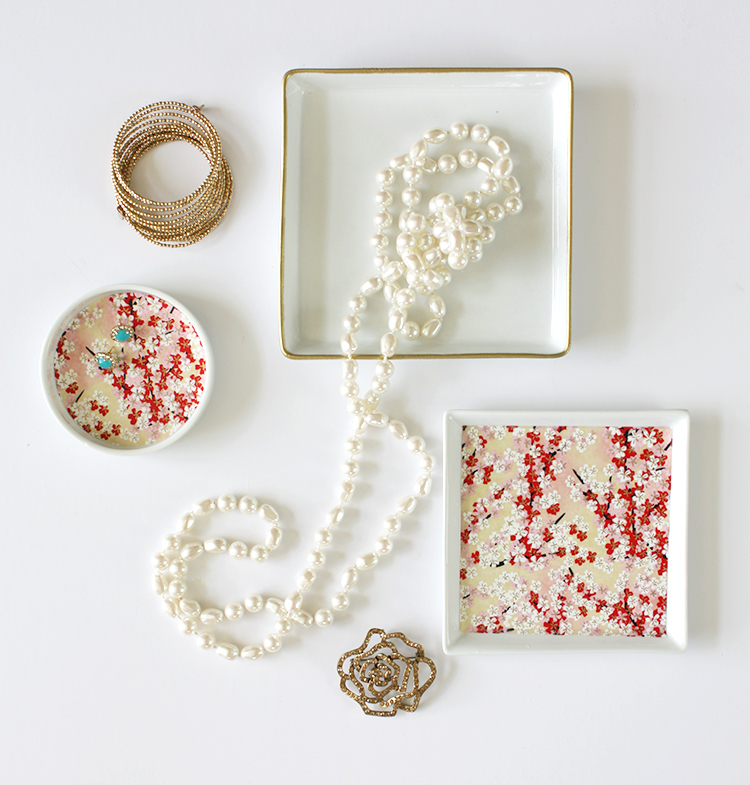
Today I’ve teamed back up with Paper Source to show you a fun DIY Mother’s Day gift craft project! Ring dishes are so handy to have around. I use them in my closet to corral all my loose earrings. And having a custom-made ring dish from my kiddos is such a treat. There are so many different variations and techniques you can do with this project, and my kids had so much fun with this that we had to go buy more dishes to work on!

I’ll show you two quick ways you can customize these ring dishes. So make sure you’ve got plenty of small ceramic dishes handy. I grabbed a bunch from Target and World Market. Restaurant supply stores are also a great resource for inexpensive options.  DIY Mother's Day Gift - Ring Dishes

DIY Mother's Day Gift - Ring Dishes Supplies

DIY Mother’s Day Gift – Ring Dishes Technique 1: Decoupage

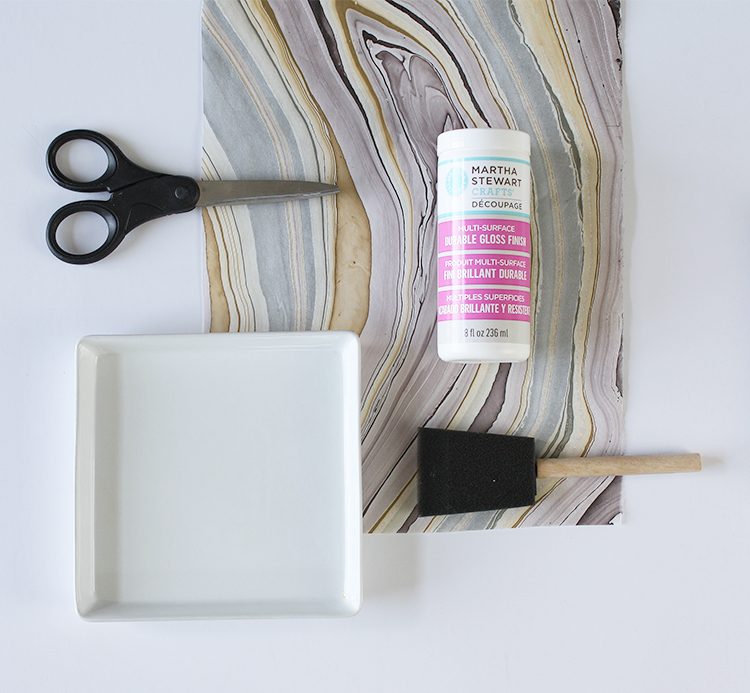
Supplies:

  • Small dish
  • Paper (I’ve always loved the fine papers from Paper Source, and this marble paper is a real showstopper!)
  • Foam brush
  • Decoupage (this stuff from Martha Stewart is the best around)
  • Scissors

 How to:

  1. Just cut a piece of paper to fit your dish, spread a layer of decoupage liquid directly on the dish.
  2. Then place the paper where you want it and smooth out any wrinkles.
  3. Next, put another layer of decoupage liquid over the top.
  4. Now set the dish aside to dry (at least) overnight. This stuff says it takes a full 28 days to cure; but for a light-use piece like a ring dish, you can start using it when it’s completely dry…24-48 hours.

DIY Mother's Day Gift - Silver Ring Dish DIY Mother's Day Gift - Silver Ring Dish Embossing Supplies

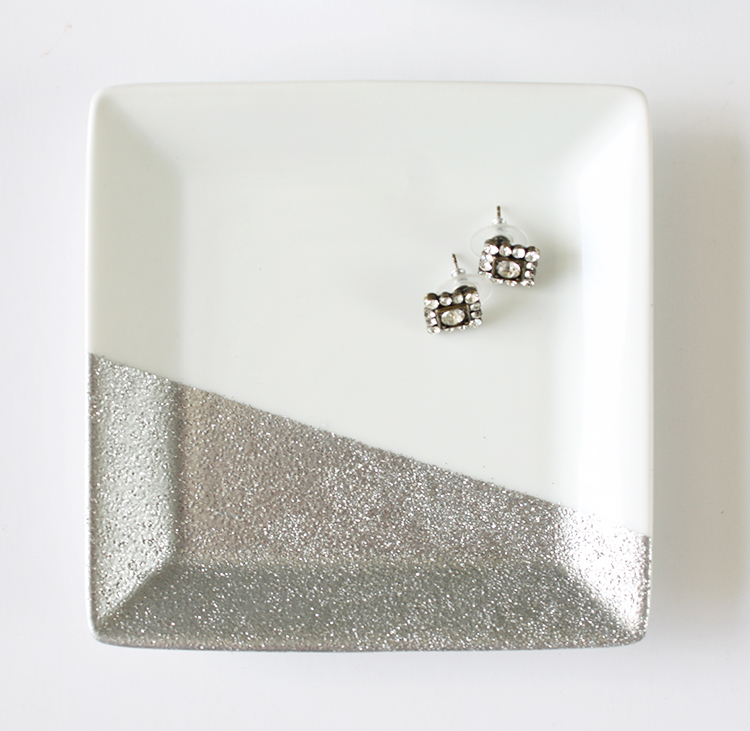
DIY Mother’s Day Gift – Ring Dish Technique 2: Glitter Dipped

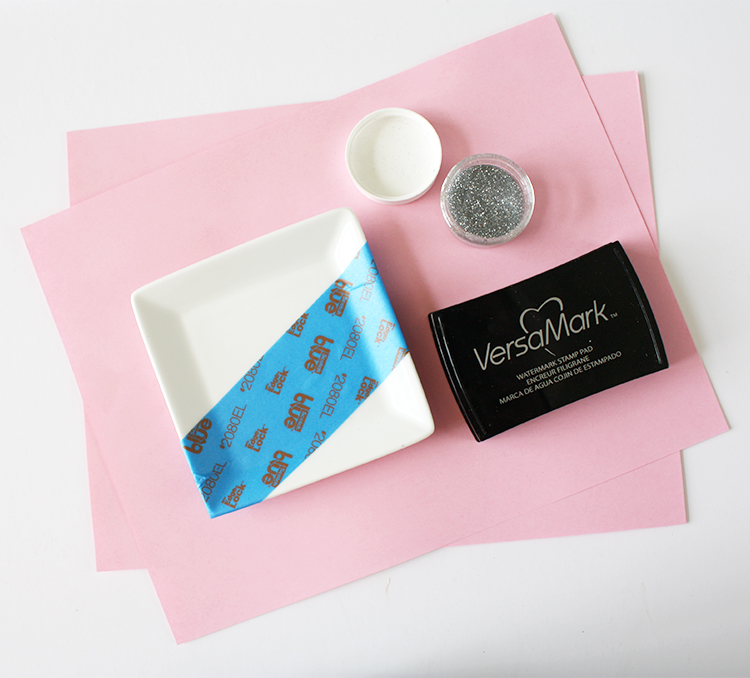
This is BY FAR my favorite project I’ve done for a really long time. I had my embossing heat tool out for a different project, and decided to give it a whirl on some dishes. The results are spectacular; and the process is so easy!

Here’s what you need:

How to:

  1. Just tape off a section with the painter’s tape.
  2. Press into the ink pad with your fingertip, then transfer the ink over to the taped off section of the plate. Keep filling in the space with ink until it’s covered.
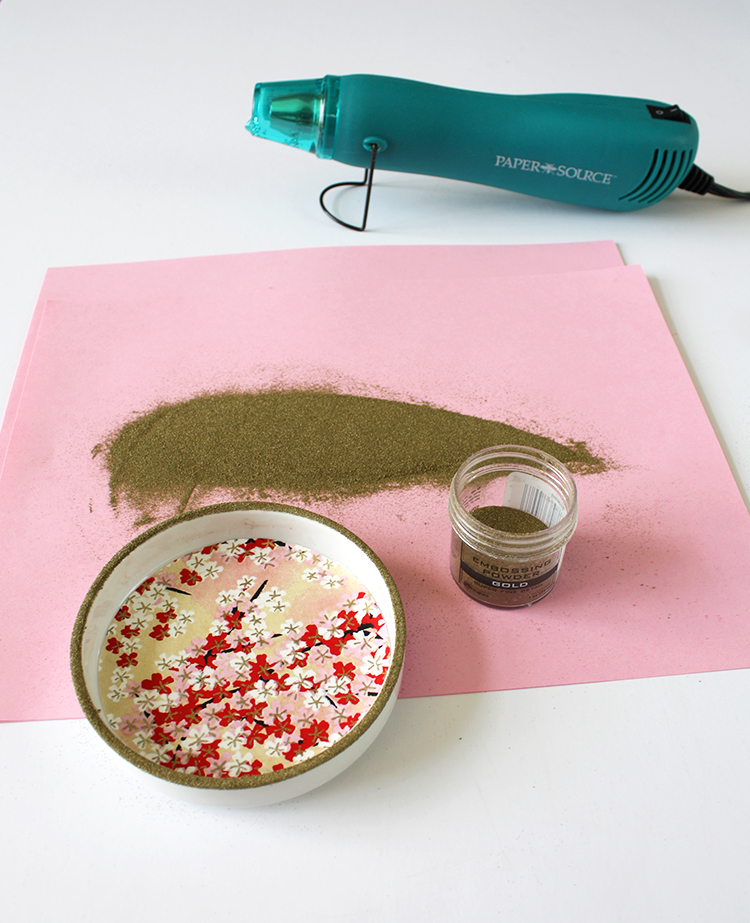
  3. Working on top of the scrap paper, sprinkle on the embossing powder and gently tap off the excess.
  4. Pick up the scrap paper and use it to pour the excess powder back into the container.
  5. Remove the tape, and use the heat tool to melt the powder.
  6. Note: The dish will be hot after embossing, so don’t pick it up until it’s cooled.

DIY Mother's Day Gift - Jewelry Dishes

DIY Mother's Day Gift - Ring Dish Gilded Edges

A few more notes: 

  • You can use the embossing powder just around the edges of the dishes for a gilded edge look.
  • You could use kids’ artwork to give it a more personalized touch.
  • My kids LOVED these projects. They were great at helping with the ink pad and the embossing powder. My 9-year-old was really into using the heat tool to help melt the powder. And my 5-year-old would have painted every dish we have in the house if I’d have let her.
  • I’ve got a few more ways to customize the ring dishes over on my blog…so come see some of our other Mother’s Day gift ideas.

And just in time for Mother’s Day, all our Honest to Nod readers can receive 20% off  any order at Paper Source (in stores & online). The offer is valid through May 10th, and the code is MOM20. Terms & conditions apply.*

*This 20% off discount is valid April 21, 2015 through May 10, 2015 and is good toward purchases of regular price and sale items at our stores or online. Discount will become void at 11:59 p.m. on May 10, 2015. Discount may not be used in combination with other discount codes. Discount is not applicable toward past purchases, returned merchandise, special orders, floor samples, Gift Cards, eGift Cards, workshops or employee purchases. Discount is also not applicable toward purchases of third party custom orders (Vera Wang, William Arthur, Elum, Checkerboard). Discount applies to merchandise only and cannot be applied toward shipping and handling charges, taxes or fees. Offer has no cash value, is nontransferable and may not be auctioned or sold. No cash/credit back. Paper Source reserves the right to modify or discontinue this offer at any time. Void where prohibited by law.

Christina Williams is a blogger and graphic designer living in Salt Lake City, Utah. She’s a night owl and a bookworm, as well as a mother to three children ranging in age from two to eight. She shares her latest DIY and design projects along with her adventures in parenting on her self-named blog, Christina Williams.

DIY Faux Cacti Terrariums

May 4, 2015

Post by Lidy of Hello Lidy

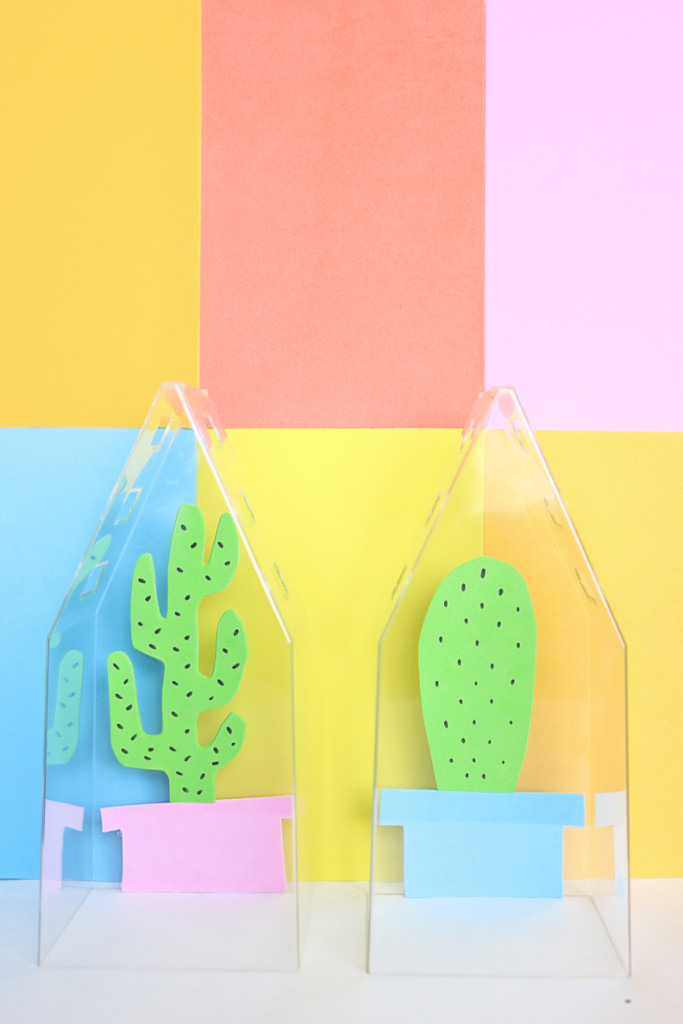
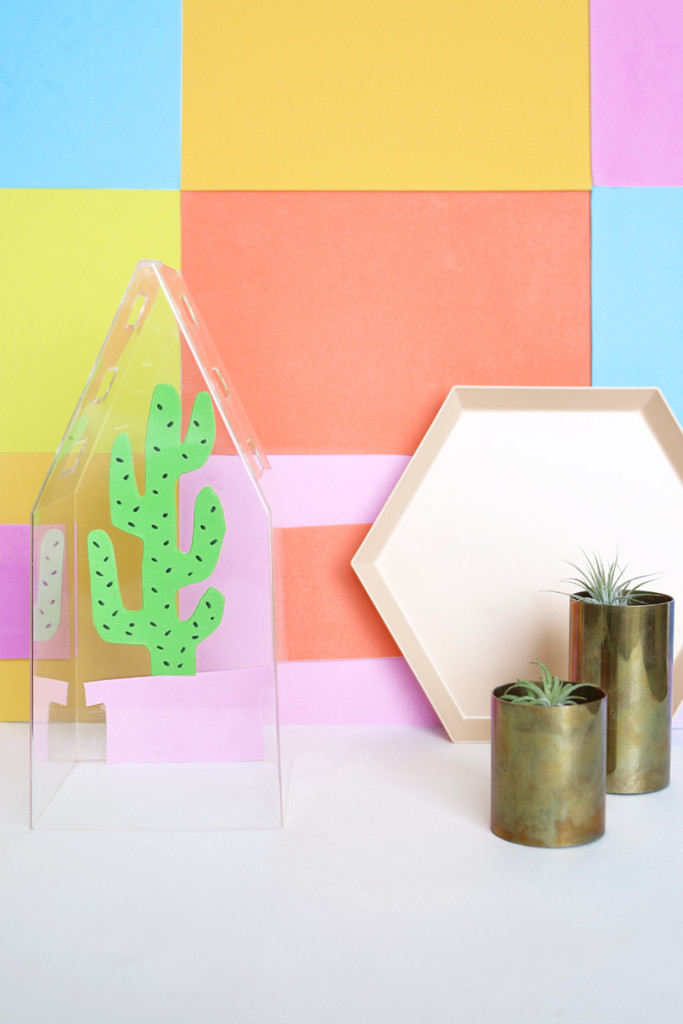
DIY Faux Cacti Terrariums

It’s no secret, I love plants! I have a plant in almost every room in our home. It’s an instant way to make the space feel fresh! The only place you won’t see plants are obviously, the kids rooms. They are too curious for their own good and so I’ve avoided a predictable disaster. But these DIY Faux Cacti and Terrariums will do the trick!

DIY Faux Cacti Terrariums Materials:

  • Colorful Foam paper (with sticky back)
  • Pencil
  • Scissors
  • Mini Green Houses (I got mine from IKEA)

DIY Faux Cacti Terrariums Instructions:

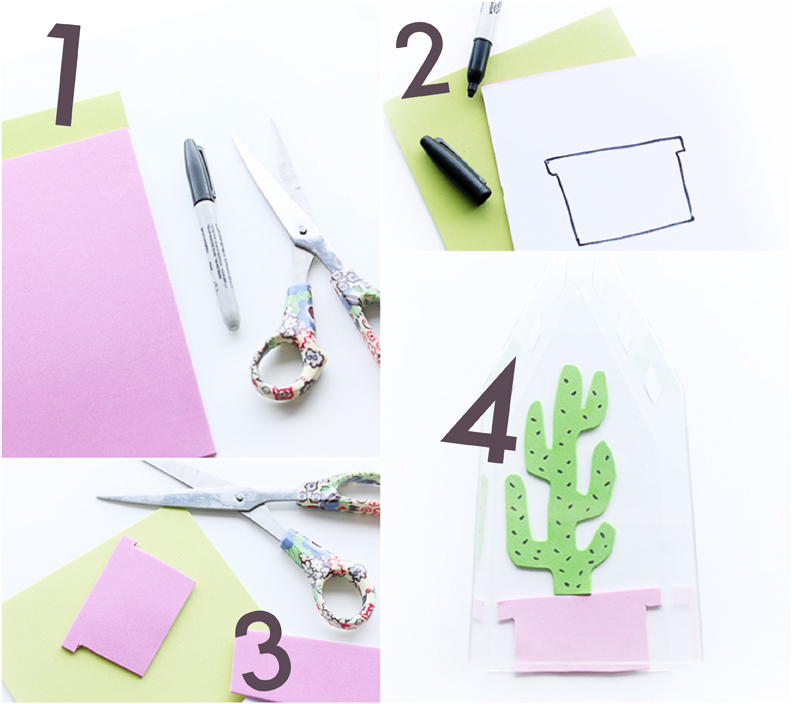
  1. Gather your supplies.
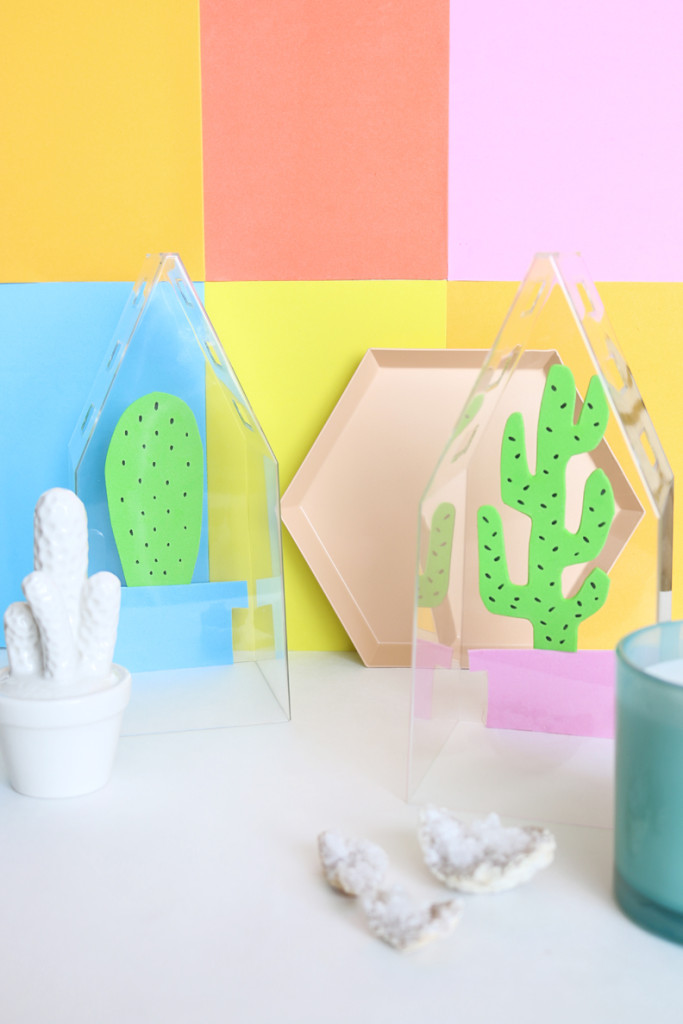
  2. Simply sketch out your cacti (google different cactus to see which form you prefer) and planter on the back of your foam paper.
  3. Using your scissors, carefully cut out your cacti and planter.
  4. Peel the back off and stick to the inside of one of your greenhouses. You can use a sharpie to add the little spines (spikes).
  5. Repeat step for the second one. It’s so easy!

DIY Faux Cacti Terrariums - Steps 1-4DIY Faux Cacti Terrariums

Now the kids can enjoy their very own cacti that won’t prick or poke! They also add a great pop of color in their space, which is perfect for summer! It would be so fun to do a whole wall installation of these of various cacti hanging from different levels on a wall. The terrariums have little holes at the top which makes it easy to string twine from. It sure would make an interesting focal point, don’t you think?!

Now off to make a few more with the kids! DIY Faux Cacti Terrariums

XOXO, Lidy

Lidy is the face behind Hello Lidy: a blog focusing on creating and cultivating unique spaces that integrate original handmade designs and vintage pieces while keeping up on current trends and designs. Lidy and her husband have three adopted toddlers.

Easy Mother’s Day Gifts

May 1, 2015

Post by Christina of Christina Williams Blog

diy-mother's-day-herb-garden

Today we’ve teamed up with Paper Source to show you two easy, yet spectacular gifts that the kids can help make for mom or grandma for Mother’s Day. These gifts are made with love and serve several purposes, so they’re sure to be a hit with moms and grandmas alike!

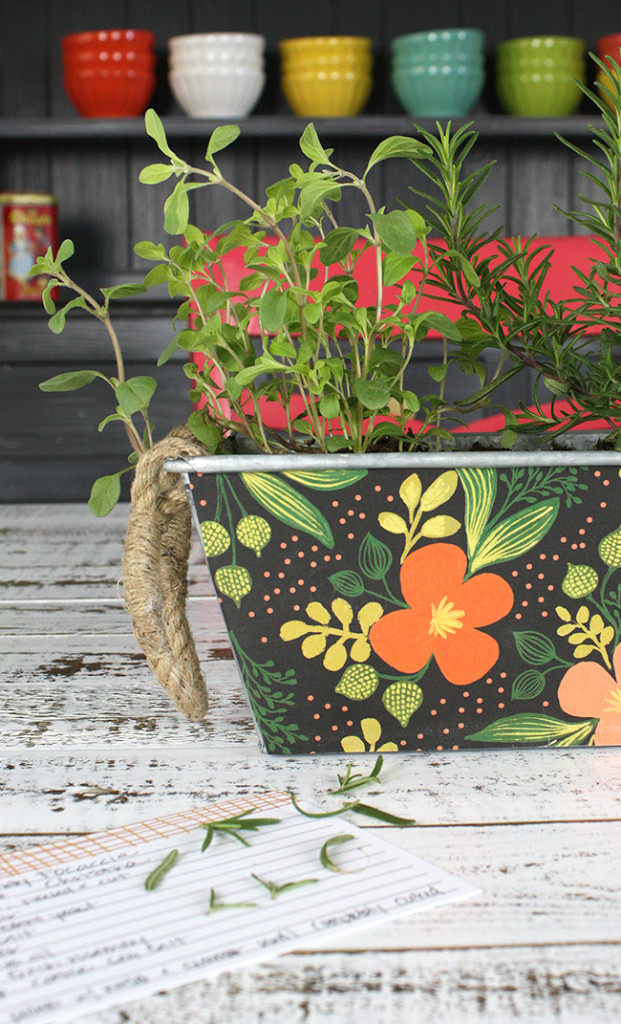
Easy Mother's Day Gifts - Tabletop Herb Garden

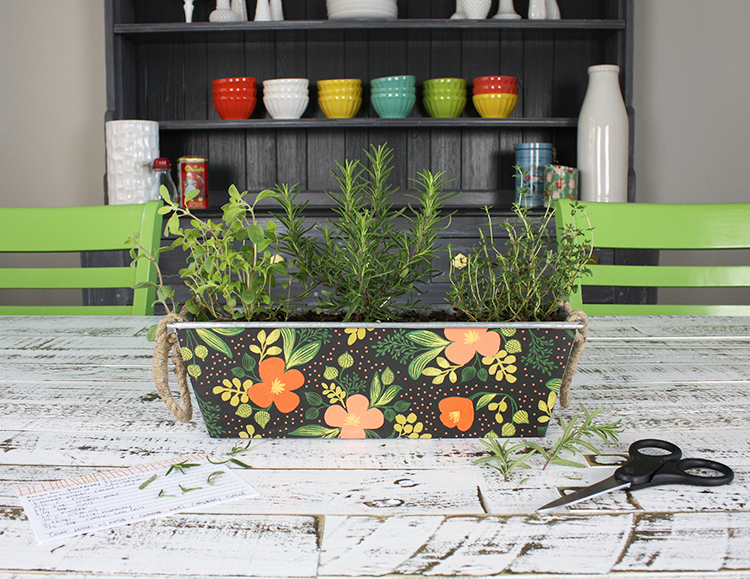
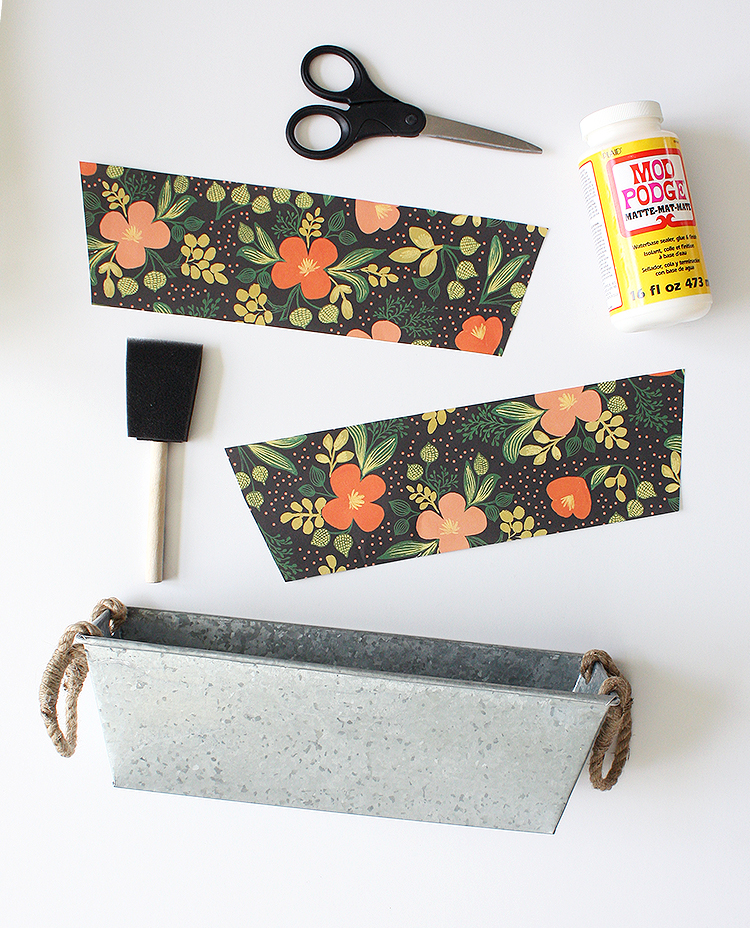
This tabletop herb garden is perfect for the grandma who likes to garden or cook or entertain. She can keep fresh herbs at arms’ reach so she’s ready to whip up a batch of her famous focaccia bread anytime she wants. The container is wrapped in gorgeous wrapping paper from Rifle Paper Company so it will make a perfect centerpiece for her next dinner party. Bonus: she’ll love to tell her friends that her cutie grandkids made it for her. The project takes about a half hour to complete, and a handful of supplies.

Easy Mother's Day Gifts - Tabletop Herb Garden Supplies

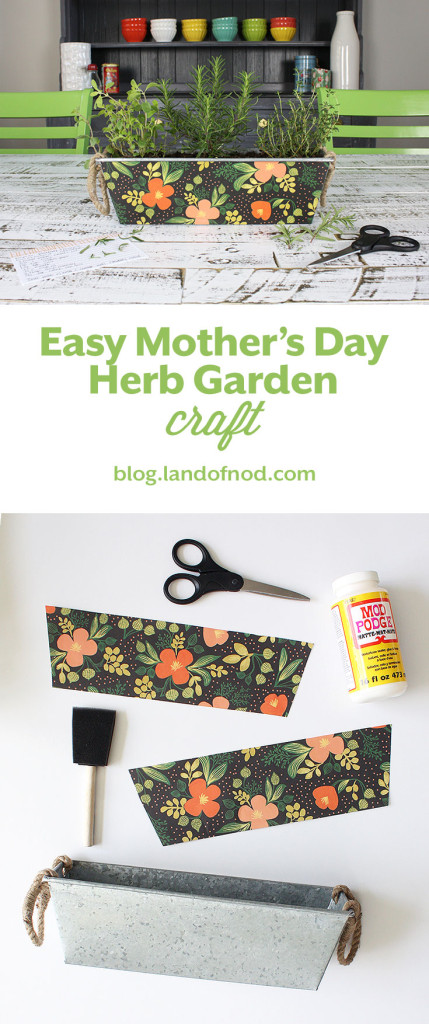
Here’s what you’ll need to make the easy Mother’s Day gift – Tabletop Herb Garden:

And here’s how to make it:

  1. Trace the container onto the back of the wrapping paper. Cut out sections of paper to fit the sides you want to cover.
  2. Spread a coat of Mod Podge directly onto the container.
  3. Press the paper onto the glued surface, smoothing out wrinkles and bubbles as you go. (The extra coat of Mod Podge helps protect it from water and dirt).
  4. Spread another layer of glue on top of the paper. Work quickly and use your thumb to smooth out wrinkles. Let it dry (about 15 minutes) and then cover the remaining surfaces.
  5. Plant your herbs

Easy Mother's Day Gifts - Tabletop Herb Garden Step 4

Easy Mother's Day Gifts - Herb Garden Centerpiece

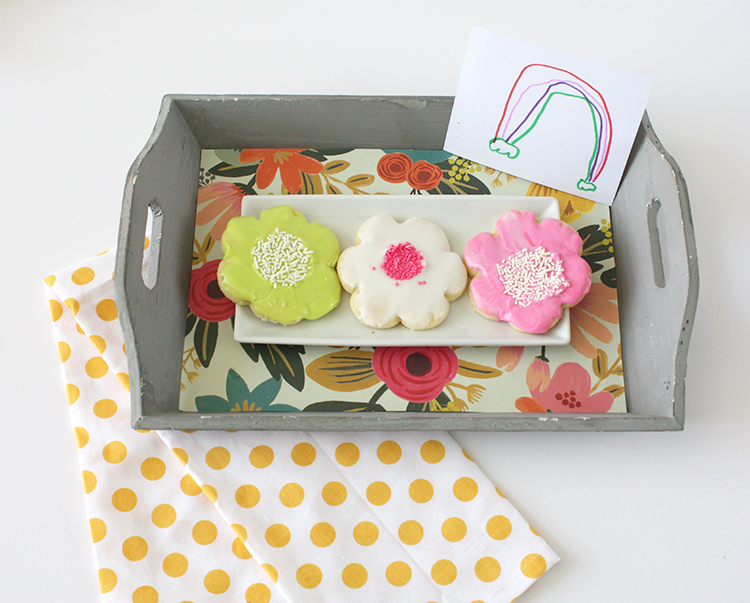
I the measured and cut the paper; the kids helped with the glue; and then they helped plant the herbs. Each kid chose one special herb for Grandma, and they were so proud of what they chose. We had such a great time making this gift, we kept going and made another versatile gift using the same concept. The full DIY for these  adorable Lined Trays is on my blog.

Easy Mother's Day Gifts - Cookie Tray

I’ve got tutorials up on my blog for these fun painted flower pots as well as the glitter-dipped succulent planters… stop by and see how we made them!

And just in time for Mother’s Day, all our Honest to Nod readers can receive 20% off  any order at Paper Source (in stores & online). The offer is valid through May 10th, and the code is MOM20. Terms & conditions apply.*

*This 20% off discount is valid April 21, 2015 through May 10, 2015 and is good toward purchases of regular price and sale items at our stores or online. Discount will become void at 11:59 p.m. on May 10, 2015. Discount may not be used in combination with other discount codes. Discount is not applicable toward past purchases, returned merchandise, special orders, floor samples, Gift Cards, eGift Cards, workshops or employee purchases. Discount is also not applicable toward purchases of third party custom orders (Vera Wang, William Arthur, Elum, Checkerboard). Discount applies to merchandise only and cannot be applied toward shipping and handling charges, taxes or fees. Offer has no cash value, is nontransferable and may not be auctioned or sold. No cash/credit back. Paper Source reserves the right to modify or discontinue this offer at any time. Void where prohibited by law.
Christina Williams is a blogger and graphic designer living in Salt Lake City, Utah. She’s a night owl and a bookworm, as well as a mother to three children ranging in age from two to eight. She shares her latest DIY and design projects along with her adventures in parenting on her self-named blog, Christina Williams.

Rainbow Ledge DIY

April 30, 2015
Post by Kim Doren of The Land of Nod’s Design Services Team

Can you tell we have a thing for rainbows? It’s such an easy way to add a pop of color to a room. And it’s easy to make your very own rainbow ledge DIY.

  1. Pick up a few color bar ledges.
  2. Send your kiddos on a treasure hunt around the house for knick-knacks that match the colors of the rainbow. Make sure they’re on the lookout for items of all shapes, sizes and types. We used everything from books to figurines, glitter and art.
  3. Add them to the shelves. Ta da!


Our Design Services team offers free one-on-one design advice, mood boards and space planning. You have a room to decorate? They’d love to hear from you.

Party On: Mystical Unicorns

April 29, 2015

Written by Becca of CAKE. | events + design

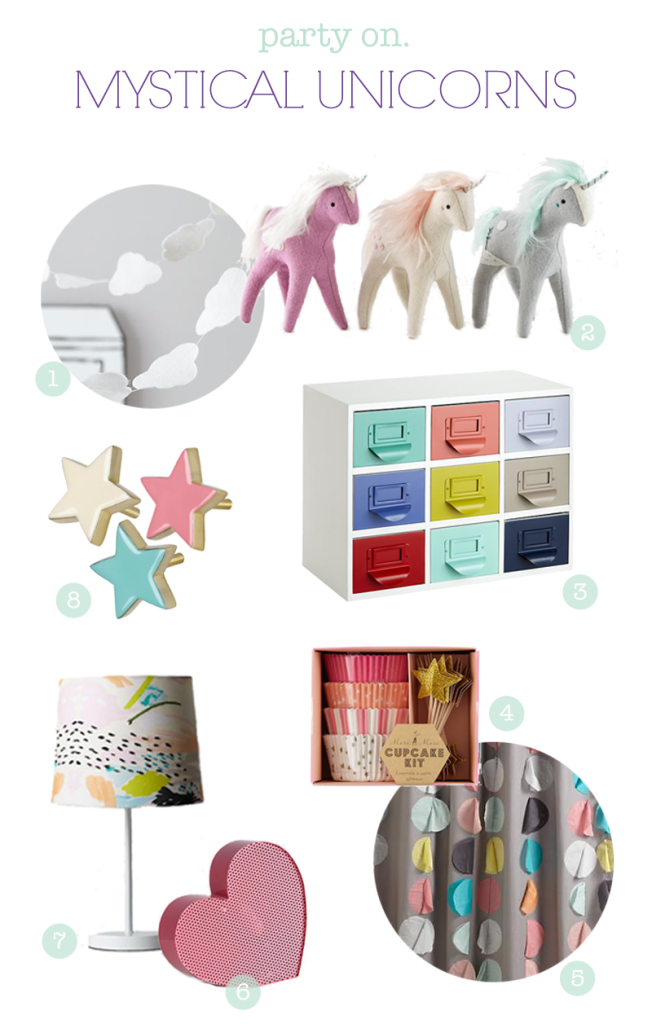
I’m in full planning mode for my daughter’s 5th birthday party, and as far as she’s concerned-unicorns are where it’s at!  I’m so in love with Sabrina Gibson’s charming plush unicorns that I’m using them as the inspiration for our unicorn themed party as well as our favors.  Check out this month’s Party On ideas for creating a sweet and modern unicorn theme.

Unicorn Themed Party 1 // 2 // 3 // 4 // 5 // 6 // 7 // 8

Color Palette: lilac // aqua // bubble gum pink // cool grey

Party Invitation: available here

What do unicorns make you think of?  I grew up in the 80’s so for me it’s a throwback to icons of childhood… stars, hearts, rainbows and fluffy white clouds.  You could create a unicorn themed party with any one of those elements, but I like the idea of mixing them all up in a soft and playful way. These boards are all about finding creative uses for household items, so here are some of my favorite suggestions on how to make this party yours:

  • Use these colorful cubbys to make a statement at your dessert bar by filling each one up with a color coded candy surprise.  Even better, make it a party activity by having guests use the candy to decorate their own cupcakes and top them with sparkly stars.
  • Garlands and streamers are an easy way to turn your living room into a magical party space, and there is no such thing as too many. For a little extra detail that won’t go unnoticed, consider replacing your drawer pulls and use them as the anchors to hang decorations all around your space.
  • Create a unicorn dance party area with simple strobe style lighting and piles of colorful balloons… while you’re at it, a rainbow heart rug wouldn’t hurt.
  • A shower curtain… why not!? Run a dowel through the top hooks and suddenly you’ve got a dramatic table backdrop or photo booth.  And if you like to DiY, craft up some party hat style horns and ribbon tails for super cute dress up props.

If you’re inspired to go out and throw your own unicorn party now, you might need an invitation… lucky for you I happen to have just the thing in my shop.

Becca Gorski lives in the SF Bay Area, is a working mother of two, and moonlights as an occasional designer / blogger / celebration maker. You can find her creative ideas at CAKE. and her line of merry happy party printables on Etsy.

The Party On series offers inspiration for family friendly parties, featuring items from The Land of Nod that can be incorporated into both your event and your home.

Laundry Room Makeover Tips

April 28, 2015

Post by Christina of Christina Williams Blog

Laundry Room Makeover Tips

Recently, I organized the very worst space in my house. The laundry room. When we moved in, it’s where everything got piled up for me to deal with “later.” And then life got busy. I could never justify the time or expense of organizing it properly since the attention and money could be better used elsewhere. It almost felt selfish to spend time organizing a space that’s primarily “mine.”

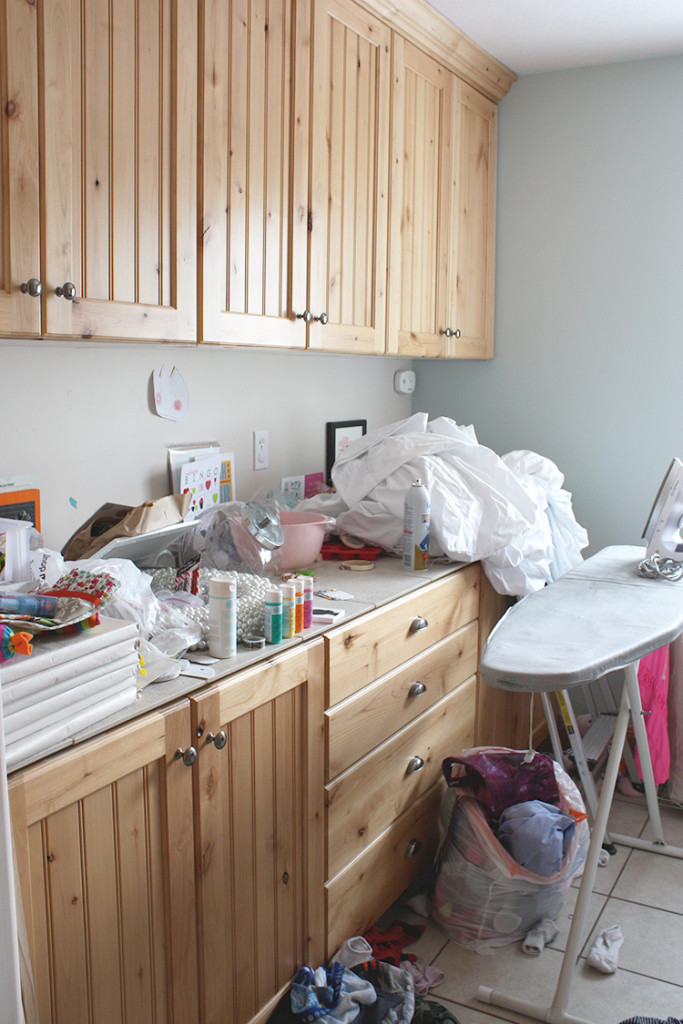
Laundry Room Makeover Tips - Before

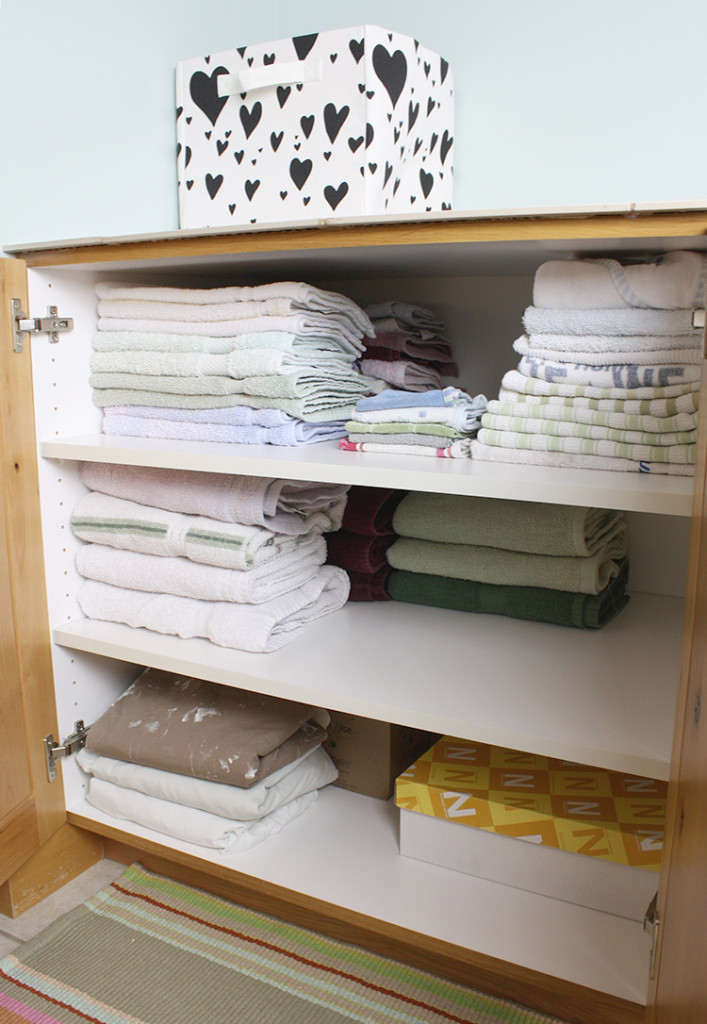
Here’s the embarrassing before picture, which was actually taken on a pretty “clean” day. I have plenty of cabinet space here so my main obstacles were time, effort and organization. When I finally decided to go for it, I quickly realized I needed a game plan. I told my buddies at Nod what I was doing, and they offered to send me some organizational goodies to help out. Thinking of having some of Nod’s cute stuff all to myself (and not for the kids!) was a big motivator.

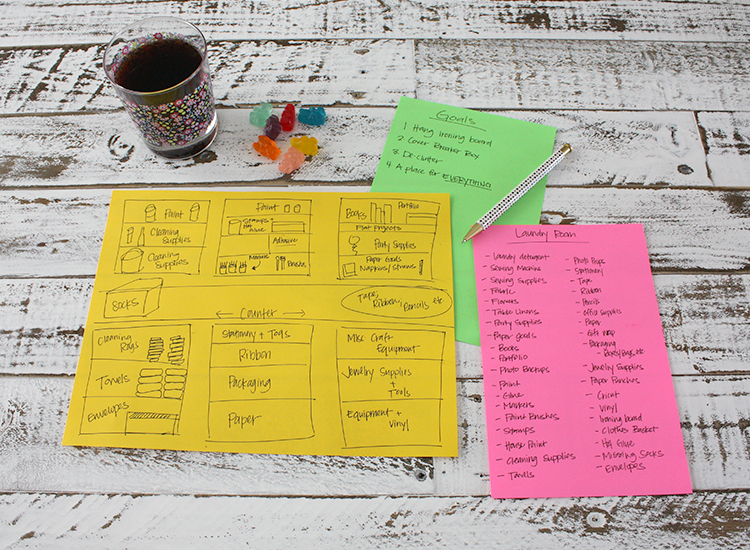
Laundry Room Makeover Planning

I grabbed a snack, and started making lists. First, I made a list of everything I needed and wanted to store in the laundry room. Second, I made a few goals – like hanging the ironing board so I won’t trip over it anymore. Then I drew a rough sketch of the cabinets and drawers and what they would hold.

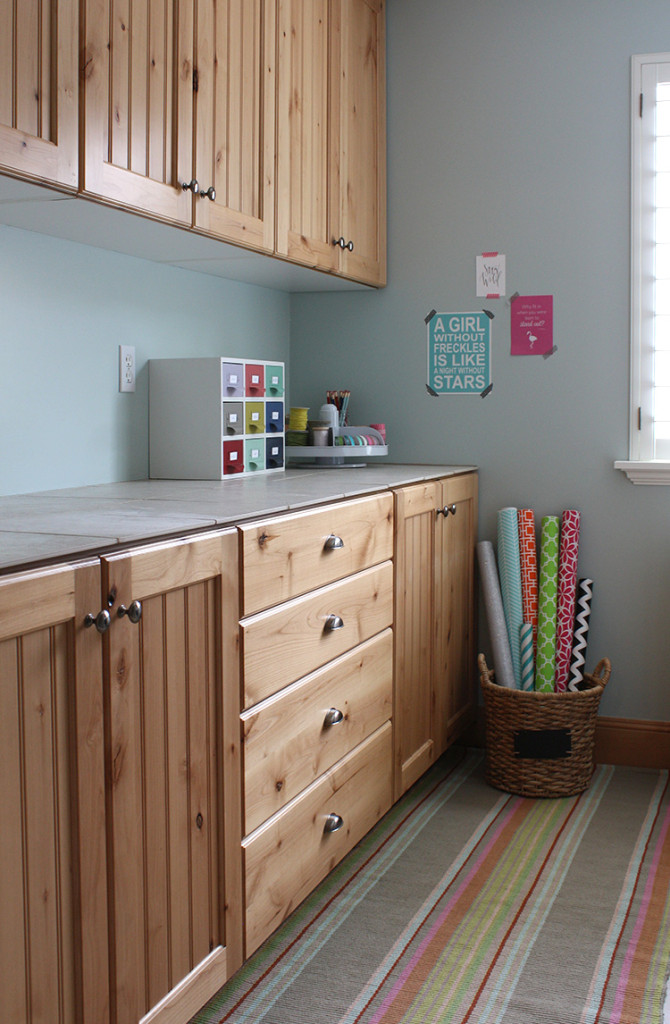
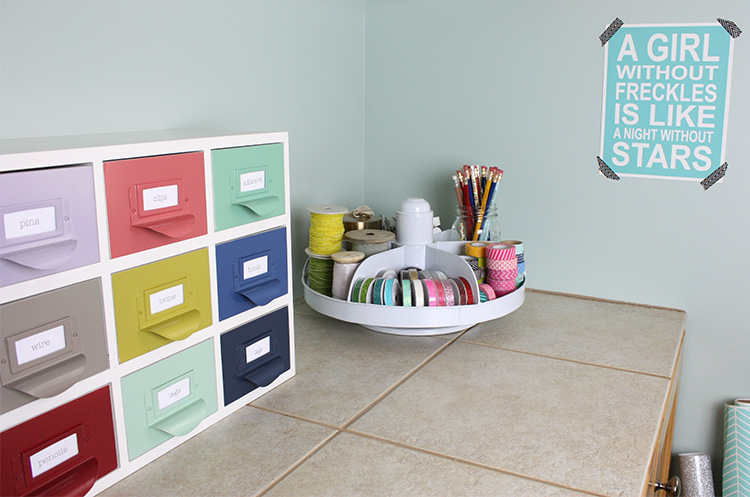
Laundry Room Makeover - Counter Top

Then I got to it. It was overwhelming, so I worked for 2-3 hours a day to avoid burnout. I started by decluttering. I was ruthless in giving things away, and only allowed myself to keep items I actually use. I stored all my important, yet messy bits and pieces (like rubber bands, push pins, etc. in the Color Reference Drawers. It’s so cheerful and fun to see on the counter, and it’s been instrumental in staying organized.

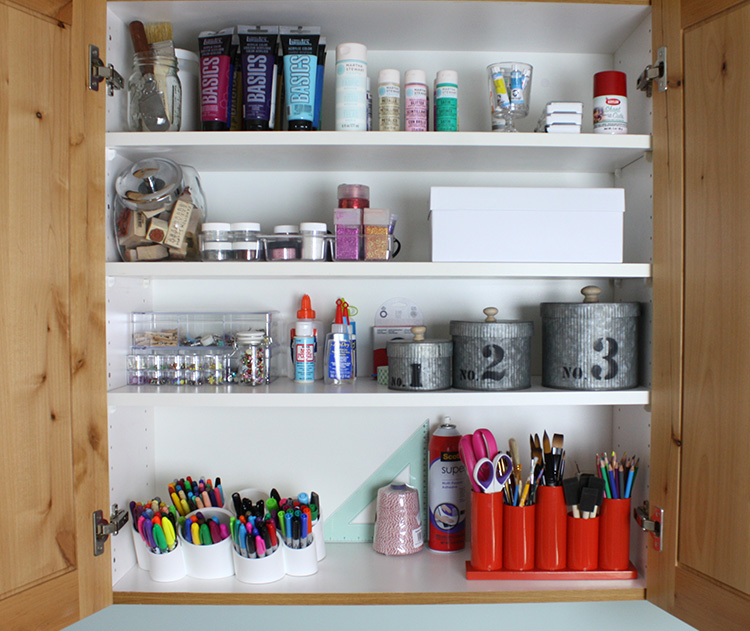
Laundry Room Makeover - Art Supplies

Sometimes stacking things on shelves works great, but other times, containing things in a jar, box or caddy on a shelf works even better. For example, my paint brushes are in the adorable Perfect Pitch Storage Caddy; and they’re not rolling around or falling all over the place. The Cubby Cups are perfect for my marker collection. Each cubby holds a different type of marker, and I can see all the colors without digging through the whole lot of them.

Laundry Room Makeover - Towels

The Love Struck Heart Bin is on the counter because it’s too cute to hide away in a cabinet, and it’s makes corralling lost socks a bit more fun.

Laundry Room Makeover - Shelving

Laundry Room Makeover - Decor

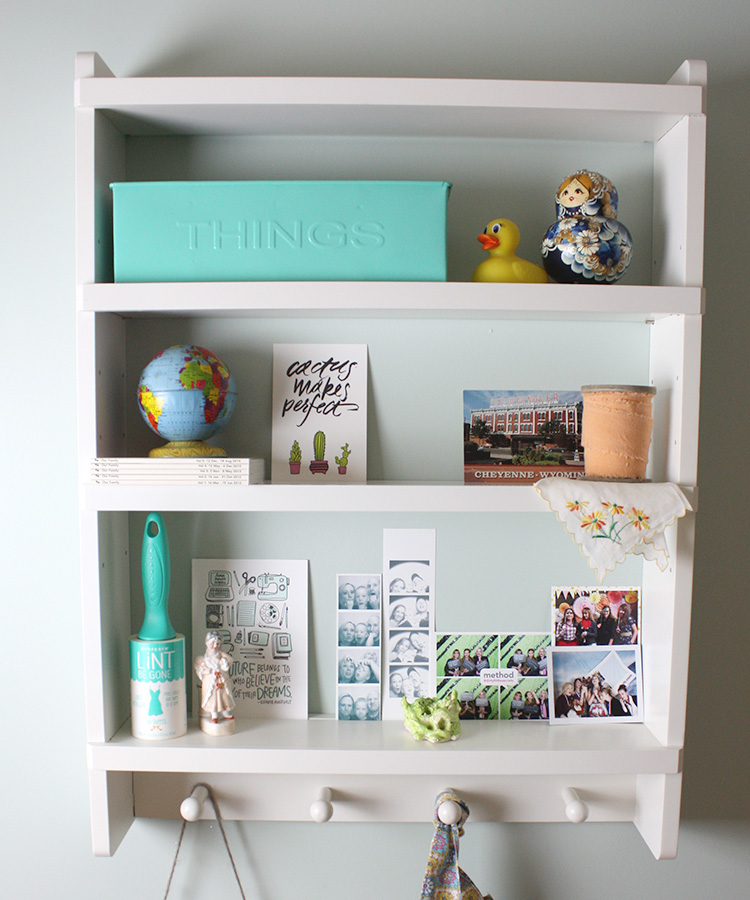
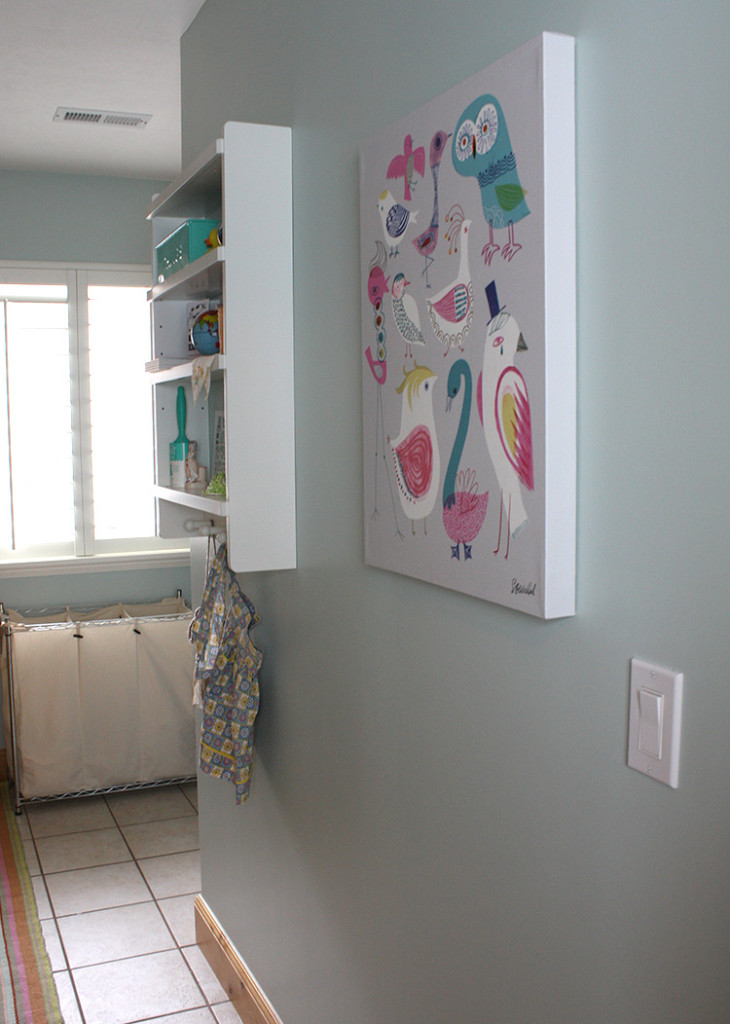
The Straight & Narrow wall shelf gives me a place to display all my sentimental memorabilia; and I even use the extra knobs for drip-drying my favorite jeans. Psst: there are treats kept up high in the “Things” bin. Perfect for keeping prying eyes and tiny hands out of my secret stash. Hiding that ugly breaker box was high on my list of wants. I measured the box, and realized the For the Birds wall art was the perfect size to cover it! Laundry Room Makeover - Side View

I’m so happy with how the laundry room makeover project turned out; and it’s been surprisingly easy to keep it clean since there’s an official place for everything. It was well worth the effort; and I’m so happy to have some Nod cuteness in my own grownup space, too!

So I’m leaving you with my top four tips for organizing an impossible space:

  1. Give yourself a deadline. It’s much easier to keep going when you know the end is in sight.
  2. Use organizational items that fit your needs. Buy or make things that fit your needs and your space. It’s easier to stay organized when things have a dedicated place.
  3. Planning is key! Make lists, draw pictures and then make it happen.
  4. Declutter. It’s hard, but worth it.

Come visit my blog to see how the rest of the laundry room turned out; and Happy Spring Cleaning!

Christina Williams is a blogger and graphic designer living in Salt Lake City, Utah. She’s a night owl and a bookworm, as well as a mother to three children ranging in age from two to eight. She shares her latest DIY and design projects along with her adventures in parenting on her self-named blog, Christina Williams.

How to Create a Unique Mother’s Day Gift

April 24, 2015

Post written by our friends at Paper Source

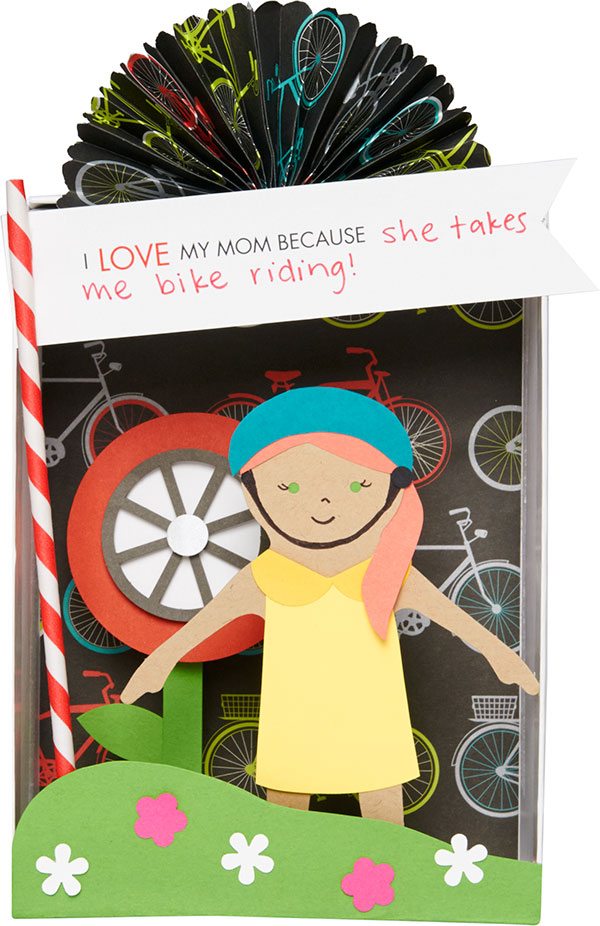
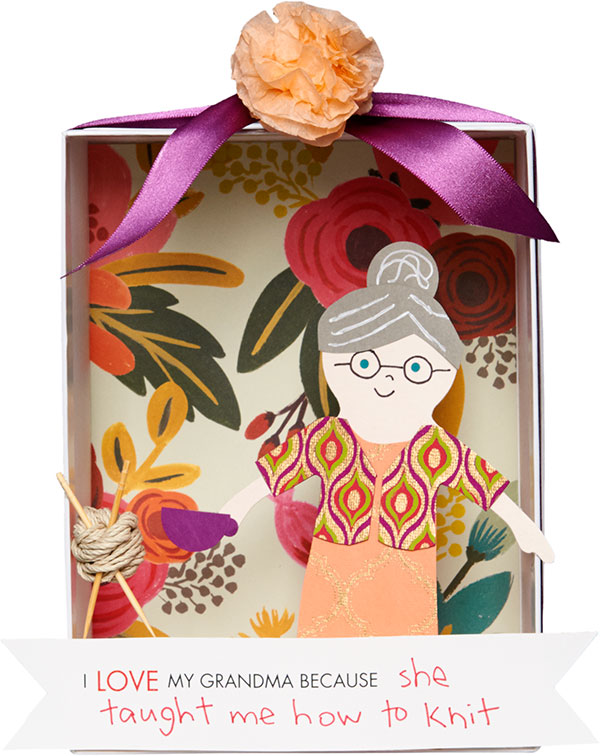
Mother’s Day is quickly approaching (May 10) and Paper Source loves celebrating the special women in your life. Whether it’s Grandma, Mom or someone who is like a mom to you, there are many ways to show your thanks for all they’ve done. If you’re looking for a unique Mother’s Day gift, try this personalized diorama. Highlighting a special shared activity, it’s a truly customized gesture.

How to Create a Unique Mother’s Day Gift

Before you start, think of a special activity that reminds you of mom, and how you’d like to re-create that scene. Some ideas are: playing a sport, visiting a new place, camping, cooking and reading. Since each gift will be unique, here are the general steps to create your own masterpiece.

Materials Needed for Your Unique Mother’s Day Gift:

Instructions:

  1. Download the Banner PDF (it can be found HERE)
  2. Choose a wrapping paper background (or use solid paper and create your own) that fits the theme of your setting. Cut to size and paste to back of box.
  3. Complete a paper doll from our kit, customizing the figure and outfit to look like mom, grandma, or that special woman in your life. Fold the legs back to glue to the bottom of the box.
  4. Add an accessory in the box that represents your activity; the Paper Source Bicycle Kit was used for more biking inspiration with mom, and twine was rolled up to create a ball of yarn for grandma. Use your imagination and make it personalized.
  5. Fill out the banner and glue it to the front of the box, or attach it to a straw.
  6. Add some more flair. To finish your box, try adding a piece at the bottom and top for a more polished look.

That’s all it takes for a fun and personalized and unique Mother’s Day gift. All supplies, as well as cards, wrapping paper and gifts, can be found at Paper Source.

How to Create a Unique Mother’s Day Gift - Grandma

And just in time for Mother’s Day, Paper Source is offering all our Honest to Nod readers 20% off  any order (in stores & online). The offer is valid through May 10th, and the code is MOM20. Terms & conditions apply.*

Paper Source is a retail destination for all things creative. With original stationery, unique gift wrap and lovely gifts, it’s the perfect place to shop for mom.

*This 20% off discount is valid April 21, 2015 through May 10, 2015 and is good toward purchases of regular price and sale items at our stores or online. Discount will become void at 11:59 p.m. on May 10, 2015. Discount may not be used in combination with other discount codes. Discount is not applicable toward past purchases, returned merchandise, special orders, floor samples, Gift Cards, eGift Cards, workshops or employee purchases. Discount is also not applicable toward purchases of third party custom orders (Vera Wang, William Arthur, Elum, Checkerboard). Discount applies to merchandise only and cannot be applied toward shipping and handling charges, taxes or fees. Offer has no cash value, is nontransferable and may not be auctioned or sold. No cash/credit back. Paper Source reserves the right to modify or discontinue this offer at any time. Void where prohibited by law.

The Nod Bookmobile is Coming to DC!

April 23, 2015

Written by Lauren, our fearless marketing events manager

Nod Bookmobile in DC

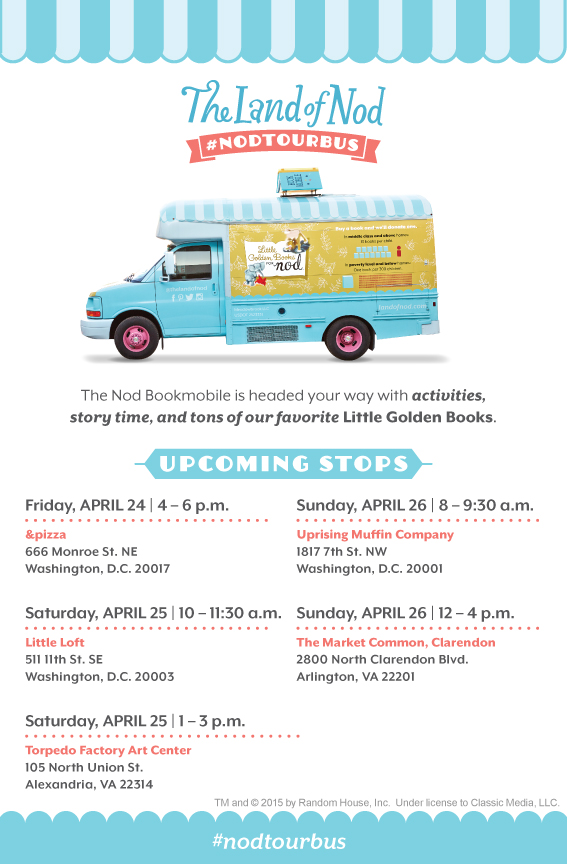
The #nodtourbus Bookmobile is headed to Washington, D.C. this weekend, and we are very excited to partner up with some awesome local businesses on our stops around the city! Be sure to come join us for books, story time and activities around our nation’s capital. For every Little Golden Book purchased from us, Random House Children’s Books will donate one to Milk + Bookies. Dedicated to promoting the joys of reading and literacy, Milk + Bookies is a charitable organization that provides books to those who can’t afford their own. Come out and see us, and help us spread the joy of reading.

When Lauren isn’t planning ridiculously awesome #nodevents for The Land of Nod, she spends her time putting up with the crazy antics of her English Bulldog, Lola. She also loves searching for treasures in vintage stores and summer antique markets. Due to her previous adventure living in Canada, she has a strong obsession to Hudson Bay stripes, as well as the fine cuisine of poutine (Don’t make her choose between the two…that’s like choosing between Ryan Gosling and Jason Bateman for her!).

Printable Coloring Pages: Earth Day

April 22, 2015

Printable Coloring Pages designed by Michelle Romo

Celebrate Earth Day with this free printable coloring page! You can download it HERE. Share the finished product on Instagram (use hashtag #CrateKids) or our Facebook page and we may feature it!

Looking for other Earth Day activities?

Nod Printable Coloring Pages: Earth Day

Michelle Romo is a self-taught illustrator and designer fueled by cookies and naps. Her influences include Mid-Century, Japanese and Scandinavian design, along with pretty much anything cute. When she isn’t working she spends her time eating good food, hugging her friends, playing video games and crafting.

Tips for Turning Your Hotel Room into a Nursery

April 21, 2015

Post by Corri McFadden of Glitter & BubblesTips for Turning Your Hotel Room into a NurseryWhen the Chicago weather was taking a serious toll and the temperature was still well below freezing, Spiro and I decided we needed a break with our little bae Zelda. With such a short notice, we had no desire to travel anywhere far. Then I had my “Ah-Ha” moment — Staycation time! I had heard amazing reviews about The Langham Hotel in Chicago and knew that was the place for us. Zelda and I already absolutely love tea time there, so I knew an entire weekend would be nothing but bliss.

True to their rave reviews, I wasn’t disappointed! The Langham was so easy and kid-friendly, I couldn’t believe it. The best parts; you don’t have to sacrifice luxury and feel like you are an entire world away from the busy city. We said “Bye-Bye” to distractions for the weekend and then it was just Spiro, me, and the babe.

To ensure it was as relaxing as possible for all parties big and small, here are some tips we followed for turning your hotel room into a nursery.

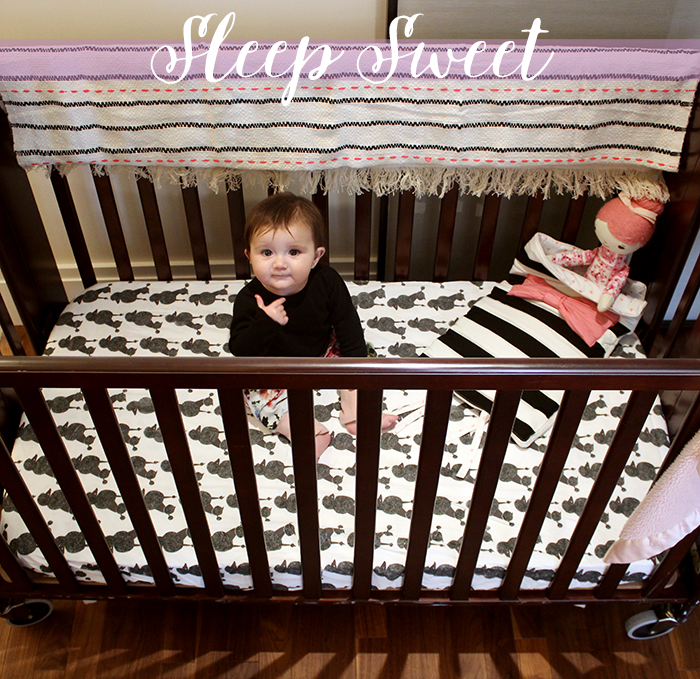
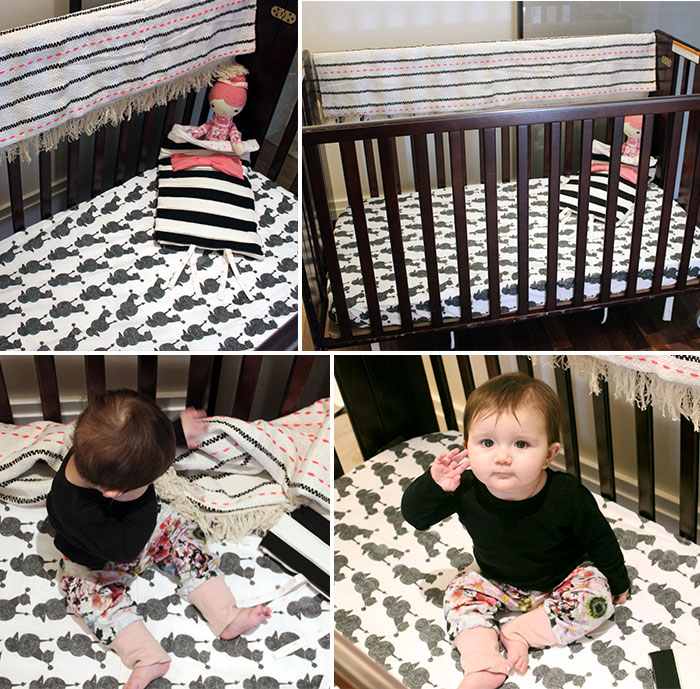
  1. Bring Your Own BeddingComfort is everything when it comes to your little one, and that starts with their crib! Most hotels do offer cribs, but when they don’t, its time to bring out your Pack & Play. The Langham Hotel in Chicago had an amazing crib with wheels that I was able to move into any part of my room. Wherever I went, Zelda came right along with me! It’s also best to bring bedding from their crib at home and a favorite sleeping toy with you to keep them comfortable. This is key so your little one has the familiar smell and touch of their own room… It will be as if they never left home!Turning Your Hotel Room into a Nursery - Crib Bedding
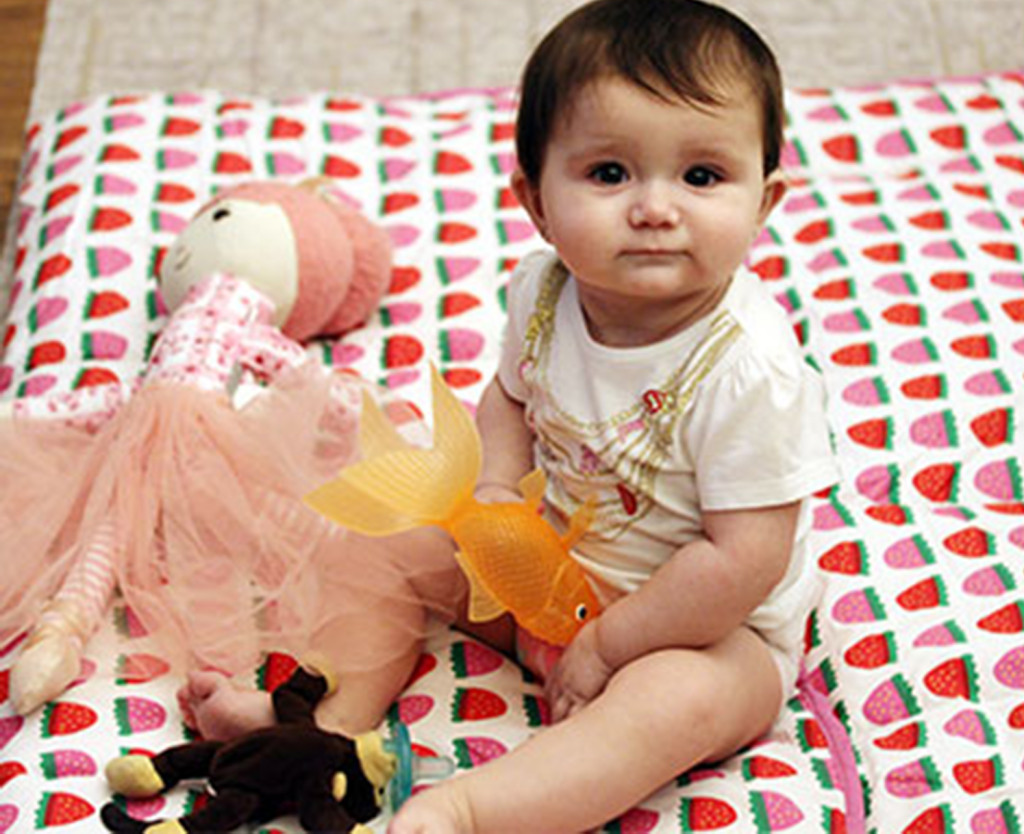
  2. Utilize a BlanketAlways bring a large, thin baby blanket. You can set up a designated play area in the hotel room on the floor with this blanket to house all of your little one’s toys and items they may put in their mouth so they don’t touch the floor. This also designates a known play area and keeps the toys together for easy inventory checks so they don’t end up strewn around the room! Additional plus — easy clean up! (We’ll totally take it!)Turning Your Hotel Room into a Nursery - Blanket
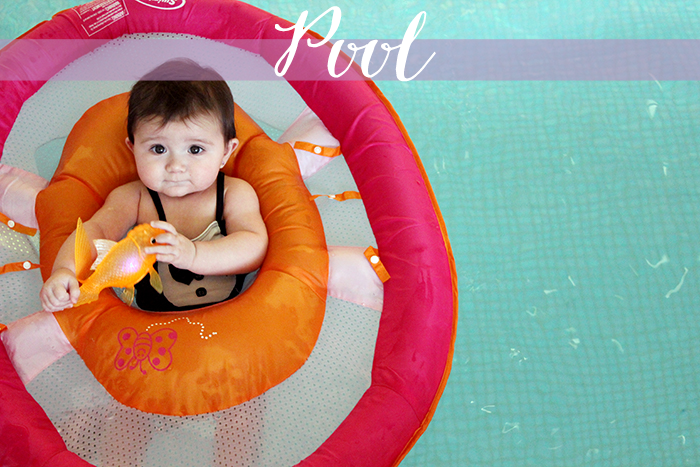
  3. Don’t Forget The Pool!Most hotels don’t have children robes or pool toys. A fun pool floaty that packs flat is great and will seamlessly fit into your luggage. Your little one will feel safe and secure at the pool with their own floaty. Don’t forget the cozy baby robe! It can make or break pool time with the little—who will definitely get grumpy when they’re sopping wet in an oversized, adult robe!Turning Your Hotel Room into a Nursery - Pool Time
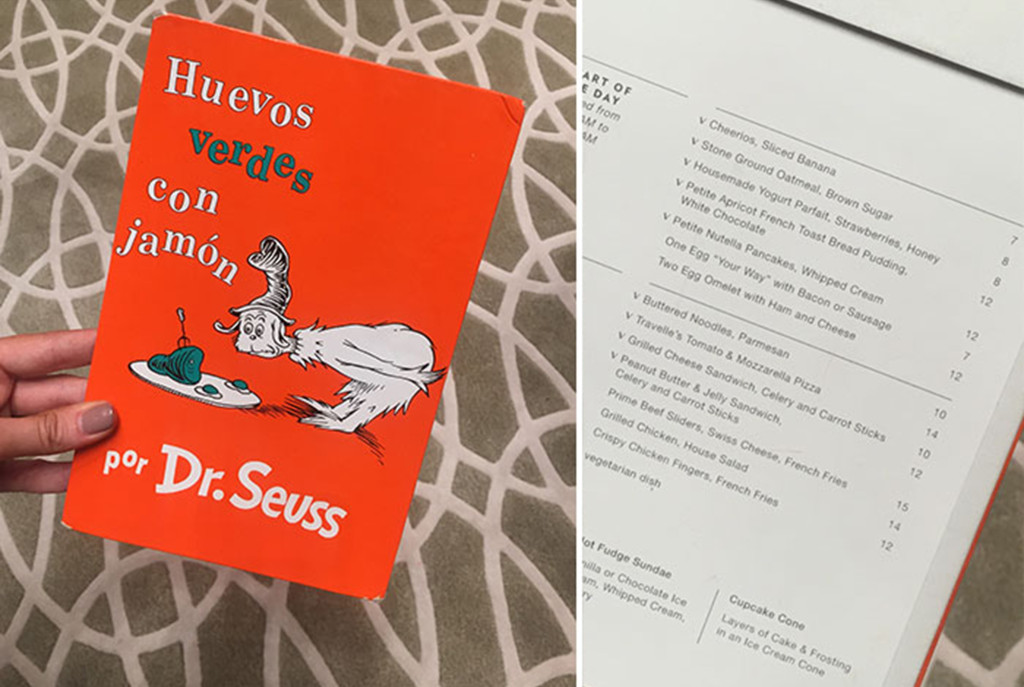
  4. Kid-Friendly ActivitiesCall your hotel in advance and check if they host any kid friendly activities; you could be pleasantly surprised that even the most adult driven locations have amazing children activities! If your little one loves to play tea party, a high tea could be even better! The Langham hosts an amazing, award-winning high tea complete with an entire menu just for kids (and Dr.Seuss book!)Turning Your Hotel Room into a Nursery - Activities

Corri McFadden is the owner and founder of eDrop-Off Luxury Consignment.  As a style expert and successful blogger, she hosts a weekly fashion segment on Chicago’s “You and Me This Morning” and features more tips and tricks on her website, Corri McFadden. She also recently launched Glitter and Bubbles, a savvy site for modern-day moms looking for inspiration through fashion, décor and food.

DIY ABC Stones

April 20, 2015

Post by Colleen of Lemon Thistle DIY ABC Stones

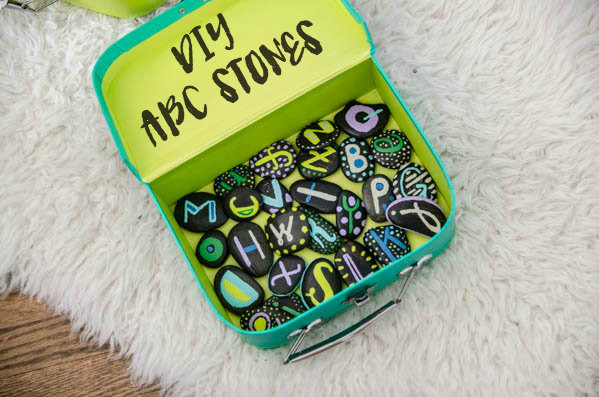
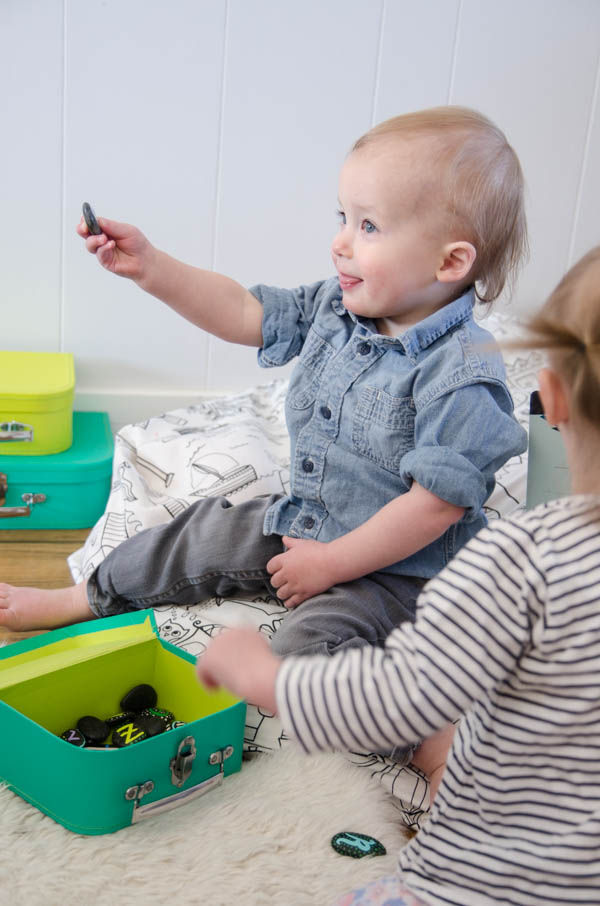
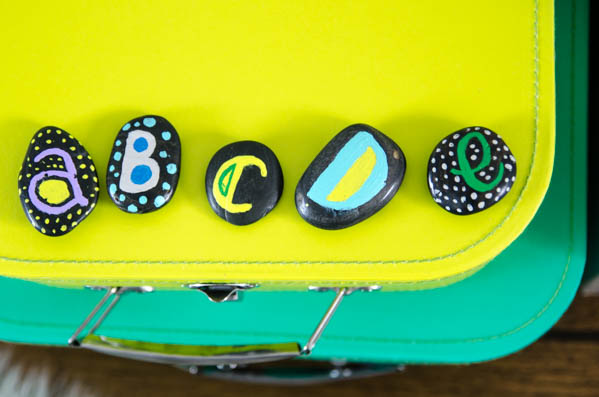
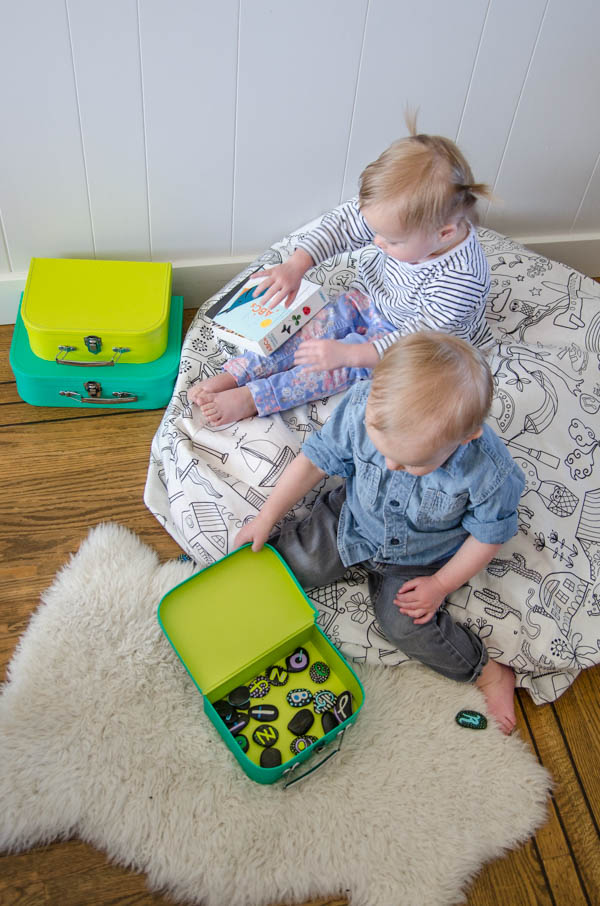
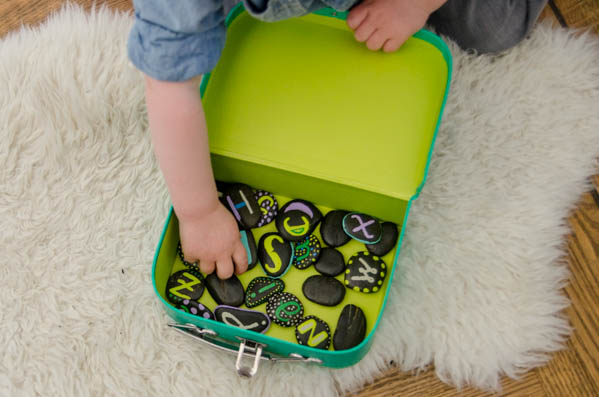
These DIY ABC Stones are the perfect gift for a little one in your life. They make great toys to pack along, younger kids love the colors, and as kids age they can be used to help with letter recognition, spelling and counting. I’m so thrilled with how these turned out, my littles are a bit too young to start learning letters but they love playing with rocks (what kid doesn’t?) and enjoyed showing me all the ‘nice’ rocks they had.

DIY ABC Stones 3

A couple years ago I made some DIY Story Stones for my niece. She brought them to school for show and tell last fall and her teacher decided they needed to have some for her classroom. There’s something about brightly painted rocks that kids just can’t get enough of. And when they encourage learning and creativity? Us parents and teachers love them too!

They could not be simpler to make. Well maybe, if you wanted to get these done in a big hurry, you could find alphabet stickers.

Here’s what you’ll need to make your DIY ABC Stones unique to you:

  • River Rocks (Can be found at many dollar stores)
  • Multi Surface Acrylic Paint (I used Americana Satin paints and they are some of my favorites to use)
  • Several Small Paint Brushes
  • Spray Clear Sealer (I use Rust-Oleum Clear in a Satin Finish)
  • Carrying Case (The one shown is the smallest of the Bon Voyage Suitcase Set)

Here’s how to make DIY ABC Stones:

  1. Start by giving your rocks a good wash with dish soap and hot water. They need to be completely cleaned for the paint to adhere properly. Let them dry overnight if possible.
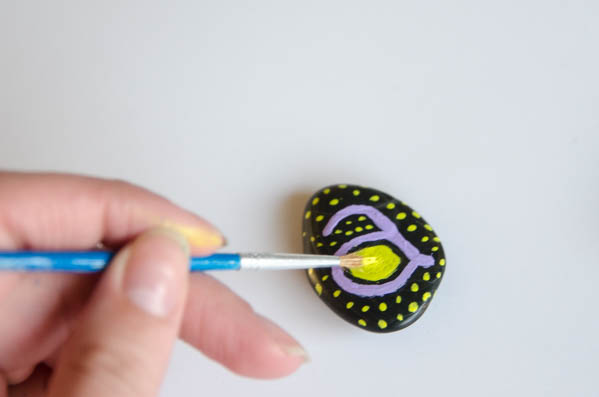
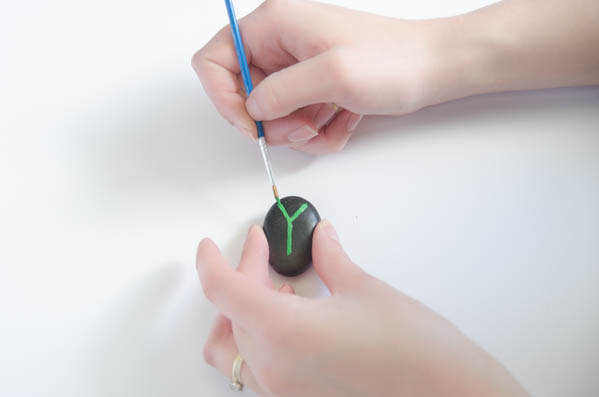
  2. Then, get creative and paint your alphabet!
  3. It will likely take a couple coats to get a good opacity. Let them dry in between coats. If you try when they are tacky, you will end up peeling off the layer that hasn’t fully dried.
  4. When you’re happy with the way your stones look, let them dry overnight and then mist them with the clear sealer. I tried to skip this step and ended up chipping a couple- so definitely take time to do the sealer!

DIY ABC Stones 1 DIY ABC Stones 41

That’s all there is to it! These DIY ABC Stones would make a great gift for any child (probably stick to age 2 or 3 and up) or for an elementary teacher. My twins are 19 months old and do well with the stones as toys, but they’re not ready for the learning aspect yet. They had the most fun taking them in and out of the suitcase. When they’re ready for letter recognition, we will use them with an ABC book (they love any book). We really love the beautiful pictures in the Big ABC Book by Charley Harper.

DIY ABC Stones 11DIY ABC Stones 54DIY ABC Stones 56

*Storage Pouf is a DIY I made, you can find the directions here.

Colleen is a wife, Mama to 19 month old twins, and the DIY and lifestyle blogger behind Lemon Thistle where she shares printable art and hands on tutorials for DIY home decor, parties and gifts. Colleen believes you can have a beautiful life, home, and party without spending a lot- we’re keeping it real on a budget so everyone can join in on the fun.

Kids Food Face Collages

April 16, 2015

Post by Rebecca of Not So SAHM

Kids Food Face Collages

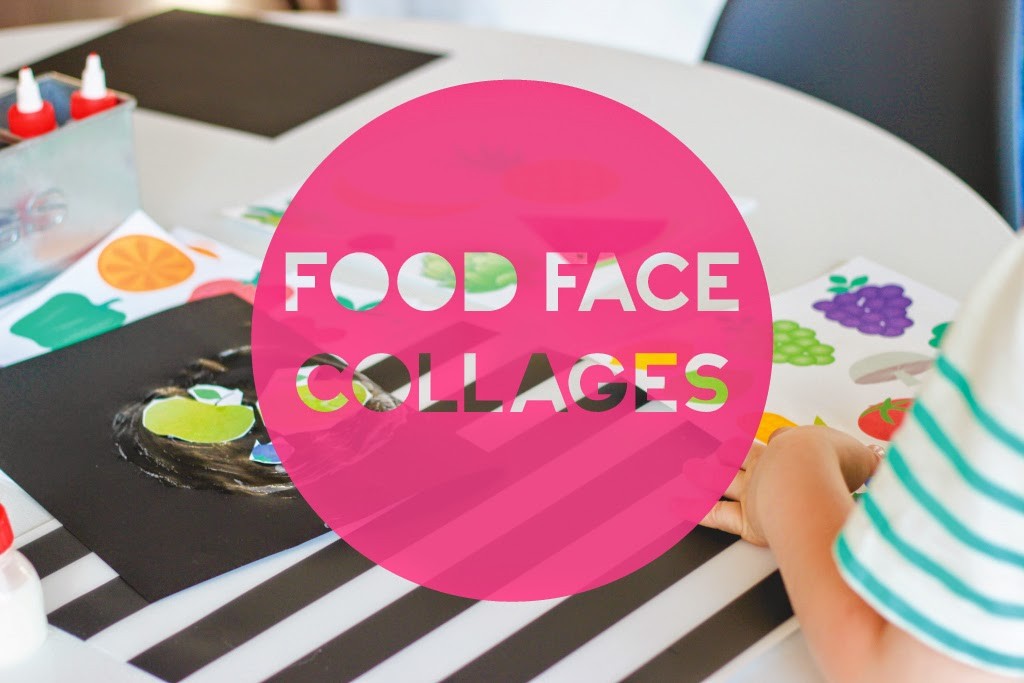
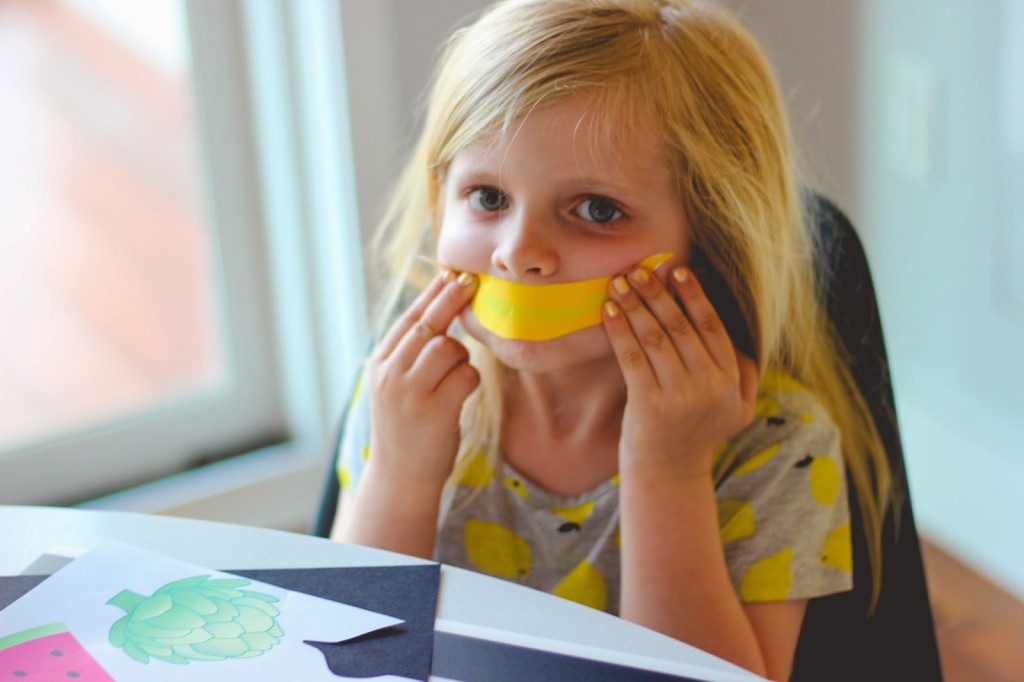
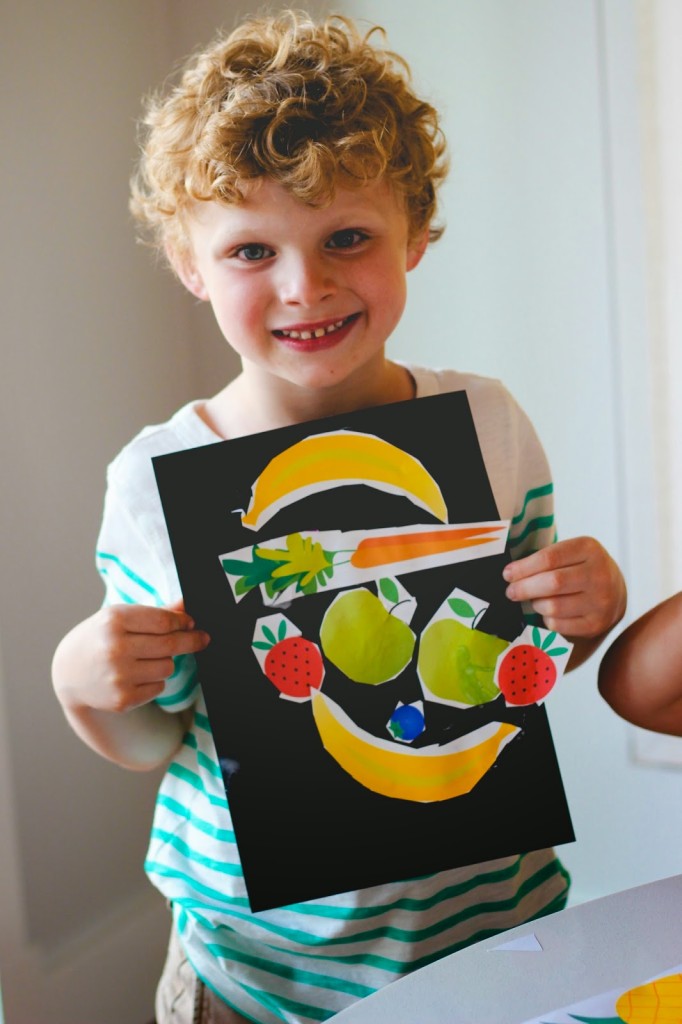
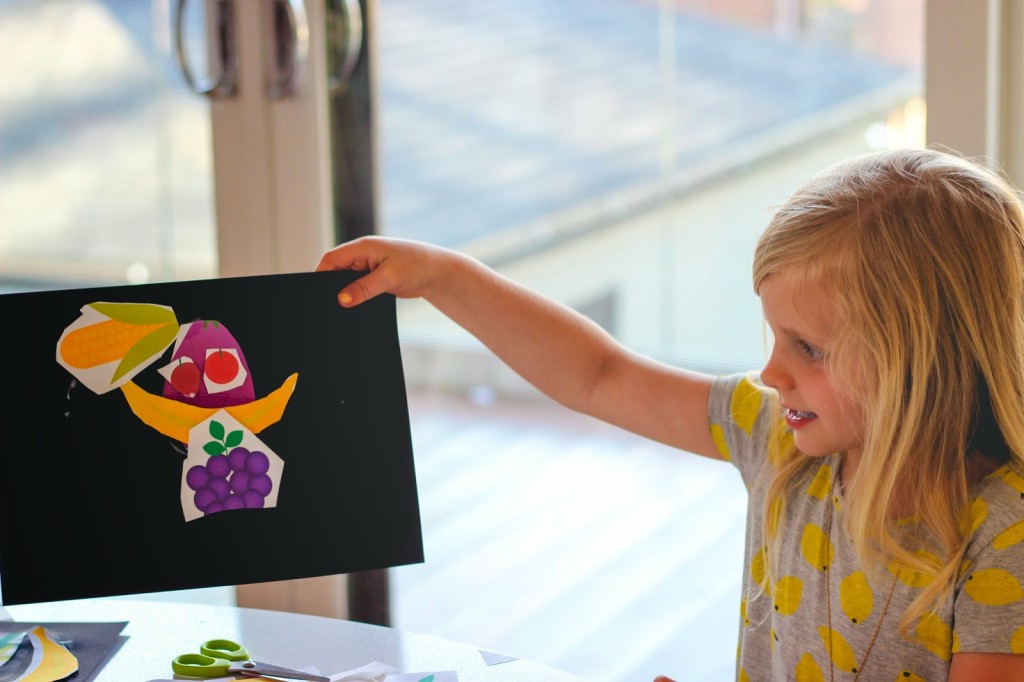
Lately, it seems that my kiddos cannot. stop. eating. They’re both going through big growth spurts and we’ve spent a lot of time talking about foods that help us grow healthy and keep tummies full at the same time! Because eating every twenty minutes to constantly avoid a “case of the hangrys” is just not realistic (no matter how many snacks I tote around with us). So I thought it would be fun to do an art project showing you are what you eat: food face collages!

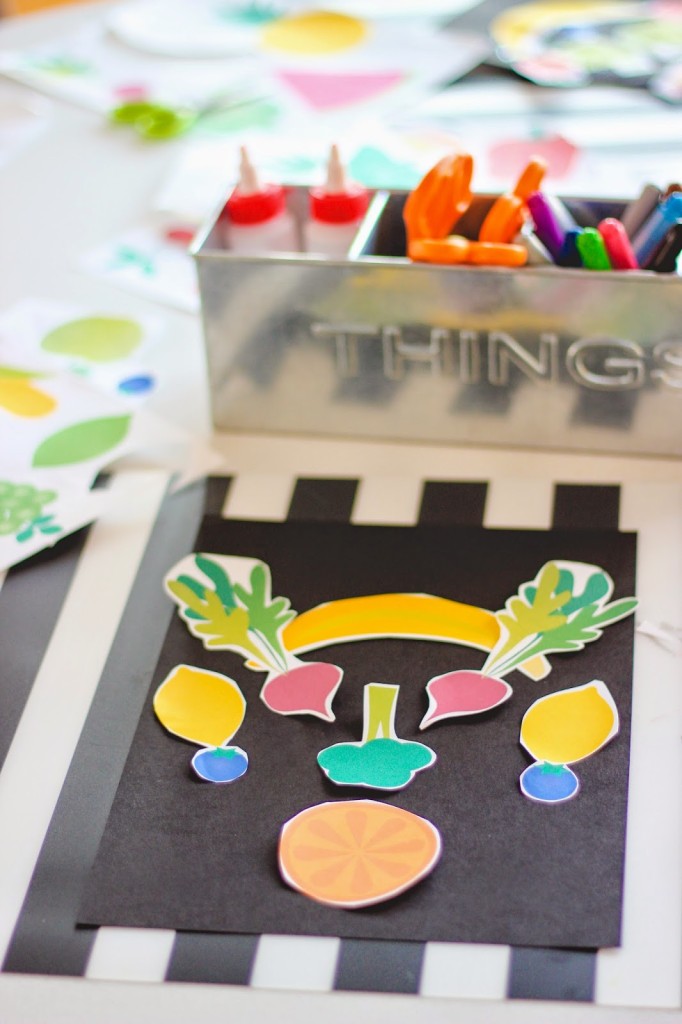
We’d done something similar before at the National Portrait Gallery, and the kids loved it. It’s super easy and really fun to see what the kids come up with. Kane wanted to use groups of fruit and veggies to make an overall abstract portrait of himself “wearing a hat” and using “carrots for [his] curly hair.” Cam decided to use an eggplant as her actual face and show herself eating a bunch of grapes. I even got in on the fun.

To make our food face collages, you’ll need:  

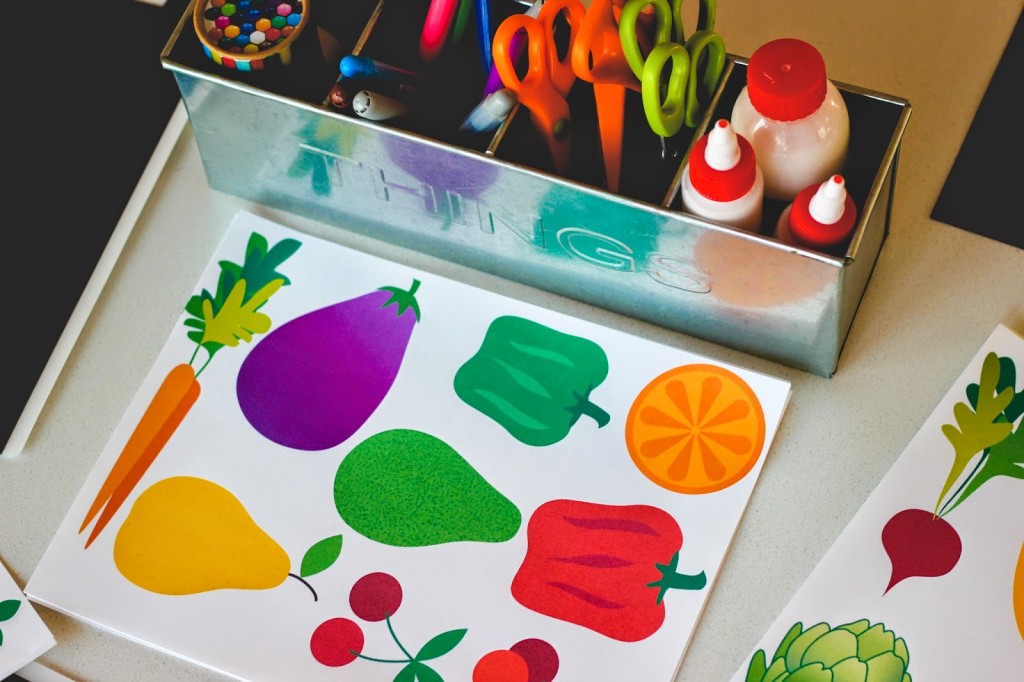
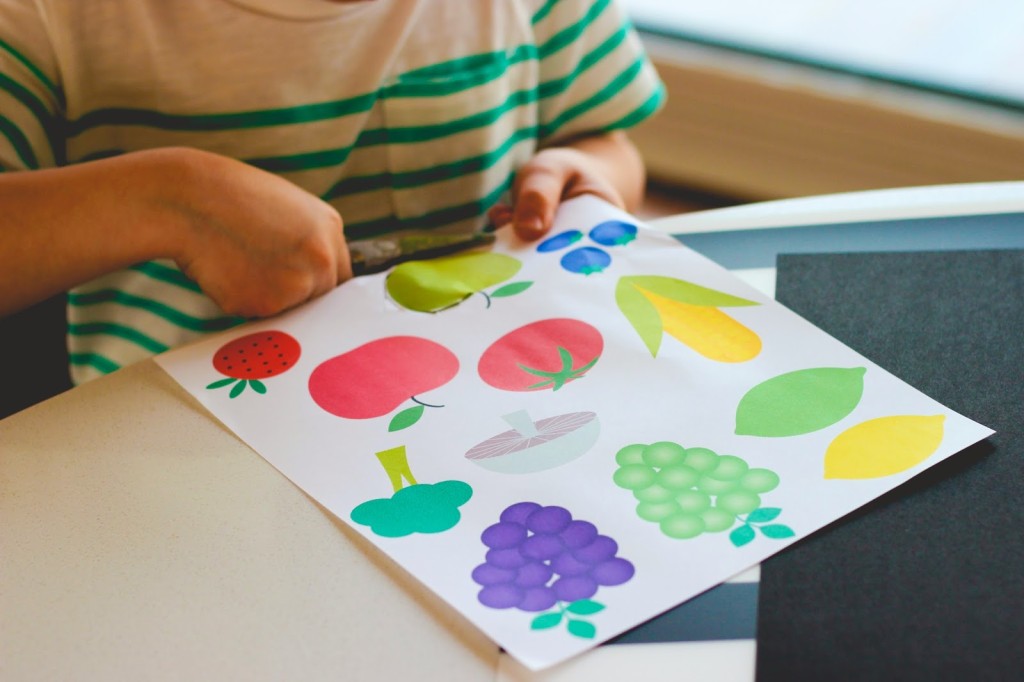
  • Clip art images of fruit and veggies — check your computer’s clip art, look for free art online (like this), or even purchase a set on Etsy
  • Heavyweight black paper (the food really pops against a black background)
  • Scissors
  • Glue

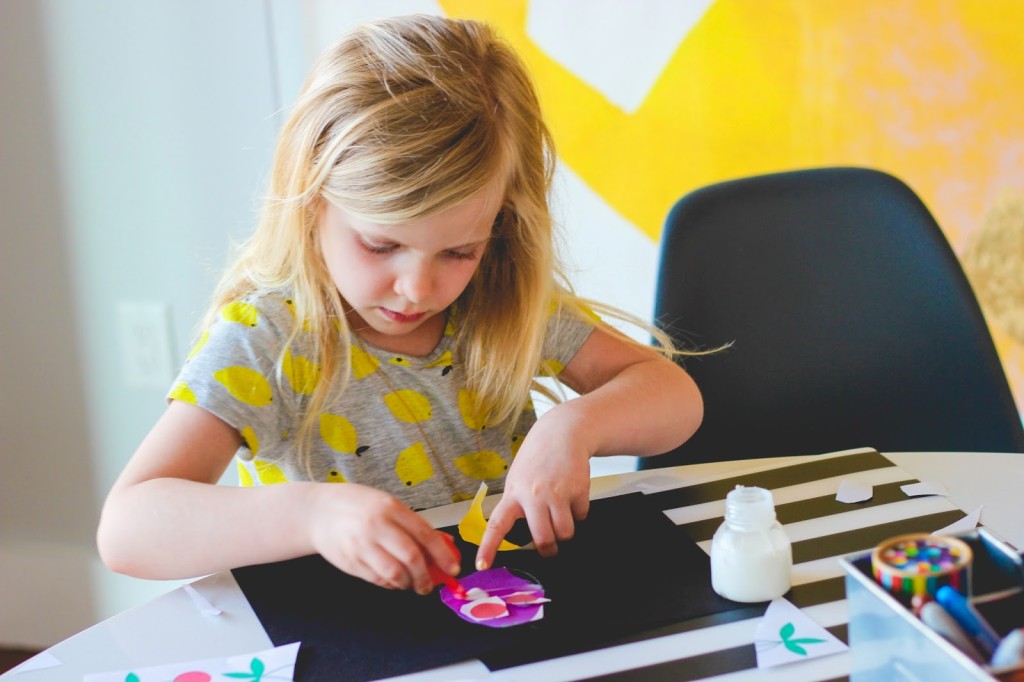
Simply let the kids cut out fruit and veggie shapes to create a face, and then glue the shapes onto black paper. I encouraged our kids to plan out their portrait first, but if they want to glue as they design (like Kane did), that’s fine too. Kids Food Face Collages

Kids Food Face CollagesKids Food Face Collages Kids Food Face Collages 15 Kids Food Face Collages 9Kids Food Face Collages 11Kids Food Face Collages 13Kids Food Face Collages 15

Rebecca is a mom to two young kiddos and, in her spare time (ha!), likes to pretend she’s a back-up dancer, craft cocktails, and run long distances. A relatively recent SAHM, she blogs family-friendly activities, DIYs and celebration fun at Not-So-SAHM.

The Nod Bookmobile is Hitting the Road

April 15, 2015

Post by Lauren Baker, our fearless marketing events manager

nod bus

We turned the Nod Tour Bus into a brand-spanking-new bookmobile, packed with tons of our favorite Little Golden Books. We’re heading to a few cities for story time, crafts and more. Come along for the ride on Instagram at #nodtourbus, too!

Where’s the bus going? Check out the full schedule on our website and the cities we’re stopping in below.

  • 4/17 – 4/19: Charlotte
  • 4/24 – 4/26: Washington D.C.
  • 5/1 – 5/3: Philadelphia
  • 5/8 – 5/10: New York City
  • 5/15 – 5/17: Boston
  • 5/22 – 5/24: Pittsburgh
  • 5/30: Chicago


When Lauren isn’t planning ridiculously awesome #nodevents for The Land of Nod, she spends her time putting up with the crazy antics of her English Bulldog, Lola. She also loves searching for treasures in vintage stores and summer antique markets. Due to her previous adventure living in Canada, she has a strong obsession to Hudson Bay stripes, as well as the fine cuisine of poutine (Don’t make her choose between the two…that’s like choosing between Ryan Gosling and Jason Bateman for her!).

How to Throw a Kids Party They’ll Actually Love

April 14, 2015

Post by Kelsey of We Heart Parties

Parties are my love language. I think they are SO fun to throw.
All the desserts and décor and tiny little treat cups and perfect party favors…

But – what matters most is that the guests have FUN. When throwing kids party, it is so important to think beyond the fancy paper lanterns and create fun spaces for them to play.
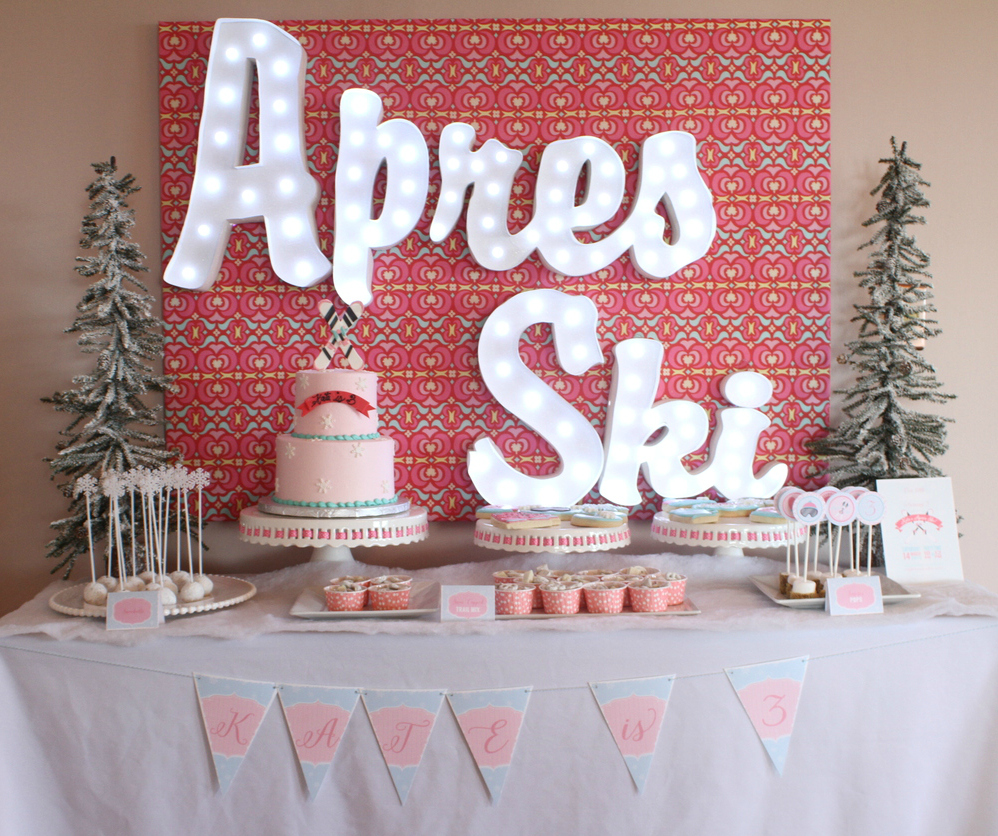
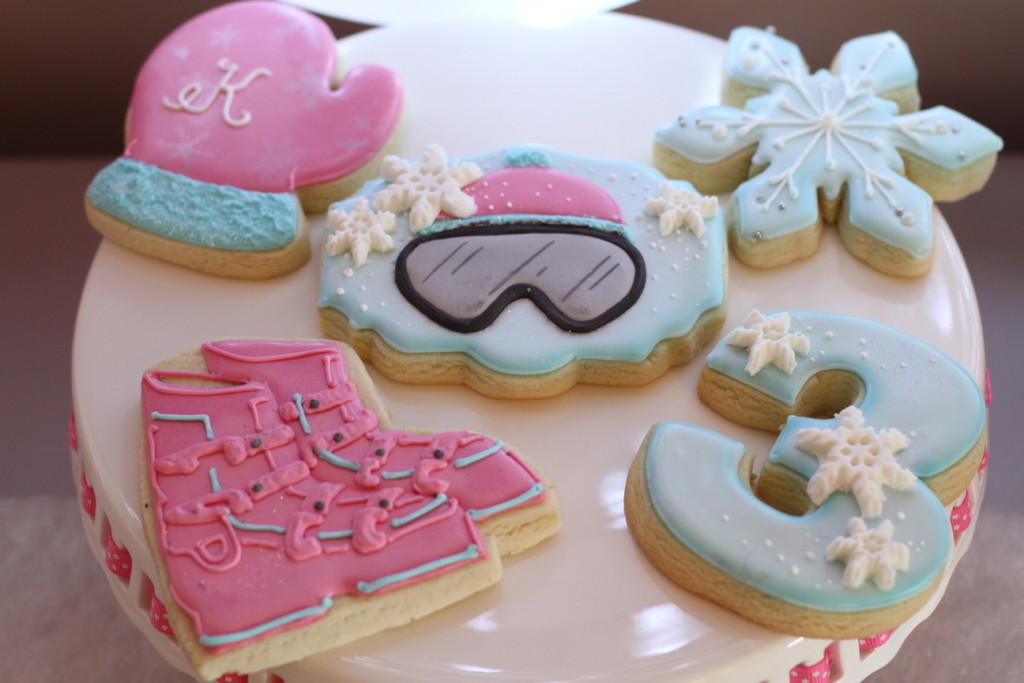
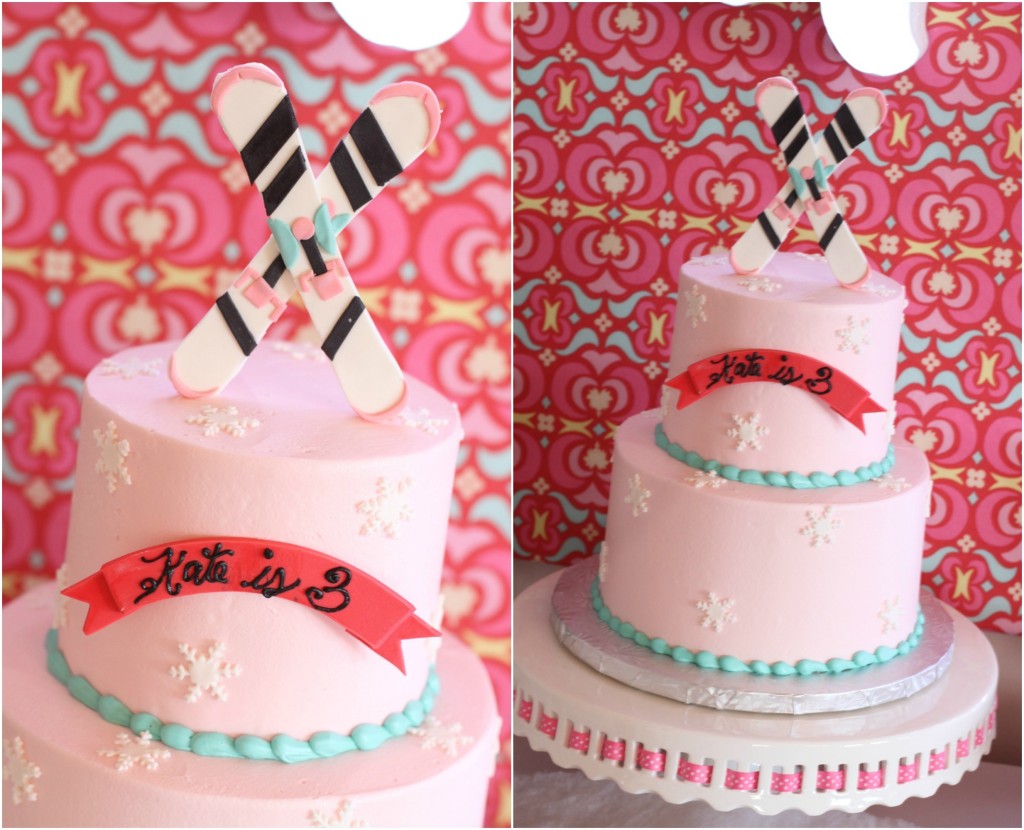
Après Ski Kids Party

I recently threw an Après Ski themed kids party for my daughter. She’s been skiing twice and loves to hit the slopes like the big kids and adults.

Après Ski Kids Party - Cookies Après Ski Kids Party - Birthday Cake

While the desserts and décor were quite cute, I wanted to make sure the kids had play spaces and games to keep them entertained.

I like to create three separate play spaces, activities or games at a party.

The guests at this Après Ski Party were between the ages of 3-5, so I decided on:

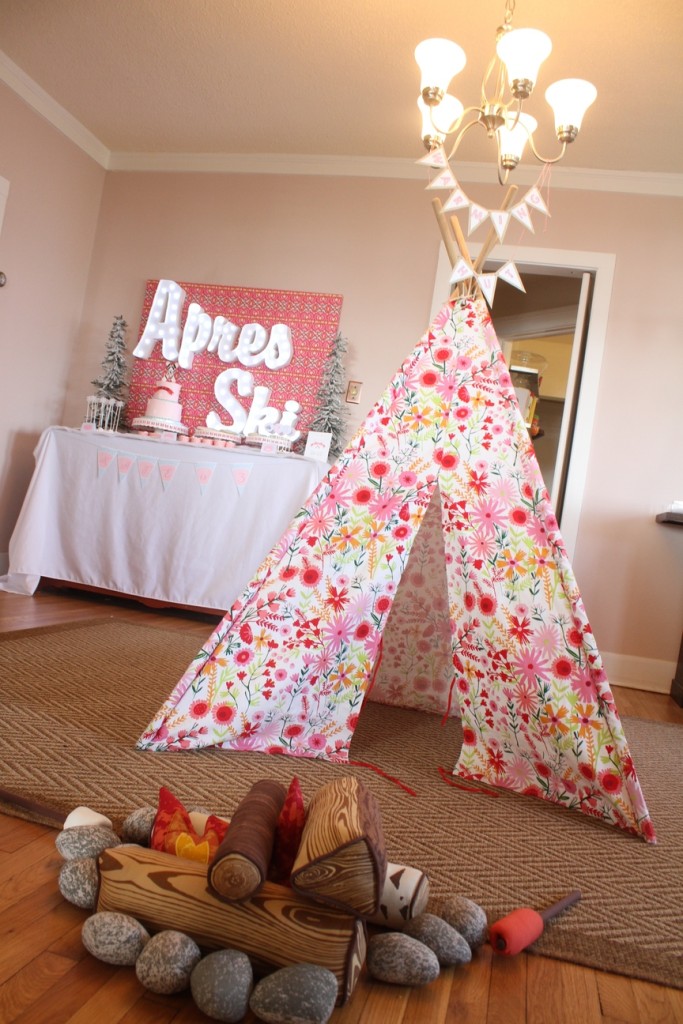
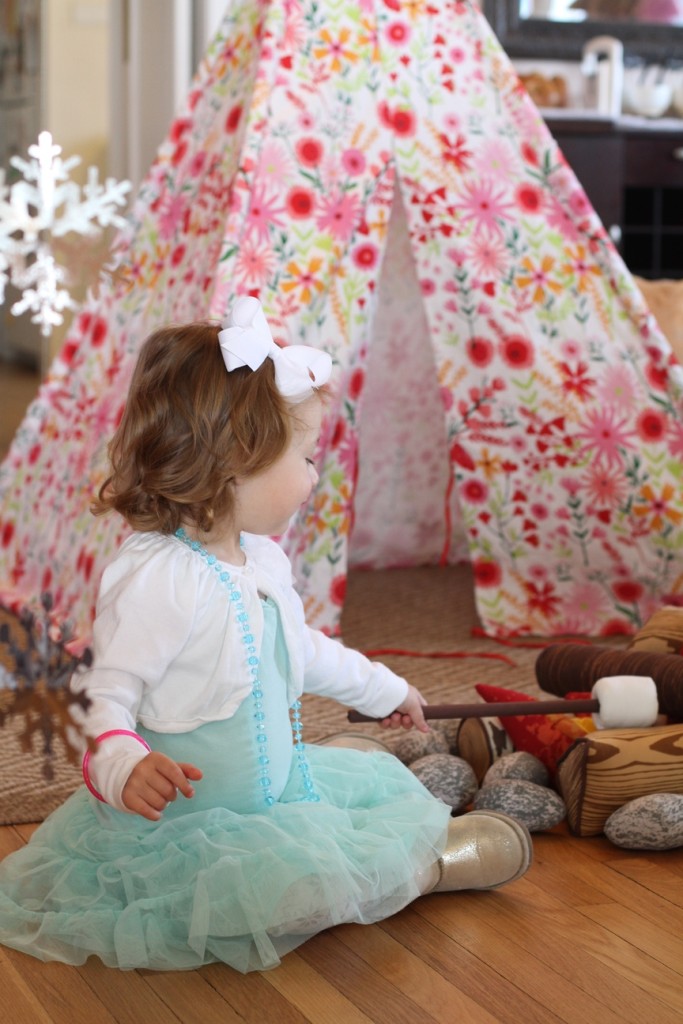
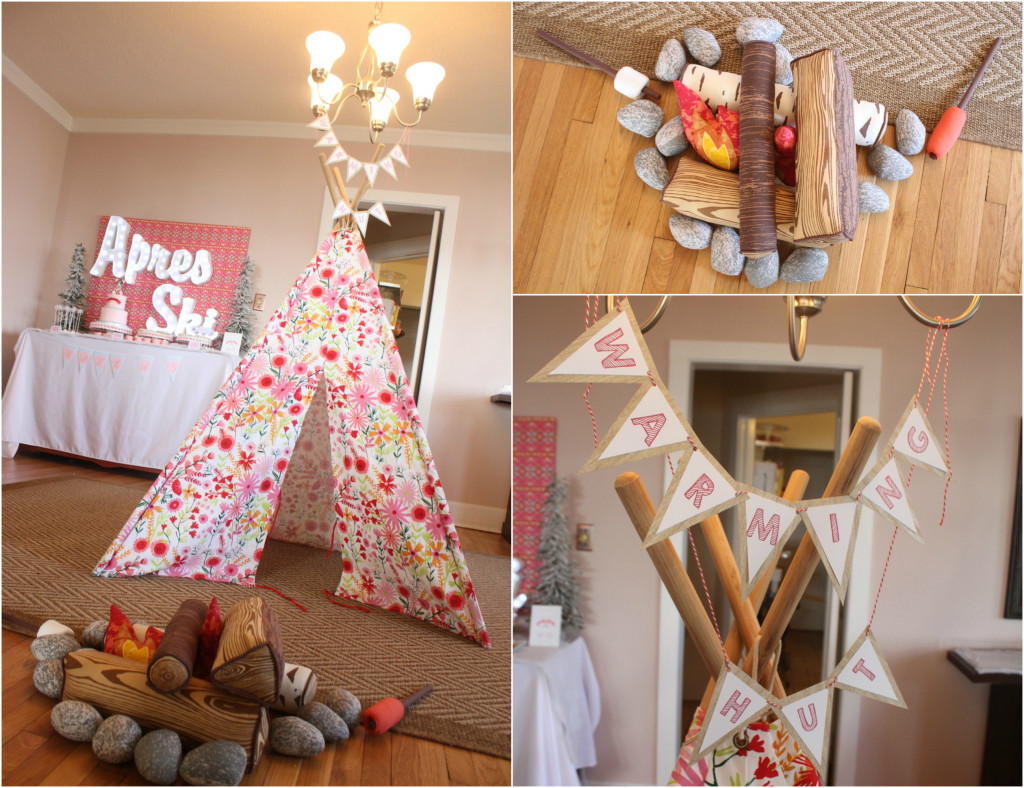
  1. A Warming Hut & Campfire Play Space
  2. A Coloring Table
  3. An Indoor Ski Race

Après Ski Kids Party Après Ski Kids Party Après Ski Kids Party

I’ve always been in love with The Land of Nod’s teepees! Paired with their Plush Campfire Set, it made the perfect “Warming Hut” for chilly little skiers. The kids loved roasting marshmallows and hot dogs over the fire!

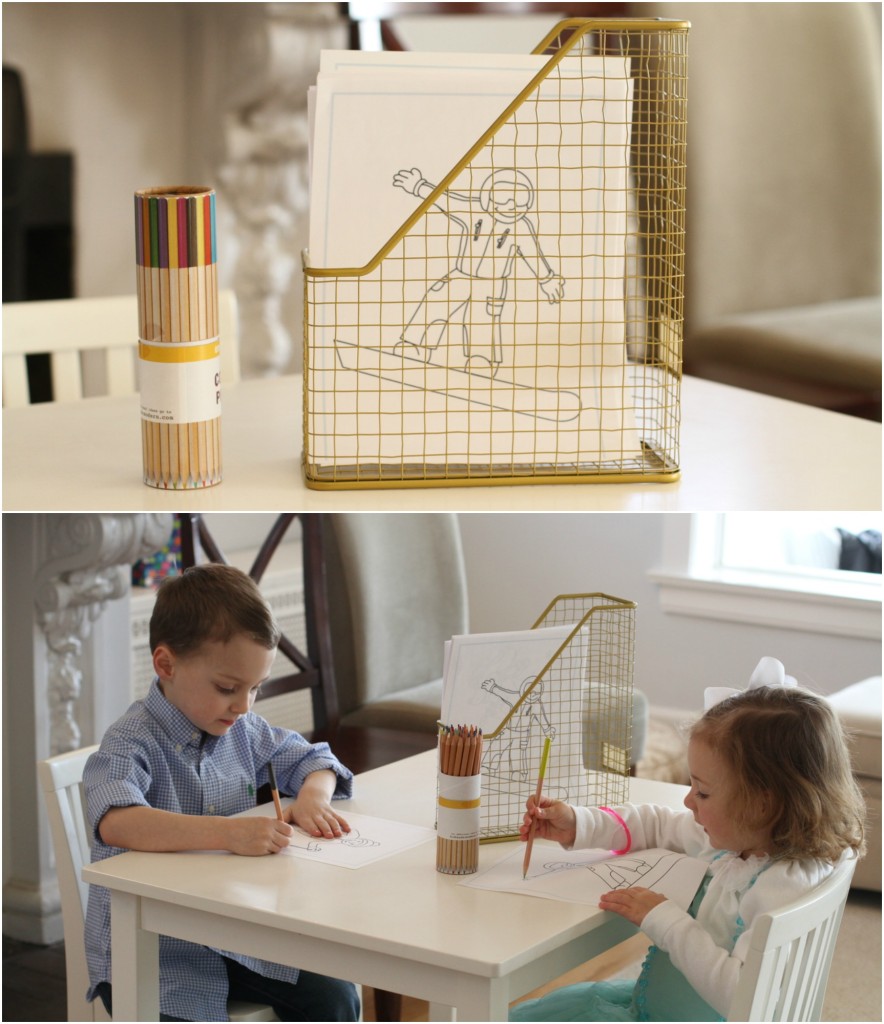
The second activity was a coloring table full of snow skiing themed coloring pages. I found all the coloring pages for free online, and the kids spent quite a bit of time here.

Après Ski Kids Party

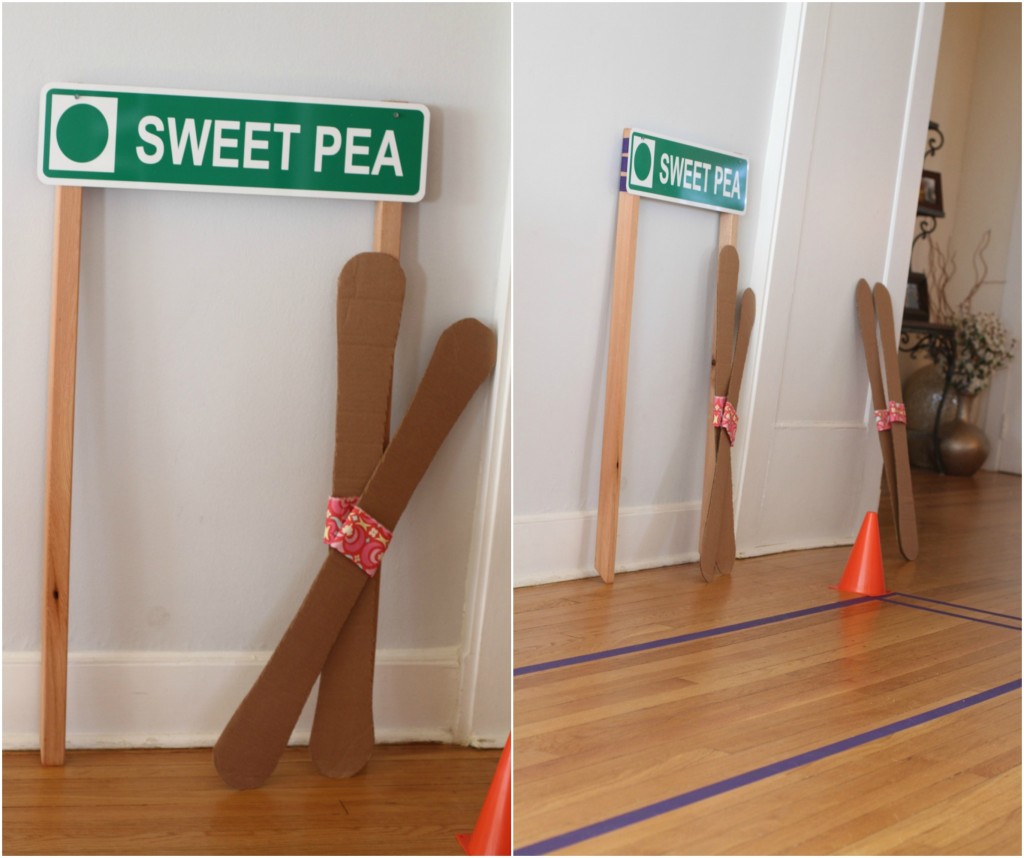
And finally, we got the kids moving with an indoor ski race course! My daughter’s first ski run was a green called Sweet Pea, so I created the Sweet Pea Race Course.

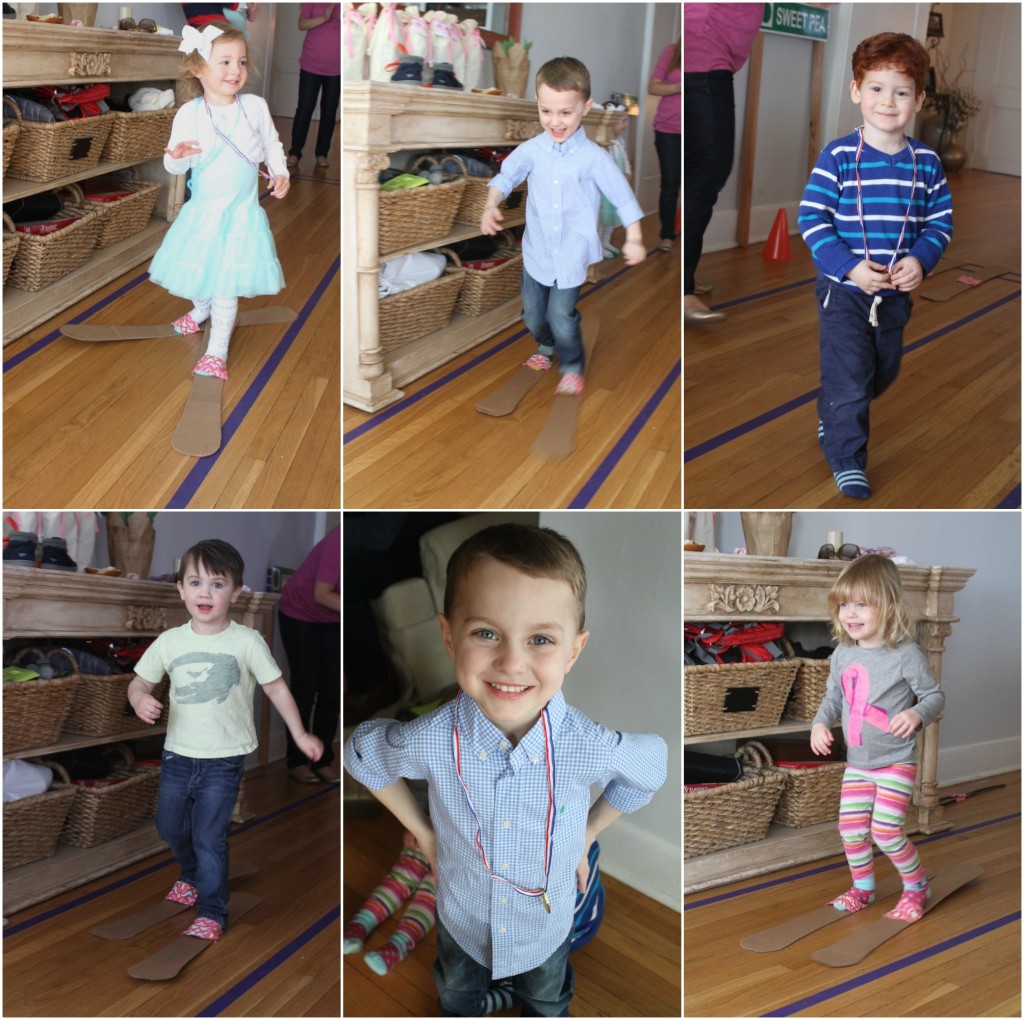
Each party guest got a turn to slip on cardboard skis and race (shuffle!) around the course.

When they crossed the finish line they were presented with a gold medal.

Après Ski Kids Party - Games

Après Ski Kids Party - Games

These three activities kept the kids entertained throughout the party, and more importantly allowed them to have lots of FUN!

So at your next party – remember to create fun play spaces and activities that kids will love, along with the super cute treats and décor.

All photos by Kyla Coots

Kelsey Graves is the founder of We Heart Parties – a party ideas website. Join the We Heart Parties community by sharing your parties on the site. And follow We Heart Parties on Pinterest and Instagram for daily party inspiration.

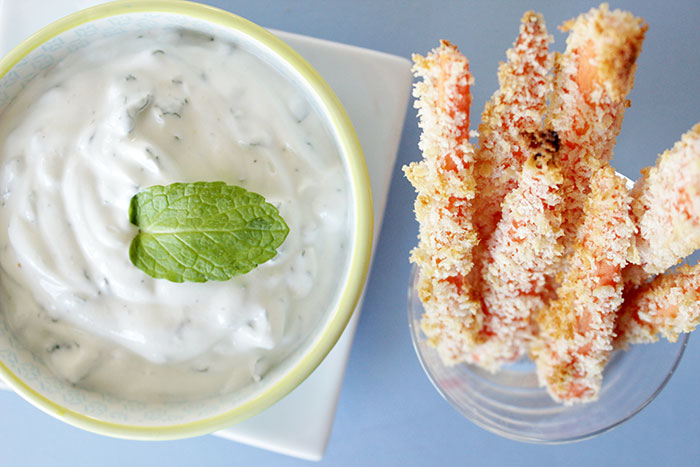
Carrot Fries with Lemon Mint Dip

April 13, 2015

Post by Corri McFadden of Glitter & Bubbles

Carrot Fries with Lemon Mint Dip

Vegetables and kids? Now, that’s a struggle! Zelda instantly glares at me with her “Not The Veggies” look anytime she thinks some are coming her way. The only way I know how to get some veggies into her diet is to transform them into something else! Knowing how irresistible french fries are, we created these yummy Carrot Fries along with Lemon Mint dip. This light, refreshing dip is one of the best I’ve ever had and makes the perfect dunking addition to these “fries!”

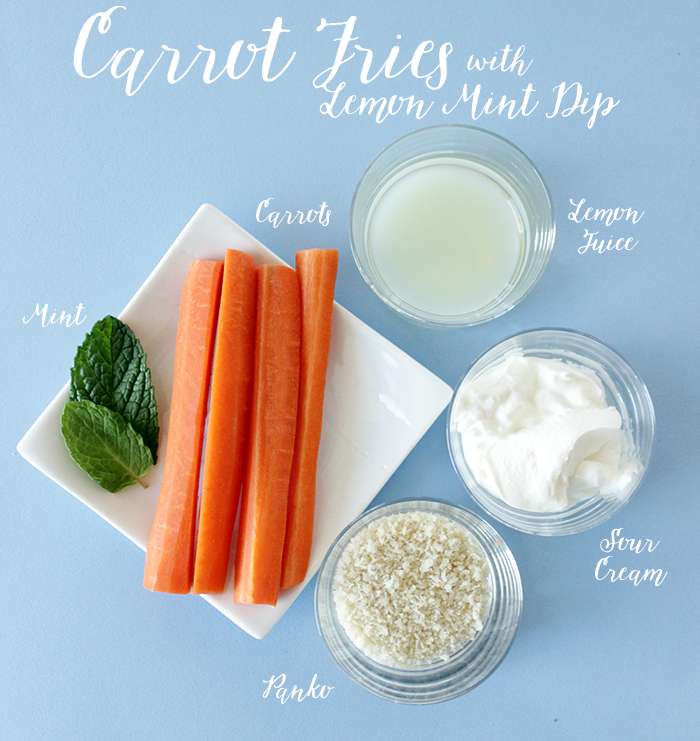
To make the carrot fries you will need:

  • Eggs
  • Panko bread crumbs
  • Long carrot sticks
  • Salt and pepper

For the dip, you will need:

  • 1 cup sour cream
  • 1/3 cup freshly chopped mint
  • 1½ tablespoons lemon juice
  • 2 teaspoons sugar
  • 1/8 teaspoon salt
  • 1/8 teaspoon pepper

Directions for Carrot Fries with Lemon Mint Dip:

  1. Start by mixing all of the dip ingredients together in a bowl until well blended, then cover and let the drip chill in the fridge for 1 hour.
  2. Preheat the oven to 425° and line a baking sheet with parchment paper.
  3. Peel your carrots and then cut them down to your desired “fry” size.
  4. Then, separate your egg yolks from the egg whites, keeping the whites in a medium bowl.
  5. In another bowl, pour in your panko.
  6. Start your coating process by dipping the carrots in the egg whites, coating them in panko, and finally, placing them on the baking sheet.
  7. Bake your fries in the over for 20-30 minutes, or until they’re golden brown and crispy.

Carrot Fries with Lemon Mint Dip

Serve them with the chilled Lemon Mint Dip and you little ones won’t suspect a thing!

Corri McFadden is the owner and founder of eDrop-Off Luxury Consignment.  As a Style Expert and successful blogger, she hosts a weekly fashion segment on Chicago’s “You and Me This Morning”, and features “Style Recipes”, videos and Fashion “Must Haves” on her self-titled lifestyle website Corri McFadden.  Most recently, she launched Glitter and Bubbles, a modern day moms guide for those looking for inspiration through fashion, food and décor.