Close

Blog

Popsicle Dreams – 80’s Inspired Kids Room

April 10, 2015

Post by Joni of Lay Baby Lay

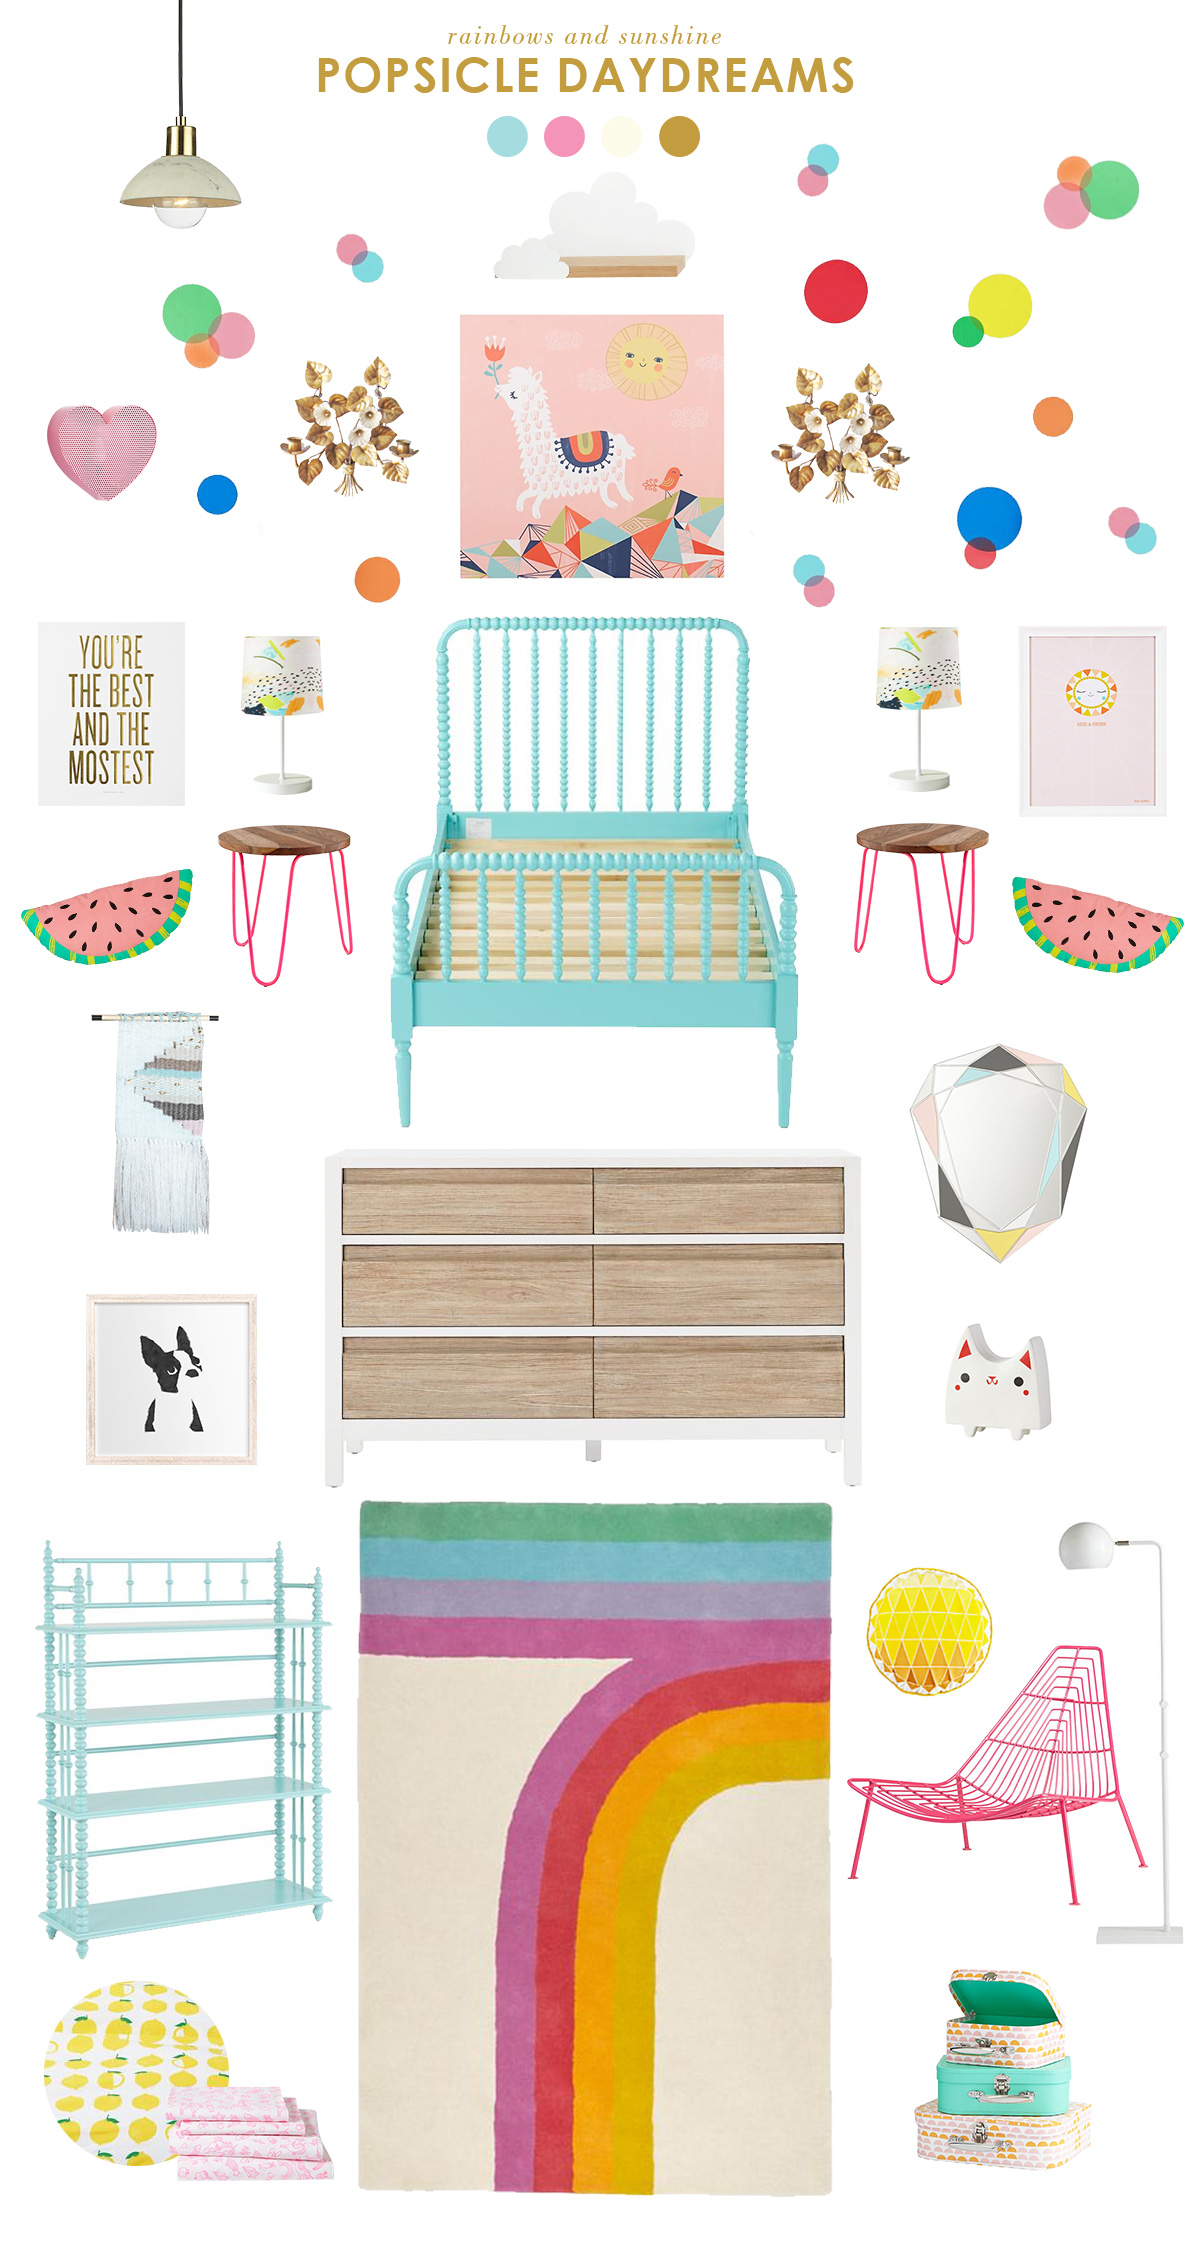
The 80s are back! The Land of Nod’s new chromatic collection captures the essence of 80’s retro style and updated it with a modern, bright color palette. The mood board below features pieces from the chromatic collection and elsewhere to create a bright and fun 80’s inspired kids room.

Popsicle Dreams - 80's Inspired Kids Room

Marble Pendant Lamp / Cloud Shelf / See Clearly Decals / Heart Pop Icon Light / Tole Sconces / Leaping Alpaca / You’re the Best and the Mostest / Art Journal Lamps / Jenny Lind Kids Bed / Day and Night Print / Watermelon Throw Pillow / Neon Nightstands / Wall Tapestry / Crown Jewel Mirror / Baby Boston / Andersen Dresser / Kitty Nightlight / Jenny Lind Bookshelf / Roller Rink Rug / Sun Throw Pillow / Domino Chair / White Hemisphere Lamp / Lemon Duvet Cover / Day Dream Sheets / Bon Voyage Suitcases

Lay Baby Lay started in 2011 shortly after the arrival of my first baby as a place to provide fresh and unique nursery inspiration with a little dose of motherhood experience. This site is my creative outlet and the place where I am able to express all the ideas running around in my head. It is my hope that you will also be inspired to create spaces for your little ones that are full of imagination, color, and delight and maybe find a little encouragement in this crazy but wonderful journey of having babies and watching them grow.

Planning Healthy Meals for Kids (That They’ll Actually Eat)

April 9, 2015

Post by Adrienne of Susie Makes SupperPlanning Healthy Meals for Kids (That They'll Eat)If your kids are anything like mine, they would be happy with chicken nuggets and pasta for supper every day of their lives. And if you have ever tried to feed a kid like mine homemade macaroni and cheese when he or she is expecting the orange stuff that comes out of a blue box, you know that feeding kids real food can be a challenge.

Here are a few tricks that I use when planning healthy meals for kids:

  1. Rename the dish. My aunt recently told me a story about a casserole that her mom made when my aunt and her brothers were little. The casserole was simple: noodles, ground meat, and tomato sauce. You know the casserole. If it were pasta with sauce and meatballs, each ingredient separately identifiable, the kids probably would have eaten it without complaint. The boys refused to eat this casserole. One day, my aunt’s mom told the boys that they were having cowboy food for supper. She served the same noodle, ground meat, and tomato casserole that her boys had previously refused and that night received rave reviews from her boys. A favorite was born. “Cowboy Food” was regularly requested for supper. Same dish, different name. A little creative license goes a long way and is exactly the way to get your kids to try meatballs with spaghetti squash instead of pasta or homemade macaroni and cheese. Your kids’ favorite story characters or zoo animal or game can provide wonderful inspiration for your next meal’s name.Planning Healthy Meals for Kids - Meatloaf
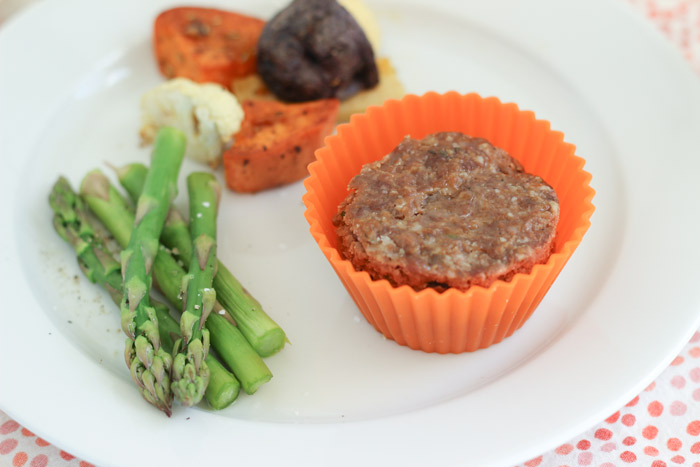
  1. Make it cute. Truth: anything in the shape of a cupcake or made in miniature is more appetizing to kids. I can’t explain it, I just know it is true. This concept works for homemade macaroni and cheese, tacos, and meatloaf. Using the cupcake technique allows you some creativity with your ingredients. Meatloaf cupcakes? How fun! You can even frost them with mashed potatoes and decorate them with peas. (I’ve actually done this before – without telling my kids what they were eating. The kids not only thought it was hilarious, but ate every bite.)Planning Healthy Meals for Kids - Chicken Nuggets
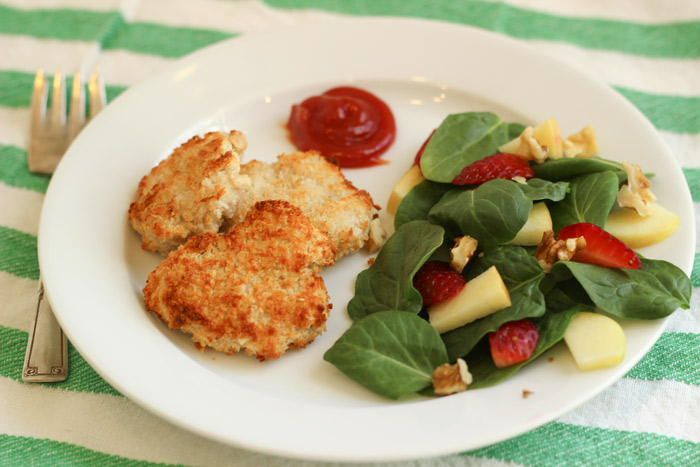
  2. Let your kids help you make the dish. What’s in chicken nuggets, anyway? A lot of things you probably don’t want to eat if we are talking about the frozen, shaped variety. But your kids can help you make their own chicken nuggets (and shape them, if you have an awful lot of anti-bacterial soap in your kitchen) with ingredients you probably already have in your kitchen. This trick works well with other classic kid favorites like spaghetti-os and pizza. It also works really well with new dishes like gnocchi and potpies.

Do you have any tips for updating kid favorite meals? Drop a note in the comment section with your favorite tip or requests for future posts about cooking for kids.

Adrienne is a compulsive list-maker with a very busy family and a not very clean house. She’s also a planner and a recovering perfectionist. Adrienne blogs at Susie Makes Supper, where she shows her successes and failures in the kitchen and freely gives advice on all sorts of topics.

Nod Real Family – Under the Stairs Book Nook

April 8, 2015

Post by Morgan Georgie of Ampersand Design Studio

Hi guys – It’s Morgan from Ampersand Design Studio and I’m back to share part two of our Nod Real Family makeover. Check out part 1 here.

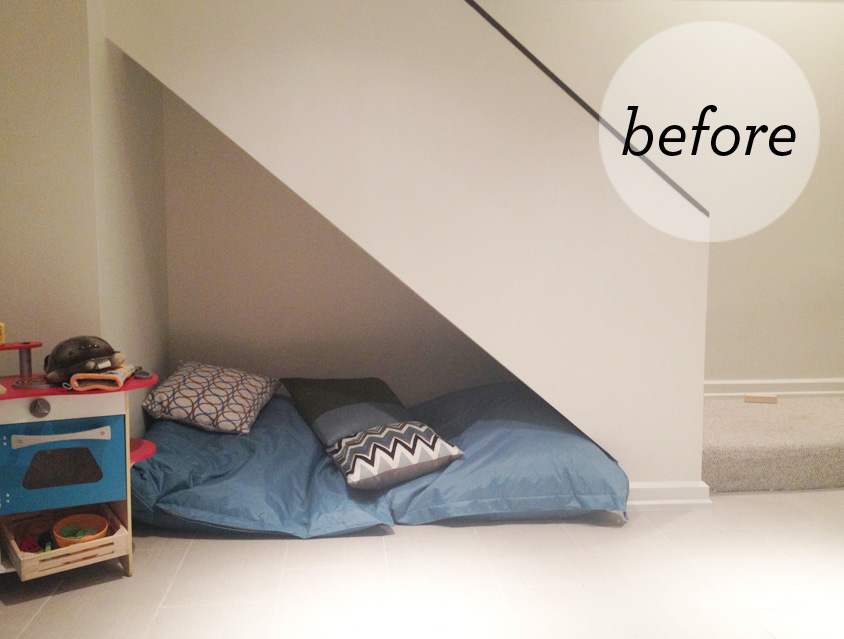
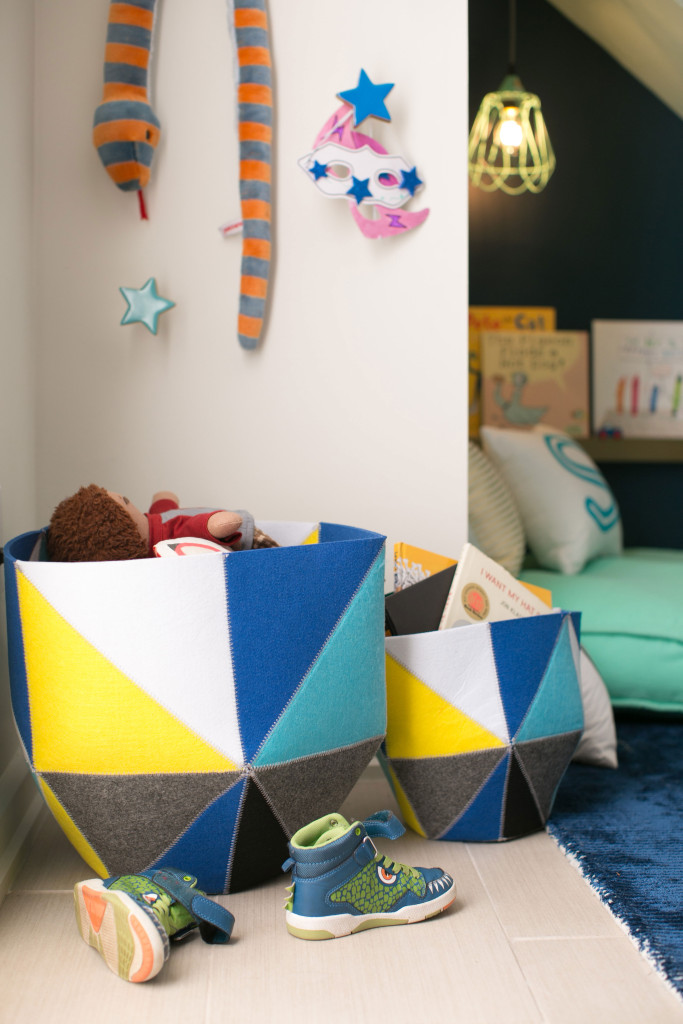
Now, let me take you downstairs. We live in a one-story ranch and have a finished basement that is sort of half playroom/half tv room. When we refinished it, I begged my husband to open up the area underneath the stairs thinking it was the perfect little hideout for kids! I had a vision, but I threw in a couple floor cushions and the decorating stopped there. I’m cringing just looking at the “BEFORE” photo. Under the Stairs Book Nook - BEFOREDanielle at The Land of Nod and I brainstormed together and I filled her in on how much Shaw loves books. He also loves forts and hiding places. So this dreamy, comfy book nook is his new favorite spot in the house. He feels like it’s all his own, although I do hope he’ll invite his brother in once he gets a bit older. How could he not? Lennon already has his “L” pillow in there to match Shaw’s! I could never have dreamed up this perfect little reading nook that Danielle so brilliantly put together! Check it out!!

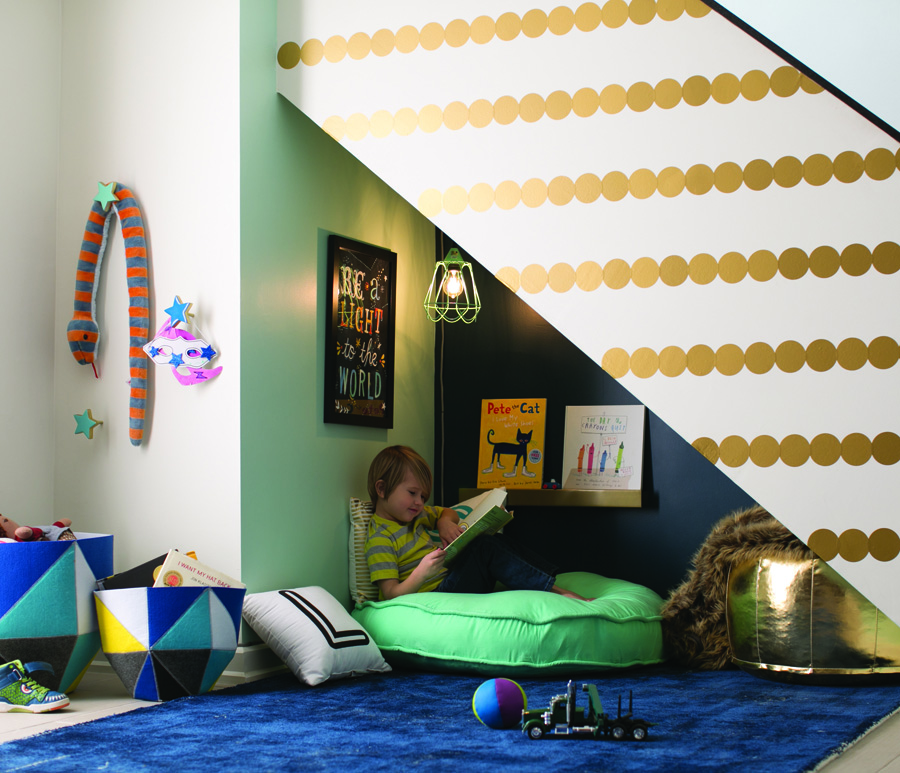
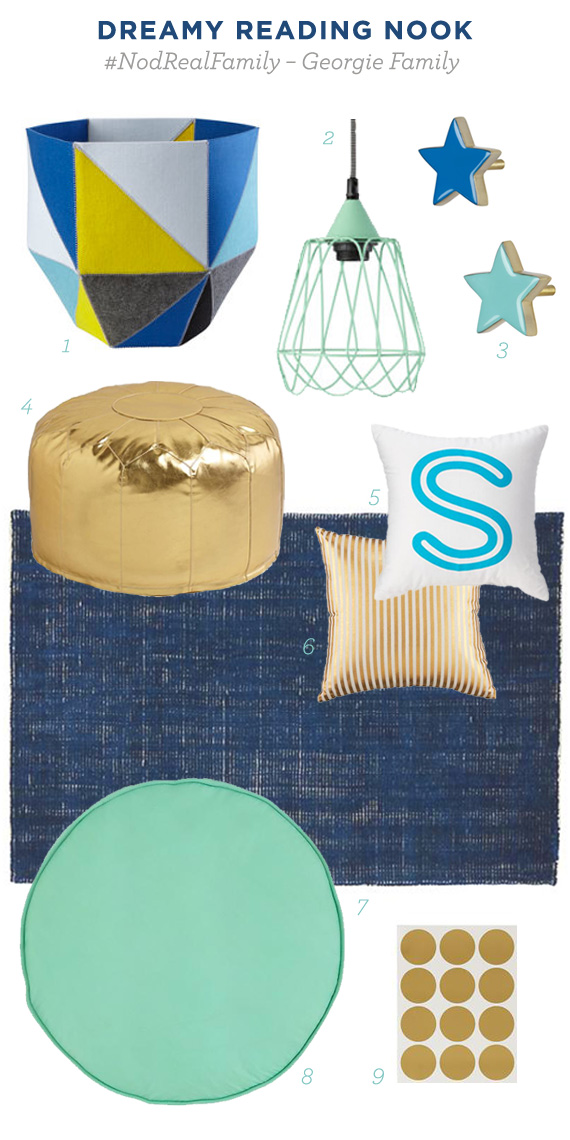
Under the Stairs Book Nook - AFTER Under the Stairs Book Nook - AFTERShe truly though of everything! Literally the second it was complete, Shaw jumped in there,  grabbed a book and started “reading”. The photography team started shooting right away! When they had all the photos they needed, Shaw didn’t want to leave his nook. I’d say that’s the truest test of a well-designed space! We love the color bar ledge wall shelf that keeps his favorite books within an arm’s reach and these super modern felt storage bins can hold all the rest! The cushions and fur blanket keep the space super comfy! I have to talk to you guys about this amazing patina rug, though! It’s the most luxurious feeling rug in our house! And, it’s such a rich blue that reflects the light in different ways throughout the day. It’s so soft, we catch ourselves actually taking our shoes off so we can walk on it with bare feet! And, do you see the cool gold stripes on the wall? Danielle came up with the idea to use gold dot wall decals to make those, pretty much proving the ideas for dot wall decals are endless! Check out the little style board below for more sources!

Under the Stairs Book Nook Design Board1 // 2 // 3 // 4 // 5 // 6 // 7 // 8 // 9

Isn’t this space every kids dream!?!?!  Let’s be honest, it’s even a dream for me!

What I must let you all know is that every single person that had a part of this Real Family feature, from a project manager, to the photographer and stylists, was just as cool and brilliant as you would imagine they are! Everyone worked so hard for the three days that they were here in Kansas City, but on their “breaks”, they were still finding time to play with Shaw while I was also taking care of our new baby. Talk about a company that just “gets it”. You might imagine that hosting that many people in your home for three days would be overwhelming, but it was nothing but fun!

So, I want to say one last HUGE thank you to Nod for this incredible experience!! I’m so grateful for the perfect spaces that were created for our family. It was truly a once a in a lifetime experience that we will never forget! Cheers to Nod!

Ampersand Design Studio specializes in surface pattern design, identity design and stationery products, with clients in the home décor, fashion and baby and kids industries. Their clients include respected big names like Land of Nod, Tiny Prints, Papyrus, Minted and Giggle,  as well as great small, local businesses around the country, including cafés, bakeries, wineries, photo studios and fashion boutiques.

Nod Real Family – Big Boy Room Design

April 7, 2015

Post by Morgan Georgie of Ampersand Design Studio
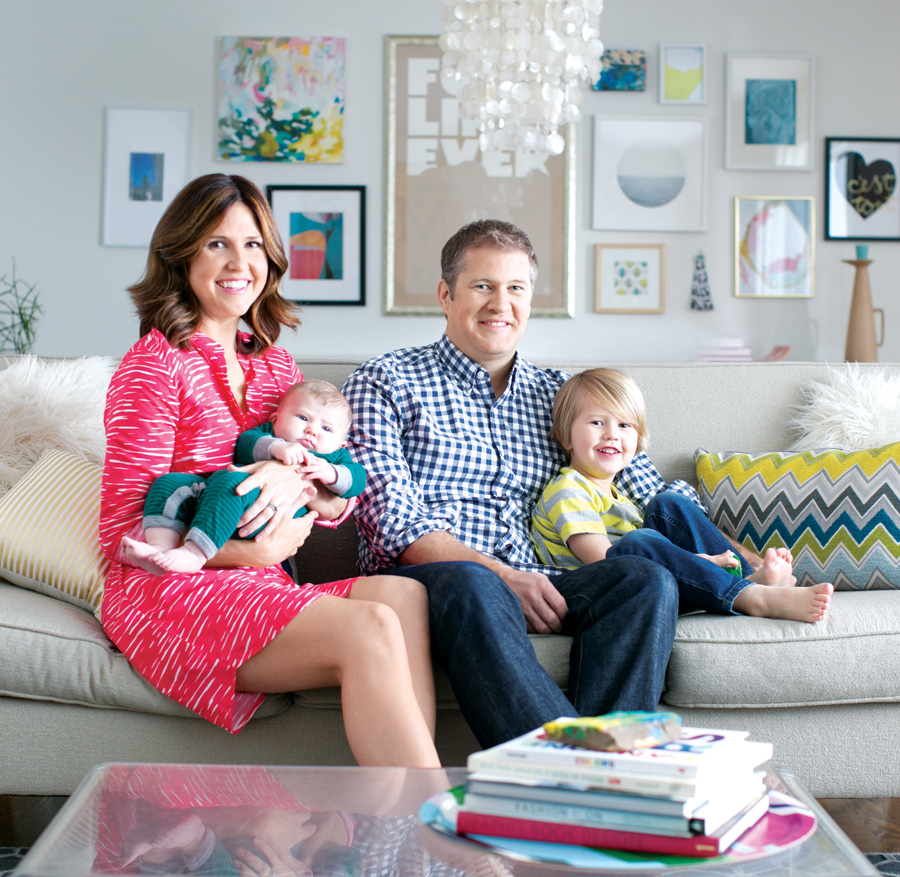
Nod Real Family - Big Boy Room Design Hi everyone! I’m Morgan and this is my little family of four: my husband, Dan, 4-year old son, Shaw and brand new baby boy, Lennon! If you’re anything like me, you flip through each Land of Nod catalog and pretty much freak out about the awesomeness on every single page. I’m not sure I’ve ever seen an item that I would not want to own. It’s all so wonderful! I’d like to challenge anyone out there to a Land of Nod biggest fan contest!

So, when Danielle Kurtz, the creative director at Nod, approached me about having our family be a “Nod Real Family”, where a team literally shows up on your doorstep to come in and completely redecorate your kid’s space, I’m pretty sure I fell out of my chair in disbelief!!! That would be a dream come true! At the time, what I couldn’t have even imagined, is that I would end up actually DESIGNING half of the pieces in the room!

Let me take you back a bit first. The original discussion started a couple of years ago with a tweet to Nod about some rugs for my son, Shaw’s “big-boy” room. Danielle just happened to be logged in to the Land of Nod Twitter account that day and responded to me directly. She said she could put together a little style board for my son’s room. OF COURSE, I jumped at that idea and probably replied, “YES” within less than a second. Danielle asked what areas we need help with and about Shaw’s interests, then began gathering pieces onto a secret inspiration board on Pinterest that only her and I could see filled with kids furniture, decor, bedding and more. I fell in love with each and every idea she had. In addition to my son’s room, she also designed a reading nook for an under-the-stairs spot in our finished basement playroom.

Here’s where the twist comes in! In addition to being a huge fan of Nod from a consumer standpoint, I happen to be a designer. Along with Carrie Kiefer, I’m the co-owner of a little company called Ampersand Design Studio and we have always admired (been obsessed with) Nod’s products for their forward-thinking and fun designs and admired their ethics in the way they produce their products! Truth be told, upon starting our company, one of our goals was to partner with Nod! In a crazy series of meetings and collaborations through our company and blog, Ampersand Design Studio was hired to design an entire line of rugs, bedding, wall decor and more for the Land of Nod Spring 2015 launch!!!!!! Count this as another HUGE dream come true!! Seriously, this is bucket list material! (Here’s our little spread from the catalog)
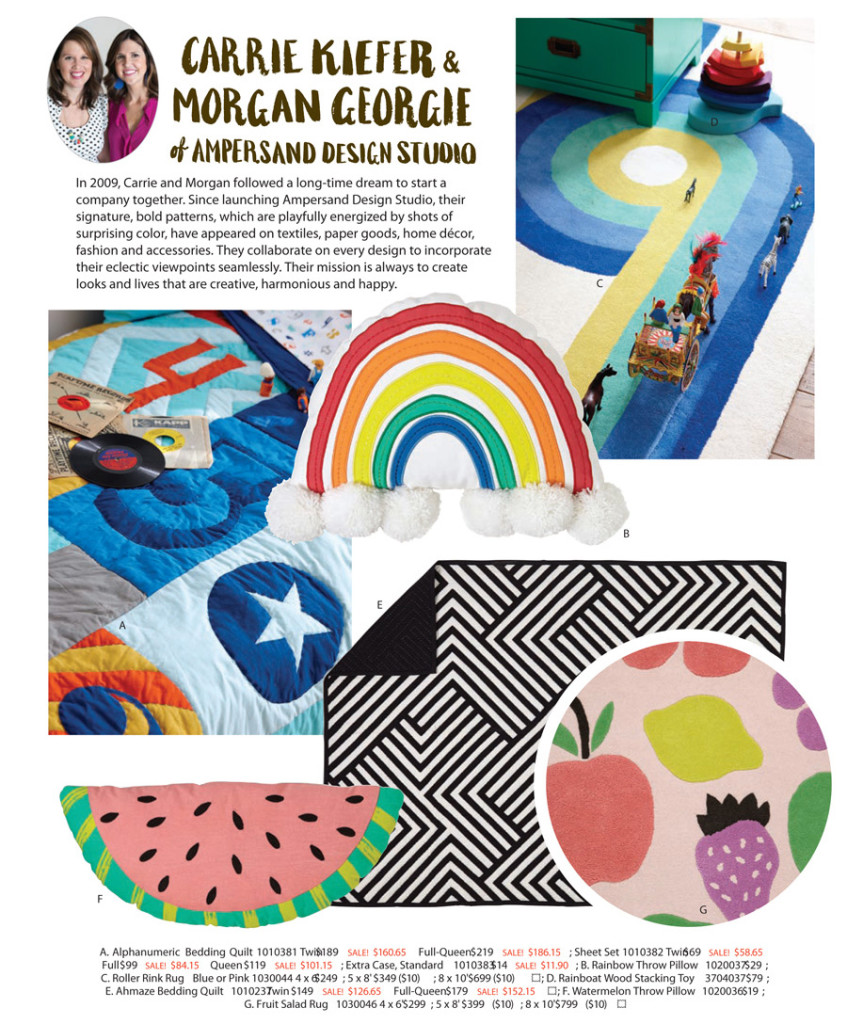
Amersand Design Studio Land of Nod CatalogSo fast forward to when the Nod Real Family came to life in my own home, Danielle updated my son’s big boy room design to include some of our very own Ampersand Design Studio exclusive designs for Nod! (ahhhhhhh!!!!!!!!!!) Now, BOTH dreams are coming true!  I am getting my four year old son’s room decorated with Land of Nod products including some that we designed! The rug, sheets, quilt, pillows and growth chart are all Ampersand designs! Pinch me! Wait, am I actually dreaming?

Nope. It’s true, this all really happened!!!!

Let’s start with the “BEFORE” picture of Shaw’s room. As you can see, we were already a fan of Nod products and owned the Gray Uptown Bed and Uptown Wide Dresser, which we love!  But other than that, we hadn’t really done much decorating. The few things that Shaw loved from his room including the vintage signage “S”, the chalkboard wall and the clipboards for various artwork, were all incorporated into the new room!
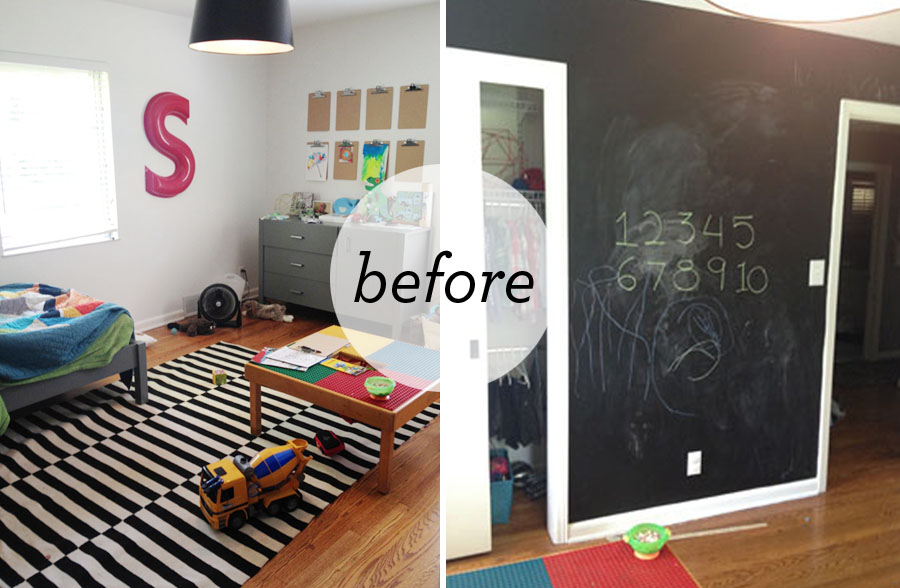
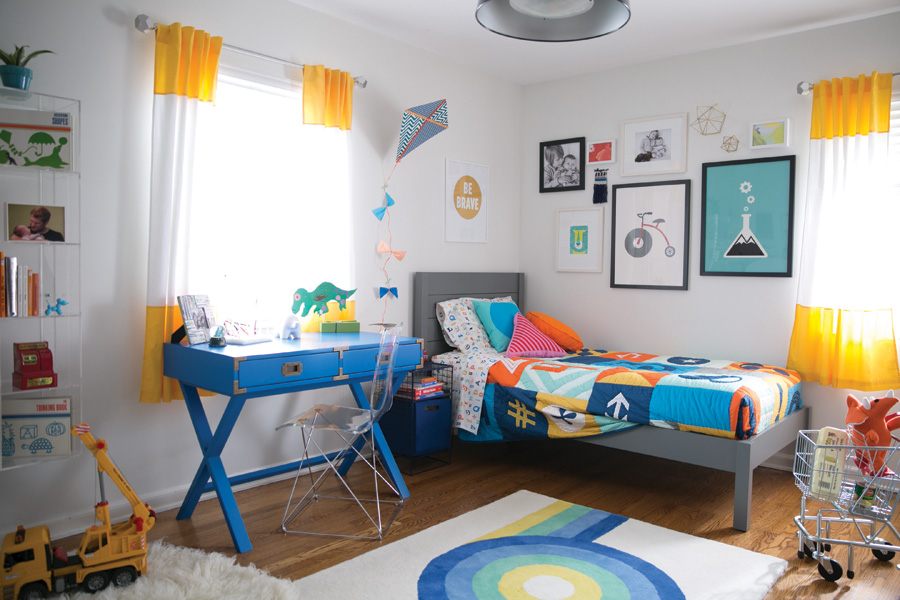
Nod Real Family - Big Boy Room Design BeforeNow, let me introduce you to the “AFTER”! This is Shaw’s brand new big-boy room!!! It’s such a true reflection of my colorful, fun little guy! Danielle and I talked about his personality, his favorite things to do and play, and how much he loves his new little brother, and Danielle found a way to weave every little thing we discussed into his new room!

To start, she completely rearranged the room and…just wow!, it feels so much bigger! We formerly had a small play table in here but Shaw had outgrown it and I just love the new campaign desk and acrylic chair! Right now he uses the drawers as his “treasure box” and the top for sticker books and coloring, but it’s a piece that will evolve with him. I love imagining him doing his grade school homework here one day!
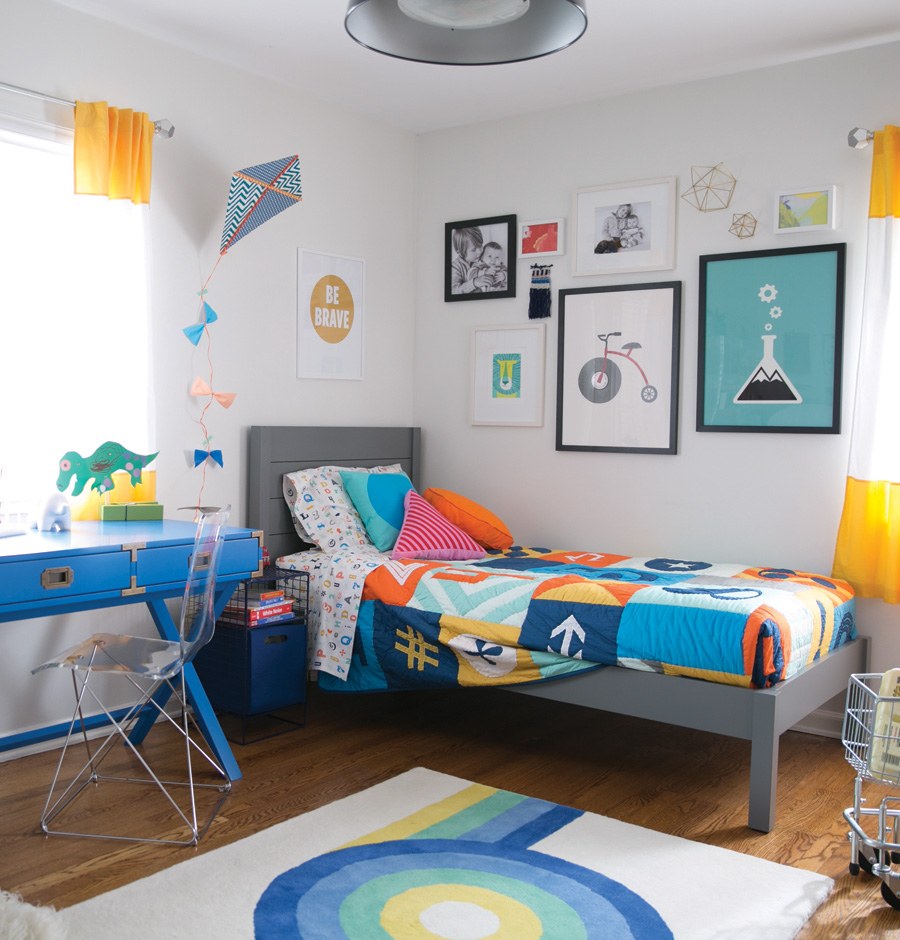
Nod Real Family - Big Boy Room Design AFTERThe Alphanumeric quilt and sheets, along with the hexagonsquare and triangle throw pillow are all pieces we chose out of the Ampersand Design Studio collection (#AmpersandforNod) as the perfect new bedding for Shaw! While these pieces were being designed, I would have them up on my computer screen and would ask Shaw which colors he liked best….just hoping one day they would come to life in his room!

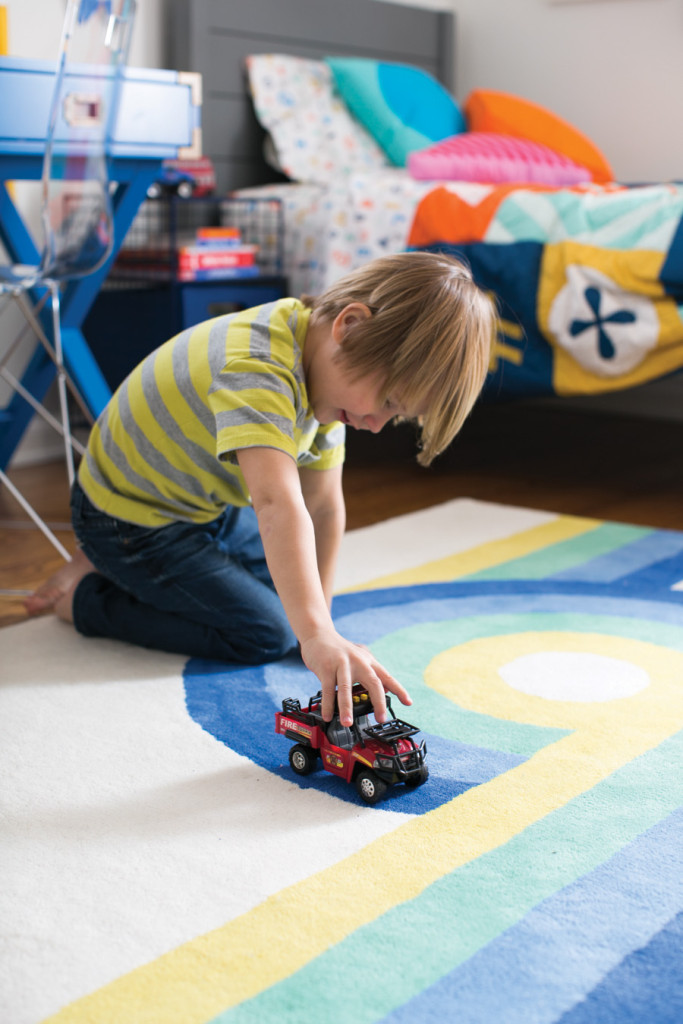
For the gallery wall, Danielle expertly mixed photos of Shaw and his little brother, three-dimensional pieces, the tricycle wall art, the beaker wall art, with some of Shaw’s own paintings and even a weaving done on-the-spot by Danielle (talk about talent!)! The on the grid nightstand now holds his stacks of bedtime books (Shaw’s favorite part) yet keeps the top clear (my favorite part)! The windows in Shaw’s room before simply had white blinds, nothing with much personality. So, these sunny yellow color edge curtains are a very welcome addition!!Nod Real Family - Big Boy Room DesignShaw using the stripes in his roller rink rug as a road is a daily occurrence! It’s just crazy because as we were designing this rug, we envisioned this very scenario! Our whole family LOVES this rug! The quality is incredible! It’s so soft and easy to play on, because see, when you have a four year old and an infant, rugs aren’t just for your feet. They are for your whole body.
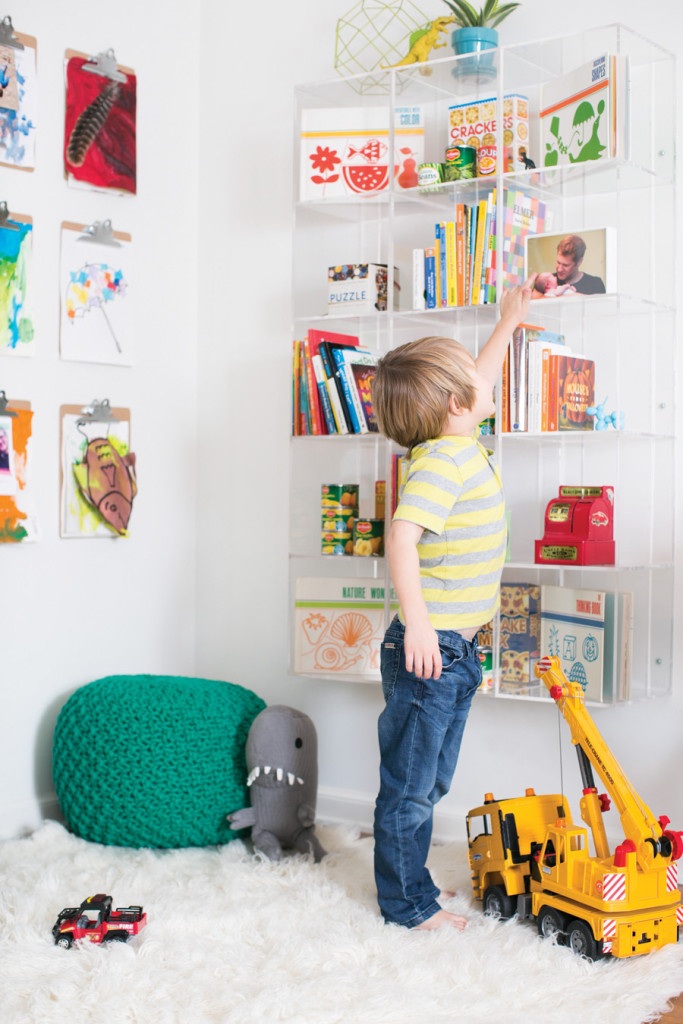
Nod Real Family - Big Boy Room DesignDanielle did such an incredible job of assigning uses to different areas of the room! I never thought Shaw’s room was big enough for this until I saw it completed! One corner is now a cool little book nook. The three acrylic bookcases hung on the wall are my favorite solution to the stacks of books all over the floor! They are such a light and airy way to get organized!  A  knit pouf and a second rug (the flokati fluff rug) layered over the central rug make this spot modern, yet comfortable!
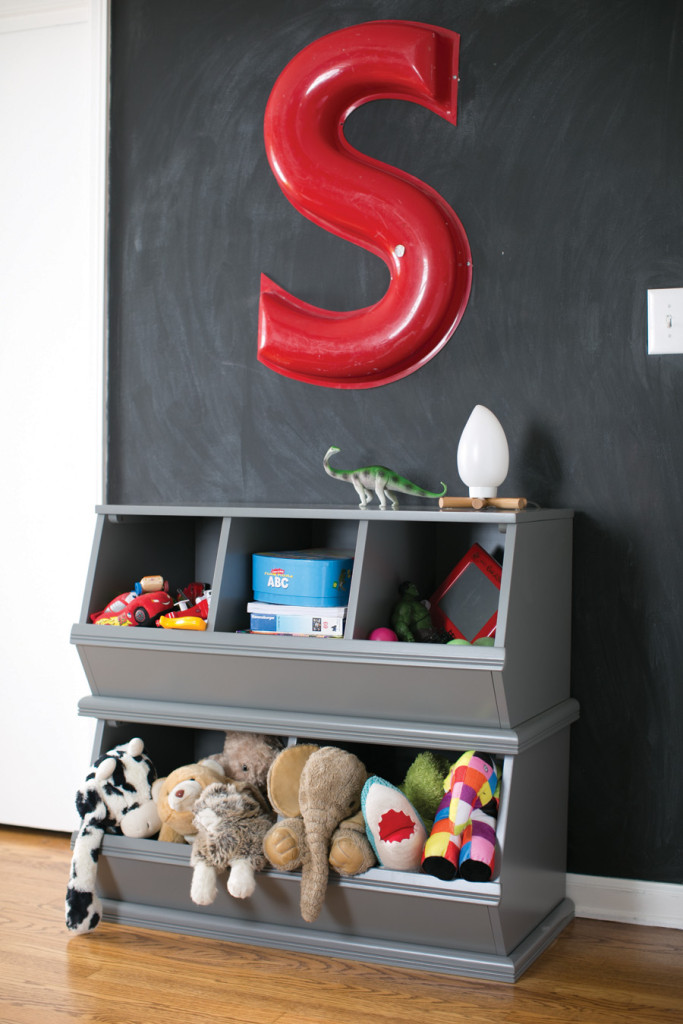
Nod Real Family - Big Boy Room DesignYOU GUYS! I have to tell you. THIS Storagepalooza is EVERYTHING! I didn’t even realize how badly we needed this until we had it. It’s so deceiving. It doesn’t look monstrous, it’s a perfect size, but it holds SO. MANY. TOYS. and stuffed animals. and games. It’s amazing!
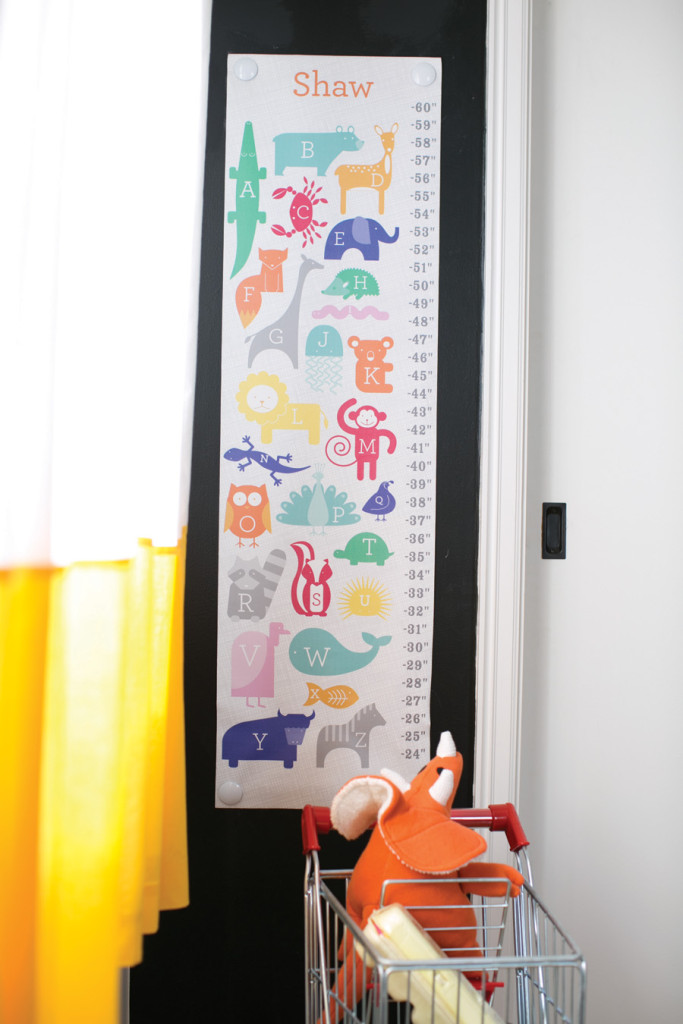
Nod Real Family - Big Boy Room DesignThe ABC Animals growth chart is another #AmpersandforNod exclusive that Danielle surprised us with. Anything with Shaw’s name on it is pretty special in his eyes! I love that we are going to get to watch him grow up by each little mark we make on this chart! Also, it’s right across from the foot of Shaw’s bed and now, he loves to go through each letter and corresponding animal before bedtime. What better way to memorize the sounds of letters than things like, “P” is for “peacock”! And below, the three Honeycomb Wall Shelves are such a fun way to display all those little collectibles and photos! Plus, the genius idea to use patterned paper as a backer in each shelf is a cool way to add pattern and color in a way that can easily be updated when you’re ready for a change!
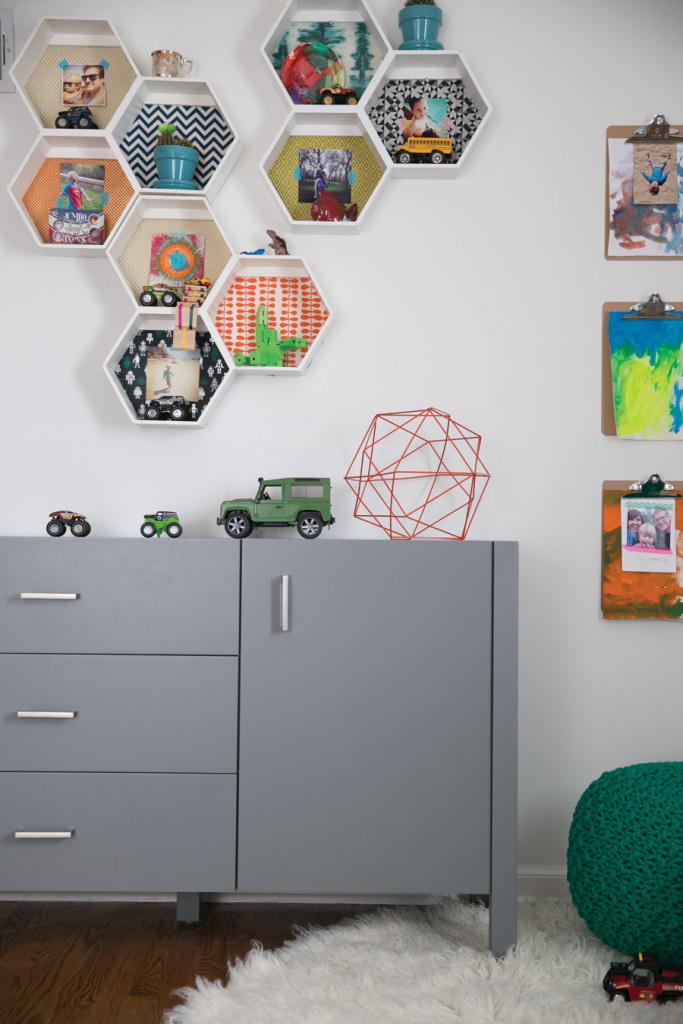
Nod Real Family - Big Boy Room DesignNod Real Family - Big Boy Room DesignNod Real Family - Big Boy Room Design Mood Board1 // 2 // 3 // 4 // 5 // 6 // 7 // 8 // 9 // 10 // 11 // 12

I wanted to share a little style board for his room just in case any of you want to recreate this fun, modern vibe!

That’s a wrap on Shaw’s big boy room design! Incredible, right?!!!!

Ampersand Design Studio specializes in surface pattern design, identity design and stationery products, with clients in the home décor, fashion and baby and kids industries. Their clients include respected big names like Land of Nod, Tiny Prints, Papyrus, Minted and Giggle,  as well as great small, local businesses around the country, including cafés, bakeries, wineries, photo studios and fashion boutiques.

Decorating Teepee Cookies

April 6, 2015

Post by Lauren Baker, our fearless marketing events manager

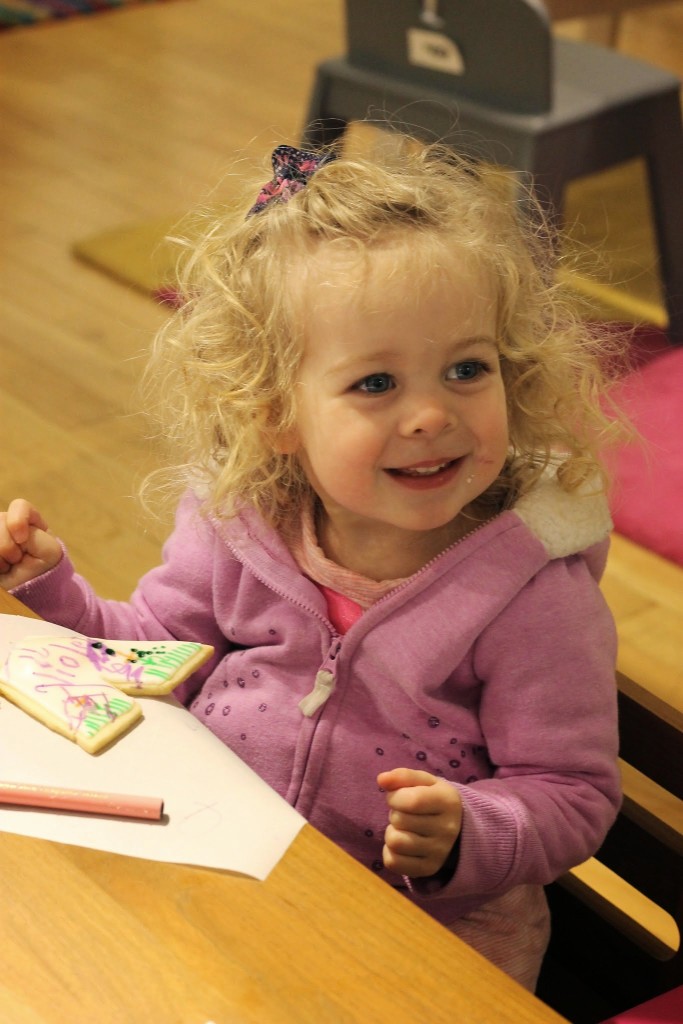
Decorating Teepee CookiesWhat’s better than decorating cookies? How about decorating teepee cookies? We loved this idea from our good pal Chef Caroline from Caroline’s Kitchen Table. She even used it for an event at our Land of Nod Oakbrook store. The little ones were first able to practice their designs on paper before decorating their own teepee cookies to take home.

Check out Caroline’s Kitchen Table blog to read more about this fun Nod Event! Thanks Caroline for hosting!

Decorating Teepee Cookies

When Lauren isn’t planning ridiculously awesome #nodevents for The Land of Nod, she spends her time putting up with the crazy antics of her English Bulldog, Lola. She also loves searching for treasures in vintage stores and summer antique markets. Due to her previous adventure living in Canada, she has a strong obsession to Hudson Bay stripes, as well as the fine cuisine of poutine (Don’t make her choose between the two…that’s like choosing between Ryan Gosling and Jason Bateman for her!).

DIY Pom Pom Bunny Rabbit Towel

April 3, 2015

Post by Colleen of Lemon Thistle

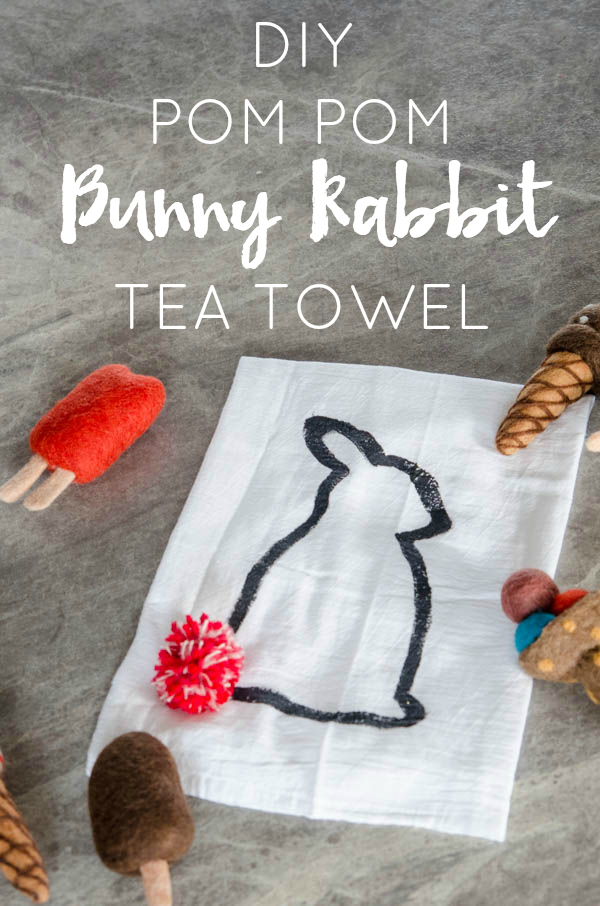
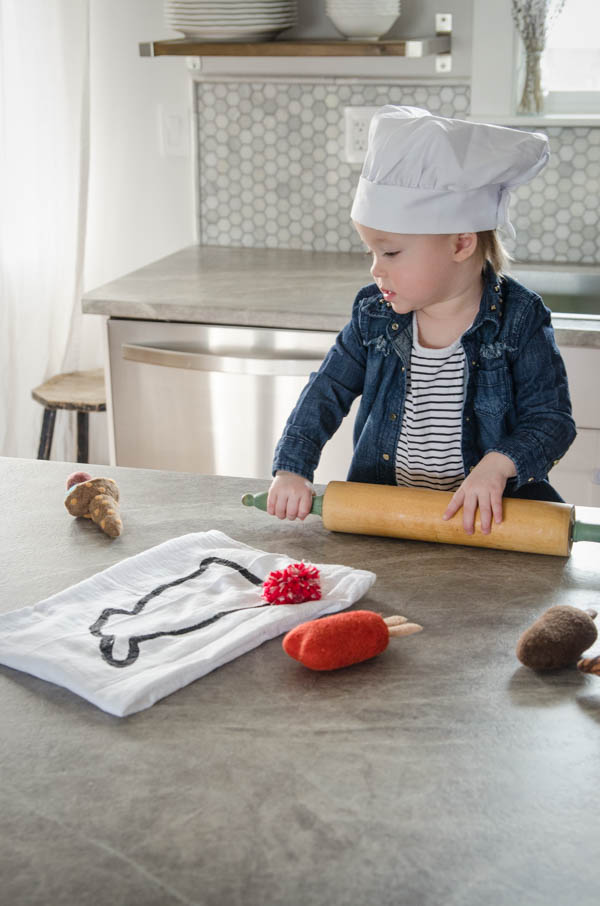
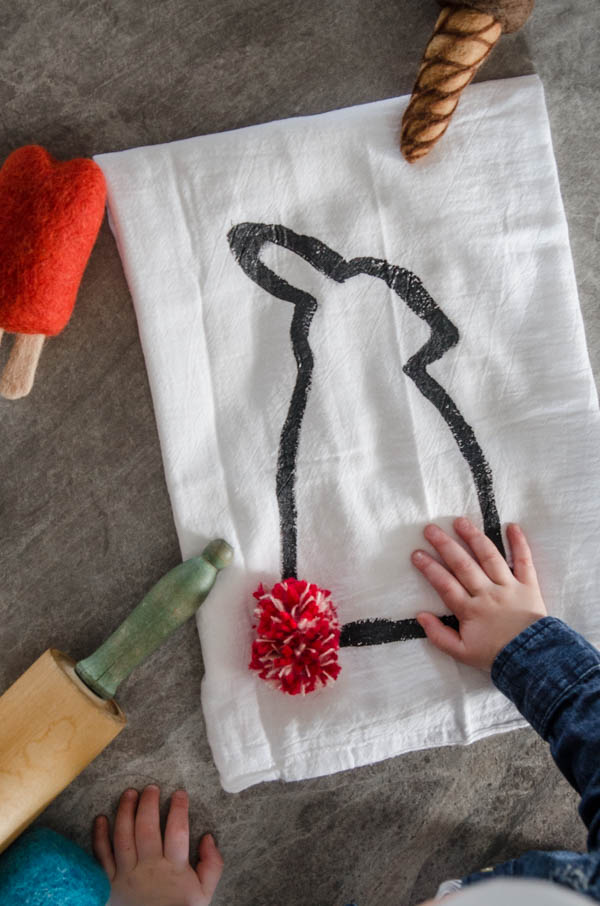
DIY Pom Pom Bunny Rabbit TowelIt’s been warm and sunny around here lately, so I can tell Easter is just around the corner. This DIY is quick, simple and brings so much joy to your kitchen in no time (and I have a printable template for you!). My kiddos so enjoyed pretending to ‘bake’ up some ice cream (they clearly don’t know how it’s made!) with their new towel. Ready to make your own DIY pom pom bunny rabbit towel?

DIY Pom Pom Bunny Rabbit TowelHere’s what you’ll need to make your DIY Pom Pom Bunny Rabbit Towel:

  • Printable Template
  • Flour Sack Tea Towel (or any plain tea towel)
  • Black fabric paint (My absolute favorite is Tulip soft – in Matte) & Paint Brush
    • OR Print Template on Iron Transfer Paper
  • Yarn for Pom Pom
  • Large Fork
  • Scissors
  • Darning Needle

Directions:

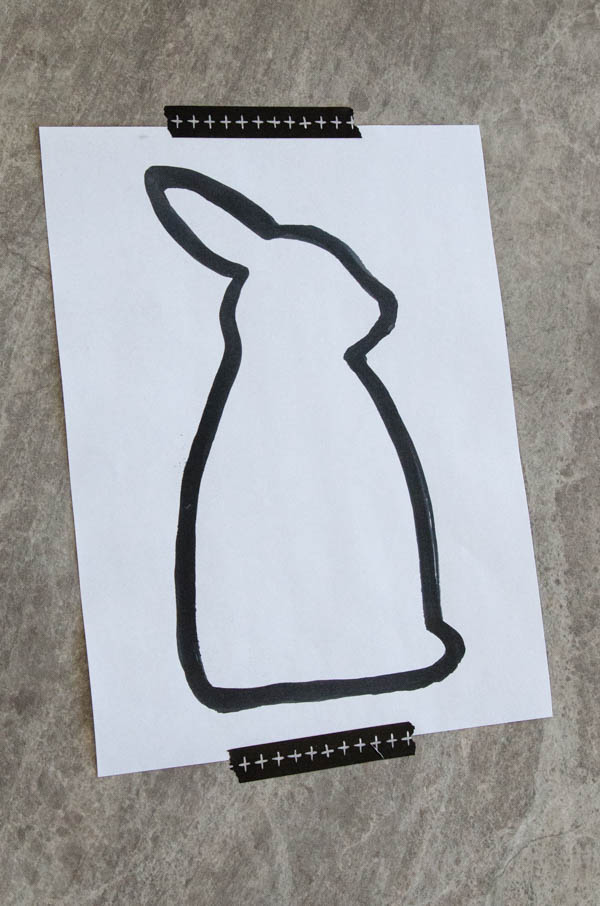
  1. Print out the bunny template either on standard paper (if you’d like to paint it on like me) or onto Iron Transfer Paper. If you are choosing to iron on your design, you can find a video explaining how to do that here. If you’re going to give the bunny a thick painted look, read on!
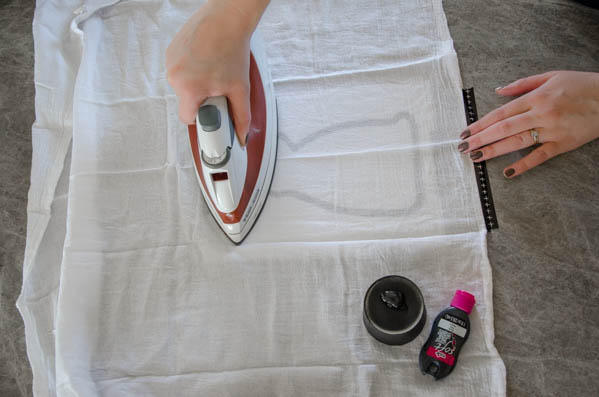
  2. Tape your template down on a hard surface. Then, lay your towel over top, lining the design up underneath where you like. Then, give it a quick iron and tape the towel down to keep it from shifting while you paint. DIY Pom Pom Bunny Rabbit Towel
  3. Now it’s time to get painting! I used a thick paint brush- I love the heavy brush look that is on trend right now. I found I needed to reload my brush quite often to keep the edges of my lines crisp. Let it dry completely before adding the pom pom (4 hours). The paint dries to be a soft matte and is washable time and time again- perfect for a tea towel!DIY Pom Pom Bunny Rabbit Towel
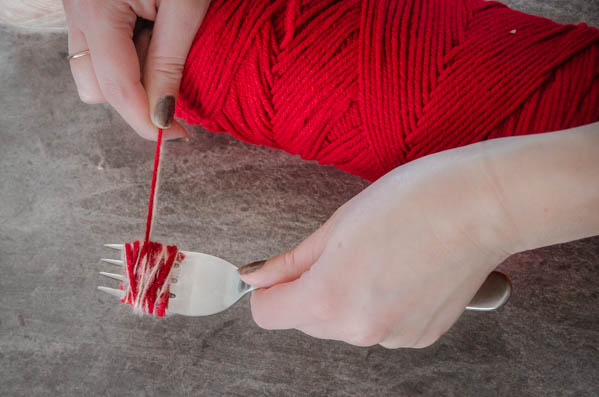
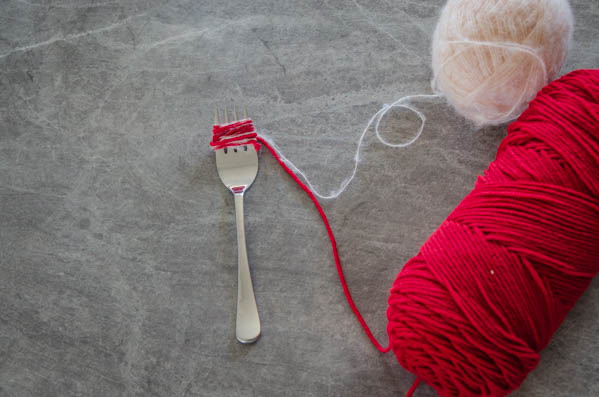
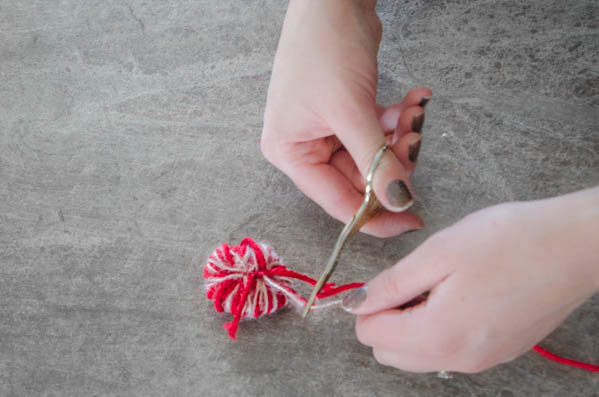
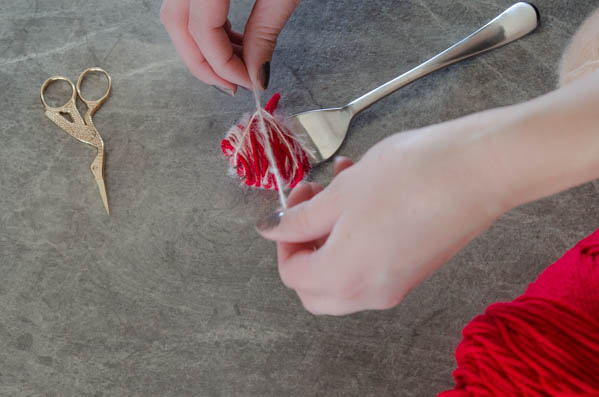
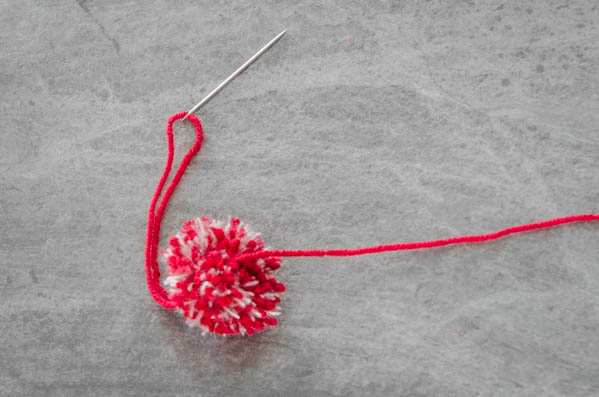
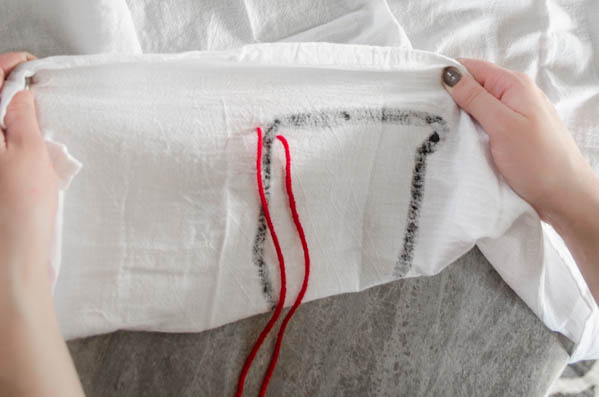
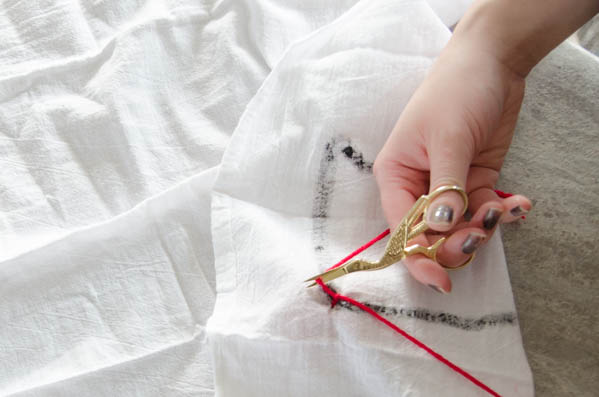
  4. Now for the pom pom. You could easily use any pom pom you might find at a craft store, but I decided to use two different colours of wool to make my own. I really like the two tone colour of the pom pom, and since the wools are different thicknesses, it has a speckled look (fun!). To make your own, wrap your yarn around a fork until you have a ball of yarn slightly smaller than the pom pom sized you would like. Then, use another piece of yarn to tie through the slats of the fork around the centre of your yarn ball. Cut the edges and fluff it out. You might find your pom pom isn’t very ‘tough’ if you haven’t tied that knot tight enough. I added a few more ties in to make sure that no wool could pull out of the pom pom.DIY Pom Pom Bunny Rabbit TowelBunny Towel-15031619 Bunny Towel-15031621Bunny Towel-15031617
  5. Then, take your darning needle (basically the biggest needle you can find at the sewing store), and use one simple stitch to tie the pom pom on to the towel as shown in the photos above. DIY Pom Pom Bunny Rabbit Towel DIY Pom Pom Bunny Rabbit Towel DIY Pom Pom Bunny Rabbit Towel

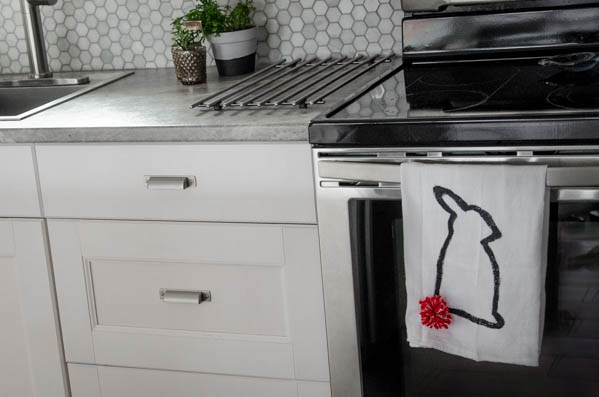
That’s all there is to it! This bunny rabbit brings a fun pop of color into my kitchen (thanks to the pom pom) and makes my kiddos so happy- they run over and give it kisses throughout the day.

DIY Pom Pom Bunny Rabbit Towel DIY Pom Pom Bunny Rabbit TowelColleen is the lifestyle blogger behind Lemon Thistle – home to DIY, parties, printables, home décor and lots of babies. She’s a wife; mama to 18-month-old twins; and lover of pretty things. Colleen believes you can have a beautiful life, home, and party without spending a lot –  (keeping it real with a budget). Every day deserves to be special, there’s no accomplishment too small to celebrate. She hopes that her children will learn to love the little things in life. 
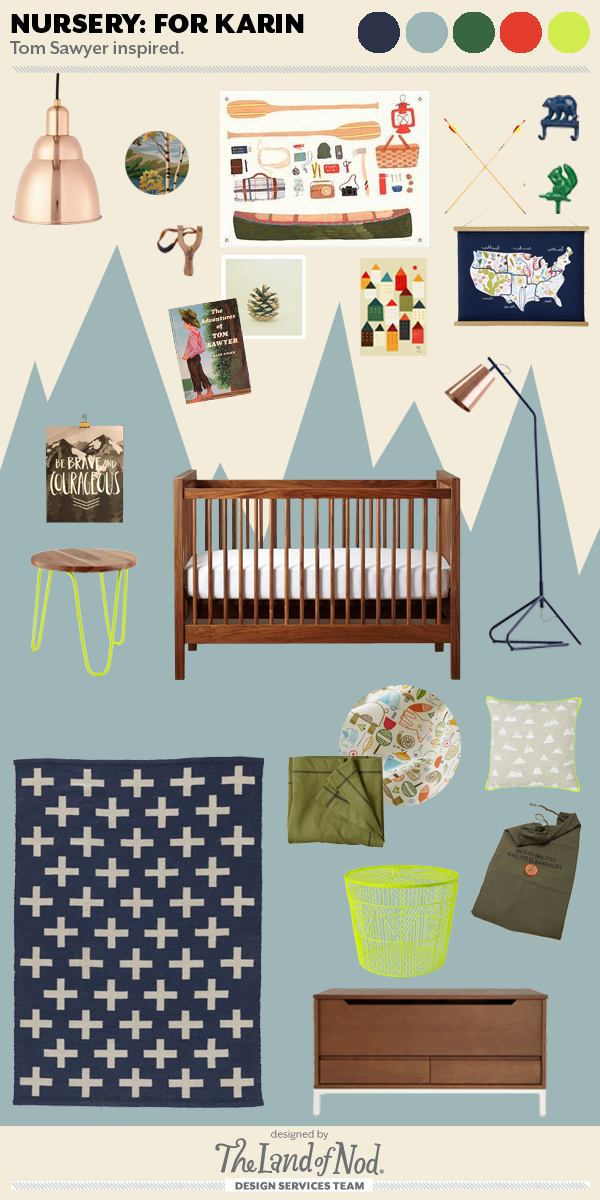
Tom Sawyer Inspired Boys Nursery

April 2, 2015

Post by Kim Doren of The Land of Nod’s Design Services Team

The inspiration for this boys nursery design was the the cover image of Tom Sawyer. One-year-old Cal finally moved out of Mom and Dad’s room and needed a place to play and grow. Mom wanted a focal wall so Kim created a mountain that could be easily painted at home without the help of a professional painter. Kim added a few neon & copper pops to add interest to the room while keeping the focus on the overall theme.

Tom Sawyer Inspired Boys Nursery Copper Fine Alloy Pendant / Paint By Numbers Circle / Slingshot / Outdoors Canoe Banner / Camp Wandawega Arrows / Bear Wall Hook / Squirrel Wall Hook / Floral USA Canvas / City Maze Print / Loft Floor Lamp / Anderson Walnut Crib / Mountain Throw Pillow / Vintage Laundry Bag / Nature Trail Crib Sheet / Green Sweatshirt Blanket / Indoor+Outdoor Blue Rug / Neon Yellow Nightstand / Be Brave + Courageous Print /

Design by Kim Doren of The Land of Nod’s Design Services Team. Our Design Services team offers free one-on-one design advice, mood boards and space planning. You have a room to decorate? They’d love to hear from you.

Little Golden Books Story Hour

April 1, 2015

Post by Michelle of Avery & Augustine 

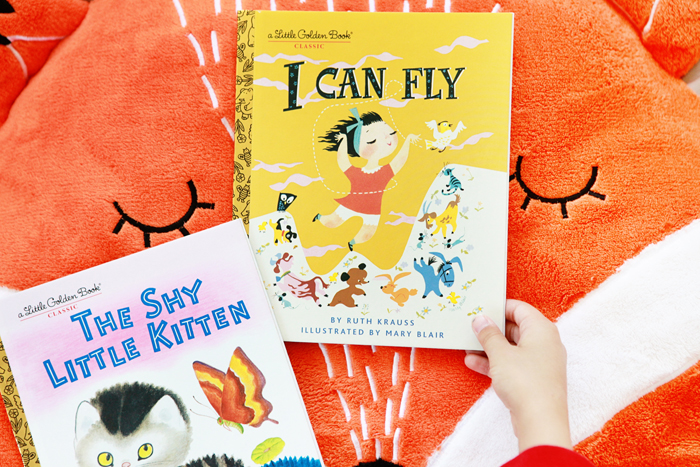
Who remembers reading their first Little Golden Book as a kid?  Well, they’re back!   Reading them with your own children will have you waxing nostalgic about your Little Golden Books story times from when you were a kid.  The Poky Little Puppy, The Shy Little KittenThe Little Red Hen and I Can Fly are some of the titles that your little ones will ask to be read over and over again.  Add a cozy nightlight and kids sleeping bag, and you’ve got a sweet new bedtime routine.   Little Golden Books Story HourLittle Golden Books Story HourLittle Golden Books Story Hour Little Golden Books Story HourLittle Golden Books Story HourLittle Golden Books Story HourLittle Golden Books Story Hour

Those lovable Little Golden Books characters have jumped out of their stories and onto an exclusively designed collection with The Land of Nod. Take a moment and check out the Little Golden Books for Nod collection!

You can see Michelle’s work and read about her two young children and their first forays in cooking, art and everything in between at Avery and Augustine.

TM and (c) 2015 Random House Inc. Under license to Classic Media LLC.

Tips for Traveling with a Baby

March 31, 2015

Post by Corri McFadden of Glitter & Bubbles

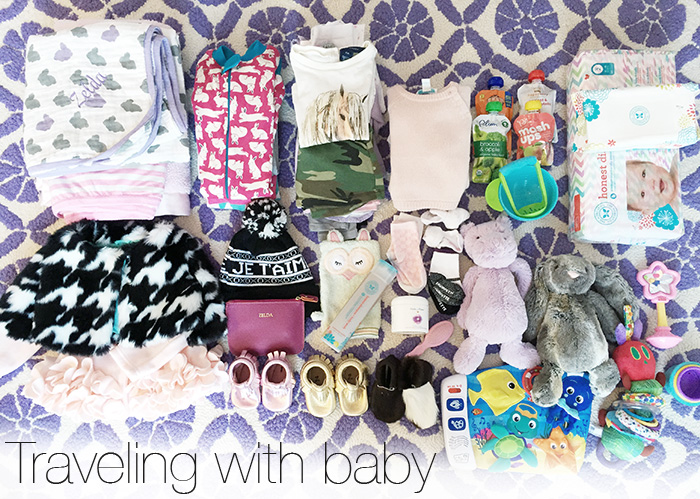
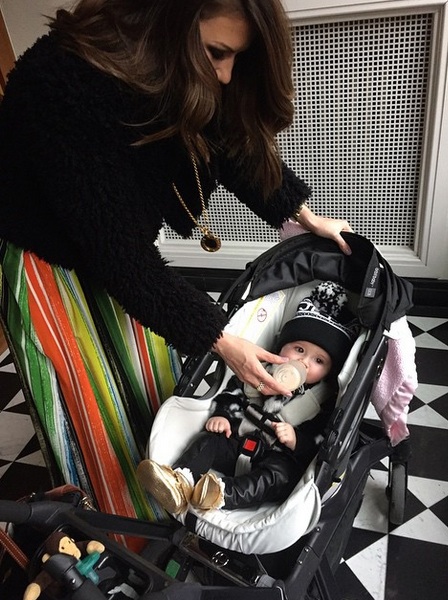
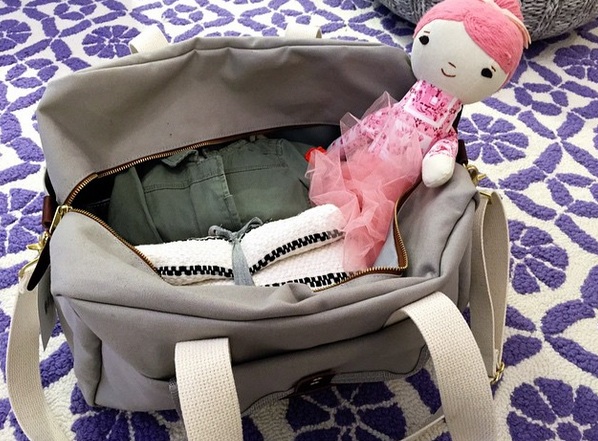
traveling-with-a-babyThese days, unless you are a celebrity mom like Queen B, flying with your little ones can seem like an impossible and terrifying task. This past week I had the pleasure, yes I said “pleasure”, of flying to New York for Fashion Week with my daughter Zelda as my fashion partner in crime. This was however, the first time I would be traveling alone sans dad or nanny. At first, I had visions of an uncontrollable baby and angry looks from fellow passengers, but the more I planned ahead of time, the less likely it looked anyone would have a complete meltdown. Flying with babies will never be a walk in the park, but by preparing ahead of time with some traveling with a baby tips and pointers below, you can help to alleviate some of the stress and keep your sanity! Tips for Traveling with a BabyTraveling with a Baby Tip 1: Heels and Wheels

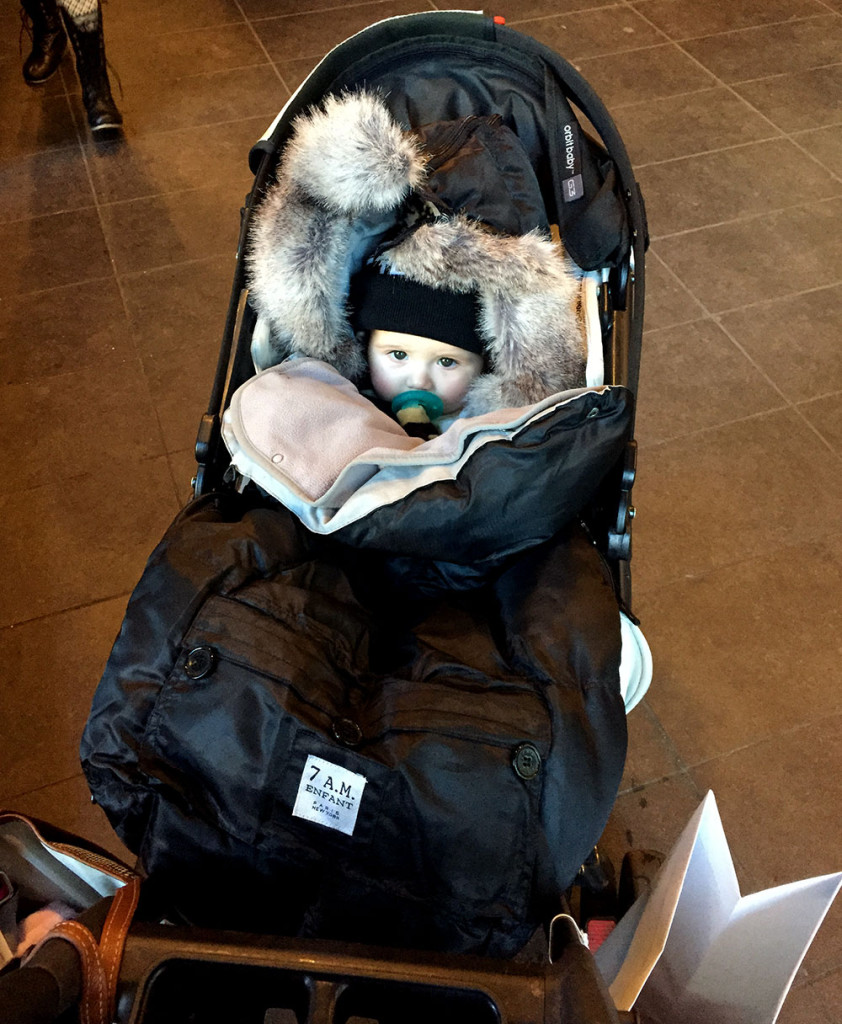
There is nothing like trying to fold up an overly complicated stroller while all the other passengers look on or having it tip over from the million bags we now have to bring to house all of our child’s needs. My Orbit stroller has saved my life! Look, I know it carries a heavy price tag but I also know I can open and close it with one hand which is super convenient when you have a baby in the other arm. Also, by the time you buy a snap n’ go, street stroller and travel stroller, these combined are the same price as one good one.

Tips for Traveling with a Baby - StrollerTraveling with a Baby Tip 2: Anti Baby Carriers!

It may seem like an easier alternative than a cumbersome stroller but if you are traveling alone, it is near impossible unstrap and strap yourself with any type of baby carrier. It can feel like a straight jacket!

Traveling with a Baby Tip 3: Keep Germs at Bay

Planes are some of the germiest places and are not always wiped down as thoroughly as we would hope. To keep babies and younger children from getting sick, swipe a bit of Neosporin under their nose, as to protect them from airborne germs. I would also suggest completely wiping down with those trusty disinfective wipes all parts of your seat (trays, seat belts, headrest) before getting everyone settled. It takes only 2-seconds and remember…we’ve all seen someone change a diaper on those tray tables!

Traveling with a Baby Tip 4: Shut It!

Many young babies and children have trouble with the varying air pressure on the plane and it can really hurt their ears. Unfortunately, not every individual is sympathetic to this so bring a tube of earplugs to pass around to your fellow passenger to help lessen the noise. They will appreciate the gesture!

Traveling with a Baby Tip 5: Bring an Arsenal of Plastic Baggies

…And fill these bad boys with snacks, toys and shiny objects. Don’t wait till you arrive at the airport to buy snacks for your baby, because most likely there will not be a lot of choices that your baby can eat. Also, don’t think his favorite rattle will be enough. Bring some items that have been hiding at the bottom of your toy bin – they will be new again to your excited little one!Tips for Traveling with a Baby - EntertainmentCorri McFadden is the owner and founder of eDrop-Off Luxury Consignment.  As a Style Expert and successful blogger, she hosts a weekly fashion segment on Chicago’s “You and Me This Morning”, and features “Style Recipes”, videos and Fashion “Must Haves” on her self-titled lifestyle website Corri McFadden.  Most recently, she launched Glitter and Bubbles, a modern day moms guide for those looking for inspiration through fashion, food and décor.

DIY Paper Floral Wreath

March 30, 2015

Post by Lidy of Hello Lidy

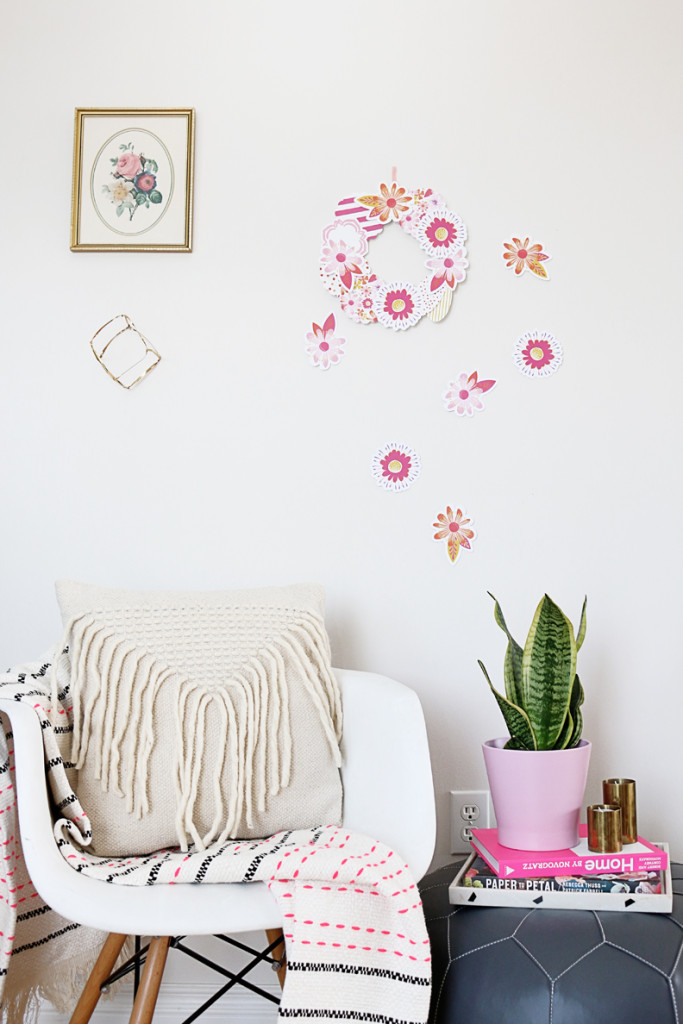
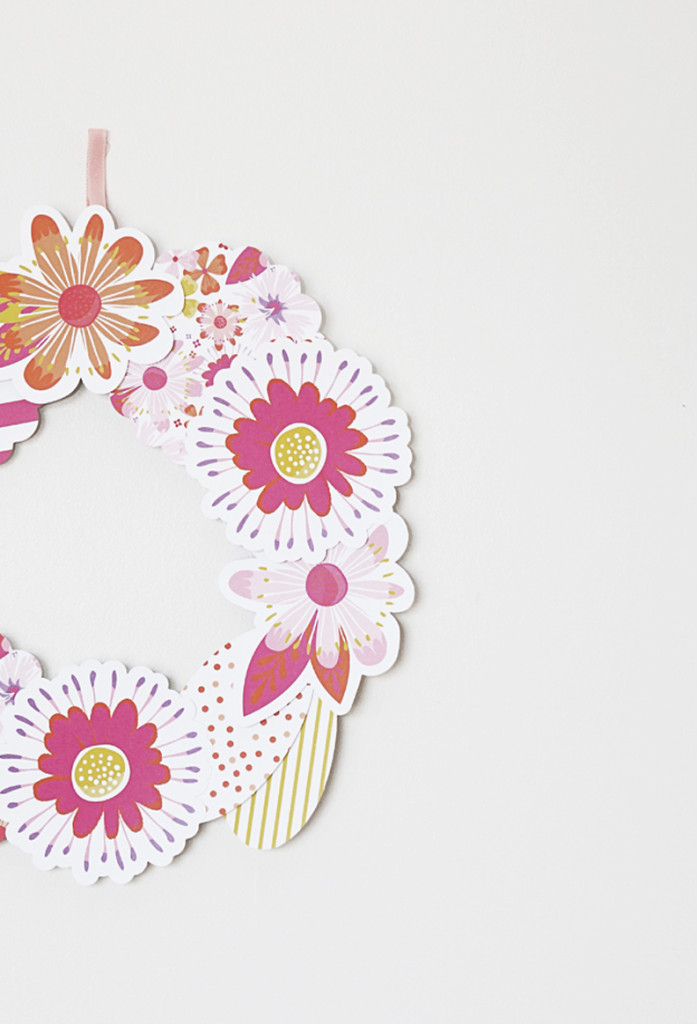
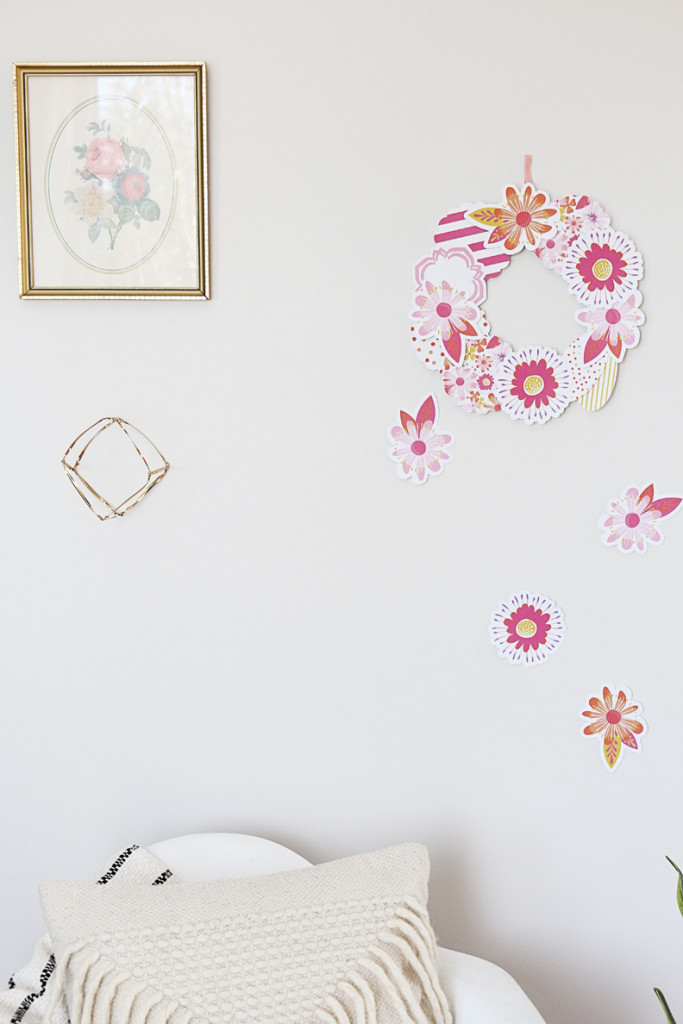
DIY Paper Floral WreathHey everyone! I’m so happy to be back to share with all of you an easy and springy DIY Paper Floral Wreath! It’s so simple and even a great little project to do with your little ones.
DIY Paper Floral Wreath

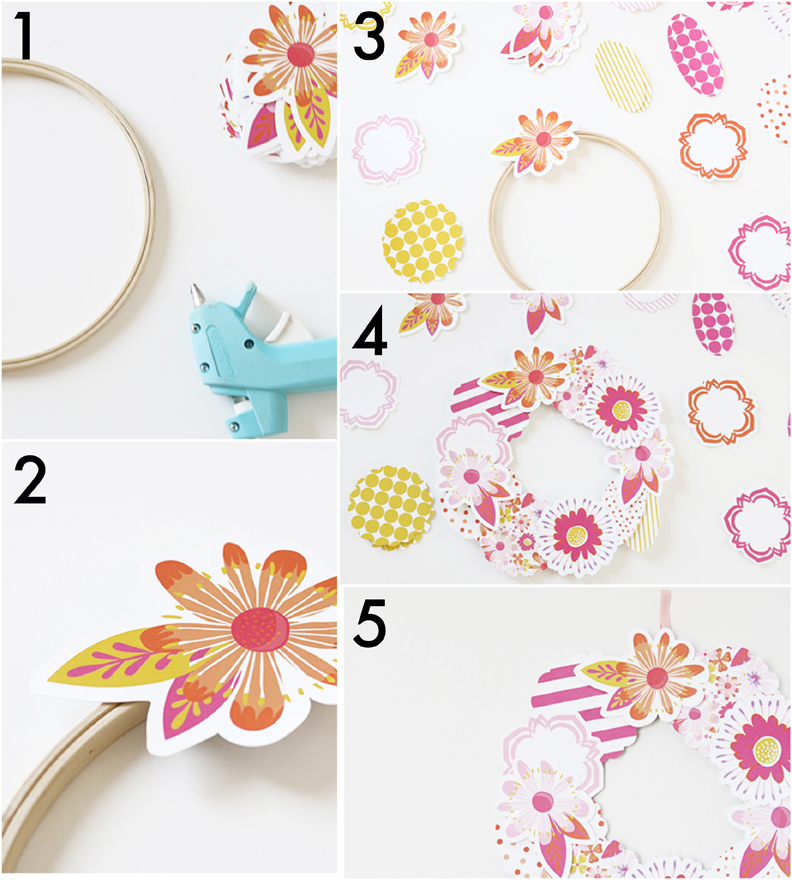
DIY Paper Floral Wreath Supplies:

  • Die-cut Flower Shapes
  • Embroidery bamboo hoop
  • Hot glue gun
    DIY Paper Floral Wreath Steps

DIY Paper Floral Wreath Steps:

  1. Simply organize your die-cut flowers in the pattern you would like.
  2. Once you are happy with the design, begin hot glueing the flowers to your hoop.
  3. Allow to dry completely. Be sure to not press too firmly, the paper could easily crumple.
  4. Continue steps 2 & 3 until your hoop is completely covered.
  5. Simply pull a piece of ribbon or yarn through the adjusting screw at the top, tie securely. Hang on your wall or door!

DIY Paper Floral Wreath It definitely feels a lot more like spring in our home! I made this paper floral wreath to add some bright and happy colors to our white walls. It’s so pretty and the colors make me feel so happy after a long winter! You could easily grab a larger hoop to make a bigger statement! I think it would look great above a fireplace or even an entryway mirror.
What are you doing to get your home all ready for spring?

XOXO, Lidy

Lidy is the face behind Hello Lidy: a blog focusing on creating and cultivating unique spaces that integrate original handmade designs and vintage pieces while keeping up on current trends and designs. Lidy and her husband have three adopted toddlers.

Party On: Easter Egg Hunt

March 27, 2015

Written by Becca of CAKE. | events + design

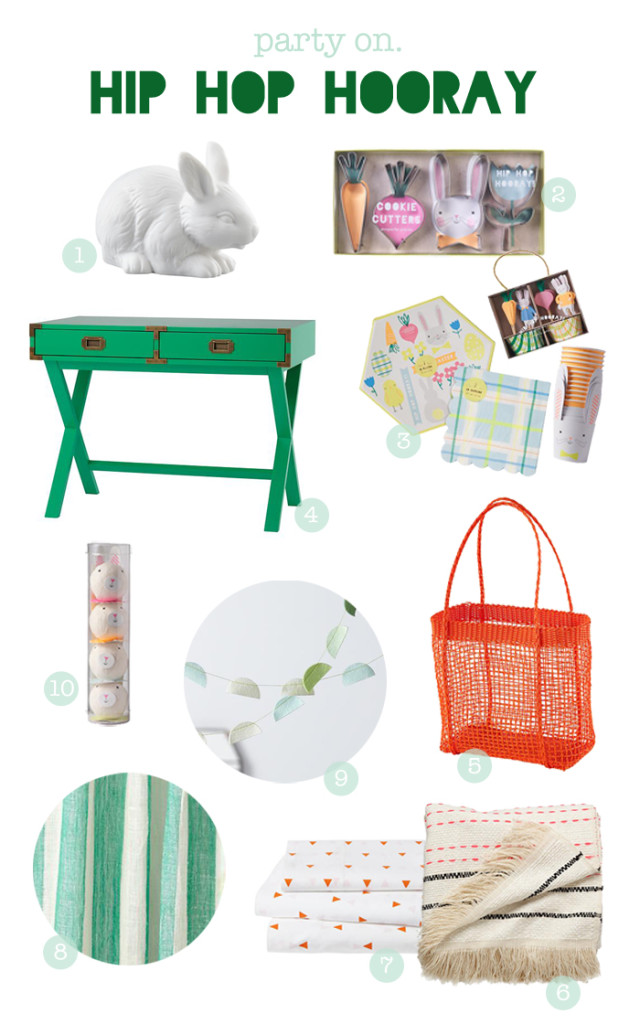
Meri Meri has created some Easter designs that are absolutely party perfect with Land of Nod’s style. So for this month’s Party On board, I’m incorporating them with green + orange accents to help you plan a very hip Easter Egg Hunt…

Party On: Easter Egg Hunt

1 // 2 // 3 // 4 // 5 // 6 // 7 // 8 // 9 // 10

Color Palette: spring green // carrot // sky // cotton
Party Invitation: available here

Here are my 10 tips for hosting a Hip Easter Egg Hunt:

1.  Obviously, bunnies are a must. Pull together an eclectic collection like this bunny lamp and place them in unexpected spots.

2. This green campaign desk is my favorite piece of the season and would make an ideal buffet or treat table (I’m thinking make your own Benedict bar!). You can open the drawers a bit to hold all your plates and flatware.

3. Establish boundaries for the Easter egg hunt ahead of time and mark them off with pretty party garlands.

4. For the egg collection, try totes or shoppers in place of traditional Easter baskets – and reuse them all season long.

6. Reward the sharpest little eyes by hiding special surprise eggs in sneaky spots, or create a scavenger hunt and offer clues to finding them.

7. For an outdoor egg hunt, throw down blankets in the grass so that when kids are done hunting, they can get right down to the business of opening their eggs.

8. If you have mix of ages, let the younger ones hunt first.  Then set up a more challenging hunt for the older kids and designate the parent with the best voice (or accent!) to read classic bunny stories like the Beatrix Potter collection or the Velveteen Rabbit to the littles.

9. You know everyone is will want to capture their children in Easter attire- so hang a simple photo backdrop using a patterned sheet or curtain panel.

10. True, you don’t need to do favors after an egg hunt, but these Meri Meri Easter cookie cutters are kind of begging to be used.  So either bake up some fun cookies for dessert, or send one home with a few mini eggs in clear bags tied up with a bow. It doesn’t get much cuter than that.

And if you need an invitation to coordinate, I happen to have just the thing in my Etsy shop.

The Party On series offers inspiration for family friendly parties, featuring items from The Land of Nod that can be incorporated into both your event and your home.

Becca Gorski lives in the SF Bay Area, is a working mother of two, and moonlights as an occasional designer / blogger / celebration maker. You can find her creative ideas on CAKE. | events + design, and her line of merry happy party printables on Etsy.

Spring Reading

March 26, 2015

Post by Michelle of Avery & Augustine 

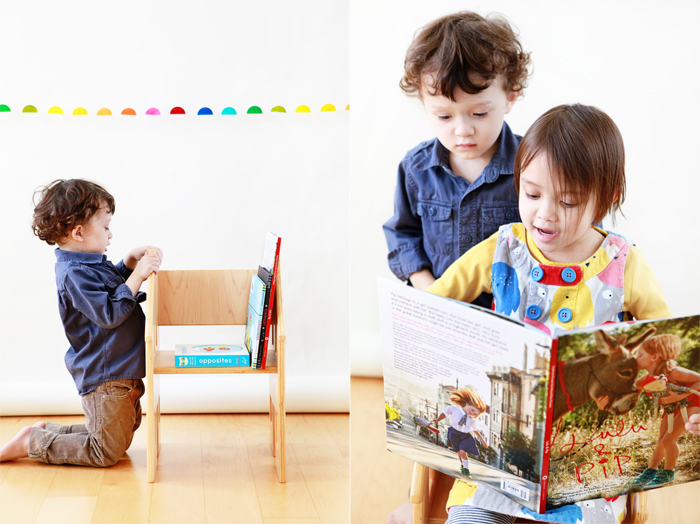
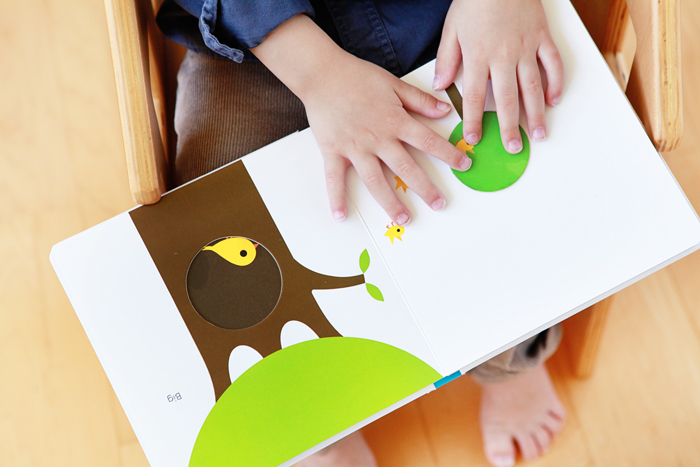
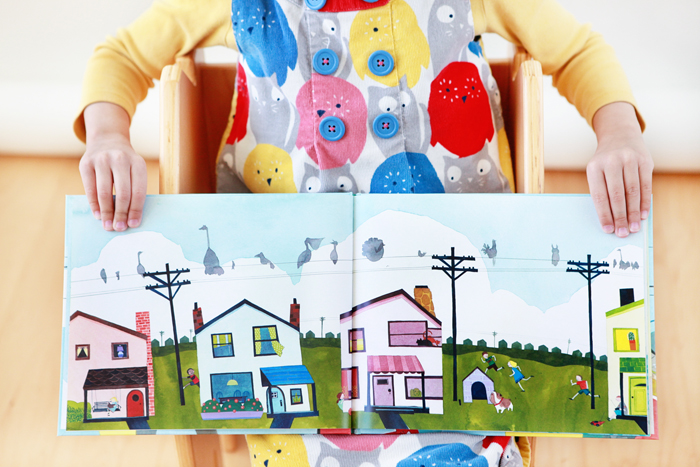
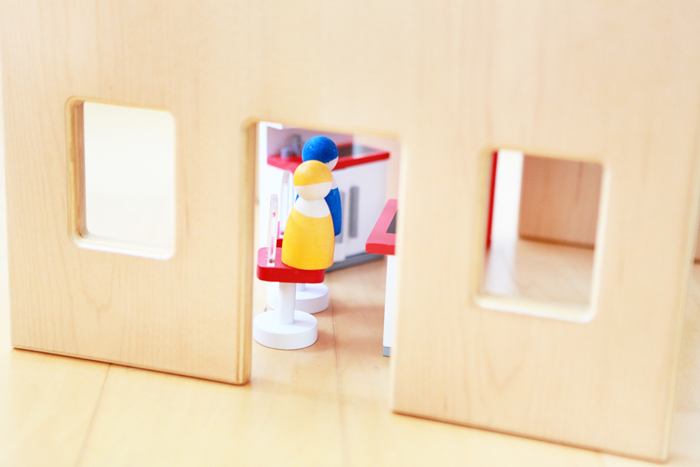
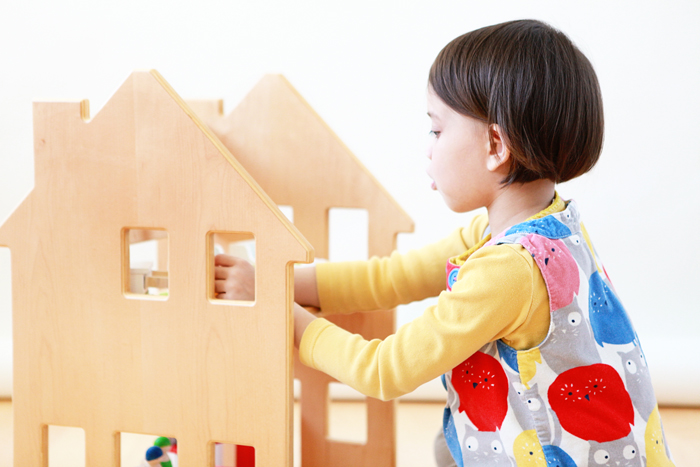
Spring Reading Play ChairSpring Reading Play ChairSpring Reading Play ChairSpring Reading Play ChairSpring Reading Play ChairSpring Reading Play ChairSpring Reading Play ChairSpring Reading Play ChairThis house sitter play chair doubles as a seat and dollhouse—you can’t say that about many chairs!  It’s spacious enough for a little family and their furnishings.  Other uses for it—as a nightstand or bookshelf—make it that much more versatile.  This rainbow garland is just the thing to brighten up any reading nook for the spring.  Stored in our house sitter chair is a small collection of fresh children’s literature. Here are a few of our favorites for spring reading:

  • Lulu and Pip, an endearing tale by the author, photographer and artist who brought you Kiki and Coco in Paris.  This one has a Northern California twist to it.
  • Flashlight, an engaging book for exploring the wonder of night, nature and art.  With your flashlight, of course!
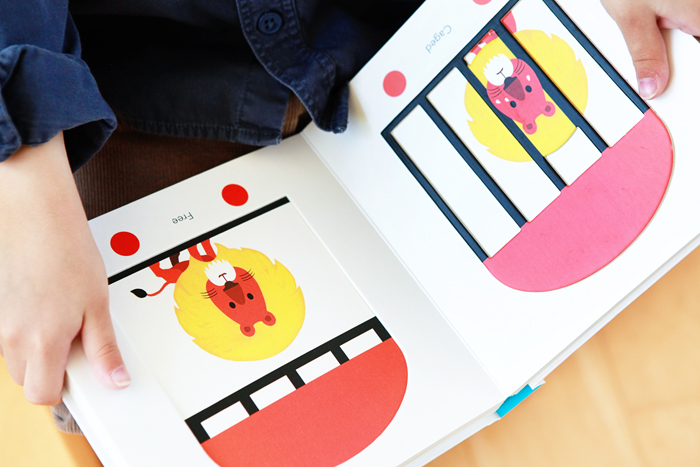
  • Opposites, from the Touch Think Learn series, which uses an important, hands-on aspect of learning–the tactile modality–to give life to a child’s first pairs of opposite words.
  • Telephone, a hilarious story about a message that goes topsy turvy as it makes its way through a group of birds (not unlike the fun game you might have played in elementary school).

Happy spring and happy reading!

You can see Michelle’s work and read about her two young children and their first forays in cooking, art and everything in between at Avery and Augustine.

The Chicken & The Egg Easter Party

March 25, 2015

Post by Nicole of Making it Lovely

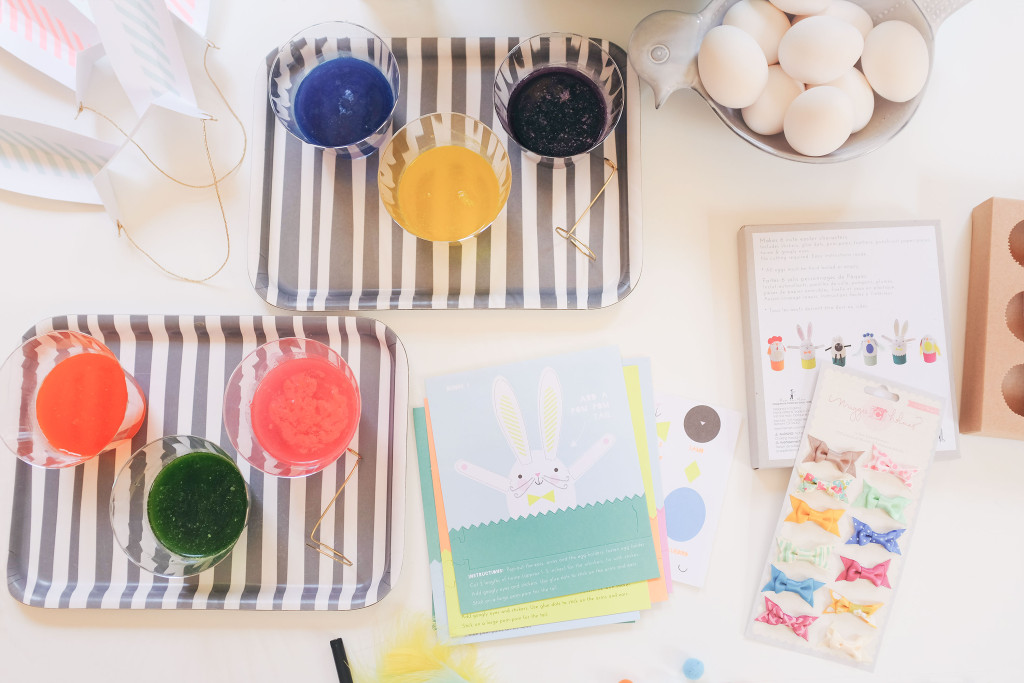
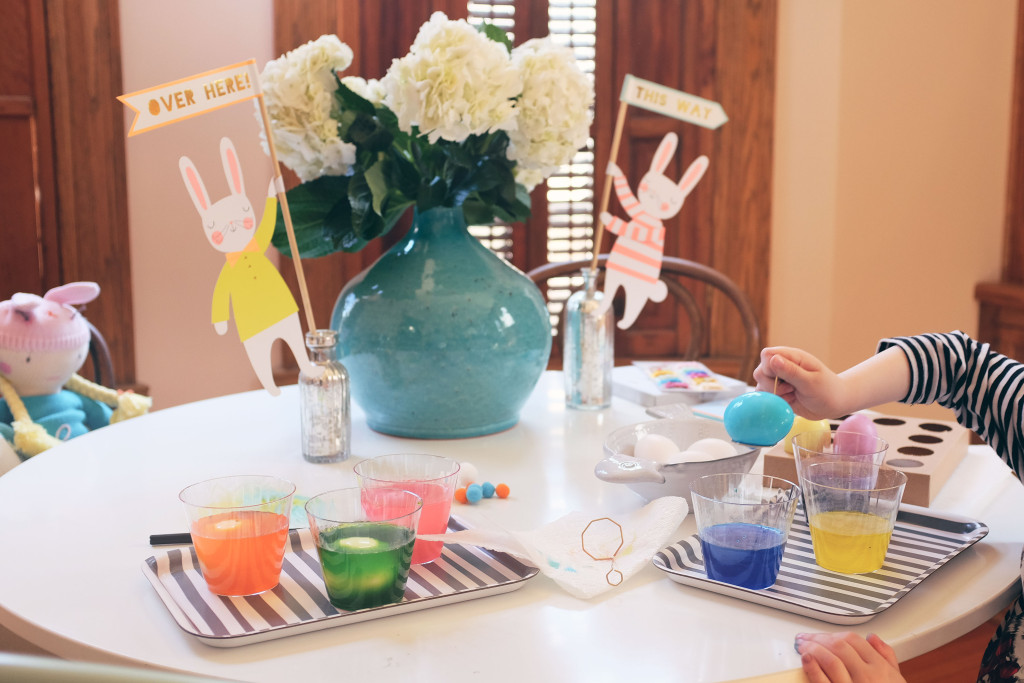
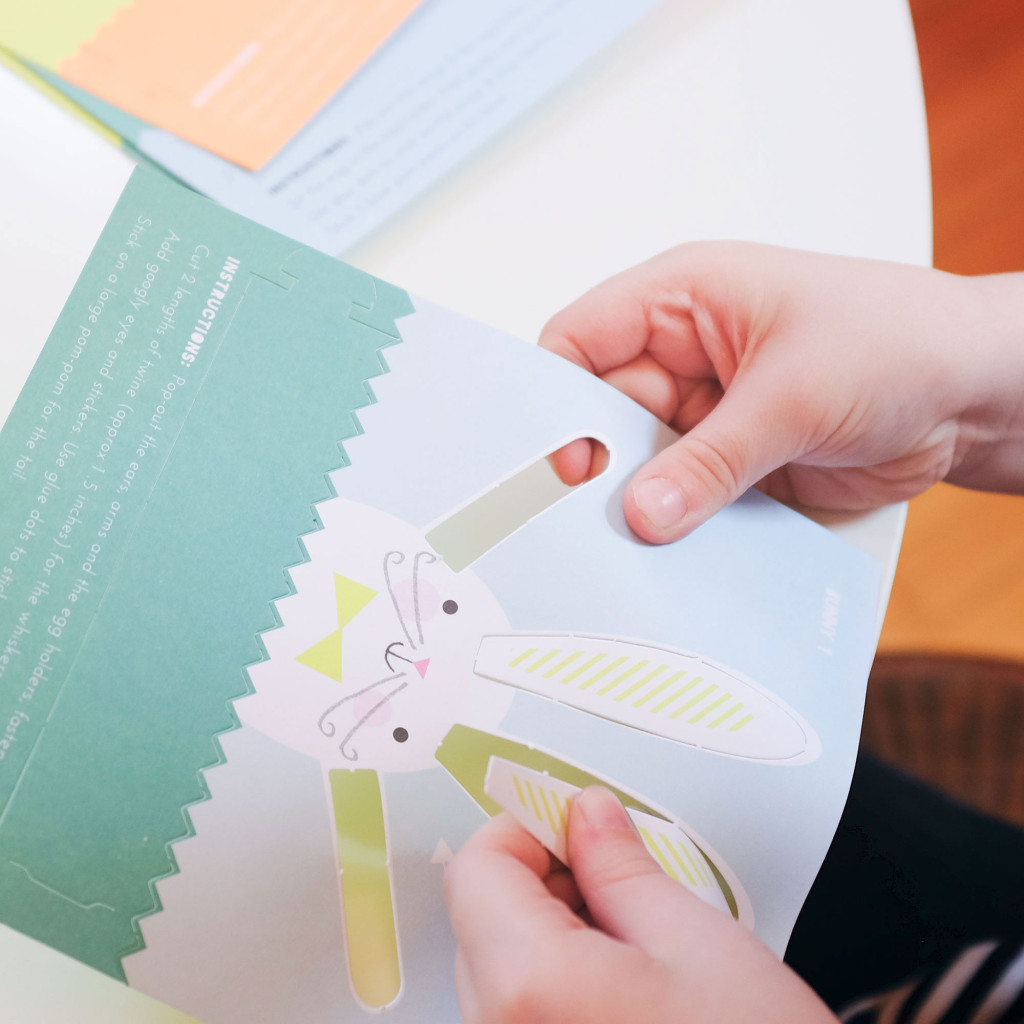
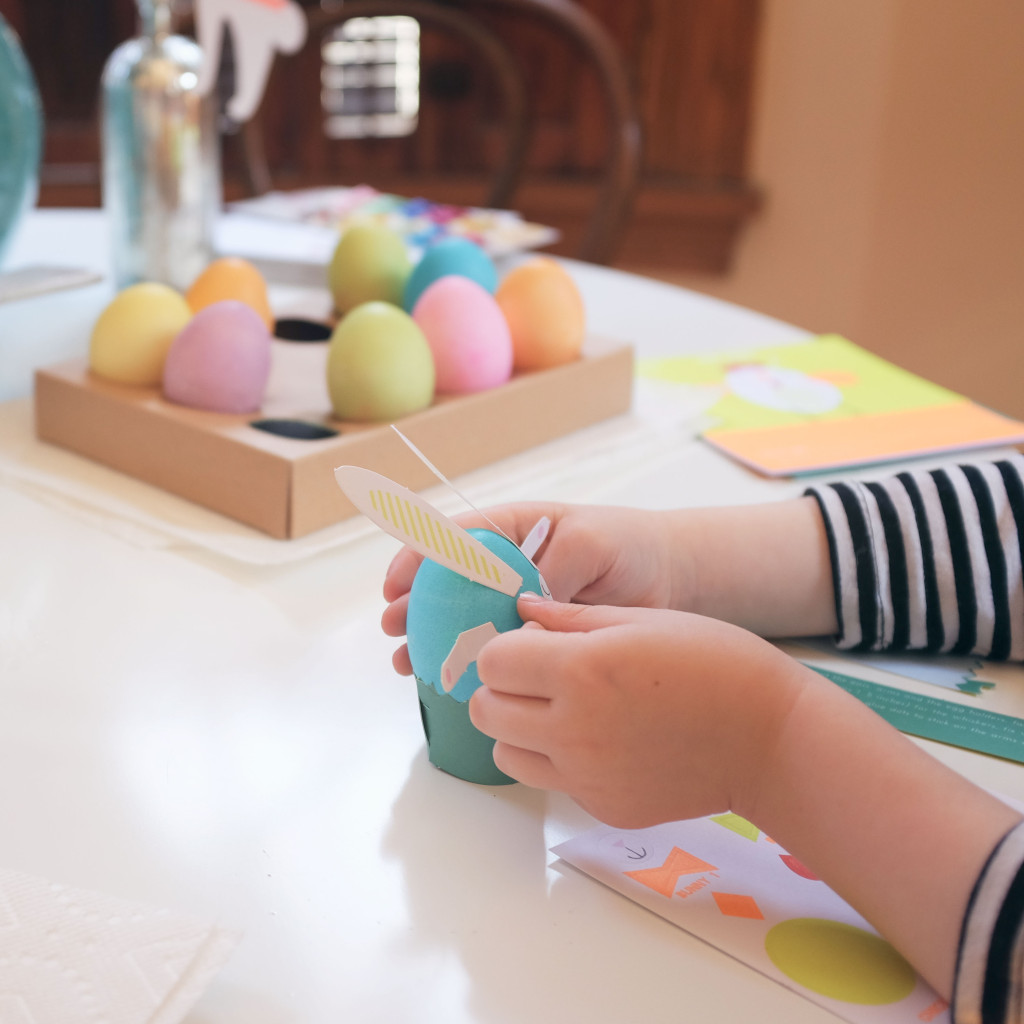
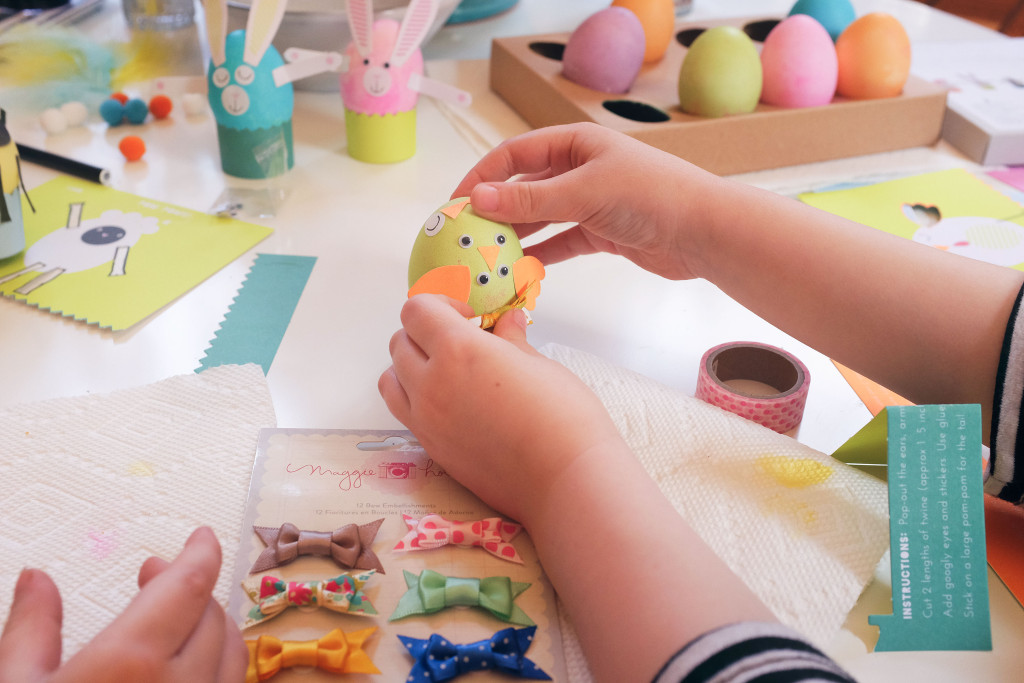
My kids like holidays (don’t they all?), but they’ve been really excited this year for Easter. For days, my son has been asking if it is “Easter Day” yet, so we decided to dye and decorate eggs and have a little Easter party to appease him until the holiday arrives. We hard-boiled our eggs and gathered some supplies: an egg decorating kit with stands, googly eyes, feathers, poms, and stickers, along with some egg dye and a pack of tiny bows. We had bunny ears to wear, too!

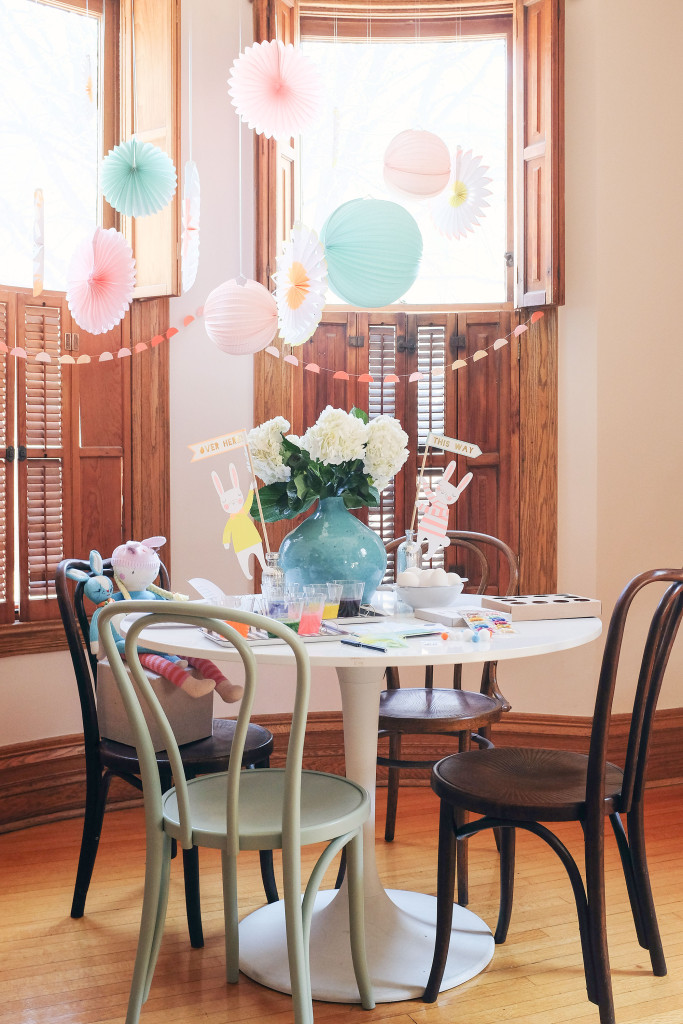
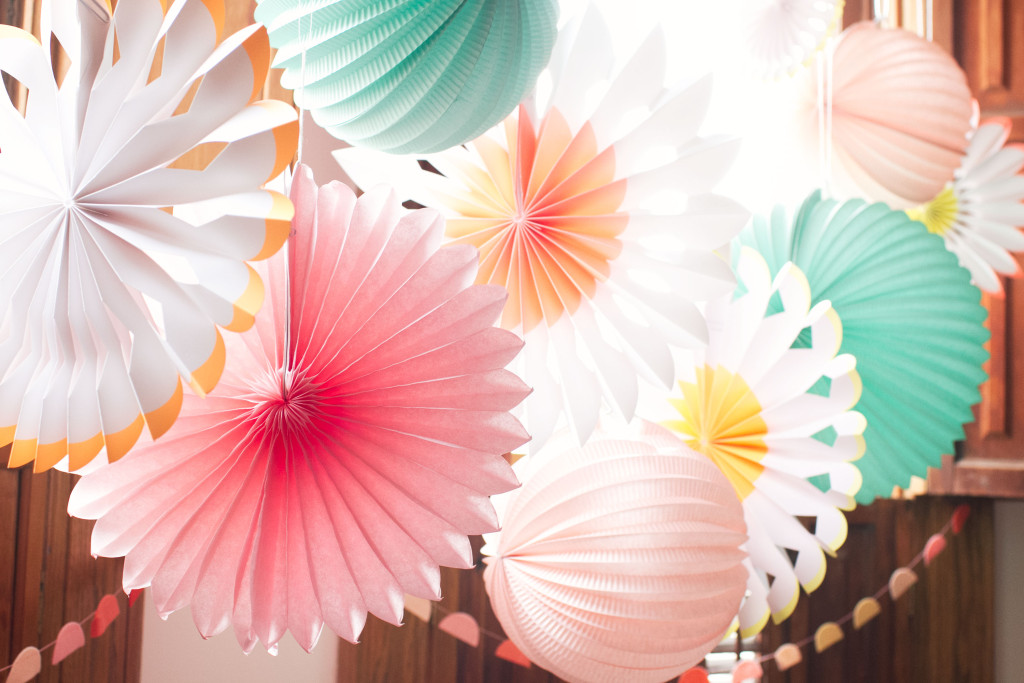
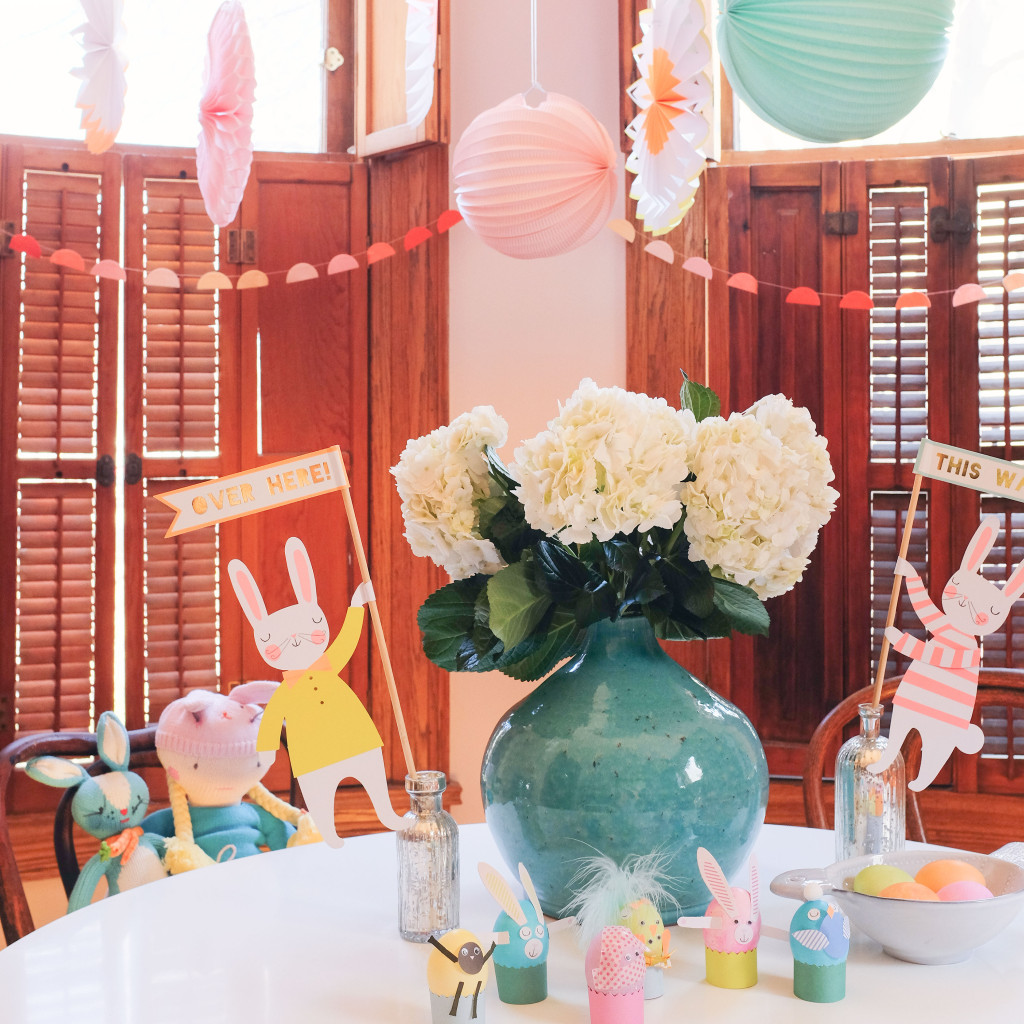
The Chicken & The Egg Easter PartyHow adorable are those paper lanterns and pinwheels? We were hosting a brunch the next day, so we got to dye our Easter eggs surrounded by some really cute decorations. We were joined by a couple of the cutest plush friend and her bunny too, for added measure.

The Chicken & The Egg Easter PartyThe Chicken & The Egg Easter PartyThe Easter egg decorating kit works well with undyed white eggs, but my kids wanted them to be colorful and I was happy to oblige.

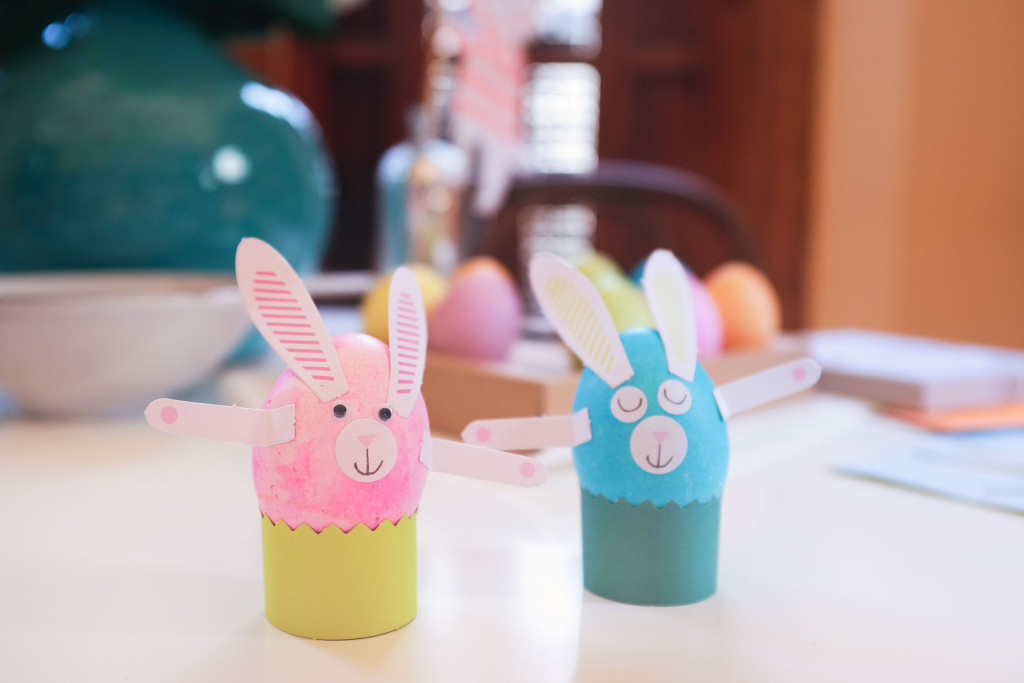
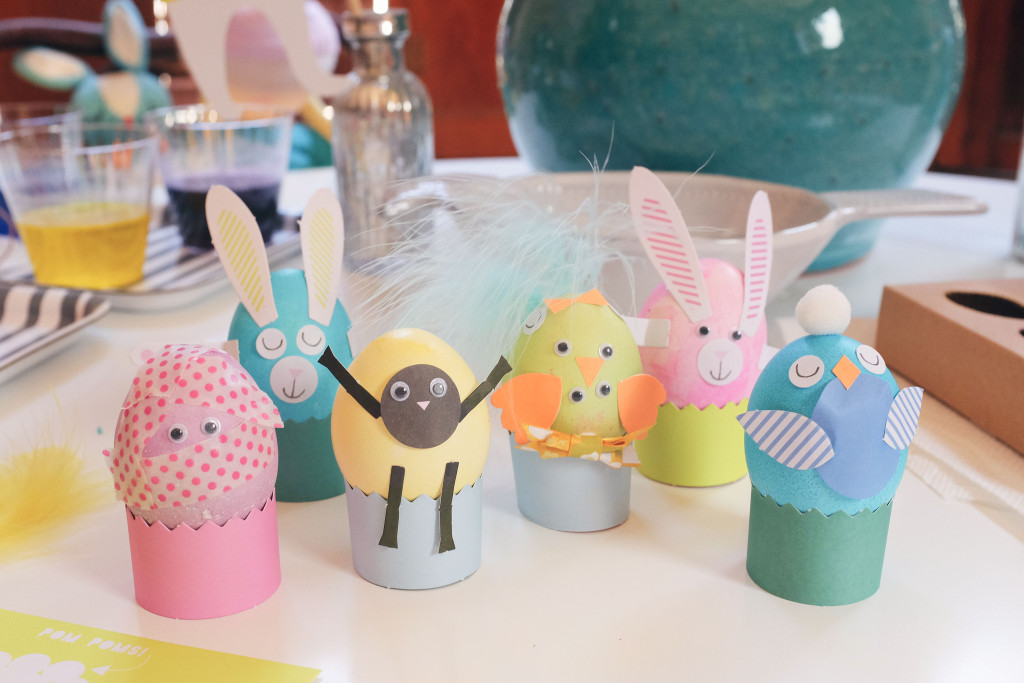
There were six animals to make for our Easter party: two bunnies, a sheep, two birds, and a chicken. We went for the bunnies first.

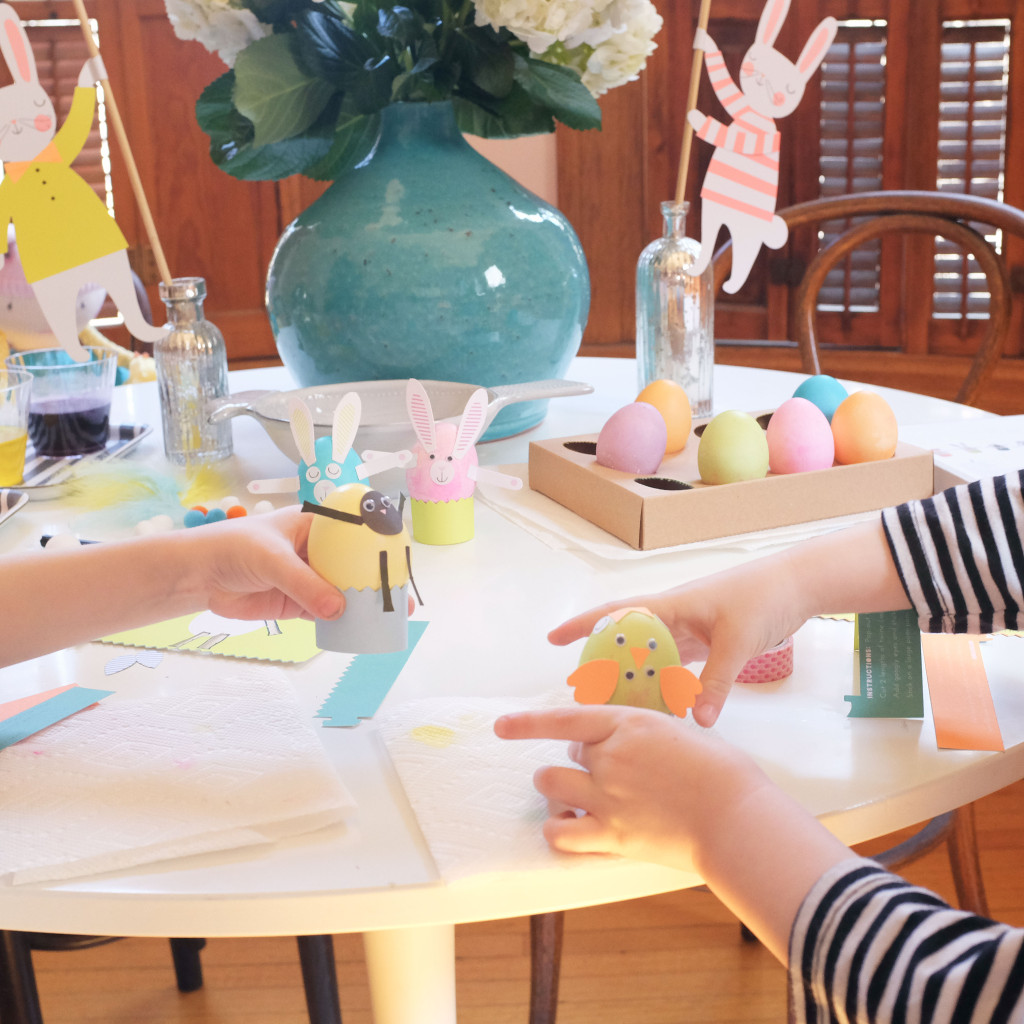
The Chicken & The Egg Easter PartyThe Chicken & The Egg Easter PartyThe Chicken & The Egg Easter PartyThe Chicken & The Egg Easter PartyAw, so sweet. We made a couple of the other animals too, before things got a little weird. And by “weird” I mean totally awesome. What has six eyes, two beaks, wings, and a bow-tie? Monster chicken!

The Chicken & The Egg Easter PartyThe Chicken & The Egg Easter PartyIn the end, we ended up with our two bunnies, a sheep, a bird, our monster chicken, and a mummy. We also had plenty of giggles, a couple of happy kids, and half a dozen really interesting hard-boiled eggs to eat.

The Chicken & The Egg Easter PartyNot a bad way to celebrate Easter Day!

The Chicken & The Egg Easter PartyNicole Balch writes Making it Lovely, a design and lifestyle blog about living a stylish life and transforming the so-so. She writes about her old Victorian home, decorating and fashion, as well as her life as a wife, mother of three young children, and blogger turned breadwinner.

Book Nook Inspiration – Part 4

March 24, 2015

Post by The Land of Nod and Brightly

Welcome to our final installment of Book Nook Inspiration created in collaboration with Brightly. If you missed them, check out Parts 1, 2 and 3 for more tips. And, don’t forget to read to the bottom for details on our giveaway.

Book Nook Design Tips from Nod:
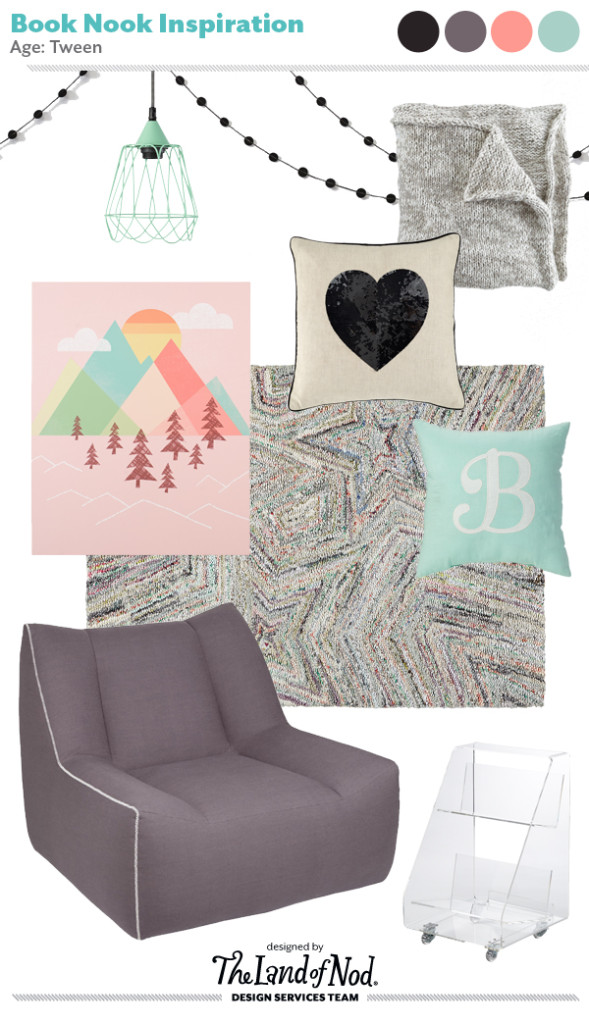
For this edition, we’ve put together a cozy lounge for your tween. We kept a focus on the three main design requirements of any reading nook, make it inviting, comfortable and quiet.

Tween Book Nook InspirationGrey Knit Blanket / Black Sequin Heart Throw Pillow / Typeset Throw Pillow / Seeing Stars Rug / Acrylic Book Cart / Open Arms Swivel Lounge Chair / Forest Poster Decal / Green Wiry Pendant / Black Spot Garland

Here’s how we put it all together:

  • Our Open Arms swivel is an ideal seat for a tween reading nook. It’s oversized and comfy, a great hang out spot.
  • We added a chunky throw blanket and sequin pillow to make it extra cozy.
  • The black accent in the throw pillow and garland make sure the space is not too sweet and contrast nicely with the soft pink and mint accent colors found in the rug and décor.
  • The acrylic book caddy brings in style and function.
  • Hang the wiry pendant above the chair for soft lighting.


Book Recommendations from Brightly:

The tween years are a great time to introduce a bit more complexity into a child’s reading life. At this age, kids will enjoy books with more of an emotional journey, as well as books with more sophisticated language and plot points. It’s also worth encouraging children this age to explore a wide range of books — from realistic fiction, to poetry, to fantasy.

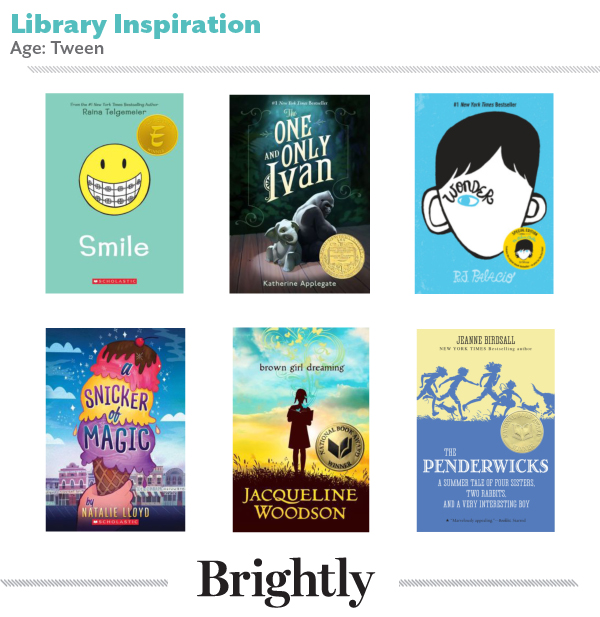
Book Suggestions for TweensOur picks:

  • Smile – Raina Telgemeier’s real-life experiences make for a humorous coming-of-age novel filled with great artwork and plenty of dental drama. Kids will identify with Raina’s struggles to forge her own identity and find real friends.
  • The One and Only Ivan – You’ll never think about caged animals the same way again. The One and Only Ivan is a heartbreaking but ultimately uplifting read about a gorilla and baby elephant who live in a circus-themed mall.
  • Wonder – Some books change the world. Some books change us. The best books do both. Wonder pushes young readers toward greater compassion, empathy, and acceptance of differences.
  • A Snicker of Magic – This much-lauded debut novel about the magical power of words will delight middle grade and tween readers.
  • Brown Girl Dreaming – Jacqueline Woodson’s highly acclaimed poetic memoir about growing up as an African American in South Carolina and New York in the ‘60s and 70s took home the National Book Award.
  • The Penderwicks: A Summer Tale of Four Sisters, Two Rabbits, and a Very Interesting Boy – Packed with summertime adventures and big-time family fun, this is a perfect read-aloud book for the whole family.

Curious what books tweens are recommending to each other? Check out Books Tweens Can’t Stop Talking About on Brightly.

Want the perfect kids’ reading nook? Enter to win $1,500 from The Land of Nod and $1,000 worth of books from Brightly. Ends 3/30.

Brightly is a new resource to help moms and dads raise lifelong readers. Brightly features book recommendations for every age and stage, reading tips and insights, seasonal inspirations, author essays, contests, gift guides, and more.

Gem Wall Decor DIY

March 23, 2015

Post by Danielle Kurtz, Creative Director at The Land of Nod

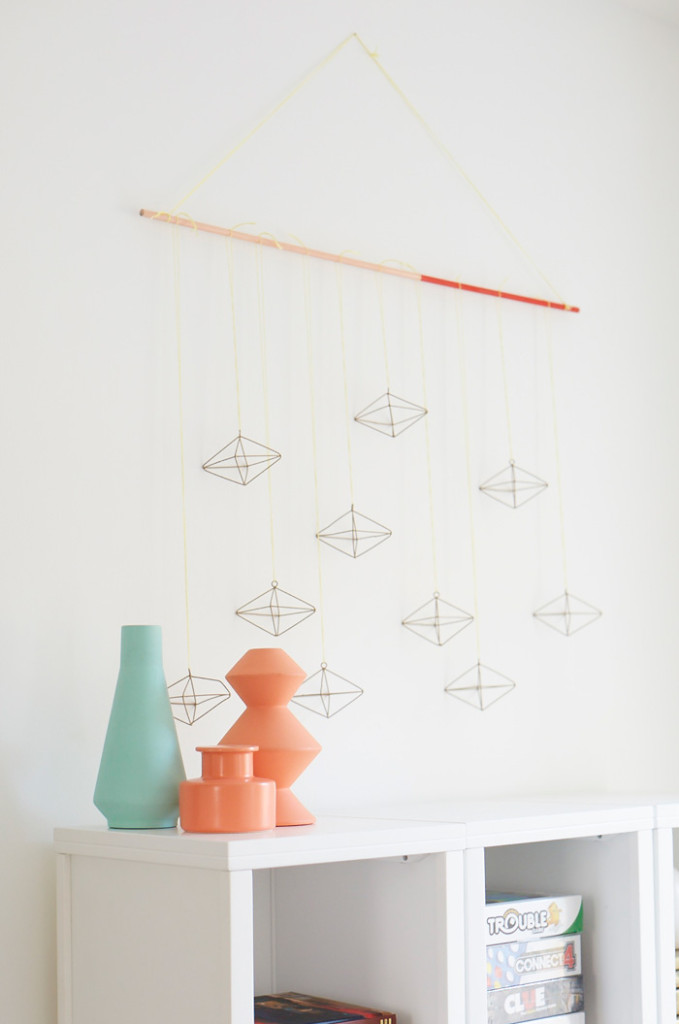
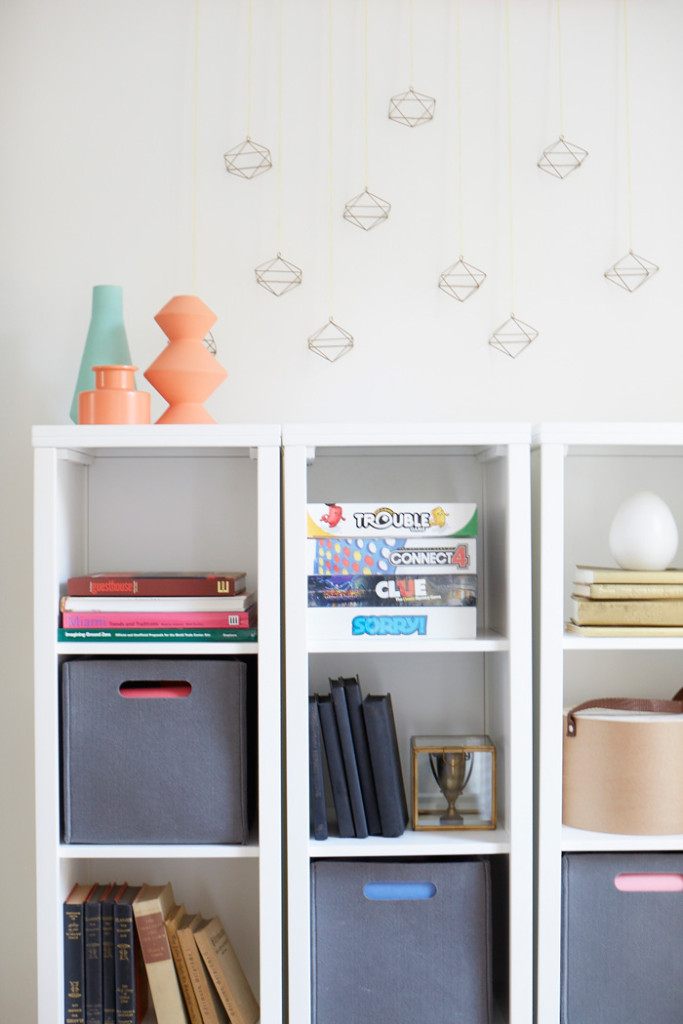
Gem Wall Décor DIYWhen I was styling the living room for the Nod Family Home, I needed a little something to hang above this bookcase. The entire room was very light and bright, so I wanted something delicate. Also, there was already quite a bit of wall art on the other walls, so I wanted to do something a bit different, and more dimensional. We’d brought along a handful of our gem ornaments to use as baubles in styling the bookcases, maybe put them in a bowl or vase, or just set them atop a stack of books, they’re so pretty! And, even though they’re technically Christmas Ornaments, that doesn’t mean they are only for the holidays or just for a tree for that matter!

Gem Wall Decor DIYHere’s what you need to make your own gem wall decor DIY:

  • Ornaments – you could choose any that fit your décor, we chose our Gem Ornaments
  • Dowel Rod – cut to length of your space
  • Paint optional – I painted the dowel rod half peach/half a neon orangey-pink
  • Embroidery Floss – pick a color to fit your space, I used a neon yellow to add a subtle pop of color

And, really, there’s not much to the “instructions.” But, here’s how I did it.

  • Determine the overall length of the space.
  • Cut lengths of floss to double your length, you’ll need one piece of floss for each ornament.
  • Thread floss through ornament and tie at the top, tie them at varying lengths, so the gems hit at varying heights. This isn’t an exact science, just create a composition that’s pleasing to you.
  • Loop the floss over the dowel rod.
  • Cut another piece of floss about 1 ½ times the width of the dowel.
  • Tie it at each end of the dowel rod, this will be your hanging piece, you may need to adjust the length once it’s on the wall.
  • Put a nail in the wall, and loop the floss over the nail.
  • You’re done!

It’s a really easy DIY, and the materials are inexpensive and readily available. You could even make this during the holidays with holiday ornaments, as festive décor. Or, instead of a dowel rod, try it with an embroidery hoop and hang it from the ceiling. It would act more like a mobile that would add lovely texture to any space.

Looking for our other Nod Family Home DIY’s? Check them all out HERE.

Danielle is the Creative Director at Nod and an over-protective mother of two. She’s also completely obsessed with Pinterest, Twitter, Instagram and her Kindle, but not necessarily in that order. Danielle loves to craft, sew and crochet. Her current craft of choice is weaving tiny wall tapestries.

Easter Entertaining Tips

March 20, 2015

Post by Aleah & Nick Valley of Valley & Co. Events

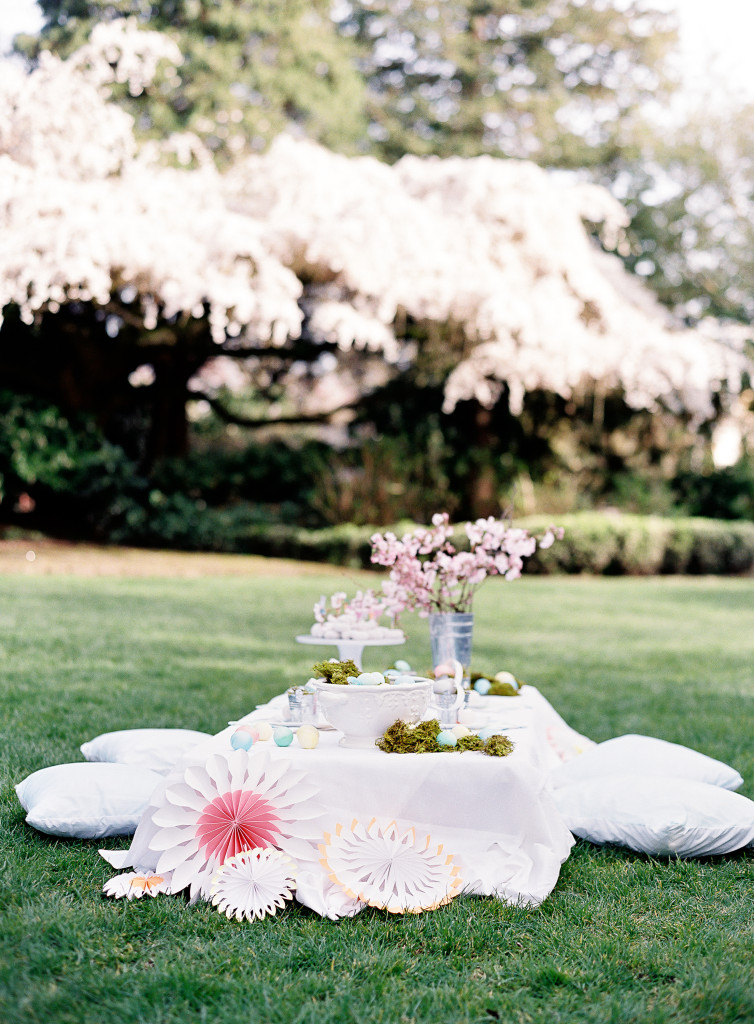
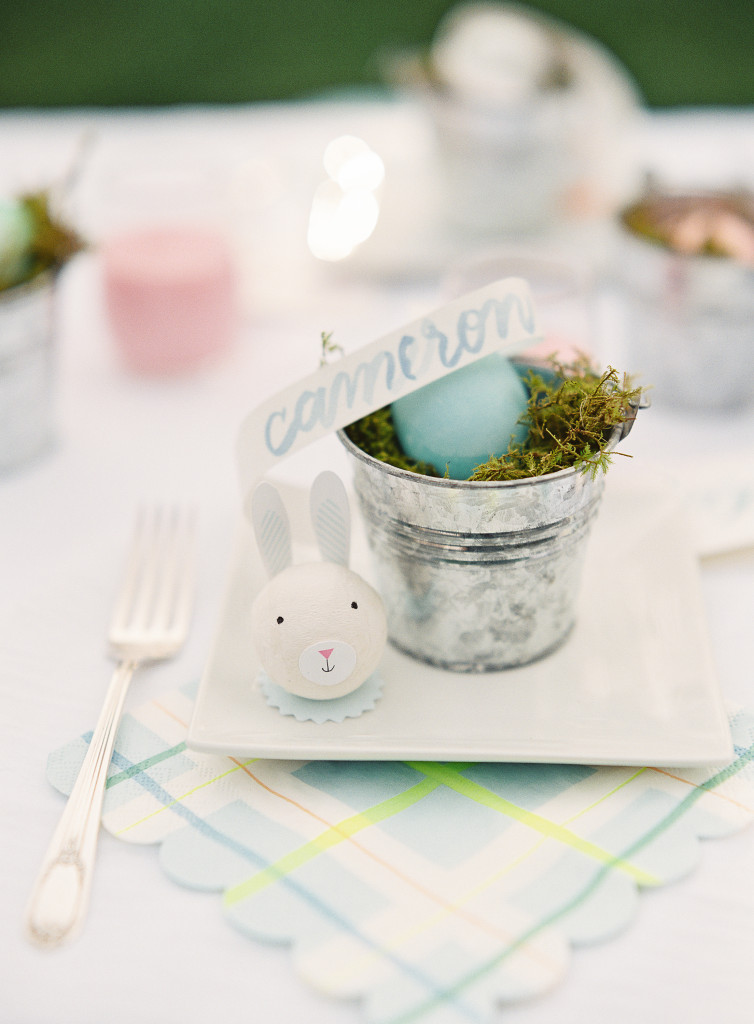
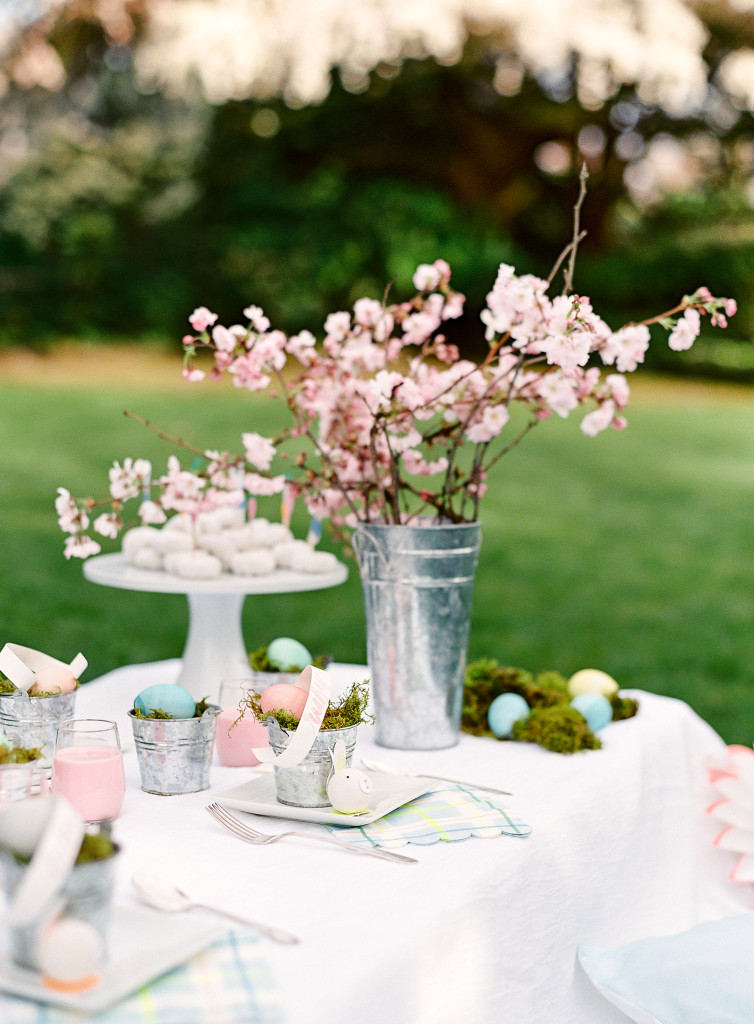
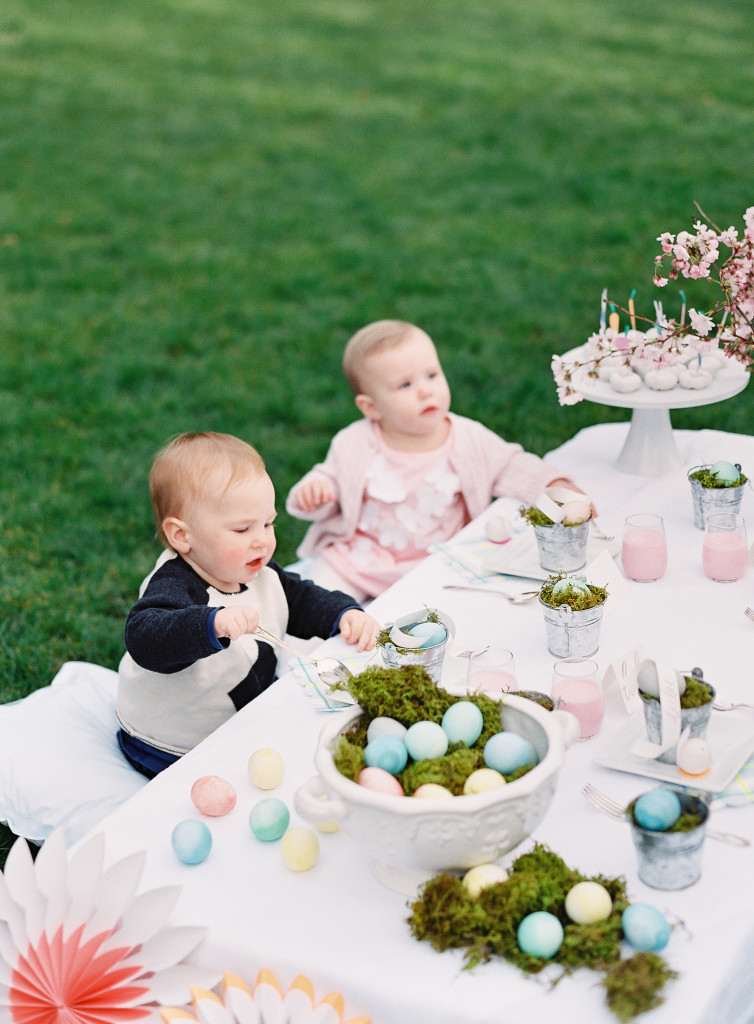
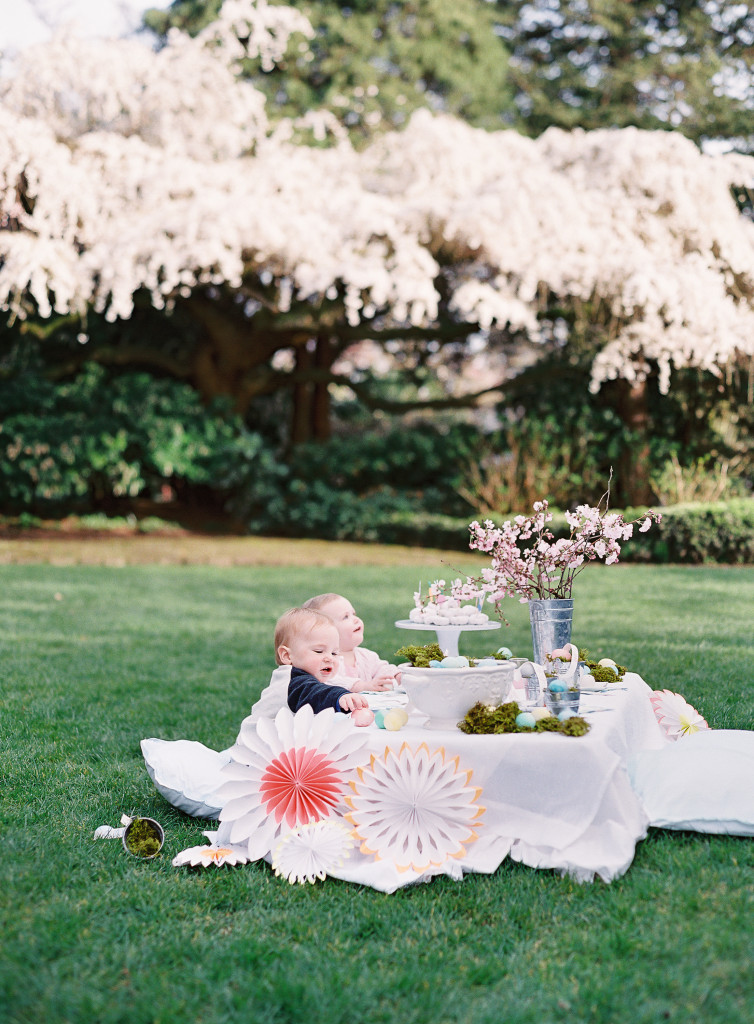
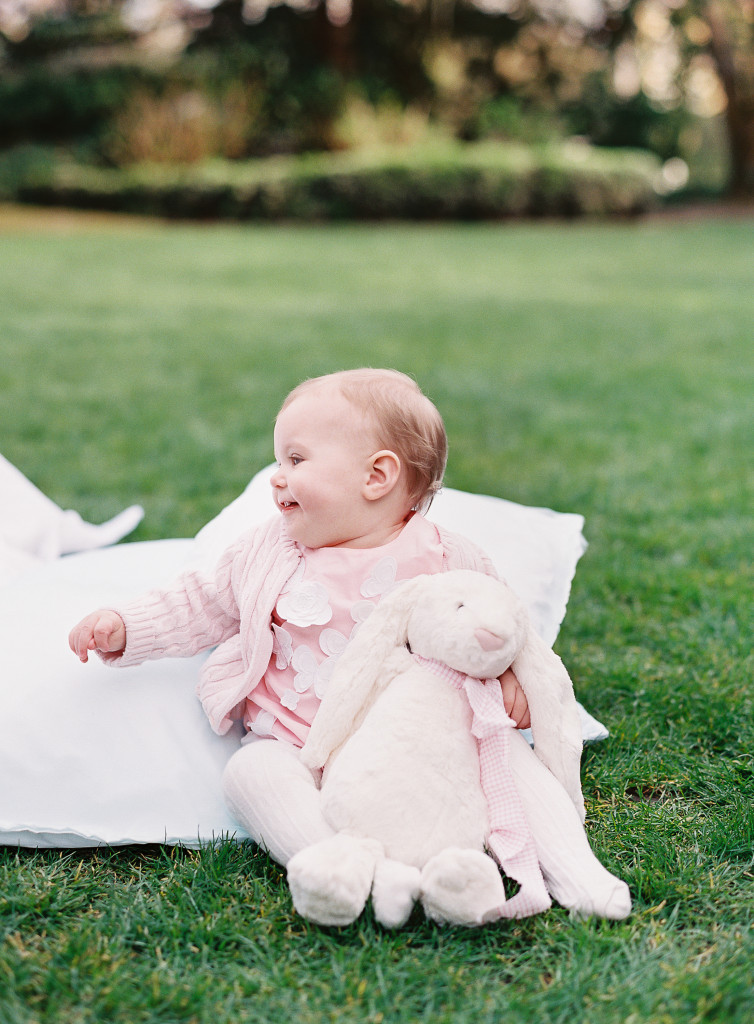
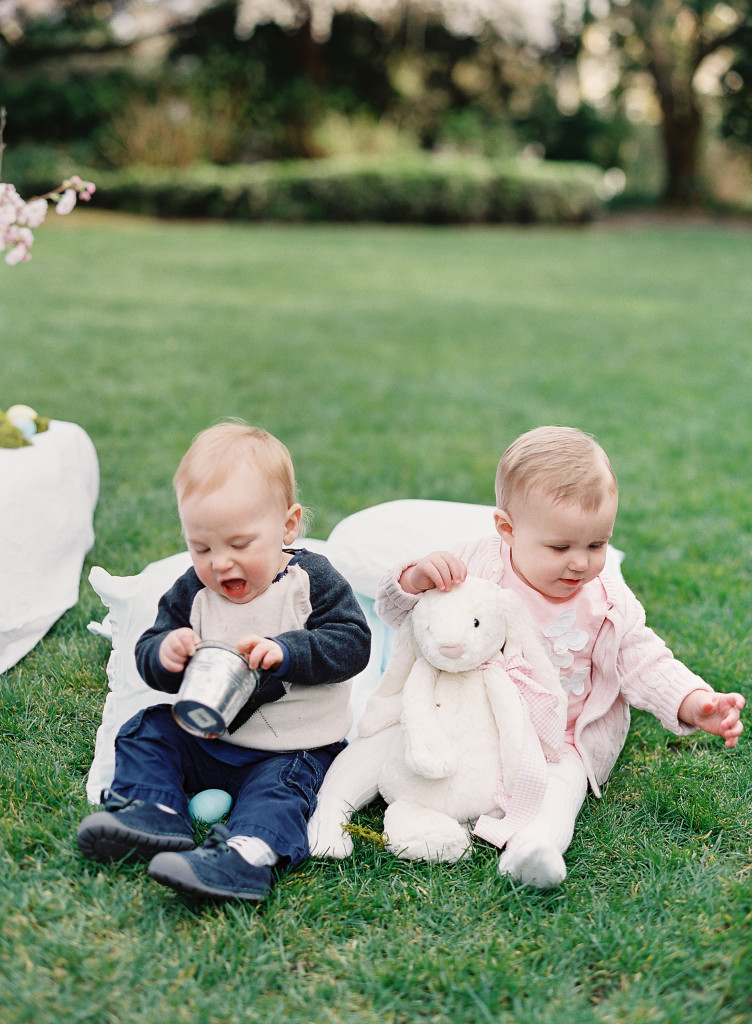
This year Easter is truly bringing out the kids in us. Each time our favorite springtime holiday rolls around {with cherry blossoms dancing trough the air}, our neighborhood gathers up all of the children for a block-wide Easter egg hunt and watch with excitement as the kids toddle along searching for speckled and vibrant eggs filled with coins, chocolates and treasures. Easter this year will be an wonderfully memorable experience as it will be Ava’s first! We will be hosting a post-egg hunt brunch and plan on having a bounty of delicious treats and a charming ambiance, all while entertaining effortlessly.

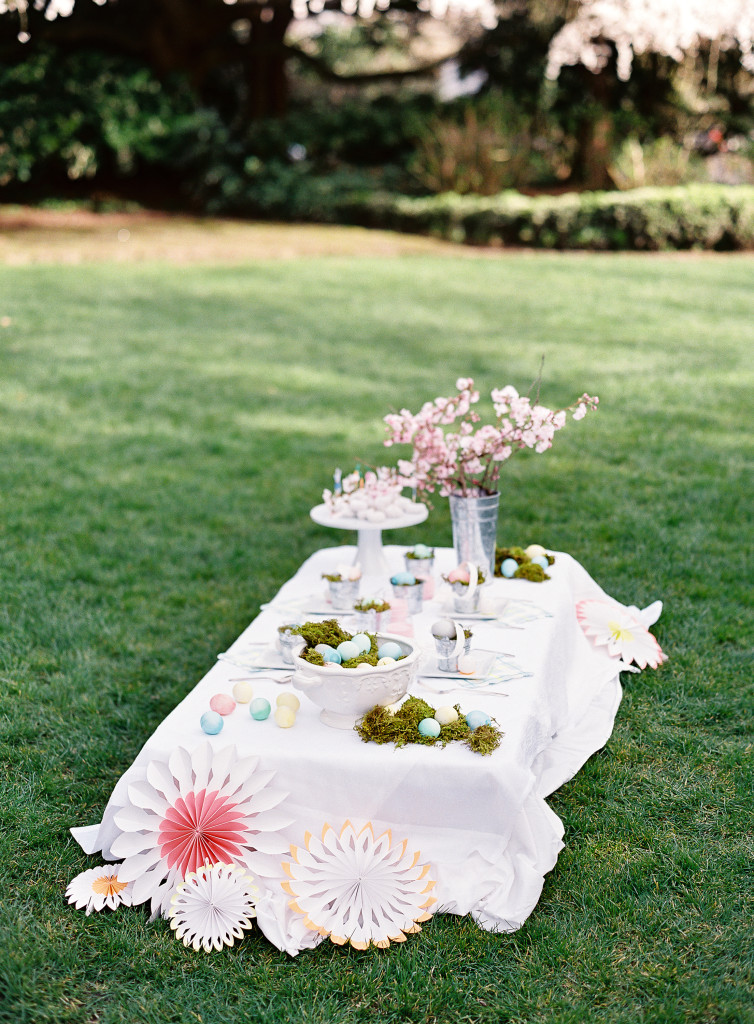
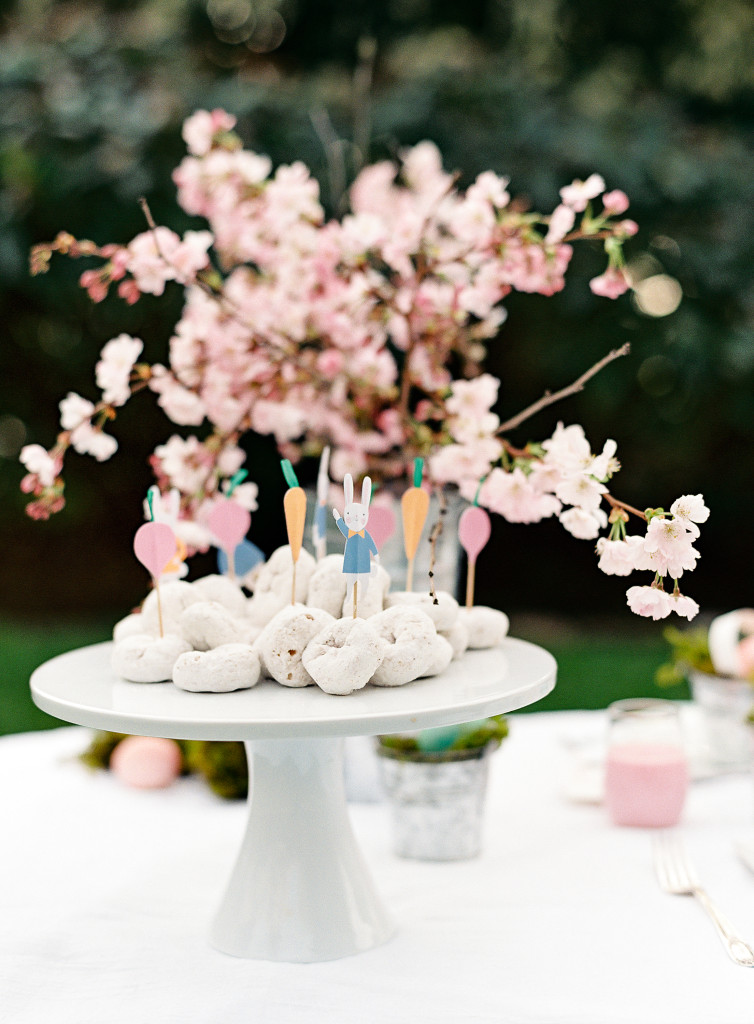
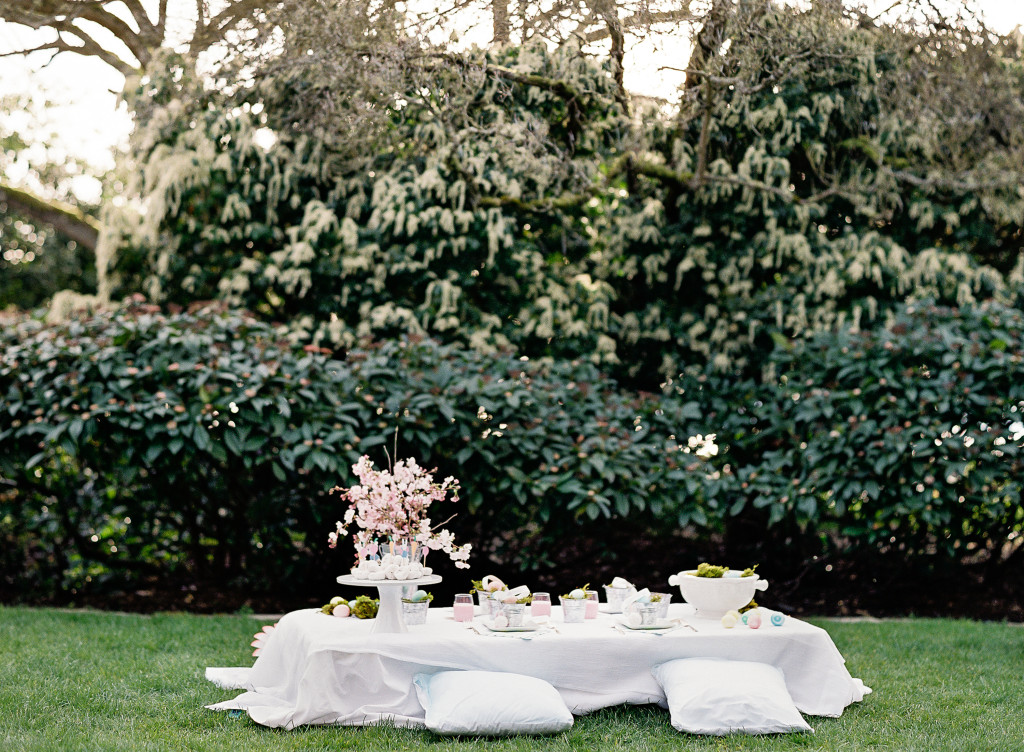
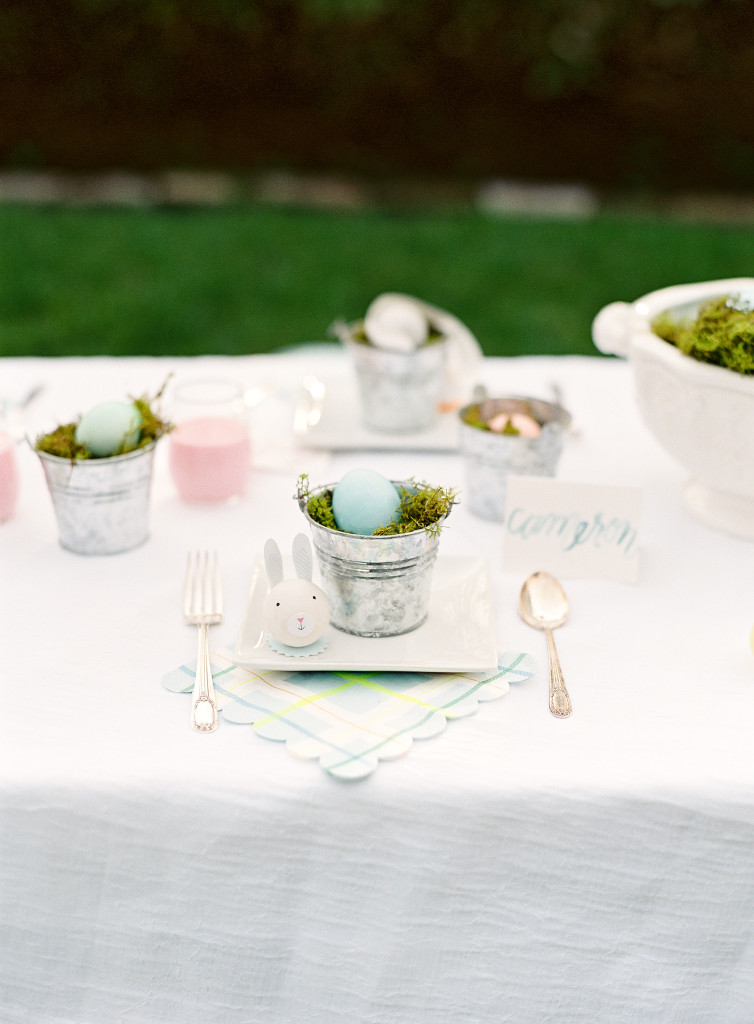
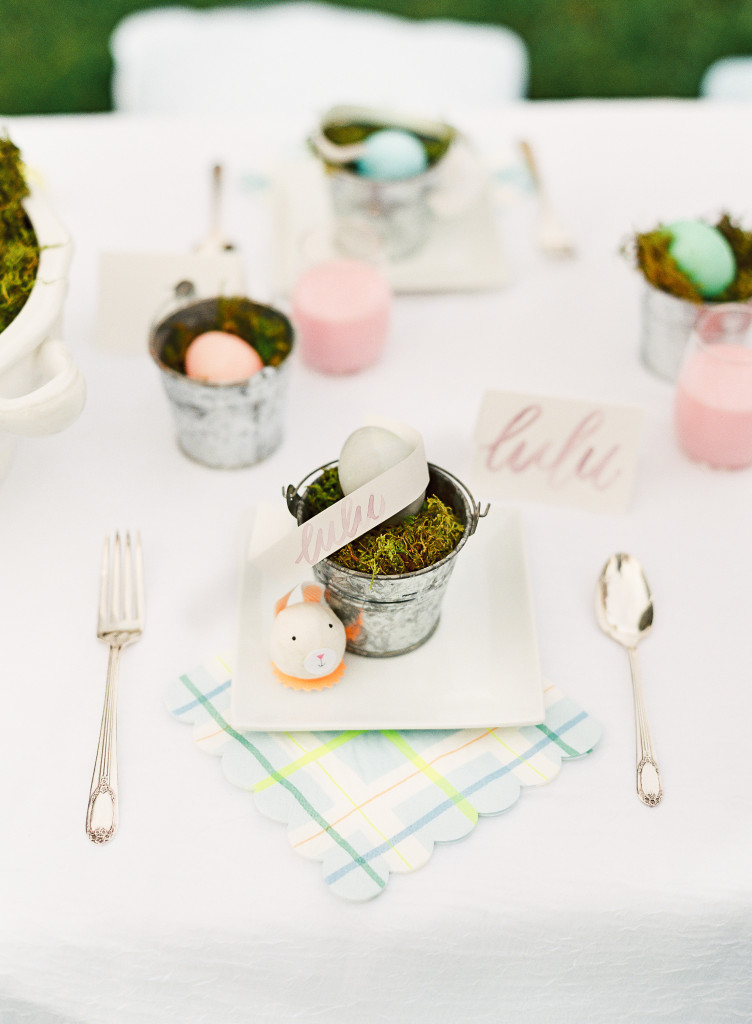
We encourage you to do the same, using a combination of items you have on hand and sweet accessories from Meri Meri found at The Land of Nod. Trust us, entertaining like a pro can be a simple feat. Below you’ll find some of our favorite at-home Easter entertaining tips, along with secrets on how we brought this table top to life for Easter.Easter Entertaining Tips Easter Entertaining TipsEASTER

  • Stage the kids’ table outdoors and make it low. We use a pop-up folding table and rather than extending the legs, we secured it by placing the top of the table on two crates.
  • Instead of cumbersome chairs, let the children sit on pillows {we sewed these using foam pillow forms, layers of tulle and muslin fabric} that can lend themselves to indoor decor when Easter is over
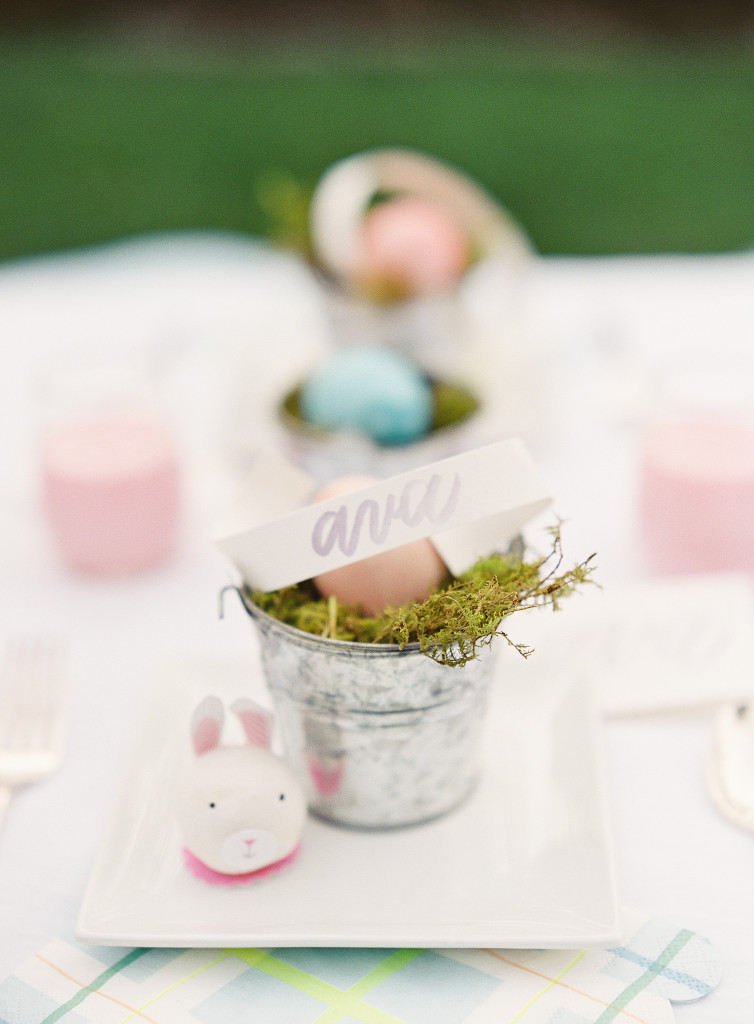
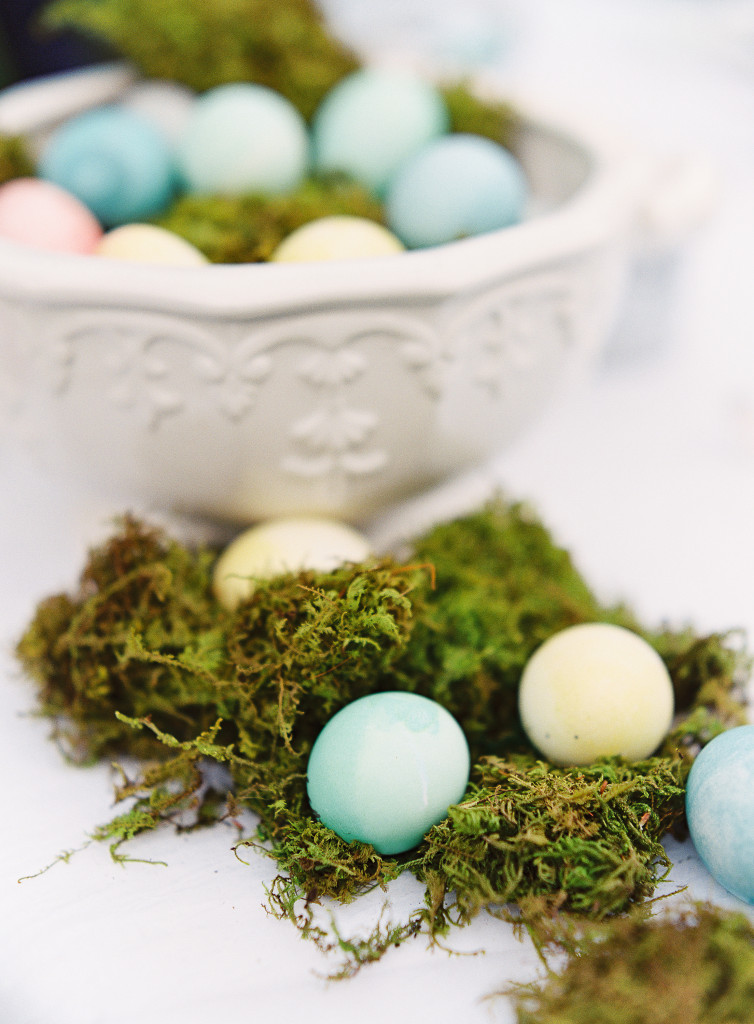
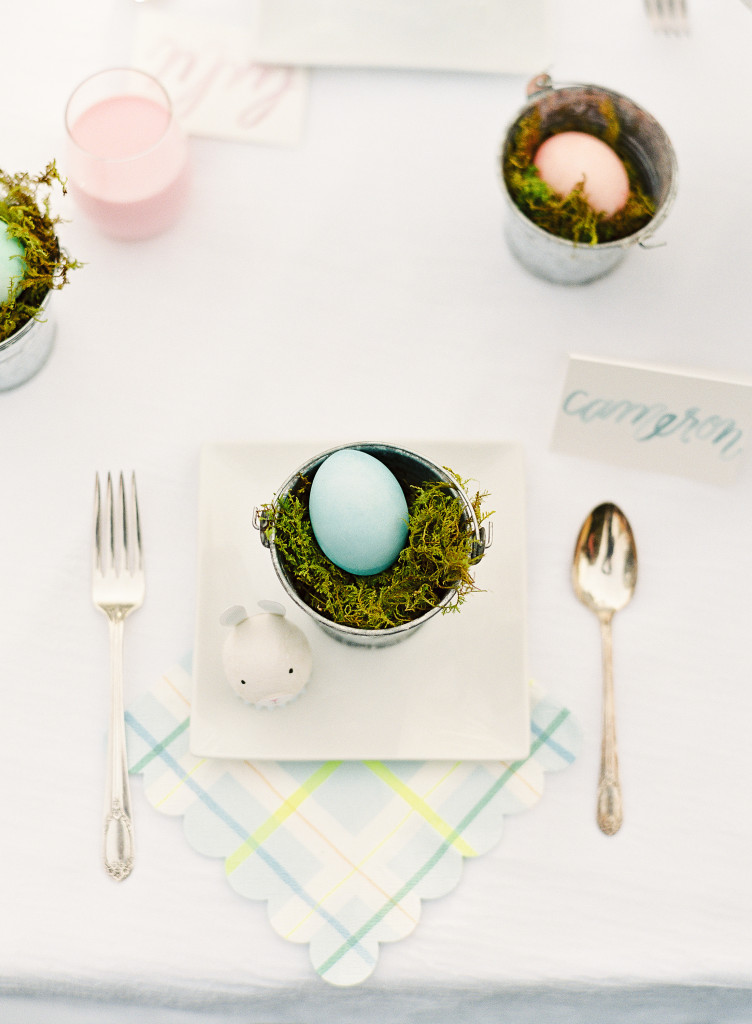
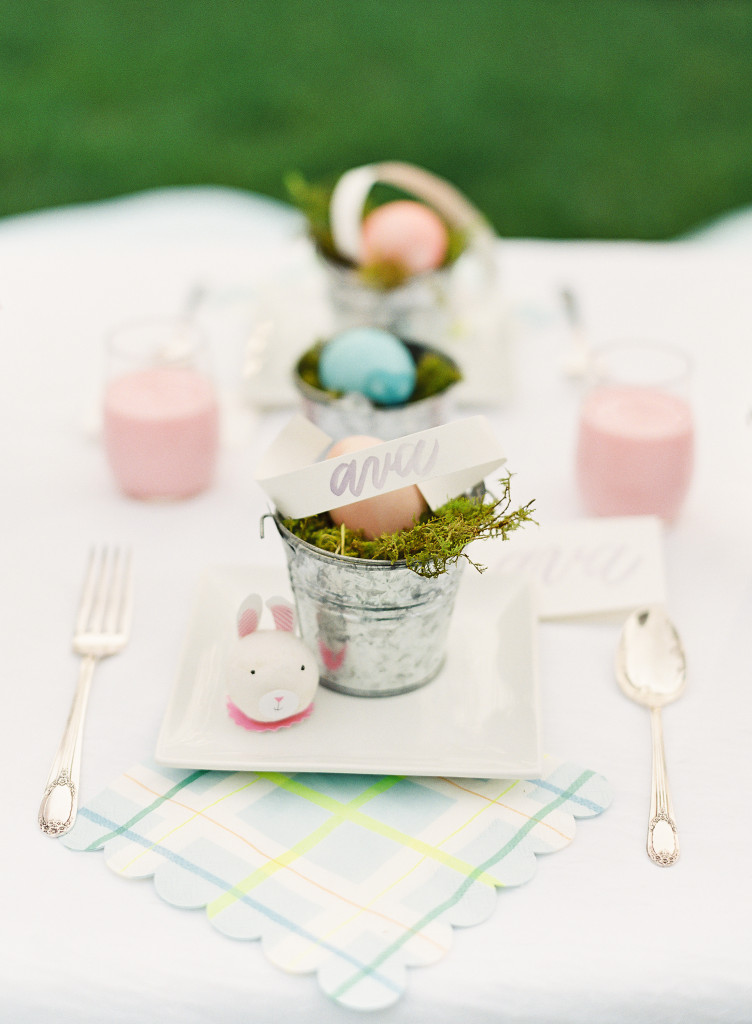
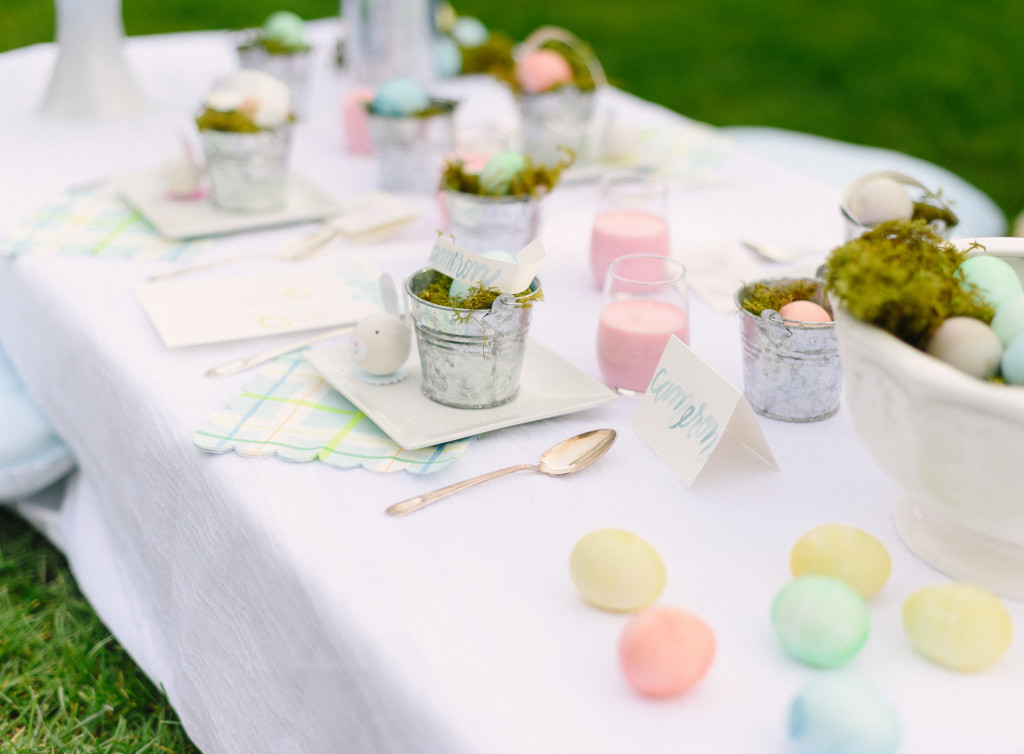
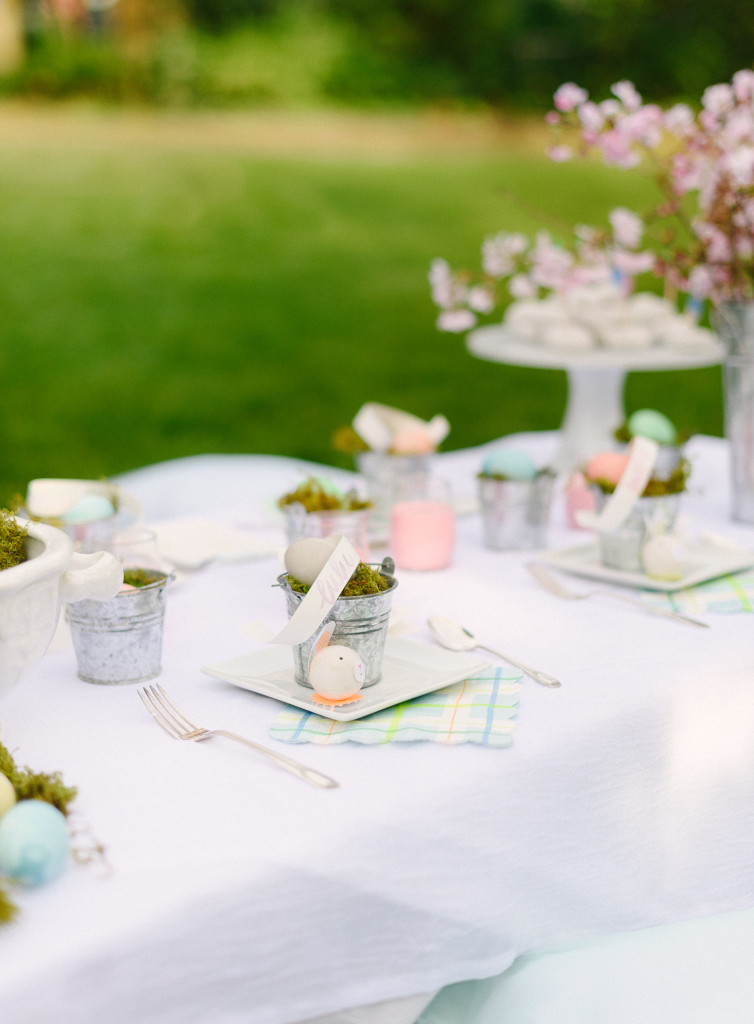
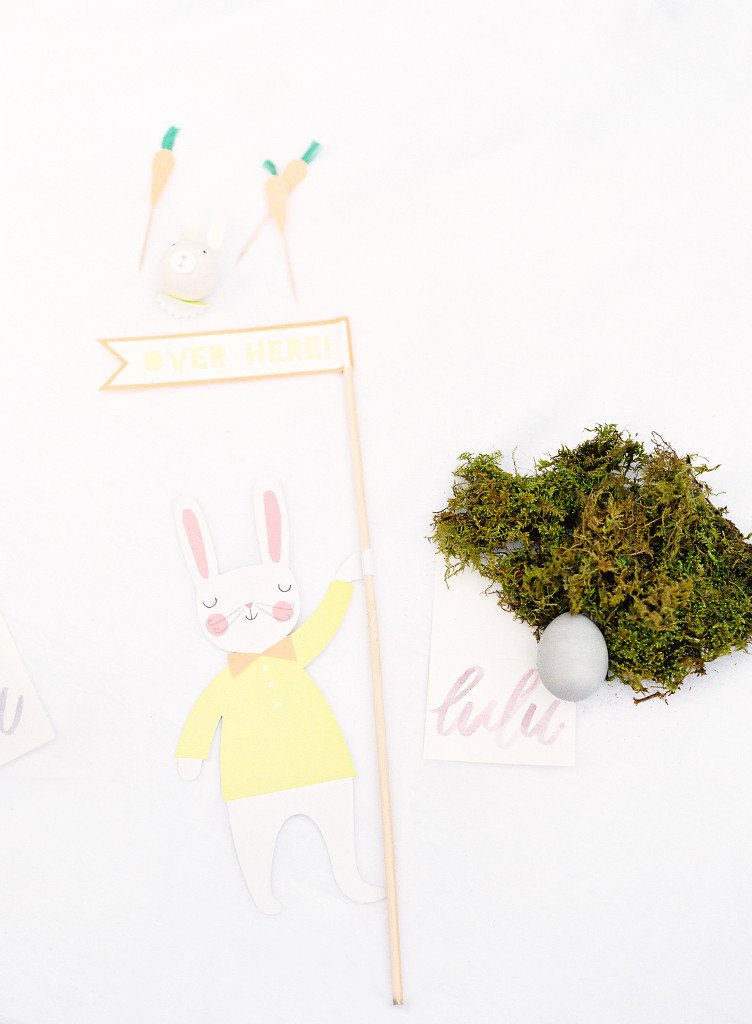
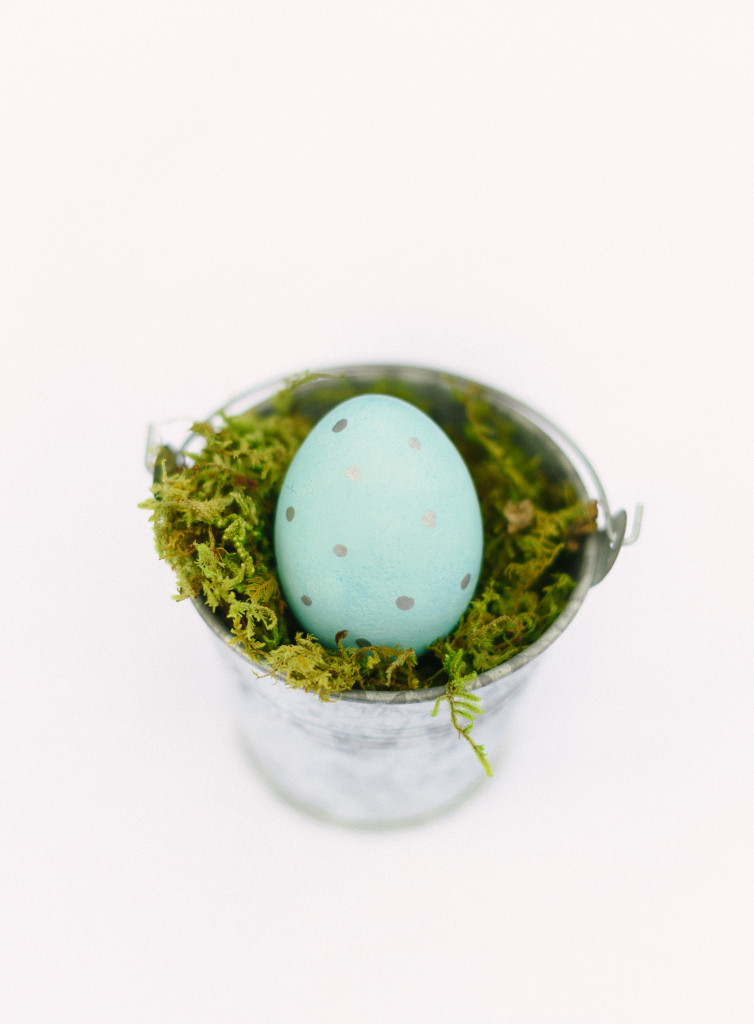
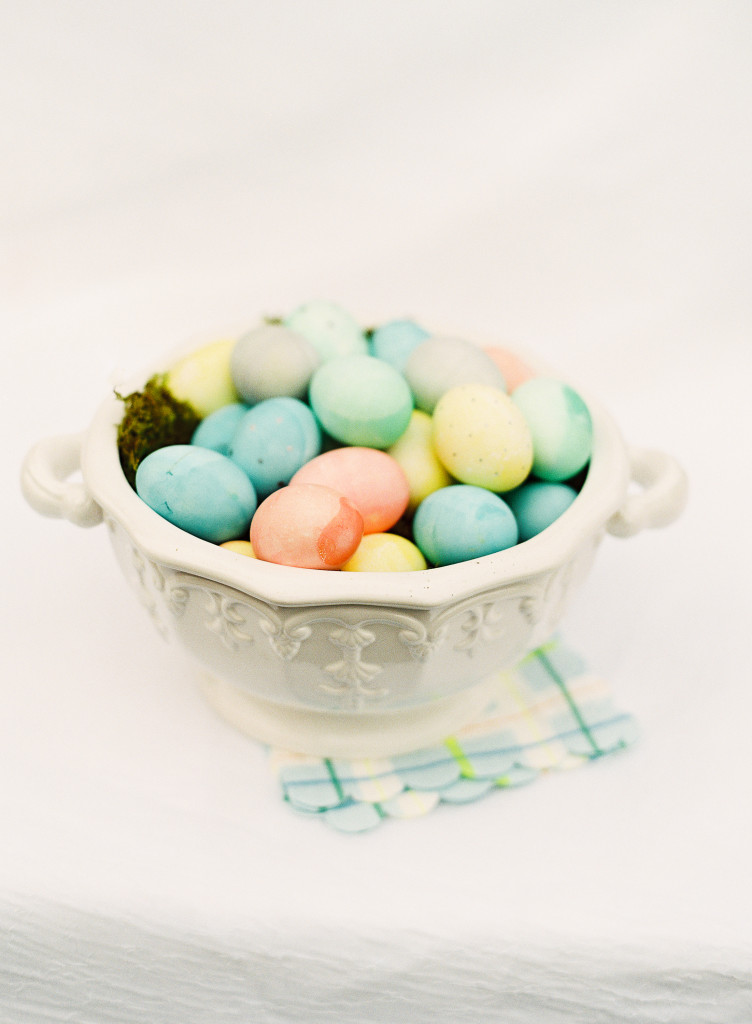
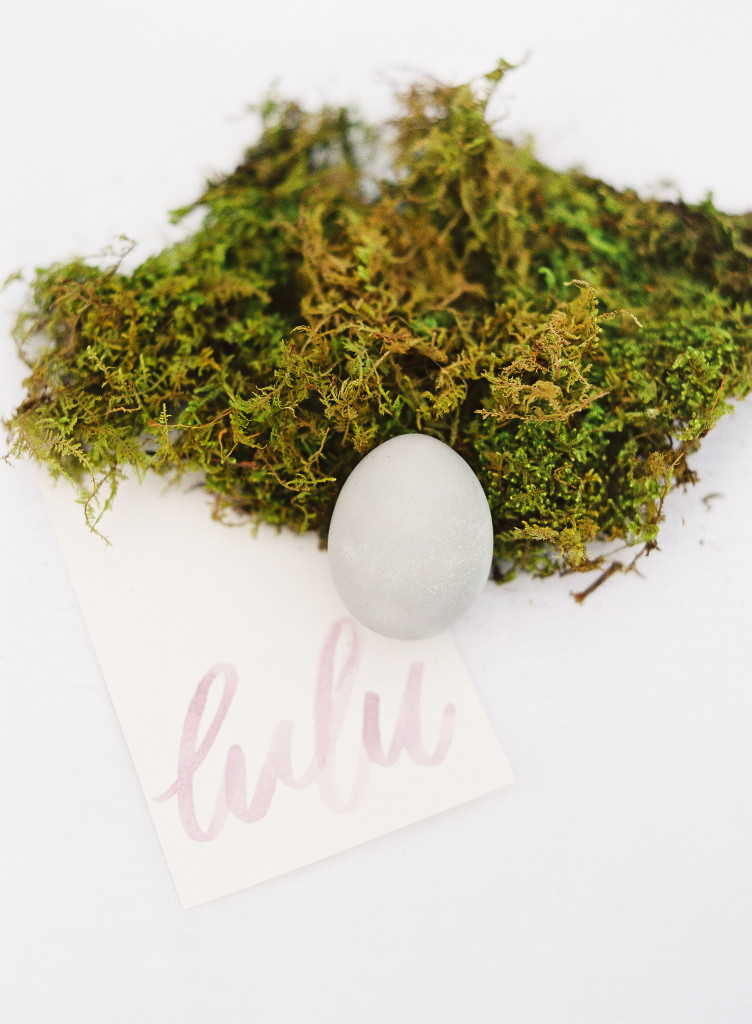
  • Purchase sheet moss from the craft supply store and roll it out on the table for a fun and okay-to-play with centerpiece. Nestle eggs atop the moss and in little silver pails.
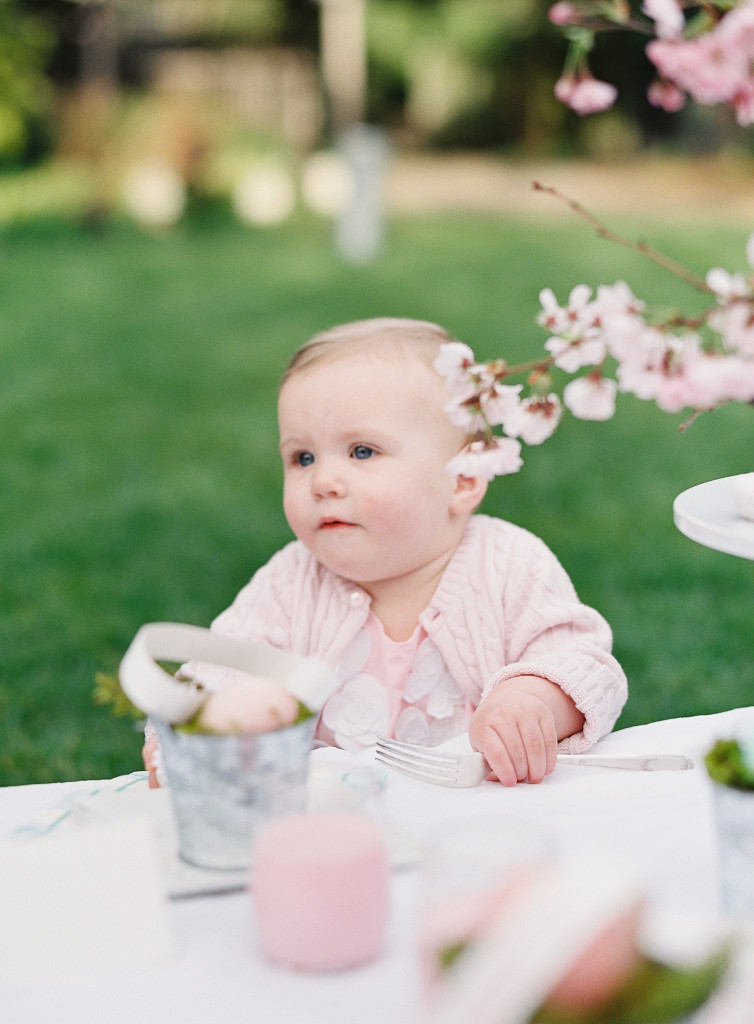
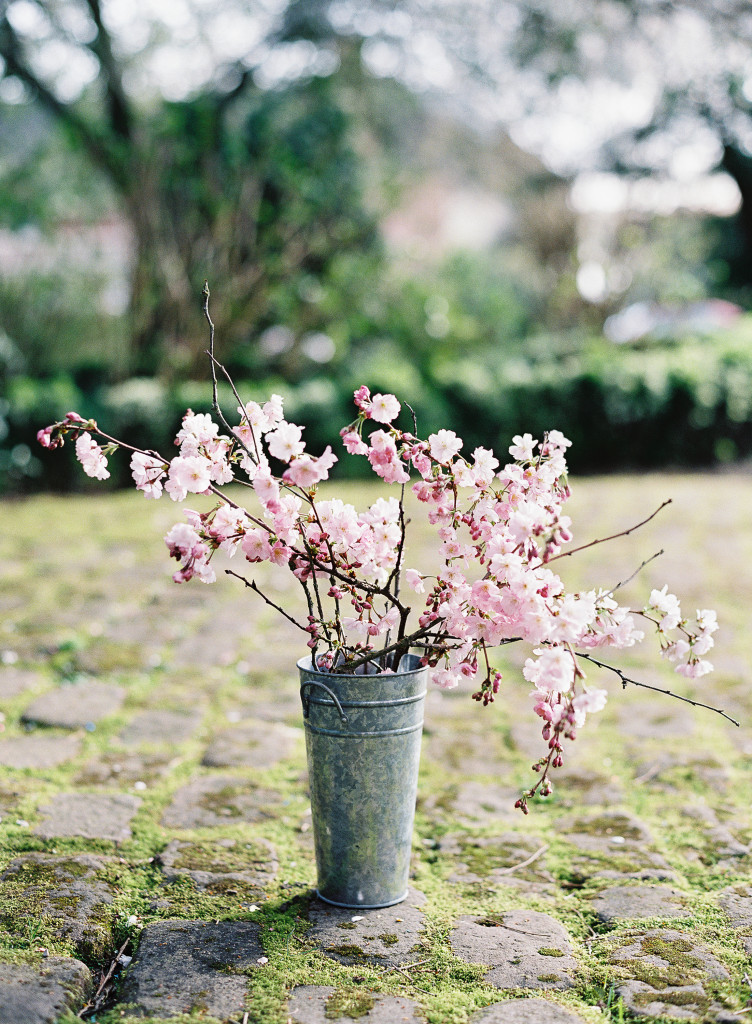
  • Clip a few cherry blossom branches for a pop of spring beauty.
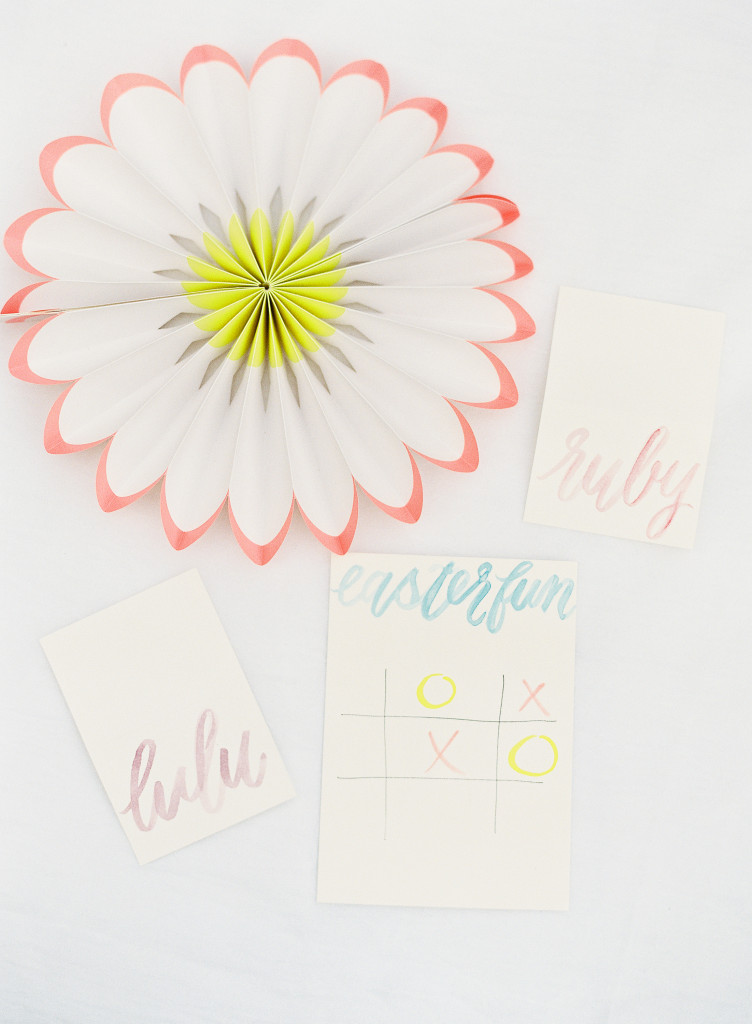
  • Water color names on thin strips of paper and curl them with a pencil. You have instant place cards!
  • Think about hosting a light lunch or snack party instead of a lengthy brunch or dinner
  • Using the same water color technique, paint on card stock and use them as Easter fun cards the kids can color on themselves or play tic-tac-toe
  • Use a silver permanent marker to make small dots or stripes on your eggs to dress them up
  • Send the kiddos home with take-home treats in silver pails {the same ones you used on the table can double as decor} filled with goodies

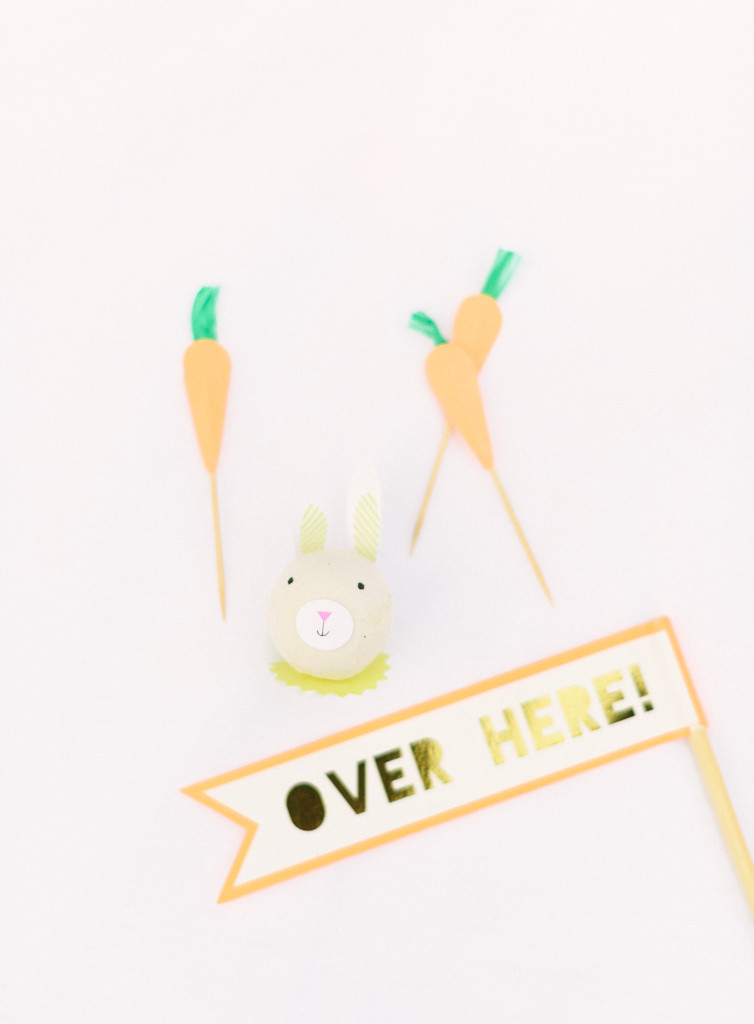
Easter Entertaining Tips Easter Entertaining Tips Easter Entertaining TipsEaster Entertaining Tips Easter Entertaining Tips Easter Entertaining Tips Easter Entertaining TipsEaster Entertaining Tips Easter Entertaining Tips Easter Entertaining Tips Easter Entertaining Tips Easter Entertaining TipsEaster Entertaining TipsEaster Entertaining TipsEaster Entertaining TipsEaster Entertaining Tips Easter Entertaining Tips Easter Entertaining TipsEaster Entertaining TipsEaster Entertaining TipsEaster Entertaining TipsEaster Entertaining TipsEaster Entertaining TipsEaster Entertaining TipsEaster Entertaining TipsEaster Entertaining TipsEaster Entertaining TipsEaster Entertaining TipsEaster Entertaining TipsEaster Entertaining TipsEaster Entertaining TipsEaster Entertaining TipsEaster Entertaining TipsCredits: Design and Styling: Valley & Co. || Photography: O’Malley Photographers || Calligraphy: Laura Hooper Calligraphy

So what are your Easter plans? Are you feeling inspired to host a fun and effortless gathering? Happy Easter!

Nick & Aleah Valley are the husband + wife owners and operators of Valley & Co. Lifestyle, based in the beautiful Emerald City {Seattle}. They love to make life grand and believe that any occasion, whether small or large, is cause for celebration. They believe that entertaining at home welcomes memories and laughter. Follow them on their blog and Instagram.

Yarn Wall Art DIY

March 19, 2015
Post by Danielle Kurtz, Creative Director at The Land of Nod 

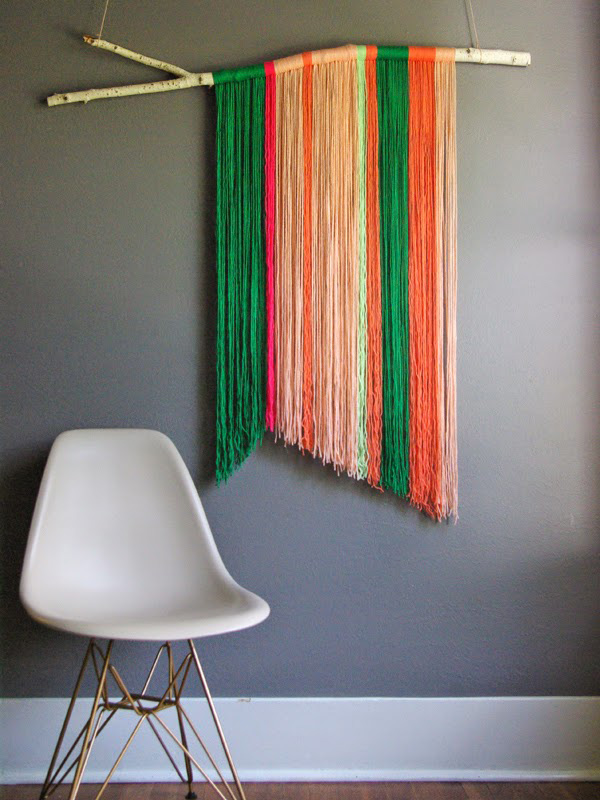
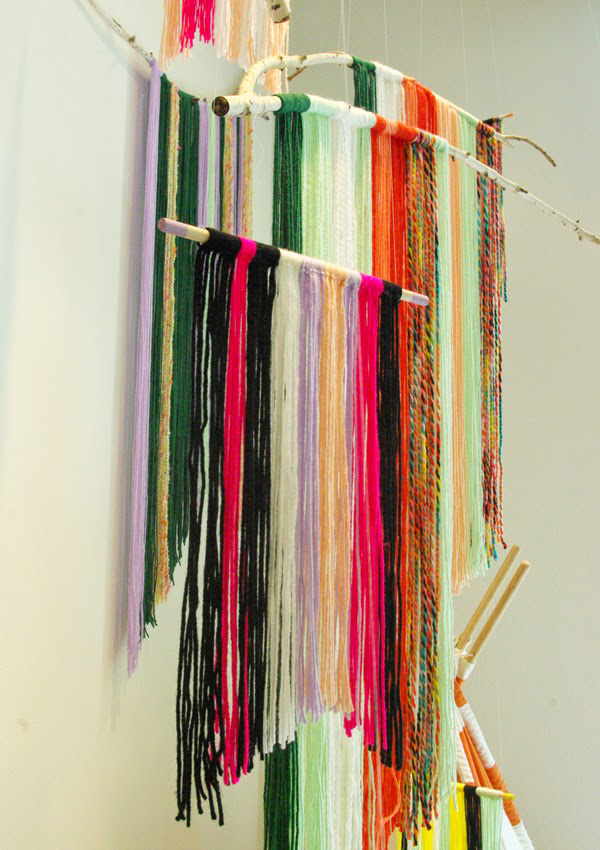
It’s no secret that we adore Jeran of Oleander and Palm. She’s been a long-time contributor to Honest to Nod, and was also one of our Real Family features. When she posted this Yarn Wall Art DIY, we found ourselves swooning over the fact that the DIY was so straightforward, but the results were anything but ordinary. Also, it’s such an easy project to make your own through different color combinations, shapes and sizes. Not to mention the fact that the materials are readily available, and very inexpensive.

Yarn Wall Art DIYphoto from Oleander + Palm

So, we invited Jeran to create an installation for our South Coast Plaza store’s windows. You can see more about that here.

Yarn Wall Art DIY 2Photo from Oleander + Palm

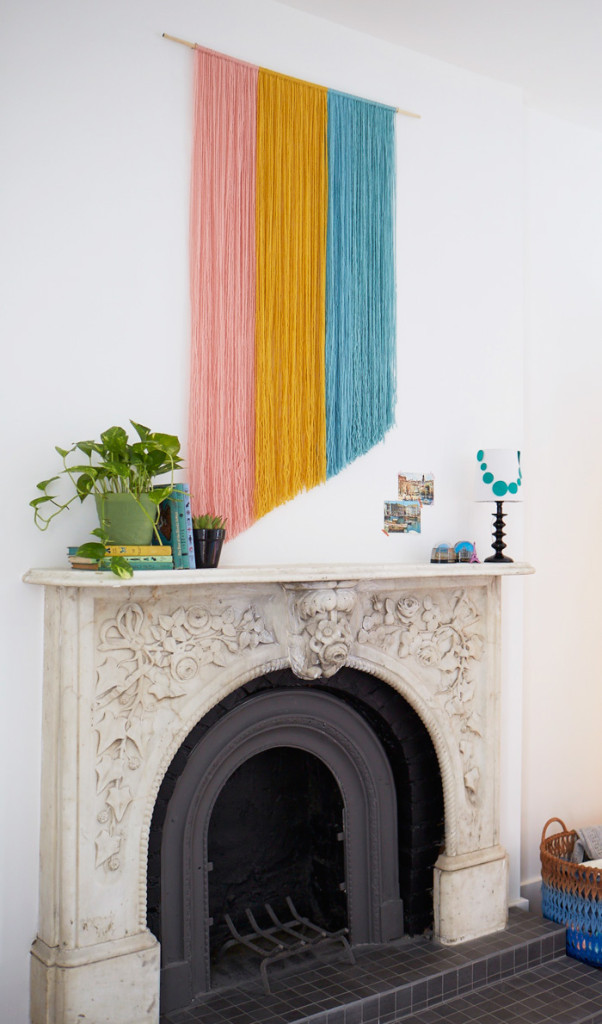
But, we just couldn’t get enough of this DIY. So, we decided to make one of our own for the Nod Family Home.

Yarn Wall Art DIY 3It’s the perfect statement piece above the mantle. It adds so much texture, and is at once sophisticated and playful. We’re major textile junkies here at Nod, and are loving the current resurgence of textile art in home décor. If you’re not up for investing in a custom woven art piece, this is a fantastic DIY alternative. Thanks Jeran for the inspiration!

Danielle is the Creative Director at Nod and an over-protective mother of two. She’s also completely obsessed with Pinterest, Twitter, Instagram and her Kindle, but not necessarily in that order. Danielle loves to craft, sew and crochet. Her current craft of choice is weaving tiny wall tapestries.

Book Nook Inspiration – Part 3

March 18, 2015

Post by The Land of Nod and Brightly

Welcome to our third installment of Book Nook Inspiration created in collaboration with Brightly. If you missed them, check out Parts 1 and 2 for more tips. And, don’t forget to read to the bottom for details on our giveaway.

Book Nook Design Tips from Nod:
For this edition, we’ve put together a modern design that can easily grow with your young reader. Still paying attention to the three main design requirements of any reading nook, make it inviting, comfortable and quiet.

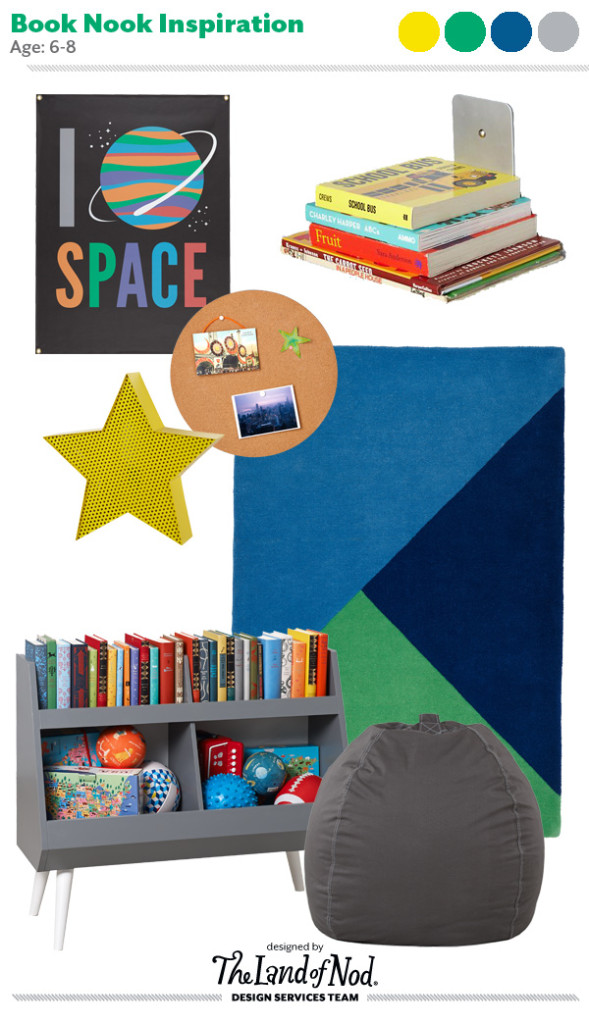
Boy's Book Nook Inspiration I Heart Space Banner / Floating Wall Shelf / Blue Rad Rug / Grey Bean Bag Chair / Grey Next Chapter Bookcase / Star Pop Icon Nightlight / Circle Corkboard

For this space, here are some of the key design elements:

  • The Rad Rug is the perfect foundation for the space; it’s plush, graphic and will define the book nook.
  • We always recommend layering in soft seating for a comfy spot to lounge, our Cool Beans! Bean Bag Chair is the perfect option for a growing child, as it’s plenty roomy.
  • The pop icon nightlight is not only a playful décor piece, but can be mounted to the wall above the bean bag chair for additional lighting.
  • A mix of cork boards and wall art can add interest in the space, and gives a place for kids to hang their latest treasures and mementos.
  • A small wall mounted shelf or ledge is ideal for keeping favorite books close at hand. We love the simple design of this book ledge, as it really turns a stack of books into a piece of art.
  • Of course, if this is a book nook, you’ll need plenty of room for books, and even a few toys. The Next Chapter bookcase is good choice because it’s low to the ground, which means your little one will have ready access to their books and toys.

Book Recommendations from Brightly:

As kids hit kindergarten and beyond, it’s a great time to explore different types of books. Finding books that relate to your young reader’s interests, pique their curiosity, or make them laugh will help keep them engaged with reading as they grow.

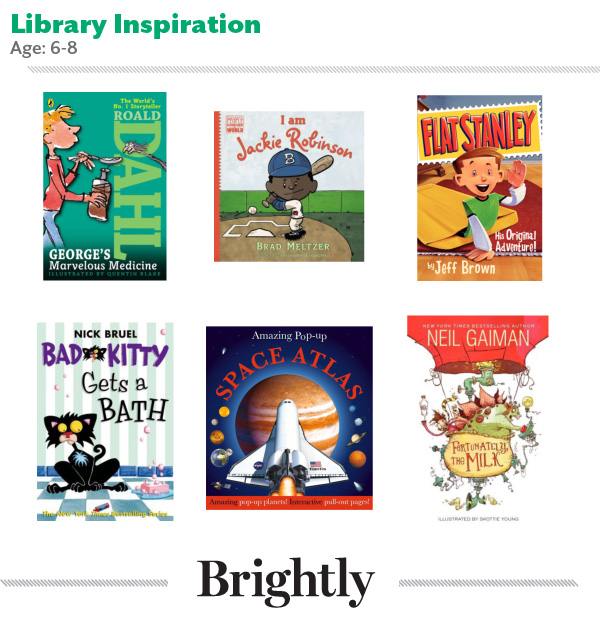
Boys Library Inspiration - Age 6-8Our picks:

  • George’s Marvelous Medicine – Wacky predicaments and laugh-out-loud moments take center stage in this short chapter book from one of the world’s greatest storytellers.
  • I am Jackie Robinson – This is the fourth title in New York Times bestselling author Brad Meltzer’s Ordinary People Change the World series. I am Jackie Robinson will entertain, inform, and inspire sports-loving kids.
  • Flat Stanley: His Original Adventure! – Who knew being flat could be so fun? Packed with plenty of pictures and goofy situations, Flat Stanley is a delightful story that young readers have loved for generations.
  • Bad Kitty Gets a Bath – Short, snappy text and great illustrations make this the funniest installment in Nick Bruel’s Bad Kitty series.
  • Amazing Pop-up Space AtlasThis interactive book introduces young readers to the wonders of outer space, complete with planet profiles, sky charts, and a 3-D pop-up Solar System.
  • Fortunately, the Milk – From Neil Gaiman, bestselling author of Coraline, comes a fantastical tale of a dad who runs out for a carton of milk and encounters aliens, pirates, and ponies on his way.

Looking for more great reads for growing readers? Check out 10 Early Chapter Books for Boys on Brightly.

Want the perfect kids’ reading nook? Enter to win $1,500 from The Land of Nod and $1,000 worth of books from Brightly. Ends 3/30.

Brightly is a new resource to help moms and dads raise lifelong readers. Brightly features book recommendations for every age and stage, reading tips and insights, seasonal inspirations, author essays, contests, gift guides, and more.

St. Patrick’s Day Rainbow Cake

March 17, 2015

Post by Corri McFadden of Glitter & Bubbles

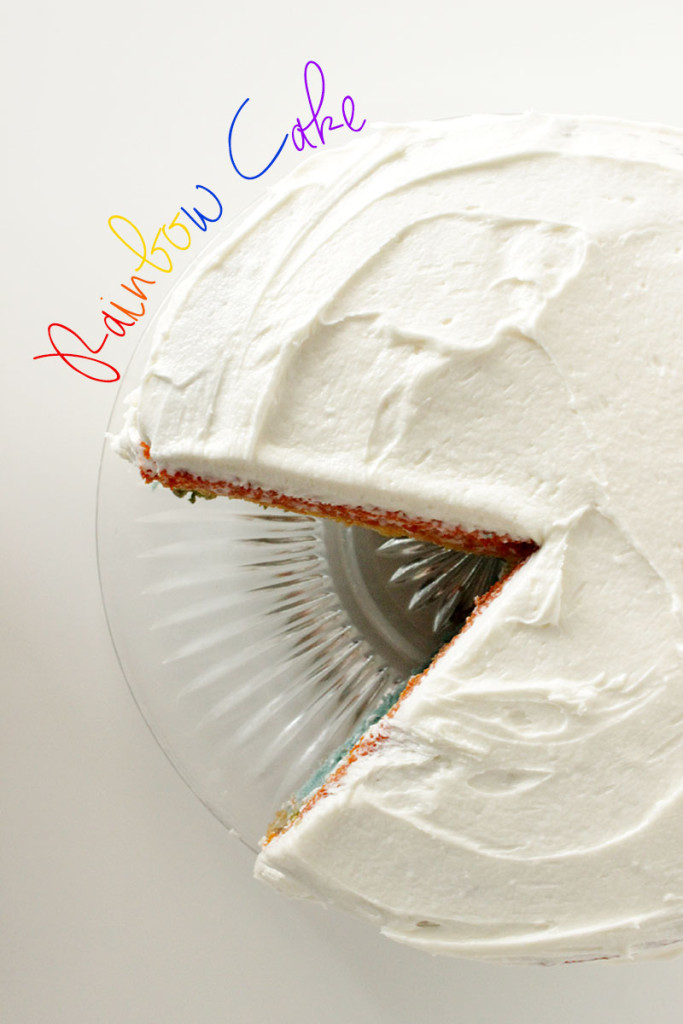
Happy St. Patrick’s Day! There isn’t a dessert I love more than a delightful Rainbow Cake with fluffy, homemade Butter Cream Frosting! Don’t shy away from creating charismatic cake, it’s not as hard to make as you may think it is. If I can make it, you definitely can!

St. Patrick's Day Rainbow CakeTo Create Your St. Patrick’s Day Rainbow Cake, You Need:

  • Six 9-inch cake pans
  • Vegetable shortening
  • 3 cups all-purpose flour
  • 1/2 teaspoon salt
  • 2 sticks unsalted butter
  • 2 1/3 cups sugar
  • 5 large egg whites (no yolks)
  • 2 teaspoons vanilla extract
  • 1 ½ cups milk
  • Red, orange, yellow, green, blue, and purple gel food coloring

To Make the Buttercream Frosting, You Need:

  • 1 cup vegetable shortening
  • 1 cup butter
  • 1 bag (2lb) powdered sugar
  • 2 teaspoons vanilla
  • 4 tablespoons milk

How to Make A Rainbow Cake:

  1. Start by preheating the oven to 350 degrees. Coat each cake pan with shortening and then line the bottom of each with parchment paper. Brush again with shortening and set aside.
  2. Whisk together the flour, baking powder, and salt in a large bowl then set aside.
  3. In a separate bowl, slowly mix the sugar and butter together using a handheld electric mixer. A great tip on slow mixing would be to add small increments of each at a time, then combine and repeat.
  4. Next, slowly incorporate the egg whites until well combined and then mix in the vanilla.
  5. Now combine your flour mixture in small increments with the milk by beginning with the flour and ending with the milk until everything is well mixed.
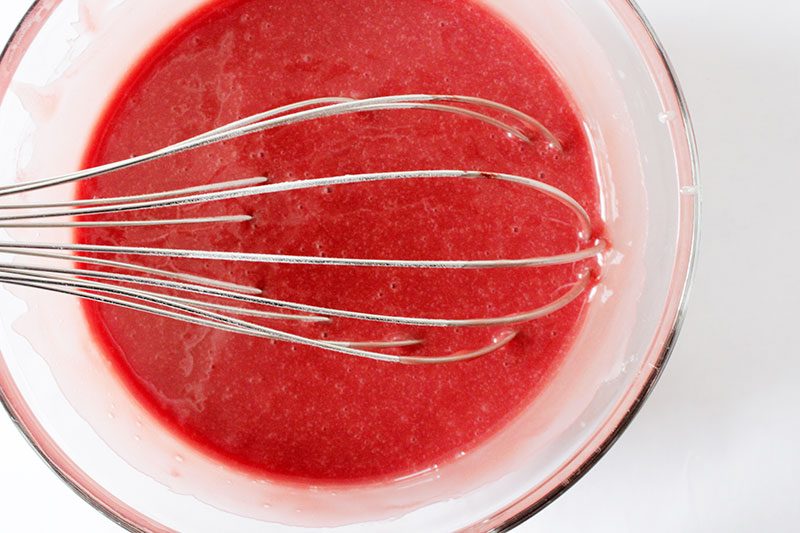
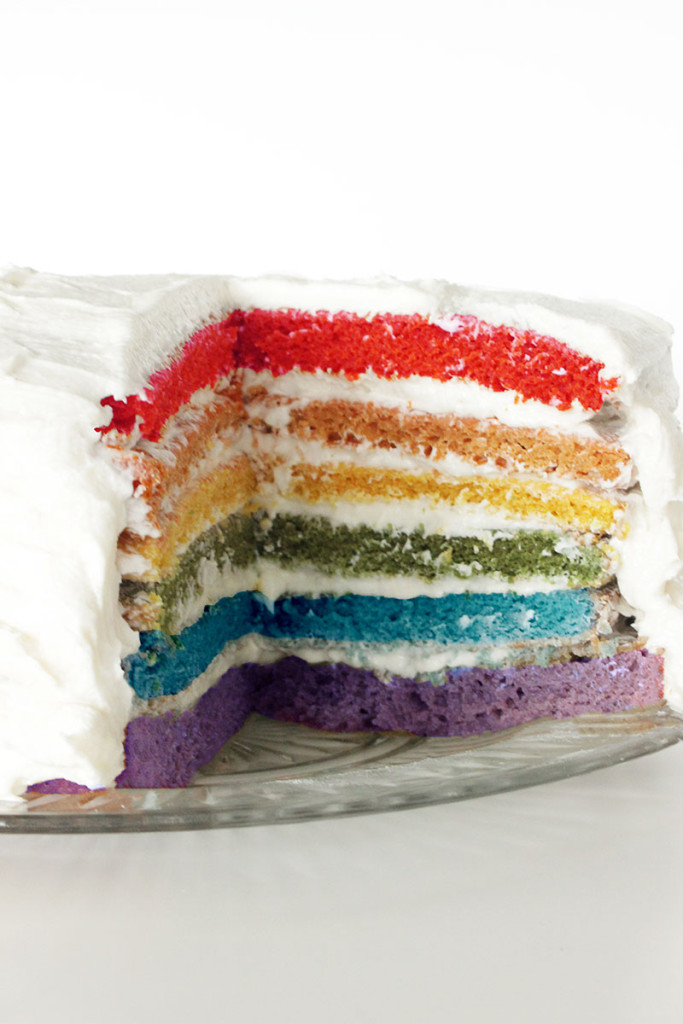
  6. Divide the batter evenly into six bowls. Add yellow, orange, red, violet, blue, and green food coloring to each their prospective bowls and mix until combined. Pour each color into a separate cake pan and bake for 15-15 minutes.St. Patrick's Day Rainbow Cake 1
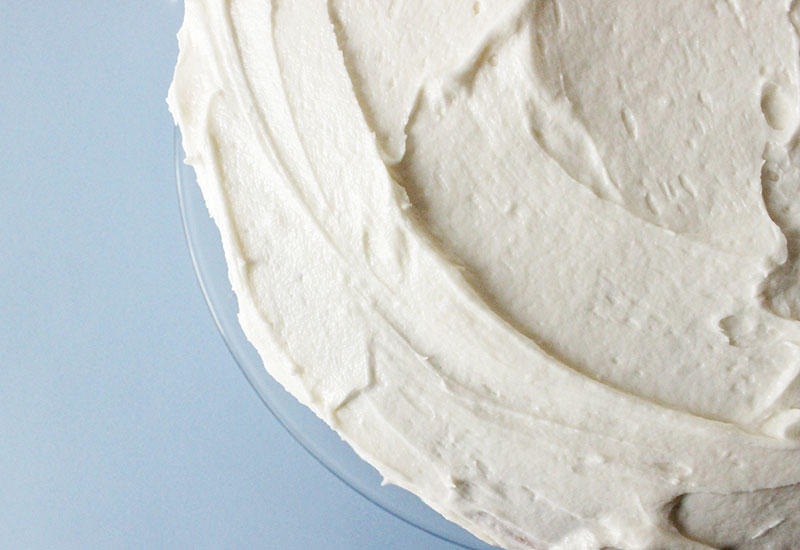
  7. To make the Buttercream Frosting, mix the shortening and butter with an electric mixer. Gradually beat in the powdered sugar and vanilla. Then, add in the milk 1 tablespoon at a time and beat until frosting is light and fluffy.
  8. Once the cakes are done, remove them from the oven and allow them to cool for about 10 minutes.
  9. After they’ve cooled, remove them from the pans.
  10. Place the first layer (violet) on your desired serving dish and frost the top and sides with a spatula.
  11. Repeat the stacking and frosting of each layer until you’ve reached the top. St. Patrick's Day Rainbow Cake 2
  12. Smooth the top and outer layers of frosting with a spatula one final time.

Cut a piece of cake and serve!

St. Patrick's Day Rainbow Cake 3

Need more tasty recipes and delicious bites? Check out our Let’s Eat Pinterest Board.

Corri McFadden is the owner and founder of eDrop-Off Luxury Consignment.  As a Style Expert and successful blogger, she hosts a weekly fashion segment on Chicago’s “You and Me This Morning”, and features “Style Recipes”, videos and Fashion “Must Haves” on her self-titled lifestyle website Corri McFadden.  Most recently, she launched Glitter and Bubbles, a modern day moms guide for those looking for inspiration through fashion, food and décor.

Easter Sweets Recipes & Easter Decor

March 16, 2015
Post by Giulia Doyle, photographer and blogger at Audrey’s
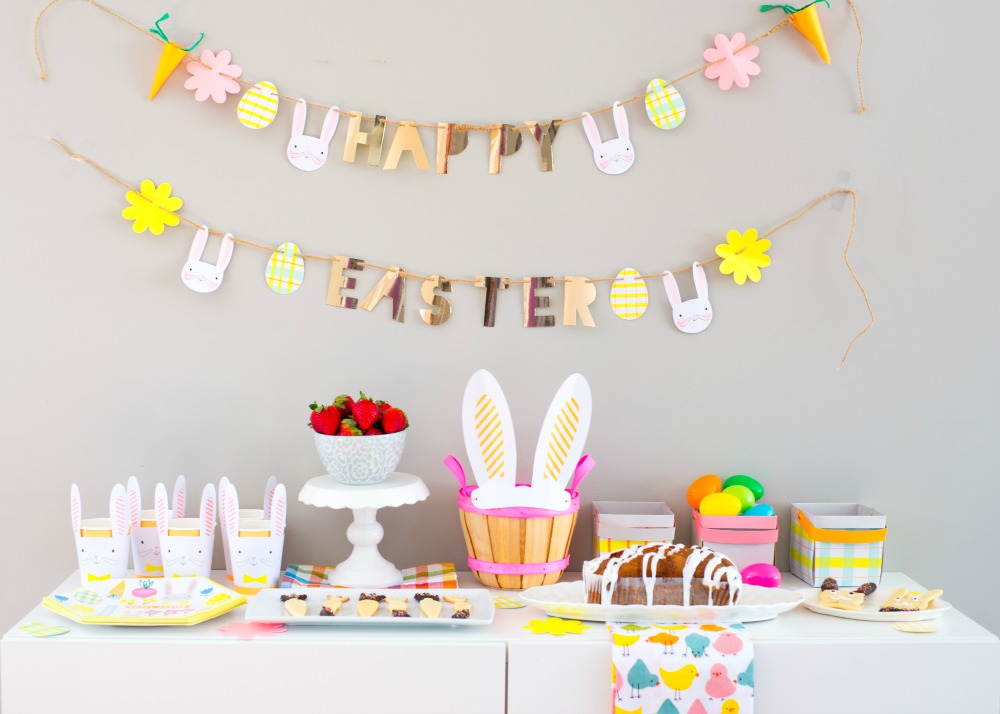
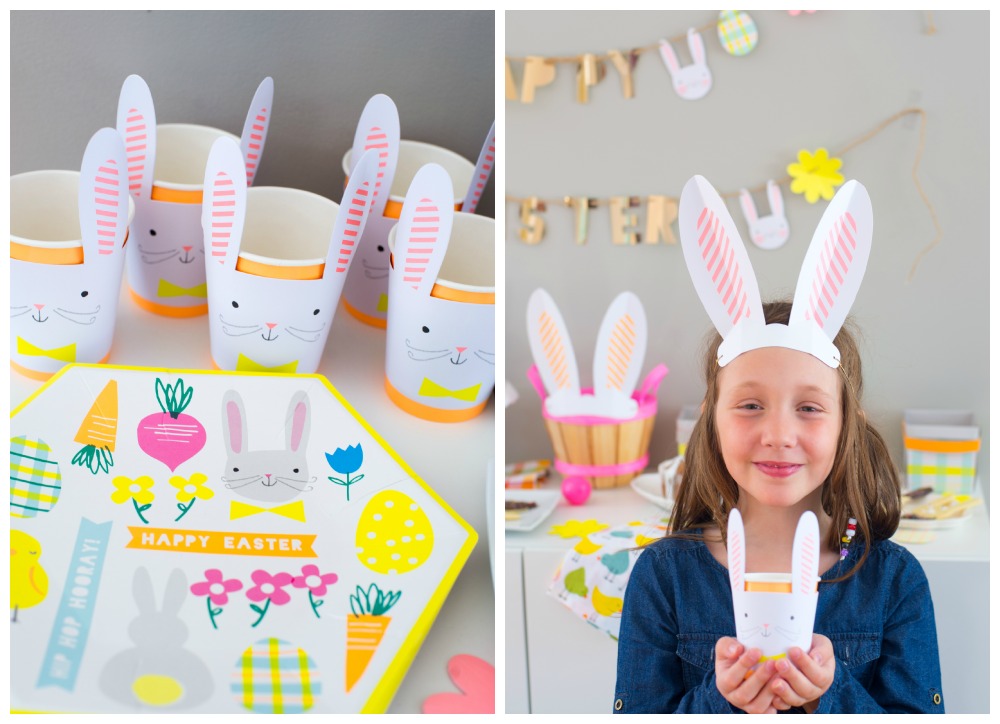
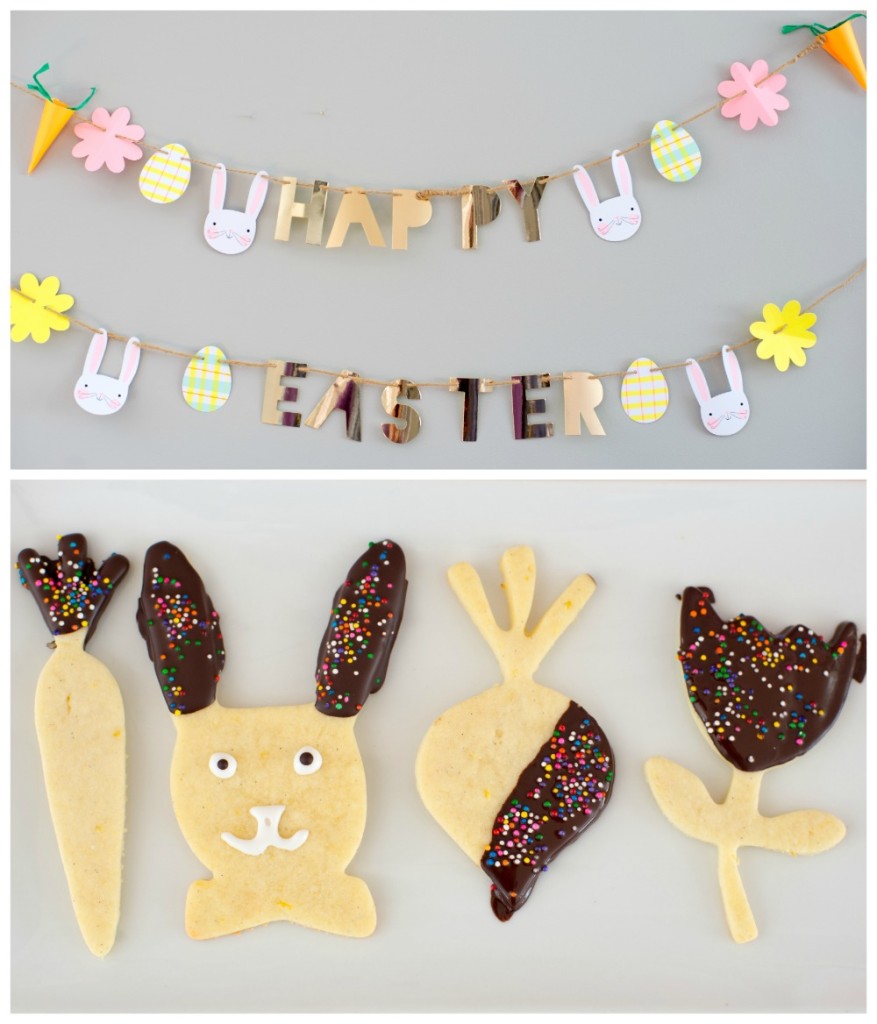
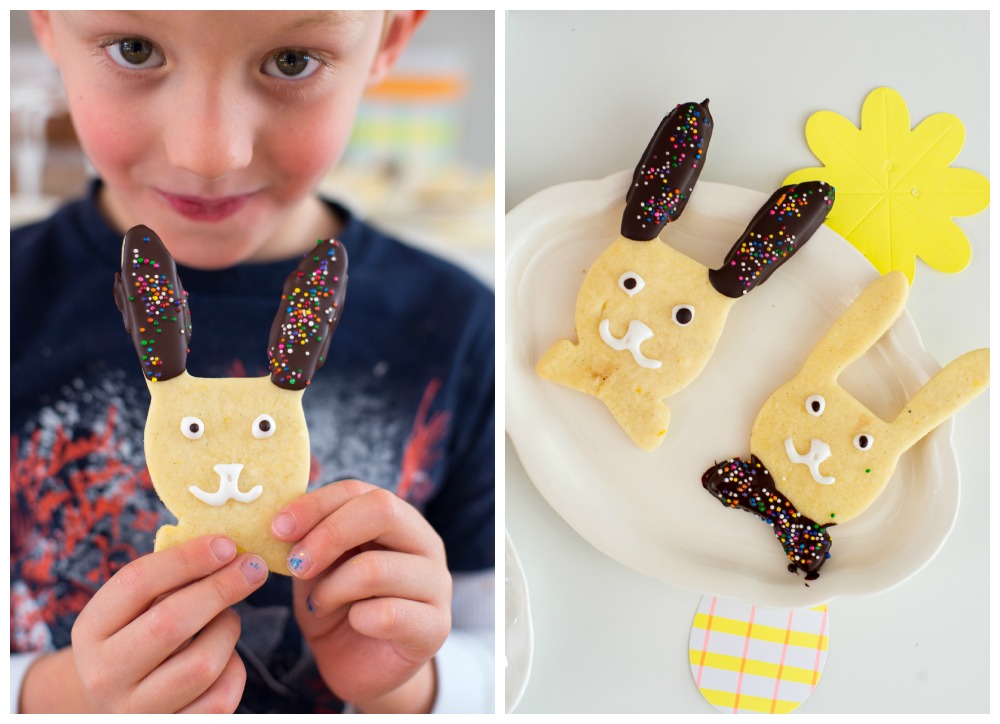
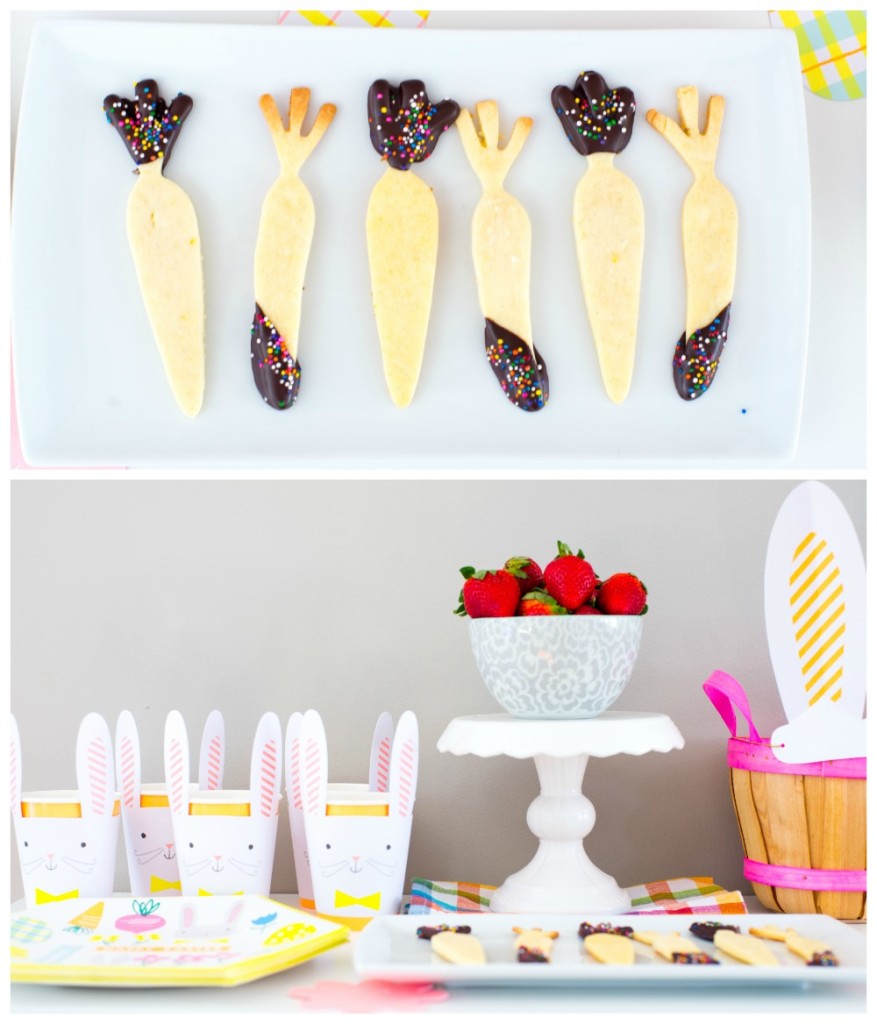
Easter Sweets Recipes & Easter DecorIs the snow melting where you live, the sun a little stronger and happy spring feelings in the air? Ready for a little Easter fun – some whimsy and punches of colour? Well, the Land of Nod sent me some fun Easter products to try and the Meri Meri Easter paper goods are wonderful – just a little cheeky and with a punch of neon color. I loved everything they sent me.Easter Sweets Recipes & Easter Decor 3To go with all the fun plates, cups, garland, baskets and bunny ears, I decided to make lemon sable cookies dipped in chocolate with the fun Meri Meri Easter cookie cutters. Not only are these cookies fun, but the recipe is easy to make, versatile and dipping things in chocolate is always a good idea.


Chocolate Dipped Lemon Sablé (French Shortbread recipe adapted from Le Cordon Bleu)

Cook Time: 10 minutes

Ingredients

  • 150 g butter at room temperature
  • 95 g powdered sugar
  • 1 egg
  • 1 vanilla bean (pod)
  • lemon zest from one lemon
  • 280 g of flour
  • 2 g salt
  • 100 g of dark chocolate
  • 3 tablespoons of heavy cream
  • royal icing and sprinkles

Instructions

  1. Mix butter with powdered sugar until fluffy. Add egg and whisk well.
  2. Cut and scrape vanilla bean. Add seeds to dough and mix.
  3. Add lemon zest and mix.
  4. Add flour in small amounts and mix. Add salt and mix.
  5. Wrap dough in plastic and store in fridge for at least an hour.
  6. Preheat oven to 350F.
  7. On a lightly floured surface roll out dough until it’s about 1/8 inch thick. Use cookie cutters to cut shape and place on parchment lined cookie sheet about 2 inches apart.
  8. Bake for 8 – 10 minutes until edges are golden.
  9. To decorate, melt chocolate gently in microwave in 15 seconds intervals. Add cream and stir until you have a smooth glossy texture. Dip each cookie into chocolate, let excess drip off and place on parchment to dry and add sprinkles. Add royal icing details if you want.

Easter Sweets Recipes & Easter Decor 5Easter Sweets Recipes & Easter Decor 7Easter Sweets Recipes & Easter Decor 9To add to our small dessert table we also made a lemon loaf cake. Again, easy to make in advance, keeps well, simple to transport and just as perfect as a dessert or a breakfast indulgence. You could also use the recipe for muffins and use the Easter cupcake liners and toppers available.

Lemon Loaf (adapted from Martha Stewart)

Prep Time: 30 minutes

Total Time: 3 hours

Serving Size: 2 loaves

Ingredients

  • 1 cup (2 sticks) unsalted butter, softened, plus more for pan
  • 3 cups all-purpose flour (spooned and leveled), plus more for pan
  • 3/4 cup low-fat buttermilk
  • Zest of 2 lemons, finely grated
  • 1/3 cup fresh lemon juice (about 2 lemons)
  • 1 1/2 teaspoons salt
  • 1/2 teaspoon baking powder
  • 1/2 teaspoon baking soda
  • 2 cups sugar
  • 5 large eggs
  • 2 tablespoons of poppy seeds (optional)
  • 1-2 cups of icing sugar
  • Milk

Instructions

  1. Preheat oven to 350 degrees, with rack in lowest position. Butter and flour two 4 1/2-by-8-inch (6-cup) loaf pans.
  2. In a small bowl (or liquid measuring cup), combine buttermilk with lemon zest and juice. In a medium bowl, whisk together flour, salt, baking powder, and baking soda.
  3. With an electric mixer, cream butter and sugar until light and fluffy. Add eggs, one at a time, beating well after each addition. Mix in poppy seeds.
  4. With mixer on low, add flour mixture in three parts alternately with the buttermilk mixture in two, beginning and ending with flour; beat just until smooth (do not over mix).
  5. Divide batter evenly between pans. Smooth tops. Bake until a toothpick inserted in centers comes out clean, 1 hour and 10 minutes (tent with foil if browning too quickly). Cool 15 minutes in pan. Turn out cakes onto a rack; cool completely before glazing.
  6. Make glaze by combining 2-4 tablespoons of milk with icing sugar until you get the consistency you like. You want it to drip but not be too watery. Add lemon juice if you want.
  7. Set rack with cakes over a baking sheet lined with waxed paper. Pour glaze over cakes, letting it run down the sides; let dry, about 30 minutes. (I also added leftover royal icing from my cookie decorating.)

Easter Sweets Recipes & Easter Decor 11

Are you hosting on Easter? Any great plans? I know I’ll be pulling out all of these great details to celebrate the day.

Easter Sweets Recipes & Easter Decor 13

Need more tasty recipes and delicious bites? Check out our Let’s Eat Pinterest Board.

Giulia Doyle blogs at Audrey’s. She loves to share the sweet and savory, be it in the kitchen or travels. She juggles a family and a full-time job – they cook, travel and often paint a wall a new color.