Blog
DIY Wall Map
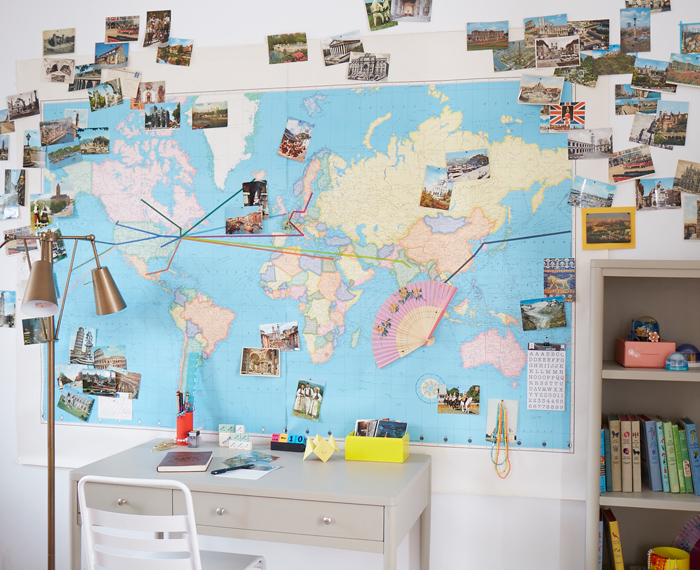 I love this DIY because not only is it an easy and inexpensive way to decorate a large wall, it’s also a very personal installation that documents the travels you’ve had with your family. For our example we used a world map, but this could just as easily be done with a US map, or even a map of your hometown. You don’t necessarily have to travel the world to find adventure (let’s be honest, sometimes going to the grocery store with young kids can be an adventure!). Instructions for Making a DIY Wall Map
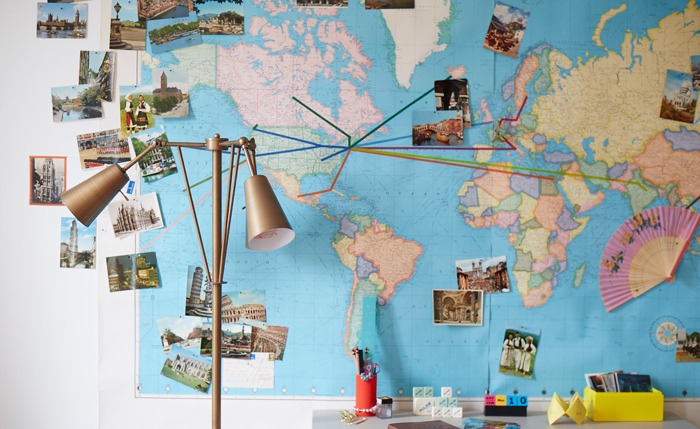
- Choose an oversized map to cover a large portion of your wall. You can track down a vintage map or purchase a new one. (Tip: If you go the vintage route beware of inaccuracies.)
- Hang the map using tacks or small nails.
- Use thin washi tape to map out your travels. Using a different color for each trip will add a fun element to your map.
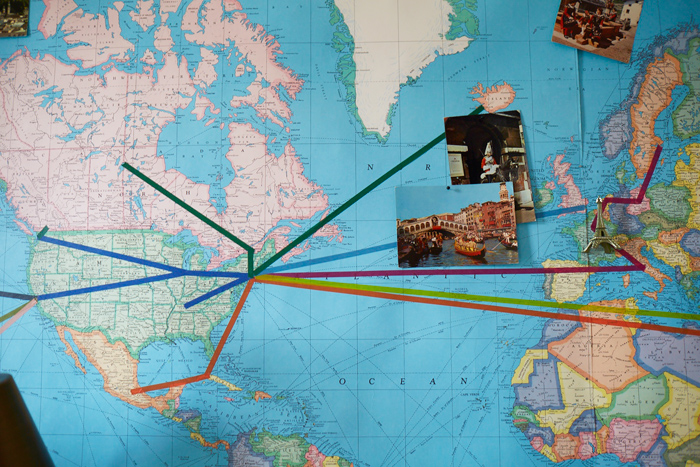
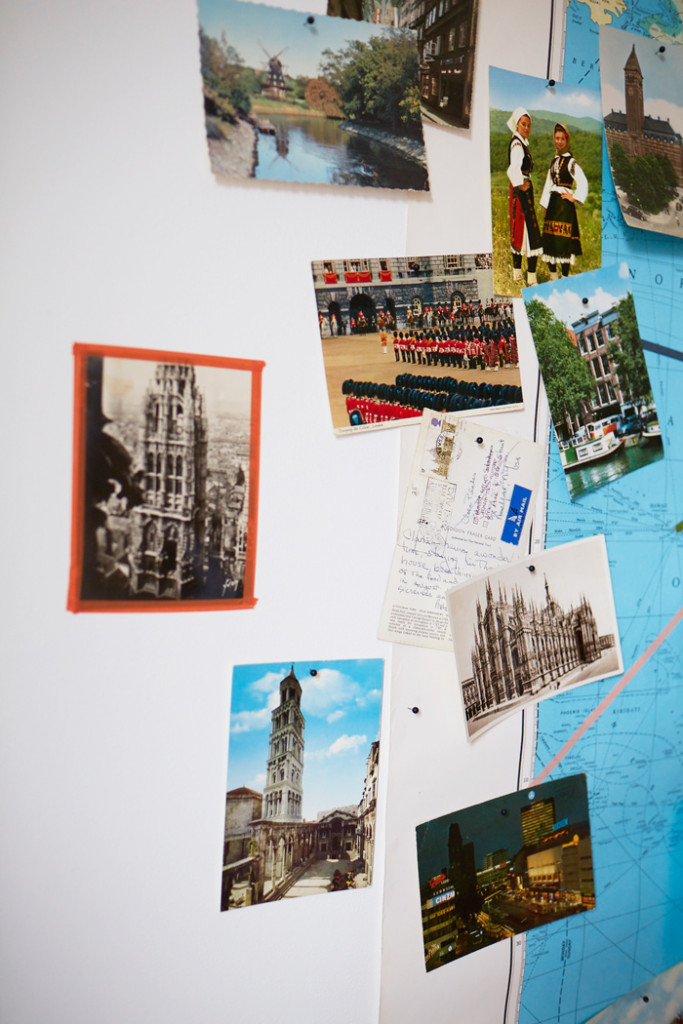
- Using decorative tacks or pins, hang trinkets from your destinations near their place on the map. From post cards and pictures, to a small fan or statue, the options are unlimited.
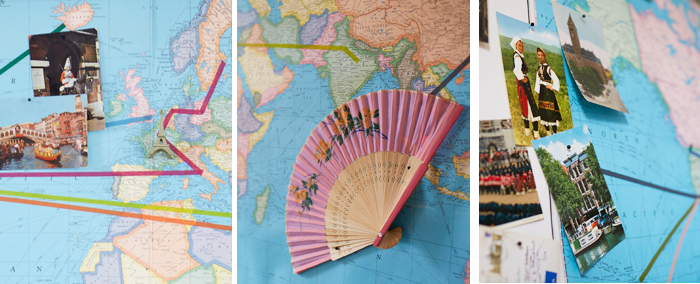
- Fill in the negative spaces around the map with post cards from each destination. Post cards are inexpensive, readily available and easy to transport home.
 There you have it, a beautiful daily reminder celebrating the adventures you’ve shared with your family. And, the best part, it’ll keep evolving as you see the world together.
 Danielle is the Creative Director at Nod and an over-protective mother of two. She’s also completely obsessed with Pinterest, Twitter, Instagram and her Kindle, but not necessarily in that order. Danielle loves to craft, sew and crochet. Her current craft of choice is weaving tiny wall tapestries.
Book Nook Inspiration, Part 2
Post by The Land of Nod and Brightly
Welcome to our second installment of Book Nook Inspiration created in collaboration with Brightly. Check out Part 1 here. And, don’t forget to read to the bottom for details on our giveaway.
Book Nook Design Tips from Nod:
For this edition, we’ve put together a feminine design for a growing reader. Still paying attention to the three main design requirements of any reading nook, make it inviting, comfortable and quiet.
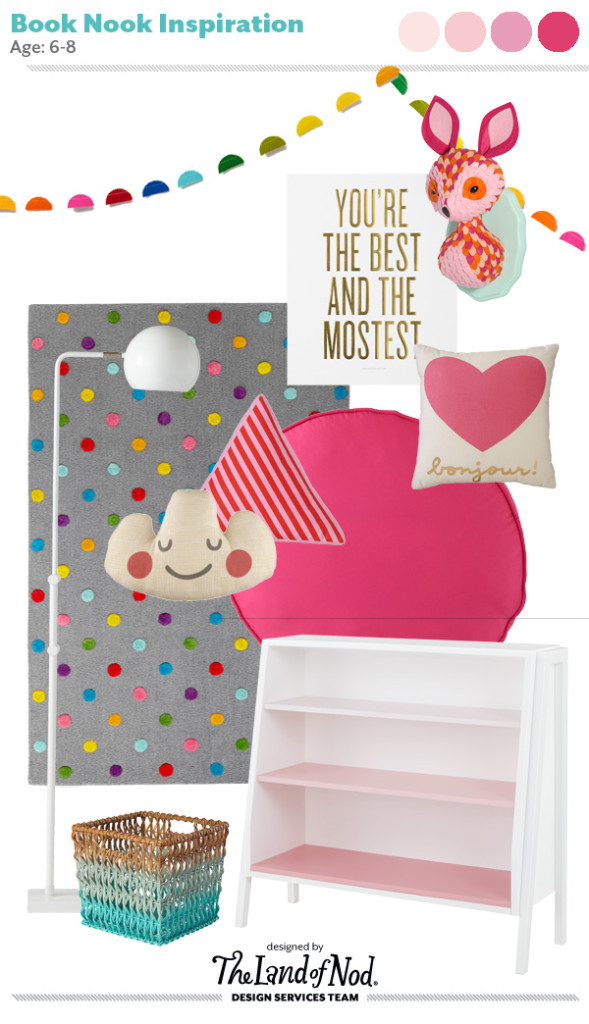 Half Dot Rainbow Garland / Horrible Adorables Faux Taxidermy / Best and the Mostest Wall Art / Bonjour Throw Pillow / Pink Play Cushion / Pink Graduated Bookcase / Aqua Ombre Cube Basket / White Hemisphere Floor Lamp / Candy Dot Rug / Cloud Throw Pillow / Triangle Throw Pillow
For this book nook, here are some of the key design elements:
- The overall color palette was inspired by shades of pink.
- We added a play home floor cushion. It’s perfect for comfy floor seating. And can be outfitted with a collection of throw pillows for added comfort and interest.
- The Graduated Bookcase offers ample storage for books and special items. This piece is the perfect height to pair with floor cushions.
- Adding a floor lamp brings in extra light.
- Next, add a collection of wall art that adds color or a sentiment.
- To finish the space, hang garland above the reading nook to help define the area and bring in dimension and color.
Book Recommendations from Brightly:
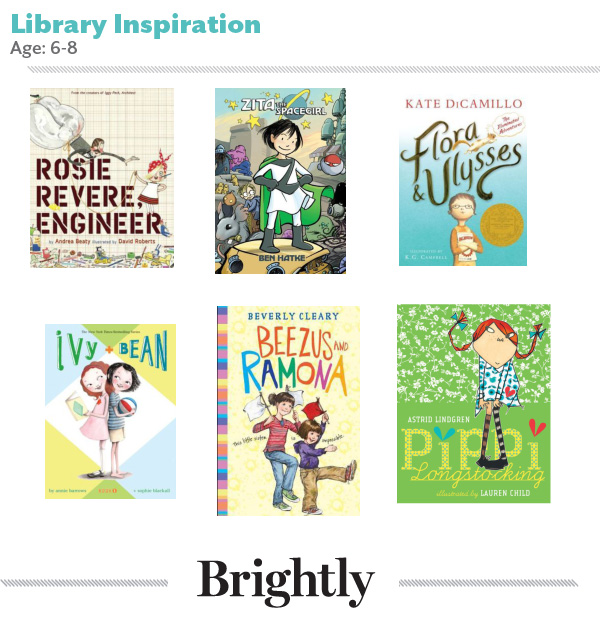
As young readers make the move from picture books to chapter books, it’s great time to infuse a little girl power into their reading selections. There are plenty of wonderful books filled with engaging stories, fantastic artwork, and strong leading ladies that are perfect for girls ages 6 – 8.
- Rosie Revere, Engineer – A wonderful story about a little girl who loves to build things, but grows discouraged when people laugh at her inventions. Accompanied by detailed illustrations, the book reminds young readers that failure is just the first step toward success.
- Zita the Spacegirl – At the center of this graphic novel is Zita, a fearless girl on a journey through another world to rescue a kidnapped friend. Girls will identify with Zita’s brave, adventurous, and loyal character.
- Flora & Ulysses – A charming story about a squirrel who gets sucked into a vacuum cleaner and emerges with superpowers. The award-winning book features full-page illustrations and comic-book style sequences.
- Ivy and Bean – This great early chapter book explores the relationship between two friends who make more mischief than either of them can handle.
- Beezus and Ramona – No list of books for growing readers would be complete without this Beverly Cleary classic. Kids will relate to these timeless truths about siblings and the love they share, even at the trickiest of times.
- Pippi Longstocking – A madcap adventurer with pluck, Pippi is a perennial favorite of young readers around the world. Charming illustrations by Lauren Child make this edition one to treasure.
Looking for more empowering books for girls? Check out Early Chapter Books with Fierce Female Characters on Brightly.
Want the perfect kids’ reading nook? Enter to win $1,500 from The Land of Nod and $1,000 worth of books from Brightly. Ends 3/30.
Brightly is a new resource to help moms and dads raise lifelong readers. Brightly features book recommendations for every age and stage, reading tips and insights, seasonal inspirations, author essays, contests, gift guides, and more.
St. Patrick’s Day Rainbow Cupcakes
Post by Corri McFadden of Glitter & Bubbles

There is no better way to celebrate St. Patrick’s Day than with a batch of colorful Rainbow Cupcakes! These cupcakes will be the hit of any St. Pattie’s Day party and impress all the kids, and Mom’s too, in your child’s classroom.
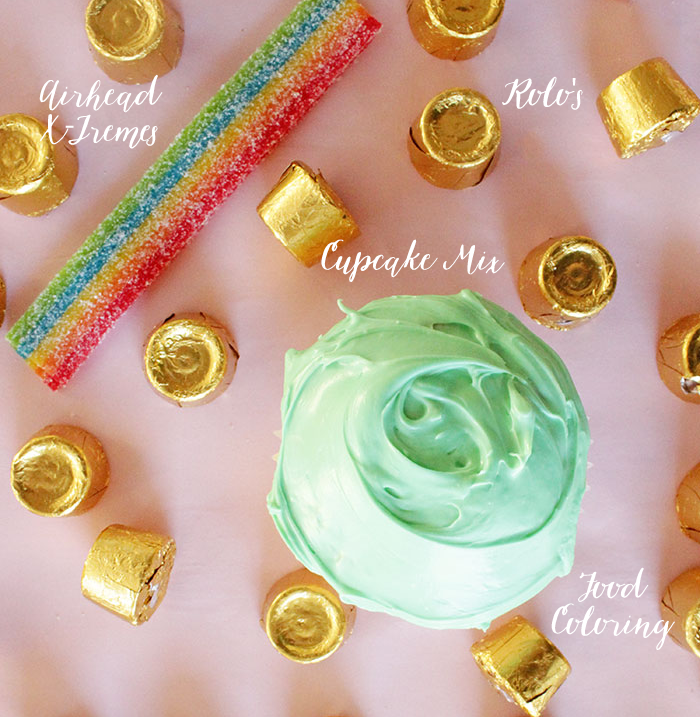
To create these fun St. Patrick’s Day Rainbow Cupcakes, you will need:
- Gluten free yellow cake mix (regular will work too)
- 1/3 cup melted butter
- 3/4 cup water
- Vanilla frosting
- Green food coloring
- Rolo’s
- Airhead Xtremes
How to make them:
- Start by cutting ¼ off of the Airhead Xtreme and continuing to do so with however many rainbows you will need. Take the larger pieces that remain and position them over a glass bowl, then pop them in the freezer. This will create the rainbow shape!
- Then, in a large bowl, combine the cake mix, water, and butter. Mix until smooth.
- Next, Preheat the oven to 350 degrees.
- Line the cupcake tin with liners and spoon in the cake mix so they are ¾ of the way full. You don’t want them to overflow!
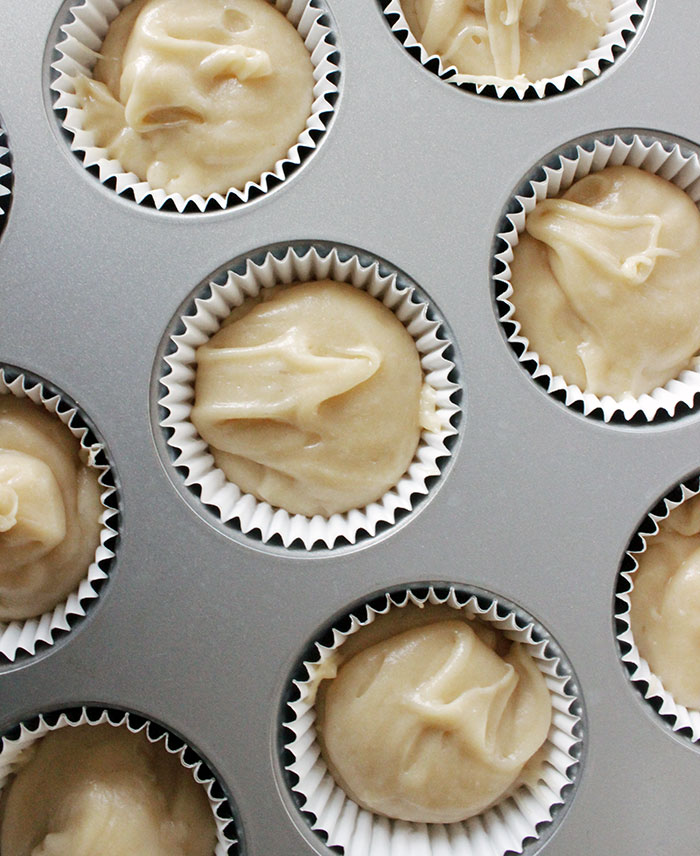
- Bake the cupcakes for 18-20 minutes, or until the cake springs at your touch.
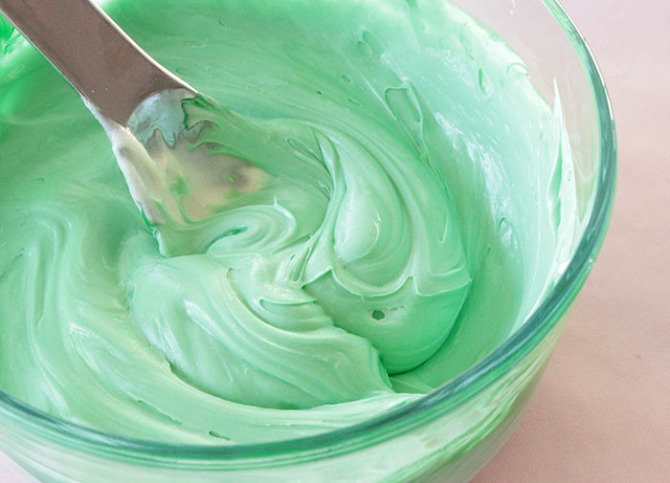
- While the cupcakes are baking, mix the vanilla frosting with green food coloring until they are well combined.
- To check if your cupcakes are done, insert a toothpick into the center of a single cake and see if it comes out clean. If your toothpick is clean, remove the cupcakes from the oven and set them aside to cool for 10 minutes.
- Once they are cool, frost your cupcakes and use a knife to create two small slits on opposite sides of the top of the cupcake.
- Remove the Airdhead Xtreme rainbows from the freezer and insert each end in the slits on the cupcake. Place a Rolo at each end of the rainbow (each one is a pot of gold!)
These colorful and delicious Rainbow Cupcakes are ready to be eaten!
Need more tasty recipes and delicious bites? Check out our Let’s Eat Pinterest Board.
Corri McFadden is the owner and founder of eDrop-Off Luxury Consignment. As a Style Expert and successful blogger, she hosts a weekly fashion segment on Chicago’s “You and Me This Morning”, and features “Style Recipes”, videos and Fashion “Must Haves” on her self-titled lifestyle website Corri McFadden. Most recently, she launched Glitter and Bubbles, a modern day moms guide for those looking for inspiration through fashion, food and décor.
DIY Honeycomb Garland
Post by Colleen of Lemon Thistle
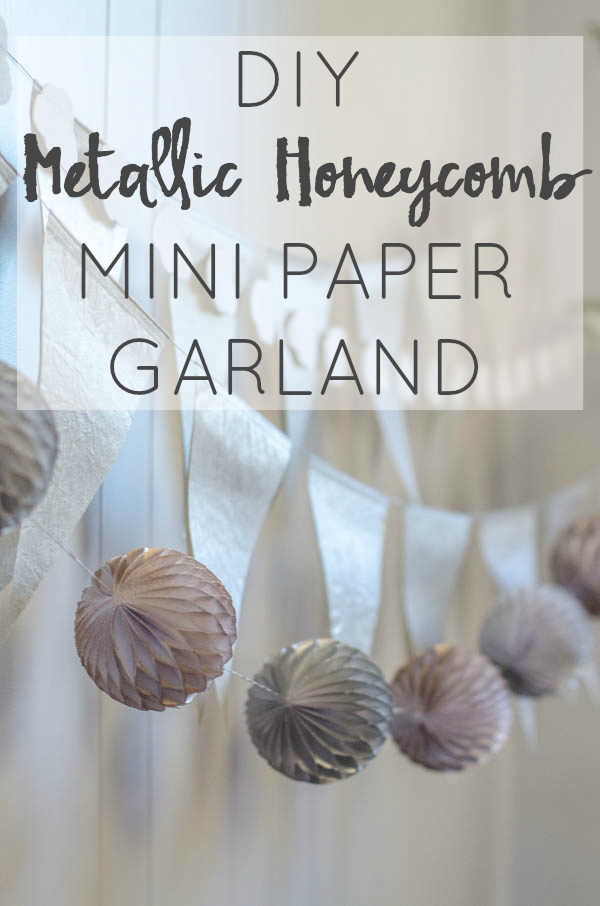 I’m excited to be sharing this DIY Metallic Honeycomb Garland with you today! We’ve been slowly adding in mixed metals to our home decor and I wanted to create something that used the metallics without looking too grown-up for our kiddos’ room. This fun garland more than fits the bill- plus it feels like a party all the time in there now. By using paper instead of the traditional tissue, this garland will stand up to a bit more love from little hands.
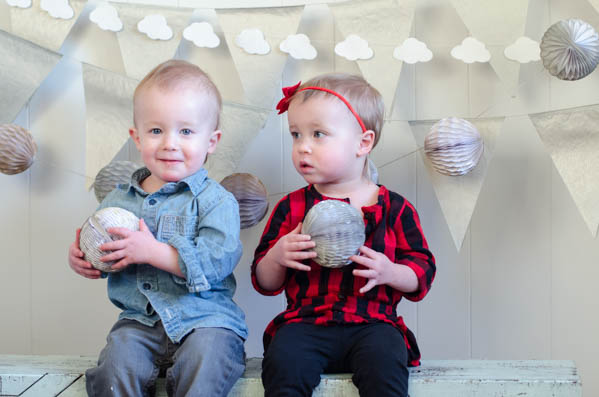 To make your own DIY Metallic Honeycomb Garland, you’ll need:
- White printer paper
- 5mm Double sided tape (and lot’s of it!)
- Scissors
- Pencil and round object to trace (mine was 4″)
- String or embroidery floss
- Spray paint if desired
To make the mini honeycombs, you’ll need to create a template.
- My mini honeycombs are 4″ round, so I marked four inches on a sheet of paper. Those are the pencil lines in the photo. This way, I could fit two across on a sheet.
- Then, mark even spaces in alternating colors. I made my lines .75″ apart.
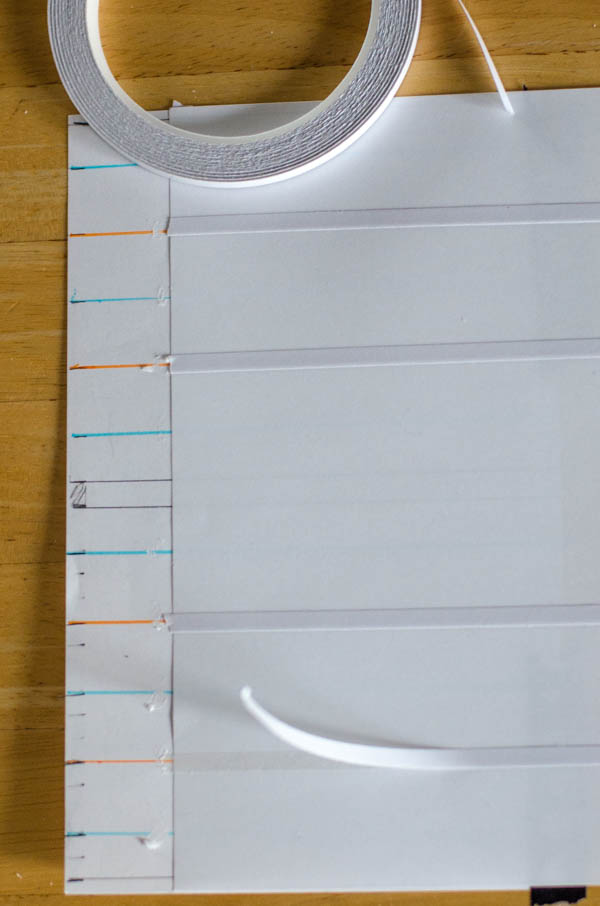
- Tape your template to the table and lay your first sheet of paper on top.
- Use your double sided tape and run pieces across the paper over one of the colors .
- Then place another sheet of paper on top and lay tape on the alternate colored lines. I used 25 sheets of paper per honeycomb ball.
- For your sanity, I’d turn on Netflix. This is super easy to do but it takes a bit of time and is repetitive- you can totally multi-task with some re-runs!
- When you’ve stuck together 25 sheets of paper, trace your circle on top and cut it out. Make sure to line up the circle with the top and bottom lines you drew (my pencil lines).
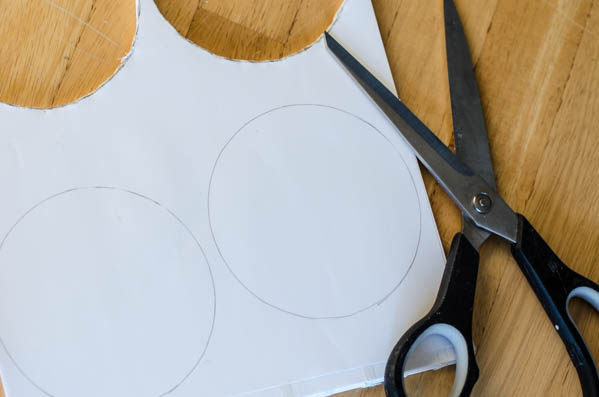
- Mark the center of the circle and staple it.
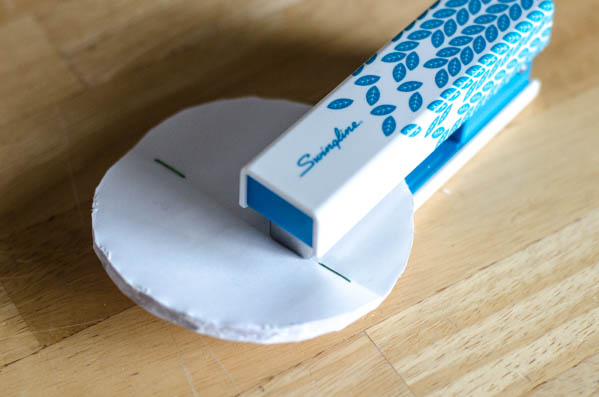
- Fold the circle in half a few times to create a crease in the center where you stapled, then cut a section out of the middle. This will help it bend easier.
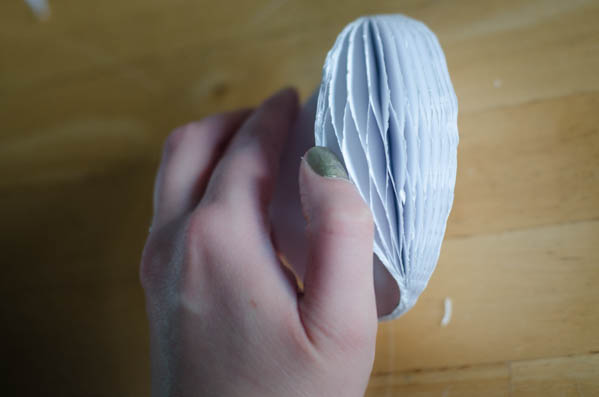
- Now apply double sided tape to each side of your circle and open it, sticking the edges together.
- Make sure to insert your string in one of the sides (as shown in the photo) before fully assembling!
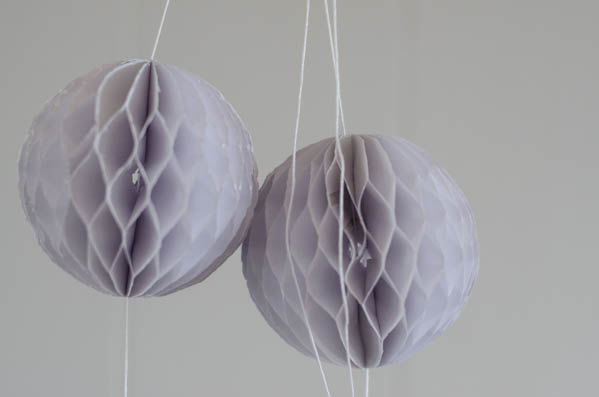
That’s it! Now you’ll have plain white honeycomb balls. I contemplated leaving mine this way- they were so cute and simple! But I stuck with my plan for metallics and misted the balls with gold and nickel metallic spray paint. You could mist them with any color you like!
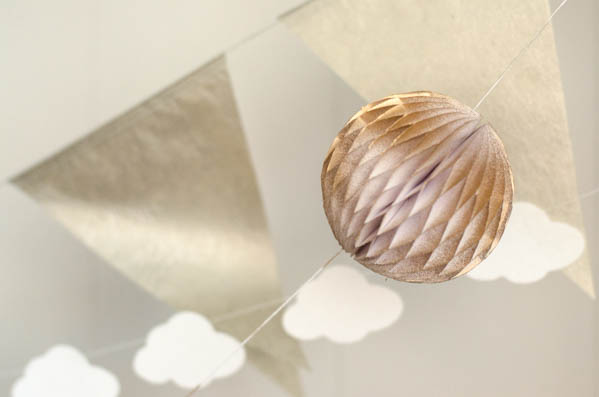
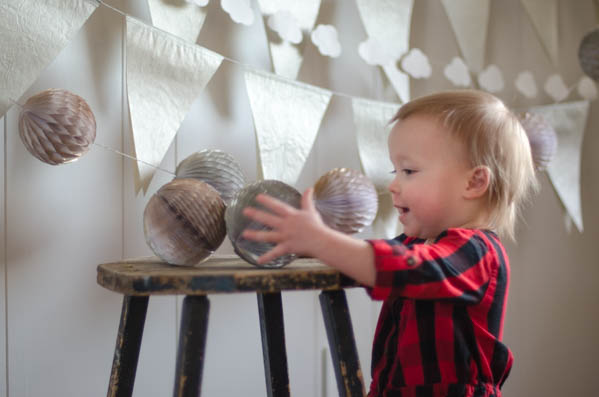
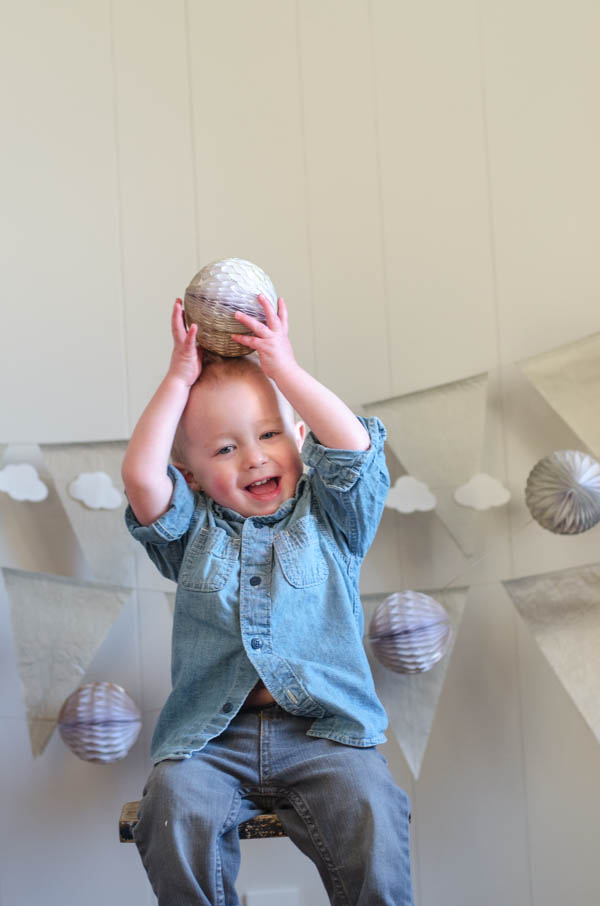 I love the way this DIY turned out! You could spray the honeycombs with any color of spray paint- to match room decor or a party theme!
Colleen is the lifestyle blogger behind Lemon Thistle – home to DIY, parties, home décor and lots of babies. She’s a wife; mama to 17-month-old boy/girl twins; and lover of pretty things. Colleen believes you can have a beautiful life, home, and party without spending a lot – (keeping it real with a budget). Every day deserves to be special, there’s no accomplishment too small to celebrate. She hopes that her children will learn to love the little things in life.
Free Printable Coloring Pages: St. Patrick’s Day
Printable Coloring Pages designed by Michelle Romo
Just in time for leprechauns and rainbows that end in pots of gold, we’re sharing our own St. Patrick’s Day printable coloring page! You can download our St. Patrick’s Day free printable today.
Share the finished product on Instagram (use hashtag #CrateKids) or our Facebook page and we may feature it!
 Keep your little ones occupied for hours (ok, maybe ten minutes) with our other free Printable Coloring Pages!
Michelle Romo is a self-taught illustrator and designer fueled by cookies and naps. Her influences include Mid-Century, Japanese and Scandinavian design, along with pretty much anything cute. When she isn’t working she spends her time eating good food, hugging her friends, playing video games and crafting.
Preschool Book Nook Inspiration
Post by The Land of Nod and Brightly
At Nod we believe that the best gifts are those that run on pure imagination, no batteries required. And, what better gift to give your kids, than a love of reading. That’s why we’ve partnered with Brightly to put together some book nook and library inspiration for your little one. Throughout the month of March be on the lookout for tips from Nod how to create the perfect reading nook, along with tips from Brightly on how to build a library to inspire your kiddos. Not only that, we have a fantastic giveaway, but you’ll have to read to the bottom of the post for details. This is all about reading, after all.
Book Nook Design Tips from Nod:
No matter the age of your child, all book nooks need to have three attributes in their design. They need to be inviting, comfortable and quiet. You want the space to feel inviting, so your kids want to spend time there. Reading shouldn’t feel like a chore, and an inviting space can make it appealing. Comfortable, so once they’re in there, they don’t want to leave. And, quiet, so they can lose themselves in their books without the distraction of the tv or other siblings.
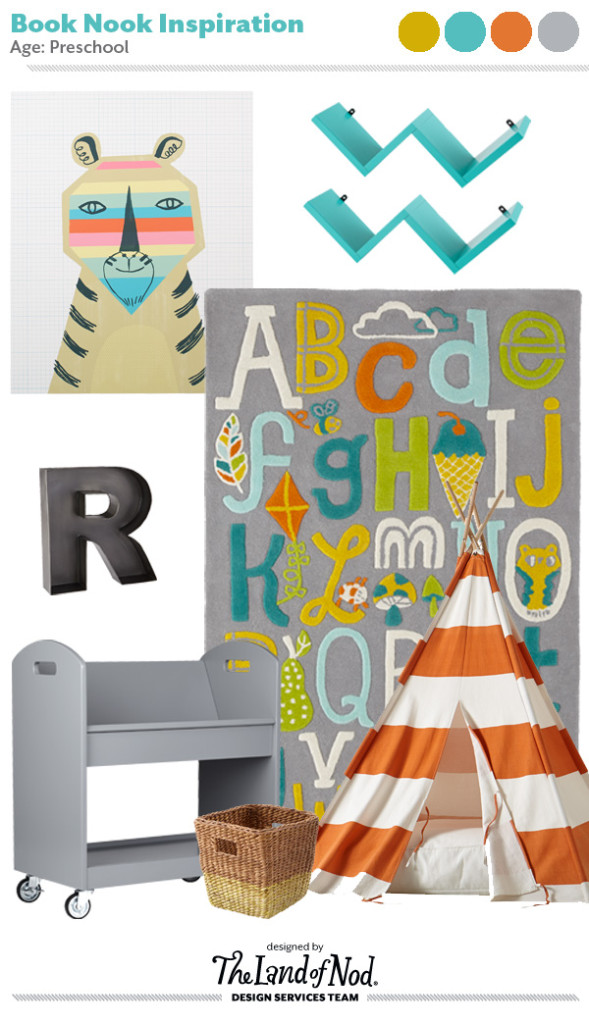 Rainbow Tiger Wall Decal / Aqua Origami Wall Shelf / R is for Rug / Orange Stripe Teepee with Floor Cushion / Yellow Half Tone Cube Basket / Magnificent Metal Letter / Local Branch Library Cart
For this book nook, here are some of the key design elements:
- The overall color scheme is based on gray as the foundation color with pops of orange, aqua and yellow to create a playful, gender-neutral space. This color scheme will work well when the nook lives in a shared space, as grey will compliment most any décor you have in your home.
- The R is for Rug is soft and plush providing a comfortable foundation for the space. And, bonus, it’s also educational, showing the whole alphabet with a corresponding illustration for each.
- We added the teepee to this design as an alternative to an architectural nook. Sure, book nooks are great in that space under your stairs, or in a dormered corner, but not all homes come equipped with that sort of architecture. So, a teepee or playhome is a great alternative to create a hideout for your kids. Don’t forget to add a floor cushion to make the space extra plush.
- The Local Branch Library cart is perfect for book storage and is easily accessible to the little ones. You want to be sure they can access the books on their own, and that they’re in plain view.
Book Recommendations from Brightly:
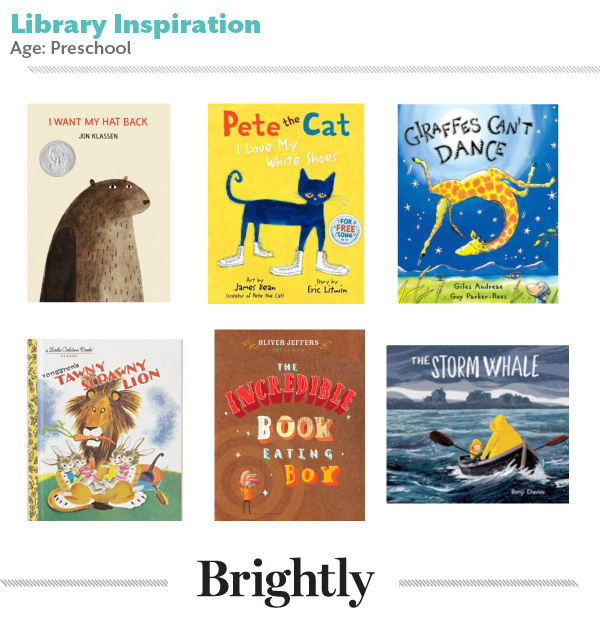
Snuggling up in a cozy spot to read with your little one is of the most enjoyable parts of parenthood. The best books for the pre-K set feature gorgeous artwork, text that’s fun to read aloud, and plenty of delightful moments throughout.
- I Want My Hat Back – This is the simple (but very clever) tale of a bear who has lost his hat. The book’s slyly subversive ending is beloved by readers and has even spawned its own Internet meme.
- Pete the Cat – Pete the Cat is one cool customer. Although his white shoes get stained with all the colors of the rainbow, Pete remembers it’s all about the journey — a good metaphor for parenting.
- Giraffes Can’t Dance – With rhyming text that makes it a pleasure to read aloud, this heartwarming and beautifully illustrated story will inspire every child with dreams of greatness.
- Tawny Scrawny Lion – You may remember this beautifully illustrated classic from your own childhood. This Little Golden Book tells the story of a family of rabbits who convince a hungry lion to eat carrot stew … so he won’t eat them!
- The Incredible Book Eating Boy – The multi-talented Oliver Jeffers has created a story that book lovers of all ages will appreciate. Young Henry loves books – or rather, he loves to eat books, so much so that it becomes a bit of a problem.
- The Storm Whale – Written and illustrated by the talented Benji Davies, this gentle tale about a lonely boy called Noi who befriends a whale, and in the process forges a closer relationship with his father, will touch parents and kids alike.
Looking for more great books to enjoy with your little one? Check out 9 Clever Picture Books for Kids on Brightly.
Want the perfect kids’ reading nook? Enter to win $1,500 from The Land of Nod and $1,000 worth of books from Brightly. Ends 3/30.
Brightly is a new resource to help moms and dads raise lifelong readers. Brightly features book recommendations for every age and stage, reading tips and insights, seasonal inspirations, author essays, contests, gift guides, and more.
A Cozy Morning with a New Pal
Post by Michelle of Avery & Augustine
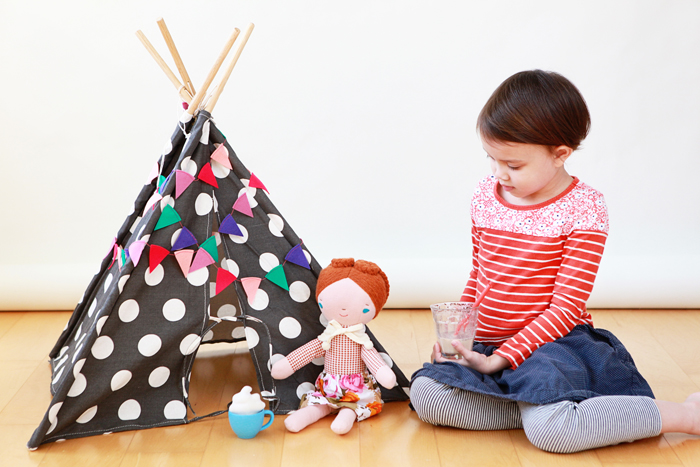 The moment Avery met Fern, it was love at first sight. We spent the morning “welcoming” Fern to our home and getting her settled in: decorating her doll teepee (just her size!) with a garland, reading her a book and making a pretend latte for her.
 Avery got to have her own caramel latte, which was super easy and fast to make! (By the way, there’s no coffee or caffeine in this drink, so it’s a perfect treat for kids.) Here’s how we made it. We warmed up approximately 3/4 cup of milk (which you can do over low heat on the stove or in the microwave). Next, we mixed in 1 tablespoon of caramel (we used Fat Toad Farm’s goat’s milk caramel) and used a milk frother to make the top layer of the drink foamy. If you don’t have an electric milk frother, this post on The Kitchn tells you how to froth your milk. Lastly, we topped off the latte with a sprinkle of grated unsweetened chocolate.


 Thanks to The Land of Nod for sending us the items for this post.
You can see Michelle’s work and read about her two young children and their first forays in cooking, art and everything in between at Avery and Augustine.
Removable Wallpaper – Big Impact, Small Commitment
Post by Danielle Kurtz, Creative Director at The Land of Nod
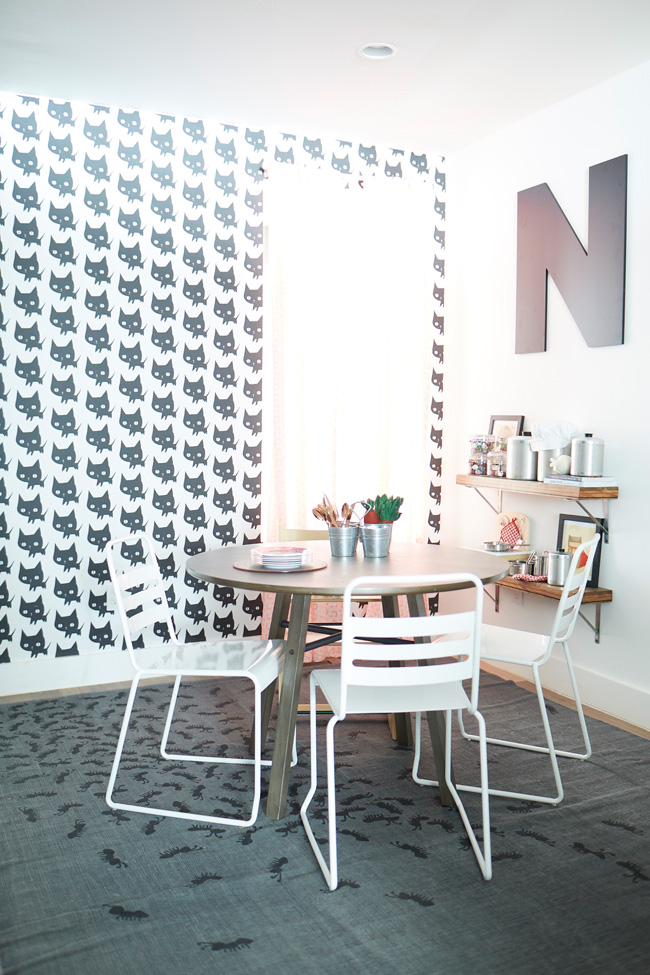 When you have young children, things are constantly in flux. Just when you feel settled, they learn a new skill or show interest in a new activity that sends things in a whole new direction. Simply said, kids just keep changing. So it makes sense that your needs in your home will evolve right along with your growing family. This can make decorating a challenge. One minute your spare bedroom is a home office/guest room, the next it needs to become a nursery for the new baby. One minute your basement is a toddler’s playroom, the next you turn around and you need a hang out for your preteen. So just how do you deal?
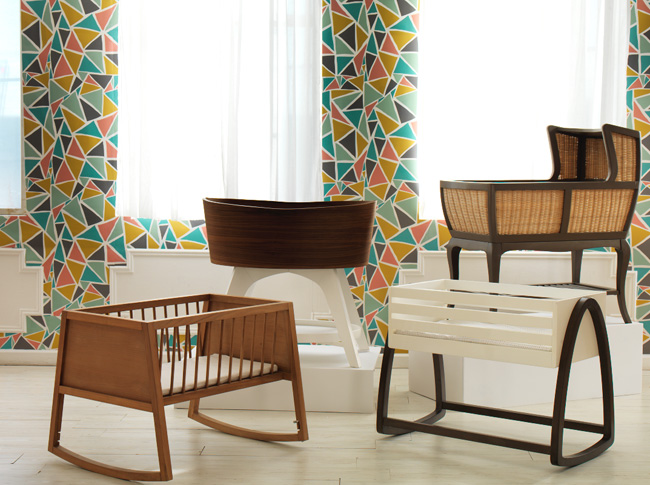 I love the idea of wallpaper. I’m constantly swooning over beautiful images of rooms with gorgeous wallpaper. But, it’s a huge commitment…time, cost, aesthetic. It’s more than I’m willing to commit to with a young family. Enter removable wallpaper. Brilliant! It has all the impact of regular wallpaper, but with the commitment of a wall decal. We’ve used removable wallpaper from Spoonflower for tons of projects, there are so many incredible patterns. It’s beautifully printed, easy to apply and just as easy to remove. Win, win, win.
Here are a few patterns I’m loving, inspired by our Spring ’15 Trends.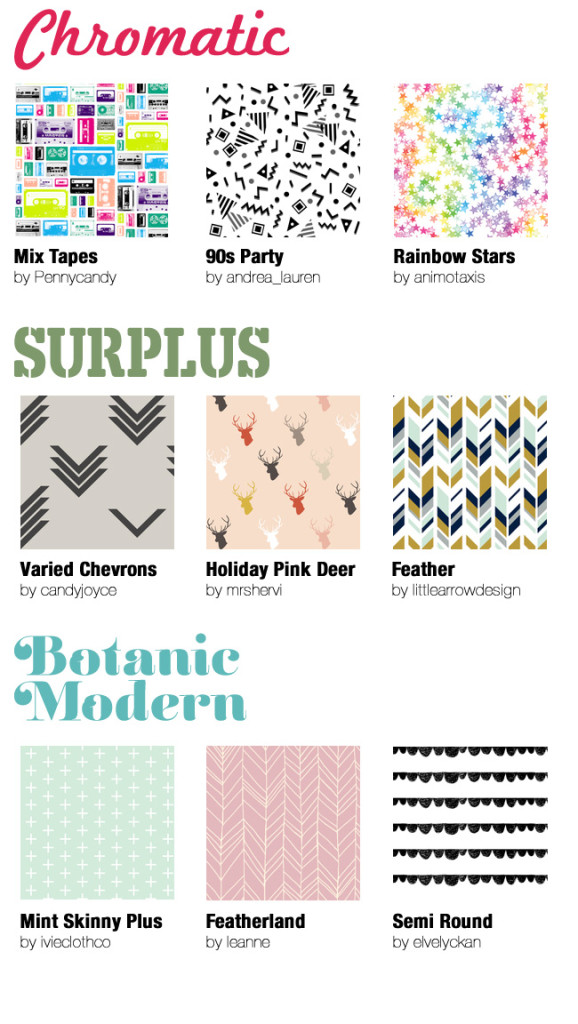 Chromatic: Mix Tapes / 90s Party / Rainbow Stars
Surplus: Varies Chevrons / Holiday Pink Deer / Feather
Botanic Modern: Mint Skinny Plus / Featherland / Semi Round
How to Create a Scandinavian-Inspired Living Room
Post by Lidy of Hello Lidy
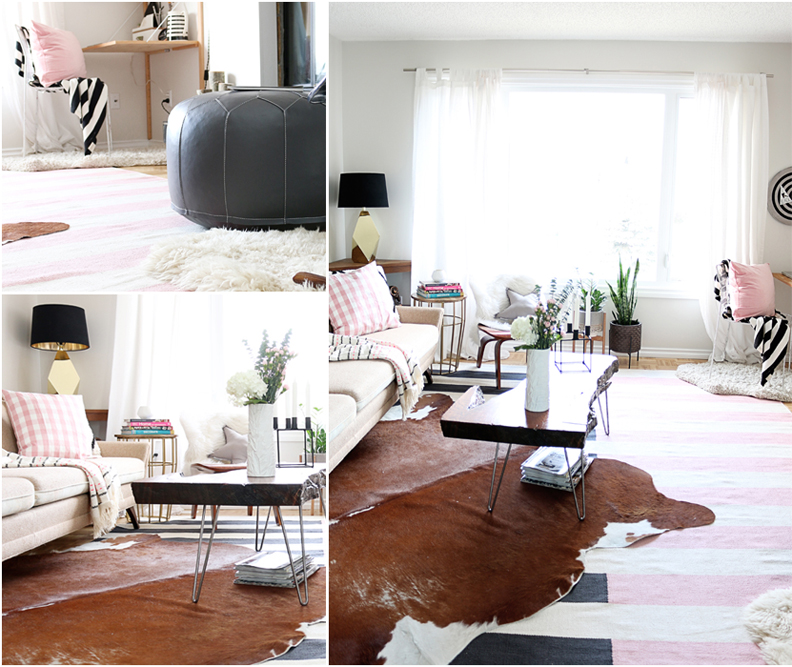 Ever since we moved into our new home 6 months ago, we’ve been busy bees trying to get our house feeling more like our home. We gave our dining room and master bedroom a makeover, but I was really stumped with our living room upstairs. I wanted it to feel more Scandinavian-inspired so it would flow with the rest of our home design, but still a space that felt playful and casual. It was a lot to fit into one room – I know!
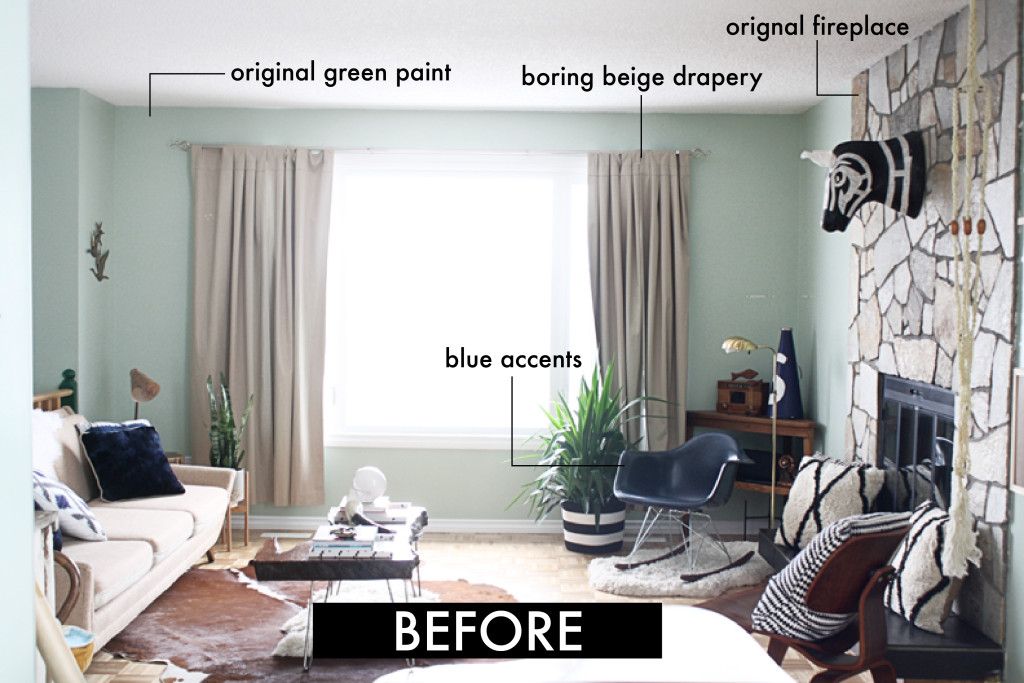 The living room before was a cool and gloomy space. It was very outdated! The walls were painted green and it almost closed the space up a bit. I love to have green in my home, but in a more natural form – such as plants! The curtains were heavy and beige. The fireplace was the original stone work, which we didn’t want to paint over and lose the character. I really didn’t know how to make the space feel bright and cheery with all the cooler tones, so I opted for blue accents. I was just not satisfied.
So, when it came to redesigning the space I decided to stick to a color palette that was a mix of bright, bold and playful! I chose black and white for the modern and formal look, but threw in grey and pink for that whimsical undertone! Here’s what we did:
- Repainted the green walls a fresh and crisp white.
- Built a faux mantle to break up the stone fireplace.
- Took down the beige drapery and added white curtains to go with the flow of the walls.
- Added a built-in desk to utilize the functionality of the space.
- Added black, white, grey and pink accents thanks to The Land of Nod’s gorgeous spring pieces!
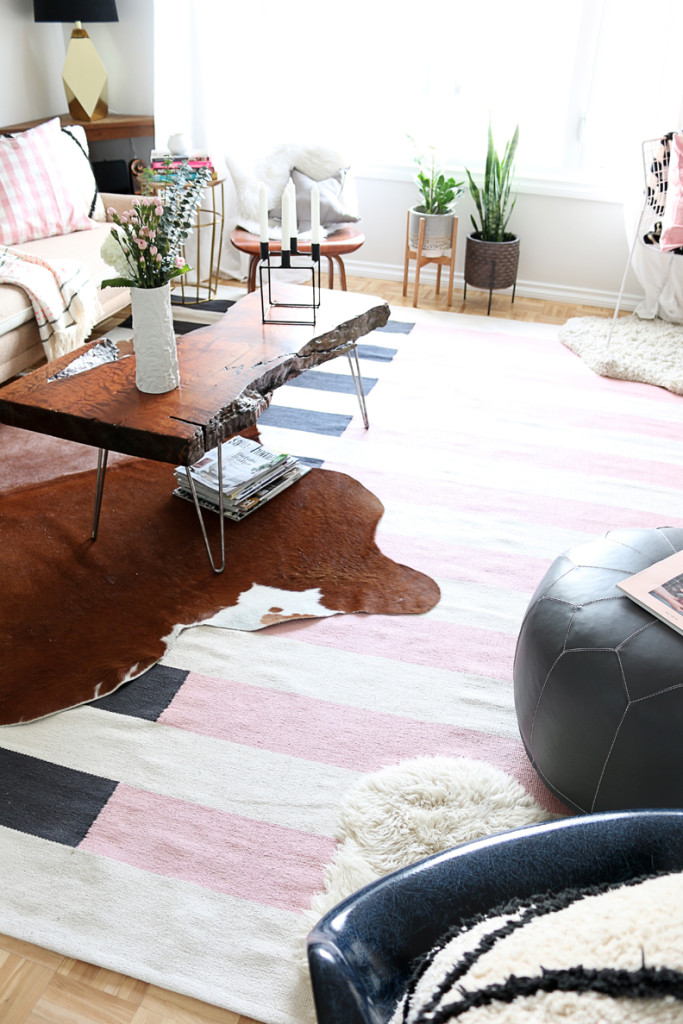
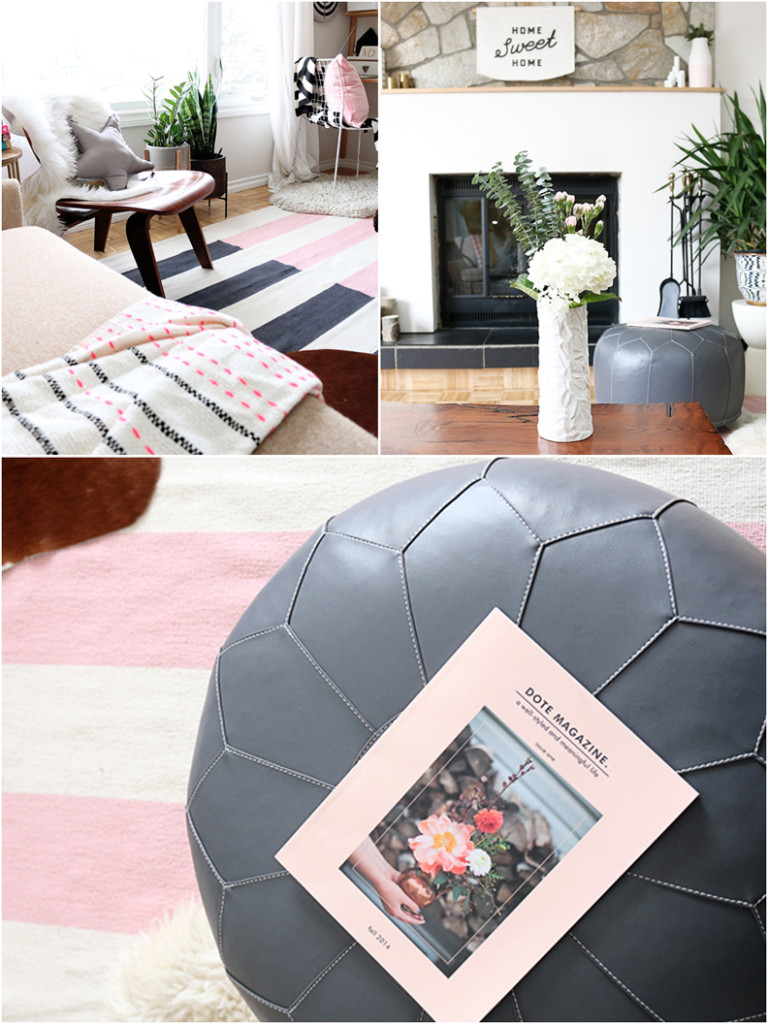
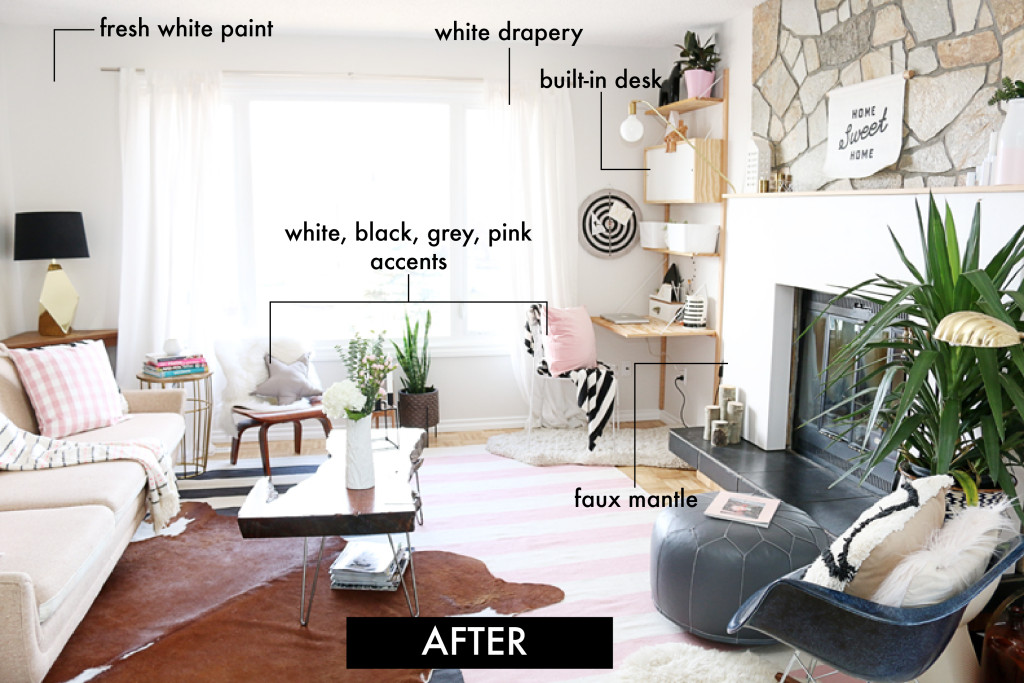 The space is literally night and day! Our Scandinavian-inspired living room feels so much more brighter, inviting and calming . My family and I absolutely love our new and improved living room – and yes, there are 3 boys in our home. And no, the pink doesn’t seem to bother them in the least! The bold and graphic area rug creates an intimate and inviting feel to the room. I love to layer, so I placed a small cow hide to overlap the larger rug for fun in order to create more texture and color on the floors! It makes the room feel a little more grown up too!
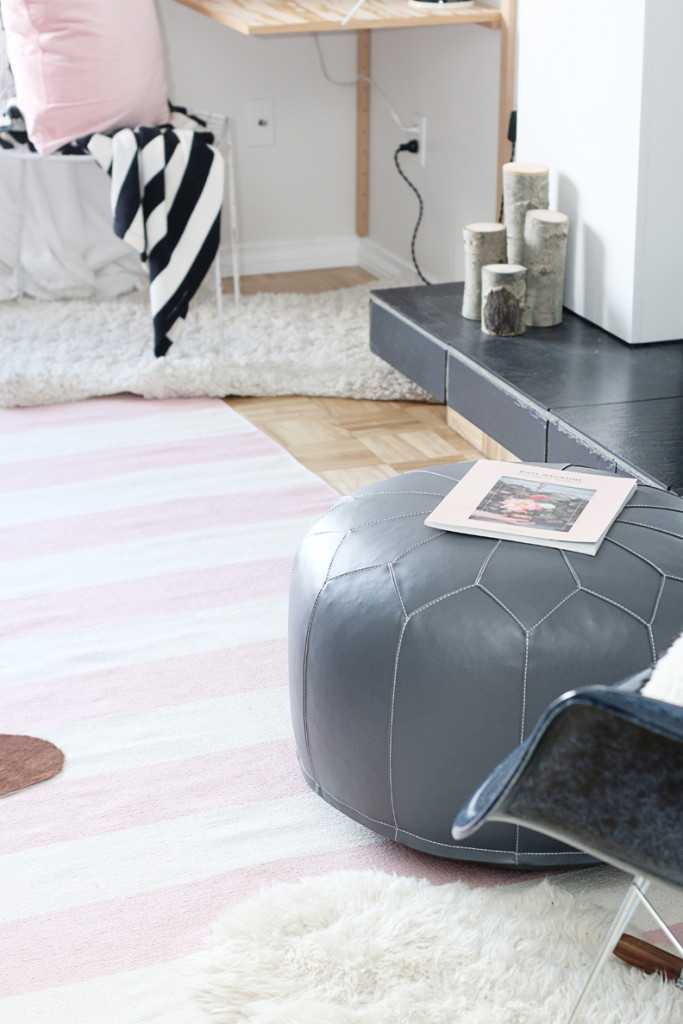
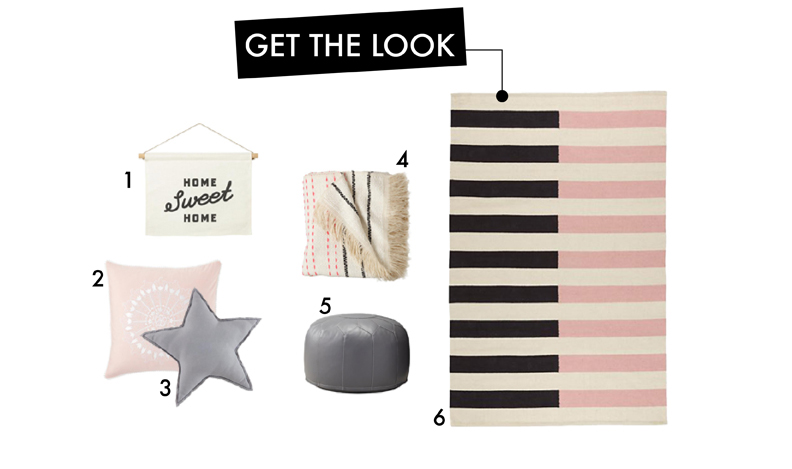
The pops of pink and grey from the pillows tie in the rug and that amazing grey leather pouf! Of course, the handmade feel of that darling “Home Sweet Home” banner makes everything feel so playful. That cozy throw also helps balance the room between formal and casual. It definitely has that clean Scandinavian look I’ve been trying to accomplish. I’m truly in my happy place here and it’s about time! What do you think of our living room makeover?!

 Lidy is the face behind Hello Lidy: a blog focusing on creating and cultivating unique spaces that integrate original handmade designs and vintage pieces while keeping up on current trends and designs. Lidy and her husband have three adopted toddlers.
The Jealous Curator – Nod Artist Interview
Let’s see – I’m Danielle Krysa and I have a BFA in Visual Arts, I’m a graphic designer, an art blogger, an author, and a mom to my sweet son, Charlie. Two years ago we moved back to my tiny hometown and settled into a 100 year old farmhouse on the side of a mountain overlooking a lake. It feels like our very own little slice of heaven. I do enjoy a hit of big city every now again mind you, so I always try to have a few book or curating projects going in places like LA and New York.
HOMETOWN: Summerland, Canada
CURRENT TOWN: After years in Toronto and Vancouver, I’ve just moved back to Summerland!
FAVE ICE CREAM FLAVOR: Anything involving brownie chunks
FAVE BREAKFAST FOOD: Hashbrowns – extra crunchy
FAVE HOLIDAY: My birthday. Yes, I’ve officially made that a holiday.
FAVE COLOR: Tie between neon coral & light aqua
FAVE MOVIE: Dirty Dancing (I totally just dated myself)
FAVE DECADE: 80s (I did it again)
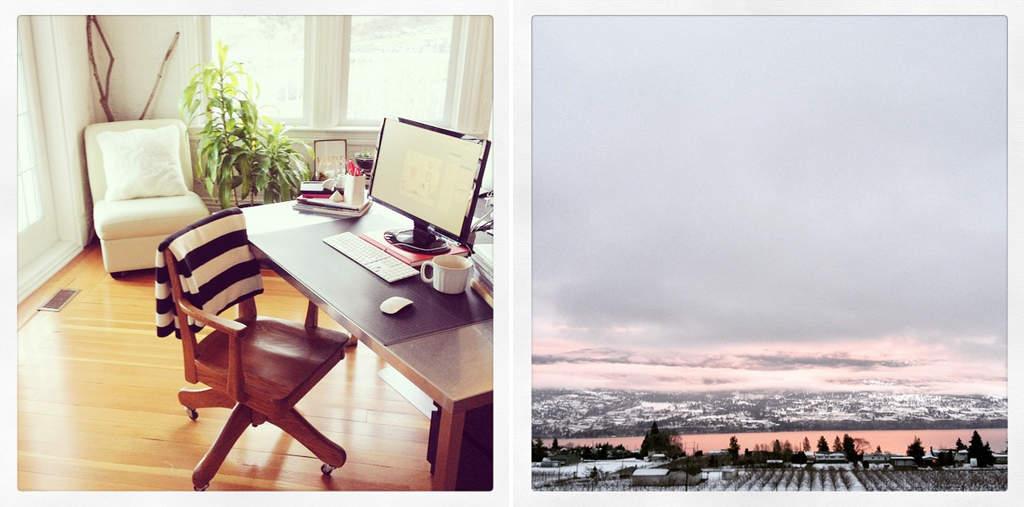 How did you begin curating art?
I made up fake shows! In the first year of my blog (2009), I used to curate/post my “dream shows” – collections of work that I would love to hang if I had a white-walled gallery at my disposal. It’s so crazy that less than two years after that, galleries started asking me do it for real.
Is there a story behind the name of your company?
Yes – I started “The Jealous Curator” for me, with no plans of ever having readers or a community. It was more like a form of self-prescribed art therapy. I was so overwhelmed, and depressed quite frankly, by the huge amount of amazing art that I was finding online. I was truly jealous of these artists and their work. It was eating me alive, and I was exhausted. So I decided to own it, and say it out loud as “The Jealous Curator”, because that’s what I was – a jealous curator. By sharing artists’ work that I loved, that toxic soul-crushing jealousy turned slowly, but miraculously, into admiration. It was a life changer. I’m no longer jealous – just excited and inspired – but my business cards are already printed, so the name ain’t changing!
What are the most rewarding and the most difficult parts of running your own business?
The most rewarding part is knowing that I’m in charge of my own success. The most difficult part is knowing that I’m in charge of my own success. Yep, it’s a wonderful sense of freedom, mixed with a dash of nail-biting fear. But, I think I’ve finally arrived at a place in my life where I don’t worry as much as I used to. At the root of it all, I know that I’ll land on my feet as long as I don’t give up.
How would you describe your style?
Hm. Eclectic? I love a lot of different kinds of art, but I suppose there are a few themes that emerge: I love work with a clean/design feel, work that seamlessly blends fine art and craft, and work that looks like the artist might have a touch of OCD! Oh, and portraits. I’m crazy for portraits.
If you could travel anywhere, where would it be?
I went to Bali a few years ago, and I’d go back in a heartbeat. And Paris, anytime.
If you could possess a superpower, what would it be?
An all powerful healing touch. Then I could sleep at night instead of worrying about my little boy.
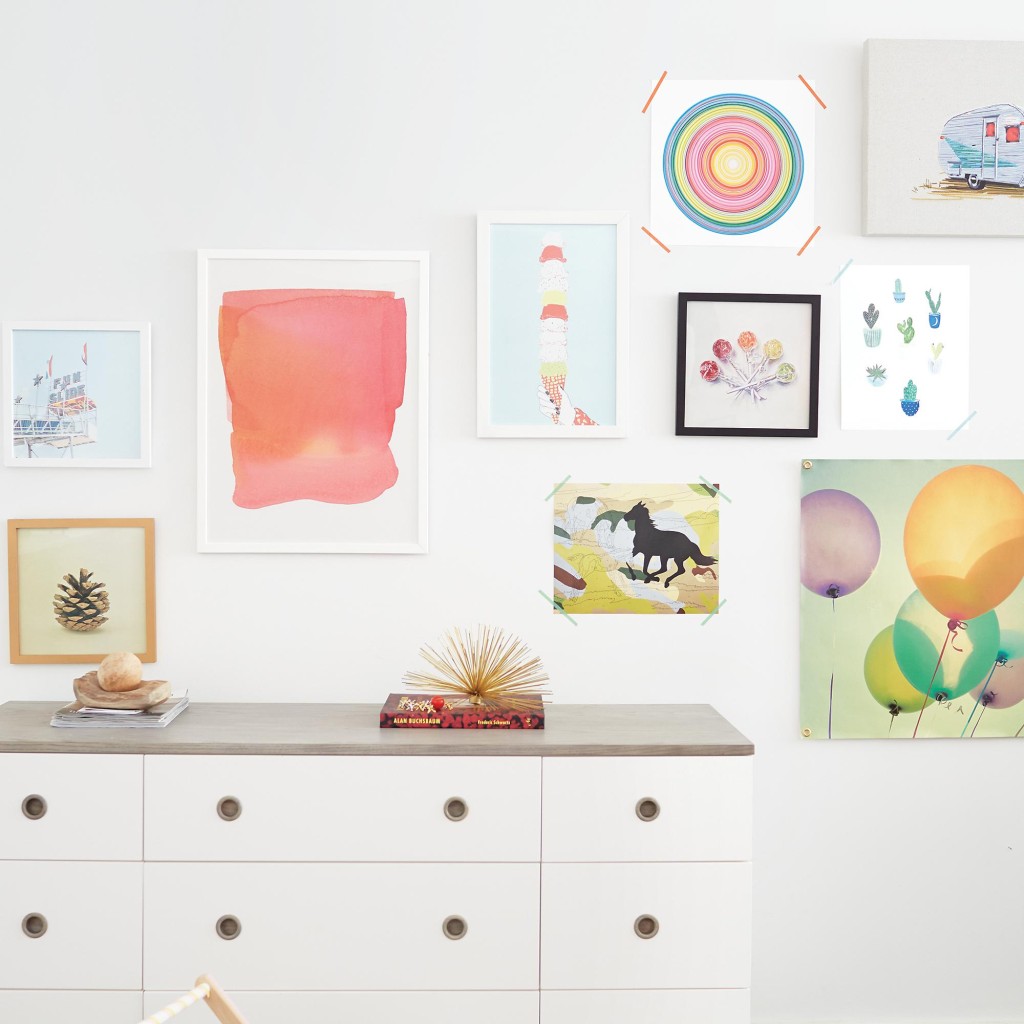 Tell us about your new curated collection with the Land of Nod.
I’m really proud of this collection! I chose these artists and their works as a curator, but I also had my “mom” hat firmly on. When my son was a baby, I had a really hard time finding cool art for his room – art that he would like, but also something that I wanted to look at while rocking him in the middle of the night, and during diaper changes, and when we were lying on the floor pretending to be [insert any farm animal here]. That’s what this collection is all about. I chose fun, fresh, candy-hued pieces that are perfect for the nursery/kids’ room, but that are contemporary enough to transition smoothly into the “grown-up” areas of a home as your babies grow up (why do they have to grow up!?)
How would you style it in a room?
I chose pieces that work well together, and also purposely made them different sizes… this is a recipe for a really rich, visually interesting gallery wall! ps. Groupings in odd numbers are usually the most successful.
Tips for Encouraging Tooth Brushing in Kids
Post by Christina of Christina Williams Blog
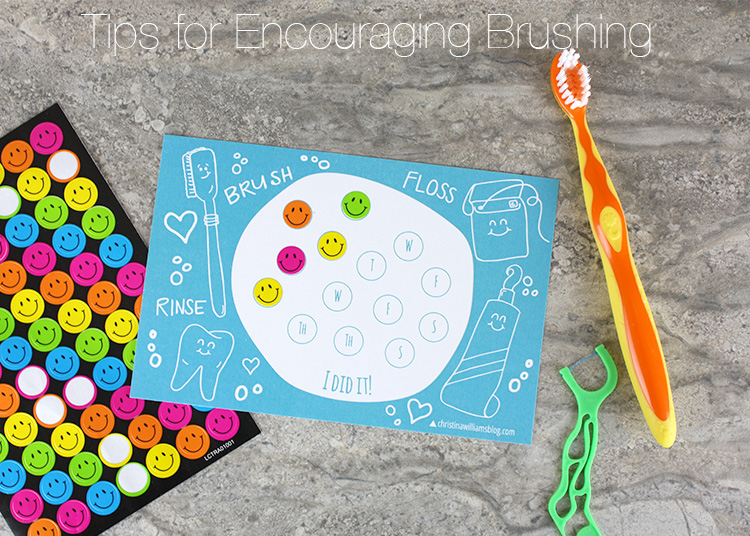 I can’t let Children’s Dental Health Month slip away without a quick post about those pearly whites. Sadly, I learned this lesson the hard way with my oldest. My husband was busy with schooling at the time, and I was an overwhelmed, exhausted first-time mom. After getting up repeatedly in the night, fighting battles over car seats, diaper changes, healthy foods, etc. all day long, I didn’t have any fight left in me at bedtime. Some nights, I completely skipped flossing or did a cursory brush job when he clamped his mouth shut and thrashed around on the bathroom floor.
Before I knew it, I had a three-year-old with several cavities between his teeth. Cavities that flossing would have prevented. The sad/ironic/embarrassing part is that my husband had just graduated dental school at this time. He was usually at school during brushing time; so the fault falls entirely on me. I knew better, and I should have done better. So I’m here to tell you that it IS a big deal. And it’s a battle worth fighting.
Thankfully, I learned my lesson really quickly after that first set of x-rays, and we haven’t had any more problems. The kids know we mean business about tooth brushing and flossing. We’re well on our way to establishing healthy dental habits that will last a lifetime. I have a lot to say about kids and their teeth, so come visit my blog where I’m sharing my favorite dental products for kids.  Here are a few of my favorite tips + tricks to making tooth brushing a little more fun:
- Take Turns: This is especially effective with the toddler (I do it myself) set. Set a timer. Let them brush for 1 minute, then you brush for one minute. They start developing the dexterity for brushing, and you make sure things are actually clean.
- Play Dentist: Let the little dudes brush your teeth. Then brush theirs. Or play Teddy Bear Dentist.
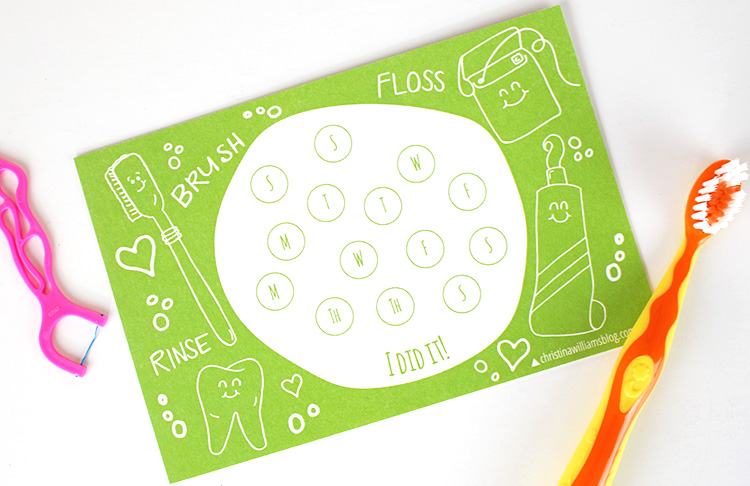
- Timers/Charts/Incentives: Anything visual helps. I made these little brushing charts that my kids like to use. You can download the free tooth brushing printable here. The charts are a good reminder and help them see how often they need to brush.
- Games: My youngest still clenches his mouth shut occasionally. I can usually weasel my way in there with a game. I pretend I can hear a dog (or cat or owl, etc.) hiding in his mouth and we have to search for it, with the toothbrush, of course. Or I do a “super fast race car brush” with lots of sounds and wiggling.
- Older Kids: My oldest is 9 now, and usually does a pretty great job with his teeth. I still check them a couple times a week; but around 8, kids are usually able to brush pretty well. There are some great rinses out there that tint the spots they miss so they can see where they need to do some more work.
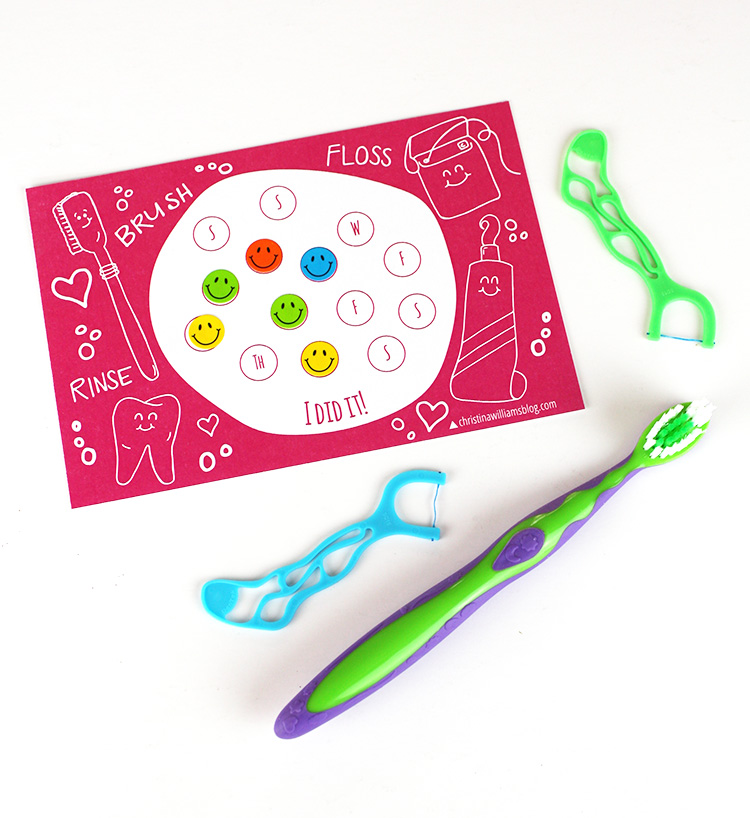
 If all else fails, just pin ’em down and brush whether they like it or not. I’ve had to use this tactic a time or two, and it’s much better than the alternative. Cavities happen, even to the best of us. With a little prevention and effort, however, we can help to minimize them and teach our kids healthy habits.
Happy Tooth Brushing!
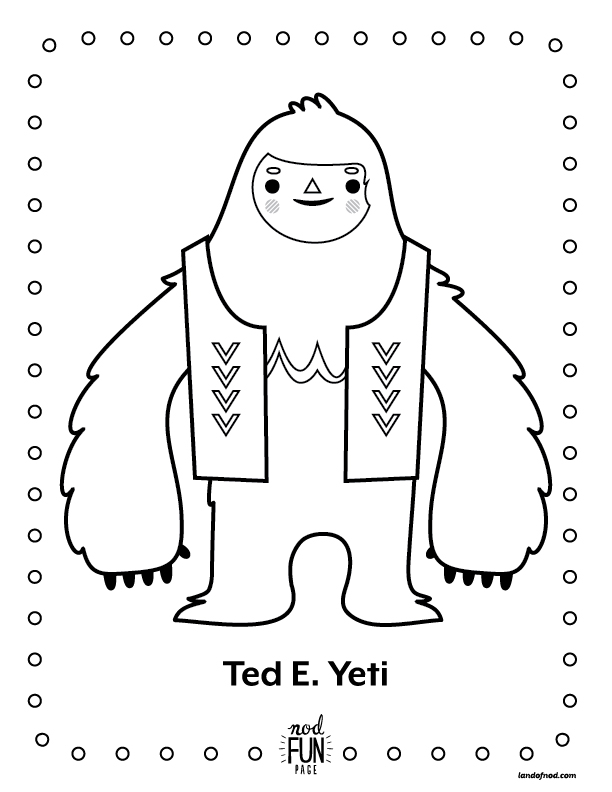
Nod Printable Coloring Pages: Winter Yeti
Nod Fun Pages designed by Michelle Romo
We hope everyone is staying warm and cozy! Today’s printable coloring page (download it HERE) is perfect for keeping littles busy after their cheeks have turned red from playing outside. It pairs perfectly with hot chocolate and marshmallows.
Share the finished product on Instagram (use hashtag #landofnod) or our Facebook page and we may feature it!
Michelle Romo is our newest Nod illustrator, she’s a self-taught illustrator and designer fueled by cookies and naps. Her influences include Mid-Century, Japanese and Scandinavian design, along with pretty much anything cute. When she isn’t working she spends her time eating good food, hugging her friends, playing video games and crafting.
Party On: First Birthday Starlight Starbright Moodboard
Written by Becca of CAKE. | events + design
My son Theo turned one earlier this year, and we all know this is a challenging time to host a first birthday party. Rather than fighting the winter and post-holiday blues, we decided to work with them and host a casual evening gathering with a celestial theme. I’m sharing my vision here in a new feature for Honest to Nod called ‘Party On’. These boards will offer inspiration for family friendly parties, featuring items from the Land of Nod that can be practically incorporated into both your event and your home.
I’m also showing off a few pictures and details from the real event. The rest of our first birthday extravaganza is being featured on my site CAKE., so be sure to pop over and see how it all came together.
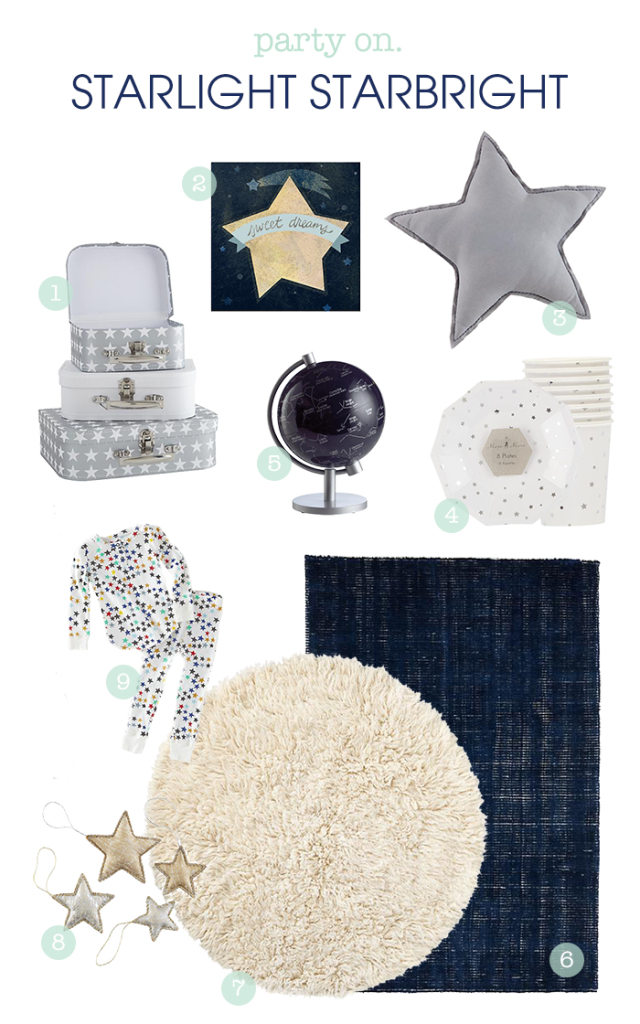 1 – Out of Stock // 2 – Out of Stock // 3 // 4 // 5 – Out of Stock // 6 // 7 // 8 – Out of Stock // 9
First Birthday Theme: Starlight Starbright
Color Palette: Indigo // Silver // Winter White
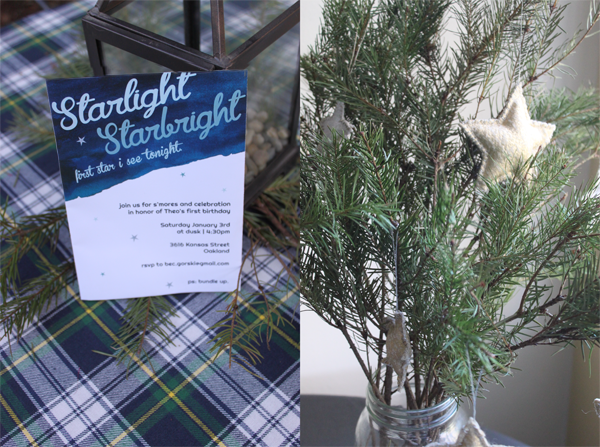
Invitation: available on Etsy
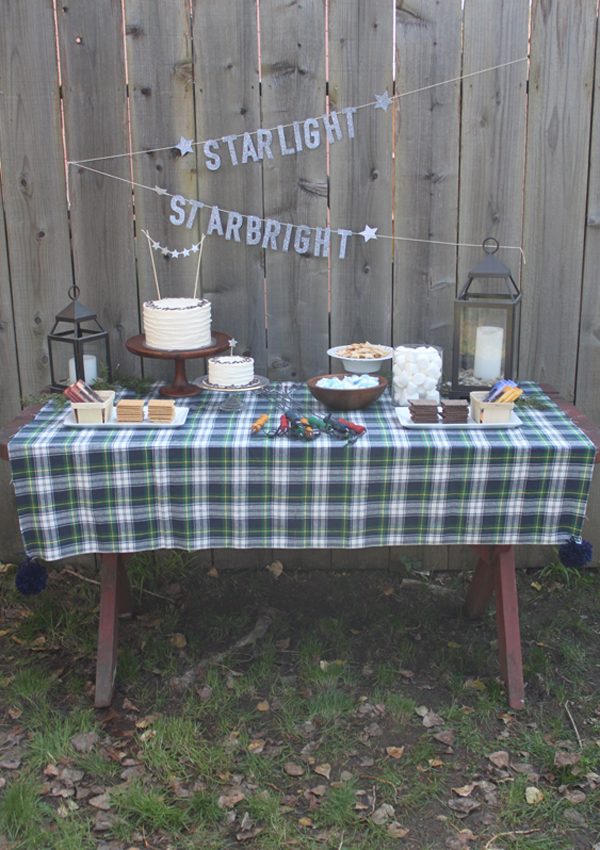
 We held the party at dusk, and luckily the weather permitted it to be held both indoors + outdoors. Because of the time, we encouraged the little ones to come in their pjs so they could head right to sleep when they got home.
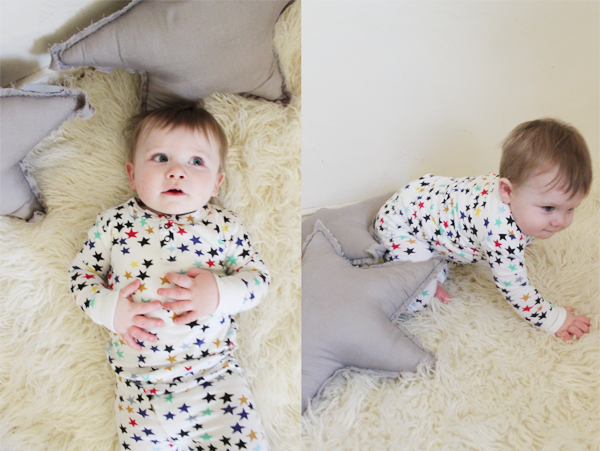 Chilly though it was, we had dessert in the backyard around our fire pit. There was vanilla cake, star cookies, meringues and all the fixings for a classic s’mores bar.
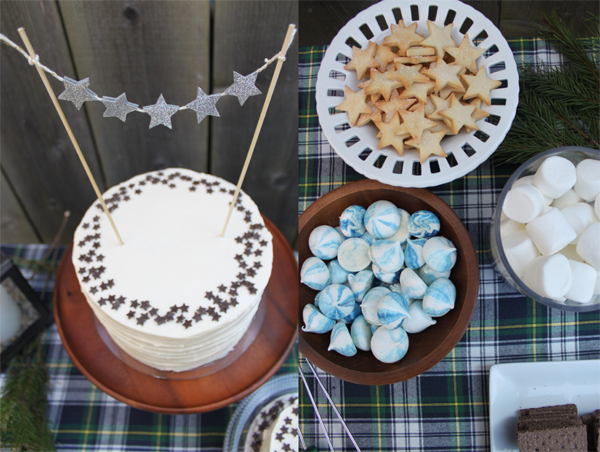
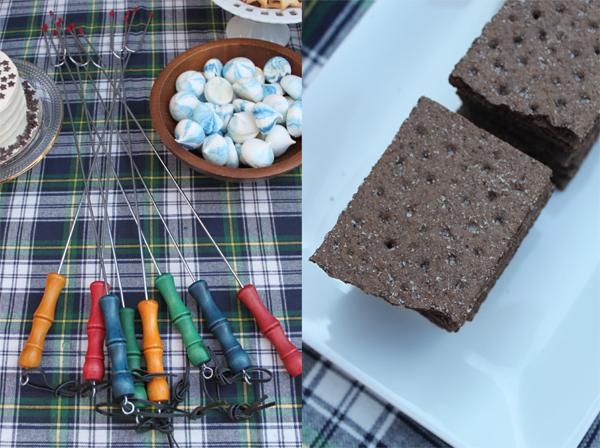
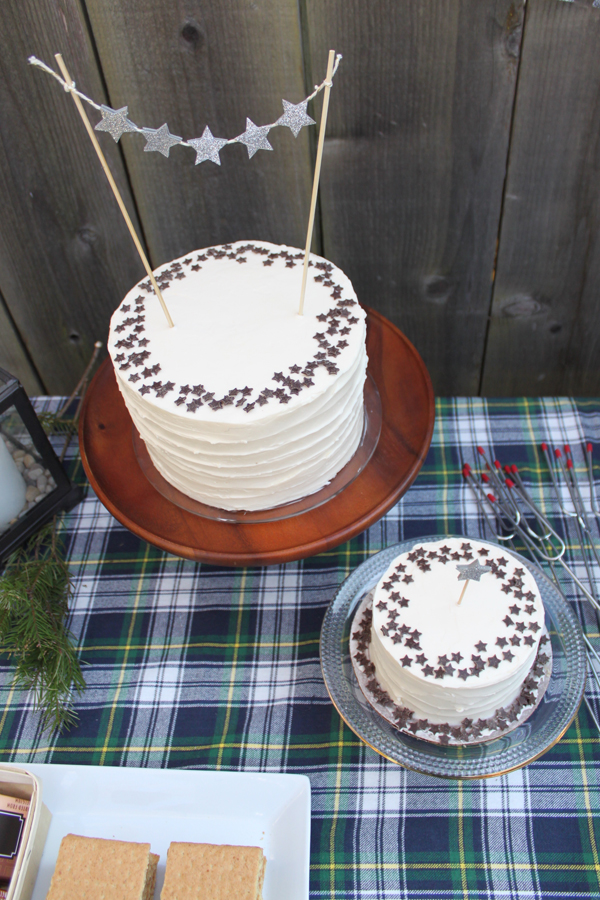 We had benches around the fire pit with star pillows and blankets to help keep everyone warm. Sitting underneath the twinkle lights it was all very cozy and campy.
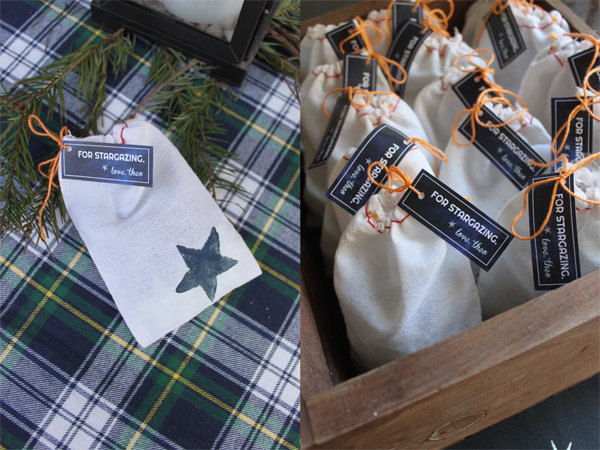
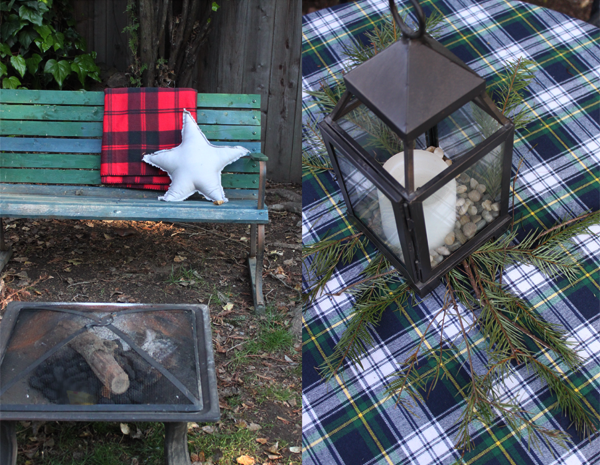 We sent each family home with a handmade favor bag that had a special surprise inside – a set of glow in the dark stars for the kids rooms. I designed a little ‘for stargazing’ tag to coordinate with the party invitation.
 Becca Gorski lives in the SF Bay Area, is a working mother of two, and moonlights as an occasional designer / blogger / celebration maker. You can find her creative ideas on CAKE. | events + design, and her line of merry happy party printables on Etsy.
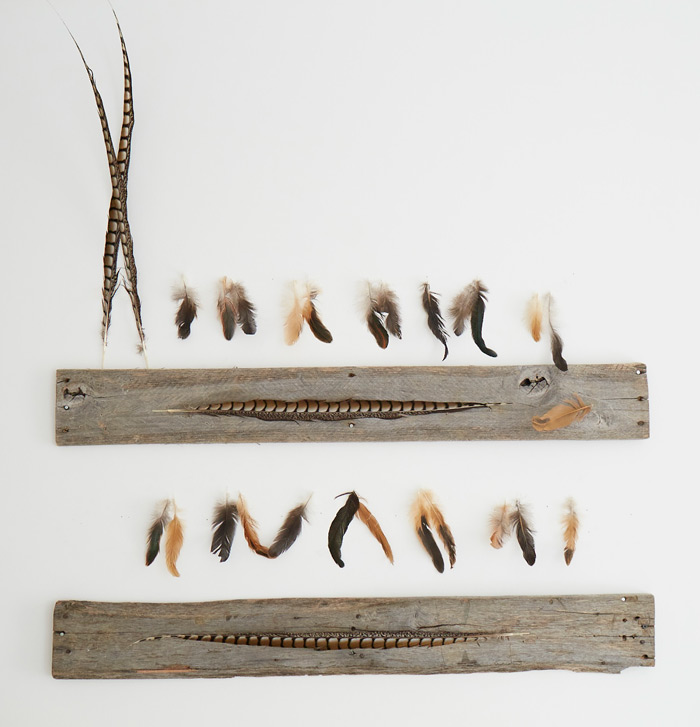
Wood & Feather Wall Decor DIY
Post by Danielle Kurtz, Creative Director at The Land of Nod
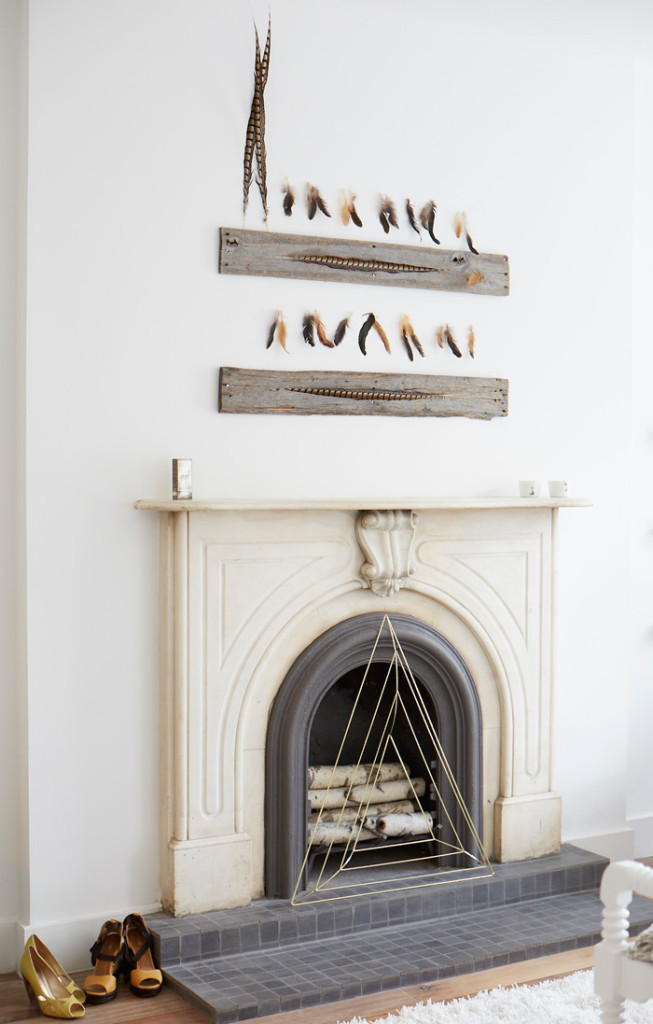 In designing the master bedroom for the Nod Family Home, we wanted to create an art piece to act as a focal point above the fireplace. Our goal was to keep the entire space light, bright and serene, with a nice balance of modern minimalism mixed with natural elements.
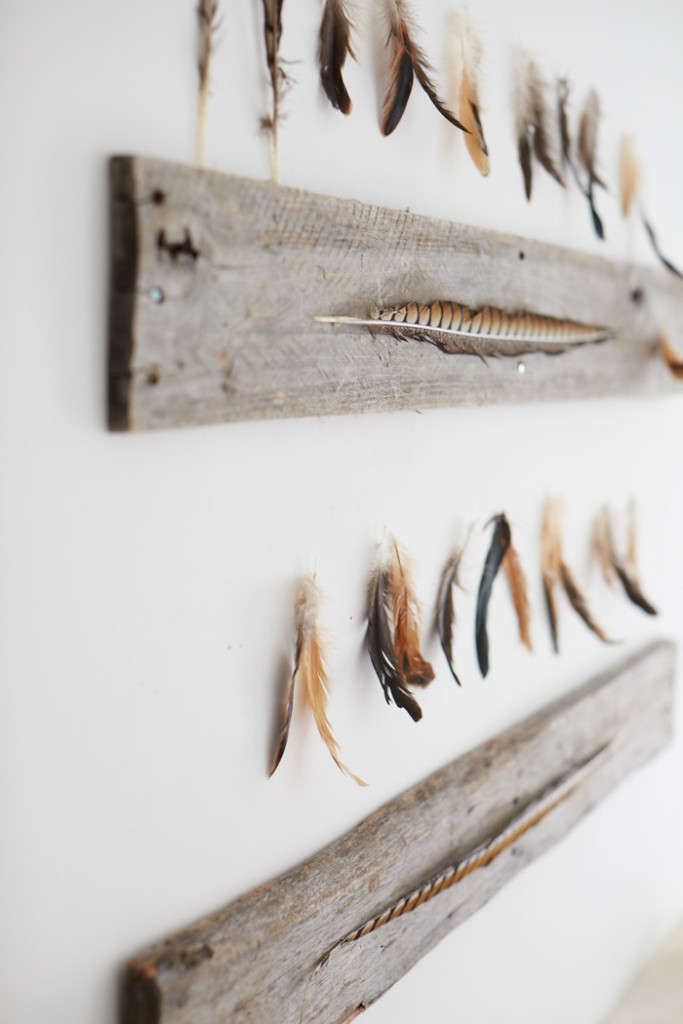 We were inspired by all the creative ways we’ve seen salvaged palette wood used, so we knew we wanted to incorporate it into the piece. We took some very rough natural materials, but put them together in a very graphic and organized arrangement to strike a balance. This DIY couldn’t be any easier, and can be adjusted to fit any size space. You could add more rows, use colored peacock feathers or even paint the raw wood to fit your color story. The options are endless.
Here’s how we created it.
Wood & Feather Wall Decor DIY Materials
- Salvaged palette wood
- Feathers
- Double-sided tape
Instructions
- Nail two horizontal pieces of palette wood into the wall at least 18 inches apart, it may be more depending on size of wall
- Using double-sided tape, add feathers to wall and wood
Voila, you have a one of a kind focal piece for your wall.
Pretty & Pink Girls Bedroom Design
Post by Joni of Lay Baby Lay
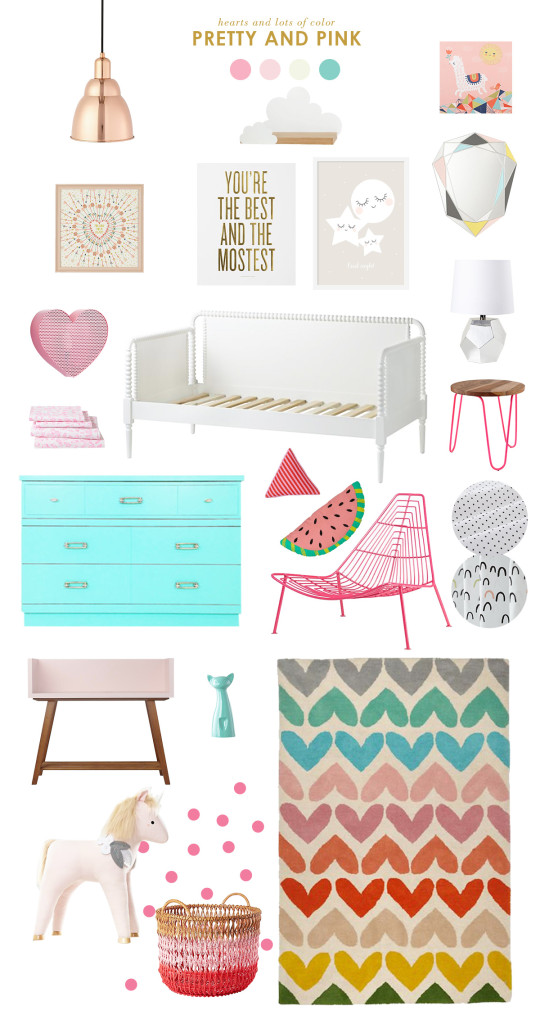 Copper Pendant / Cloud Shelf / Alpaca Print / Arrow Heart Print / You’re the Best and the Mostest / Sleepy Stars / Crown Jewel Mirror / Heart Light / Jenny Lind Daybed / Silver Lamp / Day Dream Sheets / Neon Nightstand / Aqua Dresser / Triangle Pillow / Watermelon Pillow / Domino Lounge Chair / Swiss Dot Duvet Cover / Little Arches Curtains / Alto Bookcase / Cat Bank / Heart to Heart Rug / Ride-On Unicorn / Pink Lottie Dots / Fade Up Basket
Macaron Inspired Girls Bedroom Makeover
Post by Mindy Cone of Creative Juice
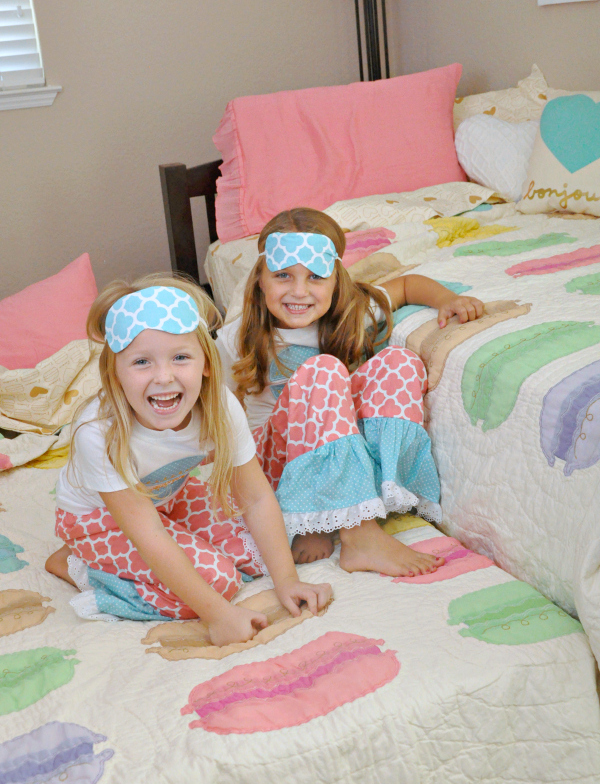 This year for my daughter’s birthday I bent the rules a bit. I have always said that Aubrey would be allowed sleepovers until she was ten…but when her best friend (named Aubrey too!) was moving across the country shortly after her 6th birthday, I wanted something special that they could always remember together. Neither of them had ever had a sleepover before, and they were absolutely giddy over the idea!
We recently purchased a new big girl bed for Aubrey with a trundle and this sleepover would be the first time we put it to use. I started to search for some bedding and was over the moon when I saw The Confectionary Bedding collection! I am a macaron fanatic you guys. No joke – I literally wrote a macaron cookbook. There could NOT be a more perfect bedding for my daughter! The colors were fun, bright, and before I knew it, her room was macaron inspired as well as the theme for her birthday party!
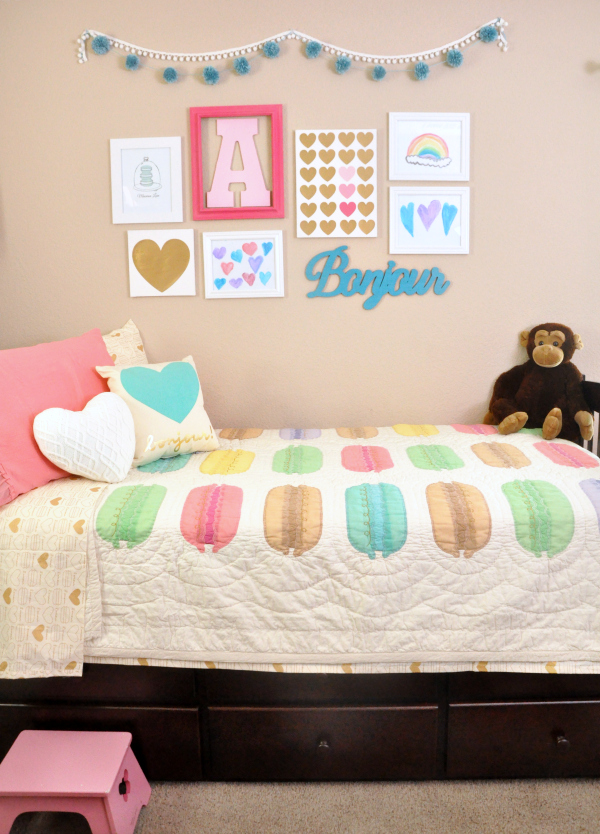 Macaron Kids Quilt / Confectionary Sheet Set / Bonjour Throw Pillow / Pink Sham / Pajamas & Eye Mask / Pom Garland / Macaron Print / Wooden Bonjour Sign
For her room, I focused on the pink and teal from the confectionary quilt as well as the gold from the confectionary sheet set. I love the mix of macarons and hearts and tried to carry that theme through the room as well. We created a little reading nook and added some cute decor over her bed.
She was very excited to incorporate her paintings so we chose a few pieces and had those framed. I love how they turned out and she is so proud of herself! I created two heart canvases using metallic & pink cardstock cut with my cricut machine and glued directly to a canvas – which was a miniature version of the dessert table backdrop I created for her party. One of my personal favorite pieces on her wall is the beautiful hand drawn macaron art print. It was a gift to me while on my book tour and I am so happy to have found the perfect home for it in her room. The custom wooden ‘Bonjour’ sign was inspired by Bonjour throw pillow and was the perfect compliment to the decor.
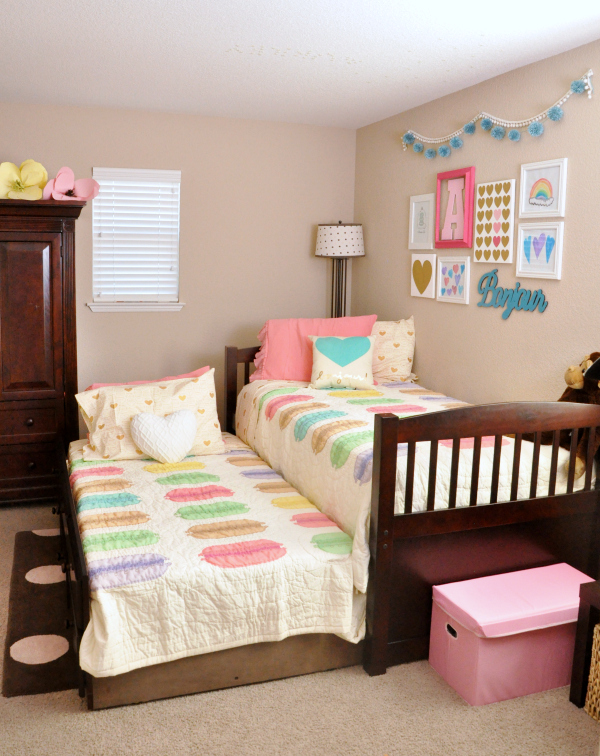 On Aubrey’s birthday I hosted several of her closest friends for a dessert pajama party using the same theme – hearts and macarons! You can see the party here. While it wasn’t practical to have all six of them spending the night on our first attempt at a sleepover – I still wanted them to feel special and included. Each of the girls received custom matching pajamas and eye masks, ate yummy desserts, played games, and had a fabulous afternoon together. While they wouldn’t all be sleeping at my house that night, they would each be in their own beds wearing matching pajamas! We planned on having her friend Aubrey return that evening for the sleepover – a strategic mom move knowing they would be tuckered out from the party and sleep soundly!
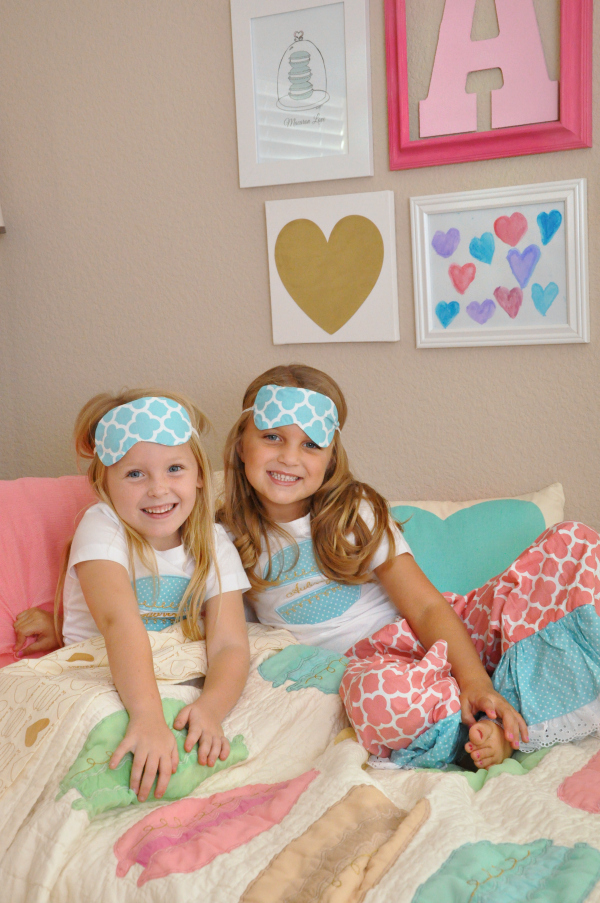 They had the best time that night! They played with dolls, watched a movie, ate popcorn, made a little craft, played tricks on her brother, and read books. When it was time for bed we went through our normal routine and then let Aubrey call home to talk to her mom and dad before bed. I was nervous we would get to this point and have a bit of cold feet but they snuggled up in their beds and fell asleep after a few minutes of giggles! Even though they have moved miles away from us now, it is a memory they will always cherish together!
Mindy Cone is the author of Party Food For Girls and Gourmet French Macarons. Her site Creative Juice is a source of inspiration for entertaining your guests and kids with style and creativity. She showcases tutorials, tips, tricks, recipes, and crafts to make every occasion fabulous.
Mustache T-Shirt DIY
Post by Darcy of No Monsters in My Bed
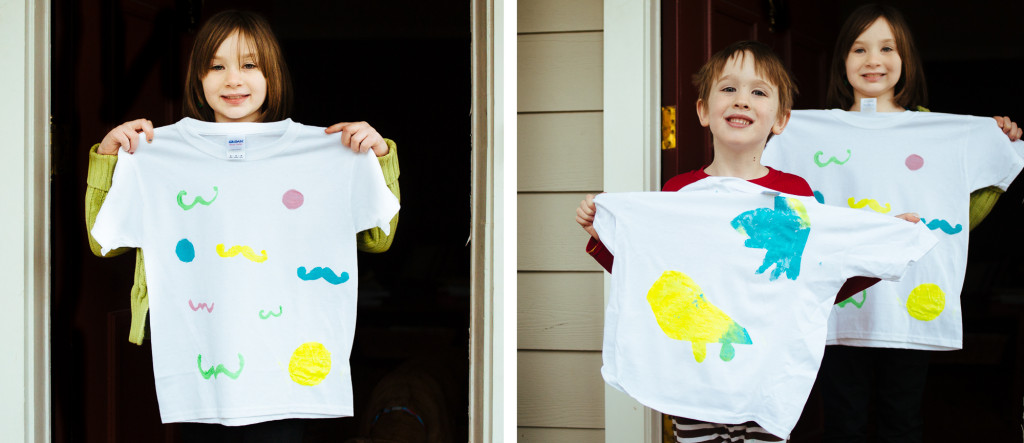 The other day my youngest daughter announced that she wanted a mustache t-shirt (mustaches being all the rage with this year’s second graders). I’ve always wanted to try freeze paper stenciling with the kids, so this sounded like the prefect opportunity.
Mustache T-Shirt DIY Materials
- Freezer paper (sold in most grocery stories, next to aluminum foil)
- Brushes
- Fabric paint
- Iron & ironing board
- Exacto knife (with cutting mat)
- Plain white t-shirts
- And some imagination
Directions
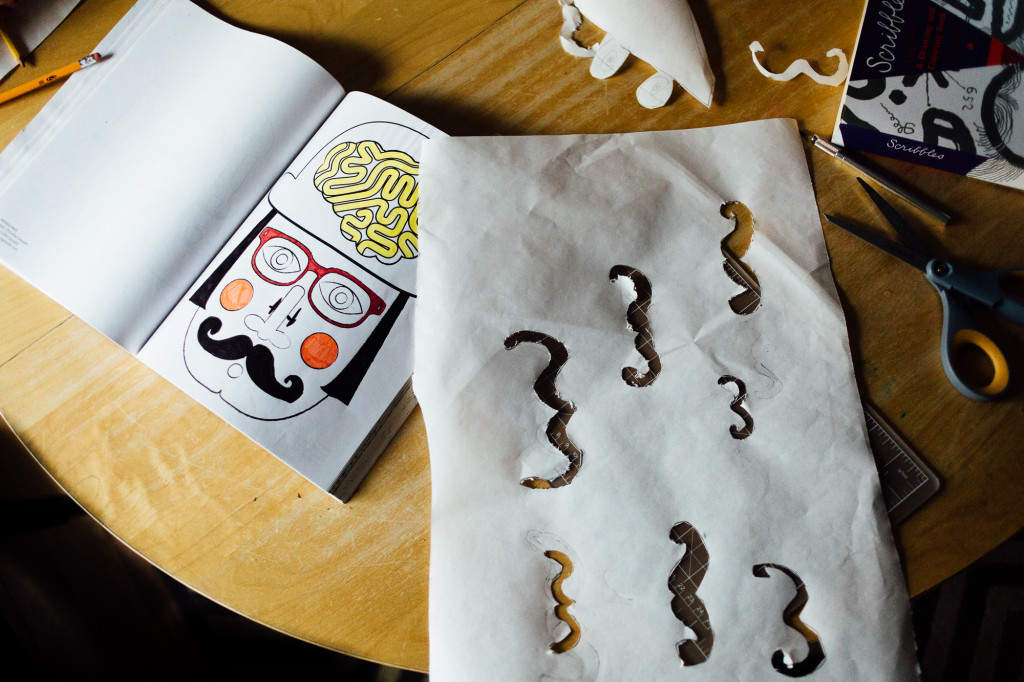
- We found pictures of mustaches we liked in an old coloring book. So my daughter traced some and freestyled some. My son decided to participate too, though we’re all unclear on what exactly he drew. After the kids finished their art, I cut out the stencils using an exacto knife and cutting mat.
- My daughter figured out where on the t-shirt she wanted the mustaches and then I ironed the stencils to the shirt. NOTE – Make sure to iron the stencil so that the shiny side faces down.
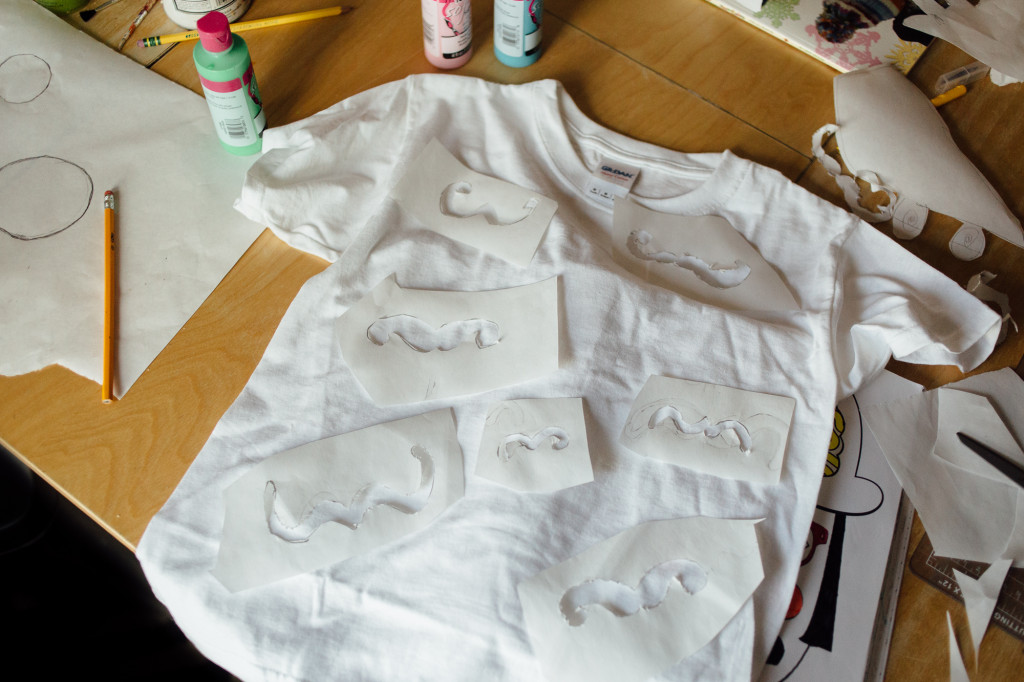
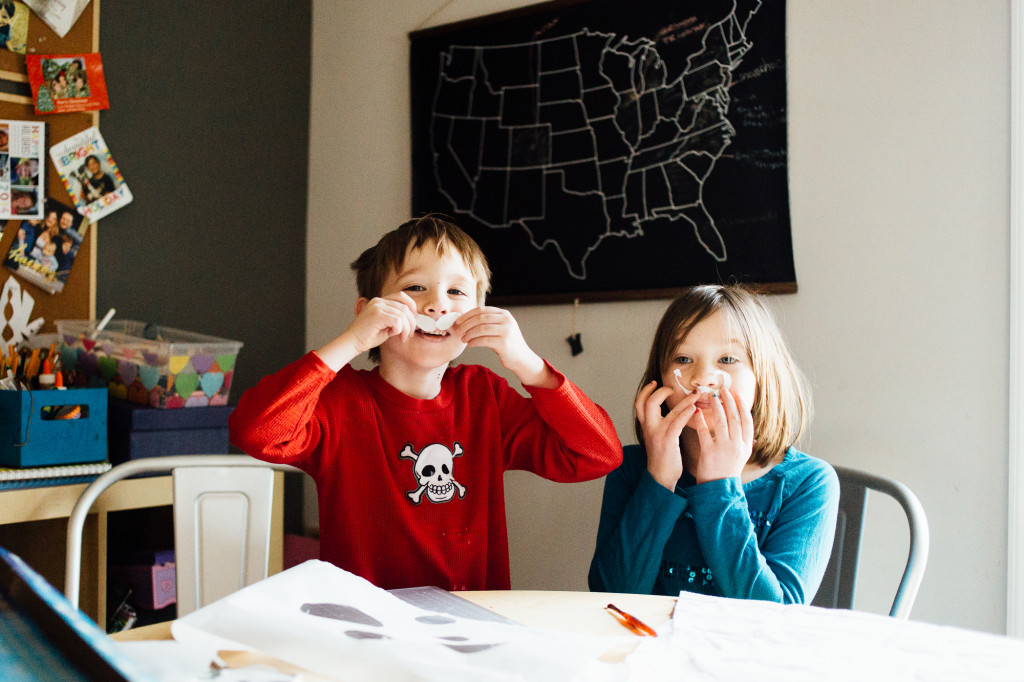
- It is important to take a break in order to “try out” the mustaches.
- Paint!
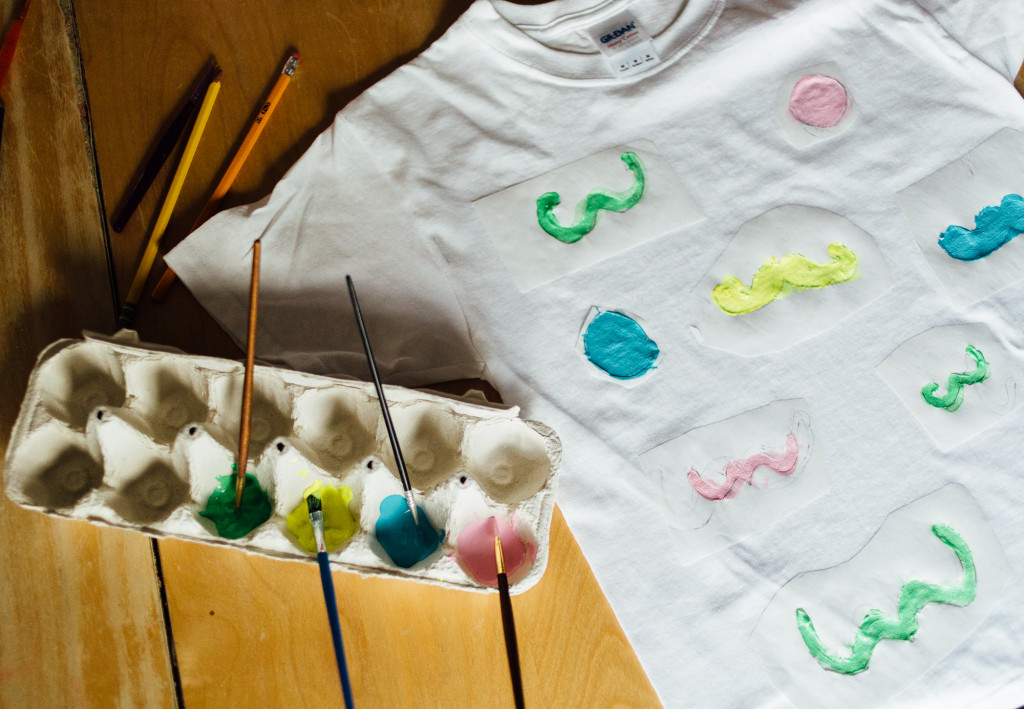
- You are supposed to wait for the paint to dry and then rip off the stencil (we cheated and only waited about 25 minutes, which worked fine).
The kids liked this project so much that we spent the rest of the morning making additional stencils (luckily I had a supply of cheap white t-shirts on hand). A great easy activity for cold, miserable winter days.
Meal Planning with Kids
Post by Adrienne of Susie Makes Supper
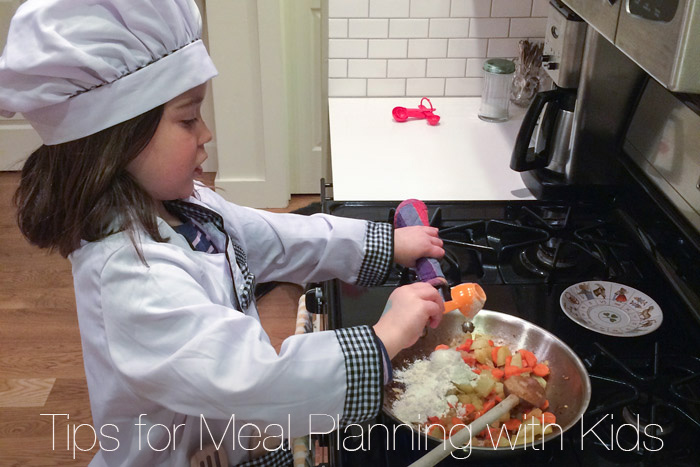 “Mom, what’s for dinner?” used to be the question that I loathed most in the world. I knew that regular meal planning could save me sixteen unnecessary trips to the grocery store each week. Even so, the thought of actually sitting down and creating a meal plan remained overwhelming.
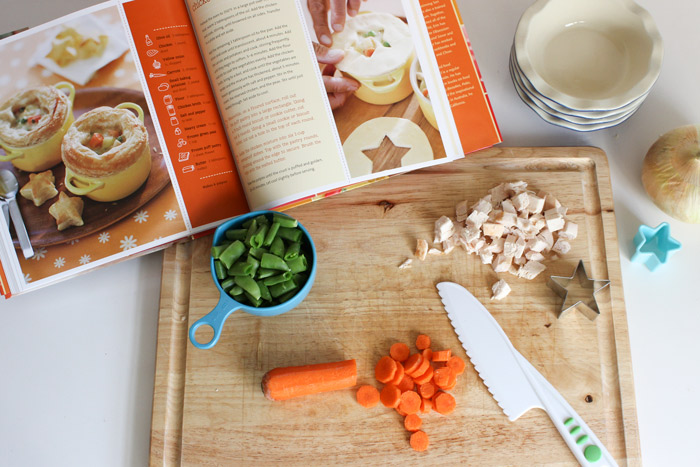
The sheer volume of writing about meal planning does not make the actual planning any easier. Most often, meal planning is a pretty solitary experience. Gather your recipes. Make a list. Make a schedule. I know very few meal planners who engage their families in the process of meal planning. The truth? It is amazing how much easier meal planning is (and how many fewer meal time battles you will suffer) when everyone is included in the process. This does not mean resigning yourself to hot dogs and mac and cheese every night. Believe it or not, you can feed your family healthy, simple meals by planning them together.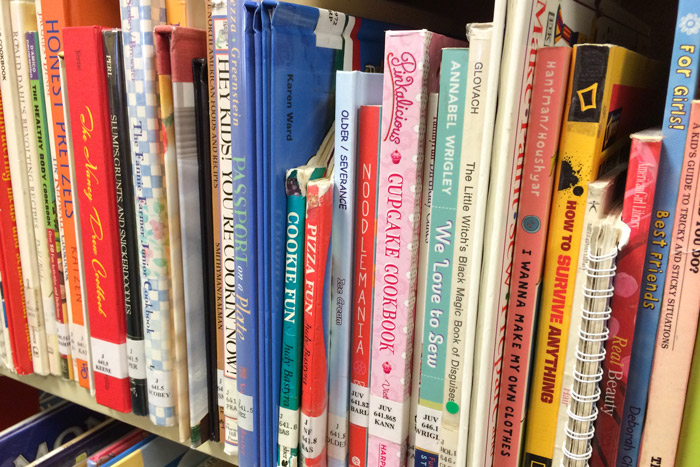
Let me let you in on a little secret. Kids love the kitchen. Do you know what else they love? Kids love to eat whatever it is that they cook. The same enthusiasm is true of meals that kids plan. Here are a few great ways to get started meal planning with kids:
- Develop a meal planning template specific to your family. You don’t need to cook something different every night. There is a reason that Meatless Monday and Taco Tuesday are both popular things on the Internet. Who doesn’t love a taco? It is perfectly ok to jump on the theme night bandwagon for a few easier planning options. Better yet, pick a category of cooking for each weeknight that works for your family. Sports practice on Wednesday nights? Try making Wednesday your slow cooker day. Tend to lose your steam in the kitchen by Thursday? That makes Thursday an excellent night for leftovers. You can chose a theme that is as simple as a single ingredient (chicken or pasta) that everyone in the family likes.
- Make a “Family Favorites” recipe list. Over dinner one night, ask each member of your family to identify their favorite meals. Make a list (or better yet, a binder) of all of those favorite recipes to keep handy. Once or twice a week, you can incorporate a family favorite into your meal plan. (Friday Family Favorite Night? I think yes.)
- Incorporate Kid Choice Night. This can be as simple as letting one of your kids chose a vegetable, side, or main dish for your meal. Even better, let them chose the whole meal. This is a great way to teach your kids the practice of a balanced plate. Multiple kids? Great. Every Monday night, one of them gets to pick the menu. Four kids? Perfect. You’ve got a month of Monday nights covered.
- Breakfast for dinner is a thing. And it is very good. I haven’t met a kid yet who won’t scarf down eggs and bacon and French toast when served for dinner. Serve breakfast for dinner with a fruit (and spinach) smoothie and you are on your way to Mom of the Year.
- Head to the library. Kid-focused cookbooks come in all types. The best way to start with kids’ cookbooks is to borrow them from the library to get a feel for whether your kids like the concept and whether you like the recipes. Most recently published kid-centered cookbooks are good at including meals that are both healthy and kid-friendly. Many kid-focused magazines (also available at the library) also include recipes geared towards kids. Kid cookbooks and magazines are an excellent way to introduce new types of food.
- Order from your local CSA. The scary thing about ordering a produce box from your local CSA is that you never know what is going to be in it. The fun thing about ordering a produce box from your local CSA is that you never know what is going to be in it. Order that your produce box then create a family challenge to use the ingredients.
- Hand your kid a cookbook and a pad of sticky notes. When all else fails, hand your kid any cookbook in your kitchen or even a food magazine with a pile of sticky notes. We have tried more recipes than I can count using this method with our teens, and some of those recipes are now on our family favorites list.
Meal planning with kids can be stressful but it can also be fun. The successes can be huge when kids are involved in the kitchen and the failures can be memorable. Most important? Have fun. Enjoy the meal as a family from start to finish.
Have any more great ideas to get kids engaged in the kitchen? I’d love to hear them!
Adrienne is a compulsive list-maker with a very busy family and a not very clean house. She’s also a planner and a recovering perfectionist. Adrienne blogs at Susie Makes Supper, where she gives weekly meal plans and shows her successes and failures in the kitchen.
Living Room Makeover
Post by Jeran of Oleander and Palm
Hi friends, I’m excited to be here and share a little living room makeover I worked on for my brother, sister-in-law, niece and nephew’s house. I think this may be a common issue that a lot of folks have. I know I’ve seen it in more then one home. So, you buy the biggest, comfiest neutral sectional for your living room. It’s practical and you’ll love it for ever, right? But, then you get it home and it’s really just a giant grey (or whatever color you chose), personality-less blob in your home. It doesn’t really say anything about your personal style. I’m going to help you out. I’m going to share with you how I helped my sister-in-law, Jess, who lives in Idaho, give her new grey sectional a little personality.
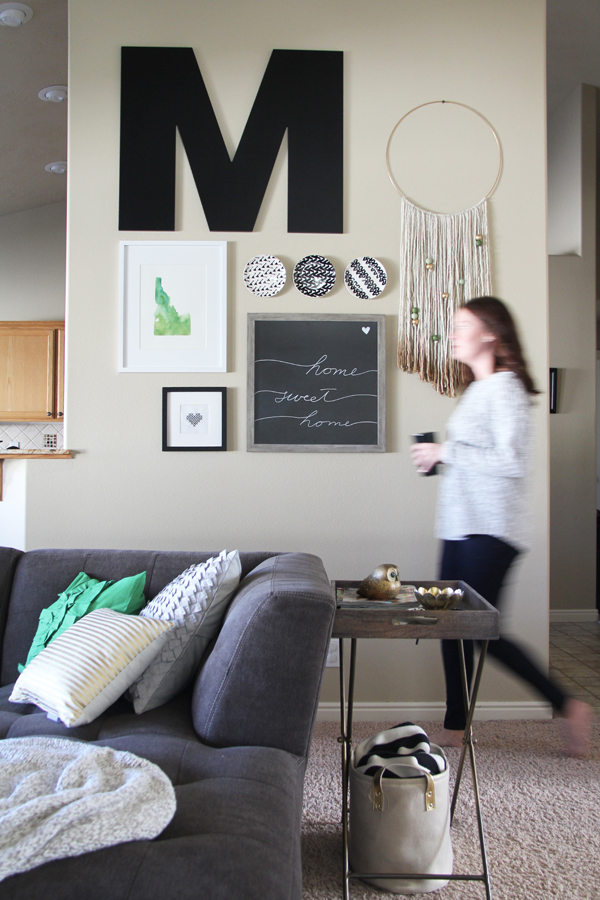
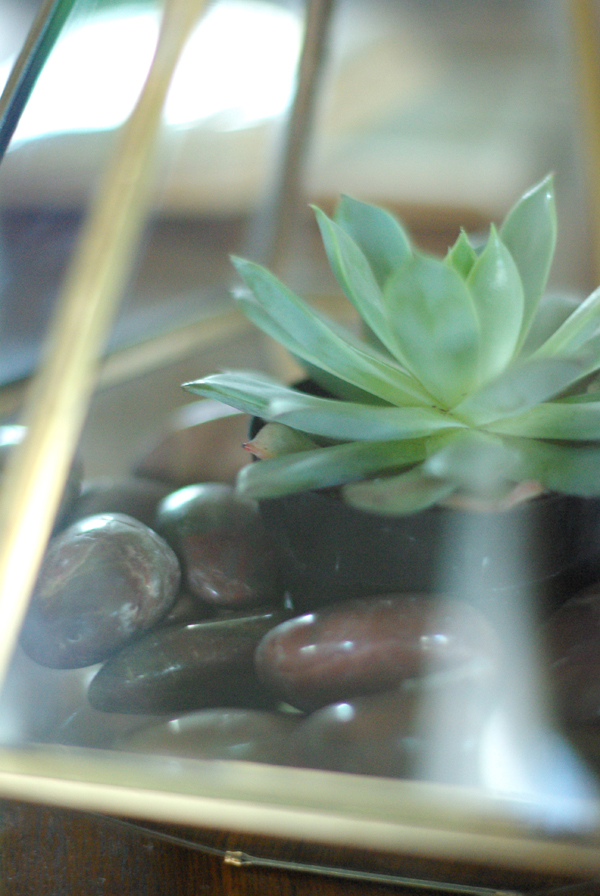 Jess already had a couple great furniture pieces. The mid century credenza that serves as the media console was purchased really reasonably at a local thrift store in Idaho. And the mid century coffee table I found for $25 at a thrift store in California. We had 4 main goals for the room:
- Give the sectional personality
- Create a gallery focal wall
- Rethink the mantel
- Accessorize the surfaces
 We started by giving the sectional personality. Pillows are the best place to start. If you can add COLOR, TEXTURE and PATTERN you are guaranteed to wake up a room. I love Nod throw pillows. There is nothing boring or neutral about them. Even if the color is calm, the pillow will definitely have some sort of amazing texture, like the grey Basketweave throw pillow. Jess already had some fun black and white pillows, so I added a pop of green and shiny gold to the grey palette. It’s a color combo I go back to over and over.
 sectional // green ruffle pillow // antique chic basketweave pillow // gold pinstripe pillow // white faux leather pouf // nice and knit grey cotton blanket


 To break up the grey blob even more, a textured throw is a good way to go. And to create some contrast, I added a shiny, bright white pouf to sit up against all that grey.
For the gallery wall we started with one main statement piece, the giant letter M. I love the unexpected size of these letters. I made a couple pieces to go along with the things Jess already owned and had in other places around the house. I painted a water color of Idaho, leaving a little heart where they call home. This added a pop of green to tie to the pillows. I also made a circular yarn hanging to add a little whimsy and fun to the room. It gives the space a relaxed and not-so-stuffy feel.


 For the mantel, we kept it simple and clean. Hanging the mirror to the side feels less traditional. By adding tall framed images on the other side of the mantel, some balance was created. Accessories do not have to be expensive. The items on this mantel were mostly thrifted or found in nature. My father-in-law is a rock hound and cuts and polishes rocks, so the gorgeous agate came from his garage. And the birch branches were found on a walk. We cut them all to the same length and spray painted the tip of one with metallic gold paint.


 And finally the details. Yes, almost everything on surfaces is thrifted. You can find fun stuff for pennies and you’ll have a look that no one else has. I love the thistles on the coffee table that my mother in law painted three different metallic colors. Jess followed this tutorial to make a himmelli wreath for the wall. And I refinished and stained a little plant stand to give the fiddle leaf fig a place of honor.


 A former elementary school teacher, Jeran has added her unique voice to the modern maker culture through her blog Oleander and Palm. She loves helping people find attainable beauty in the lives they live. Her creativity and industriousness were honed through years of living in third world countries, that challenged her to find novel solutions for creating livable spaces. Now a mother of three, settled in sunny California, her skills and styles are evolving in exciting new ways. Her focus is Simple California Living, designing and making livable spaces that incorporate vintage finds, handmade/DIY pieces and global inspiration.

 1 ||
1 || 
