Close

Blog

Decorating for Baby’s First Christmas

December 15, 2014

Post by Corri McFadden of Glitter & Bubbles

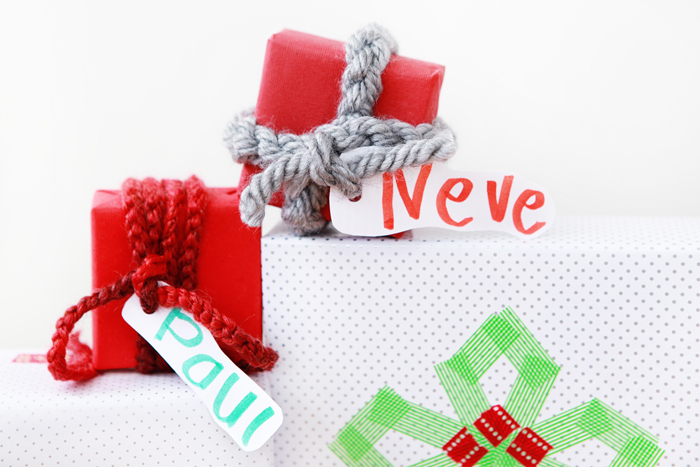
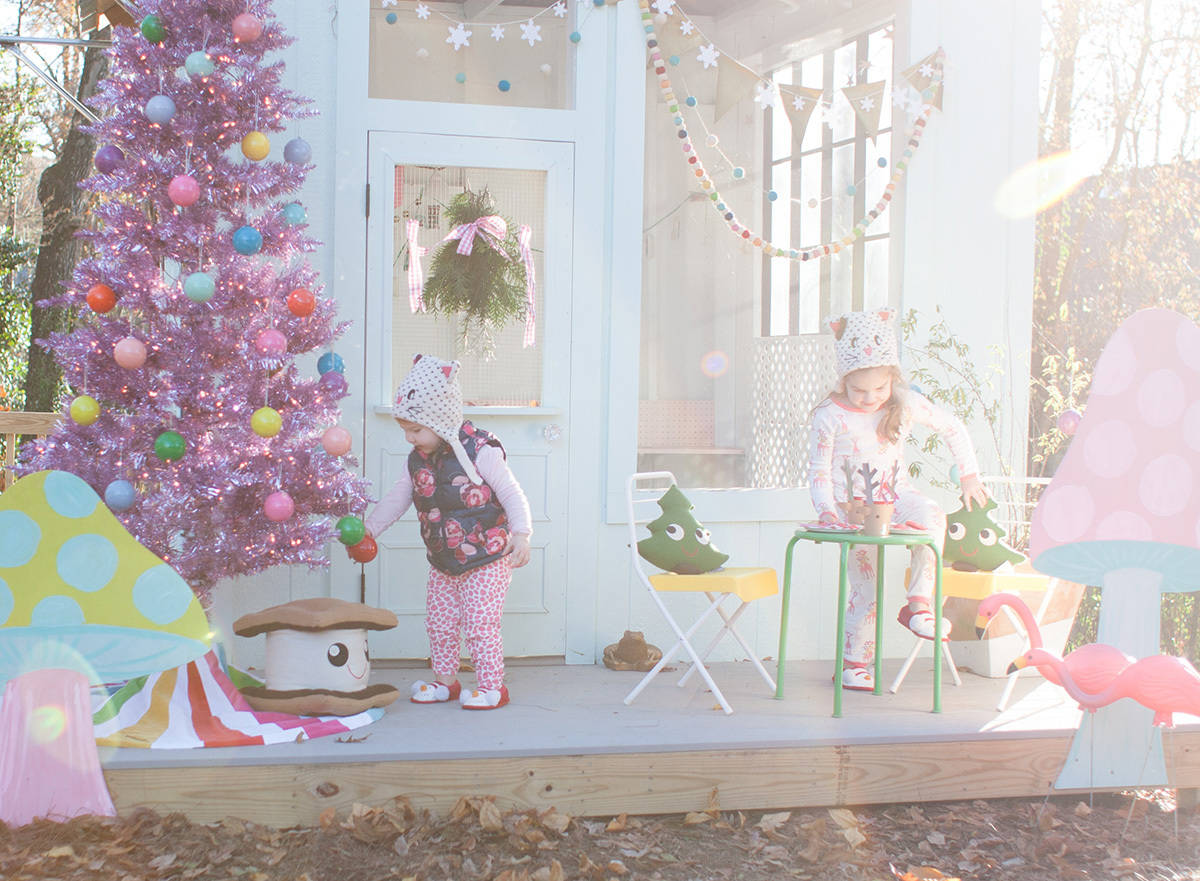
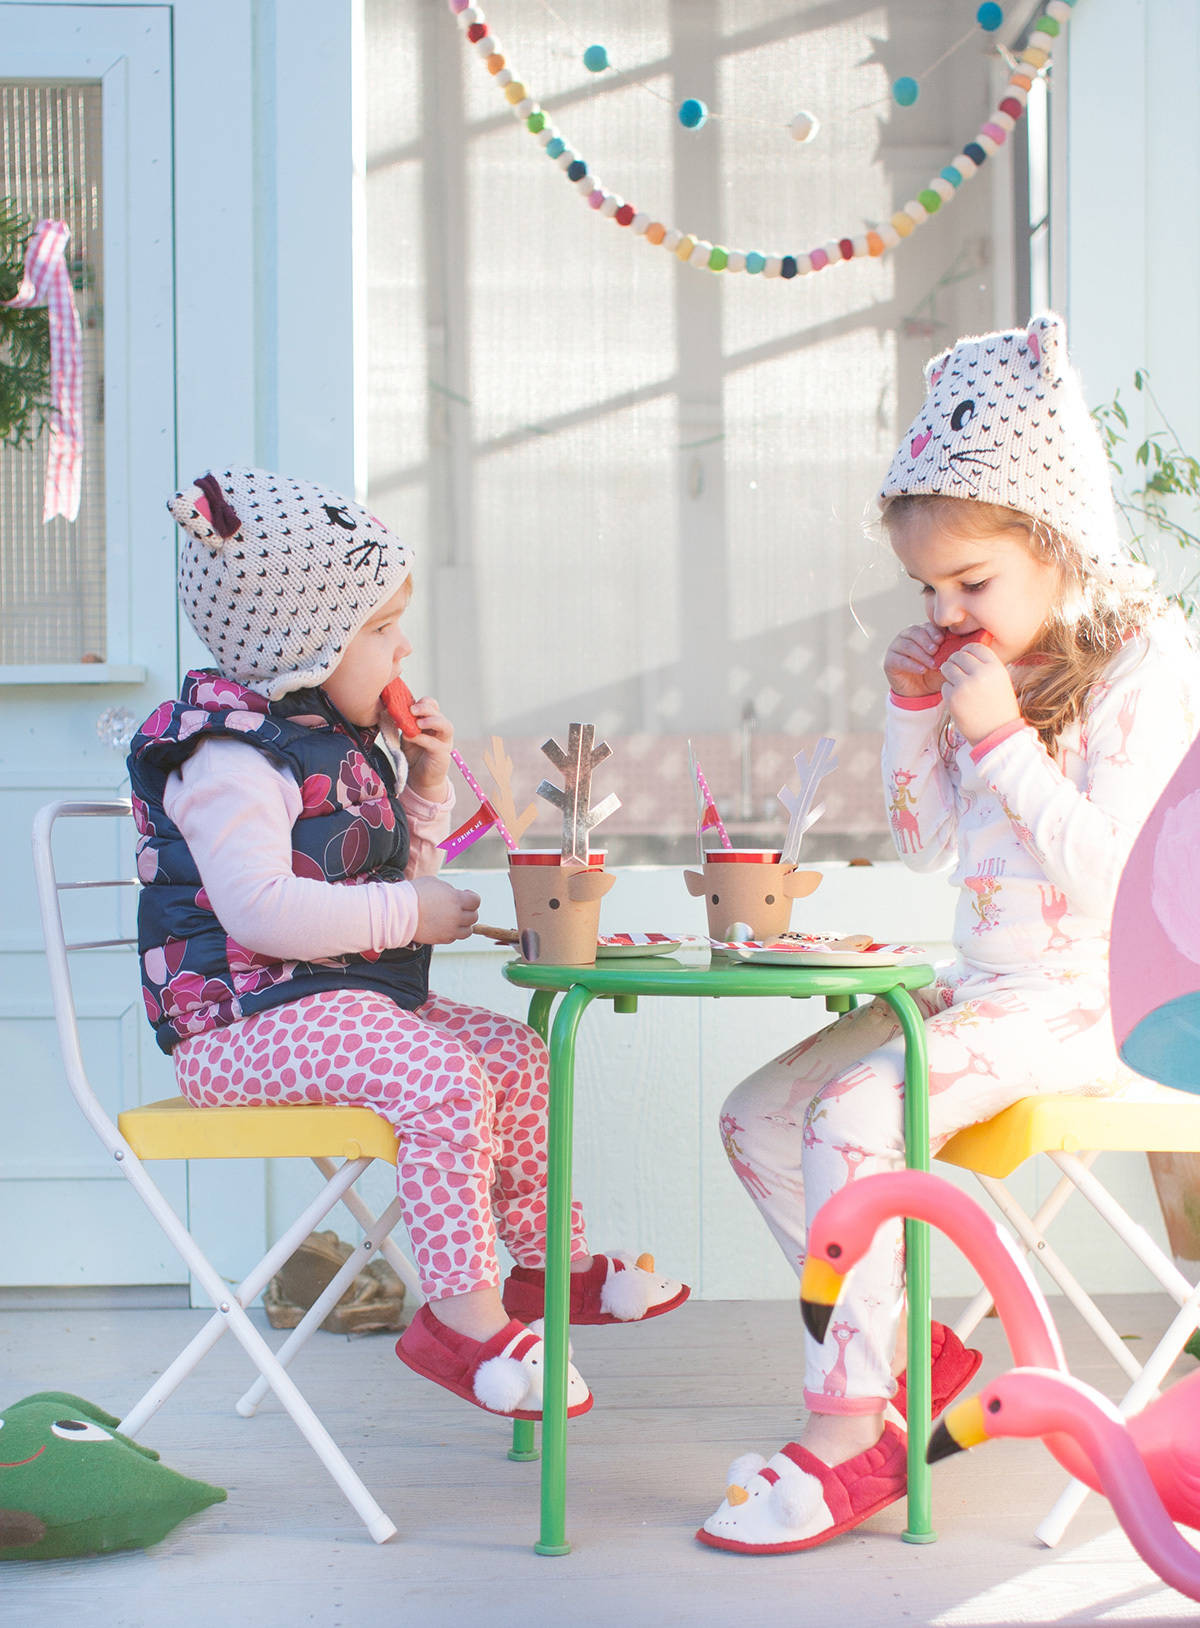
This year’s holiday decorating took on a new life with the arrival of Baby Zelda! From a festive ombré Christmas tree to whimsical plush toys, I wanted every corner of this house to be mesmerizing with holiday cheer for baby’s first Christmas. As this was our first Christmas as a family of three, it was so important to create a festive atmosphere filled to the brim with bright colors, fun accents, and tons of toys. Having Zelda makes Christmas so much more special and I wanted to capture that this year with the amazing décor and new traditions (Who doesn’t love an advent calendar?)

ChristmasTree_1 ChristmasTree_2
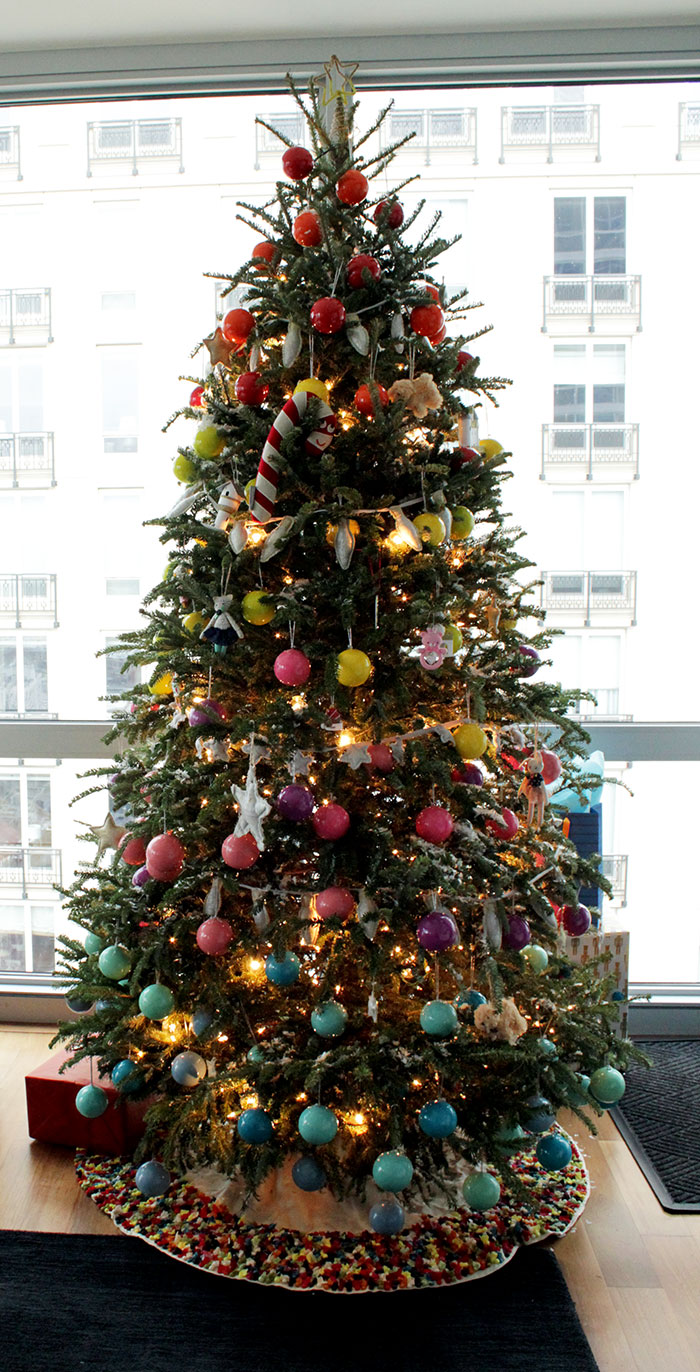
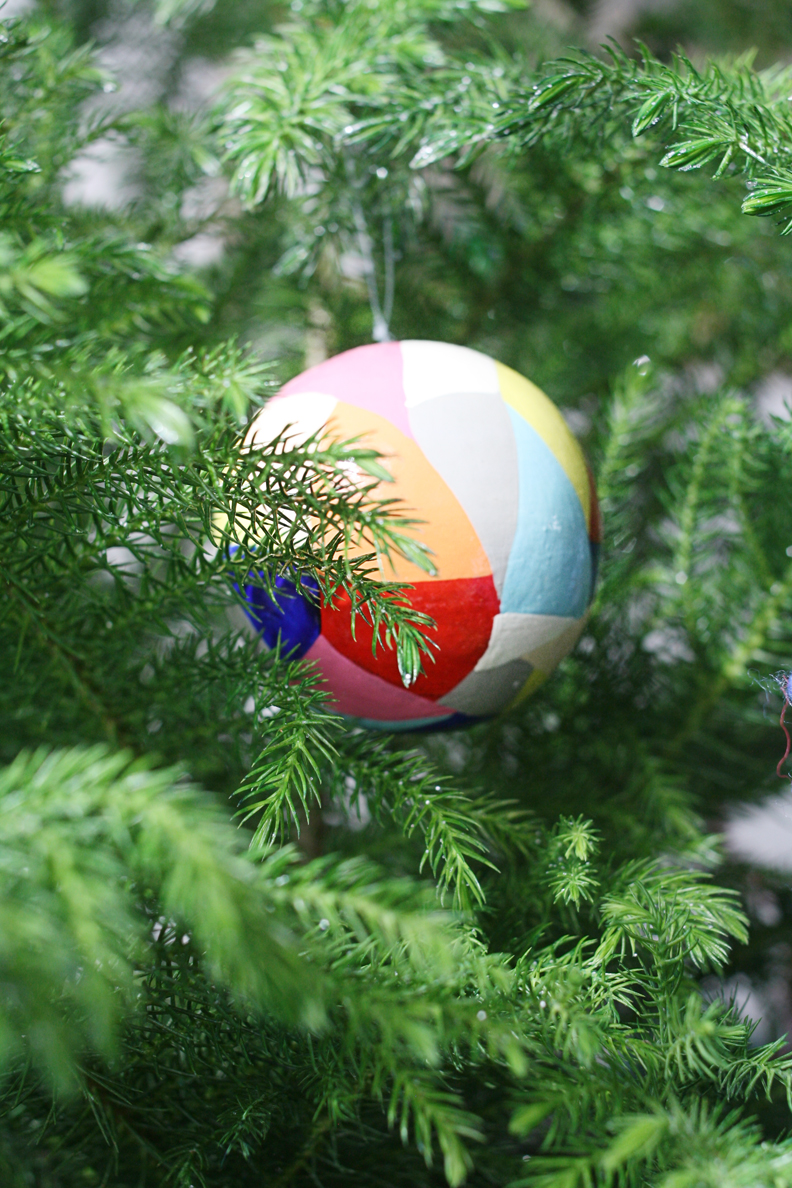
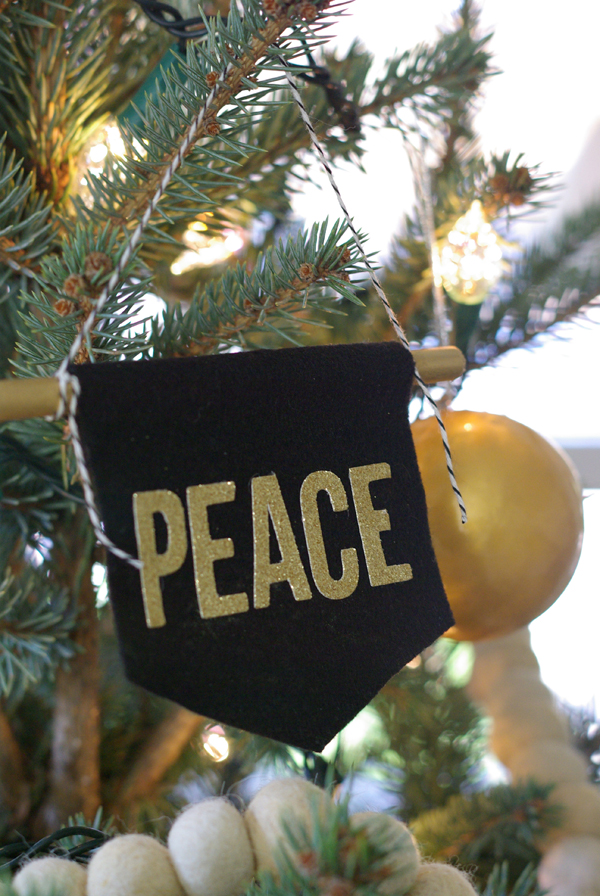
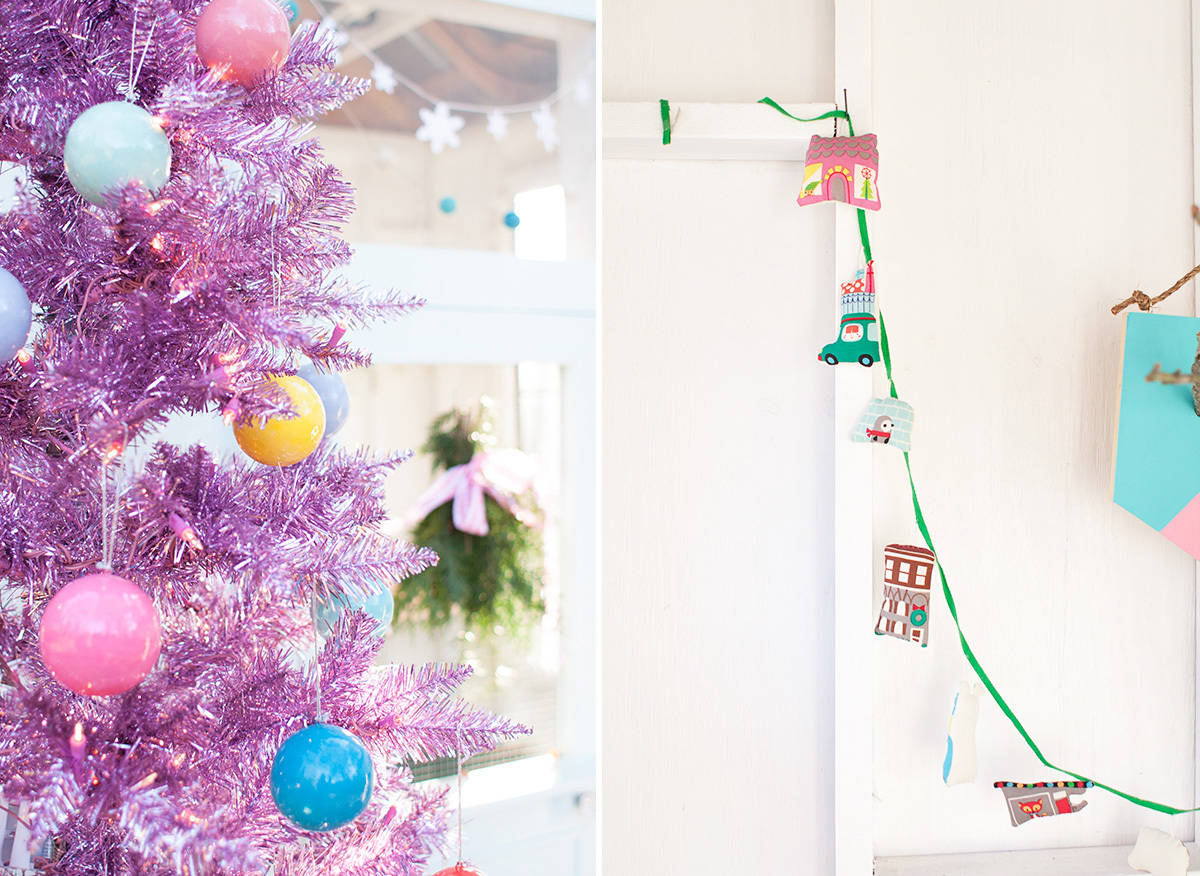
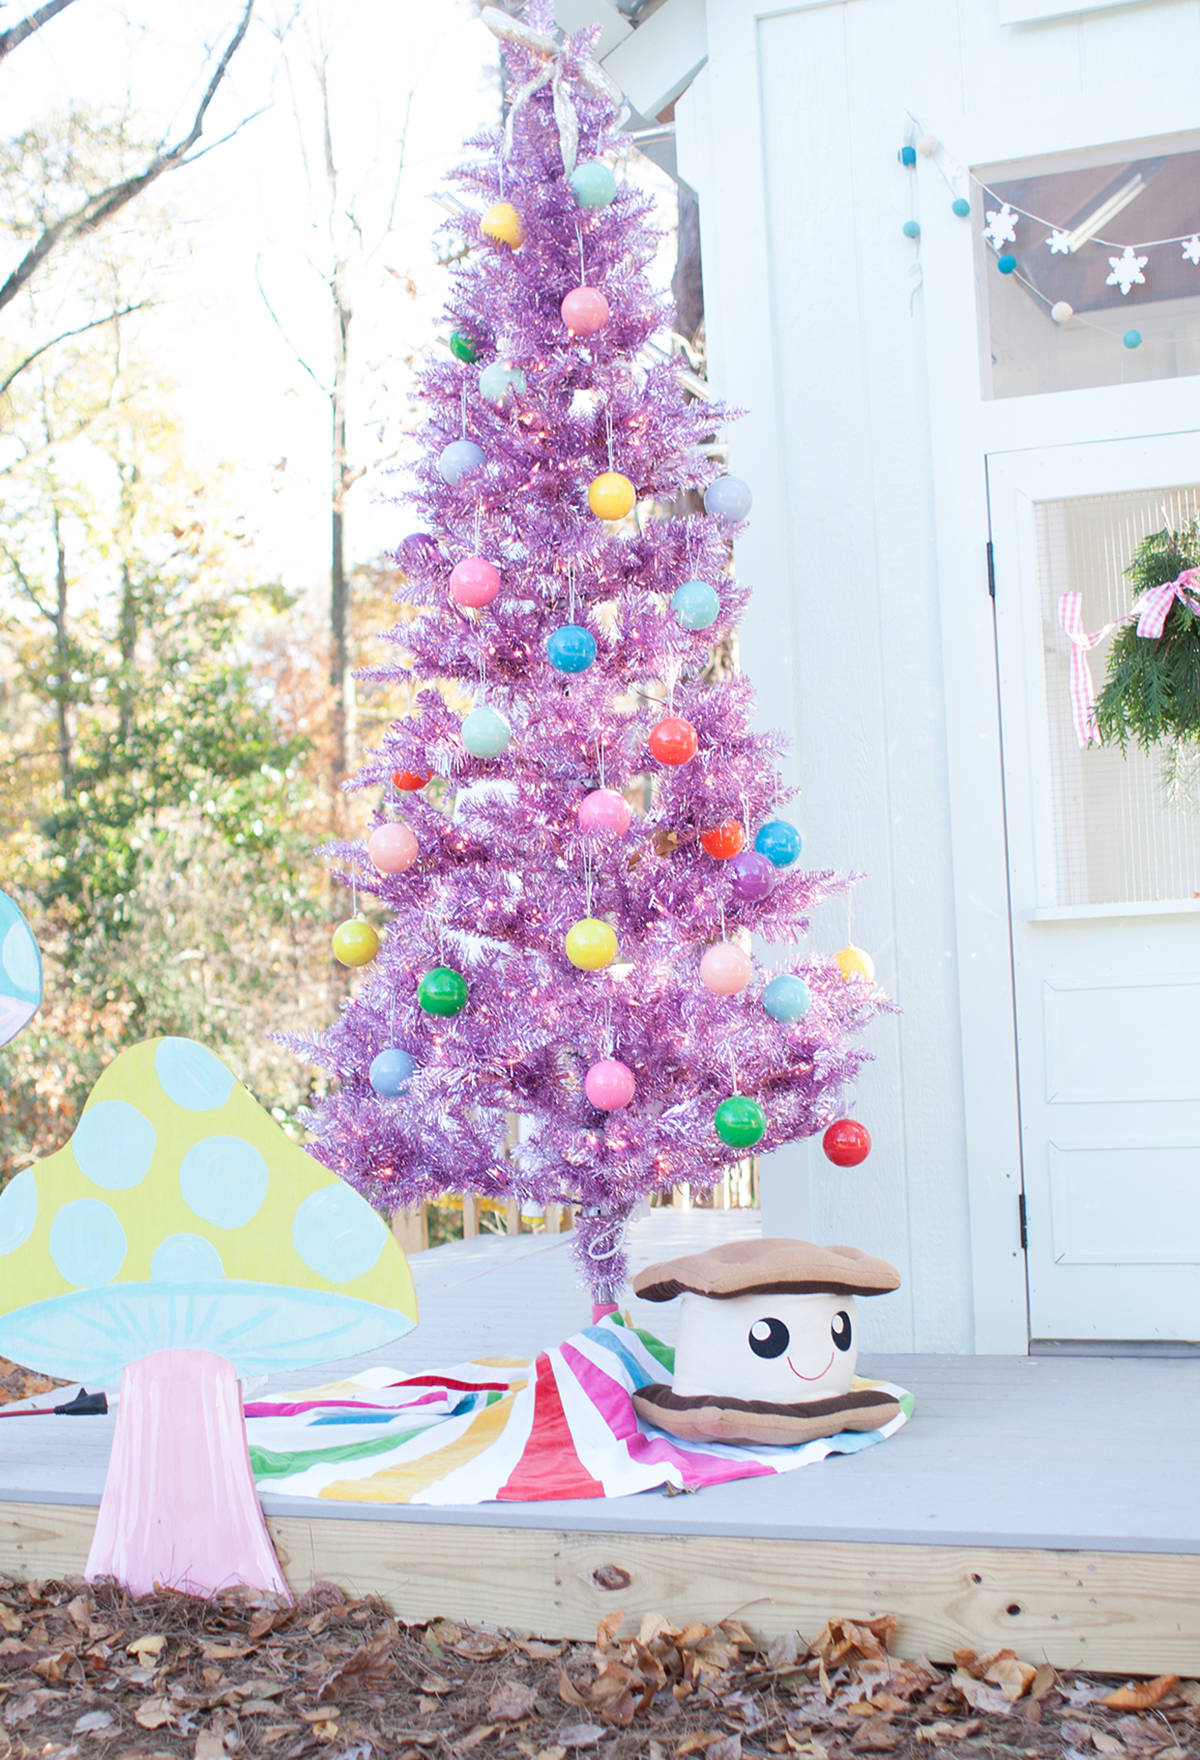
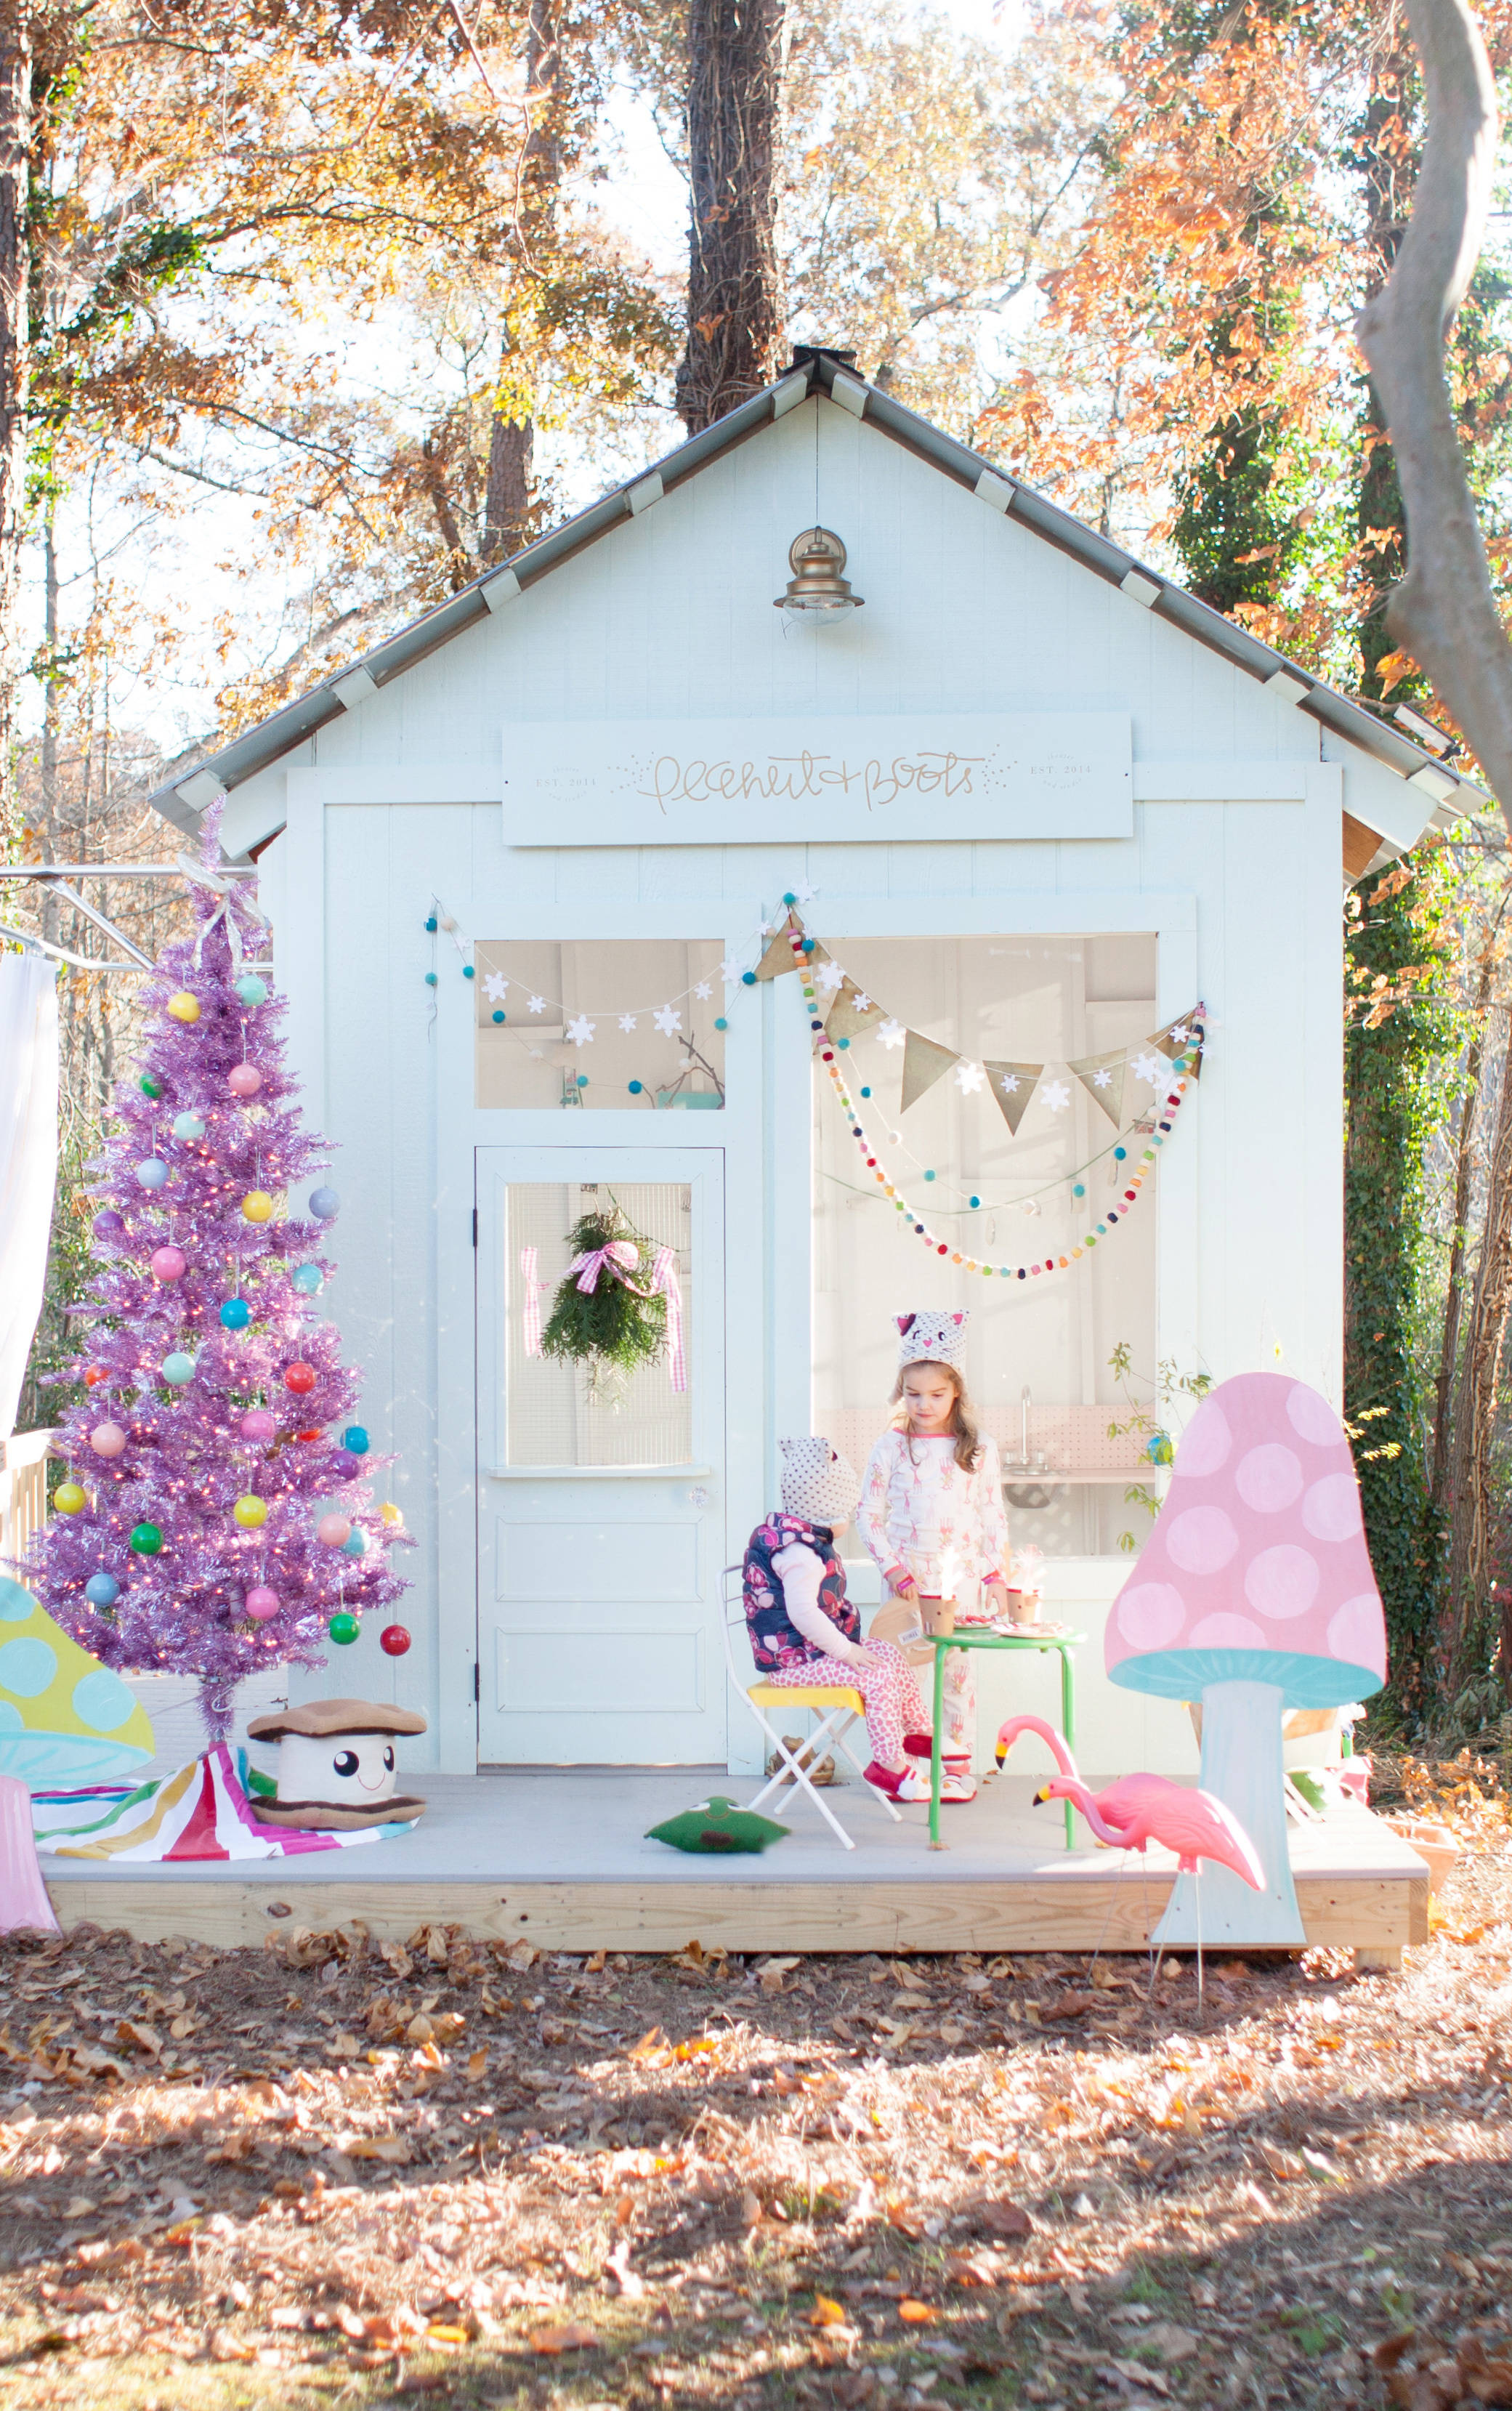
My tree is this year’s prized possession; I can’t stop obsessing over the ornaments! I chose to use hand-painted round ornaments in a rainbow of colors and created an ombré effect by sectioning off each part of the tree with a designated color.

ChristmasTree_3 ChristmasTree_4
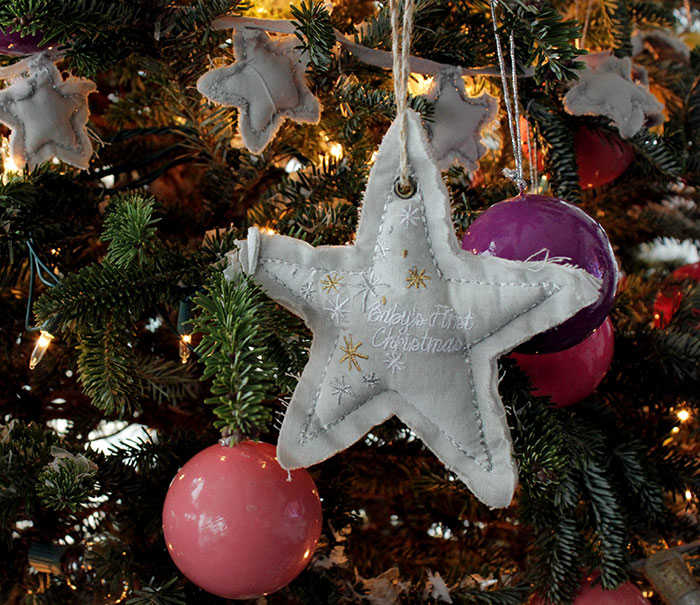
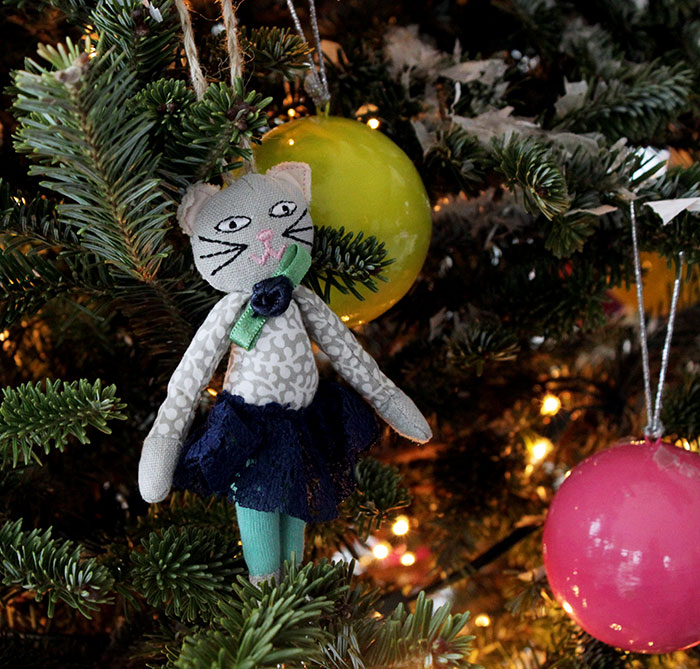
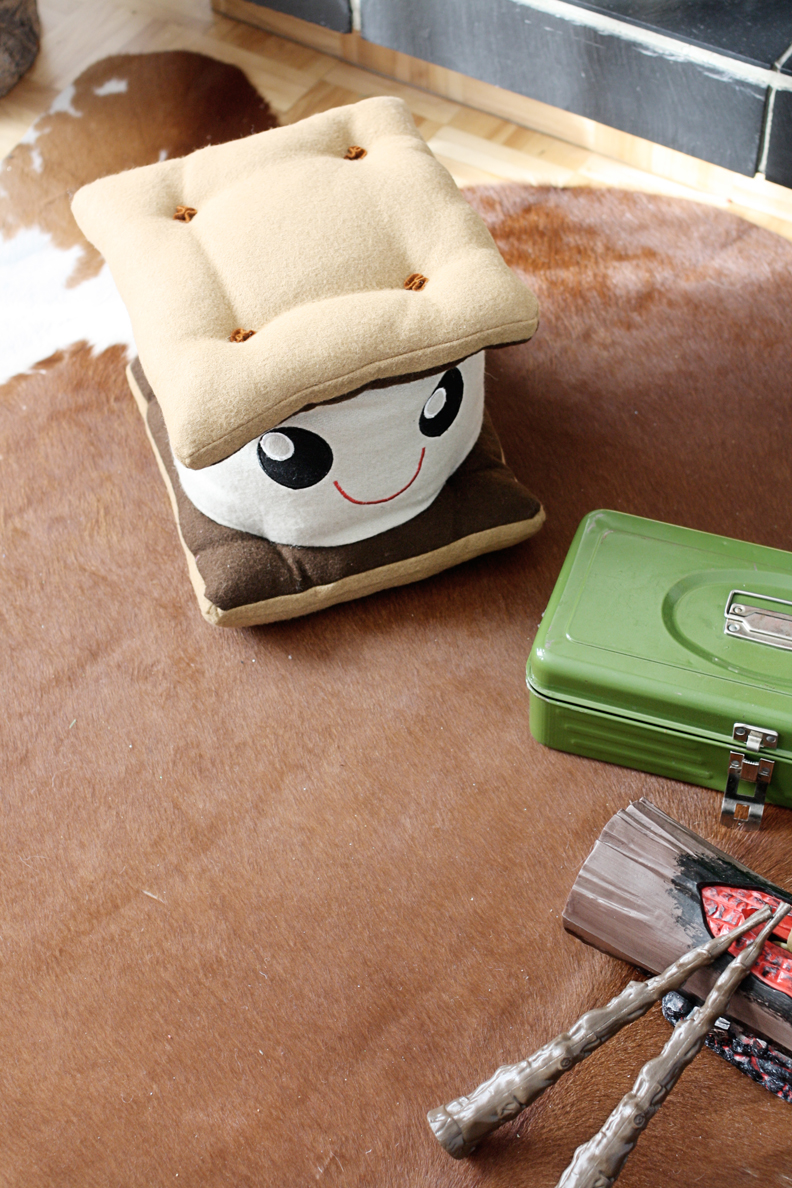
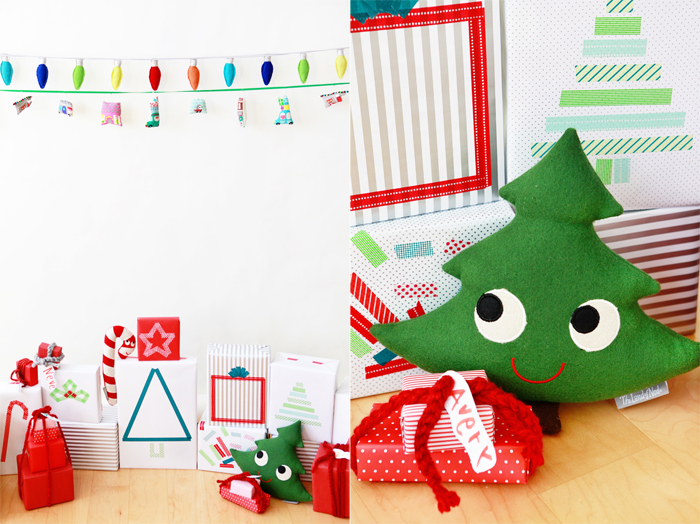
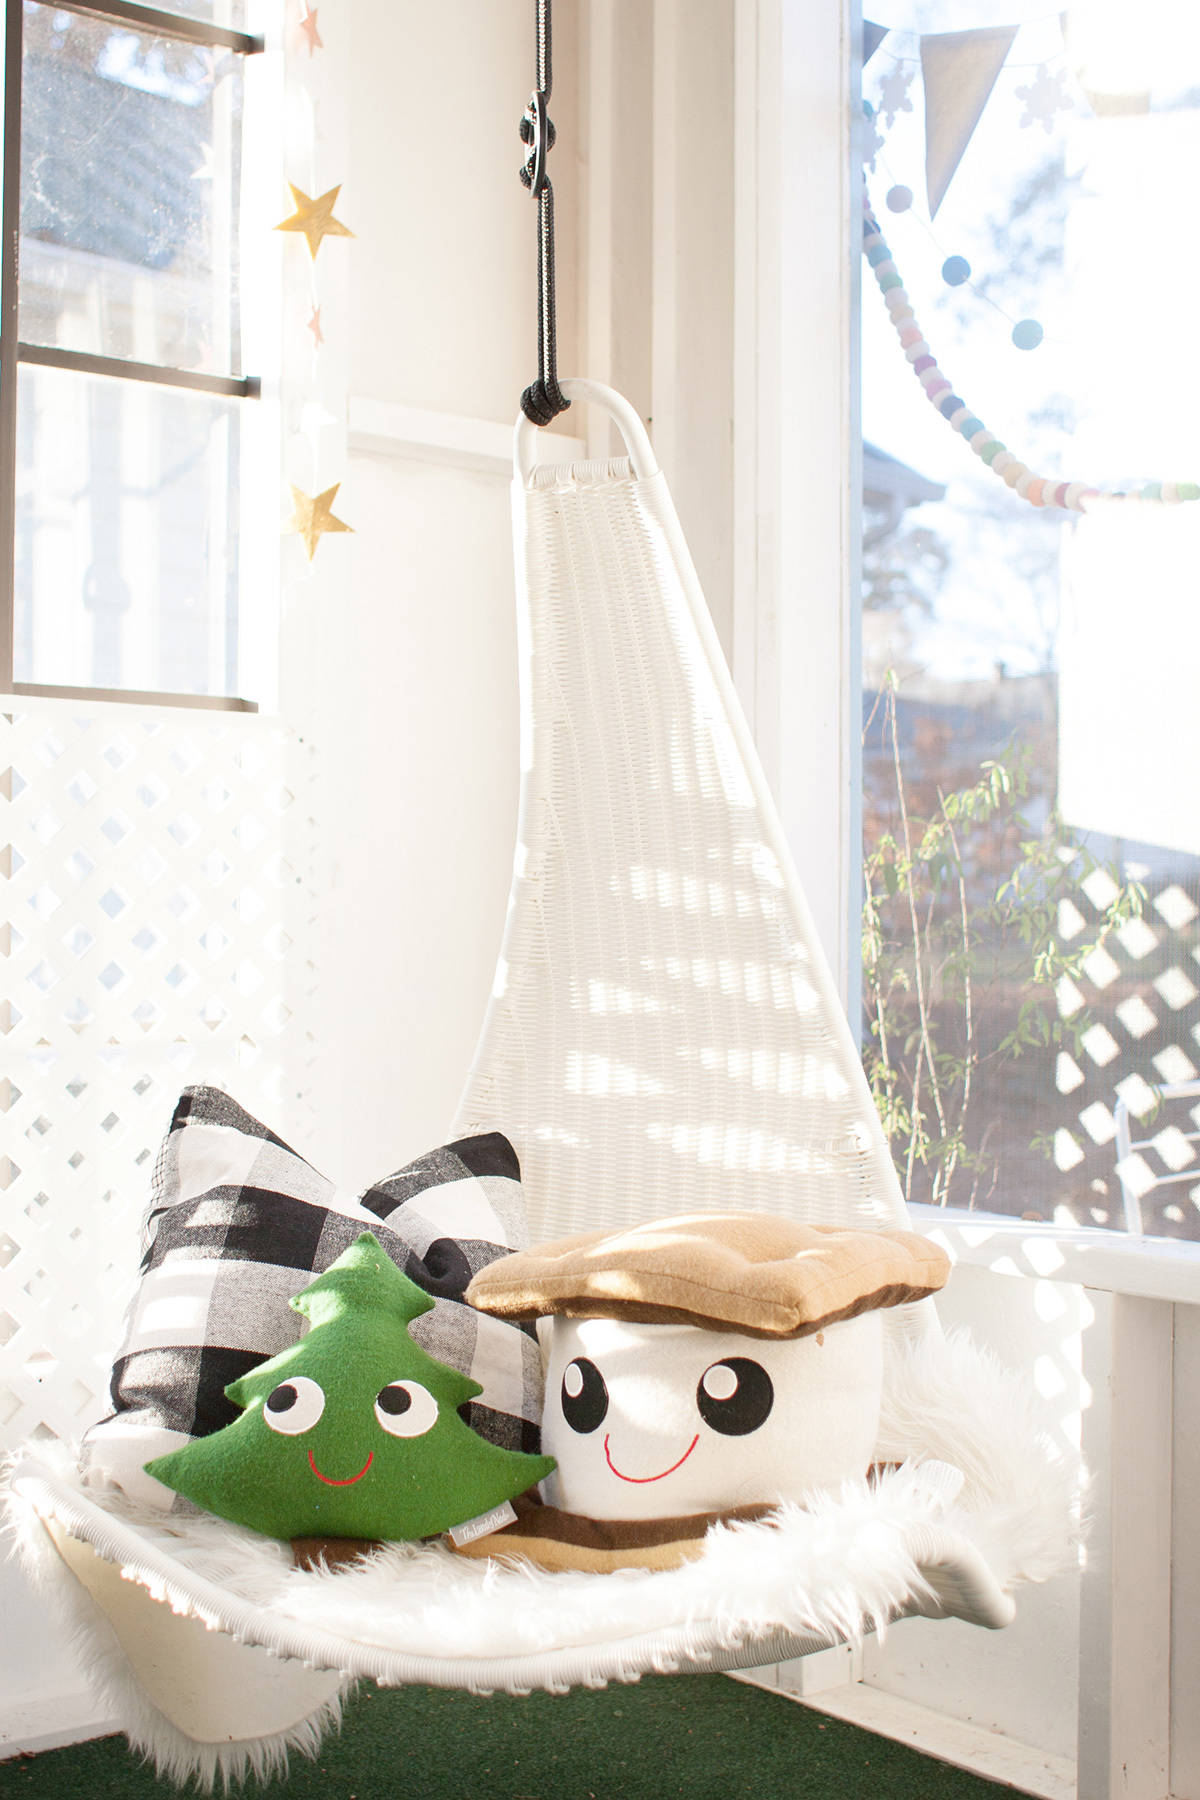
I couldn’t resist adding in the cutest plush ornaments in between layers to fill out the tree – these are so adorable for Zelda! These plush toys also double as great stocking stuffers and gifts, too. The mixture of textures from the different plush ornaments creates an eclectic tree that is a super fun for the family to decorate. I love how the tree capture the spirit of the holidays while still remaining completely my style, so it fits perfectly into the rest of the house.

ChristmasTree_6 ChristmasTree_5
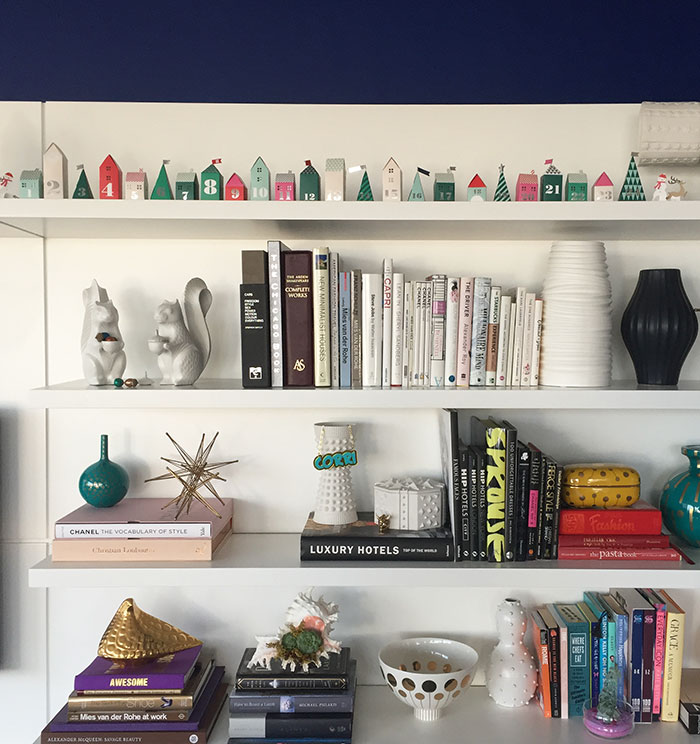
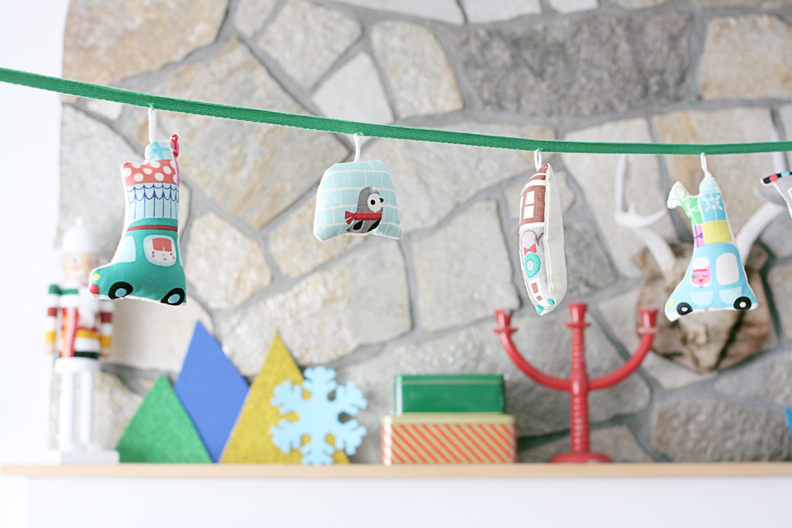
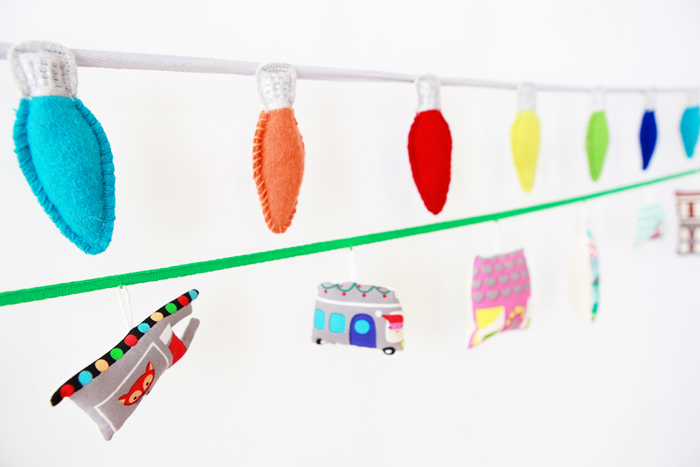
I also let my decorations trickle onto the shelves! I’m obsessed with this fun, colorful advent calendar that is created out of small houses and buildings. It fills out the top shelf perfectly and continues to carry the holiday spirit throughout the house.AdventCalendar_1 AdventCalendar_2
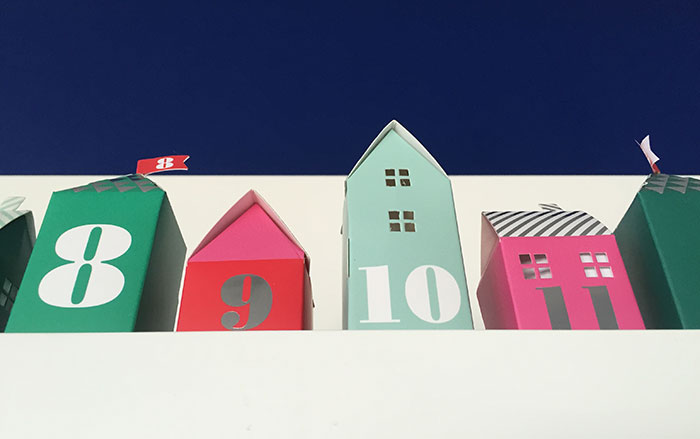
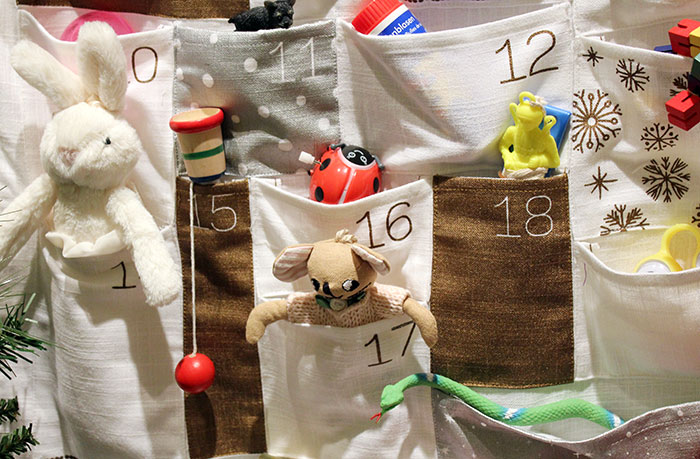
I knew I had to have an advent calendar, it’s a Christmas must! I created this fun vignette in my hallway to show off the Sterling Advent Calendar, which has gold & silver winter accents. I chose more of those amazing plush toys for the calendar along with other trinkets and goodies that Zelda would love.HolidayHallway_3 HolidayHallway_1 HolidayHallway_2
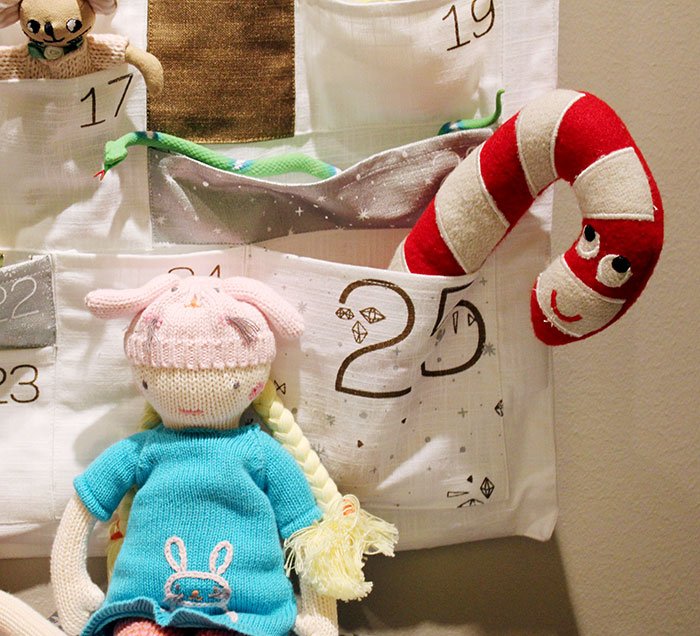
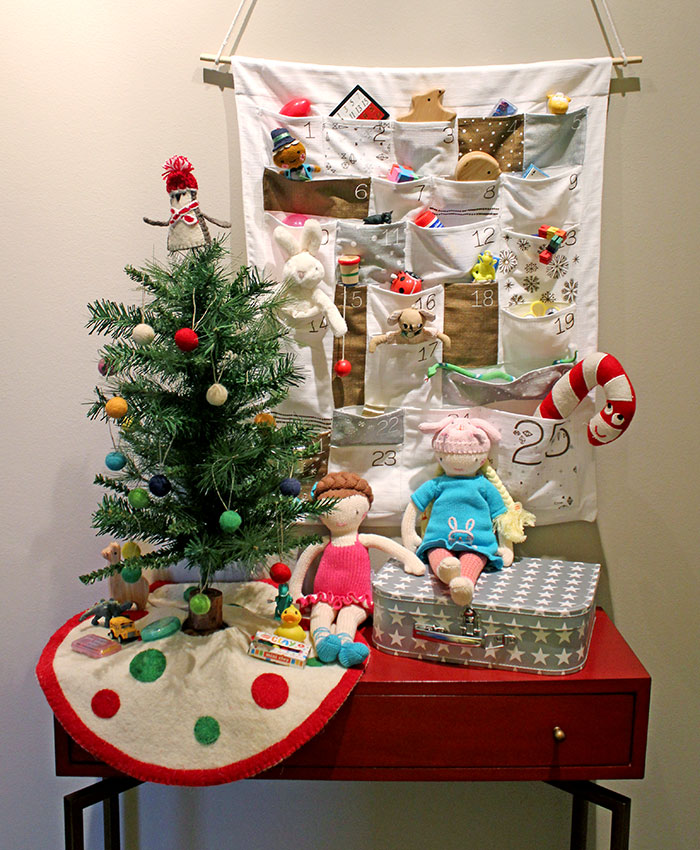
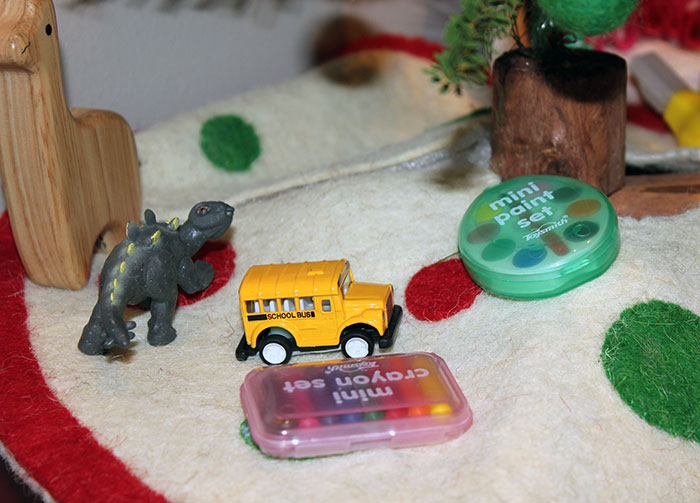
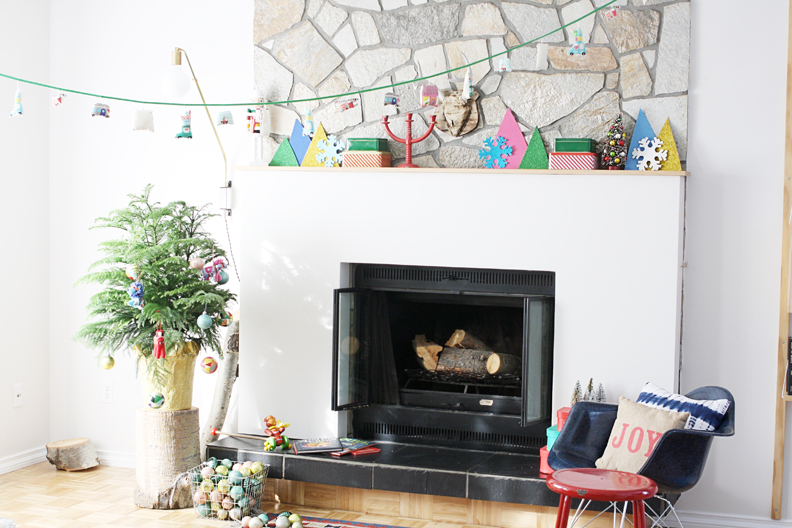
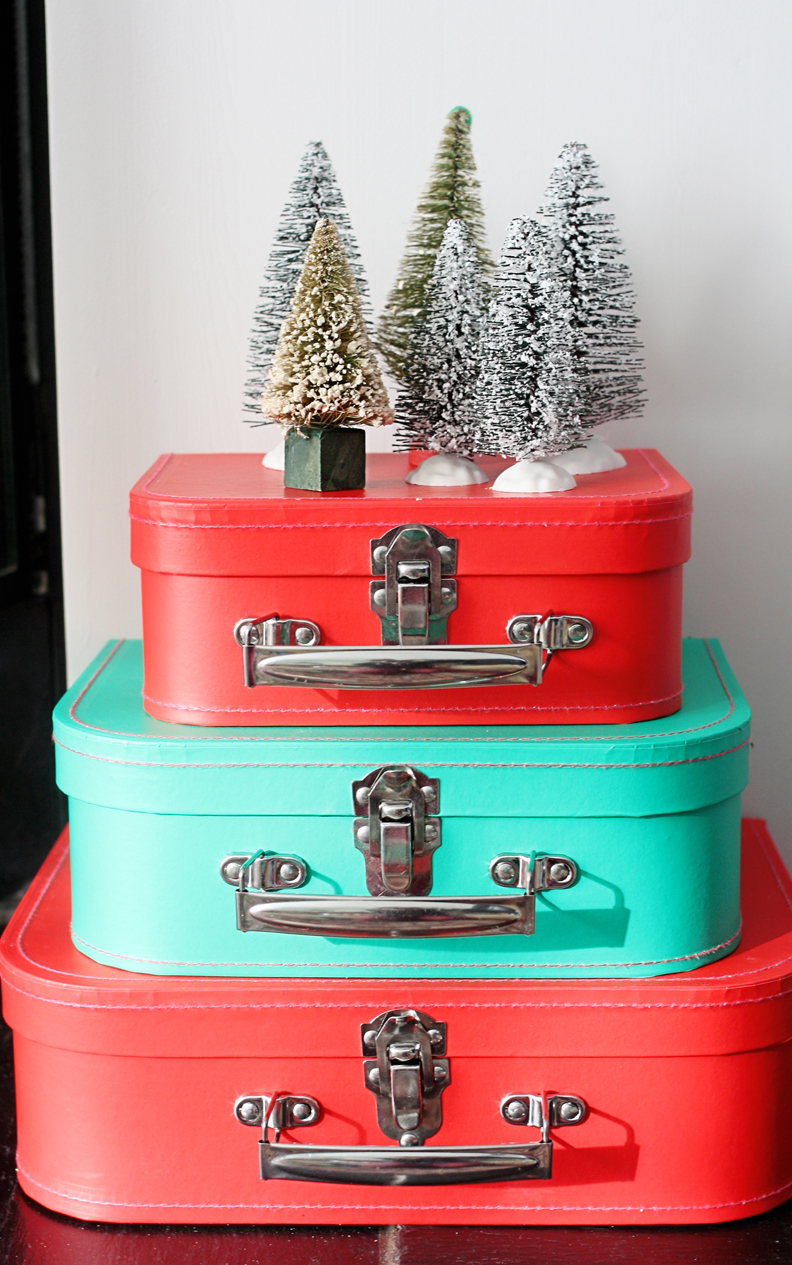
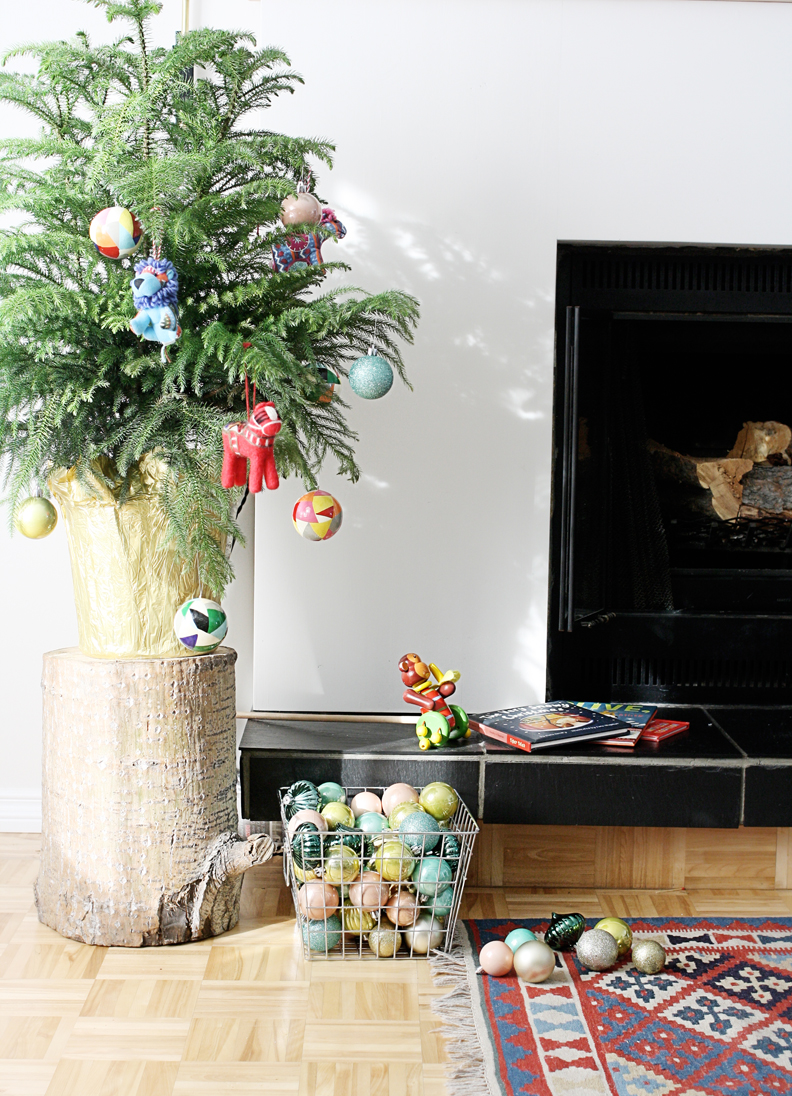
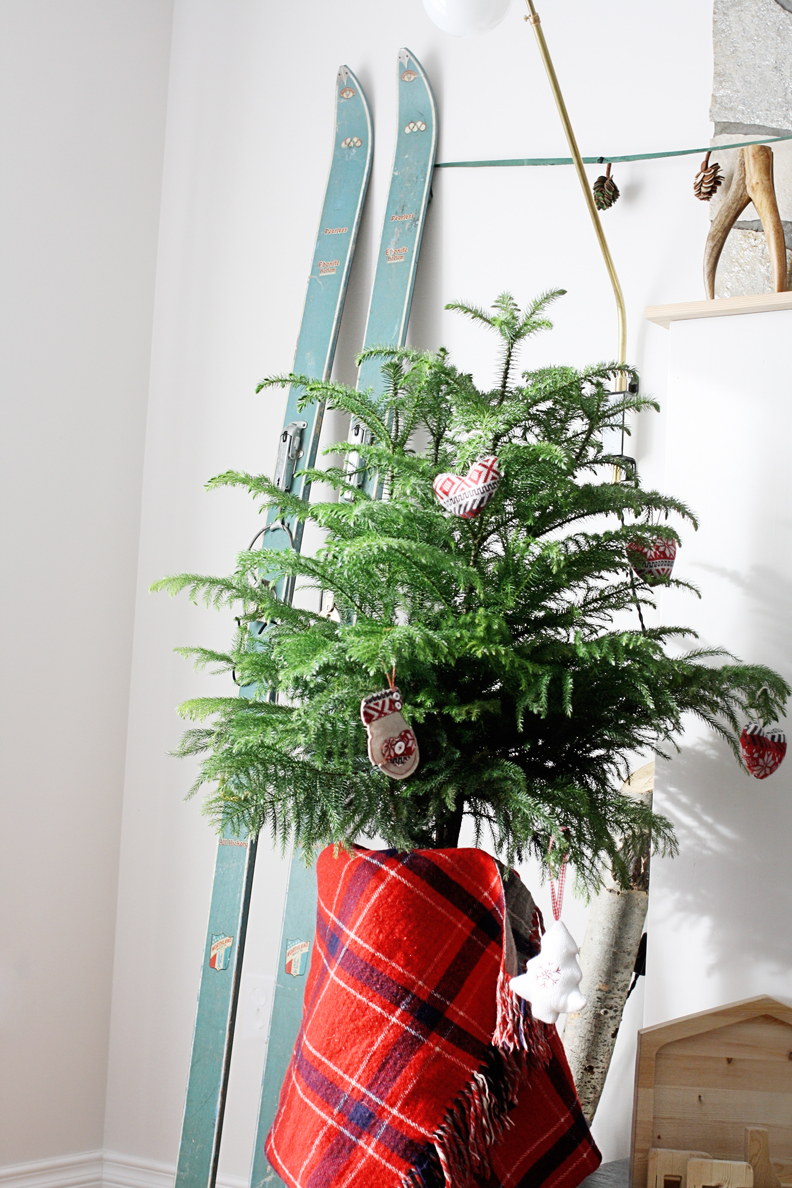
This little space wouldn’t be complete without another tree! This miniature tree is super whimsical, complete with multi-colored felt ball ornaments and a fun tree skirt. I also used the Holiday Suitcases with silver stars and placed toys on top of the cases and around the tree.HolidayHallway_4 HolidayHallway_5
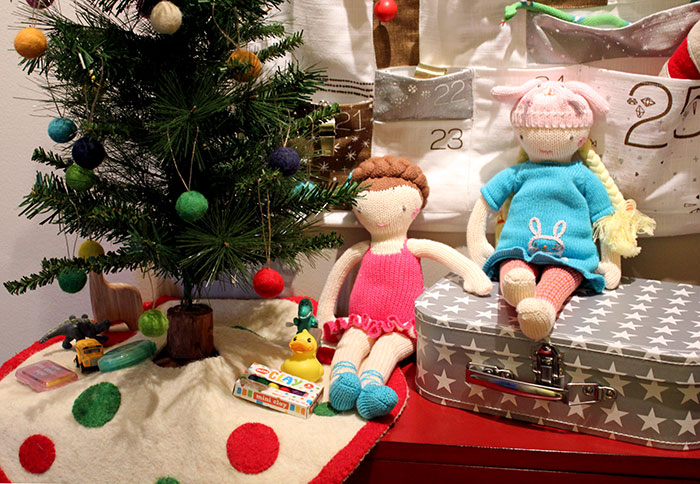
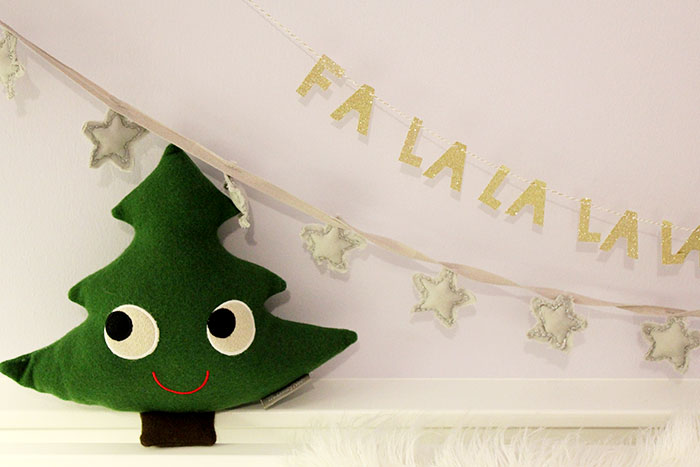
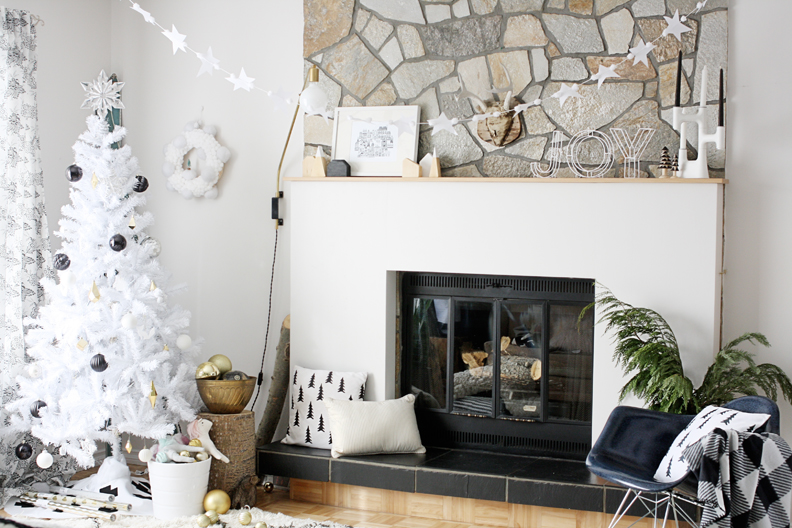
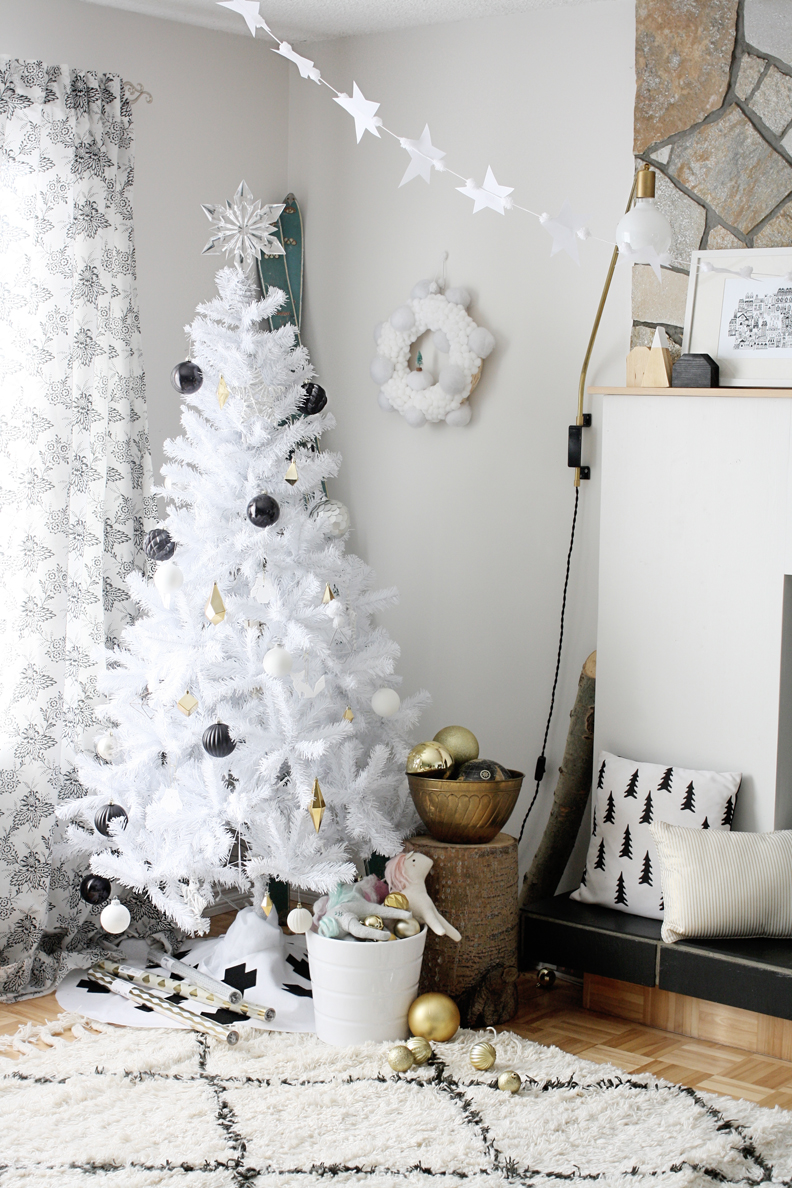
Our first Christmas with Zelda wouldn’t be complete with a decorated nursery. As a new mom, I had so much fun decorating this space with another small tree, a festive holiday garland, and her favorite holiday plush toys.Nursery_2 Nursery_1
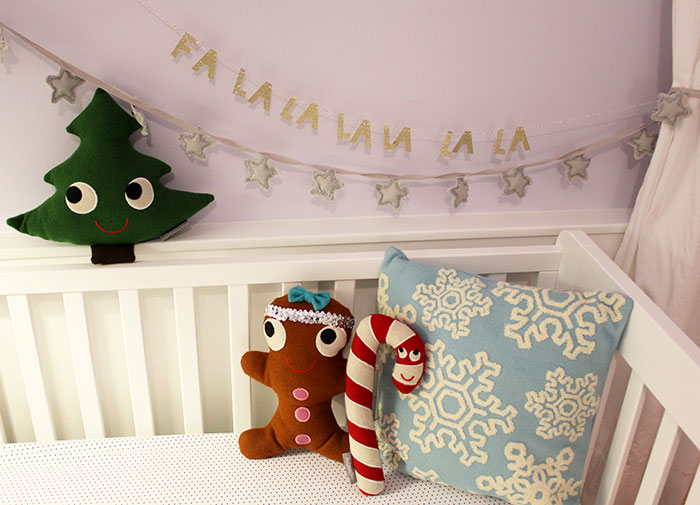
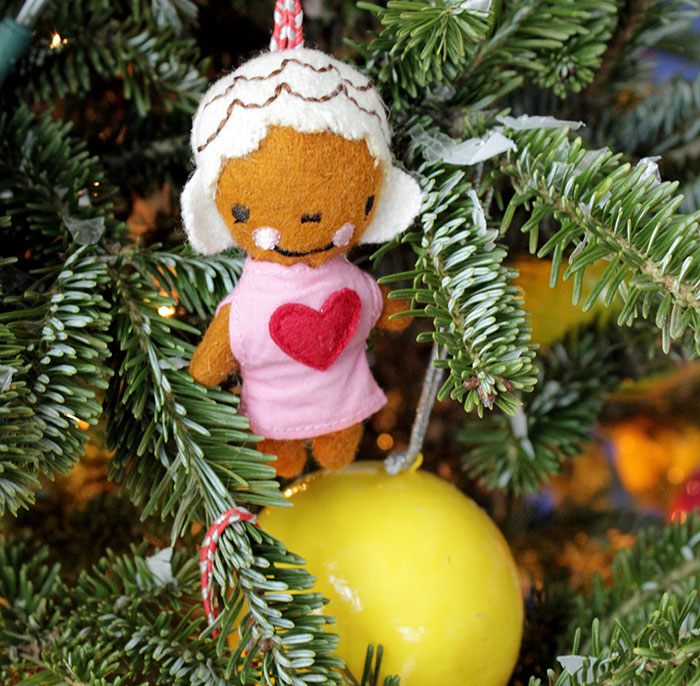
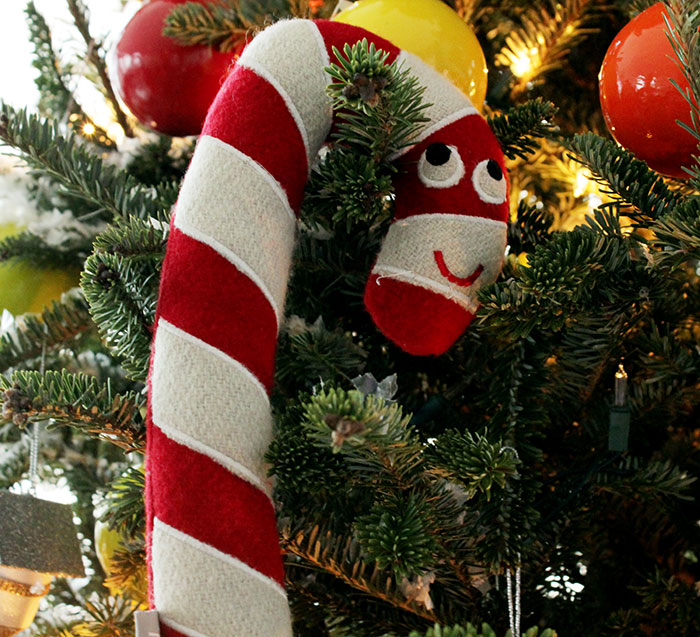
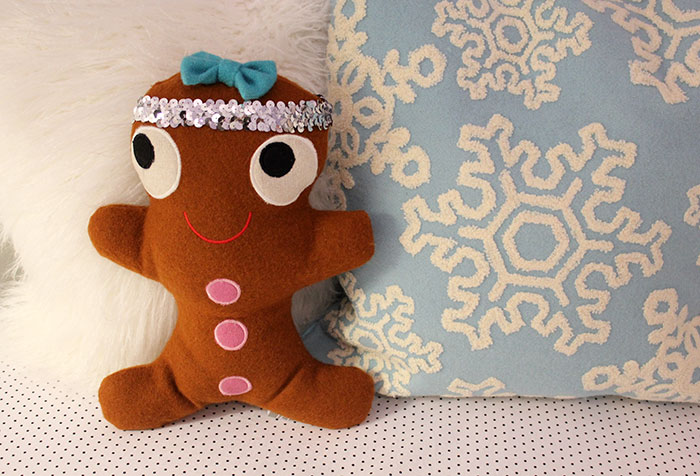
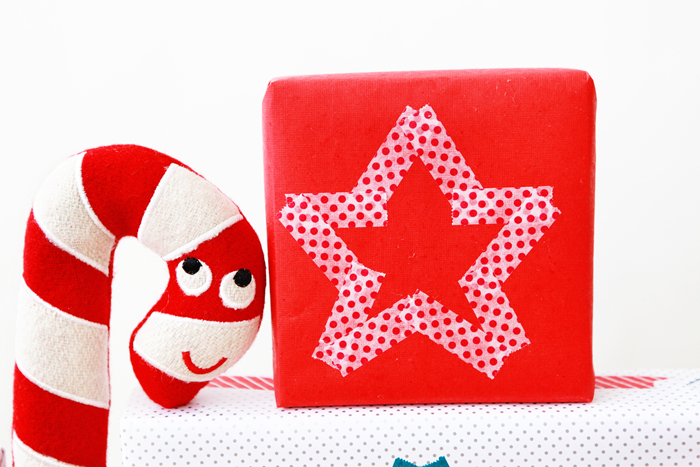
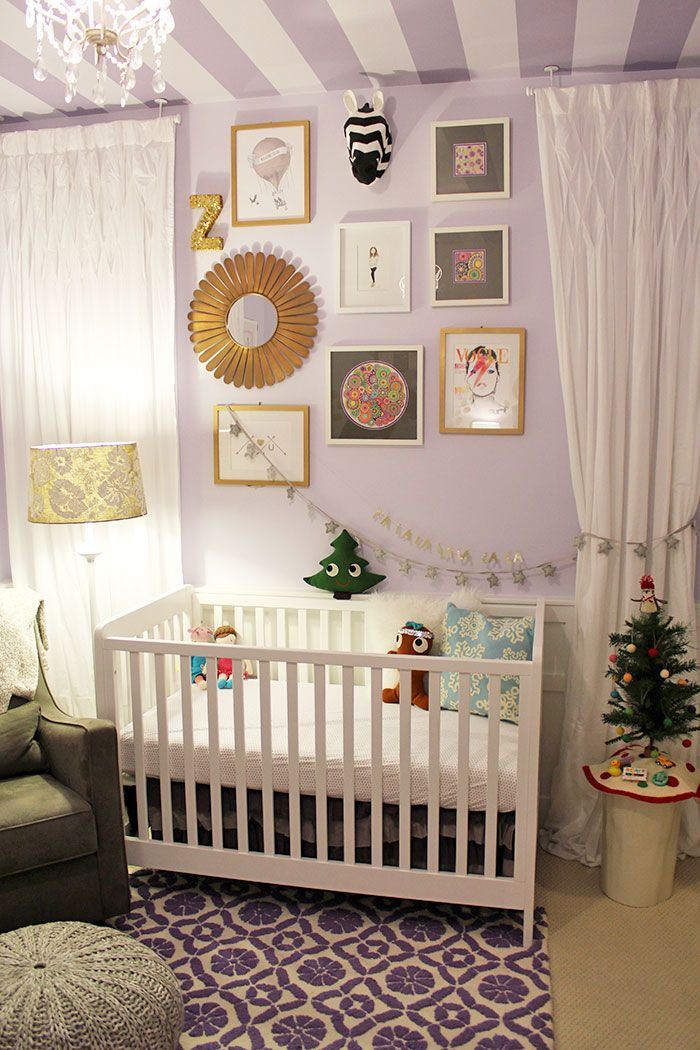
I’m completely crushing on this candy cane guy and adore the little tree, but how cute is her gingerbread girl?! I added a sequins headband that is so Zelda! These plush toy options are a great way to keep your nursery festive without over cluttering or going overboard on the decorations.Nursery_3 Nursery_4 Nursery_5
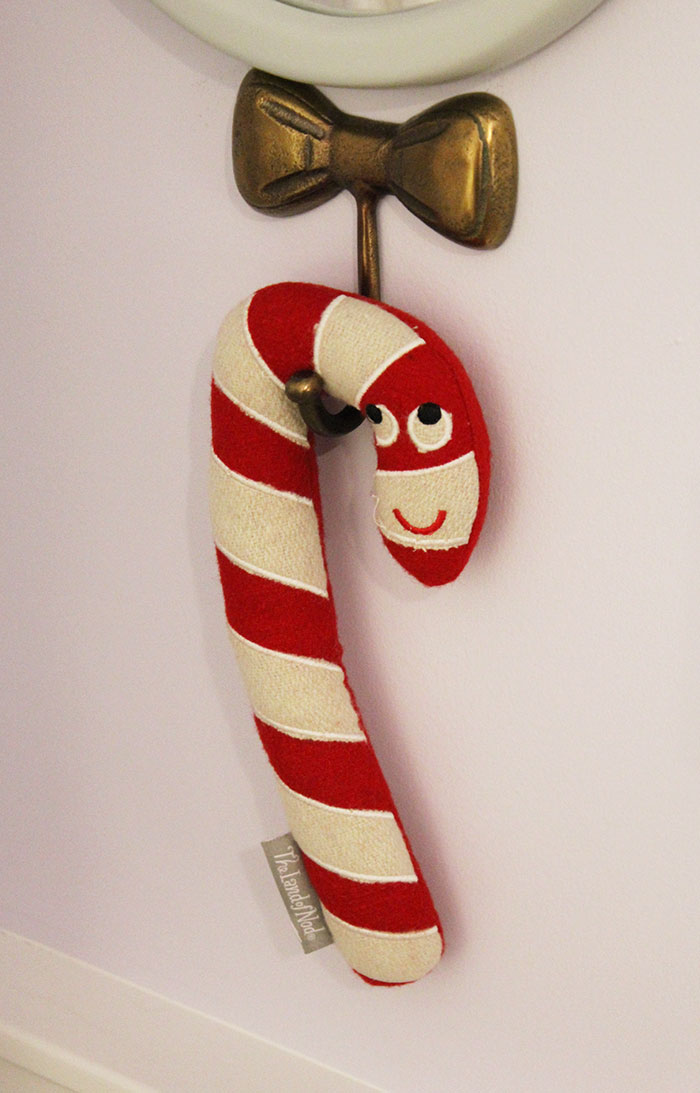
Corri McFadden is the owner and founder of eDrop-Off Luxury Consignment. As a style expert and successful blogger, she hosts a weekly fashion segment on Chicago’s “You and Me This Morning” and features more tips and tricks on her website and her site for Mom, Glitter and Bubbles.
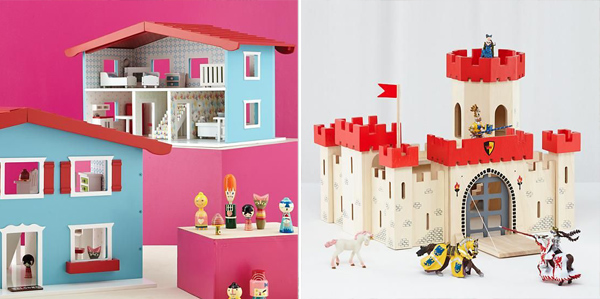
Holiday Wrapping with Paper Source

December 12, 2014

Post by Michelle Kohanzo, Managing Director of The Land of Nod

When it comes to the holidays, there’s nothing more fun than getting the family together for a bit of gift wrapping. Sure, it’s not always the most helpful, but it definitely makes the best memories. And there’s no better time to get into the wrapping (or unwrapping) season than now, since we’re partnering with our great friends at Paper Source.

A few of my favorite hands-on wrapping ideas are:

Personalize wrapping paper with heat embossing. These alphabet stamps are perfect for ditching gift tags and creating a package that’s as unique as the gift inside.

Paper Source Heat Embossing ToolOne of my favorite things about going to Paper Source is the amazing goodies they keep up at the register (finger puppets, nostalgic candy like these Candy Cane Pop Rocks and jewelry). They’re the perfect gift toppers.

Pop Rocks: Candy Cane


Shop Paper Source’s collection of gift wrap, greeting cards and more, and you’ll save 20% with promo code LON20 through December 24th.

Plus, the Nod Tour Bus will be stopping by Paper Source in Naperville, IL on Sunday, December 14 from 11am-1pm with tons of games and giveaways. Paper Source will even be hosting a fun activity for the kiddos. See you there!

Aside from being the Managing Director of The Land of Nod, mother to four kids (yes, FOUR!) and a gourmet cook, Michelle is a retail junky. She’s painted her dining room countless times and changes rugs like most people change their bedsheets. When she’s not living and breathing retail, she’s weaving amazing works of art with her sister for Bourbon+Gin Weaving.

Play With Your Food – Christmas Tree Food Art

December 11, 2014

Post by Selena of How About Cookie

Play With Your Food - Christmas Tree Food ArtThe holidays are magical; the dreary weather, not so much. It’s been overcast for several days here, and keeping my kids entertained is no easy feat. When I laid eyes on this adorable plush Christmas tree, though, I had a light bulb moment. Sometimes a fun snack inspired by your kids’ toys is all it takes to make the day a little merrier and brighter.

For this fun food art plate, you’ll need:

  1. honeydew
  2. two banana slices
  3. two blueberries
  4. fruit leather

First, cut three thick wedges of honeydew of different lengths; the smallest wedge should be a triangle to be the treetop. Feel free to leave the skin on: it makes munching on them later a lot easier! Use the rim of a large mug to smooth and shape the top of each wedge so that they stack snugly in the shape of a Christmas tree.

land of nod christmas tree step 1Next, cut two slices of banana and lay them on the bottom wedge. Take the two biggest blueberries of the bunch and place them on top of the banana slices for the eyes.

land of nod christmas three step 2Cut a couple inches of fruit leather and place just under the bottom of the tree. For the mouth, use a measuring tablespoon to cut a semicircle from the remaining fruit leather. Use kitchen scissors to cut a thin smile, using the curve of the semicircle as a guide.

land of nod christmas tree placematAnd you’re done! Have fun guessing with your kids what the tree is looking at, or maybe Plush Christmas Tree and Honeydew Christmas Tree might fancy a friendly conversation. My three-year-old called them “mommy and baby twees” saying “what do you wanna eat” to each other. They keep it real!

land of nod christmas tree step 3Keep those adorable googly-eyed toys coming, Land of Nod!

Take a peek at Selena’s food art on her blog, How About Cookie, and follow her creations, crafts, and—once in a while—actual cooking on Instagram.

Milk and Cookies, and a Giant Book

December 10, 2014

Post by Michelle of Avery & Augustine

Milk and Cookies, and a Giant BookWhat’s more cozy than an enormously good book with a side of milk and cookies?  This story is not only sweet, but incredibly gorgeous with hand appliquéd and embroidered artwork by Michelle Romo.  Avery enjoyed this special story time with I’m So Glad You’re Here along with a glass of milk and Speculoos cookies.  We changed things up a bit from the usual snack routine and dipped the Speculoos in semi-sweet chocolate and finished them off with a sprinkling of salty pretzel bits.  There is one added bonus with this work of art: if all that milk makes you a wee bit drowsy, well, you have a blanket for a short snooze!

Milk and Cookies, and a Giant Book 2Milk and Cookies, and a Giant Book 3Milk and Cookies, and a Giant Book 4Milk and Cookies, and a Giant Book 5Milk and Cookies, and a Giant Book 6Milk and Cookies, and a Giant Book 7Milk and Cookies, and a Giant Book 8Thanks to The Land of Nod for sending us this giant book.

You can see Michelle’s work and read about her two young children and their first forays in cooking, art and everything in between at Avery and Augustine.

DIY Holiday Syrups

December 9, 2014

Post by Rae Ann of Rae Ann Kelly.com DIY Holiday Gift: Homemade SyrupsWith the holiday season in full swing, we’ve been indulging in everything warm and cozy. Snuggly blankets, homemade soup and flavored steamers to name a few. Below are recipes for three of our favorite syrups to get you feeling warm and festive! Simply add a tablespoon or two to warmed milk or coffee for a yummy treat. To make it extra special top with whip cream and sprinkles, cinnamon or shimmer sugar. As a fun bonus, I’ve included cute drink syrup labels so you can package them up and give to friends!

DIY Holiday Gift: Homemade Syrups 2Recipes & how-to’s are below.

White Chocolate Syrup – also delicious as a topping on ice cream and other desserts.

You’ll Need:

  • 1 can (14 oz.) sweetened condensed milk
  • 12 oz. white chocolate chips
  • 1 tbsp. pure vanilla extract

Here’s How:

  1. Stirring occasionally, heat milk in a small saucepan over medium heat. When hot add white chocolate. Remove from heat and stir until chocolate has melted. Stir in vanilla.
  2. Allow syrup to cool and then store in an airtight container in the refrigerator for up to 3 weeks.

Cinnamon Dolce Syrup 

You’ll Need:

  • ½ cup water
  • ½ cup light brown sugar
  • 1/3 cup pure maple syrup
  • 2 teaspoon ground cinnamon

Here’s How:

  1. Combine all ingredients in a small saucepan over medium heat. Whisking frequently, heat through until sugar has dissolved (about 5-10 minutes). Remove from heat.
  2. Allow syrup to cool and then store in an airtight container in the refrigerator for several months. Stir before using!

Vanilla Syrup

You’ll Need:

  • 1 cup granulated sugar
  • 1 cup water
  • 1 vanilla bean, sliced lengthwise and seeds scraped (optional, but delicious)
  • 2 teaspoons vanilla extract

Here’s How:

  1. Combine sugar, water, vanilla seeds and pod in a small saucepan. Heat over medium, stirring frequently until sugar has dissolved. Let simmer, stirring occasionally for about 10 minutes. Remove from heat and stir in vanilla extract. Discard vanilla bean pod. Remove seeds using a strainer if desired.
  2. Allow syrup to cool and then store in an airtight container in the refrigerator for several months. Stir before using!

Print out the drink syrup labels, cut & add to mason jars for an easy gift! Hope you indulge, enjoy and share!

DIY Holiday Gift: Homemade Syrups 3DIY Holiday Gift: Homemade Syrups 5DIY Holiday Gift: Homemade Syrups 6{Images by Stacy Jacobsen}

Rae Ann blogs at Rae Ann Kelly and is a kid wrangler, graphic designer, food & craft nut. Her blog features little tidbits about her day to day life & design projects, tutorials for DIY’s, free downloads, yummy recipes, lots of kid friendly ideas and outfit inspiration. 

20% Off Pretend Play Kids Toys – Today Only!

December 8, 2014

We’re feeling extra festive and are counting down to the holidays with a kids toys sale a day through December 17th! Today’s kids toy sale is 20% off pretend play. Encourage your littles to use their imagination with these fun toys. And don’t forget to head to www.landofnod.com to discover each day’s unique sale.

What’s that Stand For Play Stand (create a lemonade stand, theater, post office and more)

Kids Toys: Pretend Play

Jenny Lind Doll Bed

Kids Toys: Pretend Play - Jenny Lind Doll BedCottage Dollhouse

Kids Toys: Pretend Play - Cottage Doll HouseThere are plenty more pretend play kids toys on sale at landofnod.com. Head to our site now and snag 20% off before the sale ends! And be sure to check our site daily to see what toys will be on sale next as part of our HoliDAILY kids toy sale through December 17.

Shop The Land of Nod Kids Toys

New Year’s Eve Party Animals!

December 5, 2014

Post by Rebecca of Not-So-SAHM

Kids New Years Eve Party Decorations I know people love to hate it, but we can’t help it. The Greens just love New Year’s Eve. And our kids are no exception. Every year we have a kids New Years Party just for them. Long before midnight looms, we get out the streamers, the party poppers, the silly string and go to town. We bang pots and pans. And we let them stay up until the late, late hour of 9 p.m.

So as soon as I saw The Land of Nod’s Meri Meri New Year’s Eve party collection, I knew my party animals had to have it. And I knew that there would be no objections to partying a little early this year in rehearsal for the big day. In our continuing commingling of the holidays this year, the day after Thanksgiving we had our own little New Year’s Eve party with the kids’ favorite stuffed animals. As a bonus, I gave them each one of their Hanukkah presents early — Kane got the suit he has sought for years (I’m biased, but how handsome does he look in a suit!?) and Cam a new sequin skirt. Because you can never have enough sequins. We had a total blast, especially breaking out all our kids New Years Eve party decorations.

Kids New Years Eve Party Decorations 2The Meri Meri collection is truly a gorgeous set of dark charcoal gray, white and gold geometric shapes. It makes for a sophisticated kids party, but I would completely use it for a party of my own as well (and, btw, I can attest after seeing it in person, that this combination of sophisticated kids + fun for the adults is worked throughout The Land of Nod’s soon-to-be released spring line. So awesome). The banner went together easily, but almost more importantly, comes back apart and stores nicely. The Party Pinwheels add a great touch of whimsy, too.

Kids New Years Eve Party Decorations 5 Kids New Years Eve Party Decorations 7To make it really fun for the kids (and their party animals), I set out the New Years Eve Party Props and Party Hats. I was happy to find that the props came with a sheet of temporary metallic tattoos, which are really all the rage right now. Not surprisingly, my children who are normally decked out in tats, were not in the “mood” for them that morning. So I’m saving those for another day.

Kids New Years Eve Party Decorations 9 Kids New Years Eve Party Decorations 11 Kids New Years Eve Party Decorations 13What would a New Year’s Eve party be without lots of sugar?! To get in the spirit, and in keeping with the collection’s color scheme, I set out black + white popcorn, chocolate and vanilla macarons, and root beer floats sprinkled with edible gold stars.

Kids New Years Eve Party Decorations 15 Kids New Years Eve Party Decorations 16 The kids gobbled those and then got down to the business of turning up the volume. I had set out inexpensive confetti poppers covered with pretty glittered paper, metallic noisemakers, and clear balloons filled with confetti. They set everything off pretty much at once — bouncing on the balloons to pop them, spraying confetti in the air seemed to be the favorite activity. Kids New Years Eve Party Decorations 18In fact, we loved it so much, I wouldn’t be surprised if we needed to have another full dress rehearsal before the real deal at the end of the month. Party animals, these two.

Kids New Years Eve Party Decorations 19 Kids New Years Eve Party Decorations 21 Kids New Years Eve Party Decorations 22Rebecca is a mom to two young kiddos and, in her spare time (ha!), likes to pretend she’s a back-up dancer, craft cocktails, and run long distances. A relatively recent SAHM, she blogs family-friendly activities, DIYs and celebration fun at Not-So-SAHM

Shop The Land of Nod New Years Eve Party Decorations

Three Ways to Decorate For Christmas

December 4, 2014

Post by Lidy of Hello Lidy

Hi everyone – I’m back to share some more seasonal inspiration! This year is a special time for our family because we are spending Christmas in our new home for the first time! Not to mention, I love decorating for the holiday season so I decided to share three ways to decorate for Christmas inspired by The Land of Nod’s holiday trends! I also realized that each one of these designs suits each one of our kids to a tee! Crazy, right?!

Christmas Decorations Design One: Merry and Bright

Personality Type: Holden (our oldest son)

Holden is our funny character! He brings so much life to our family with all his funny story telling and random comments. This design seemed to have his name all over it. I love his passion which truly adds that pop of color to each of our lives! This room design is fun, cheery and packed full of happy thoughts! If I could get inside the mind of my child, this is probably what it would look like. I absolutely love the addition of the Hit the Town Garland. It reminds me of his wonderful imagination! The green and red holiday suitcases and the Polygon Ornaments add that burst of excitement that make the room really stand out! They go perfectly with the rest of our pieces, which we’ve either collected for some time or made ourselves this year!

Christmas Decorations Design One: Merry and BrightChristmas Decorations Design One: Merry and Bright 2Christmas Decorations Design One: Merry and Bright 3Christmas Decorations Design One: Merry and Bright 4Christmas Decorations Design One: Merry and Bright 5Christmas Decorations Design Two: Winter Garden Collection

Personality Type: Violet

This was a no brainer – obviously. Our only daughter is our little beauty. She is all girl, which I’m sure I’ve mentioned before! She loves shiny, sparkly and girly things. She lives on the edge and is by far our bravest child. She is constantly pushing us with her strong will, but we see it as her way of exploring the world around her. Just like her personality, this room design is focused on bringing out those edgier, more modern pieces this year while keeping the colors simple and minimal. What you see is what you get and it’s all very good! I am absolutely in love with the gem ornaments. They are light, airy and totally on trend. The Mythical Plush Unicorns are ridiculously girly and too adorable for words!! Violet kept telling me over and over again, “They are so cute mommy”! Of course, the Metal “Joy” is modern and minimal – it adds that fun factor, but in a more subtle way! It looks lovely along with our DIY Paper star garland!

Christmas Decorations Design Two: Winter Garden CollectionChristmas Decorations Design Two: Winter Garden Collection 2IMGChristmas Decorations Design Two: Winter Garden Collection 3Christmas Decorations Design Two: Winter Garden Collection 4Christmas Decorations Design Three: Into the Wild

Personality Type: Sebastian (our youngest son)

Sebastian is by far our most adventurous child! He is always trying to teach himself new things and is very independent. He is only 21 months old and I heard him quietly counting to ten all by himself. I have NO idea where he learned that, but it’s so typical of him. This room design fits his personality completely – plus, he LOVES camping! He is always picking up sticks, waving them around and saying “Hi-ya” or “Fight”! This room is inviting, adventurous and brings the outdoors inside. The Piney Fresh Garland is too cute – seriously! It’s fuzzy, fresh and totally outdoorsy! Don’t get me started on The Goodies S’more and Bear Pillow, which go so perfectly with our camping toy set. It’s like having a family night by the fire, without the cold winter factor.

Christmas Decorations Design Three: Into the WildChristmas Decorations Design Three: Into the Wild 2Christmas Decorations Design Three: Into the Wild 3Christmas Decorations Design Three: Into the Wild 4Christmas Decorations Design Three: Into the Wild 5 So, which room design would you pick?!

Lidy is the face behind Hello Lidy: a blog focusing on creating and cultivating unique spaces that integrate original handmade designs and vintage pieces while keeping up on current trends and designs. Lidy and her husband have three adopted toddlers.

Christmas Present Wrapping Party

December 3, 2014

Post written by Michelle of Avery & Augustine

Christmas Present Wrapping PartyChristmas Present Wrapping Party 2Christmas Present Wrapping Party 3Christmas Present Wrapping Party 4Christmas Present Wrapping Party 5Christmas Present Wrapping Party 6Christmas Present Wrapping Party 7Christmas Present Wrapping Party 8Christmas Present Wrapping Party 9Christmas Present Wrapping Party 10Christmas Present Wrapping Party 11Christmas Present Wrapping Party 12I thought it would be fun to turn this year’s wrapping of Christmas gifts into a Christmas present wrapping party, inspired by one I had seen in an old issue of Real Simple years ago.  These merry garlands and plush friends helped create a festive and jovial atmosphere!  I set up a simple plate of wintry snacks because I knew we would work up an appetite in the midst of all the paper and ribbon frenzy—slivers of gjetost, freeze-dried cranberries, shortbread trees, chocolate creme-filled cookies and Happy Hippos.

Every year, I try to come up with a different theme for our gift wrapping, be it a particular set of colors or patterns.  This year, we went with a color palette of reds and grays.  We used washi tape to embellish our packages, creating simple Christmas motifs and letting Avery and Nate have a go at it with their own designs.  Avery and I knit some chains to tie around a couple of the presents.  Avery wrote gift recipients’ names on card stock using these dual-tip markers and I cut out an outline of each name, creating a unique shape for each.  I liked how using the brush tip of the markers added some nice depth to the letters.  When Avery looks at all of our wrapped parcels, she’ll know that she had a part in the creative process and that her work was valued.

I love how when we look back at photos of this event, it’ll remind us of the things we did together as a family throughout 2014—Nate experimenting with washi tape and different art media, the fun Avery had starting to knit (and how proud she was when got the hang of it!) and her important milestone of learning how to write letters, words and names.  Wondering if this wrapping party will become an annual tradition!

Thanks to The Land of Nod for providing us with inspiration for our wrapping party!

You can see Michelle’s work and read about her two young children and their first forays in cooking, art and everything in between at Avery and Augustine.

DIY Mini Christmas Pendant Ornaments

December 2, 2014
Written by Jeran of Oleander and Palm
DIY Mini Christmas Pendant Ornaments Hi there, it’s Jeran from Oleander and Palm.  I’m all about cute pendants.  I made this Sisters one for my daughter’s bedroom.  So, this year I thought it would be fun to make mini pendant’s for our Christmas tree.

We’ve bought and planted a little Colorado blue spruce this year.  The plan is that we will be able to use this little guy for a couple years.  We’ll move him out for the rest of the year and then bring him back in for the holidays.

I kept the tree simple with our large bulb lights, my Mini Pendant Christmas Ornaments, Winter Festive Felt Garland, Ice Globe Ornaments, Gem Ornaments and topped it with a geometric himmeli heart that I made.

DIY Mini Christmas Pendant Ornaments 2DIY Mini Christmas Pendant Ornaments 3Here’s what you’ll need to make DIY Mini Christmas Pendant Ornaments:

  • Felt in black and white
  • Glitter fabric (you can buy a 8×10 sheet at Hobby Lobby for just $1.47)
  • Hot glue gun
  • 1/4″ dowel (I painted mine gold)
  • Baker’s twine
  • A copy of the printable template (download it HERE)

mini pendant christmas ornaments 4 DIY Mini Christmas Pendant Ornaments  5How to make it:

  • Start by cutting out the pendant shape.
  • Fold over the top of the pendant and glue down with hot glue.
  • Cut out the letters with small sharp scissor (or I gave myself a short cut and used my Cricut Explore).
  • Glue the letters on with hot glue.
  • Finish by tying a baker’s twine to either side of the dowel for hanging.

DIY Mini Christmas Pendant Ornaments 6And here’s a little look at little more of my living room ready for the holidays.

DIY Mini Christmas Pendant Ornaments  7DIY Mini Christmas Pendant Ornaments  8DIY Mini Christmas Pendant Ornaments  9DIY Mini Christmas Pendant Ornaments  10 DIY Mini Christmas Pendant Ornaments  11 DIY Mini Christmas Pendant Ornaments  12mini pendant christms ornaments 11DIY Mini Christmas Pendant Ornaments 12A former elementary school teacher, Jeran has added her unique voice to the modern maker culture through her blog Oleander and Palm. She loves helping people find attainable beauty in the lives they live. Her creativity and industriousness were honed through years of living in third world countries, that challenged her to find novel solutions for creating livable spaces. Now a mother of three, settled in sunny California, her skills and styles are evolving in exciting new ways. Her focus is Simple California Living, designing and making livable spaces that incorporate vintage finds, handmade/DIY pieces and global inspiration.

A Playhouse Decorated for Christmas

December 1, 2014
Post by Joni of Lay Baby Lay
A Playhouse Decorated for Christmas I adore The Land Of Nod’s Christmas decor.  I especially love that it’s beautiful and super kid friendly, but without feeling kid friendly.  It brings so much color and whimsy, and I was excited to get to deck out the girls’ playhouse in some of the collection.  It sort of turned it into a life-size gingerbread house or something out of candy land, don’t you think?
A Playhouse Decorated for Christmas 2We’re in Atlanta, so our winters are chilly, but quite milder than it can be elsewhere, so we’re often playing outside in December.  To celebrate all the Christmas trimmings, we enjoyed a post-nap extra special snack on the playhouse deck, complete with cozy pajamas and snowman slippers.  Can I just say I’m crazy about these pillows?  They are just adorable, and I feel like they are always smiling at me.  They are just so fun.
image005The girls were super thrilled with this afternoon surprise, and they enjoyed taking the rainbow ornaments on and off the tree in between gingerbread bear nibbles and sips of milk out of the cutest reindeer cups ever (I can’t get over them!).
A Playhouse Decorated for Christmas 7A Playhouse Decorated for Christmas 9And that felt garland.  I love the colors, and that it looks like candy.  I layered it with the snowflake garland, a felt ball garland from last year and some handmade gold paper pennants.  The layers make it extra fun; don’t be afraid to mix it all together!
image011This garland by Suzy Ultman is also super dreamy.  It’s just the sweetest assemblage of little Christmasy dwellings, and they are all stuffed and cozy-looking.
A Playhouse Decorated for Christmas 13Vivi is especially charmed by the Christmas tree, which is the perfect backdrop for the rainbow ornaments.  She calls it the “purple tree,” and although it’s supposed to be pink, I quite agree with her.  I love having real trees, but it’s fun to have an extra pop of color, and it’s positively delightful with the lights twinkling at night.
A Playhouse Decorated for Christmas 15And once again, those pillows!  The s’more pillow is delicious, isn’t it?  I can’t help but just be happy looking at them.
A Playhouse Decorated for Christmas 17Thanks so much to the Land of Nod for inspiring such a fun afternoon, and helping us get the season kicked off!  I’ll probably be moving some of this into the living room, because I need to be able to look at all the cuteness all the time!
A Playhouse Decorated for Christmas 19A Playhouse Decorated for Christmas 21
 Lay Baby Lay started in 2011 shortly after the arrival of my first baby as a place to provide fresh and unique nursery inspiration with a little dose of motherhood experience. This site is my creative outlet and the place where I am able to express all the ideas running around in my head. It is my hope that you will also be inspired to create spaces for your little ones that are full of imagination, color, and delight and maybe find a little encouragement in this crazy but wonderful journey of having babies and watching them grow. 

Last Minute Thanksgiving Printables

November 26, 2014
Post by Christina of Christina Williams Blog
Thanksgiving PrintablesOne of my favorite parts of Thanksgiving is creating a fun kids’ table. This year, though, Thanksgiving really snuck up on me. I’m not nearly as prepared as I would like to be, so I created an easy Thanksgiving printable place mat concept that can be done at the last minute. And I decorated using toys and decorations from Nod that are usually in my kids’ rooms and playroom. Take a look around and see what you’ve got handy that might work to make a fun kids’ table for Thanksgiving.

Thanksgiving Printables - PlacecardsKids Table Thanksgiving PrintablesThanksgiving Printables 4Thanksgiving Printables 6Thanksgiving Printables 7Thanksgiving Printables 8 I started by covering the table with a roll of kraft paper. It’s nice and thick, so it will hold up to whatever the kids can dish out, plus they can draw on it. Then I created some printable “modular” place mats. The last thing I need right now is one more errand, so these place mats needed to be something I could do at home without running to the copy center for a large print. I made a variety of activities that work for a range of ages–everything from simple coloring activities to scrambled words and the good ol’ fashioned thankful list for older kids. I even threw in a couple silly jokes for good measure.

So just hop over to my blog and download the printables. Then let the kids choose the activities they want, cut them out and tape them to the table cover. I used Nod’s Archery Garland, as a table runner, and the I Could’ve Bin an Art Caddy to hold utensils and crayons.

The Junior Lumberjack blocks, though, really steal the show. They’re my favorite part of the table. They’re measured to specific thicknesses and heights, so building with them is super easy. My kids play with them every day, and it’s fun to see all the imaginative things they build with them. I created little place card stands out of the blocks, and I figured the kids will probably want to build with them while they’re waiting for the food…so these block are a triple win in my book: fun, functional, and adorable!

There you have it! Raid your kids’ rooms, and your craft stash for decorations, print out my modular place mat activities, and you’re all set. Happy Thanksgiving, Everyone!

Christina Williams is a blogger and graphic designer living in Salt Lake City, Utah. She’s a night owl and a bookworm, as well as a mother to three children ranging in age from two to eight. She shares her latest DIY and design projects along with her adventures in parenting on self-named blog, Christina Williams.

Kids Holiday Gift Wishlists From Our Friends at Pinwheel

From our friends at Pinwheel

Your kiddos have been dreaming about their holiday lists since the catalogs started pouring in months ago. Which is adorable, but can be very stressful for us parents when it comes to actually buying the gifts! How do you weed through the millions of things on their wishlists to make sure their faces light up when opening gifts?

Enter Pinwheel. Pinwheel makes it easy and fun to create and share a wishlist of the gifts your children want and need. Parents can add anything from any online store to one list and share it anytime someone asks “what should I get your child?” Best of all it keeps track of who bought what, as well as your child’s current sizes and interests.

The app even makes gift suggestions based on your child’s age and preferences. You can visit Pinwheel’s website and begin building their holiday wishlists today.

Pinwheel Kids Gifts 
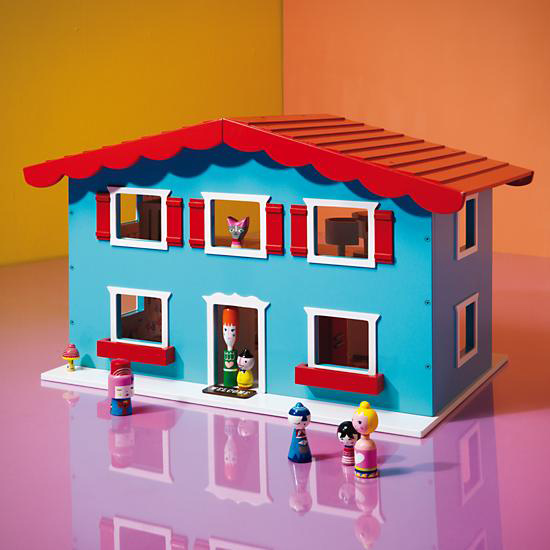
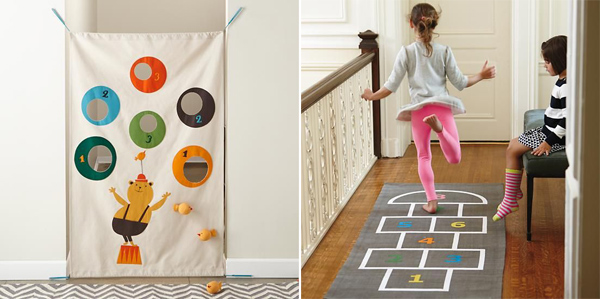
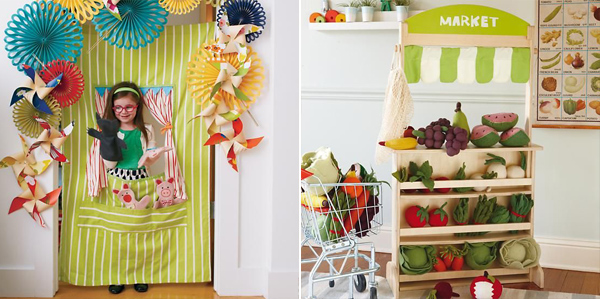
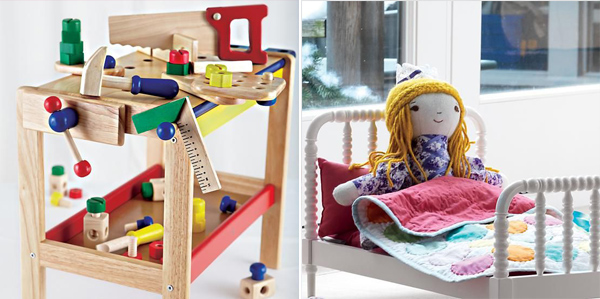
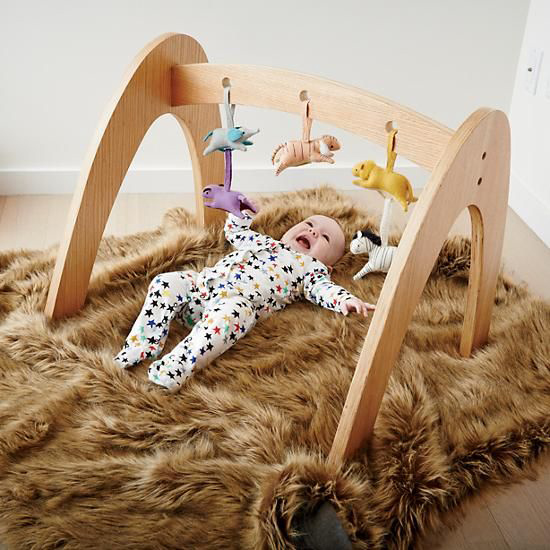
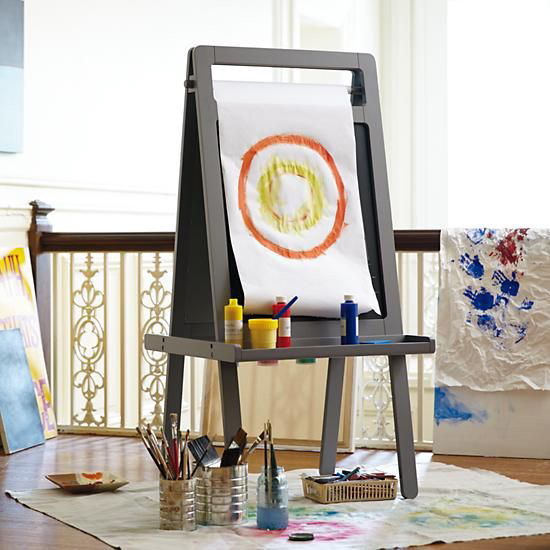
We’ve created 3 Little List gift guides for kiddos that love imaginary play, creating art & music, and enjoying nostalgic toys we played with as kids.

  • Imagination in Play – For little ones who let their imagination run wild and love playing dress up, making pretend meals or entertaining a captive audience.
  • Crafts & Music – Family jam session under the tree? Budding Picasso? Architect in the making?
  • Classic Retro Kids Toys – Nothing’s more fun than seeing our kids play with and love the same toys we enjoyed as kids!

Pinwheel Kids Gifts 2

Post by Pinwheel, makers of wishlists for kids. Keep track of your children’s wants and needs in an easy to use platform to share with friends and family, or simply help you organize your shopping list for the holiday or your children’s birthday.

Thanksgiving Entertaining Tips for the Kids

November 25, 2014

Written by Nick & Aleah Valley of Valley & Co.

The holiday season means gatherings galore and traditions, old and new. It’s about getting together around a table to share in a delicious meal, laughter and great company. Thanksgiving often involves a kids’ table, a space where cousins and siblings collect to eat and visit.

We say dress up the kids’ table so they feel extra special and have a place that looks fun, is cozy, has activities, and is one that they won’t want to leave. Why not pull out all of the stops and let them enjoy sparkling cider from beautiful goblets, dine on festive china and be dazzled by a centerpiece that rivals that on the adult table?

Valley & Co.’s Thanksgiving Tips:

Elevate the kids’ table this Thanksgiving with dressy china and napkins tied with ribbon. Don’t have festive dinnerware? Look to your local rental company to rent flatware, glasses and dishes. Create a centerpiece with moss, branches and pine cones and nestle in little woodland creatures the kids can play with during dinner.

Thanksgiving Entertaining Tips for Kids - 15 Thanksgiving Entertaining Tips for Kids - 9

Upgrade the classic Tic-Tac-Toe game by painting your own squares with metallic paint on a white linen napkin {we just used plain old tape to make a grid and a foam brush to paint squares}, and give the children pine cones and creature figurines as their game pieces.

Thanksgiving Entertaining Tips for Kids - 10 Thanksgiving Entertaining Tips for Kids - 7Leave messages for the kids on their place settings that tell them how thankful you are for them.

Thanksgiving Entertaining Tips for Kids - 8 Thanksgiving Entertaining Tips for Kids - 11Hand draw Thanksgiving bounty {or download our PDF Coloring Sheet} and make up photo copies so each kid has their own coloring page to doodle on during dinner.

Thanksgiving Entertaining Tips for Kids - 4 Thanksgiving Entertaining Tips for Kids - 3

Thanksgiving Entertaining Tips for Kids - 18Have small canning jars filled with moss, acorns, pine cones, and woodland creature figurines that the children can use to create their own little terrariums to take home.

Thanksgiving Entertaining Tips for Kids - 16 Thanksgiving Entertaining Tips for Kids - 2 Thanksgiving Entertaining Tips for Kids - 1What fun do you have planned for Thanksgiving?

Nick & Aleah Valley are the husband + wife owners and operators of Valley & Co. Lifestyle, based in the beautiful Emerald City {Seattle}. They love to make life grand and believe that any occasion, whether small or large, is cause for celebration. They believe that entertaining at home welcomes memories and laughter. Follow them on their blog and Instagram.

Pumpkin Spiced Homemade Play Dough

November 24, 2014

Written by Kelsey Nixon of Kelsey’s Essentials

Pumpkin Spiced Homemade Play DoughMaking homemade play dough is the perfect way to blend cooking and crafting at home with your littles. My 2 year old Oliver has recently fallen in love with play dough thanks to preschool and has been requesting that we make batches together at home. It makes my heart flutter any time he asks to be in the kitchen with his mama and we’ve had such a great time making this foolproof pumpkin spiced homemade play dough recipe together. Going beyond adding a food coloring to the dough, we’ve started adding spices or extracts so that it not only looks colorful and vibrant, but it also smells fantastic!

Pumpkin Spiced Homemade Play Dough 1With Thanksgiving right around the corner we added pumpkin pie spice and orange food coloring to our mixture to get in the spirit of the holiday. My Ollie can’t get enough of molding pumpkin pie slices, turkeys, and pumpkins out of our dough. We also like to pull out cookie cutters and a few safe kitchen tools to let his imagination run wild.

If you’re looking for a kid friendly cooking craft to entertain the kiddos this week, consider this simple and fun activity and don’t forget that you can file this recipe away and add different spices, extracts, and colors to customize your homemade play dough for any month of the year. Check out the recipe below:

Homemade Pumpkin Pie Spiced Play Dough

Ingredients

  • 3/4 cup water
  • 1/4 cup salt
  • 1 cup all purpose flour
  • 1 teaspoon cream of tartar
  • 1 tablespoon vegetable oil
  • 1 tablespoon pumpkin pie spice
  • orange food coloring

Pumpkin Spiced Homemade Play Dough Ingredients Directions

Heat the water and salt over your stove or in your microwave it until boiling and the salt has dissolved.

In the bowl of a stand mixer, combine the flour, cream of tartar, and pumpkin pie spice and mix until combined. Mix in the vegetable oil.

Pumpkin Spiced Homemade Play Dough  3Working carefully, add the orange food coloring to the boiling water then slowly pour the water into the mixer while it’s running. (be sure to help your littles with this step) Mix until fully combined and the dough pulls away from the sides of the bowl.

Pumpkin Spiced Homemade Play Dough - 4 Pumpkin Spiced Homemade Play Dough - 5Pumpkin Spiced Homemade Play Dough - Pie SlicesKelsey Nixon  is the host of Kelsey’s Essentials on Cooking Channel and author of Kitchen Confidence. Kelsey’s Essentials is also currently airing Mon-Thurs at 3pm on Food Network. Kelsey, her husband Robby, and son Oliver (“Ollie”) live in New York City. Follow her on Facebook, Twitter and Instagram.

Kid-Friendly Thanksgiving

November 22, 2014

Written by Selena of How About Cookie

Kid-Friendly ThanksgivingBetween the big feast, luscious desserts, and tons of time with friends and family, Thanksgiving has kid-friendly written all over it. Here’s a way to make it a kid-friendly Thanksgiving; invite your littles into the kitchen and make some easy, fun food art together.

Turkey Plate

This turkey plate is a great way to get them snacking on veggies. I used this adorable Thanksgiving Cupcake Kit to bake muffins, the centerpiece of this food art. You’ll need 4-5 rainbow carrots, white chocolate chips and mini chocolate chips (or store-bought candy eyes), and your favorite muffin or cupcake recipe. I used this Best Ever Pumpkin Muffin recipe—hard to beat a name like that.

Kid-Friendly Thanksgiving - 1Start by peeling your carrots and slicing them in half, lengthwise. Trim them all to the same length, then slice the sides so they taper to a pointy tip. Arrange alternating colors on a plate as turkey feathers—this is when even the smallest of hands can help.

Kid-Friendly Thanksgiving - 2Now for the eyes: Warm a small saucepan over high heat for a few seconds, then turn off the heat. Hold a mini chocolate chip, point down, just enough to melt the tip; stick it on your white chocolate chip and let cool. Repeat to make a second eye. Gently push these into your muffin. Cut a small triangle from a carrot scrap to make the beak, and if you’re feeling extra crafty, use kitchen scissors on an apple peel to cut a wattle, i.e. that red hanging thing. (Thanks, Google!) Balance the muffin on top of the carrots.

Turkey Leg

Kid-Friendly Thanksgiving - 3This turkey leg plate is inspired by the clever Pull Apart Poultry toy. All you need is a red pear and string cheese. Cut your pear in half; set aside. Cut a piece of string cheese about 1/3 the length, then cut two more short pieces—each the height of your first. Have your child use a round measuring spoon (1/2 teaspoon-sized or smaller works best) to carve away the bottom corners of your long string cheese. Ask them to assemble the “turkey meat” and “bone”. Done!Kid-Friendly Thanksgiving - 5

Kid-Friendly Thanksgiving - 6Kid-Friendly Thanksgiving - 7Happy Turkey Day, and have fun playing with your food!

Take a peek at Selena’s food art on her blog, How About Cookie, and follow her creations, crafts, and—once in a while—actual cooking on Instagram.


I Scream, You Scream, We All Scream For An Ice Cream Truck Playhouse!

November 21, 2014

Written by Michelle of Avery & Augustine

Ice Cream Truck Kids PlayhouseWith the cold weather encroaching and your kids still pining for summer’s frozen treats, this ice cream truck kids playhouse is just the ticket.  Its cheery color palette and vintage flair will brighten up any gray day, and the kids playhouse is finished off with the cutest handmade embroidered and patchwork details.  Some of our favorite features are the windows and awnings, and naturally, Avery and Nate love leaning out the window to take a customer’s order.

After a morning of selling their freezy dream treats, Avery and Nate eagerly noshed on ice cream sandwiches from Coolhaus, a local business which had its beginnings as a modern-day ice cream truck roaming the streets of LA.  No matter how cold it gets, something tells me Avery and Nate will have ice cream on their minds all winter long!

Ice Cream Truck Kids Playhouse 2Ice Cream Truck Kids Playhouse 3Ice Cream Truck Kids Playhouse 4

Ice Cream Truck Kids Playhouse 5Ice Cream Truck Kids Playhouse 6Ice Cream Truck Kids Playhouse 7Ice Cream Truck Kids Playhouse 8Ice Cream Truck Kids Playhouse 9Ice Cream Truck Kids Playhouse 10Ice Cream Truck Kids Playhouse 11Ice Cream Truck Kids Playhouse 12Ice Cream Truck Kids Playhouse 13Ice Cream Truck Kids Playhouse 14You can see Michelle’s work and read about her two young children and their first forays in cooking, art and everything in between at Avery and Augustine.

Snow Day Salvation

November 20, 2014

Post by Danielle Kurtz, Creative Director at The Land of Nod

If you know me, it’s no secret that I really, really, really do not like the winter. As far as I’m concerned there’s really no good reason to be outside once it’s cold and snowy. This poses a problem living here in Chicago, since it seems like it’s winter about 90% of the year. While I’m exaggerating a touch, it really does feel that way, mostly because I live in a tiny house, which I love, with my super fantastic family, whom I adore, but after weeks on end of arctic temperatures and inches upon inches of snow, we all go a little stir crazy.

Which leads me to this, my list of must-have-snow-day-salvation-kid-occupying-so-you-can-read-a-magazine-do-the-dishes-or-just-stop-hearing-the-words-I’m-bored, toys. In other words, great kids snow day activities (or rainy day kids activities, if you’re fortunate enough to live somewhere warm) to keep the kids and their imaginations active without 6 layers of clothes.

Keep the kids active

Kids Snow Day Activities - GamesOne big issue with being cooped up all winter is all that excess energy to burn off. Our doorway bean bag toss is a great way to kill some time, and get a bit of a work out. And, why not swap your hallway runner for a hopscotch mat this winter? Both are games that can be played alone or with as many willing players as you have.

Give their imaginations a workout

Kids Snow Day Activities - ImaginationOur doorway puppet theater and our What’s that Stand For can both keep the kids occupied for quite a while. They can write a story for their play, make tickets, playbills, posters and then there’s the performance. And, the What’s That Stand For can be a market, a lemonade stand, a puppet theater or whatever else they can come up with that day. For the market, they can create price tags and setup a whole shop, and then open it to the public (your family) for some shopping. Both of these toys are a great catalyst to getting their imaginations working overtime.

Encourage solo play

Kids Snow Day Activities - Imagination 2With a playset like our Cottage Dollhouse or Noddingham Castle, kids can play on their own for quite a while. This will encourage them to use their imaginations and get lost in the incredible little worlds they’ll create. My daughter has this dollhouse and spends countless hours decorating and re-decorating, and every toy under 4” lives in her dollhouse from time to time!

Encourage role playing

Kids Snow Day Activities - PlayIn addition to playing in their imaginary worlds, kids also very much want to do what they see their parents doing. That makes role-playing toys perfect. While you’re trying to finish the latest DIY project, keep your little busy with her own workbench. And, if you’re trying to get the baby to take a nap, encourage your son or daughter to put their baby doll down for a nap, too.

Activities for babies

Kids Snow Day Activities - BabiesSpeaking of babies, they can benefit from some exercise, too. A baby gym is the perfect way to entertain your little one while you fix breakfast or fold laundry.

Inspire your budding artist

Kids Snow Day Activities - Arts & CraftsAnd, last, but certainly not least, my absolute favorite way to pass the time during the winter is a good ol’ fashion arts and crafts project. An easel is a great start, but in general, keep lots of craft supplies on hand (glue, pom poms, construction paper, pipe cleaners, paints), put down a drop cloth and let the kids go to town. You’ll be amazed by what they’ll create.

I hope this list helps you and your families not just survive, but actually enjoy the winter months. I know I’m inspired to try to love winter a bit more. Bring on the snow!

By Danielle Kurtz. Danielle is the Creative Director at Nod and an over-protective mother of two. She’s also completely obsessed with Pinterest, Twitter, Instagram and her Kindle, but not necessarily in that order. Danielle loves to craft, sew and crochet. Her current craft of choice is weaving tiny wall tapestries.

Shop The Land of Nod for Baby & Kids Toys & Gifts

Holiday Trend – Into the Wild

November 19, 2014
Post by Anna Passadori, Nod’s resident trend expert

This holiday trend was inspired by firewood – the art of cutting, gathering and storing logs can be so beautiful.

Holiday Trend - Into the Wild 1 | 2 | 3

The textiles of the holiday season make me want to stay inside all day! I could live in stacks and stacks of wool and flannel.

Holiday Trend - Into the Wild Textiles 1 | 2

But mostly this trend was inspired by nature and all the amazing creatures that live within it.

Holiday Trends - Into the Wild - Animals1 | 2 | 3

Here are some of our products inspired by the Into the Wild trend!

Land of Nod Holiday Trend - Into the WildFox Stocking / Bear Stocking / Owl Stocking / Faux Fur Trapper Hat / Teepee Ornament / Canoe Ornament / Snuggle In Sleeping Bag / Deer Ornament / Flannel Forest Pillowcase / Bear Little Lodge Ornament / Moose Little Lodge Ornament / Raccoon Little Lodge Ornament /Peace on Earth Advent Calendar / Fox Stocking Holder

Anna develops and designs exclusive product for The Land of Nod. She hails from the west coast and has traveled the world to source product. She loves anything Marc Jacobs, Sofia Coppola or stripes! (So, if anyone can get a photo of Sofia Coppola wearing a striped outfit by Marc Jacobs, please send it along.)

DIY Glitter Holiday Mugs

November 18, 2014

Written by Kacia of Coconut Robot

DIY Glitter Holiday MugsI don’t know about you, but the time from Halloween to Christmas seems to just fly by.  I find myself thinking that I have plenty of time for DIY gifts and decor projects….only to blink and have December holidays upon us!

I wanted to make gifts for Harlow’s preschool teachers this year, but I knew that if I kept saying “Oh, I’ll do it when we are closer to Christmas break” would leave me running out to buy a gift card the last morning of school before break.

Can I get an amen?

So one chilly morning, Harlow and I got our crafting on and made these DIY glitter holiday mugs for her teachers!  We will be filling them with chocolates and gift cards and some artwork from Harlow as well!  I’m seriously ecstatic about how they turned out!

DIY Glitter Holiday Mugs 2If you’ve followed any of my DIY projects and tutorials, you know that I like to push the boundaries of how materials are traditionally used.  Enter iron-on glitter vinyl and ceramic mugs!  I did some tests and found that ironing the vinyl right on to a ceramic mug….works!  And it stays!  I haven’t had the guts to put mine through the dishwasher, but after hand-washing and air-drying, they are still looking amazing!

How did we make them?  Let me show you!

DIY Glitter Holiday Mugs 3DIY Glitter Holiday Mugs 4I purchased these mugs from Amazon — they are both microwave and oven safe.*  I then had some glitter iron-on vinyl scraps left over from another project. (similar)

I have an at home vinyl cutting machine that I used to cut out the vinyl for my mugs, but if you don’t have one? Don’t fret!  I have a bunch of options and ideas for you!

I love iron-on vinyl, because it’s easy to use and apply.  Unlike adhesive vinyl, you don’t need an additional transfer sheet to apply the vinyl.  Just cut, iron and peel away the clear backing.

  • Free hand cut with a scissor.  If you choose this option, you will cut through both the vinyl and the plastic backing.  The matte side will be the side adhering to your mug and the plastic side will peel away. Keep this in mind as you are cutting letters and shapes, so that they don’t end up backwards!  🙂
  • Free hand with a craft knife.  Lightly draw a design on the matte side of your vinyl.  Using a small craft, cut through the vinyl.  You won’t have to press very hard — don’t try to cut through the plastic backing as well, it’s best if that is kept in contact.  Weed away the excess vinyl, leaving only your design on the backing.
  • Use a paper punch.  Select holiday paper punches and cut out your designs.  If your plastic backing is too thick to cut, be sure to put the vinyl side closest to the blade — as long as you cut through the vinyl, don’t worry about cutting through the backing too!

There are so many ways to use iron-on vinyl for these mugs!  You could do something as simple as polka dots or stripes — both would be easy with a pair of scissors or a paper punch!

*I’m not entirely sure that it’s necessary that they are, but areas of the mug did get pretty hot as I was ironing!

DIY Glitter Holiday Mugs 5After you’ve cut out your designs, you are ready to begin ironing!  If you were able to keep the plastic backing in place, your design will look like my “JOY JOY JOY” pieces.  Remember to cut them out mirrored if cutting from the vinyl side! 🙂

If you are cutting through both the backing and your vinyl, your shapes will look like the snowflake pictured above.

DIY Glitter Holiday Mugs 6 DIY Glitter Holiday Mugs 7 IDIY Glitter Holiday Mugs 8Assemble your vinyl and mugs and a small iron.  I love this mini iron, but any iron will work — just be careful!  The mug can get pretty hot as you work!

Harlow worked on her drawings, giving me direction on where to place each of the snowflakes and words for both of the mugs.

DIY Glitter Holiday Mugs 9DIY Glitter Holiday Mugs 10DIY Glitter Holiday Mugs 12DIY Glitter Holiday Mugs 13Follow the instructions found on your iron-on vinyl.  I held my iron in place for at least 30 seconds on each letter.  I love using a craft iron, because I don’t worry as much about it getting gunk on it from these projects — if you are using a nice iron, I would use a thin piece of fabric between your iron and the backing.

I iron and let it cool before peeling back the transfer plastic.  When the edges are secured enough to remove, I remove the plastic and lightly iron on the vinyl to get it to stick really well. After it cools I check the edges to make sure I got every bit of the surface to adhere well to the mug!

DIY Glitter Holiday Mugs 14DIY Glitter Holiday Mugs 15DIY Glitter Holiday Mugs 17DIY Glitter Holiday Mugs 18DIY Glitter Holiday Mugs 19And that’s it!  Continue this process until you achieve your desired look!  Fill with candy or coffee or hot cider or soup or … well, you get the idea!

IMG_1582IMG_1593IMG_1607IMG_1602IMG_1610Kacia is a natural blonde, type-A and an artist: proof that God has a sense of humor.  Kacia writes Coconut Robot about her city-living family, motherhood, fashion, DIYs and really anything else that makes her smile.  She is a published quilt designer and loves dreaming up new projects and tutorials to share with her readers.  Addicted to coffee and Instagram. (@CoconutRobot)