Close

Blog

kiki and coco in paris

April 15, 2014

Post by Michelle Sterling of Avery and Augustine.

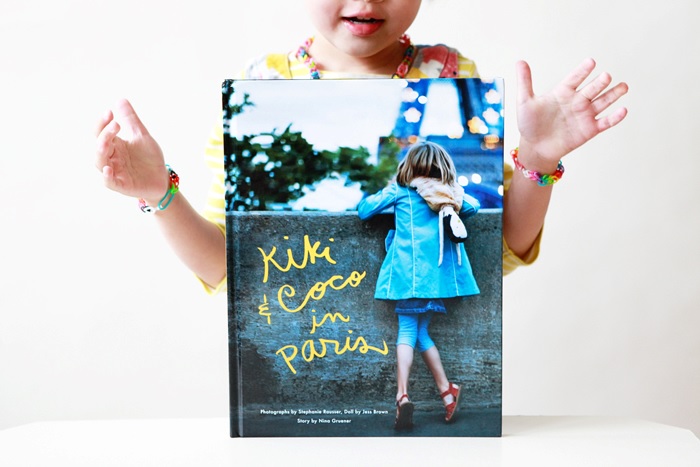
Children's Book: kiki and coco in paris

Children's Book: kiki and coco in paris 2

Children's Book: kiki and coco in paris 3

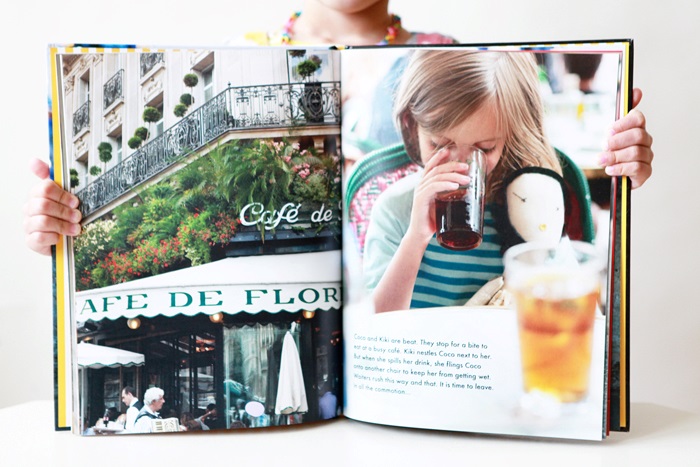
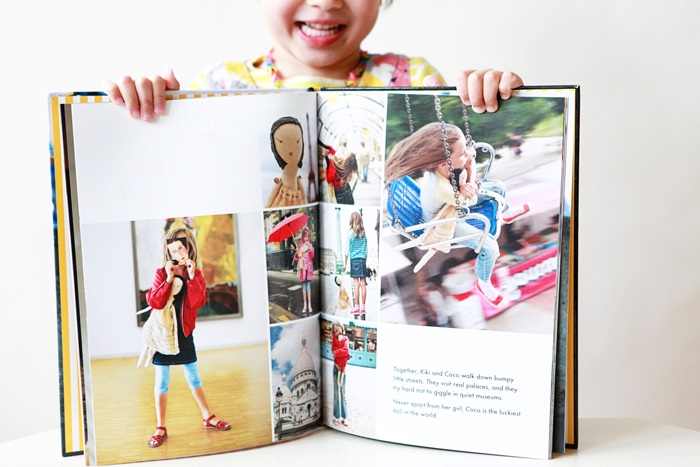
Remember that time you took your favorite doll or stuffed animal with you on a trip to a faraway city?  The charming story of Kiki and Coco in Paris will remind you of those jovial times.  One of the protagonists in the story is a lovely handmade doll named Coco, made by artist Jess Brown, and the adventures (and misadventures) she and her girl Kiki have together on a trip to Paris.  Avery’s favorite part is when a dog takes Coco and breaks her arm, which is later fixed.  We loved seeing all the sights and sounds of Paris through Kiki’s eyes.  This story would be the perfect theme for a party or play date!  Fill a pretty plate with some brioche and macarons and call it an afternoon.  Extra points if you whip up a cup of Parisian chocolat chaud!

Kiki and Coco in Paris was authored by Nina Gruener, photographed by Stephanie Rausser and the doll in the story was made by Jess Brown.

Post by Michelle Sterling of Avery and Augustine. You can see her work and read about her two young children and their first forays in cooking, art and everything in between at Avery and Augustine.

Mussels in White Wine

April 14, 2014

Post by Giulia Doyle of Audrey’s

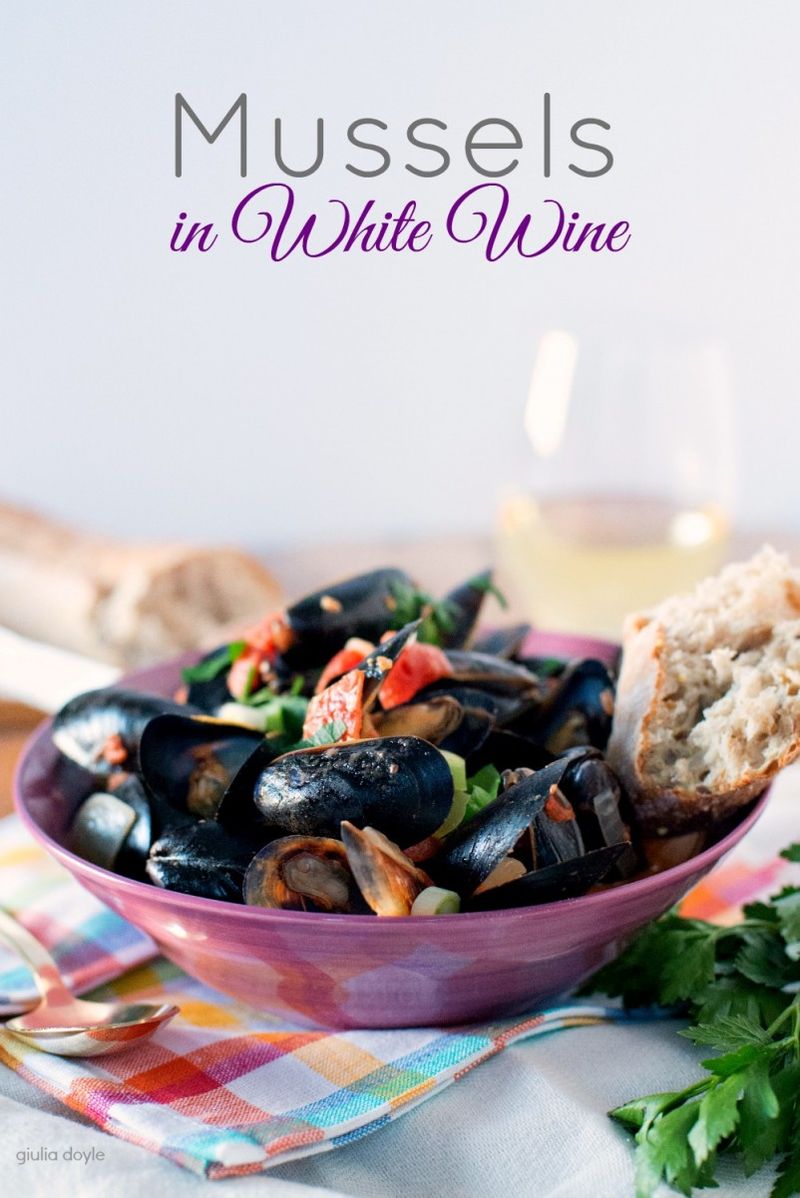
Mussels in White Wine Recipe

I love mussels, I love the simplicity of them, the drips of broth on my fingers and that they come together easily – really without a recipe. Mussels are versatile – add to the pot what you like and you’ll end up with a wonderful light broth – nothing too heavy. This was the perfect dinner after having pizza the night before.

As in most recipes, wine is optional, but I do believe it gives the broth a deeper flavor – a few simple ingredients will shine in this recipe.

Mussels in White Wine

Prep Time: 15 minutes
Cook Time: 10 minutes

Ingredients

  • 1 bag of mussels
  • 1 tablespoon of butter
  • 1 onion, slices thin
  • 2 cloves of garlic, minced
  • 1 stalk of celery, cut in half lengthwise and chopped
  • 1 cup of dry white wine
  • 1 large can of diced tomatoes (28 oz)
  • 1/2 cup of heavy cream
  • salt and pepper
  • Chopped parsley
  • Chopped green onion

Instructions

  1. Clean the mussels with lots of cold water. Pull out any beards or seaweed. Throw out any that have broken or cracked shells, or ones that don’t close when lightly squeezed.
  2. In a large pot melt the butter over medium heat, add onion, garlic and celery and cook until soft. Season with salt and pepper. Add wine and increase heat to high, after a couple of minutes add diced tomatoes. Stir well and add mussels. Cover the pan and cook for 3-4 minutes or until mussels open. Shake the pan a few times so they cook evenly.
  3. At the end of the cooking time discard any mussels that didn’t open. Add the heavy cream and stir well. Serve immediately with some crusty bread and a garnish of chopped parsley and green onion.

Notes: When buying mussels, make sure the bag they come in isn’t sealed – mussels need to breathe until they are cooked.

Post by Giulia Doyle of Audrey’s

We’re Stopping at Papabubble LA in the Nod Tour Bus

April 10, 2014
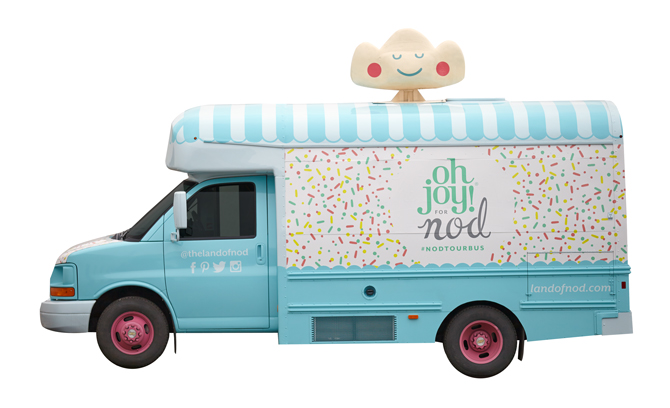
The Land of Nod Tour Bus

When we found out about the amazing candy making process at Papabubble, we knew we had to make a stop during our first Nod Bus Tour at their location in Pasadena, CA. We were even more excited after we discussed partnering with them to create some exclusive custom candy to hand out on our #nodtourbus stops around California in April.

We sat down with Mike from Papabubble LA to find out a little more about their delicious and creative candy.
Papabubble

What exactly is Papabubble?

We are a handmade candy shop that specializes in hard candy with images or words inside, the perfect candy for weddings, parties and special events.

When did Papabubble begin?

Papabubble was founded in Barcelona in 2004 with the goal of bringing back the charm of hand crafted sweets. Since then, it has grown to more than 23 stores throughout the world. The stores are independently owned, and each store is free to create delicious flavors that suit their market.

How is Papabubble candy made?

Our candy is made from 5 simple ingredients: water, sugar, glucose, flavor and color. We do not use corn syrup or preservatives in any of our products.

After boiling and melting all the ingredients, we pour the molten sugar onto our water cooled table. It is then cooled down and colors are “painted” into the candy.

After further cooling, we cut the candy into different pieces according to color. We then move to our heated table where we assemble all the pieces together and form a big roll of candy.

The big roll of candy is then stretched out by hand, and cut into arm’s length. After rolling and cooling down the smaller rods, we hand chop them into smaller, bite-sized candy. The entire process is done by hand, similar to making glass. Except that in our case, the finished product is edible.

Check out this video on how Papabubble candy is made:

papabubble from Pilgrim on Vimeo.

How long has your shop been up in Pasadena? Where are the other locations?

The Pasadena shop opened May 11, 2013. There are Papabubble shops in New York, Tokyo, Taipei, Seoul, Hong Kong, Shanghai, Amsterdam, Lisbon, Brussels, Kuwait, Qatar, Jakarta and Sao Paulo.

P.S. There will be a store opening up in San Francisco this summer!

What’s your personal favorite Papabubble flavor?

My personal favorites are the mango and cinnamon apple.

Do you have any special events in your shop?

We have a candy making show every Saturday and Sunday at 3 p.m. It lasts between an hour to an hour and half depending on what design we are making that day. It’s a family friendly event with lots of samples given out!

Be sure to follow us on Instagram @papabubblela to see what we’ll be making that weekend.

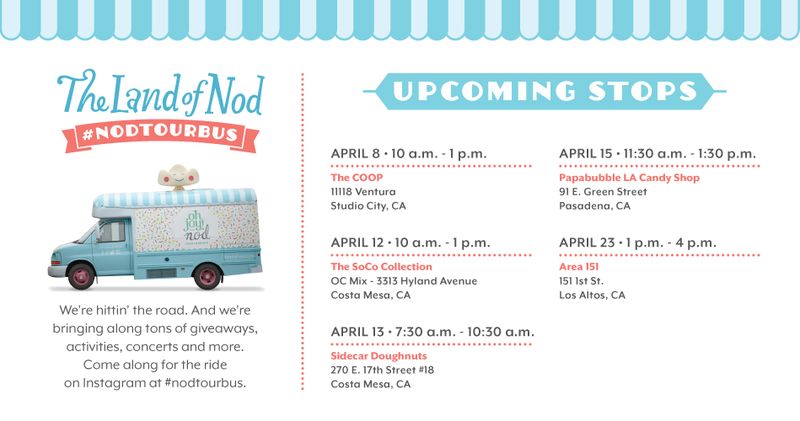
Thanks, Mike for telling us more about Papabubble. Be sure to join us at the #nodtourbus stop on Tuesday, April 15 from 11:30 a.m. – 1:30 p.m. at Papabubble LA Candy Shop in Pasadena. We will be bringing along tons of giveaways, a photo booth and of course, free exclusive Papabubble candy!
Easter Egg Bath Bombs

April 9, 2014

Post by Christina Williams of Christina Williams Blog

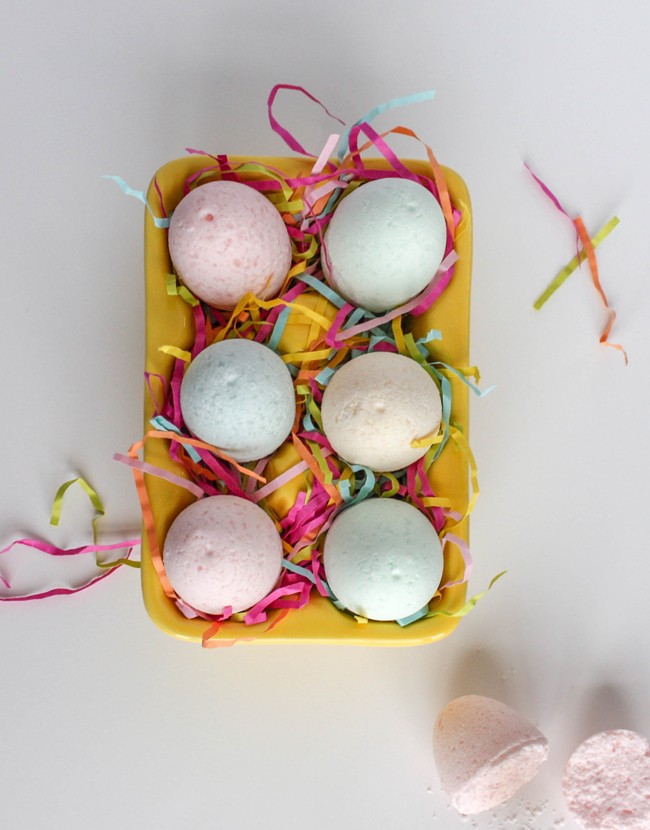
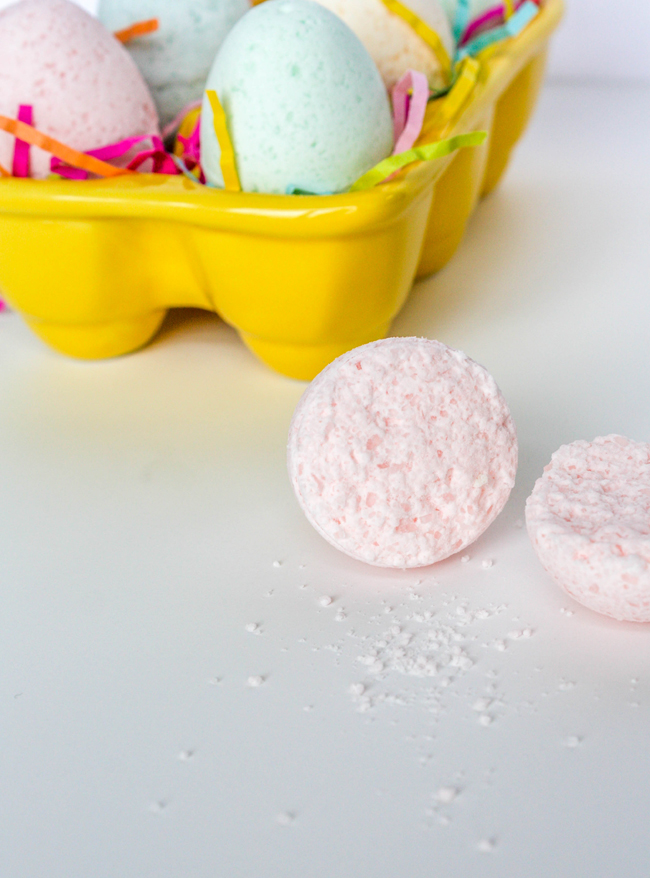
DIY Easter Egg Bath Bombs

I’ve been wanting to make bath bombs with the kids for quite some time now. One morning I was plotting how exactly we’d go about this, when I realized that all those plastic easter eggs I’ve got sitting in the storage room are very similar in shape to the plastic ornaments everyone uses to mold their bath bombs. And I was even more excited that I had this idea right before Easter. Perfect timing!

DIY Easter Egg Bath Bombs

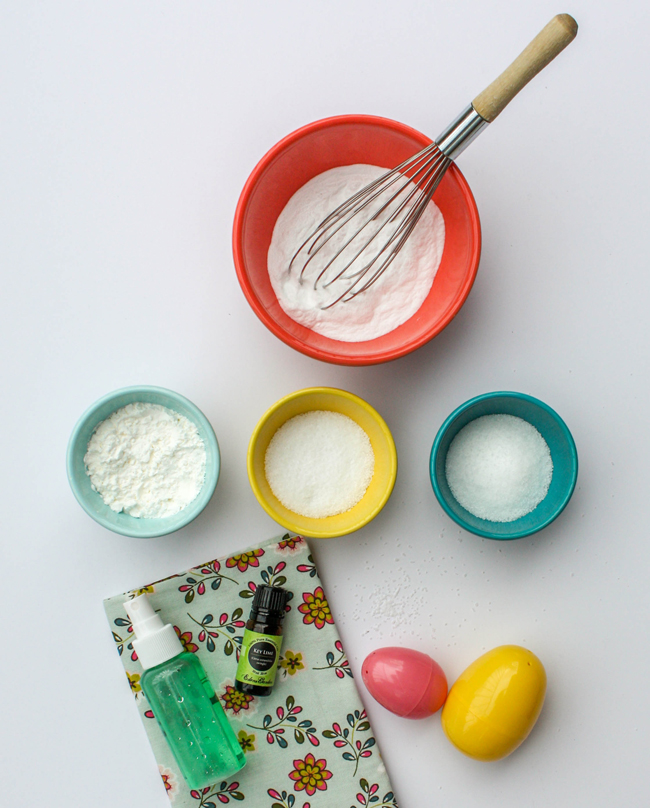
I researched and tested all the different bath bomb recipes I have pinned on my DIY Crafts + Projects board to come up with the best possible recipe. All the recipes have the same ingredients: Citric Acid, Baking Soda, Epsom Salts, Cornstarch, Essential Oils, Coloring and some water and/or witch hazel. Simple enough, right? Except I had no idea where to get citric acid and the wide world of essential oils is completely foreign to me.

DIY Easter Egg Bath Bombs 2

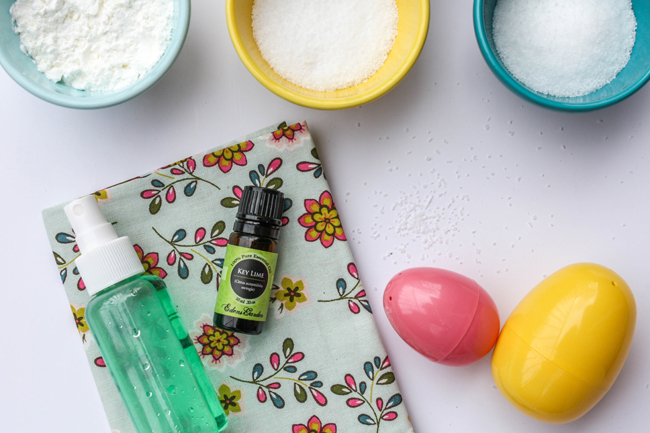
I ordered citric acid from Amazon, which was easy enough. Then I popped into Whole Foods to grab some essential oils because I thought seeing my options in person would help. Nope. That made it worse. I was surrounded by a mind-boggling assortment of little vials, and I had no idea where to begin. I quickly left more confused than before. So I turned back to Amazon and ordered some oils from Eden’s Garden. Mostly because I liked the labels, and they were inexpensive. That’s some informed purchasing, huh? Pretty labels, and good prices. Yep.

DIY Easter Egg Bath Bombs Ingredients

Anyway, there are a bazillion tutorials for bath bombs out there. And some great YouTube videos, too. So I won’t go too in-depth here. But here’s the winning recipe:

  • 1C. Baking Soda
  • 1/2 C. Citric Acid
  • 1/2 C. Epsom Salts
  • 1/2 C. Cornstarch
  • 2 tsp. Essential Oil
  • 2 1/2 tsp. Safflower Oil (or any other light oil)
  • 3 drops food coloring
  • 1 tsp. water

You’ll also need a glass bowl, a mini spritzer bottle (I got mine for 79¢ in the travel section of Target) and a whisk. Round up your old plastic Easter eggs and throw on an apron while you’re at it, too.

DIY Easter Egg Bath Bombs Ingredients 2

  • Combine all the dry ingredients in the glass bowl. Break up any lumps with the whisk.
  • Combine all the liquids in the spray bottle.
  • Start spritzing the dry ingredients with the liquids…just keep whisking. You’re trying to keep it from fizzing…so keep it moving.
  • I used all the liquid in the bottle, then had to add a little extra water. You want it to be moist enough to clump in your hand without crumbling, but not so wet you can hear it fizzing.
  • When you’ve got the right consistency, start molding. I found it worked best when I packed a bit into each side of the egg, then scooped up extra and squished the two halves together.
  • Give it a little shake for good luck, then gently pry the pieces apart. It takes a few tries to get the hang of it, but once you’ve got it down, you’re good to go.
  • Cover a soft towel with some waxed paper and lay the eggs there to dry overnight.

Wrap up a bunch and give them out as Easter gifts. They’d be great for friends, teachers, and I can tell you my kids are HUGE fans. We’ve got a big bag of eggs, but they’re all ready asking if we can make more when they’re gone.

A couple more ideas:

  • Add some sprinkles or glitter to add some excitement.
  • Hide a small toy in the center so they have a surprise when the egg dissolves.
  • Try different combinations of scents and colors
  • Use different molds. Cupcake tins, ice cube trays, tartlet tins, etc.

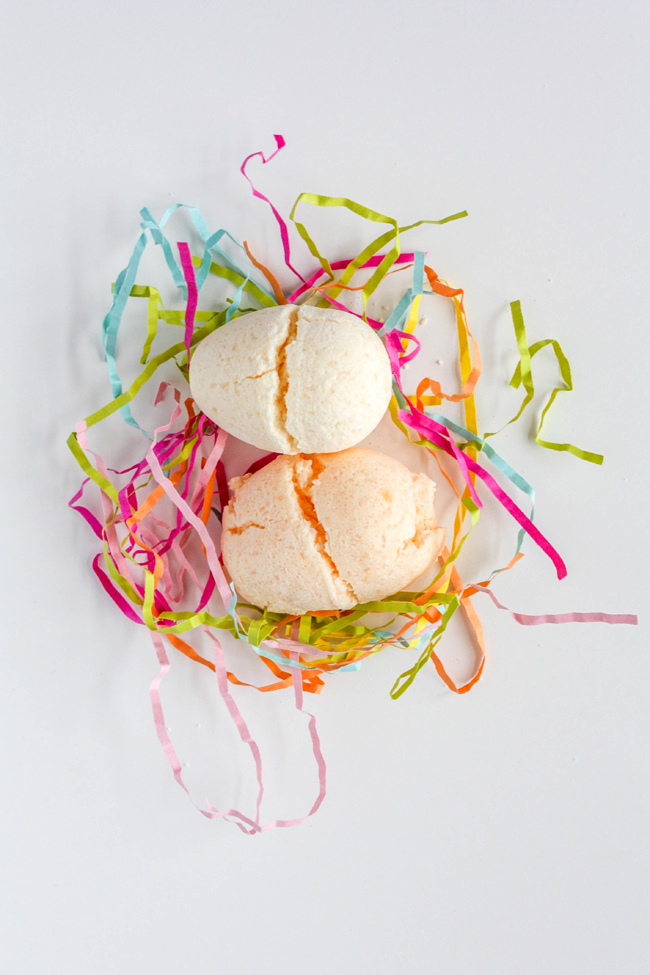
DIY Easter Egg Bath Bombs - Hatching Eggs

And here’s what they look like when you add too much water to the mixture. They mold up like a dream, and you go to bed thinking you’re a DIY rockstar. Then you wake up in the morning to find your eggs have “hatched” and you’re not as cool as you thought you were. My daughter was pretty excited to see we’ve got some that are hatching, so she made a nest for them. Maybe she should make a nest for my bruised ego while she’s at it.

Christina Williams is a blogger and graphic designer living in Salt Lake City, Utah. She’s a night owl and a bookworm, as well as a mother to three children ranging in age from two to eight. She shares her latest DIY and design projects along with her adventures in parenting on her self-named blog, Christina Williams.

Setting a Natural Spring Table

April 8, 2014

Post by Becca of CAKE

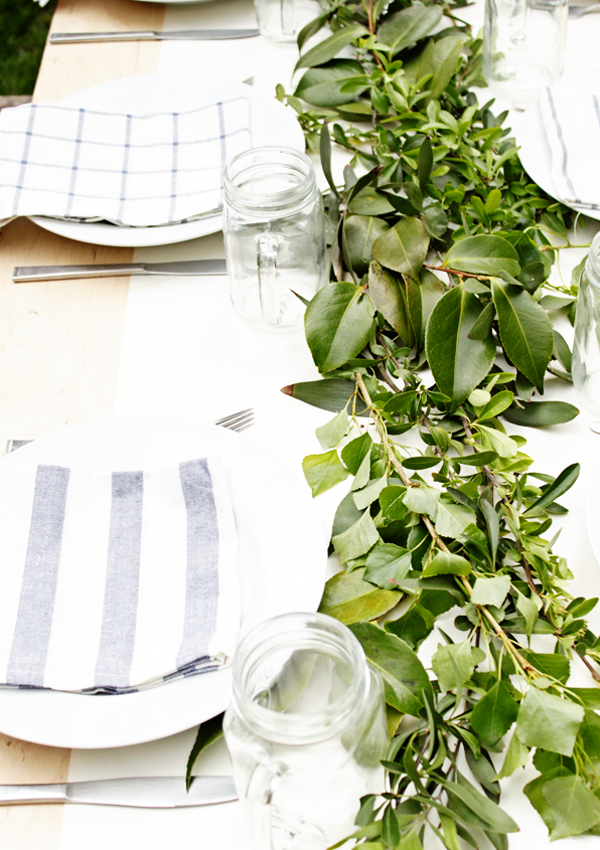
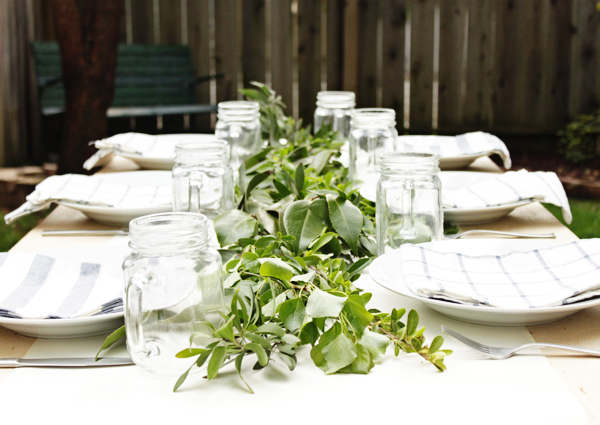
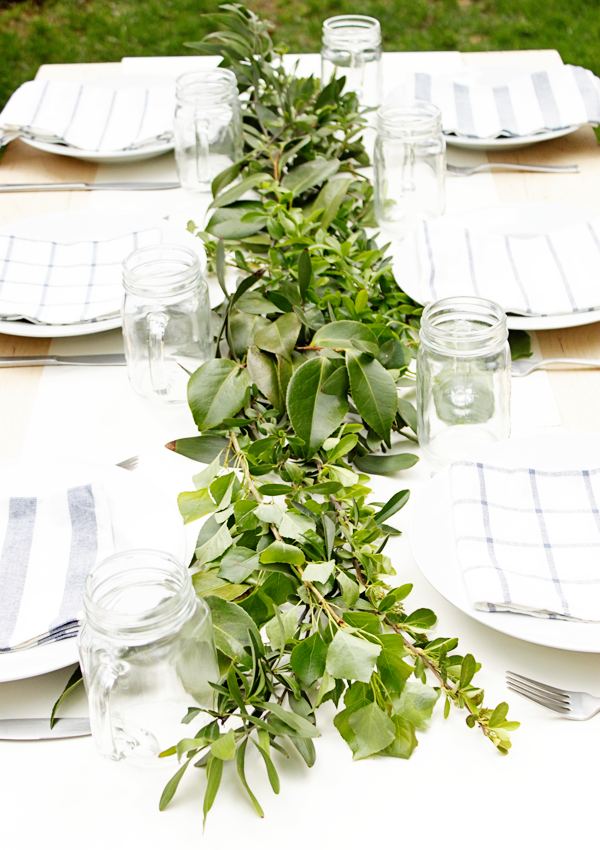
A few weeks ago we hosted a small dinner party in our backyard. I didn’t have a lot of time or money to spend, but sometimes that turns out for the best doesn’t it? I wound up clipping a few branches from each of the different trees in our yard and laid them out as a table runner on top of some plain butcher paper. The blue patterned napkins…. yeah, those are actually dish towels from Ikea. Pretty right? And that was basically all it took. We had a grand old time and ate ourselves silly on southern bbq, red beans + rice, cole slaw and king cake.

Setting a Natural Spring Table

Setting a Natural Spring Table 2

Setting a Natural Spring Table 3

Post by Becca of CAKE. Becca spends her days working for a strategic design firm in SF, and her nights trying to find time to blog, design + create while raising an adorable three year old hellion named Caitlin and newborn son, Theo.

Buckle up. The Nod Tour Bus is coming to visit.

April 7, 2014

Land of Nod Tour Bus Travel Schedule

We’re hittin the road, Jack. (or whatever your name is) And we’re bringing along tons of giveaways, activities, concerts and more. Stay tuned to see where we’re going next at landofnod.com/nodtourbus or come along for the ride on Instagram at #nodtourbus.

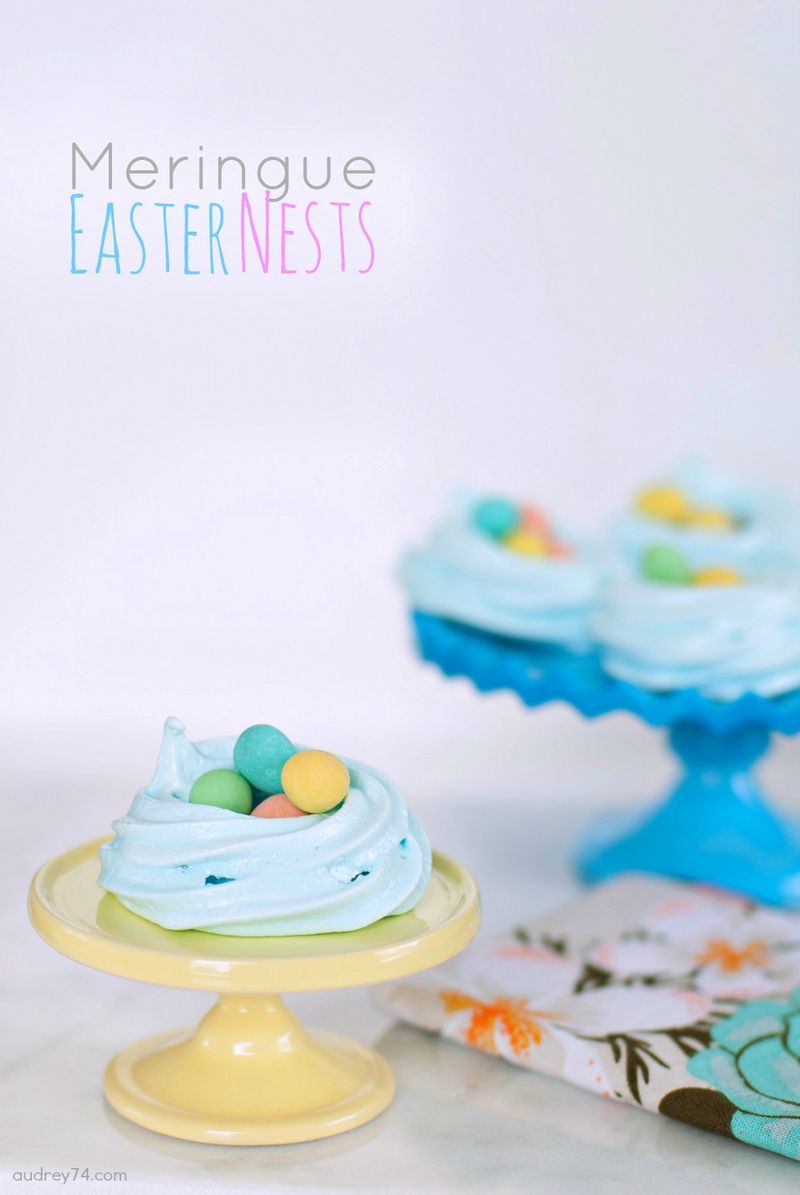
Meringue Easter Nests

Post by Giulia Doyle of Audrey’s

Meringue Easter Nests

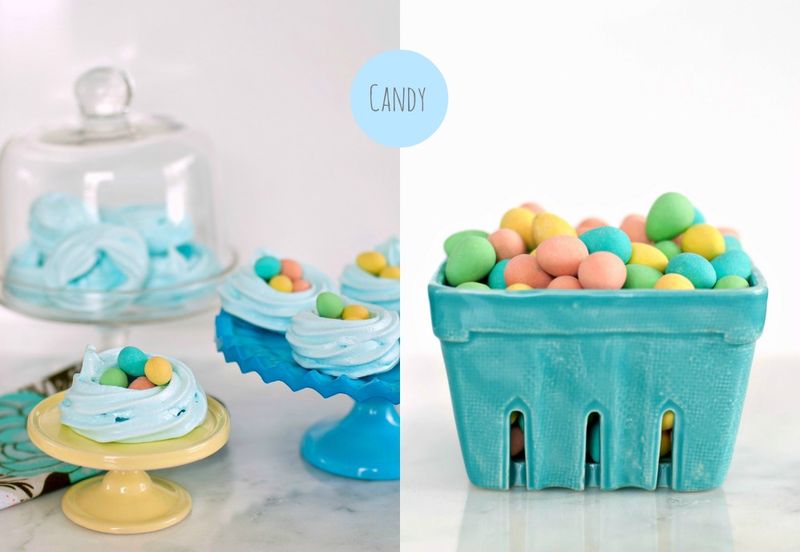
I wanted to create something really cute and precious for Easter. I was thinking of something whimsical in pastel colors, something sweet, but not a cupcake. I’m not sure why, but that’s where my mind was taking me. I had seen these Martha Stewart Meringue nests, which were cute; but then Sweetapolita upped the ante by coloring her nests blue. I wanted to make my nests pink at first, but realized that I didn’t have any red food coloring left – so blue it was. I kept them simple by adding a couple of chocolate eggs in beautiful pastel colors. This way they make an instant Easter treat and are easy to hand over as a gift as well.

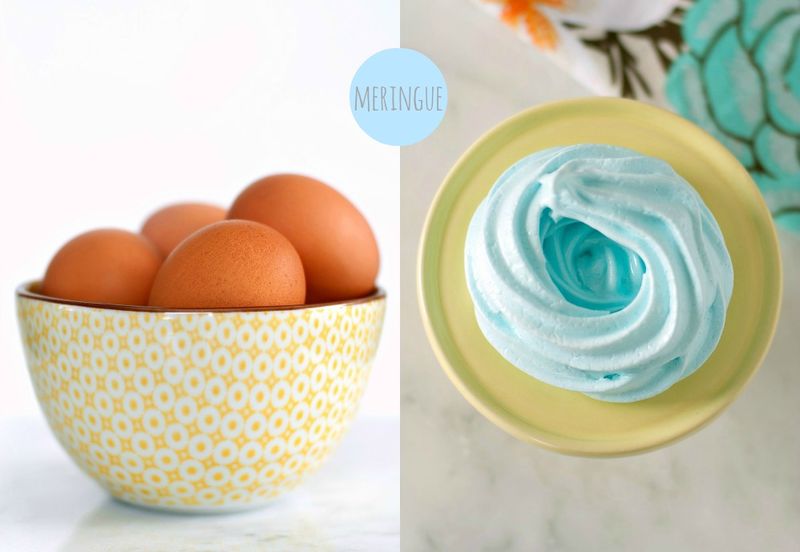
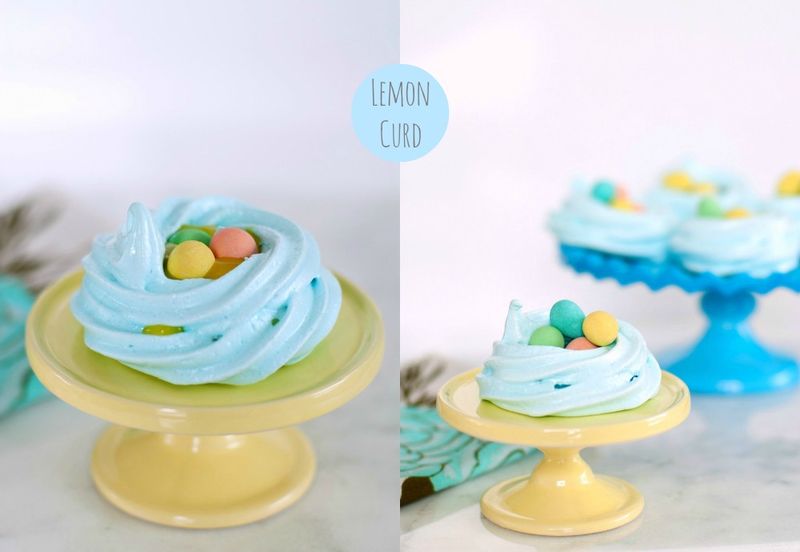
Meringue Easter Nests - Making MeringueWhile meringue is not hard to make, it does take time. So make sure you’ve got a couple of hours at home. Once you have the nests, your options are limitless. Fill them with candy like I did above, add some butter-cream like Rosie did, add fruit like Martha did, fill them with melted chocolate or make some lemon curd with the left-over egg yolks. I made this lemon curd and filled a couple of nests. It makes for a nice flavor combination, but they do get messy with all that sticky sweetness.

Meringue Easter Nests - Adding Candy

You can also store your meringue nests in an air tight container for a couple of days, just make sure you don’t crush them as they are quite fragile. The perfect bit of pastel whimsy just in time for Easter. And yes, we did give most of them as gifts, because there’s only so much sweetness I want to keep in our house.

Meringue Easter Nests with Lemon Curd

Meringue Easter Nests – adapted from Sweetapolita and Martha Stewart

Prep Time: 30 minutes
Cook Time: 1 hour, 30 minutes
Yield: Approximately 14 three inch nests

Ingredients

  • 5 egg whites, at room temperature
  • Pinch of cream of tartar
  • 1 cup superfine (caster) sugar or regular sugar
  • Drop of food colour or food gel colour of choice

Instructions

  1. Line two baking sheets or one large baking sheet with parchment paper and preheat oven to lowest temperature (for my oven this is 175°F).
  2. Separate your eggs (best done when cold) and add the 5 egg whites into a clean metal mixing bowl. If you get any yolk into the mixing bowl, remove all contents and begin again. Leave bowl on counter until they come to room temperature.
  3. Once egg whites are room temperature (warm is best), place bowl back on mixer and fit with whisk attachment. Mix on low speed until egg whites become frothy, about 2 minutes, and add cream of tartar.
  4. Increase speed to medium-high and beat until soft peaks form, about 2 minutes. Gradually add all of the sugar and beat on high speed until stiff peaks form. You should be able to hold the bowl upside down over your head with no meringue falling out. Add food colour and beat until combined.
  5. Fit a large pastry bag with a large tip and pipe approximately 3-inch circles, working from the middle outwards, followed by two full rings atop one another around the perimeter of the nest. Pipe 14 nests placing a few inches apart.
  6. Bake in oven until completely dry and crisp, but not browned, about 90 minutes (this can take much longer, depending on your environment). Nests should lift from parchment with ease. Turn off oven and leave nests inside until oven has cooled, then remove nests from oven.

Notes

If you don’t want to pipe your nests, you can spoon the meringue on to the parchment and use a spoon to create a small indentation. This will create more organic looking nests.

Post by Giulia Doyle of Audrey’s

Easter Egg Drying Rack

April 4, 2014

Post by by Aimée Lowry & Bettijo B. Hirschi from PagingSupermom.com

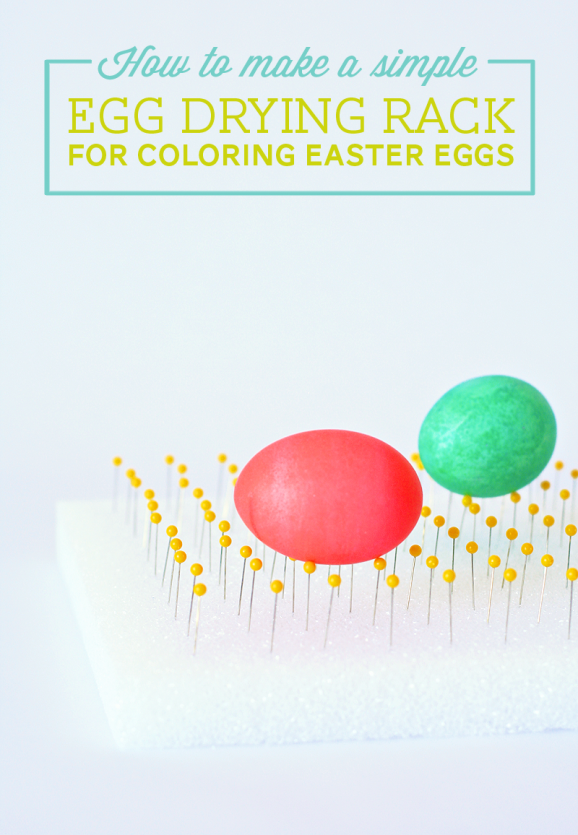
Dying Easter Eggs is a messy business — that’s party of the fun. Help contain some of the mess by giving freshly dyed eggs a spot to rest.

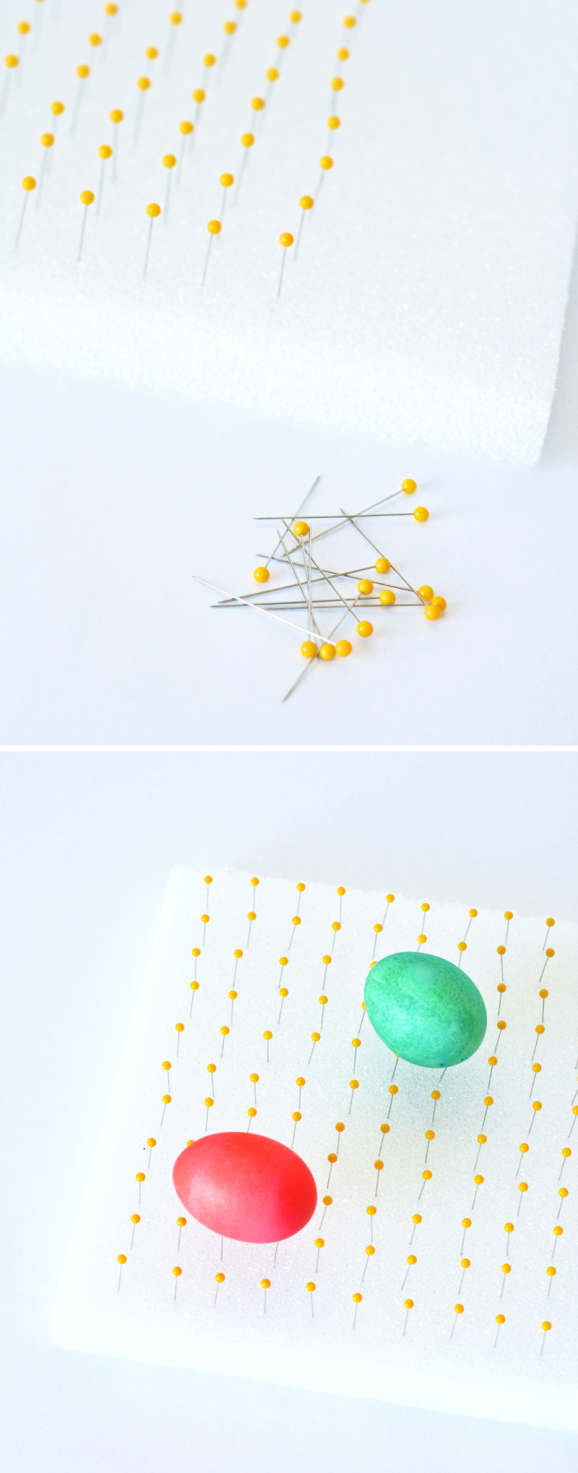
Easter Egg Drying RackOur Simple Easter Egg Drying Rack Solution: Stick a bunch of quilting pins into a styrofoam board to create your Easter Egg Drying Rack. Normally eggs set on a paper-towel-lined tray get towel marks or dark spots from dye puddling. On the drying rack, eggs are elevated so excess dye will drain onto the board, preserving the egg’s finish.

It is still a good idea to protect the work surface with a plastic tablecloth, butcher paper or wax paper. You may also want to cut down the foam piece for your drying rack so it fits on a cookie sheet.

Easter Egg Drying Rack 2Reposted with permission by Aimée Lowry & Bettijo B. Hirschi from PagingSupermom.com

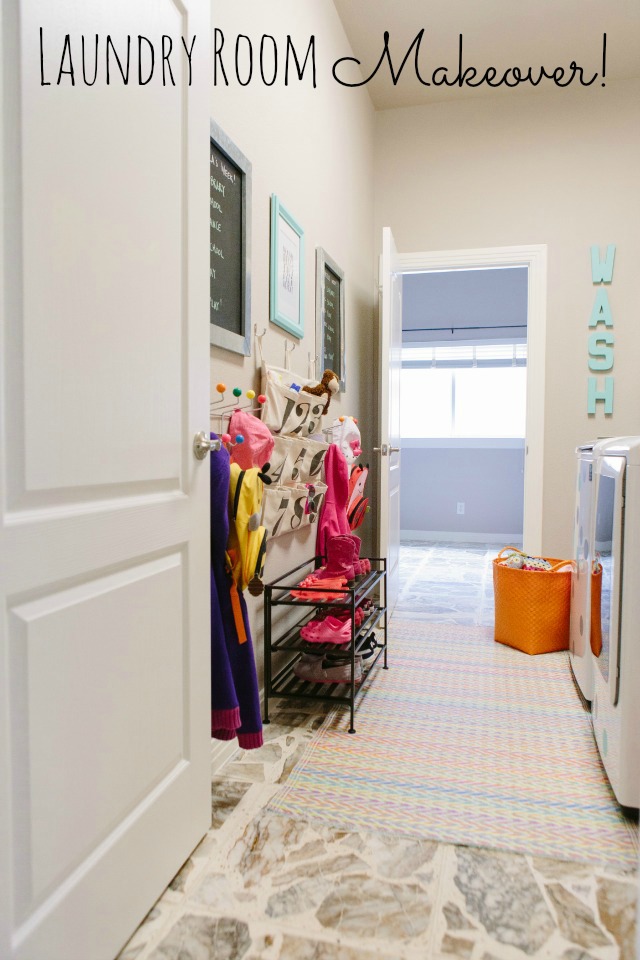
Laundry Room Makeover

Laundry-Room-Makeover

If you asked me the household chore I disliked the most, it would be laundry hands down. But now with my new cheery laundry room, it may have just moved down on the list!

Laundry-Room 1

I was so excited to have a full laundry room when we moved to our new home last summer – a big step up in space from the closet with a stacked washer and dryer we had in Chicago. 

Laundry-Room 2

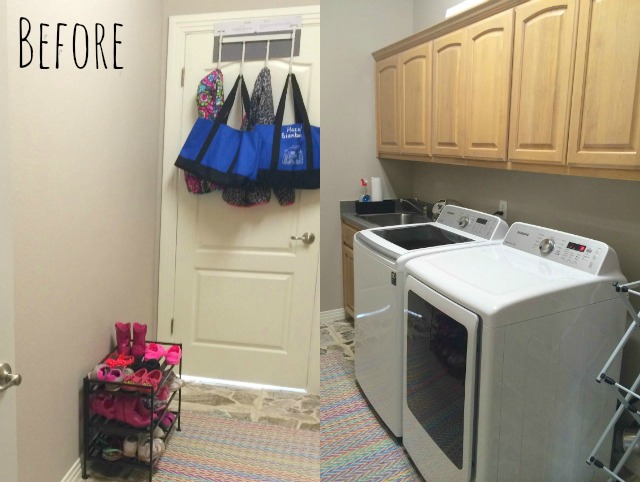
However, I wasn't sure what to do with the room. The blah cabinets and big blank wall needed help. Someday we'll paint the cabinets and do more of a renovation, but for now I wanted to have fun with the room (in hopes that it would make doing laundry more fun!).

Laundry-Room 3

I reached out to my friends at The Land of Nod. I thought their bright and colorful storage and decor pieces would be perfect to brighten up the room and help it function as a mudroom for my girls as well. They were game to bring Land of Nod to the laundry room! Here's what I did in case you want to cheer up your laundry room a little as well: 

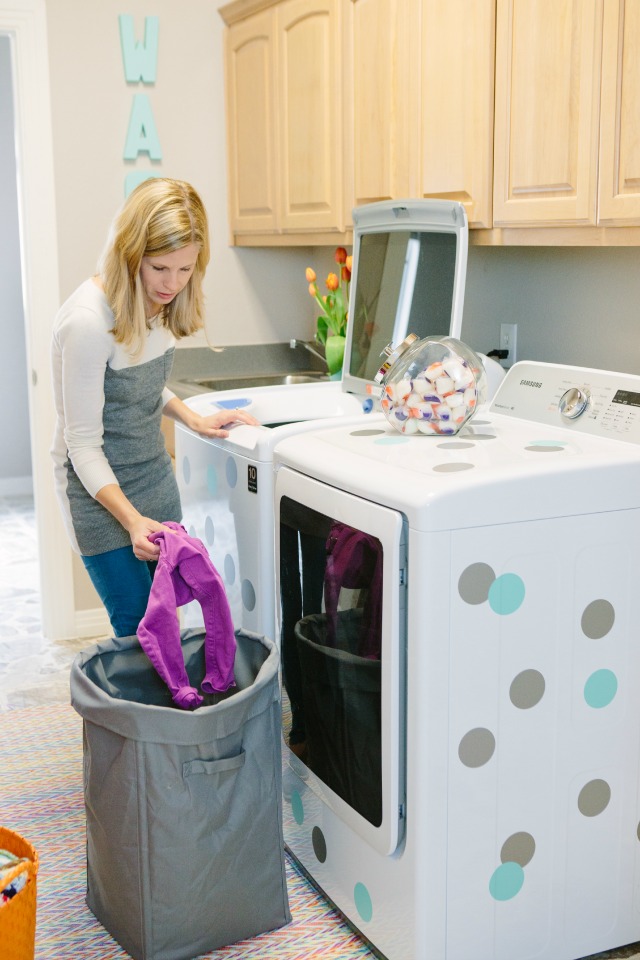
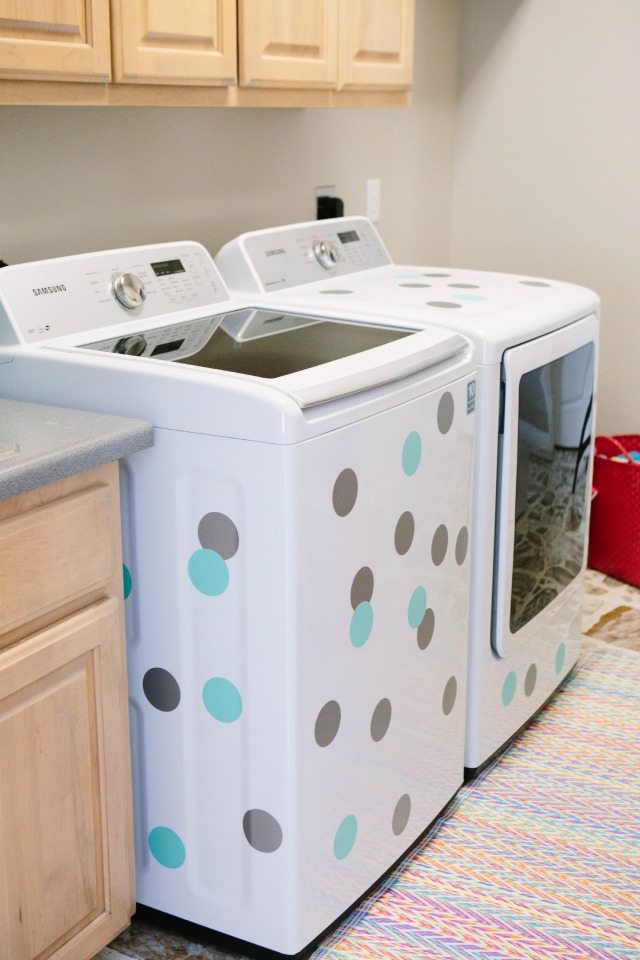
1. Give the washer and dryer a makeover! Turn these boring appliances into something to smile at with colorful polka dot decals. It is as simple as peel and stick and they are completely removable (just peel off with no harm to the appliances). 

Laundry-Room 4

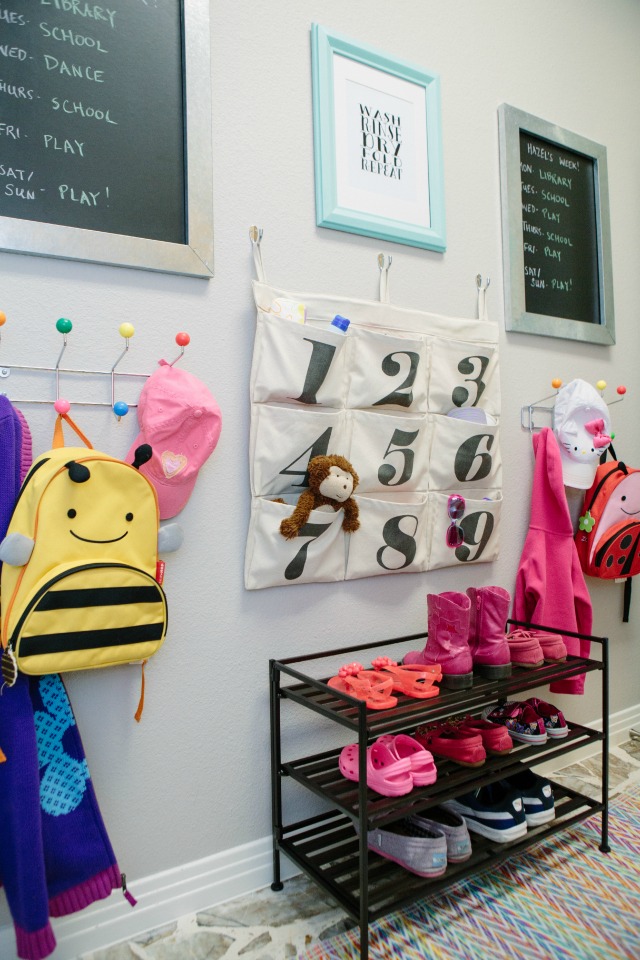
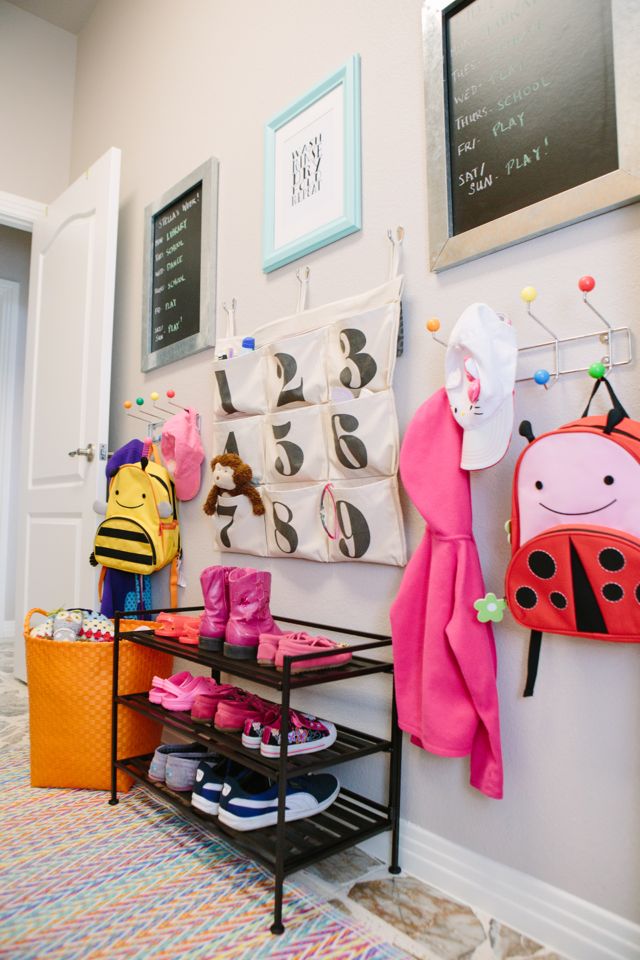
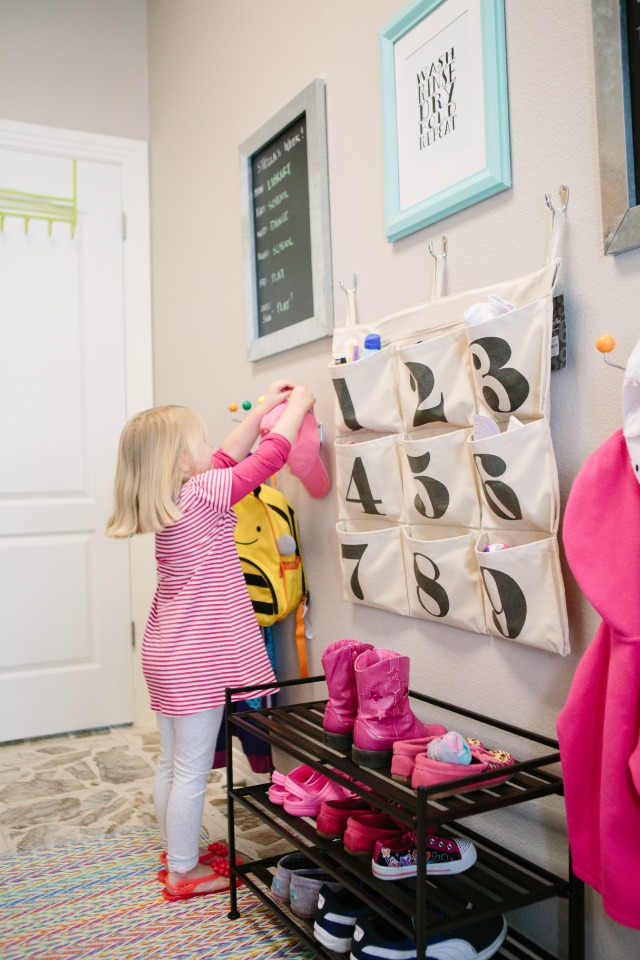
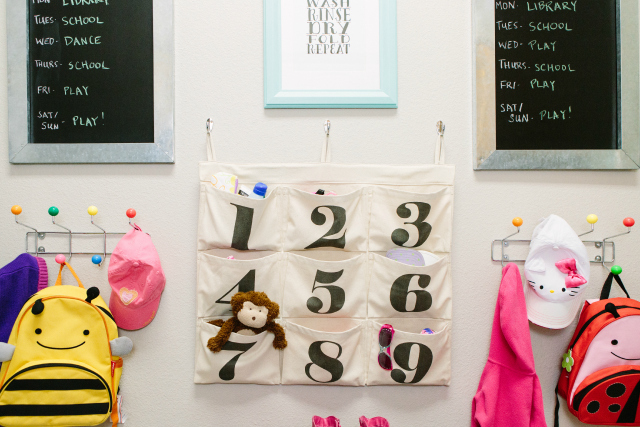
2. Make use of wall space - Our laundry room is pretty narrow, but the long blank wall offered untapped storage opportunities. The addition of colorful wall hooks and a pocket cubby along with a shoe rack corrals quite a bit of stuff.

Laundry-Room 5

3. Keep it at kids height - By giving each of my girls their own set of hooks and a row in the numbered wall cubby, I'm hoping it encourages them to hang up their coats and bags when they come home rather than dropping them on the floor as usual. So far, I've had about a 50% success rate!

Laundry-Room 6

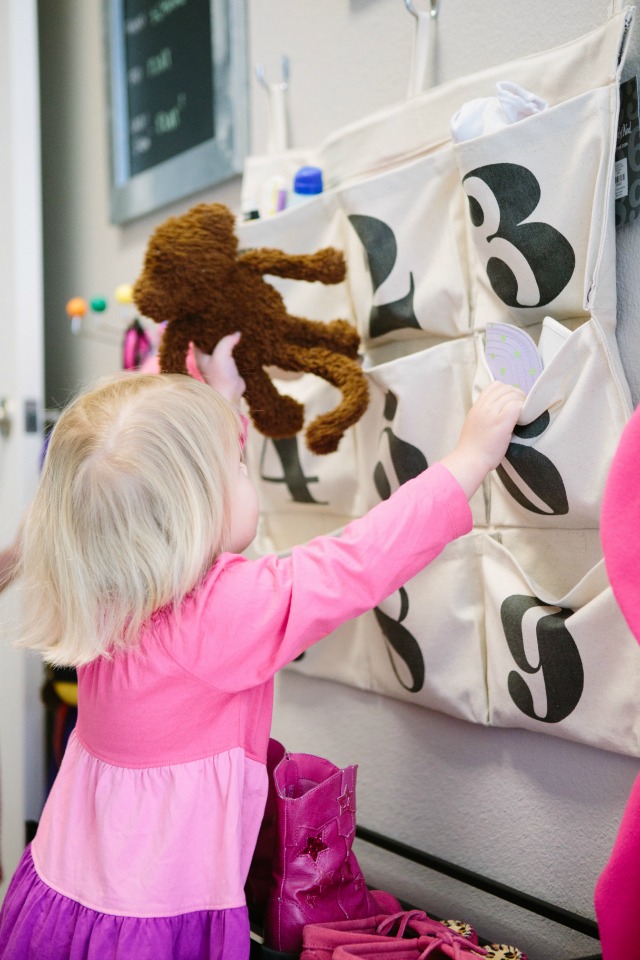
The pockets in the wall cubby hold everything from extra socks, to hats, to sunscreen… and the occasional monkey.

Laundry-Room 7

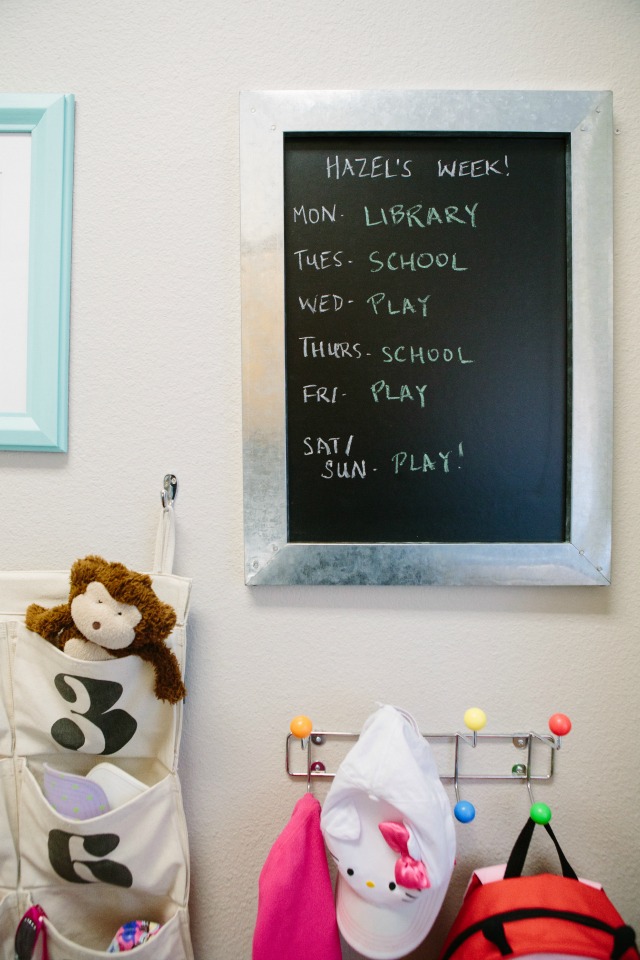
4. Stay organized with chalkboards - the addition of chalkboards with the girls' "schedules" helped designate each spot on the wall as their own. As you can see my girls have very rigorous weeks. 😉 Not looking forward to the days when these chalkboards will be filled with all sorts of sports practices and after-school activities!

Laundry-Room 8

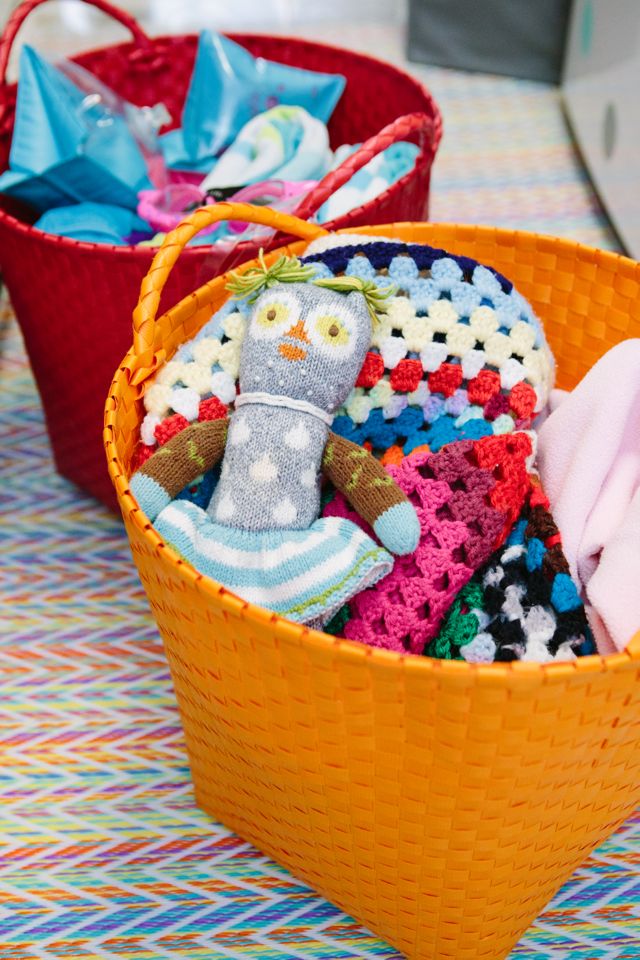
5. Swap in some new baskets - something as simple as trading our old plastic laundry basket for some of these colorful woven ones immediately made an improvement in my overall outlook toward laundry! In addition to using the baskets to sort laundry, I have one basket designated for the girls' pool toys and towels so they are ready to go as soon as warm weather hits here in San Antonio.
Laundry-Room 9

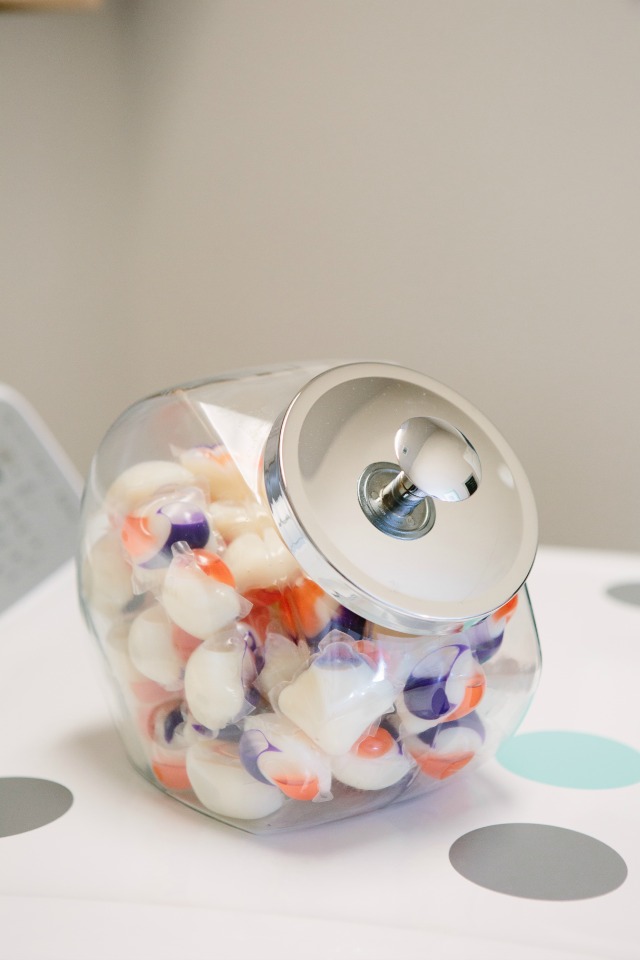
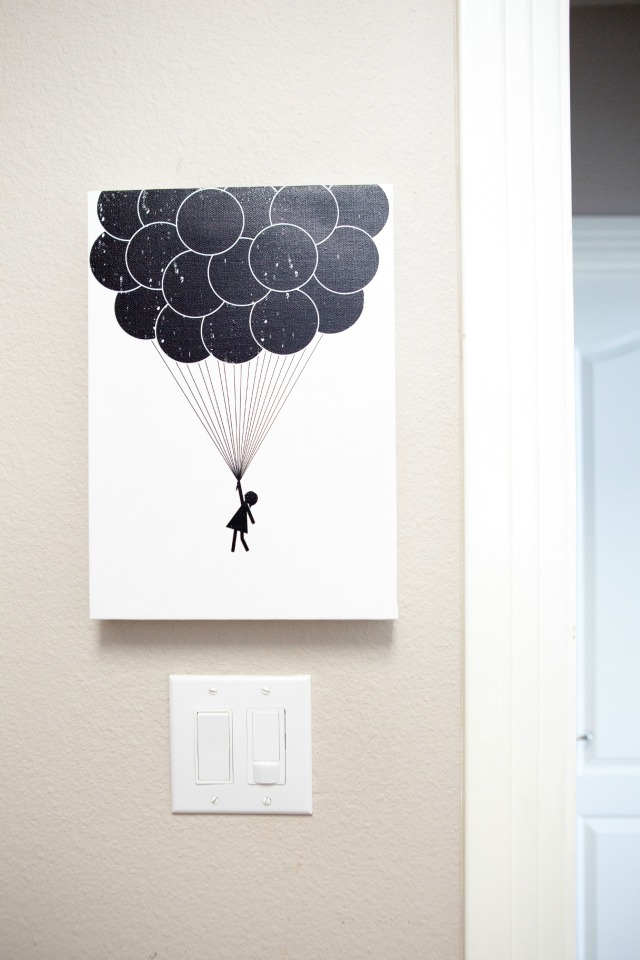
6. Add some pretty details – store your laundry pods in a pretty cookie jar instead of their usual plastic bin. (However, please make sure to keep it out of the reach of kids!) Also, don't overlook the laundry room as a place to put a little wall art. I made the "WASH" letters by painting inexpensive paper mache letters.

Laundry-Room 10

I loved this whimsical canvas from the Land of Nod. Who wouldn't want to be carried away by a huge set of balloons when they are surrounded with a mountain of laundry?!
Laundry-Room 11

So excited to have tackled this room in our home! Now off to do some laundry..

Laundry-Room 12

Photos by Candice Stringham

Post by Haeley: Design Improvised 


How to Make Custom Easter Egg Dye

April 2, 2014

Post by Aimée Lowry & Bettijo B. Hirschi from PagingSupermom.com

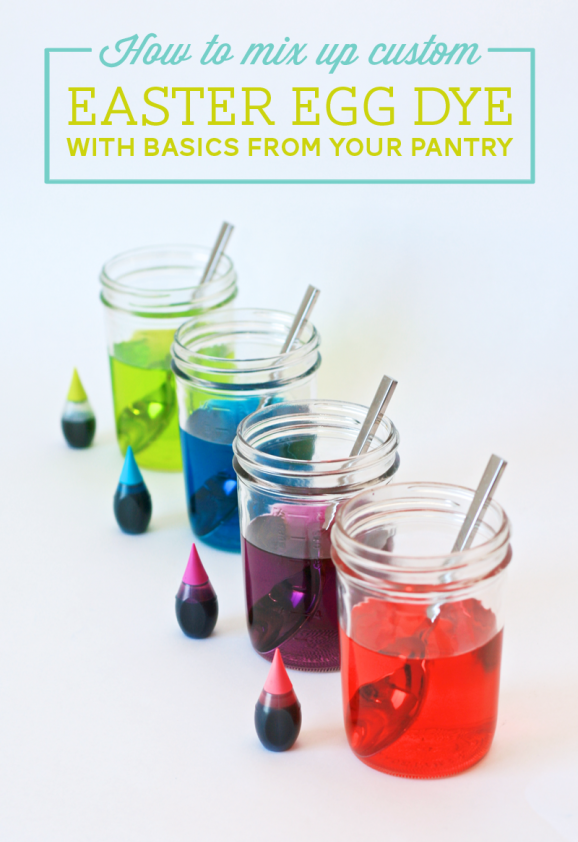
Continuing with our week of Easter Basics… now that you have the recipe for perfectly hard-boiled eggs, we figured it would be fun to share how to make your own custom Easter Egg Dye. This recipe will come in handy should you forget to buy one of those packets with the dye tablets (like I did last year), but actually I am so happy I forgot because it forced me to learn how to make Easter egg dye. It is incredibly easy, and when you make it yourself you can create fun, custom colors!

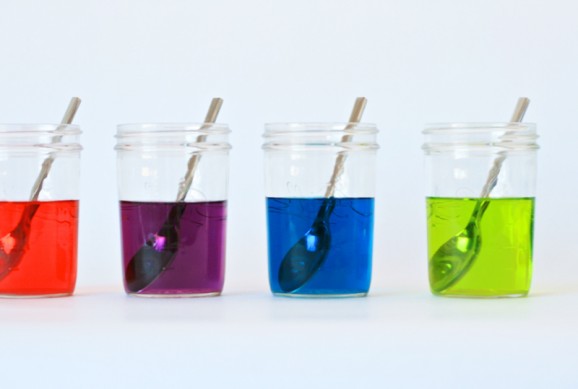
How to Make Custom Easter Egg Dye 1A separate container is needed for each color of Easter egg dye. Note that plastic or ceramic containers may be ruined by dye. We prefer wide-mouth mason jars because we have several of them handy and the glass is sturdy. You may cut the dye recipe in half or double to suit the size of your container.

Basic Easter Egg Dye Recipe

  • 1 cup boiling water
  • 2 teaspoon white vinegar
  • 10-20 drops food coloring

Add ingredients to desired container and mix well. Repeat for each color. Dip hard-boiled eggs in dye for 5 minutes or longer to achieve desired color vibrancy. Let dry.

How to Make Custom Easter Egg Dye 2You can make Easter egg dye in just the primary colors that came in your food color set, but the fun really begins when you start mixing things together! Try the combinations below to or mix up your own custom blends. We love to use the Neon food coloring set for an added range of color options.

ORANGE :: 17 yellow + 3 red
RASPBERRY :: 14 red + 6 blue
PLUM :: 10 red + 4 blue
PURPLE :: 15 blue + 5 red
TEAL :: 15 green + 5 blue
MINT :: 12 green + 4 yellow + 2 blue
LIME :: 15 yellow + 5 green

Reposted with permission by Aimée Lowry & Bettijo B. Hirschi from PagingSupermom.com

Oh Joy! for Nod

April 1, 2014

OhJoy_Ruby_01

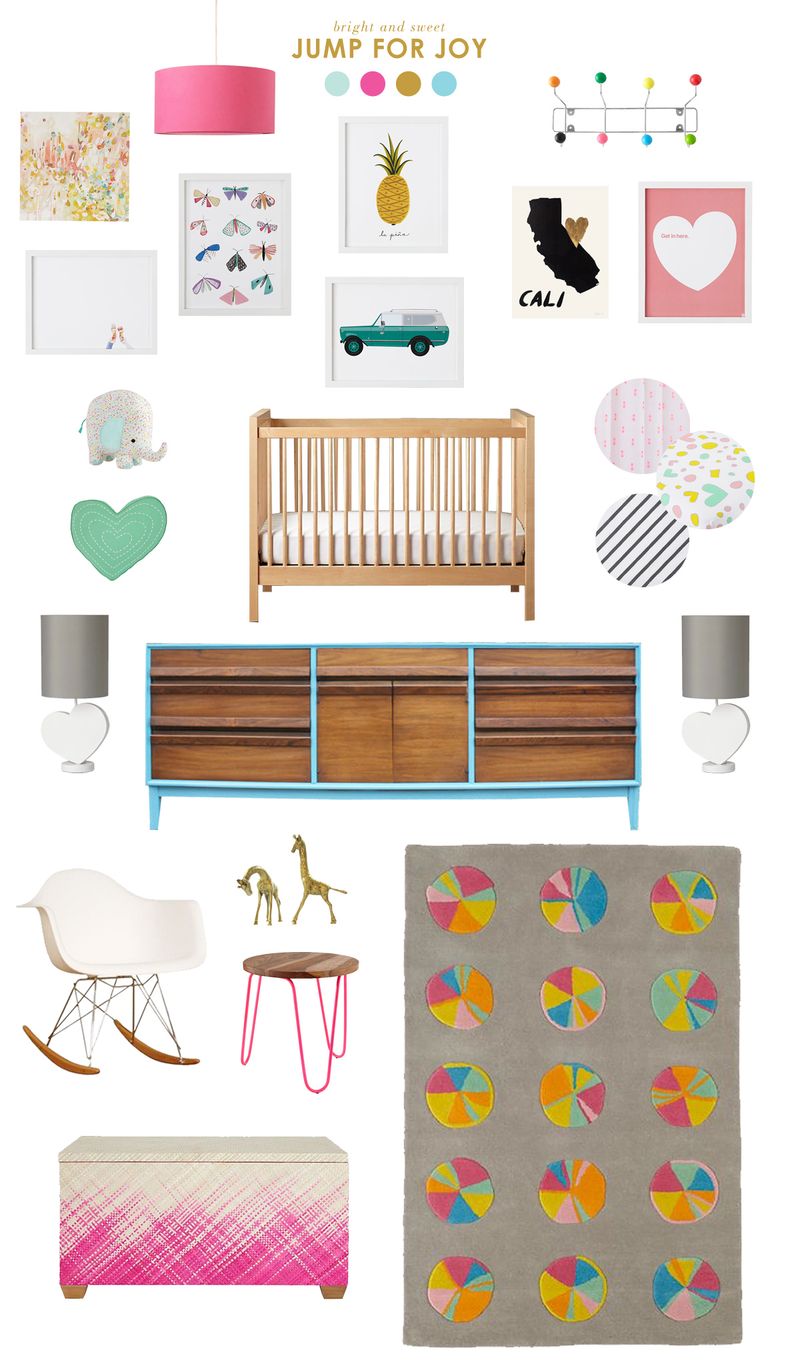
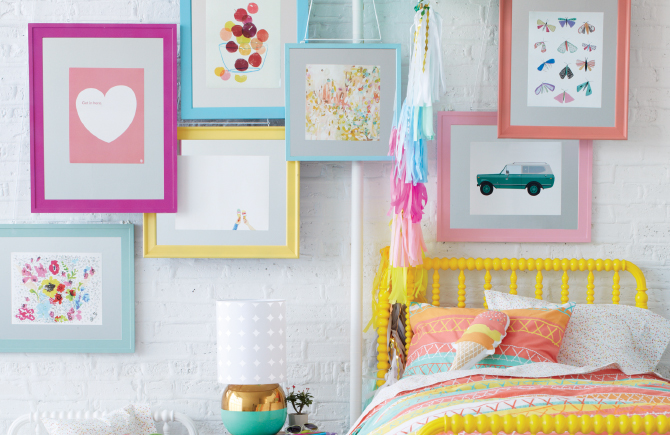
It really blows my mind that Joy Cho of Oh Joy! designed these fabulous rooms for Nod.  When I approached Joy with this idea, I was really uncertain about what she would say and figured it never hurts to ask. I had been a fan of her blog for a long time. I have always been drawn to her playful, colorful aesthetic and her passion for life, food, family and celebrating. The idea was to design a bedroom for Ruby, Joy’s adorable daughter. At the time that Joy and I first met (with Ruby in tow) she was 1 1/2 and it seemed to me such an obvious pairing: Nod and Joy to design a happy, chic space for Ruby to transition from crib to big girl bed. To my delight, Joy loved the idea and the rest is history. We’ve literally spent the past year collaborating to bring you this gorgeous collection. Enjoy.

Fave pieces:

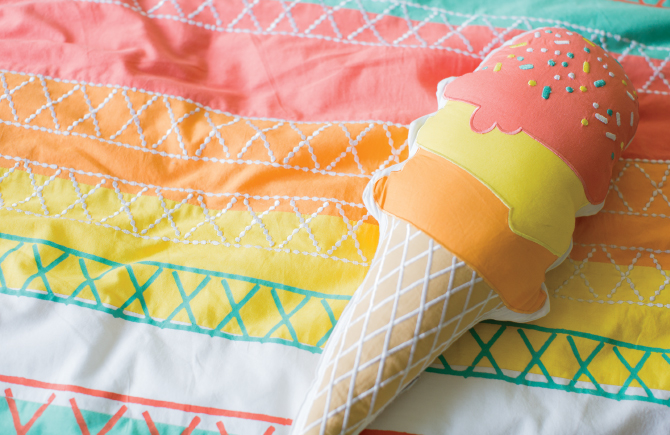
Ice cream cone pillow – why?  Because it’s an ice cream cone!

OhJoy_IceCream_02

Nod Institute of art – curated by Joy – It is an absolute imperative to buy all of these pieces and create a gallery wall, they are so cheeky and fabulous all together.  Seriously, that heart – “get in here”, beyond adorable.

OhJoy_WallArt_03

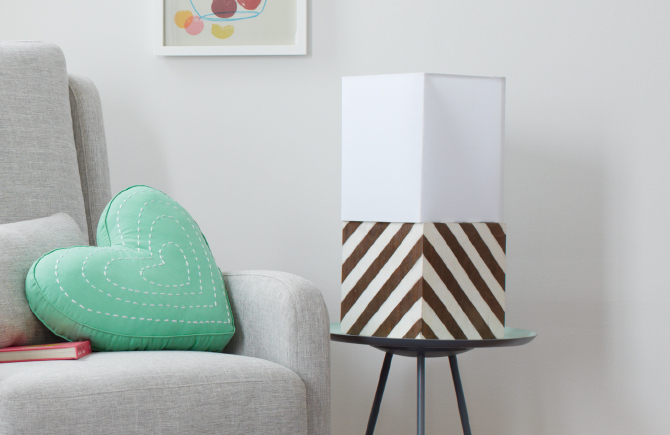
Diagonal stripe lamp – I love the idea of a square lamp and the use of wood really elevates the design.  This piece would look amazing in an entryway, as well as a nursery.

OhJoy_Lamp_04

XO,

Michelle

Michelle is the mother to four kids (yes, FOUR!), a gourmet cook and a retail junky. She’s painted her dining room countless times and changes rugs like most people change their bedsheets. When she’s not living and breathing retail, she’s weaving amazing works of art with her sister for Bourbon+Gin Weaving.


Recipe for Perfectly Hard-Boiled Eggs

March 31, 2014

Post by Aimée Lowry & Bettijo B. Hirschi from PagingSupermom.com

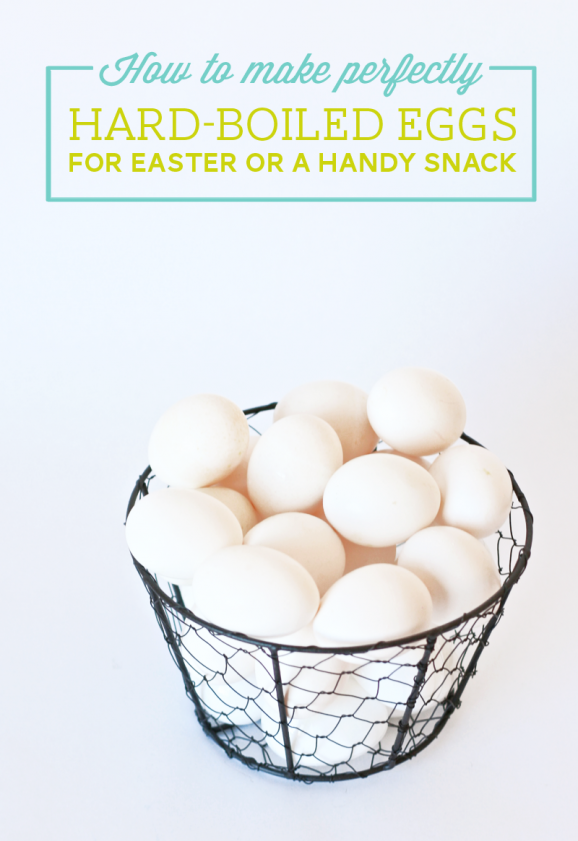
I think hard-boiling eggs is one of those things that is considered so basic you almost feel silly asking how to do it. Bettijo admitted to me a while ago that she didn’t really know how to hard-boil eggs, and we figured there may be some other Supermoms out there also wondering. So here is our no-judging primer on how to get the perfect hard-boiled eggs, just in time for Easter.

Recipe for Perfectly Hard-Boiled EggsThis is the method that my grandma and great-grandma used, and my mom taught it to me. Put eggs in a single layer on the bottom of pan and fill with enough water to cover about an inch over eggs.

Place over high heat and bring to a boil. As soon as the water begins boiling, turn off heat and remove pan. Cover immediately and let set for 17 minutes — be sure to set a timer. As soon as time is up, rinse eggs in cold water bath to stop the cooking process.

A few good hard-boiling egg tips:

  • 17 minutes has been my family’s magic number, but if you like a softer yolk you can cut up to five minutes off this time.
  • When it comes to easily peeling hard-boiled eggs, older eggs are actually better. Bettijo’s family has chickens and they usually leave their fresh eggs to age at least a week before hard boiling. Most store-bought eggs are going to be aged enough already.
  • It is easiest to peel eggs if you gently roll them to crack all over, then run under some water to help you get underneath the membrane and peel the shell off cleanly.
  • For egg salad sandwiches, use a pastry blender to quickly cut the peeled eggs up into small pieces without mashing them too much.

Reposted with permission by Aimée Lowry & Bettijo B. Hirschi from PagingSupermom.com

An Honestly Glam Mother’s Room

March 27, 2014

MothersRoom_1

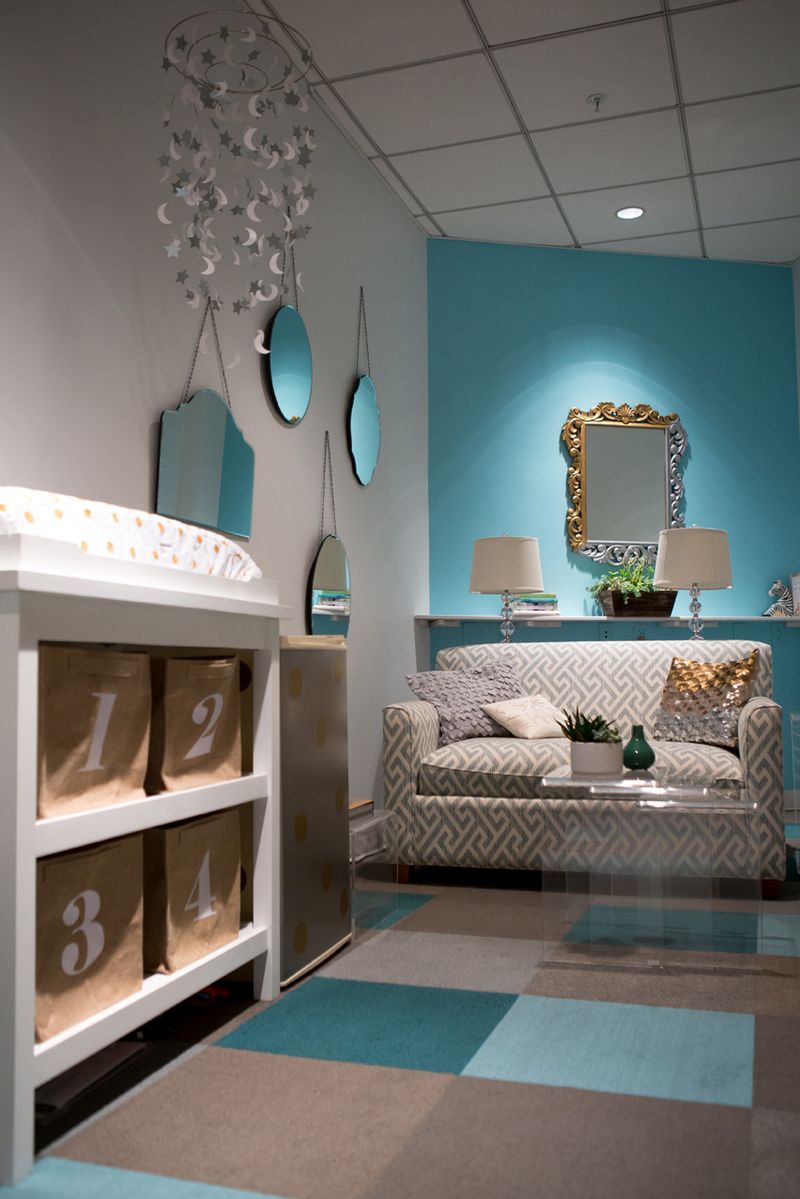
Anyone who’s been a nursing-working mom knows that pumping at the office is hardly a glamorous affair. In fact, from my experience, it’s generally one of the most extremely unglamorous things you’ll ever do. So, when I had the chance to collaborate with The Honest Company on the design of the mother’s room at their corporate office, my main goal was to make it a place that moms might actually want to hang out. (BTW – if you don’t know about Honest check them out. They have an incredible line of baby and home products. And are seriously a very cool group of folks doing some fantastic things.)

MothersRoom_2

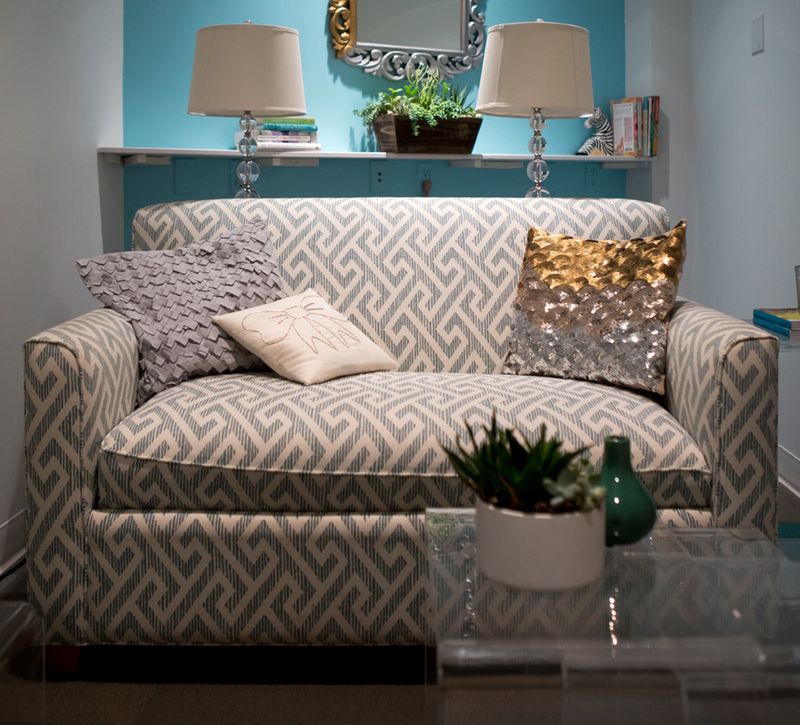
Anyway, back to the mother’s room. Honest had some amazing things already in the works for their corporate office, so it was easy to be inspired. Their color palette is mostly aqua with lots of grey. So, that was my starting point. The showpiece of the room is our Sleeper Sofa in a great teal puzzle patterned fabric. The mother’s room was intended not only for nursing moms, but also for moms that might bring their young kiddos into the office for a visit. And, hey, they might need a place to nap. So, the sofa doubles as a place to sit and a place to nap, with a twin fold out bed.  A great small space solution.

MothersRoom_3

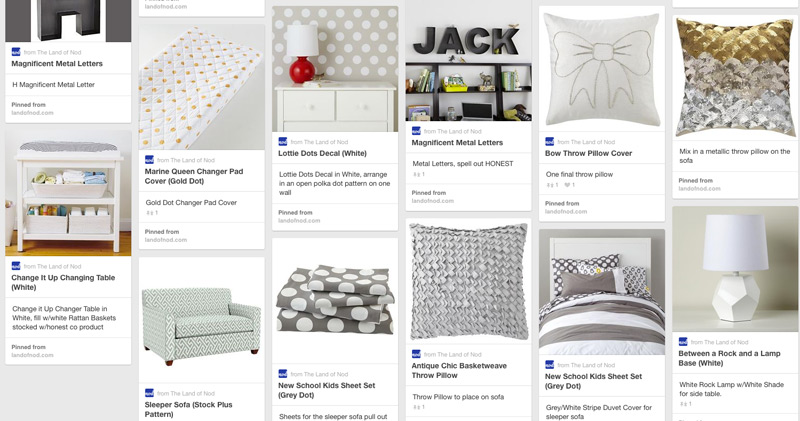
­­­From there I added in some basics like our white changing table, a perfect place to change baby’s diaper with tons of storage for all the essentials. And then I dusted it all with a bit of metallic…gold dot changer pad cover, metallic pillows, gold dot decals. It was so fun to add these all to Pinterest and have Jessica Alba (yes, you read that right) Jessica Alba comment, like and add to the board. Jessica’s one of the founders of Honest and was actively involved in the design.

In the end I think the room is functional, modern and decidedly feminine. I hope all the ladies who visit it feel at home and just a touch pampered.

By Danielle Kurtz

Danielle is the Creative Director at Nod and an over-protective mother of two. She’s also completely obsessed with Pinterest, Twitter, Instagram and her Kindle, but not necessarily in that order. Danielle loves to craft, sew and crochet, but all her supplies have a layer of dust on them about 7-years-thick, wonder if it's just a coincidence that her oldest kiddo is 7 years old?

Let’s Make Something! Beads

March 26, 2014

Beads

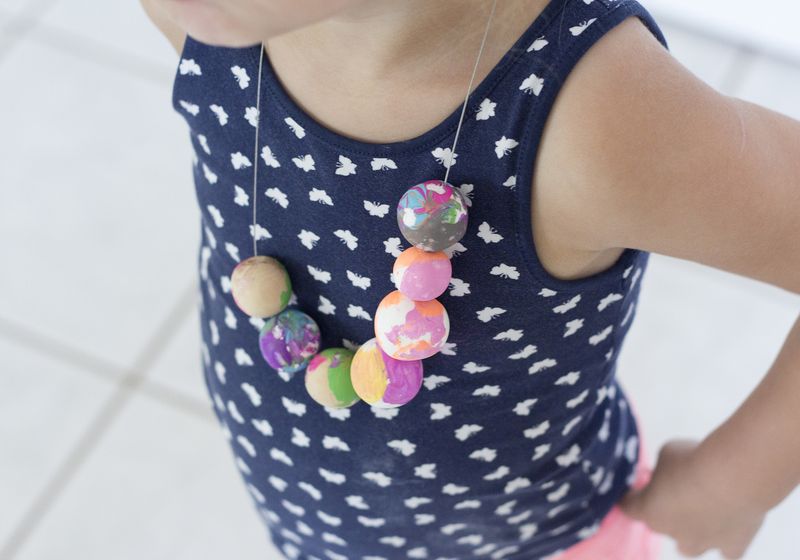
Yay! Well, it only took us about 3 months to make another one of these videos. Remember our bath bomb one? Whoops. I even video taped this one in August but just never got around to editing it till now. Better late than never I guess? I’ve been painting wooden beads like a mad women around here for the necklaces I’ve been selling in my etsy shop. The idea actually came from making beads and hand painting them with Rowan one day. It’s a super fun craft to do with your little one!

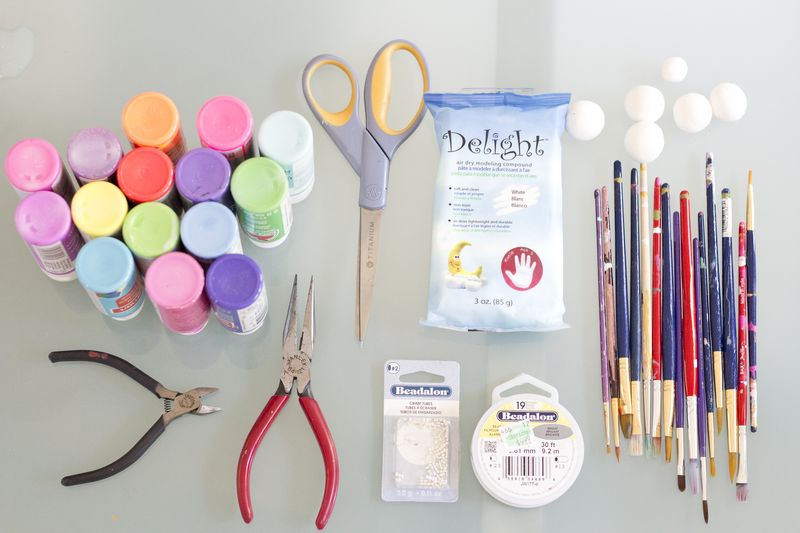
Bead necklaces supplies

Materials:
Craft Paint
Paint Brushes
Air Dry Clay ( I like the Delight brand. Super light weight for kids!)

Yarn Needle
String
Clasps (Magnetic Clasp work best for little kids. They can take it on and off easily and if it ever got caught a slight pressure would break it off)

Beads from Jen Lula on Vimeo.

Post by Jen Lula Jen Love Kev

We Built This City

March 25, 2014

Gothic City Blocks set 1

Gothic City Blocks set 2

Gothic City Blocks set 3

Gothic City Blocks set 4

Gothic City Blocks set 5


Gothic City Blocks set 6


Gothic City Blocks set 7

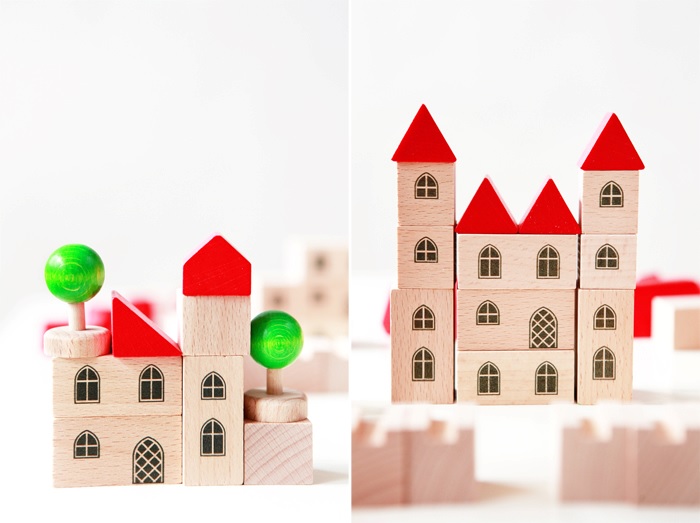
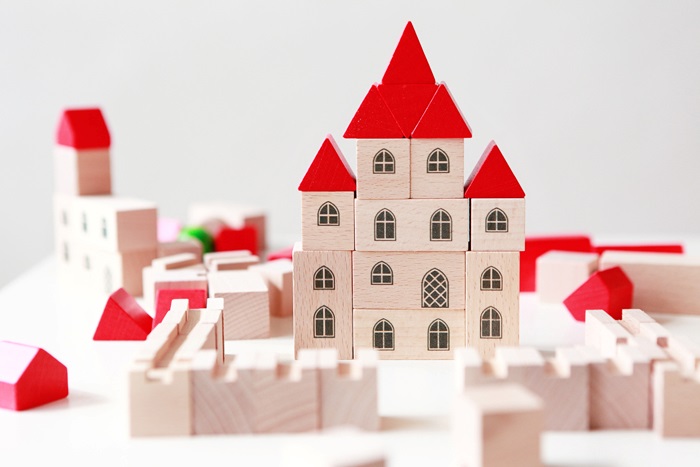
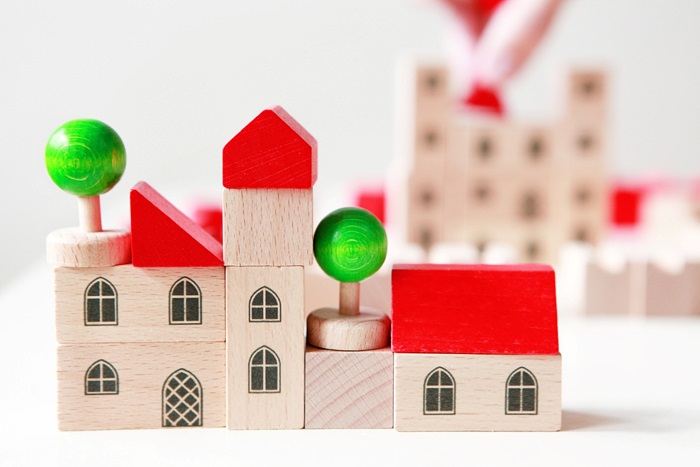
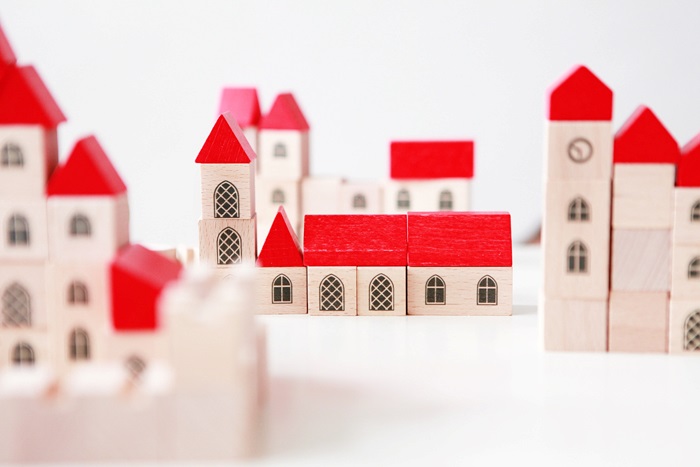
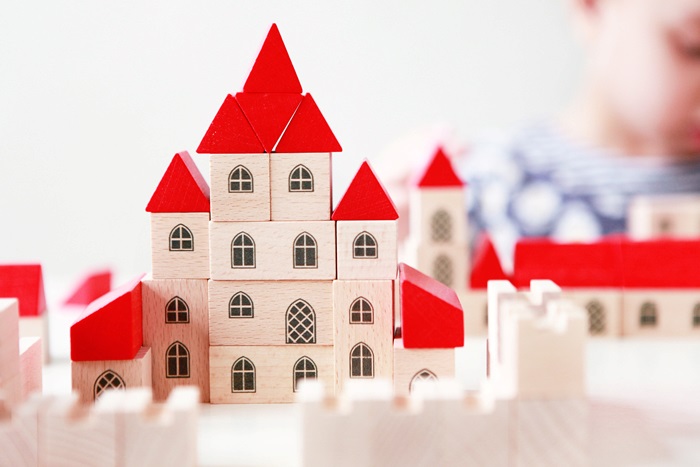
This Gothic City Blocks set, made in Poland, comes with many blocks with which you can build a castle or small village of houses.  The blocks provide a great starting point for the imagination to wander and think about what life might have been like in the 14th century.  Time to check on that cauldron of stew…

Post by Michelle Sterling of Avery and Augustine

You can see her work and read about her two young children and their first forays in cooking, art and everything in between at Avery and Augustine.

Gold and Pastel Easter Eggs

March 24, 2014

Post by Jeran of Oleander and Palm

Gold and Pastel Easter Eggs 1
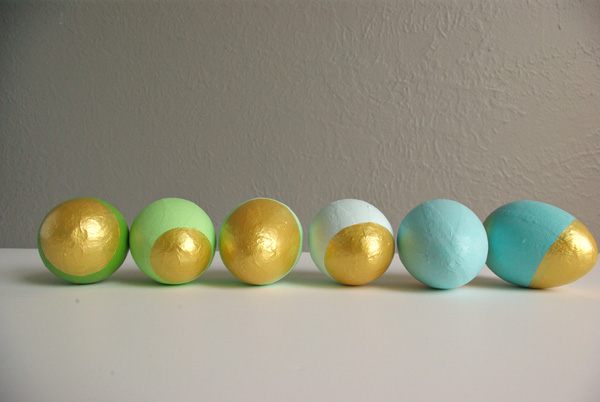
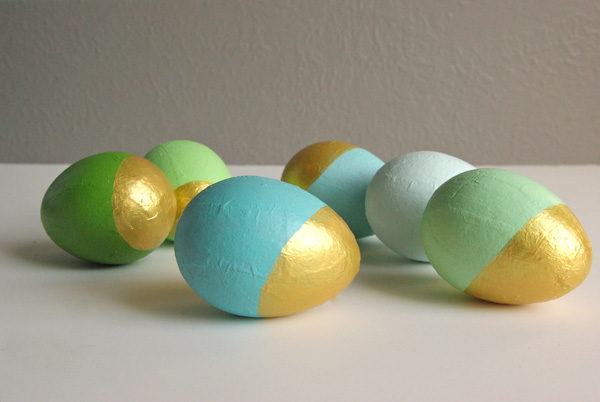
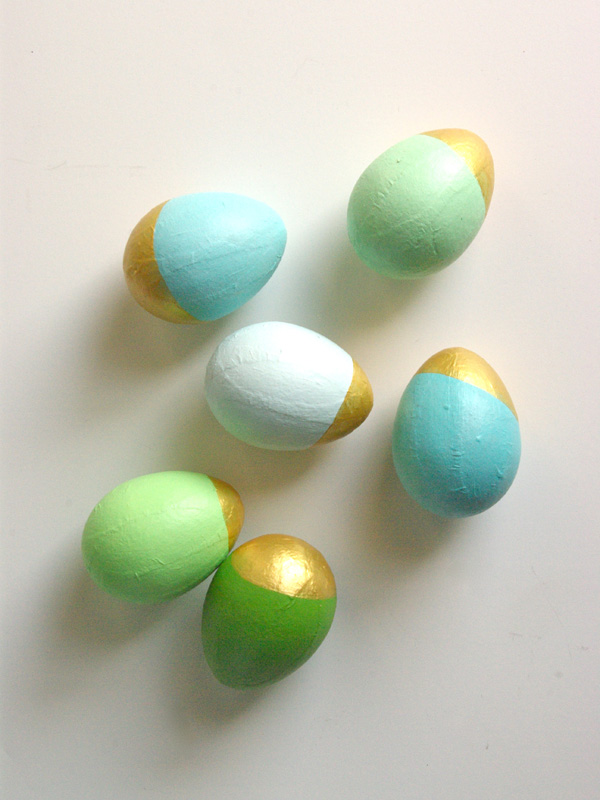
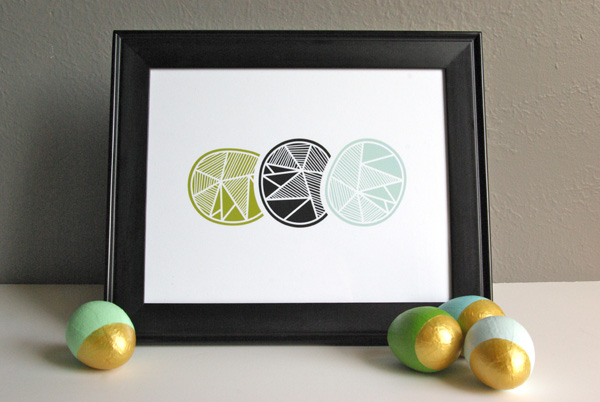
I don’t know about you, but I am loving that Spring is here (well at least it’s here in California).  I’m having so much fun pinning Spring and Easter ideas on Pinterest.  I’m totally inspired by these gorgeous ombre eggs and these beautiful gold dipped ones.  So, I decided to make my own Gold and Pastel Easter Egg version.

Gold and Pastel Easter Eggs 2

Gold and Pastel Easter Eggs 3

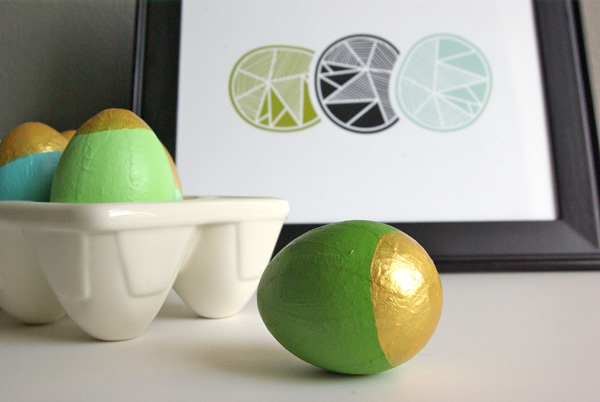
I love to use paper mache eggs for Easter (like my chalkboard ones).  It’s fun to be able to take them out year after year and they are nearly indestructible, which is very important with an 18 mo. old in the house.

Gold and Pastel Easter Eggs 4

Gold and Pastel Easter Eggs 5

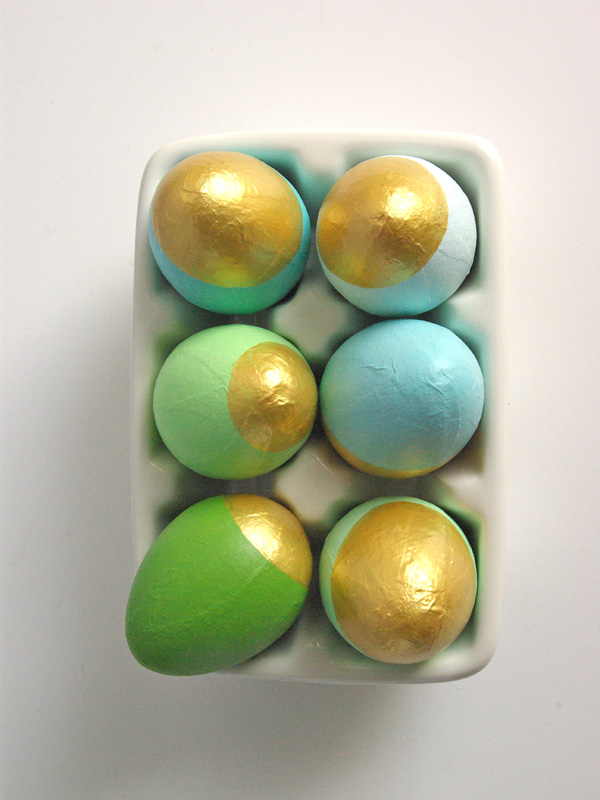
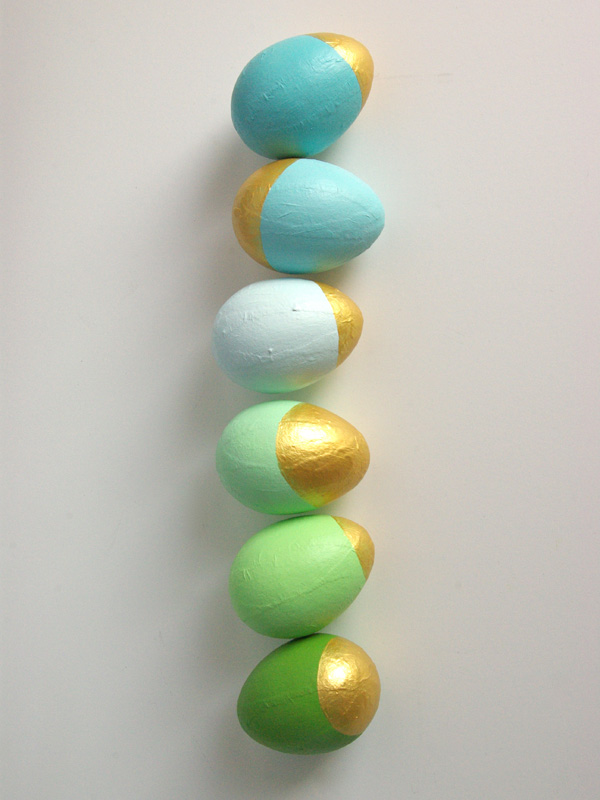
I took my color inspiration from this lovely modern art print, Stacks, from Minted.  This piece reminded me of beautiful painted Easter eggs, so I putting it with my framed Easter cards and white bunnies.   I painted them 3 shades of blue and 3 shades of green.  Then I simply painted one end of each egg metallic gold.  I tried taping them off with blue painter’s tape to start with, but then I decided I wanted something a little more free form.  So, I just free hand painted them, making them all unique and one of a kind.  I’m happy with the results.

Gold and Pastel Easter Eggs 6

Gold Eggs 7

Post by Jeran of Oleander and Palm

Spring to Cleaning Sweepstakes – CLOSED

March 20, 2014
SpringCleanSweeps
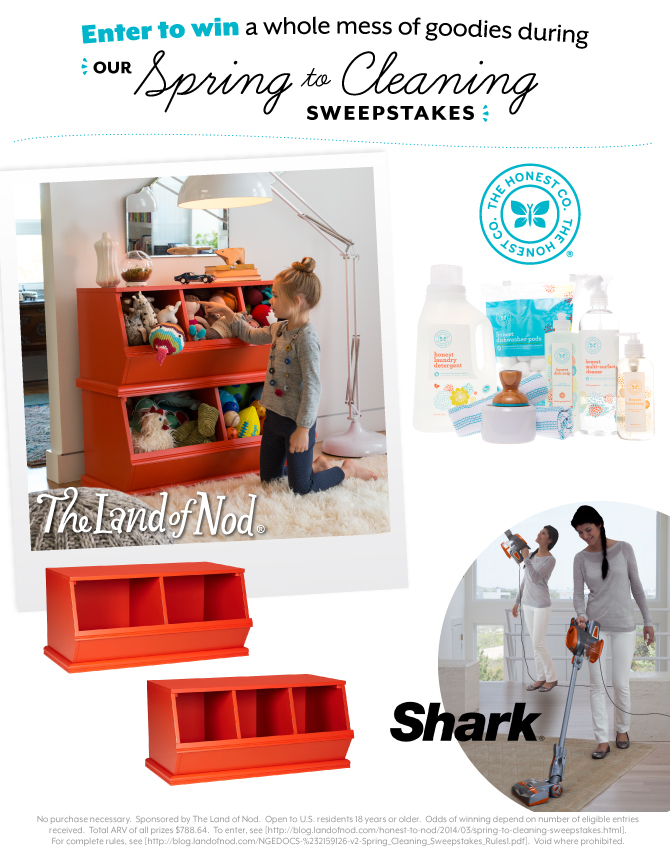
Ready to do a little spring cleaning? We partnered with our pals at The Honest Company and Shark Cleaning to offer you a chance to win a whole mess of spring cleaning goodies! Enter below for a chance to win Land of Nod Storagepaloozas, an Essentials bundle Honest Company, and a Steam & Spray along with a Rocket Ultra Light Upright from Shark Cleaning.


a Rafflecopter giveaway

Nectarine and Blueberry Millefeuille

March 19, 2014

Post by Giulia Doyle of Audrey’s

Nectarine and Blueberry Millefeuille Recipe | Honest to Nod

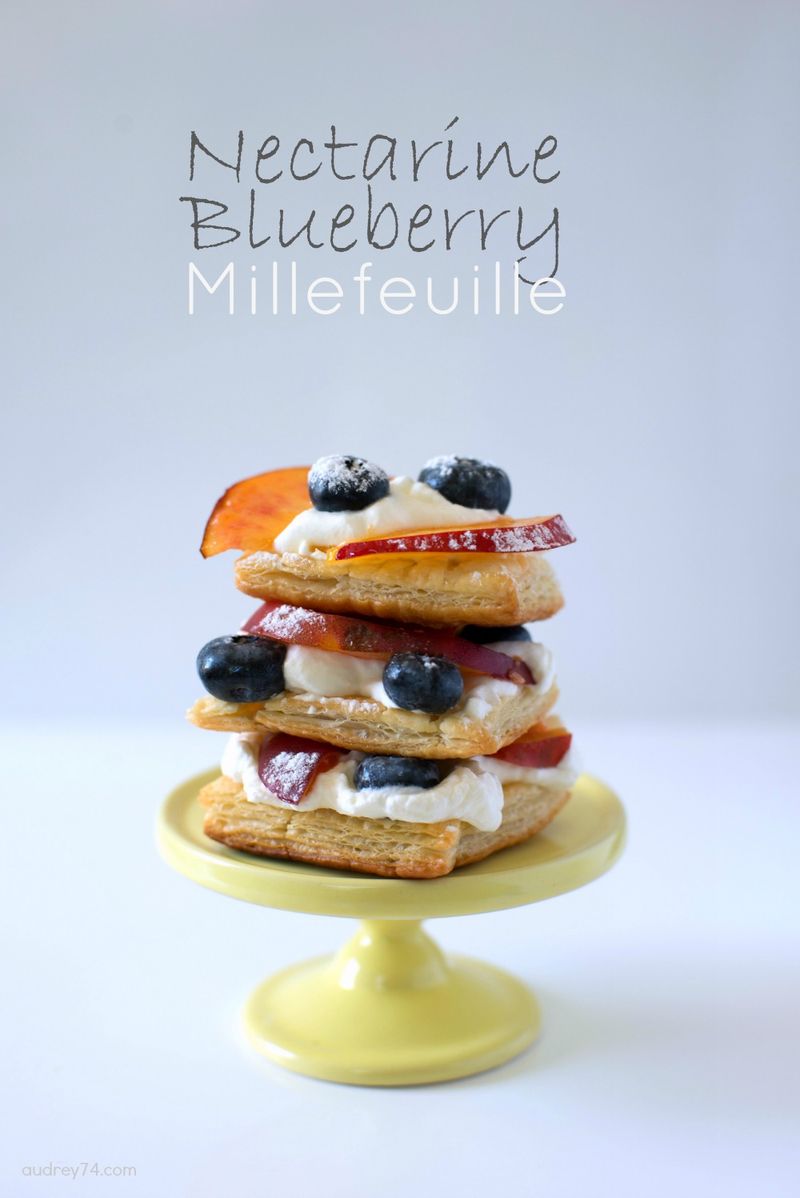
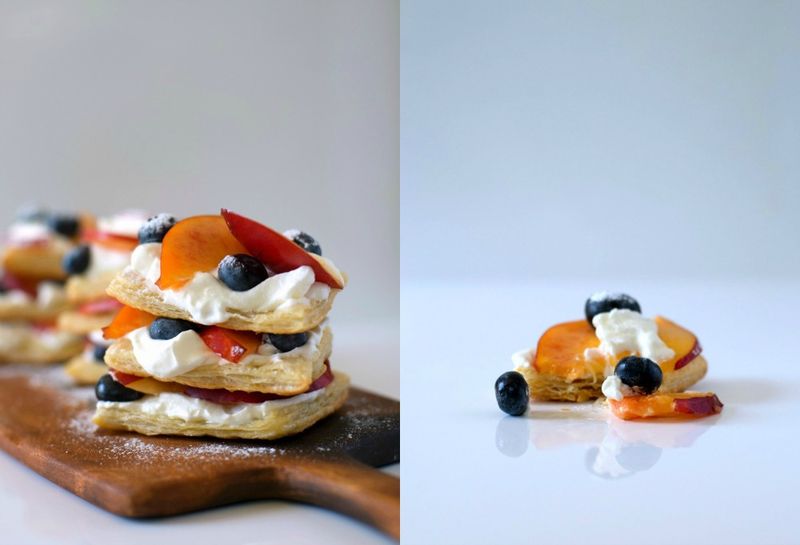
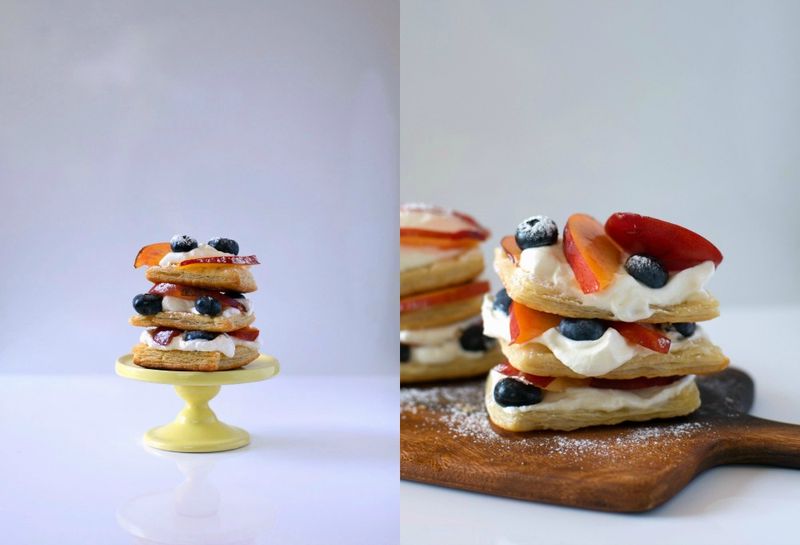
Aren’t these pretty? I’ve been eating my share of nectarines this year – at least one a day, usually with a paper towel or napkin next to me to catch the drips. While eating my allotment of fresh fruit, I was thinking about a fancier way to present these lovelies – something that looks impressive, but is easy to make. Puff pastry fits that description – it’s easy to use, versatile and looks impressive. Add a little vanilla whipped cream and a couple of blueberries for colour (and antioxidants) and you’re done.

Nectarine and Blueberry Millefeuille Recipe | Honest to Nod

I use frozen puff pastry – I’ve never attempted to make the pastry from scratch. Having a couple of rolls in the freezer has made many fast meals possible. I’m also using the term ‘millefeuille‘ with creative freedom here. While there are three layers of puff pastry, and there are variations with whipped cream – this version doesn’t include icing and has fruit, which I think makes it prettier.

Nectarine and Blueberry Millefeuille Recipe

Prep Time: 20 minutes

Cook Time: 15 minutes

Total Time: 35 minutes

Ingredients

  • 1 sheet of frozen puff pastry, defrosted
  • 1 cup of whipping cream
  • 1 teaspoon of vanilla extract
  • 1 tablespoon of sugar
  • 1 nectarine, sliced thinly
  • A few blueberries
  • icing sugar

Instructions

  1. Preheat oven to 400F
  2. Cut puff pastry into rectangles on parchment – about 3×2 inches
  3. Transfer pastry on parchment to cookie sheet and cover with another piece of parchment. Cover second parchment with another cookie sheet to weigh down puff pastry while baking
  4. Bake about 12-15 minutes until edges are golden.
  5. While pastry is baking, whip cream with sugar and vanilla. Whip by hand for fluffier texture.
  6. Once pastry has finished baking, remove top cookie sheet and parchment and let cool completely.
  7. Assemble dessert by starting with one pastry base, dust with some icing sugar, add a dollop of cream, some blueberries and 2-3 slices of nectarines. Add a second piece of pastry, push down gently, repeat sugar, whipped cream and fruit layer. Cover with last piece of pastry, whipped cream and decorate with final fruit. Finish with a dusting of icing sugar right before serving.

Notes

Make sure to weigh down your pastry while baking or it will puff too much and you won’t be able to stack it.

Nectarine and Blueberry Millefeuille Recipe | Honest to Nod

Need more tasty recipes and delicious bites? Check out our Let’s Eat Pinterest Board.

Post by Giulia Doyle of Audrey’s