Close

Blog

Coconut Key Lime Cookies Recipe

January 23, 2014

Post by Becca of CAKE

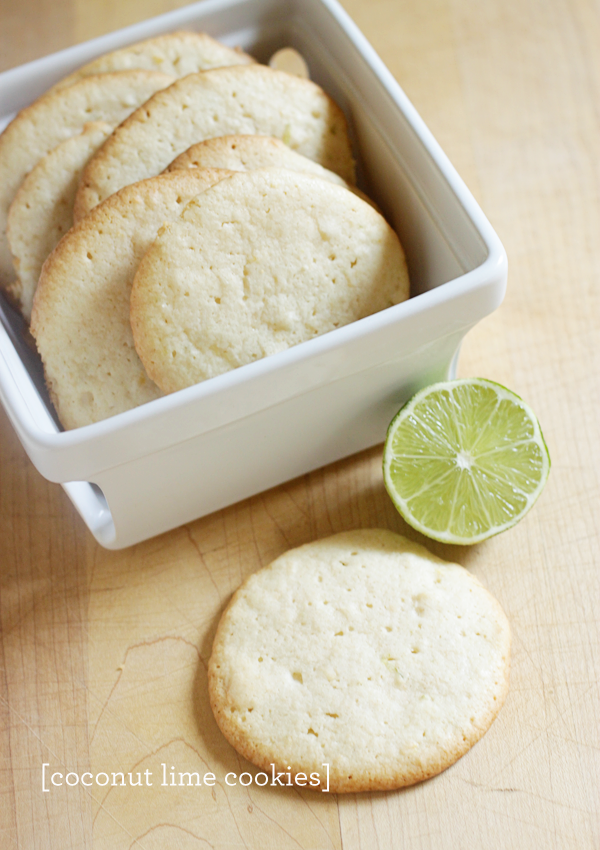
I set out to make some of my favorite lemon currant cookies, only to discover that I’d forgotten to buy currants. After a slight meltdown I decided to see what other useable ingredients I had around the house.  I had some roasted coconut chips from Trader Joes (have you tried them?), but wasn’t sure about pairing them with lemon.  Then I remembered we also had some key limes left over. Score. Lime and coconut always go hand in hand.

I followed the original recipe with my substitutions and somehow they were a smashing success. I think my mom described them best when she said “I would never think to call a cookie refreshing, but these totally are!”. So there you go. When life hands you coconut in place of currants… go make some cookies. Profound wisdom for a Thursday.

Coconut Key Lime Cookies Recipe | Honest to Nod

photo + styling © cake. 2013

Coconut Key Lime Cookies

adapted from martha stewart
Ingredients
1/2 cup unsalted butter, softened, plus more for baking sheets
1 cup sugar
1/4 cup sour cream
1 large egg
1 1/2 cups all-purpose flour
1/4 teaspoon baking powder
1/4 teaspoon salt
1/2 cup toasted coconut flakes
1 tablespoon grated lime zest
1/4 cup lime juice
Directions
1. Preheat oven to 350 degrees F. Generously butter two baking sheets, or line them with parchment paper.
2. Combine the butter and sugar in a mixing bowl; beat until light and fluffy. Beat in sour cream and egg.
3. In a separate bowl; whisk together the flour, baking powder, and salt. Gradually beat the dry ingredients into the butter mixture until they are well combined.
4. Stir in coconut and lime zest/juice.
5. Drop heaping teaspoonfuls of dough about 1 1/2 inches apart onto prepared baking sheets. Bake until cookies are puffed and golden around the edges, about 20 minutes.
6. Let cool 5 minutes on baking sheets before transferring cookies to wire racks to cool completely.

Post by Becca of CAKE

Need more tasty recipes and delicious bites? Check out our Let’s Eat Pinterest Board.

Free Printable Funny Valentine

January 22, 2014

Post by by Aimée Lowry & Bettijo B. Hirschi from PagingSupermom.com

Free Printable Funny Valentine

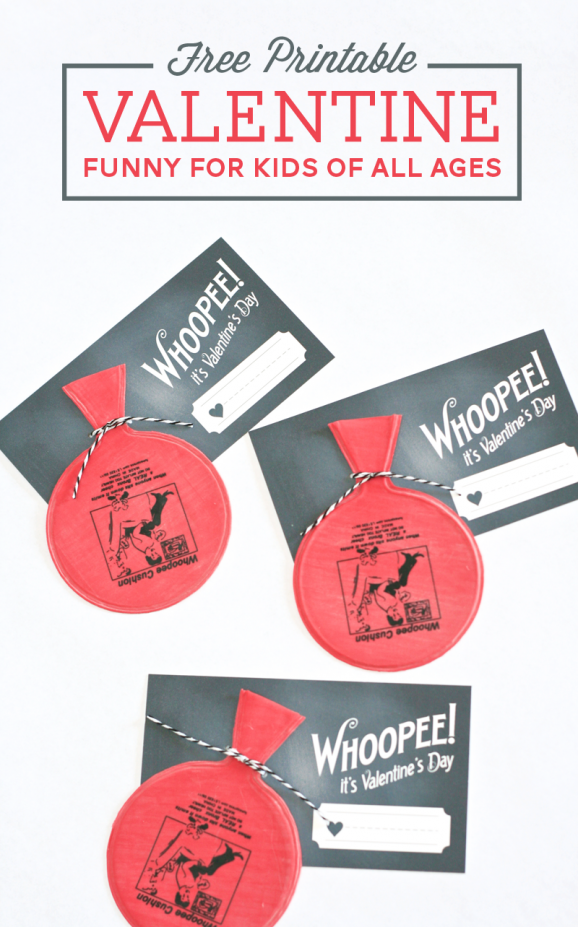
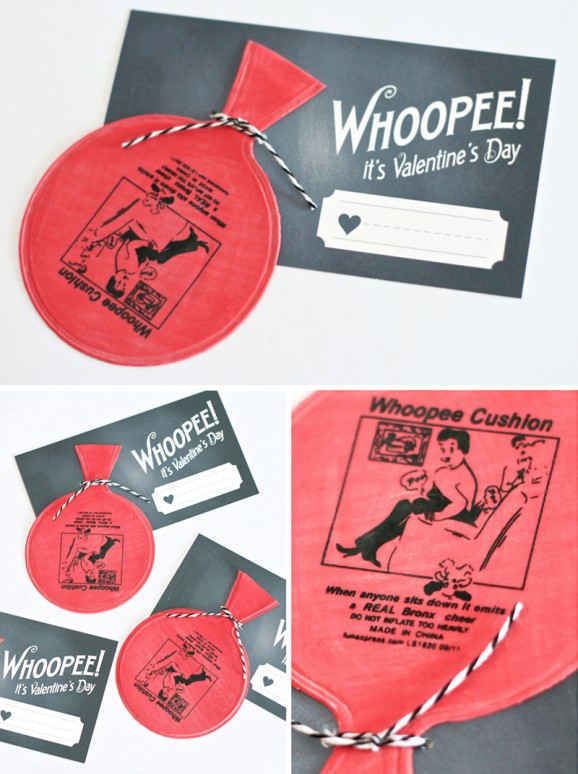
As a Mom to a 6-year-old boy I’m already starting to see his enthusiasm for Valentine’s Day starting to wane. (Tear!) So last year when he came to me bubbling with excitement asking to pass out newly discovered WHOOPEE CUSHIONS to his classmates for valentines, I was tempted to let him. But, of course, I didn’t. I mean, that just doesn’t adhere to my well-mannered ideals. Leave it to Liam to remember whoopee cushions and beg to pass them out this year. Although I’m still deciding, I can’t help loving the concept we came up with…

Free Printable Funny Valentine 2Download our free My Funny Valentines template and print onto cardstock. Cut out each valentine and have your child sign his or her name. Attach mini whoopee cushions to your valentine. Place a cushion on the card as shown then using a screw punch make holes on either side of the mouthpiece being careful not to punch through the cushion itself. Loop string or twine through the holes and over the cushion. Secure with a knot.

Clearly this funny valentine is not just for little boys, but for anyone who’s a kid at heart!

Reposted with permission by Aimée Lowry & Bettijo B. Hirschi from PagingSupermom.com

Get the Look: English Modern

January 21, 2014

Love a tailored, modern look but not sure how to incorporate it for kids? First, add some tailored, refined details such as bordered textiles and furniture with clean lines:

8733ff3392e1879fa6dfe44863e05fe3

image

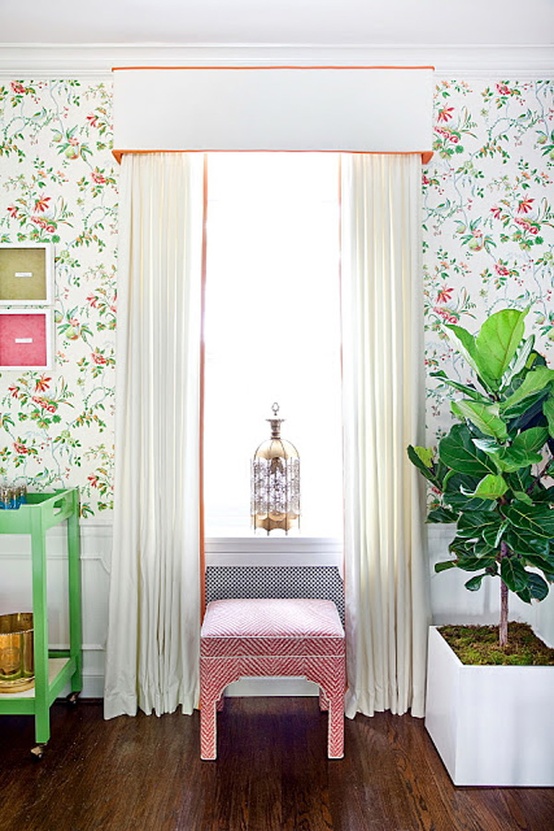
Next, add in botanical and tropical details in preppy colors like Kelly green and pink:

Tumblr_m2zngjF8EP1qb9lpko1_1280

image

Lastly, mix in some textured throw pillows, the more the better!

Amy_Smilovic_Closet-001_2

image

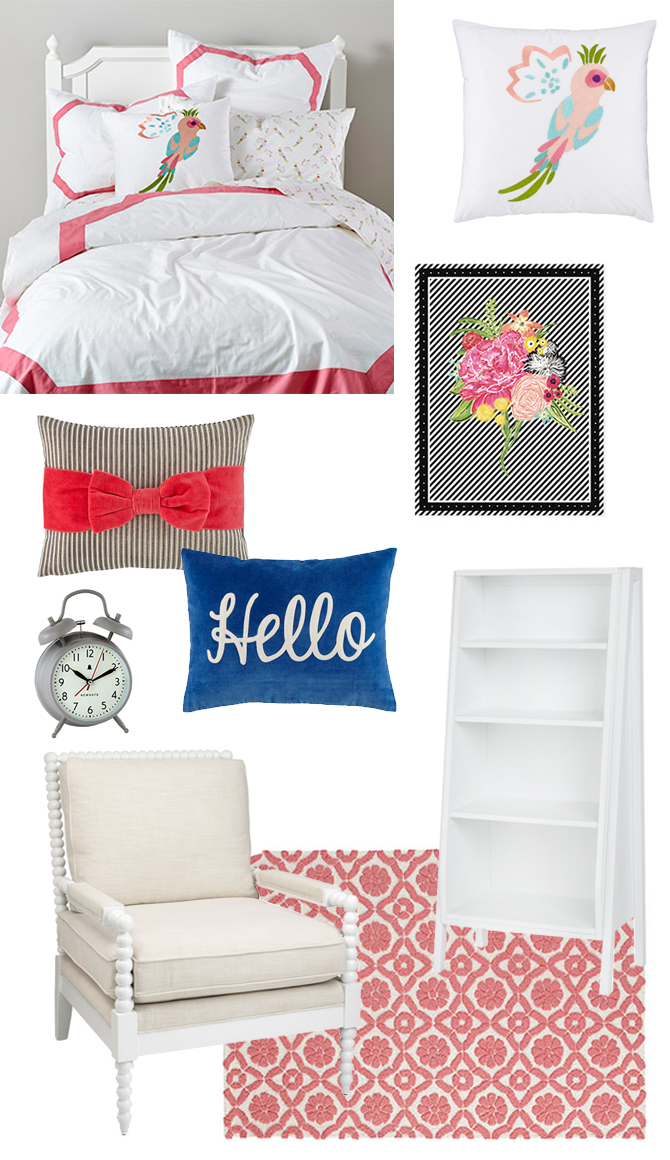
Try it for yourself:

ENGLISH MODERN

Clockwise from top left:

Bordeaux Bedding

Parrot Throw Pillow

Floral Pop Canvas Wall Art

Graduated Tall Bookcase

Garden Trellis Rug (Pink)

Jenny Lind Chair & Ottoman (Devote Cream)

Grey Chime Alarm Clock

Hello Throw Pillow

Pink Bow Throw Pillow

By Anna Passadori

Anna develops and designs exclusive product for The Land of Nod. She hails from the west coast and has traveled the world to source product. She loves anything Marc Jacobs, Sofia Coppola or stripes! (So, if anyone can get a photo of Sofia Coppola wearing a striped outfit by Marc Jacobs, please send it along.)

Roasted Red Pepper Soup with Quinoa Salsa

January 20, 2014

Roasted-Pepper-soup

I like winter in limited amounts. I love the look of fluffy snow on fields, kids throwing snowballs and toboganing down a hill. I also love taking a  nice walk in the snowy woods on a cold sunny day, as long as I’m dressed properly. But – and this is a big but, I will always choose summer over winter, sand over snow, shorts over snow pants. So these past couple of weeks have been challenging – this is not the fun, let’s play out in the snow winter. This is the deep freeze, hard as rock snow banks and dangerous walking conditions kind of winter. The coldest winter in 10 years  – and I don’t like it!

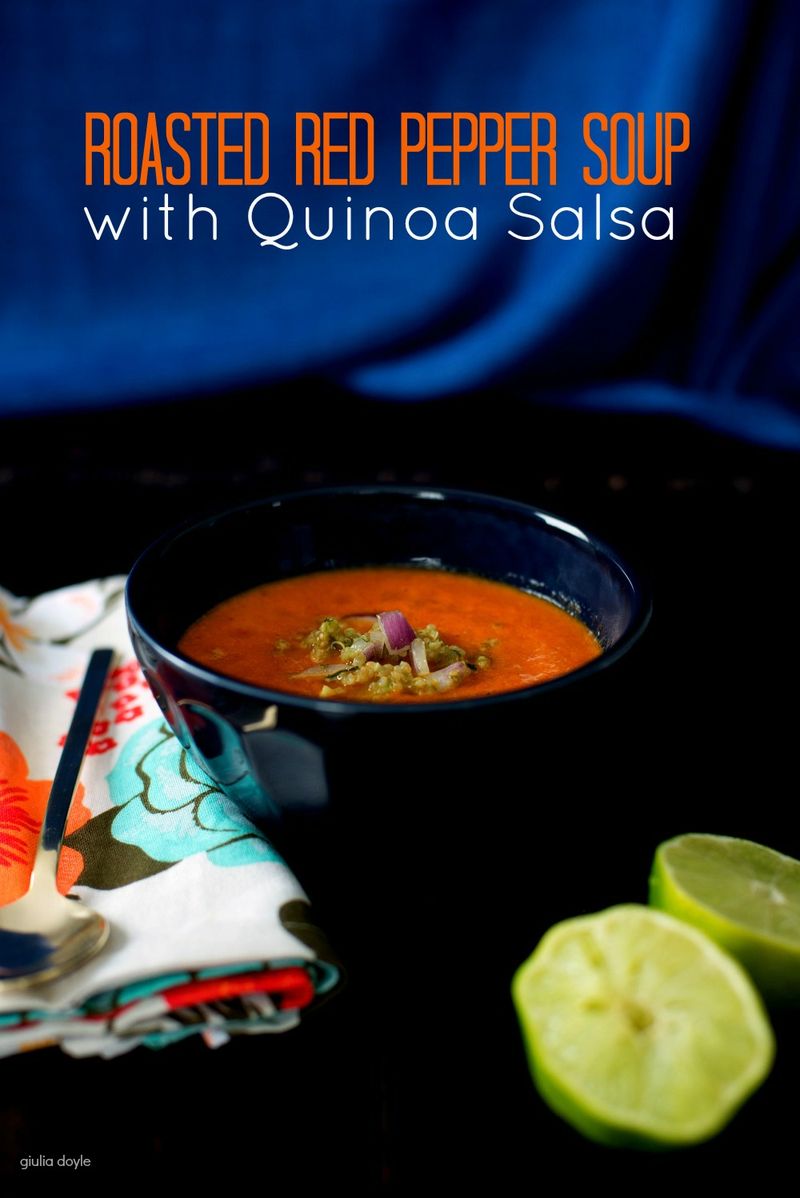
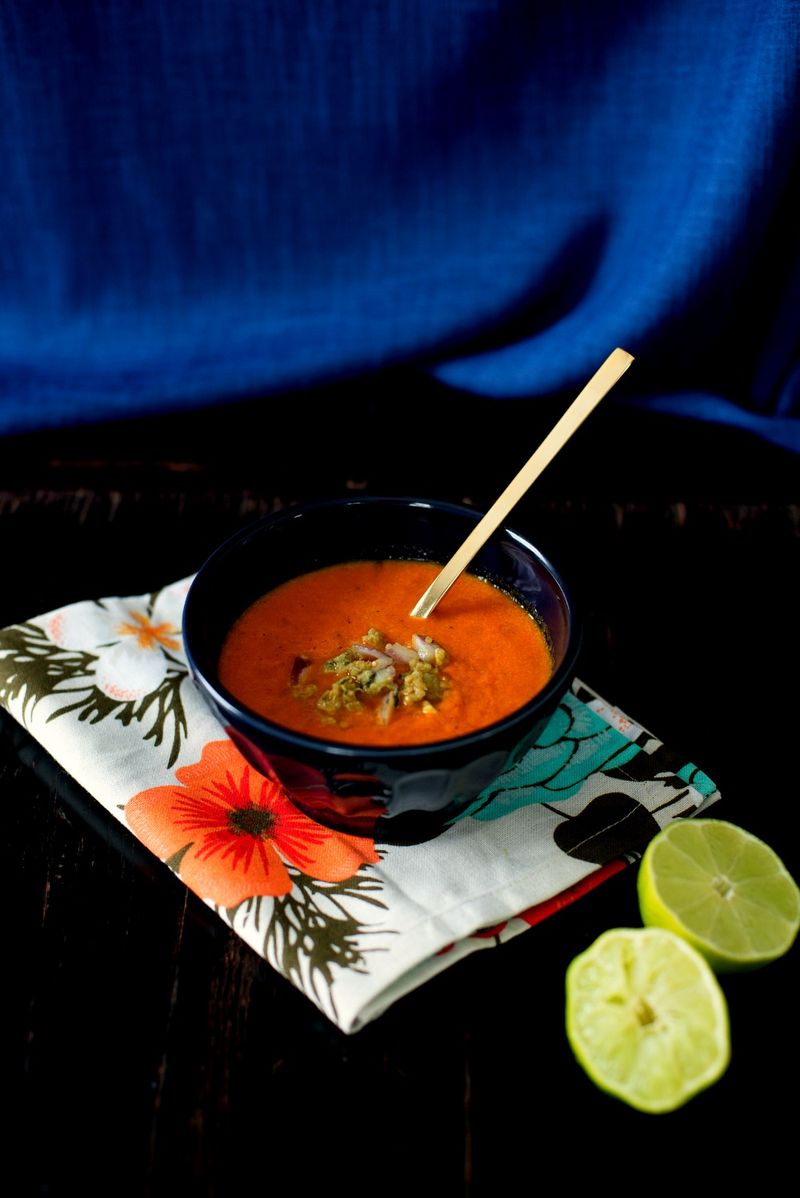
To counteract the January winter blahs, I decided to make a colourful and vitamin rich soup. Roasted Red Pepper soup with some added bulk and protein from a delicious quinoa/avocado salsa. This meal is healthy, satisfying, warms you up and a adds a bit of colour to a dreary day.  Doesn’t this pop of red make you happy?

Roasting the peppers is a little tedious, so next time I’d double the recipe to make the effort worth it. This soup warmed up really well, perfect to take with you to work. Now, off to scrape some more ice off my walkway.

Red-Pepper-Soup-8

Roasted Red Pepper Soup with Quinoa Salsa – from Meatless Cookbook

Yield: Serves 4

Ingredients

  • 2 tablespoons olive oil
  • 1 yellow onion, chopped
  • 2 garlic cloves, sliced
  • Pinch of red pepper flakes
  • 4 red bell peppers, roasted and quartered
  • 3 cups of vegetable stock
  • coarse salt
  • 1 cup cooked quinoa
  • 1/4 cup of red onion, diced
  • 1 firm, ripe avocado, diced
  • 2 tablespoons chopped fresh cilantro leaves
  • Lime wedges, for serving

Instructions

  1. Heat olive oil in a medium saucepan over medium heat. Add yellow onions, garlic, and red pepper flakes and cook, stirring occasionally, until onion is tender – 6-8 minutes. Add roasted peppers and stock. Bring to a boil, reduce heat and simmer for 10 minutes.
  2. Let cool slightly. Working in batches, puree soup in a blender until smooth, being careful not to fill jar more than halfway. Reheat after blending and season genereously with salt.
  3. In a small bowl, mix together quinoa, red onion, avocado and cilantro. Season with salt. To serve, divide soup among 4 bowls, top with quinoa salsa, and squeeze with lime.

Notes

Roast your peppers by putting them on the BBQ or direct flame of your gas stove. Keep turning until skins are charred. Let cool in a covered bowl and peel off charred skin.

Roasted-Pepper-Soup-1

Post by Giulia Doyle : Audrey's

Free Printable Valentines Roundup

January 16, 2014

Post by Aimée Lowry & Bettijo B. Hirschi from PagingSupermom.com

We’ve rounded up our favorite FREE printable valentines from around the web.

Free Printable Valentines Roundup

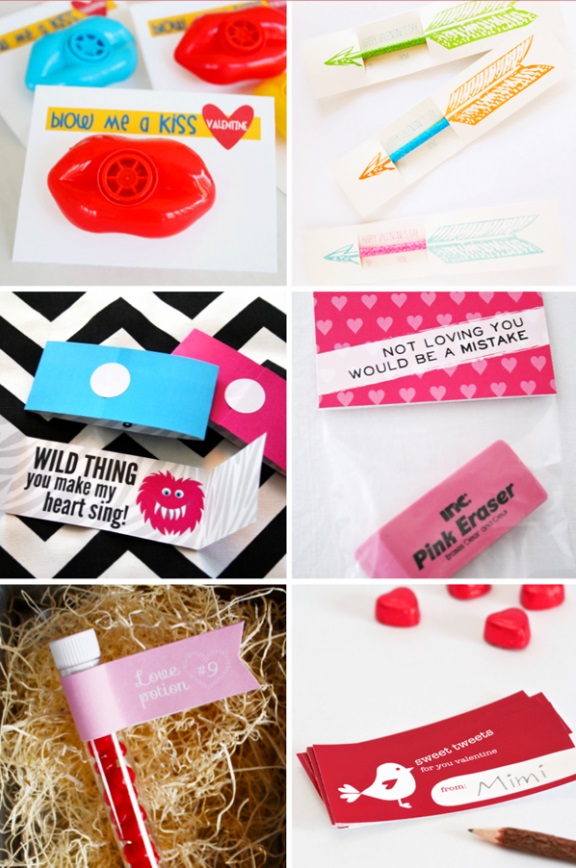
FREE PRINTABLE VALENTINES: Blow Me a Kiss from At Second Street :: Cupid’s Arrow Pencils from Sweet Muffin Suite :: Wild Thing from Paging Supermom :: Not Loving You Would Be a Mistake from Paging Supermom :: Love Potion No. 9 from Hello Bee :: Sweet Tweets from One Charming Party.

Free Printable Valentines Roundup

FREE PRINTABLE VALENTINES: Superhero Lollipops from Zakka Life :: You’re Super from One Charming Party :: I Dig You from One Charming Party :: Love Bugs from Dandee Designs :: Have a Ball from Paging Supermom :: Dropping Down by Paging Supermom.

Reposted with permission by Aimée Lowry & Bettijo B. Hirschi from PagingSupermom.com

Tomato, Mozzarella and Basil Orzo

January 15, 2014

Fishlynewsorzo1

Making pasta is a way to ensure that everyone has a meal they enjoy -  adding melty cheese to it makes it even more of a success. Once in a while though I like to change it up and move away from Spaghetti or Penne. Using orzo and cooking it like Risotto seemed like the prefect way to do this. I like that this recipe also allowed me to use our last tomatoes and tiny little basil leaves growing outside. It’s comfort food with a node to late summer – a time where you can cuddle up with blankets, walk through piles of leaves on a crisp day, but tomatoes still burst with flavour. I urge you to try this simple recipe – it truly is comfort in a bowl.

Tomato, Mozzarella and Basil Orzo (adapted from Emeril Lagasse)

  • 3 tablespoons of olive oil
  • 1/2 cup of minced red onion
  • 1 tablespoon of minced garlic
  • 2 cups of orzo pasta
  • 4 cups of chicken stock, heated
  • salt and pepper
  • 2 cups of diced fresh tomatoes
  • 1/2 cup of diced fresh mozzarella (I increased this amount)
  • thinly sliced basil
  • Heat olive oil in a medium sauce pan over medium heat. When hot, add the red onion and garlic and cook until fragrant, about 30 seconds. Add the orzo and stir well to coat.
  • Gradually add the hot chicken stock in 1/2 cup increments, stirring until all of the stock has been absorbed before adding more. Do this until you used up all the stock, the liquid is absorbed and the pasta is just tender – about 15 minutes. Season with salt and pepper.
  • Add the tomatoes to the orzo and cook until just heated through, 1 -2 minutes. Add the mozzarella and cook for another 2 minutes or just until  incorporated.
  • To serve, spoon the orzo into bowls and garnish with basil.

Post by Giulia Doyle : Audrey's

Pretzel Crust Brownies

January 14, 2014

Post by Ali of Papery & Cakery
Pretzel Crust Brownies | Honest to Nod

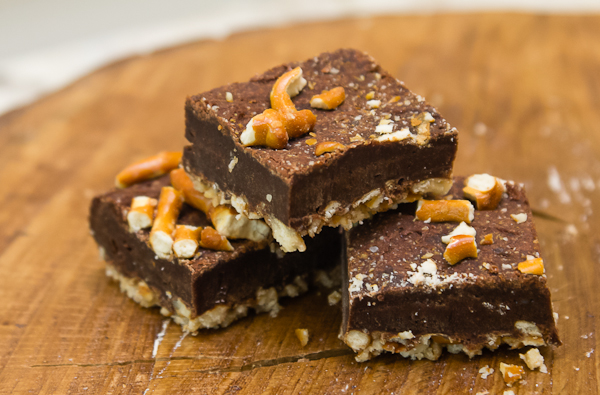
Recently, I have developed an addiction to chocolate covered pretzels. I just can’t get enough.  I don’t really discriminate {although my personal fave is the Whole Foods dark chocolate ones}.

So as I was brainstorming blog ideas and thought I would play with my favorite combo – chocolate + pretzels, and then throw in a brownie mix or two. How could I go wrong with pretzel crust brownies?

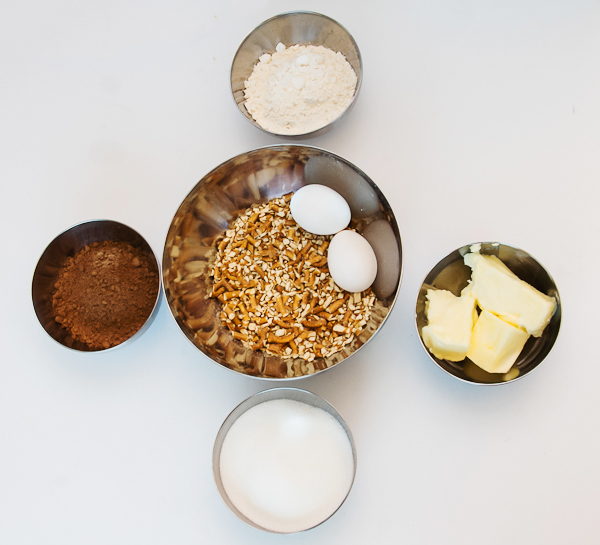
First, gather all of the ingredients.

Pretzel Crust Brownies | Honest to Nod

In a plastic bag, place 2 1/2 cups of salted pretzels {I used mini ones} crushed. I found it easiest to use a rolling pin over the bag to pulverize the pretzels.

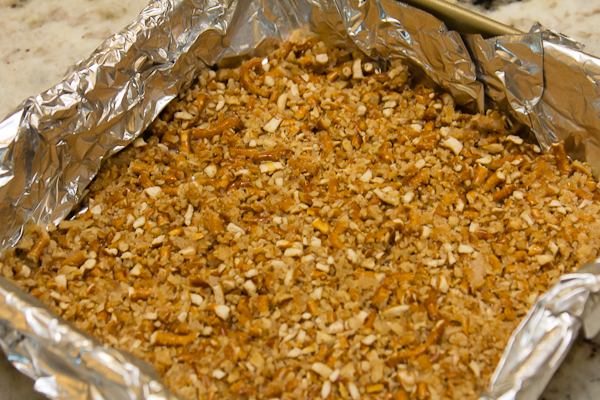
Transfer pretzels to a bowl and add in 4 tablespoons of melted butter and 4 tablespoons of sugar. Mix well. Press the pretzel mixture into an 8 x 8 inch pan that has been covered with aluminum foil and sprayed with non-stick cooking spray.

Pretzel Crust Brownies | Honest to Nod

Bake the crust for approximately 5 minutes at 325 degrees, just till you being to smell it.

Meanwhile, prepare your brownie batter.

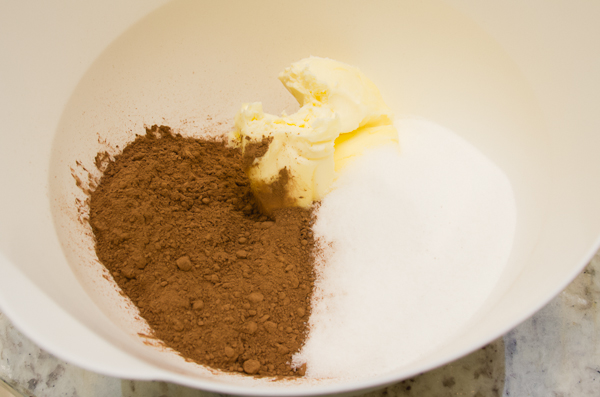
In a large microwave safe bowl place 10 tablespoons of butter, 3/4 cup cocoa powder and  1 1/2 cups of sugar. Microwave on high for 1 minute, until the butter is melted.

Pretzel Crust Brownies | Honest to Nod

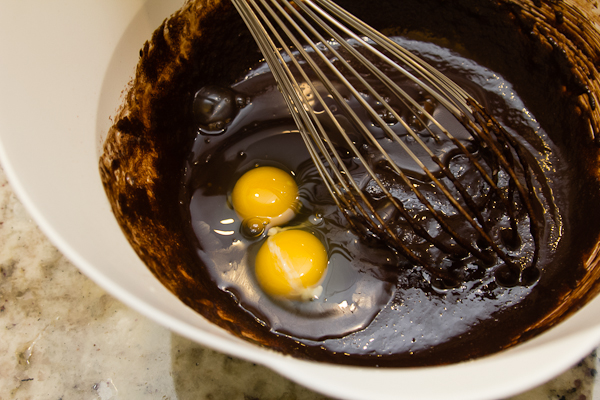
Whisk all of the ingredients together.

Add in 2 cold eggs. Making sure to mix well.

Pretzel Crust Brownies | Honest to Nod

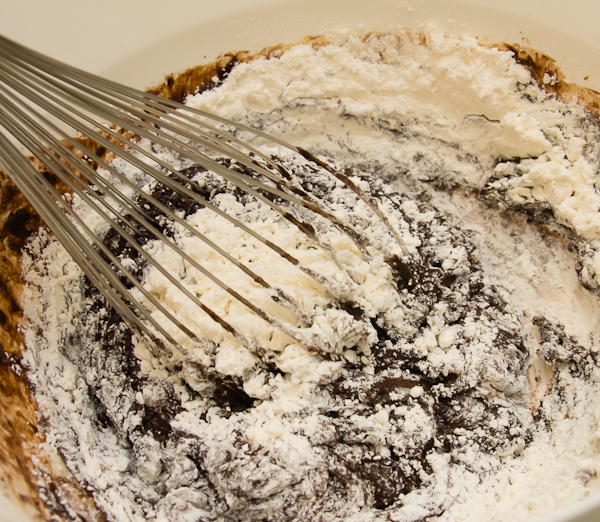
Finally, add in 1/2 cup of sifted flour and beat into batter very well.

Pretzel Crust Brownies | Honest to Nod

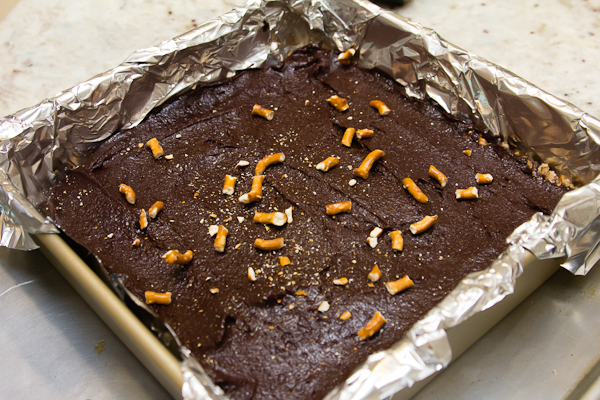
Pour the brownie batter over the pretzel crust. Spread evenly with a spatula.

Pretzel Crust Brownies | Honest to Nod

Bake for 30-35 minutes {until a toothpick comes out clean} in a 325 degree F oven.

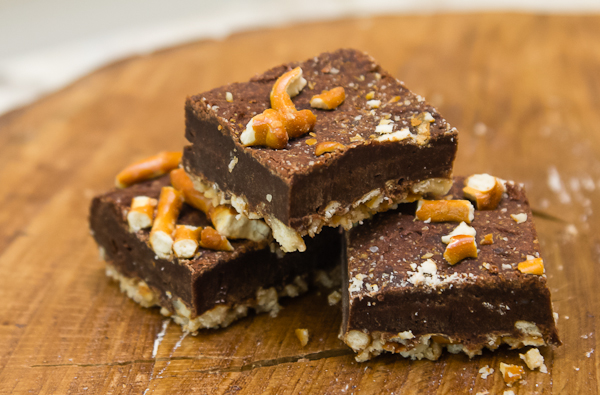
Allow to cool completely. Slice and enjoy! ** I actually like to freeze my brownies for about an hour after cooling, it ensures a perfectly clean line. Don’t be discouraged if a pretzel piece or two falls off the bottom – just pop it in your mouth :)

Pretzel Crust Brownies | Honest to Nod

Happy Baking!

xoxo.

Post by Ali of Papery & Cakery

Need more tasty recipes and delicious bites? Check out our Let’s Eat Pinterest Board.

Charlotte’s Room

January 13, 2014

Charlotte's Room-01

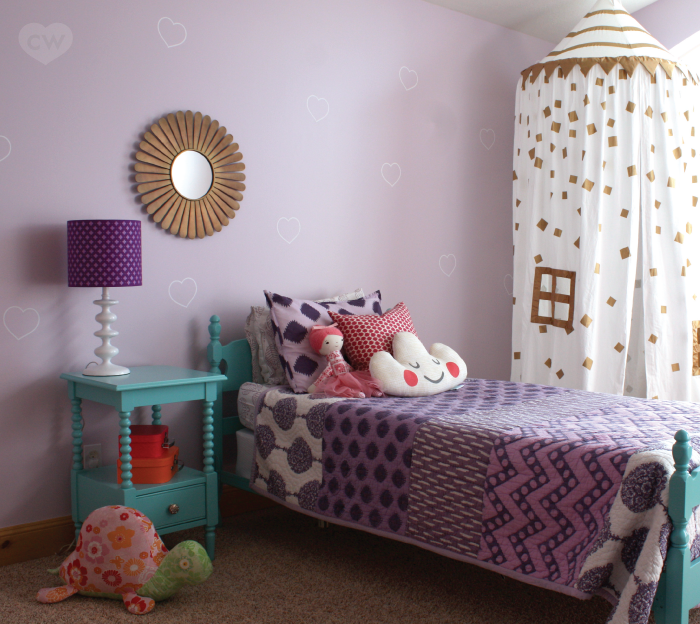
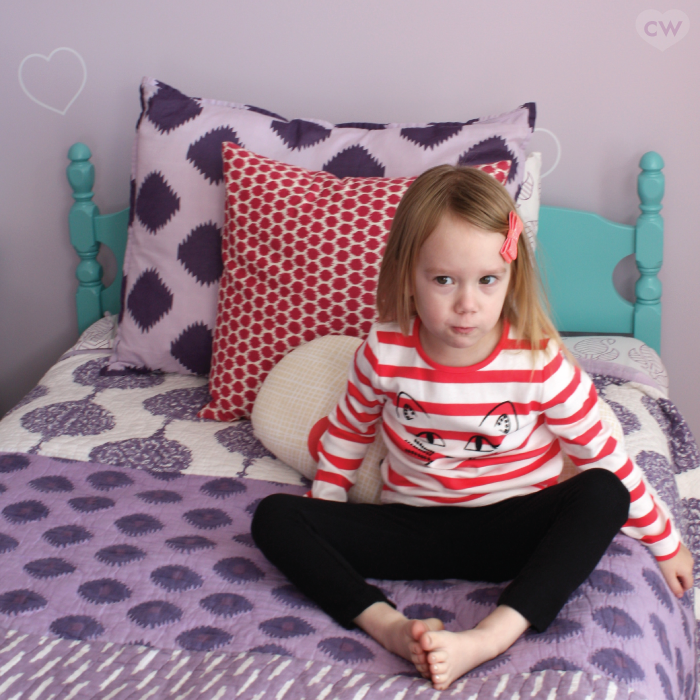
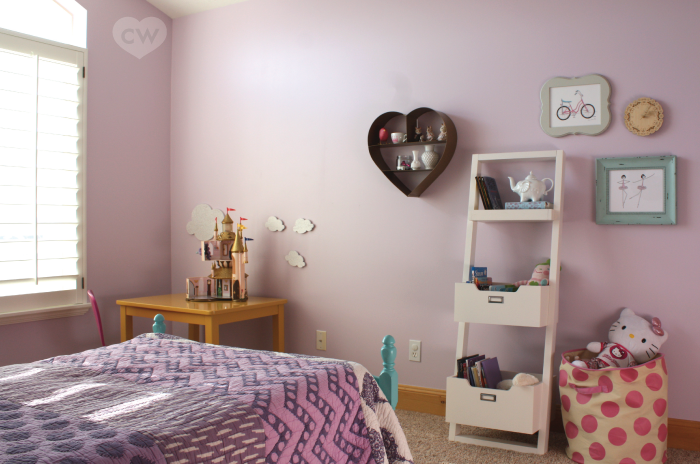
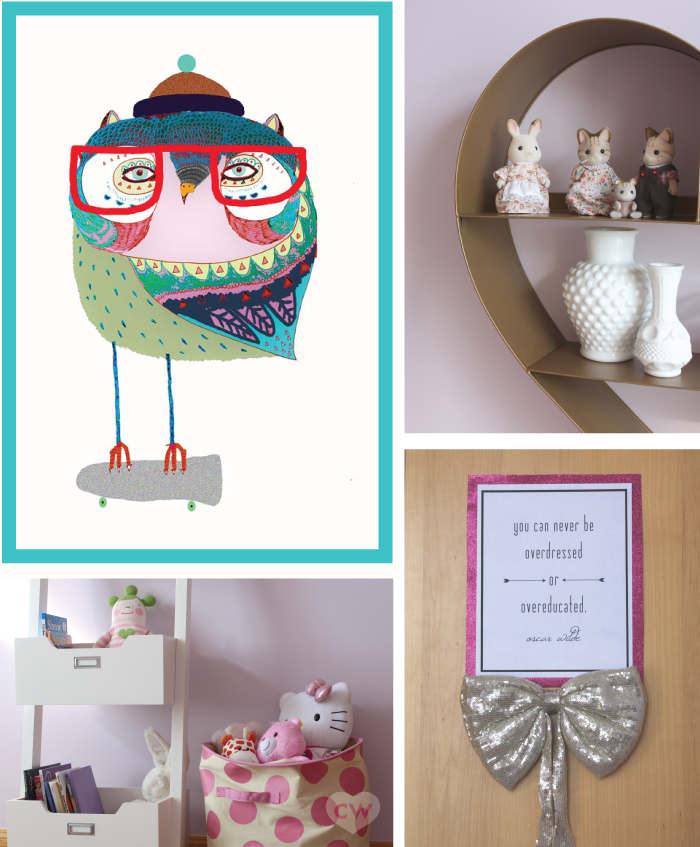
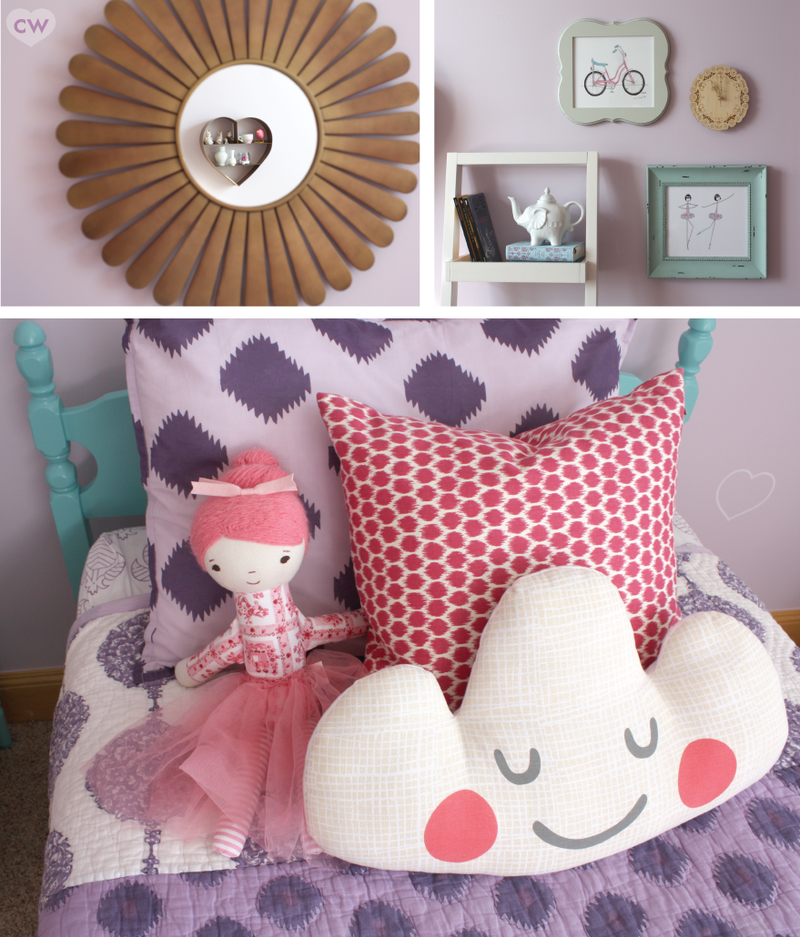
As soon as we bought our home, I started dreaming up a plan for my daughter's room. You might remember my inspiration board here. I really underestimated the time it would take to give her room a complete transformation…so my progress felt very slow. But at long last, it's done! 

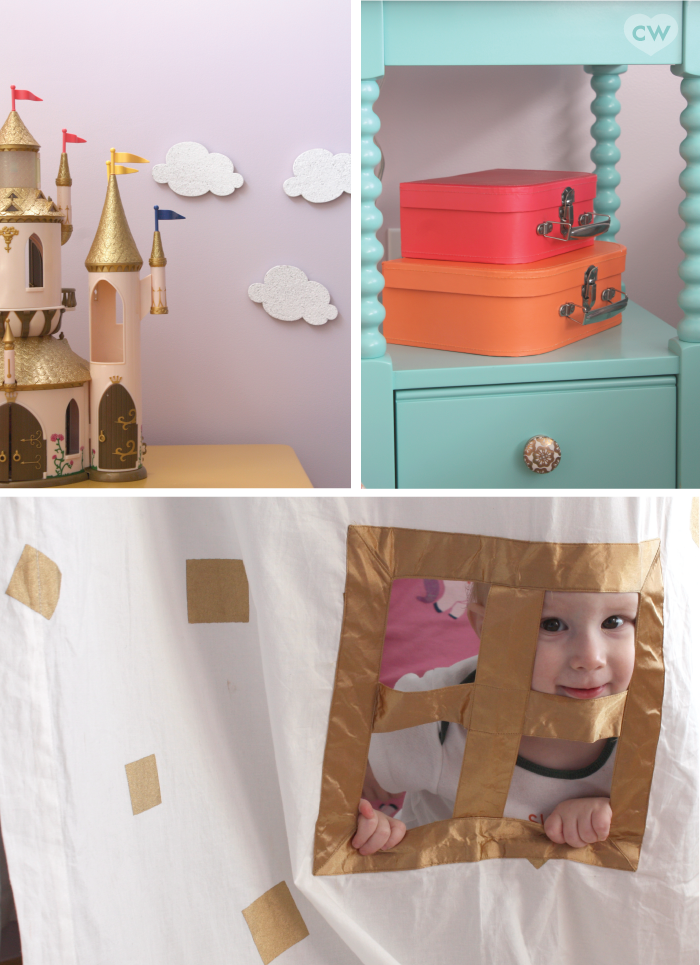
We are absolutely thrilled with the completed project! I deviated from my original plan when I decided to install the beautiful play tent and ditch the wallpaper. I wanted the wallpaper at first, because a) it's darling and b) the one wall was heavily damaged and I didn't know if I'd be able to repair it. A quick lesson in sheetrock repair from my dad and I was able to save the wall. Hooray! Once the tent came into the picture, I wanted the walls to be a little more colorful so the tent would stand out. 

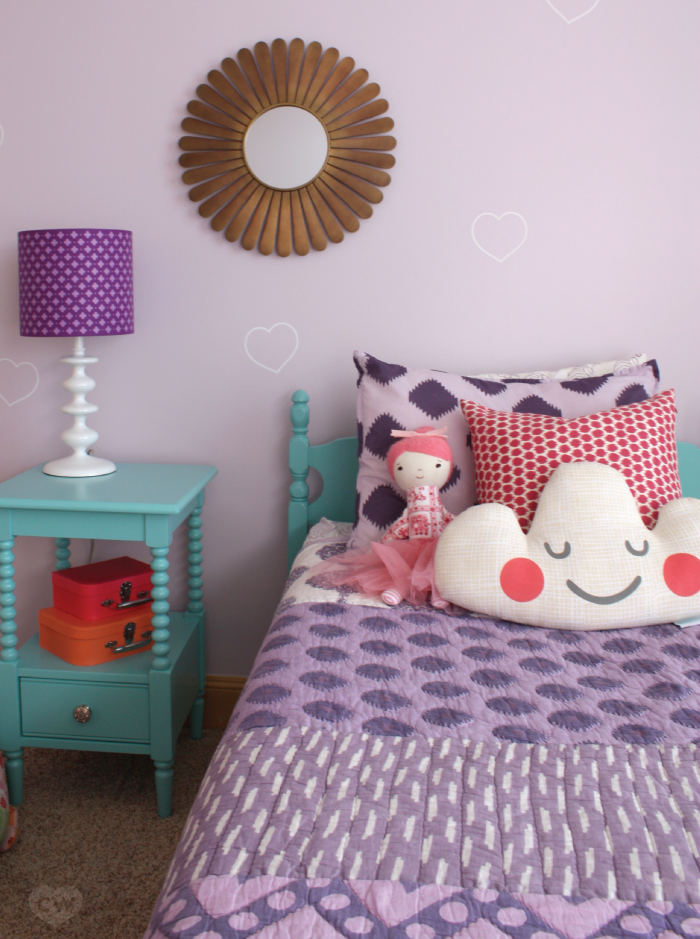
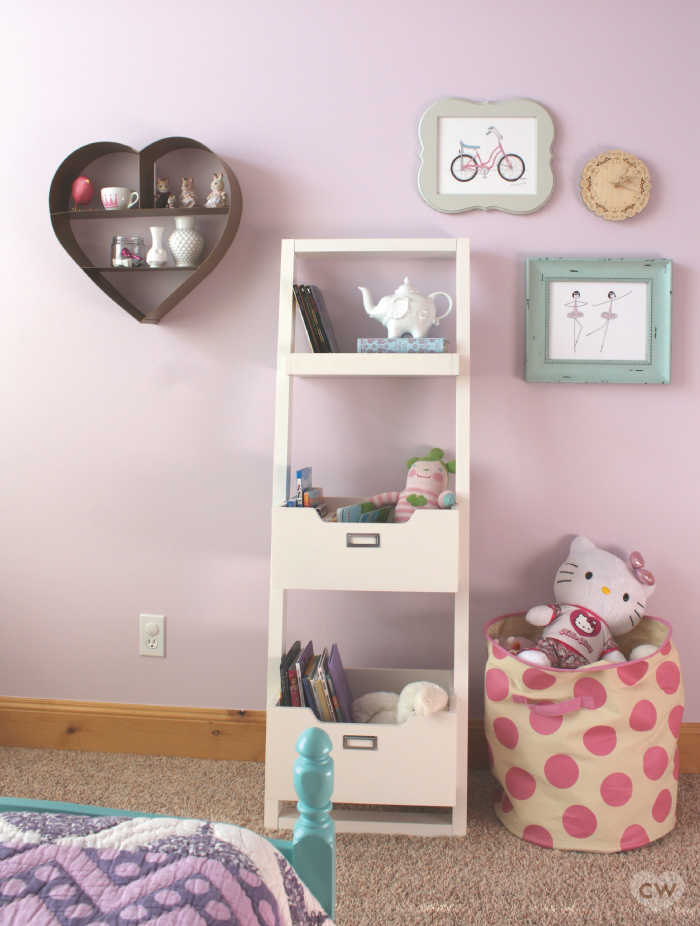
So here we are. I painted the room, added some vinyl hearts for an accent wall, and then the fun began. I arranged and re-arranged the furniture to suit Charlotte's needs. We hung the tent, loaded the bookshelves, and settled right in. 

Charlotte's Room-02

Despite her unwillingness to have her photo taken, Charlotte really loves her room. And her brothers really love playing in her "castle" as well. The tent has become a fast favorite of the entire family. It's the best story time spot in the house; it's great for both hide-and-seek and teddy bear picnics. Charlotte and I have even fallen asleep in the tent a time or two. Some nights, after I think everyone is asleep, I'll hear whispers and see the beams of two flashlights concealed within the castle walls. It's childhood magic at it's very best.

Charlotte's Room-08

Charlotte's Room-05

Charlotte's Room-04

Charlotte's Room-03

Charlotte's Room-06

Charlotte's Room-07

Here are all the adorable Land of Nod products featured Charlotte's Room:

Handpicked knob, gold floral

Jenny Lind nightstand in Azure

Glow Lightly Table Shade

Checkmate Table Base

Bazaar Bedding

Sunburst Mirror

Head in the Clouds Pillow

Heart of Gold Wall Shelf

Mini Cloud Corkboards

Cloud Corkboard

Wee Wonderfuls Agnes Doll

Home Sweet Play Home Canopy

Gold Confetti Floor Cushion

Little Felix Chair

Bon Voyage Suitcase Set

Dotted Floor Bin

Little Sloane Leaning Bookcase

All of the artwork is from Etsy, and the bed is vintage. Stop over to my blog for more details and decorating sources along with before and after photos. I have several other DIY projects coming up for this space…so I'll share those as they're completed. Just imagine a hot pink and glittery gold play table. Fingers crossed I can pull it off!

Signature

Christina Williams is a blogger and graphic designer living in Salt Lake City, Utah. She's a night owl and a bookworm, as well as a mother to three children ranging in age from two to eight. She shares her latest DIY and design projects along with her adventures in parenting on her blog, Just Call Me Chris.

Confetti Birthday Party: Favors

January 10, 2014

1

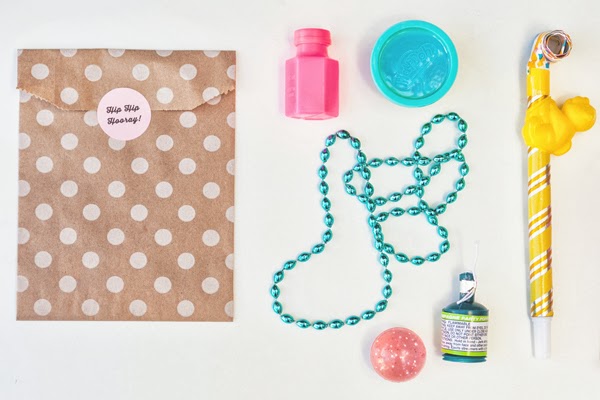
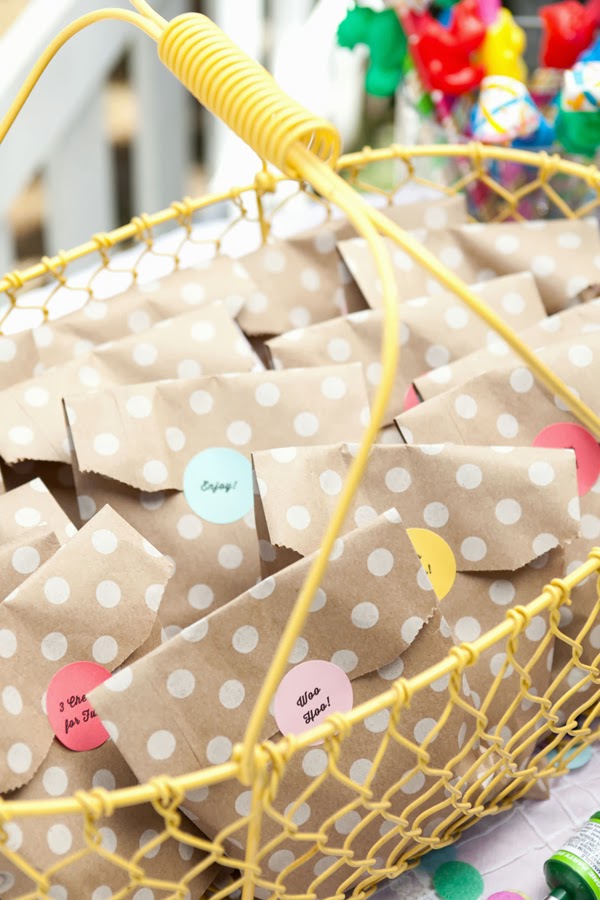
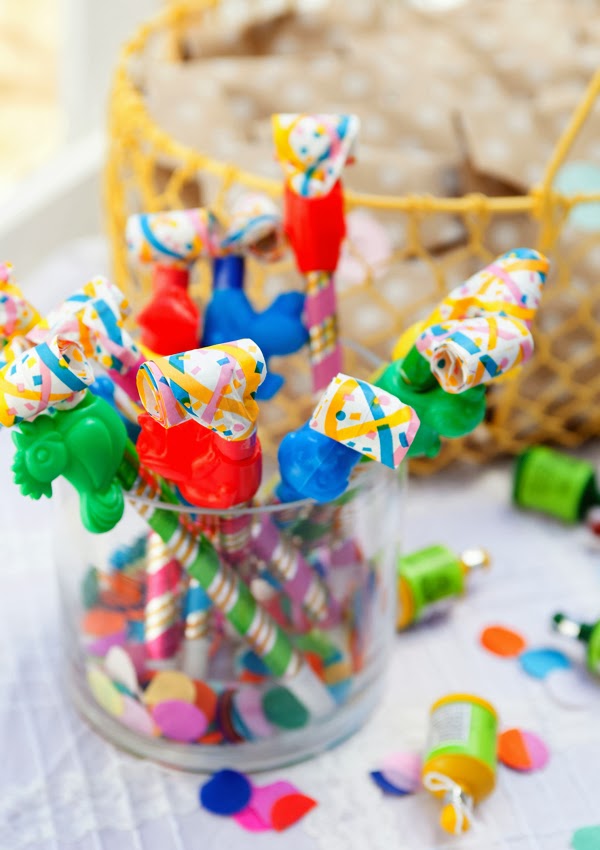
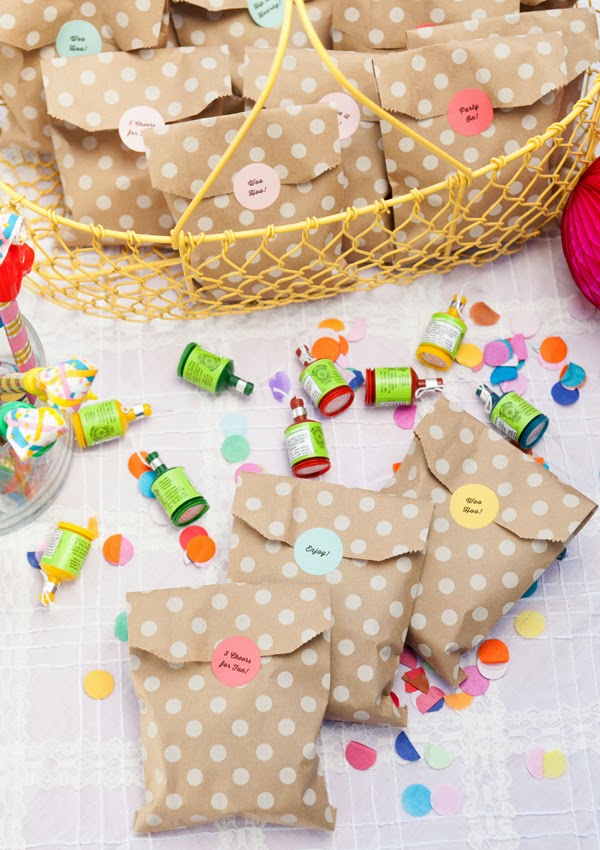
I hope you've enjoyed all the "3 Cheers for Caitlin" party details this week!  Did I mention how much fun it was to put together?  These favor bags were meant for the kids, but there were a few items that went over pretty well with the grownups too.  I'll leave it to you to guess which.  I filled kraft paper treat bags with playdoh, bouncy balls, mardi gras beads, bubbles, poppers and a 'party animal' blower… and of course, I threw in some extra confetti for a surprise (ie: mess) at home.  I labeled them with phrases like "woo-hoo", "hip hip hooray", "party on"and "3 cheers for fun".  Done and done!

2

3

4

Well that about wraps it up. A great big thank you to everyone who contributed and a special shout out to my friends at Shop Sweet Lulu for being the source for all things party pretty!

But wait, there's more… have you seen the rest of this party yet?  Click here: Invitation + Decorations  Food + Drinks  Activities 

Post by Becca:  CAKE

Pattern, Texture & Colour – Creating a New Playroom & Office

January 9, 2014
Playroom-1-802x1208

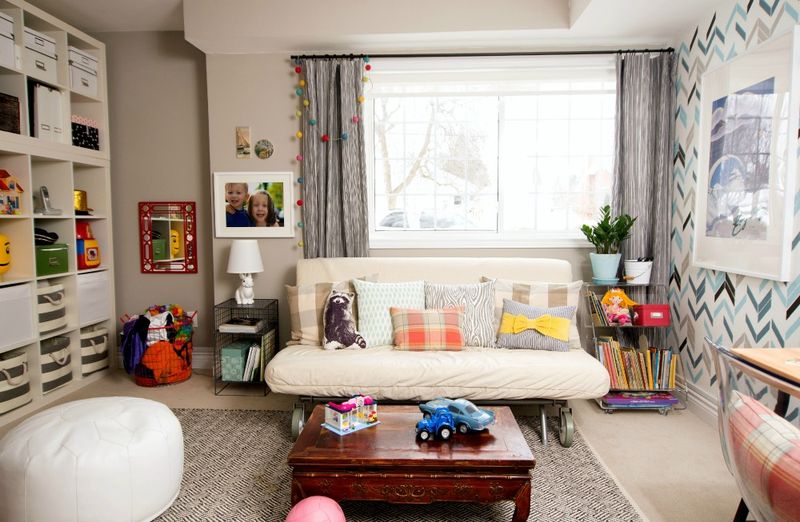
I’ve been sitting on this big reveal for months now – impatiently waiting to share this great space with you. I’ve been working on this room with the Land of Nod since late summer. I’ve been contributing to the Land of Nod blog for over a year now, and luckily I had a chance to have them help me transform our how-hum multipurpose room into a comfy and welcoming space we can use every day.

My favorite thing about the Land of Nod brand? I love how their products are appealing to kids, but can fit into an adult space. They offer high-quality home decor items that I’d want even if I wasn’t furnishing a playroom. And how appealing their things are is evident in how we used their items in our playroom/office/guest room. It’s a space we play in, a space we work in and a space we have people stay when they visit. Everything works well together, it’s efficient and no longer looks cobbled together.

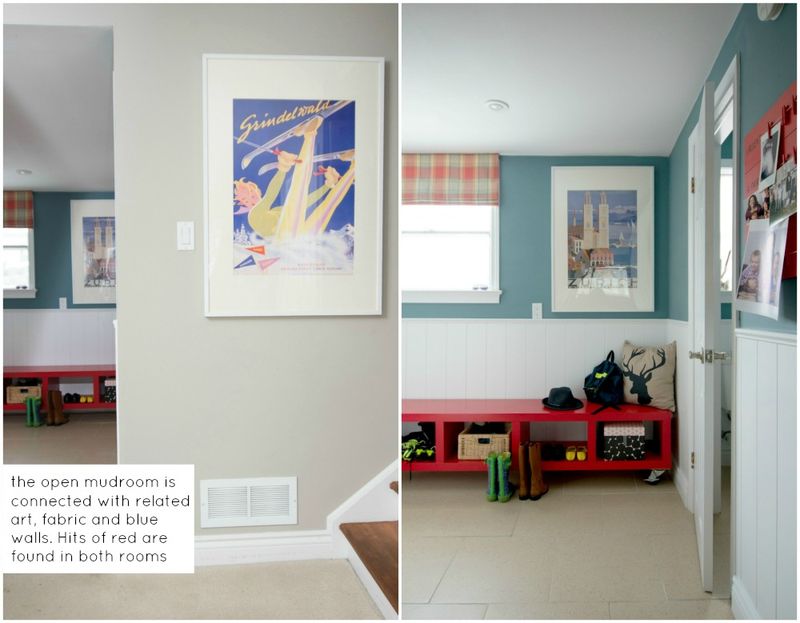
So, let’s take a tour together – our playroom/office and sometimes guestroom is on the main floor, a couple of steps below our kitchen and living/dining room. This room is a challenge in many ways, as it not only serves multiple purposes, but also has the door to the basement and connects to the mudroom. Tackling the odd layout (3 doorways, 1 window, 9 corners) was our first challenge – after that, Danielle Kurtz, the awesome Creative Director at Land of Nod created a shared Pinterest board where we could share our ideas and decide on a design direction.
Playroom-10

Playroom-12

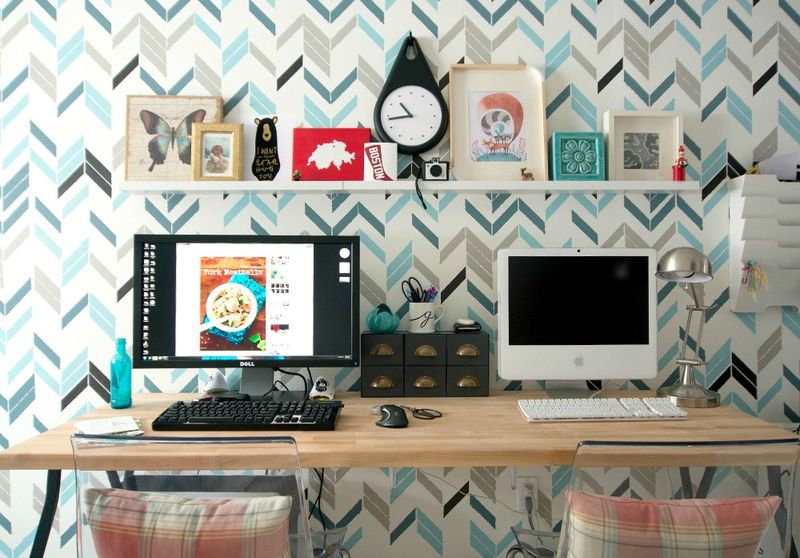
I wanted to ensure that the room connected visually to the mudroom that was visible through a large open  doorway, but we also wanted to add some interest to a 14 foot long wall that you see right when you enter the room. We decided to make it the focal wall and to create different zones throughout the space. After pinning many things we liked, we saw a theme. ‘Woodland Inspired Menswear’ is the direction we were going…something playful, but masculine – a mix of patterns and textures with some tongue in cheek references to woodland animals. Neutrals and pops of colour here and there – just like you’d add a fun tie or a checked shirt. 
Playroom-11

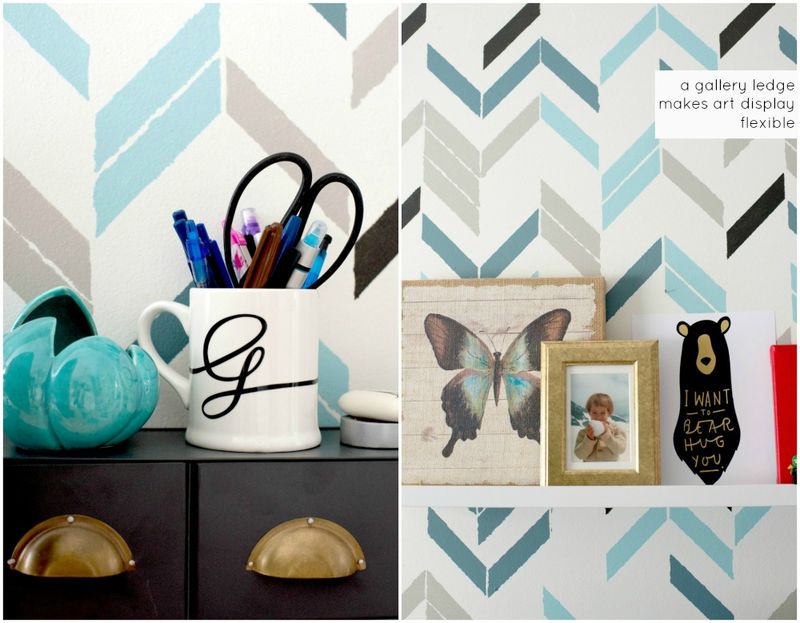
We looked at different wallpapers for the feature wall and considered a hounds-tooth pattern and a buffalo check, but I was drawn to different versions of herringbone. I couldn’t find wallpaper that matched my colours or scale, but I did find a stencil. So that’s what I did – I stenciled and stenciled and stenciled some more. Albeit far from perfect, I love the end result, but truth be told, it was tedious and painful and I would not do it again. My stenciling days are over! (I also have to do some touch ups on less than perfect edges, but I’ll get to that later this year)

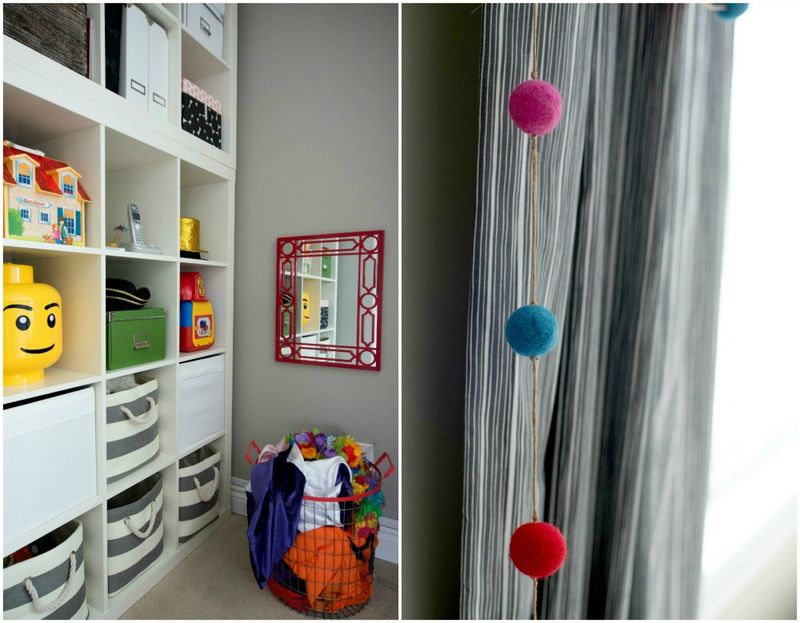
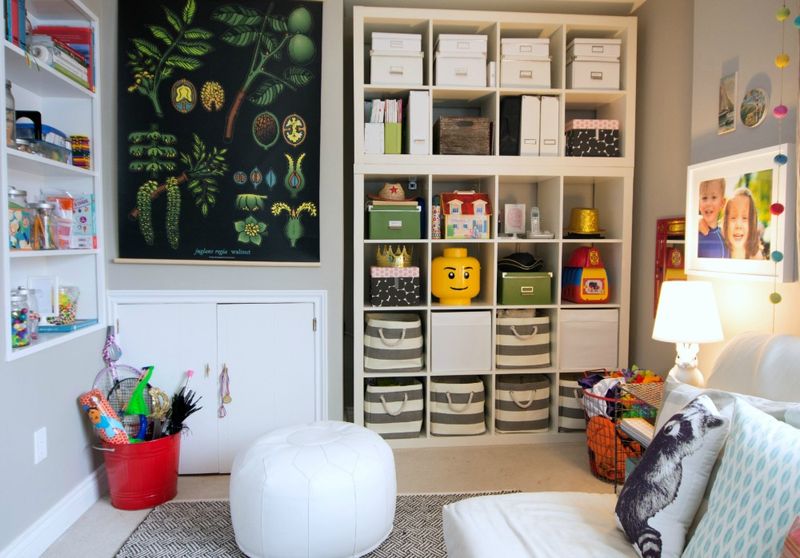
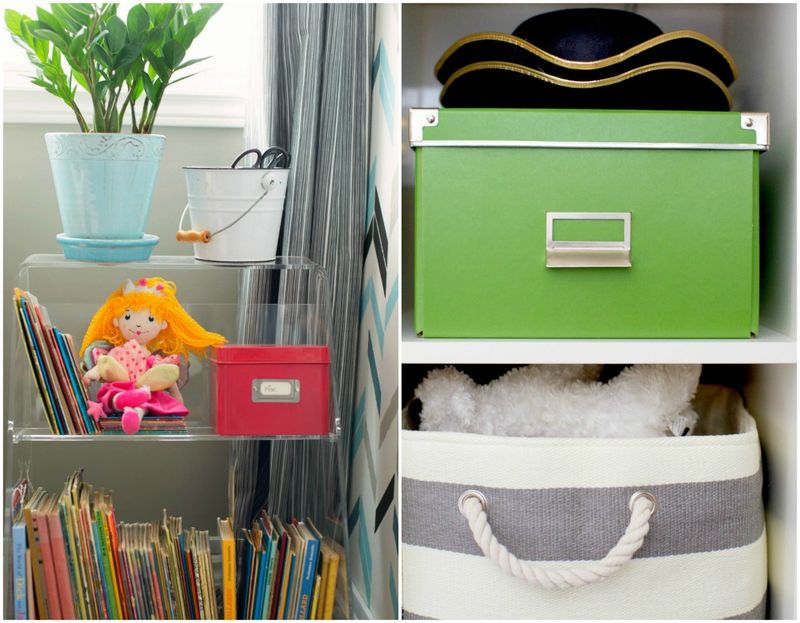
In addition to the feature wall, we also created a double desk area, put in place a shelf and a book trolley next to the sleeper couch, added an area rug, a coffee table, extra seating, a large storage unit and tons of baskets and bins to store our toys, craft items and office supplies.

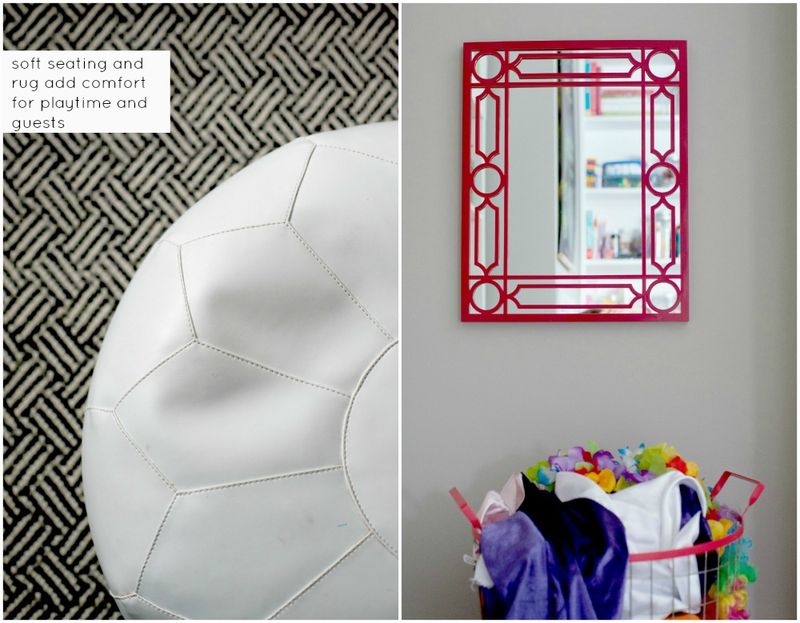
A fun light added whimsy to the space and serves as a perfect reading light. Adding a low hung mirror above the dress-up basket encourages play. The acrylic book trolley helps the space not go too country, is light and airy and references the acrylic office chairs. It’s also the perfect space to keep all of my husband’s old children’s books.

Three large scale vintage style Swiss travel posters have a big impact on some big expanses of wall and connect different areas of the room, while maintaining some of the blue colour palette. Adding a picture ledge above the desk allows for a fun rotating gallery and display of small items.
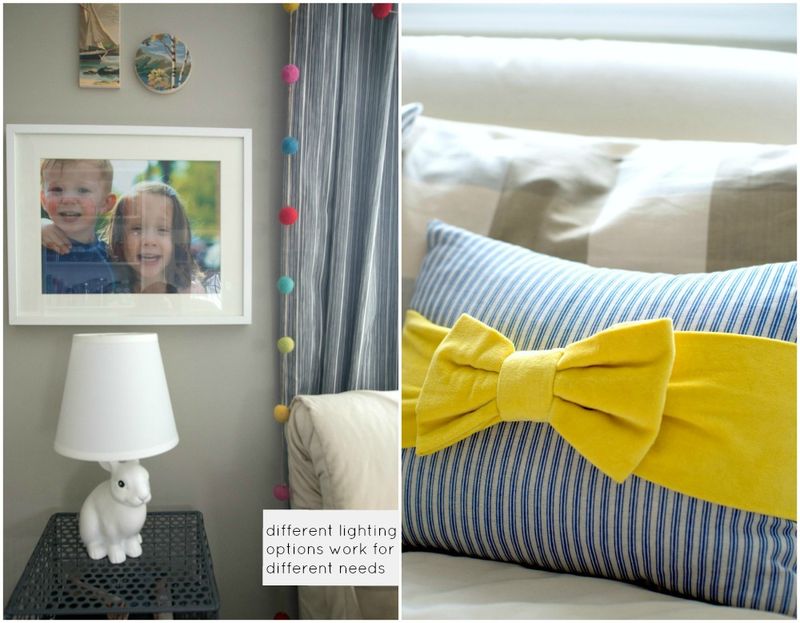
Playroom-3

Playroom-4

Playroom-5

Once the wall was stenciled, the walls were painted and the rug placed, I turned to my friends at Tonic Living for fabric. I wanted the menswear inspired patterns and textures, but I also wanted that take on the woodland theme we were looking for. We opted for a dark grey pinstripe fabric for the window panels to give some weight to that wall and connect it to the darker colour on the feature wall. More grey and a obvious woodsy feel was brought in with the willow pillow. We introduced the light blue colour and referenced the wall pattern by adding the spice market pillow. Small lumbar pillows in a red Herringbone were added to the office chairs and two covers for the existing sofa bed pillows were made with a neutral buffalo check fabric. I also added the fun raccoon pillow and bow throw pillow from the Land of Nod.
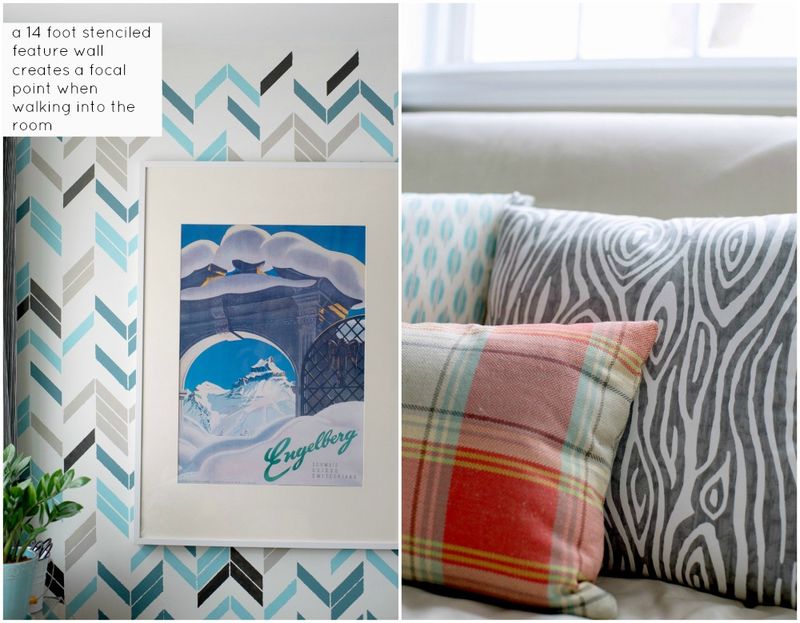
Playroom-6

Playroom-8

We made two mall changes to the mudroom. We replaced the window treatment with a faux roman blind made from the same red herringbone fabric as the pillows. The texture, pattern and colour of the fabric work well with the new large Zurich poster, but also connect the room to the playroom/office.

We also sprinkled bits of red throughout the room to connect to the red bench in the mudroom. Examples are art on the picture ledge, lumbar pillows, buckets and baskets and the small mirror. While the main colours are grey, white and shades of blue – adding pops of red, yellow and green make the space less contrived and more manageable.

Until we finish the basement (next project on the list!), we decided to keep our existing sleeper sofa. Once our guests can move to a separate space, I will upgrade to the twin sleeper in a darker shade of grey. The smaller scale will work better in the room and the darker grey will ground everything a bit more. I also decided to use my vintage low chinese coffee table – I like the size and height and the dark work wood tone brings some warmth to the space and plays well off the acrylic and metal elements in the room.

Whew – I think this is the longest post I’ve ever written! This was such a fun project – so much work went into this and I can’t thank Land of Nod and Tonic Living enough for working with me on making this space a great place for everyone. I hope you are inspired to tackle that odd space, that forgotten corner.

Get the Look:

Wall colours:

  • Grey walls: Thunder by Benjamin Moore
  • Blue in mudroom and on feature wall: Blue Echo by Benjamin Moore
  • Light blue on feature wall: Sunken Pool by Martha Stewart
  • Dark brown on feature wall: Willow by Benjamin Moore
Playroom-9

Playroom-7

Post by Giulia Doyle : Audrey's 

Confetti Birthday Party: Toddler Activities

January 8, 2014

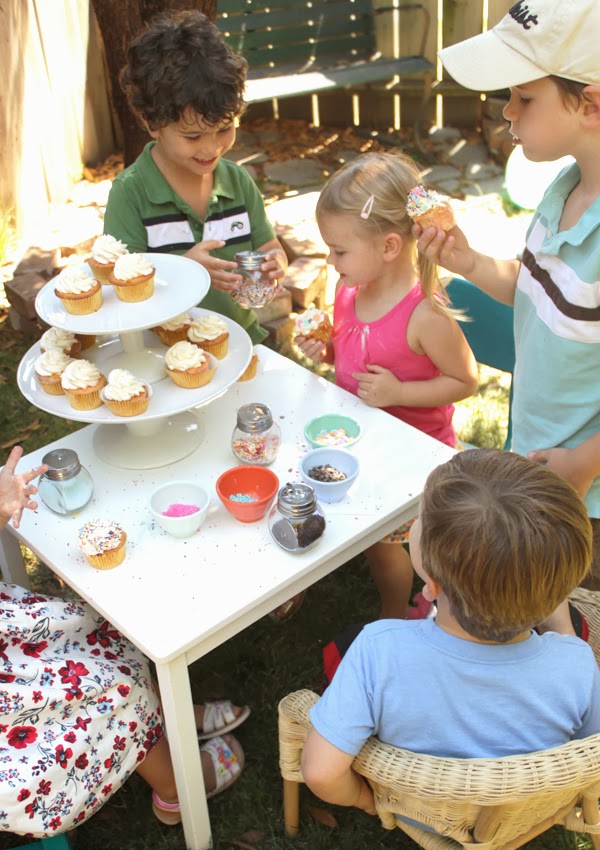
My husband and I had so much fun thinking up activities for Caitlin's "3 Cheers" confetti party.  We didn't want anything too structured, but decided instead to have a few stations set up to keep the kids entertained.

2CAKE_confetti_cupcaketable

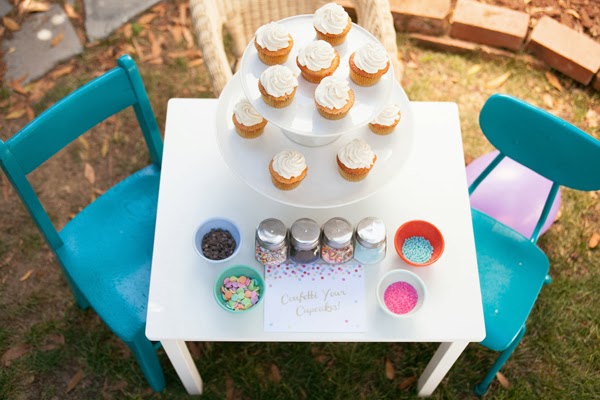
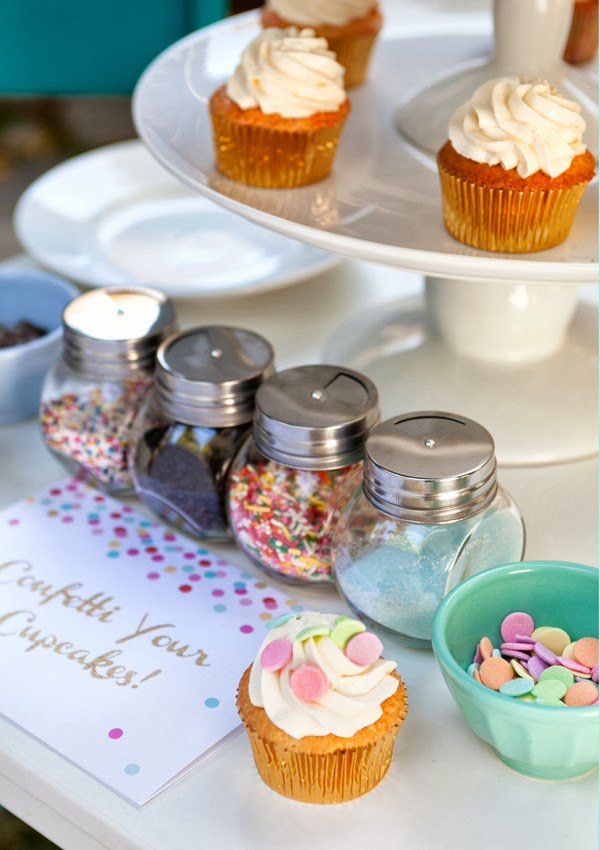
The start of the show had to be the 'Confetti Your Cupcakes' area.  Undecorated vanilla cupcakes were set up at a kid sized table with 8 kinds of sprinkes in shakers and little bowls.  I was mildly worried about toddlers knocking the cake plates over and making a giant mess, but they were surprisingly well behaved.  Their parents were there to help of course, but I think the kids treated the sprinkles with a kind of reverence because they were just so pretty.  One of Caitlin's friends actually camped out at the table and would decorate her cupcake, lick off the sprinkles and then re-decorate it. Girl after my own heart.
2

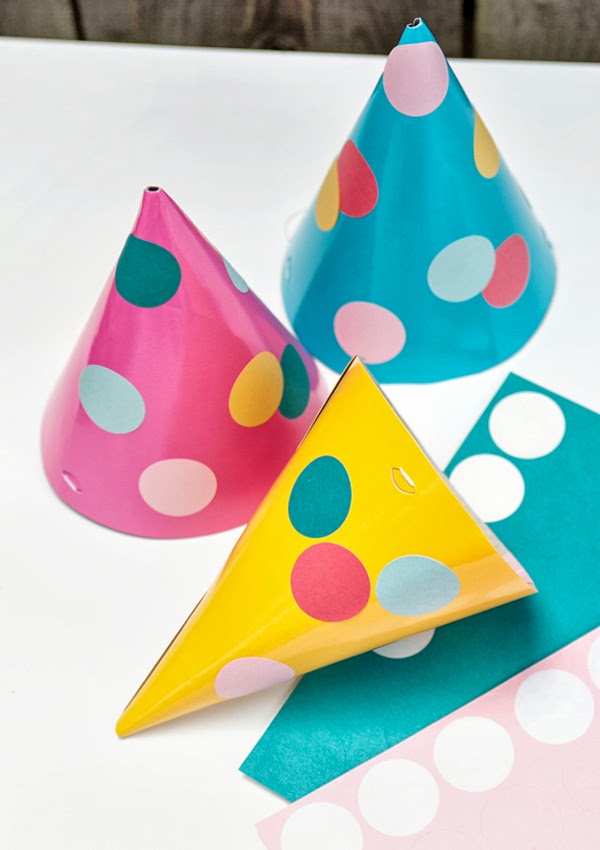
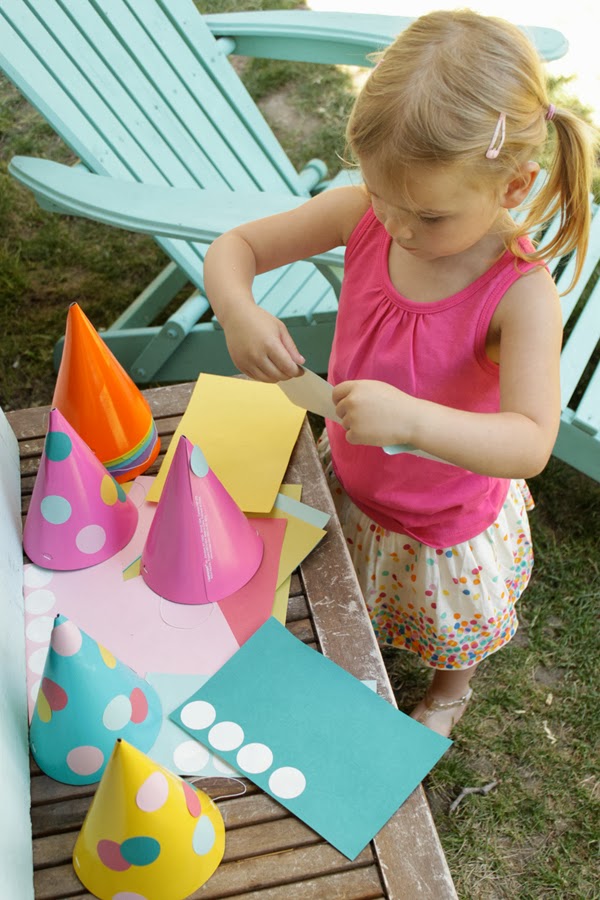
The party hat station was a pretty big hit too. I bought a bunch of 1" colorful circle labels from Paper Source, so all the kids had to do was peel off the dots and apply them to their hats. Little kids are obsessed with stickers and mostly just like to peel them, so some of them may or may not have ended up on clothing, skin and other party decorations… don't say I didn't warn you.
 
3
4
5
 
6

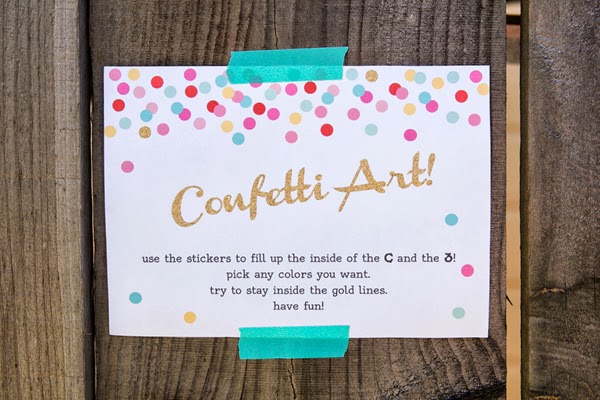
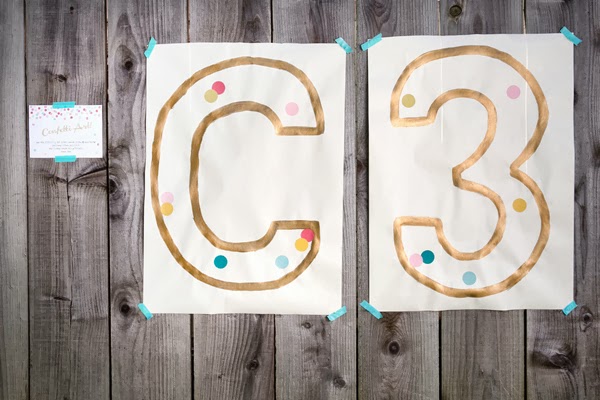
The Confetti Art station didn't get very much use, which I was bummed about because it was my absolute favorite idea.  I was inspired by this art installation to have the kids fill in giant posters with colorful stickers (same ones used for the party hats).  I thought I might even frame them if they turned out well.  I did one in a C and one with a 3… I'm going assume you understand why, but my husband was quick to point out that all the dads would think I was making a Star Wars reference.  Men are nerds.  The kids didn't spend too much time with it (though to be fair, I neglected to mention there was also a bounce house…), so I recommend if you want to try something like this that you make it a competition to see who can finish first.

7

A special thank you goes out to Sherry Heck for spending the day on her pregnant feet so she could capture the details on camera. All images of Caitlin and her party guests are my own.

Post by Becca:  CAKE 

Moving Out of the Nursery is as Easy as 1, 2, 3.

January 7, 2014

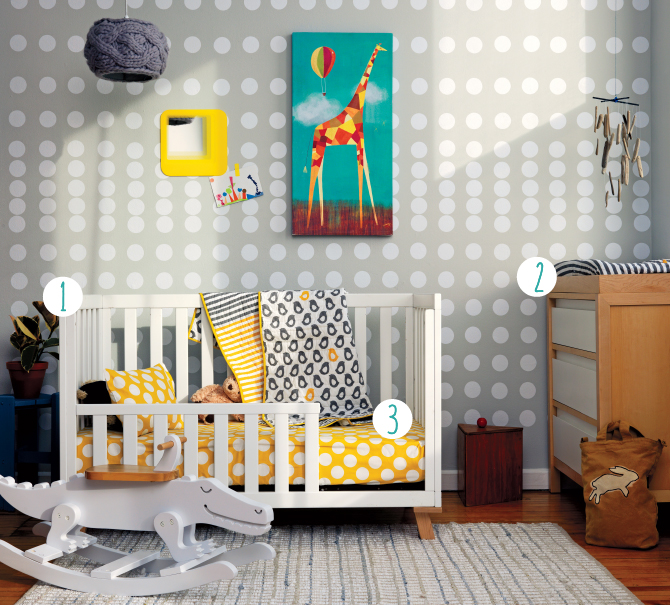
Saying bye-bye to the nursery doesn’t mean saying bye-bye to all your existing furniture
and décor. Save money and time by repurposing items you already have.
3stepsNursery_blog_01

Convert your crib into a toddler bed. Using a conversion kit will allow you to turn
your existing crib into a toddler bed, making the transition easier for your little one, as
well as yourself.
3stepsNursery_blog_02
Low-Rise Crib White w/Maple Base $899 Conversion Kit $119


Turn your changing table into a dresser. Rather than invest in a changing table, add a changer top to your dresser. When you’re done with diapers, just remove the top to make it a dresser again.

3stepsNursery_blog_03
Andersen Dresser Maple $699  Changing Tray and Pad Set  Maple $149Changing Pad Cover Grey Stripe $35


Add toddler sheets to your crib bedding. No need to buy all new bedding. Just mix
some toddler sheets in with your current bedding and voila! You now have a complete set of
toddler bedding.

3stepsNursery_blog_04New School Crib Bedding Quilt Not a Peep $79 Toddler Sheet Set Yellow Dot $39

Confetti Birthday Party: Sprinkled Treats

January 6, 2014

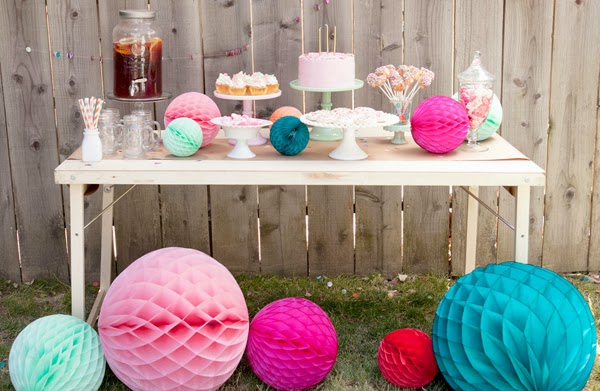
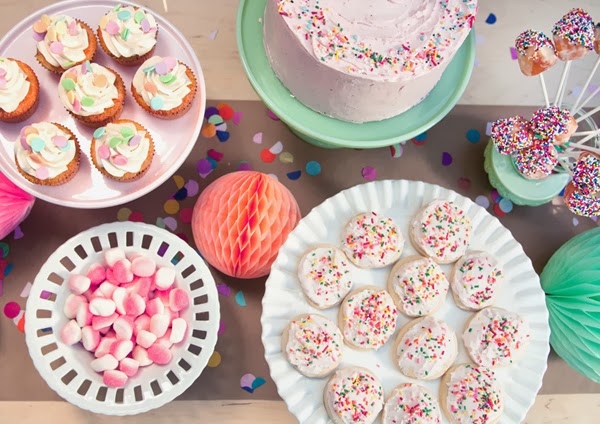
Who doesn't love a sprinkled party treat?  Wait, let's make that 5 kinds of sprinkled party treats!  Today I'm sharing the eats & drinks from Caitlin's "3 Cheers" confetti birthday… and stay tuned for more details throughout the week.

1

2

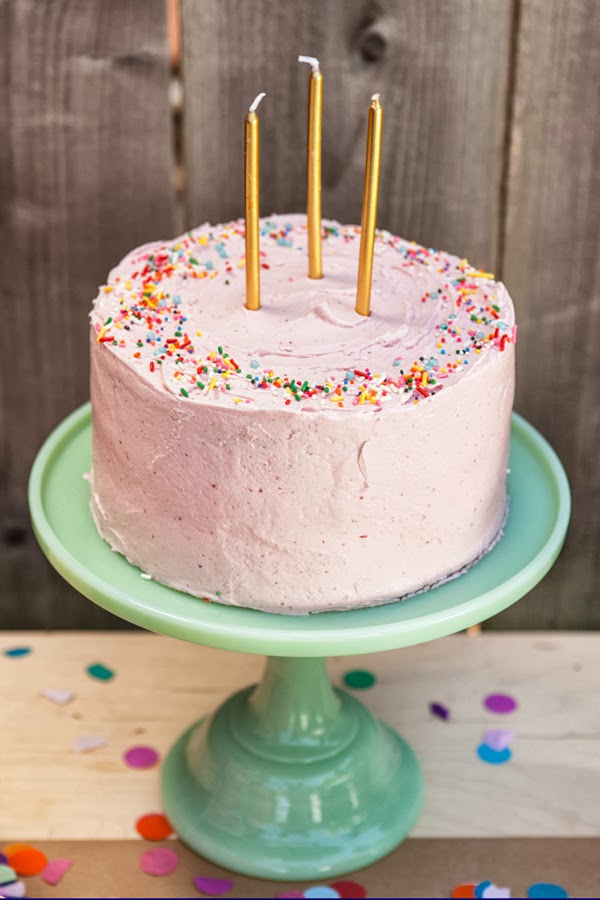
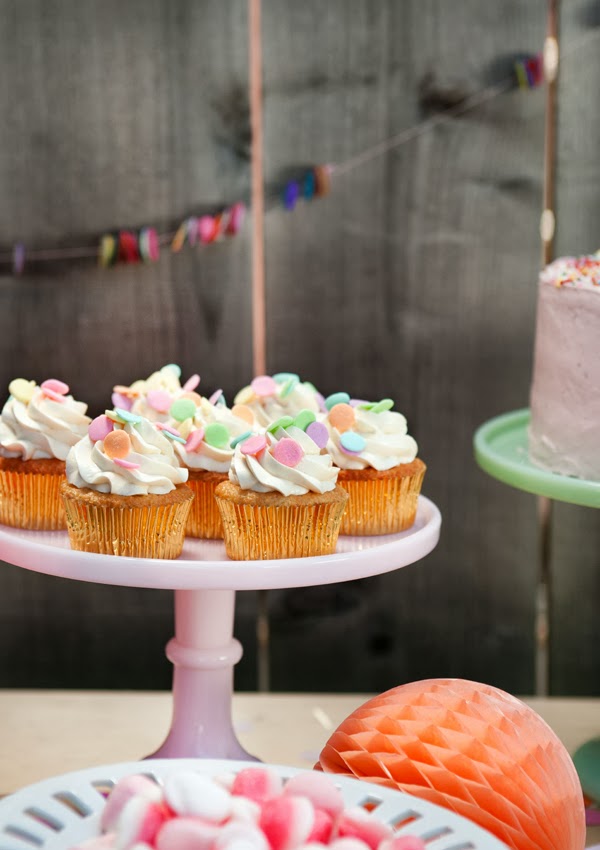
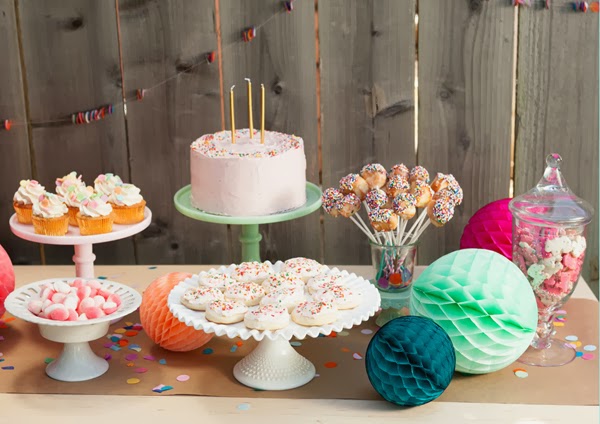
Let's talk about this beautiful cake, shall we?  Michele of Cakewalk Baking created both the cake and cupcakes.  The inside was Funfetti vanilla and the cake was frosted with the most delicious fresh strawberry buttercream.  We topped it off with a variety of sprinkles and these awesome gold metallic birthday candles.

3

4

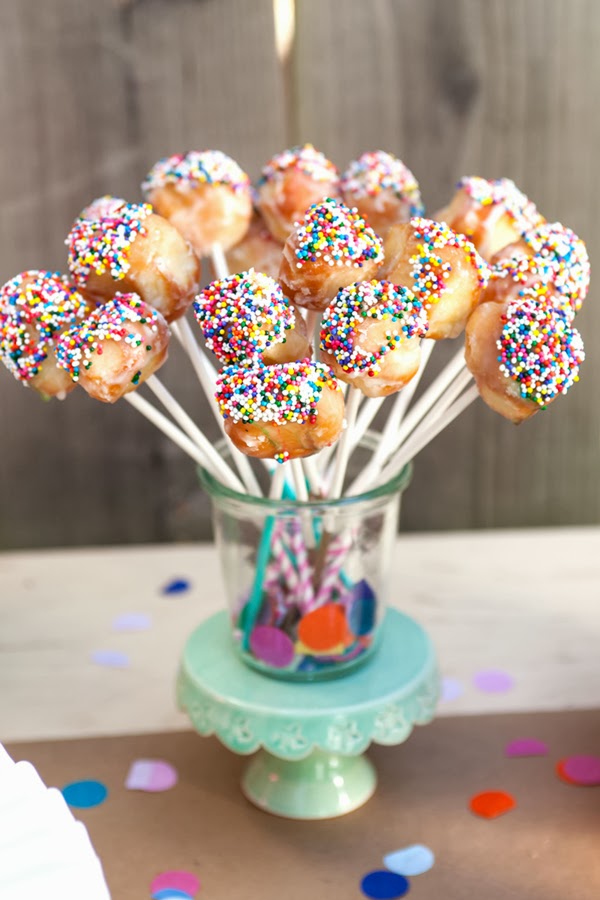
My favorite, though messy, creation was definitely the doughnut pops. I picked up 2 dozen glazed holes from our local donut shop and attached them to lollipop sticks wrapped in washi tape.  I just brushed on a little extra glaze and half dipped them in rainbow sprinkles for that happy confetti'ed look.

5

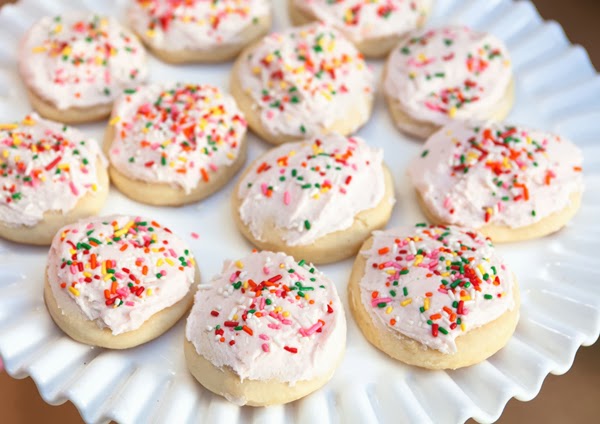
I took on the cookies from this lofthouse style recipe I'd been dying to try.  They were way more work than I would have guessed… probably because I waited to bake them until the night before and didn't realize the dough is supposed to be refrigerated overnight before rolling.  Friends, don't neglect that step and you'll thank me later.  In the end, the recipe made lots and they tasted far better than their processed grocery store counterparts, so it was worth the effort.

6

7

Rounding out the snacks we had a bit of gummy candy along with typical toddler food like circus animal cookies, fruit salad and goldfish crackers.

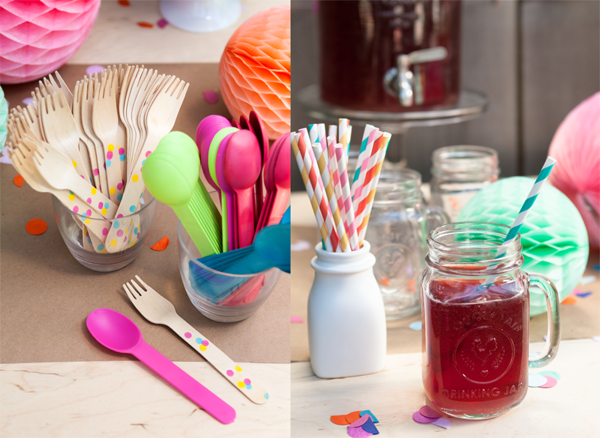
In addition to juice boxes for the kids and booze for the grownups, I also made my own fruit punch complete with 'fruit confetti'. I basically made up the recipe by pouring a few different juices (apple, white grape, cherry, pineapple) and some sparkling water into our large mason dispenser and filled it up with round slices of lemons, limes and oranges.  (ps: it would taste great mixed as a cocktail too… if you happened not to be entertaining a bunch of three-year-olds)

8

Post by Becca: CAKE

Krafty Fun with The Land of Nod

January 3, 2014

Remember how I teased you guys about the event I hosted at The Land of Nod? Well, it’s about time I shared the details!

The Land of Nod is one of my family’s favorite places to not only shop and hang out, but to also be inspired. A single trip always leaves us, well maybe only the ladies in our family, dreaming of our dream bedrooms. I say we because the furnishing you find appeal to both the young and the young at heart. You will find pieces that will really grow with your children – en trend, yet classy enough to use in a ‘big kids’ room (aka grown up room).

Now back to the craft.

1

Isn’t it crazy how you can be so excited about something, but yet, be so consumed with fear at the same time. The days and weeks leading up to the event left me a huge ball of nerves. Would the craft be too difficult? What if no one showed up? Or worse, what if I ran out of supplies? These thoughts were all silly really. Silly because everything went perfectly – better than I could have imagined!

2

3

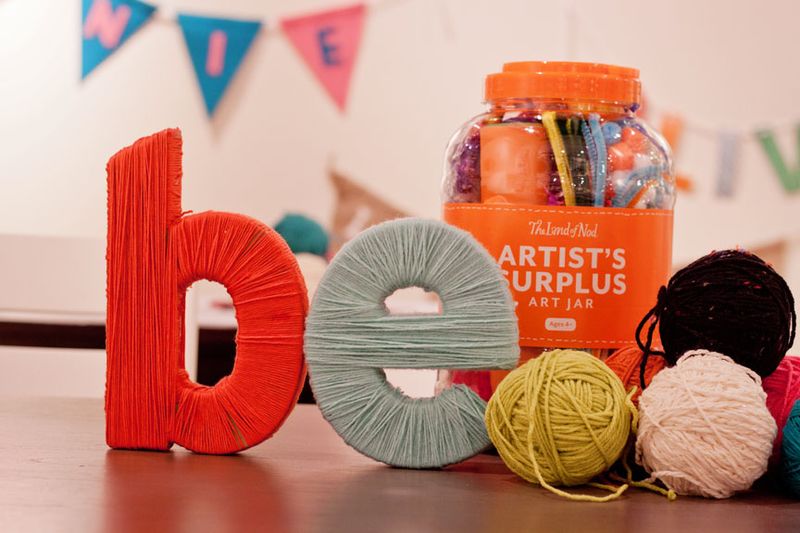
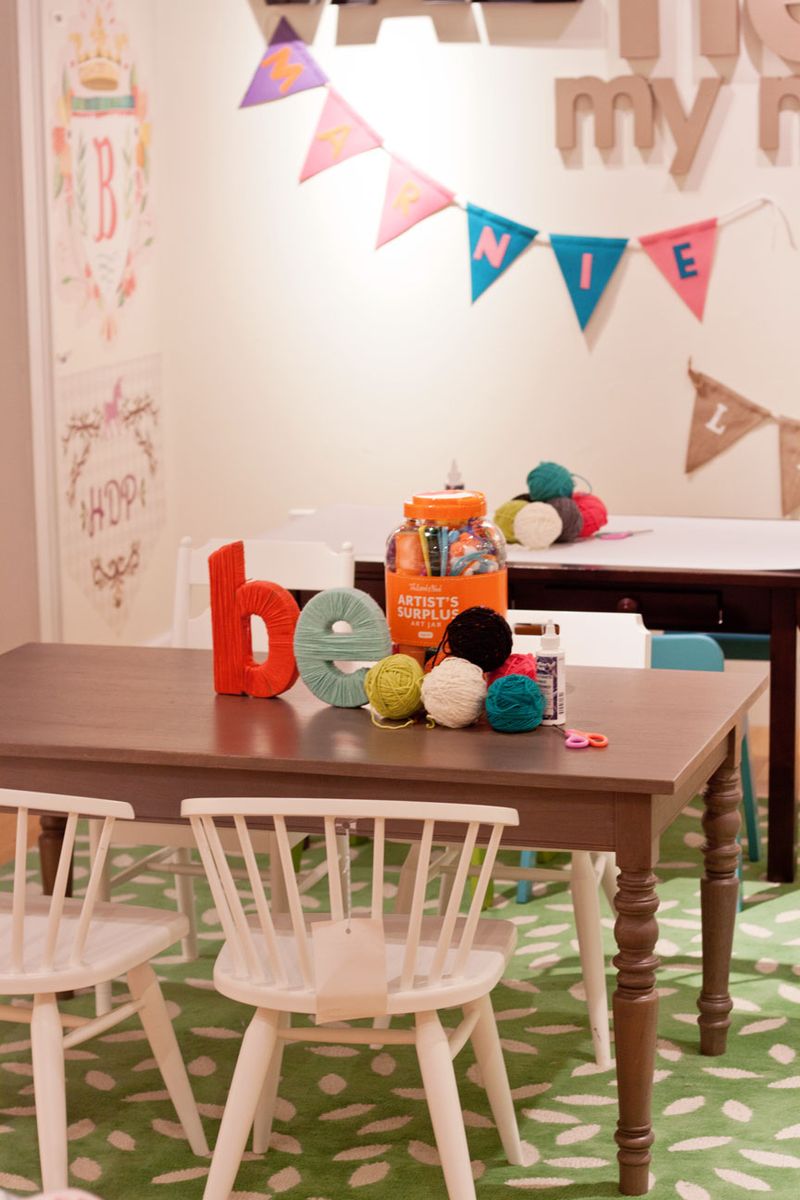
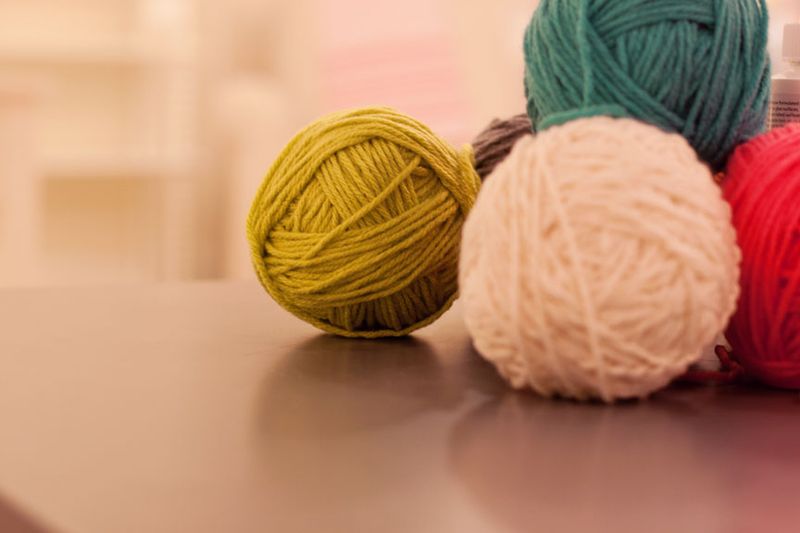
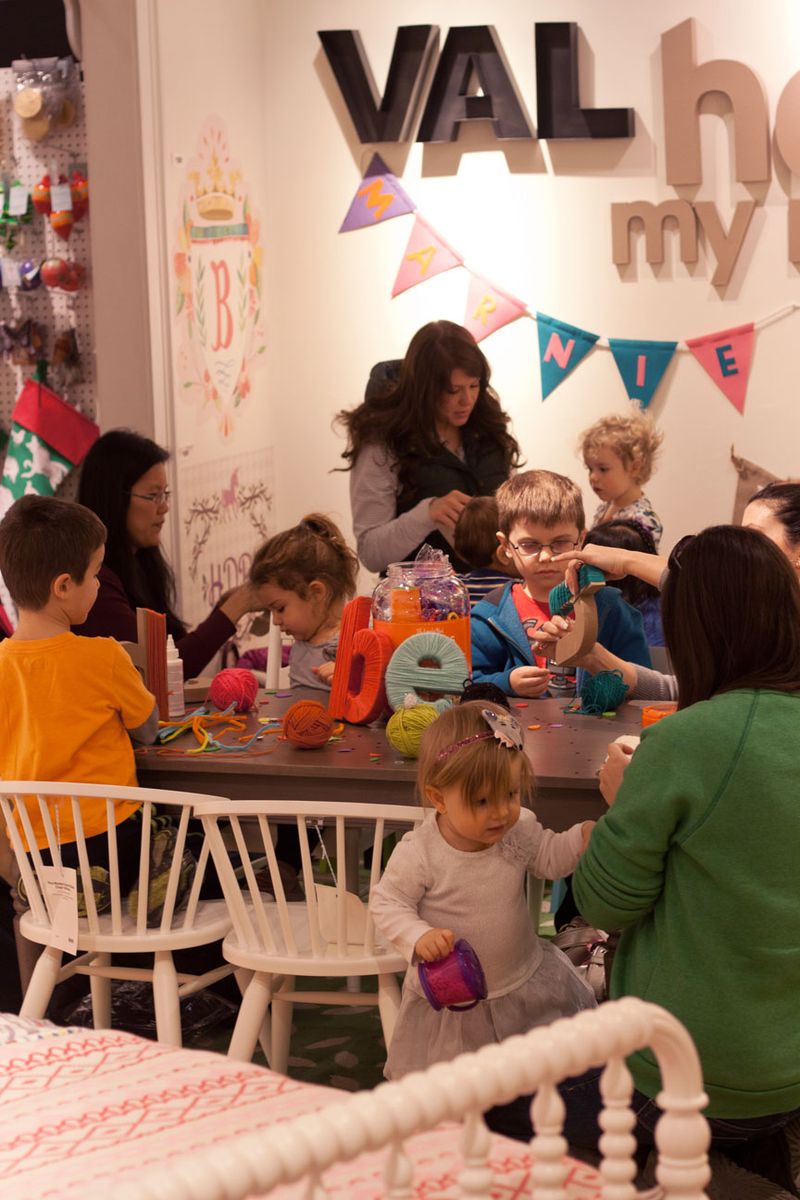
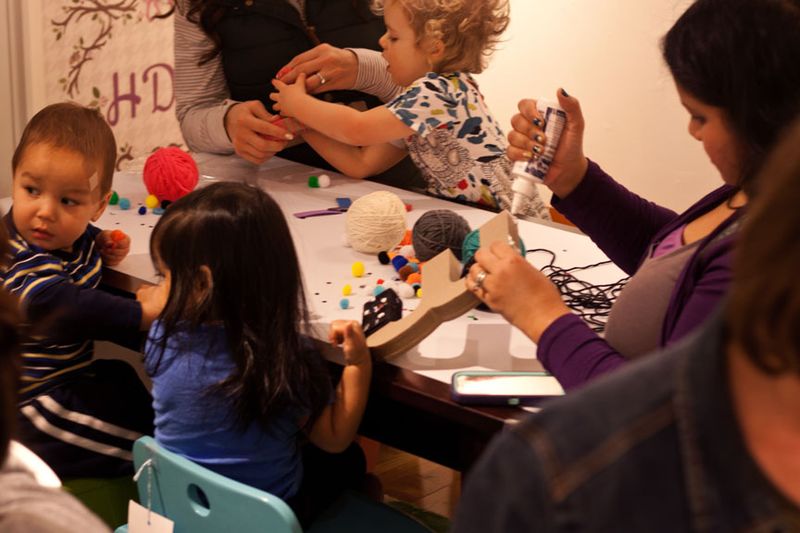
We made yarn wrapped kraft letters. The Land of Nod was super generous and provided the letters and everything else needed to have a wonderful time and create something special.

4

While I worried that the craft may be too difficult for smaller hands, it was a worry that soon disappeared. What could have been a massive failure on my part turned into something magical. With the help of their mamas, their tiny hands created mini masterpieces. Together they transformed something rather plain into something unique and beautiful. But more beautiful than their letters, are the memories they made together in my small sliver of time. Hopefully seeing the letter they made proudly displayed in their own homes will bring back fond memories of the time they spent together that day.

5

In the end, the event was a success. Crafts were created. Memories were made. Moms were able to connect with other moms. I so enjoyed meeting everyone who stopped by, just like their children, they were all so sweet and lovely. It was an amazing experience, and I am so very thankful that I had the opportunity!

Post by Andrea : Life by Andrea Victoria 

Pink Ombré Vanilla Cake

January 2, 2014

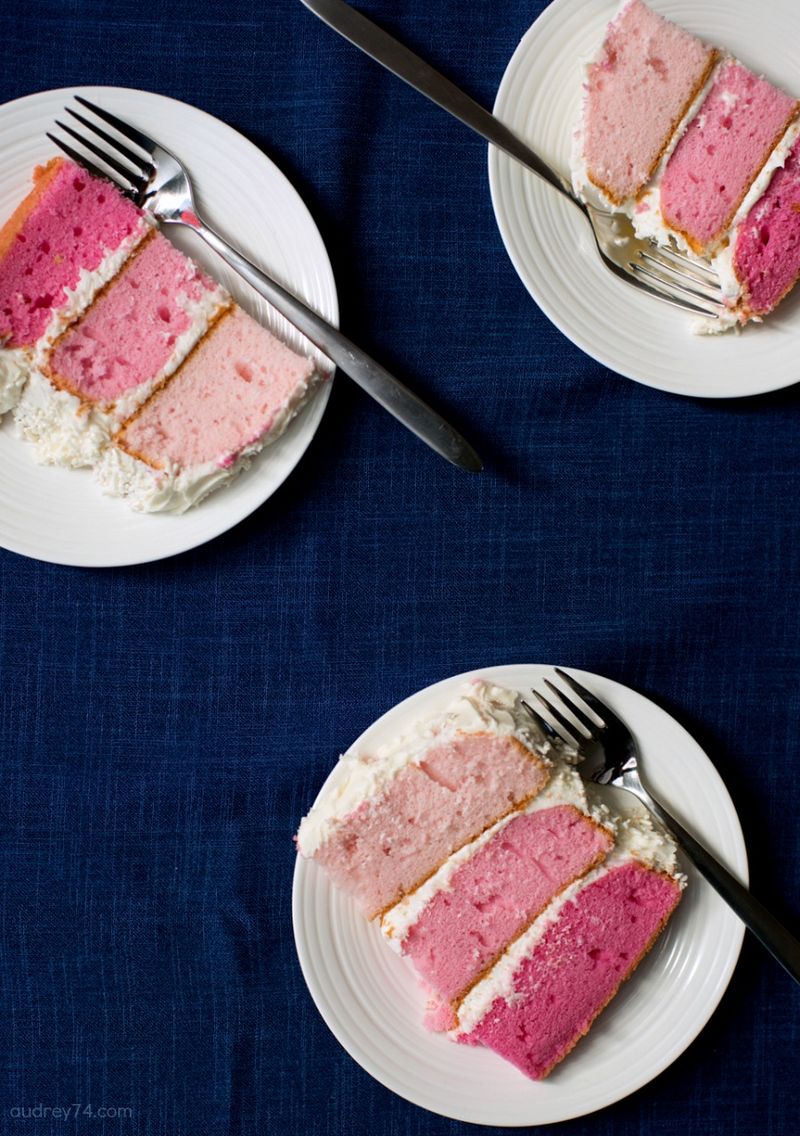
1

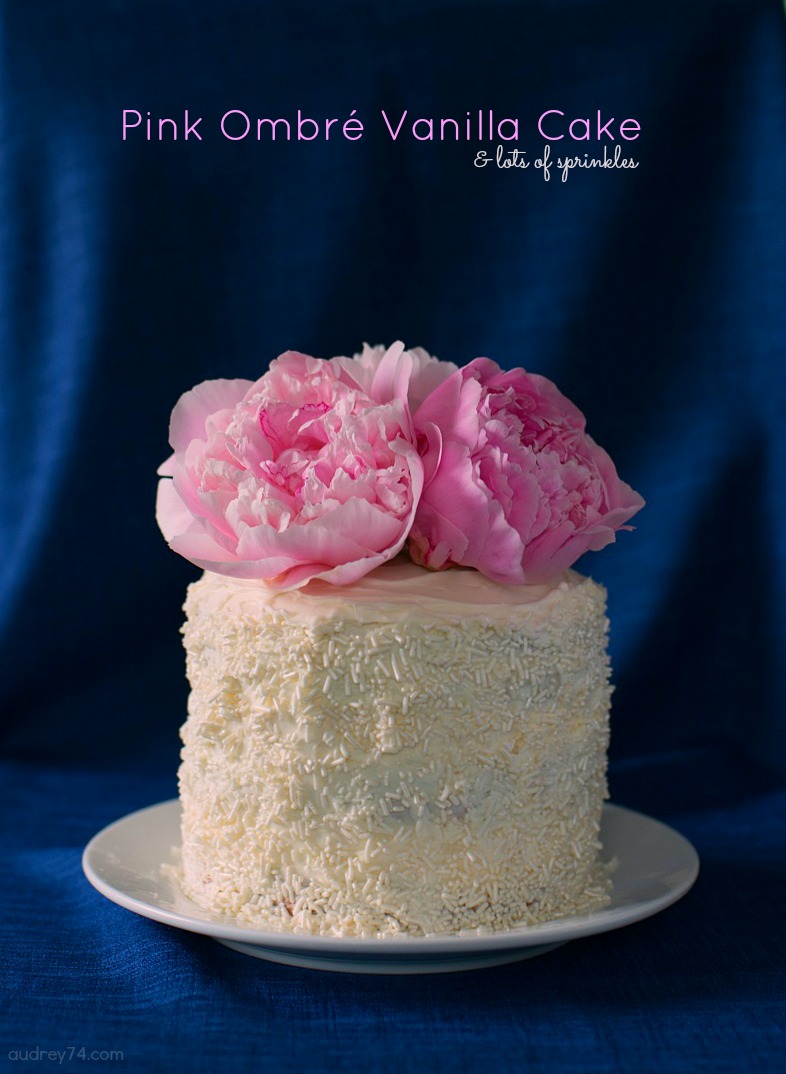
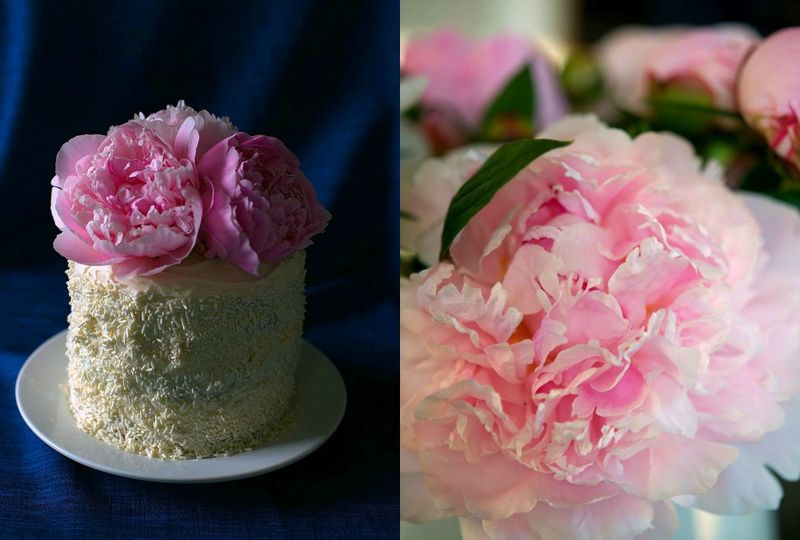
It’s cake time again. Cake to celebrate my grandmother’s birthday. My grandmother likes white cake – fluffy cake with lots of icing. This time a simple vanilla cake with vanilla icing turns a little fancy with ombré layers, sprinkles and the birthday girl’s favourite flowers! I also added cuteness by baking this cake in 6 inch pans – allowing a regular recipe to give me three layers. I love how flowers make this cake so special.

2

I split the cake batter into three measuring cups to ensure I would have even distribution. In the measuring cup I added red food colouring. Just a few drops for one layer, a few extra for the middle layer and about double for the third. I adjusted the colour once I mixed the batter with the colour – remember, you can always go darker, but you can’t remove colour, so start with a little colour first. Once I got the colour I wanted I filled the 6 inch cake pans with the batter and baked it a tad longer than you would cupcakes.

As I anticipated, adding a lot of sprinkles to the side of a cake is quite tricky – and messy. I made sure to freeze my three layers, then I iced the layers and the side of the cake and added two skewers to keep the layers together. I needed the icing to be tacky for the sprinkles to adhere, so I could not put it back in the freezer. After adding the skewers I tilted the plate and put a small bowl under the front edge of the plate. While rotating the plate I gently distributed the sprinkles, top to bottom and around the cake. I was catching the stray sprinkles on the counter and filled bare spots by hand. I iced the top of the cake once I was done with the sprinkles.

Pink Ombré Vanilla Cake – Cake batter adapted from Martha Stewart

Prep Time: 2 hours, 30 minutes

Cook Time: 25 minutes

Yield: 3-layer 6 inch cake

Ingredients

  • 1 1/2 sticks unsalted butter, room temperature, plus more for baking pans
  • 1.5 cups flour, plus more for baking sheet
  • 1 teaspoons baking powder
  • 1/2 teaspoon salt
  • 1 1/4 cups sugar
  • 1/2 teaspoon pure vanilla extract
  • 1/2 cup milk
  • 4 egg whites at room temperature
  • liquid or gel food colouring

Instructions

  1. Preheat oven to 350 degrees. Butter and flour 3 6 inch cake pans, tapping out any excess flour; set aside.
  2. In a medium bowl, sift together flour, baking powder, and salt; set aside.
  3. In the bowl of an electric mixer fitted with the paddle attachment, beat butter and 1 cup of sugar until light and fluffy, 3 to 4 minutes, scraping down sides of the bowl as needed. Beat in vanilla. With mixer on low speed, add flour mixture in three parts, alternating with the milk and beginning and ending with the flour; beat until just combined. Transfer mixture to a large bowl; set aside.
  4. In the clean bowl of an electric mixer fitted with the whisk attachment, beat egg whites on low speed until foamy. With mixer running, gradually add remaining 1/4 cup sugar; beat on high speed until stiff, glossy peaks form, about 4 minutes. Do not overbeat. Gently fold a third of the egg-white mixture into the butter-flour mixture until combined. Gently fold in remaining egg-white mixture.
  5. Transfer batter to 3 measuring cups and colour the shades you want. Make sure to combine well for even colour.
  6. Transfer coloured batter to cake pans and smooth tops with spatula.Transfer to oven and bake until a cake tester inserted in the center comes out clean, about 25 minutes. Transfer to a wire rack and let cool 10 minutes. Invert cake onto rack, then re-invert and let cool completely.
  7. Once cooled, stack in ombre fashion and ice each layer and sides. Add skewer to stabilize layers and add sprinkles to side. Ice top and add flowers right before serving.

Notes

I used store bought vanilla icing. You don’t have to beat your egg whites if you don’t want to, but doing it will result in a fluffier cake.

3

Need more tasty recipes and delicious bites? Check out our Let’s Eat Pinterest Board.

Post by Giulia Doyle of Audrey’s

Race Tracks

December 31, 2013

Race1

Race2

Race3

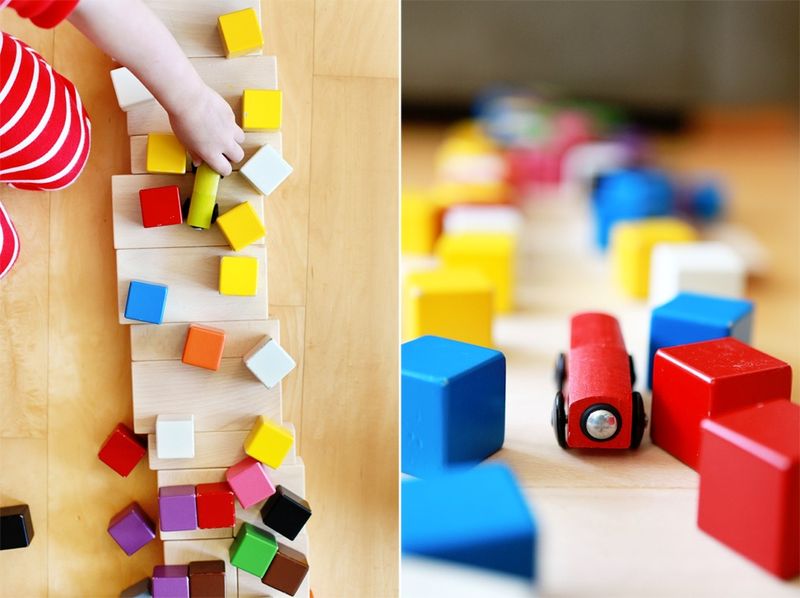
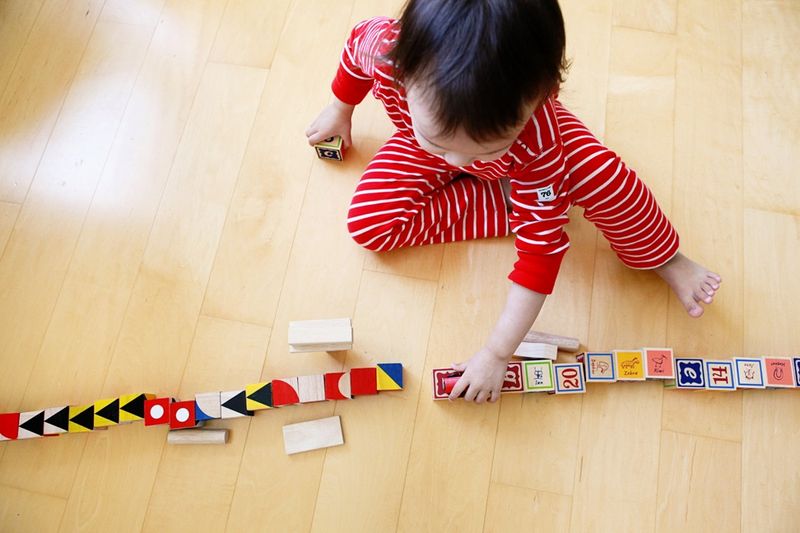
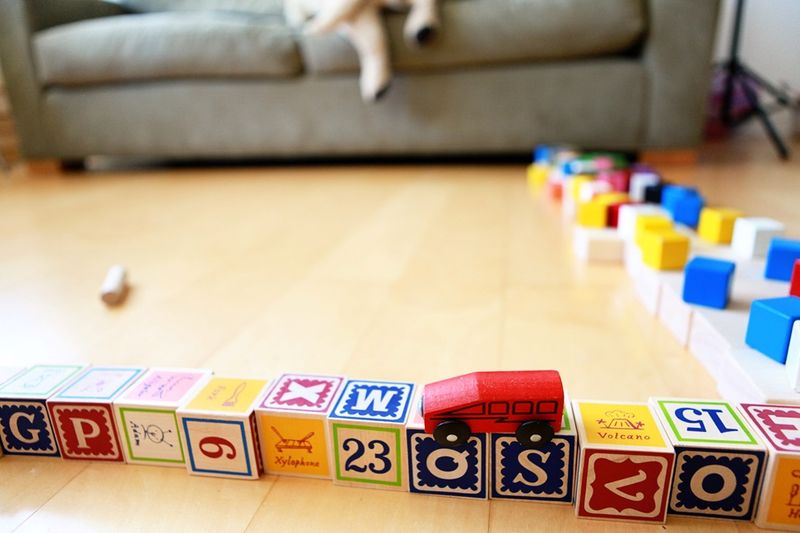
Lately, Avery has been really into building race tracks.  It's useful to have more than one block set that she can use for building.  The more blocks, the longer the track and the more varied the terrain.  Whenever she builds a track, she always asks me to take a picture.  I love how she's proud of her work!  Also, by constructing race tracks again and again, she is working through different ideas, generating new designs and innovating.  She is learning that there are different ways to build something, which will help her become a flexible thinker and a creative problem solver in the future.  Block sets pictured are by Kid O, MillerGoodman and Land of Nod.

Post by Michelle Sterling of Avery and Augustine

You can see her work and read about her two young children's first forays in cooking, art and everything in between at Avery and Augustine.

Chocolate Granola

December 30, 2013

1

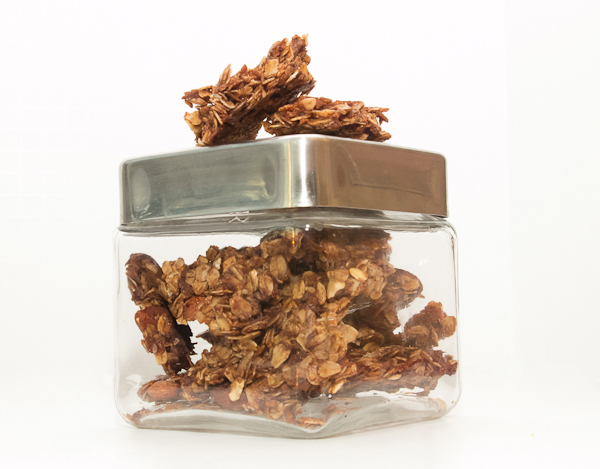
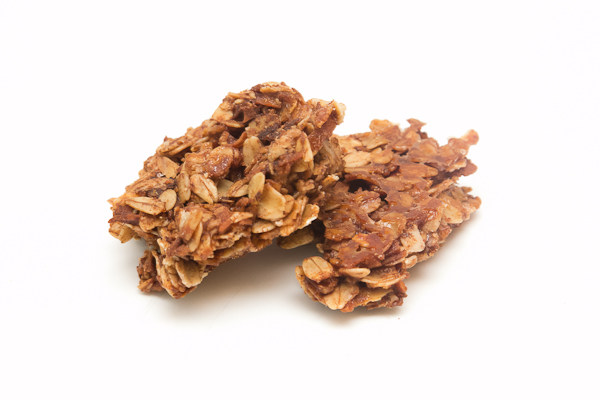
I am a huge proponent of the saying “if it ain’t broke, don’t fix it.” The same could be applied to my original granola recipe. But let’s be honest, some things just taste extra yum with a little cocoa. This recipe is super simple and has an extremely long shelf life. It makes the perfect addition to your breakfast yogurt but is perfectly delicious eaten all on its own.

2

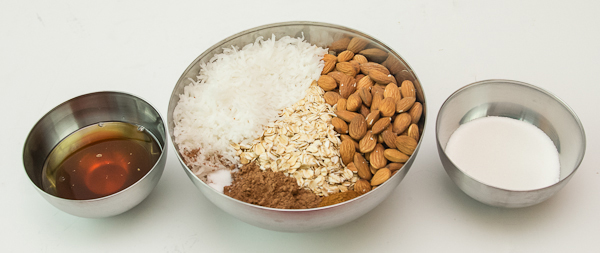
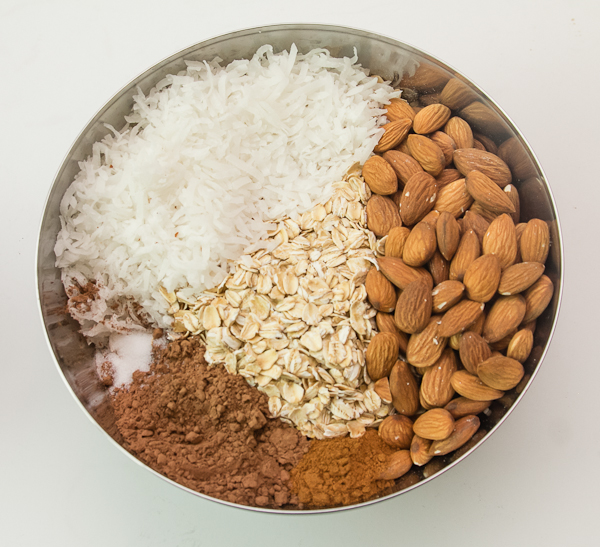
Gather all of the ingredients.

3

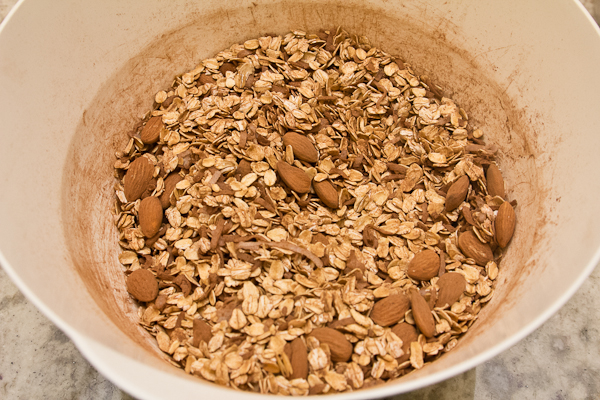
In a large bowl place 4 cups of old-fashioned oats, 1 cup whole almonds, 1 cup shredded coconut, 1/2 teaspoon of cinnamon, 2 tablespoons of unsweetened cocoa powder and 1/2 teaspoon of salt. Stir to combine and place aside.

4

5

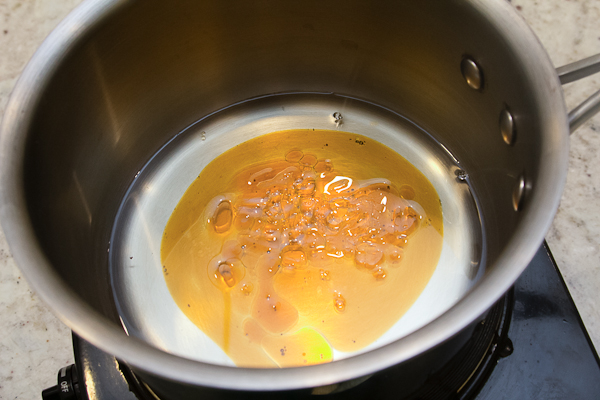
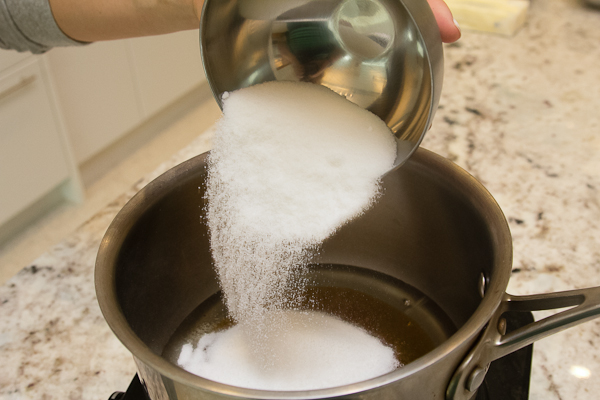
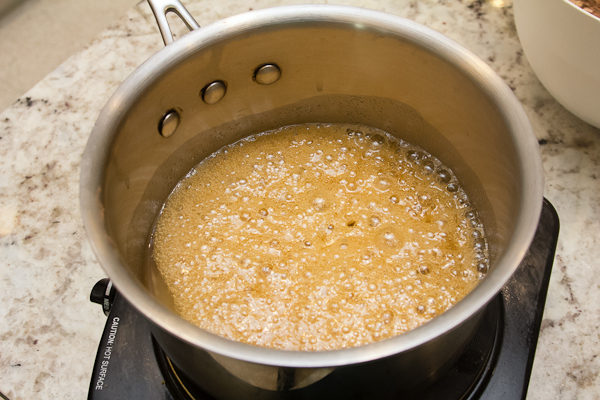
In a small saucepan place 1/2 cup of sugar with 1/4 cup of honey and 1/2 cup vegetable oil. Stir over medium heat until mixture begins to bubble, remove from heat.

6

7

8

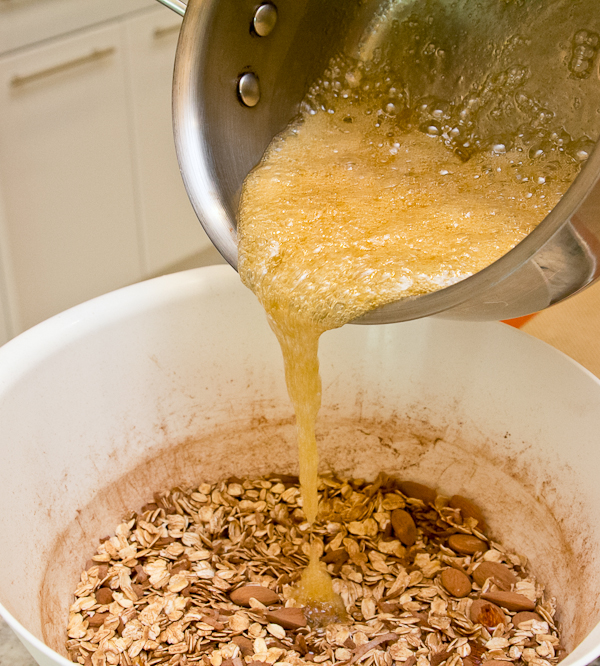
Pour the hot sugar mixture over the oat mixture and toss together until all of the dry ingredients are moistened with the sugar mixture.

9

10

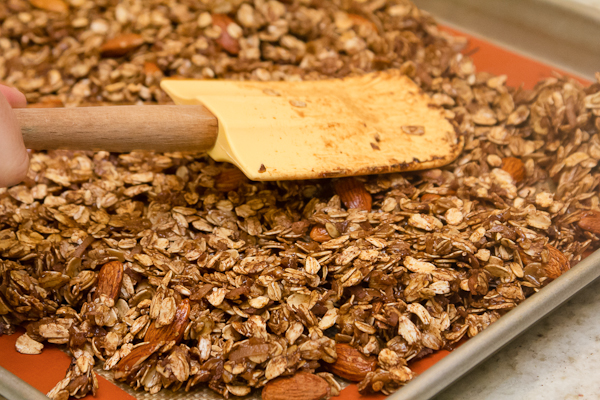
Bake for 30 minutes. Granola is done when it is toasted around the edges and fragrant.

11

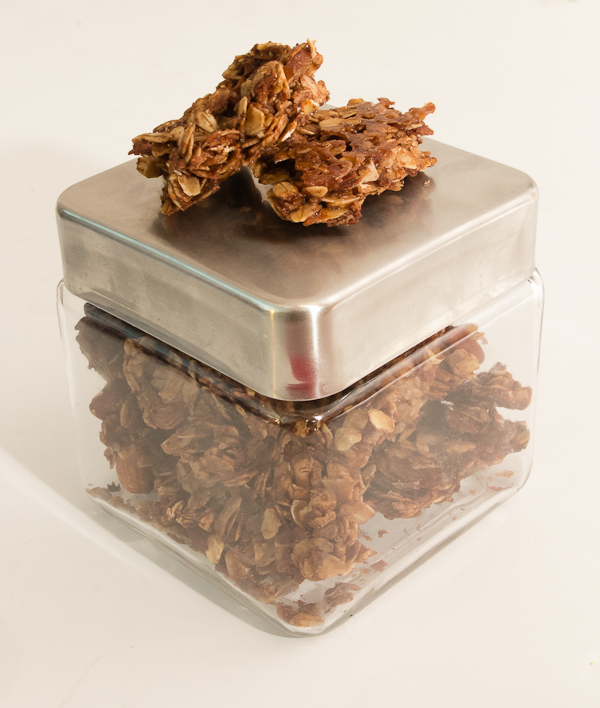
Remove from the oven and allow to cool completely on the baking sheets. Store in an airtight container, at room temperature.

Need more tasty recipes and delicious bites? Check out our Let’s Eat Pinterest Board.

Post by Ali of Papery & Cakery

Detour Ahead!

December 27, 2013

1

2

3

4

5

6

7

8

9

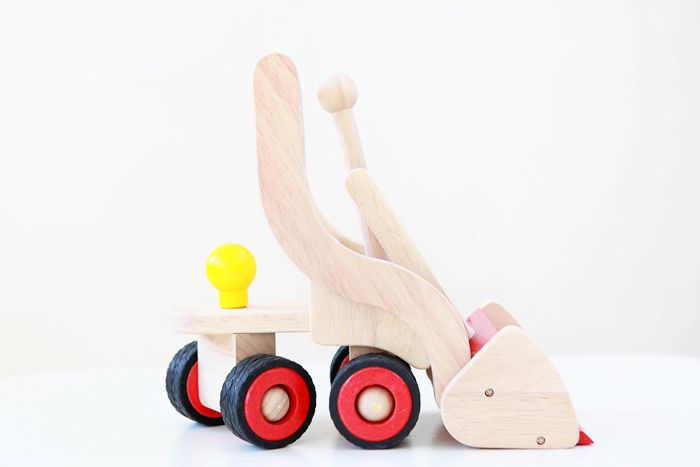
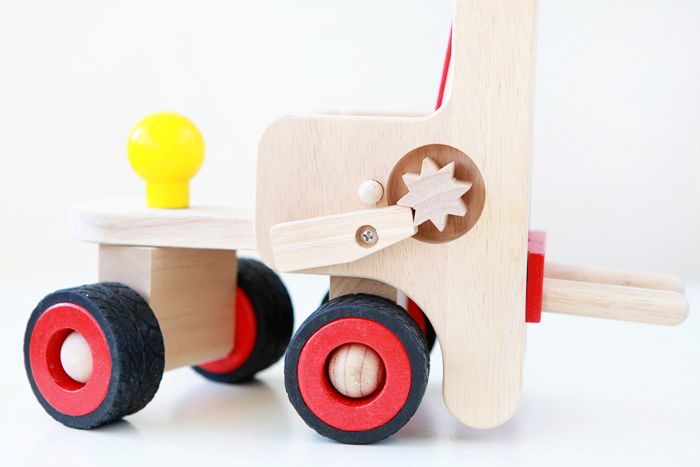
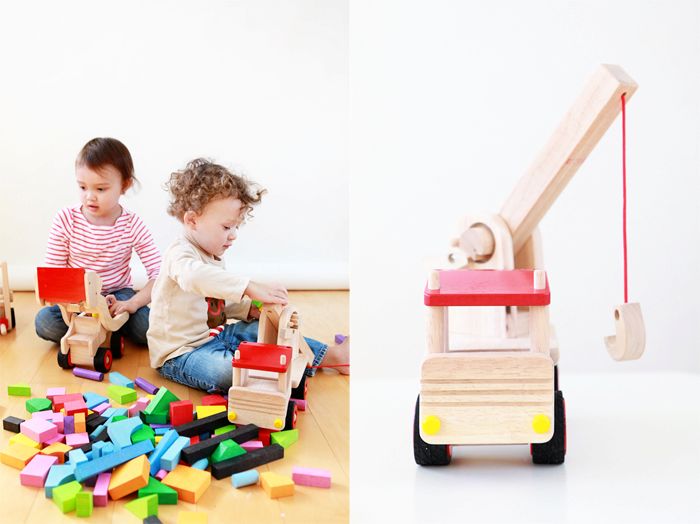
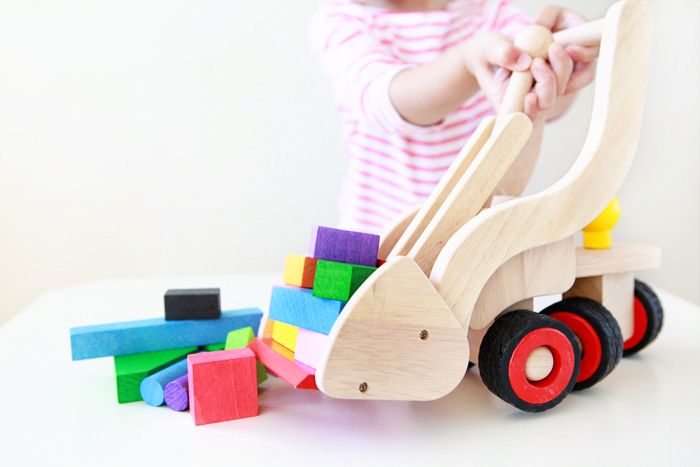
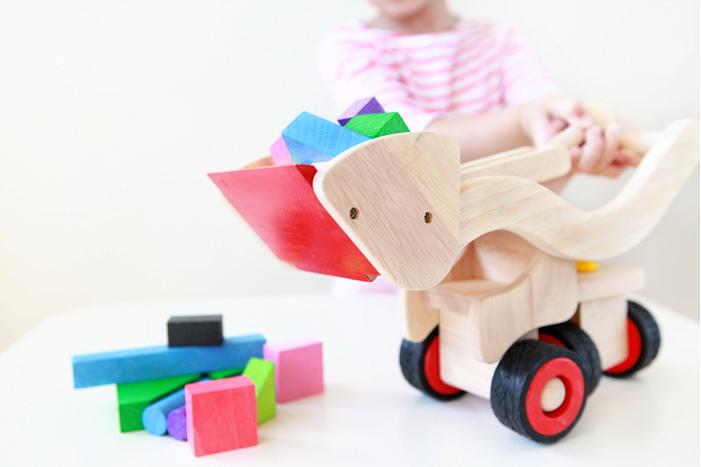
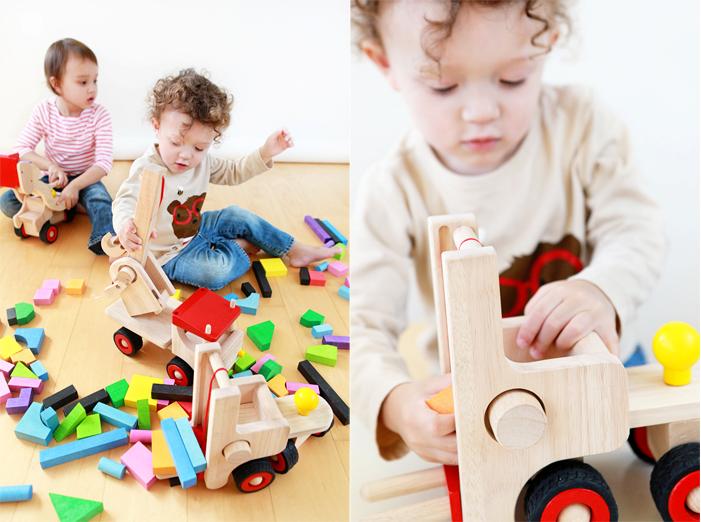
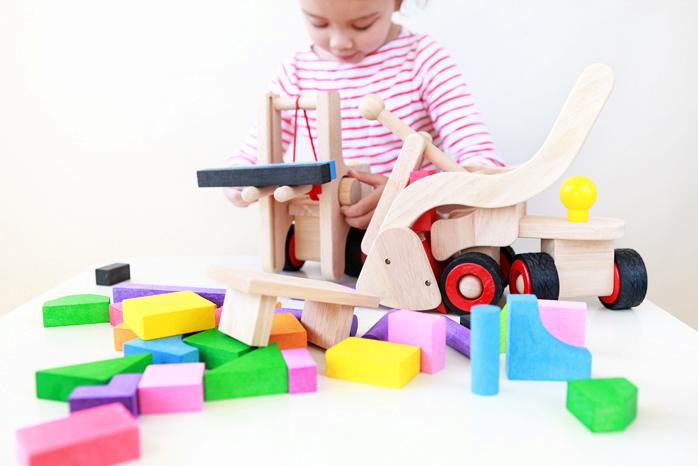
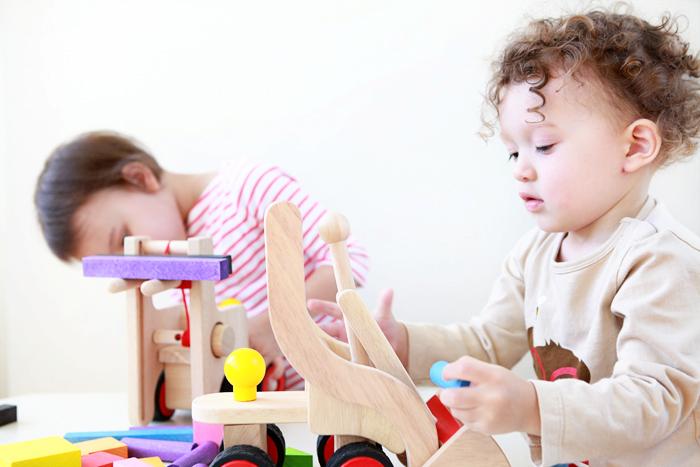
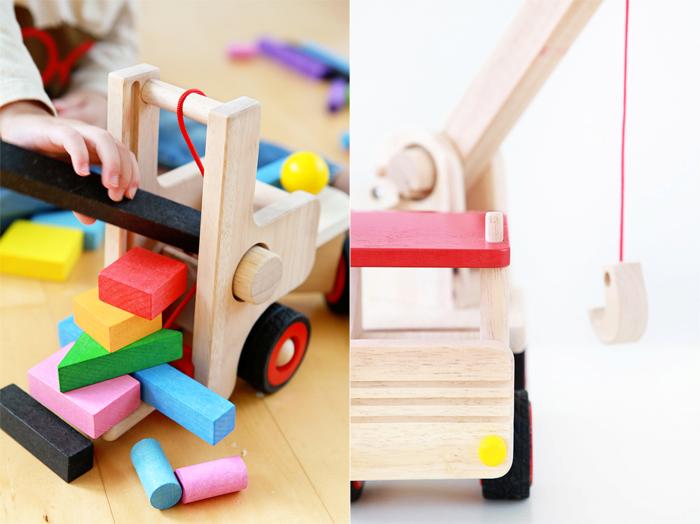
This wooden loader truckcrane and forklift get the job done, for sure.  They are made of sturdy rubberwood and each has either a steering wheel, lever, hand crank or fork that shows cause and effect relationships in action.  They allow you to see a simplified version of the mechanics of these construction vehicles and learn how they work.  You can use the steering wheel on the loader truck to steer it left or right, which we liked a lot.  Avery loved scooping up blocks with the loader truck and dumping them into a big pile.  

The Bucket O' Blocks is a good set of starter blocks with a variety of different shapes, sizes and colors perfect for building a modern abode or a small town.  And you can use the forklift to transport the blocks over to your construction site!

Post by Michelle Sterling of Avery and Augustine

You can see her work and read about her two young children and their first forays in cooking, art and everything in between at Avery and Augustine.

Winter Pearl Christmas Wreath

December 26, 2013

Post by Christina Williams of justcallmechris.blogspot.com

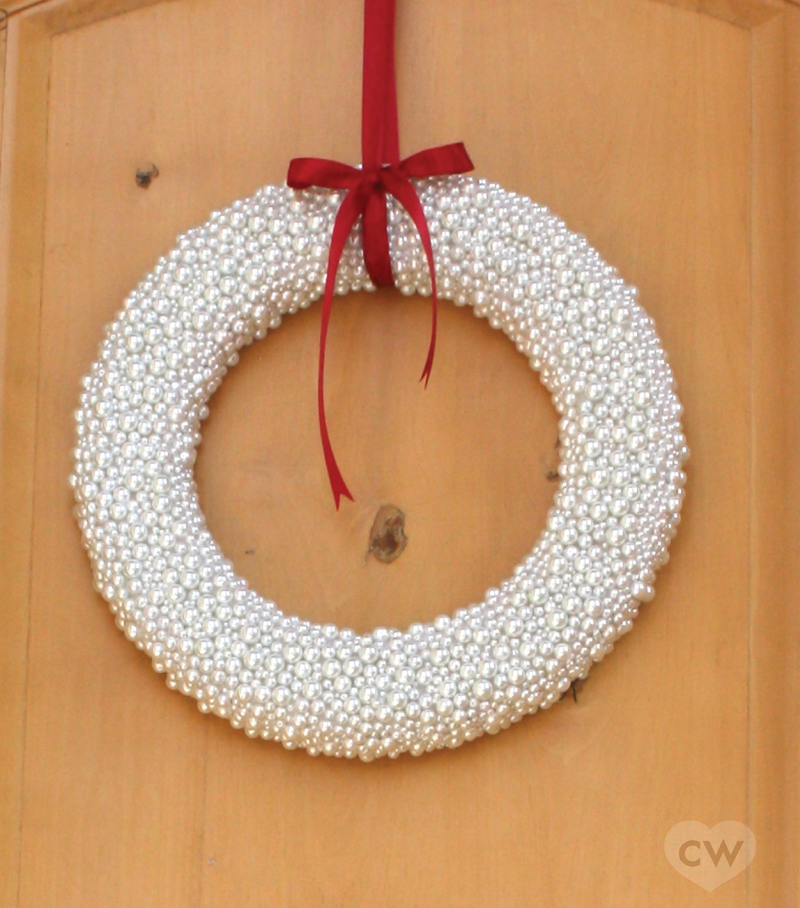
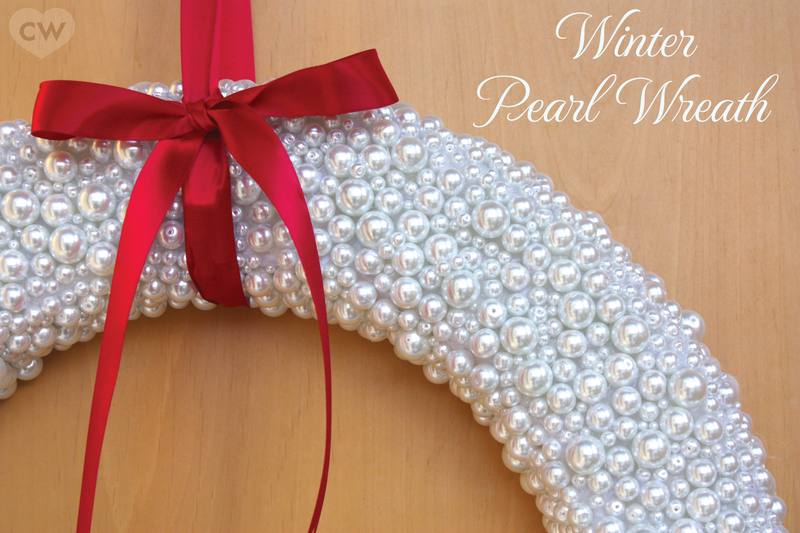
Winter Pearl Christmas Wreath
I’ve been dreaming of doing this winter pearl Christmas wreath project for several years now…but the stars never quite aligned in my favor. This year, however, I made it happen. It was a real labor of love, but I’m so happy with the results. I designed and made these wreaths for a display window of a brick and mortar store in my hometown. The whole window was done in frosty whites, pearls and tiny white lights, and turned out really beautifully, if I do say so myself.

Pardon that scrawny red bow on the wreath. I needed something so I could snap a quick photo before I sent these babies onto their final destination, and red was the best I could do. But the finished product actually has a beautiful white bow at the top, so just use your imagination. Thanks.

Anyway, if you’d like to make a pearl Christmas wreath of your own, here’s how I did it:

Supplies: wreath forms (I used 18″ white foam wreaths…the biggest I could find.) Keep in mind, though, the bigger the wreath, the more pearls you need. White grosgrain ribbon, pearls (I used an assortment of 4mm – 16mm white glass pearls, and lots of hot glue. Right now, let me do you a favor. Go get your little namby pamby mini craft glue gun. Walk it out to the garbage bin and drop it right in. Now go get yourself a rough, tough glue gun at the hardware store. You’re welcome.

Seriously, I used my mini craft glue gun for 2/3 of my first wreath, and it was terrible. The glue wasn’t hot enough to hold the pearls and those things were bouncing all over my kitchen. Bad news.

Step 1: Wrap the foam wreath form with grosgrain ribbon. Use hot glue to secure the ends. This makes the back look a bit prettier since you don’t cover the back with pearls.

Step 2: Start gluing pearls to the front of the wreath. I worked in about 2″ square sections. Squeeze the glue onto the wreath form, and stick pearls into the glue. I started with the largest pearls to cover the most space, then filled in with the smaller ones. I started with the face of the wreath, then worked on the outside and inside sections last.

For a 18″ wreath, I’d say it took me about 5 hours…so it’s definitely not a quick, easy project. But it’s definitely worth the time and effort. I’m actually making another one to layer over the top of the mirror in my entryway. I’ve also got some little foam cone shapes I’m going to turn into little pearl “trees” using the same concept.

Winter Pearl Christmas Wreath

Happy Crafting!

Post by Christina Williams of justcallmechris.blogspot.com

Chocolately Chocolate Fudge

December 24, 2013

1

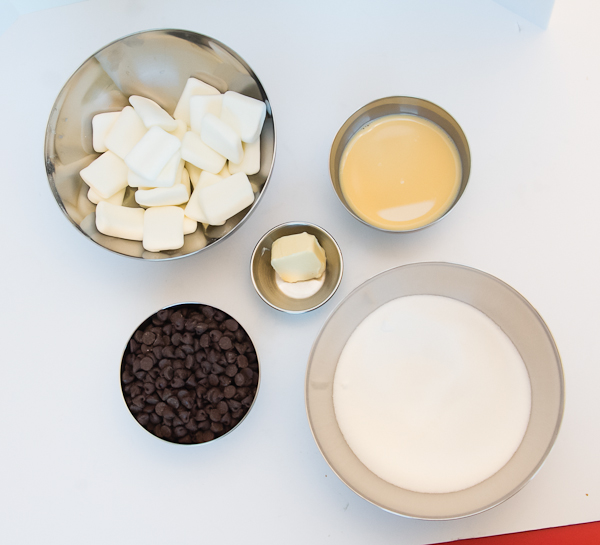
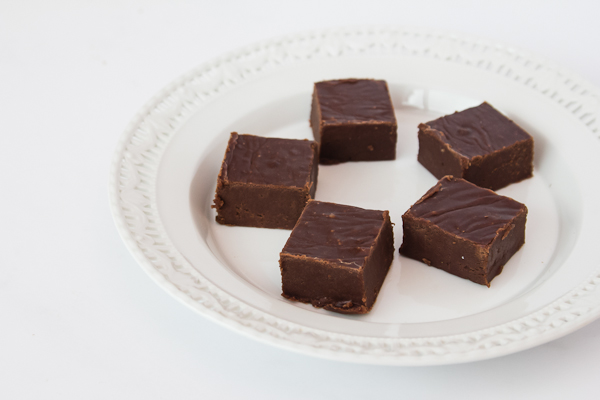
Fudge was one of the first desserts I learned to make when I was a youngin’. I used to make it as a birthday gift for all of my friends on their special day. This recipe is slightly lighter than my original favorite, but it’s just as good. Gat-free evaporated milk, marshmallows and Earth’s Balance soy free butter are better than their fattening counterparts. Fudge: it’s not just for birthdays any more!

Gather all of the ingredients.

2

Coat an 8 x 8 inch pan with aluminum foil and nonstick spray.

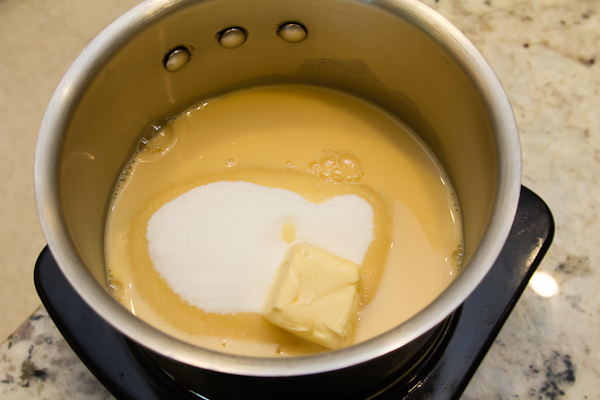
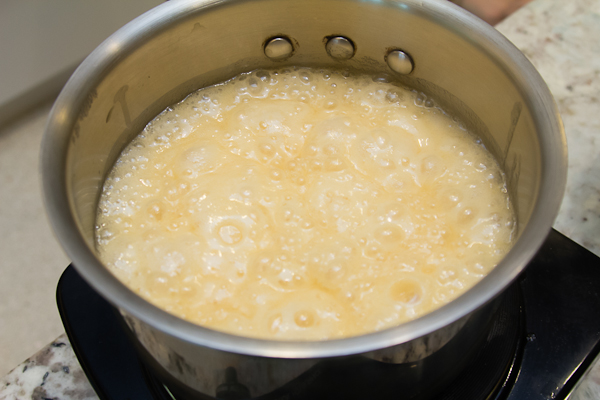
Stir together 1 2/3 cup sugar with 2/3 cup fat-free evaporated milk and 2 tablespoons of Earth’s Balance {or whatever butter alterantive you prefer} soy free butter. Bring to a boil in a pan, reduce heat to medium-low heat and cook for 3 minutes, stirring constantly.

3

4

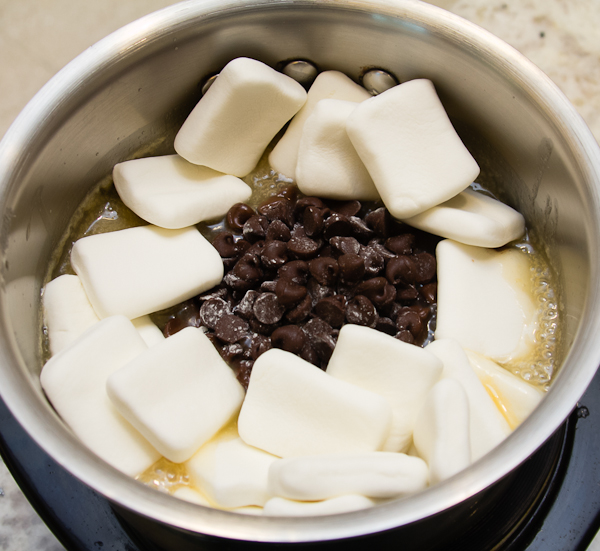
Stir in 12 ounces of semisweet chocolate and 14 large marshmallows. Remove from heat and stir until smooth.

5

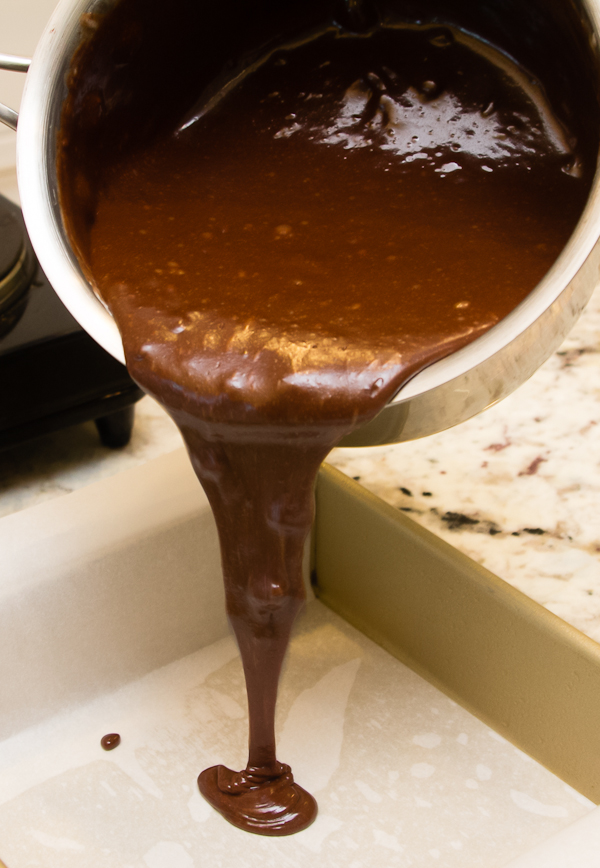
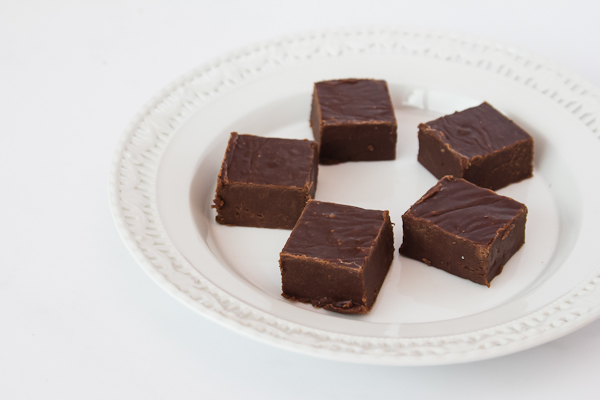
Pour into pan and refrigerate until firm, about two hours. Cut into small squares and serve.

6

7

For a printer-friendly version of this recipe click here: Chocolately Chocolate Fudge

Happy Baking!

Need more tasty recipes and delicious bites? Check out our Let’s Eat Pinterest Board.

Post by Ali of Papery & Cakery