Close

Blog

Worksheet Wednesday: Zoo Syllables

September 4, 2013

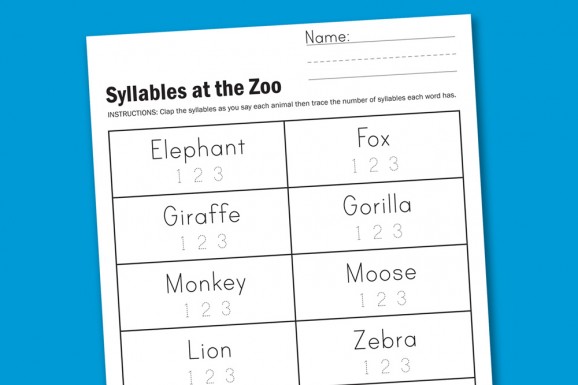
Grab your little ones and get ready for some educational, silly animal fun! The concept of syllables may be daunting for a preschooler or kindergartner, yet our “Syllables at the Zoo” worksheet will make it fun.

SyllablesZooPreview-578x385

As you read the animal names aloud, feel free to act like the animals or make animal sounds — be goofy. While you’re at it, talk about syllables and try clapping them as you say each word. Our dotted numbers will give your students a chance to practice writing their numbers, too. Download the free printable worksheet.

Reposted with permission by Aimée Lowry & Bettijo B. Hirschi from PagingSupermom.com

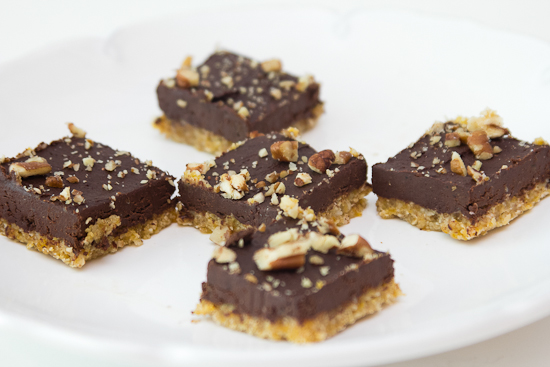
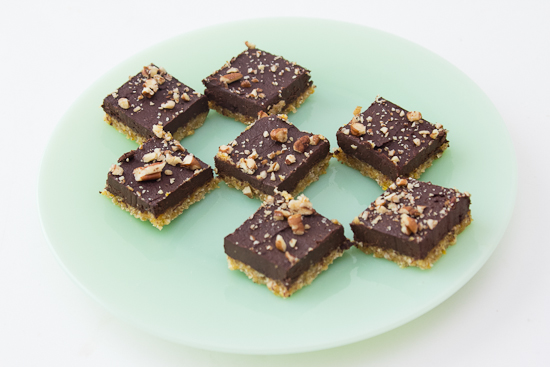
Raw, Vegan & Gluten Free Chocolate Fudge Bars

September 3, 2013

Bars1

Remember last week when I blogged about the most ridiculous RAW chocolate spread ever? Well I just kicked it up a notch. Turn that spread into delicious bars you can even trick your husband into eating it {mine did – and he still thinks they’re real chocolate. Shhh}.

These bars are a synch to put together, taste delicious straight from the refrigerator andddddyour waistline won’t increase from indulging in them! It’s a win win.

Bars2

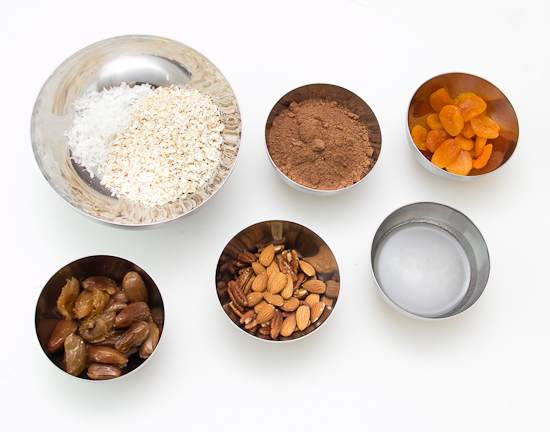
Gather all of the ingredients.

Bars3

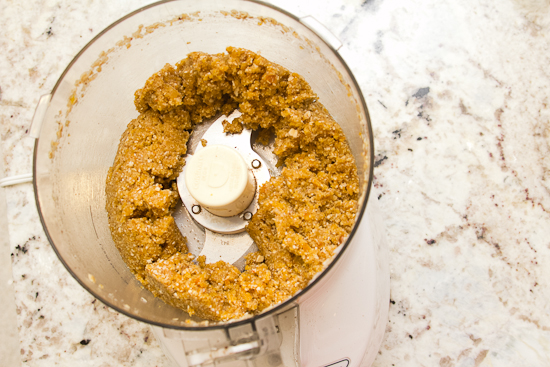
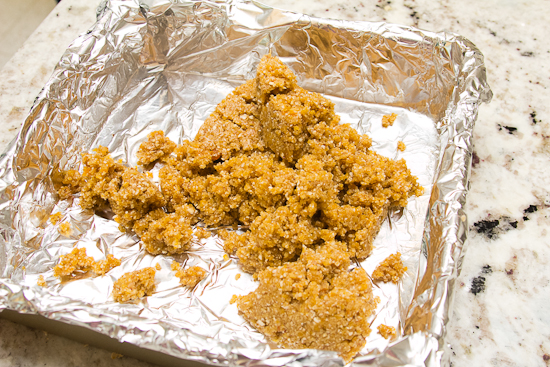
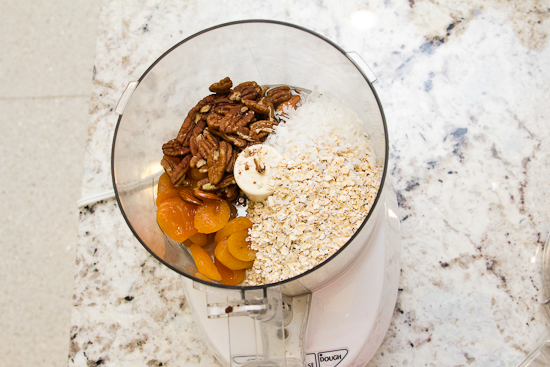
In the bowl of your food processor mix together 1 cup of gluten free oats, 1/4 cup of nuts {your choice – I did a mixture of pecans and almonds}, 15 dried apricots, 1/4 cup of unsweetened coconut flakes, 1 tablespoon of coconut oil {warmed so that it is liquid} and a pinch of salt. Process together until grainy.

Bars4

Bars5

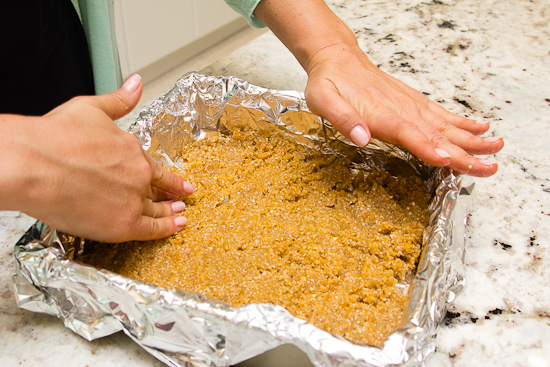
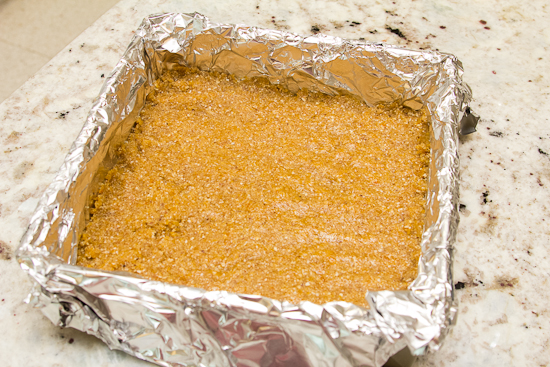
Using your fingers press the crust evenly into the bottom of an 8″ x 8″ pan.

Bars6

Bars7

Bars8

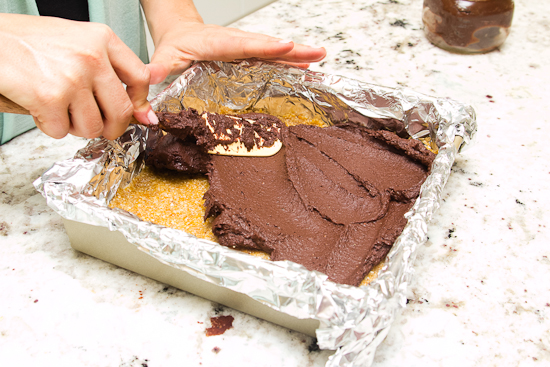
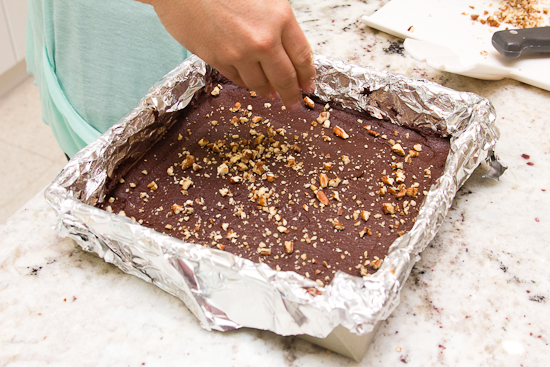
Spread 1-2 cups {depending on how thick you want them} of the raw chocolate.

Bars9

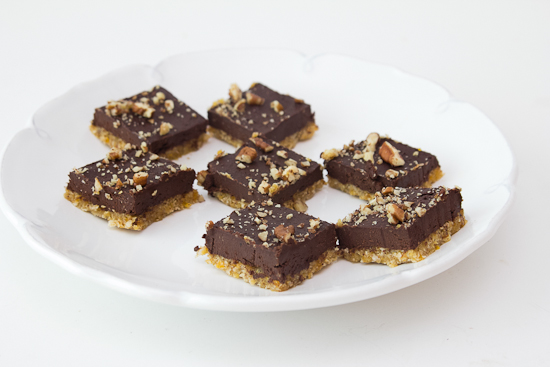
Sprinkle with chopped pecans. Chill until hard. Slice and serve!

Bars10

Remember to keep these bad boys in the fridge, they taste much better this way.

Bars11

For a printer-friendly version of this recipe click here: Raw, Vegan and Gluten Free Chocolate Bars

Happy “Baking”!

xoxo,

Post by Ali: Papery & Cakery

Need more tasty recipes and delicious bites? Check out our Let’s Eat Pinterest Board.

Measuring 101

September 2, 2013

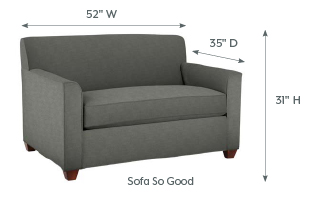
MEASURING FOR YOUR SPACE.

Use our published dimensions (like 12" x 19" x 78"), width x depth x height to ensure your furniture will fit in the space you have planned.

MG_SofaSoGood_pg1

MEASURING FOR DELIVERY.

Before your furniture arrives, you’ll need to take certain measurements that relate to getting it through your entryways. Use the handy guidelines below.


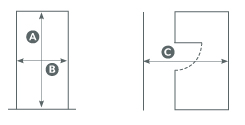
1. Measure your entryways.

Measure the heights (A) and widths (B) of any hallways and door accesses, as well as the entry clearance (C).

MG_EntryWays_pg1

2. Measure your furniture (or ask a store associate).

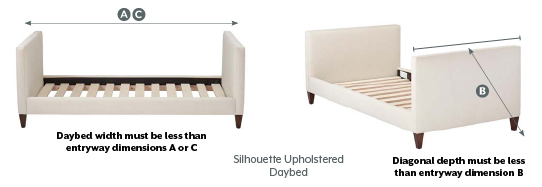
Upholstered seating: Measure the width (A) and diagonal depth (B).*

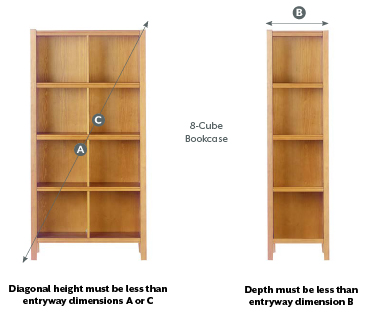
Bookcases, Dressers, etc.: Measure the diagonal height at the widest point (A) and depth (B). 

MG_Daybed_pg1

2. Measure your furniture (con’t).

Upholstered seating: Measure the width (A) and diagonal depth (B).*

Bookcases, Dressers, etc.: Measure the diagonal height at the widest point (A) and depth (B). 

MG_8cubeBkcse_pg2

3. Compare the dimensions of your residence and your furniture to make sure it’ll fit.

And don’t forget to make note of any other obstacles like light fixtures, ceiling fans, banisters or imaginary dragons.

*The diagonal depth of upholstered seating can be determined by first placing a straight edge from the highest point of the back frame (do not include pillows) to the front of the arm. Then measure from the bottom rear corner of the sofa up to the point that bisects the straight edge.

Note: Our Measuring Guide is merely a tool and does not guarantee your furniture purchase will fit. You should consider the size constraints of the entire path from our delivery truck to the item’s final destination.

Furniture + Storage Collections

August 31, 2013

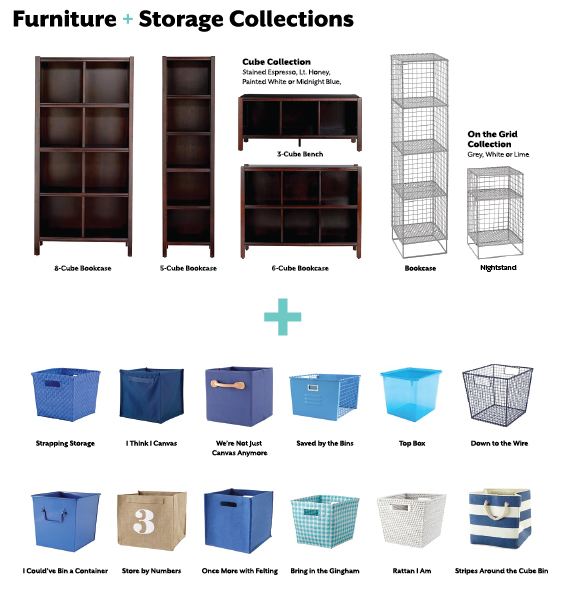
MixMatch_header_p1
Mix and Match Storage Cube Collection

Strapping Storage Collection

Ideal for a playroom or bedroom, our Strapping Cubes are offered in a rainbow of colors, making them great for virtually any space.

Strapping Storage Collection

I Think I Canvas Storage Collection

Mix and match multiple colors of this collection to fit the existing décor of any playroom or bedroom.

I Think I Canvas Storage Collection

We’re Not Just Canvas Anymore Storage Collection

The brushed canvas and leather handles give this storage collection a sophisticated look, perfect for any shared living space.

WereNotJustCanvasStorageCollection_p2

Saved by the Bins Storage Collection

Great for playrooms or bedrooms, their classic design resembles traditional school lockers. And the name plate is perfect for labeling toys, art supplies, books or whatever you put in them.

Saved by the Bins Storage Collection | The Land of Nod

Once More With Felting Storage Collection

The soft construction of these cube bins means no sharp edges. Which means they’re great to use in a shared space for kids of all ages.

Once More Felting Storage Collection | The Land of Nod

I Could’ve Bin a Container Storage Collection

These metal bins with bright, powder coated colors are ideal for holding toys, art supplies, books and more. With a variety of coordinating desk accessories available, they’re the perfect storage for any playroom.

I Couldve Bin Storage Collection

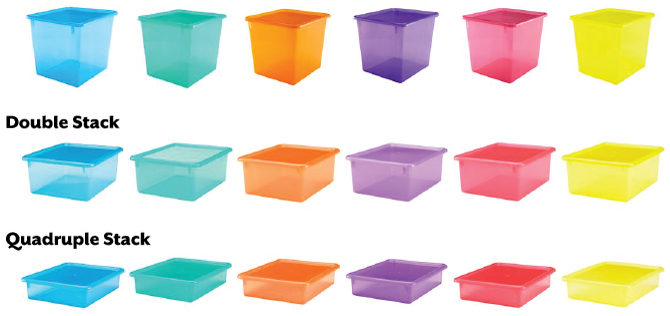
Top Box Storage Collection

Available in a wide range of colors and sizes, these bins have a see-through design, so you’ll always know what’s inside. Plus, the easy-to-remove lid is perfect for the little ones. Put them in a playroom and fill them with arts and crafts supplies.

Top Box Storage Collection | The Land of Nod

Store by Numbers Storage Collection

The printed numbers on this collection are a fun way for your little ones to learn their numbers. They’re ideal for a playroom or a bedroom.

Store By Numbers Storage Collection | The Land of Nod

Down to the Wire Storage Collection

This durable collection features a mesh design, which allows for easy viewing of the contents inside. Put them in a playroom and fill them with books, toys and more.

Down to the Wire Storage Collection

Rattan I Am Storage Collection

With sophisticated style and classic materials, this cube collection makes a great addition to any nursery.

Rattan I Am Storage Collection | The Land of Nod

Stripes Around the Storage Collection

Clutter around the house? Try our Stripes Around the Cube Bins. They have natural rope handles and are available in five different colors so you can move them around and match your décor.

Stripes Around the Storage Collection | The Land of Nod

Dotted Storage Collection

Surely there’s a spot in your home for our Dotted Cube Bin. It features a large polka dot pattern and has matching handles for easy transport. Mix and match colors to create your own storage collection.

Dotted Storage Collection | The Land of Nod

SeeMoreStorageCollectionsArrow

Good Clean Fun

August 30, 2013


 photo painthero1.jpg

If you have kids, you know that boredom can strike them at any moment – even after what you think has been a full, satisfying, educational day of top-notch, interactive parenting. Nearly seven years of surprise-boredom-attachs have taught me that it's never a bad idea to have in the back of my mind (or my kids' art closet) a few new, fun and tidy (!) activities all set to bust their boredom. Behold, last Tuesday's life savers:

 photo paint.jpg

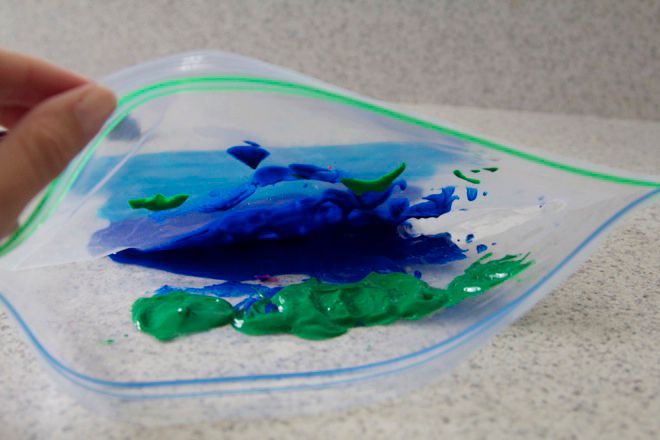
Just squeeze a little bit of paint into a gallon ziploc bag and seal it up really tight.

   photo blueandgreen.jpg

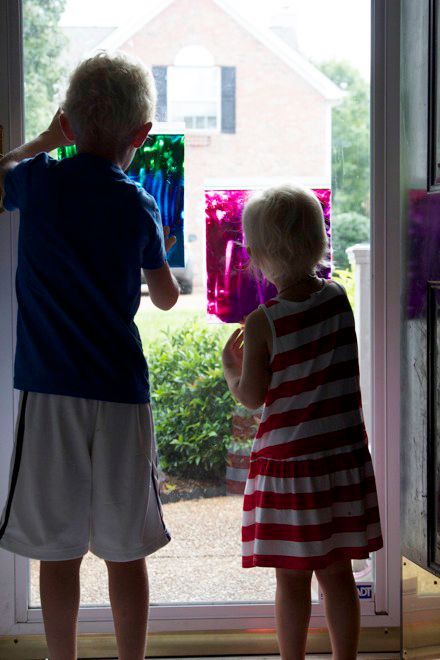
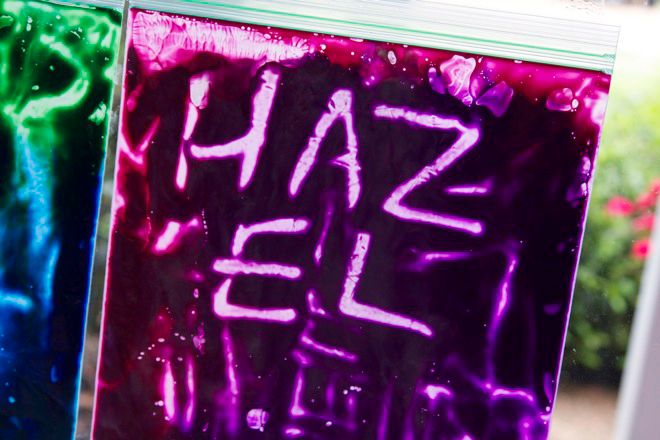
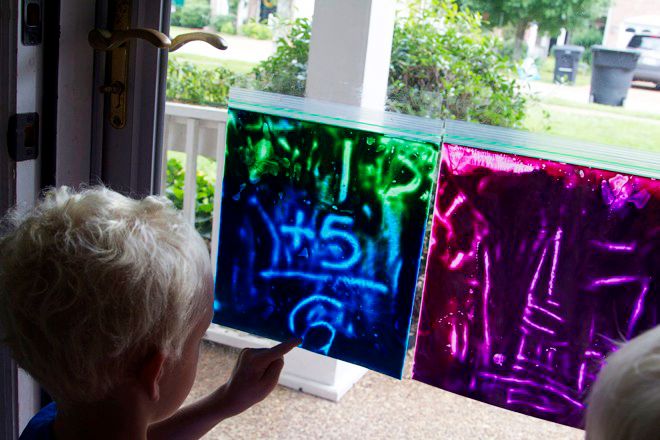
We found that mixing a few colors together (a happy accident since we didn't have enough of any one color left) and taping them to the glass door gave them a cool, almost glowing effect.


 photo backs.jpg

 photo H.jpg

 photo hand.jpg

 photo hazelpaint.jpg

The kids spent nearly an hour doodling, practicing letters, working out math problems, playing school, and on and on and on! We actually still have them taped to our front door several days later (we're classy like that) because they're still haven't gotten old!

 photo mathproblem.jpg  photo oliverwindow.jpg

So that was our big, educational boredom-buster win this week. What about y'all? Anything you've found recently that your kids love, takes just a few supplies and doesn't make a giant mess? I'm ALL EARS!!  

Raechel Myers blogs at Finding My Feet. She has two kids, an adorable husband and an addiction to Twizzlers.

Adventuring Sailor

August 29, 2013

Adventuring-sailor

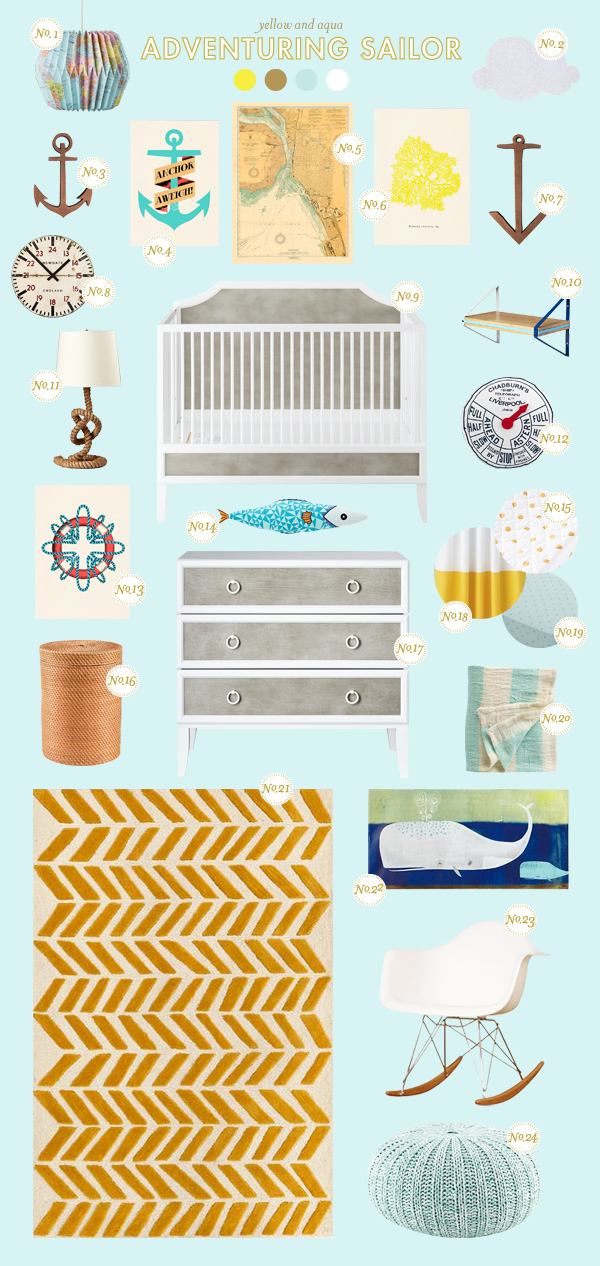
I can never tire of a room with a nautical feel – there is always something you can do to give it a fresh spin.  The weathered gray on that dresser and crib are so perfect for this look.  If you haven’t checked out this Verona crib, take a peek!  It’s an investment, but it will turn into an absolutely gorgeous twin bed, so it will last for years to come.  

(1) Map Pendant (2) Cloud Corkboard (3) Wood Anchor (4) Anchor Aweigh
(5) Vintage Nautical Map (6) Yellow Coral (7) Wood Anchor (8) Tube Station Clock
(9) Weathered Gray Crib (10) Tricolor Shelf  (11) Tug – O – Rope Lamp (12) Telegraph Pillow (13) Life Saver (14) Fish Pillow (15) Marine Changer Cover (16) Honey Rattan Hamper (17) Weathered Gray Dresser (18) Edge Yellow Curtain (19) Aqua Dot Sheet 
(20) Aqua Stripe Blanket (21) Gold Bars Rug (22) Whale Watching (23) Retro Rocker 
(24) Aqua Pouf

Register for these great nursery items at LandofNod.com

Post by Joni: Lay Baby Lay

Living Stylishly with Toys

August 28, 2013

Post by Jeran of Oleander and Palm

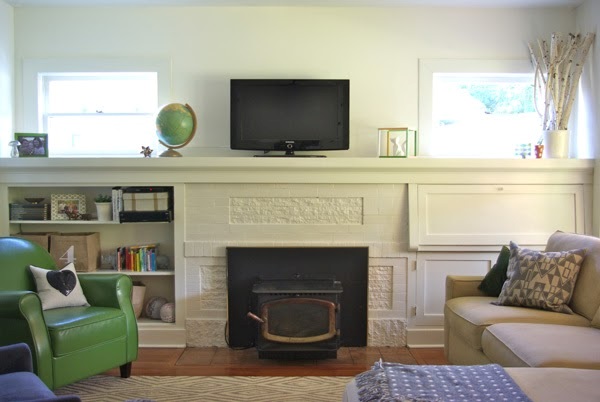
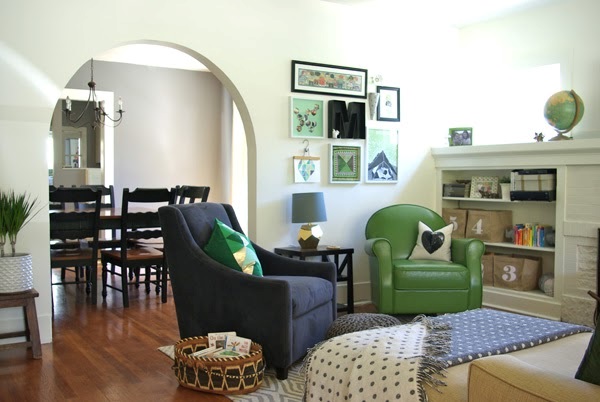
Yes friends it is possible to live stylishly with toys!  We live in a little California bungalow built in 1920, so their is no playroom or even spare bedroom.  There has to be toys in our grown up spaces.  We really do live in our living room, it’s where we are most of the time.  And I don’t know about you, but I don’t want to feel like I’m living in a day care.

Living Stylishly with Toys | Honest to Nod

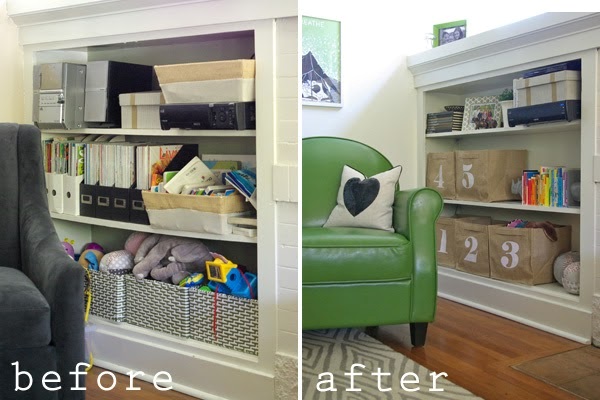
When I recently gave our living room a mini modern makeover, I realized that the toys were taking over!

Living Stylishly with Toys | Honest to Nod

So, I’m going to share a couple tips for living stylishly with toys.

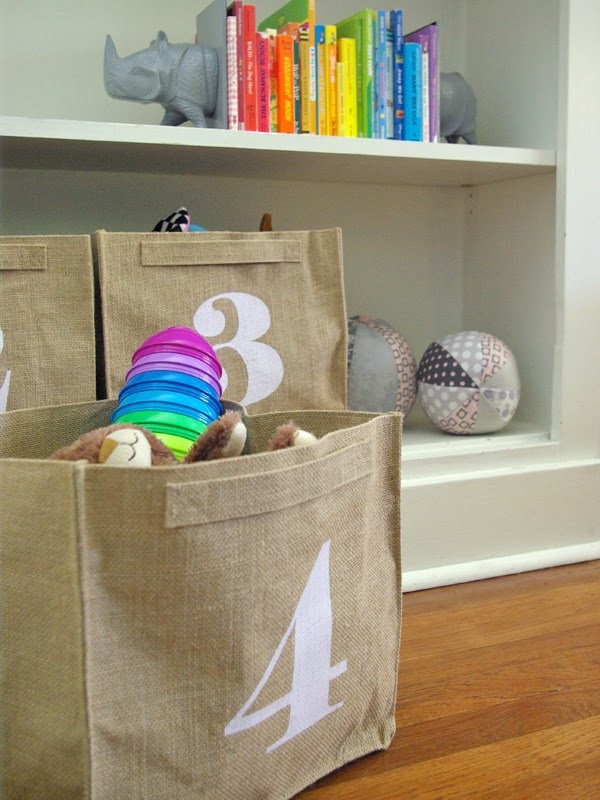
1.  Give them a home.  Pick one place where ALL the toys will go.  I think you’re going to need a small bookcase of some sort.  Mine is built into my mantel, but Nod has an amazing selection to go with any decor or style.

Living Stylishly with Toys | Honest to Nod

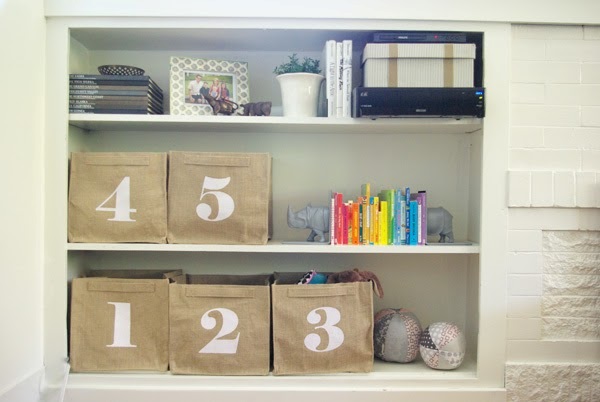
2.  Bins and baskets are a MUST!  I love the numbered ones we have, but really The Land of Nod had probably the best selection of bins and baskets out there.  Toys come in so many bits and pieces and sometimes they just need to be contained.  I like to sort like toys in bins together.  My almost 2 year old doesn’t always put them back in the correct bins, but every couple days I do.  I really believe kids enjoy toys so much more when they are organized.  And yes, I’m that parent that says “Put that away before you play with something else”.  Kids need to learn to clean up after themselves.

Living Stylishly with Toys | Honest to Nod

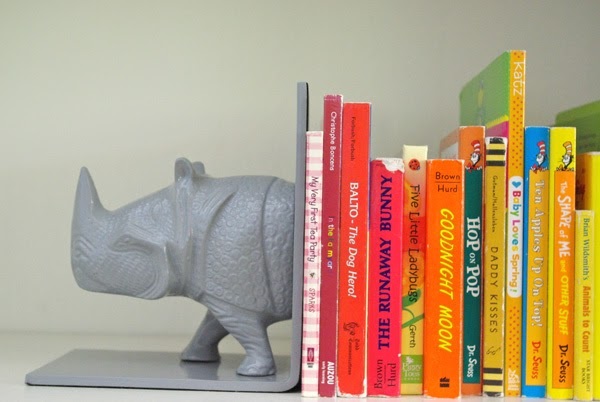
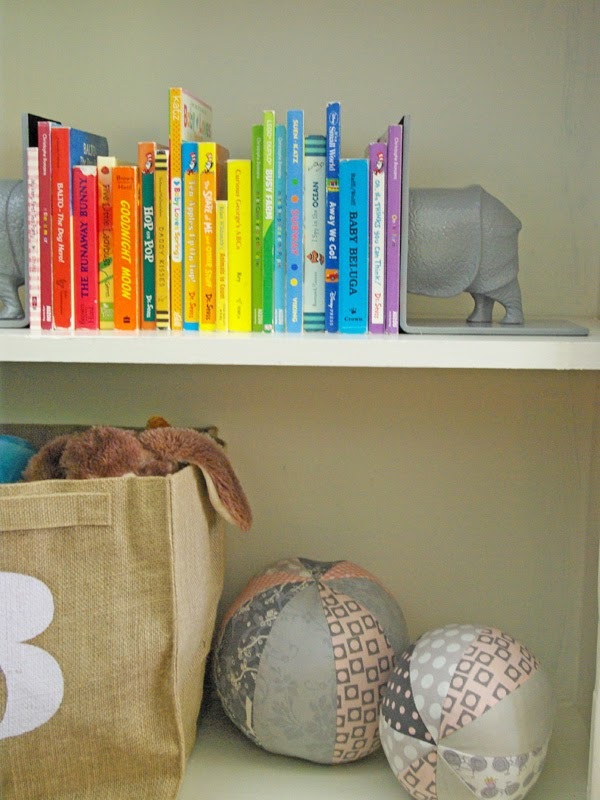
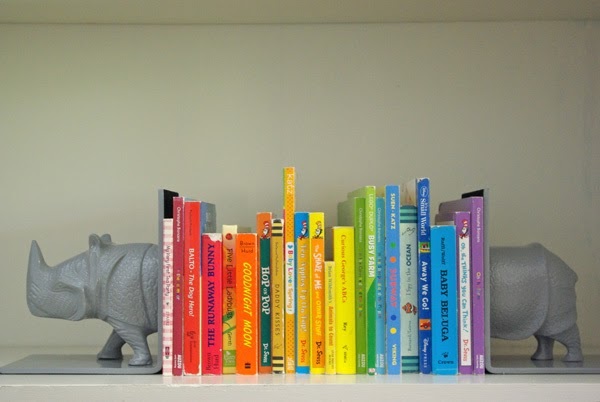
3.  Get the books under control!  I LOVE these rhino bookends, they’re funky and functional.  Nod had a great assortment of stylish bookends.  I sorted some of our favorite books into a rainbow of colors and baby board books suddenly become an instant art installation.

Living Stylishly with Toys | Honest to Nod

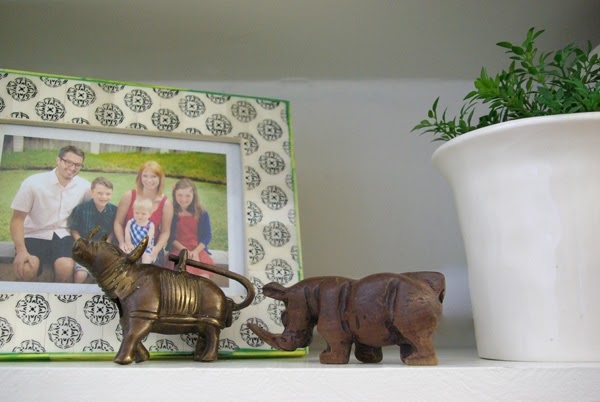
4.  Leave some space for the the grown ups.  The top shelf needs to be none kiddy.  You need to leave space for your personality to be infused into the space.  I put a picture of our family, my husband’s little rhino collection and some books that have meaning to us.

Living Stylishly with Toys | Honest to Nod

5.  Fake it till you make it.  Yes, I have a fake plant on my shelf.  I think a little green goes a long way, but I don’t trust my almost 2 year old with dirt yet.  To be safe, anything you put on the shelf needs to be kid proof.  My husband’s rhinos (one I bought for him in Ghana and the other in Yemen) are sturdy and totally kid proof.  They look great, but can’t be broken if my daughter reaches the top shelf.

Living Stylishly with Toys | Honest to Nod

6.  Rotate toys in and out of the space.  ALL the toys don’t have to be out at the same time.  I think it’s overwhelming to have too many toys out for kids.  Narrow the choice and rotate toys into the room every couple weeks or month or so.  I have a big basket on the floor full of lots of books, but just a couple weeks ago, it was full of Little People toys.  I’ll probably change it out for wooden trains soon.  This makes my kids feel like they are getting new toys every couple weeks.

Living Stylishly with Toys | Honest to Nod

Post by Jeran of Oleander and Palm

Looking for even more playroom inspiration? Check out our Playroom Board on Pinterest.

Handmade Pottery That Runs in the Family

August 27, 2013

Pick up one of our Eden Lamps, Gumball Lamps or Gumdrop Lamps, and you’ll not only notice that it’s been designed and crafted by hand, but by four generations worth of hands. That’s because they’ve been cast, hand finished, and hand glazed for over 140 years by the family of artisans at Haeger Potteries. Founded in 1871 by David H. Haeger, the company began firing bricks along the bank of the Dundee to river to help rebuild after the Great Chicago Fire. So while Haeger Potteries may have its foundation in Chicago, Chicago actually has its foundation in Haeger Potteries (literally).

Haeger_sign_p1

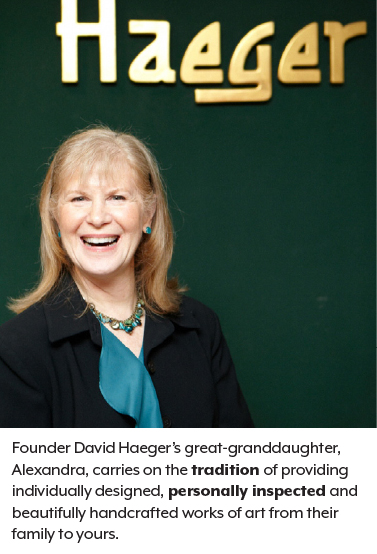
When Royal Arden Hickman joined Haeger Potteries in 1934 to help create artistic ceramic wares, the company began selling their goods under the Royal Haeger brand name. Over 70 years later, these pieces are still highly collectible and extremely sought after. Today, David Haeger’s vision for creating stunningly handmade ceramics lives on in his great-granddaughter and current president, Alexandra Haeger Estes. It just goes to show that the only thing more established than Haeger’s rich collection of pottery is their family. 

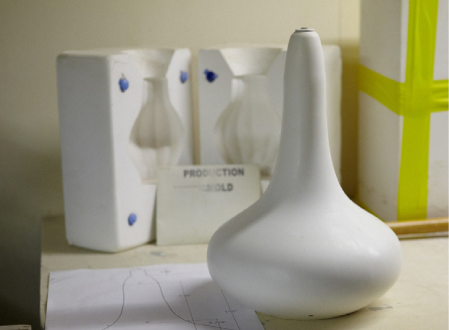
Each piece begins its life as a handcrafted, individually designed work of art. From there, a master mold is cast, and it’s ready for production. 

Haeger_WhiteMold_p2

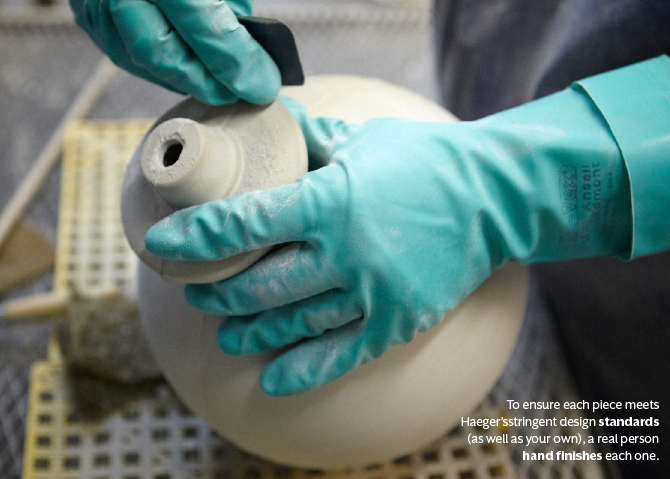
To ensure each piece meets Haeger’s stringent design standards (as well as your own), a real person hand finishes each one.

Haeger_GreenGloves_p2

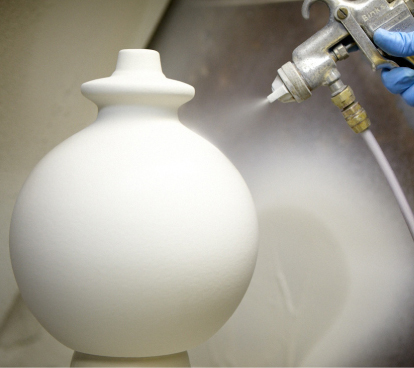
Haeger’s specially designed glaze creates a look that’s unlike any other. And since it’s all done by hand, each piece also has a look that’s unlike one another.

Haeger_Spray_p2

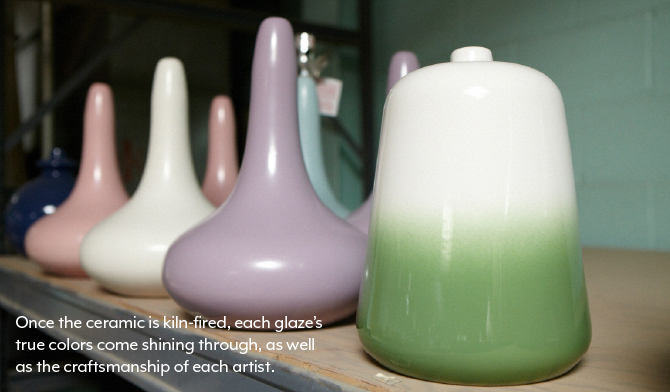
Once the ceramic is kiln-fired, each glaze’s true colors come shining through, as well as the craftsmanship of each artist. 

Haeger_GreenGumdrop_p2

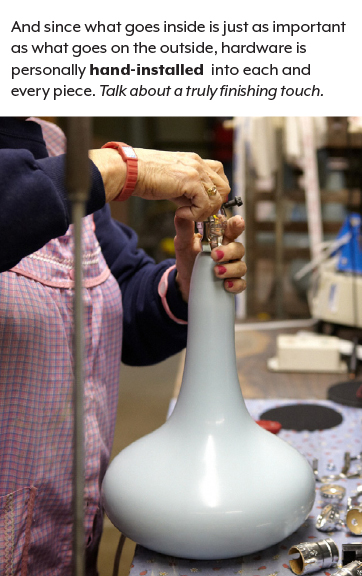
And since what goes inside is just as important as what goes on the outside, hardware is personally hand-installed into each and every piece. Talk about a truly finishing touch. 

Haeger_BlueEden_p2

Haeger_granddaughter_p2

Founder David Haeger’s great-granddaughter, Alexandra, carries on the tradition of providing individually designed, personally inspected and beautifully handcrafted works of art from their family to yours.


Cherry Ice Cream Sandwiches with Brownies

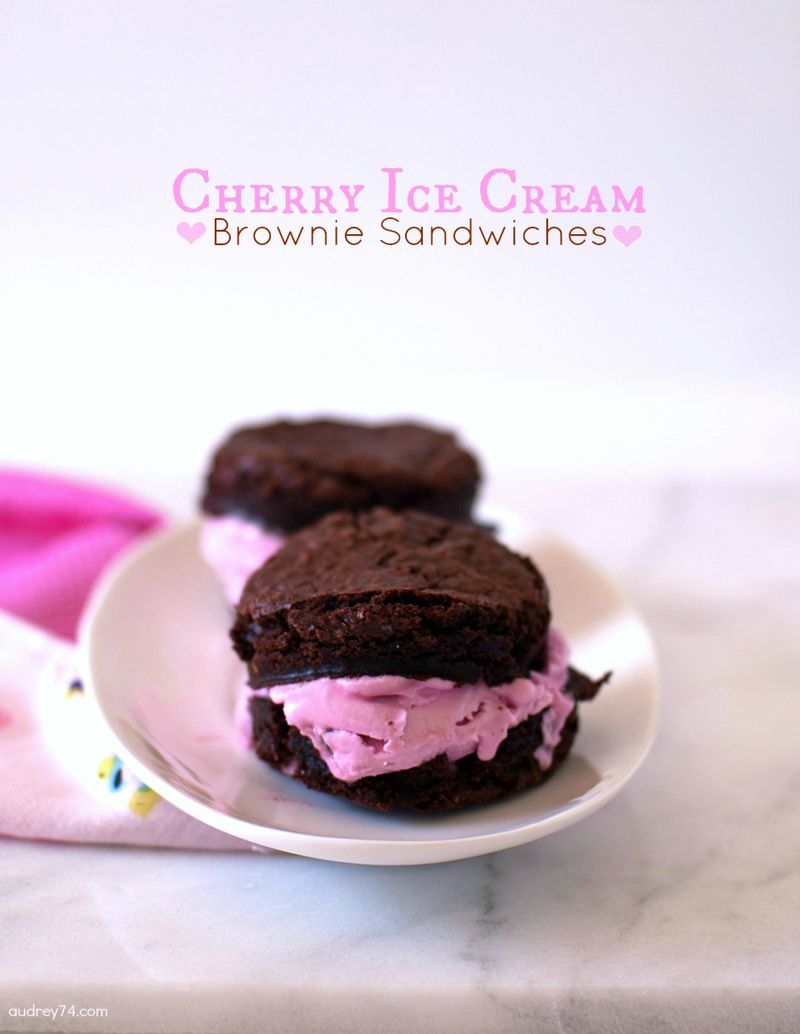
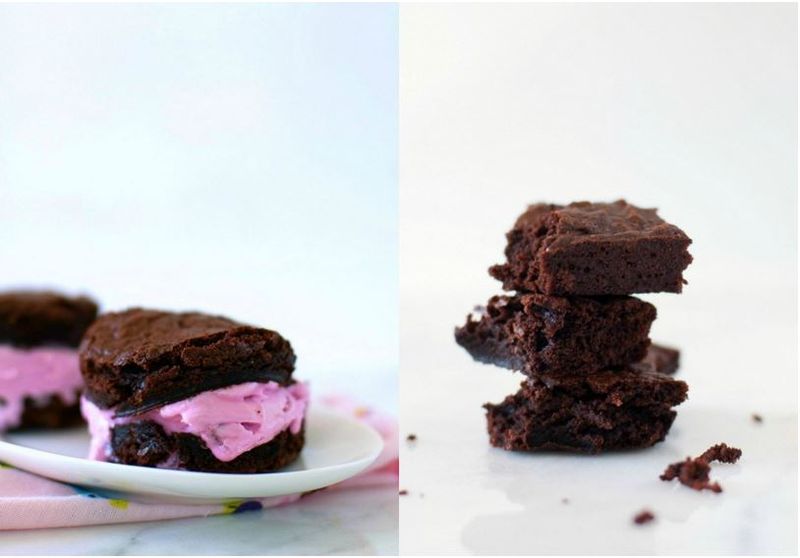
Audreys-Brownie-Cherry-Ice-Cream-Sandwiches

I love cherries and jump on them as soon as I find them in the store. My first try was to create these Cherry Chunk Cookies and make ice cream sandwiches. I read in the comments that using fresh cherries worked. Well – while they tasted quite good (a little too soft maybe), they also turned blue/green in colour because of the cherry juice, which made them look hideous. So, I did not photograph them and we just ate them. I probably should have tossed the fresh cherries in some flour before adding them to the batter so the juice wouldn’t transfer.

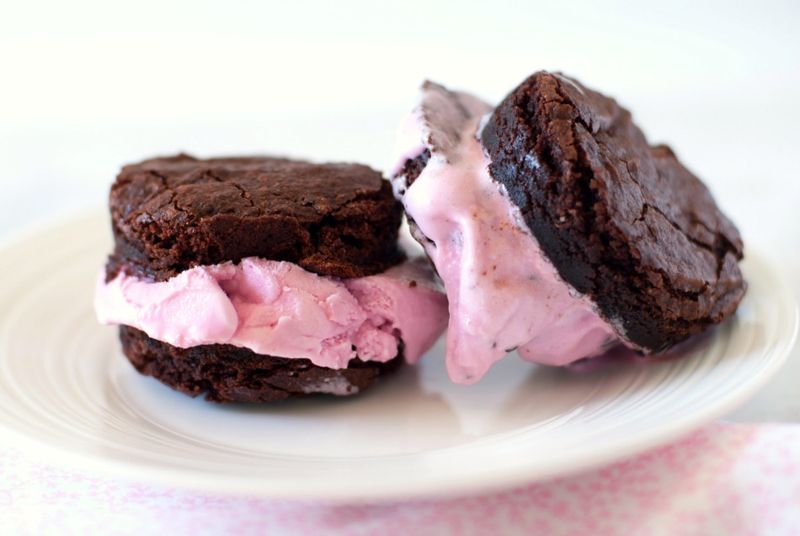
Audreys-Brownie-Cherry-IceCream-Sandwiches

After that, I decided to use the remaining cherries and create miniature cherry clafoutis based on Aran’s recipe. Again, they tasted great, but the custard was a dull beige colour and when I took my photos I found them to be uninspiring and not at all what I had in mind. I wanted bright and fun and pink! These two fails have led to a lot of dessert, more than we normally would have. Also know that I am very impatient, which is probably why I didn’t make the same recipe twice and work towards a different result. So I surprised myself when I attempted yet another recipe. This time back to my original thought of ice cream sandwiches. I could get the cherries and pink with ice cream and I decided to make brownies instead of cookies.

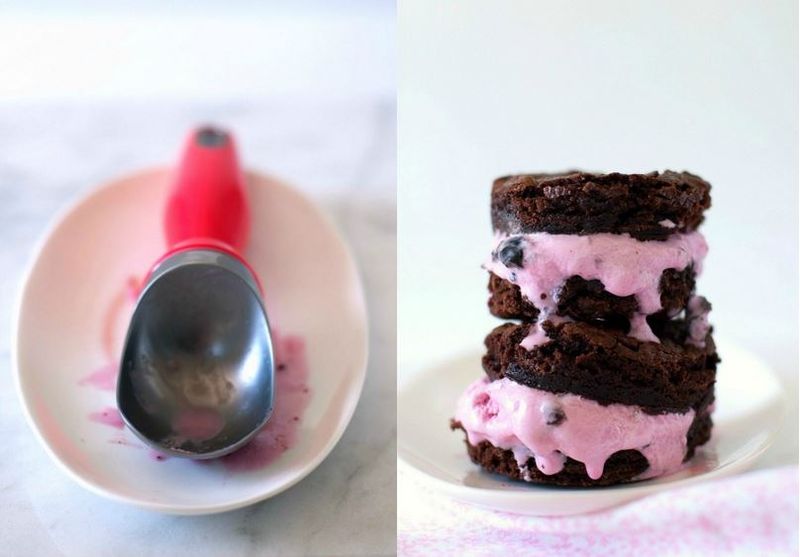
Cherrybrownie

There you go. Fun, summery and cherries included! And these cute sandwiches are now living in the freezer until we have a real reason to eat another dessert. And yes, taking pictures of ice cream is a challenge – drip, drip, drip…

Cherry Ice Cream Sandwiches with Brownies (Brownies from Martha Stewart)

Prep Time: 20 minutes

Cook Time: 35 minutes

Yield: Between 4 and 8 sandwiches depending on size

Ingredients

  • 6 tablespoons unsalted butter, plus more for pan
  • 6 ounces coarsely chopped good-quality semisweet chocolate
  • 1/4 cup unsweetened cocoa powder (not Dutch-process)
  • 3/4 cup all-purpose flour
  • 1/4 teaspoon baking powder
  • 1/4 teaspoon salt
  • 1 cup sugar
  • 2 large eggs
  • 2 teaspoons pure vanilla extract
  • store bought cherry ice cream. Look for locally made for best results, or make your own.

Instructions

  1. Preheat oven to 350 degrees. Line a buttered 8-inch square baking pan with parchment paper , allowing 2 inches to hang over sides. Butter lining (excluding overhang); or use silicon mold.
  2. Put butter, chocolate, and cocoa in a heatproof medium bowl set over a pan of simmering water; stir until butter and chocolate are melted. Let cool slightly.
  3. Whisk together flour, baking powder, and salt in a separate bowl; set aside.
  4. Put sugar, eggs, and vanilla in the bowl of an electric mixer fitted with the whisk attachment, and beat on medium speed until pale, about 4 minutes. Add chocolate mixture; beat until combined. Add flour mixture; beat, scraping down sides of bowl, until well incorporated.
  5. Pour batter into prepared pan; smooth top with a rubber spatula. Bake until a cake tester inserted into brownies (avoid center and edges) comes out with a few crumbs but is not wet, about 35 minutes. Let cool slightly in pan, about 15 minutes. Lift out brownies; let cool completely on a wire rack before cutting into squares.
  6. Once cooled, use a round cookie cutter to cut out pieces or cut into squares. Scoop small amount of ice cream on to back side of brownie and top with second brownie. Squeeze down slightly to ensure the ice cream and brownies stick together. Put into freezer and allow ice cream to fully freeze.

You can choose to make your ice cream if you want. Or you can simplify this even more by making brownies from a box and making square sandwiches instead of round ones.

Last

Need more tasty recipes and delicious bites? Check out our Let’s Eat Pinterest Board.

Post by Giulia Doyle : Audrey’s

DIY Colorful Cube

August 26, 2013

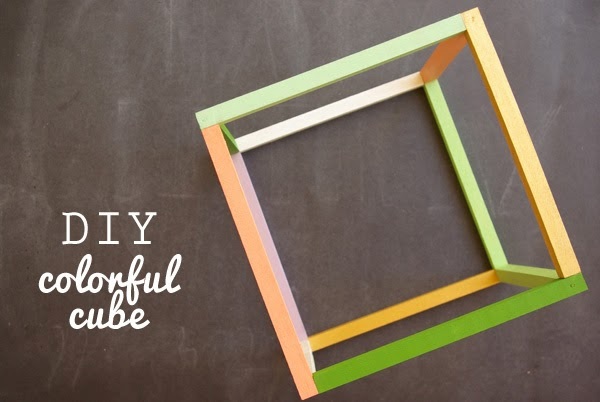
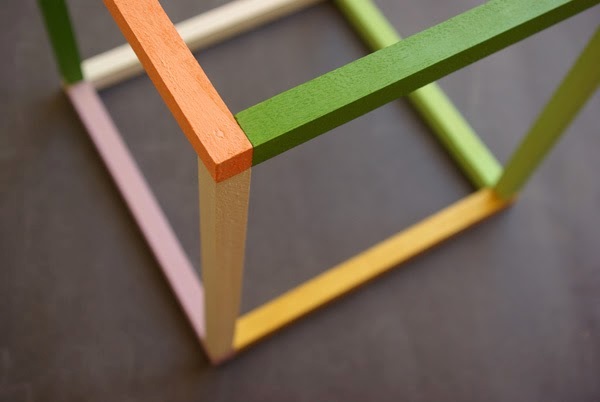
Cube1

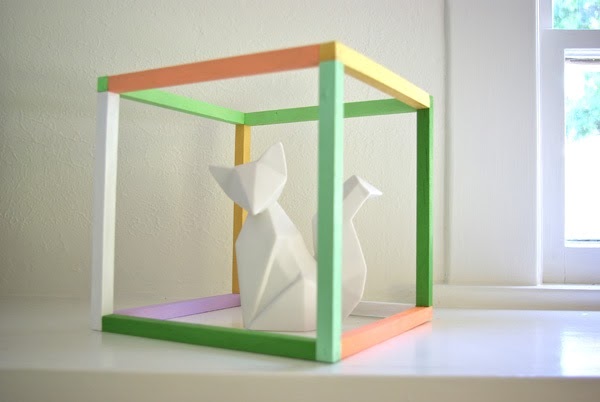
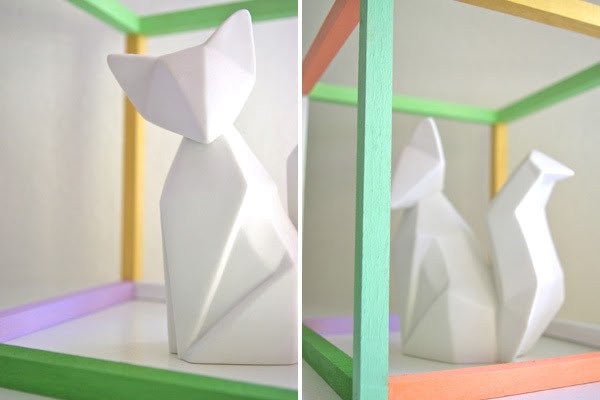
It's Jeran again, from Oleander and Palm. I'm back, as promised, to share my DIY Colorful Cube.  Geometric shapes and designs are everywhere right now. And I can't get enough of them. They bring a modern, angular edge to any space. I shared how I wanted my living room to feel more current, and I think playful accessories from The Land of Nod and little touches like this decorative cube help. The cube adds a subtle splash of color and interest to my mantel without feeling heavy or bulky. I set my little white fox in my cube and it acts as a 3 dimensional frame for it.

Cube2

Cube3

This is a simple little DIY that requires very few materials and just about an hour of your time.

Cube4

Supplies:

3 3-foot lengths of 1/2" maple (I got mine at Home Depot)
16 small finishing nails
Craft Paint (various colors)
Hammer
Paint brush
Saw

1.  To start, measure 8 in. lengths of the wood and cut them with a drop saw (this could easily be done with a hand saw as well). You'll need 12 pieces that are 8 ins. each.

2.  Then I painted the pieces in various colors. I used Martha Stewart paints in Metallic Yellow Gold, Pea Shoot, Wild Salmon, Wedding Cake, Hailstorm, Scottish Highlands, and Mint.  I wanted a random selection of colors, but green was definitely the anchor.

Cube5

3.  When the pieces were dry, I began to assemble the cube by nailing the corners together. 

4.  I started by making to flat squares.

5.  Then I attached the 2 squares together with the cross pieces. 

6.  Once the cube was assembled, I went back and painted over the nail heads to hide them and did any touch up necessary.

And that's it! It's really such a simple DIY for your home. For an easy update, add a little geometric to your space. I think these would look great in a grouping of different sized cubes. They also could look great in one solid color or stain the wood a nice dark walnut color to bring out the wood grain.

Post by Jeran: Oleander and Palm

Nod Products in a Grown Up Space

August 23, 2013

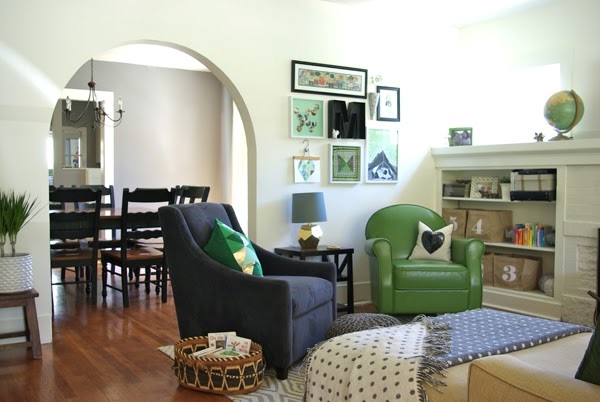
Hi, it's Jeran from Oleander and Palm.  I was here a few months ago and shared my girl's Toddler and Tween bedroom makeover.  I'm back because, with the help of The Land of Nod, I've been working to give our living room a more modern feel. Yes, I'm using Nod products in a grown up space!  
Lr1

Lr2

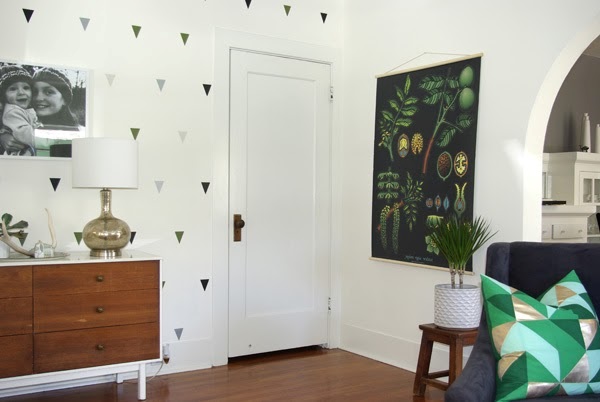
I started with a fresh coat of white paint.  This was our living room before, boring beige, bleh. It's funny how your taste can change in just a few years. But, I find myself drawn to more clean lines and geometric shapes.  Yes, our house was built in 1920, but I really think trendy, modern and fresh can be achieved in any home with Nod's products.  And I'm not talking about stripping the room bare and starting with all new furniture.  Most of my furniture, even my rug did not change. I believe a room's feel, mood and even style can be changed with just a few accessories and a little paint.
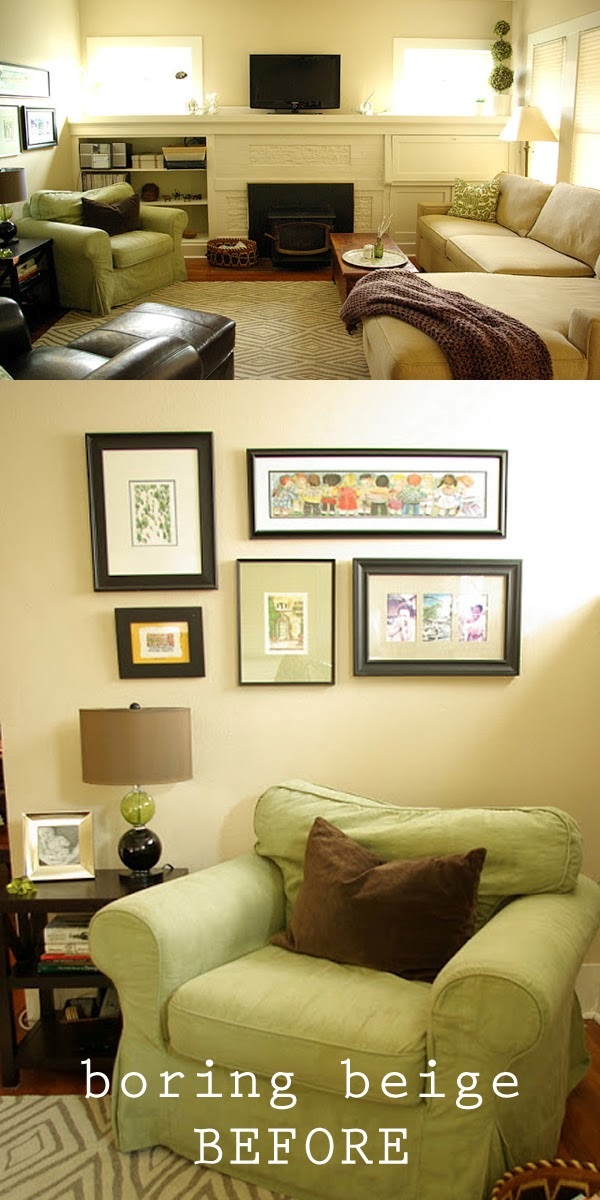
Lv3

Here's what I chose from The Land of Nod's fabulous products to give my room that quirky, playful vibe, that only Nod can do.  

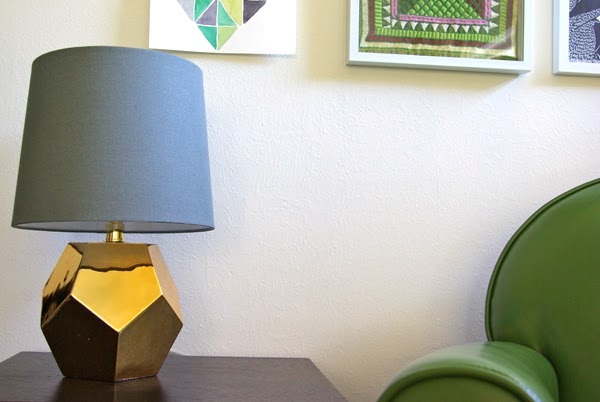
1.  I got the Between Rock and a Lamp in gold (because the geometric goldness of it was too much to handle).

2.  The cute Squirrel night light (because who doesn't love a woodland animal?).

3.  M Magnificent Metal Letter (because type adds a graphic element).

4.  Rhino Book Ends (because we are both teachers, so we have LOTS of books and rhinos are my biology teacher hubby's favorite animal).

5.  Store by Numbers Cube I'll need numbers 1-5 (because we need to get those toys under control and we might as well encourage learning to count at the same time).

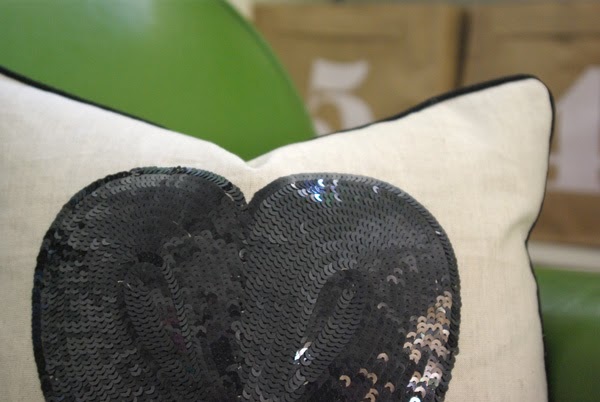
6.  Black Sequin Heart Pillow (because it's so totally awesome!).
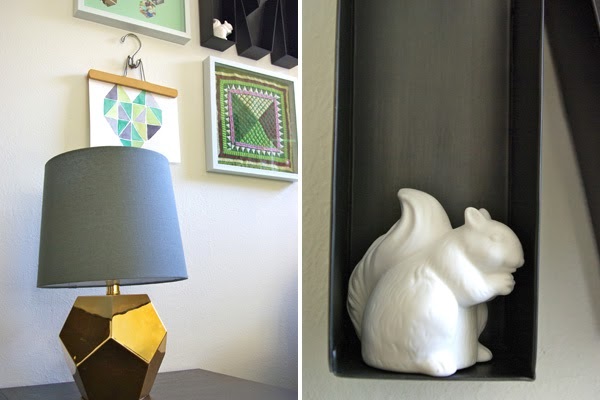
Lv4

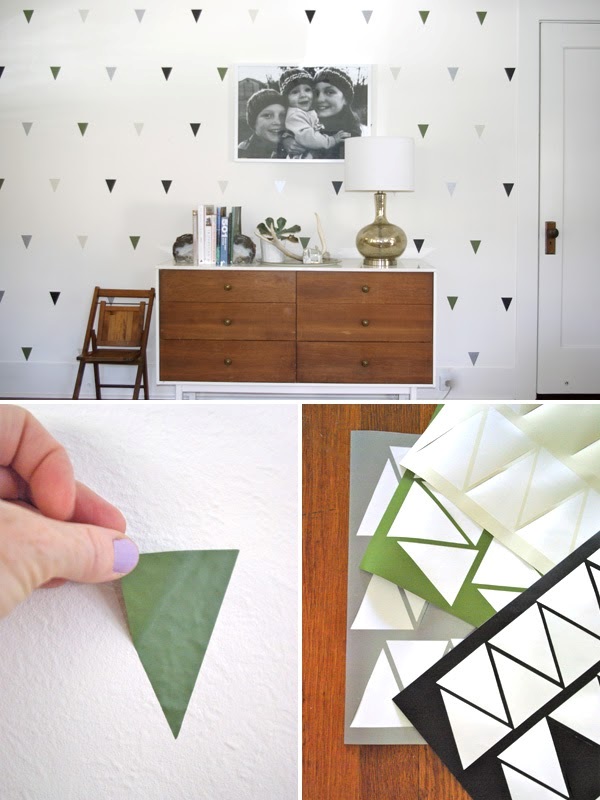
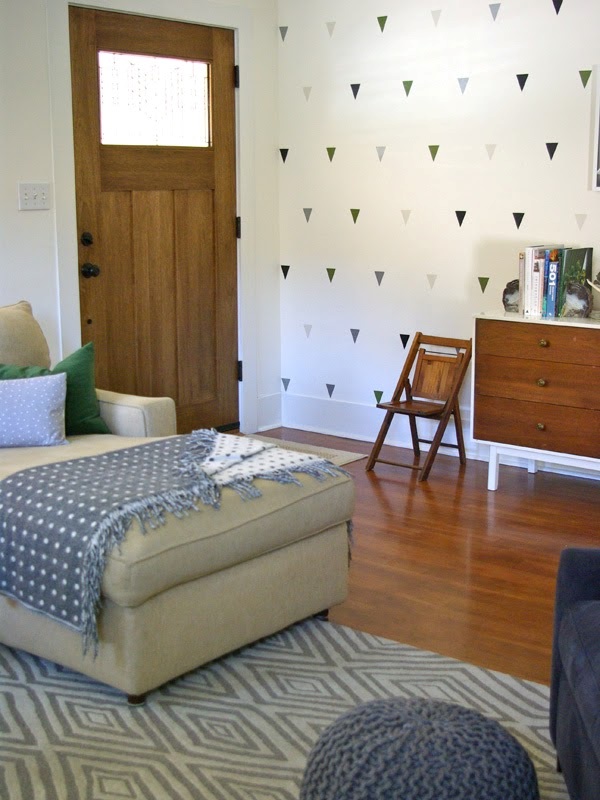
I also spent a Saturday morning cutting and sticking on my wall of triangles.  I was inspired by Nod's dot decals, but wanted something more angular and geometric.  I used my Cricut machine to cut 2" triangles out in green, silver, cream and black vinyl.  Then I did a whole bunch of measuring and taping to get them all in neat rows and columns.  I placed the colors in random order and I'm so pleased with this inexpensive, totally removable, addition to the space. 
Lv5

Lv6

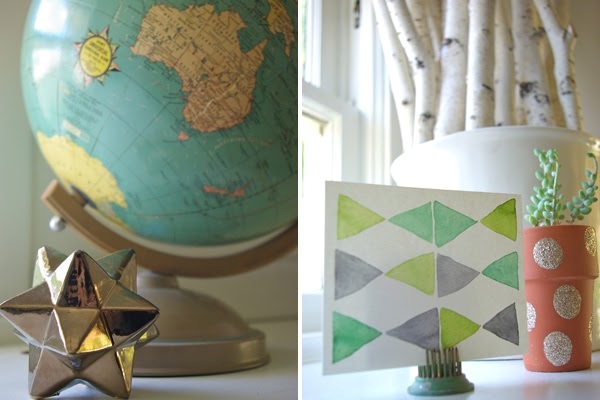
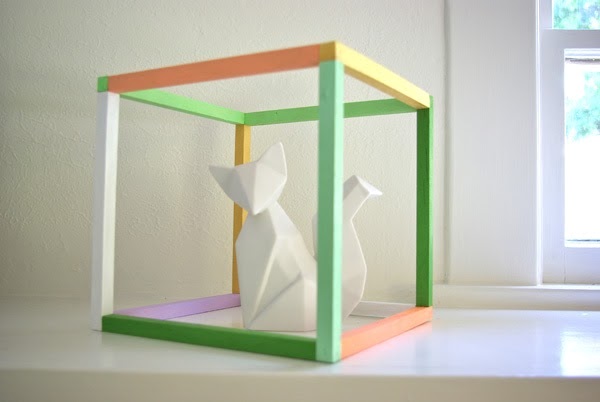
I mostly rearranged my nicknacks on the mantel, but I did make a fun DIY colorful cube (I'm calling it a 3D frame).  I'll be back to share the how-to with you later.
Lv7

Lv8

Lv9

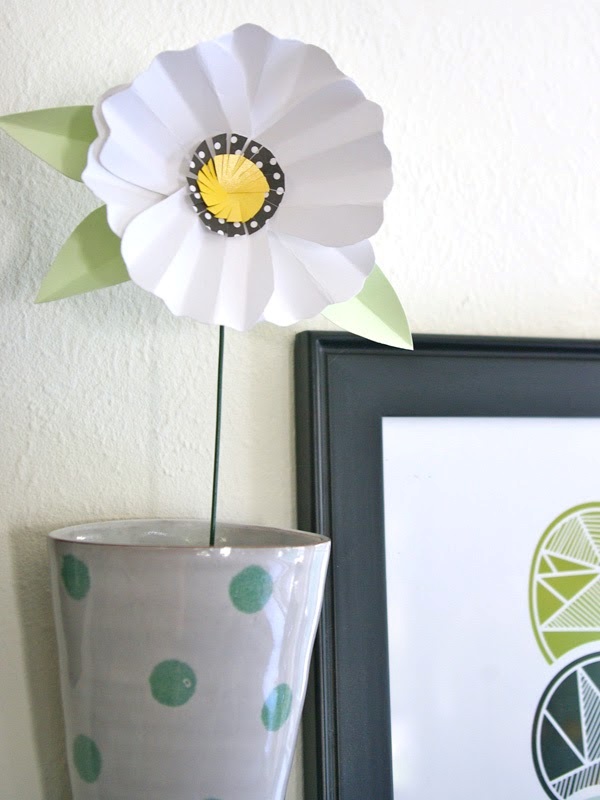
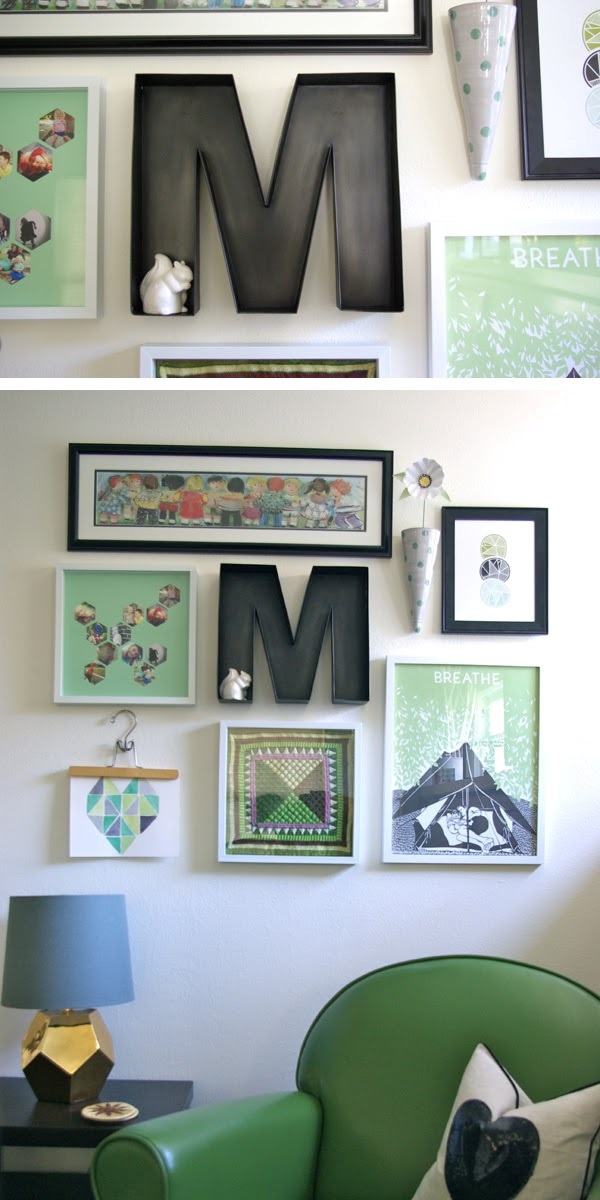
Probably my favorite part of the room is the new grouping of art the sits over my green chair (which I just moved from my bedroom to the living room).  There's some of my old favorites in the mix and some new pieces as well.  I used the M Magnificent Metal Letter as the anchor and then arranged everything around it.  There is a collage of my instagrams, a framed textile from Yemen, a simple little water color I painted, a treasured painting of children I bought in Rome many years ago, my gorgeous Breathe print, and a hanging vase with a little paper flower I made (from this tutorial).  I love using a grouping of little pieces to create one big statement. 
Lv10

Lv11

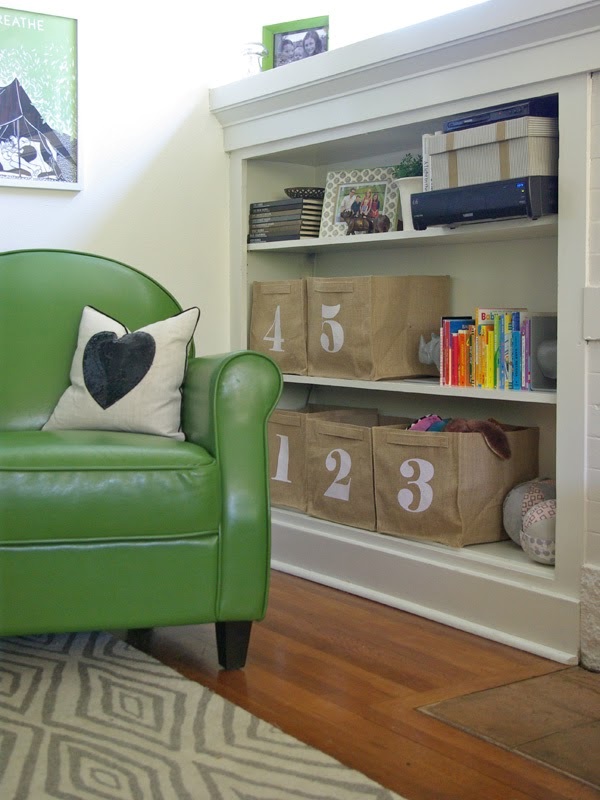
And last, but not least, a got some order of my book shelf.  It doesn't look like an explosion of toys and junk anymore.  I'll be back later to share how you CAN live with toys stylishly in grown up spaces.
Lv12

Lv13

There you have it friends, playful, modern style can be achieved quite reasonably with Nod products.  Wouldn't you agree? 
Lv14

Lv15

Post by Jeran: Oleander and Palm
DIY Golden Kraft Letters

August 22, 2013

GoldenKraft_LoN_AugBk_1016

Adding a sparkling golden accent is easier than you’d imagine. A simple coat of metallic paint can turn everyday kraft letters into shiny pieces of art. Not only that, they also make a great way to add a personalized accent to any room. Visit landofnod.com to take a look at our Crafty Kraft Paper Letters, and start giving them your own personal golden touch. 
Find more creative inspiration here

Alphabet Cards Garland

Post by Haeley of Design Improvised
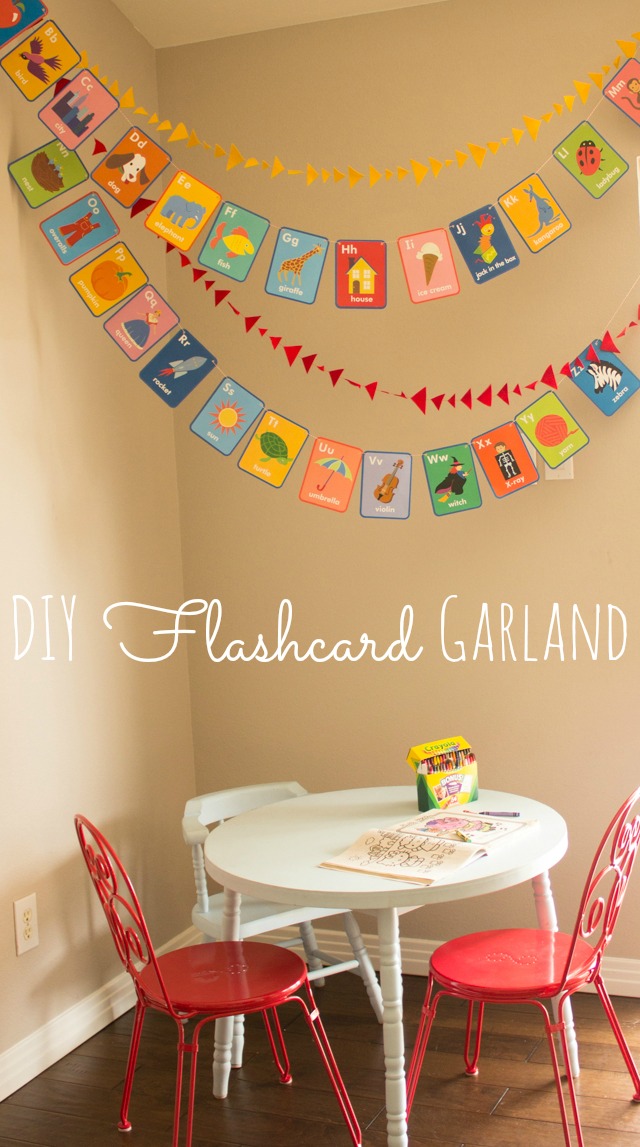
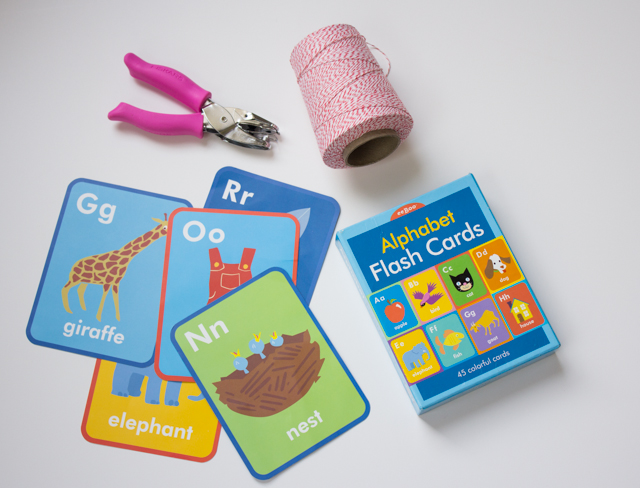
Abc-Flashcards

With all the unpacking and settling in over the past month, I haven’t had time for DIY projects. I must say, I’ve been missing them! Since I haven’t put anything up on the wall in the girls’ playroom yet, I came up with this idea the other day to A) satisfy my crafting urge and B) add a little color to their play area:

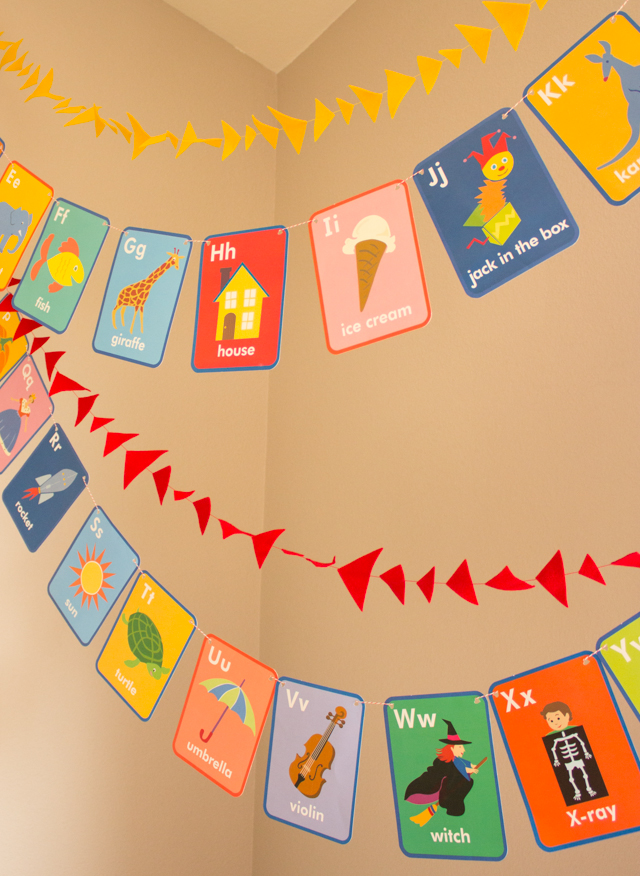
Abc-Flashcards-5

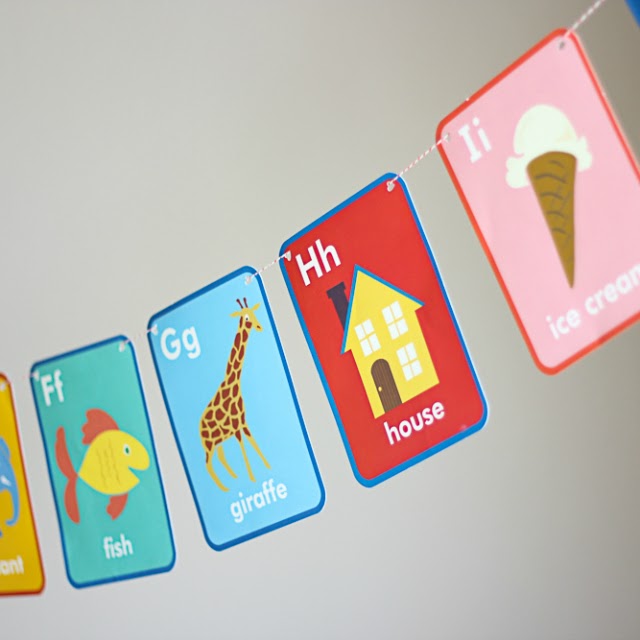
These flashcards are so cute I thought they were display-worthy. Several were a little fingerprinted or bent from being played with, but if you hang them up high it is hard to tell. 😉

To make the garland all you need are a pack of flashcards, a hole puncher, and some twine.

Abc-Flashcards-1-2

Punch a hole in each of the top corners and then work the twine through the back. Tip: start by stringing on the “Z” first and then work backwards through the alphabet!

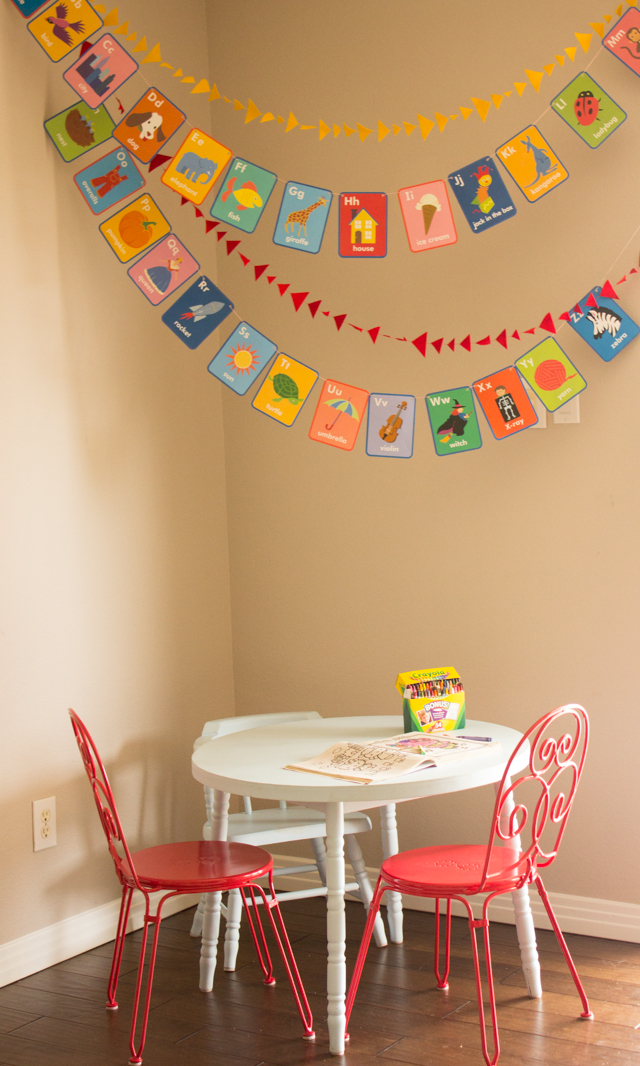
I made two strands of the garland and hung them up in the corner of the playroom along with a couple garlands from The Land of Nod. I made sure to hang them up just out of reach of the girls!

Abc-Flashcards-3

For now, they are adding a fun focal point to a room with bare beige walls. It would also make for cute decor for a baby shower or a back-to-school party!

Flash-Cards

Post by Haeley of Design Improvised 

Turn This Image Into A Room – Vintage Bohemian Sparkle

August 21, 2013

Post by Anna Passadori

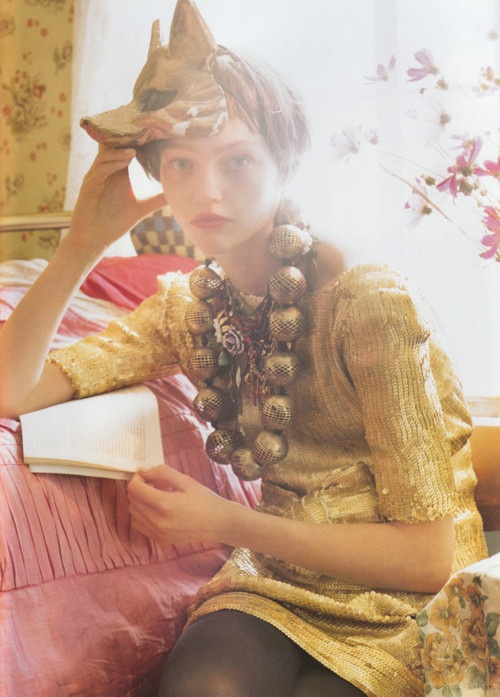
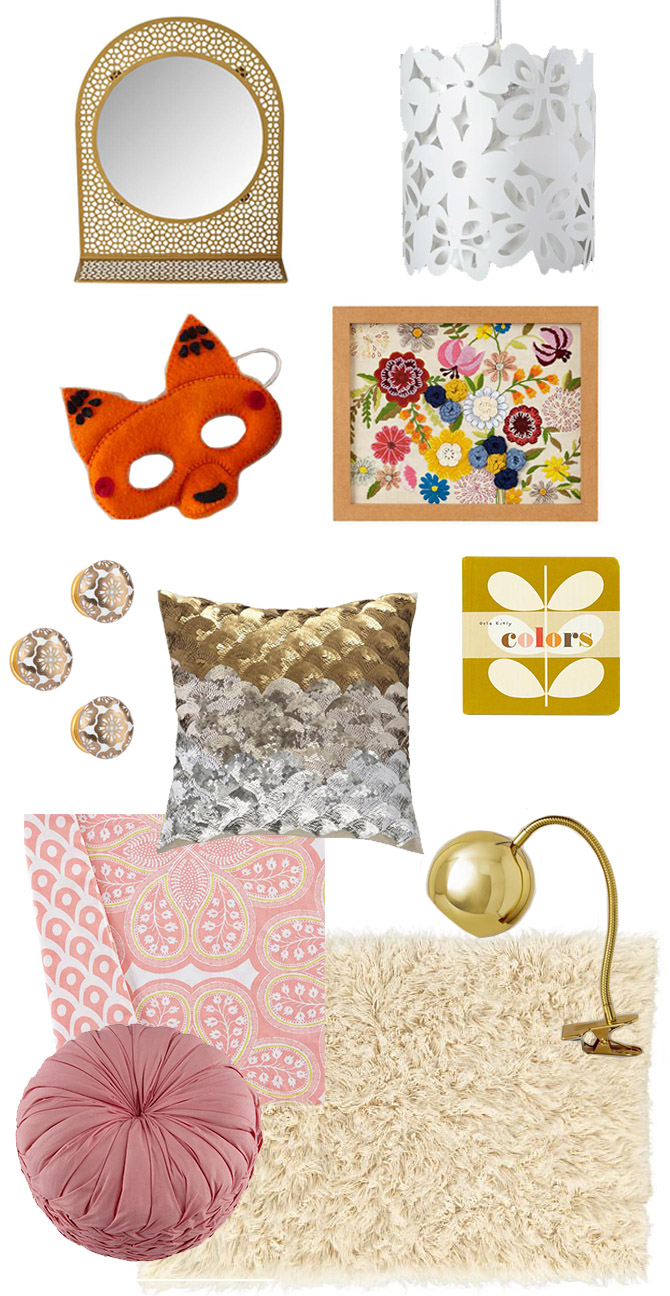
When I saw this image from an old Vogue UK magazine, I thought how can I make this into a room? The image is so dreamy, feminine, and such a lovely mix of vintage styles.

50346caf50d1745e70fcc72cfdc55406

Source

First step was to write down the words that came to mind when I looked at this image:

textured
layered
bohemian
woodland
glamour
disco
grandma floral
vintage
sparkle

This made it easier to nail down the concept for the room, Vintage Bohemian Sparkle. Next I gathered the product together, keeping the same textures and mood of the original image. Although this mood board is for a nursery, it could easily transition into a bedroom.

Bohemia

Products clockwise from top left:

Chantilly Mirror, $79
Cutting Garden Ceiling Lamp, $69
Natural History Framed Wall Art, $119
Colors by Orla Kiely, $9.99
Modern Clip Lamp, $59
Flokati Fluff Rug, $129-629
Ruched Throw Pillow, $29
Mosaic Paisley Crib Bedding, $29-$49
Sparkle Pillow, $44
Handpicked Knobs in Gold Floral, $7.95 each
Wear the Wild Things Dress-Up Set, $24.95

By Anna Passadori

Anna develops and designs exclusive product for The Land of Nod. She hails from the west coast and has traveled the world to source product. She loves anything Marc Jacobs, Sofia Coppola or stripes! (So, if anyone can get a photo of Sofia Coppola wearing a striped outfit by Marc Jacobs, please send it along.)

Have a Slice of Fraction Pie

August 20, 2013

Teaching your little one about fractions is easy as pie! Sorry… so cliché, but I couldn’t resist. Actually, I’ve never really understood that “easy as pie” expression because I’ve actually tried making pie crust from scratch and it is NOT easy!

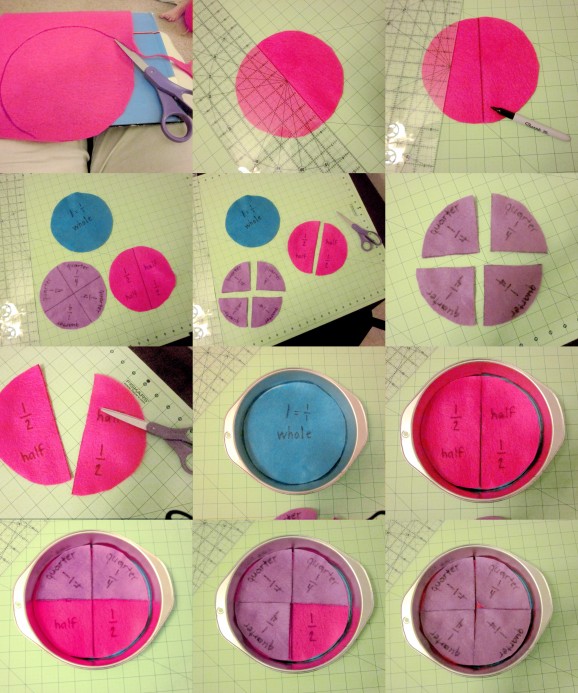
Back to fractions, I actually had one of these Felt Fraction Pies when I was a kid. My Mom (a former kindergarten teacher) made it for us to play with. Mostly we’d use it to play make believe in our pretend kitchen, but it was a great introduction to the concept of fractions.

PiePuzzleFractionsTutorial-578x693

Felt Fraction Pie Ingredients:

:: Pie tin or round cake pan
:: Three pieces of felt, each a different color
:: Scissors
:: Straight Edge
:: Permanent Marker

1. Place your chosen pan on your first piece of felt (ours was pink) and trace a circle using the pan as a guide.

2. Cut out the circle along inside of the traced marker line.

3. Using a straight edge create a line that divides your pink circle in half. Write the labels “Half” and “1/2″ on both sides of the pink pie.

4. Repeat steps 1-3 for the remaining two felt pieces, only divide the second piece into quarters and the third piece leave whole.

5. Cut apart the half and quarter so you have pie “slices.”

Now your little one is ready to make some Fraction Pie. Enjoy!

Reposted with permission by Aimée Lowry & Bettijo B. Hirschi from PagingSupermom.com

Numbers By Orla Kiely

August 19, 2013

N1

N2

N3

N4

N5

N6

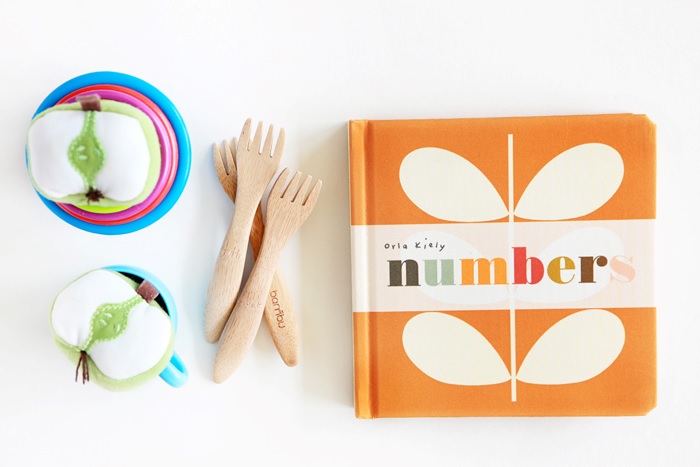
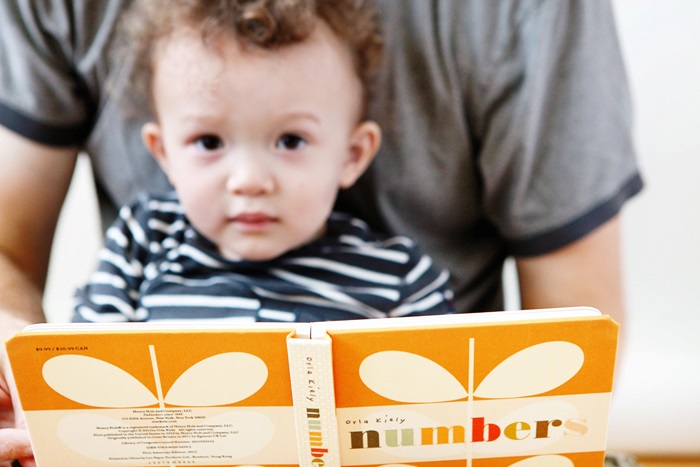
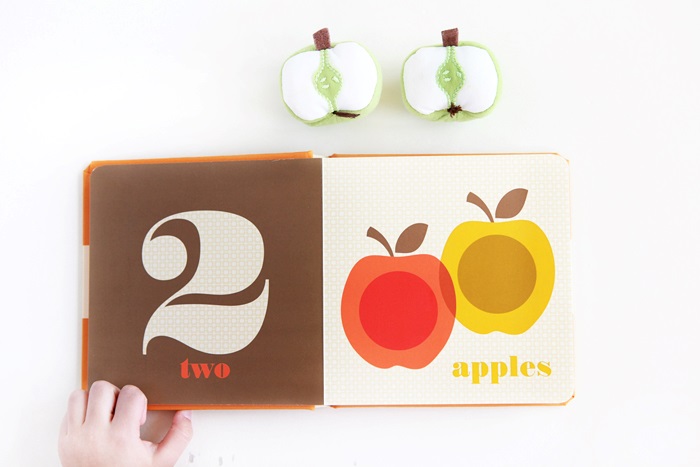
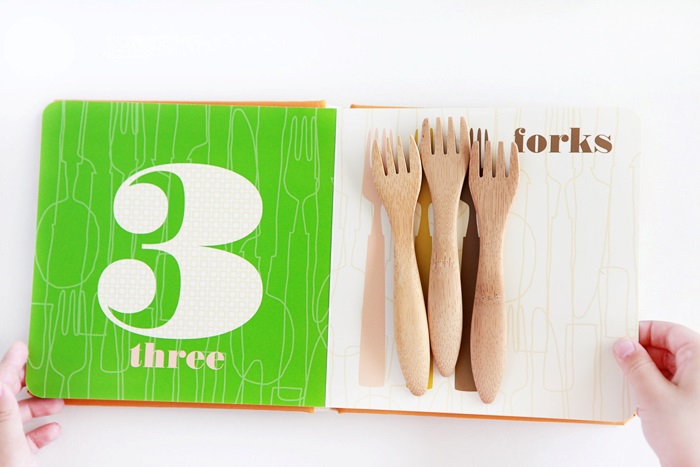
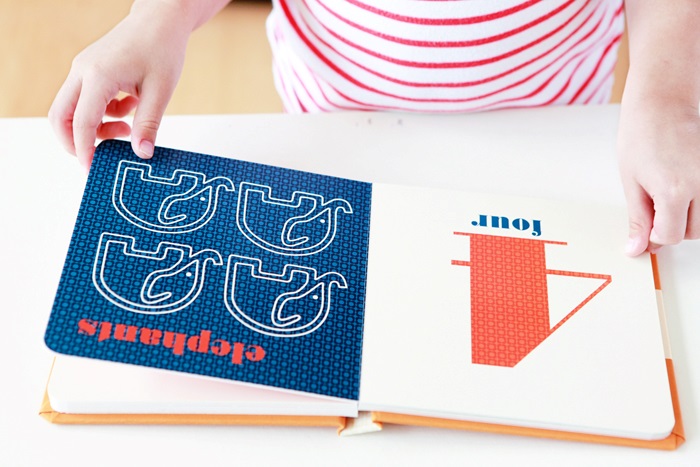
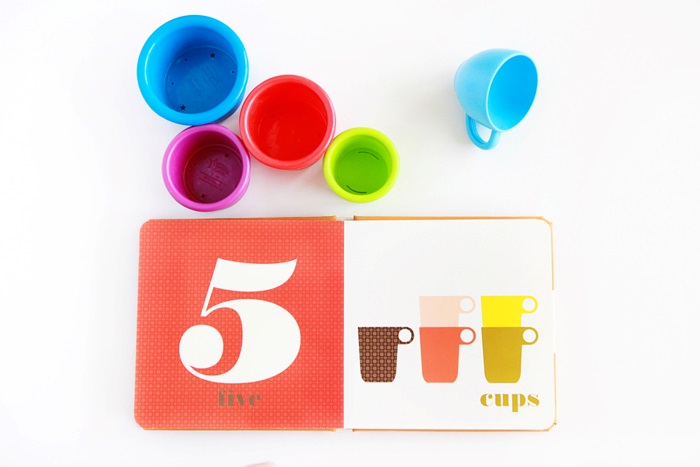
Numbers by Orla Kiely is a companion to her board book Colors and both are a wonderful introduction to the UK designer's bold and modern style.  You can find items that match the pictures in the book to practice counting and one-to-one correspondence with your toddler or preschooler.  An explanation of this important skill and other activities can be found on this website.

Post by Michelle Sterling of Avery and Augustine

You can see her work and read about her two young children and their first forays in cooking, art and everything in between at Avery and Augustine.


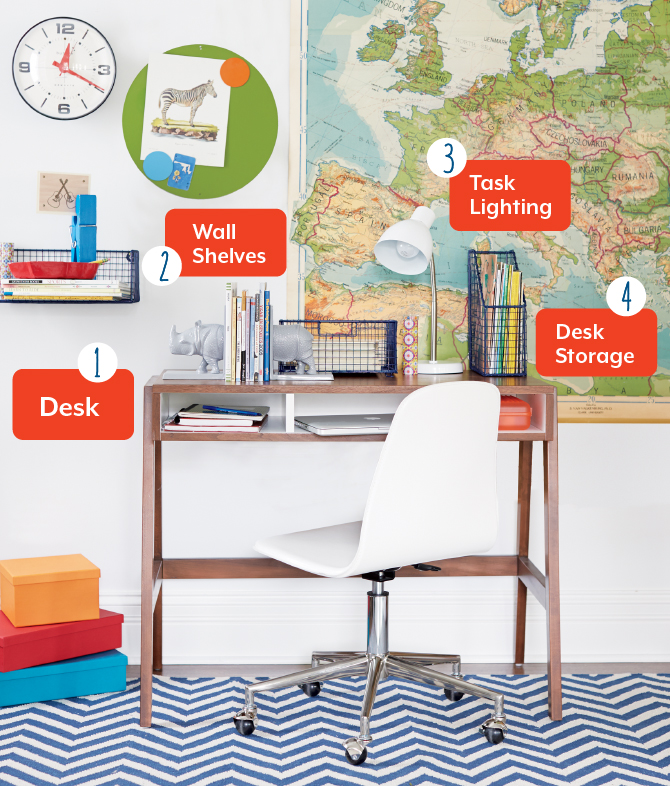
Four Steps to a Study Space

August 16, 2013

01_4stepsStudySpace_blog
Use a desk that’s versatile, so it’ll grow with your kids from addition all the way to trig.
01_4stepsStudySpace_blog

Prairie School Desk Walnut or White Lacquer $299
Pirouette Desk $349

Ansel Teak Desk $499


Add a wall shelf to maximize storage without taking up valuable workspace.

02_4stepsStudySpace_blog

Down to the Wire Shelf Blue, Green, Grey or White $29
I Could've Bin a Wall Organizer Lime $49

Heart of Gold Wall Shelf $49


Add a variety of desk storage to keep all the essentials close at hand.

03_4stepsStudySpace_blog

Cubby Cups White $24.95
Down to the Wire Storage Collection Grey, Green, Blue or White $24.95–$79
I Could've Bin Storage Collection Blue, Lime, Pink or Aqua $4.95–$65


 Finish it off with some task lighting, like a table lamp or clip-on light.

04_4stepsStudySpace_blog

Modern Clip Lamp Gold or Silver $59
I've Got the Whole Illuminated World in My Hands $99

Clip It, Clip It Good Lamp Black, Yellow, Aqua, Pink, Red or White $29

Curated Comfort

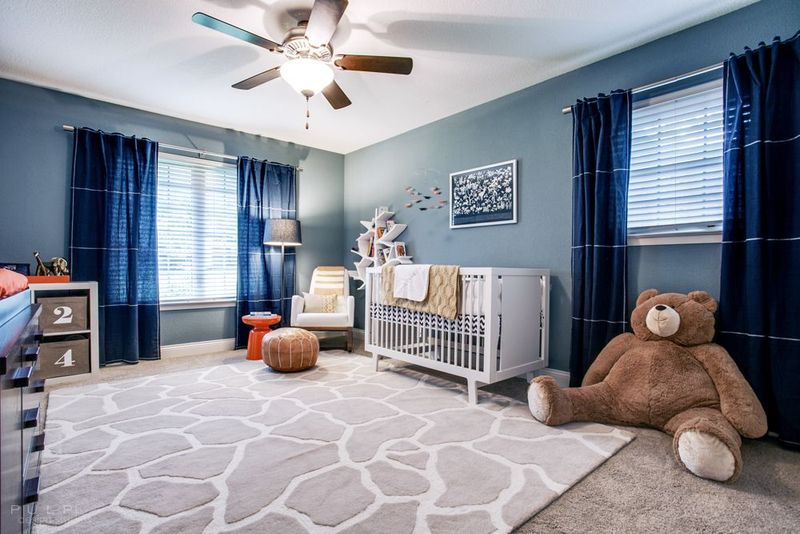
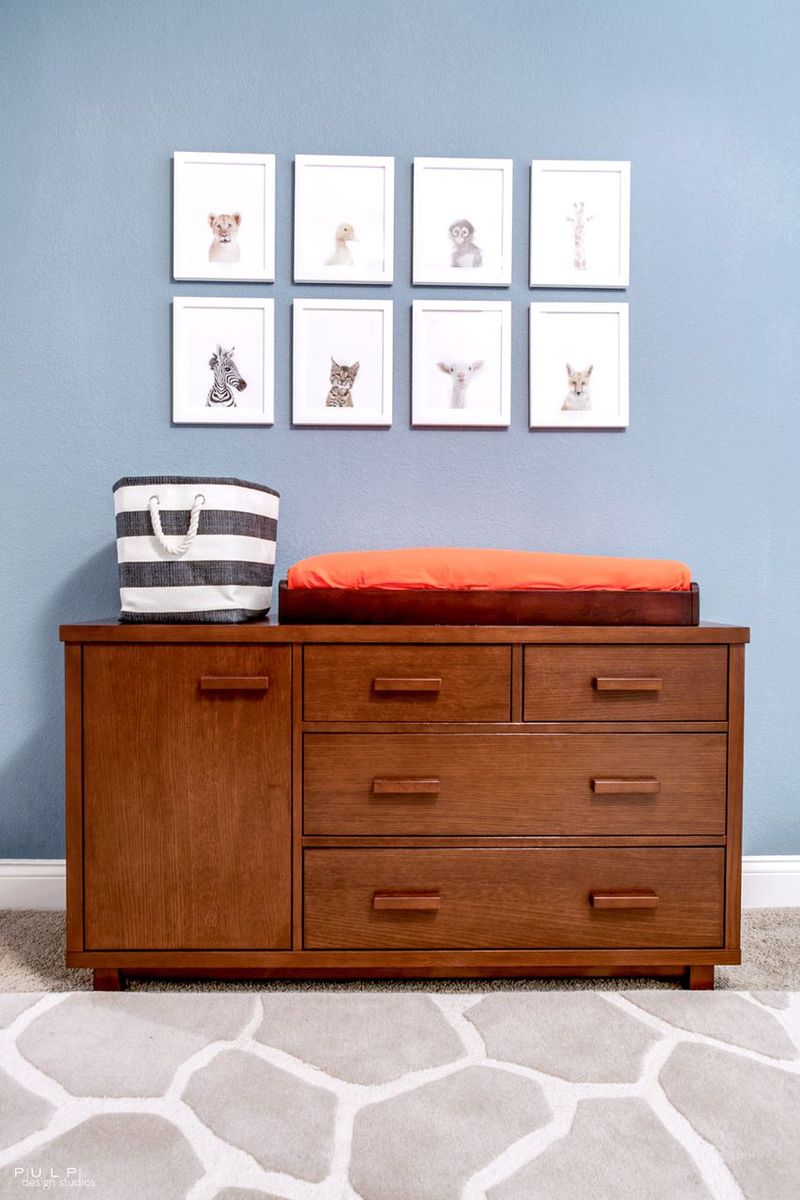
Beth Dotolo, Co-Owner & Principal Interior Designer at Pulp Design Studios took on a fashion-forward business owner as their client in Dallas, Texas. Due to the nature of their business and the fact that she and her husband were expecting her first child, this client’s residence had to be completed with the utmost of style, on a budget, and completed in a hurry… No small feat!

Nursery1

As far as inspiration Beth shares:

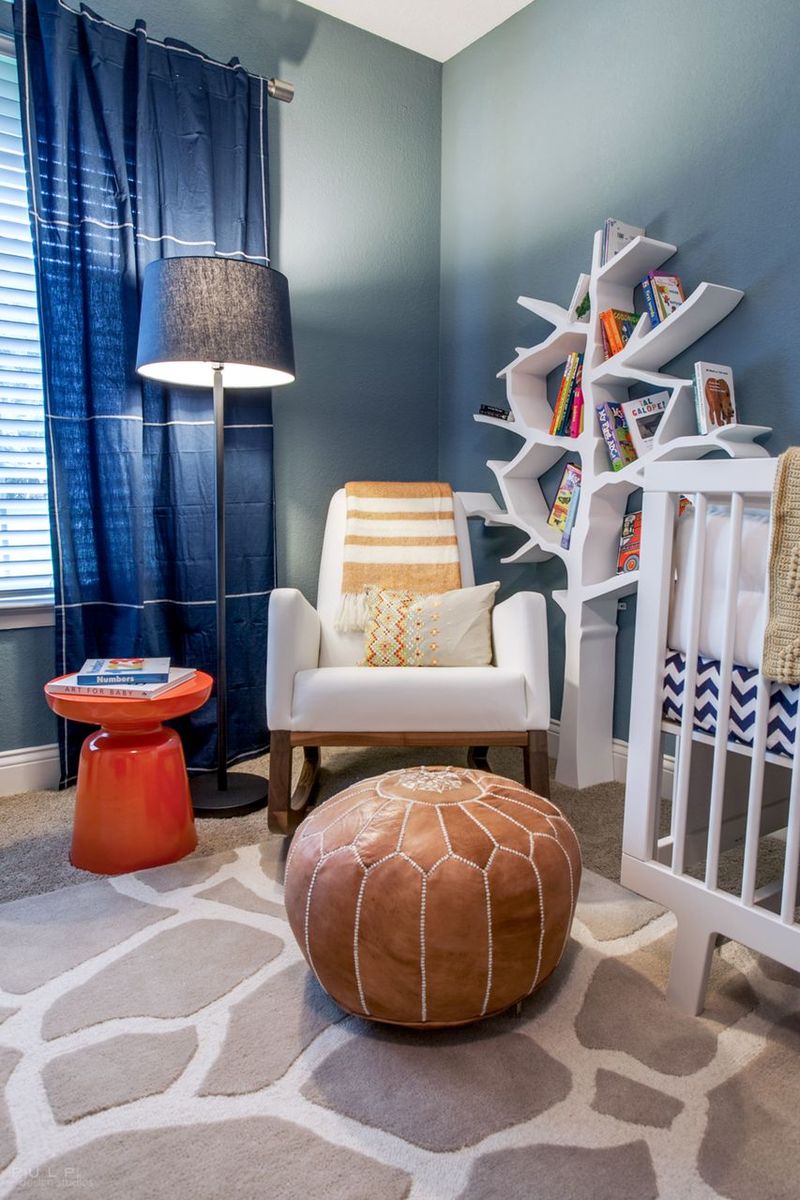
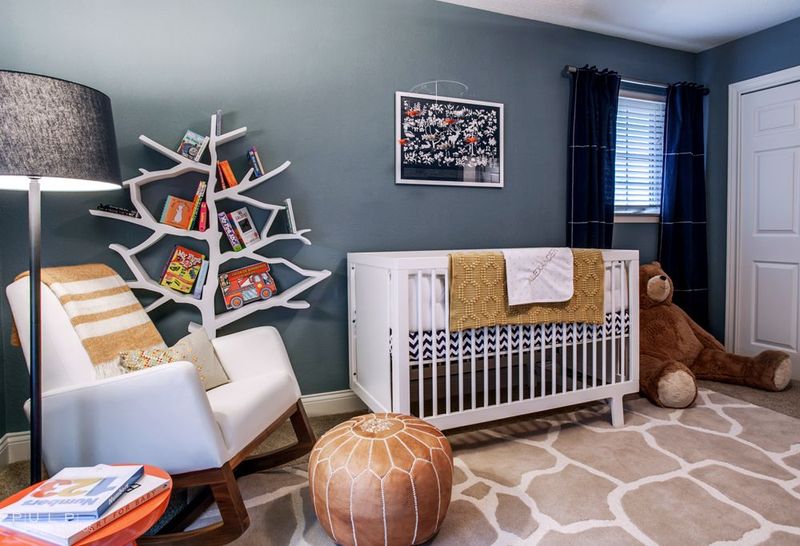
“We began planning the nursery before the couple knew what gender the baby was (which ended up being a boy). But, either way, we didn’t want to be gimmick-y or very gender specific. We designed the space with a palette of creams, navy, beige, brown and white rather than pastel pinks and blues. We wanted it to be modern and unique to set the style, but have enough whimsy to be stimulating. The result is a soothing nursery, with a subtle animal theme, that the baby can grow with and age into.”

Nursery2

Nursery3

Nursery4

Land of Nod Items Used:

Canvas Curtain 84” Panel in Blue
Graphite Floor Lamp & Dark Blue Shade
Oak Park Elementary Dresser w/ Changing Tray & Pad
Canvas Number Storage Bins (for small white bookshelf)
Joya Rocker in White Leather

Register for these great nursery items at LandofNod.com

Photo & Interior Design credits: Pulp Design Studios

Back to School With Neon

August 14, 2013

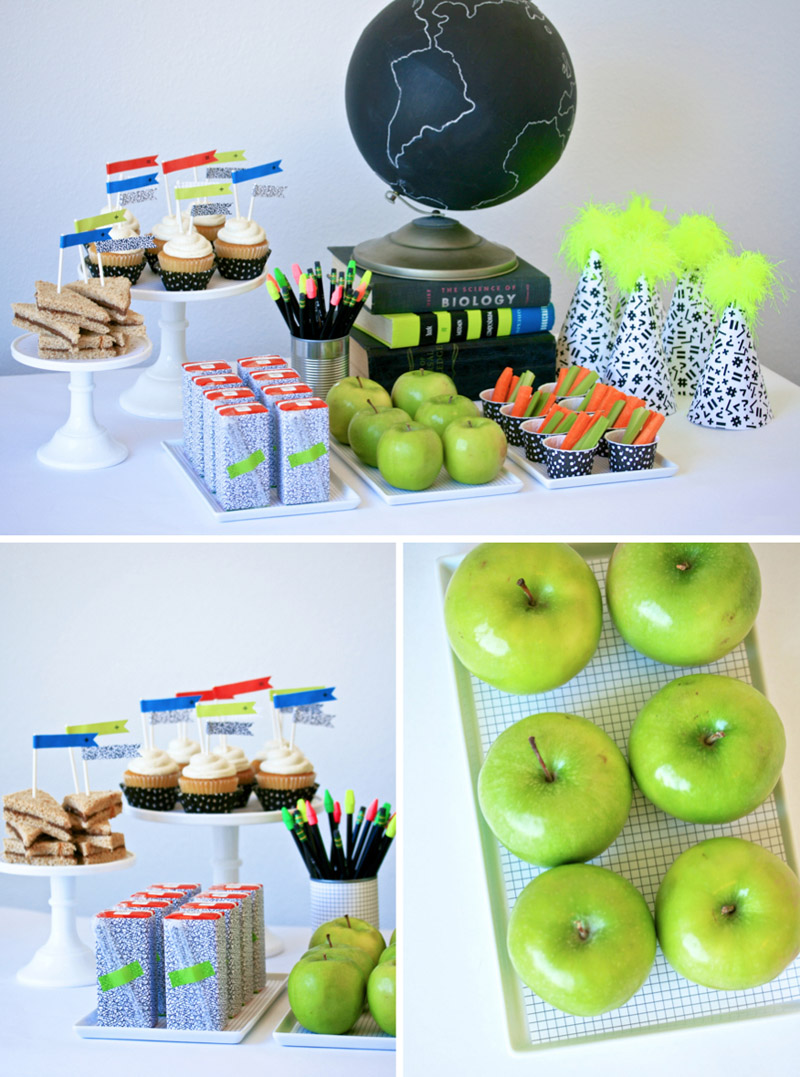
We're wild about neon this summer so we couldn't resist sharing the brilliant Back to School spread put together by our friends over at PagingSupermom.com. The free printable decor includes a good mix of fun and funky, that would create a cool party or playdate with kids of all ages.

1-Neon-Back-To-School-Party-Food

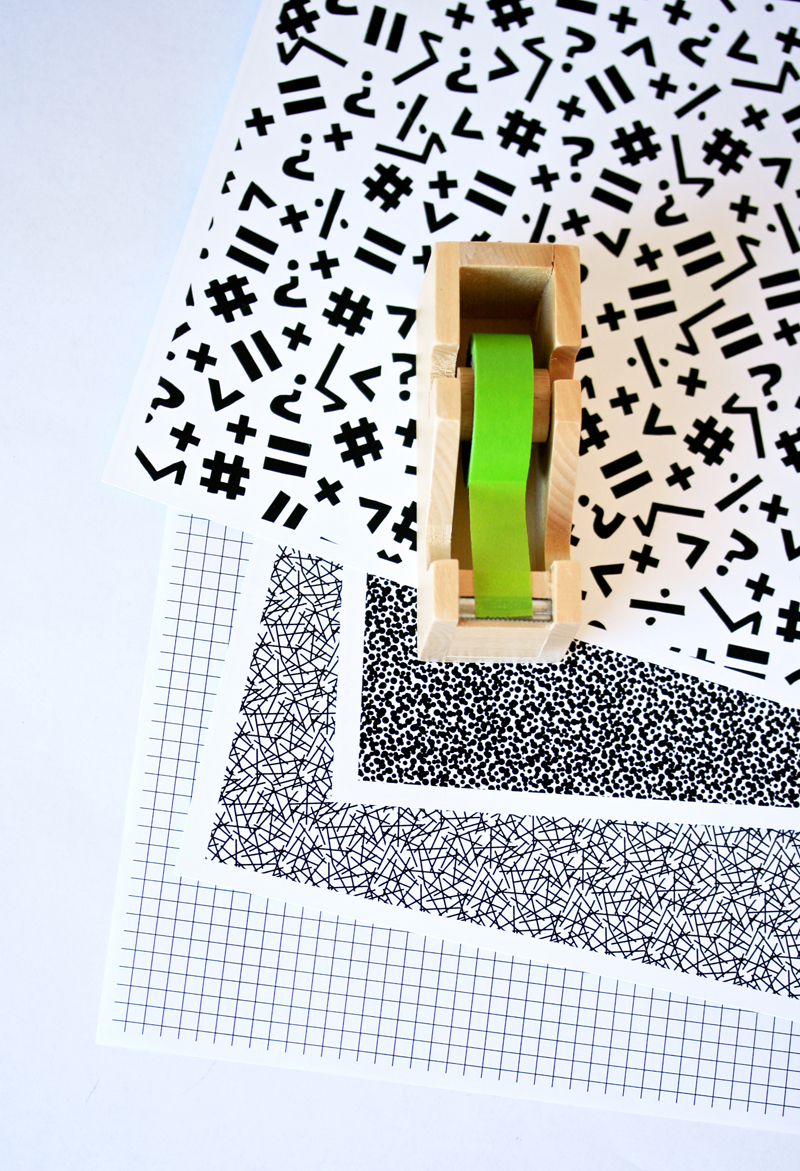
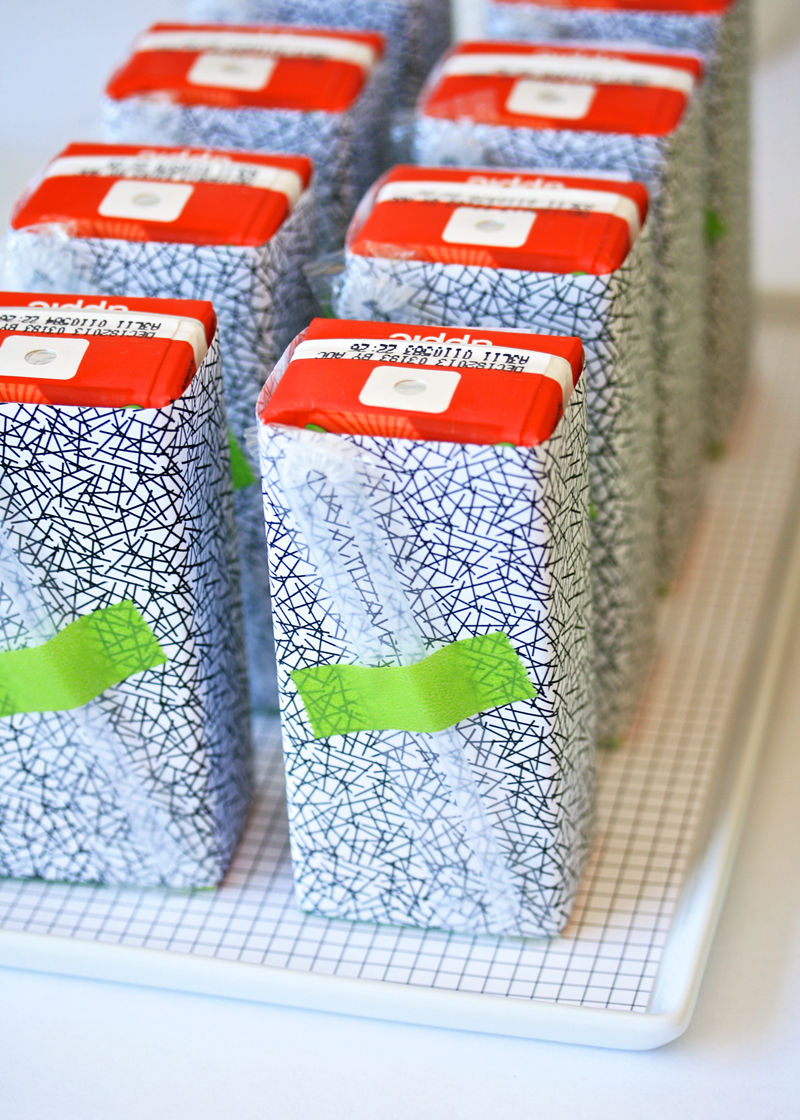
Make your own party decor with the free, exclusive back to school patterns. They are practically free to print in black and white and can be cut and taped to create party hats, decorate juice boxes and to line trays and cake stands — genius!

2-Neon-Back-To-School-Party-Decor-Patterns

3-Free-Printable-Juice-Box-Wraps

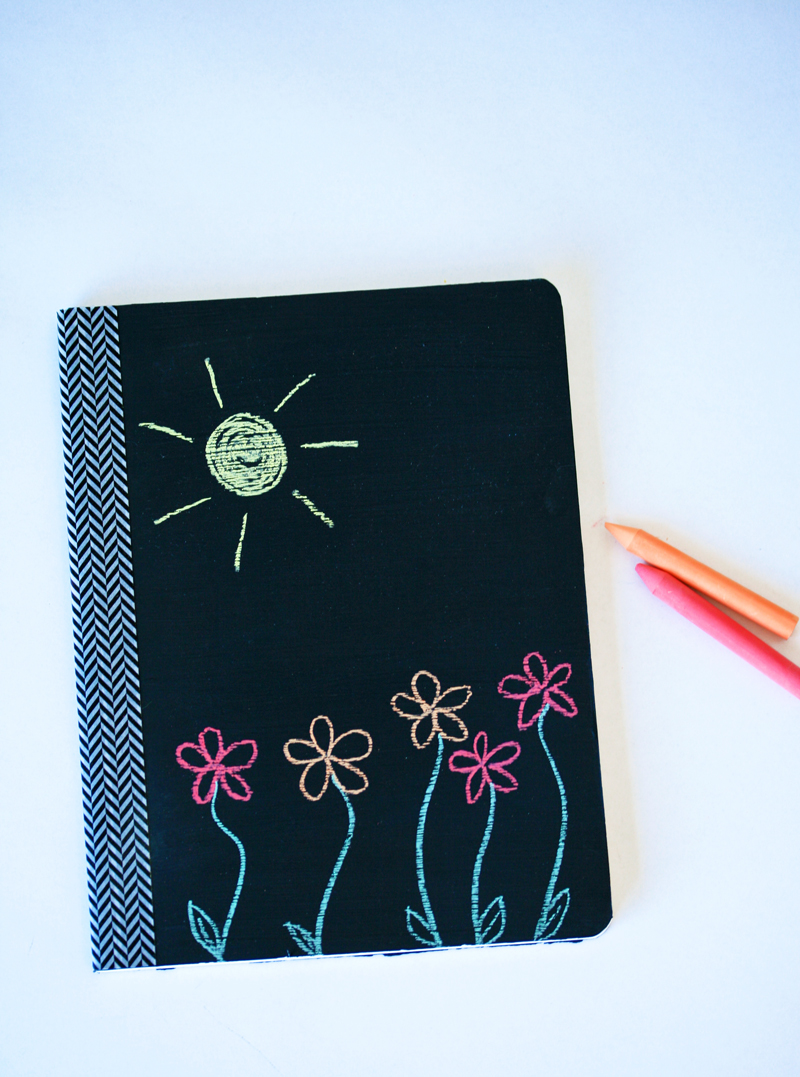
We love these DIY Chalkboard Composition Notebooks for party favors, and what kid wouldn't want to make a personalized pencil?!

4-Chalkboard-Notebook

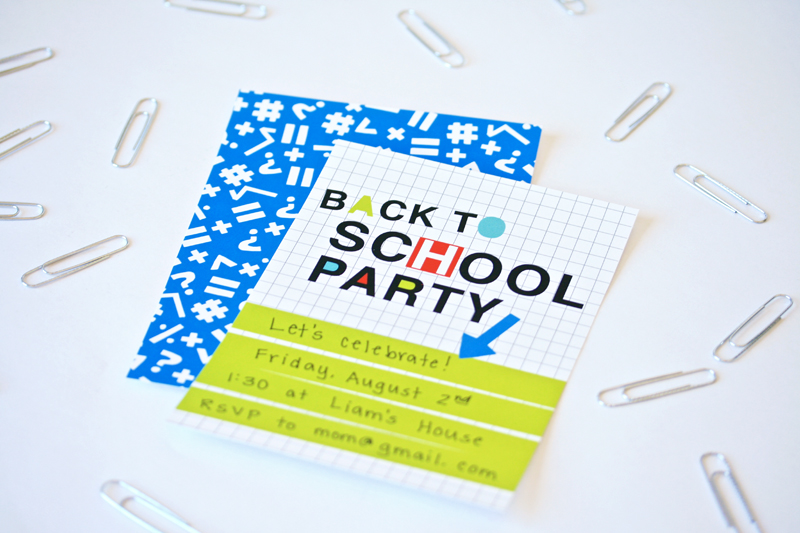
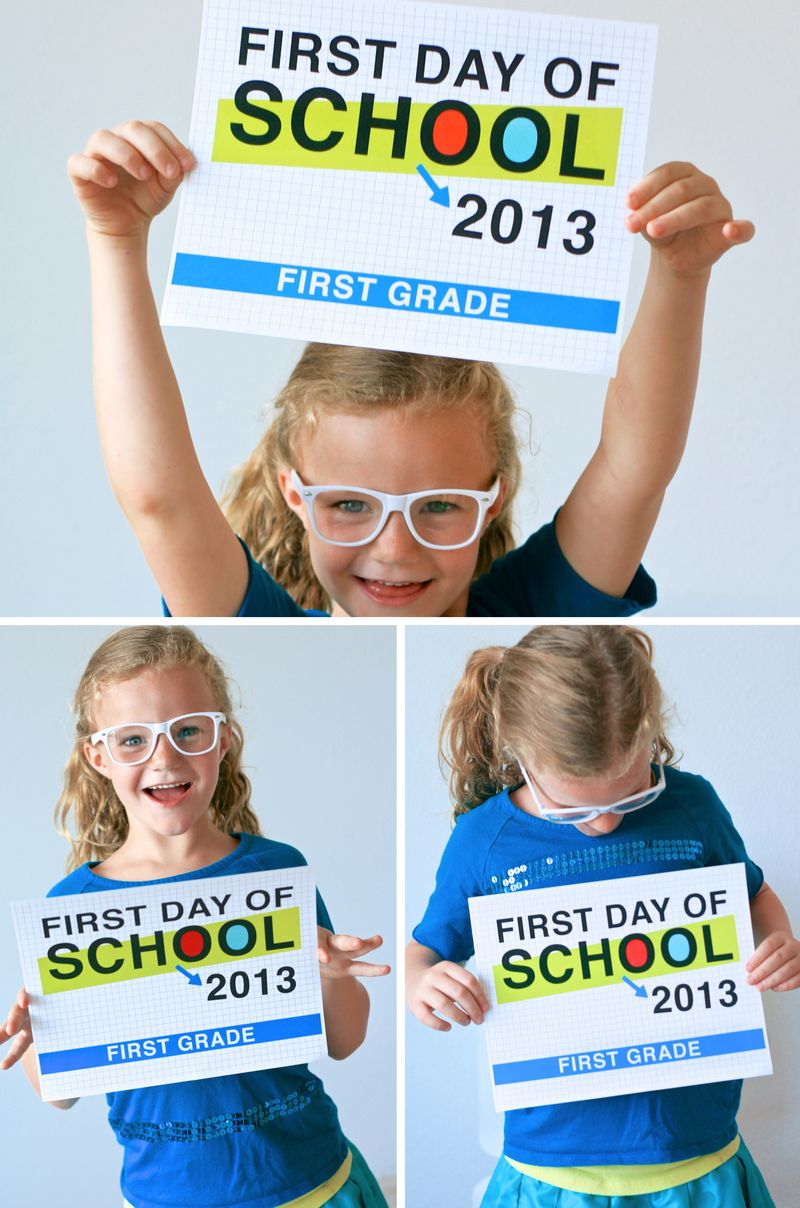
Of course there is a free printable party invitation as well as these rad, first day of school photo signs. Be sure to post pics of your cuties on their first day via Instagram and tag @thelandofnod and @pagingsupermom so we can see too.

5-Back-To-School-Party_invite

5-First-Day-School-Signs

Geo Glam

August 13, 2013

These days I’m loving geometric patterns and forms mixed with rich, glamorous accessories such as gold furniture and black accents. It can be a fun way to liven up a room while keeping it sophisticated and feminine.

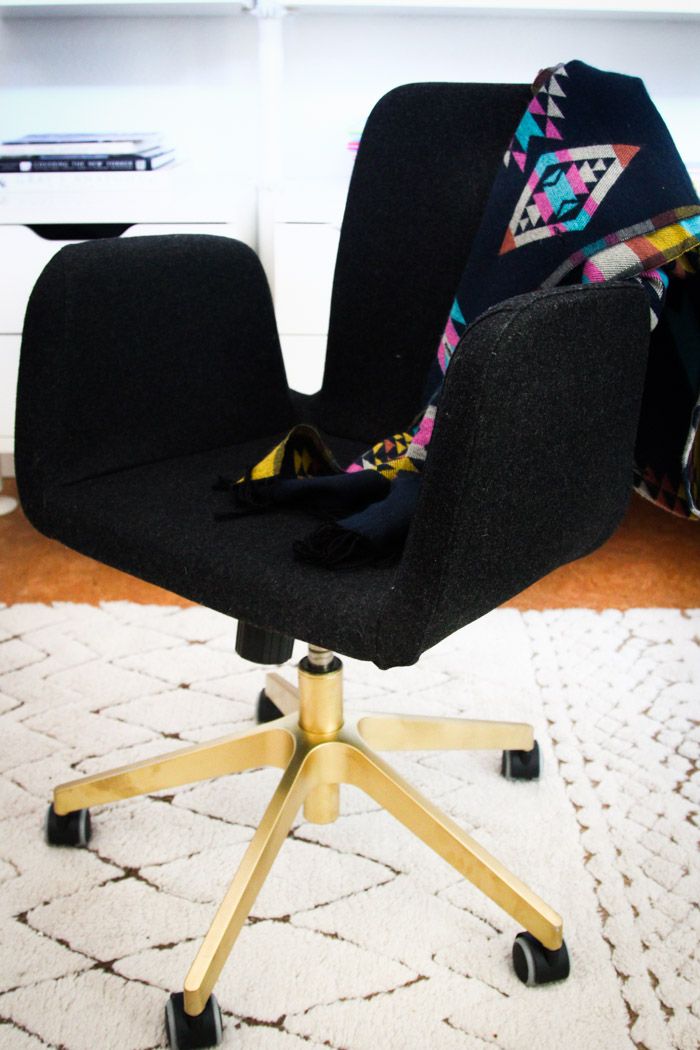
A geometric patterned throw and rug look fab with this glamorous chair:

C583336d232bc2fa0b0248110d4d3113

source

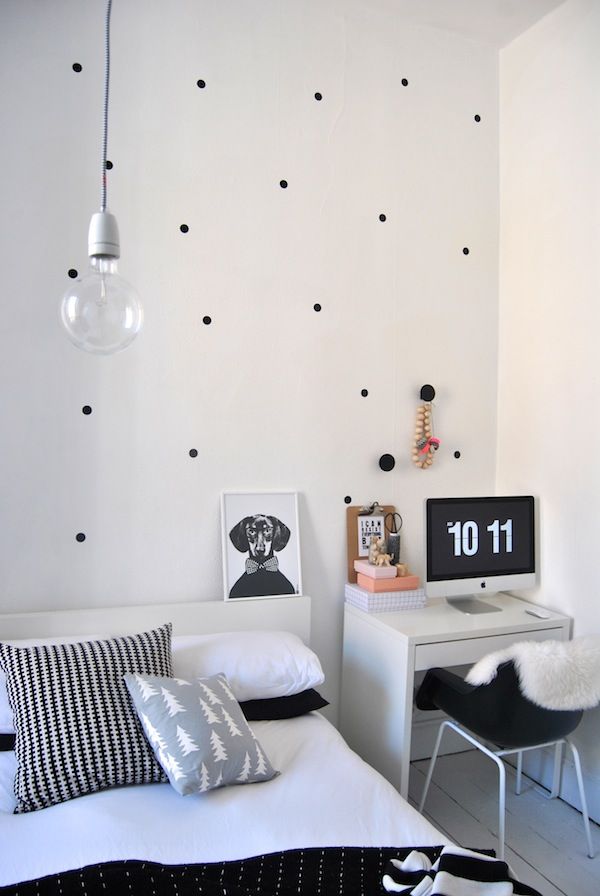
Make an interesting pattern on the wall with geometric decals and hooks:

D79f232cd4f8cda8dc2682aecf7a1f2c

source

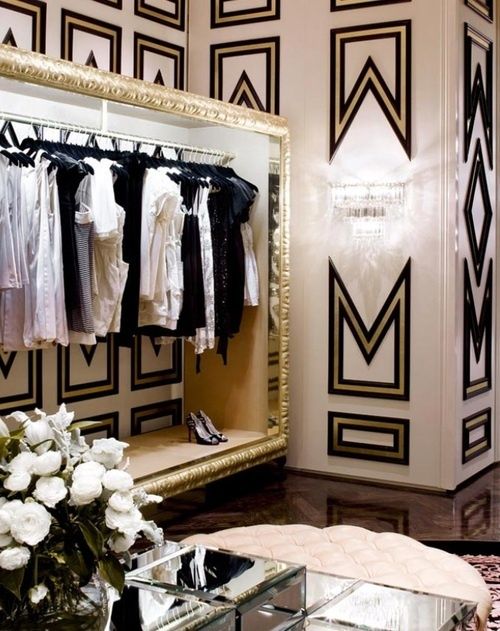
Add some art deco and metallic accents in geometric forms:

Be192b80bfbe63723fcfb2161e3e19b2

source

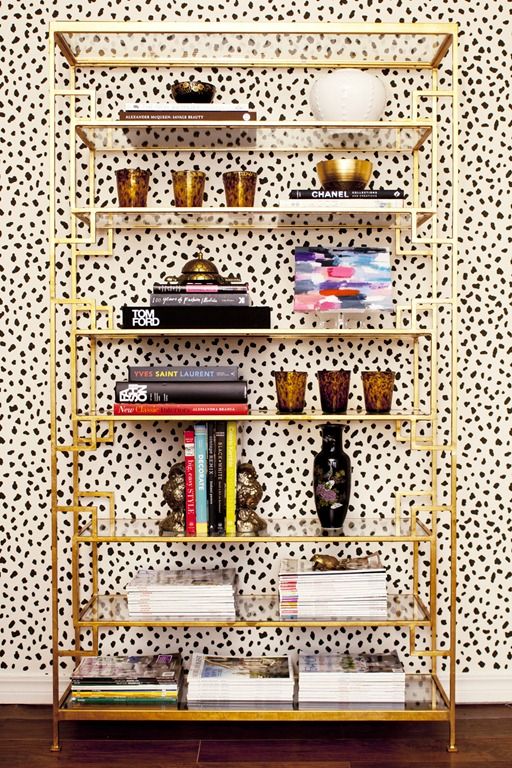
The structured lines of this bookcase contrast nicely against the energetic pattern behind it:

5e7d1733f600f78c0abb01df03d25a5f

source

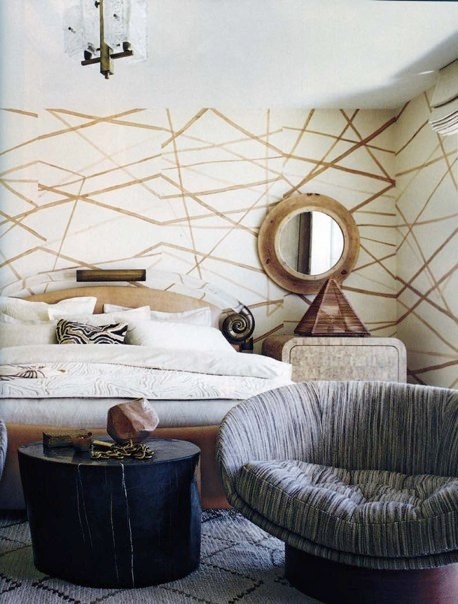
The angular graphic treatment to these walls compliment the round shapes of the furniture:

F4d397b096c3fd2772076085b51ea6c8

source

Now try it at home!

GEO GLAM

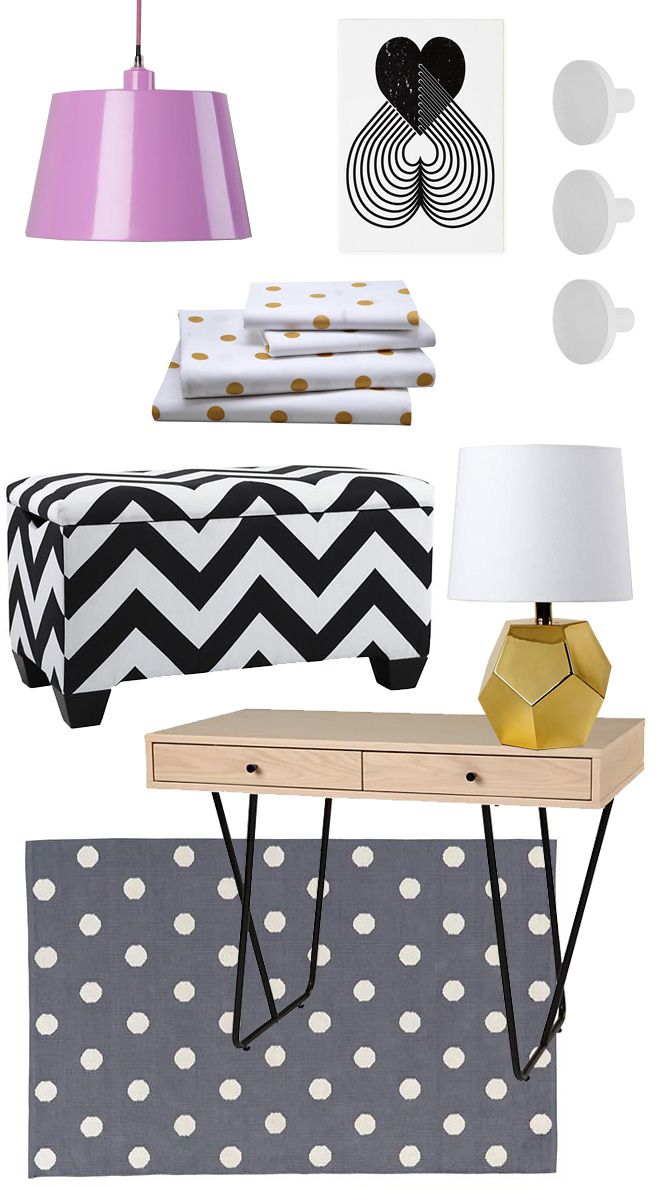
Clockwise from top left:
Pop of Color Pendant Shade and Cord, $88
Print Noir Canvas Wall Art, $59
Can’t Miss Wall Knobs, $8.95
Between a Rock and a Lamp, $98.95
Pirouette Desk, $349
Lotsa Polka Dots Rug, $159-499
As You Wish Storage Bench, $349
Gold Dot Sheet Set, $79-119

For more Geometric inspiration, visit our website. 

By Anna Passadori

Anna develops and designs exclusive product for The Land of Nod. She hails from the west coast and has traveled the world to source product. She loves anything Marc Jacobs, Sofia Coppola or stripes! (So, if anyone can get a photo of Sofia Coppola wearing a striped outfit by Marc Jacobs, please send it along.)