Close

Blog

DIY Memento Picture Frame

August 12, 2013

Looking for a unique piece to fill a void on your child's bedroom wall? Consider digging out a favorite outgrown piece of clothing. Maybe a family heirloom, maybe your daughter's first pair of bloomers, or maybe even your son's first bow-tie.  

E2465_Bedroom_DETAILS-0818 copy

We chose a swimsuit. Living here in Charleston it was a sensible choice. But what makes this swimsuit extra special is that the designer, Marysia Reeves of Marysia Swim, is a good friend of mine and named the suit "Lilly" after my daughter. That's pretty special in my book. So I went to my favorite in town framer and chose a coral frame and white background to display the suit. I love tone on tone, and the white backdrop allows the suit to pop. 

Screen Shot 2013-08-11 at 2.24.21 PM

Framing the suit allows us to enjoy the suit long after the short span of Lilly fitting into it. And bonus, storing it safely on the wall keeps it clean and preserved until a future granddaughter wants to wear it.  

E2465_Bedroom_DETAILS-0839 copy

I love the way this project turned out. To see more of Lilly's room, check out this post that I wrote for Honest to Nod.

Posty by: Chassity Look Linger Love

Add a Fun Twist to our Honeycomb Shelves

Raise your hand if you're in love with Land of Nod's new honeycomb shelves. I mean, they're pretty tops.  

E2465_Playroom_DETAILS-0714 copy

As soon as I saw them I knew we had to include them in the kids' playroom makeover. Not only do they look good, but they're great for storing little nicknacks. To add a little color to our white walled room, we backed our honeycomb shelves with patterned papers that were similar in color tone.   

E2465_Playroom_DETAILS-0422 copy

It's really easy to do. Just grab some collected sheets of paper and place the shelf on the backside of it (be sure to have your pattern laying in the direction you will want it to lay). Then take a pencil and trace around the shelves.   

photo-18

Next, grab your scissors and cut out the shape you traced. I recommend cutting inside the shape a little. Then simply tape the paper to the back of the shelf and hang the honeycomb shelf on the wall.   

E2465_Playroom_DETAILS-0407 copy

I think creating an ombre colored wall would be pretty awesome, too. Playing with backgrounds really draws your eye in, don't you think?   To see more of our playroom makeover check out this post that I wrote for Honest to Nod.   

Posty by: Chassity Look Linger Love

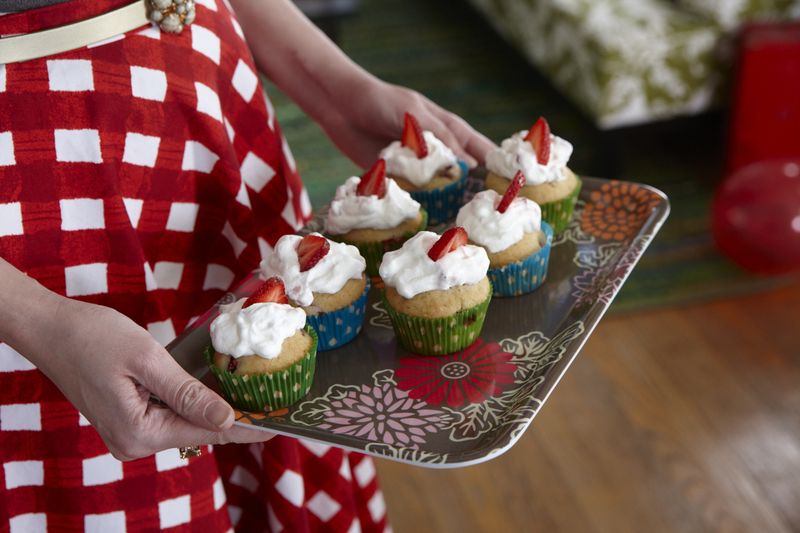
Strawberry Cupcakes for a Family Celebration

At Nod, we believe your home should be a celebration of family. We’ll be featuring our Managing Director, Michelle, at home celebrating her own family with recipes, crafts and décor created by our friend Sweet Paul

LoN_Kndrgtn-0335

It’s a big day here at home for Nod’s managing director Michelle. Her youngest son Everett is getting ready for his first day of kindergarten. But Everett’s not the only one celebrating. The whole family has gotten together to throw him a party. And what better way to celebrate than with a few tasty treats. It just goes to show that any milestone can be a way to get the whole family together for a little fun & a little food.

STRAWBERRY CUPCAKES adpated from Sweet Paul Magazine.

Makes about 12

1 stick butter, room temperature
¼ cup sugar
2 large eggs
1 teaspoon vanilla extract
1 ½ cups plain flour
1 teaspoon baking powder
½ cup chopped strawberry whipped cream
15 strawberry slices

1. Preheat oven to 350°F.
2. Beat butter and sugar until light and fluffy.
3. Add the eggs one at a time and beat well between each.
4. Add vanilla, flour and baking powder.
5. Mix together until you have a smooth batter.
6. Fold in the strawberries – don’t stir them in.
7. Divide batter in a cupcake pan.
8. Bake until firm to the touch, about 20 minutes.
9. Cool on a wire rack. Serve with a dollop of whipped cream and a sliced strawberry.

08-13_CelebrateBTS_blog (3)

Need more tasty recipes and delicious bites? Check out our Let’s Eat Pinterest Board.

All That Glitters…

August 9, 2013

01_GSsong

I’m trying to make friends with gold. Growing up, I chose silver as my metal of preference till about a year ago. That’s when I started giving in to the impending trend of gold. From what I’ve seen, gold can work into all sorts of settings. But I think the key is when and where you use it. Think of it as accessorizing an outfit — how one or two additions can make your look classic, ladylike or eclectic.


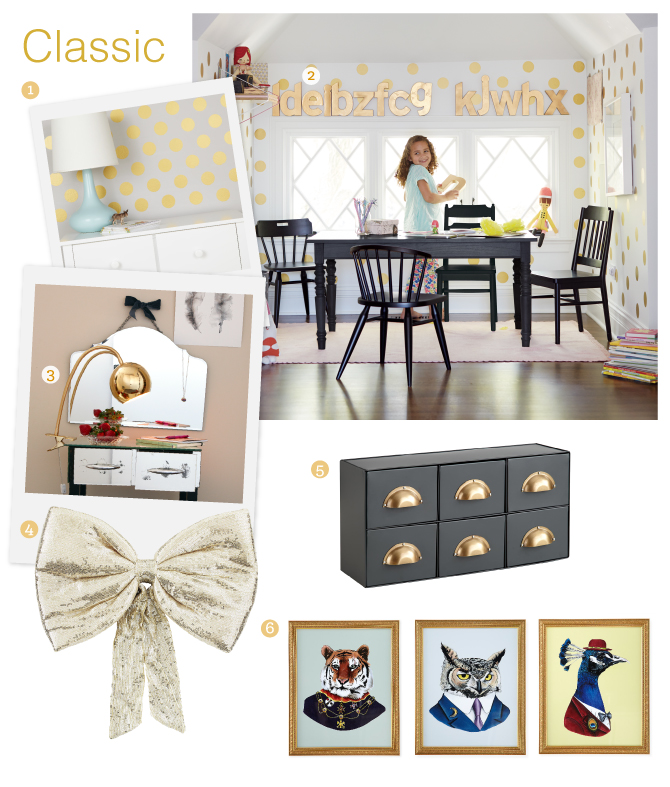
Keep it simple with classic additions to brighten any space. 

02_Gold_classic_blog

1. Lottie Dots Decal Set Gold $24.95 / set of 48
2. Crafty Kraft Paper Letters $3.95 ea. (shown decorated)
3. Modern Clip Lamp Gold $49.95
4. Giant Sequin Bow Gold $19.95
5. Little Study Drawers $45
6. Painted Masterbeasts Wall Art $299 / set of 3 or $119 ea.


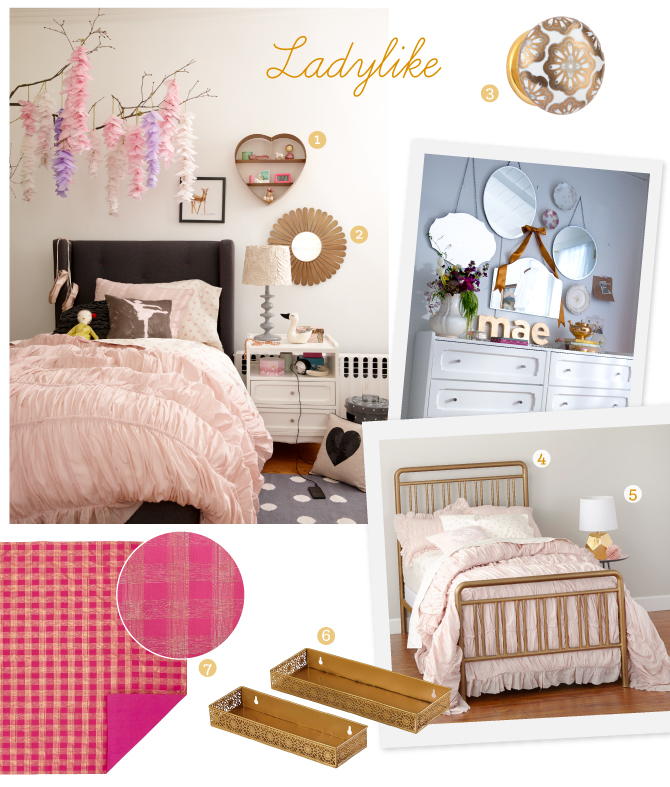
Anyone would feel like a lady with touches of muted gold surrounding from head, hand (drawer pull) and toe. 

03_Gold_ladylike_blog

1. Heart of Gold Wall Shelf $49
2. Sunburst Mirror $69
3. Handpicked Knobs Gold White Floral $7.95 ea.
4. Astoria Metal Bed $999-$1,099
5. Between a Rock and a Lamp Base Gold $79   Light Years Table Shade White $19.95
6. Chantilly Wall Shelves Gold $29 / set of 2
7. Bands of Gold Bedding $99–$129


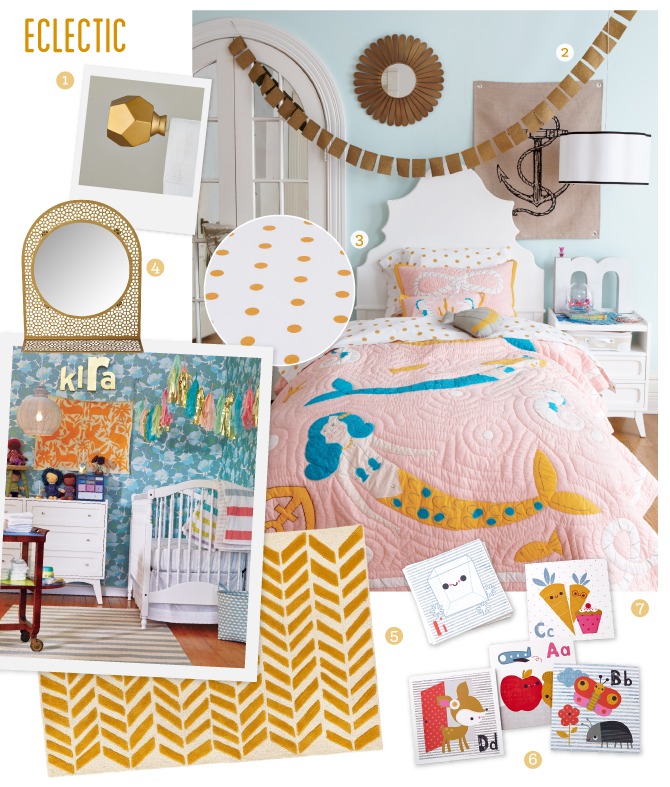
Maybe you like to mix it up? Gold works easily as a neutral adding highlight to your décor. 

04_Gold_eclectic_blog

1. Gold Rock Finials $21.95 / set of 2
2. Embroidered Metallic Garland Gold $19.95
3. Dot Sheet Set Gold $79–$119
4. Chantilly Mirror Gold $79
5. Gold Bars Rug $299–$799
6. Alphabet Wall Cards by Jillian Phillips $22.95
7. Fairy Tail Bedding $189–$219 


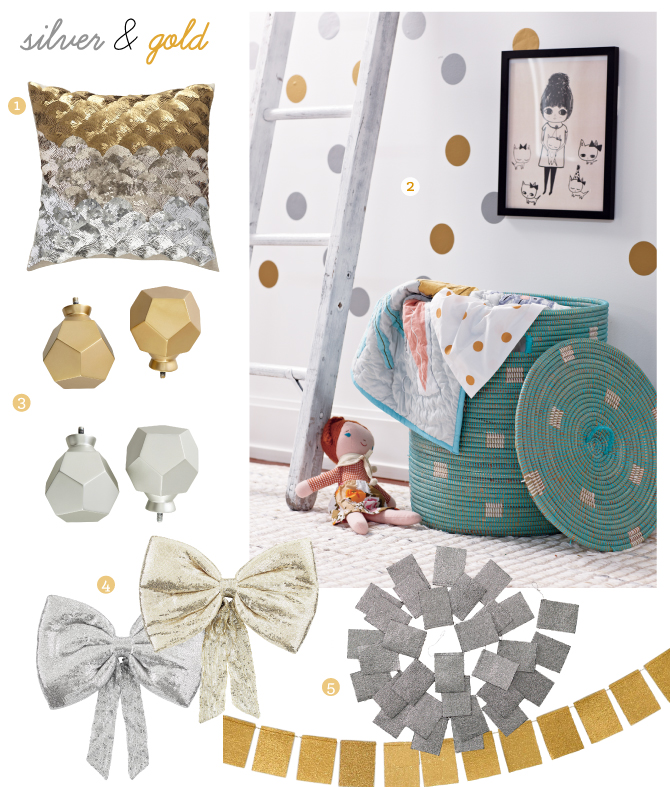
Silver will always be a friend to gold adding polish and vibrancy to your little ones space or keep it for yours.

05_silver_Gold_blog

1. Sparkle Throw Pillow $44
2. Lottie Dots Decal Set Silver & Gold $24.95 / set of 48
3. Gold & Silver Rock Finals $21.95 ea. / set of 2
4. Giant Sequin Bow Gold & Silver $19.95 ea.
5. Embroidered Metallic Garland Silver & Gold $19.95 ea.

By: Julia DeNamur

Growing up Julia loved color so much she gave her crayons different genders and specific positions in the box based on who they got along with. Fast forward to adulthood, and Julia had the opportunity to work for a paint company where she honed her eye for color, and sometimes even got to name colors things like Dandelion Scream and Wild Child. Today Julia works at Nod as a Graphic Designer, and channels her love of color into her constantly changing hair & nail colors, as well as colorful designs for Nod's website.

Just Like a Fairy Tale – Bedroom & Playroom Makeover

Post by Chassity of Look Linger Love

Just Like a Fairy Tale - Bedroom & Playroom Makeover | Honest to Nod

I’m a long time fan of the Land of Nod. Many of my kids’ toys and things come from them (what would we do without Lilly’s dollhouse and Fletcher’s workbench?!). So when I got to meet the Land of Nod team at Alt Summit in Salt Lake City this past January I was pretty stoked. We chatted briefly, there was a lot of glitter and one big giant swan around us, but I made a mental note to follow up with them when I got home. And I did. And boy am I glad that I did. We brainstormed for a little while about the ways we could work together when, suddenly, my dream collaboration presented itself – a playroom and bedroom makeover. Land of Nod designer Danielle Kurtz and I worked together to design two different spaces that worked with the flow of our home. I vividly remember squealing at my computer when Danielle would pin not yet released items to our secret shared pinboards.

Just Like a Fairy Tale - Bedroom & Playroom Makeover | Honest to Nod

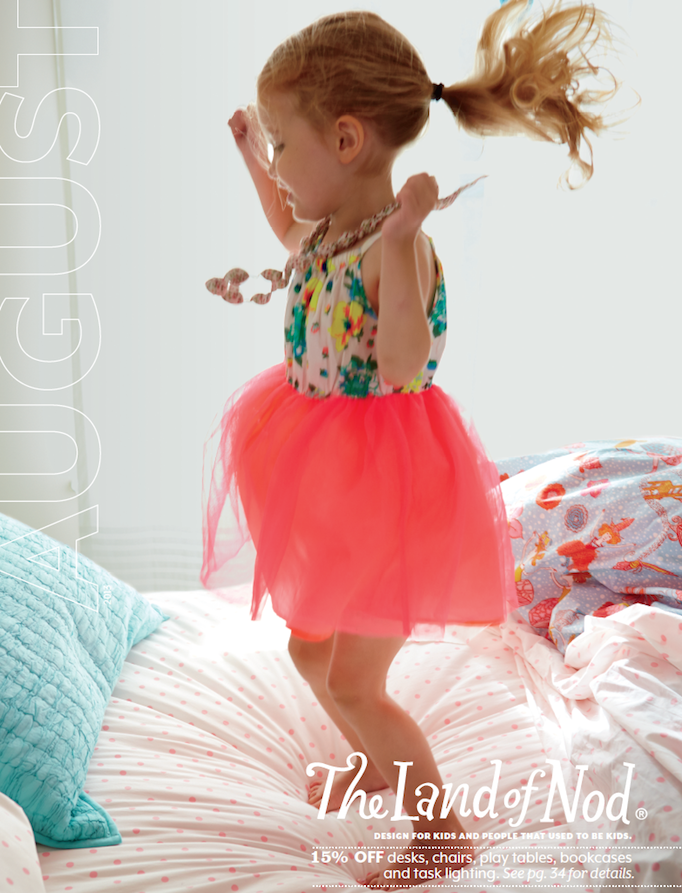
Fast forward a couple of months and it was time to turn our pinterest boards into my reality (if only that were true for all of my pinterest boards…I don’t suppose you could help me with that one could you, LON?). For a couple of days my home did sort of look like we just moved in. There were boxes and boxes of amazing new Land of Nod items that my kids were going crazy over. Lucky for me, the Land of Nod team flew down to my home in Charleston, SC and installed our vision for me. Just like a fairy tale. Lilly now refers to them as the Nod Fairies. I can’t say I disagree. Two new rooms and my girl landed the August cover? Pretty magical to me.
Just Like a Fairy Tale - Bedroom & Playroom Makeover | Honest to Nod

We are really happy with our new rooms. I’d love to show you around… Let’s start in Lilly’s room. It was hiiiigh time that Lilly move out of her crib and into a big bed. She is 3 1/2 after all, but she loved that crib so much that we never felt the rush. Turns out, there is something she loves more though… her new upholstered marquee bed. We got the full size so that the whole family could pile on for bedtime stories and books. The headboard is quite cushy to lean up against.

Just Like a Fairy Tale - Bedroom & Playroom Makeover | Honest to Nod

Lilly loves her tiny dancer duvet (discontinued) and polka dot sheets. The aqua quilt helps keep it all from being too girly.

Just Like a Fairy Tale - Bedroom & Playroom Makeover | Honest to Nod

We also installed hanging closet storage & the coordinating drawer inserts to keep Lilly’s tiny closet organized. And by “installed” I mean we velcro strapped it on. Couldn’t have been easier. Plus the monarch nightstand next to the bed has two useful drawers that we use for pjs and socks and stuff.

Just Like a Fairy Tale - Bedroom & Playroom Makeover | Honest to Nod

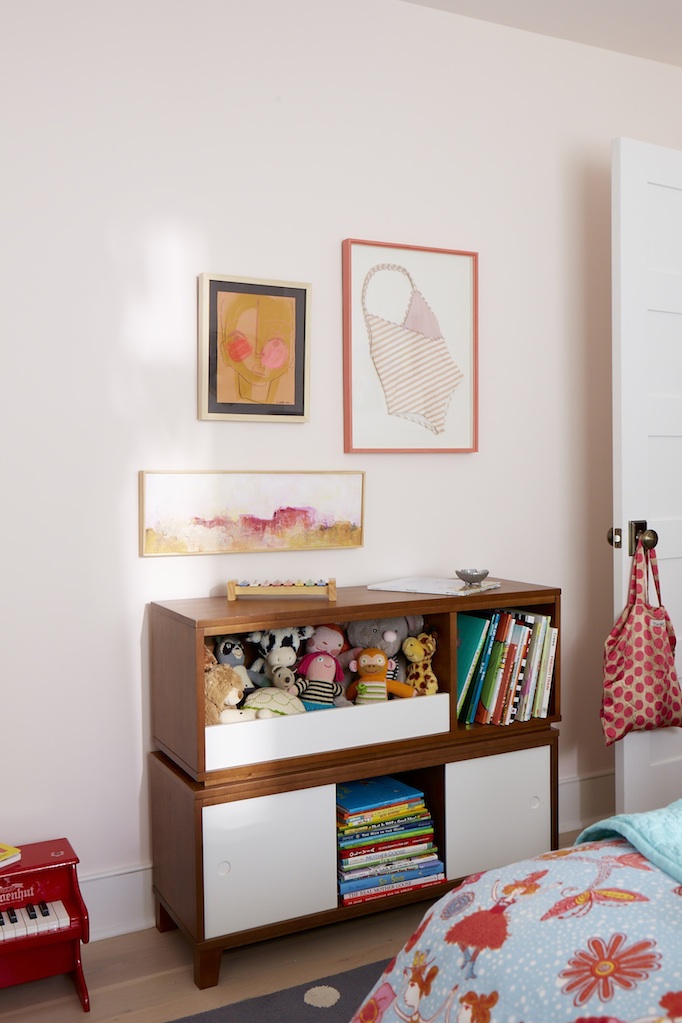
One of my favorite things in Lilly’s room is the district bookcases. We stacked two on top of each other (don’t worry, they bolt down) for Lilly to use as storage for her stuffed animals and current favorite books.
Just Like a Fairy Tale - Bedroom & Playroom Makeover | Honest to Nod Just Like a Fairy Tale - Bedroom & Playroom Makeover | Honest to Nod

One of Lilly’s favorite spots in her room is her framework coat rack corner. She’s constantly rearranging her necklaces and scarves and dress up items over here. She can hop up on one of her storage cube seats and peek at herself in the mirror. It’s the perfect dress up corner.

Just Like a Fairy Tale - Bedroom & Playroom Makeover | Honest to Nod

Alright, let’s head downstairs to the playroom. I love the way this room turned out. We needed it to be eye pleasing since it’s on the main floor of the house.

Just Like a Fairy Tale - Bedroom & Playroom Makeover | Honest to Nod

That yellow gold bars rug gives the room a grounded pattern which I love. But if you look to the left of the picture you’ll see one of our most favorite items, the orange stripe teepee. The kids play in there all the time, especially Fletcher.

Just Like a Fairy Tale - Bedroom & Playroom Makeover | Honest to Nod

I’m a big, big fan of our three leaning bookcases. All of the kids; little toys and things have a happy home now that they can easily see and access. I really don’t know how we ever cleaned up the playroom without them.

Just Like a Fairy Tale - Bedroom & Playroom Makeover | Honest to Nod Just Like a Fairy Tale - Bedroom & Playroom Makeover | Honest to Nod

The kid’s craft closet also got a fun makeover. I’ll admit, it was pretty lame before. But now it’s organized and beautiful. Most of the art supplies get stored in those colorful see through stackable boxes. The kids couldn’t be happier with their “office”. I regularly find Lilly plopped down in the cobalt iron chair making masterpieces to display on the cork-board rails.

Just Like a Fairy Tale - Bedroom & Playroom Makeover | Honest to Nod

We put all of their favorite washi tapes on a paper roll holder – I love the look and simplicity of this. That aqua wall organizer (discontinued) also comes in handy for stashing more craft supplies.

Just Like a Fairy Tale - Bedroom & Playroom Makeover | Honest to Nod

We also added a fun element to the craft closet door by putting colored tape on the interior trim. We used an x-acto knife to get it just right. I think it’s a fun, non-permanent detail to see when the door is open.

Just Like a Fairy Tale - Bedroom & Playroom Makeover | Honest to Nod

One of my kids’ favorite things to play with is my collection of trolls that I collected when I was a child. I guess a love for creepy looking dolls runs in the family. But I’m glad they like them b/c it’s fun to revisit childhood memories. We found a spot for them in the playroom by hanging book ledges and organizing them all on there. It’s pretty funny, really. I wonder if LON ever envisioned their book ledges holding trolls?

Just Like a Fairy Tale - Bedroom & Playroom Makeover | Honest to Nod

Oh, and I have to call out those amazing honeycomb shelves. They might just be my favorite detail. Perfect for visual interest and holding little objects. We decided to back ours with different patterned papers to bring a little more color to the room.

Just Like a Fairy Tale - Bedroom & Playroom Makeover | Honest to Nod

See, the Land of Nod really is fairy like. We couldn’t be happier with our new rooms. A big, big thank you to The Land of Nod team for making all of this happen. You guys are the best.

Post by Chassity of Look Linger Love

Looking for even more playroom inspiration? Check out our Playroom Board on Pinterest.

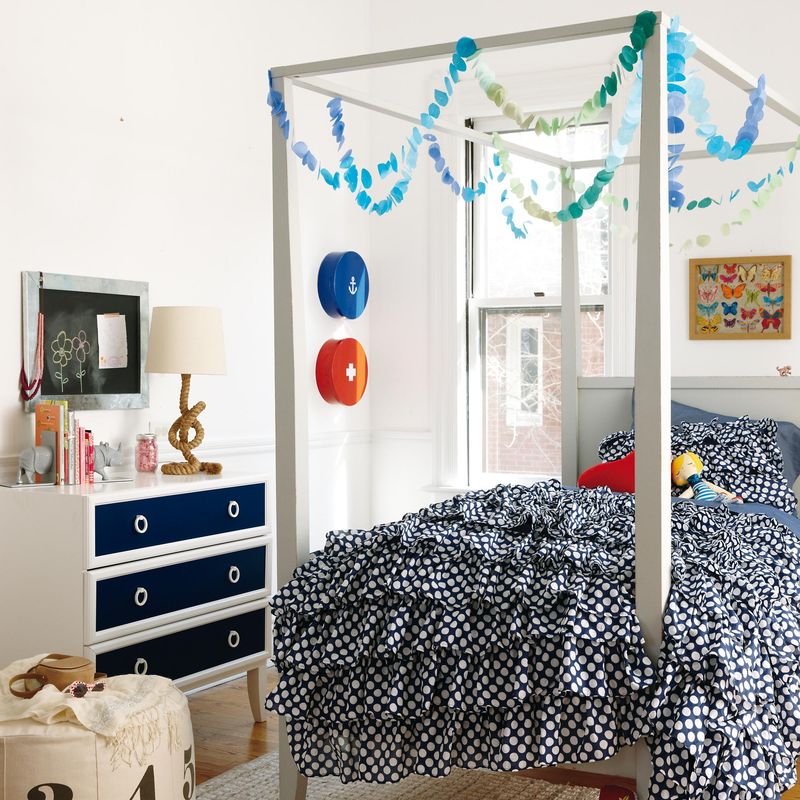
DIY Tissue Garland

August 8, 2013

Royal-canopy-bed

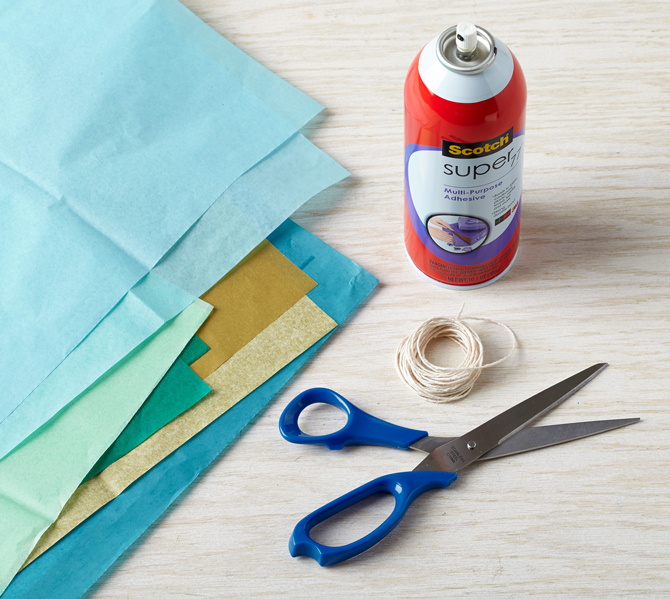
Whattya need?

  • Tissue paper
  • String
  • Scissors
  • Spray adhesive

Tissue_Garland_Materials

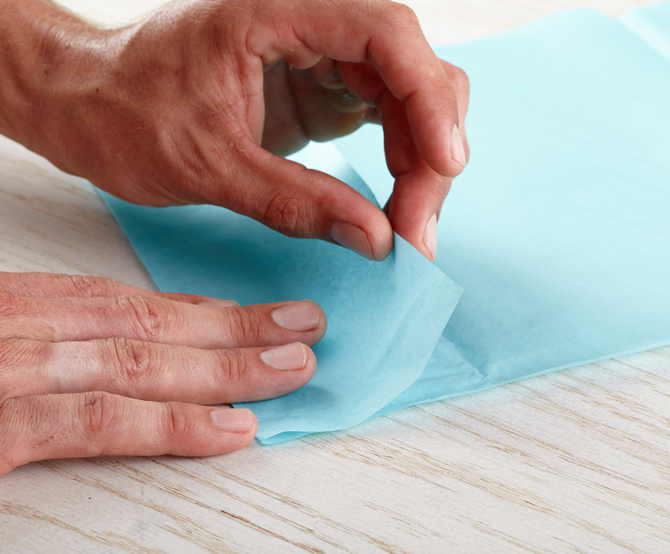
Step 1: Fold tissue back at approx 3".

Blog_Tissue_Garland_Step_01

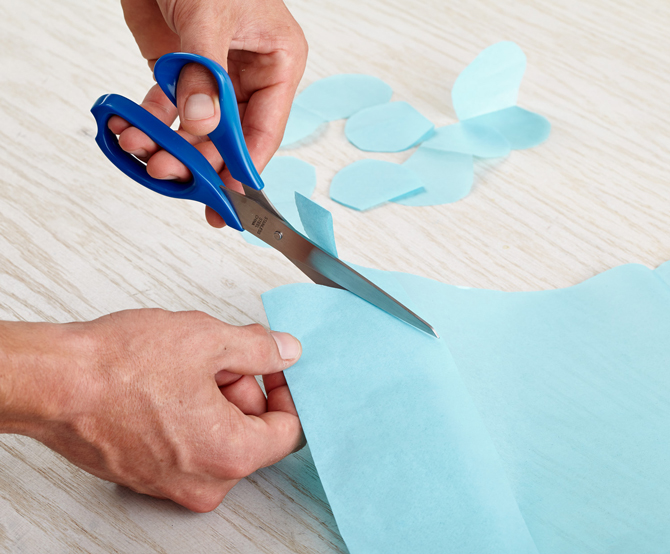
Step 2: Cut semi-circle from folded edge to create loose figure eight shape.

Blog_Tissue_Garland_Step_02

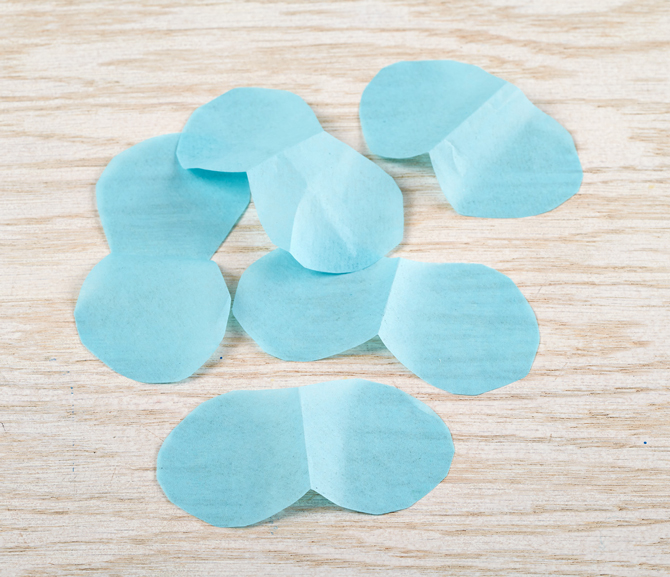
Step 3: Repeat until multiple pieces are cut.
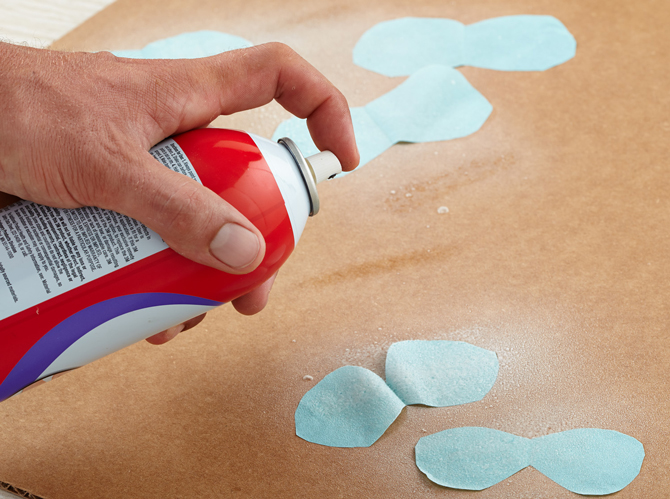
Blog_Tissue_Garland_Step_03

Step 4: Apply spray adhesive to inside surface of shape.
Blog_Tissue_Garland_Step_04

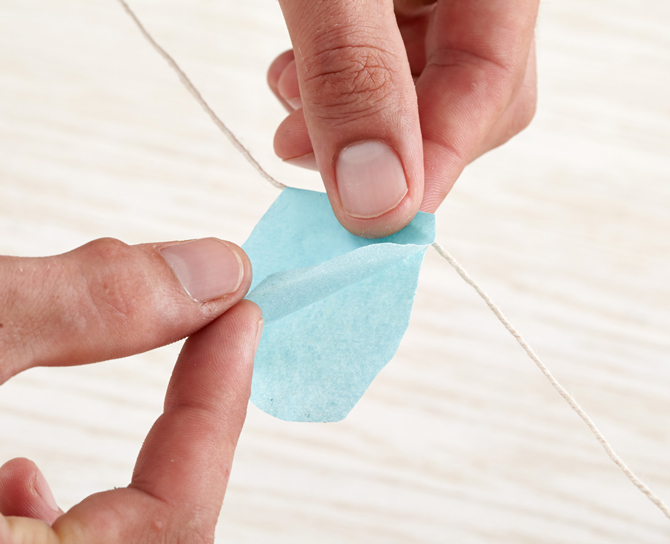
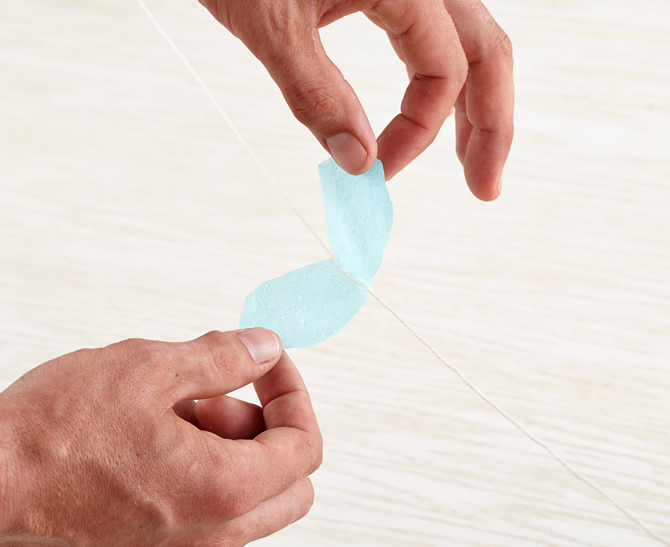
Step 5: Fold over desired length of string.

Blog_Tissue_Garland_Step_05

Step 6: Press together and repeat.
Blog_Tissue_Garland_Step_06

Tissue_Garland_Final


We Got Crafty with Brittany from The House That Lars Built

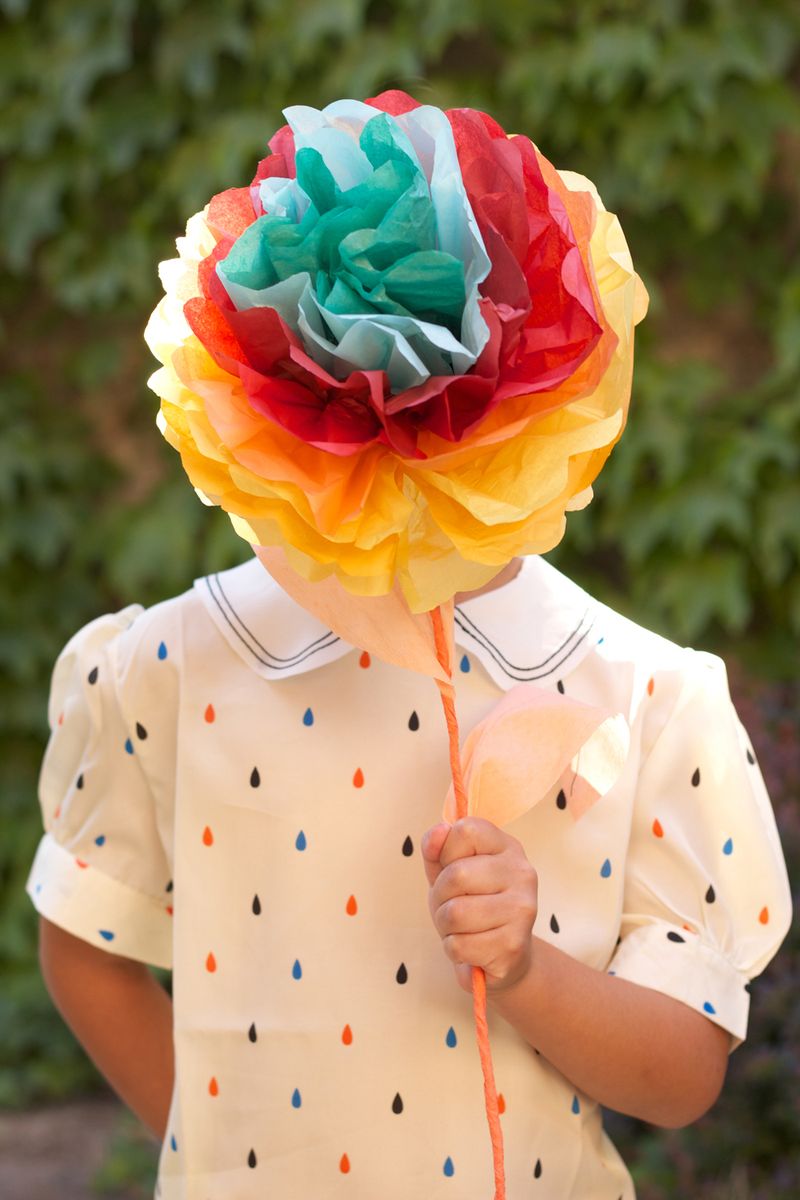
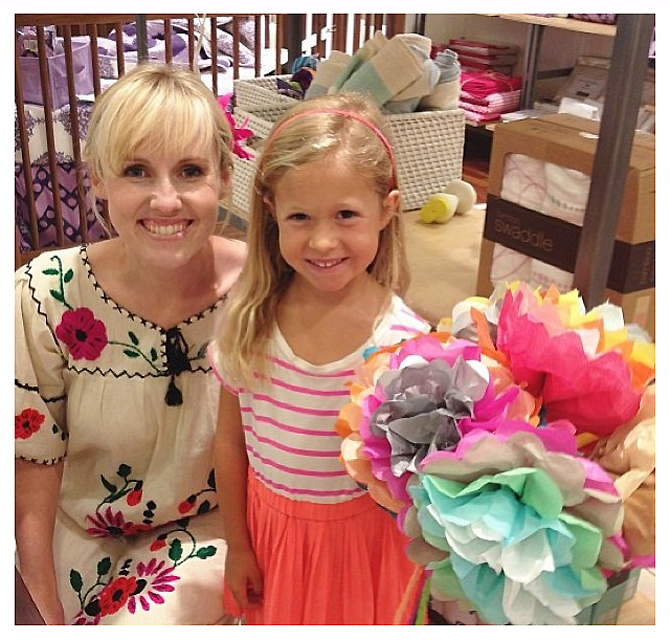
We were so excited to hear that our friend Brittany Watson Jepsen from The House of Lars Built would be in Southern California in July, we jumped at the opportunity to partner with her on a Paper Flower Workshop event at our South Coast Plaza store.
We knew what a fun event this could be for our customers (both kids and adults!).  Brittany was beyond amazing with coming up with a flower that could be made by everyone, and she came up with the most amazing Mexican flower. We loved the idea!

  Mexican-tissue-paper-flower

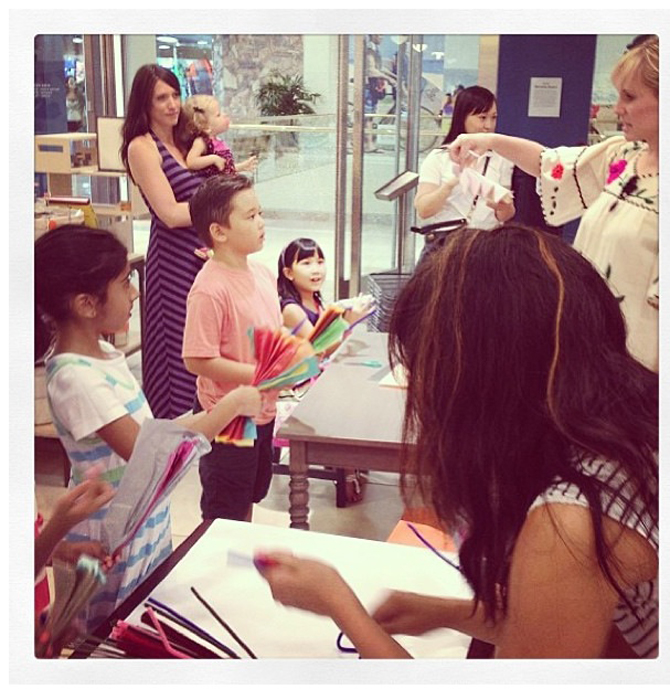
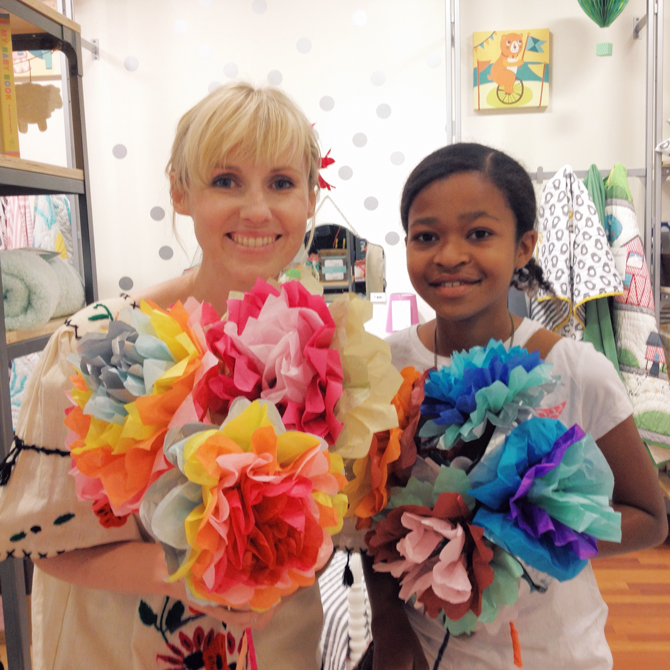
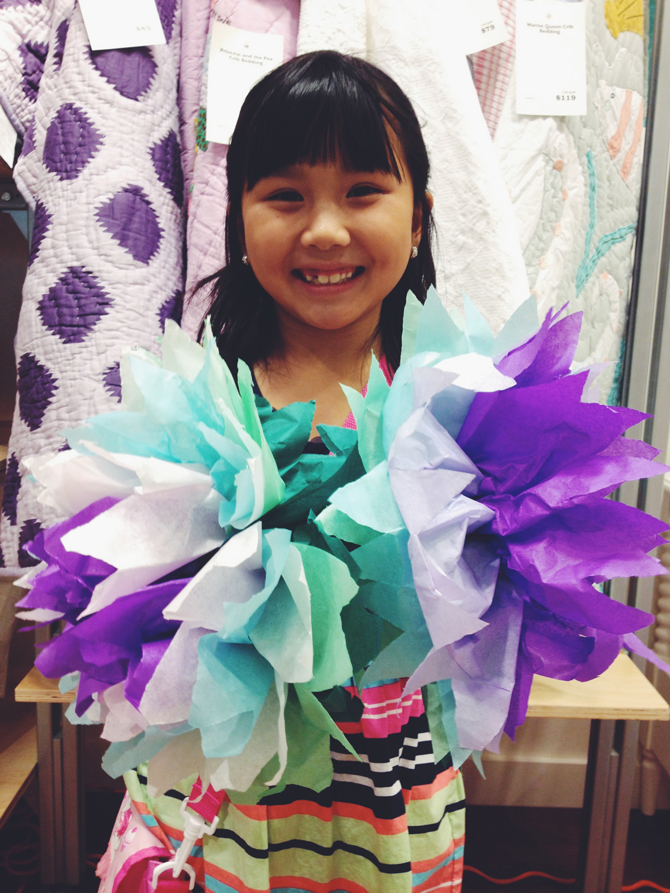
The event was held on Tuesday, July 16th, and what an amazing time it was! Almost 75 participants came out to make flowers at our South Coast Plaza store, and Brittany was incredible with teaching her wonderful craft.

Lars-3Photo-lars

Photo

We are definitely huge fans of the House that Lars Built, and can’t wait to partner on future store events!

To stay up to date with store events happening at The Land of Nod store near you, email nodevents@landofnod.com.

If you want to see more pictures from the event, take a look at the hashtag #nodevents on Instagram.

Lars-2

By Lauren Baker


At the Farmers’ Market

August 7, 2013

At the Farmers Market Blog 1

At the Farmers Market Blog 2

At the Farmers Market Blog 3

At the Farmers Market Blog 4

At the Farmers Market Blog 5

At the Farmers Market Blog 6

At the Farmers Market Blog 7

At the Farmers Market Blog 8

At the Farmers Market Blog 9

At the Farmers Market Blog 10

At the Farmers Market Blog 11

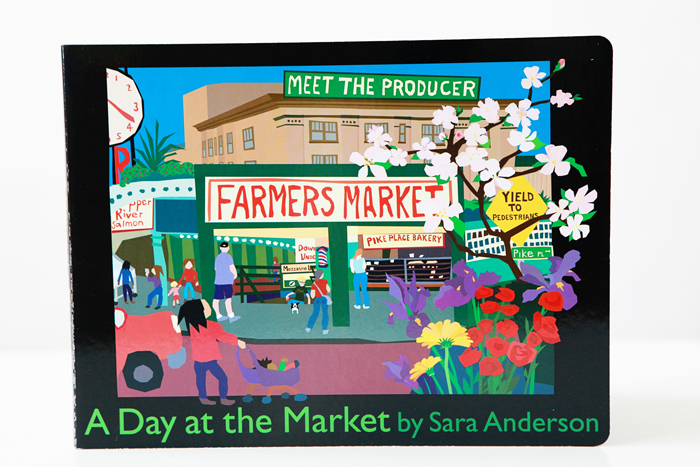
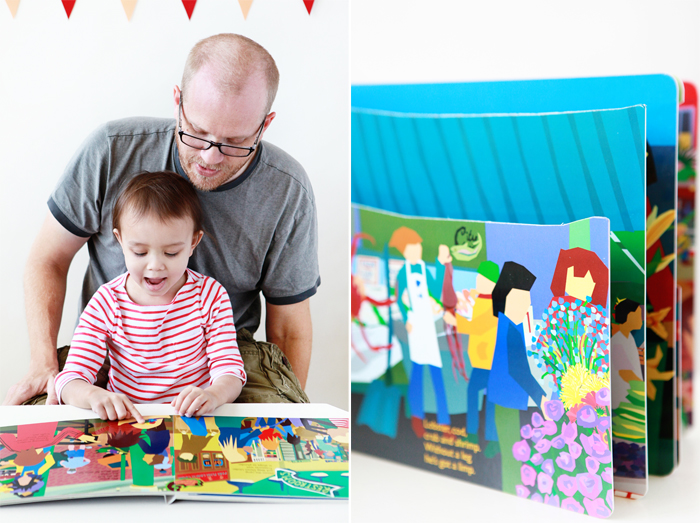
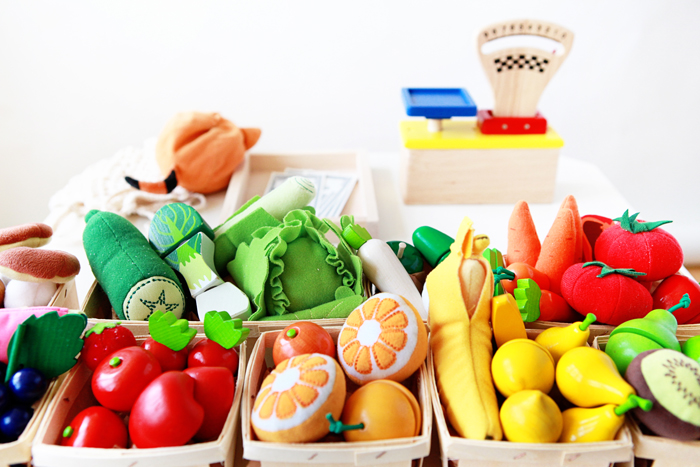
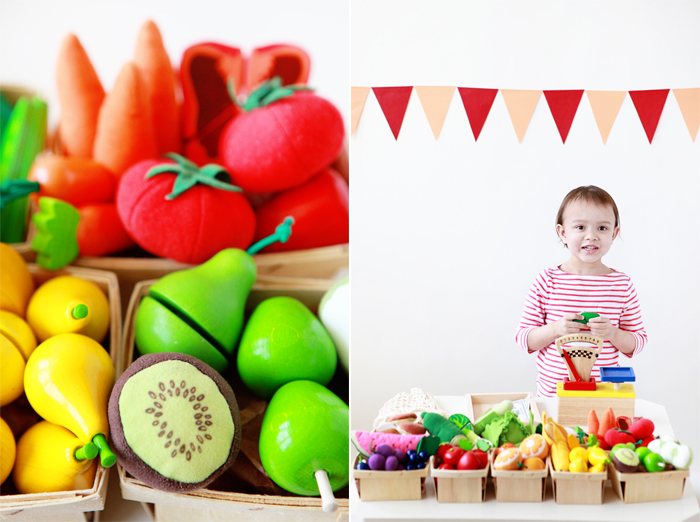
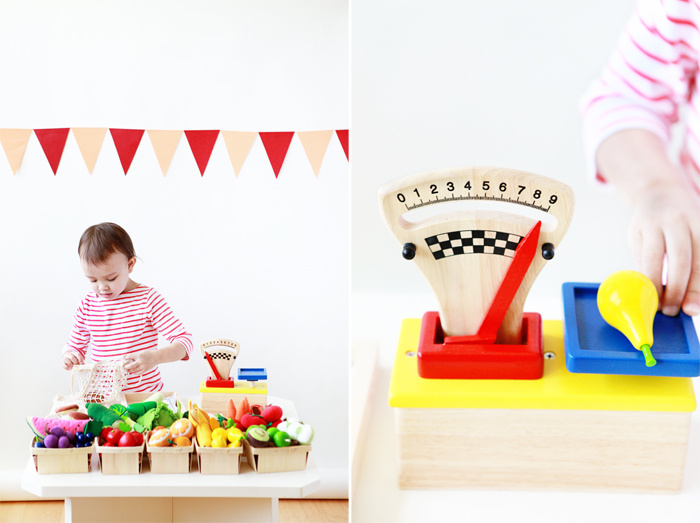
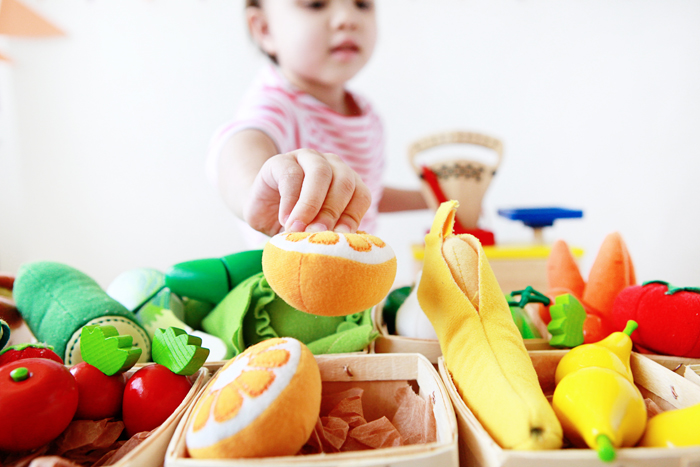
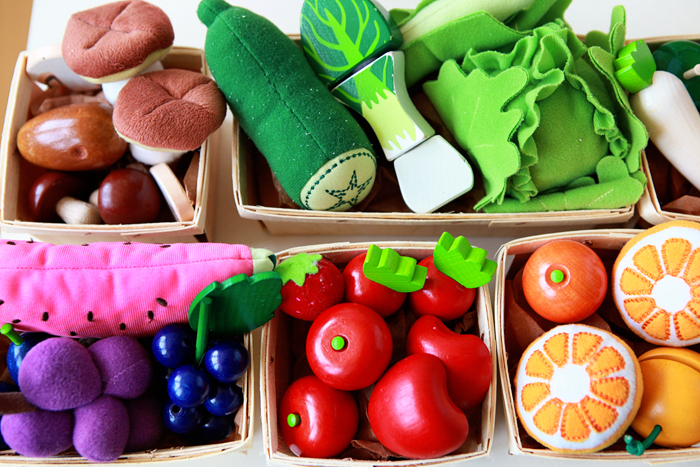
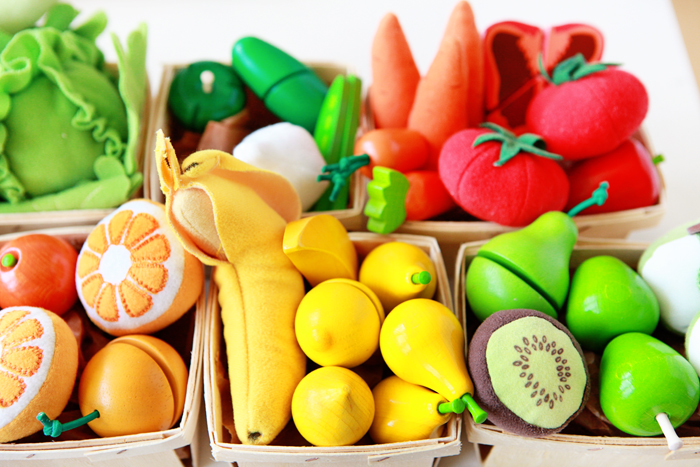
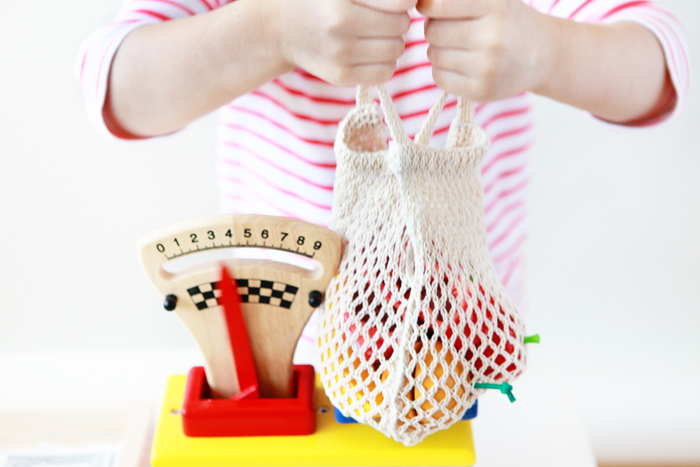
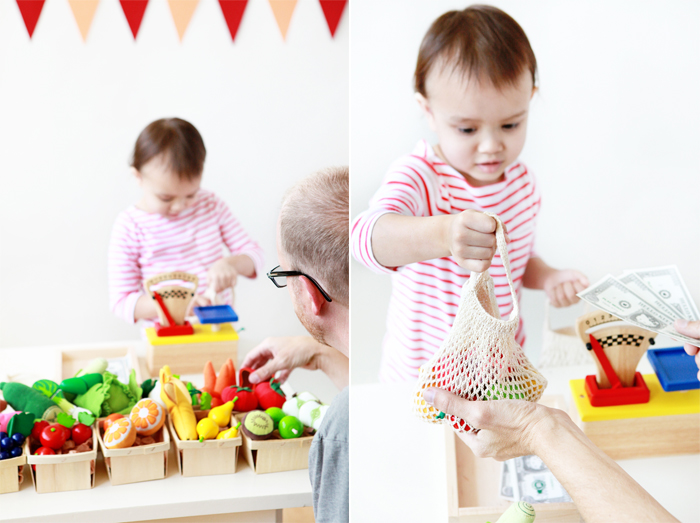
Avery has been to a farmers' market a few times and I thought it would be fun to set up her own farmers' market stand at home (another opportunity for collaborative pretend play).  She also helped in categorizing the produce (fruits vs. vegetables) and sorting by color.  Avery loved looking through and listening to A Day at the Market.

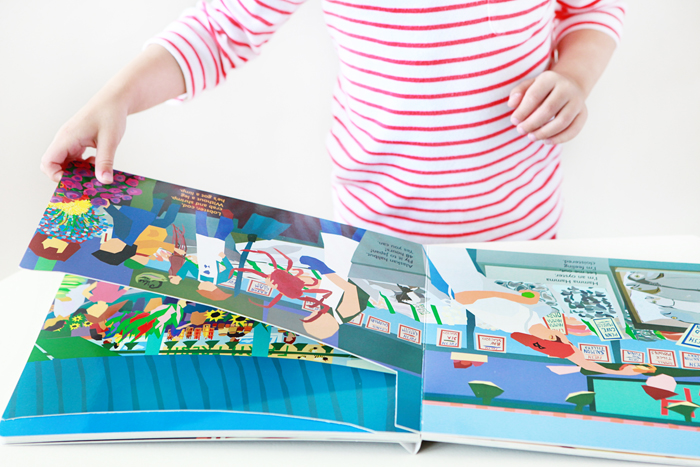
Sara Anderson brings to life the buzz and energy of a farmers' market with beautiful color and her modern paper-cut style.  The die-cut pages add a fun dynamic and interesting flow to the story and the clever rhymes and dialogue keep little ones engaged.

This post is the second in a series on collaborative pretend play.  The first post in the series was Avery's Bakery.  Thanks to Land of Nod for providing the wooden scale and A Day at the Market.  Other sources: fruit and vegetables by HabaPlan Toys and IKEA; wooden baskets from Garnish.

Post by Michelle Sterling of Avery and Augustine

You can see her work and read about her two young children's first forays in cooking, art and everything in between at Avery and Augustine.

Back to School Lunchbox Jokes

August 6, 2013

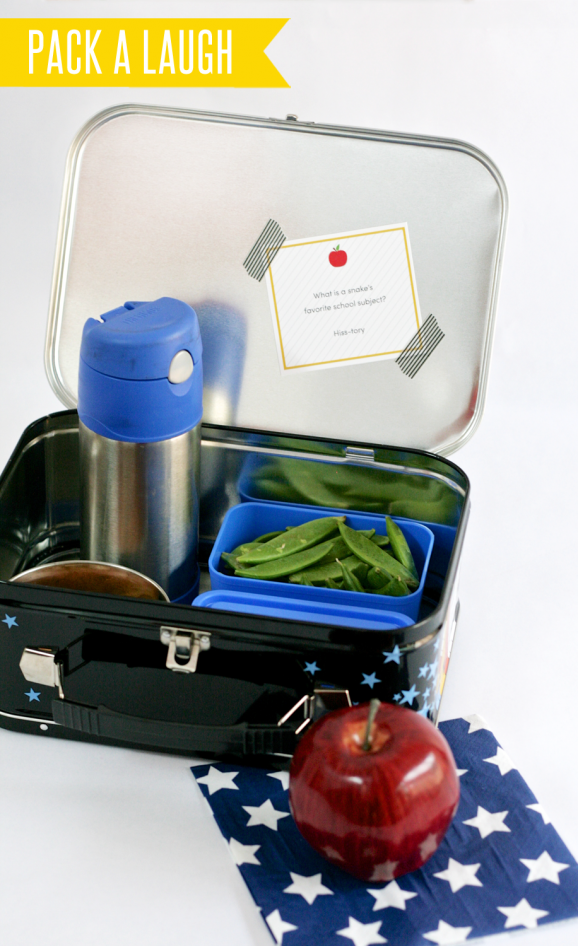
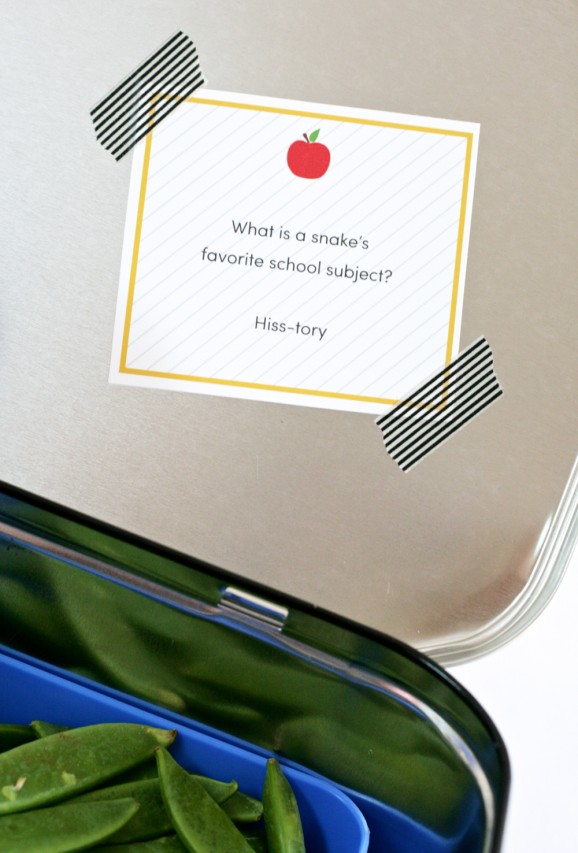
They’re back! Last year our seasonal and holiday lunchbox joke printables were a big hit. Our kids love them; their friends love them, and it appears you love them, too?

PackALaughFreeLunchboxJokes-578x946

As a busy Sometimes Supermom, these are the perfect addition to any school lunch (or snack). Simply download our lunchbox joke printable, print, cut and stash away with your lunch-making supplies. Each day, toss a joke into your child’s lunch. Yup, it’s that easy.

Be sure to come back every month for a new set of lunchbox joke printables!

FreePrintableLunchboxJokes4-578x853

Reposted with permission by Aimée Lowry & Bettijo B. Hirschi from PagingSupermom.com

Dorm Ready

August 5, 2013

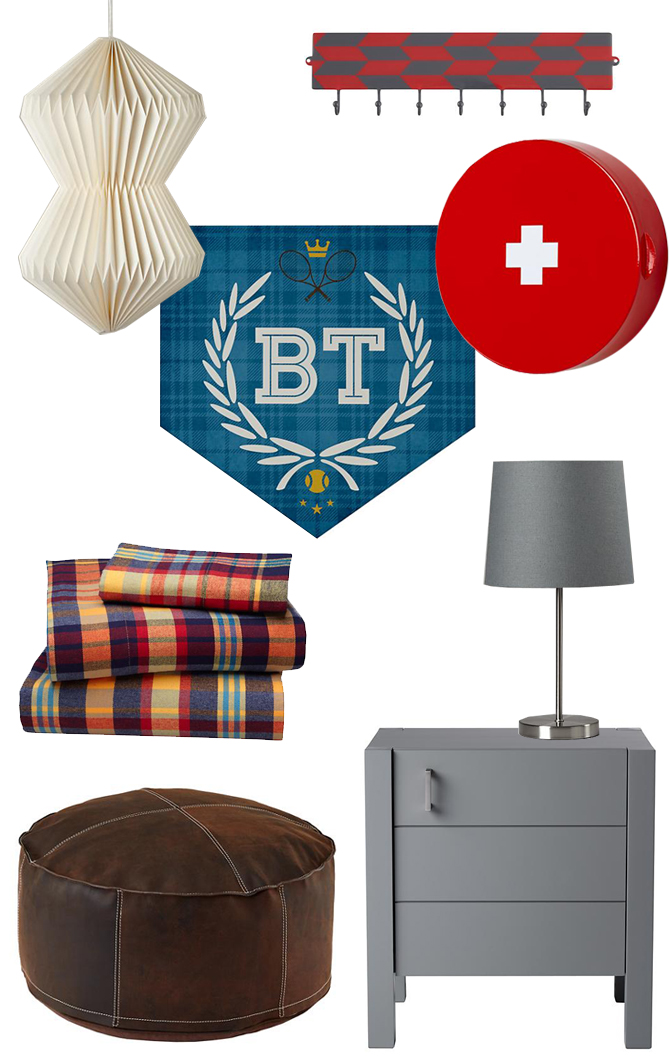
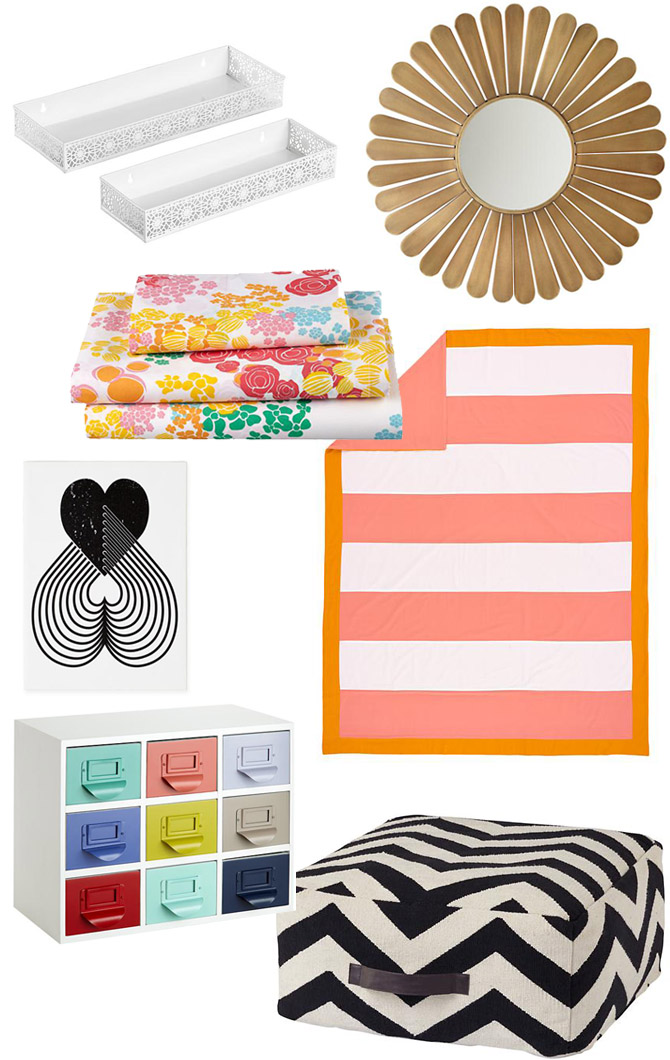
College-bound this Fall? Try these pieces that will work well in any small-spaced dorm room.

DORM READY

Clockwise:

Looseleaf Pendant Shade and Cord Kit, $58
Hooks and Laterals Wall Rack, $19.95
Store More Metal Wall Shelf (First Aid) $39
Ivy League Monogram Wall Decals, $59
Light Years Table Shade and Base, $48.95
Uptown Nightstand, $249
Sit in Style Leather Pouf, $199
Urban Lumberjack Bedding, $69-$109

DORM READY 2

Clockwise:

Chantillly Wall Shelves Set of 2, $29
Sunburst Mirror, $69
Floral Gem Bedding, $19-109
Chevron Pouf, $149
Color Reference Drawers, $99
Print Noir Canvas Wall Art, $59

By Anna Passadori

Anna develops and designs exclusive product for The Land of Nod. She hails from the west coast and has traveled the world to source product. She loves anything Marc Jacobs, Sofia Coppola or stripes! (So, if anyone can get a photo of Sofia Coppola wearing a striped outfit by Marc Jacobs, please send it along.

3…2…1…

August 2, 2013

3 2 1 Blog 1

3 2 1 Blog 2

3 2 1 Blog 3

3 2 1 Blog 4

3 2 1 Blog 5

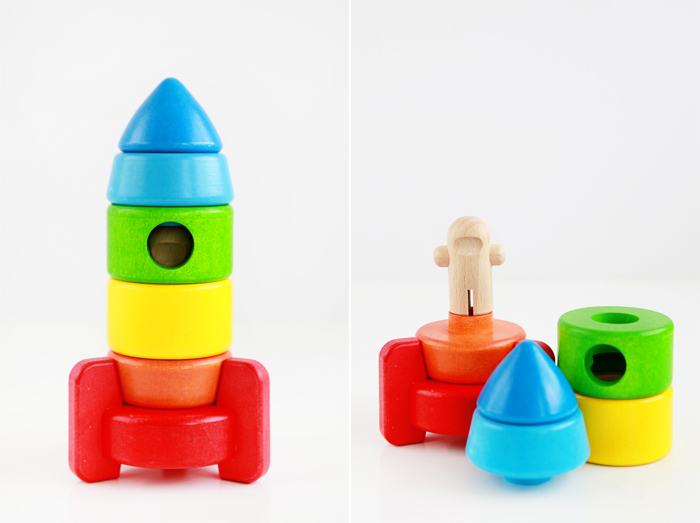
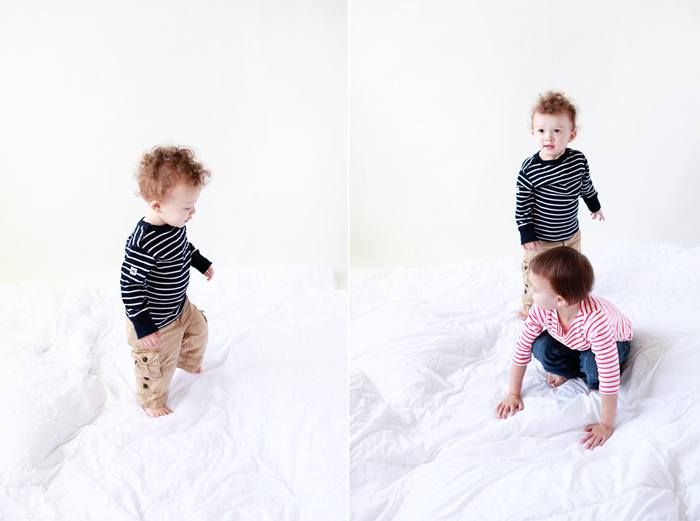
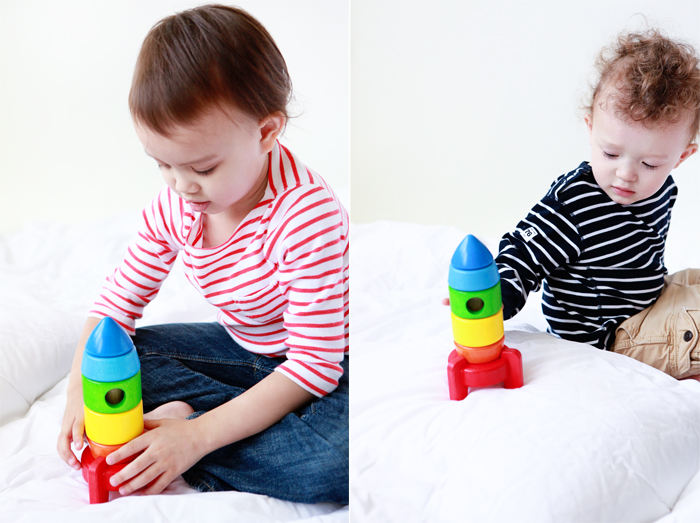
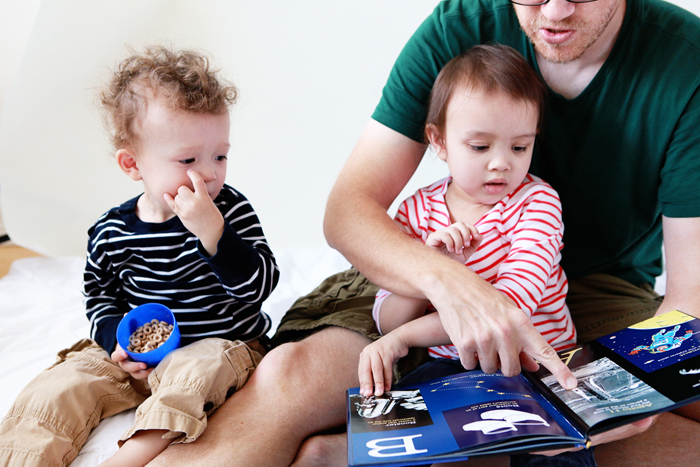
Our trip to the moon started with Avery and Nate exploring and bouncing around on a moonscape made with pillows and a white duvet.  Avery and Nate loved this stacking wooden rocket (similar here) and liked trying to figure out how to put it together and assembling all the different possible color combinations.  Nestled in the rocket was a little astronaut, ready for an adventure.  A wonderful book that finished off our lunar afternoon was A is for Astronaut.  Thanks to Land of Nod for sending us the wooden rocket!

Post by Michelle Sterling of Avery and Augustine

You can see her work and read about her two young children's first forays in cooking, art and everything in between at Avery and Augustine.

Fancy & Fantastic Foxes

August 1, 2013

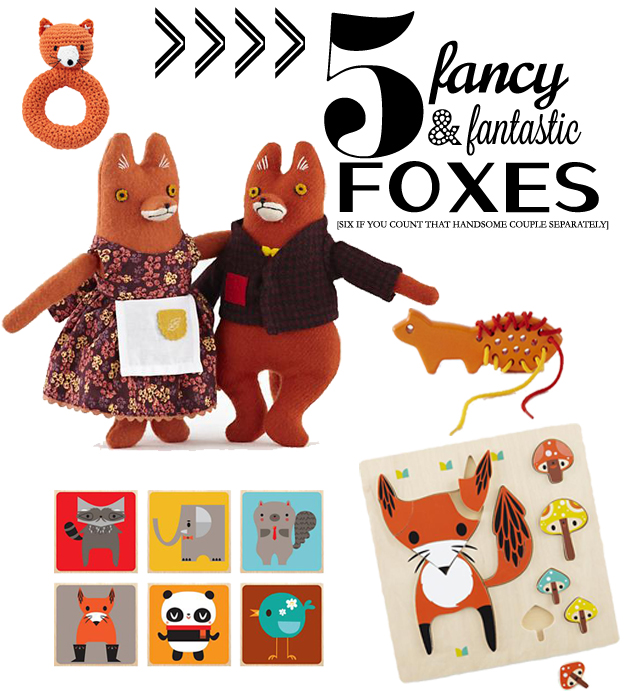
Feeling fantastic about foxes lately? Loving how adorably gender-neutral and whiskery they all are? Well I most absolutely am! Here are a few of my favorites from the most recent Land of Nod catalogue! 

5fancyFoxes (4)

Mr + Mrs Fox // Lacing Red Fox // Fox Knit Rattle //

Artist Collective Animal Puzzle // Wildlife of the Party Puzzle

Want to win the handsome couple for your own little boy or girl (or self)? Just head on over to Finding My Feet to enter.

Raechel Myers blogs at Finding My Feet. When she's not elbow deep in her next DIY project, you'll likely find her happily buried under a pile of library books with her kiddos or sneaking chocolate covered almonds out of the pantry when nobody's looking!

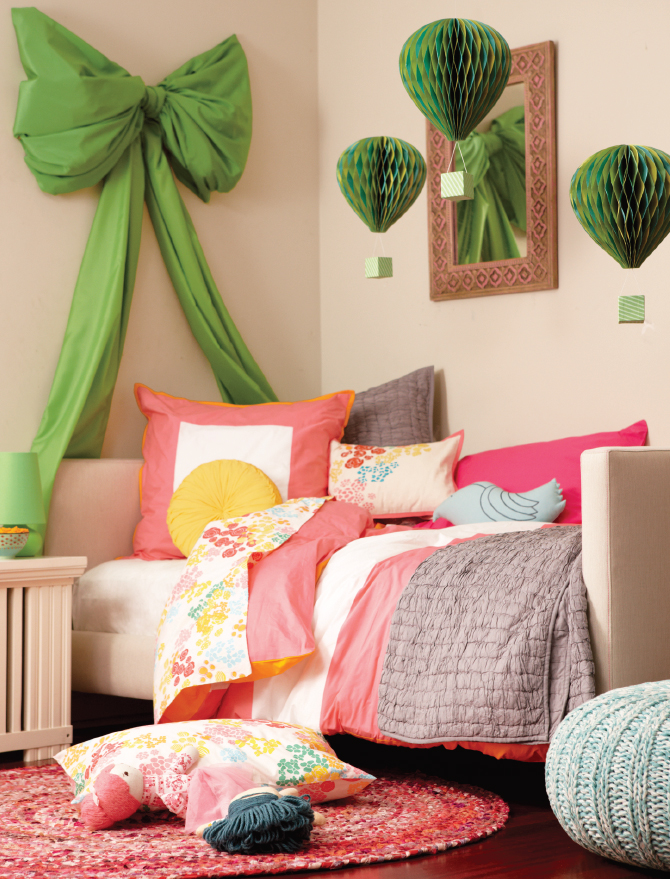
DIY Giant Wall Bow

July_catalog_pg27 (5)

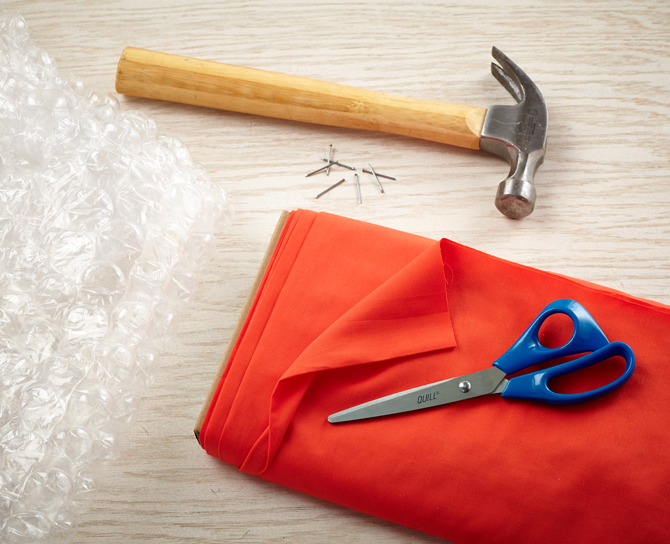
Whattya need?

  • 6 Yards, 45" width of a solid material of your choice
  • Scissors 
  • Hammer
  • Small nails
  • Recycled bubble packing

WallBow_Materials

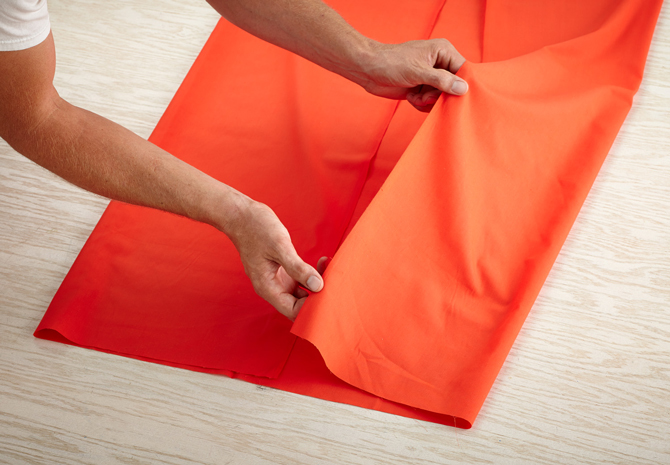
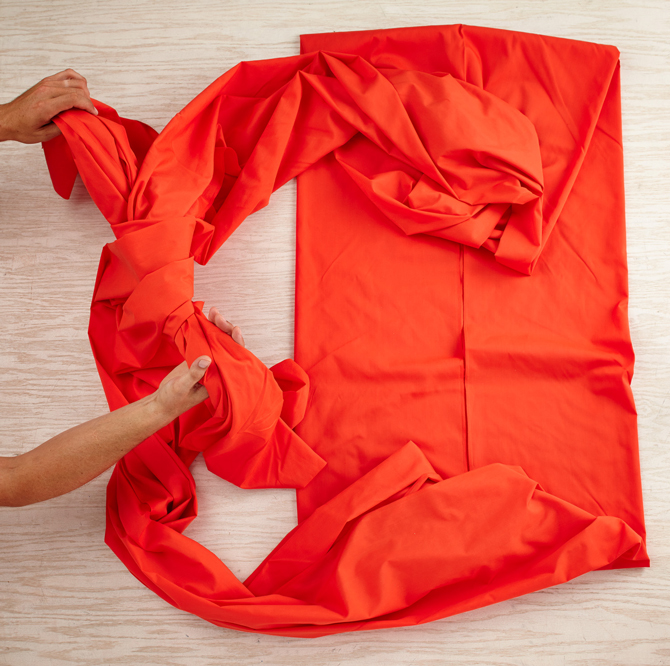
Step 1: Lengthwise, fold fabric edges to the middle.

WallBow_Step_1

Step 2: Gather and bring both ends together to tie a knot.

WallBow_Step_2

Step 3: Tigthen knot so it’s in the middle of the fabric.

WallBow_Step_3

Step 4: Bring one end through center knot to begin bow.  

WallBow_Step_4

Step 5: Repeat with other end.

WallBow_Step_5

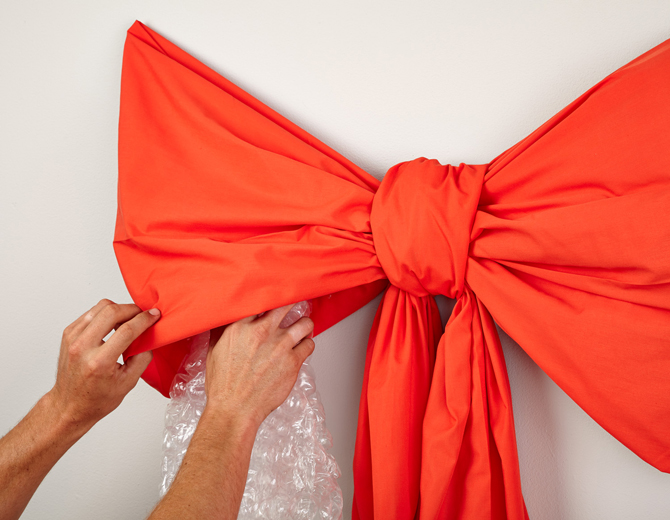
Step 6: Attach upper corner of bow loops to wall with by nailing through the inside of the loop.

WallBow_Step_6

Step 7: Set lower covers of loop with additional nails to the inside of the loop.

WallBow_Step_7

Step 8: Fill out loops with bubble wrap and style bow.

WallBow_Step_8

WallBow_Final


Vacation Scavenger Hunt

July 31, 2013

ScavengerHunt1

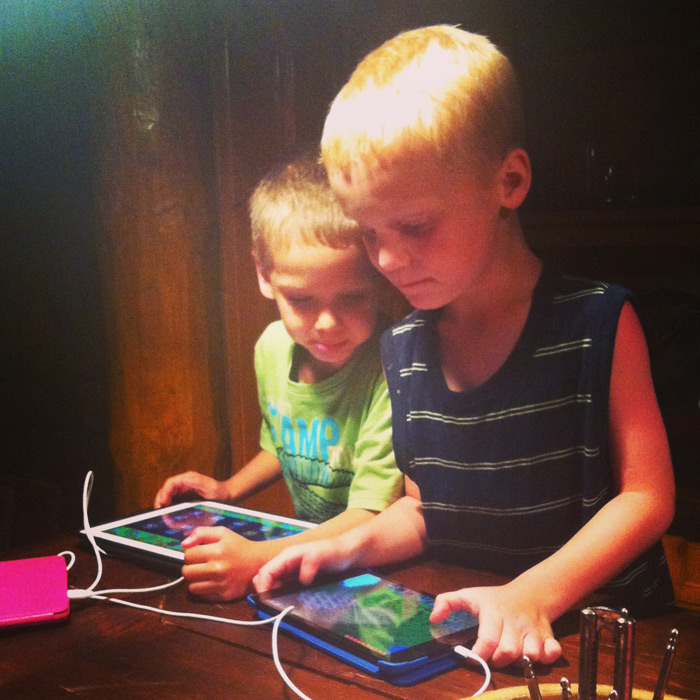
Maybe it’s just me, but it seems to take so much planning to get my own kids to run wild outside and entertain themselves. Last summer we traveled to Maine with my family, and I had visions of a vacation spent outdoors watching the kids play in the surf while I read a good book or two. But, with 8 adults and 6 kids, it was a little more challenging than one might think. And, in an effort to find our own relaxation, we didn’t protest much when the kids spent way too much time on their iPads. 

ScavengerHunt2

It left me wondering why we endured the pain of air travel with small children, when they may as well have been sitting on the couch at home playing their games. (Well, I did get to dine on freshly caught lobster every night, so that’s probably why.)

So this summer as we planned for our family vacation to Northern Wisconsin, my husband and I were determined not to let iPads take over. We agreed with the other adults that we’d try our best to institute an “electronics after dinner only” rule. But, that meant finding some way to entertain the kids. They couldn’t exactly “run wild,” I am, after all, an extremely overprotective mom, and we were on a lake with a boat and camp fires and bugs and eagles and all other forms of danger. (I’m being a teensy bit dramatic, but not about the eagle, he was totally circling us and eyeing my daughter for an afternoon snack.)

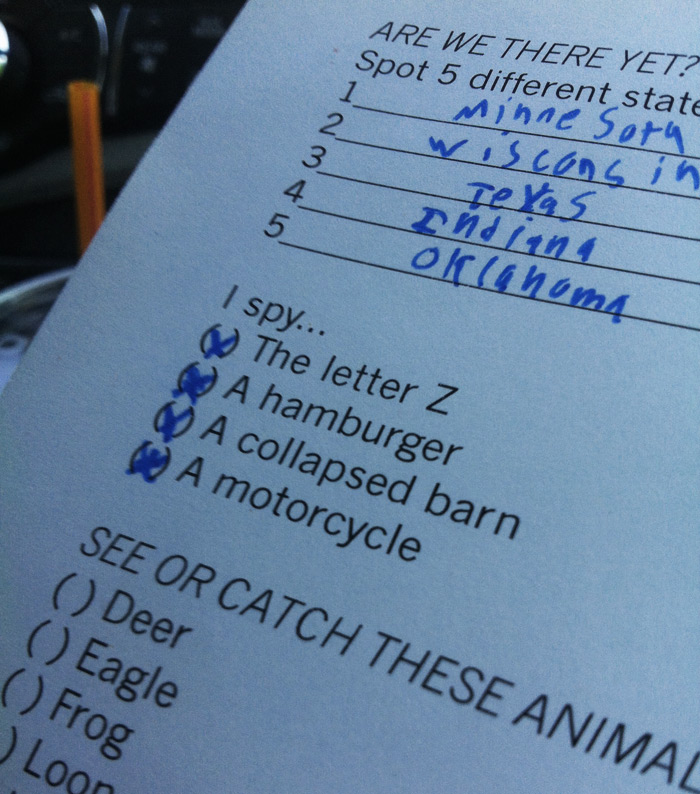
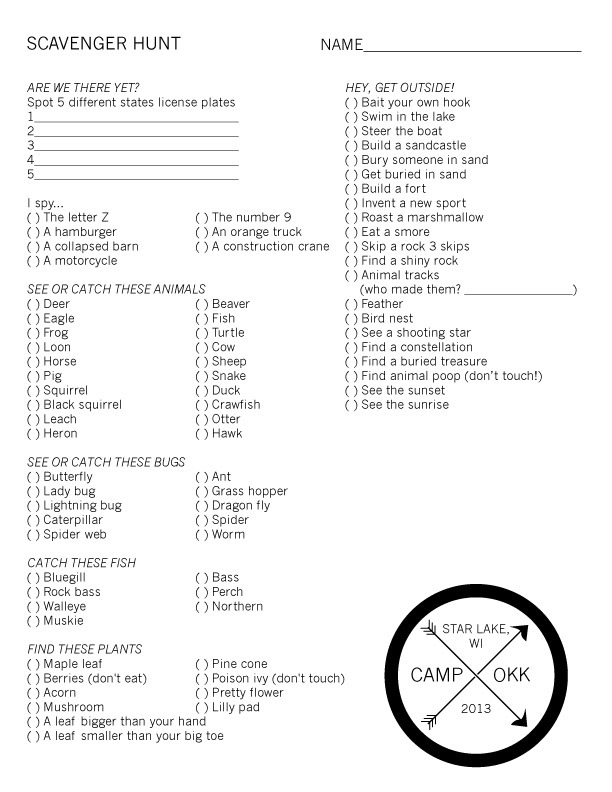
In an effort to give the kids an activity that didn’t require constant adult intervention, my husband had the great idea of creating a scavenger hunt. It was something all the kids could participate in, and they could work on it the whole week, including on the drive up. The drive was about 6 hours each way, so passing time in the car was key. We came up with a lengthy list of things to see/catch/build, and the kids loved it. They ended up forming teams based on the cars they drove up in, and it started quite the competition. They did everything from catching fish to building forts and burying each other in the sand. Here’s the one we created. 

ScavengerHunt3

This could be easily personalized for any vacation location, and can be done as a competition or the whole family can pitch and do it together. We’ve already started a list of additional items we’ll include next time around. 

ScavengerHunt4

It took a little bit of preparation in the beginning, but was an extra little element that everyone enjoyed throughout our trip, and hopefully it helped create some memorable moments for the kids.  Call me old fashioned, but I’m pretty sure catching a slimy toad from under a rock with your bare hands is more memorable than taking care of virtual frogs on your iPad.

By Danielle Kurtz

Danielle is the Creative Director at Nod and an over-protective mother of two. She’s also completely obsessed with Pinterest, Twitter and her Kindle, but not necessarily in that order. Danielle loves to craft, sew and crochet, but all her supplies have a layer of dust on them about 6-years-thick, wonder if it's just a coincidence that her oldest kiddo is 6 years old?

Camping is My Favorite

July 30, 2013

Post by Joni of Lay Baby Lay

Some fun camping inspiration with the Land of Nod today!  I love this look for a boy or a girl – and it would be really fun for a shared room, too!  I really like this bright, happy feel that captures the outdoors without being too rustic.

pop of color shade || vintage arrows || be brave foil print || trifle paper co. animals

paint by number mountain landscape || venture out canvas || yellow isosceles lamp || raccoon pillow

prism pillow || weathered gray oslo crib || green shop clock || walnut ellipse dresser

m is for moose || log pillow || vintage boy scout backpack || white leather joya rocker

teal 88 keys rug || color edge curtains || field guide crib sheet || orange stripe teepee

natural numbers pouf

Register for these great nursery items at LandofNod.com

Post by Joni of Lay Baby Lay

Coconut Pineapple Tiramisu

July 29, 2013

Audreys-Tiramisu

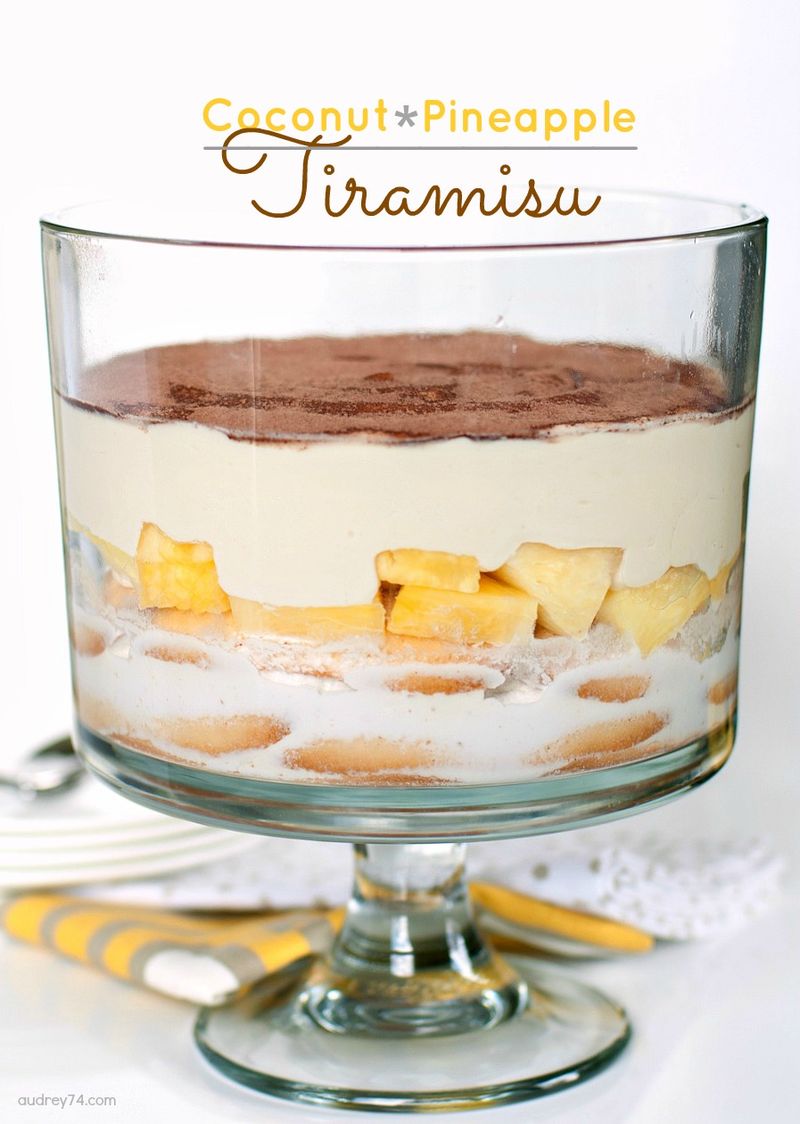
My husband will turn down dessert on a regular basis. At our children’s birthday parties, he’s the one that won’t have a piece of the three-tier chocolate cake. I really don’t comprehend this. He claims he doesn’t like cake much, especially the layered and iced ones. Now, how does one celebrate a birthday  without a cake or cupcakes? Would I bake a cake anyway, so he could blow out the candles? No. I decided to look for desserts he does like – Crème caramel and Tiramisu came to mind.

I had recently come across a different version of Tiramsu in the Tibits cookbook. Adding Coconut and Pineapple, seemed like an interesting take on a classic Italian desert. Normally, Tiramisu is prepared in a shallow dish, allowing you to get cut pieces out easily, even with all the creamy mascarpone. But, because it was his birthday, I wanted the non-cake to look more like a cake, or something equally celebratory – so I doubled the recipe and assembled it in my trifle dish. Beautiful to look at, but not very easy to serve. That didn’t stop my dear husband though to successfully blow out his candles and dig into his birthday dessert. He had a second helping and had more the next day. I call that a success.

Audreys-Tiramisu-9

Coconut Pineapple Tiramisu – adapted from Tibits Cookbook

Prep Time: 20 minutes

Total Time: 1 hour, 20 minutes

Ingredients

  • 100 g ladyfinger cookies (about one pack, or as many as fit at the bottom of your dish)
  • 100 ml Coconut Milk (about 1/4 can)
  • 160 g fresh Pineapple (roughly 2 cups)
  • 3 tablespoons of light brown sugar
  • 250 g of Mascarpone (a little more than one container)
  • 50 ml of whole cream (1/4 cup)
  • 1 vanilla pod
  • 5 tablespoon of light brown sugar
  • Sweetened Cocoa

Instructions

  1. Layer the bottom of a rectangular baking dish with ladyfinger cookies until bottom is covered. Cover with coconut milk.
  2. Cut pineapple into 1/2 inch pieces and mix with the 3 tablespoons of sugar. Spread over cookies.
  3. Mix mascarpone with cream, sugar and scrapped vanilla seeds until you have a smooth mixture. Spread mixture over pineapple layer.
  4. Refrigerate for at least 1 hour, but it’s best if you prepare it the night before so the cookies have a chance to soak up all the liquid.
  5. Sprinkle with sweetened cocoa right before serving.

Notes

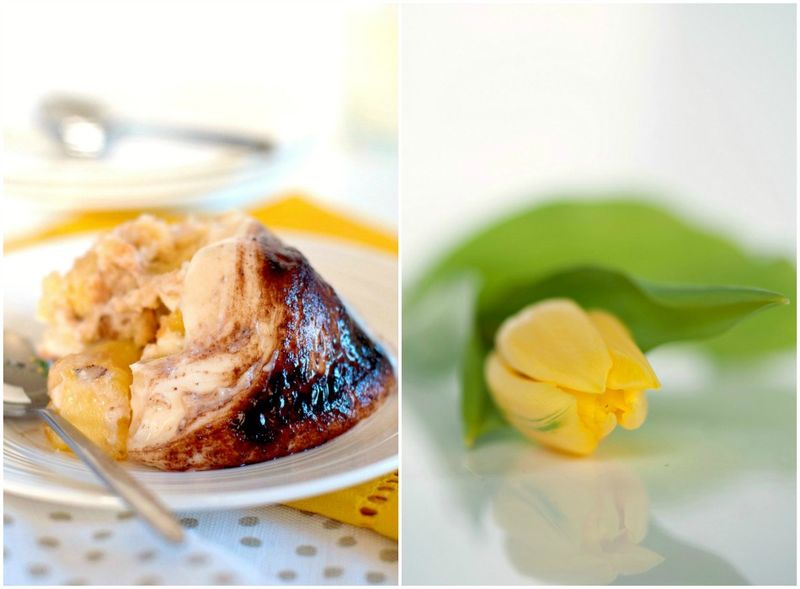
This is a rough translation from a metric German recipe – this recipe is pretty forgiving, so feel free to adapt to your liking. I doubled the recipe and added more coconut milk than the recipe calls for. Next time I would chop my pineapple very fine to create a nice smooth layer, rather than large chunks of fruit – it would look nicer and probably serve prettier.

If you are looking for a creamy dessert that is very easy to make and can be made ahead of time, try this. It’s different than anything I’ve had. What do you think – as good as a cake?

Audreys-Tiramisu-5

Need more tasty recipes and delicious bites? Check out our Let’s Eat Pinterest Board.

Post by Giulia Doyle of Audrey’s

Hailing From London

July 25, 2013

Post by Michelle Sterling of Avery and Augustine
Hailing from London Blog 1

Hailing from London Blog 2

Hailing from London Blog 3

Hailing from London Blog 4

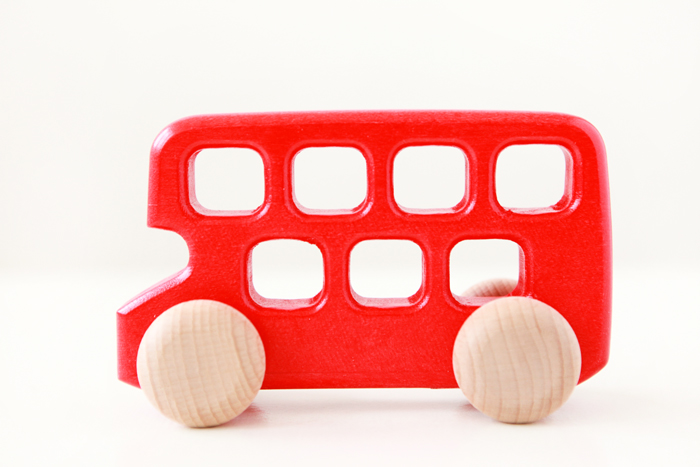
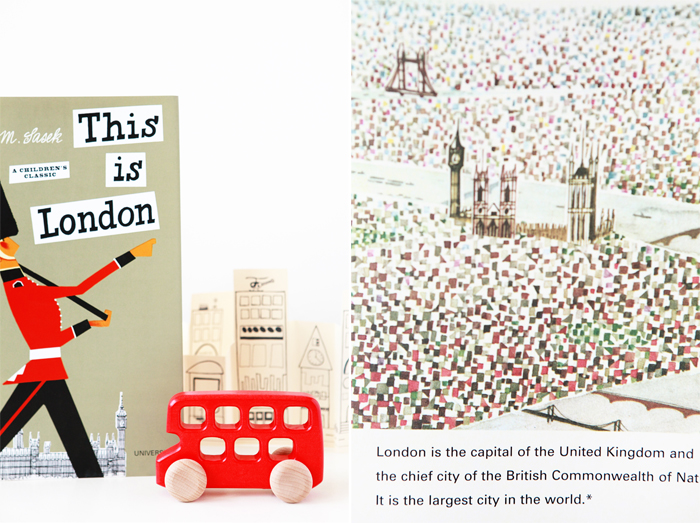
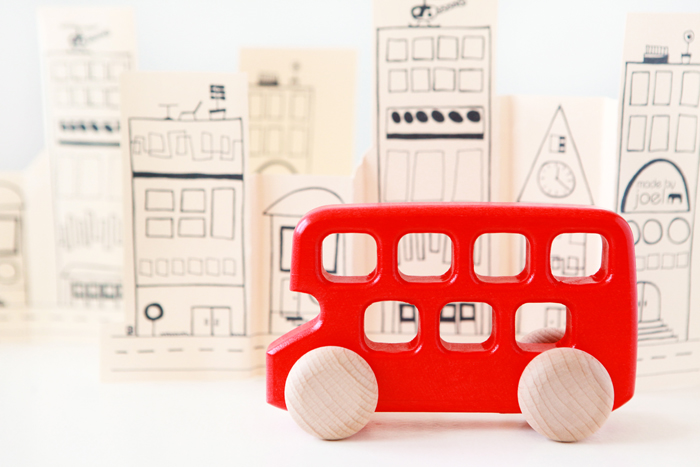
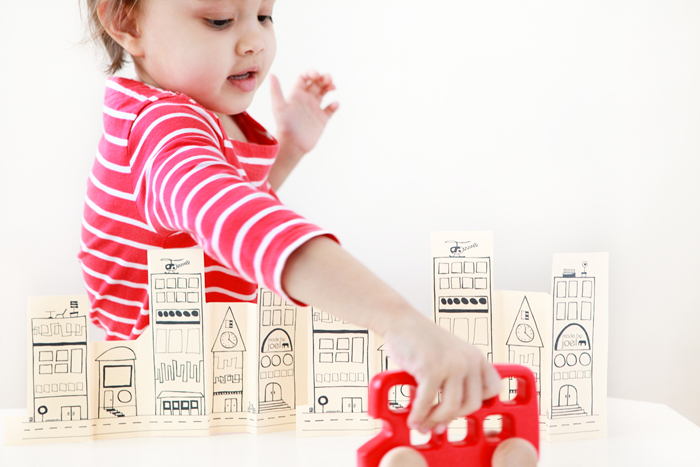
Bajo’s iconic double decker bus hails from London and is perfect roaming around in any urban metropolis, including this charming paper city from Made by Joel.  The brilliant red bus bears Bajo’s characteristic smooth surfaces and rounded edges, making it an ideal toy for a toddler or preschooler.  Pairing perfectly with the little wooden bus is Miroslav Sasek’s This is London.  Time to hop off the bus for a spot of tea and raspberry scones!

Post by Michelle Sterling of Avery and Augustine. You can see her work and read about her two young children’s first forays in cooking, art and everything in between at Avery and Augustine.

Popcorn Chocolate Chip Cookies

July 24, 2013

Cp1

There is something about a lazy summer weekend that makes you just want to curl up on the couch, watch a mindless romantic comedy and eat a bowl of popcorn…. and some fresh baked cookies. What could possibly be better? What if you combined the popcorn and cookies together? Sound amazing? I think so!  The dark chocolate chunks in this recipe play off of the buttered popcorn. And a little extra sprinkling of sea salt is the perfect finish.

Cp2

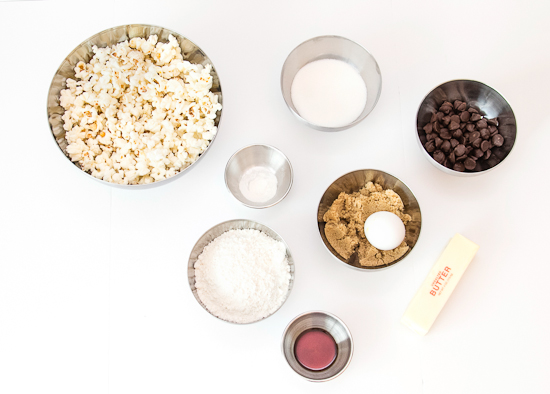
Gather all of the ingredients.

Cp3

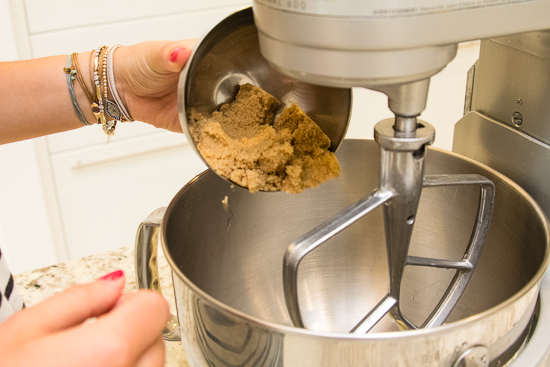
In the bowl of your electric mixer fitted with the paddle attachment beat together 1/2 cup of unsalted, room temperature, butter with 1/2 cup tightly packed light brown sugar and 1/3 cup granulated sugar. Beat until light and fluffy, about 2 minutes.

Cp4

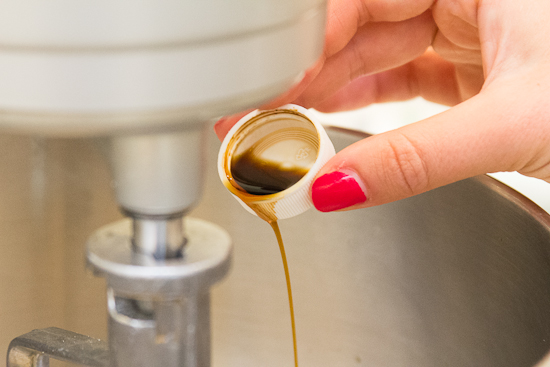
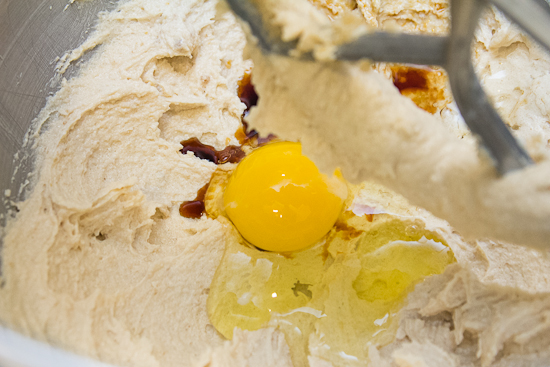
Add in 1 large egg and 1 teaspoon vanilla extract and beat until incorporated, remember to scrape down the bowl as needed.

Cp5

Cp6

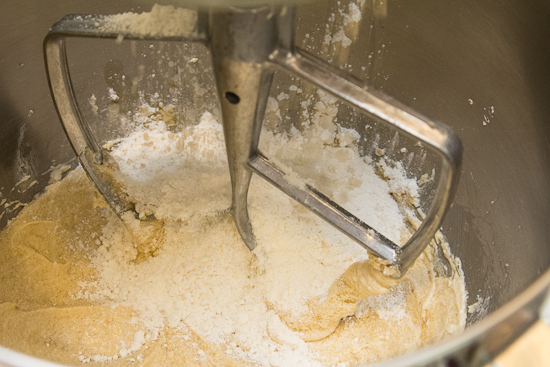
Fold in 1 1/4 cup all purpose flour,  1/2 teaspoon baking soda and 1/4 teaspoon of salt. Until just incorporated.

Cp7

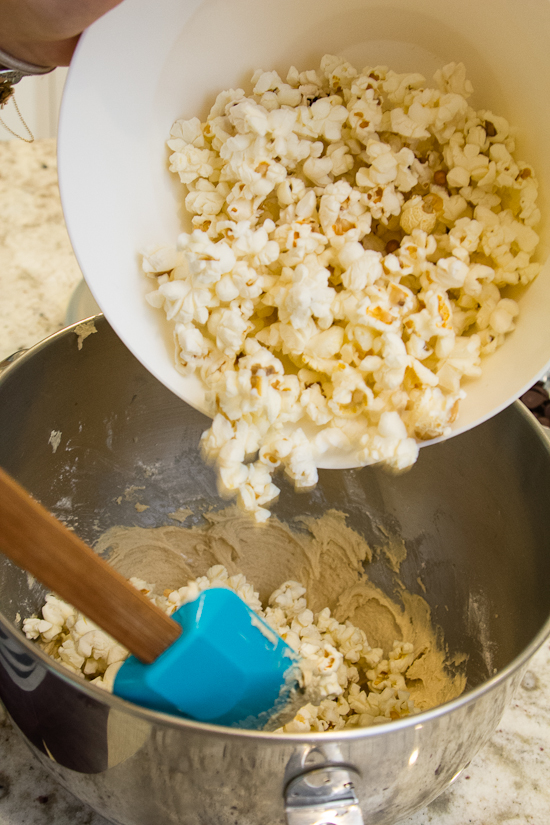
Fold in 4 cups of popped buttered popcorn. You can either use bagged popped corn or you can pre-pop your own kernals. Whatever floats your boat – it does not matter either way! This may seem like a lot of popcorn but trust me, it breaks down as you fold it into the dough.

Cp8

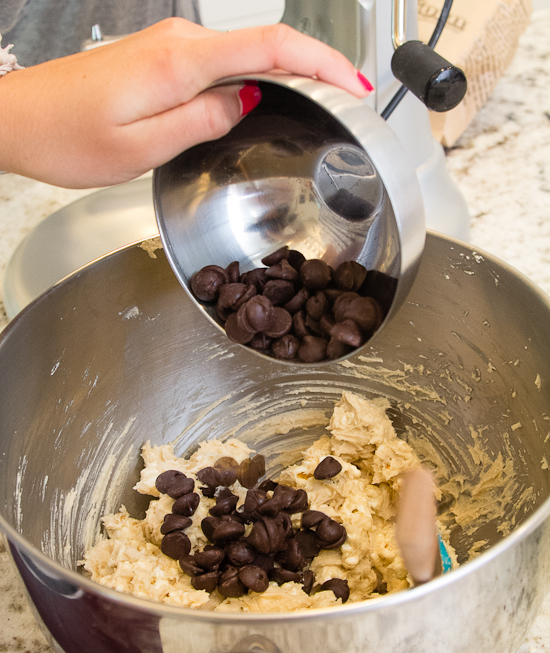
Finally fold in 1/2 cup of dark chocolate chips {dark is key here – they are SOOO good. But if you only have semi-sweet they will do too}.

Cp9

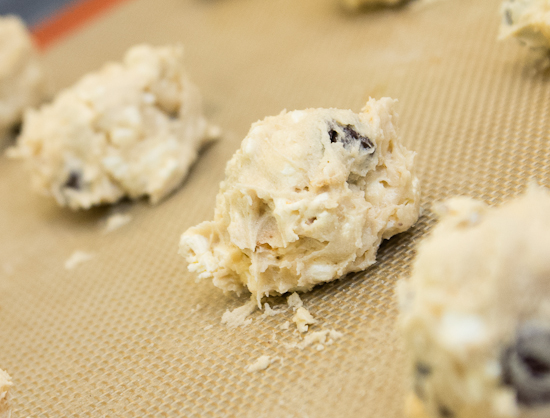
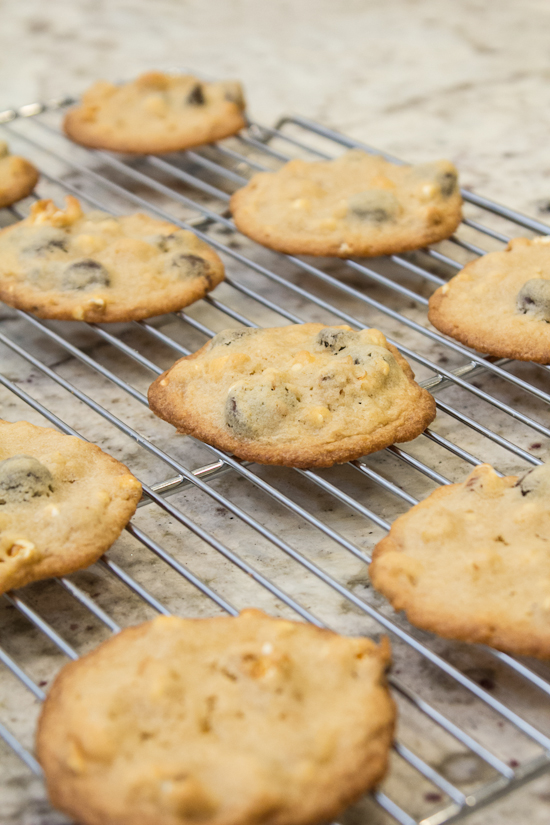
Scoop into dough onto baking sheets fitted with parchment paper or Silpat mats and bake in a pre-heated oven at 350 degrees for 10-12 minutes, until golden brown. Allow to cool completely.

Cp10

Enjoy!

Cp11

Happy Baking!

Cp12

For a printer-friendly version of this recipe click here:  Popcorn Chocolate Chip Cookies

xoxo,

Post by Ali: Papery & Cakery

* Recipe adapted from joythebaker.com

Need more tasty recipes and delicious bites? Check out our Let’s Eat Pinterest Board.

Turtle Nursery, Two Ways

July 23, 2013

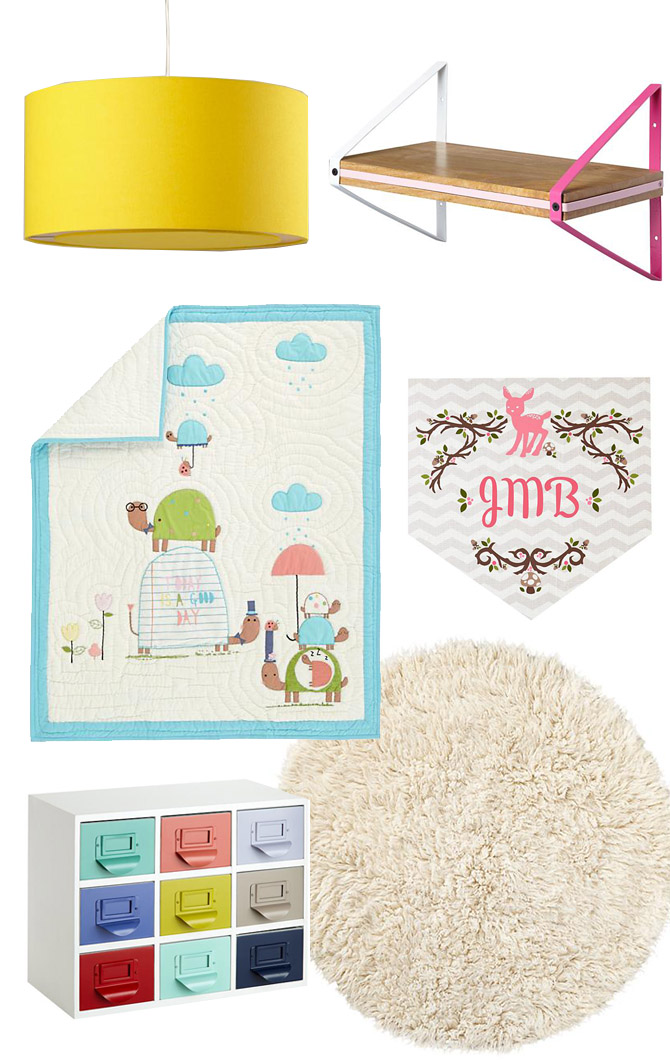
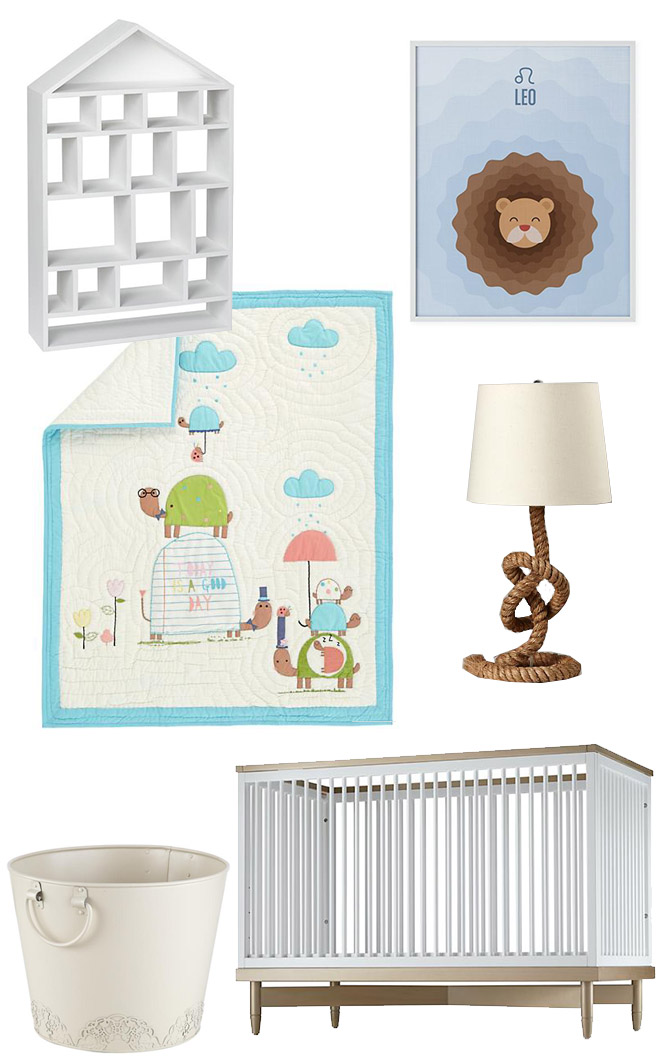
This turtle crib bedding can be styled many different ways. Here are two- pick your favorite!

Choose from Quirky Modern or Warm & Rustic.

TURTLE NURSERY

Quirky Modern
Clockwise:

Hanging Around Ceiling Lamp, $99
Tricolor Wall Shelf, $59
Fable Monogram Wall Decals, $59
Flokati Fluff Rug, $229
Color Reference Drawers, $99
See Turtles Crib Bedding, $29-$109

TURTLE NURSERY rustic

Warm & Rustic
Clockwise:

Four Story Wooden Wall Shelf, $149
What’s Your Sign Framed Wall Art, $89
Tug o Lamp, $99
ducduc ™ for Nod: Oslo Crib, $1,399
Doily Floor Bin, $29
See Turtles Crib Bedding, $29-$109

Register for these great nursery items at LandofNod.com

By Anna Passadori

Anna develops and designs exclusive product for The Land of Nod. She hails from the west coast and has traveled the world to source product. She loves anything Marc Jacobs, Sofia Coppola or stripes! (So, if anyone can get a photo of Sofia Coppola wearing a striped outfit by Marc Jacobs, please send it along.)

Avery’s Bakery

July 22, 2013

Avery Bakery Blog 1

Avery Bakery Blog 2

Avery Bakery Blog 3

Avery Bakery Blog 4

Avery Bakery Blog 5

Avery Bakery Blog 6

Avery Bakery Blog 7

Avery Bakery Blog 8

Avery Bakery Blog 9

Avery Bakery Blog 10

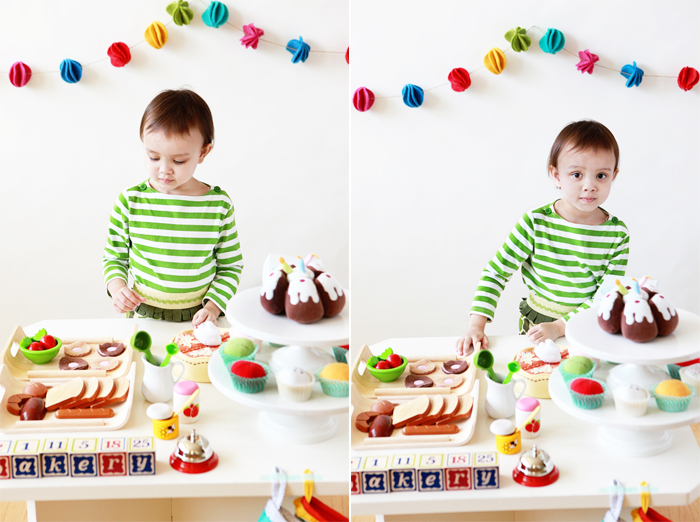
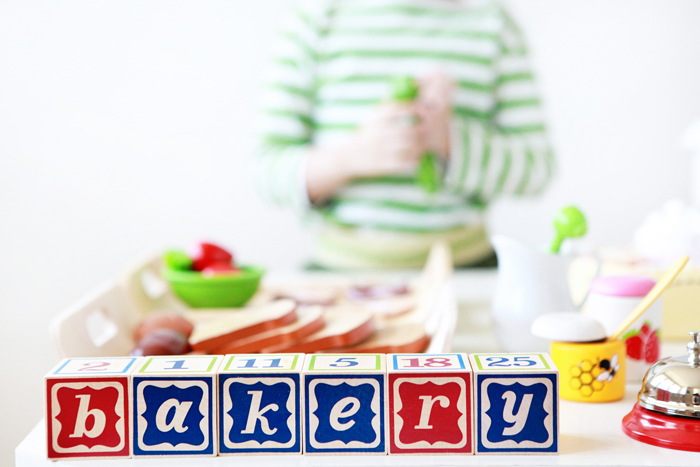
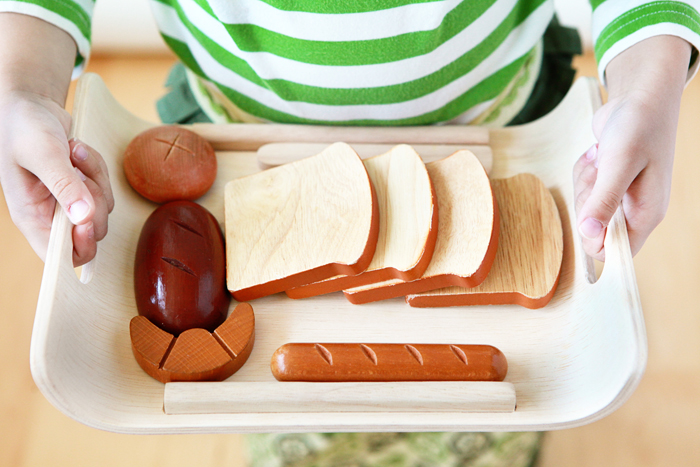
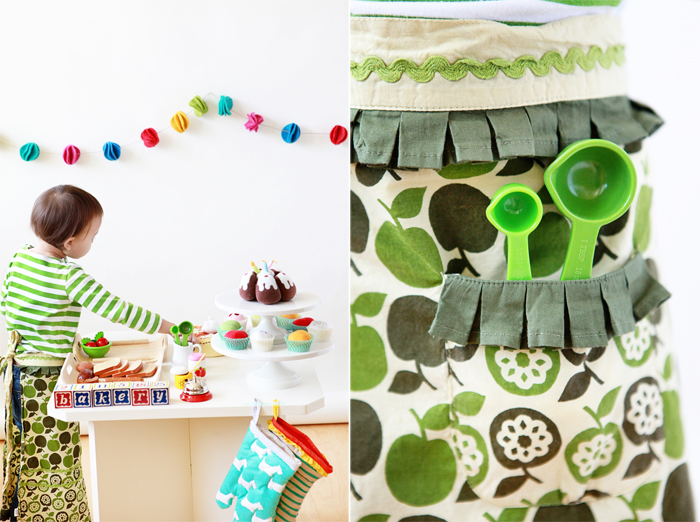
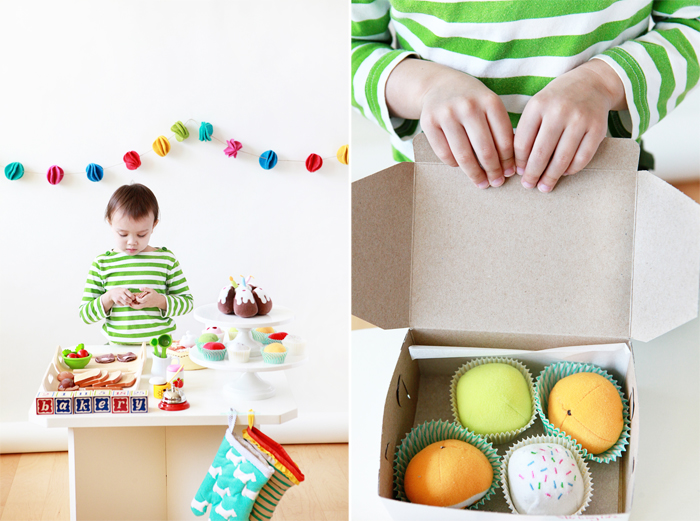
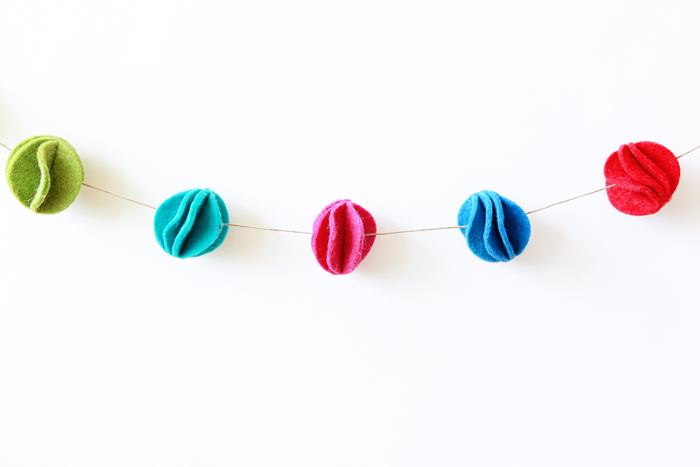
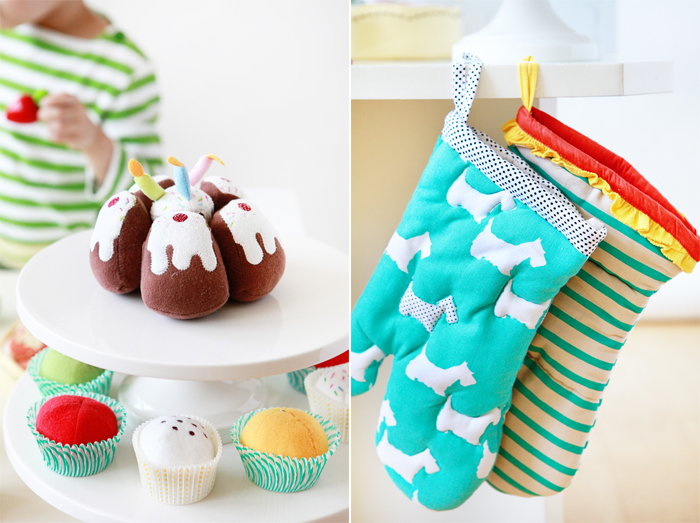
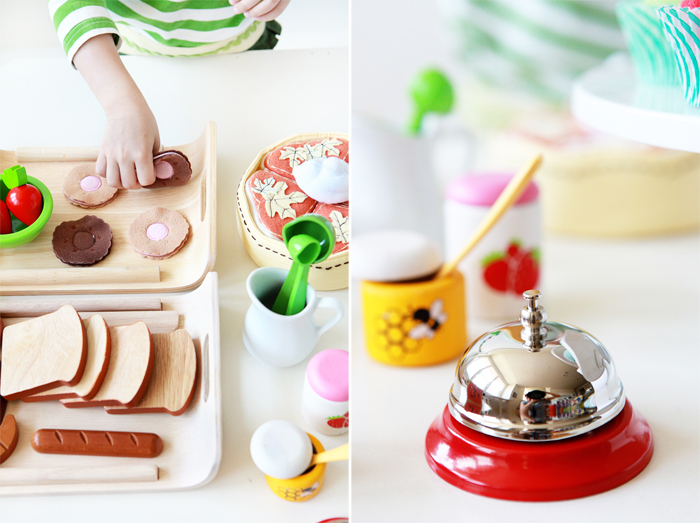
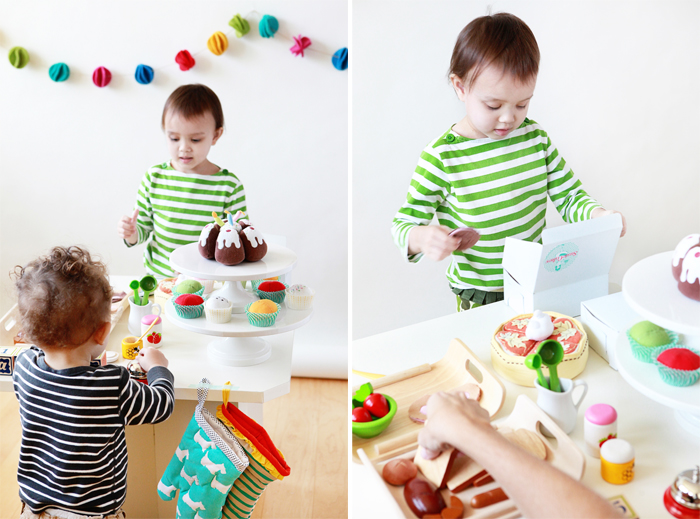
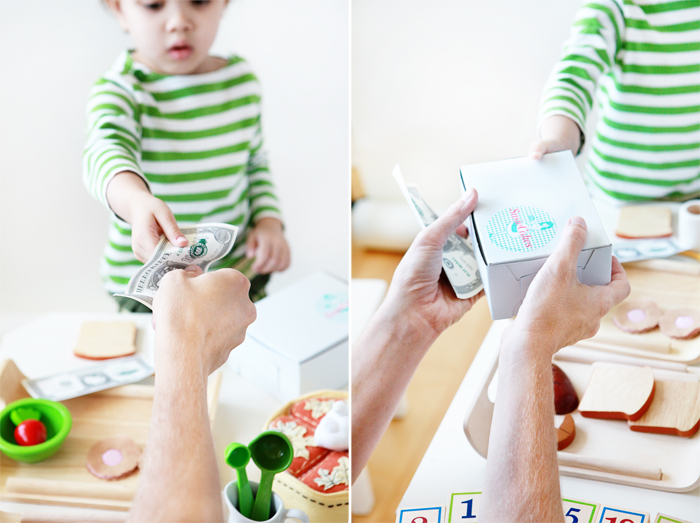
Collaborative pretend play (also called "dramatic play")  is essential for building language, learning everyday scripts, rules of play and social norms, perspective-taking, turn-taking and a host of other important early childhood skills.  I thought Avery would love running a bakery, so I gathered all of her pretend baked goods which included an assortment of breads, cupcakes, a cake and a pie.  I also threw in a couple of strawberries, measuring spoons and jars of jam and honey.  A couple of other details that helped complete Avery's bakery counter were Nod blocks spelling out the word "bakery," a bell for customers to ring and hanging oven mitts. A rainbow felt garland added some colorful whimsy to the setting as well.  We talked about the kinds of items that bakeries sell and how customers visit and buy things with money.

Sources: Play food collected over the last few years (from IKEAHaba ToysPlan Toys), wooden trays (Plan Toys), cake stands (Macy's), oven mitts and apron (Anthropologie), bakery boxes (Susiecakes) and play money (Sanrio).

Post by Michelle Sterling of Avery and Augustine

You can see her work and read about her two young children's first forays in cooking, art and everything in between at Avery and Augustine.