Close

Blog

Raechel’s Favorite Fonts

July 19, 2013

 photo raechelsfavoritefonts.jpg

nouvelle vague // playball // mathlete

aardvark cafe // lullaby // monoglyceride // znikomit

jenna sue // pigeon // airplane

chunk five // sudestada // bead chain

Raechel Myers blogs at Finding My Feet. She's a self-proclaimed 'font nerd', and when she's not elbow deep in her next DIY project, you'll likely find her happily buried under a pile of library books with her kiddos or sneaking chocolate covered almonds out of the pantry when nobody's looking!


Summer Citrus Scoops

July 18, 2013

CITRUSSCOOP

We are sweltering here in SoFla. Like beyond. I can’t get from my house to the car without sweating {profusely}. Oh, and I park in the garage.

So to beat the heat, I’ve been longingly staring at these stuffed citrus recipes. They are so refreshing and cool, and I love the idea of serving them right in their own peels!

{Clockwise: 1. Lemon Dessert Bowls  2. Watermelon Punch 3. Citrus Bowls  4.  Grapefruit Sorbet}

xoxo,

Niki

Post by Niki: Papery & Cakery

A Land of Nod Shoot!

July 17, 2013

It’s no secret I LOVE Land of Nod and everything they do. The catalog is like candy! When we moved into this house – I knew I wanted the girls’ rooms and spaces to be bright and cheerful and full of toys that would stand the test of time (as in four little girls who play tough) Over the past few years, I have stocked the playrooms at PLAY and Bumble with Land of Nod adorableness and I had so much fun picking pieces and accessories to fit our “new” old home with lots of character… and COLOR!


Then one day… my new friends from Land of Nod CAME OVER TO OUR HOUSE! I was so thrilled to met the people behind the genius. I had sent them some photos of my girls’ rooms (aka land-of-nod-obsession) and they wrote me back and asked if they could do a feature in “real families || real kids” – ummmm… YES! So we picked two days in April and had so much fun sprucing up the rooms even more and sharing creativity. They added a bunch of touches I never would have thought of and really completed the rooms.

They even raided my closets to pick outfits for everyone- my sister was thankful someone else brought some fashion sense to the table 🙂 It was a really relaxed, easy shoot and we got some family photo opportunities too, pretty rare these days.

First was the girls’ bedroom. We wanted the three oldest to share a room as long as they can and it was a perfect fit for three Jenny Lind twin beds and sweet night stands in between. We mixed up the bedding in yellow, teal and purple on each bed and the pink chevron rug brought in our household favorite color 😉

I love all the garlands from Land of Nod but sleeping beneath the stars can’t be beat. They added these silver and gold garlands to frame the headboards – and they are all still up today!

(and no they NEVER jump on their beds. ever. yours do? 😉

Sweet Maisie in the middle – I love all of the personal touches on the nightstands – one of my favorite things about Land of Nod is that even all the new stuff feels a little vintage!

Then there is a big, square closet next to the girls’ room that wasn’t built out for shelves yet and by some miracle we had enough storage for linens etc (since they are always alternating between laundry and the kids beds!) so we turned the closet into a reading nook – something I had always wanted to do. We kept it simple with book shelves along three walls and my FAVORITE hot pink tiny chevron chair from Land of Nod – that and a pouf was all it needed. Janie showing her favorite “lady pose” reading Goodnight Moon while sisters were at school.
 

Is that through the keyhole? No, it’s a reading hideout! (and yes the Q is missing – did you notice? Every quilt has a mistake and our alphabet wall just likes to keep people on their toes)

The playroom was a small “half room” on the side of the house that was just like an attic space I had off my room growing up in an old farm house in Menlo Park that my parents restored (we were lucky this old Craftsman was meticulously restored by the previous owners!) but I knew my girls would love the hideaway feel of the sloped ceiling just like I did. I painted and stenciled one wall with a fun “tribal” stencil and tried to keep the furniture sparce to leave room to play. I picked the colors for the stencil from one of my favorite Land of Nod floral rugs that fit perfectly in the space!

before:

after!

The wall stencil was a tribal chevron from Cutting Edge Stencils – I was planning the whole wall but quickly realized that was a little aggressive! So a Charlie Brown stripe did the trick 🙂

Maisie was loving the camera moments – which is usually unlike her!

Francie

And there was a “bonus” room off this room that was used for storage but a little chalkboard paint and a pink-on-pink chevron kids rug turned it into the Secret Clubhouse! We painted the frames in white paint so they don’t erase and then the girls can chalk in whatever they want. The stars on the ceiling are paint too – can you tell I am slightly obsessed with sparkly stars and lots of COLOR!?

SO after a few months wait… the July issue is out! It hit the east Coast first and my friend Sherry in Florida texted me these photos before I saw it in person, I was so excited to see us in print!!

We got to play around the the backyard too – and toured our new Land of Nod friends around The Makery and our businesses downtown Los Altos. It was pretty flattering the most creative people I can think of were loving all the DIY creativeness there too! Hope you guys all come back sometime and thanks for such a fun experience!

Thanks for reading! Love The Heffernans, Mary, Brian, Francie, Maisie, Janie and Tessa.

DIY Tissue Wisteria

July 16, 2013


Whattya need?

  • Tissue paper
  • Embroidery needle
  • String
  • Scissors

Blog_Tissue_Wisteria_Material

How do I make Tissue Wisteria?

Step 1: Fold tissue into rectangle.

Blog_Tissue_Wisteria_Step_01

Step 2: Cut folded tissue into balloon shape, producing multiple “petals.”

Blog_Tissue_Wisteria_Step_02

Step 3: Repeat with other assorted colors.

Blog_Tissue_Wisteria_Step_03

Step 4: Fold petal lengthwise.

Blog_Tissue_Wisteria_Step_04

Step 5: Twist narrow end.

Blog_Tissue_Wisteria_Step_05

Step 6: Fold twist into petal.

Blog_Tissue_Wisteria_Step_06

Step 7: Pinch end of petal.

Blog_Tissue_Wisteria_Step_07

Step 8: Repeat steps to create multiple petals.

Blog_Tissue_Wisteria_Step_08

Step 9: With threaded needle, pierce narrow end of petal.

Blog_Tissue_Wisteria_Step_09

Step 10: Repeat to create flower of desired length.

Blog_Tissue_Wisteria_Step_10

Step 11: Trim excess string from bottom.

Blog_Tissue_Wisteria_Step_11

Step 12: Tie knot at the bottom of string.

Blog_Tissue_Wisteria_Step_12

Blog_Tissue_Wisteria_Final

Handmade Shadow Boxes

July 15, 2013

You might have noticed we have six new themes for our fall collection bedrooms. To enhance our vision, we reached out to the very talented, seventeen year-old Lova Blavarg.

Her work can be seen in Martha Stewart and Sweet Paul where her crafting, illustrations and artwork bring ideas to life in such a magical way.  

Most recently The Land of Nod collaborated with Sweet Paul for their first kid issue. Lova’s work is featured and we just love her playful approach.

Spread

Through her little collages, she has captured the essence of each room through fun and thoughtful ephemera. Then she found tiny vintage tin boxes in a range of shapes and sizes and put it all together.

Here are a few of her piles of wonderful found objects, collages and our room photos.

Eastern Shores

America

Americatin

Sg-kids-bedding

Hexagon Adventure

Geometric

Geotin

Meteorite-bedding

 Black and White

Blkwht

Blacktin

Loves-me-loves-me-not-bedding

To see more of Lova’s amazing work, be sure to check out our July catalog.

By Cara Reche

When young, Cara had two imaginary friends. As their friendship grew, so did her imagination. Cara loves to “get crafty with it” and is the Associate Art Director at the Land of Nod.  

Recycled Can Planters

July 12, 2013

At Nod, we believe your home should be a celebration of family. We'll be featuring our Managing Director, Michelle, at home celebrating her own family with recipes, crafts and décor created by our friend Sweet Paul

This is one of those projects that’s just so simple and has adorable results.  I found a box of vintage tin cans at a flea market for $5.  In a few easy steps I was able to transform them into the most charming little planters!  You don’t have to use vintage cans either–you can use any colorful can with a fun photo or illustration.  The best part is, after the season has ended you can recycle the cans!

LoN_VgtblDtl-0513 (2)

Just remember to make a few holes in the bottom of the cans so that the water can drain.
(Use a large nail and hammer for this)

1. Fill the bottom with some pebbles and fill in dirt and your plant. 
2. Super cute with herbs outside your garden window as well.

By Paul Lowe:

When it comes to making simple crafts or elegant meals, Paul Lowe is the man to call. His blog, Sweet Paul has now spun into a successful magazine, providing tons of useful design tips. 

Watermelon & Tomato Salad

July 11, 2013

At Nod, we believe your home should be a celebration of family. We'll be featuring our Managing Director, Michelle, at home celebrating her own family with recipes, crafts and décor created by our friend Sweet Paul

I love to have a simple yet interesting go-to summer salad recipe each year.  This year I’m thrilled by the combination of herbaceous fresh tomatoes coupled with supremely sweet watermelon.  The simple dressing of lemon juice and oil brightens everything up into a salad that sings!  Bring it to your next potluck barbecue and I’m SURE you’ll be going home with an empty bowl!

LoN_VgtblDtl-0492 (2)

Serves 4

1/4 watermelon
24 red and yellow cherry tomatoes, cut in half
4 cups watercress
4 tablespoons olive oil
1 tablespoon lemon juice
salt and pepper

1. Use a melon baller and make a bunch of watermelon balls.
2. Place them in a bowl with the tomatoes and watercress. 
3. In a small bowl mix together olive oil, lemon juice, salt and pepper. 
4. Pour the dressing over the salad, mix and serve.

By Paul Lowe:

When it comes to making simple crafts or elegant meals, Paul Lowe is the man to call. His blog, Sweet Paul has now spun into a successful magazine, providing tons of useful design tips. 

DIY Watercolor Canvas

July 10, 2013

See-turtles-crib-bedding

Whattya need?

  • Canvas
  • Watercolor pigments
  • Brushes
  • Mixing palette
  • Water dish
  • Push pins

Blog_WaterColorCanvas_Material

How do I make a Watercolor Canvas?

Step 1: Load brush with tiny amount of pigment and dilute in water

Blog_WaterColorCanvas_Step_01

Step 2: Apply to canvas and continue spreading pigment by adding water to brush. ( Be sure to cover you work surface as paint will bleed through.)

Blog_WaterColorCanvas_Step_02

Step 3: Load brush with tiny amount of the next pigment and dilute in water

Blog_WaterColorCanvas_Step_03

Step 4: Apply to canvas and continue spreading pigment by adding water to brush. 

Blog_WaterColorCanvas_Step_04

Step 5: Load brush with tiny amount of the third pigment and dilute in water

Blog_WaterColorCanvas_Step_05

Step 6: Apply to canvas and continue spreading pigment by adding water to brush. 

Blog_WaterColorCanvas_Step_06

Step 7: Allow to dry and mount on wall with push pins.

Blog_WaterColorCanvas_Final

Bread and Tomato Necklace

July 9, 2013

At Nod, we believe your home should be a celebration of family. We'll be featuring our Managing Director, Michelle, at home celebrating her own family with recipes, crafts and décor created by our friend Sweet Paul

This project is so much fun to do with the kids.  Simply place bowls of your bread balls and tomatoes on the table and let the kids go to town!  I like to put holes in everything before I let the kids start–it’s so much easier.  Kids love to show off their edible fashion and it’s a great way to get another serving of vegetables into their day!

LoN_VgtblDtl-0412 (2)

Makes 8 necklaces

1 package active dry yeast
1/4 cup warm water
1 teaspoon honey
1 cup warm water 
3 cups plain flour
1 teaspoon salt
2 tablespoons olive oil
48 cherry or grape tomatoes
Kitchen twine

1. In a small bowl, dissolve yeast and honey in 1/4 cup of water. 
2. Let stand until bubbly, about 5 minutes. 
3. In a large bowl, mix flour, 1 cup of water, yeast mixture, salt and olive oil. 
4. Mix well until it becomes a smooth dough. 
5. Cover with plastic wrap and let rise for 2 hours. 
6. Knead the dough and cut into 64 pieces. 
7. Roll each piece into a ball. 
8. Transfer to a baking sheet.
9. Spray with a little water. 
10. Bake at 390˚F until golden, about 15 minutes. 
11. Cool on a wire rack. 
12. Using a bamboo skewer, poke a hole in each of the bread balls and thread them on a kitchen string. 
13. Make holes in the tomatoes and string them on. Use firm tomatoes; otherwise it will all be a big mess. 
14. Tie and your necklace is ready to be used and eaten.

By Paul Lowe:

When it comes to making simple crafts or elegant meals, Paul Lowe is the man to call. His blog, Sweet Paul has now spun into a successful magazine, providing tons of useful design tips. 

Eggs and Smoked Salmon Toasts

July 8, 2013

Audreys-Egg-and-Smoked-Salmon

We seem to only eat eggs on the weekend. Sometimes I wonder why I don’t make eggs more often during the week. They are fast and keep you going. But weekday mornings are just crazy – between the kids not wanting to eat breakfast or get dressed, lunches and book bags to pack – I’m lucky if we get out the door on time with something in our bellies. The eggs would just be ignored and that would be sad. So I save them for the weekend, when we’re not in a hurry and can enjoy a breakfast when our bellies are ready for it. Most weekends that would be an hour later than during the week.

This time we added some smoked salmon. It gives the meal a beautiful colour and satisfying salty flavour – adding my usual cream cheese to the bread makes these eggs perfect for breakfast, brunch or a light lunch.

Audreys-Eggs-and-Smoked-Salmon

Audreys-Egg-and-Smoked-Salmon-3 (1)

Eggs and Smoked Salmon on Toast

Ingredients

  • Fresh whole wheat crusty bread
  • Eggs
  • Milk
  • Smoked Salmon
  • Cream Cheese
  • Chives or Dill
  • Salt and Pepper

Instructions

  1. Cut your fresh bread into slices. If the bread is a day or so old, toast the slices.
  2. Scramble your eggs in a hot pan and finish off with a splash of milk.
  3. Fold small pieces of smoked salmon into the hot eggs.
  4. Salt and pepper to taste.
  5. Spread a small amount of cream cheese on each piece of bread, top with egg/salmon mixture and garnish with chives or dill.
  6. Serve warm.

Post by Giulia Doyle : Audrey's

Family Game Night

July 5, 2013

NodGiftingBoutique_GamesLayout (6)

It’s been said that nobody knows you like your family.  Whether enjoying a family dinner around the table or enjoying a car ride together, nothing promotes family bonding like some together time.  One great way to strengthen the bonds of family is to play games together.  The Land of Nod has a great assortment of battery-free games that the whole clan can enjoy! 

Many of our toys are secret learning tools in disguise.  While kids are having fun playing, their brains are also expanding as they explore new games.  When kids are younger, tactile toys such as theLetters Entertain You Block Puzzle and the You Can’t Spell Abacus Without ABC toy help to develop senses and motor skills, all while teaching sequencing, patterns and the alphabet!  One toy that my family has particularly enjoyed is the A Trip Down Memory Game, which we’ve adapted into many different modified memory games.  When my daughter was very young, we used half of the tiles and left them all face up so that she could identify matches without having to remember the location of each tile.  Once she’d mastered face up matching, we turned the tiles over into a traditional memory game, but still using only half of the tiles in the box.  As she grew better and better, we slowly added more and more matches to the game until we were playing with the whole bag of tiles.  Sometimes, she would use the tiles as if they were dominoes and create long trains of matches on her own.  My son is now about the age of my daughter when we first started playing, and she greatly enjoys showing off her expertise when we play the face up memory game with him. For me, though, the best part of the game is that it comes with a bag to store the pieces!  Easy cleanup! No matter how we played with this game, we had a lot to talk about and greatly enjoyed both the game and our time together!

On days when it is rainy (almost every day this spring in Chicago!) we find other games to play together that make those long afternoons move by a little bit faster!  In March, my mother gave the Let’s Go Fishing Game to my son for his birthday, and this game has provided BOTH of my kids with endless entertainment!  The fact that the set comes with TWO poles is a major highlight for us, as both kids can play together in their quests for the big shark.  I’ve even put this game into a bag and hooked it to the center console of my car and the kids have happily played together in the back seat of the car, which makes this game worth its weight in gold!  Other games that we’ve happily enjoyed for hours are the Livingroom Bowling set, which is hefty enough to provide a challenge, but soft enough to not risk lamp and limb while you play in your home.

Lastly, for a classic one-on-one gaming experience, our wooden Chessand Checker sets can’t be beat!  Both are time-honored games that encourage strategy, communication and planning!  These sets are gorgeous, heirloom quality pieces that your kids will use to play against their kids.  The checker set is both cut and finished by hand, and the chess set is made of maple and cherry hardwood and is laser engraved.  These are both classic games in classic styles, and they are perfect to leave out as a conversation piece!

No matter what games you play, family togetherness can’t be beat.  What sometimes starts out as a simple way to pass the time before bed or to give some structure to a lazy afternoon can be the start of wonderful, warm memories that the whole family can enjoy—much like the games!

By Jayne Mangione

Jayne has a lot of experience with children as a former elementary school teacher and a mom of two kids. In her job as a customer service specialist at Nod, she offers advice to customers on our wide array of products, 90% of which she and her family already own. A Chicago native, she’s mastered multiple seasons, often in one week, while being able to cite 90’s pop culture and musical references at the drop of a hat.  Speaking of hats, ask her about the time she looked like Blossom.

Hosting a Shrimp Boil

July 4, 2013

Post by Michelle Kohanzo, Managing Director of The Land of Nod

Hosting a Shrimp Boil

I have silly dreams of lazing my days away on a beach somewhere on the east coast, preferably Maine, in a St James stripe shirt.  So, when it came about that I would be hosting dinner for 30 in my yard the obvious choice was a shrimp boil, with “Hamptons Chic” dress code.  I always have a dress code for parties; I love how everyone gets so into getting dressed.

Hosting a Shrimp Boil

A shrimp boil is genius for a large outdoor gathering – there is virtually no prep and very little cook time and the whole presentation of the boil dumped out on to the table is fabulous, not to mention it’s utterly delicious.  Without further ado, how to throw a fab shrimp boil:

Décor:  Stay casual and don’t worry about matching – a general color scheme helps pull it all together – I chose red, white, and blue – to keep it nautical.

Hosting a Shrimp Boil

Table setting –

Balloon Dip Ball jars

Paper stripe straws

Aluminum pie plate

Bamboo disposable flatware

Drap Gingham napkins (these are awesome they come on a roll and can be reused)

For the grown-ups I used 3 – 10 foot tables in a line, wanted to make sure everyone had a lot of room.  For the kids I used two of Nod’s play tables, decorated the same as the grown-ups

Hosting a Shrimp Boil

I used an assortment of Crate and Barrel tablecloths in red check and blue stripe and then put a paper runner down the center of the table. All of the flowers were from my yard – peonies, daisy’s, and cat mint and I placed them in mismatched jars and cups, then filled more cups with tea lights to create a little ambiance.

Menu –

Appetizers:

Olives, assorted cheeses, fresh strawberries

Drinks:

White wine sangria

Assorted wine, assorted beers, Capri Sun

Dinner:

Shrimp boil with the following modifications – add polish sausage, clams, and crawfish in equal proportion to the shrimp

Hosting a Shrimp Boil

Asparagus Goat Cheese Galette (this was for my vegetarian friends – the crust is amazing and can be used with any topping, yum)

Herb Butter – Melt 2 sticks of butter, add minced 4 cloves minced garlic and assorted chopped herbs – sauté on low 10 minutes, do not let it burn.  Pour into a pretty bowl and refrigerate, amazing!

French bread

Dessert:

Neon Rainbow Cake – sorry folks, this one’s from a box

“Shrimp Cakes” (by the wonderful Elle)

Hosting a Shrimp Boil

Grilled bananas with chocolate and marshmallows – slice a banana long-ways, stuff with chocolate chips and marshmallows and wrap in tinfoil – grill 5 minutes and dig in.

Hosting a Shrimp Boil

Hope this inspires you to throw a Hampton’s Chic Shrimp Boil for your family and friends!

XO

Michelle

Aside from being the Managing Director of The Land of Nod, mother to four kids (yes, FOUR!) and a gourmet cook, Michelle is a retail junky. She’s painted her dining room countless times and changes rugs like most people change their bedsheets. When she’s not living and breathing retail, she’s weaving amazing works of art with her sister for Bourbon+Gin Weaving.

Pom-Pom Balloons!

July 3, 2013

Post by Haeley: of Design Improvised 

These pom-pom balloons just might be my favorite DIY yet. Who would’ve thought that you could hot glue things onto a balloon without it popping? I figured it was worth a try. 🙂

Balloon1

Hot glue and balloons may sound like a precarious combination, but I promise you it works. I’ve made two bunches of these without a single balloon popping…and the results are so fun!

Balloon-Craft-2

I first made these for our going away party, but was having too much fun at the party to get any good photos of them. So I made another round the other day. It took 15 minutes. Totally worth it for some unexpected decor that you can customize to the colors of your party.

Balloon3

Supplies for Pom-Pom Balloons

  • Helium grade latex balloons – I used clear as I liked being able to look through the balloon and see the pom-poms on the other side, but you could try any color
  • Small pom-poms – I found some fun glitter pom-poms
  • Hot glue – I used it on “low” setting just to be safe!

Balloon4

How to Make Pom-Pom Balloons

It is as simple as putting a small dab of hot glue on a pom-pom and sticking it on the balloon! I used a variety of colors and stuck them on randomly until it was well covered.

Balloon5

These were so easy to make I can see myself making lots of different versions of these for parties down the road.

Balloon6

Balloon7

How cute would these look in red, white, and blue pom-poms for the 4th of July? How else would you improvise on them?

Post by Haeley: of Design Improvised & Photos by Annie Sturgis Photography

Nod at Emerald City Theatre

July 2, 2013

When designing the lobby of the Emerald City Theatre, the very first theater in the nation devoted solely to children ages 0 to 4, I knew it had to be visually stunning for all ages. This space had to evoke fun and creativity, welcoming families into a magical space, where imaginations could flourish.

Wholething

In The Wizard of Oz, the movie began in black and white. As a little girl I was very drawn to this style. It felt simple, and when the movie changed to color I was overwhelmed. I wanted this same concept to translate from the lobby to performance space. 

City

Bold black and white artwork promotes visual strength for baby’s eyes too. 

Bwdetail

Julia Rothman’s interpretation of the Emerald City has playfulness, unique to other Oz references. I am inspired by her bold patterns, line strokes and simple graphics. You can follow the yellow brick road through the rainbow hall into a world of performance.

Floor

Hall

Detail hall

My favorite characters in The Wizard of Oz were the munchkins and their Lollipop Guild. The giant lollipops made of plexi-glass allow light to shine through. 

Lolli

Lolli2

Remember when Dorothy and her friends ran through the poppy field and felt sleepy? Perhaps after the show, little ones will play with these giant magnets and feel very sleepy, drifting into a nice long nap.

Magnet

Poppy

Bathroom time is fun, too. Stripes in one bathroom, dots in the other.

Stripes

Dots

Opening night and the ribbon cutting ceremony was very special. It was an honor to be part of this project and to collaborate with some very talented people in the process. Best of Luck Emerald City “Little Theatre.”

Ribbon

For more info and behind the scene pictures, visit Emerald City Theatre on Facebook.  

By Cara Reche

When young, Cara had two imaginary friends. As their friendship grew, so did her imagination. Cara loves to “get crafty with it” and is the Associate Art Director at the Land of Nod. 

Avery’s Honey & Cheese Party

July 1, 2013

Avery Honey and Cheese Party Blog 1

Avery Honey and Cheese Party Blog 2

Avery Honey and Cheese Party Blog 3

Avery Honey and Cheese Party Blog 4

Avery Honey and Cheese Party Blog 5

After telling her a few details about our honey and cheese party, I asked Avery if she wanted to have her own party.  Her reply was, "Cheese, honey.  That sounds like fun!"  Avery loved drizzling honey over her cheese sandwich and ate almost all of it.

The organic honey dipper is from Bambu and some of the play food and accessories are from this breakfast set and Haba Toys.  Thanks to Lately Lily for sending Avery some of their adorable shirts.  It was love at first sight and she was really drawn to their hangtags with Lily's travel stories as well.  This lavender Notre Dame shirt is Avery's favorite.  It is too cute!

Post by Michelle Sterling of Avery and Augustine

You can see her work and read about her two young children's first forays in cooking, art and everything in between at Avery and Augustine.

Honey & Cheese Party

June 28, 2013

Honey and Cheese Party Blog New 1

Honey and Cheese Party Blog New 2

Honey and Cheese Party Blog New 3

Honey and Cheese Party Blog New 4

Honey and Cheese Party Blog New 5

Honey and Cheese Party Blog New 6

Honey and Cheese Party Blog New 7

Honey and Cheese Party Blog New 8

Honey and Cheese Party Blog New 9

Honey and Cheese Party Blog New 10

I'm excited to introduce a new series called Noshing with Friends, which brings together craft food and simple pairings in the company of good friends.

The inspiration for this event was this post as well as two pairings I remember having while living in (and later returning to Spain): manchego and membrillo, also known as quince paste (a quintessential Spanish dessert) and mel i mató (a Catalán dessert traditionally made with rosemary honey and fresh unsalted cheese from Montserrat).  This crostini bar post on TheKitchn also inspired and provided some good ideas.

These articles on Food and WineMartha StewartSnoothMetro.usSerious Eats and The Cheese Shop of Centerbrook were good sources for different elements to include in the menu and various ideas for pairings.  I also printed out some of the articles for guests to read during the party.

I wanted to serve a couple of cheeses that I knew and loved– manchego and Humboldt Fog–and some cheeses that were new to me.  In the end, we had a diverse collection of wonderful cheeses provided by the new Provisions Market in Old Town Orange: Lamb ChopperFiscalini CheddarKunikHumboldt Fogmanchego and Whole Milk Jersey Ricotta by Bellwether Farms.  

Provisions also gave us some of their handcrafted jams: apricot ginger, strawberry chili and blackberry pinot noir, all of which were flavorful and bright accoutrements to the cheeses. Ames Farm sent over some lovely raw single source honey: basswood, buckwheat, sweet clover, buckthorn and savory spring.  Honey Pacifica provided a great sampling of their fantastic local raw honey: mango (a honey flavored with mango extract), creamy wildflower, sage, avocado, orange blossom and wildflower.  Guest favorites were Ames Farm's basswood and Honey Pacifica's mango.  I think what surprised us most was the basswood honey–it had fruity notes to it–almost like lychee, someone remarked at the party.  Overall, I was very impressed with the high quality and diversity of all the honey.  Each honey had a distinct personality and flavor profile.  It was interesting to try Ames Farm's buckwheat honey and Honey Pacifica's avocado honey–they were both full-bodied and rich, almost like molasses. Honey Pacifica's sage was nice and delicate as well as Ames Farm's sweet clover, and they paired nicely with the more mild, delicate or fresh cheeses.  The saltier, aged or sharp cheeses seemed to go well with the more full-flavored honeys.  However, it doesn't seem like you can go wrong with honey and cheese–according to cheese expert Laurie Werlin, "… almost any kind of honey is delicious with a salty cheese."  The pairing of salty and sweet is a basic, fundamental combination that just works well.  I definitely recommend trying a sampler of raw honey–you'll get just enough of each and will be able to compare and appreciate the nuances of each.
We also had fruit on hand to go with our different cheeses and honeys: apples, pears, cherries, figs and Frog Hollow Farm's beautiful peaches.  Everyone adored the peaches, saying that they tasted like no other peaches from around here.  To me, they were the ultimate "peachy" peaches and every bite evoked the sweetness and warmth of summer.  We also had membrillo (quince paste) to go with the manchego.  It sweetness and tartness complemented almost all of the cheeses.
Some pairings that were liked:

Jonagold apples with Humboldt Fog
Manchego and apricot ginger preseves
Fiscalini and basswood honey
Humboldt Fog and buckwheat honey

Humboldt Fog and mango honey
Kunik and basswood honey
Kunik and orange blossom honey
Manchego and mango honey
Fig, ricotta and mango honey
Lamb Chopper, cherries and sweet clover honey

Many thanks to all the different artisan businesses that provided their amazing products for our event:

Bambu makes natural handcrafted products for the home.  Their ideas are inspired by the materials they work with, and crafted in a way that supports sustainable business practices.

Provisions Market is a newly opened market, deli and bruery in Old Town Orange that fills a need for a neighborhood spot offering a curated selection of craft beer, cheeses, sandwiches and artisan goods and a great place to share a meal with friends.  They also feature Sidecar doughnuts, bread by OC Baking Company and soon, coffee by Portola.  All the best things in one place.  Provisions Market is making and jarring its own jams and preserves on site and will have a rotating line of pickles, jams, jellies, and sauces.  Production is just getting going, so look to find these on the shelves in the coming weeks.

Frog Hollow is a farm in the Bay area city of Brentwood that is known for its legendary and organic stone fruit.  During one of my many weekends spent at the Ferry Building in San Francisco, I had one of their fruit tartlets at their bakery and loved it.  You can order their stone fruit, preserves and other assorted artisan goods on their website.

Ames Farm Limited is a virtual farm with 5 orchards and 18 bee locations spread out over a large area of central and southern Minnesota.  They produce high quality, raw single source honey, bee pollen and 20 varieties of apples. 

Honey Pacifica is a local raw honey producer located in Long Beach.  "In order to preserve the delicate flavors of the raw honey," they make each flavor themselves.  You can watch their video "The Beekeeper's Life" and read more details about their honey process on their website.

What is great about this kind of gathering is that if you invite people that don't know each other, the food and pairings are a great starting point for conversation and help people to connect with one another.  But then again, that's what food has done historically: connected us and brought us together.  Looking forward to the next gathering in our Noshing with Friends series.

Post by Michelle Sterling of Avery and Augustine

You can see her work and read about her two young children's first forays in cooking, art and everything in between at Avery and Augustine.

Easy Fireworks Stamps

June 27, 2013

Fireworks-intro

Last year I created a series of fireworks stamps for my children and they were a huge hit, so this year I decided to try it again. The stamps are super easy to make and most likely involve materials you already have around the house.

Here's What You'll Need:

  • Cardboard, Poster Board or Foam Board
  • Yarn
  • Scissors
  • Pen or Pencil

Fireworks-01

To Create the Stamps:

Cut your cardboard into small circles. Mark a series of evenly spaced lines around the outer edge of the circles and then cut small incisions in the circle.

Fireworks-02

Thread the yarn around the circle to form an asterisk-like shape and then tie the ends of the yarn in the back.

Fireworks-03

Once your stamps are ready, place paint in a dish and either press the stamp into the paint or use a brush to apply the paint along the lines formed by the yarn.

Fireworks-04

Now you can use your stamps to make fireworks-themed art, banners or even gift wrap.

Post by Julee : Warm Hot Chocolate

Imagination Workout

Post by Aimée Lowry & Bettijo B. Hirschi from PagingSupermom.com

We’re back today with an extra special worksheet designed by my own clever super daughter Attalie.

She loves color, art and pretty much anything creative. One of her favorite activities is what we like to call “Imagination Workouts.” Attalie tells me she got the idea in art class at school. The first I saw of them was a worksheet she created totally from scratch. It featured a hand-drawn grid that was not at all straight but very cute! (If I was really Supermom I would have remembered to take a picture of it — it was SO precious, but I fear it ended up in the trash.)

ImaginationWorkout-578x802

Well Attalie really wanted me to share this idea on the blog. So we decided I would use the computer to create a nice straight grid, and then she would hand draw in the lines and shapes in each of the boxes. Download Attalie’s Imagination Workout worksheet for you kids!

Since the worksheet involves creating 11 mini pictures, this is an activity that could keep your kiddos busy for a good stretch of time (Score! Right?). Plus it is really interesting to see what the kids come up with — it surprises me at just how creative Attalie can be, and also I’m fascinated to see what things she’s got stored away in her brain (like that Route 66 sign?!) This is not just a worksheet for kids either! Everybody at our house enjoys working on these.

If you like Attalie’s worksheet please be sure to leave a comment for her below because she has been really looking forward to *her* Worksheet Wednesday.

ImaginationWorkoutWorksheet-578x385

Reposted with permission by Aimée Lowry & Bettijo B. Hirschi from PagingSupermom.com

Behind the Scenes – Nod at South Coast Plaza

June 26, 2013

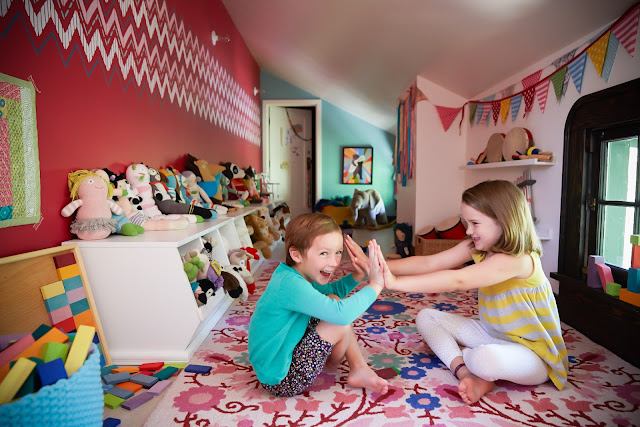
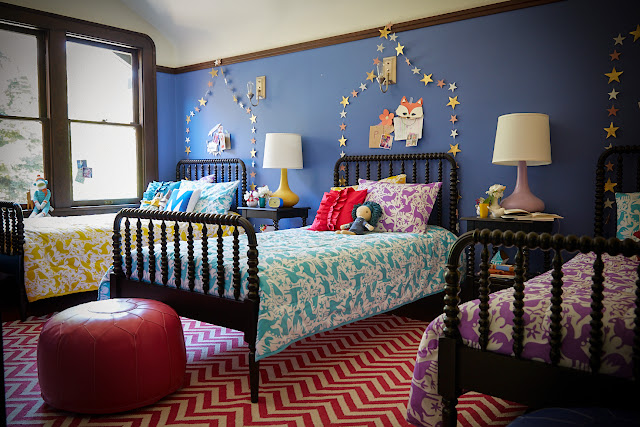
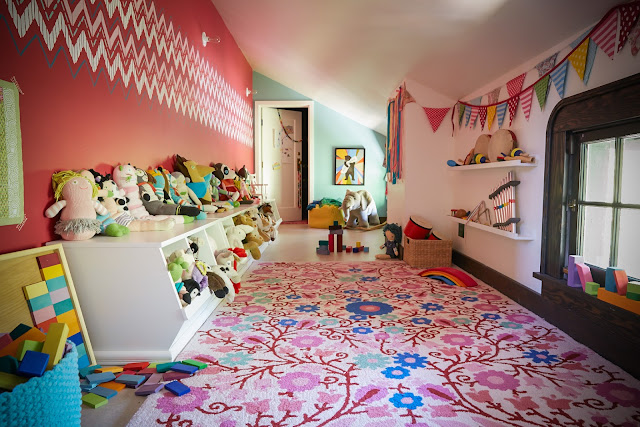
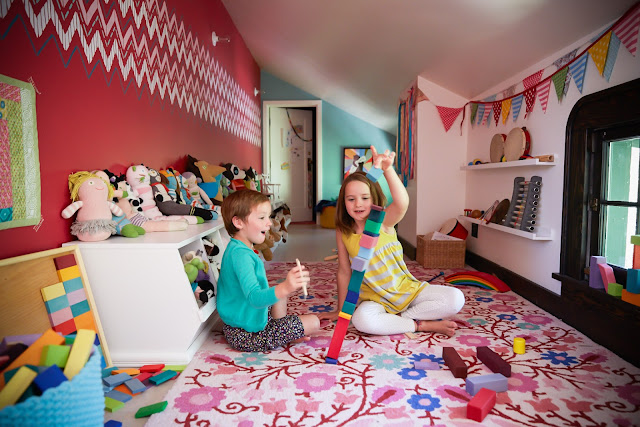
Last month we opened our first store in California (yay!). It’s located in Costa Mesa at South Coast Plaza. When we set out to design the space, we knew we had to do something inspiring. The shopping center is filled with luxury brands like Louis Vuitton, Prada and Harry Winston. And they spare no expense in making their stores gorgeous. Also, we have tons of fantastic, loyal customers in California who have been waiting years to see Nod in person, and we didn’t want to disappoint. 

SCCWALL_1

Certainly we wanted our latest collection of home furnishings to be the star of the show, but the space itself needed a little something to make it Nod. As soon as I saw the brick wall behind the front counter, I knew just what it needed….COLOR! A riot of colors to be more exact. So, I decided that we should paint each individual brick in a rainbow palette, but not your standard rainbow, something a little more updated and a little unexpected. To pick the colors, I first looked to our product and was inspired by our Pop of Color Pendants. Starting with those hues, and a Sherwin Williams swatch book, I finally settled on a color scheme.

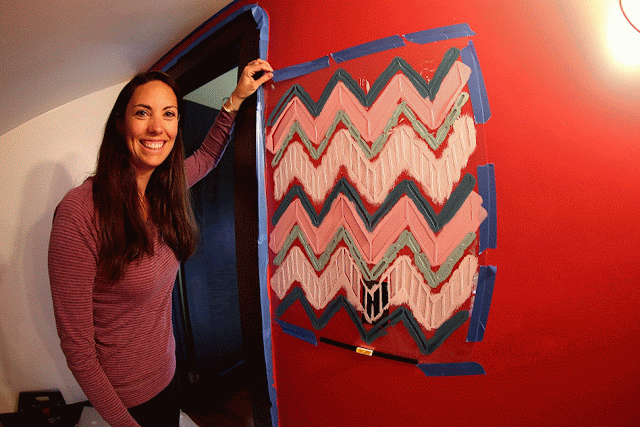
Coming up with crazy ideas is one thing, but figuring out how to execute them is usually the bigger task. Now that we’d all fallen for this idea, just how on earth were we going to do it. I distinctly remember my conversation with our Managing Director, Michelle. “So, you know that brick wall we want to paint multi-colored at the South Coast store? Tell me if I’m nuts, but I’m thinking I’ll just paint it myself.” Luckily, “we’re a little nuts” is one of our principles of being a Noddie, so she agreed it was a perfectly fine idea.

Here’s what the wall looked like when I arrived. 

SCCWALL_2

We’d had our contractors paint it a light mint green (Sherwin Williams Gratifying Green SW6435), which would eventually become the “grout” color of the wall. I have to admit, when I stood in front of the wall, paint-brush in hand, it felt a lot bigger than I remembered it when I proposed I’d paint it.

At this point, a contractor we’d hired to do some other work looked at me and said, Him – “You’re painting this by yourself?”

Me – “yes”

Hime – “Each brick? Individually? All of them?”

Me – “yes”

Him – “and you have HOW LONG to do it?”

Me – “A day and a half.”

At which point I think he just decided that I was off my rocker and walked away shaking his head.

If you knew me, you’d know I don’t like to be told I can’t do something. So, challenge accepted. I snapped a photo and got to work. I decided to start with the lightest color and go from there, figuring that the darker colors would need fewer bricks to feel balanced. And, if I needed to paint over any, it would be easier to paint over the lighter colors.

First up, a pale pinky-purple (that’s the technical name). Sherwin Williams Queenly SW-6977

SCCWALL_3

Then a mandarin orange. Sherwin Williams Mandarin SW-6891

SCCWALL_4

Next a bright grass green. Sherwin Williams Outrageous Green SW-6922

SCCWALL_5

Followed by a vibrant, orangey-red (a great color for lipstick or nail polish BTW). Sherwin Williams Gladiola SW-6875

SCCWALL_6

Then a color Sherwin Williams likes to call Decisive Yellow. LOVE! SW-6902

SCCWALL_7

Last color, a deep turquoise blue. Sherwin Williams Blue Nile SW-6776

SCCWALL_8

You may have noticed that the top row isn’t done in any of these. Here’s the thing, I couldn’t reach it, even on my tippy toes. And, I was afraid to stand on that ledge you see here. (Full disclosure: I’m 5’10” and afraid of heights, not even high heights, any heights higher than 5’10”, really. I have a theory that tall people aren’t often picked up so are, therefore, not used to and uncomfortable being any higher up than they already are.) We didn’t have a ladder that could reach across the back counter, and no scaffolding was available, though I’m not sure I’d have gone on it if it was there. So, I used the next best thing, one of our Storage Play Chairs

SCCWALL_9

Now, I definitely don’t recommend doing this at home. But, I did first check the product info and saw that this chair is rated to hold up to 200 lbs! Wow, that’s one sturdy kids chair, impressive. So, I stood on my tiny chair and finished the top row.

Then I went back and did a little touch up to the grout. Which, oddly enough was the most satisfying part of the process.

SCCWALL_10

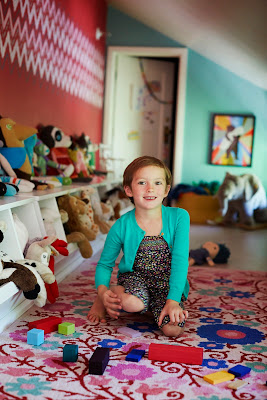
Before heading back to Chicago, I couldn’t resist hopping up on the counter and getting my pic with the wall. 

SCCWALL_11

I was sad to leave it behind, and have been trying to convince my husband to let me replicate it on the outside of our brick house, but, as you can imagine, he’s not having it.

By Danielle Kurtz

Danielle is the Creative Director at Nod and an over-protective mother of two. She’s also completely obsessed with Pinterest, Twitter and her Kindle, but not necessarily in that order. Danielle loves to craft, sew and crochet, but all her supplies have a layer of dust on them about 6-years-thick, wonder if it's just a coincidence that her oldest kiddo is 6 years old?

Colors by Orla Kiely

June 25, 2013

Orla Kiely Colors Blog 1

Orla Kiely Colors Blog 2

Orla Kiely Colors Blog 3

Orla Kiely Colors Blog 4

Orla Kiely Colors Blog 5

I have been a long-time fan of Orla Kiely's beautiful and modern prints, bags and textiles.  The way she combines bold color and pattern is an homage to vintage mod yet fresh and innovative at the same time.  In Colors, Orla Kiely's design sensibilities translate well to a board book about colors for babies, toddlers and young children. Her familiar stylish and playful icons and graphics grace each set of pages.  After we read and admired the different prints and shades of color on each page, we sorted objects by color in different columns to create our own interesting designs.

Post by Michelle Sterling of Avery and Augustine

You can see her work and read about her two young children's first forays in cooking, art and everything in between at Avery and Augustine.