Close

Blog

Things to Make – Paper Bag Quilt

June 24, 2013


finish

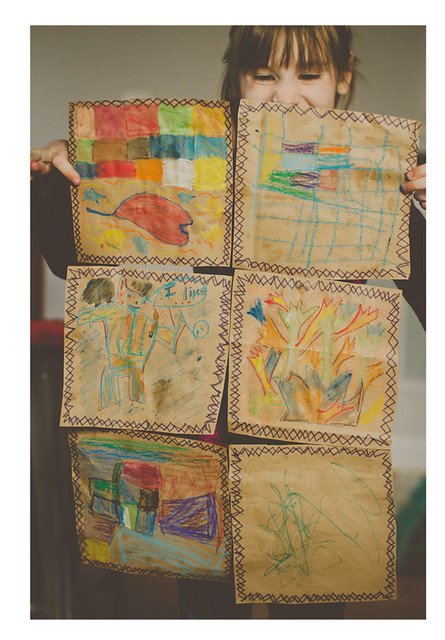
Another recycling bin project, I love these . . . I cut a few large paper grocery bags into squares. And then outlined the squares with a cross-stich pattern using a marker. Each kid received two squares (but T gave me one of his). And I put oil pastels, markers, and watercolor crayons/with paintbrushes (love these) on the table to create with. When everyone finished arting, I stapled the squares together. Just one staple on each side, to give it a loose, free-flowing look. Easy peasy. I think this would be a fun project for a party or a large playgroup, as it allows the kids to work separately and still make something unified. makePost by Darcy : No Monsters in My Bed

Coffee Filter Place Settings

June 21, 2013

1

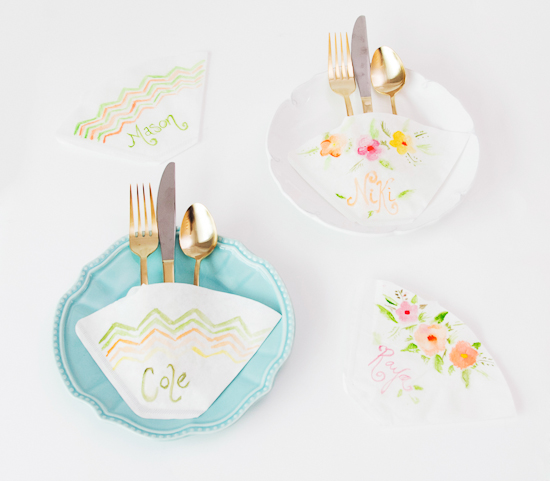
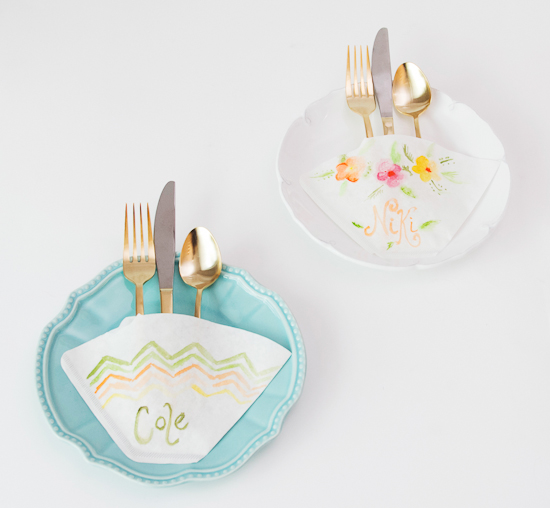
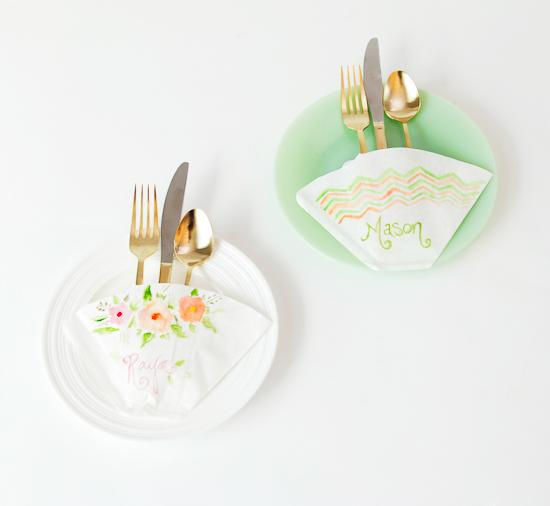
After assembling these coffee filter roses a few weeks ago, I was intrigued by just how resilient and forgiving filters can be. I’m always searching for unique ways to set the table. Coffee filters are the perfect means to both hold flatware while directing guests to the appropriate seat.

2

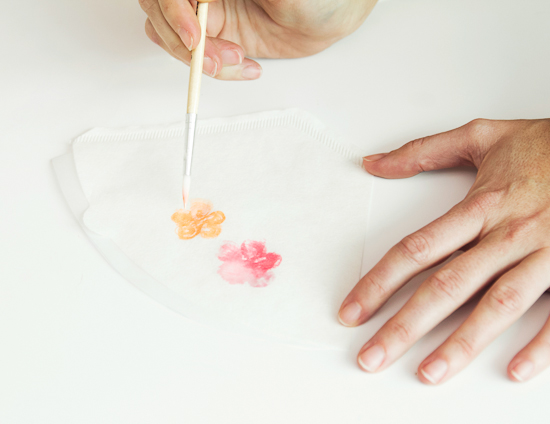
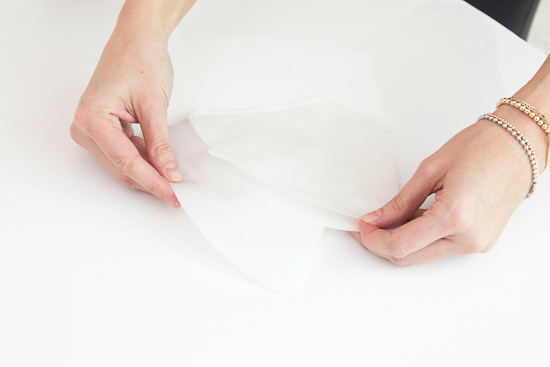
First, place a piece of parchment paper cute to size in between the filter so your design doesn’t bleed through.

3

4

5

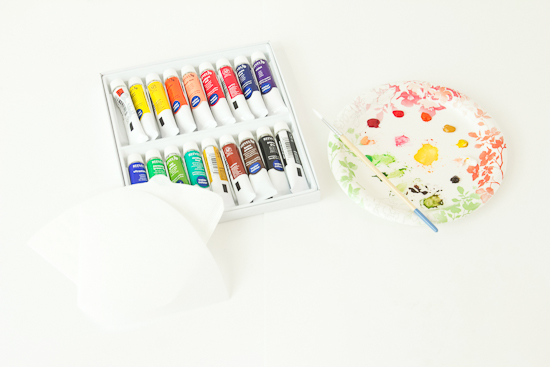
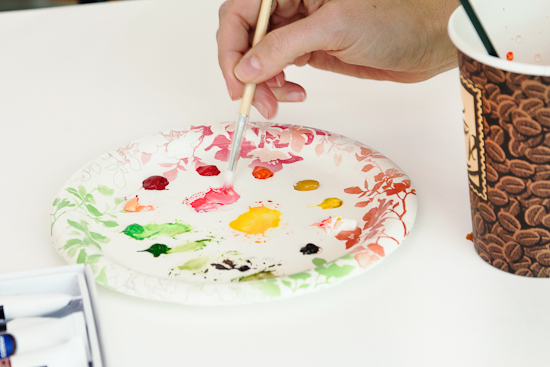
Simply paint the filters with watercolors.

6

7

8

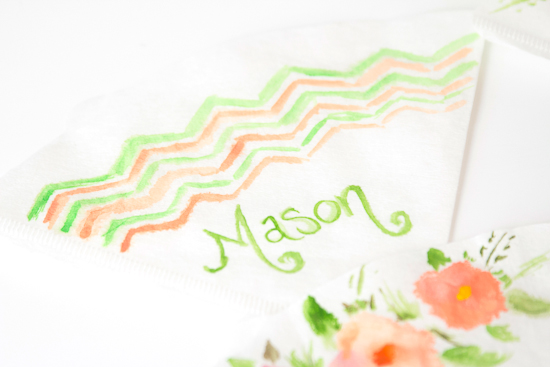
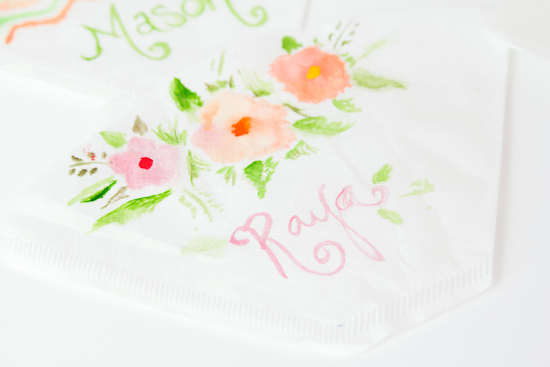
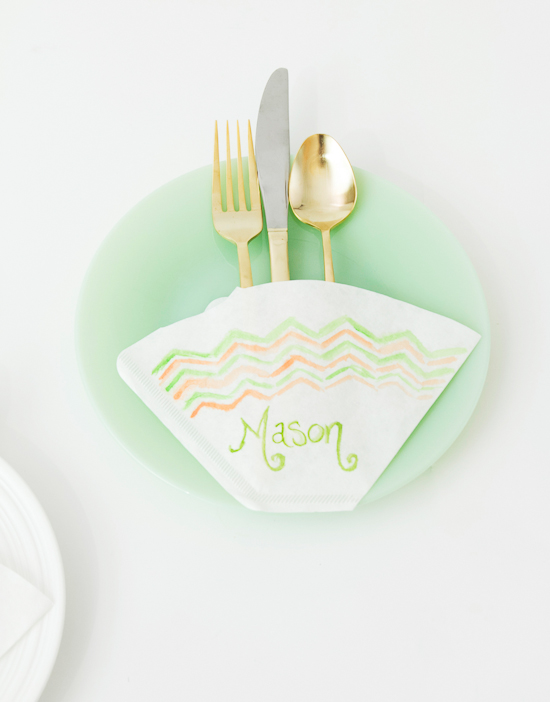
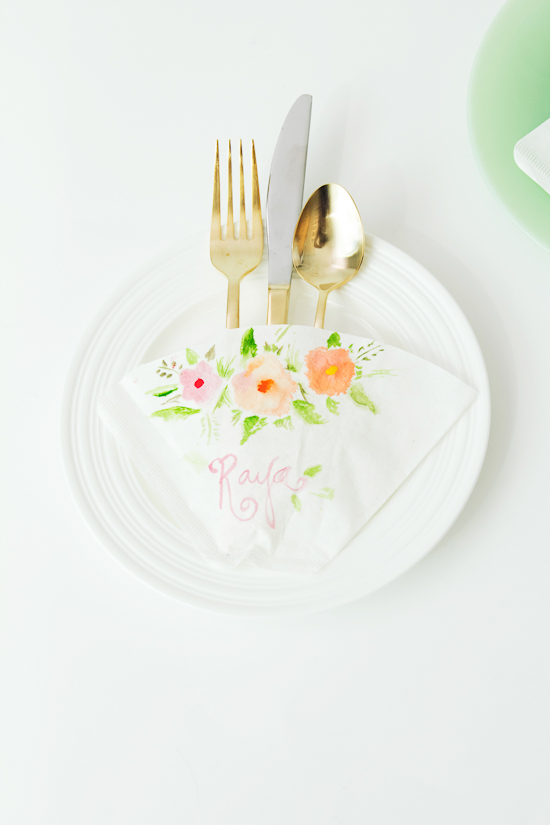
Decorate with each guests’ name. Try to tie in themes, colors and motifs that are appropriate for your event.

9

Remove the parchment once dry. Place the flatware inside.

10

Voila!

11

12

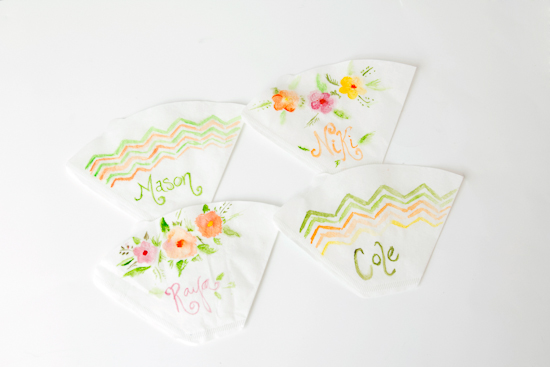
Lovely and elegant table cards!

xoxo,

Niki

Post by Niki: Papery & Cakery

DIY Stick Horse (Minus the Stick)

June 20, 2013

It's summer time (yaaaaay!!) & that means time for all those creative projects that get stuck on the back burner during the hectic school year. Here's one of our favorites–a perfect activity for those too-hot-to-be-outside days!!

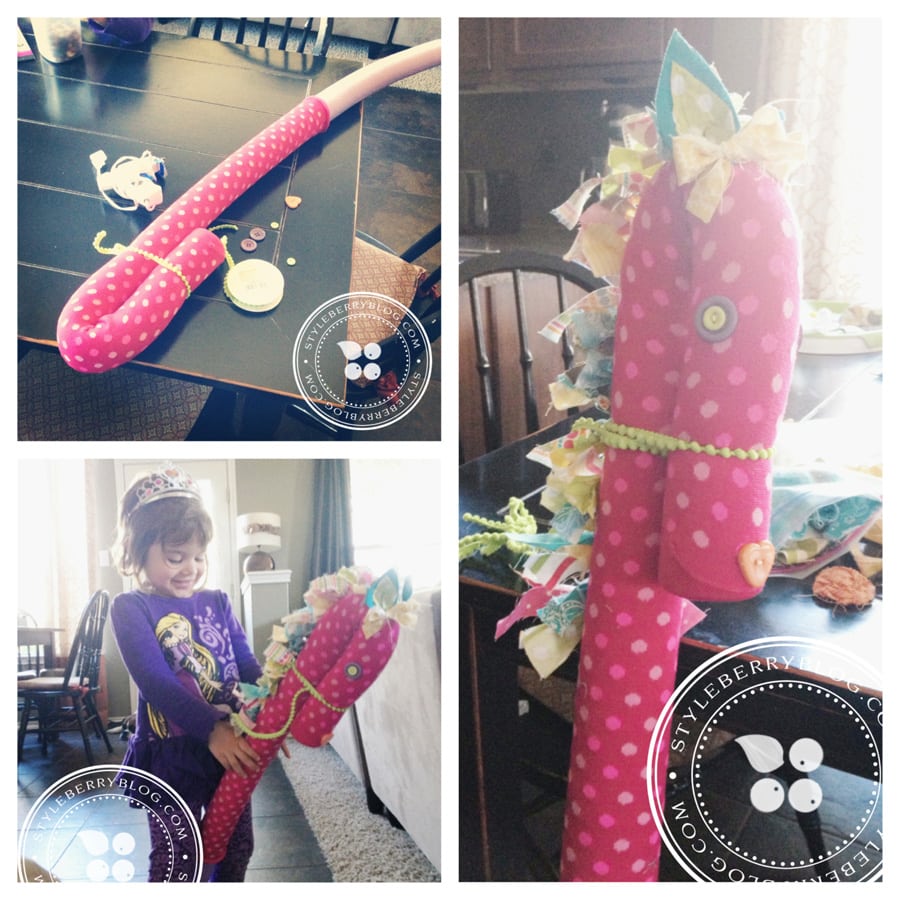
Get ready for some indoor rodeo-ing! I wanted to find an alternative to the hard, pointy object that is usually part of a typical stick horse so after poking around pinterest (with seriously limited findings) and a good imagination, this is what we came up with! Here's what you need!

DIY STICK HORSE

  • pool noodle
  • trim (or ribbon or twine), about 2 yds
  • hot glue gun
  • fabric scraps (for the mane)
  • felt (for the ears)
  • buttons (or anything else you can dream up, for the eyes & nose)
  • & if you're feeling fancy, an old (or clearance) pair of sweater tights, kid sized

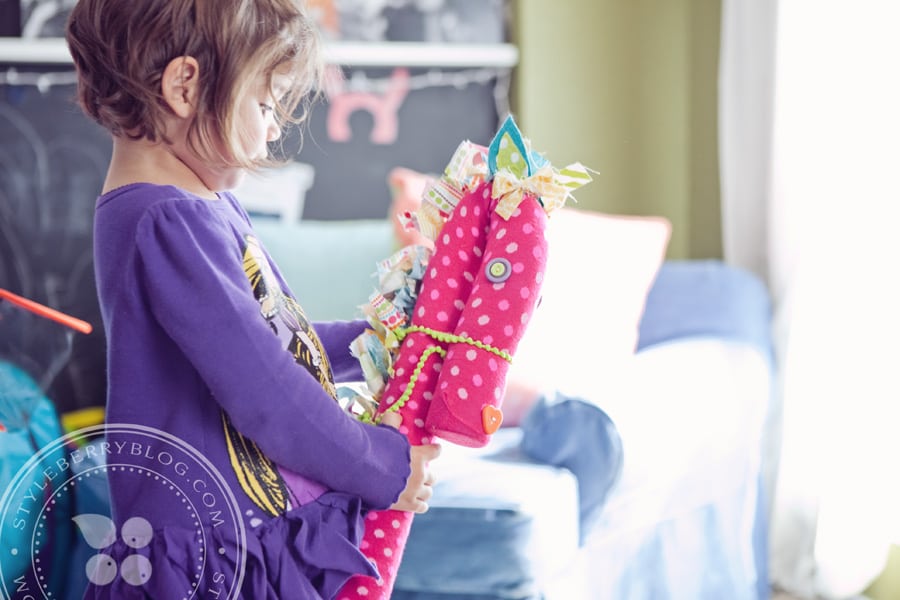
This was allllll my daughter's choosing. She picked the tights ($2 clearance, target), then we slipped them over the noodle. We used the trim to secure the noodle together after we bent it over & made some reigns. Then she went through my scraps and picked out her favorite colors. Turquoise & "gween" ears. 🙂 With bows, of course. & "cute yittle buttons" for the eyes and nose. I couldn't talk her into two nostrils, so one'll have to do. 😉

For the mane I just knotted little strips of fabric & hot glued them down the tights. She picked the order. I was under quite some pressure: no two of the same touching. Thankyouverymuch. (so proud!)

"Wainbow Sp-wink-uwl" has now accompanied us to Lowe's and took a nap on the stairs and is tucked in tight next to her mama for the night. Oh, the joy! Happy horsey making!  

Post by shawna of styleberryBLOG.com

Despite days full of washing diapers & messy fun, Shawna is determined to make mommyhood a stylish adventure. Married to the military & mother to one feisty girl & a snuggly little guy, she is a passionate DIYer & loves sharing how to make the complicated simple. Shawna talks creativity, style, food, decorating, green-chic living & mommyhood atstyleberryBLOG, a daily-ish dose of something fab.

Green

June 19, 2013

Green Blog 1

Green Blog 2

Green Blog 3

Green Blog 4

Green Blog 5

Green Blog 6

Green Blog 7

Green Blog 8

Green Blog 9

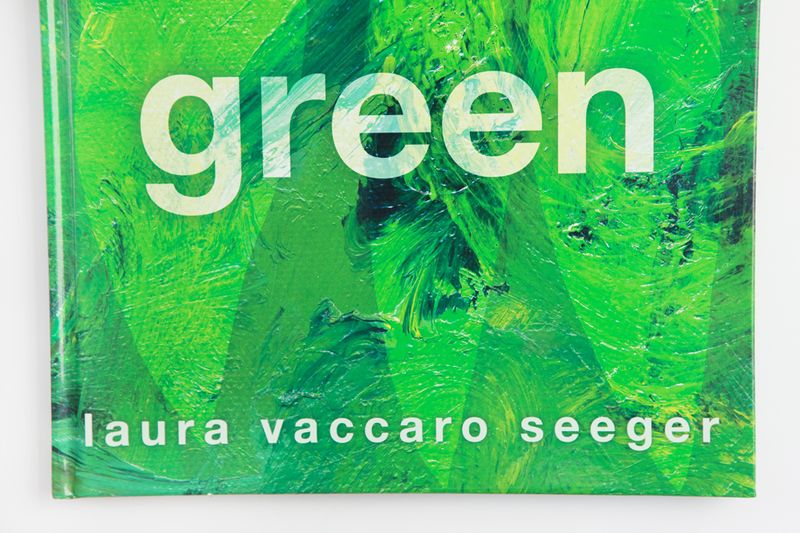
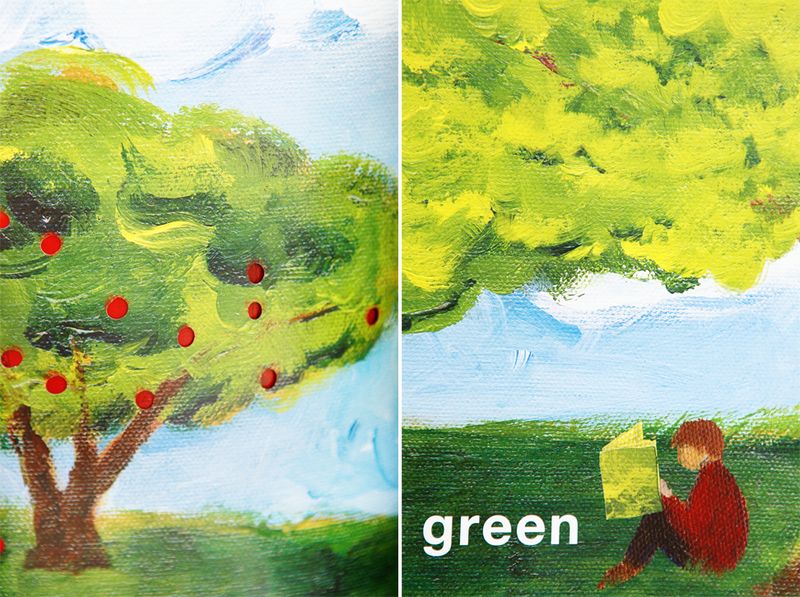
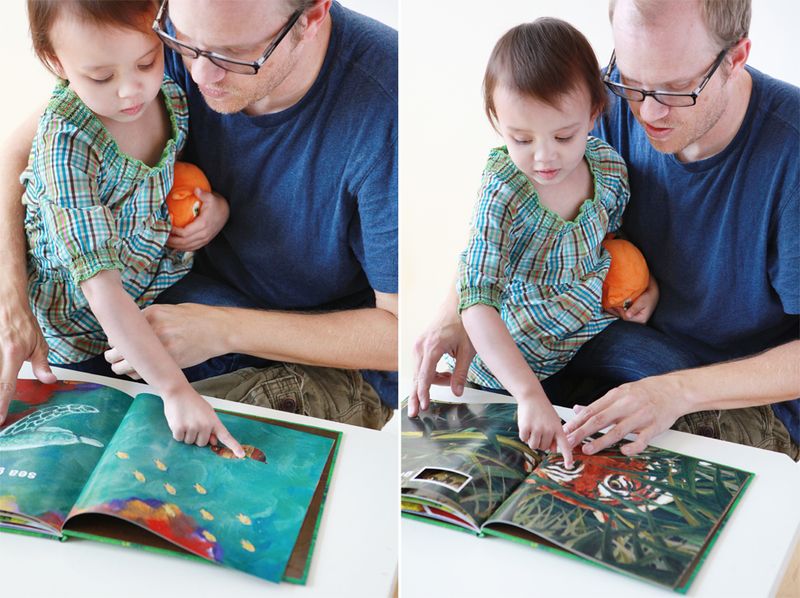
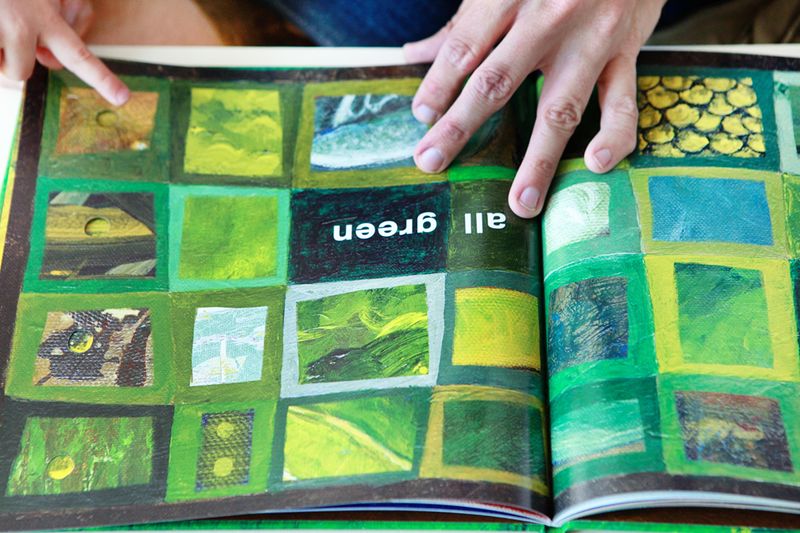
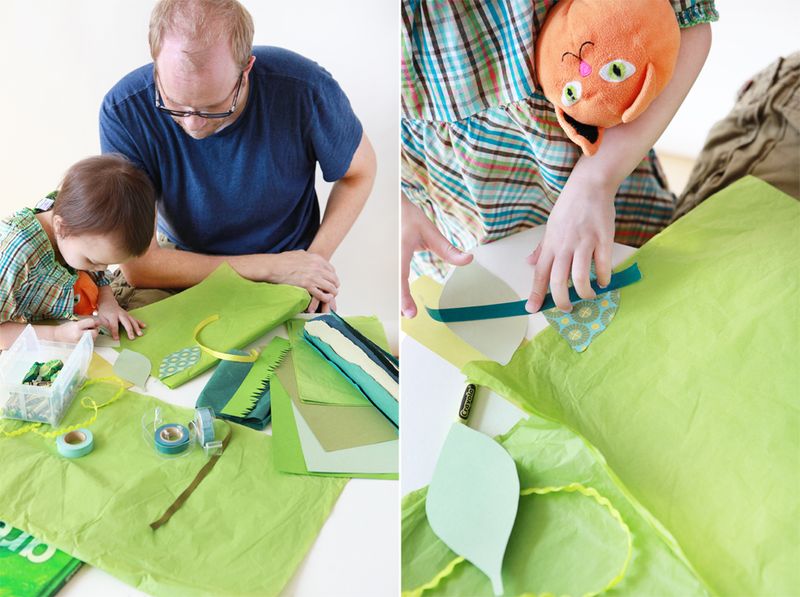
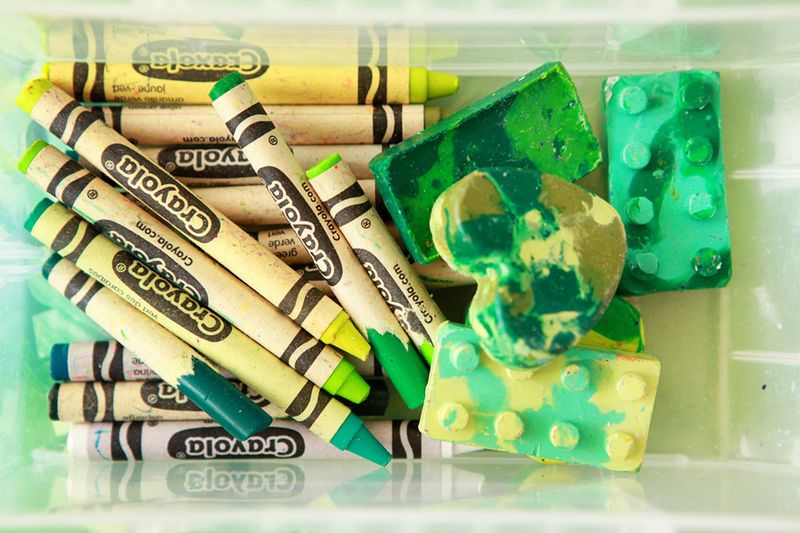
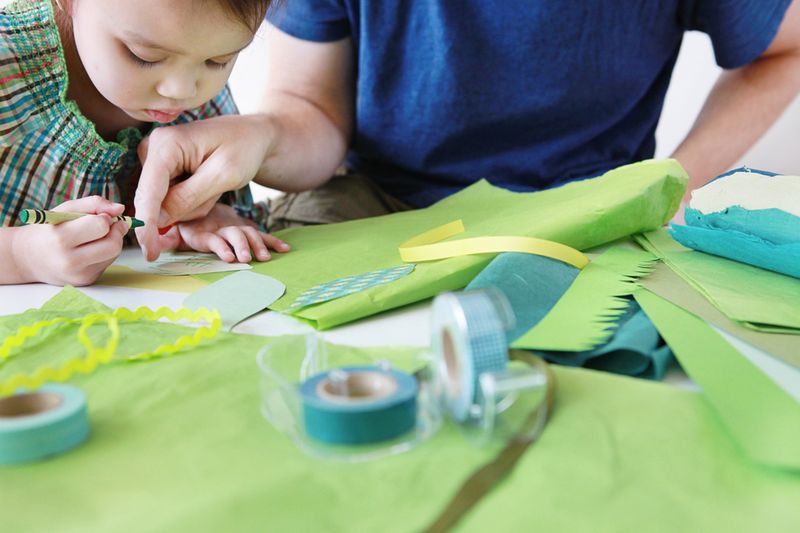
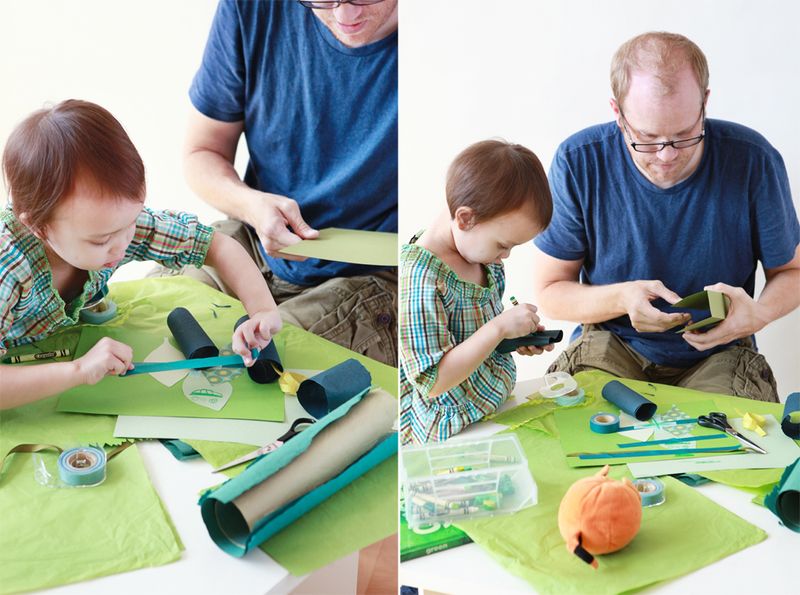
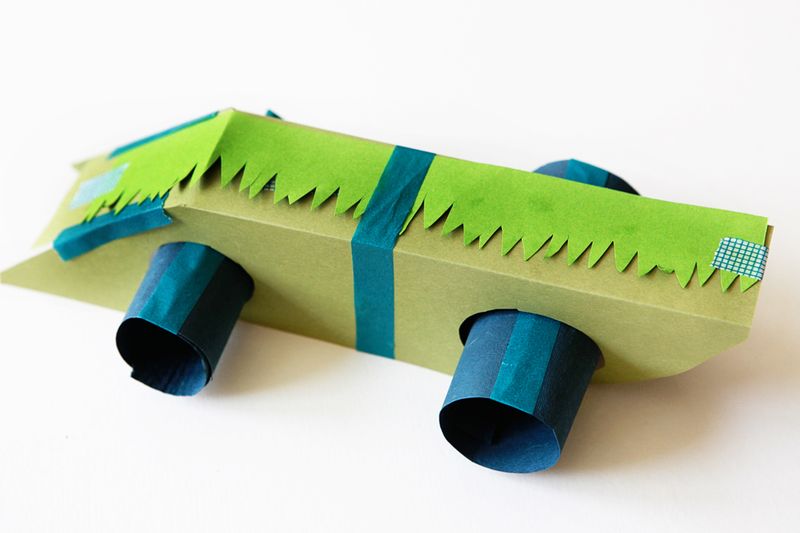
Green is a unique children's book that is also a remarkable work of literary art.  In it, Laura Vaccaro Seeger presents various shades of green, each with its own charming story and within its own gorgeous painterly environment, and then weaves the greens together in an intriguing way, using die-cut pages.  Avery enjoyed seeing the die-cut shapes change and transform, from leaves in a forest to fish under water on the next page.  Inspired by the book, we collected different green materials for Avery to collage and explore (paper in different shades of green and varied textures, tissue paper, paper leaves, ribbon, washi tape and crayons).  Avery and her dad collaborated to build a race car (one of Avery's interests at the moment).  More information about Laura Vaccaro Seeger and her creative process can be found on her website.  We eagerly look forward to this Caldecott author and illustrator's next book!

Post by Michelle Sterling of Avery and Augustine

You can see her work and read about her two young children's first forays in cooking, art and everything in between at Avery and Augustine.

Fire Station Play Nook Before & After

June 18, 2013

Post by Alexandra Hedin

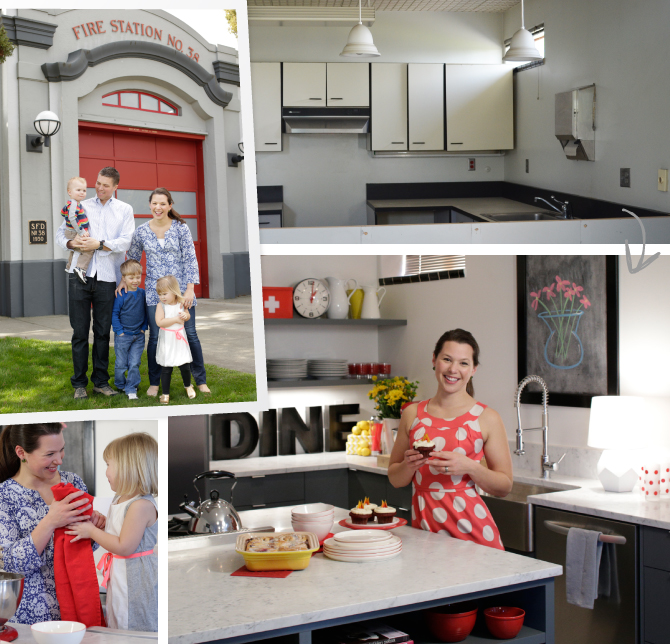
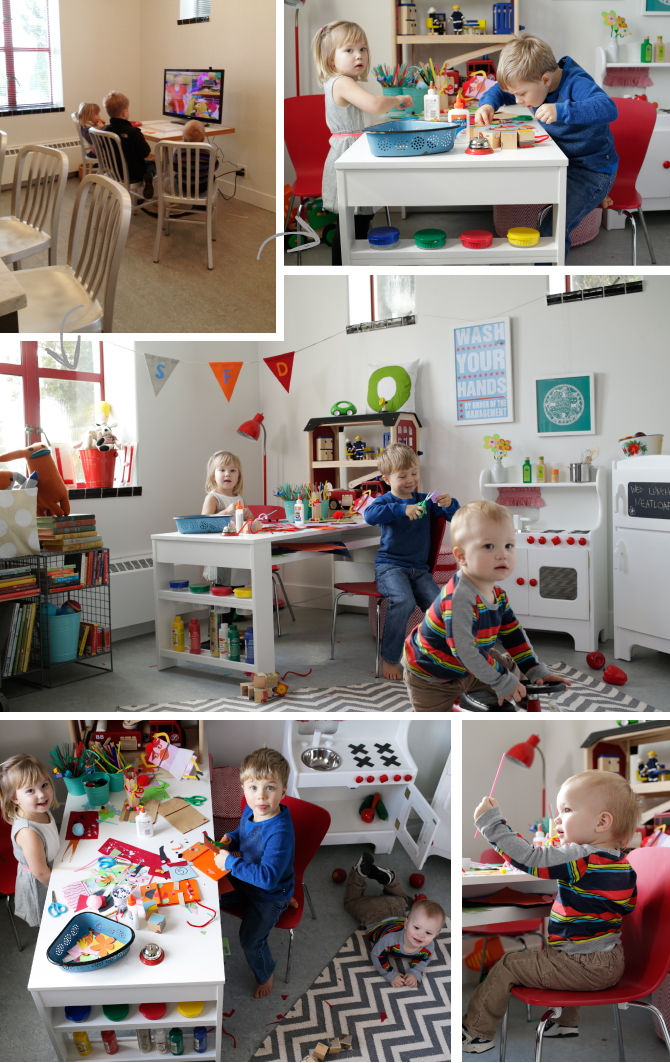
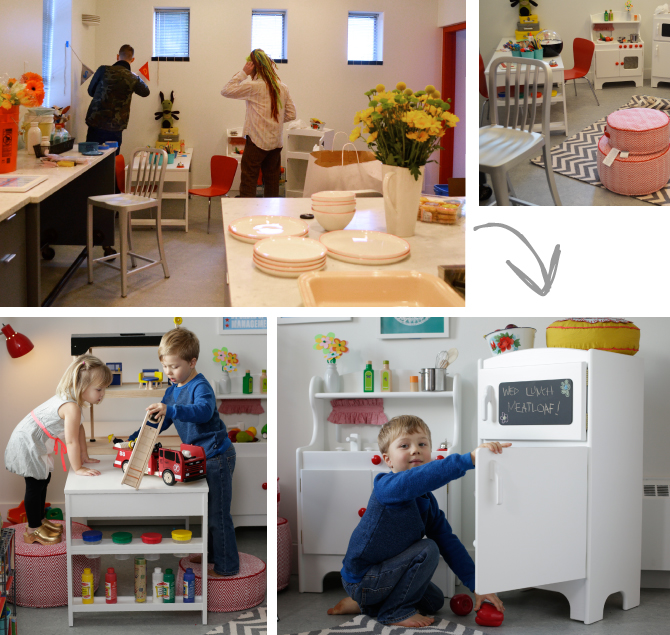
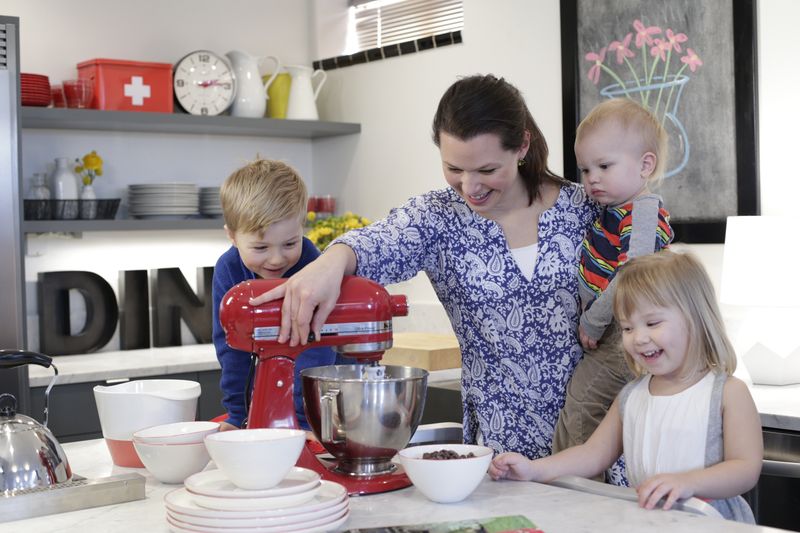
When we were on the hunt for office space, an old 1930’s firehouse was being decommissioned and sold to the public.  PERFECT!  It felt like an omen.  A sign.  Is there anything cooler than working out of an old firehouse?  No.  No, there is not. The problem with an old firehouse, however, is that it was in really rough shape.  Like, really rough shape.  More than seventy years of being inhabited by men {and a few women} had taken its toll on the old building and removed any element of ‘cute.’  To start, Mr. Hedin gutted and rebuilt an entirely new kitchen for me to use as a studio and it’s become our little ‘home away from home.’

Fire Station Play Nook Before & After | Honest to NodAfter months of remodeling, the decorating part felt overwhelming.   So when Land of Nod asked if there was anything they could add to the space, I almost cried.  Yes!  My children are at the firehouse constantly while I work, and usually they are helping.  But to have other things for them to do while I cook, craft, or surf Pinterest would be amazing.

Fire Station Play Nook Before & After | Honest to Nod

We brainstormed, we pinned, we came up with the most awesome little play nook for the children.  Now, they have their own space.  And it’s almost impossible to get them to go home.

Fire Station Play Nook Before & After | Honest to Nod

Post by Alexandra Hedin. As a lifestyle and entertaining expert, this mother of three constantly juggles her life at home with her life at the office.  See more of Alexandra’s decorating tips & recipes at Alexandra Hedin.com

Looking for even more playroom inspiration? Check out our Playroom Board on Pinterest.

Shrinky Dink Cupcake Toppers

June 17, 2013

Post by Alexandra Hedin

Firehouse_1067

For Christmas last year my children got a Shrinky Dink kit. I can’t even tell you the last time I played with Shrinky Dinks, but I can tell you I was suddenly obsessed. I  Shrinky-Dink-ed everything.

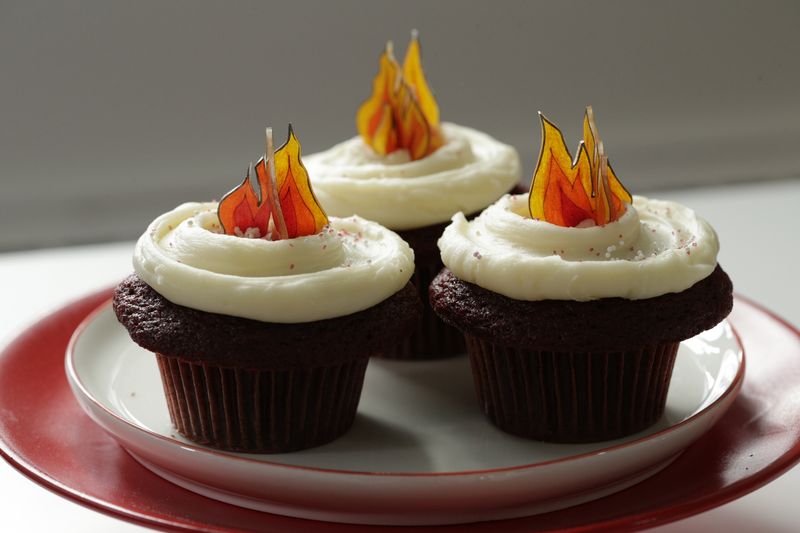
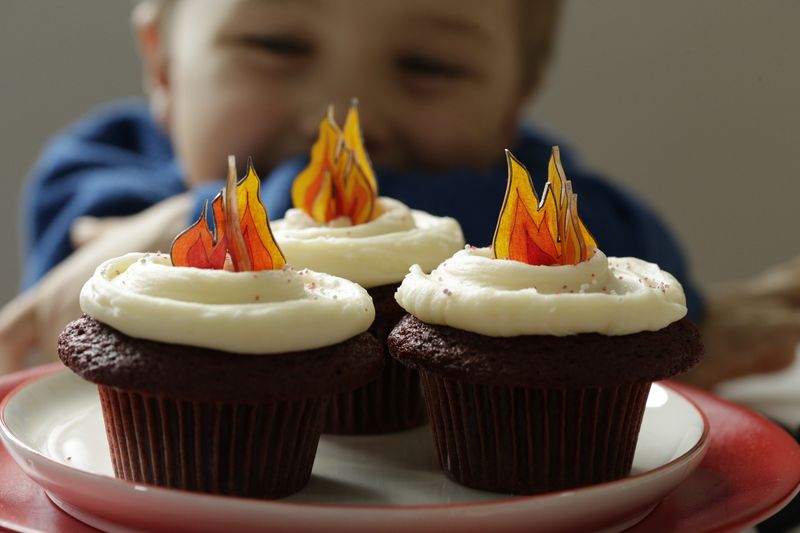
When we started planning a photo shoot at the firehouse with Land of Nod, I knew  that I would somehow use Shrinky-Dinks. Did you know that they could be made into three-dimensional shapes that stand up remarkably well? Why does that  matter? Because it makes the PERFECT cupcake topper!

You’ll need:

  • 1 package blank Shinky Dink paper
  • Yellow, red, and orange colored pencils
  • Permanent marker in thick and thin
  • Scissors

Step 1 :: Trace the stencil onto the Shrinky-Dink paper using the thick permanent marker.

Step 2 :: Fill in the detail ‘flame’ lines using the thin permanent marker.

Step 3 :: Color in the flames using the colored pencils. To get the gradient look, start
with the lightest color in the center and work out, overlapping the color as you go.

Step 4 :: Cut out the shapes and follow the package instructions for shrinking.

Step 5 :: Let cool and assemble on the top of a cupcake!

Firehouse_0352

Firehouse_1048

By Alexandra Hedin: As a lifestyle and entertaining expert, this mother of three constantly juggles her life at home with her life at the office.  See more of Alexandra’s decorating tips & recipes at Alexandra Hedin.com

DIY Yarn Ball Light Fixture

Post by Raechel Myers of Finding My Feet
DIY Yarn Ball Light Fixture | Honest to Nod Blog

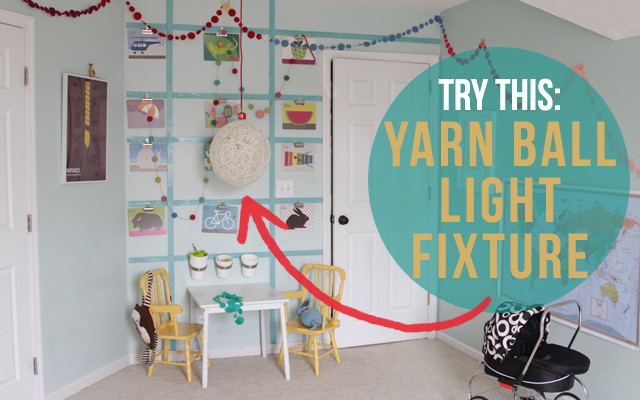
I feel like our bonus room is the one room in our home that will probably be evolving for as long as we live here. It has served as an office, a family room, and for the past few years (and probably for a good while still), it is our play room.

And even as our play room, I imagine I will always enjoy adding little bits of happiness to it, just to keep it feeling fresh.

Recently, I decided it might be fun to switch up the light fixture above the kids’ coloring table – maybe a pop of color with a touch of DIY. I didn’t want to spend a lot of money, and I’ve been dying to attempt a yarn ball light fixture like I saw in the window display of Anthro a few months ago, so this seemed like my chance.

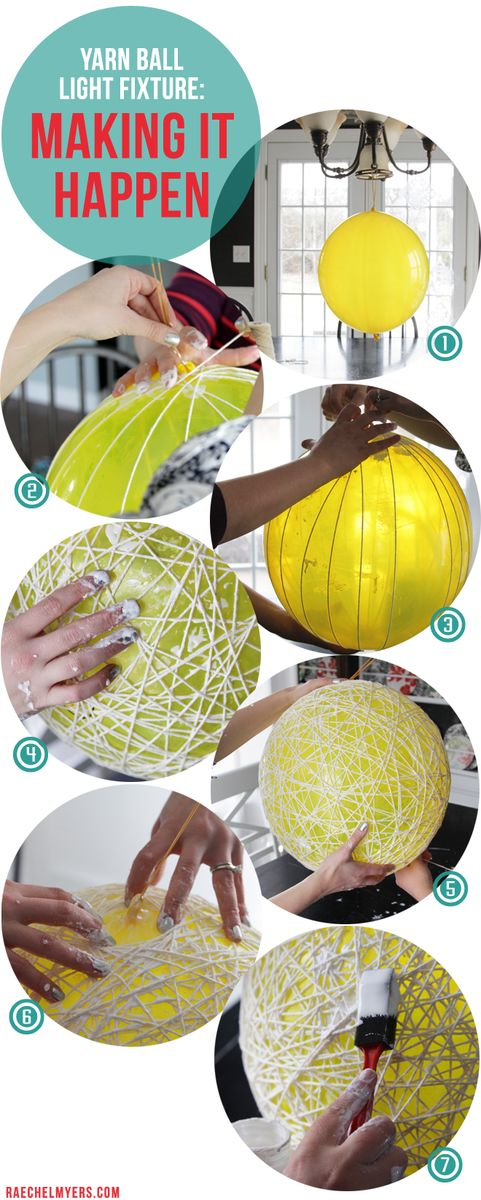
Of course I didn’t bother to take the time to research how other folks have done it, I just took an afternoon with my sister and we sort of winged it. Trial and error taught us a lot and I’m excited to share what worked really well for us to make our very own Yarn Ball Light Fixture:
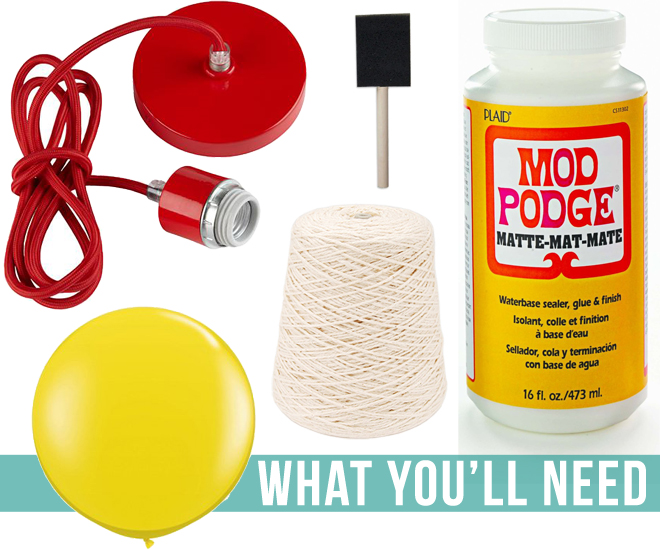
What You'll Need: DIY Yarn Ball Light Fixture

cord kit // foam or bristle brush // cotton yarn

mod podge // round balloon or punch ball
DIY Yarn Ball Light Fixture | Honest to Nod Blog

1. Inflate the balloon to the size you want (if this is your first time, start small), and hang it so that it’s not touching anything. (We used a punching ball, so there was already a giant rubberband attached.) We worked at my dining room table. I HIGHLY SUGGEST covering your work surface with newspaper. My whole table had a decoupage glaze until I could get it clean.

2. This is definitely going to take two people – even if you have it hanging. Getting started is tricky, but once you get going, it’s simple and fun. I recommend getting your fingers a little wet with the Mod Podge to get started.

3. Ultimately, you want the yarn to have a cool, chaotic look. But to get started, you have to be organized. Do a bunch of vertical wraps until you feel like things are pretty secure. Don’t be afraid to pull tight into the balloon’s elasticity a bit.

4. Take turns with your buddy. With everyone’s fingers a little bit messy with mod podge, one person hold the balloon still, and the other person just get wrapping – being as intentionally chaotic as you can stand.

5. Stand back. You don’t want to under-do this, but you don’t want to over-do it either. At some point you’ll hit the sweet spot and you’ll know it. That, or your back will be so tired and your hands will be so sticky that you’ll cry uncle and conveniently be at a happy stopping point. You know… either way.

6. While everything is still wet, start thinking about the reality that you’re going to need to fit a light bulb and your fist through the bottom hold, and that the top hole will need to almost perfectly fit the light fixture. No pressure, there will be time to make adjustments once everything is dry. But the more you can do now, while everything is still wet, to accommodate those things, the better.

7. Now, go nuts with mod podge. Once things are about how you’d like them to be, and you’re totally finished wrapping, make it stick. (And speaking of stick, don’t worry about it sticking to the balloon – it will all work out great in the end!) We used a foam brush at first, but ultimately found that it was just easier to scoop the goop out with our hands and slather it on. Clean up was tough though, so if you’re a tidy person, use a foam or bristle brush for this step.

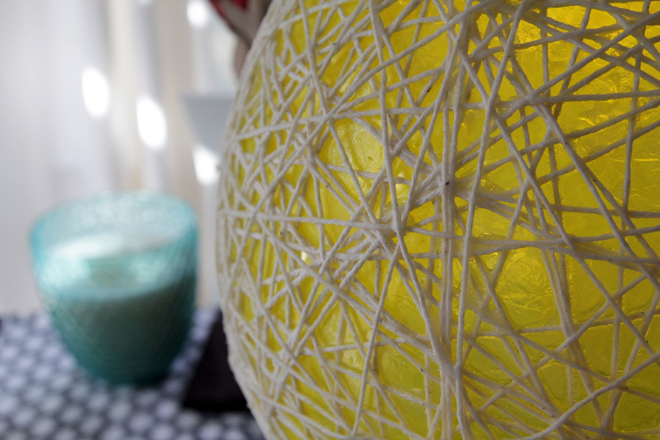
Now? Let it dry. I gave our project a full 24 hours, then checked it for “soft spots”, recoated those areas and gave it another 24 hours after that. Patience is a virtue. It is worth making sure all of the yarn is really good and hard.
DIY Yarn Ball Light Fixture | Honest to Nod Blog

[I’ll confess that I didn’t leave the balloon totally alone while it dried. Just about every time I walked past it (which was a lot of times), I would poke my finger through a hole in the yarn to push the balloon in and separate it a little more from the Mod Podge/yarn frame. Super satisfying. I’m just saying.]
DIY Yarn Ball Light Fixture | Honest to Nod Blog

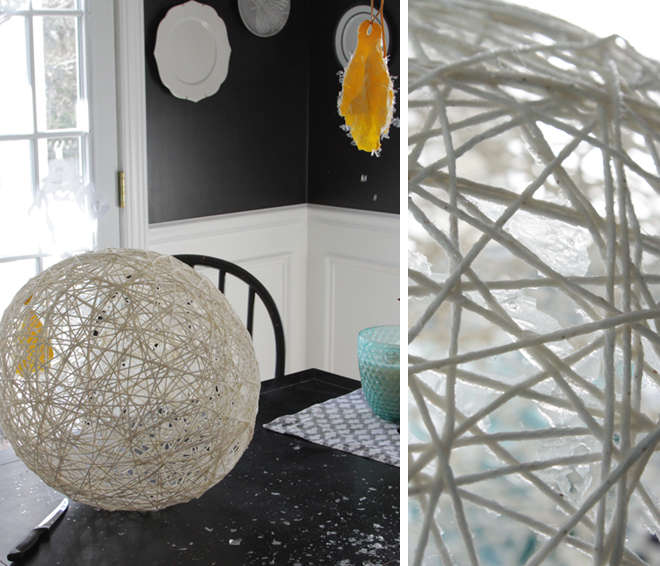
And now… the moment we’ve all been (or at least I was) totally waiting for… the POP!
DIY Yarn Ball Light Fixture | Honest to Nod Blog

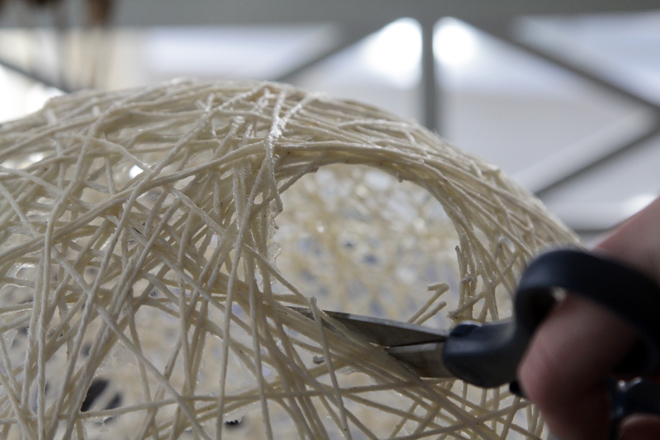
You guys, I’m not going to lie. It was both thrilling and incredibly satisfying. The noise, the explosion of clear, dried Mod Podge scattered everywhere like confetti, the ball unexpectedly dropping to the table (I should have seen that coming), and the fact that IT WORKED!! It looked like a legitimate yarn ball! I used a q-tip to clear out some of the dried Mod Podge that didn’t break free with the balloon. Then, I used scissors (and eventually a cutco knife, but that’s dangerous, so don’t do that!) to clear a hole at the bottom large enough to fit my arm in.
DIY Yarn Ball Light Fixture | Honest to Nod Blog

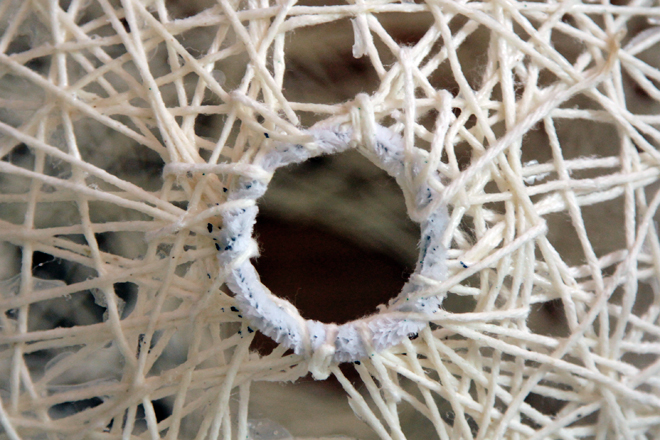
The top hole was actually a little too big (oops!), so I got creative and made a ring with a white pipe cleaner, and “stitched” it in place with some more yarn, then made it permanent with my last drips from the bottle of Mod Podge. I’m kind of MacGyver. It’s cool. We can still be friends.
DIY Yarn Ball Light Fixture | Honest to Nod Blog

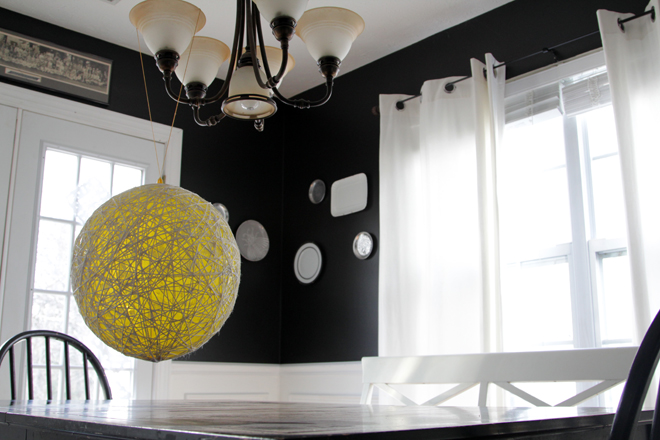
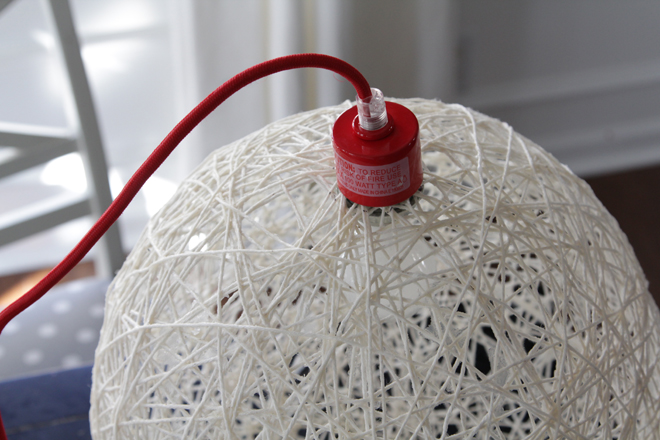
Of course next comes the big, payoff, moment-of-truth when you attach your cool, pop of color cord to your masterpiece and hallelujah! The design angels rejoice!
DIY Yarn Ball Light Fixture | Honest to Nod Blog

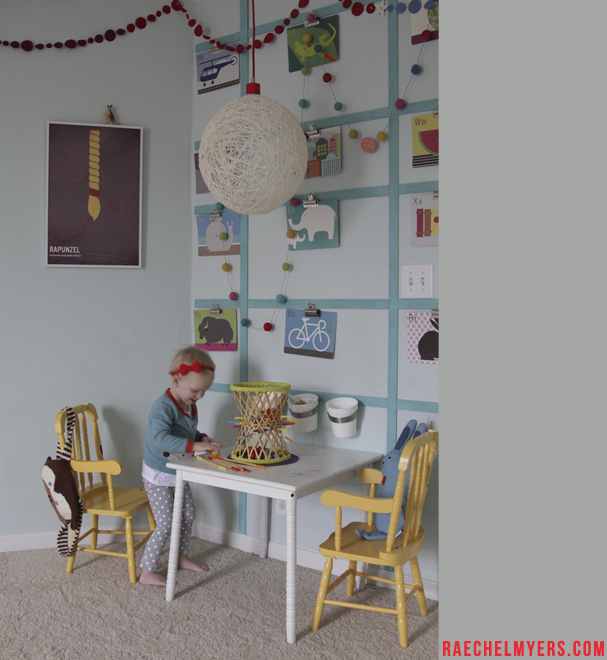
Hang that bad boy up (and, you know, safely wire it into some electricity) and feel awesome because you did something super cool.
DIY Yarn Ball Light Fixture | Honest to Nod Blog

(Wouldn’t it be fun to do a bunch of little ones in different colors to make Easter Eggs? THAT wouldn’t even require electricity or cutco cutlery!)

Other fun things you may have seen in this post: Rapunzel Print // Alphabet Wall Cards // Pallina Game Felt Ball Garland (similar) // Pretty black + white pram

Have an awesome weekend, friends! Enjoy the sunshine and exercise your creativity!

Raechel Myers blogs at Finding My Feet. When she’s not elbow deep in her next DIY project, you’ll likely find her helping her 6-year-old with his Kindergarten homework or playing babies with her 3-year-old daughter. She lives with her husband in Franklin, TN where they can only hope to train their kiddos to love the Lord and take their dishes to the kitchen sink.

Easy Apple Craft

June 14, 2013

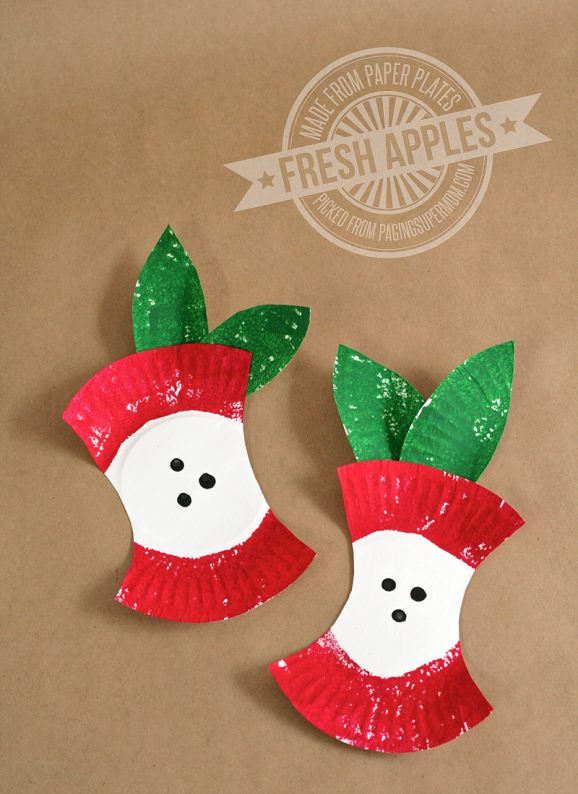
We love this adorable apple craft — the perfect activity to do with your pre-schooler. 

PreschoolAppleCraftFinished-578x794

SUPPLIES:
:: Mini Paper Plate
:: Scissors
:: Red, Green & Black Paint
:: Sponge or Paint Brush
:: Pencil with Eraser or Marker
:: Glue

PreschoolAppleCraftTutorial-578x1125

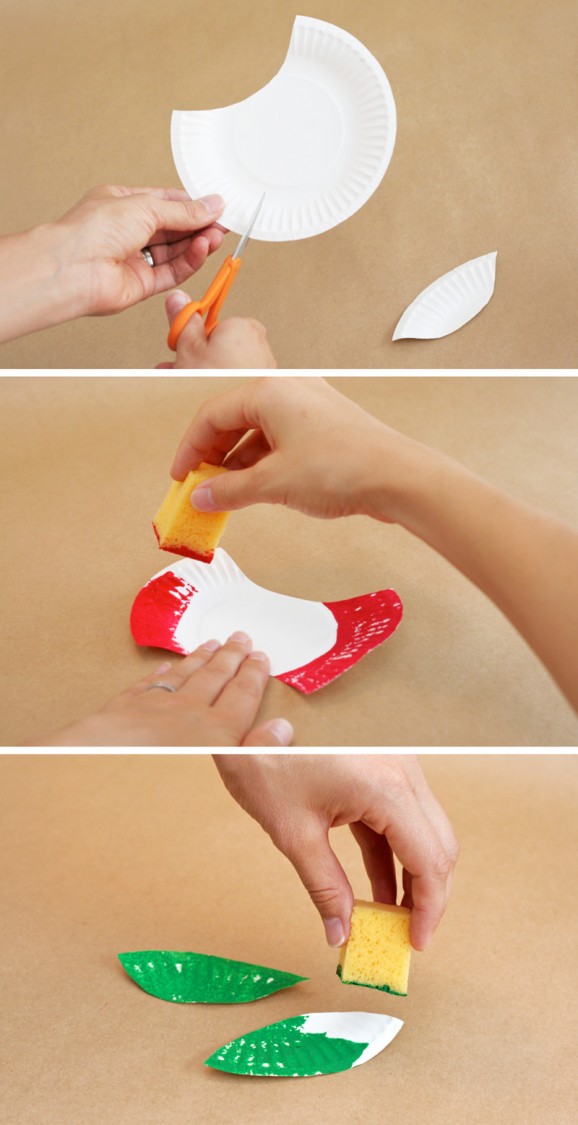
TO MAKE: Cut an arc out of each side of the mini paper plate to create an apple-core shape. The cutout pieces become your apple’s leaves. Apply red paint along the top and bottom edges of your apple. Dip the eraser-end of a pencil into black paint and stamp three seeds into the center of your apple core. Paint the leaves green. Let dry. Finish by gluing both leaves to the back of your apple.

Reposted with permission by Aimée Lowry & Bettijo B. Hirschi from PagingSupermom.com

Croque Madam – Father’s Day Breakfast

June 13, 2013

At Nod, we believe your home should be a celebration of family. We'll be featuring our Managing Director, Michelle, at home celebrating her own family with recipes, crafts and décor created by our friend Sweet Paul

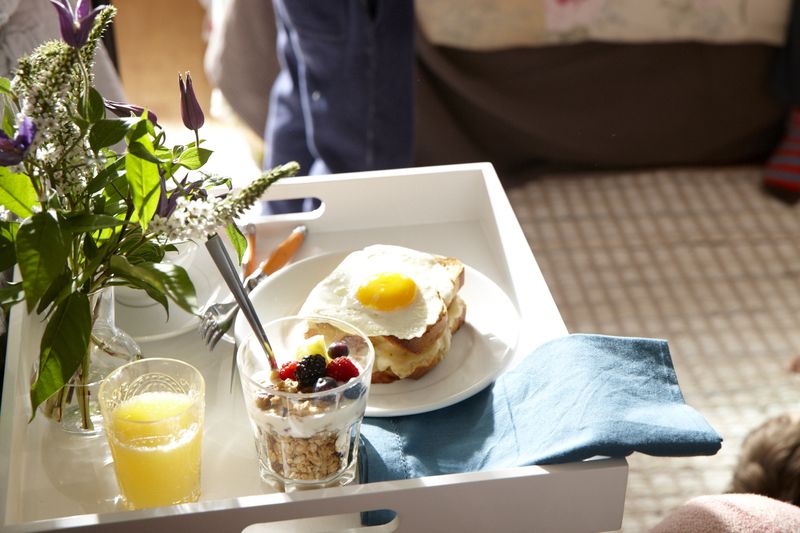
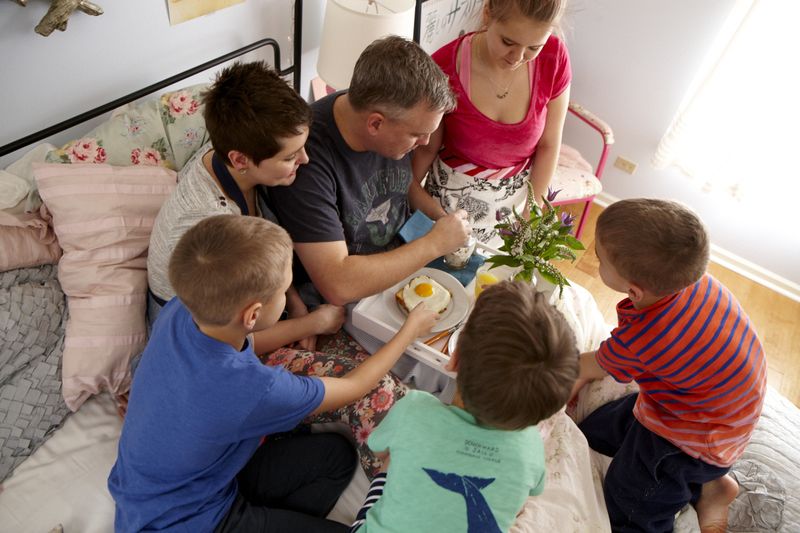
The first time I had a croque madam I was hooked.  It was on a trip to France with my parents when I was a boy.  From the description on the menu it sounded like a very simple ham sandwich to me, but when a gooey and cheesy golden brown sandwich topped with an egg appeared before me, I melted.  It’s been my FAVORITE sandwich ever since!

E0906_FthrsDy_0021

Serves 4

You will need:

2 tablespoons butter

1 1/2 tablespoon plain flour

1 cup warm milk

salt and pepper

8 thick slices of good bread

8 slices ham

4 oz grated gruyere cheese

4 fried eggs, sunny side up

1.Melt the butter in a small pan and add the flour. 2.Stir for about a minute, don't let it go dark. 3.Add the milk, a little at a time, stirring until you have a smooth sauce. If it's to thick, just add some more milk. 4.Season with salt and pepper. 5.Heat oven to 400F. 6.Place 4 slices of bread on a baking tray covered with parchment paper. 7.Add some sauce, ham, cheese and another piece of bread. 8.Bake in the oven until golden. 9.Serve hot with more sauce and a fried egg on top.

E0906_FthrsDy_0264

By Paul Lowe:

When it comes to making simple crafts or elegant meals, Paul Lowe is the man to call. His blog, Sweet Paul has now spun into a successful magazine, providing tons of useful design tips. 

It’s Easy Bein’ Green

June 12, 2013

Post by Julia DeNamur

RegistryGreenNeutral_blog01

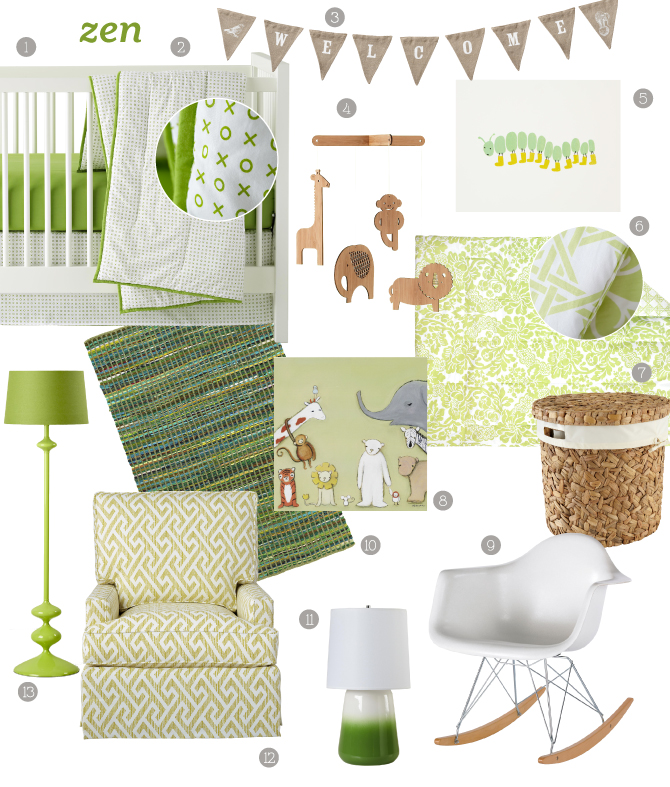
I love green as an alternative to yellow for a couple that’s waiting for a surprise on their newborn’s birthday. Green creates a zen nursery palette with all its tints and shades from nature. It lends itself easily to bamboo and wood as well if that is your taste.

RegistryGreenNeutral_blog02
1. Andersen Crib, White  2. Fine Prints Crib Bedding, Green XO  3. Achievement Banner Flags  4. It’s a Jungle Up There Mobile  5. Bug Print, Caterpillar  6. With a Flourish Crib Bedding, Green  7. Water Hyacinth Hamper and Liner  8. Keep Your Friends Close Wall Art  9. Retro Rocker  10. Rags to Riches Rug, Green  11. Gumdrop Lamp, Green  12. Mod Nod Glider, Stock Plus: Puzzle Leaf   13. Checkmate Floor Lamp Base, Green & Light Years Floor Lamp Shade, Green

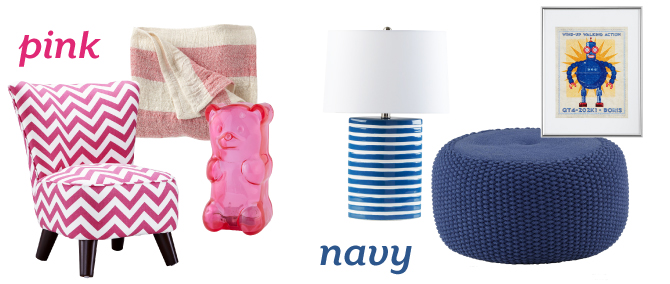
After the little one is born, you can embellish the room with pink or navy accents that blend beautifully with your sanctuary. The benefits of registering with Nod are amazing. It’s so easy for your friends and family to help build that serene nursery of your dreams. Click here to start your baby registry.

RegistryGreenNeutral_blog03

Pink

Little Slipper Chair, Hot Pink/White | Lightly Striped Baby Blanket, Pink | Gummy Bear Nightlight, Pink

Navy

Coastline Table Lamp, Blue | Pull Up a Pouf, Blue Braided | Retrobot Wall Art, Blue


Post by Julia DeNamur: Growing up Julia loved color so much she gave her crayons different genders and specific positions in the box based on who they got along with. Fast forward to adulthood, and Julia had the opportunity to work for a paint company where she honed her eye for color, and sometimes even got to name colors things like Dandelion Scream and Wild Child. Today Julia works at Nod as a Graphic Designer, and channels her love of color into her constantly changing hair & nail colors, as well as colorful designs for Nod’s website.

Things to Make – Coconut Milk Tropical Smoothies

June 11, 2013

untitled (6 of 12).jpg untitled (1 of 12).jpg

Smoothies are one of our go-to after school snacks. Usually we make them the typical way, with yogurt and juice, but F is lactose intolerant and sometimes we run out of lactaid. Plus the yogurt always gets everywhere, since the kids like to "help". So recently we tried using coconut milk instead, which tastes pretty good (though the smoothies always come out super thick). When we have leftovers, this recipe also makes fantastic popsicles.

COCONUT MILK TROPICAL SMOOTHIES:

INGREDIENTS:
* 2-3 cups coconut milk
* 6 oz frozen (or fresh) mango
* 6 oz frozen (or fresh) pineapple
* 1 banana
* 1-3 tablespoons of agave nectar (depending on how sweet you like your smoothies).

Post by Darcy : No Monsters in My Bed
Bowtie Giftwrap

June 10, 2013

At Nod, we believe your home should be a celebration of family. We'll be featuring our Managing Director, Michelle, at home celebrating her own family with recipes, crafts and décor created by our friend Sweet Paul

I’m a big fan of making giftwrap be part of the present.  A perfect idea for a dapper-Dad on Father’s Day is to buy a special bowtie and use it in place of a ribbon on a gift.  In fact, a fun gift would be a small box with a note inside that says “I love you, Dad!” and then simply use the bowtie to wrap the box.  An instant inside-out present! 

E0906_FthrsDy_0516

TIP:

Keep an eye out at the thrift store or flea market for old clothing with vintage buckles.

E0906_FthrsDy_0414

By Paul Lowe:

When it comes to making simple crafts or elegant meals, Paul Lowe is the man to call. His blog, Sweet Paul has now spun into a successful magazine, providing tons of useful design tips. 

Homemade Pizza Party

June 7, 2013

At Nod, we believe your home should be a celebration of family. We'll be featuring our Managing Director, Michelle, at home celebrating her own family with recipes, crafts and décor created by our friend Sweet Paul

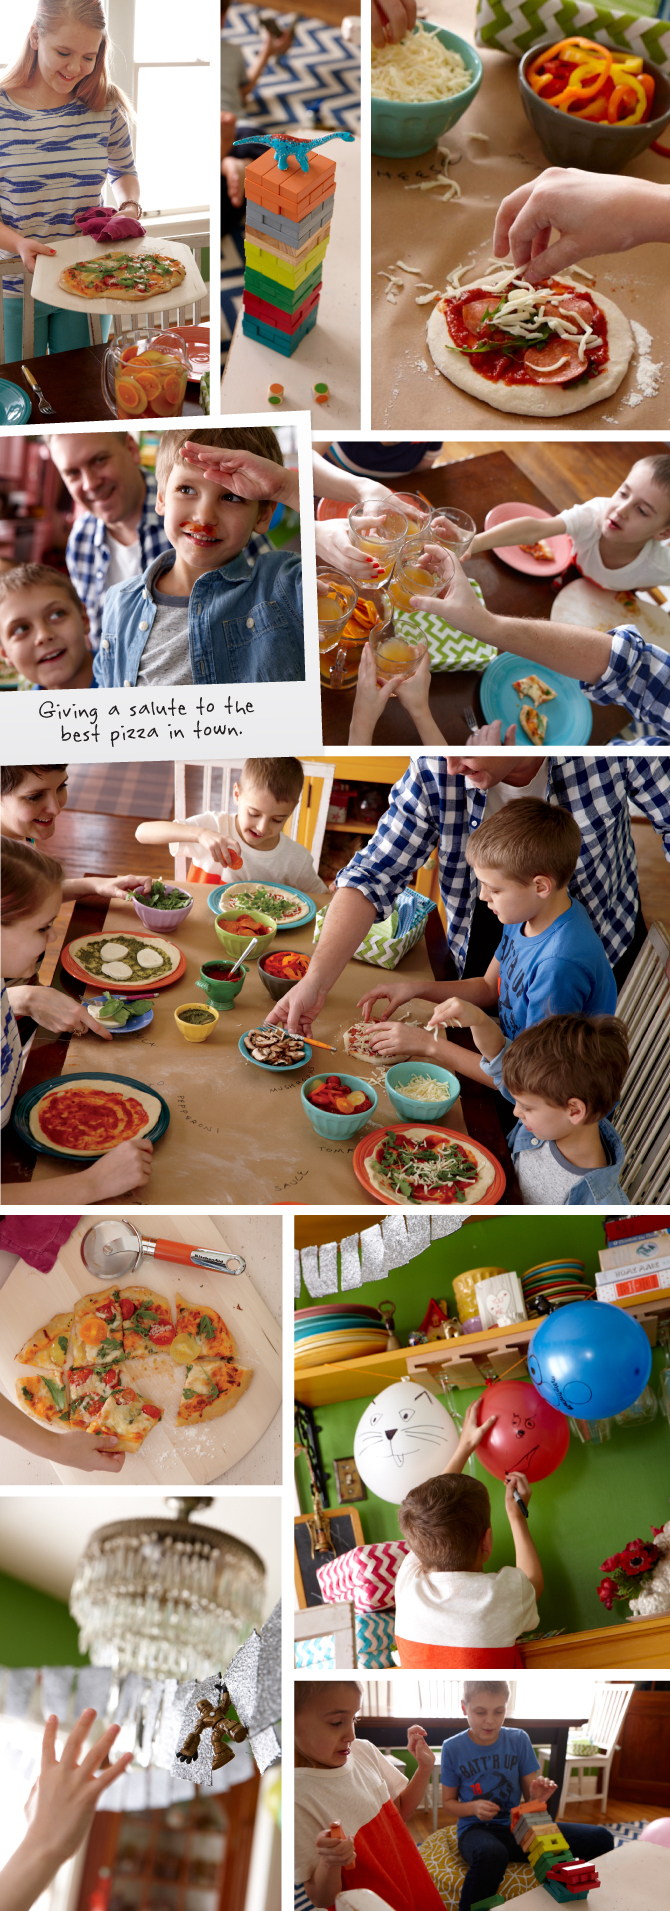
I think a pizza party is the perfect family activity!  Small hands can help prep all the toppings and put them in bowls on the table.  Building the perfect topping combinations on personal sized pizzas is something the whole family will enjoy as well.  One of my favorite things to do is to prepare sweet toppings for dessert pizzas to finish off the meal.  Try some apricot jam as your "sauce", sliced fruit as your toppings and shredded coconut as your cheese… top with a drizzle of icing with lemon zest after it's out of the oven.  Delish!

06 09_CelebratePizzaParty_blog (2)

Pizza Dough Recipe:

2 teaspoons dry yeast 
1 1/3 cup lukewarm water 
1 tablespoon honey 
1 teaspoon salt 
2 tablespoons olive oil 
3 1/2 cups plain flour 

1. Mix yeast and water in a bowl and leave for 5 minutes 

2.Add honey, salt, oil and flour. Mix until you have a smooth dough. Cover with plastic wrap and let it rise for at least 1 hour. 

3.Get your grill going, remember it needs to be really hot. You will need a clean grill rack for this, so clean it well if it's old and gritty. 

4.Divide your dough in two and place it on a well greased parchment paper. Press it out using your fingers and coat it with a layer of olive oil. 

5.Flip the paper upside down on your grill and slowly remove the paper. Let the pizza grill for 3 minutes. 

6.Take it off and place it on the paper. 

7.Add your favorite ingredients

8. Slide the pizza of the paper onto the grill and grill for another 3 minutes. 

9. Take it off, cut in pieces and enjoy.

By Paul Lowe:

When it comes to making simple crafts or elegant meals, Paul Lowe is the man to call. His blog, Sweet Paul has now spun into a successful magazine, providing tons of useful design tips. 

Gift Sets Galore

June 6, 2013

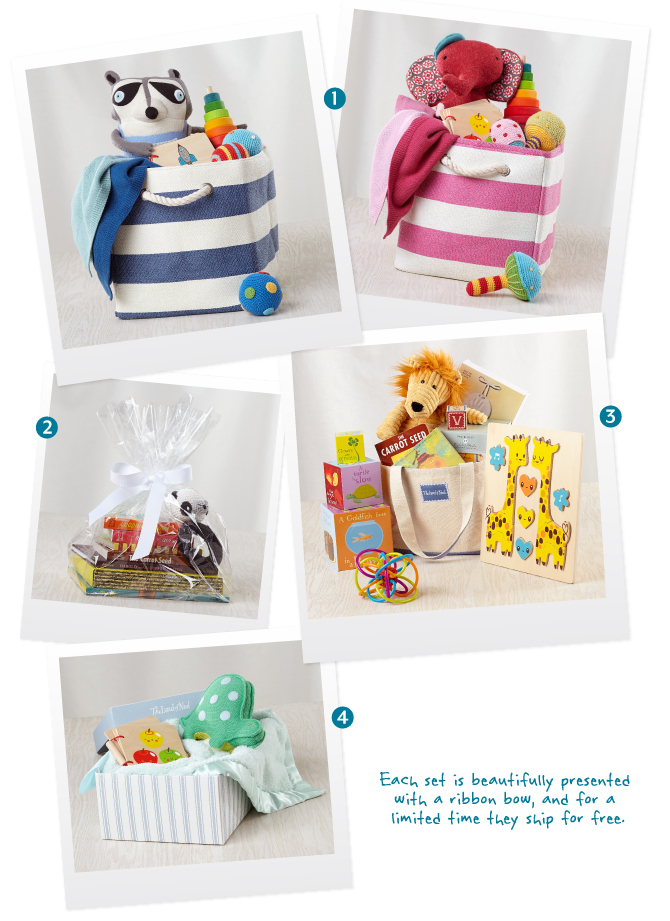
Gift giving can be a daunting task.  Finding the perfect something for that special little one’s birthday or baby shower can be challenging.  Take the guesswork out of gift giving with these amazing gift sets.  These sets provide a little bit for everyone, including infant-safe items that can be used immediately, toddler items that can be introduced once the child grows bigger and even a storage basket for the parents.  Each one is beautifully presented with a ribbon bow, and for a limited time they ship for free.  These gift sets really are the gift that keeps on giving!

1. Nod Baby Gift Sets in Storage Bin

This set contains a plethora of items that can be used immediately, like our adorable chunky crocheted rattles and touchably-soft baby blanket and other items that can be saved for when the child is slightly older, like our wooden book made of maple plywood and finished with a water-based, non-toxic lacquer that is sturdy enough to survive the rough handling of little hands.  The included plush toy is certain to become a special loved item.  Set savings of over $18.

2. Baby Book Gift Sets

Is there any gift more classic than that of books?  Books provide a great way to develop language and critical thinking skills and the CD of our favorite artists provides sing-along opportunities for the whole family!

NodGiftingBoutique_GiftSetsLayout

3. Nod Baby Gift Set in Canvas Bag

This adorable gift option provides years of entertainment value.  From infant toys to toddler puzzles to classic building blocks, this gift set equips the new mom and new baby with plenty of activities!  Set savings of over $19.

4. Nod Baby Gift Box

What better gift than the official baby gift box?  This fantastic gender-neutral box of goodies is the perfect way to welcome the newest member of the group.  The book, plush toy, and blanket are proven crowd pleasers… we know babies can be a tough crowd!  Set savings of over $12.

By Jayne Mangione

Jayne has a lot of experience with children as a former elementary school teacher and a mom of two kids. In her job as a customer service specialist at Nod, she offers advice to customers on our wide array of products, 90% of which she and her family already own. A Chicago native, she’s mastered multiple seasons, often in one week, while being able to cite 90’s pop culture and musical references at the drop of a hat.  Speaking of hats, ask her about the time she looked like Blossom.

Spot It!

June 5, 2013

Sp1

Sp2

Sp3

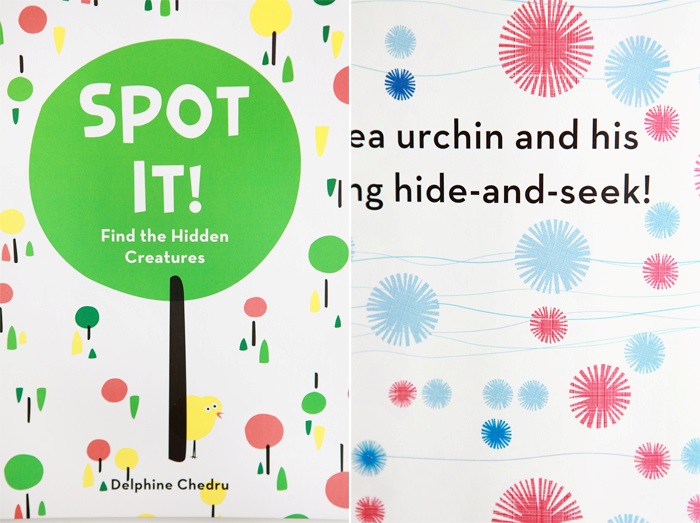
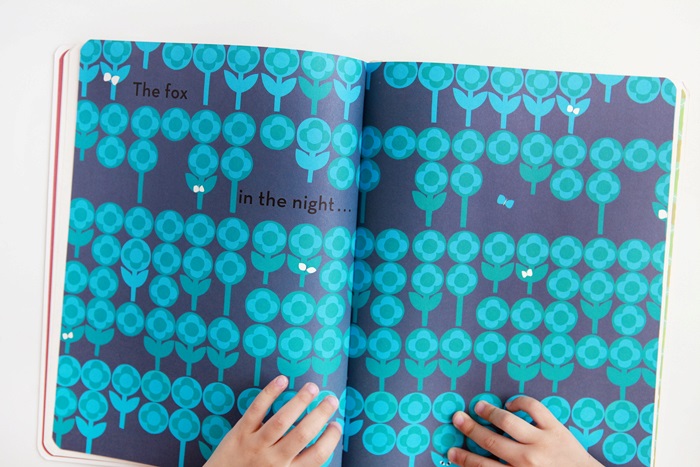
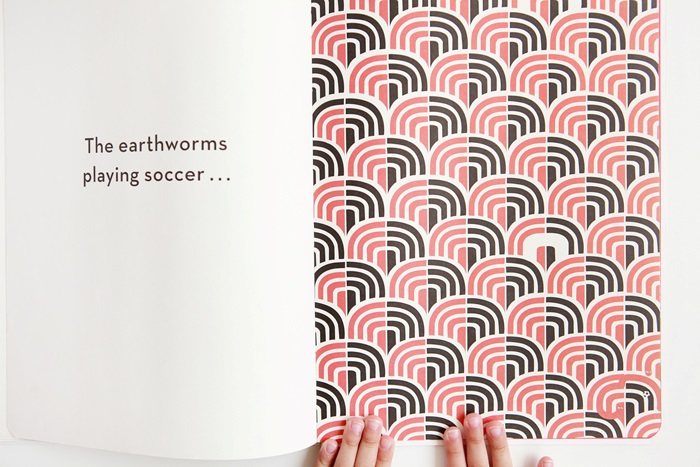
I originally found a recommendation for this book on the Wee Blog.  Spot It! is by French author, illustrator and designer Delphine Chedru, and is a collection of stunning patterns, one on each set of pages, with a hidden creature.  The task of finding each skillfully disguised creature is a good exercise in visual discrimination.  The fun we had with this book will definitely have us looking for Chedru's other works!

Post by Michelle Sterling of Avery and Augustine

You can see her work and read about her two young children's first forays in cooking, art and everything in between at Avery and Augustine.


Stamp Art

June 4, 2013

At Nod, we believe your home should be a celebration of family. We'll be featuring our Managing Director, Michelle, at home celebrating her own family with recipes, crafts and décor created by our friend Sweet Paul

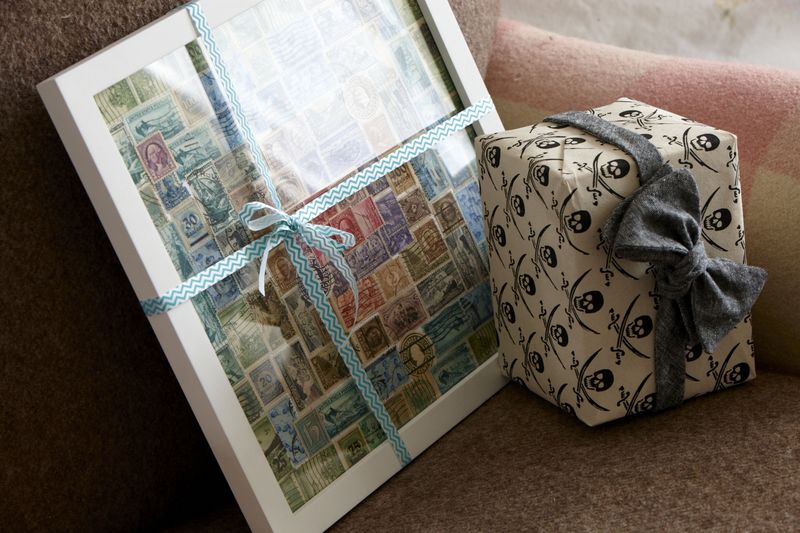
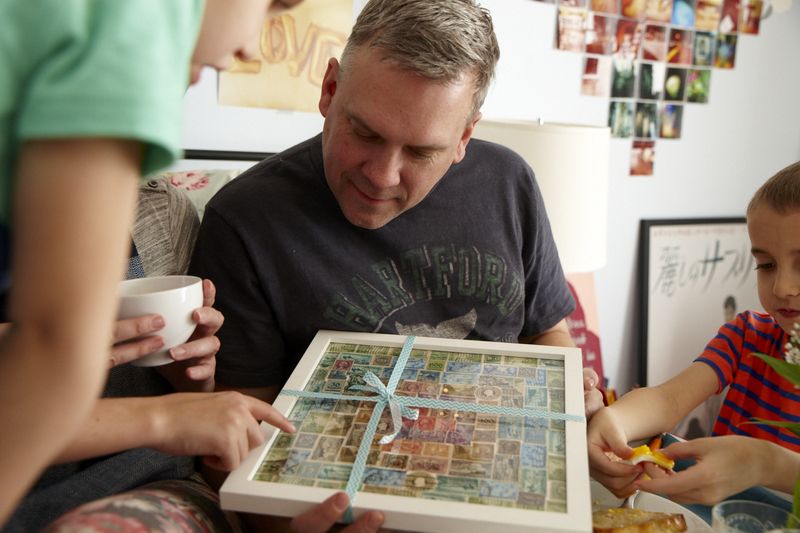
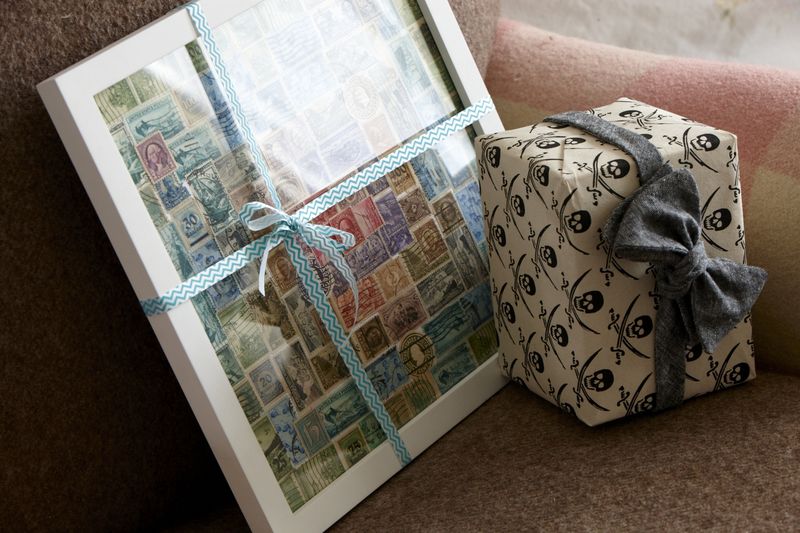
When I was a boy I loved to make presents for my parents.  My parents had very good taste so I had to be very careful with my projects to make sure they would be fit to display in our house.  Often times, if I made a less than amazing present, the project would end up being displayed in MY room instead of the livingroom!  This stamp art project would surely have earned me a prized spot in our house if I made it for my dad for Father’s Day!

E0906_FthrsDy_0385

You will need:

Old stamps – you can often find bags full at a flea market or on Etsy

Picture frame - THIS ONE from The Land of Nod is great!

Glue

1.Sort through your stamps and decide your color scheme or pattern… or just go random! 2.Open your frame and begin to glue your stamps to the backer-board. Make sure to overlap them! 3.Once the board is covered and has dried, close the frame.

E0906_FthrsDy_0516

By Paul Lowe:

When it comes to making simple crafts or elegant meals, Paul Lowe is the man to call. His blog, Sweet Paul has now spun into a successful magazine, providing tons of useful design tips. 

Dads Are Super!

June 3, 2013

So we feel a bit like slackers since we don’t have any new Father’s Day ideas to share. Actually we have lots of ideas, it’s the time that’s missing, and we didn’t have any *time* this year to actually execute any of our ideas, which is pretty much the story of my life these days. We’re about two weeks into summer, and I’m happy to report that I’m surviving, although some days just by a thread!

But back to Dads: we didn’t want anyone to think we’d completely forgotten about Dads — because we sure haven’t… we love them, LOTS! — so I thought I’d dust off the super-fabulous Father’s Day ideas we shared last year.

FreebieSuperdadGiftTags-578x389
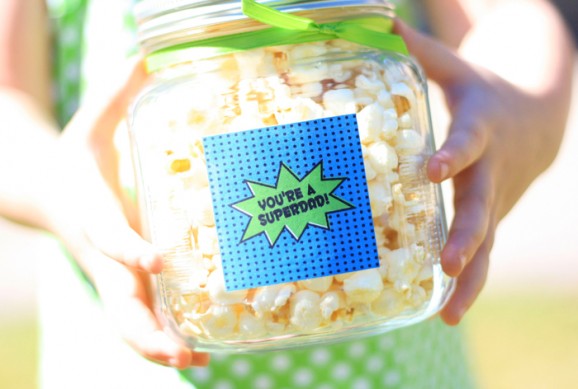
:: Printable Superdad Labels

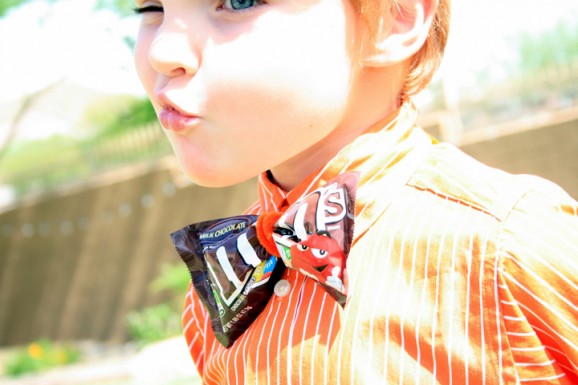
CandyBowtieForDad

:: M&Ms Candy Bowtie Tutorial

What are your plans for Father’s Day this year? Do tell!

Reposted with permission by Aimée Lowry & Bettijo B. Hirschi from PagingSupermom.com

Who’s That Noddie? Volume 4

May 30, 2013

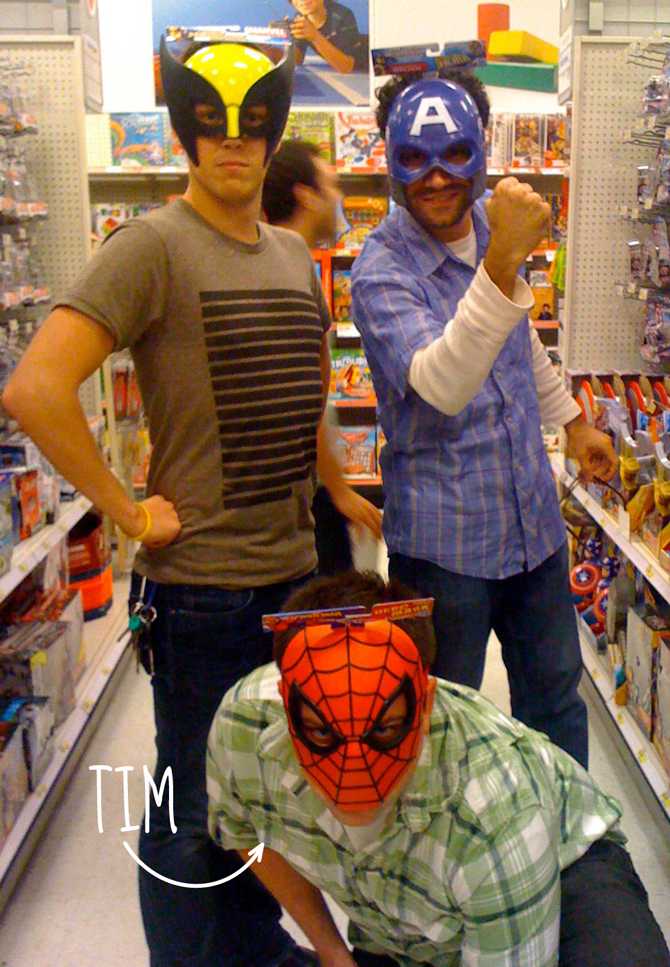
Woot! It’s time for another installment of Who’s That Noddie? This time we are super excited to introduce you to Tim Piper who is an uber talented graphic designer for us here at Nod.  We are sure you have seen his awesome work on our exclusive bedding and toy packaging, not to mention a gazillion other products we carry. Tim’s talent and sense of humor is one-of- a-kind, and we are some very lucky ducks to have him on our team.

Tim_01

Why do you love your job?

There is always something new and fun to design, whether it is product packaging for toys or window displays for our stores. Definitely never bored at work!

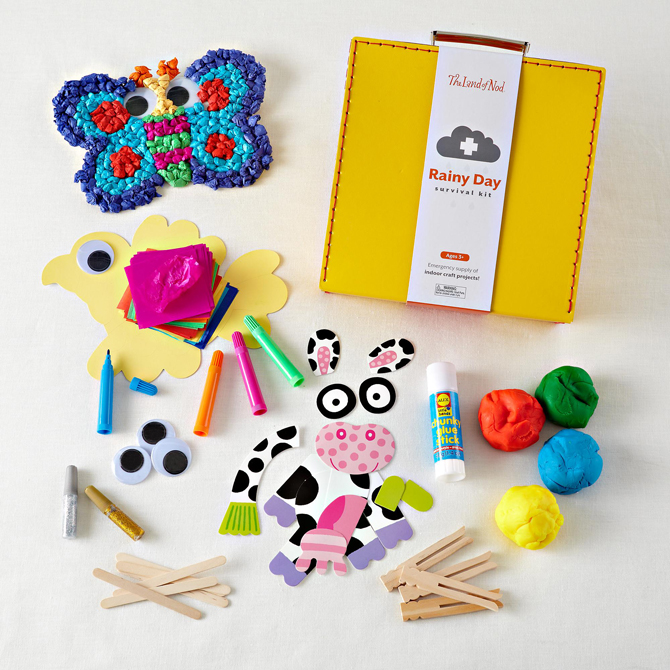
Rainy-day-survival-kit_02

What’s your favorite Nod memory?

This is tough one. I would say that it’s a tie between my first day on the job and every Ugly Sweater Holiday Party.

What’s something unique or surprising about you?

People always find it surprising that I am a designer, but also happen to be pretty color blind.

What was your favorite toy as a kid?

 I loved Jurassic Park toys (and still do).

Logo-03

What do you love most about working for The Land of Nod?

The best thing about Nod to me is nothing creatively speaking is ever set in stone. We are a constantly evolving brand, and as a designer it is very rewarding to be part of a company that is always looking for new ways to stand out from the crowd.

Super-hero-Tim_04

How is your role impactful to the company?

 As a member of the creative team, our work is literally front and center everywhere in the company. We are more or less responsible for the “face” of Nod (and keeping it pretty!).

What's your favorite Nod product?

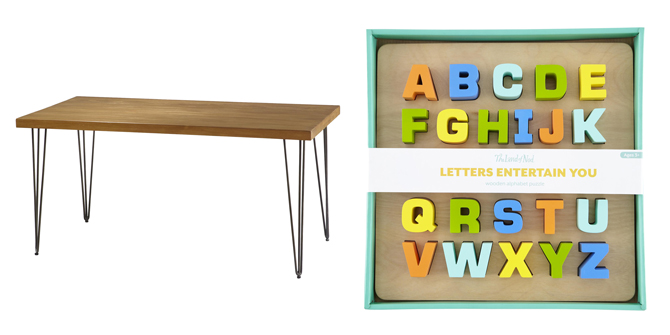
Furniture – Ansel Table / Everything else – Letters Entertain You Puzzle.

AnselTable_LettersPuzzle_05

Thanks Tim for the awesome chat! We hope you enjoyed this installment of Who’s That Noddie? Be sure to stop back by Honest to Nod to check out plenty more about our team at The Land of Nod in the upcoming weeks.

Fun Idea for Picky Eaters

May 29, 2013

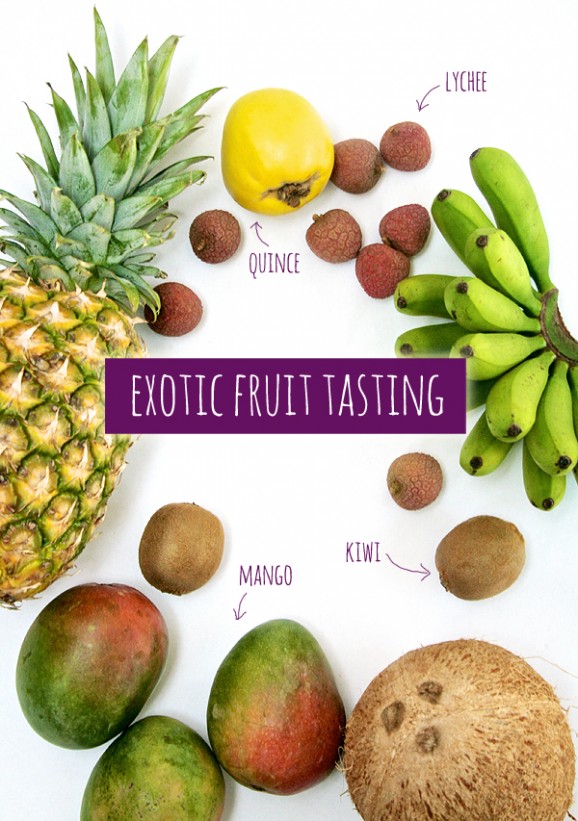
We recently did a very cool Bali-inspired birthday party shoot for One Charming Party. There were so many things to love about this party, but my favorite was our Fruit Tasting activity.

FruitTasting-578x821

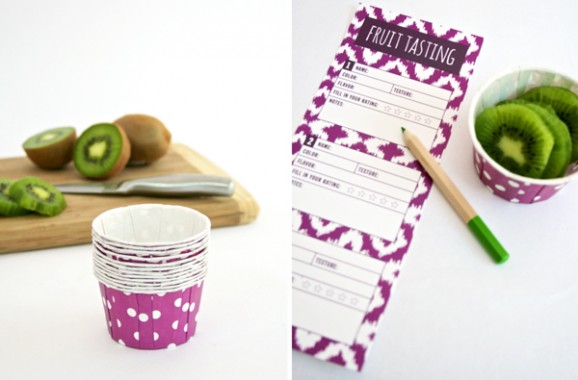
I think it is so fun and smart to encourage kids to branch out and try some new foods. Although most kids would probably have turned their noses up at the sight of any one of these exotic fruits, in this setting they are apt to be more adventurous. We even had a nifty form for them to fill out.

FruitPartyPrep-578x380

FOR PICKY EATERS: While perfect as a party game, I couldn’t help, but think how this might be useful for dealing with picky eaters. Rather than all the typical tactics, why not turn it into a scientific experiment and let them evaluate different foods? They might just find more foods to add to their “will eat” list. Also the whole star rating thing means it’s more than a simple yes/no thing. They have to decide just how bad (or slightly OK) it is. This might provide Mom some insight into which foods aren’t so totally offensive that they could be worth pushing?

So I’ve adapted our fruit tasting card into one that says Food Tasting. Very official. Of course I’m not a child psychologist, but I think this might work!

Reposted with permission by Aimée Lowry & Bettijo B. Hirschi from PagingSupermom.com

To and Fro

May 28, 2013

Car1

Car2

Car3

Car4

Car5

Car6

Car7

Car8

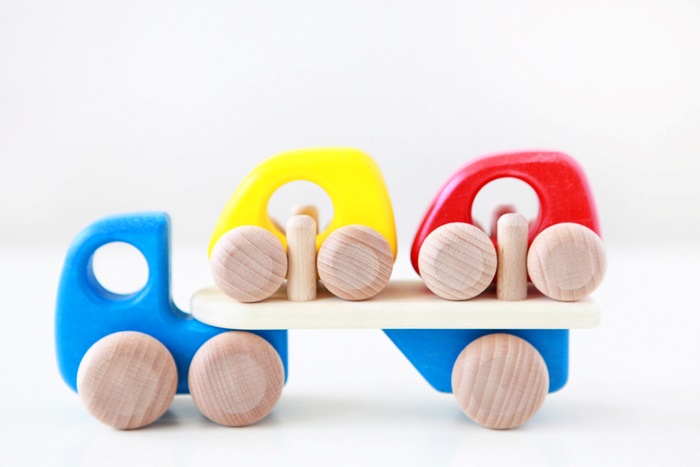
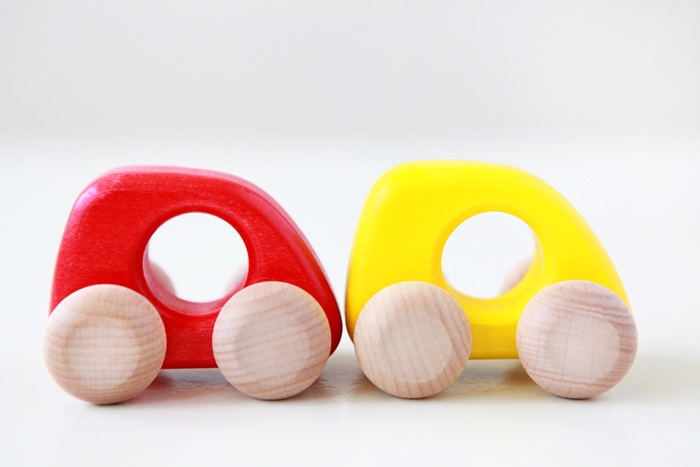
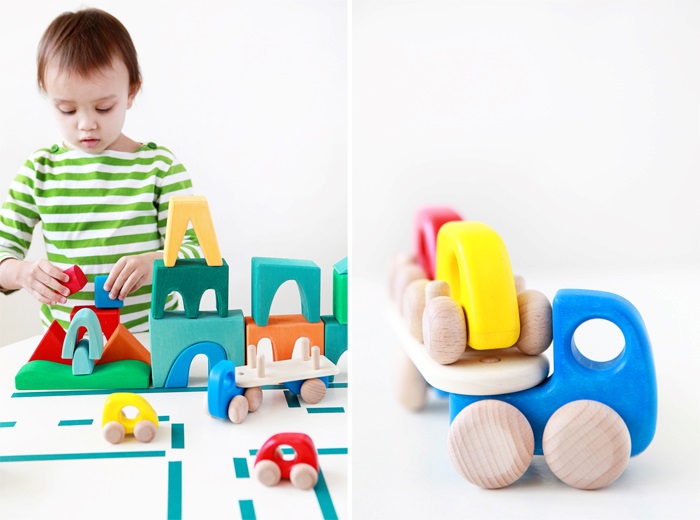
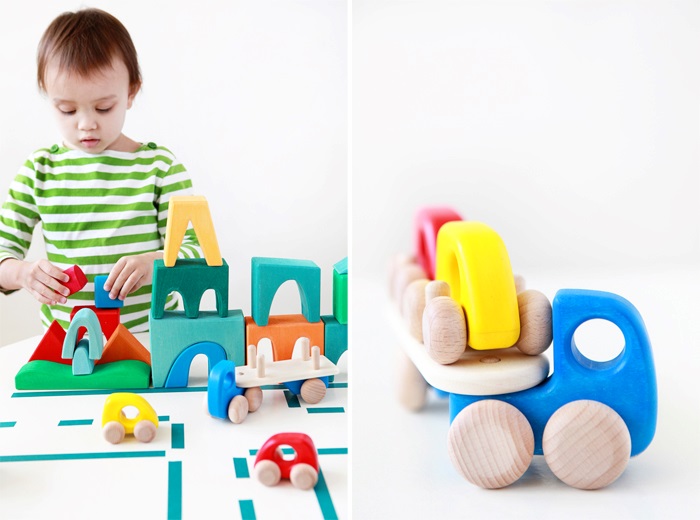
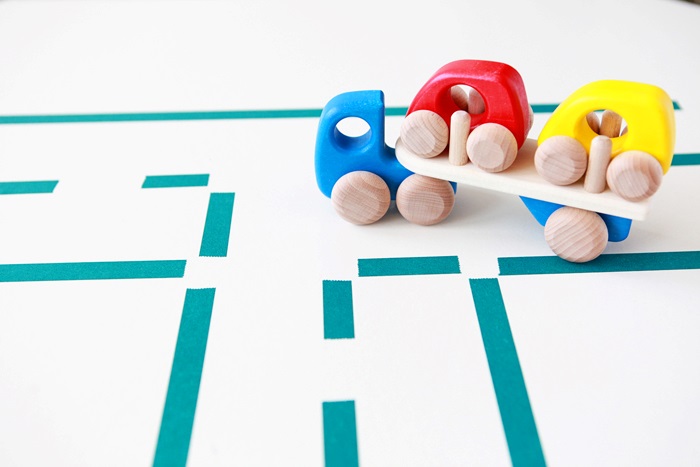
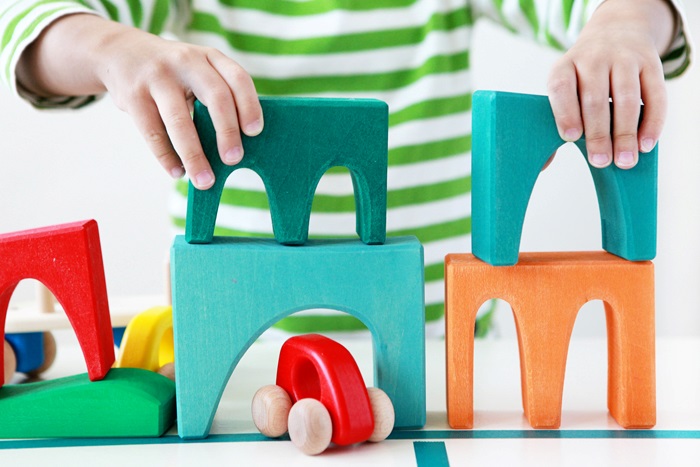
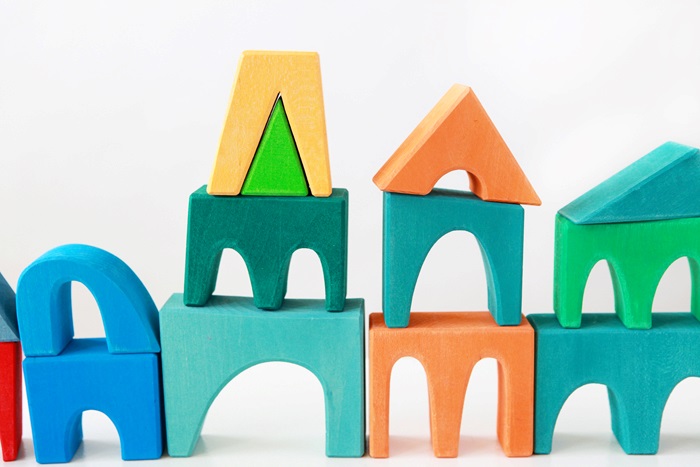
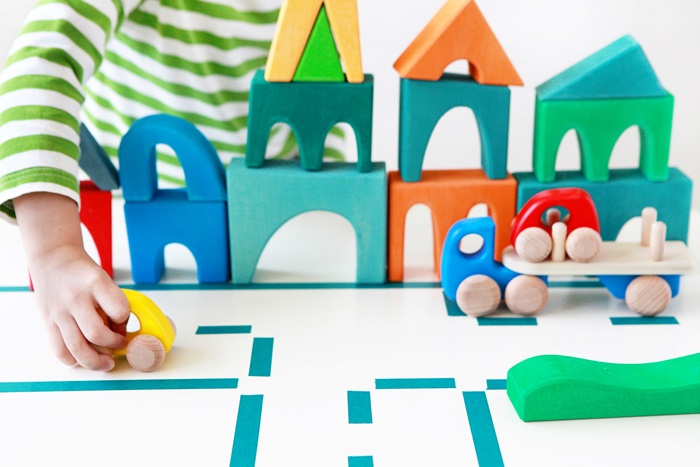
The Car Transporter, hand-painted and assembled in Poland by Bajo, has beautiful, sturdy construction, smooth textures and is painted in bright primary colors. The transporter takes two little cars where they need to go, whether it be from room to room or across the rug.  The soft, smooth surfaces and rounded edges are perfect and gentle for a toddler or preschooler's hands.  Stack up some blocks to make a cityscape, lay down a washi tape road and now all you need is someone to direct traffic!  Washi tape road found via Apartment Therapy Family.


Post by Michelle Sterling of Avery and Augustine

You can see her work and read about her two young children's first forays in cooking, art and everything in between at Avery and Augustine.