Close

Blog

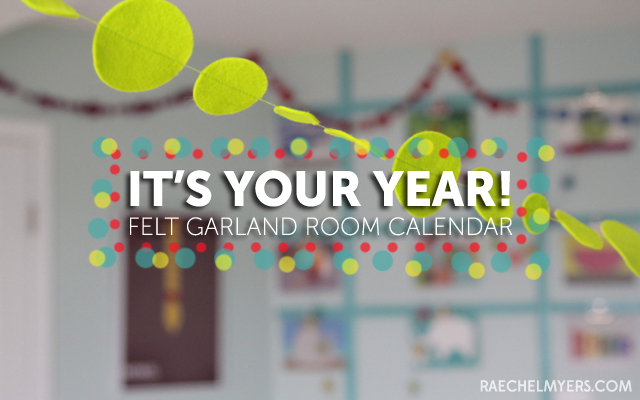
Felt Garland Calendar

April 2, 2013

ItsYourYearHeader

My sister Rebecca does cool stuff. Like the time she and her husband set out to lay a wood floor in their living room, they decided on a herringbone pattern instead of, you know, plain old boring straight lines.

All over her house are these great little details that make their home unique and eclectic and theirs. Like the giant grapevine monogram from their wedding that hangs in the dining room, or the blue, faux stained glass doors that open into her office. She does things because they feel right, and because they make sense to her, not because she’s seen it done on Pinterest or because she plans to blog about it later. Her home goes un-photographed, un-pinned, un-blogged. Because none of that is what makes her happy.

BUT … but she has a sister who happens to love blogging andphotographing and pinning. Those things make her sister very happy. And so when I see projects like these, from time to time, it just feels like the world needs to know the coolness that goes on behind closed doors at my big sister’s house.

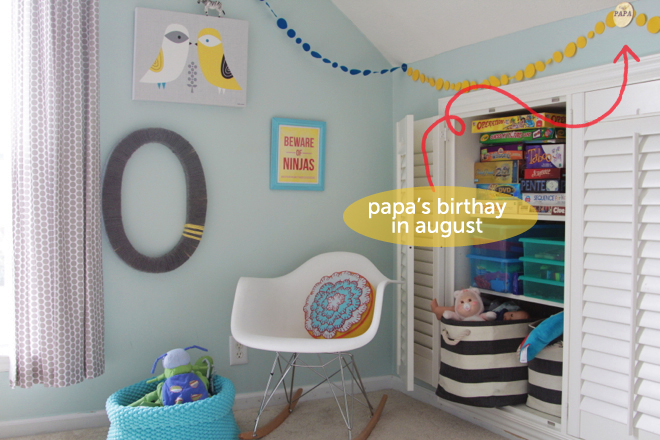
Just last fall I was in her daughter Beatrice’s room rounding up my own kiddos to go home (they live just a few miles away). I noticed a paper chain hung around the circumference of the room at the ceiling and asked her what it was.

“It’s a calendar!”

I looked closer. Sure enough, here and there I saw chain links marked for holidays or birthdays or school breaks. It wrapped all the way around the room so Beatrice could lay in bed and see the whole year at a glance. Not only was she getting an awesome grasp of time and calendars, but she could see for herself whose birthday was coming next, how long until Christmas, or how the seasons relate to one another.

Pretty darn cool.

And you can bet I wanted one of these for myself! Even beyond a bedroom, it would be awesome in a playroom or a homeschool classroom – or even an actual school classroom!

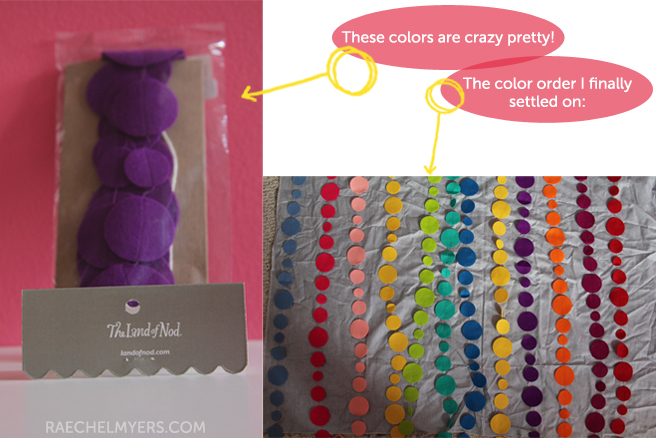
I wanted to make one for our house, but I wanted it to be more permanent. Why not plan to make our way around that calendar year after year after year?!! Paper was great, but I wondered if felt might last a little longer. I probably could have cut out 365 colored felt circles and stitched them together, but the Land of Nod has such awesome, brilliant colors in their wool felt garland already, I sat right down and got to work assigning colors to months for our playroom!

Prettycolors

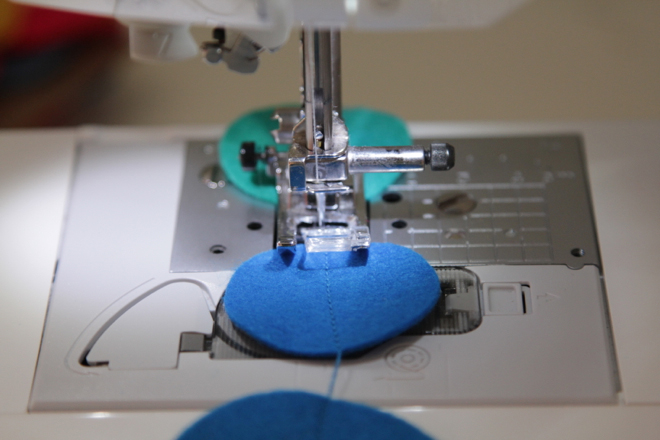
Once I had all of my months measured out and cut, it was just as simple as stitching them together in order, leaving a 1/2"-1" stitch chain in between.

StitchingStrandsTogether

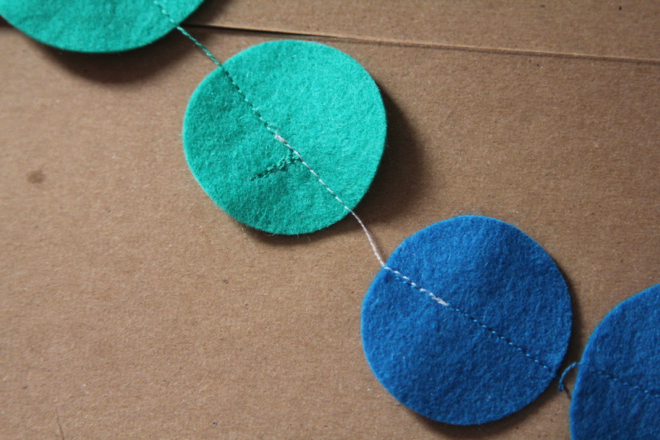
I didn't bother matching the colors (I just used white thread), but now that it's hanging up, I haven't even noticed.

Stitchedup

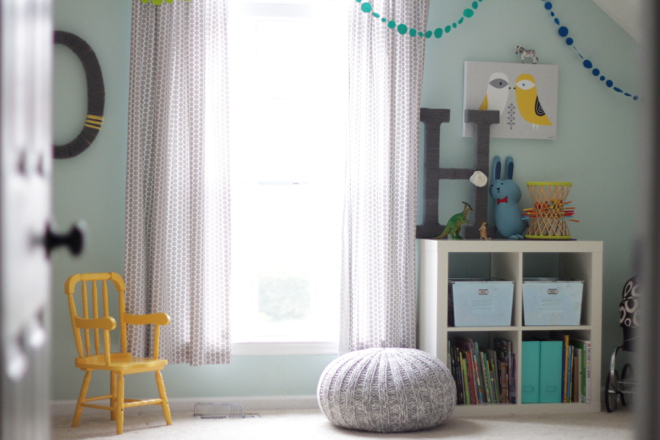
If your room is a perfect square, you can just plan out three months per wall. Our playroom is much longer than it is wide, so I just sort of winged it, making sure to hang it high above doors and low where it felt happy. I'm sure 3M makes some kind of awesome removable hanging strips that would work perfectly here, but I just used clear push pins and really, no one is the wiser. (These white thumb tacks would work, too!)

IMG_9498

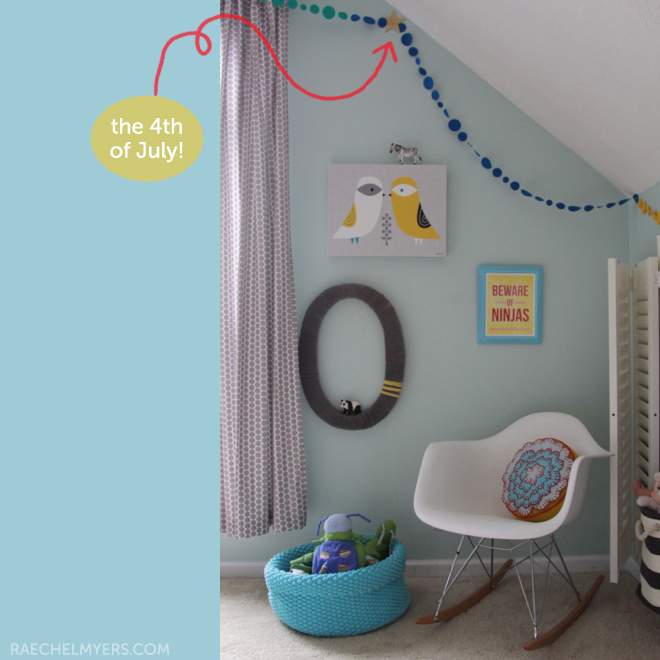
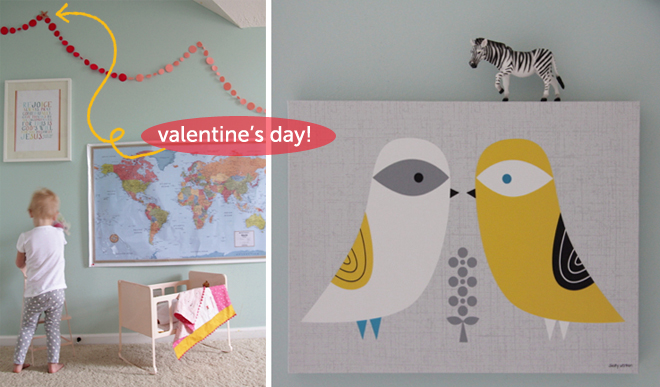
To mark holidays that are the same every year, I cut apart a string of Starry Garland and pinned a star over circles to mark them as special.

4thofjuly1

And to mark the birthdays, I ordered a set of Dot Dot Decor circle ornaments and embroidered everyone's names on them. (I'm going to assume that not everyone has an embroidery machine at their disposal, so instead you could do something fun like letting each person decorate their own birthday with puffy paint or an appliqué with their initial or name – kind of a cool opportunity for a creative activity!)

Papasbirthday

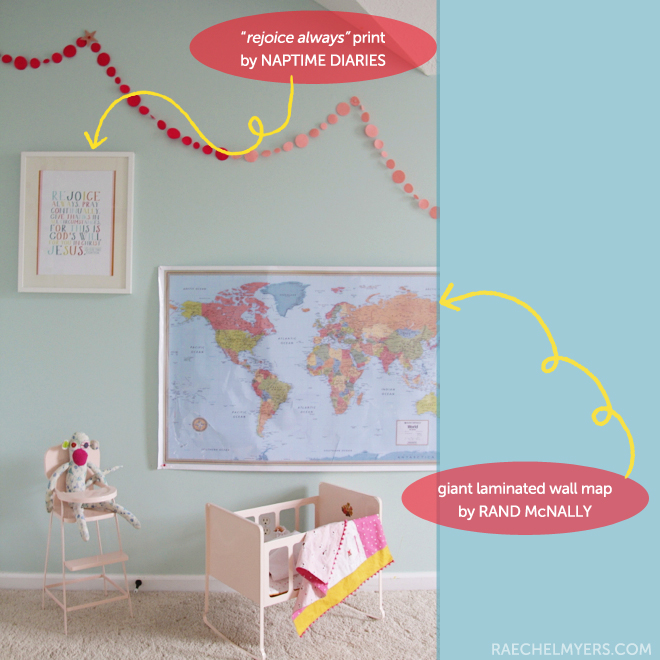
I know y'all have been seeing a lot of our playroom lately, so I'll spare you a full tour. BUT, here is one little area you haven't seen yet! That laminated map was only about $15 and it has been such a fun tool for talking with our kids about the world! (We have even been known to employ a Nerf dart gun as a tool for geography lessons – those suckers stick great with a direct shot!)

The Naptime Diaries print ("Rejoice always, pray continually, give thanks in all circumstances…") is a great and appropriate bit of scripture to have posted in a playroom (or any room where people interact with people!).

Rejoicealways

And that is our happy bit of beautiful, educational, festive decor that could no longer go un-shared with the world! Please thank my sister for her brilliance, and only thank me for my excessive use of yellow squiggly arrows 🙂

Valendinesday

other pretty things you may have seen in this post:

 yarn-wrapped letters / grey pouf / pallina game / birdies canvas print / blue magazine storage 

silver locker bins / toy zebra / yellow throw pillow / kneatly knit storage / "Beware of Ninjas" print 

Eames rocker / toy storage boxes in built-ins / dotty monkey 

xoxo, Raechel

Raechel Myers blogs at Finding My Feet. When she's not elbow deep in her next DIY project, you'll likely find her helping her 6-year-old with his Kindergarten homework or playing babies with her 3-year-old daughter. She lives with her husband in Franklin, TN where they can only hope to train their kiddos to love the Lord and take their dishes to the kitchen sink.
Black & White

April 1, 2013

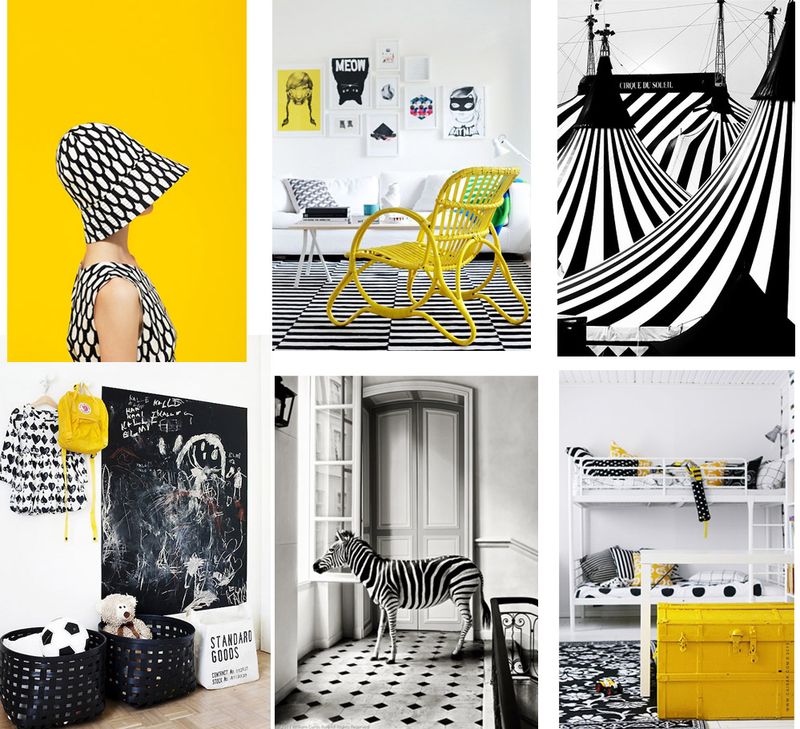
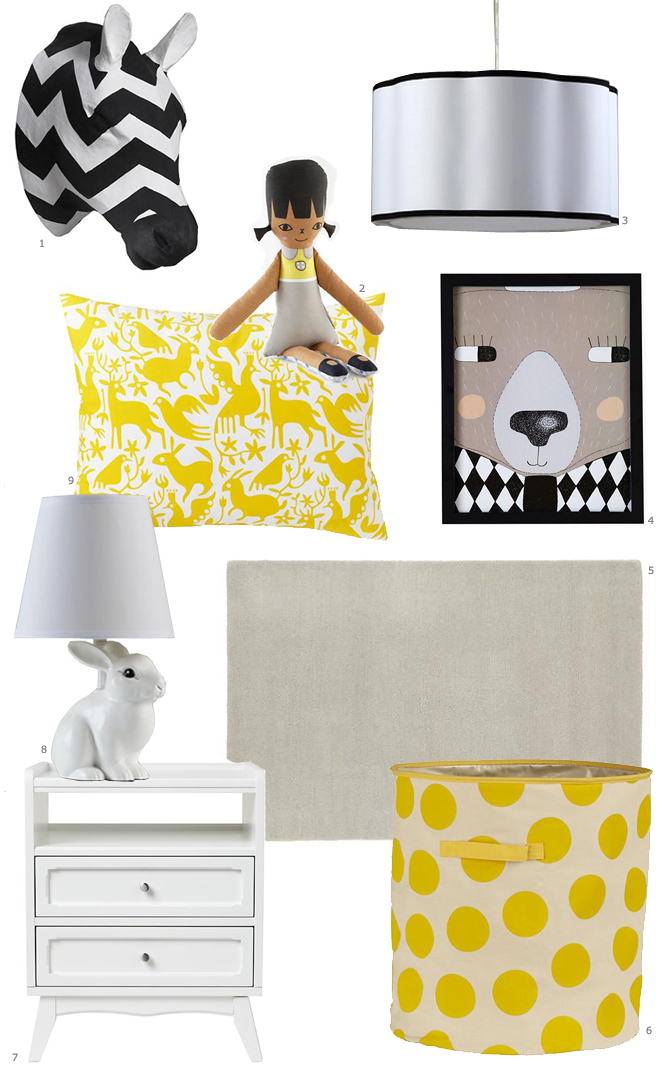
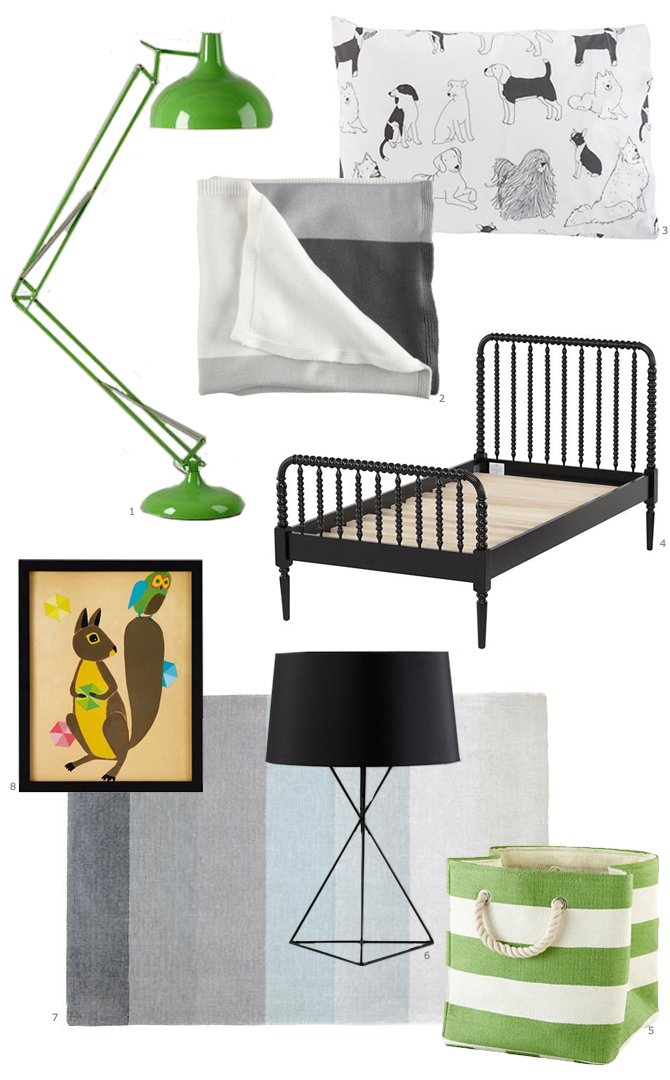
Black and white décor has long been a decorating classic. For a new, modern approach, try it in your kid’s room. Keep it child-friendly by mixing in animal motifs and a pop of color like yellow or green. To keep the colors from being too overpowering try adding in neutral colors like khaki or grey.

The inspiration:

Inspiration_yellow

Clockwise  1 / 2 / 3 / 4 / 5 / 6

Get the look:

Black and white + YELLOW

1 Décor on Safari Zebra, $69
2 Hello Doll (Stella), $19.95
3 Fifth Avenue Pendant, $129
4 Big Bear, $39.90 (as shown)
5 Preppy Pastel Rug, $249-$649
6 Dotted Storage, $29
7 Monarch Nightstand, $279
8 Abracadabra Lamp, $69
9 Animales Graficos Bedding, $19-$129

Black and white and GREEN

1 Wow, That’s a Big Lamp, $299
2 Knit Ombré Blanket, $39
3 Bed’s Best Friend Bedding, $14-89
4 Jenny Lind Bed, $549-649
5 Stripes Around the Storage, $12.95-19.95
6 Isosceles Lamp, $89
7 Broad Stripe Rug, $249-$649
8 Squirrel and Owl, $39.90 (as shown)

By Anna Passadori

Anna develops and designs exclusive product for The Land of Nod. She hails from the west coast and has traveled the world to source product. She loves anything Marc Jacobs, Sofia Coppola or stripes! (So, if anyone can get a photo of Sofia Coppola wearing a striped outfit by Marc Jacobs, please send it along.)

DIY Geometric Heart Pillow

March 29, 2013

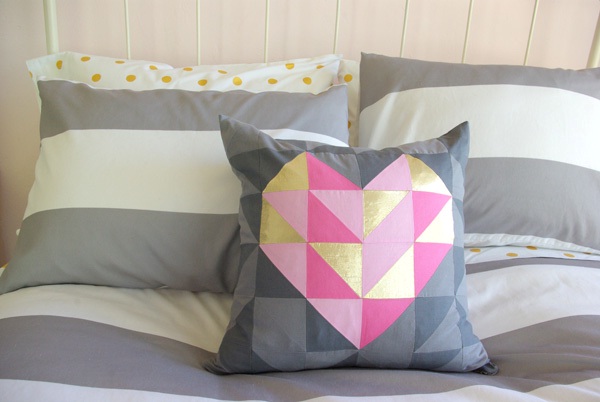
Geopillow1

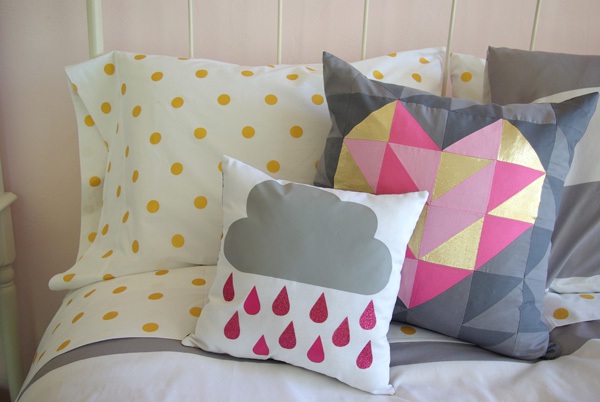
This fun geometric heart is a miniature version of a giant one I made for Valentine's day.  I took my original inspiration from a classic quilt block, so it only seemed fitting to make the very same quilt block into a pillow.  I used this pillow to pull together the colors in the room – the gold in the gold dot sheets, the grey in the duvet cover and the pink in the walls.

Even if you have never even thought about making a quilt before, this is so easy and totally doable.  All you need to know how to do is cut triangles, sew straight lines and use an iron.

Geopillow2

Here's how I made my pillow front:

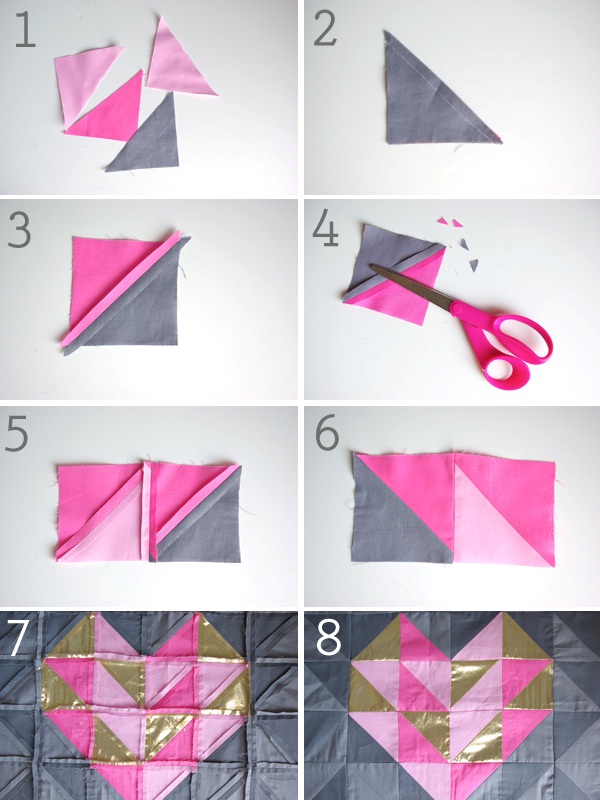
 1.  Using a cutting matt and a rotary cutter, you are going to need to cut 72 triangles.  Start by cutting 5" squares and then cut those squares in half diagonally.  You will need 52 grey triangles (I used two tones of grey) and you will need 20 triangles for the heart (I used 7 gold triangles, 7 light pink, and 6 dark pink).

2.  Lay out your pattern exactly how you want the finished product to look like.  Then working in triangle pairs, sew right sides together with a 1/4" seam allowance.

3.  Then, using an iron, press open the seam.  Turn the square over and iron it on the front side as well.

4.  Using scissors, trim the ends off the corners, to make the square perfectly square.

5.  Then working in rows, sew the squares together to make an entire row of the pillow.  And press open the seams each time.

6.  Press on both sides, so that everything lays flat.  Things will be more likely to line up if everything is  pressed well.

7.  Now sew the rows together and press the seams flat (again).

8.  Ta-da!  What a beautiful thing simple triangles can make.

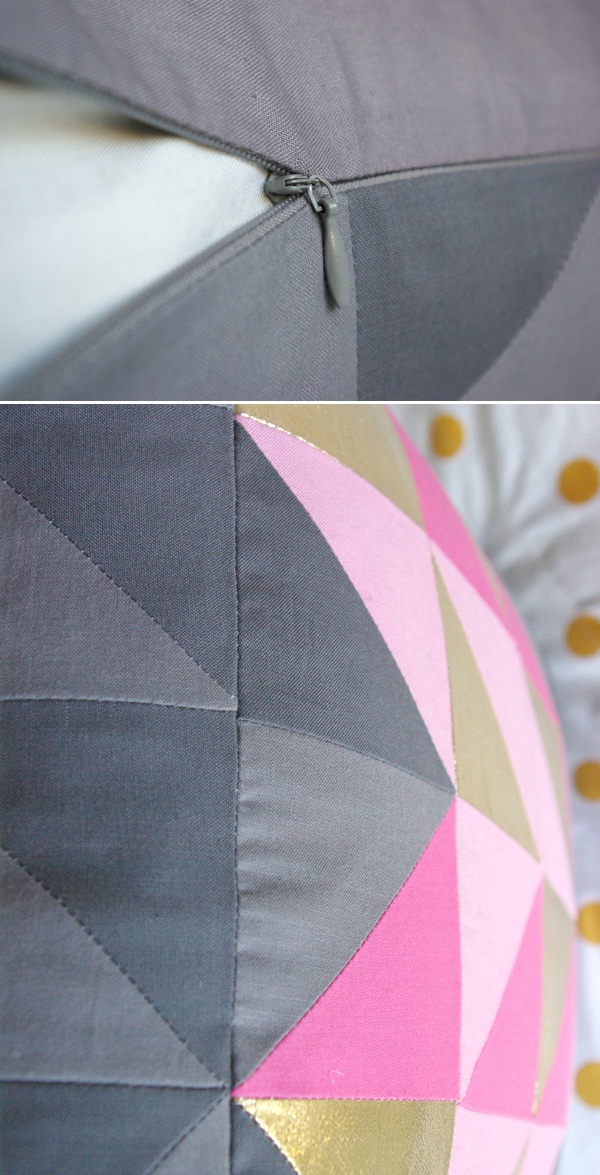
I backed this pillow with solid grey fabric.  I put in a hidden zipper along the bottom edge.  But, you could easily just top stitch it closed with the same colored thread.

Geopillow3

I've had a lot of fun with triangles and geometric shapes lately.  I made this green, mint and gold geometric pillow recently as well.  It is much more random pattern, but can you see how much fun sewing triangles can been?

Geopillow4

Post by: Jeran Oleander and Palm

DIY Color Block Easter Eggs

March 28, 2013

Post by Becca of www.cakeeventsblog.com
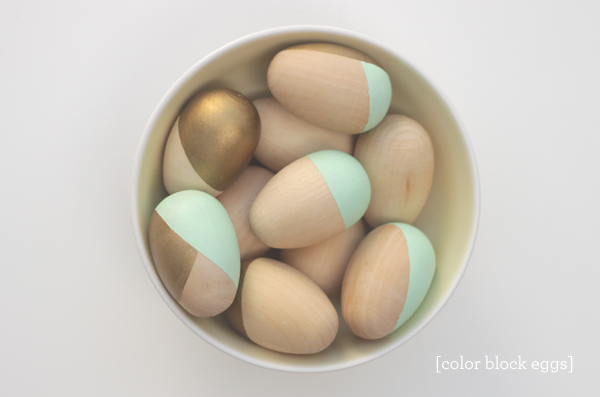
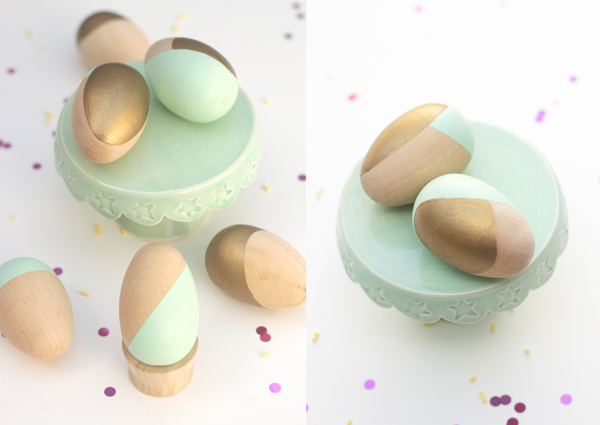
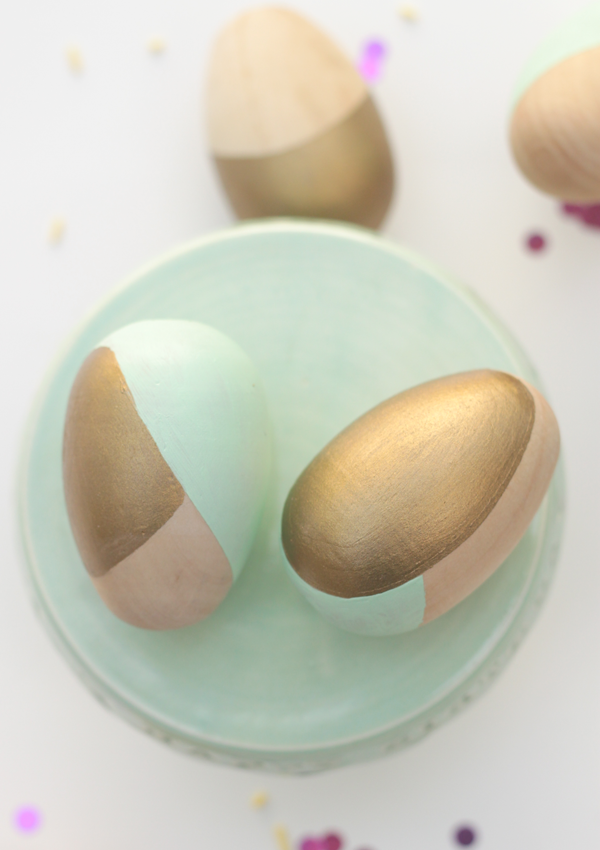
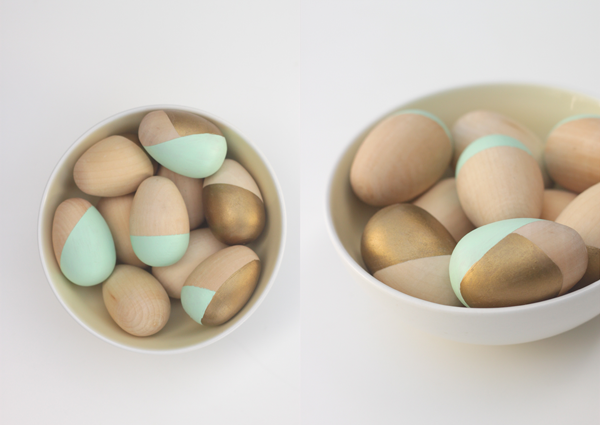
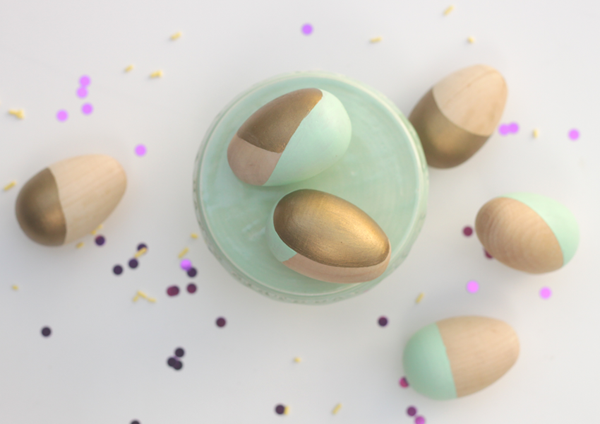
DIY Color Block Easter EggsI’ll be honest… I’m kind of in love with this project.  I’ve been pinning loads of beautiful Easter eggs this month and was thinking about what a shame it is that they only last a few days.  Then lo and behold, while I was at the craft store hunting for the cheap-o plastic kind, I wandered into these wooden beauties and bam- inspiration! It’s almost like they were begging to become a DiY.  They’ve already become a focal point of our spring decor, and they’re sturdy enough that I’m considering hiding them around the house for Caitlin to hunt down next Sunday.

I’m a bit of a failure as a DiYer because I never stop what I’m doing to take pictures of the process, but you can rest assured that these are pretty easy… see below for the written instructions. Have a happy Easter!

DIY Color Block Easter Eggs 2

DIY Color Block Easter Eggs 3

DIY Color Block Easter Eggs 4

DIY Color Block Easter Eggs 5

DIY Color Block Easter Eggs 6

Here’s what you’ll need to make DIY Color Block Easter Eggs: 

  • wooden eggs
  • masking or washi tape
  • craft paints (I used martha stewart pea shoot + gold)
  • 2 small paint brushes
  • egg cups for drying paint (a cooling rack works too)

Here’s what to do:

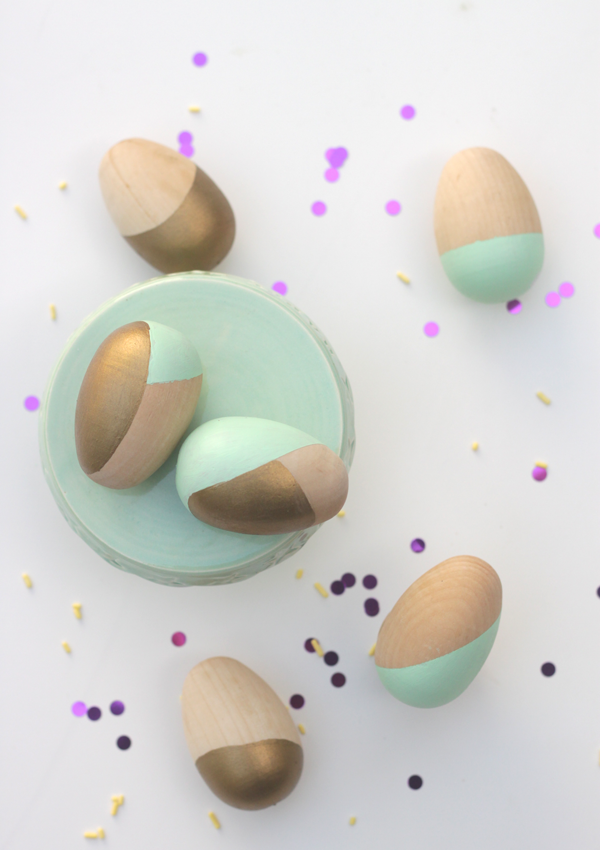
  1. Wrap tape end to end around your eggs using a different angle on each egg.  If you’re planning on using multiple colors, it’s best to choose the lighter color first and let dry completely before taping and painting the darker color.
  2. Brush paint on taped area. This may require 2 coats. Tip: If you’re impatient like me, I find that using my finger to help smooth the paint helps it dry faster and more evenly.
  3. Let paint dry before removing tape.
  4. Use a bit of paint on the end of your brush to even out any rough edges.

Post by Becca of www.cakeeventsblog.com and photos & styling © cake. 2013

DIY Natural Easter Egg Dye

Post by Darcy of bedtimemonsters.blogspot.com

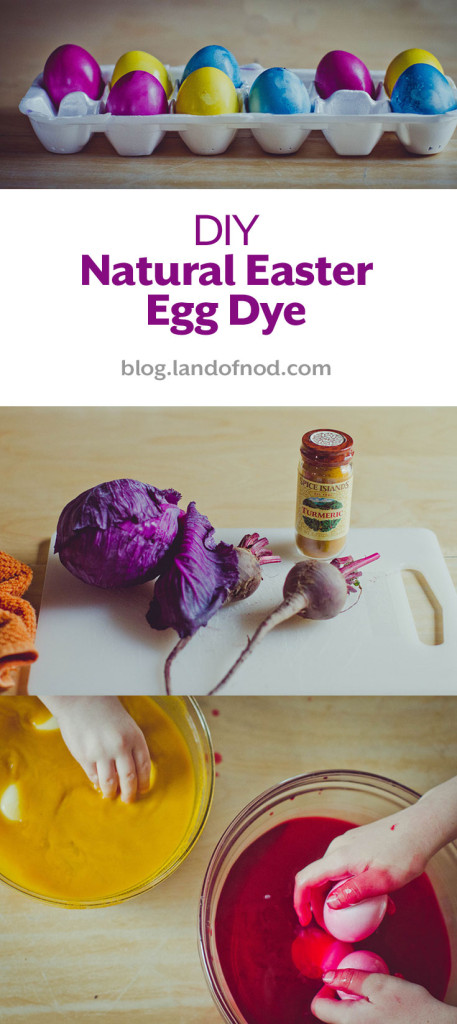
DIY Natural Easter Egg Dye
We rarely dye Easter eggs (mom guilt). Often we vacation around this time, so I can use that as an excuse. But truthfully I hate hard boiled eggs and the obligation to eat several of them usually weighs me down, so I avoid the whole scenario. Luckily, lately both Dan and T cannot stop eating any sort of egg, so without any excuses holding me back, we had a job to do. I’ve wanted to make natural Easter egg dye ever since reading this post. We borrowed the recipes used by Sweet Fine Day and the colors turned out beautiful and vibrant. And the kids’ all loved following the recipes – now I’m trying to decide what to do with the leftover dye – any suggestions?DIY Natural Easter Egg Dye

Here’s the Scoop on DIY natural Easter Egg Dye:

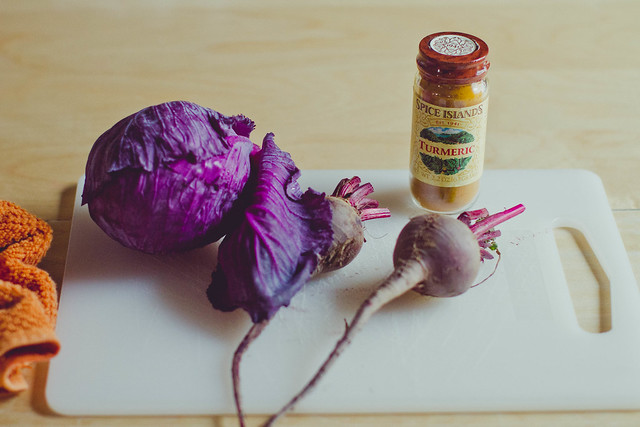
Ingredients: red cabbage, red beets, turmeric, eggs (preferably white)

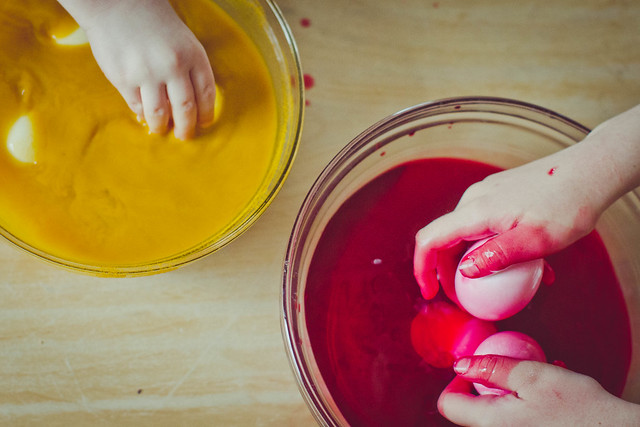
1. Follow the recipes below to make the dye: Blue: Simmer 4 cups of water with 1 small red cabbage (roughly chopped) for 15 minutes. Red: Simmer 4 cups of water with 2 medium red beets (grated) for 15 minutes. Yellow: Bring 4 cups of water to a boil and stir in 1/4 cup turmeric. Boil for 1 more minute.

2. After each of the mixtures have cooled down, mix in 1/4 cup white vinegar and strain each of the colors into bowls for dyeing.

3. Leave the eggs overnight – refrigerated- in the color bath.

4. Eat (or, if you’re like me, don’t eat) HAPPY WEDNESDAY EVERYONE!!

DIY natural Easter Egg Dye Ingredients DIY natural Easter Egg DyePost by Darcy  of bedtimemonsters.blogspot.com

Who’s That Noddie? Volume 2

March 27, 2013

NODDIES_header

It’s time for another installment of Who’s That Noddie? We figured you’ve probably been losing sleep waiting for the next one, right? Good news! The suspense is over… This time we’re talking to super cool hardware/tech guru Jonathan Hodges. Jonathan constantly saves the day around here for us, and we are so lucky to have him on our team.

01Jonathan

Why do you love your job?

I’ve always had an interest in computers, electronics and things that “lit up.” I used to take apart all of my battery-operated toys when I was younger, and while I didn’t always succeed in making them function properly again, I did get a little better at figuring out what I could have done differently. Before I knew it, I started really enjoying the idea of troubleshooting various tech issues, and that love grew exponentially over time. My job’s great because it’s a continuous learning experience.

What is one of your biggest passions?

Aside from computing, I’d say science in general. The subject is completely fascinating, and I try to stay current on scientific discoveries as much as possible.

What was your favorite toy as a kid?

I used to have the Thundercats’ “Sword of Omens” when I was a younger lad, and I can’t begin to tell you how often it’d come in handy on the playground, haha.

What’s your favorite Nod memory?

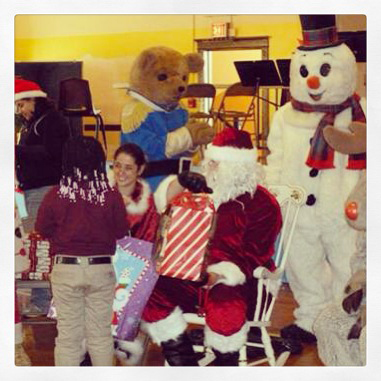
I’ve got two memories that stand out: My trip to N.Y. for our Fall Preview Event and dressing up as the “Mouse Soldier” for the Santa Visit in 2011. The NY trip was great. I got a chance to get out of my element for a few days and get to know my coworkers a bit better in the process. The Santa visit was memorable for various reasons, especially seeing the look on their faces when it came time to open their presents.

02jonathan2

What’s something unique or surprising about you?

I was born in Brazil, and lived five minutes away from this beach:

03santosbeach2

What do you love most about working for The Land of Nod?

For the simple fact that it isn’t like any other place I have ever worked at before. The camaraderie between everyone is truly great, and the products are nostalgic – so much so, that every day, I'm reminded of what it's like to be a kid again. I'm fortunate to work in such a great atmosphere.  

How is your role impactful to the company?

I think each person here plays an integral part to the overall success of the company. My piece of the puzzle is making sure that the hardware side of things is working properly, and that they have the necessary tools in that aspect to get the job done.  

What's your favorite Nod product?

I’m digging the Illuminated Globe right now. 

Thanks Jonathan for the awesome chat! We hope you enjoyed this installment of Who’s That Noddie? Be sure to stop back by Honest to Nod to check out plenty more about our team at The Land of Nod in the upcoming weeks.


Simple Bunny Easter Garland

March 26, 2013

Post by Haeley of Design Improvised

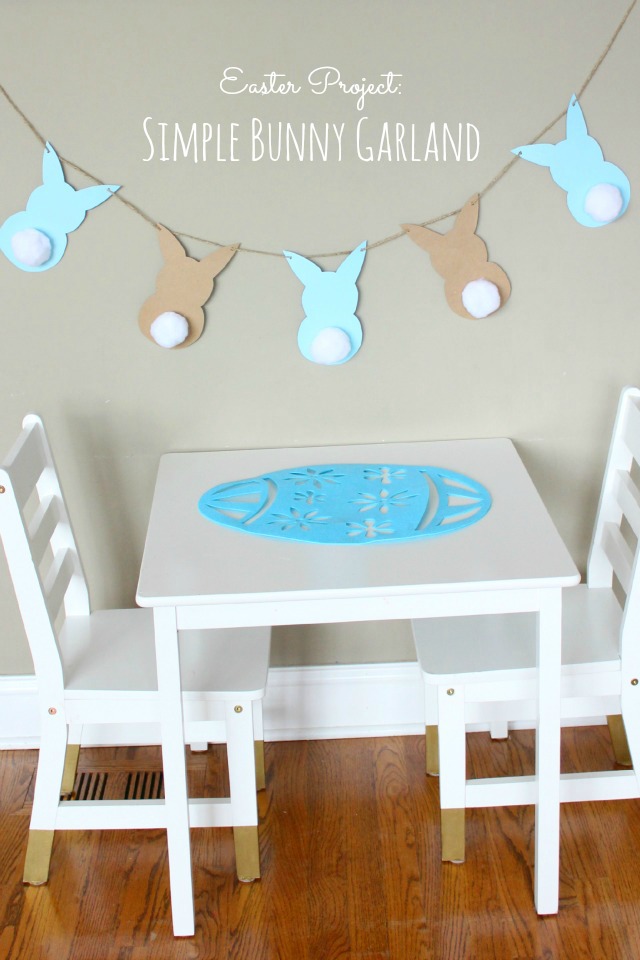
I’m on a garland kick. Last week it was shamrocks for St. Patrick’s Day, this week it’s a simple bunny Easter garland!
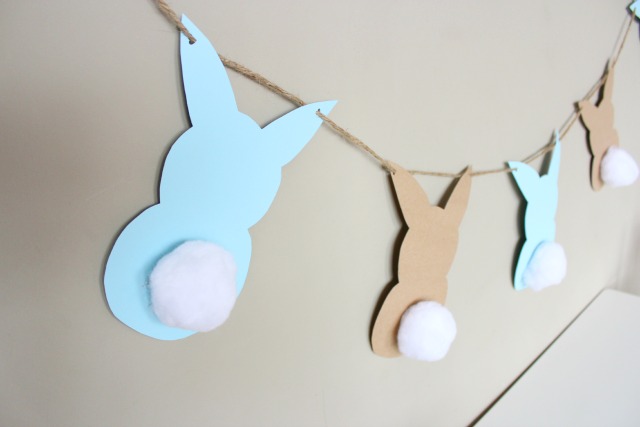
Simple Bunny Easter GarlandI love making garlands because they are an easy and inexpensive way to decorate for the holidays. This one just requires card stock, twine, and some pom-poms. Even cotton balls would work great.

Simple Bunny Easter Garland 2

Supplies for Simple Bunny Easter Garland

  • Bunny template (you can freehand draw a template instead)
  • Cardstock in your choice of colors
  • White pom-poms (or cotton balls)
  • Jute twine or string
  • Scissors
  • Hole punch
  • Hot glue

How to Make the Simple Bunny Easter Garland

1. Trace template onto cardstock and cut out as many bunnies as you want for the garland.
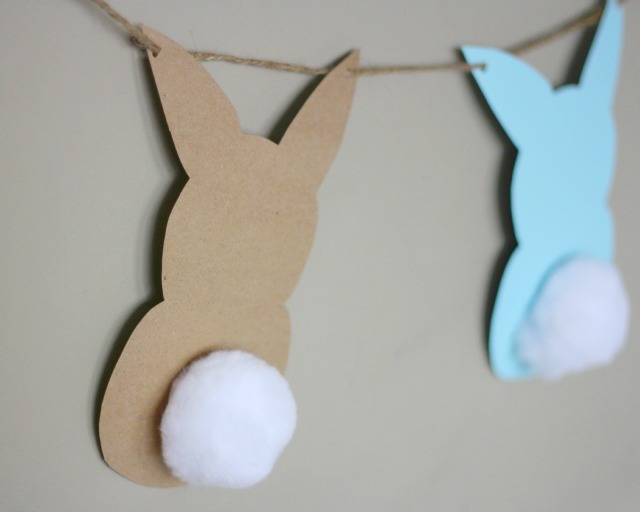
2. Hot glue on the pom-pom tail.
3. Punch a hole in each ear and string the bunnies onto the twine!
Simple Bunny Easter Garland 3

How cute are those big fluffy tails? Are you making any special crafts for Easter?

easy-easter-bunny-garland

Post by Haeley of Design Improvised

DIY Gold Dot Lampshade

March 25, 2013

Post by Jeran of Oleander and Palm

Lamp1

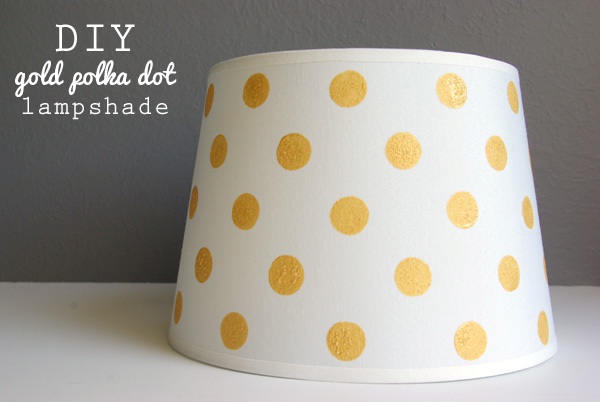
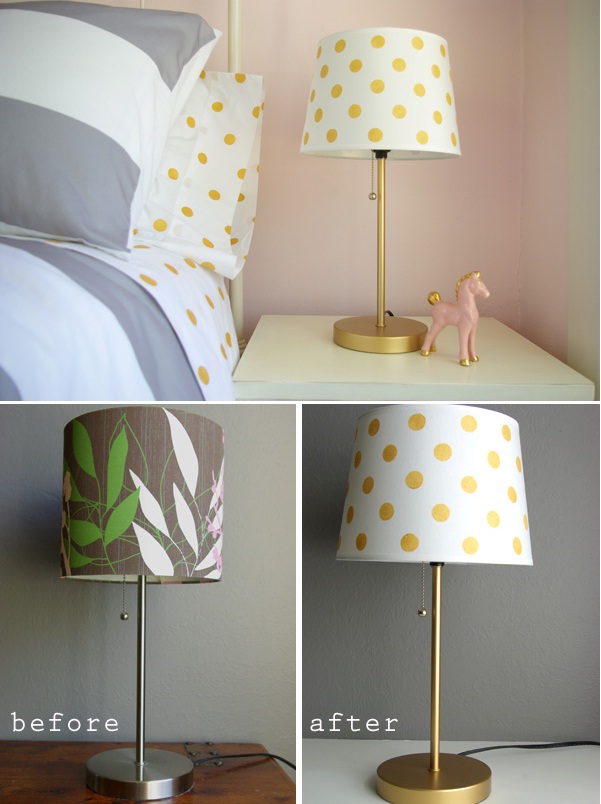
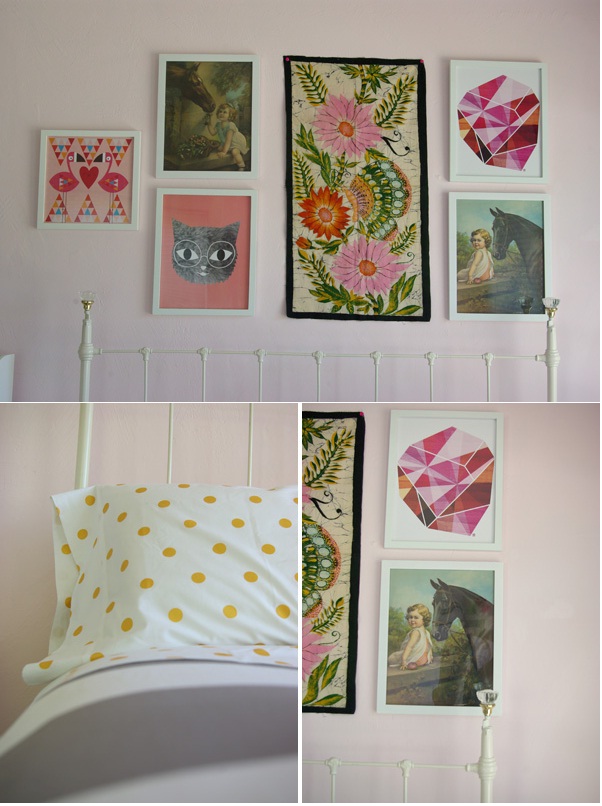
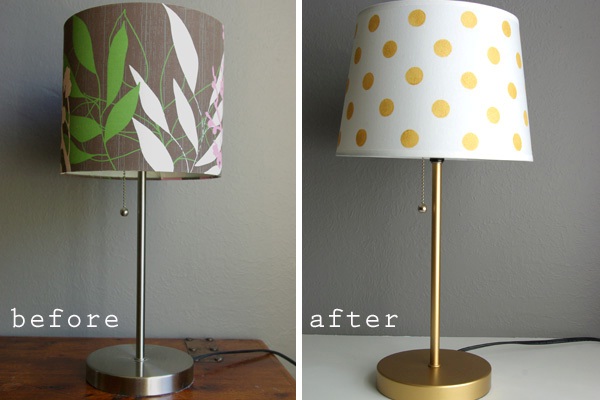
How about a custom lamp and lampshade that doesn’t cost a fortune?  You can do it!  I gave an old lamp new life with a coat of metallic gold paint and a new custom shade.  I recently gave my daughters’ Toddler and Tween shared room a mini makeover.  To give the bed a new fresh modern feel I got Land of Nod’s fabulous gold dot sheets.  I was so impressed and inspired by them, that I decided to mirror the playful pattern on the lampshade.

I think the results are pretty fantastic, and the sheets and lampshade definitely go together.  Their room is far from matchy-matchy, but I think it’s fun to repeat themes once in awhile.

Lamp2

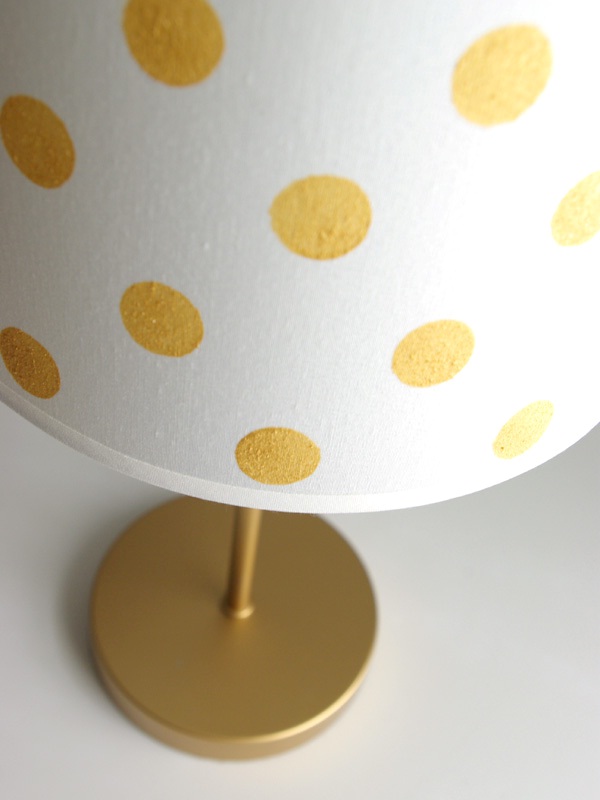
I bought a very inexpensive white lampshade (I paid only $12 for mine) and then with a few simple supplies and a little measuring, I painted on metallic gold polka dots.

Lamp3

Here’s how I did it:

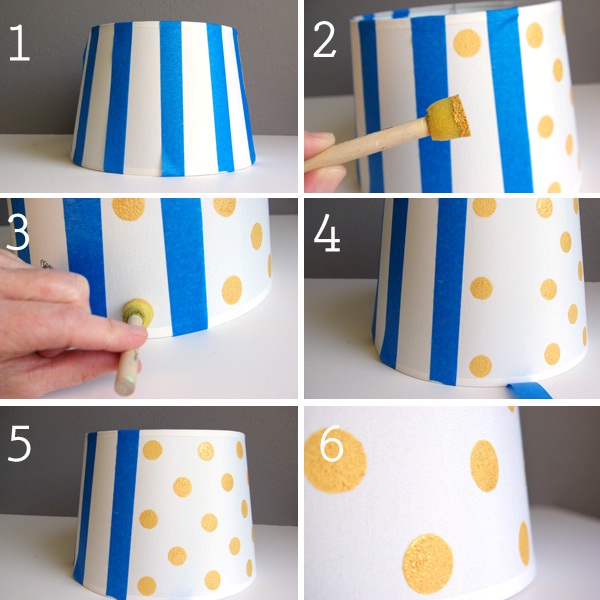
1. Start by taping off equal lines around your lampshade with blue painters tape.  I did a bit of measuring and figured out that leaving about 1 1/2″ gap between the tape at the top of the shade worked well.

2.  Using a 3/4″ foam stencil brush, load the brush with craft paint (I used Martha Stewart’s metallic gold).  Dab the brush on a paper towel to make sure you don’t have too much paint.  This will cause blobs and make your dots not very round.

3.  Between each line of tape, make three evenly spaced dots.  One right in the middle and then one on both the top and bottom.  To make even, round circles, press the brush onto the lampshade and then spin the brush in a semicircle.  This will give the edge of the circle a nice crisp, even line.

4.  Remove the tape.

5.  Then place two dots right between the two rows you just made both vertically and horizontally.

6.  Continue steps 3, 4, and 5 until you have made it all the way around the lampshade.  Let the shade dry over night.

Lamp4

With a simple white lampshade, the possibilities are endless.  I had so much fun doing this, I’m ready to polka dot something else very soon.

Post by Jeran of Oleander and Palm

Land of Nod & CupcakeMAG Pinterest Party

March 23, 2013

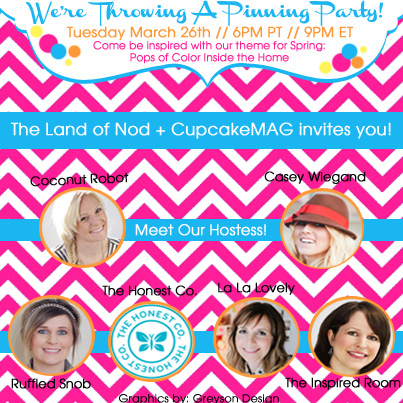
The Land of Nod + cupcakeMAG are hosting a Pinterest Party inspired by pops of color — a bright rug, a colorful lamp, a bright focal point walls plus examples how to do it. And you’re invited!! Join some of our favorite bloggers, most stylish social influences and one of our favorite companies — The Honest Company — to pin with us! Follow the Pops of Color board now so you can pin along!

Pinning-Ad-III-copy

FEATURING SPECIAL GUEST PINNERS 

 Coconut Robot // Casey Wiegand // Ruffled Snob

La La Lovely // The Inspired Room  // The Honest Company 

Head over to the party on Tuesday March 26th at 6PST//9EST to re-pin from our board! Leave us some comments and join the fun. Make sure you come back to check out the complete board too!

START FOLLOWING THE BOARD NOW! 


Get to Know This Paper Ship

March 22, 2013

NODia_ThisPaperShip

Artists: Joel & Ashley of This Paper Ship

Hometown for Joel: Columbia, MD

Hometown for Ashley: East coast (military kid), mostly WV and NC

Current town of residence: Saxapahaw, NC

8129175441_d7b86840b7_o

Would you rather travel by plane, train, car or ship?

A ship is the most romantic option as well as the most fitting for us! However, seasickness might be an issue, so our official answer is train. We've taken train trips together in DC, Germany, Italy, and Scotland and hope to take many more!

I spend most of my work day…

Drawing, taking pictures of drawings in progress, coloring drawings in Photoshop, networking about drawings, shipping printed drawings to people all around the world, and planning future drawings!

You can find me eating __for breakfast.

Concoctions that, under most standard definitions, would be considered lunch! Our favorites: kale, sausage, feta, and eggs over easy; savory french toast with seared grape tomatoes and sharp cheddar drizzled with honey; and puff pancakes of any kind, especially involving the aforementioned savory ingredients. And of course, there's the obligatory British cuppa (milky tea with 1 scoop of sugar) for Ashley and a cup of French press coffee for Joel.

On the weekends, you can find me…

Relaxing in our loft apartment in a converted 1800's cotton mill and exploring the surrounding town of Saxapahaw, NC; strolling around/catching a movie/tracking down a food truck in Chapel Hill, Durham, or Raleigh; or exploring other exciting areas of the beautiful state of North Carolina. We also occasionally find ourselves visiting family in eastern NC, WV, CA, and Scotland when we can.

Got any pets? Tell us about them.

Four cats and a chicken! Aki, Tsuki, and Pepper are our 3 "home" cats and Ginger is our silly reclusive "studio" cat who lives in our cozy illustration office. They're all rescue kitties and are all a little crazy in their own ways. Henny, our chicken, lives at the local community garden down the hill and next to a creek, and she's a feisty bird—in her 3 years she's fought off raccoons, hawks, and even a fox!

What was the coolest, most exciting thing that you ever bought?

Joel's favorite piece is an old hand-carved statue of Tintin holding Snowy, about 1.5 feet tall, that he found in an old shop in the fishing village of Peterhead in northern Scotland. He wouldn't fit in Joel's luggage, so he stayed out the whole journey home on a plane, several subways, a bus, a train, and finally a taxi ride. Several years later his sister-in-law went back to buy the other two Tintin statues, but the shop was closed!

Our favorite piece we bought together is our circa-1870's Golding Pearl #8 letterpress. She's a beautiful cast-iron beast—the guy who refurbished it for us even got a replica foot petal recast by a local blacksmith to replace her missing one!—and her name is "Golda." She currently lives in our print shop right off our main living area, right at home where huge cotton-spinning machinery once was.

If you were a crayon, what color would you be?

Ashley would be fire engine red and Joel would be lime green.

What’s a song that you never get sick of?

"When You Wish Upon a Star" from Pinocchio!

If you could posses a superpower, what would it be?

Flight! (Of course, we could always choose superhuman drawing ability—but that's a not a power, that's a skill…)

You’re stranded on a desert island, with only a volleyball to keep you company. Luckily, you brought a book, a person and an object.  Who and what are they?

The Bible, because it's the only book we'll ever need; each other, because we actually enjoy spending that much time with each other, we make a really good team, and we could make it the tropical getaway we always wanted; and a really good knife, because otherwise building a hut out of bamboo and palm fronds would be a lot more time-consuming.

Tell us about your Nod Institute of Art print, how you made it or your inspiration behind it.

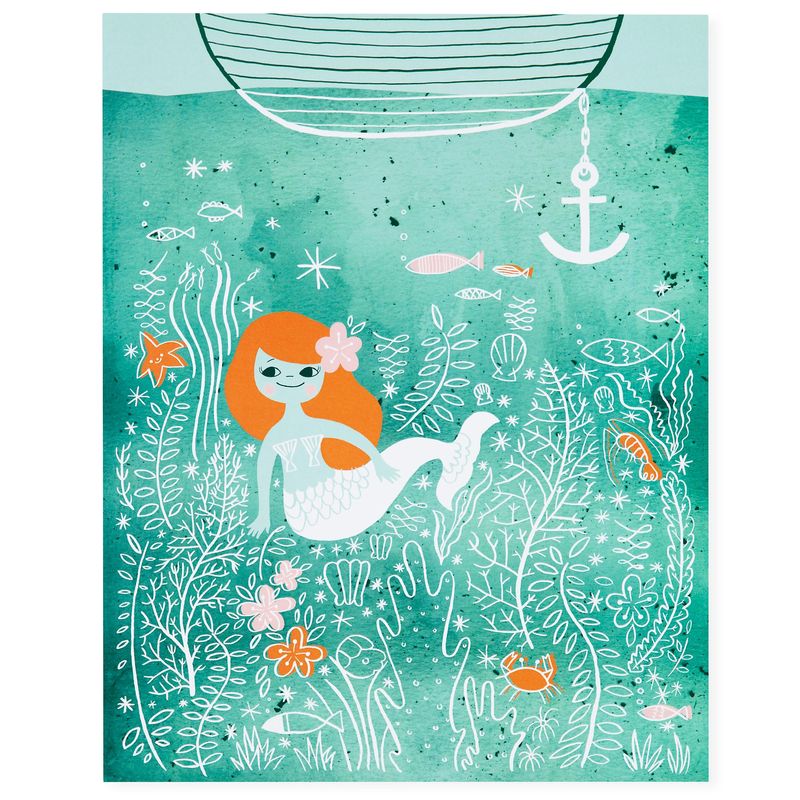
We love nautical imagery for obvious reasons, and are constantly looking to add more to our offerings for printed illustrations. At the same time, the great thing about being an independent artist is that you can draw whatever you want, whenever you want. One day it struck Ashley's fancy to draw a mermaid surrounded by ocean-floor things while we were listening to the Peter Pan soundtrack (at one point Wendy's "wonderful thought" is a mermaid lagoon underneath a silver moon) and, lo and behold, "Mermaid Lagoon" came into being!

Mermaid-lagoon


Cooking with Avery: Making Granola

March 21, 2013

Granola1

Granola2
Granola3

Granola4

Granola5

Granola6

Granola7

Granola8

Granola9

Granola10

Granola11

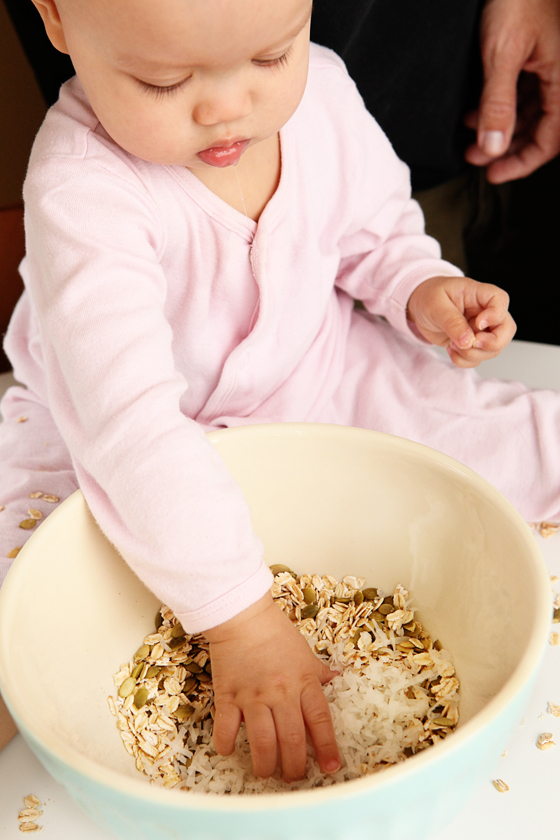
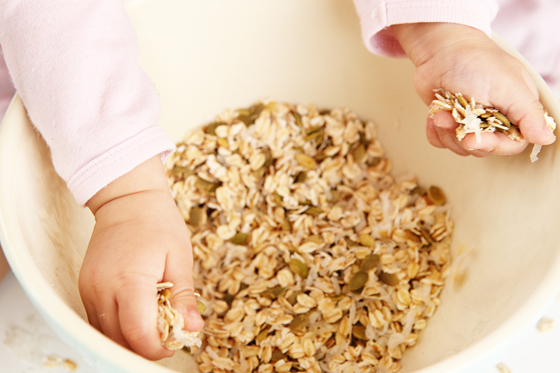
Making granola is simple and quick, and is something children of all ages can help make. Children as young as toddlers can pour and mix dry ingredients and experience different textures and shapes (with adult supervision, of course).  Cooking with children is also a perfect time to build language, teach new vocabulary, expose your children to math and science concepts (e.g., measuring, cause-and-effect relationships) with concrete, hands-on experiences. Did we mention it's fun and yummy, too?

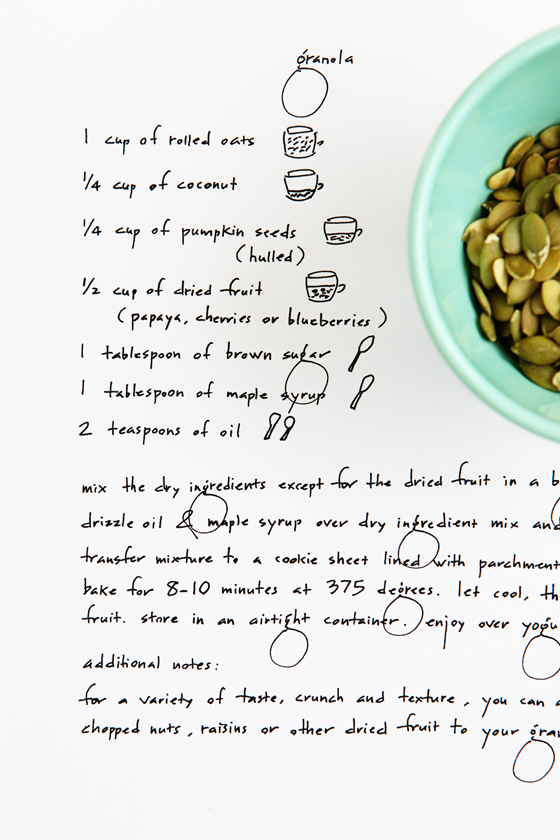
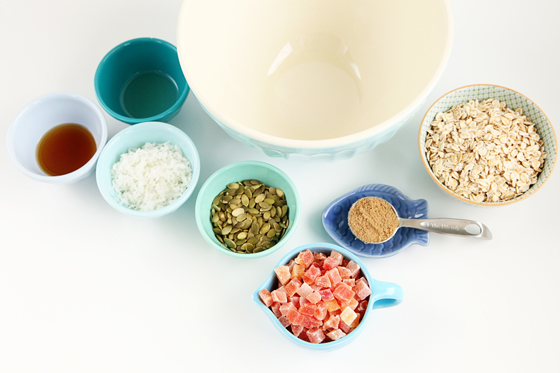
1 cup rolled oats
1/4 cup shredded coconut
1/4 cup pumpkin seeds or sunflower seeds (hulled)
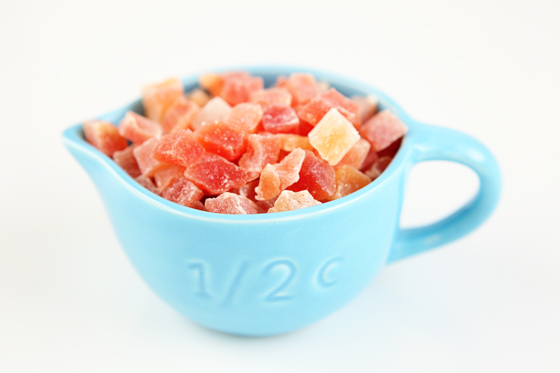
1/2 cup  dried fruit (papaya, cherries, blueberries, or any other dried fruit)
1 tablespoon brown sugar
1 tablespoon maple syrup
2 teaspoons oil

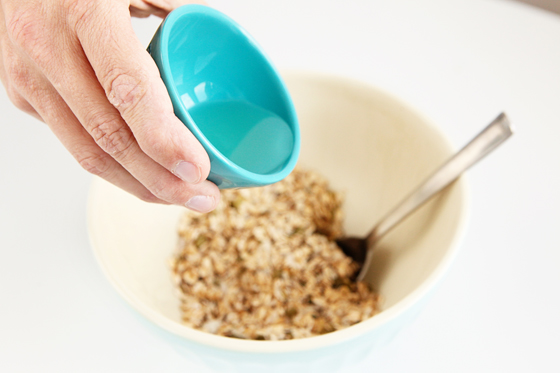
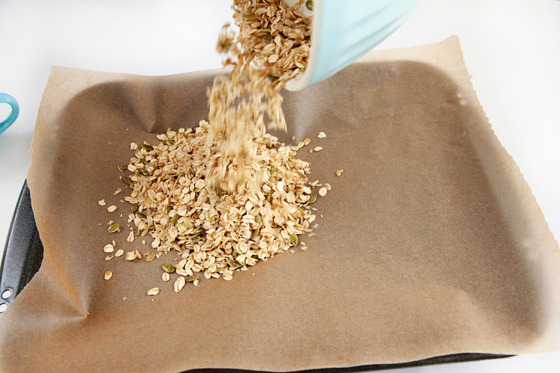
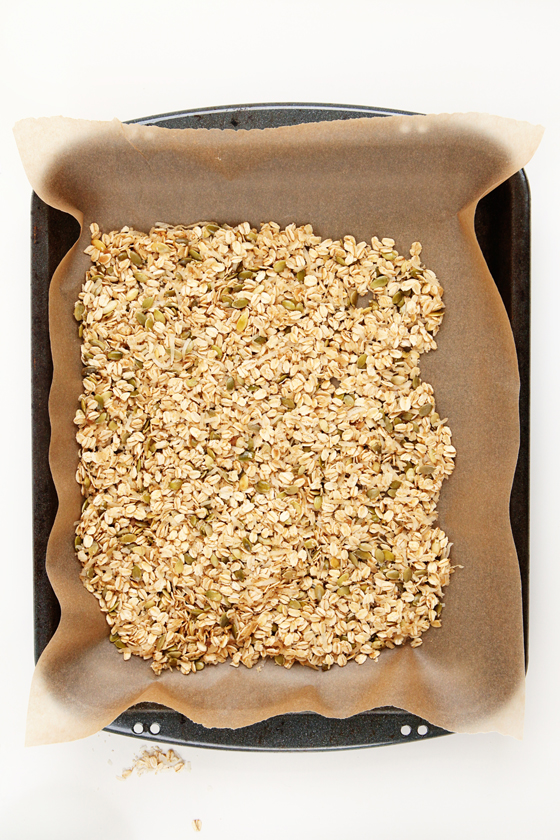
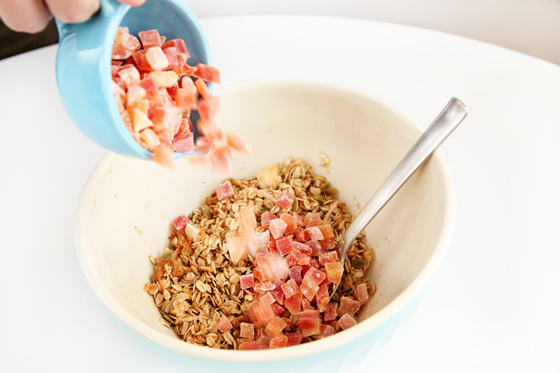
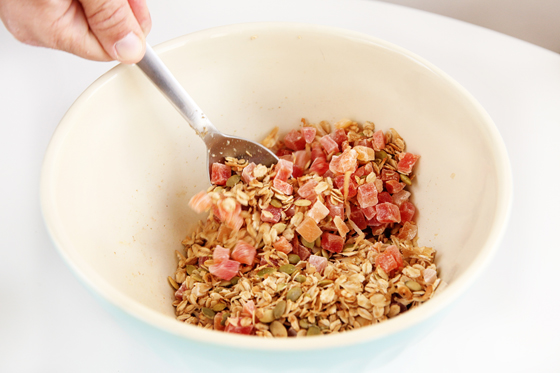
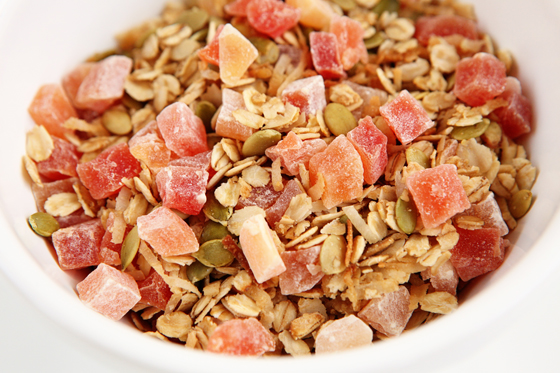
Mix the dry ingredients except for the dried fruit in a big bowl.  Drizzle oil and maple syrup over the dry ingredient mix and stir to coat.  Transfer mixture to a cookie sheet lined with parchment paper and spread evenly.  Bake at 375 degrees for 8-10 minutes.  Let cool, then stir in dried fruit.  Store in an airtight container. Enjoy over yogurt or ice cream!

For a variety of taste, crunch and texture, you can add wheat germ, chopped nuts, raisins or other dried fruit to your granola.

Note: This recipe was inspired and adapted from a recipe at Buen Dia Family School in San Francisco.

Post by Michelle Sterling of Avery and Augustine

You can see her work and read about her two young children's first forays in cooking, art and everything in between at Avery and Augustine.

Toddler and Tween Shared Room

March 20, 2013

Makeover1

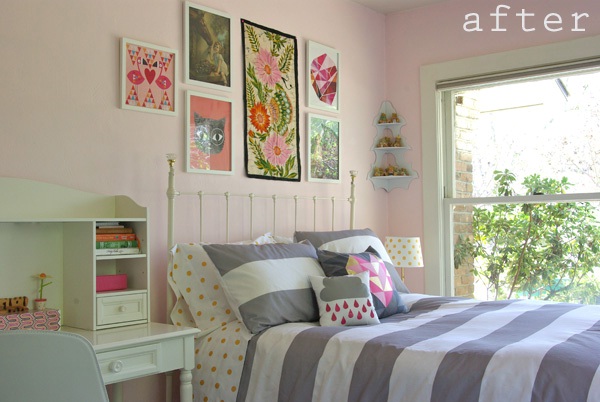
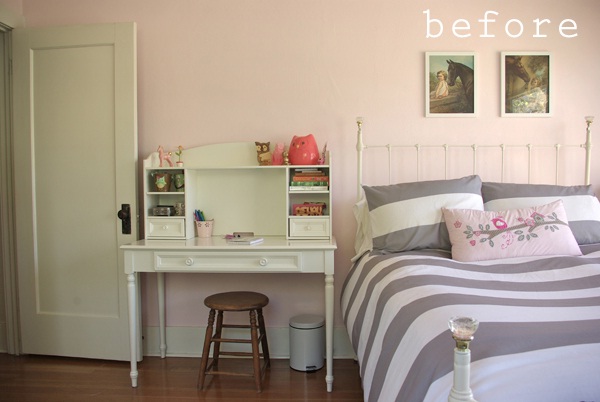
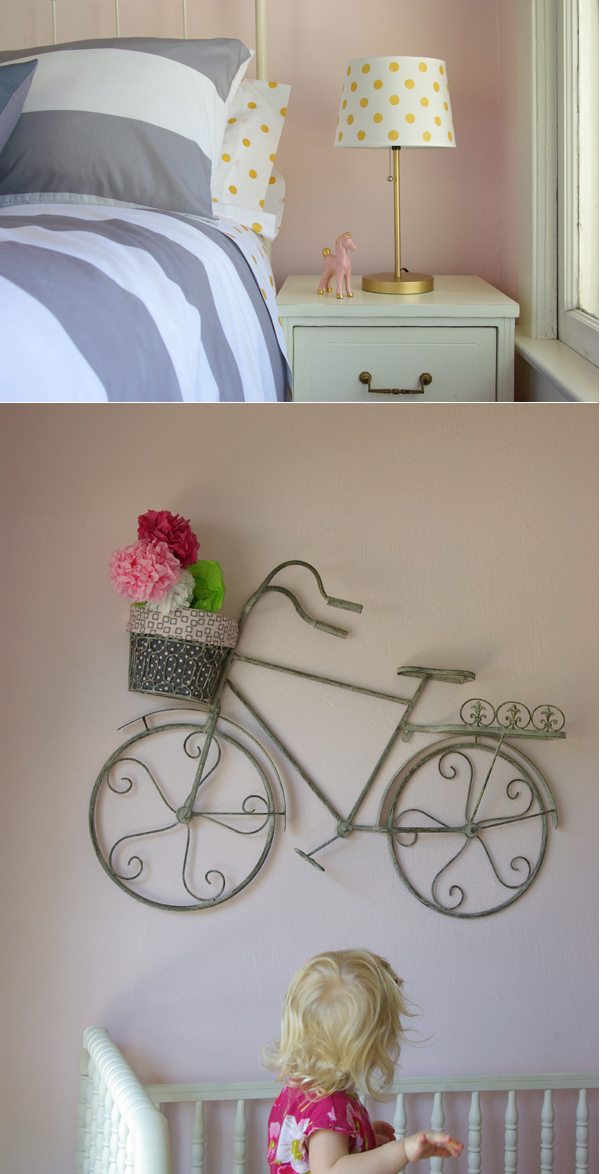
Most of the time, I love my little 1920’s California bungalow. But, recently I’ve realized our tiny home is not totally ideal. The problem is that my daughters, Denali and Olivia, have to share a room.  This doesn’t seem like it would be a big issue, but there is a big age gap between them. Denali is 11 (going on 16) and Olivia is just a year old. I want them to have a space that is appealing and organized for both of them. I don’t want the room to look like a nursery, or on the other extreme, like a mature teenage space either. The room does have furniture, but really no defined style. The bedding, rug and walls are grey and light pink and I do love that color combo.  But, beyond color, there isn’t much else. I’m struggling to give my toddler and tween the space and design that they each need. I want their room to be a place that they both love. We need function and funk folks.

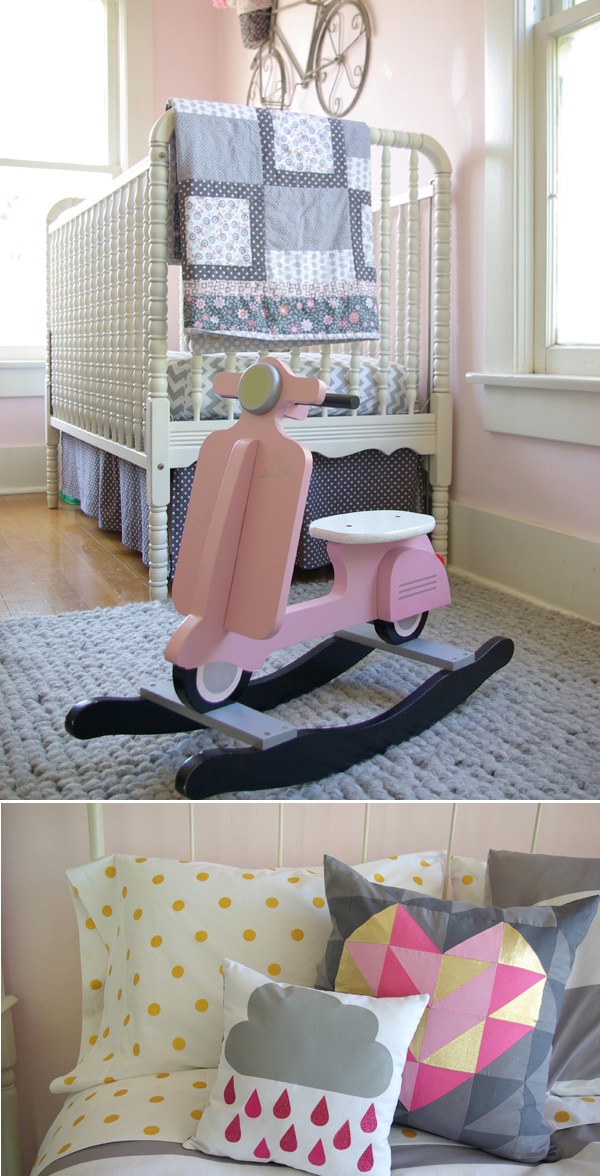
They both have vintage beds. Denali’s is a full sized metal frame from Lonnie’s grandparent’s farm and Olivia’s crib was my Jenny Lind crib from when I was a baby. Obviously our house is also old, but I think the space needs a splash of modern and playful.

Makeover2

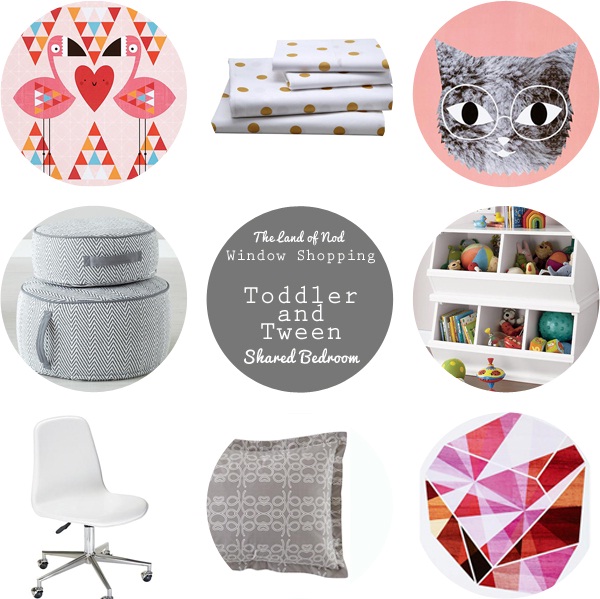
To start, I put together an inspiration board of fun pieces that I think could help bridge this age gap in design. I think The Land of Nod has beautiful pieces that will provide my toddler and tween with the unique and quirky style that I’m looking for.

Makeover3

I ended up getting all the pieces on my inspiration board except the storage bench and the new duvet cover.  I decided there really wasn’t room in the space for another piece of furniture. And after getting the adorable gold dot sheets, I was totally fine with keeping her old duvet cover.  The sheets added spunk and a fresh vibe to the bed.

Taking what we already had and mixing in the new fun things from The Land of Nod, made all the difference.  Even though it has a lot of familiar old pieces, it feels like a whole new space.

Makeover4

I love the juxtaposition created by pairing my Grandma’s vintage horse prints with the modern art pieces like The Amethyst.  I played around with the arrangement of art pieces for quite a while before I decided on this arrangement.  I think the colors and shapes play so nicely together.

Makeover5

The metal bicycle that hangs over the crib was a baby shower gift from a dear friend.  I made a little basket liner and some tissue paper flowers for it.  The bicycle goes well with the quilt my mother in law made for my baby.

Makeover6

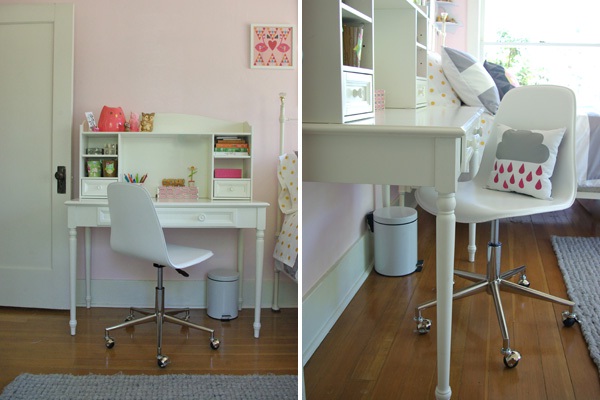
I made a couple new pillows for the bed.  The geometric heart is my personal favorite and I’ll be sharing this sewing DIY very soon.  I made a giant version of this pattern for Valentine’s day, it’s fun to have a miniature version that I can keep in my home all year long.

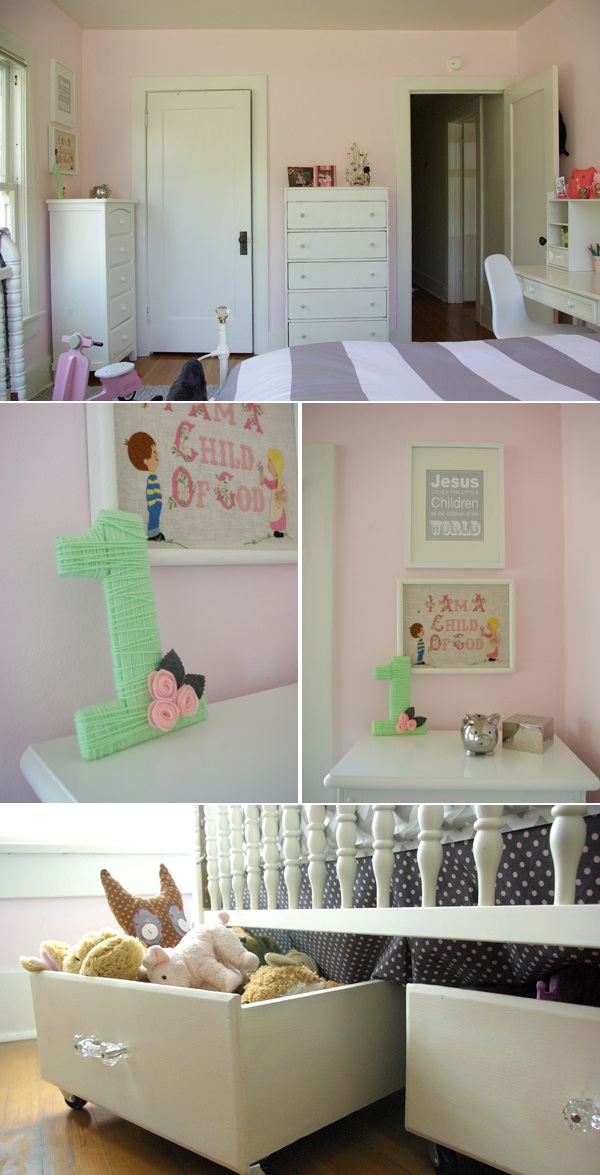
The new leather chair is fabulous.  I really hope when my daughter moves away for college, that this stays with me.  It really added to the modern look I was hoping to infuse into the space.   An extra bonus is that it’s very comfortable.

Makeover7

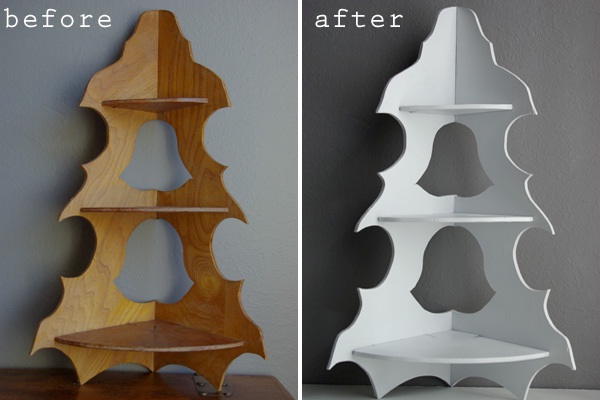
My oldest daughter has a collection of porcelain birthday bears that her Grandma has given her.  I had them on a couple little shelves above her dresser, but I found them a new home in the corner of the room on a shelf from my Grandma’s house that I refinished.  Now I’m looking at the space over the dresser thinking that a mirror would look pretty fantastic (this one in particular).

Makeover8

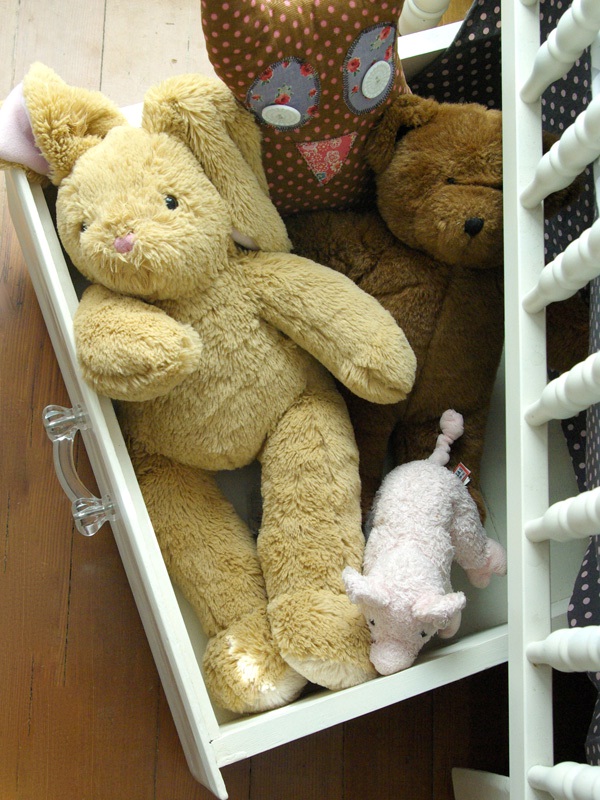
To help with storage issues I made these under crib storage bins.  I found these two wooden drawers are a garage sale, I believe I paid $4 for each of them.  I gave them a coat of fresh white paint, added casters to the bottom, and put a fun glass pull on the front.  Now they slide easily under the crib and help keep the clutter at bay.

Makeover9

I gave their old lamp a facelift with a coat of metallic gold paint and a new shade to match the sheets.  This lamp shade is an easy DIY.  I took an inexpensive white lamp shade, did a little measuring and taping and then I painted on polka dots with metallic gold paint.  I’ll be back to share this DIY with you soon.

Makeover10

Here’s the little shelf from my Grandma’s house that I painted white for a crisp clean look.

Makeover11

Post by: Jeran Oleander and Palm

Instagram Magnets for Super Cheap

March 19, 2013

Instagram Magnets 1

I love Instagram, yes I do! I love Instragram, how ’bout you?

I do. I adore Instagram. As a Droid smartphone user, Instagram only became available to me last summer though before that I had Insta-envy. For those who don't know, Instagram is a photo sharing app for smartphones where users can add various filters to their images giving them a unique and funky look. While the photo filter part is very fun, my favorite part of Instagram is getting a peek into the everyday life of the people I follow and my very favorites to follow are my far flung family members.
Most of my images are of my babes as we are a little wanting of sweeping mountain vistas here. 🙂 However, the only way I was getting enjoyment was through looking at them on my phone. I wanted them in physical form and I knew we would like the magnet version.

Instagram Magnets 8


Sweet J really likes the Instagram magnets. I actually had to remove them from the refrigerator for a time because he was pilfering them and hiding them all over the house.
His favorite hiding place is right underneath the fridge.

Instagram Magnets 9.1


Here's what you need:
-printed Instagram images
-ruler
-cutting blade
-adhesive backed magnets – I used these which I bought for $6.90 (4-4" x12" magnet strips).

Instagram Magnets 3


First, print the Instagram images. I used Photoshop to make a image grid. To coordinate with the magnets I purchased, I resized the images so each was 2" x2". On a 8.5" x11" piece of paper, 12 images fit with plenty of margin space. Don't have Photoshop? There are a number of other programs you can use that allow you to dictate the image sizes. Work with what you have.


Instagram Magnets 2


Once the images are printed, trim away the excess paper. Again, with the magnets I purchased in mind, I cut it down to a 2-image column with 2 1-2 image stacks. Cutting it this way made the next step very simple. If you want to add a clear coat to protect the printed image, add it before cutting the images apart. It's less work that way. 🙂


Instagram Magnets 4


Peel away the cover on the magnet's adhesive and carefully stick down the images. Cutting it as I did made this step a cinch.

Instagram Magnets 5


Using a sharp cutting blade, cut out each individual magnet. Trim away any excess magnet which again, because of the measurements used, there shouldn't be much.

Instagram Magnets 6


That's it! Real Insta pics for all to enjoy.

Instagram Magnets 7


If you have trouble choosing which images to print like me, just print a bunch. It's so easy and cheap, why not have a lot, right? I was able to get 12 magnets from each sheet and after doing the math, the price for each magnet is around $0.14 – pretty darn good.

Instagram Magnets 12


Are you on Instagram? Come say hello! Find me @thisheartofmineblog.
Take care.

Cinnamon-Sugar Doughnut Muffins

March 15, 2013

Good morning. Have I got something sweet for you.

My mom shared this recipe with me a couple of months ago. After telling her about some delicious cinnamon-sugar muffins we’d eaten and loved, she told me I would love these as well. But I brought the recipe home, filed it away and sort of forgot about it until last week when I got a craving for cinnamon and sugar and remembered this recipe.

W.O.W.

I think my eyes kind of bugged out of my head when I took the first bite. Delicious doughnutty taste coated in buttery cinnamon sugar. They even have a little bit of a crispy edge, too. Seriously, these will rock your world. If you are anything like me and have high standards for doughnuts (fresh, delicious, perfect), I am bestowing the power to make your own without the requirement of a deep-fry. The recipe is listed below. It’s very easy to put together.

Once the batter is put together, scoop it into a greased and floured muffin tin. Make sure to only fill 2/3rds full. For a mini-muffin cup, approximately 1/2 Tbsp scoop was just right. I didn’t measure each scoop, just eyeballed it. You can use a regular or mini-muffin pan.

Update: Greasing and flouring the tins is a must, unless you like doughnut muffin bits. Update: A small cookie scoop fills the mini muffin cups perfectly so use it to speed up the process. If the scoop gets clogged with batter, rinse it with cold water and continue.

Bake in a 350° oven for 20-30 minutes, until golden brown.

Update: The muffins may be done at 15 minutes.

These mini-doughnut muffins were perfectly done at 19 minutes. When I use the oven, I methodically set the timer at or below the lowest cook time recommended to avoid over-cooking things. This method is a result of ‘experience’. As you can see, not all of my scoops were exactly even.

Let the doughnut muffins cool for 5-10 minutes in the pan. Then loosen the muffins in the pan with a knife.

Remove them.

Next, the doughnut muffins are dipped in butter and rolled in cinnamon and sugar.

Not pictured are my buttery, cinnamony, sugary fingers. Mmmmm! It’s the little things I tell you.

Update: You can make the batter the night before and refrigerate it overnight. Prep the pans and bake like the recipe says, making sure to watch the cook time to avoid over-baking.

Cinnamon-Sugar Doughnut Muffins
recipe from my mother

Makes 12 regular sized muffins and approximately 60 mini-muffins.

Ingredients

Muffins:

  • • 1/3 cup shortening
  • • 1 cup sugar
  • • 1 egg
  • • 1 1/2 cup flour
  • • 1 1/2 tsp baking powder
  • • 1/2 tsp salt
  • • 1/4 tsp nutmeg
  • • 1/2 cup milk
  • • 1/4 tsp vanilla

Coating:

  • • 10-12 Tbsp butter (1 stick plus 2-4 Tablespoons more)
  • • 1 1/4 cup sugar
  • • 2 1/2 tsp cinnamon

Instructions

  1. In the bowl of a stand mixer, cream shortening and sugar together. Add in the egg and combine well.
  2. In a separate bowl, sift the flour, baking powder, salt and nutmeg together. Measure out the milk and vanilla in another separate bowl/measuring cup.
  3. Alternately add the flour mix and milk mix to the egg mix in the mixer.
  4. Scoop batter into greased and floured muffin pans and only fill 2/3 full.Use a small cookie scoop with the mini-muffin tin to expedite the process.
  5. Bake at 350° for 15-20 minutes, until lightly browned. Timing depends on the size of muffin tin you use.
  6. Allow to cool in the pans for 3-4 minutes. Remove from the pans.
  7. Dip the muffins in butter and roll in a mixture of cinnamon and sugar.

Thank you notes can be sent to my mom.

Take care.

Need more tasty recipes and delicious bites? Check out our Let’s Eat Pinterest Board.

Post by Amy C of  this heArt of mine

Happy Pi Day 2013!

March 14, 2013

Hello, it’s me again.  Yes, that person who works at The Land of Nod that is completely obsessed with Pi.  I can’t really top last year’s essay on my love of Pi (look in the archives, it’s worth it), I’m just going to share a few thoughts on Pi.

Have you checked out The Land of Nod website lately?  After my constant begging and pleading, Pi has finally arrived.  It is on our Show Your Work Bedding – which I love for many reasons other than just Pi:

Show-your-work-sheet-set

So I’ll admit that I’m not the most up to date on all of the technology of today, but I do occasionally get on Facebook.  What did I find?  Yes, there is a Facebook Pi Event page.  And I was, get ready for it, the 14th person to say I would attend the event.  Now, with a community of millions of people, you would think more than 14 would attend a Pi Day event, right?

I’m very excited to be spending Pi Day itself with our Naperville Outlet team this year.  Not only will I be wearing my Pi Day T Shirt and my Pi Day “πrate” temporary tattoo, but our Outlet Manager Lauren will be making Pi shaped cookies!  Yes, she is almost as fanatical as I am about math, and she has π shaped cookie cutters!  And she’s an excellent baker, so I’m pretty excited on multiple levels.

My final thought on this Pi Day comes to Hollywood.  What do Sandra Bullock and Alfred Hitchcock have in common?  While you ponder that, I bet you thought that I would say something about Star Wars or Star Trek since I’m a Pi fan?  True, Spock did save the world by challenging an evil computer to compute to the last digit of Pi.  But anyway, Pi is the secret code in 2 movies – Alfred Hitchcock’s Torn Curtain and Sandra Bullock’s hidden gem The Net.

Now, how many of you remember the secret code to get Word to print π?

By Mike Janecek

In addition to being our Director of Stores, Mike Janecek is a collector of mid-century modern furniture, which he sells at various antique shops throughout Chicago. He also has an extensive collection of vintage paint-by-numbers. And, impressively, challenged himself to wear fun patterned socks for 365 days in 2011, a feat which he very stylishly accomplished!

Get to Know Elizabeth Evans

March 12, 2013

NODia_Wildhorse

Name: Elizabeth Evans of Wildhorse Press

Hometown: Tonganoxie, Kansas

Current Town of Residence: Boulder, Colorado

On the weekends, you can find me hiking or exploring Colorado. I just moved to Boulder so I am enjoying all the great places to hike as well as taking day trips to places like Rocky Mountain National Park and Pike's Peak.

ElizabethEvans

My favorite poem is “The Journey” by Mary Oliver. This poems was recommended to me by two different people I encountered at a time in my life that it was exactly what I needed to hear. Every time I read it I am reminded to remain true to myself.

Do you believe in ghosts?  Yes, and I experienced my first ghost while visiting the Stanley Hotel last month in Estes Park. It is the hotel that Steven King stayed in which inspired him to write “The Shining.” I am fascinated with the paranormal.

What is your zodiac sign? Gemini is my sun sign, but my rising sign is Virgo. That's why I tend to have a perfectionism present in my artwork.

What’s a song that you never get sick of? One Hundred Years From Now by The Byrds. Gram Parsons is my favorite musician.

Your dream vacation would be… walking El Camino de Santiago. I've started training for this nearly 500 mile pilgrimage by taking full day walks with a local walking group. I would like to walk the Camino in the fall and spend a month in Ireland before or after.

If you could have lunch with any person from the past, present or future, who would it be? Gloria Steinem, to me she is a symbol of a strong and wise woman. She has also been present in a few of my dreams as a guide, so it would be amazing to meet her in person.

If you could trade places and work in another career for a day, what career and why? Adventure travel guide. I love to travel to beautiful settings but also enjoy the camaraderie of meeting people during a journey.

Tell us about your Nod Institute of Art print, how you made it or your inspiration behind it.

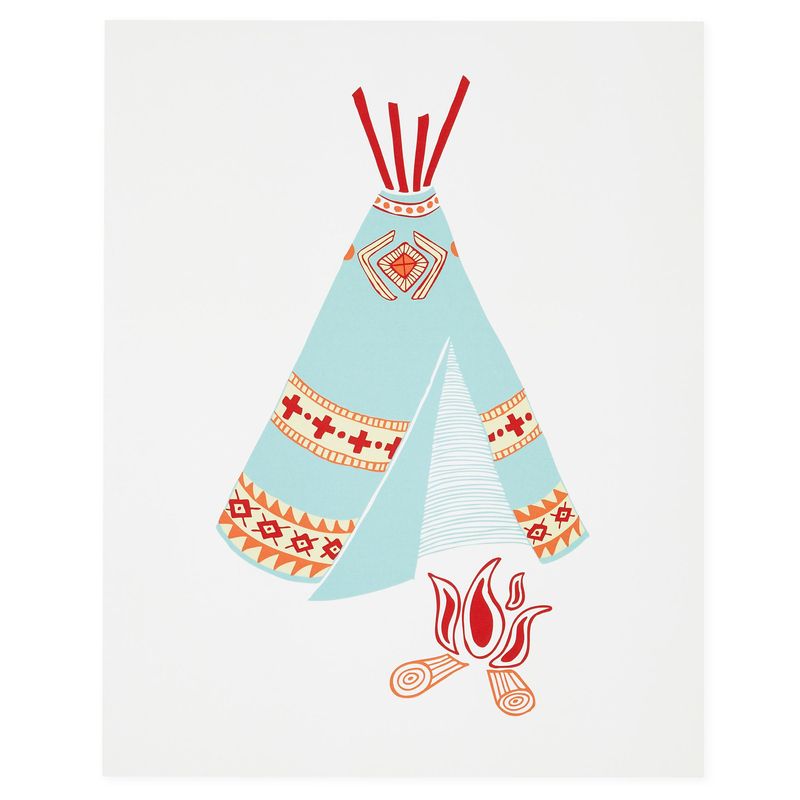
My print was inspired by Teepee Junction in Lawrence, Kansas. Lawrence is the closest city to the small town of Tonganoxie where I grew up. On my many trips to Lawrence I would always drive by Teepee Junction, which includes a 50 foot tall concrete teepee built in 1928. I have driven by the teepees thousands of times and the images are engrained in my subconscious and memories of growing up, so naturally it would end up in my art.

Teepee that inspired her print

Teepee-campfire

Lucky You St. Patrick’s Day Banner

March 11, 2013

Post by Aimée Lowry & Bettijo B. Hirschi from PagingSupermom.com

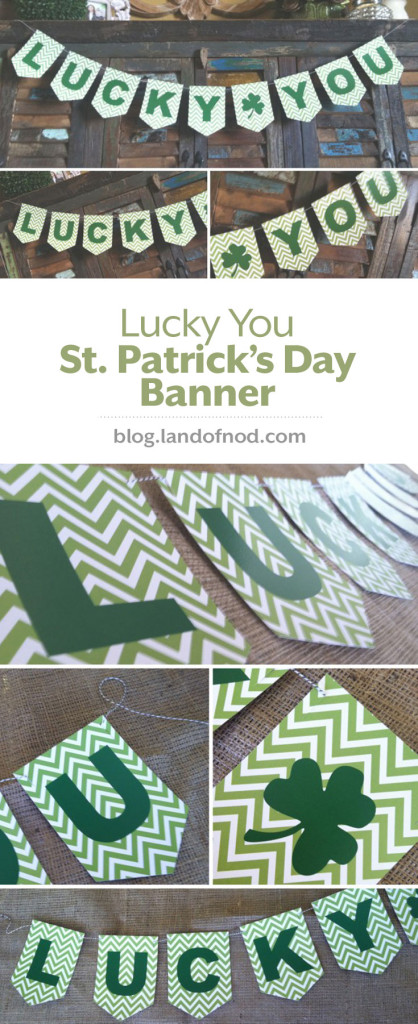
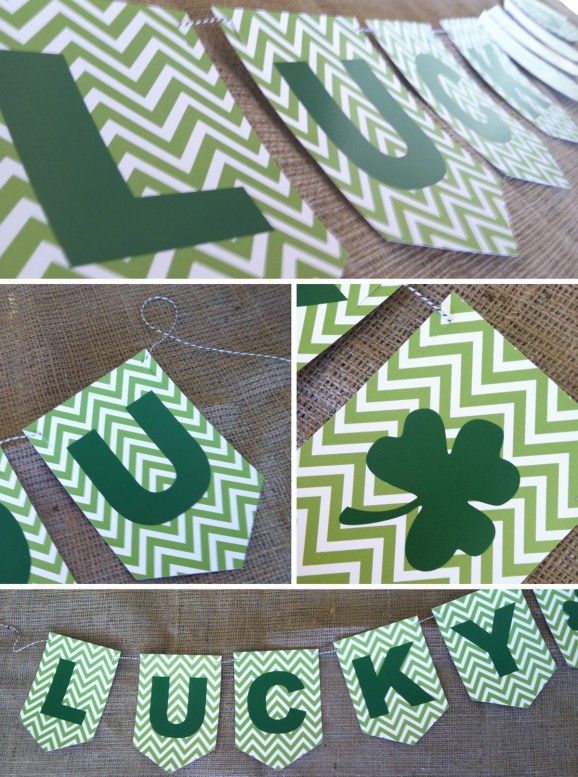
LUCKY YOU St. Patrick's Day Banner
St. Patrick’s Day is among my favorite holidays. Lots of lucky green, crazy leprechaun trickery, pretty rainbows and precious gold—what’s not to love? So, let’s bring on the St. Patrick’s Day ideas, right? When a new holiday approaches, decorating is always first on the agenda. You, too? How about a LUCKY YOU St. Patrick’s Day banner printable to start us all off? Complete with everybody’s favorite chevron pattern!

LUCKY YOU St. Patrick's Day Banner 2

Download our LUCKY YOU St. Patrick’s Day banner here. It’s very simple to assemble: download and print on cardstock. Cut out pennants. Using a kraft knife, make slits in the upper corners of each pennant. Thread with twine, string or ribbon to create a banner.

Where will you hang your St. Patrick’s Day banner?

Reposted with permission by Aimée Lowry & Bettijo B. Hirschi from PagingSupermom.com

Mermaid Lagoon Room

March 8, 2013

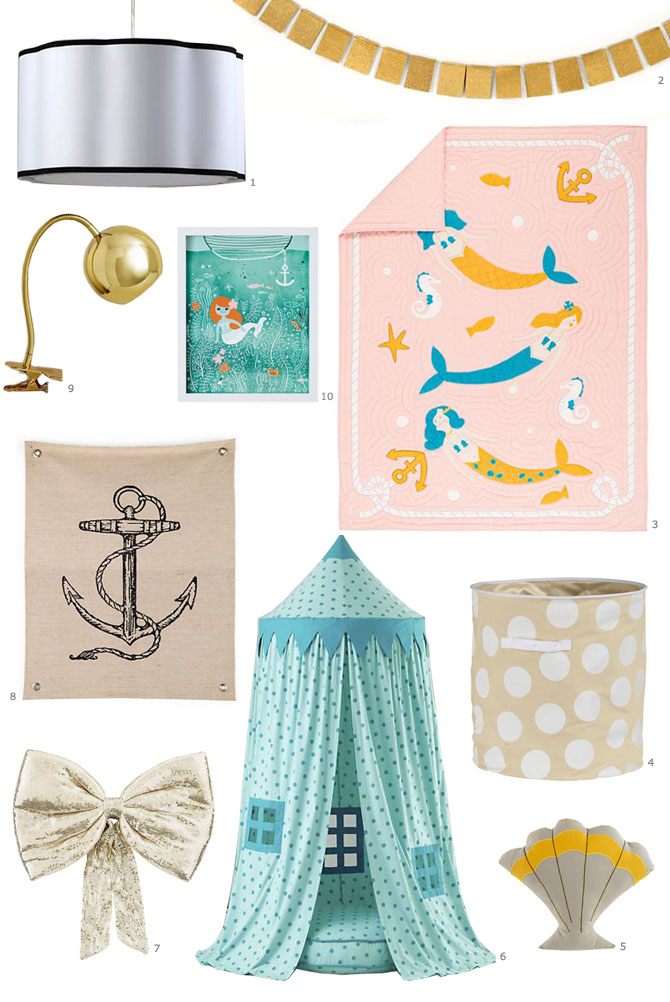
What little girl wouldn’t want a pretty mermaid room? The inspiration behind this look is soft, peachy pinks and sea-inspired aquas, along with feminine details such as bows and scallops:

Mermaid inspritation

1 / 2 / 3 / 4 / 5 / 6 / 7 / 8

Mermaid

1 This black and white lamp add crispness, the scallops hint at the mermaid theme
2 Accent the bed with this embroidered gold garland
3 Charming mermaid bedding by Danielle Kroll
4 Fun polka dot storage adds subtle contrast and interest
5 Whimsical throw pillows for the bed
6 Cascading play home in a lovely sea-inspired aqua
7 An oversized shimmery bow would be a great focal point over the bed
8 A nod to rustic with this anchor banner
9 This gold clip lamp compliments the mermaid tails
10 Watercolor mermaid print adds beauty and charm

Deep Sea Bedroom

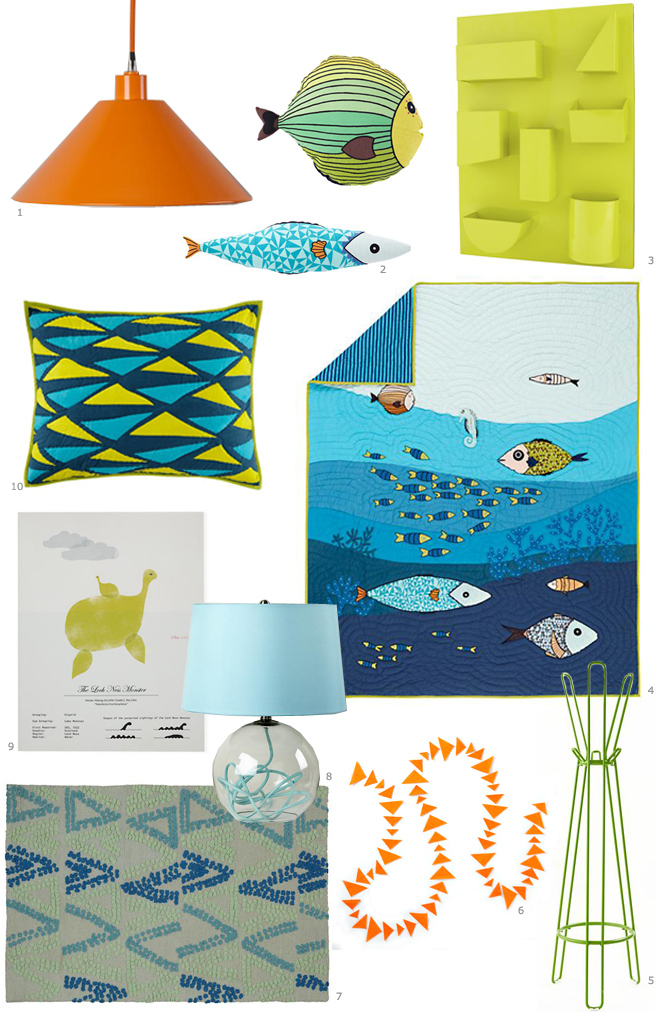
For a modern, sea-inspired bedroom, try mixing graphic abstract elements with a tropical, translucent feel. Go beyond blue and mix in pops of orange and acid greens.

Fish_inspiration

Clockwise 1 / 2 / 3 / 4 / 5 / 6


Fish_room

1 I love the triangle shape of this orange pendant.
2 How fun are these graphic fish pillows?
3 The pockets on this wall organizer are all different shapes!
4 Beautiful oceanic quilt designed by Amy Soczka
5 This coat rack reminds me of fishing rods!
6 Add a punch of graphic color with this felt garland
7 This tufted wool rug compliments the other shapes in the room
8 The round glass base on this lamp is reminiscent of an aquarium!
9 I like the translucent quality in this Loch Ness Monster wall art
10 The abstract triangles on this pillow remind me of little fish!

By Anna Passadori

 Anna develops and designs exclusive product for The Land of Nod. She hails from the west coast and has traveled the world to source product. She loves anything Marc Jacobs, Sofia Coppola or stripes! (So, if anyone can get a photo of Sofia Coppola wearing a striped outfit by Marc Jacobs, please send it along.

Get to Know Ashley Goldberg

March 7, 2013

NODia_AshleyG

Ashley Goldberg

Hometown: St. Louis, MO

Current city: Portland, OR

Would you rather travel by plane, train, car or ship?

Car! I love a good road trip! The last long road trip I went on was down the coast of Oregon to California stopping along the way at antique and thrift stores. That really is my ideal kind of vacation!

You can find me eating __for breakfast.

Hmmmm…my actual breakfast varies day to day. My FAVORITE breakfast is french toast, but coffee, coffee, and coffee is always the most important part of my breakfast. The ritual of brewing it or going to get it turns my brain on. Few things make me happier than waking up to the smell of coffee.

On the weekends, you can find me__. 

On the  weekends you can find me going to estate sales, thrift stores, the park with my dog, out to brunch, or on a mini day trip to all the amazing places Oregon has to offer. Although, I never quite feel like I am doing enough on the weekends. i tend to be pretty relaxed with them (if they are not a working weekend, but there are plenty of those too!)

How many times do you usually hit the snooze button after your alarm goes off?

I have never ever used an alarm…even in high school. I HATE the sound of them so much, that before I would go to bed I would tell myself the time I needed to wake up (say 7 am) and I would usually wake up about 10 minutes before. Sometimes, it would just end in a restless night sleep, waking up every hour or so. NOW, I think I am out of practice enough that I would set an alarm to wake up at a specific time.

If you were a crayon, what color would you be?

Green! Green isn't even my most favorite color, but it is the color I most identify with. I "feel" green : )

Ashley g

Your dream vacation would be…

I have never left the US and I soooo want to visit Paris. After that I have a list a mile long, but that is the first place I would like to see.

Do you have a current celebrity crush?

My celebrity crush has stayed the same for over 10 years…Pharrell Williams. He's adorable and talented. Sold and sold.

Got any pets? Tell us about them.

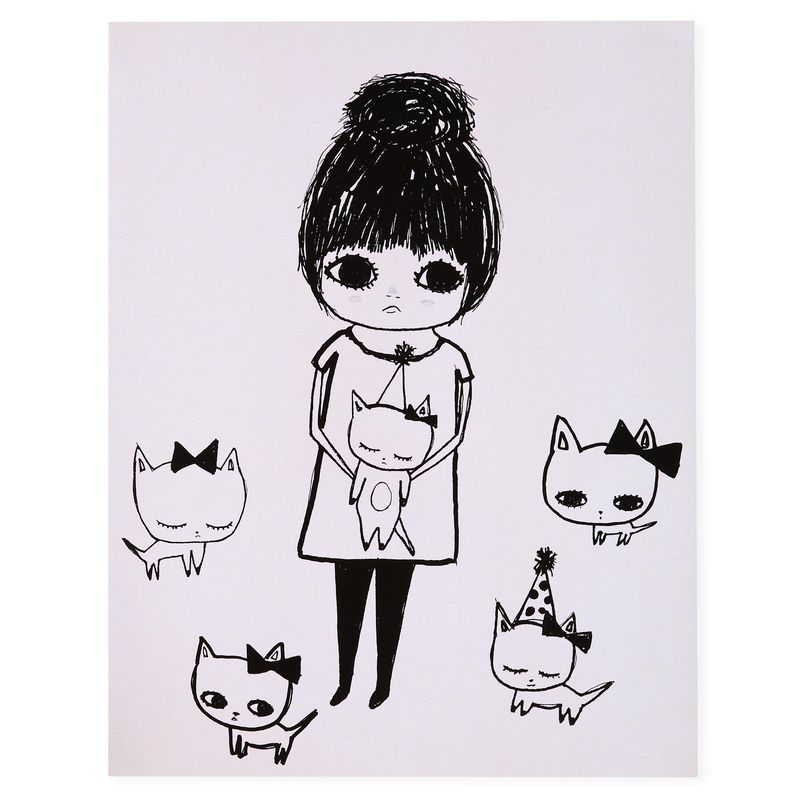
I have two! I have a cat, Isadora. She is 12 years old, but still looks like a little kitten. My best friend dubbed her a "forever kitten" when I adopted her. Isadora has been my muse for a very long time. In fact, "The Party" the print I have at The Land of Nod is really a portrait of Isadora and me (And a few of her kitty friends!)

Lyle is my dog. I adopted him about 6 months ago and he is an adorable little faux fox. The shelter had no clue what combination of breeds he is, except that there is some corgi in there. He has a big head and little legs and most people think he is a puppy (I guess having baby looking animals is a trend with me). He is funny and adorable and is starting to make appearances in my work as well.

Tell us about your Nod Institute of Art print, how you made it or your inspiration behind it.

My print, The Party, is a pencil and ink drawing, based on a series of sketches I have in my sketch book of my cat Isadora and me. The first sketch I ever made was when my hair was in a messy bun and I felt extra frumpy and I look over at the arm of my chair where Isadora is sitting looking very prim and proper. The piece is titled "how does she always looks so pulled together?". I have a lot of little isadora and ashley doodles in the corner of my sketchbooks. And then I decided to actually create a few prints out of them. And I am delighted to see that people get a chuckle out of them and identify with them!

The-party

Making Felt Balls with Kids

March 6, 2013

Fb1

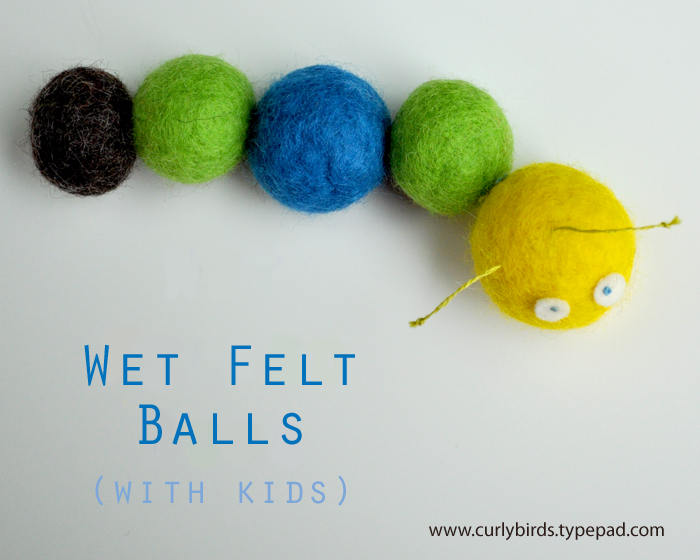
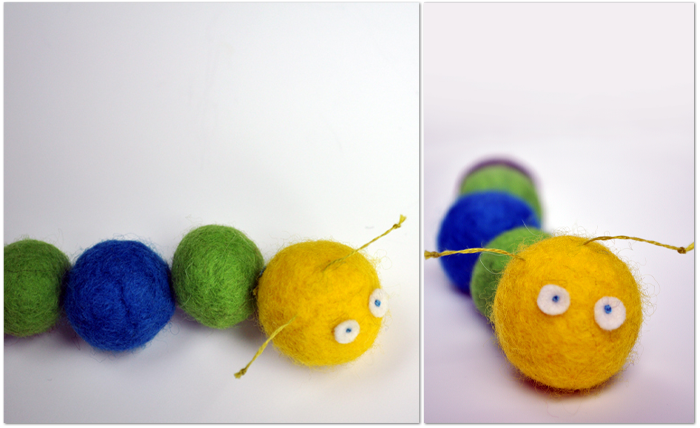
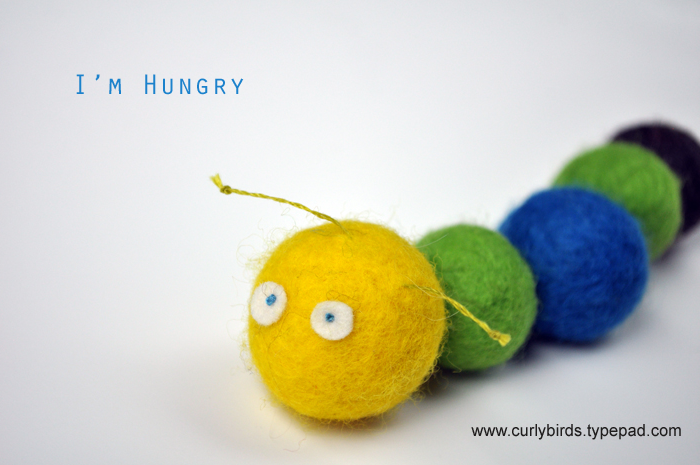
We have covered buying the roving and how to wet felt with kids – now let's make something!

Fb2
Fb3

HOW TO MAKE FELT BALLS

Fb4
Fb5

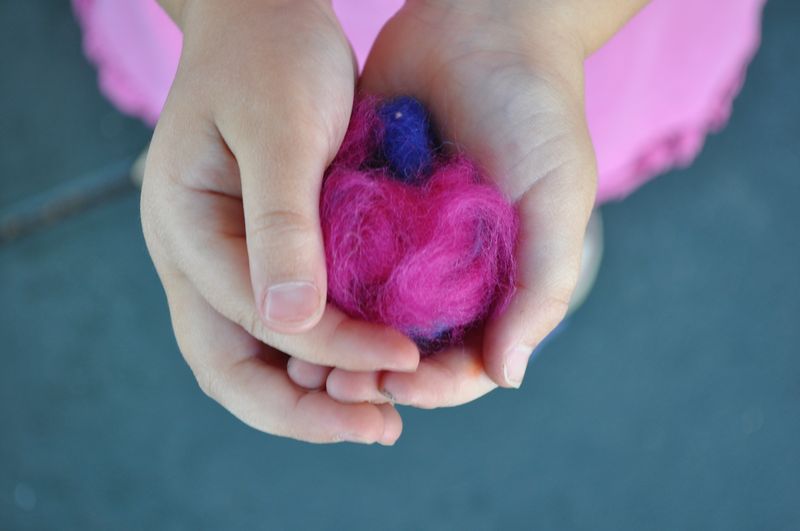
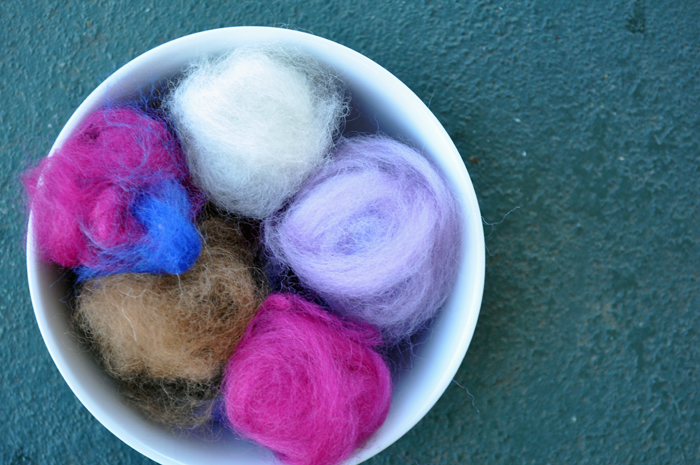
To Prepare the Roving: Pull off layers of roving and roll it into a ball, pull off another layer of roving and wrap it in the opposite direction around your tiny object. Continue wrapping layers at 90 degrees angle to each other until you have an object about 2 inches in diameter.

If you are planning on making a lot of felt balls, prepare all of the roving first so the balls turn out about the same size.

To Prepare the Water: When I am felting on my own, I make my water as hot as possible. When I am felting with my girls, I make the water as warm as I think they are comfortable with. Mix in a generous squirt of dish liquid with the water. I have used many different varieties of dish soap from Dove to Meyers and Green Works and they all seem to work fine.

Fb6
Fb7

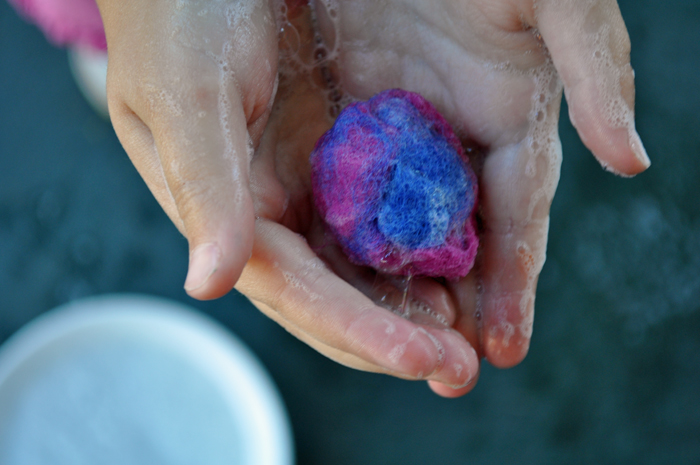
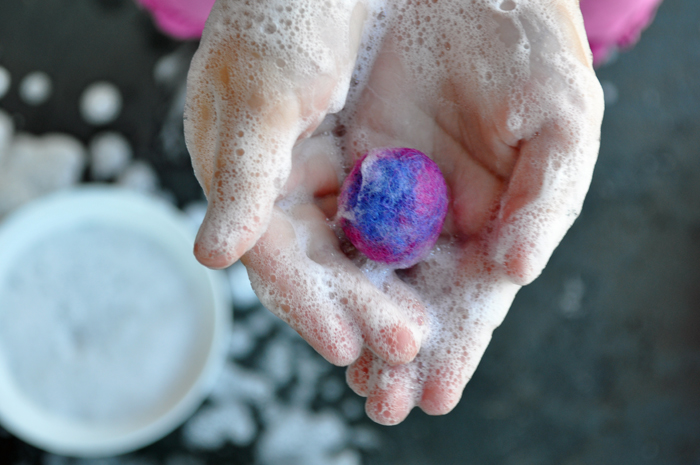
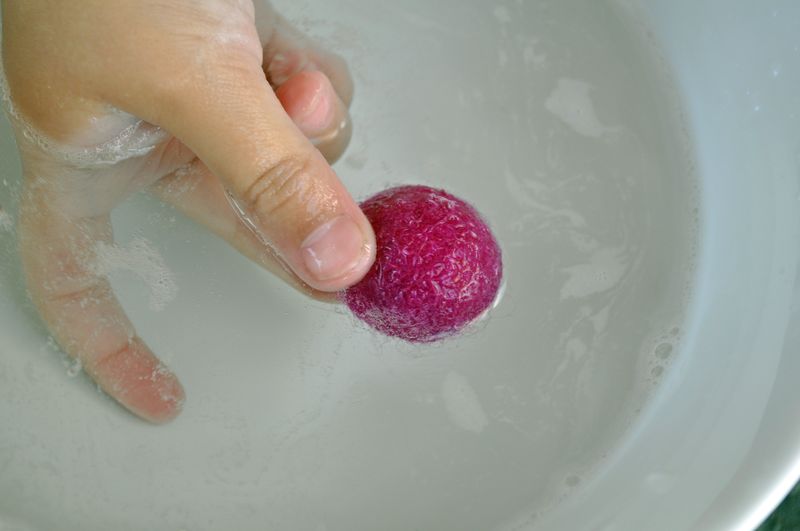
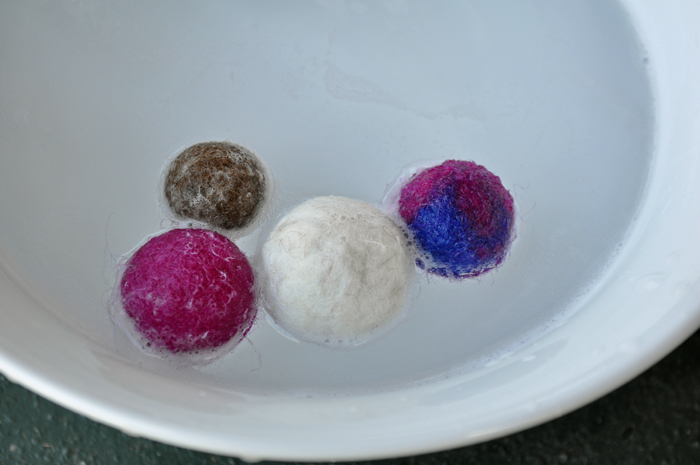
Getting Wet: Dunk the wrapped roving into the soapy water. Gently squeeze and shape into a ball. As the roving begins to shape into a ball, roll it between the palms of your hands. The roving will slowly begin to congeal and become smaller and harder. Repeat dunking, squeezing, rolling, and adding roving until you achieve your desired sized ball.

Fb8
Fb9

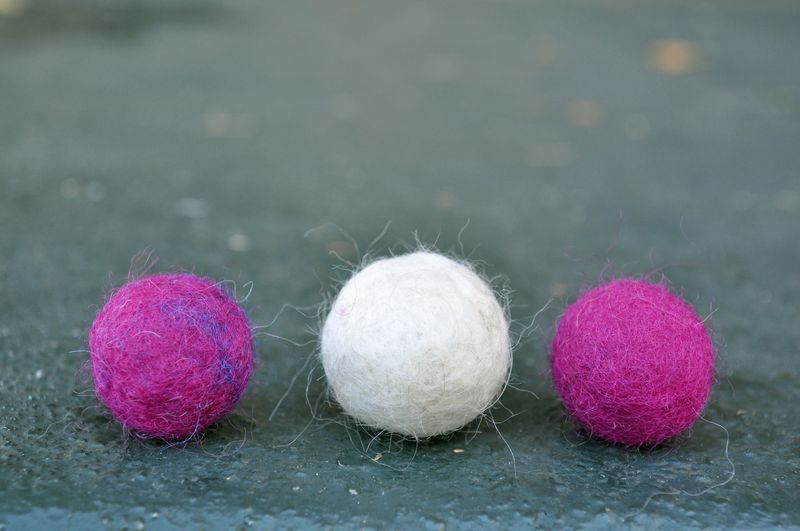
Rinse: Rinse in cold, clean water and let dry. Drying usually takes a day or two.

Fb10

Read more here for other creative felt crafts with the kids. 

Post by Helen Bird : www.curlybirds.typepad.com