Close

Blog

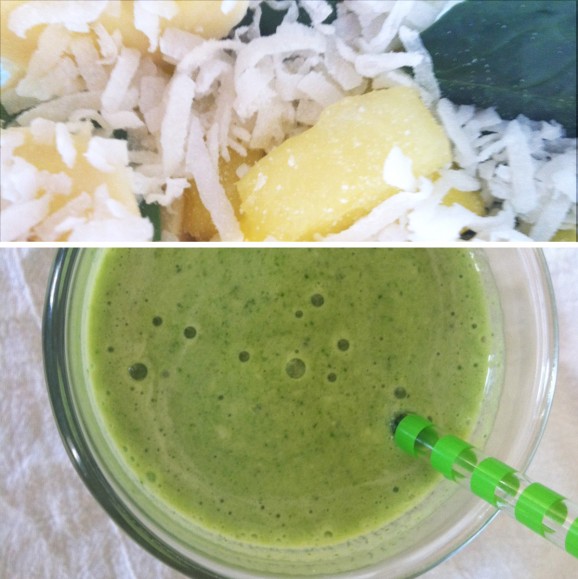
Kid Friendly Green Spinach Smoothie

March 5, 2013

Post by Aimée Lowry & Bettijo B. Hirschi from PagingSupermom.com
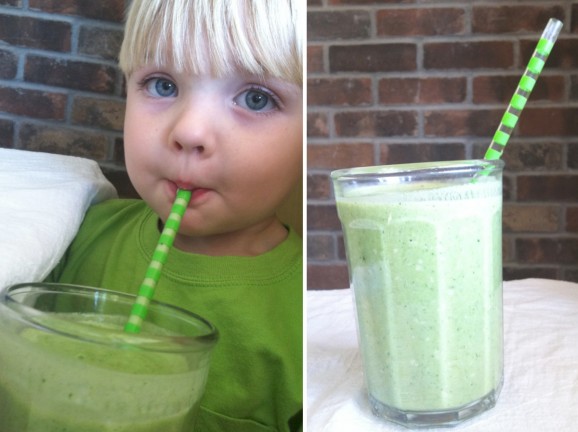
Kid Friendly Green Spinach SmoothieIn honor of the little leprechauns that will come around on St. Patrick’s Day, I’ve planned green afternoon snacks for the week. And, to my little boys, what could be a yummier snack than a green SPINACH smoothie?? Yup, I’m serious!

See, a little while back Liam went to a Healthy Kids cooking class that my friend Beth taught. (By the way, Beth is THE healthiest Mom I know—I’m pretty sure every meal she creates is a Supermom Moment.) Anyway, so Liam came home from her class with cute worksheets and recipes—and a newfound love of spinach. Since I add spinach to quite a few food items around here (by the way, spinach scrambled eggs are totally yummers), I didn’t think too much of his resulting spinach infatuation UNTIL we’re months later and he’s still asking for spinach—especially spinach smoothies.

Kid Friendly Green Spinach Smoothie 2

So, when thinking of a green snacks for the week, I immediately thought of Beth and her signature healthy GREEN smoothies. As much fun as green jello shapes and mint icecream shakes are, if we can get our kids (or ourselves) to drink healthy, nutrient-filled SPINACH or KALE smoothies, we’ll all be better off, right? To check out Beth’s Kale Smoothie Recipe, click here.

So, let’s get to my go-to recipe already, right?

Kid Friendly Green Spinach Smoothie

  • 2 cups fresh spinach
  • ¾ cup frozen pineapple
  • 2-3 tablespoons sweetened shredded coconut
  • 1 banana
  • ½ cup milk of choice (we like light coconut milk)
  • ¾ cup Greek yogurt

I layer everything in the blender and puree until well mixed. It’s pure deliciousness and a *POW* of a Supermom Moment (if I do say so myself)!

If the concept of green smoothies is new to you, here are a few helpful hints: First, I promise they taste delicious. I know they’re green which can be awkward—but with it being St. Patrick’s Day, just consider it part of the holiday experience, and you’ll fall in love. Trust me, and just try it! If you simply can’t get past the color, add some berries — that’ll hide the green (yet also make it much less Leprechauny and festive — which is almost the same thing as BORING for the week of St. P Day). Rather than buying fresh pineapple and going through the hassle of slicing it, I buy frozen pineapple tidbits (as well as other fruit intended for smoothies) in the freezer section. I always read the package to make sure no other ingredients (such as sugar) have been added. I store our coconut in the freezer — keeps it fresh and ready for green smoothies. We use non-fat Greek yogurt, which I find in the normal yogurt section. With a few easy steps you too can get your kids to fall in love with this healthy and tasty green spinach smoothie!

Reposted with permission by Aimée Lowry & Bettijo B. Hirschi from PagingSupermom.com
Who’s That Noddie?

March 4, 2013

NODDIES_header

Ever wonder who the awesome people are behind the scenes at The Land of Nod? (Our moms told us we were awesome…so yeah we are going with it.) If the answer is yes, then today is your lucky day! 

Today begins the blog series Who’s That Noddie? We are going to be chatting it up with some of the fantastic employees of The Land of Nod to tell you about their roles, and some super cool fun facts about them, too! I mean do you really think we can work in a place where there are speedster races around cubicles, and take ourselves too seriously? This is a no suit and tie place folks! Get ready for some laughs and some impressive brain power! 

Mmm..who should we start with? Ok…let's start with me!

01_LB_portrait

My name is Lauren Baker and I am the product manager assistant for textiles at The Land of Nod. (aka…guru of all things rugs, bedding and soft seating). I love my job because I get to partner with every team at Nod on a daily basis, and I get to work with the textiles team to bring some of the best textiles EVER to our customers! 

What gets you up in the morning?

That would be Lola, my 5-year-old English Bulldog. You think all bulldogs are lazy? Think again. Lola can go on three-mile runs with me. She also loves waking me up daily with a bark that sounds like no other. She's my soul mate in life, and I wouldn't trade her for the world!

02_Lola

Lola “smiling”on The Land of Nod Medallion Rug.

Whats your favorite Nod memory?

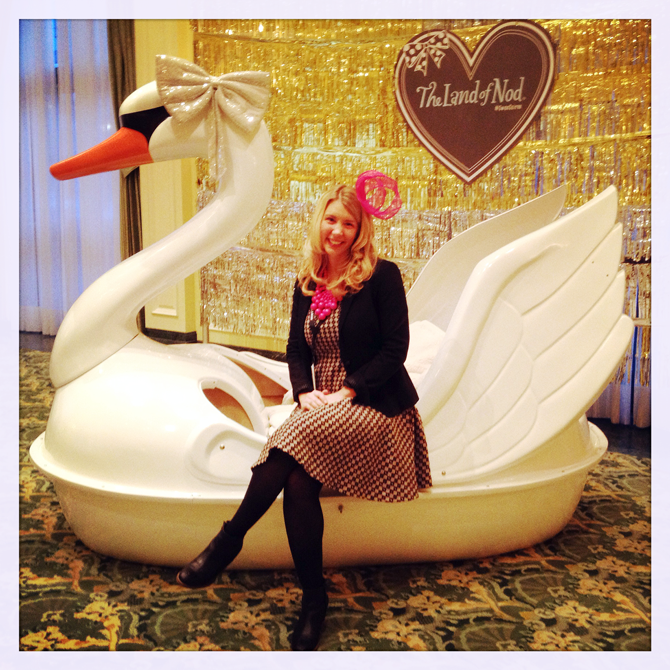
That’s a tough one! I would have to say attending Alt Summit 2013! Being part of that week with a team from Nod, was one of the greatest weeks of my career! It was so fun talking with artists and bloggers about their work and our company! (and hey…we had a swan boat in our tea party lounge…that was basically better then Christmas Day for this 33 year old!) 

03_LaurenSwan

With the ever popular swan boat at Alt Summit. 

Where were you before Nod?

Canada eh?! I was living in Vancouver, BC for a great work opportunity. Loved that experience so much, but I'm a Midwest girl at heart and was over the moon to have an opportunity to be offered a position in merchandising at The Land of Nod!

04_Vancouver

Beautiful Vancouver, BC. Everyone must visit there.

What do you love most about working for The Land of Nod?

Although we are part of something big, it still feels like we are small! I love shooting off random ideas to Michelle, our managing director, or coming up with new processes for our merchandising team. Everyone has a voice here, and there are so many opportunities to create! 

How is your role as a Product Manager Assistant impactful to the company?

In a typical day I work with my product manager to help develop and select new product. I work with our creative team to create new packaging, product names, and website copy. I also communicate with customer service to make sure they have all the detailed information for our customers. Plus, I work with the photo studio to make sure everything gets photographed for the website and catalog (and that’s all before 10:00am!). I keep the wheels turning so we can keep providing the best product and service to our awesome customers!

What's your favorite Nod product?

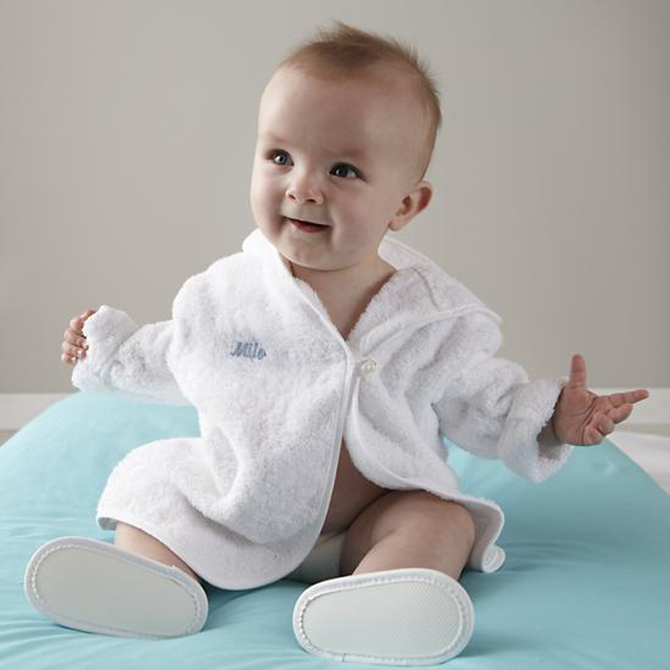
Again with the tough questions!  Right now I would have to say it’s the baby robe and slippers. My friends are having kiddos every other day, and I think this is the best shower gift EVER! Seriously…a baby in slippers might possibly be cuter than a bulldog puppy.

05_MiloBathrobe

Check out my little pal Milo striking a pose in a Nod bathrobe.

We hope you enjoyed our first installment of Who’s that Noddie? This will be a regular series so be sure to stop back by honesttonod.com to check out plenty more about our team at The Land of Nod in the upcoming weeks! 


DIY Leprechaun Gold Goodie Bags

March 1, 2013

Post by Aimée Lowry & Bettijo B. Hirschi from PagingSupermom.com
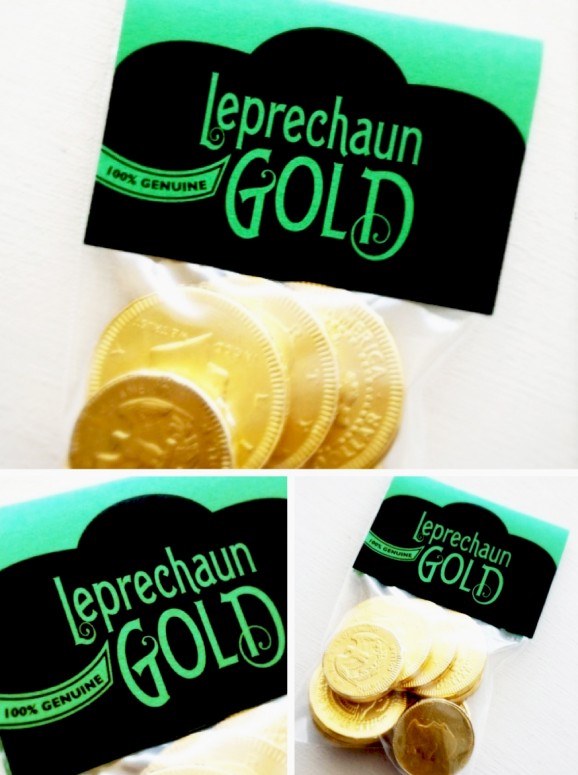
DIY Leprechaun Gold Goodie BagsTo make your DIY Leprechaun Gold Goodie Bags fill enough mini zip-top bags for all your child’s friends (or your friends!) with chocolate gold coins. Download our freebie 100% Genuine Leprechaun Gold tags, print on green cardstock, cut, fold, attach. You’re golden!

A quick word about chocolate coins: you’re probably aware that not all are created equal. Unfortunately most of the chocolate coins I’ve tasted in my life have been downright awful. The only ones I ever eat — Albert Premier Belgian Chocolate Coins. They are not the most inexpensive but definitely the most enjoyable.

Reposted with permission by Aimée Lowry & Bettijo B. Hirschi from PagingSupermom.com

Get to Know Rebekka Seale

February 28, 2013

NODia_RebekkaS

REBEKKA 1


Name: Rebekka Seale (www.rebekkamannseale.com)        

Hometown: Fairhope, Alabama

Current Town of Residence: Nashville, Tennessee 


  • Would you rather travel by plane, train, car or ship Train? Always train. Preferably down the Crescent line to New Orleans, where I can eat fresh oysters and fall asleep listening to Dixieland jazz.
  • I spend most of my work day at my desk with a tiny brush in my hand. 
  • You can find me eating buttered toast and strong coffee for breakfast.
  • How many times do you usually hit the snooze button after your alarm goes off? Zero! I’m one of those crazy folks that wake up a long time before the sun does.
  • What is your zodiac sign? Taurus. And, from what I hear, I’m a prototypical one.
  • Got any pets? Tell us about them. Mabel and Lina: two little cats that look like sisters but they’re not. Mabel is the queen of our home. Lina is the baby.
  • Favorite restaurant? Highlands Bar and Grill in Birmingham, Alabama. 
  • If you could have lunch with any person from the past, present or future, who would it be? Julia Child or Flannery O’Conner. Both would be ideal. 
  • What’s a song that you never get sick of? “Dream a Little Dream of Me” (all versions of it!) 
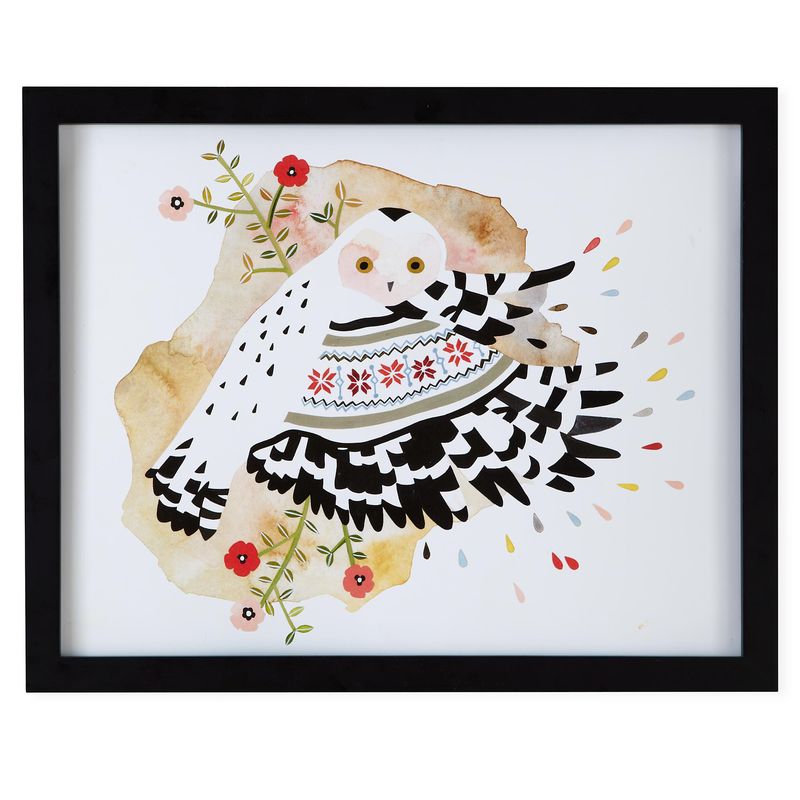
  • Tell us about your Nod Institute of Art print, how you made it or your inspiration behind it. Owl in Flight” was part of a series of alphabet paintings I created last year. I wanted him to be whimsical and full of joy, painting the sky as he soared across it. 

Owl-in-flight

Mushroom Triangles

February 27, 2013

Audreymushroom

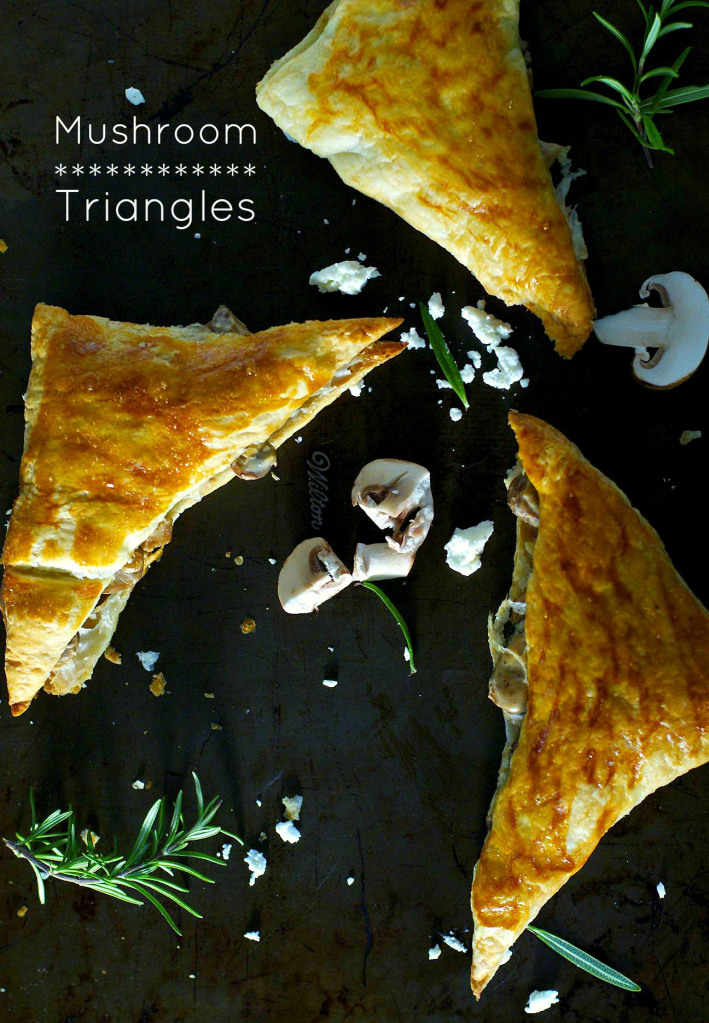
I remember how my mother used to make mushroom toast. She loves mushrooms and that was an easy meal to make. I can’t remember a time I didn’t like mushrooms, or a time I didn’t like toast – so this combination was a hit in my books.

With the fall season starting I was craving mushrooms, but I wanted to make them with a buttery puff pastry. The puff pastry and mushroom combination really reminded me of those appetizers you get at parties. I made these as a main course though, accompanied with a nice vinegary salad.

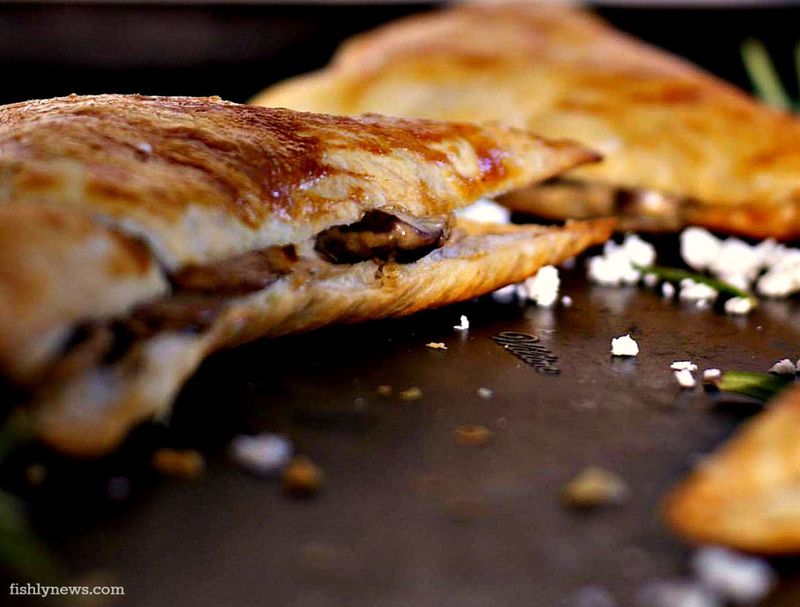
These are really easy to make. Cut your sheets of store bought and thawed puff pastry into triangles (cut into four squares first, then cut each of the squares on the diagonal. Brush pastry with egg. Transfer the pastry and the parchment paper onto a cookie sheet and bake at 375 for 10-12 minutes, until golden.

While the pastry is baking, heat a pan and cook your favourite chopped mushrooms until they soften and release their liquid. Season with salt and pepper, add some chopped rosemary and a splash of heavy cream. Cook until the cream evaporates. Add two table spoons of soft goat cheese and stir until combined. Taste and season if you need to.

Once the pastry triangles are cooled slightly, carefully cut them in half and fill them with the mushroom mixture. Serve warm or cold.

Fishlynewsmushroom1

Need more tasty recipes and delicious bites? Check out our Let’s Eat Pinterest Board.

Post by Giulia Doyle : Audrey’s

Coffee Filter Roses

February 26, 2013

Post by Niki  of Papery & Cakery

COFFEE-FILTER-ROSES

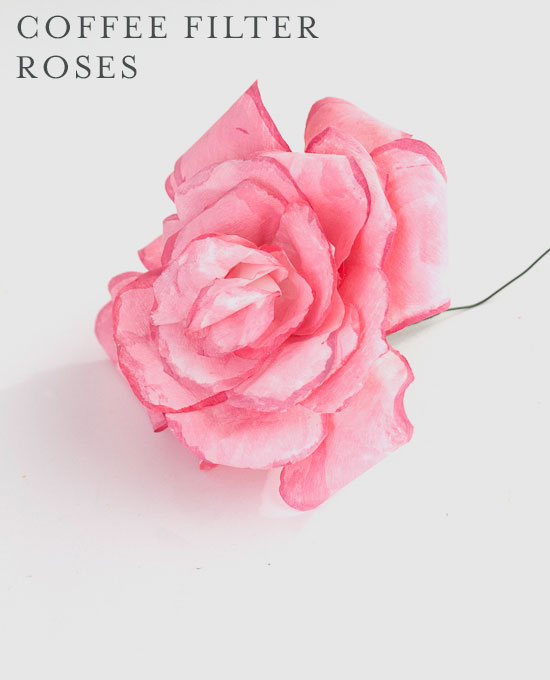
I’ve been dying to try my hand at paper flower making, but wasn’t sure where to begin. My friend Thuy told me about these gorgeous coffee filter roses she made for a party last year, so my mind was made up! I won’t lie. These flowers don’t take 20 seconds to make. But the results are worth the effort. They look so realistic and gorgeous. Plus, you’ll have them forever!

Coffee filters are a really resilient paper, so these are pretty difficult to mess up. Don’t be afraid. Dig in!

C1

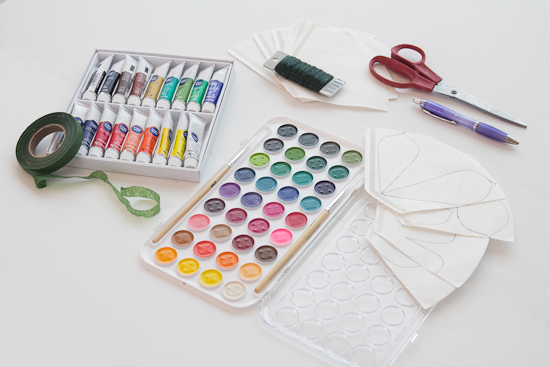
You’ll need: 

+ 4 coffee filters per rose

+ scissors

floral wire – 1 stick per rose

floral tape {approximately 8 to 10 pieces per rose}

+ water colors {I prefer the this set} & a paintbrush

Assembling the Roses

C2

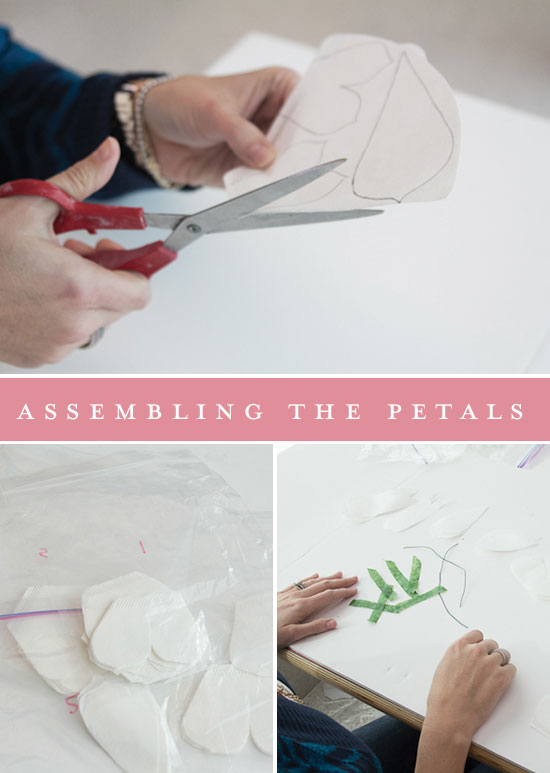
Start out by downloading and printing this template. Trace and cut out the petals. If you are making multiple roses place them in ziplock bags or cups corresponding to their number {which is the order you’ll assemble them in}. You can cut about 4 filters per shape.

C3

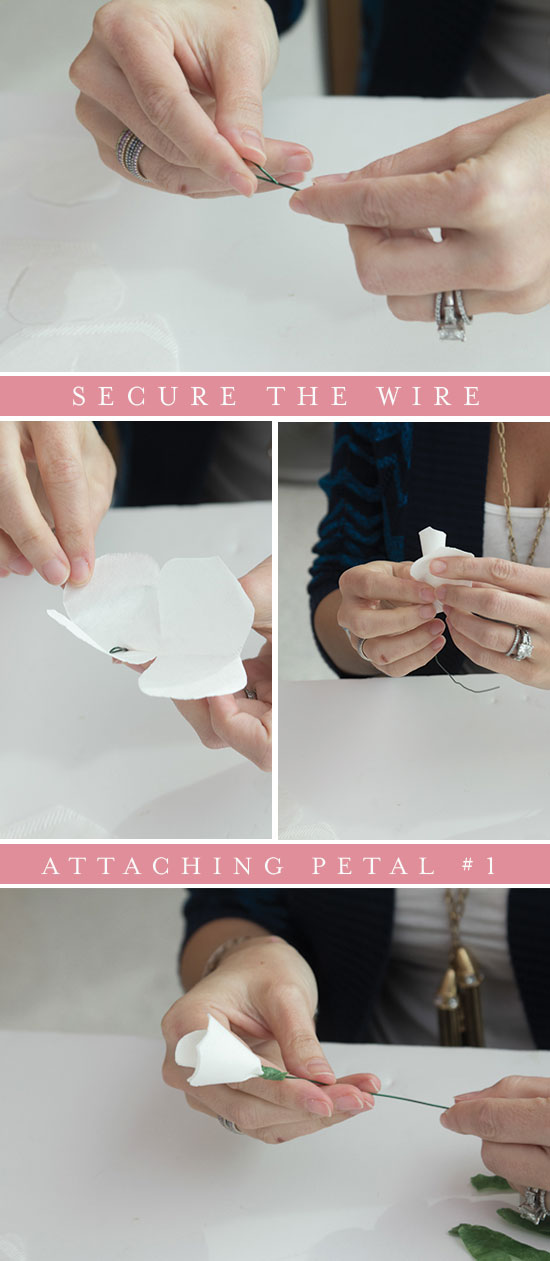
Stick the wire through the right hand of #1 petal. Bend the top of the floral wire creating a small oval, closing it on top. The “clasp” will ensure that the wire doesn’t go through the entire petal and will keep it from sliding around. Make sure it pushes down so it “hooks.” Fold the petal inward and roll to coil around the wire. Then wrap a piece of floral tape {about 4-6 inches long} the base of the petal to secure.

C4

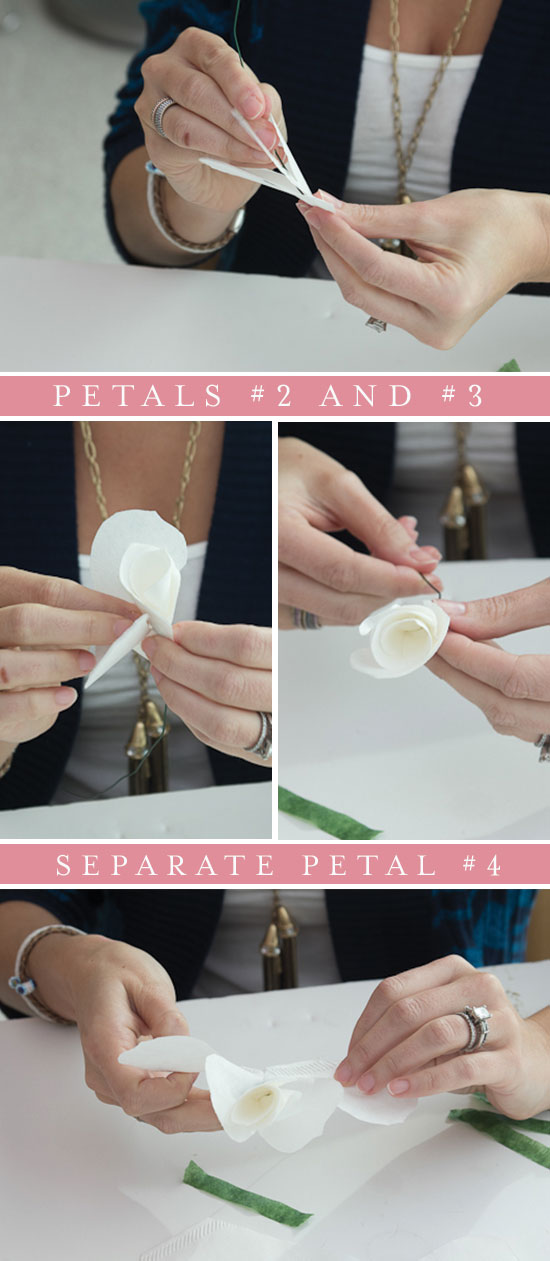
Petals #2 and #3 are added just like #1. Poke the wire down between the right petals. Arrange the petal so that it fills in empty spaces between the first petal. Roll and secure with a piece of floral tape. Pull and stretch the tape to get a good, tight hold around the base.

Petal #4 needs to be separated first. Gently tear along the bottom of the petal to make a flat strip.

C5

Then wrap this around the rose and secure with tape.

C6

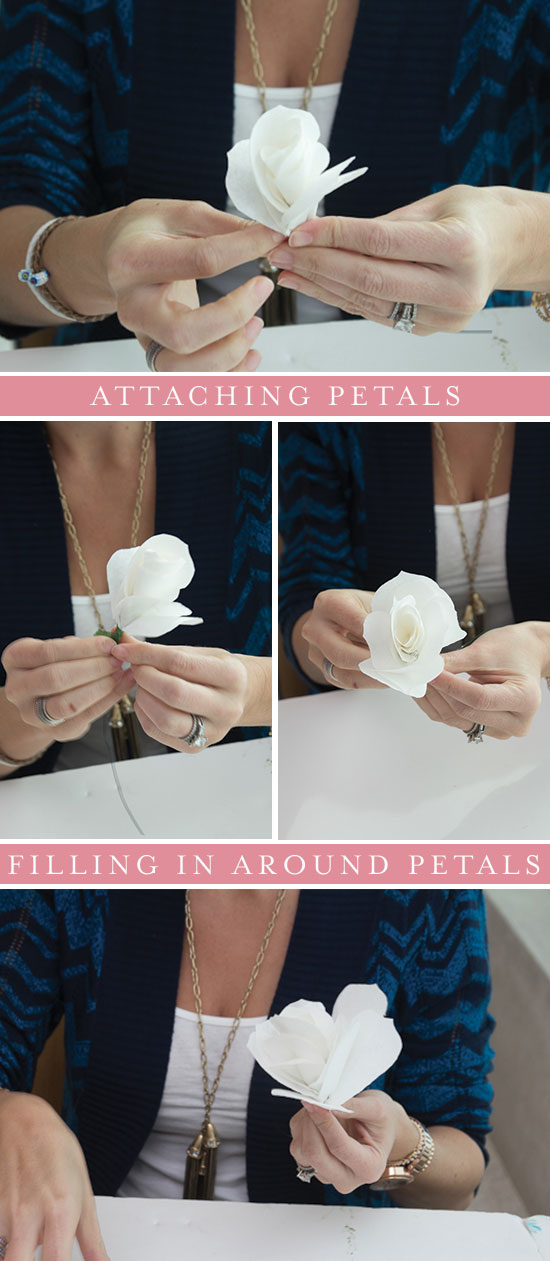
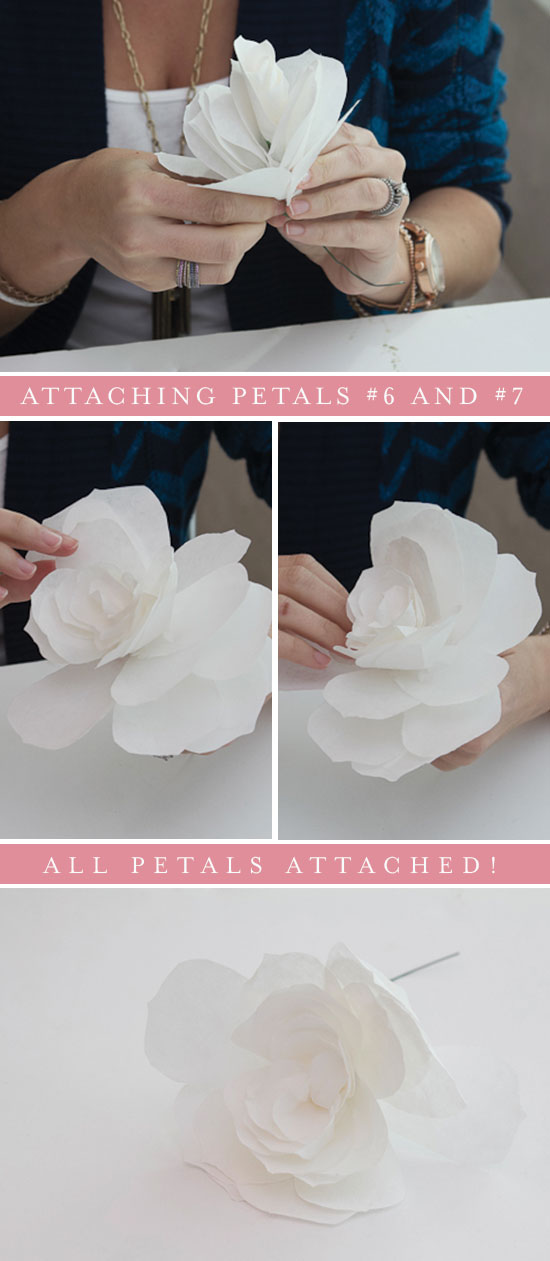
Next get two #5 petals and two #6 petals (since these petals weren’t cut on the fold, you’ll have double the amount of these). Fan out the four petals like you would a hand of cards. Place the rose in the center and wrap the petals around the rose. Secure tightly with floral tape.
Repeat with two #7 petals and two #8 petals.

Then wrap the entire stem in tape for a more realistic look, or to help secure it together.

Fan out the petals, bending gently backward from the base.

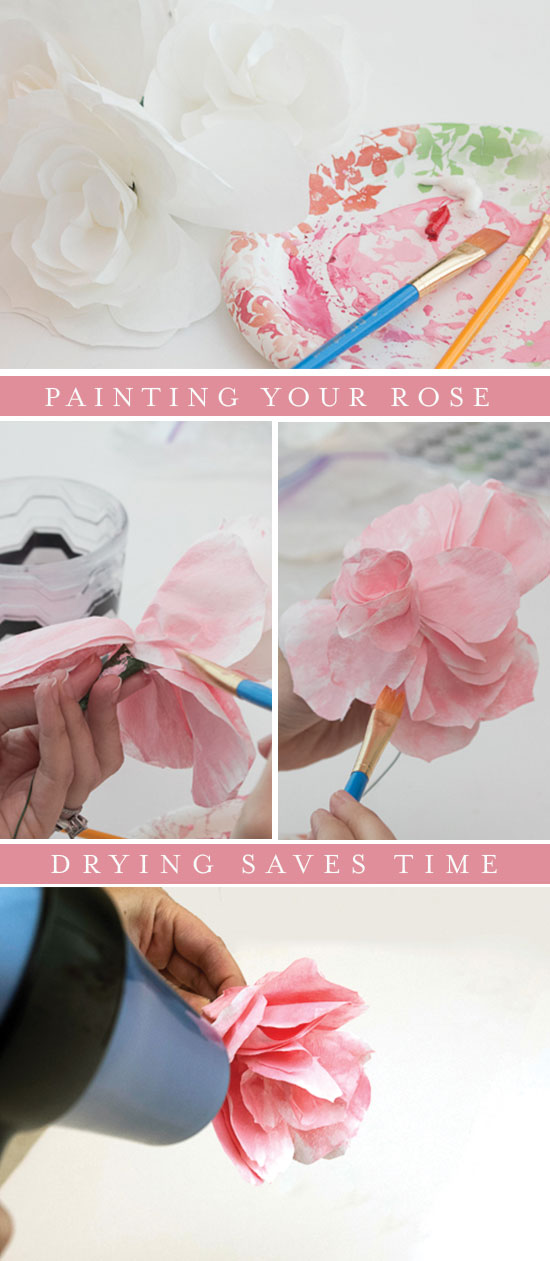
Painting the Roses

C7

Mix your color using tube watercolors {I found that their density and thickness works best}. I like this set.

A little color goes a long way when you mix with water. Paint the petals, starting from the center and working outward. If you use enough water the color will bleed through. Let the petals dry {or expedite with a blowdryer}. You’ll notice the coffee filters almost harden as they dry with paint.

C8

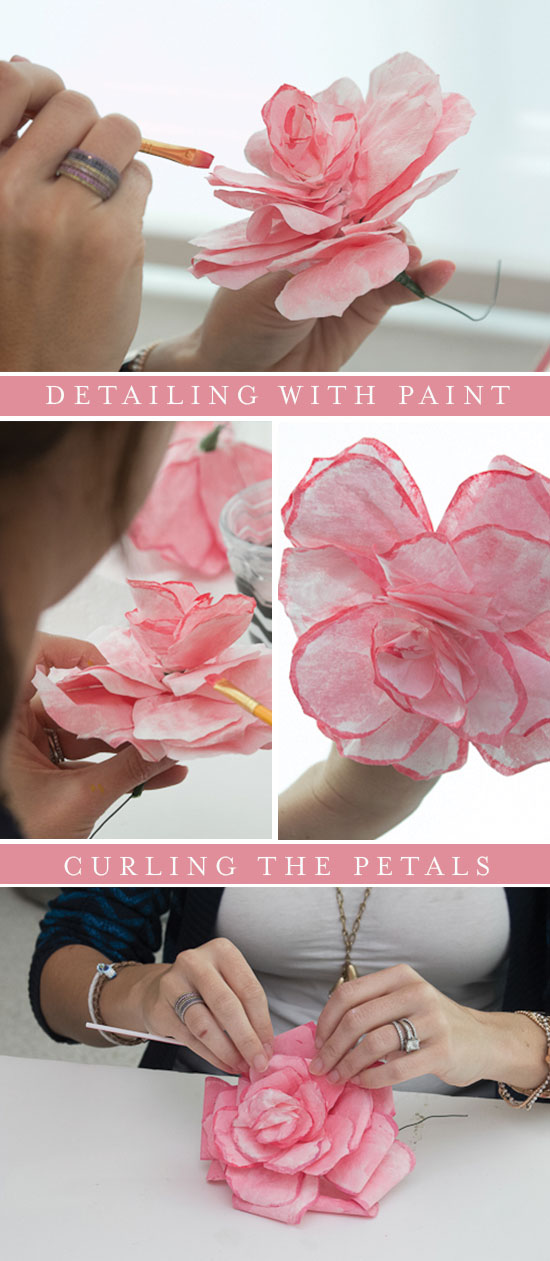
Use a second, deeper version of your initial color for contrast and shaping. Run the tip of your brush along the edge of each petal. I edges each outside petal completely, while really onto edging the top of the inner petals.

Again dry or turn upside down and wait about three hours.

Once your rose is dry, shape the petals. I used a small plastic straw, but you could use a pen/pencil or something small and round. Roll each petal around it to curl backwards and “open” your rose.

C9

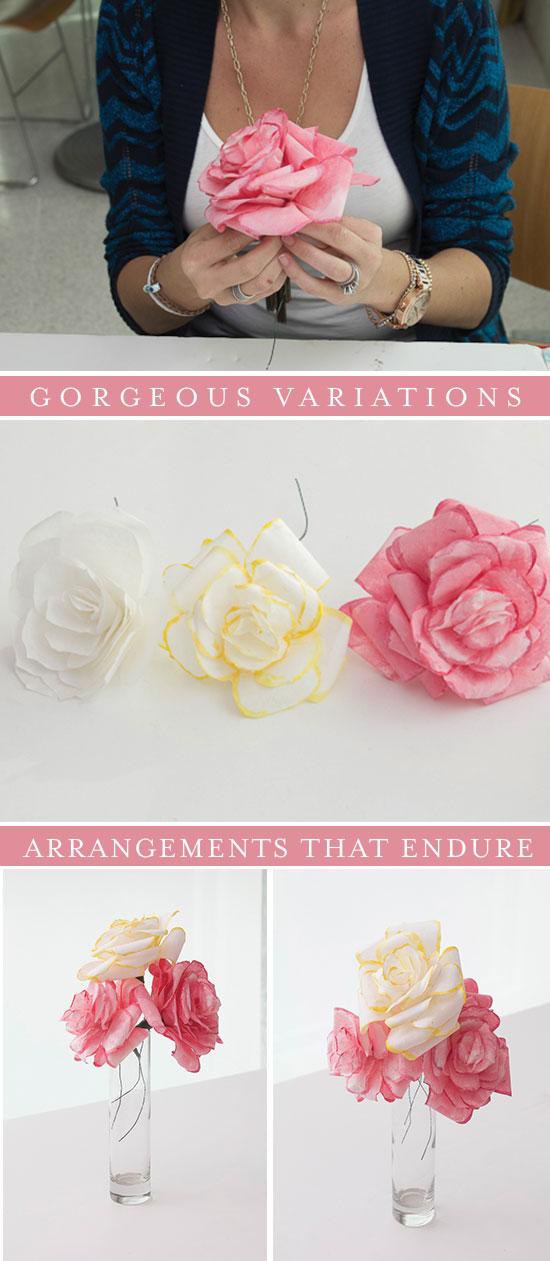
Arrange into a bouquet, vase or as a single lovely rose!

xoxo,

Post by Niki  of Papery & Cakery

Room Decor Math: Part II

February 25, 2013

I’m back for another addition of Room Décor Math! Get out your binders and calculators and take notes, there may be a quiz after!  

CIRCUS

Décor on Safari + Print Neatly Pennant Garland + Three Ring Wall Art = Under the Big Top

BLACK_AND_WHITE

Fifth Avenue Pendant + Chalk with the Animals + Décor on Safari = Black & White World

STUDY_SMART

Circulation Chest + Show Your Work Bedding + Grand Canvas Banner = Study Smart

SKY

Cloud Corkboard + My Beautiful Balloon Hang Up + Can’t Miss Wall Knobs = Up, Up & Away!

SEA

Mermaid Lagoon + Bon Voyage Suitcases + Fairy Tail Bedding = Down By the Sea


By Anna Passadori

 Anna develops and designs exclusive product for The Land of Nod. She hails from the west coast and has traveled the world to source product. She loves anything Marc Jacobs, Sofia Coppola or stripes! (So, if anyone can get a photo of Sofia Coppola wearing a striped outfit by Marc Jacobs, please send it along.

Bright Hues – A Little Goes a Long Way

February 22, 2013

01_BrightHues_Intro

In the dead of winter, it can be hard to find any color inspiration amid the gray. Luckily, I work in a place where color never ends. I come by loving color naturally as my hair and nail color change as frequently as the weather. As soon as I see the new products for upcoming seasons, it’s the colors that excite my senses (and hair color)!

02_BrightHues_Rasp

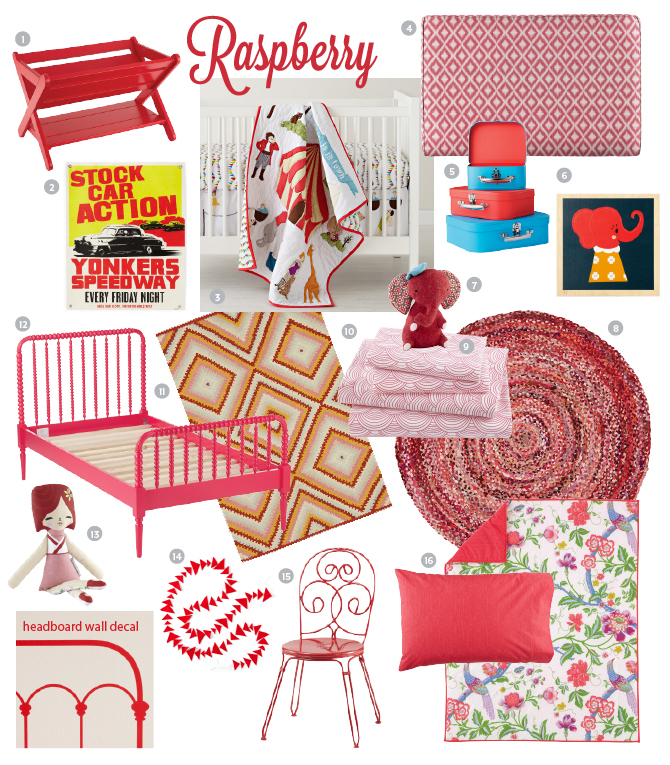
Here are some great colors that will warm you up during these last cold days of winter. Raspberry will put some flush into your cheeks. This not quite red is still hot from furniture to rugs. Even just a hint of this Raspberry will perk up any space or face.

03_BrightHues_Azure

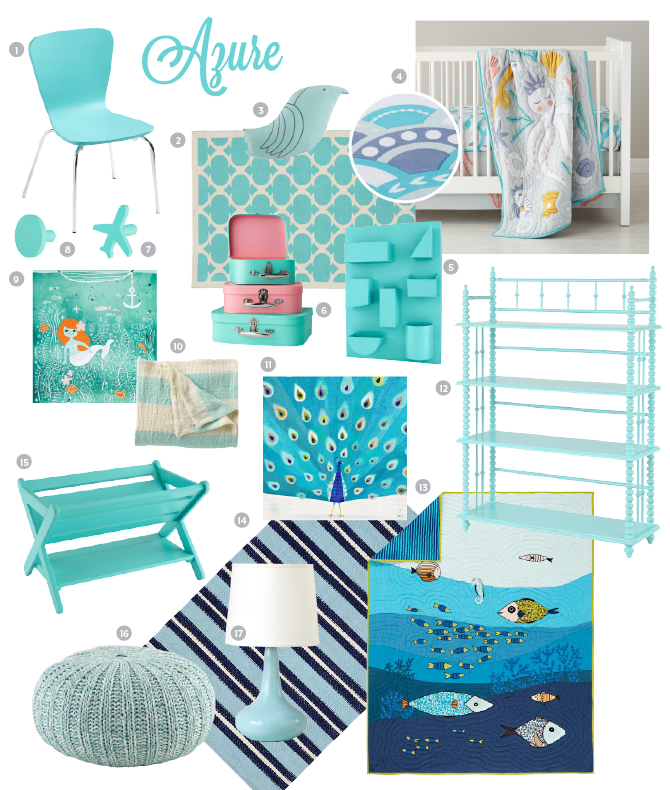
Azure, the hue halfway between blue and cyan, will have you dreaming of blue skies and possibly a tropical paradise. This cool to the touch hue, works well with other colors and is easy to introduce to your child’s playroom or bedroom without feeling blue.


04_BrightHues_Yellow

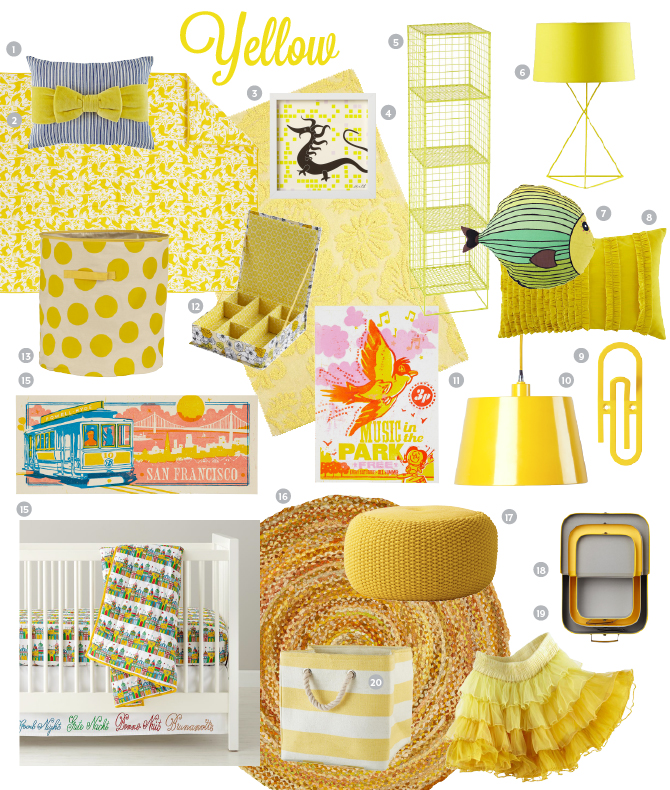
Talk about hot; with neon Yellow on your mind you could start a fire with this much color. This color from the lime yellow to a mellow version is ready to stoke your senses. Use as much or little as needed to intensify any corner of your environment.

05_BrightHues_allThree

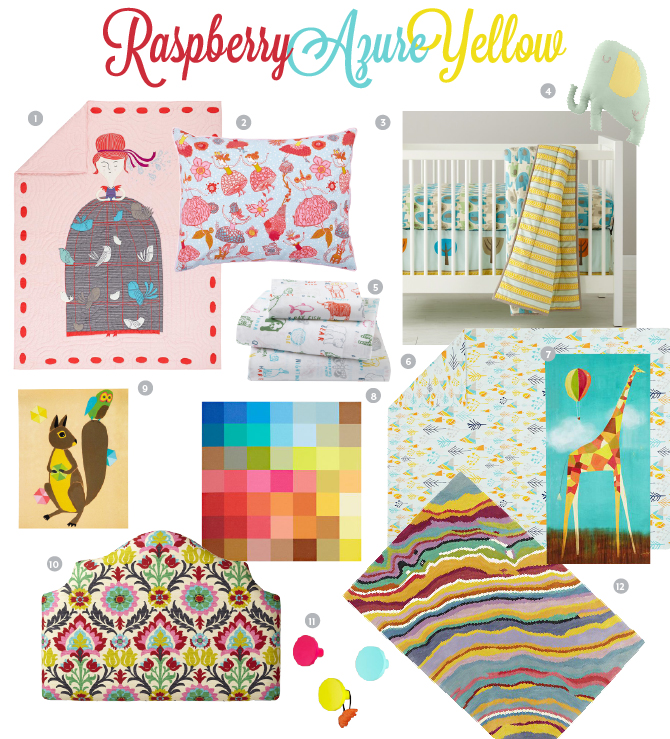
Imagine the warmth and inspiration created when these colors work together! These perfectly balanced patterns and palettes from our artisans can start creations or enliven any room.

You can find all the products shown above at The Land of Nod.

By: Julia DeNamur

Growing up Julia loved color so much she gave her crayons different genders and specific positions in the box based on who they got along with. Fast forward to adulthood, and Julia had the opportunity to work for a paint company where she honed her eye for color, and sometimes even got to name colors things like Dandelion Scream and Wild Child. Today Julia works at Nod as a Graphic Designer, and channels her love of color into her constantly changing hair & nail colors, as well as colorful designs for Nod's website.

A Sewing Kit for a Little Sewer

February 21, 2013

S1

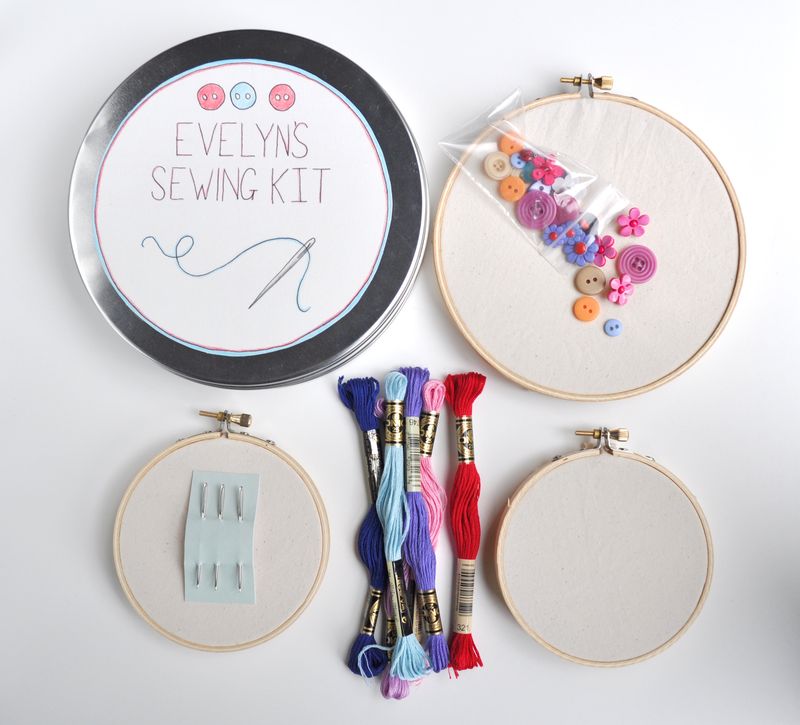
Every little sewer needs a pretty sewing kit.

S2

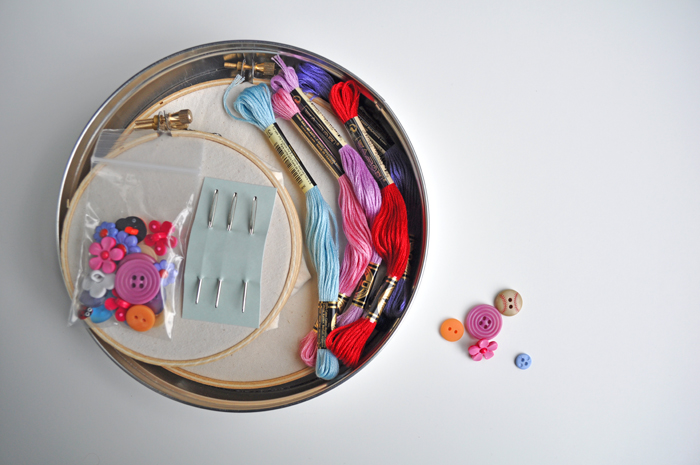
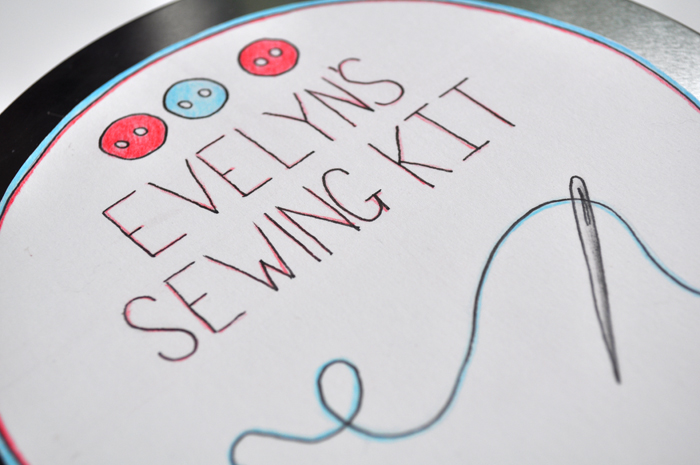
To make your little sewer a kit, use an old biscuit/cookie tin and personalize it with a hand-drawn label.

S3

Include a variety of supplies: embroidery hoops, needles, silks, and buttons.

S4

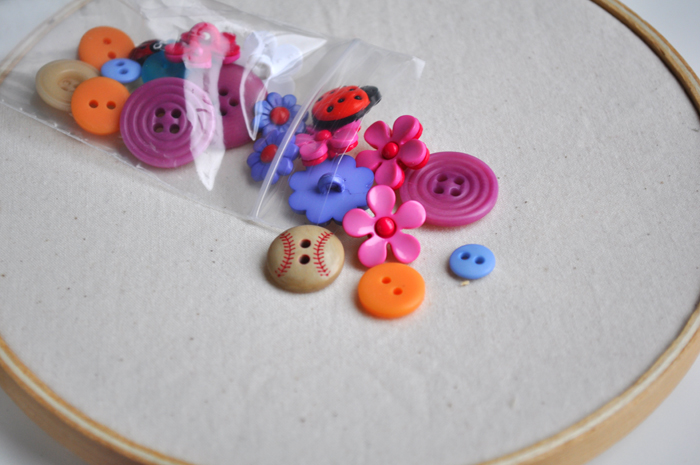
The prettier the buttons, the better… include some personal buttons from your collection, and a few fancy new ones.

S5

Pretty soon, your little sewer will love sewing as much as you do.

My girls and I really enjoy sewing together, perhaps our sewing projects for pre-schoolers will inspire you.

Post by Helen Bird : www.curlybirds.typepad.com
Four Steps to a Book Nook

February 20, 2013

4stepsBookNook_blog_01 (2)
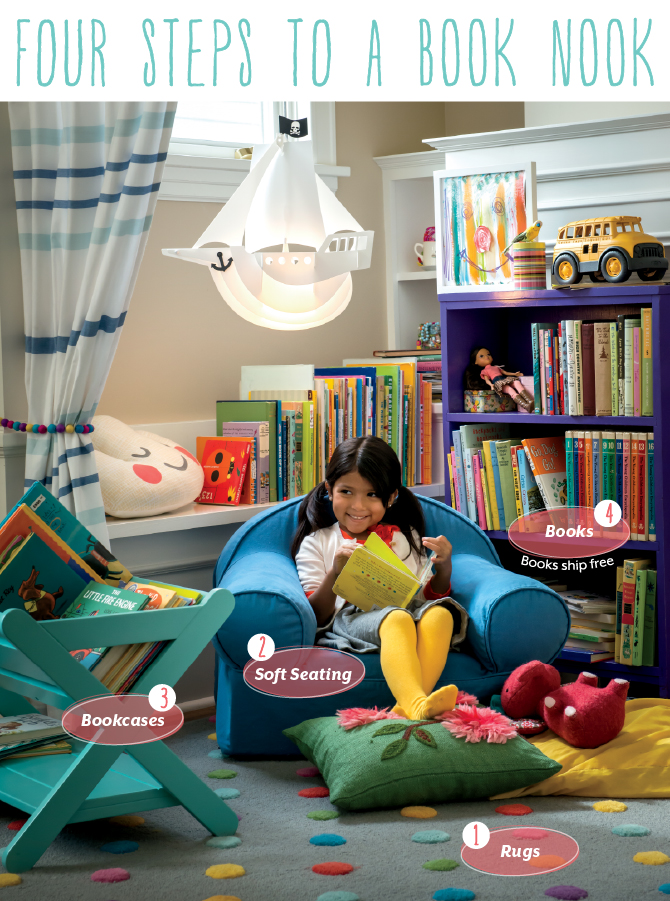
If your little bookworm is always bugging you for a story, consider building them a cozy little nook where they can read their favorite book again and again.

4stepsBookNook_blog_02
1/2/3

Start with a rug for coziness. Find one that’s soft, but also durable to withstand the test of time.

4stepsBookNook_blog_03
1/2/3

Choose the right soft seating. Beanbags, poufs and cushions are lightweight and comfy.

4stepsBookNook_blog_04
1/2/3

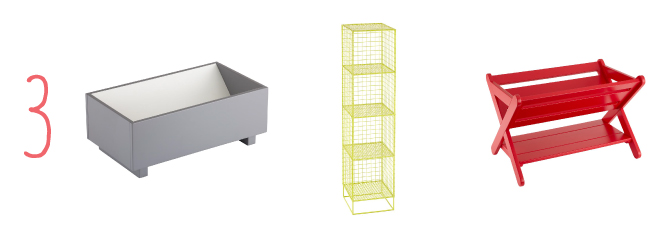
Use storage bins and book caddies instead of traditional bookcases. They’re the perfect height for little hands.

4stepsBookNook_blog_05

1/2/3/4

Add your books. Select an eclectic mix, since you never know what your little ones will be in the mood to read.

Croissant and Panetone Bread Pudding

February 19, 2013

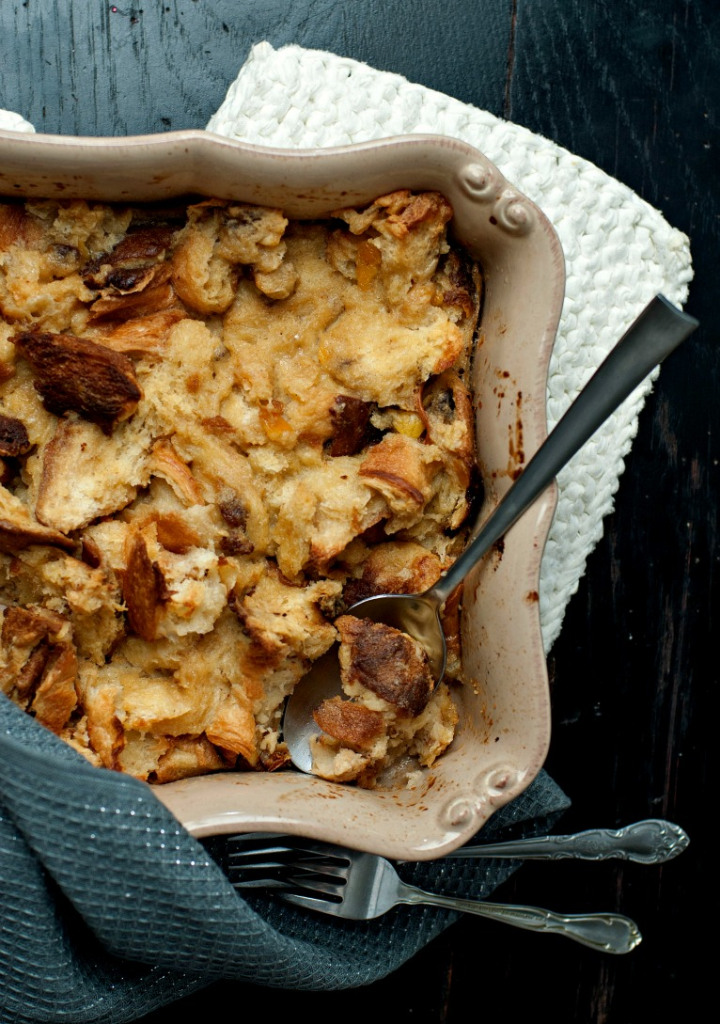
Audreysbreadpudding

Recently I had some left over croissants and a big chunk of leftover Panetone – they were starting to go stale, so I decided to make bread pudding. Bread pudding tends to be a dessert in my grandmother’s home, but I thought I could change it up and make it for breakfast. I’m so glad I did. It turned out great – a warm sweet and comforting breakfast in a bowl – perfect for a gloomy and cold weekend. Just make sure you have enough mouths to feed or else you’ll eat it all yourself!

Croissant and Panetone Bread Pudding

  • Butter, for baking dish
  • 3 croissants and large chunk of Panetone, torn into pieces, enough to fill your baking dish
  • 1 cup of milk (2%)
  • 1/2 cup of cream
  • 2 large eggs, lightly beaten
  • 1 cup of unsweetened apple sauce
  • 1/4 cup packed light-brown sugar*
  • 1 teaspoon vanilla extract
  • 1 teaspoon of cinnamon
  • 1/4 teaspoon salt
  • Confectioners sugar (optional)

Preheat oven to 350 degrees. Grease a 2-quart baking dish. In a large bowl, whisk together milk, cream, eggs, apple sauce, brown sugar, salt, vanilla and cinnamon. Arrange bread in dish. Pour custard over bread. Bake until custard is set, 45 minutes. Let cool slightly. Serve warm or at room temperature and dust with confectioners sugar if you wish.
If you serve this for dessert you can add a dollop of whipped cream for garnish.
*Because the Panetone is quite sweet there is no need for a lot of sugar – you can adjust this amount to your taste.

Need more tasty recipes and delicious bites? Check out our Let’s Eat Pinterest Board.

Post by Giulia Doyle : Audrey’s

Get to Know Melissa d’Arabian

February 18, 2013

Melissa

Years ago, you posted a tutorial video for homemade yogurt. Did you ever think it would eventually lead to your own television show?

 After having four daughters in three years, I changed paths from working in corporate strategy and finance to focus on being a stay-at-home mom. Living in Texas at the time with four babies, I quickly realized I was hardwired to streamline my family’s expenses (just like my mom had to do when I was growing up). I began sharing my tips and ideas with local groups of moms, and the homemade yogurt I made in my hot Texas garage – a strategy that saved us over $1,000 a year at the time – was a clear favorite. I decided to make the video in order to share the technique with more people. I then submitted it online for “The Next Food Network Star” season 5 auditions (in 2008). It’s been a true joy to share my recipes, strategies and tips with Food Network and Cooking Channel viewers.  (And as for the yogurt recipe…it now appears in my Ten Dollar Dinners cookbook  and was also the subject of a Food Network Magazine feature.)

With four children, how do you find ways to prepare meals that everyone in your family can enjoy?

With a big family, we have a variety of tastes and preferences.  Still, I serve one meal for dinner (always including two vegetables so the girls have a choice – “Would you like the spinach or carrots, or both?”) that deliver on being both delicious and nutritious for the whole family. My husband and I both love spicy food, so we may adjust certain spices or seasonings especially when serving ethnic cuisines. We use our meals as a time to have the girls be part of the food conversation and develop a healthy understanding of what different ingredients offer us – each night one daughter presents the meal by sharing in simple terms what each dish is, its main ingredients and the functions of those ingredients (e.g., chicken is a protein and helps build muscle).  Also, I always serve at least one healthy food that I know the kids like, sort of my insurance policy against picky eaters.  For instance, I can always put out a basket of whole grain rolls and know that if someone eats only rolls and milk, she will be fine for one meal.  Lastly, dinner is about more than just the food for us.  It’s about sharing and connecting with the family, and hearing about the day’s highs and lows for everyone.  So even if we do a quickie dinner, such as an omelet and salad, we still sit down as we would for any dinner and connect.

Where are your favorite places to shop for food? (ie. farmer’s markets, grocery stores, specialty food shops, etc…)

I do the majority of my shopping at grocery stores and also at warehouse clubs where I can implement the many savings strategies I share on my show and in my book – everything from making smart splurges in the produce aisle, using the bulk aisle in surprising ways for both large and small quantities, stocking up on (and then freezing) the loss leaders (proteins on sale for 50-75% off to get shoppers in the door), taking advantage of manager’s specials especially on dairy and bread.  Farmer’s markets are wonderful for fresh and local produce, and I just love when we go as a family; it’s a fun, relaxed and educational outing (and much cheaper than going to the movies as a family these days!).

Screen Shot 2013-01-21 at 12.03.41 PM

Describe a typical dinner at the d’Arabian household.

If it’s a rushed Tuesday night, I will likely be the one in charge of getting dinner on the table. On nights when we have more time (or just as a separate activity altogether), the girls love to help in various ways (making salad, measuring out ingredients, cracking eggs, breading, etc.). You would find us eating the very same recipes I share on my show and in my book, or perhaps some new recipes I am testing for upcoming projects – my family has become my focus group of official taste testers. One of the girls presents the meal (as I mentioned above) and we enjoy being together. I think just simply being around the table together as a family is so important. Whether you ordered in pizza or cooked a lavish meal, sharing the time together at the table is beneficial for myriad reasons.

What’s your favorite part of preparing meals for your family?

It’s simple: Creating positive and happy memories for my girls to look back on while nourishing and respecting our bodies with satisfying delicious food.

Any tips for parents who struggle to get their kids to eat healthy?

I have four girls (8, 7, 5 and 5) and I believe in developing their palettes while also laying the groundwork for them to have an overall healthy relationship with food. So, I have lots of tips – ranging from how to get them involved, how to encourage them to try new ingredients, and beyond. Here’s a recent write up I did on Cooking Channel’s Devour blog that highlights some of my favorites.

Do you have any guilty pleasures when it comes to food? (It’s okay, you can tell us…)

Of course, I love to indulge in sweet treats here and there (enter the entire dessert chapter of my book!). I will say that I just love a piece of super dark chocolate with an espresso – my favorite combination. When it comes to savory and comforting, I can’t resist my famous Potato Bacon Torte.

I hope you and your readers will stay in touch with me through Facebook (www.facebook.com/darabianmelissa), Twitter (@melissadarabian), and my website www.melissadarabian.net

4 Ways to Chambray

February 15, 2013

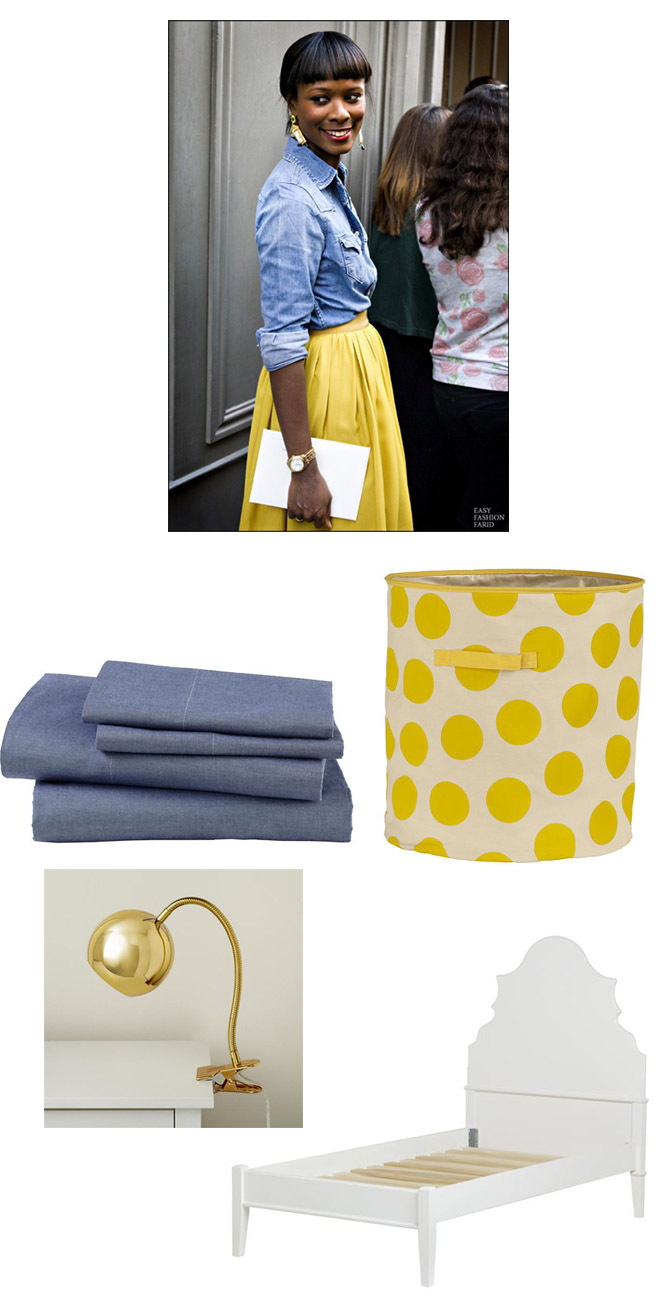
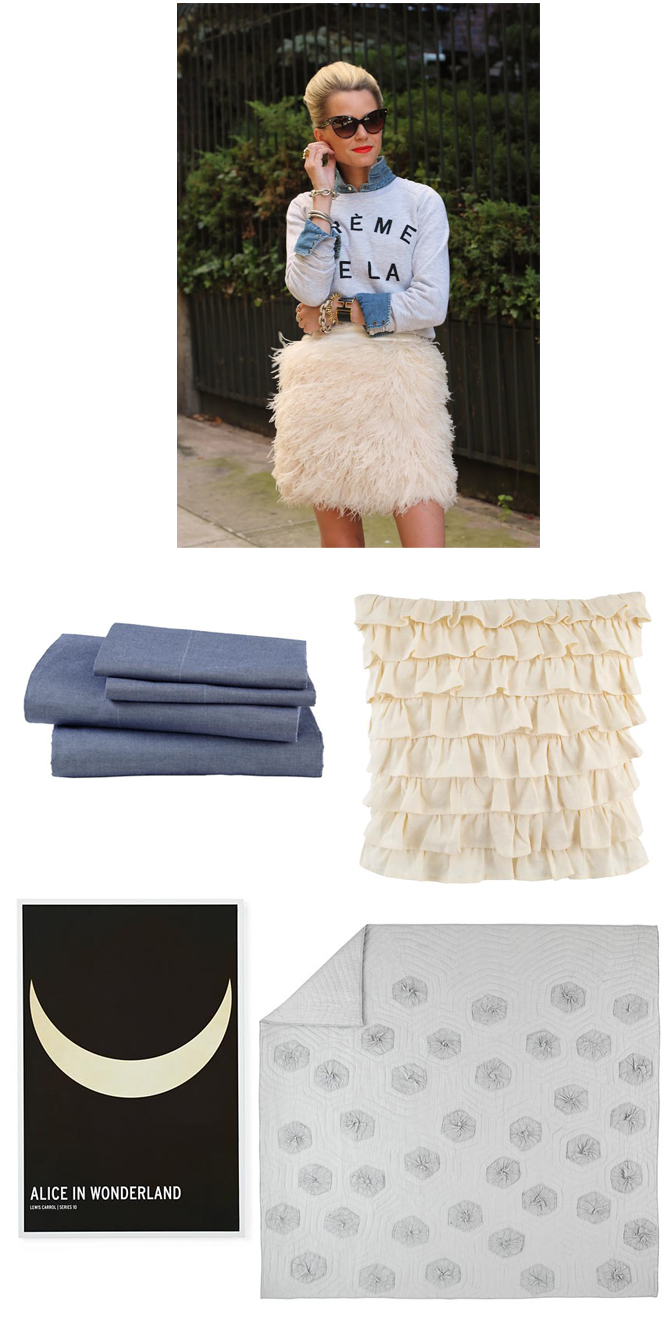
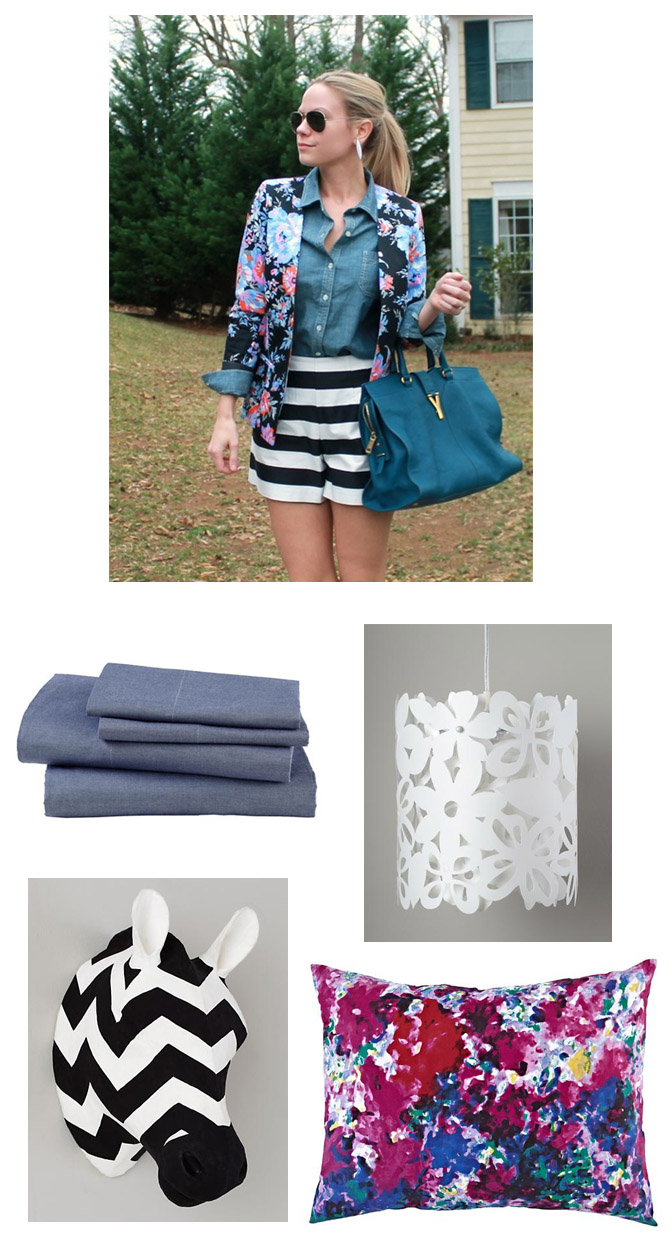
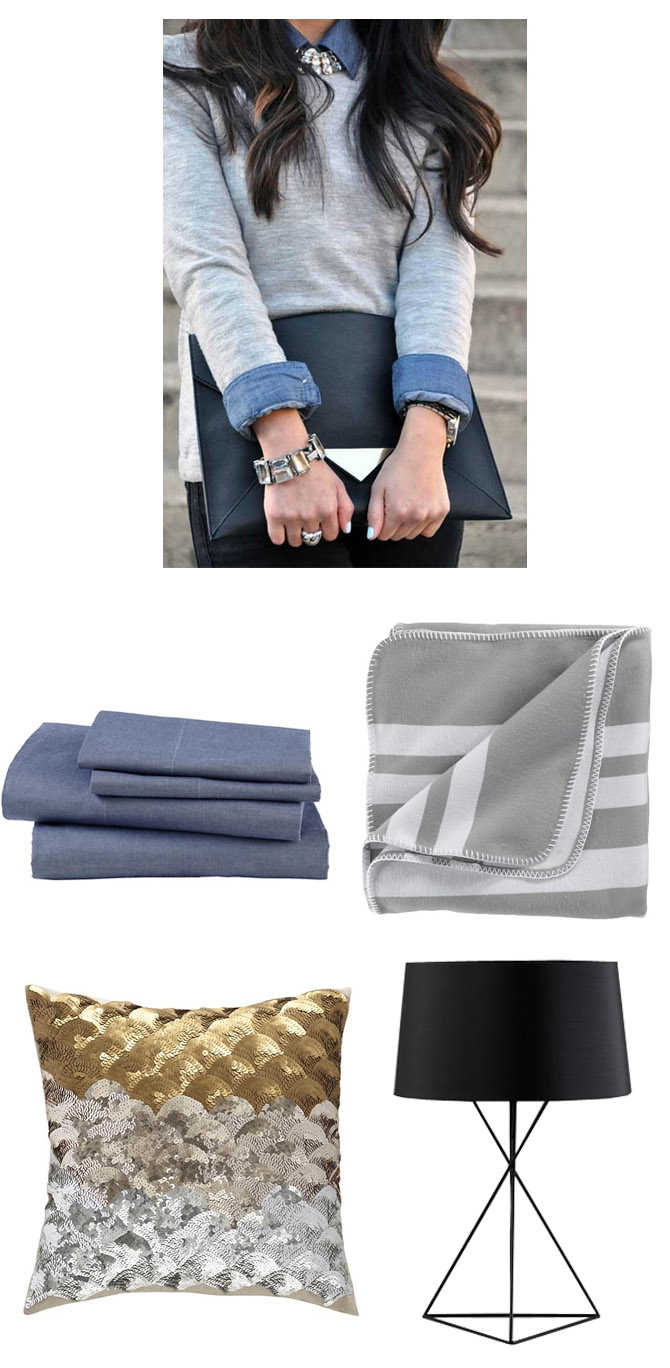
Chambray is a fashion staple these days; you can pair it with just about anything. Taking a cue from this fashion trend, I thought I would try to style our chambray sheets in 4 different ways. Naturally a more masculine fabric, it seemed more challenging to try it for girl’s rooms.

Crisp & Clean

I love the elegance and simplicity of this outfit with the pop of yellow and hints of white and gold.

Yellow

Inspiration, Sheets, Storage Bin, Bed, Lamp

Soft & Dreamy

These neutral colors mix well with voluminous and feminine pieces, for an ethereal and magical feel.

Fluffy

Inspiration, Sheets, Pillow, Duvet, Poster

Graphic Floral

For a little more pow, these graphic patterns have a slightly bohemian quality.

Floral

Inspiration, Sheets, Pendant, Pillow, Zebra

Casual Luxe

Laid back with a modern edge, these pieces contrast between soft and hard.

Sweatshirt

Inspiration, Sheets, Blanket, Lamp, Pillow

Which is your favorite look?

By Anna Passadori

Anna develops and designs exclusive product for The Land of Nod. She hails from the west coast and has traveled the world to source product. She loves anything Marc Jacobs, Sofia Coppola or stripes! (So, if anyone can get a photo of Sofia Coppola wearing a striped outfit by Marc Jacobs, please send it along.

Candy Bracelets

February 14, 2013

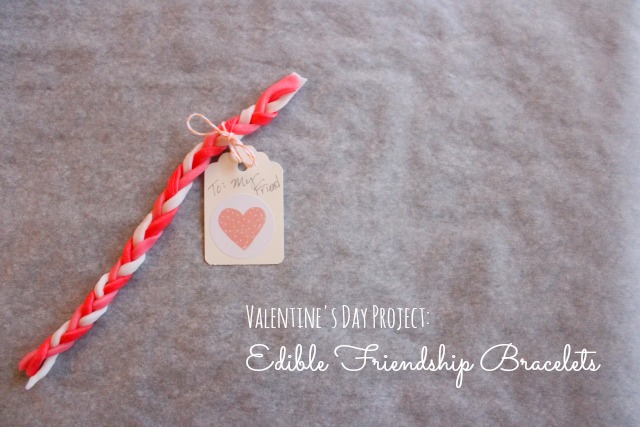
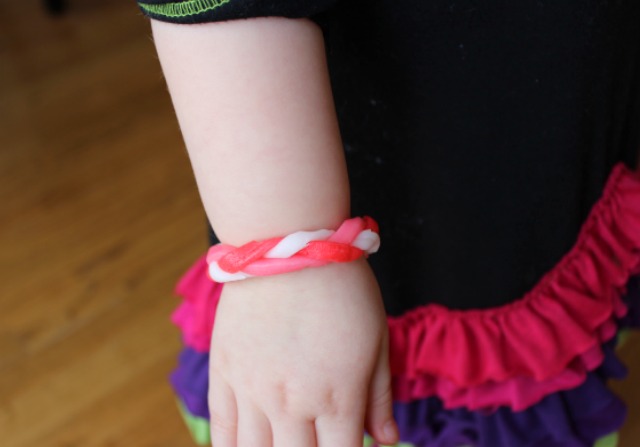
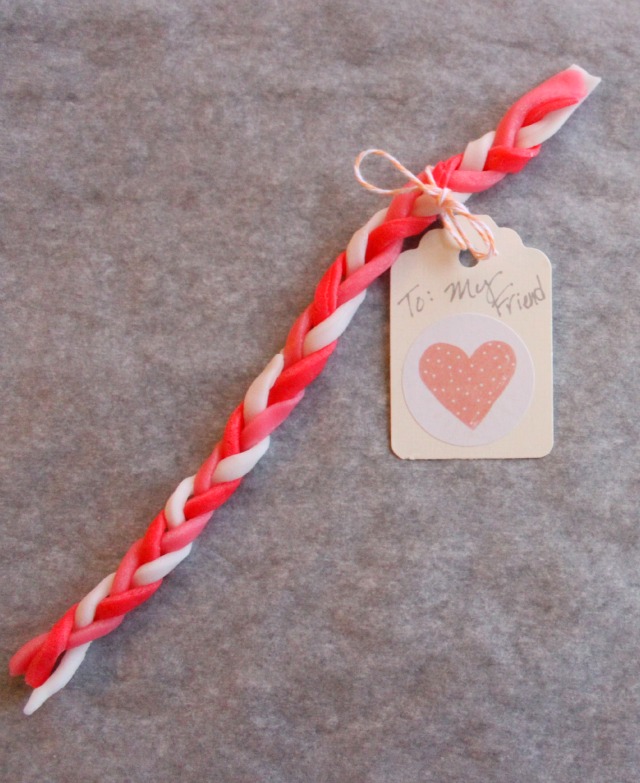
Here's a little Valentine's Day project for you to do with your kiddos – friendship bracelets made from AirHeads candy! 

C1

I bet you didn't know you could braid AirHeads candy! The candy actually makes for a really cool crafting material that you can cut out shapes from, bend, stretch, you name it. This friendship bracelet would be a fun Valentine's gift to make for friends. The one I made for my 3 year old was a big hit, although it didn't last long on her wrist before it was gobbled up!

C2

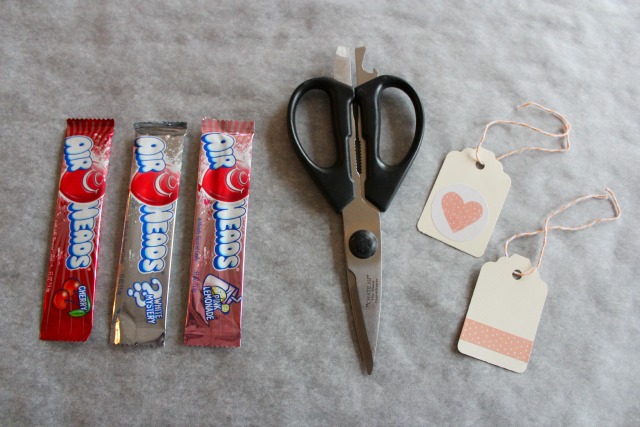
Making them is really simple – all you need are some AirHeads candies, kitchen shears, and some cute tags. I was able to make two bracelets out of the 3 AirHeads below (I used a cherry, white mystery, and pink lemonade):

C3

How to Make Candy Bracelets

C4

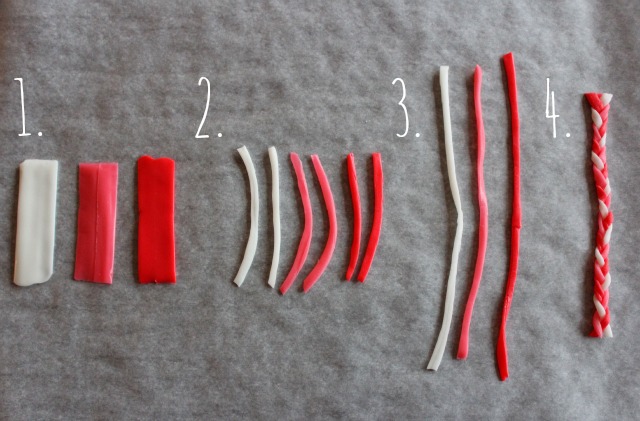
1. Wash your hands! Then unwrap the AirHeads and stretch them out slightly (like pulling taffy) to make each of the three pieces fairly even in their thickness and length.

2. Using kitchen shears, cut each AirHead into four pieces (you will need two pieces of each color to make one bracelet).

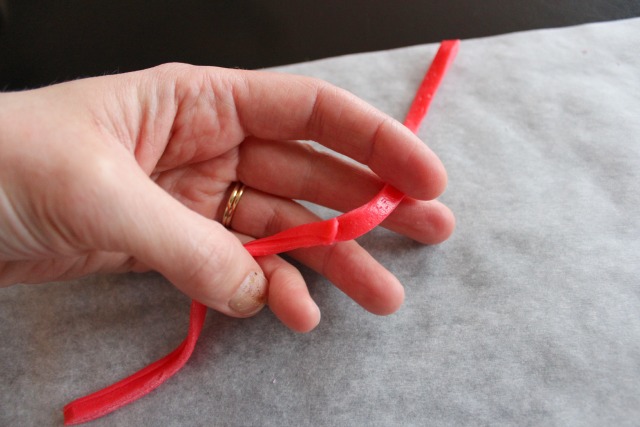
3. Take two pieces of the same color and press their ends together to make one long piece. The pressure from your fingers will be enough to soften the AirHeads and make them stick to each other without needing any other type of adhesive! See below:

C5

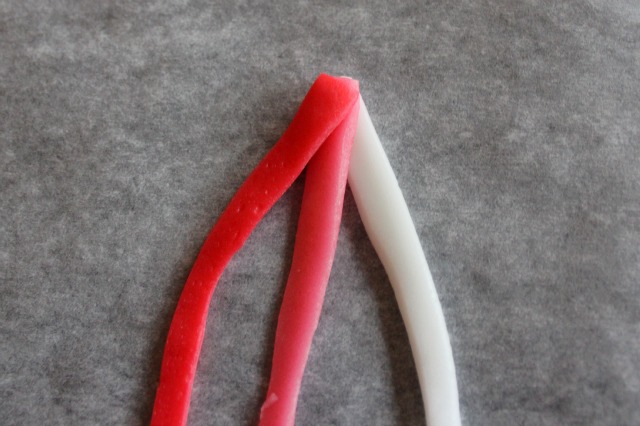
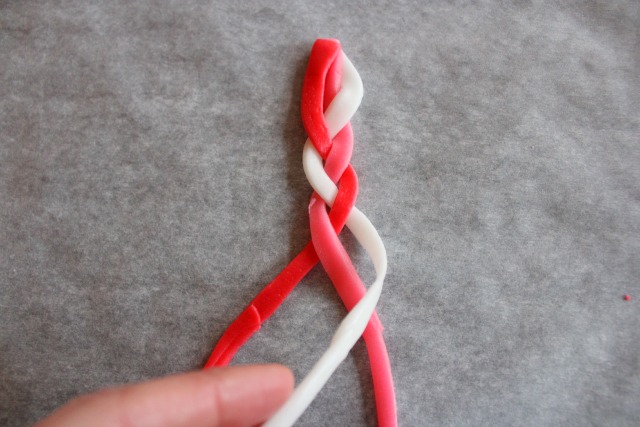
4. Now for the best part! Once you have your 3 long pieces, you can start to braid. First take your 3 long pieces and press them together at the top. Similar to the last step, they will easily hold together just from the pressure of your fingers:

C6

Braid the pieces together, folding the top piece over as you braid. If you know how to do a simple braid, you can do this easy peasy!

C7

Finally, tie on a cute little note and package it up in an airtight plastic bag. I wouldn't make these more than a day before you plan on giving them to friends, so they stay at their freshest.

C8

P.S. I made these bracelets to enter an AirHead's Valentine's Day contest. They were one of the great sponsors at Alt Summit. You can check out (and vote!) for my entry and all the others on their Facebook page!

Post by Haeley : Design Improvised

Simple Shrimp Tacos

February 13, 2013

Audreys-shrimp-tacos

Shrimp Tacos are a staple at our house – a fast weekday dinner that is sure to please even the picky eaters. I always have a bag of frozen shrimp in the freezer and a pack of tortillas. We quickly fry up the shrimp with some oil, garlic and cumin – maybe a dash of chilli if we want a little extra spice.

I then season some sour cream or plain yogurt with cumin and lime juice. A little shredded cabbage for some crunch, coriander and avocado if you like, and a squeeze of lime – you’re set. The best part of this meal is that we assemble everything at the table – the kids love adding all the things they love to their tortilla – sometimes even a bit of shredded cheese will sneak into their serving.

PS: I find the store bought tortillas taste best if I warm them up straight on the gas burner flame – just enough so they blister.

Post by Giulia Doyle : Audrey's

Alt Summit 2013: Nod Supper Club

February 12, 2013

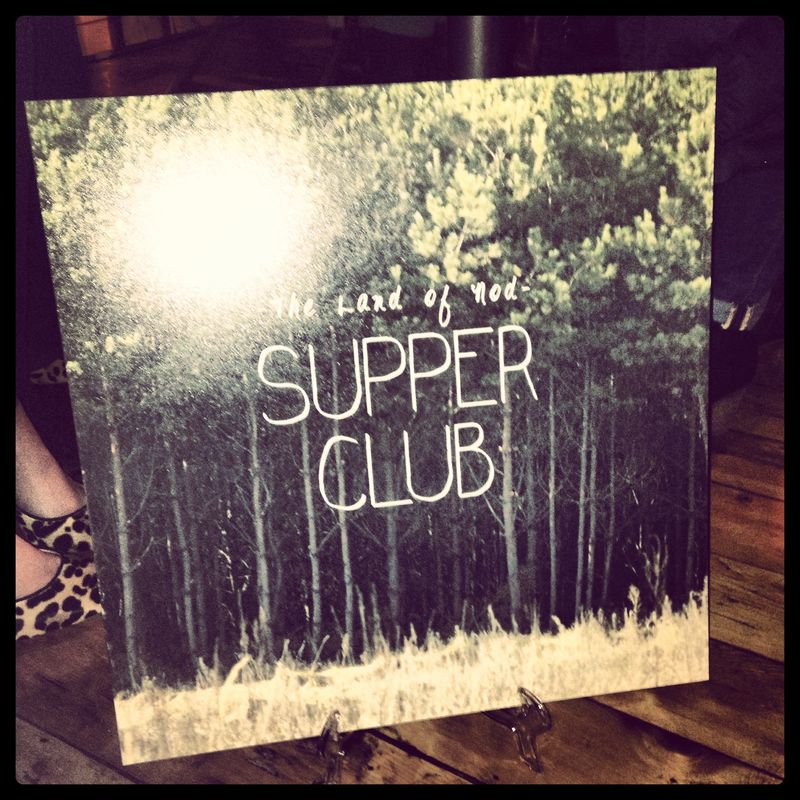
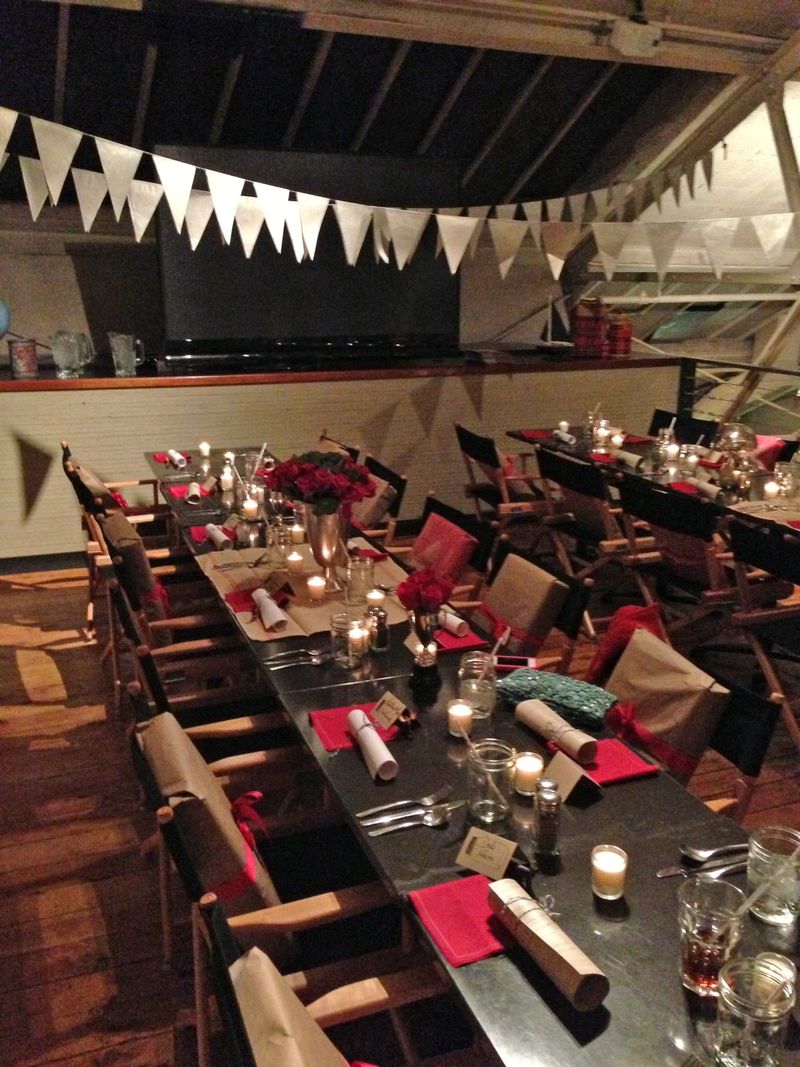
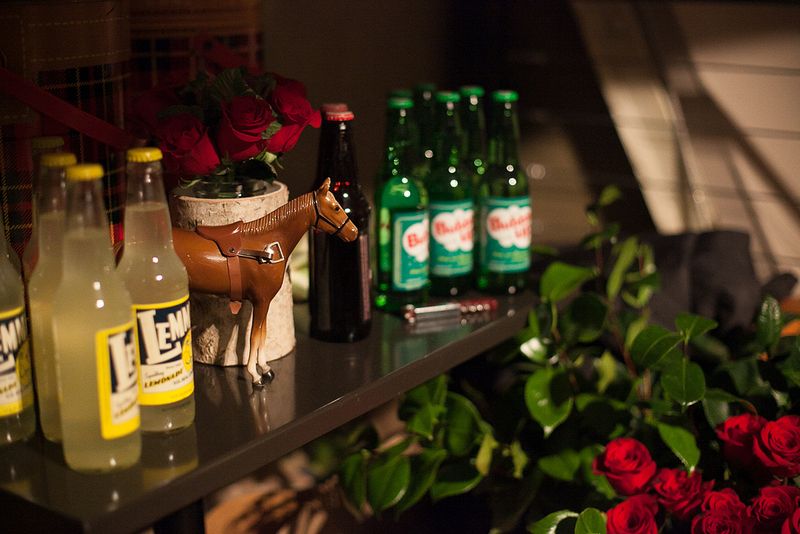
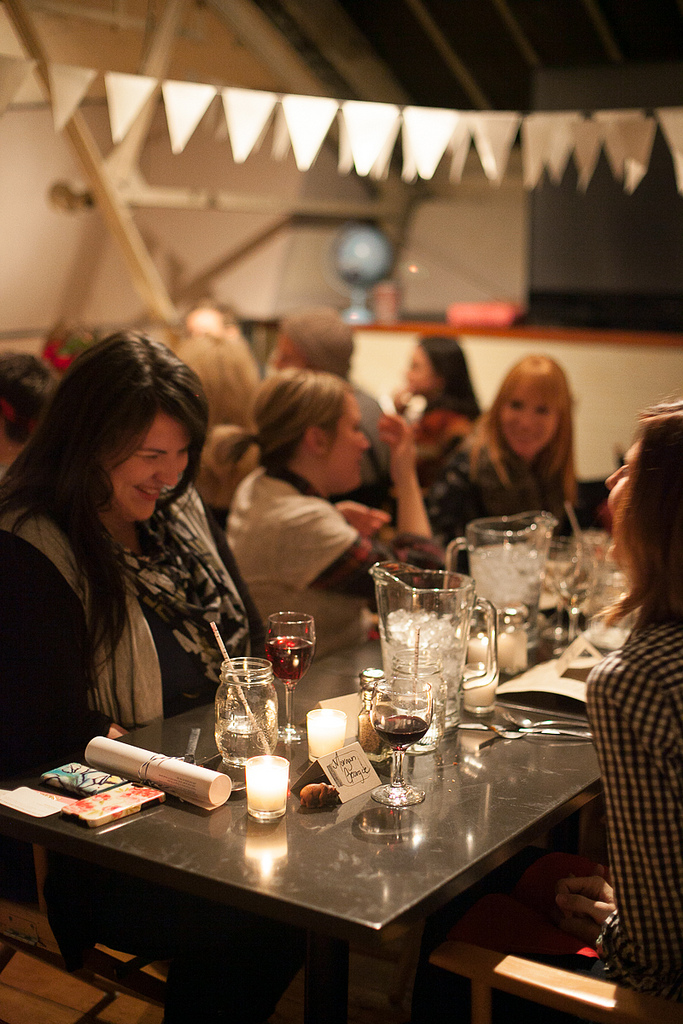
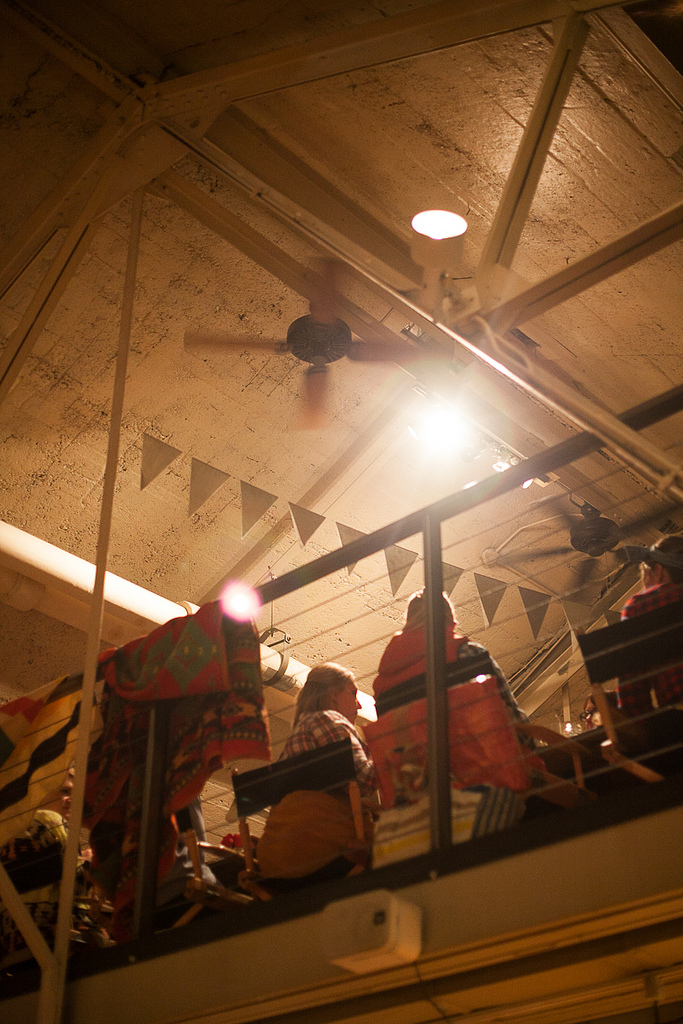
We hosted a dinner at Alt Summit this year in Salt Lake City. We got to meet some of our favorite bloggers and spend some good quality time with them! Our theme for the dinner was Supper Club, and we decorated the space in our favorite American Kitsch décor.

IMG_5200

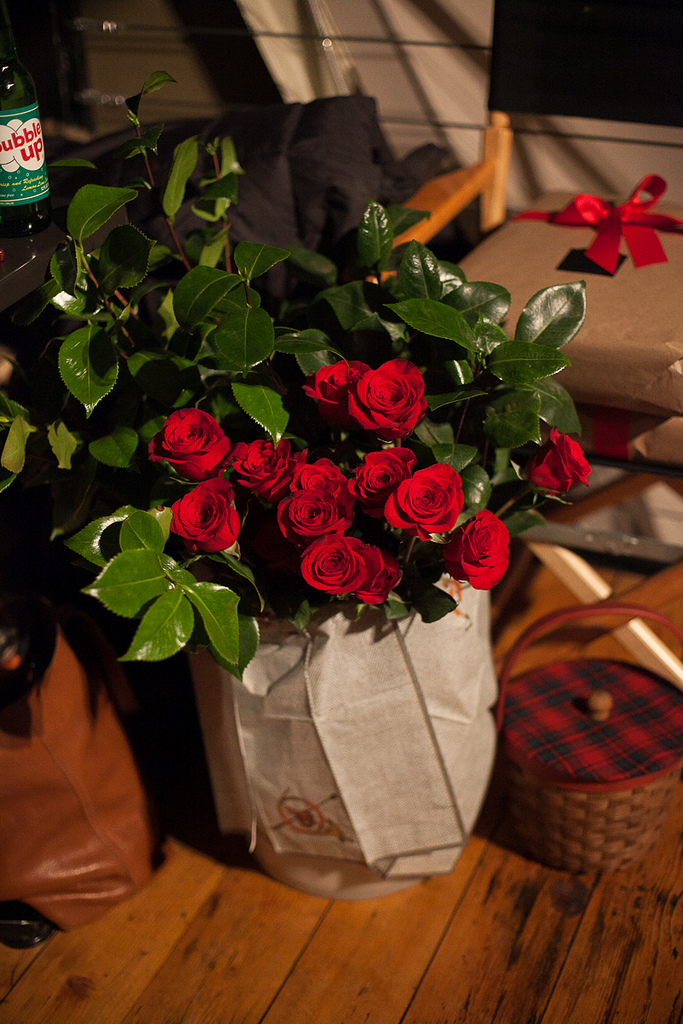
We used red and natural accents to decorate the tables. There were mason jars for drinking out of and we decorated the tables with roses in vintage trophies. Other décor elements included plaid coolers, vintage globes and metallic pennant garlands.

Photo 6

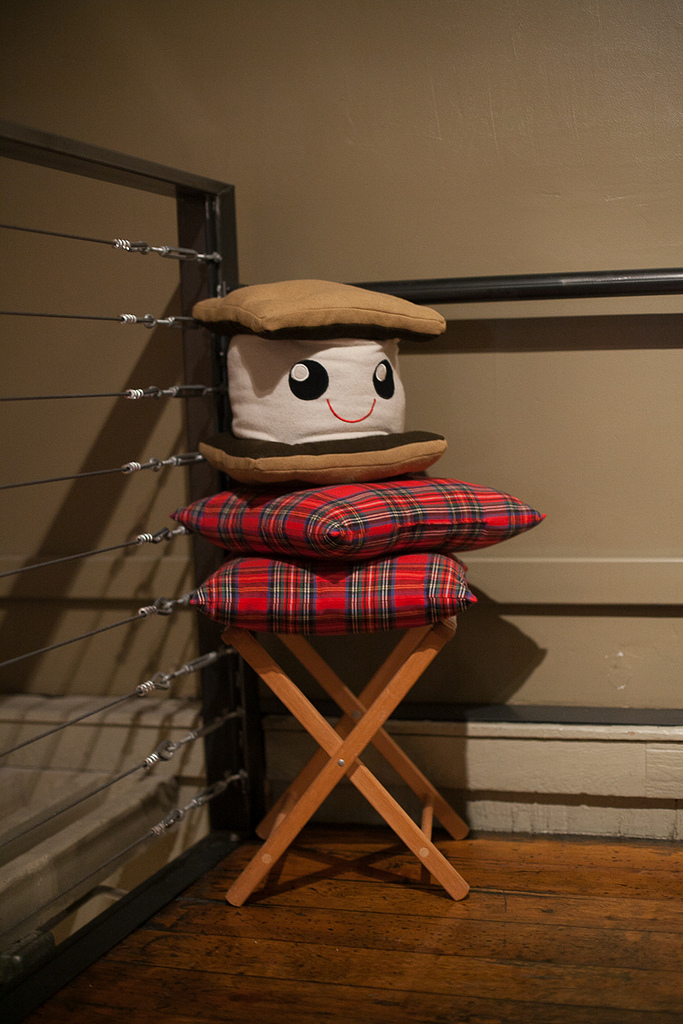
Our favorite Smore pillow greeted guests

8412099314_7e9222b45d_b

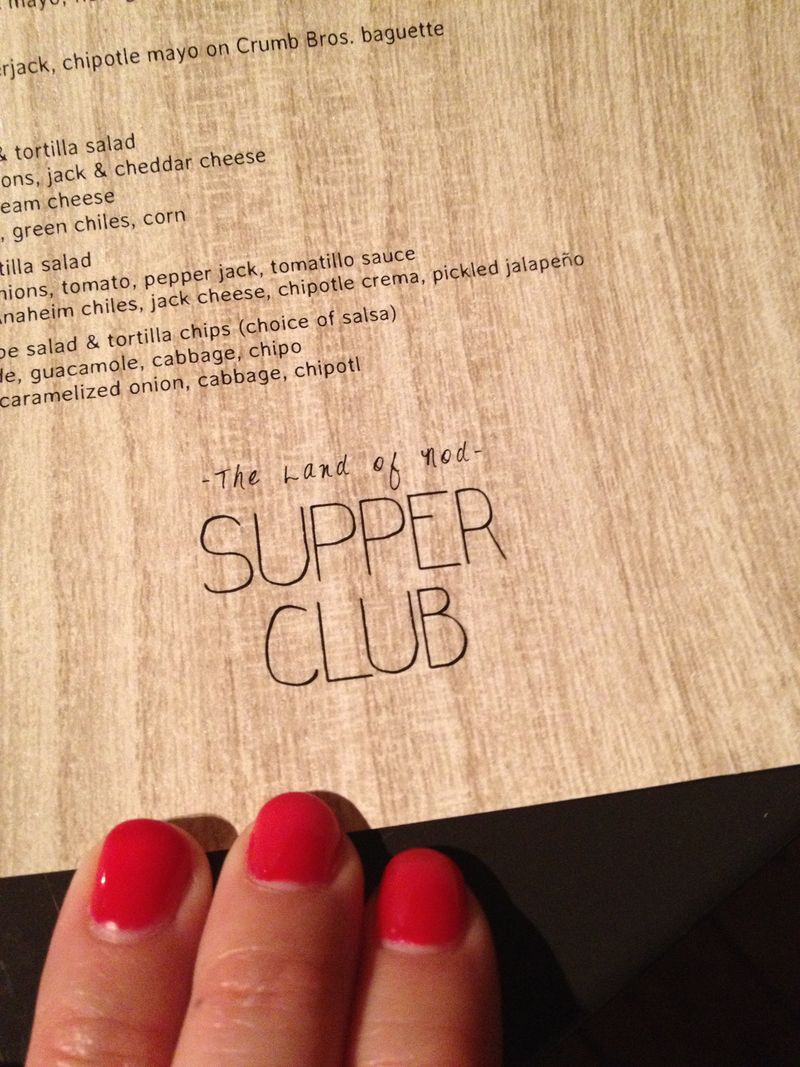
Custom menu on wood grain paper

IMG_5194

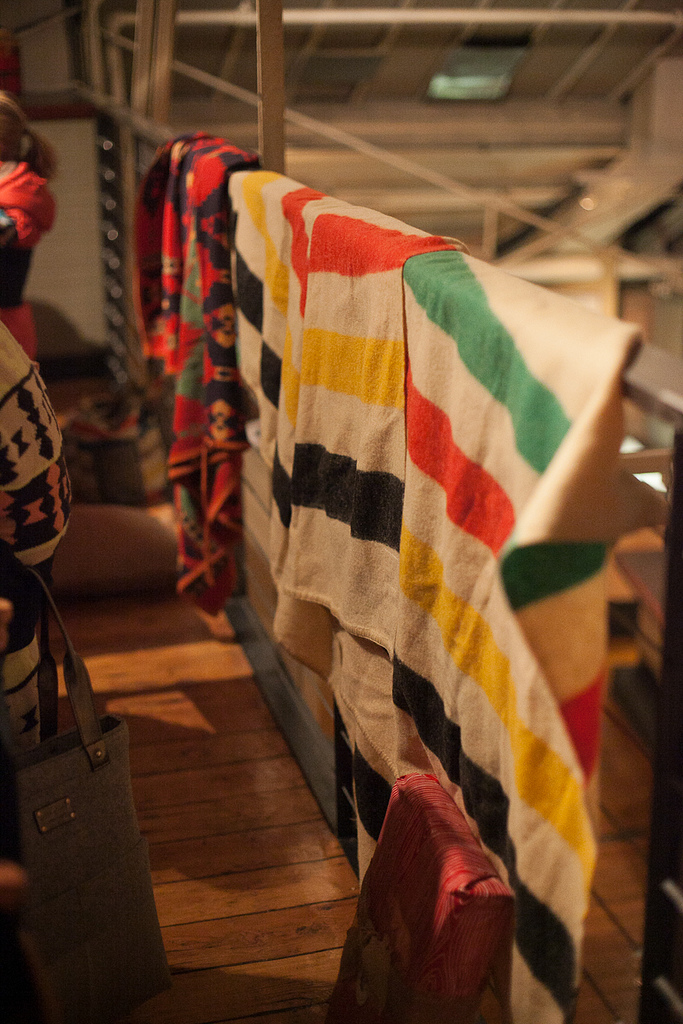
Vintage Hudson Bay blankets

8411002937_e368a30c91_b

The vintage soda bar

8411003045_5559b6a1b4_b

Red roses for that preppy Ralph Lauren look

8412099088_802cac4ec1_b

The kids had a good time!

8411003215_87e3671d35_b

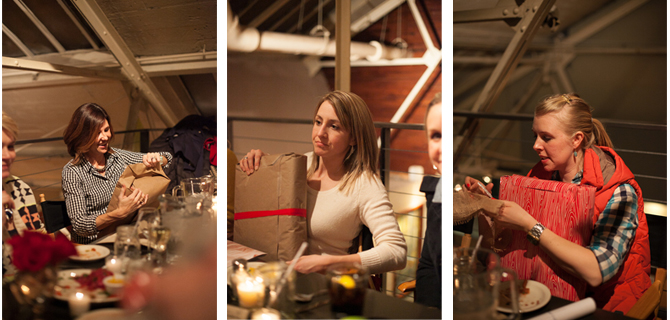
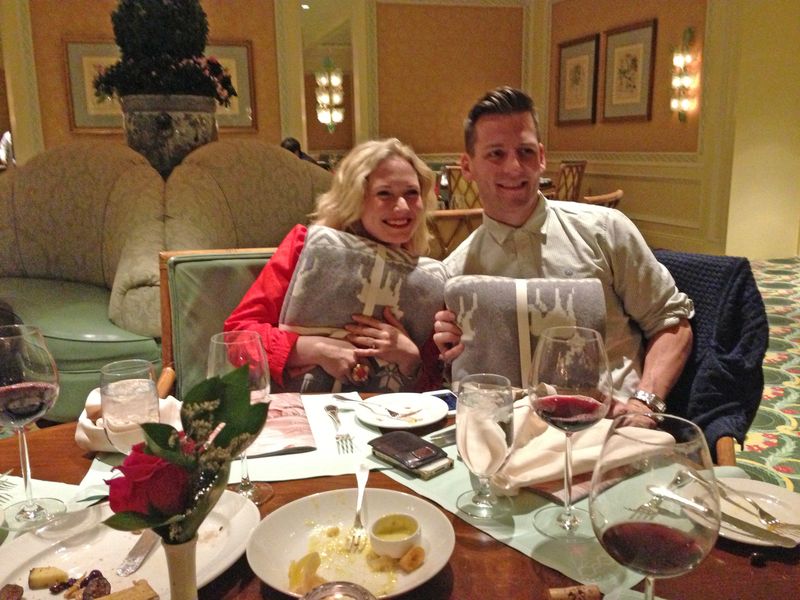
Guests opening their moose throw blankets


Guests

A wonderful night!

8412099358_9e0da055f2_b

Later that week we got to meet Emily Henderson and Orlando Soria, who we have major design crushes on! They were thrilled to have the moose blankets to keep warm in chilly Salt Lake.

Photo 16

If you missed Part 1 of our Alt Summit recap, you can find it here.

By Anna Passadori

Anna develops and designs exclusive product for The Land of Nod. She hails from the west coast and has traveled the world to source product. She loves anything Marc Jacobs, Sofia Coppola or stripes! (So, if anyone can get a photo of Sofia Coppola wearing a striped outfit by Marc Jacobs, please send it along.

Things to Make – Secret Agent Messages Two Different Ways

February 11, 2013

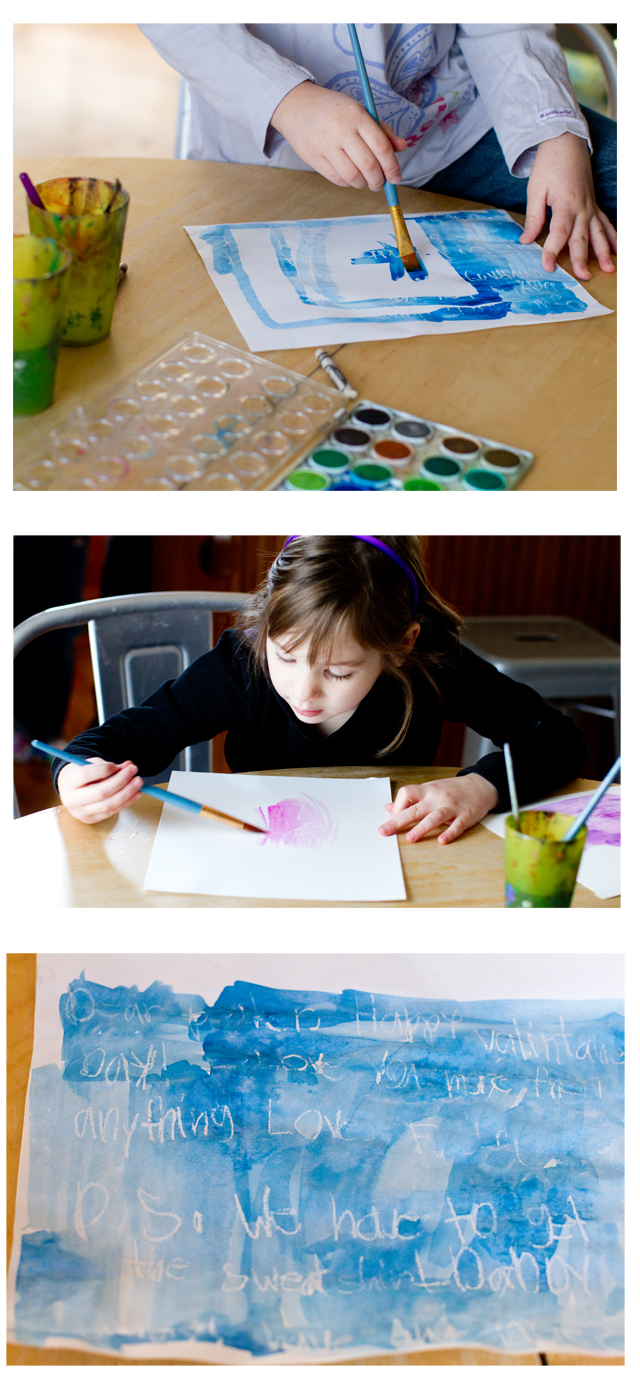
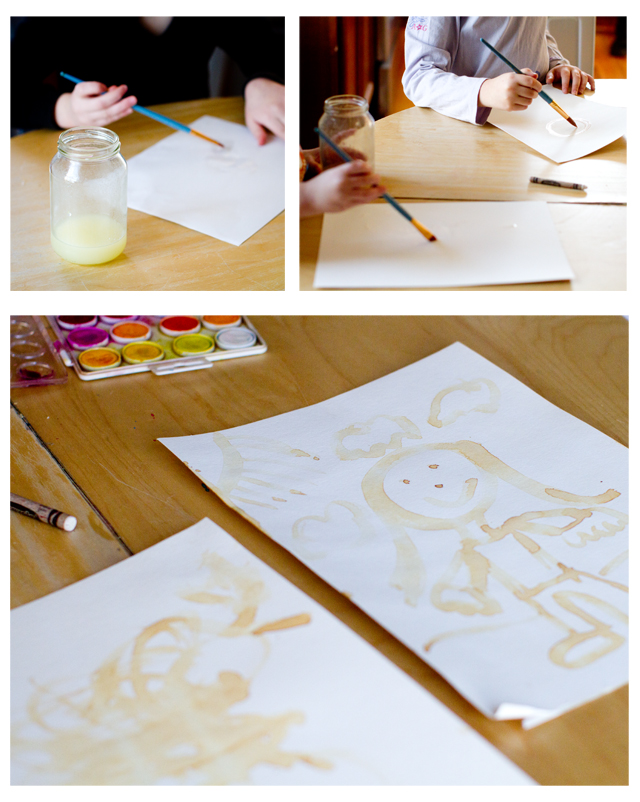
Lately all three of my kids are obsessed with spies and secret agents. My oldest daughter especially loves these kits, whereas her younger siblings prefer hiding behind doors and surprising me. Anyways, on one of the many snow days we've had lately, we spent a morning creating secret agent messages using two different methods in an effort to "trick" the bad guys. crayon  Method 1 – White Crayon.

So so simple. Write with white crayon on white paper. Then paint over the crayon with watercolor paint to reveal hidden messages. lemon Method 2 – Lemon Juice.

I've always heard that you can use lemon juice to create secret messages, but I never knew how to make it work – turns out you that after you paint on the lemon juice, you need to cook the [thick, watercolor] paper in an oven at 350 degrees for a few minutes in order to see the magic pictures appear. Thank you Not-So-SAHM for letting us in on the secret! (And by the way, if you're looking for more spy play ideas, check out Not-So-SAHM's post here).

Post by Darcy : No Monsters in My Bed

Add Some Geometry to Your Decor

February 8, 2013

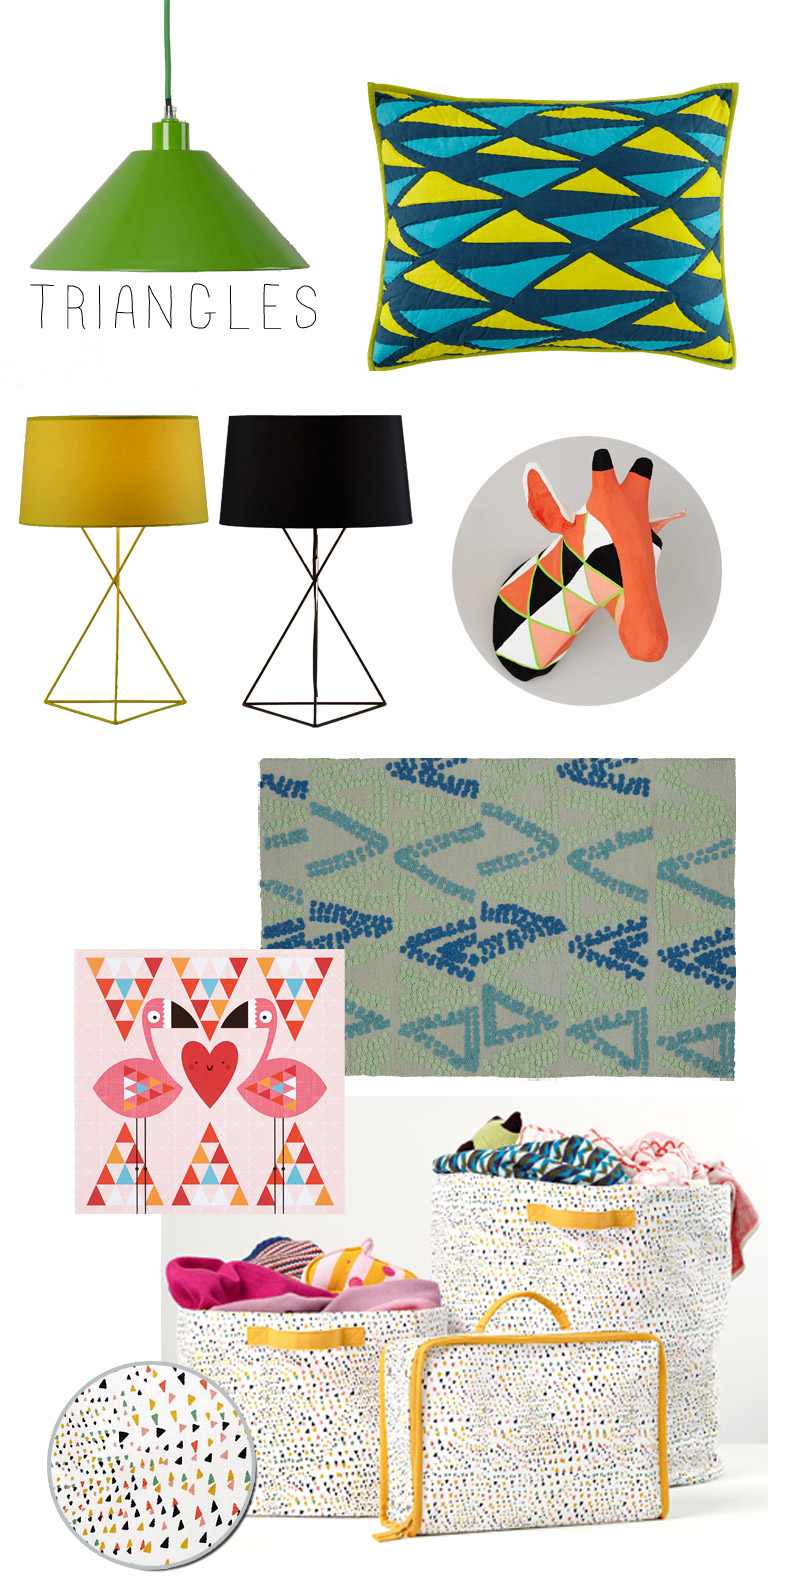
Forget seeing spots, seems everywhere I look these days everything’s covered in triangles. And our new spring collection is no exception. 

Triangles

Product as shown top to bottom: Green Triangle Pendant, Oceanic ShamIsosceles Table LampGiraffe HeadEvergreen and Blue RugFlamingos Wall ArtDesigned to be Organized Bins

If you’re nervous about incorporating trends into your space, do it in small doses. That way you won’t break the bank or need to completely redecorate when the parallelogram dethrones the triangle! Another way to look at it is just like you’d look at clothing, add trend in accessories (jewelry, shoes, purses), but stick to the classics for that 3-piece suit.

By Danielle Kurtz

Danielle is the Creative Director at Nod and an over-protective mother of two. She’s also completely obsessed with Pinterest, Twitter and her Kindle, but not necessarily in that order. Danielle loves to craft, sew and crochet, but all her supplies have a layer of dust on them about 5-years-thick, wonder if it's just a coincidence that her oldest kiddo is 5 years old?


DIY Mosaic

February 7, 2013

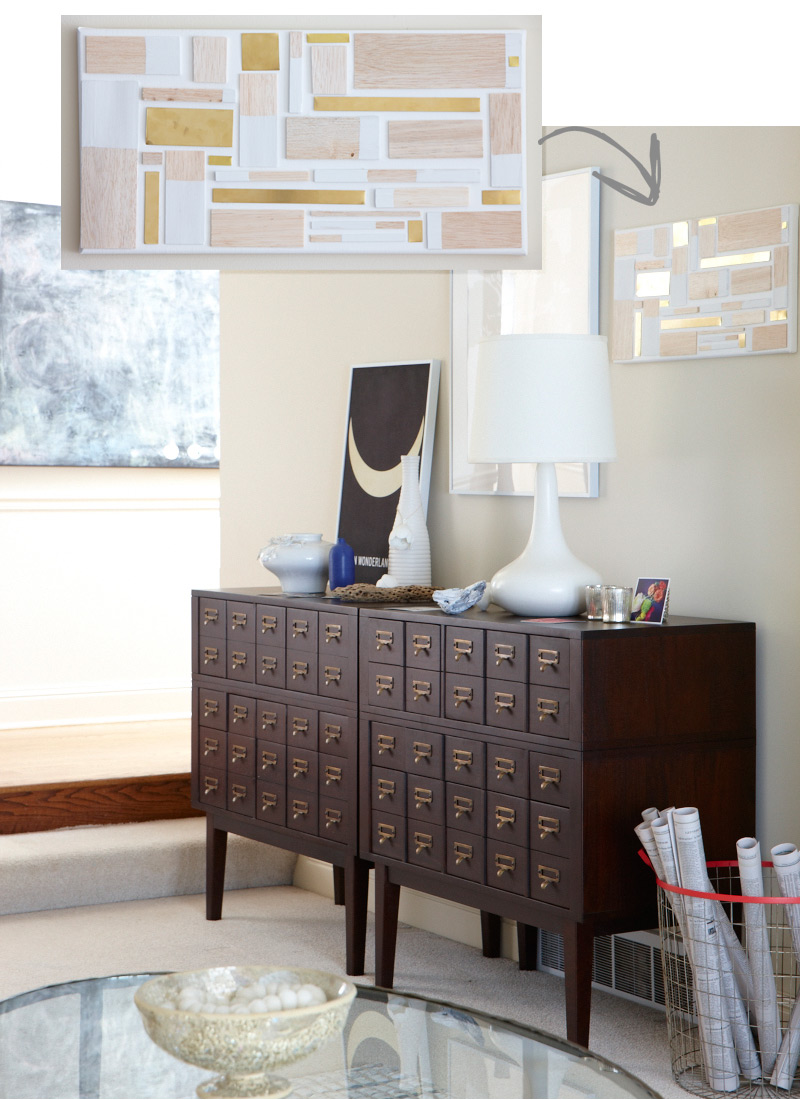
MosaicTryThis_1

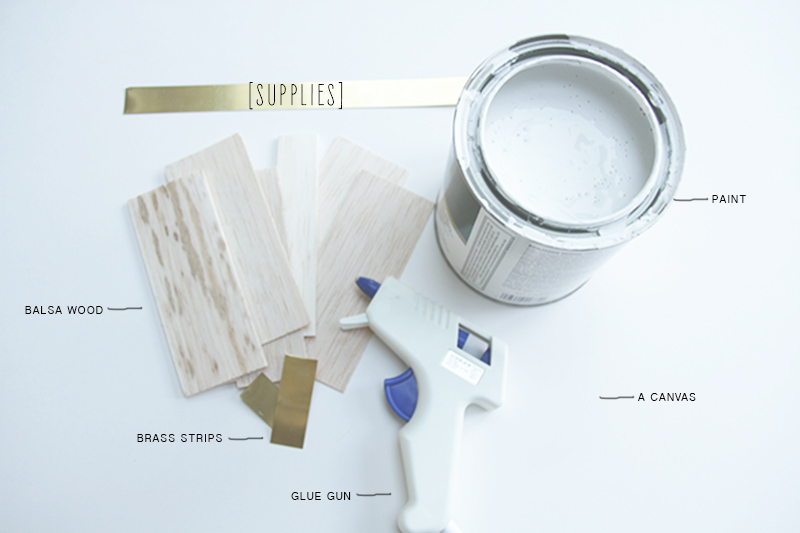
Mosaic supplies_ La La Lovely

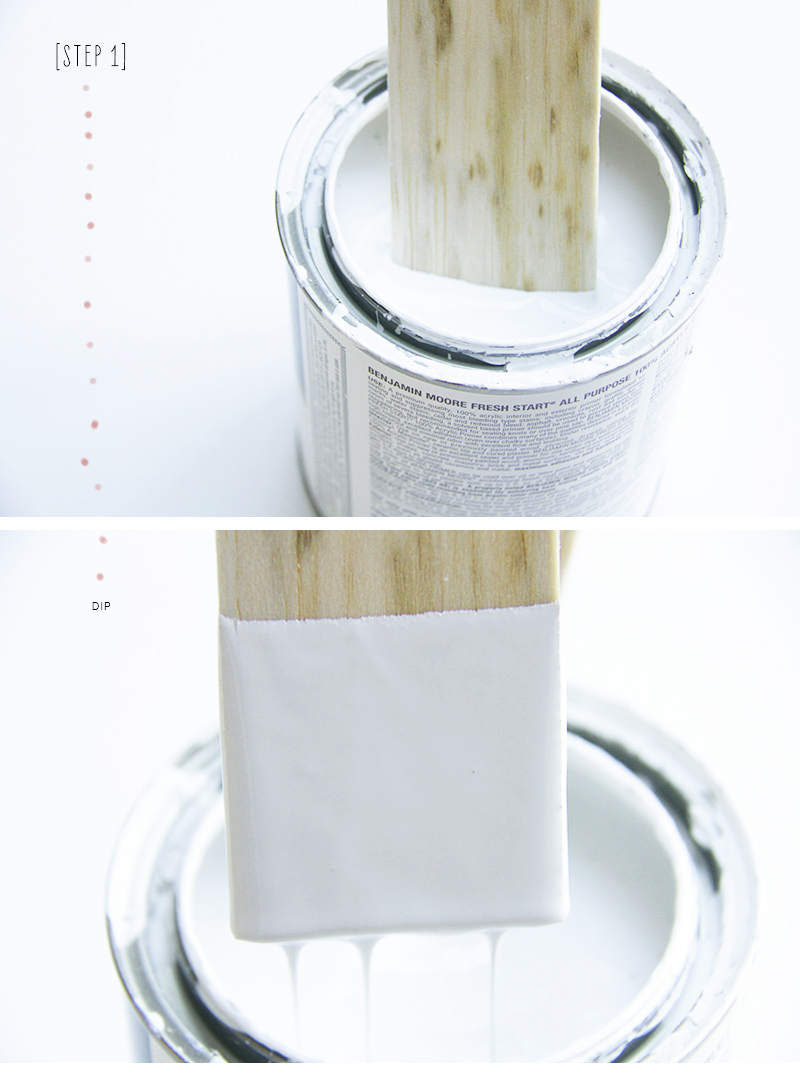
Mosaic 1 _La La Lovely

Mosaic 2 _La La Lovely

Mosaic tip_La La Lovely

Mosaic 3 _La La Lovely

By Trina McNeilly. Who blogs at la la L O V E L Y, a lifestyle blog with an eye for design in all areas of life. She started la la a few years back to keep track of this + that + everything pretty in between. And, it just so happened that la la Lovely is where the lovely things land.