Close

Blog

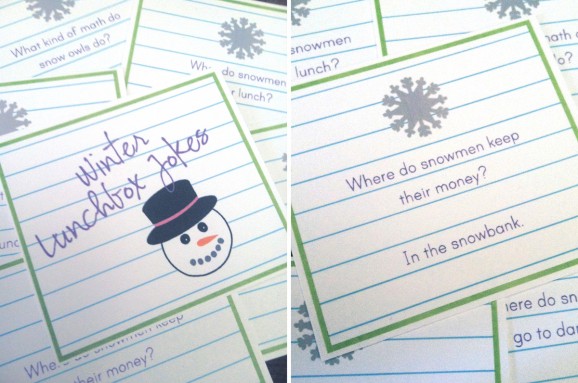
Winter Lunchbox Jokes

January 14, 2013

1

It’s the middle of January, and I can’t help but wish for a little snow! With that in mind, I thought a few cold-weather winter jokes for our kids’ lunches would help us all appreciate winter? Or at the very least give our kids a giggle in the lunch room!

As for the snow, it’s a comfortable 70 degrees today here in Phoenix… I’m pretty confident we won’t be getting any fluffy white flurries today ever. Nonetheless, I’m sure we’ll enjoy our day! After a quick Valentine’s photoshoot (Yay!!!) at Bettijo’s this morning, Harrison and I plan to ride our bikes to the park. What’s on your agenda today?

Oh, before you get going, be sure to download your winter lunchbox jokes!

Reposted with permission by Aimée Lowry & Bettijo B. Hirschi from PagingSupermom.com

Things to Make – Winter Trees

January 11, 2013

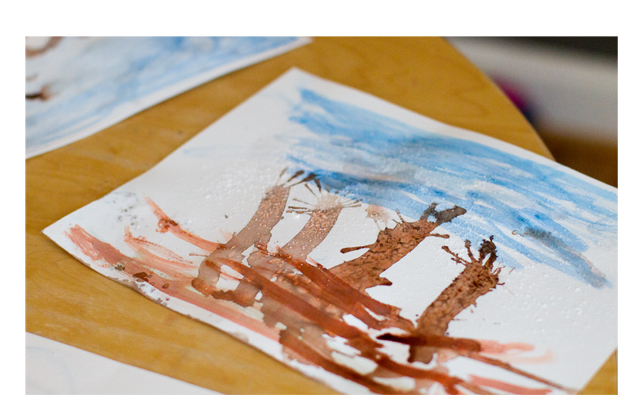
finish This project was one of my daughter's ideas, from her copy of Art Treasury , which has become her lazy day boredom buster. Anyways, making winter trees proved simple and fun, so we'll probably try it again sometime.

Here's the scoop:

1. Use watercolor paint to create a sky and ground on a blank sheet of watercolor (or other thick) paper.

2. Then pour some brown liquid watercolor paint into a small container (we didn't have brown so we mixed orange and black). If you don't have liquid watercolors, you could use food coloring or soak marker tips in a small amount of water.

3. Drop a larg(ish) glob of the brown paint on the paper and use a brush to create a tree trunk, then use straws to blow the paint over the paper to make branches (this is the fun part).

4. (Optional) Sprinkle the pictures with salt to create a snow/frost effect.

untitled (17 of 57).jpg lodtwo

Post by Darcy : bedtimemonsters.blogspot.com

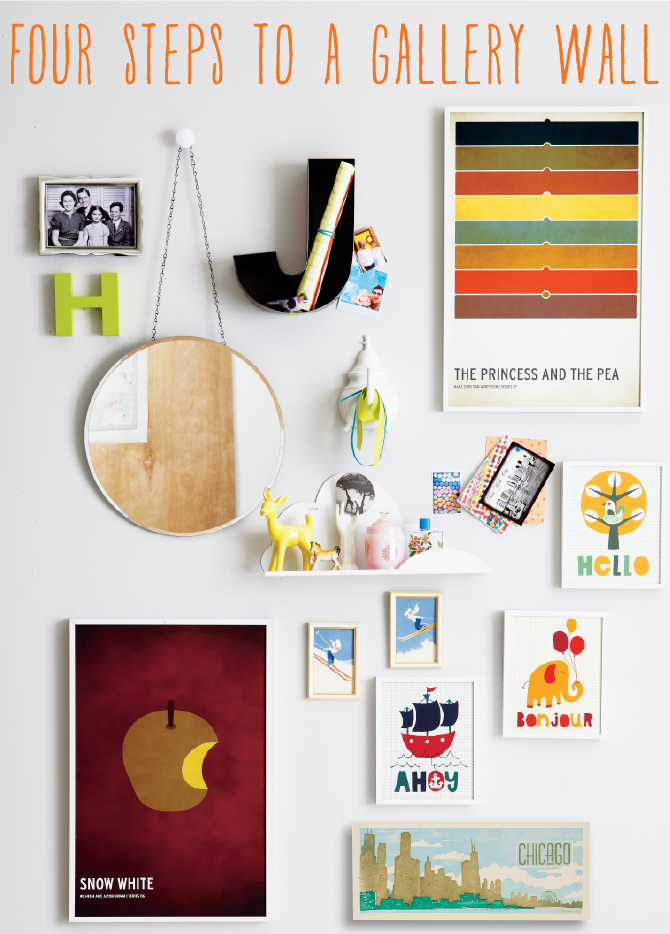
Four Steps to Creating a Gallery Wall

January 10, 2013

Four Steps to Creating a Gallery Wall

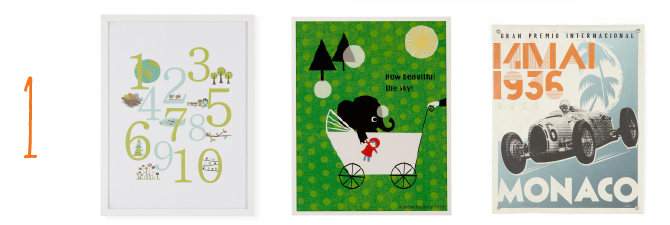
Step 1 – Start with a large piece of art so your eyes get drawn in (no pun intended). This will act as the focal point for the whole display.

Four Steps to Creating a Gallery Wall - Step 1

 Step 2 – Add smaller pieces for contrasting scale. Choose frames in the same color for a cohesive look.

Four Steps to Creating a Gallery Wall - Step 2

Step 3 – Personalize with words or letters. Different shapes will keep it from looking too boxy.

Four Steps to Creating a Gallery Wall - Step 3

 Step 4 – Create depth with a 3-dimensional accent.

Four Steps to Creating a Gallery Wall - Step 4

Step 5 – (Optional) Stare at wall.

Product as shown.

Step 1: Framed Wall Art

Step 2: Unframed Wall Art

Step 3: Wall Letters

Step 4: Misc Wall Decor

Puff Pastry with Balsamic Tomatoes

January 8, 2013

1

This is the easiest recipe that you can either serve as an appetizer or a light dinner with salad. My daughter ate it, but my son didn’t because of the visible vegetables.

How to:
  • Store bought frozen puff pastry
  • Tomatoes (smallish ones or cherry tomatoes)
  • Green onions
  • Cream cheese at room temperature
  • Balsamic Vinegar
  • Salt and pepper
  • Defrost the puff pastry and cut into small squares if used for an appetizer or leave as one large sheet if using for your dinner. Place on parchment paper lined cookie sheet and pre-heat oven to 400F.
  • Stir cream cheese to make it spreadable and season with salt and pepper. Spread carefully on puff pastry.
  • Cut tomatoes into wedges or quarters if using cherry tomatoes. Distribute on top of cream cheese.
  • Cut green onions and distribute on pastry pieces.
  • Drizzle with balsamic vinegar and bake in oven until crust is crunchy and golden – about 20 minutes. Let cool a little and enjoy! This is nice warm or at room temperature.

Need more tasty recipes and delicious bites? Check out our Let’s Eat Pinterest Board.

Post by Giulia Doyle : Fishly News

Making a Dent in the Winter to do List

January 7, 2013

When a new activity checklist pops up on the fridge, my kids get right to work. Oddly enough, they don't have the same attitude concerning the chore checklist. Strange. They mean business with these activities, though. And we've made a decent dent in the Winter List during its first week on the fridge.

Here are a few of our favorites so far:

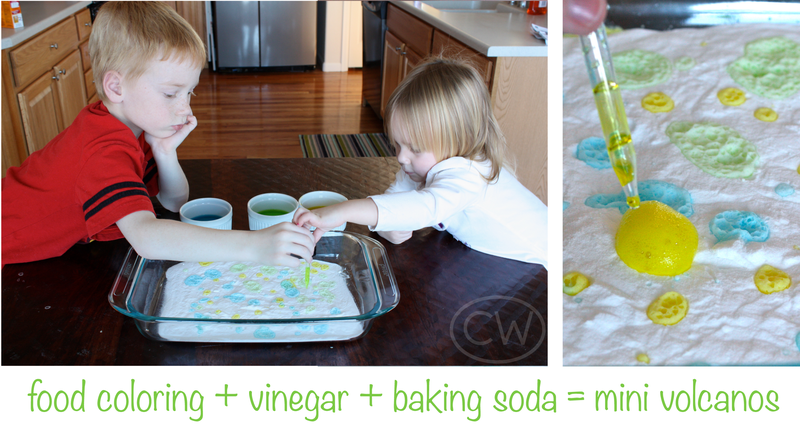
Mini Volcanos: It's the same concept as the baking soda/vinegar volcano minus all the paper maché mess. Just use an eye dropper to drop colored vinegar onto a bed of baking soda and ta-da…instant science project, with minimal mess.

Winter list-05

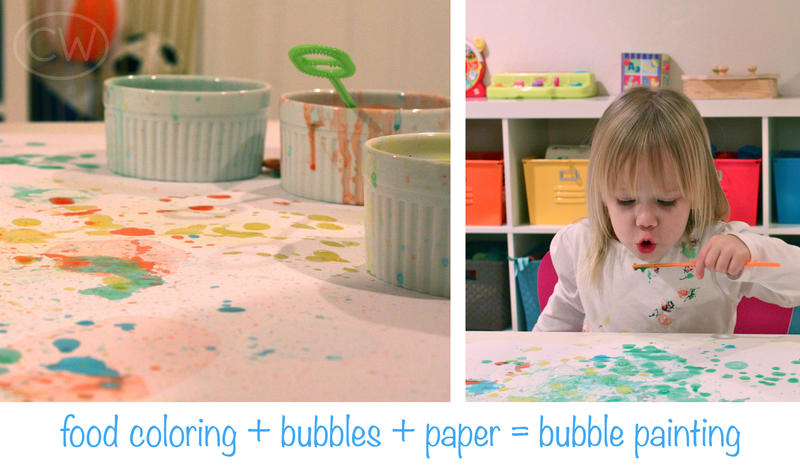
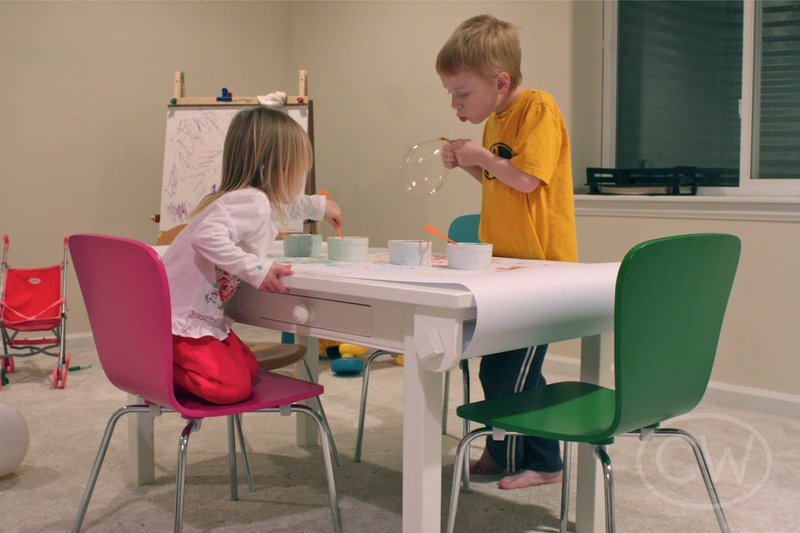
Bubble Painting: We'd been trying to freeze bubbles outside, but alas, it was too windy. So we tinted our bubbles with food coloring and marched downstairs for an art project instead. The kids really loved this one. And now we've got a super-sized masterpiece to hang on our bare playroom walls. Everybody wins.

Winter list-04

Winter list-03

P.S. Yep…my photos are grainy and horribly lit. That's the way we roll in the basement at night. Just keeping it real. You're welcome.

Post by Christina Williams : justcallmechris.blogspot.com

100 Things to do This Winter

January 3, 2013

Post by Christina Williams of justcallmechris.blogspot.com

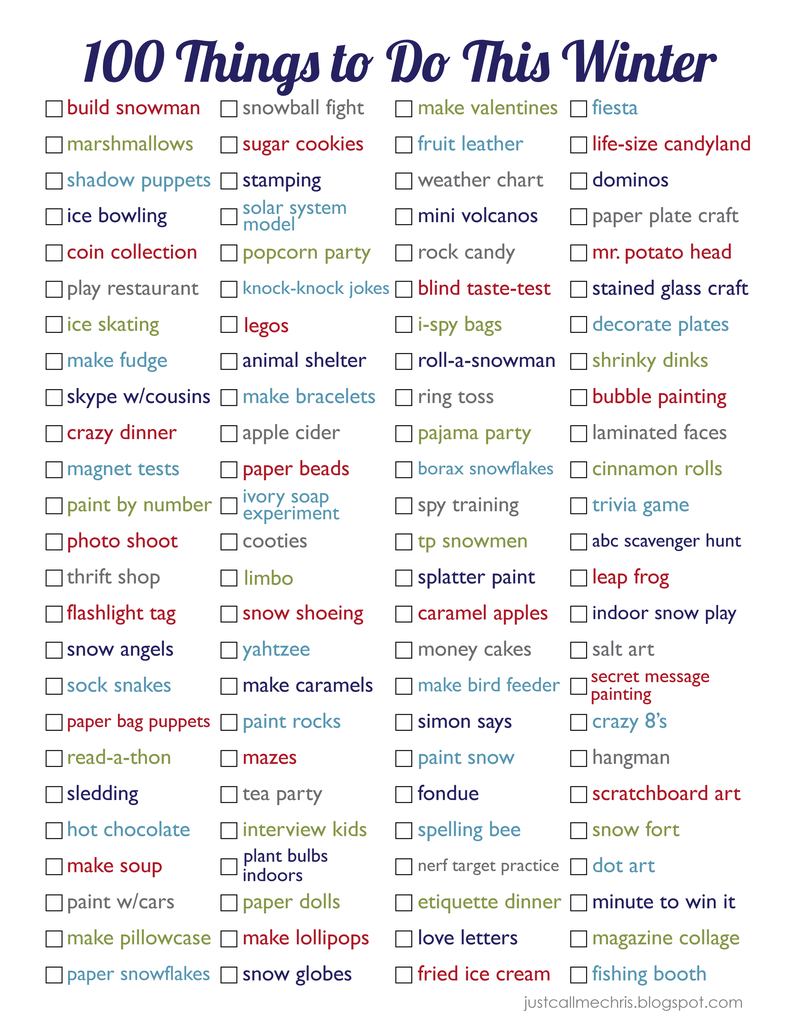
This is the first winter we’ve lived somewhere with actual winter weather. Snow, ice, howling wind, sub-zero temperatures. We’ve got ’em all. And it’s gonna be a loooong winter. So I’m fighting back with a Winter List…the cold-weather companion of the Summer List and the New Summer List.

There are two items on the Winter List that appear on one of the summer versions: ice skating, and making snow globes. But they’re both very seasonally appropriate activities, so I let it slide.

And if you’re one of those lucky ducks who doesn’t have harsh winter weather, then you’ll just have to get a little inventive with the list. {Think: indoor snowball fight with rolled up socks, “snow” angels in the sand, etc.} Just get creative, and have some fun! And everyone keep your fingers crossed that I survive the winter. I’m not sure I’ve got it in me. 😉

Winter List-01

Here’s a link to the free printable version of the Winter List. Have fun!

Post by Christina Williams of justcallmechris.blogspot.com

Old Christmas Card DIY Projects {Three Ways}

January 2, 2013

Post by Maggie Terryn of Mom Colored Glasses

If you’re anything like me, you have a difficult time throwing your stack of Christmas cards away at the end of the month.  I mean, people took time to send you a picture of their family–and many of them–are beautiful; Christmas cards aren’t cheap!  So it’s no wonder that I have four gallon-sized Ziploc bags in my basement all housing the last four years worth of Christmas cards.  And every year I shuffle through those bags and think, “I should really get rid of these…..or do something with them…because this is just silly.”

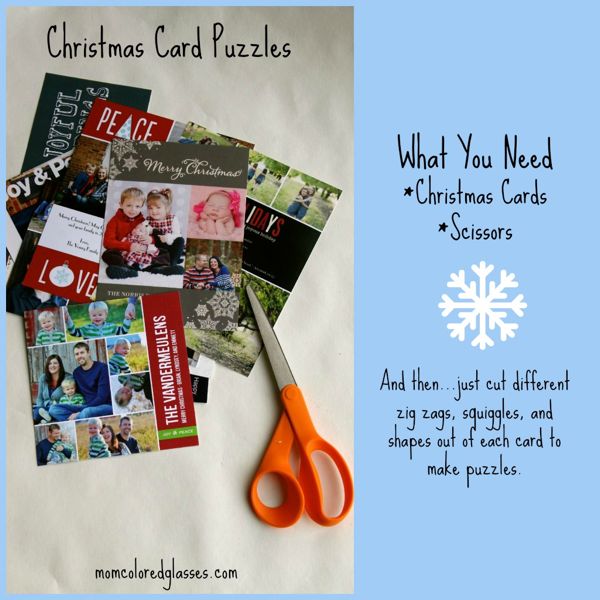
So I have  three simple old Christmas card DIY projects you could do with your Christmas cards this year instead of throwing them in a Ziploc bag or, gasp, the trash.  One is for the younger kiddos (think 2-4 years old) and on a difficulty scale of 1-10 is about a negative five, one is for you or to gift to someone special and is a little more difficult than the first one and the final idea is to use next Christmas or the rest of this year depending on which cards you select to use for the project.

So, gather your stack and let’s get started.

Project #1:  Christmas Card Puzzles

(Figure out which Christmas cards you’ll want to use for Project #2 before commencing with project #1.)

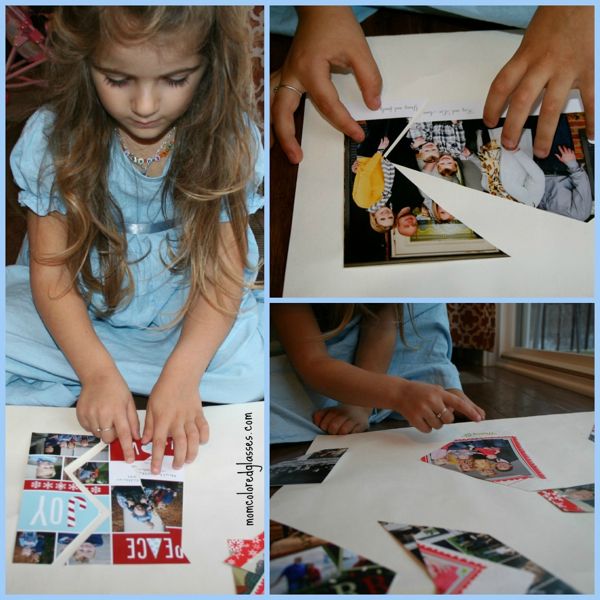
Old Christmas Card DIY Projects - Card Puzzles Remember, this is for the younger set so you don’t want to make your pieces too intricate.  Shuffle them all and lay the pieces picture side up on the floor and have your toddler work on putting them together.  Many times your kids will recognize some of the people in the pictures and they’ll think it’s fun to put their faces together.  It’s also a great activity to get them thinking about categorizing things.  They’ll have to look for similar patterns, colors, texture, and finish when they’re finding the pieces for each puzzle.

Old Christmas Card DIY Projects - Card Puzzles 2

Project #2:  Christmas Card Ornaments

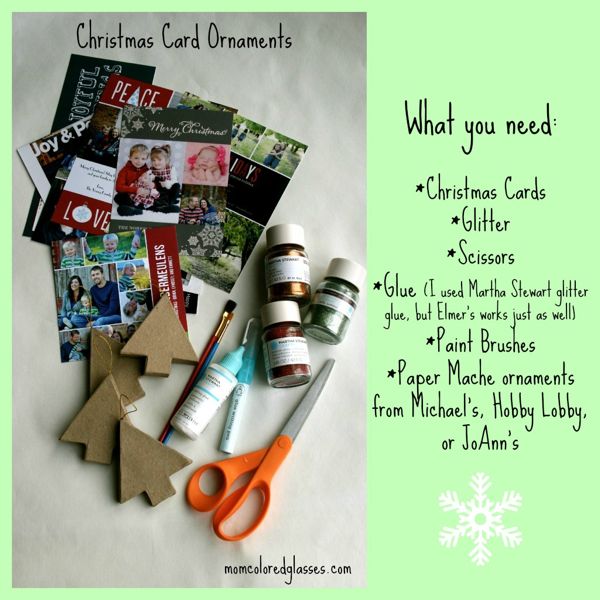
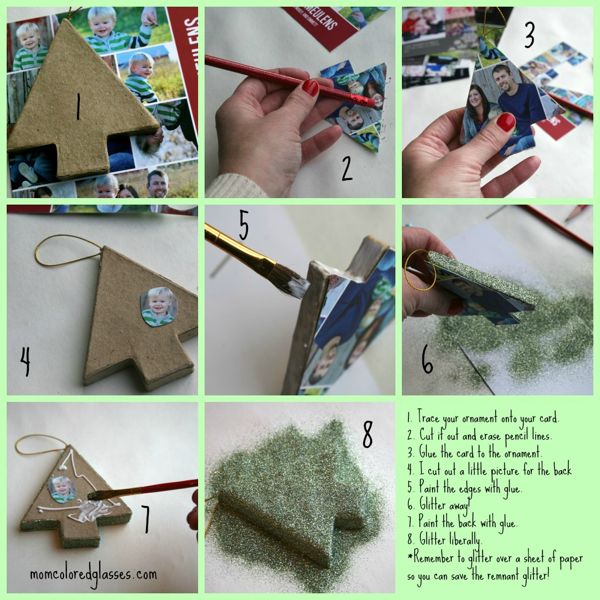
My mom made one of these for me last year and I loved it!  I thought it was genius and made sure to tuck the idea away for this year.  It will require a little more time on your part, and of course glitter……but that’s always a good thing in my book.

Old Christmas Card DIY Projects - Christmas Card Ornaments

Old Christmas Card DIY Projects - Christmas Card Ornaments 2

Old Christmas Card DIY Projects - Christmas Card Ornaments 3

Project #3:  Christmas Card Gift Tags

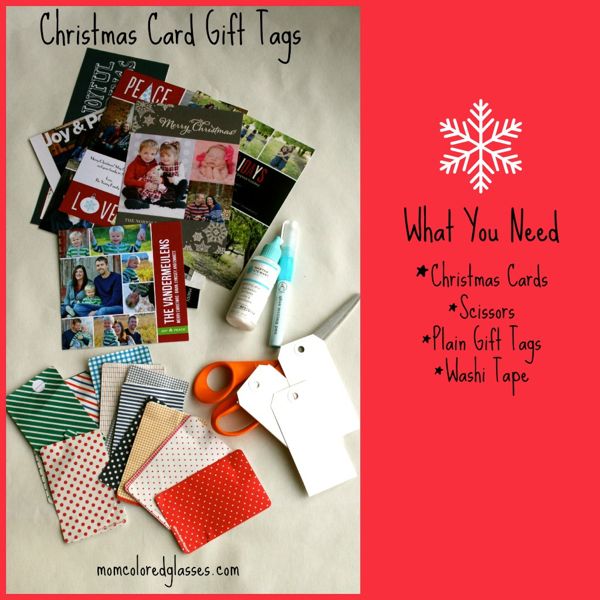
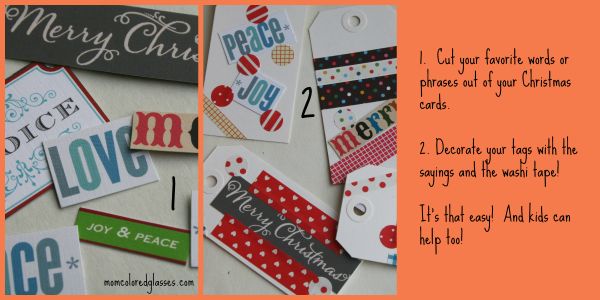
Theoretically, these could be use on any gift all year long.  However, they’ll probably end up looking a bit “Christmas-y” as you’ll be using Christmas card scraps.  So really……it’s up to you how festive you make them!  I know I plan on saving mine specifically for Christmas gifts next year as I’m always lacking in the gift tag department when it comes to wrapping night and I end up just writing the recipients name on the back of the package in Sharpie!

Old Christmas Card DIY Projects - Christmas Gift Tags

Old Christmas Card DIY Projects - Christmas Gift Tags 2

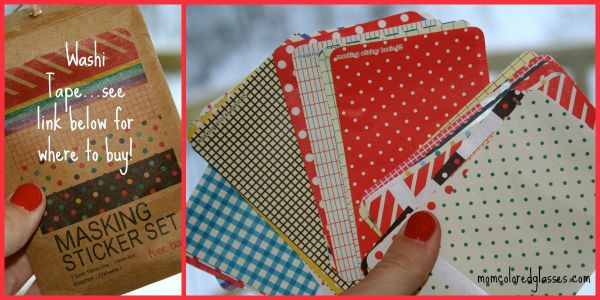
Washi Tape:  You can buy them from Amazon if you don’t have any and you really want some….no one would blame you!

Old Christmas Card DIY Projects - Christmas Gift Tags 3

When you have a nice stack throw them in your box with all of your Christmas ornaments!  That way you’ll be sure to come across them next year when you need them!

Have fun crafting with your cards!  Make sure to get the kiddos in on the action too!

Post by Maggie Terryn of Mom Colored Glasses

“French Kids Eat Everything.” An Important Book for Moms!

December 28, 2012

“French Kids Eat Everything” is the most convicting book I’ve read to date on day-to-day parenting.  Additionally, nothing I’ve encountered in the last few years on food education (Super Size Me, Fast Food Nation, Eating Animals, Food Inc., etc.) has provoked more thoughts in me about changes I personally need to make in my own eating habits as this book.

Karen Le Billon’s book is nearly impossible to put down, and once finished I think you’d be hard-pressed to admit that it didn’t stir in you the need to take some action in regard to changing the way your kids eat, what you make for them, how much you let them snack, how you eat, American ‘food extremism’ that generally falls flat (Atkins diet, gluten-free eating, shake diets, home delivery meals, etc.), and what REAL food is.

Le Billon’s book is told as an entertaining narrative of her family’s experience living in France for a year (a family that included two typical North American kids who prior to their arrival in France existed on pasta, crackers, and nothing green) but is heavily laced with statistic after statistic that drives home how vastly different French kids eat from American kids; eating well in France is as ingrained in their culture as eating fast food is in ours.
1

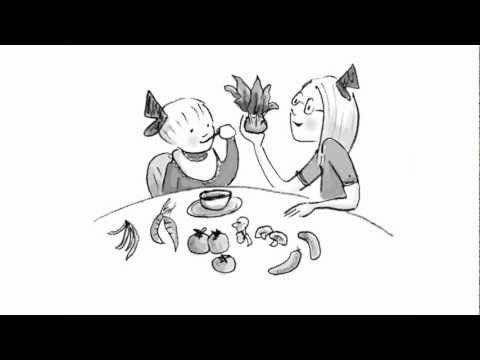
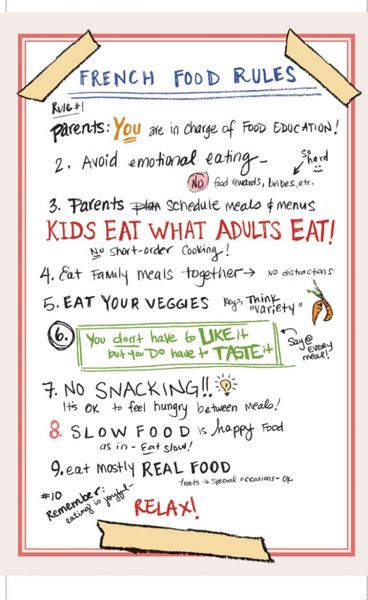
“French Kids Eat Everything” is written on the platform of ten unwritten French rules that LeBillon found herself assimilating to while abroad; rules that she was bent on proving wrong as she recounts numerous heated discussions with her new French friends about how ridiculous she thought they were about eating.  But she soon realized that her children needed to go through a food “re-birthing” of sorts; learning to eat all over again as if they were still infants–because the French way of eating just made more sense after-all.  Most North American kids she concluded are neo-phobes…….they have a fear of new foods and we….their parents…… are to blame.  She also couldn’t ignore the statistic that only 3% of French children are considered obese compared to 20% of American children.
2

Is it possible to implement all ten of these immediately, or ever?  Especially while living in America? I don’t know.  But I think it’s worth a shot.

A handful of these I feel like I’m pretty good at, #3, #4, and #6, but others–I’m giving them a try as I write.

Rule # 7:  SNACKING

LeBillon tells many stories in her book of French parents being put off with her if she offered food to their children outside of meal time, the jokes that French people tell of those (foreigners of course) they see consuming “disgusting” snacks and constantly “slurping” drinks, the no-nonsense reaction her daughter’s teacher  had when she asked if she could send a snack to school with her (the answer was a resounding NO), and the fact that the French believe it’s okay to be hungry, to work up an appetite, to look forward to their next meal, and to actually eat a tasty fulfilling meal each time so you don’t have a need to load up with snacks in between.  Proof that the French are baffled by North American snacking; most strollers made in France do not have cup-holders and traditionally, cars made in France don’t have them either.

How many times do I make sure my purse is loaded up with fruit snacks, 100 calorie packs, or a cheese-stick……just in case my daughter gets fussy, gets impatient, we’re five minutes late for a meal, I need her to be quiet while I’m on the phone, or because I know it’s easier to just give her a little bag of gold-fish when she’s cranky instead of showing her how to change her attitude and learn patience? The same amount that most North American moms do and that’s the problem.

The French believe in one substantial (consisting of REAL food–cheese and crackers, fruit, vegetables, bread and butter, etc.) snack a day–usually between three and four in the afternoon (they eat dinner around seven) and that’s it.  I’ve been pretty religious about this going on a week now and the biggest difference I’ve seen is that my daughter finally has an interest in eating a good breakfast–eliminating almost all of her requests for snacks mid-morning.

*Word to the wise…….you have to include yourself in the no snacking rule if you want your kids to do it; they learn by osmosis.  So find a good hiding spot to scarf down a handful of Cheez-its or challenge yourself to eliminate snacks too.  Ouch!

Rule #5:  EAT A VARIETY OF VEGETABLES

One of the most mind-blowing sections of LeBillon’s book is the day care and school lunch menus that are posted on the doors of every school and day-care center in France at the beginning of the week.  Lunch menus for kids…..infants, toddlers, kindergartners, third graders, middle school students, everyone; in every school and day-care center, no matter the socio-economic make up of the school.  The French believe that healthy diets and high quality food should not just be accessible to the elite and the food education their students receive in all schools proves it.

The menus include things like leek soup, beet puree, goat cheese and endive salad, roasted sole, mussels, and spinach soup.  There is no such thing as kid food–all French people eat the same thing.  Schools believe that educating students on healthful, delicious food is as much a part of the education process as getting students to understand addition, subtraction, and reading and writing.

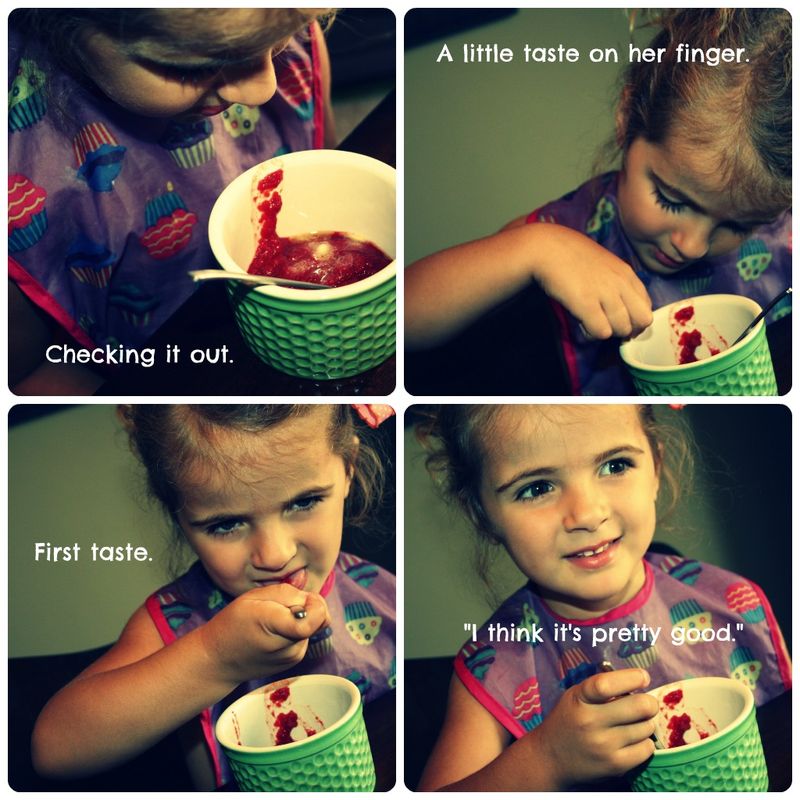
So in true French fashion I whipped up some beet puree for my daughter this week…….she actually kind of liked it. We gave it a fun name per the advice of “French Kids Eat Everything,” and I put a little butter on top. We didn’t finish a whole (very small) bowl, but we made progress.  The French also believe that there are very few cases of a child actually not liking something.  If they turn their nose up at it more likely than not it’s because they just haven’t tried it enough times.

3

4

*This one is a challenge for me too.  I don’t naturally love a lot of vegetables.  But it’s time for me to grow up and expand my vegetable palette along with my daughter. Right?

When I feel like we’ve a firm handle on these two I’m going to tackle Rule #9–the mostly  REAL food rule.  I’ve always felt like I’ve done a fairly good job with this but was shocked when I really started keeping track of how much processed food goes into what I make…even what our recipes call for.  That food co-op is sounding better and better.

So read the book for yourself.  On every page is something you can learn and apply to your own kitchen.  You don’t come away from it with a sour taste in your mouth that all Europeans think everything they do is better–it’s not the point of the book.  What you’ll come away with is the motivation, determination, and honestly…excitement to try something new with your kids when it comes to their eating habits.

Now, off to buy some leeks.

Post by Maggie Terryn : Mom Colored Glasses
Cheese Ravioli with Crispy Sage

December 27, 2012

1

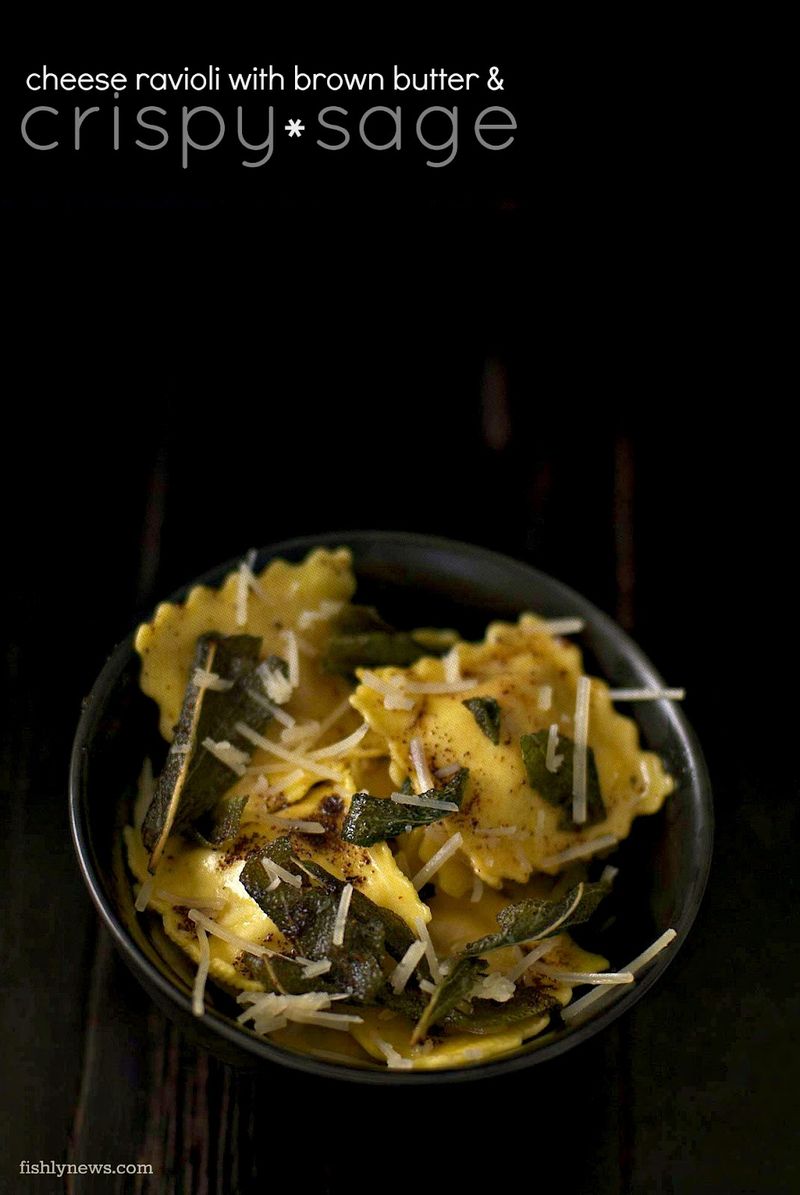
A few weeks ago we visited friends that have this amazing garden – all the vegetables and herbs you can imagine. She sent us home with yellow zucchini, eggplant and a bunch of sage. I love the smell of sage, the velvet texture and the muted green colour.

I decided to use the sage as the main player in a simple ravioli dish. I bought cheese ravioli, and while the water was coming to a boil, I browned some butter in a pan and added the sage – cooking it long enough for it to turn crispy but not burnt.

Toss cooked pasta with butter/sage sauce. I love how the flavour of browned butter and crispy sage plays off the pasta. Add a bit of Parmesan and you have a family friendly meal in twenty minutes.

2

3

Post by Giulia Doyle : Fishly News

A DIY Nap Mat

December 26, 2012

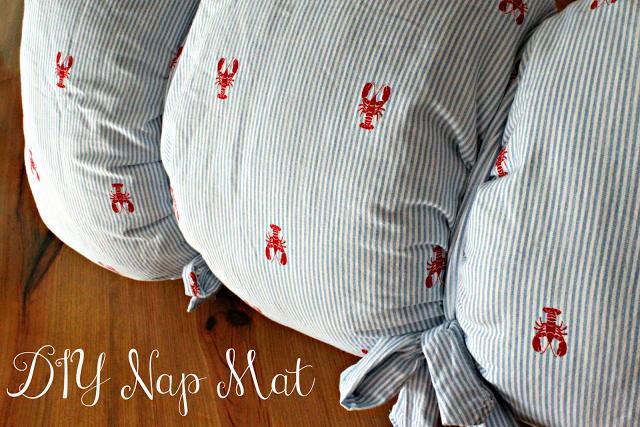
This is the story of a DIY Mom, last minute school lists and bad lighting. The boys started Mother's Day Out a few weeks ago, they love it, they are doing great! Let's back up a few weeks shall we? School started on a Friday, the day before we had "Meet the Teacher". Clyde is 20 months old so at that Teacher Meeting I learned that they will be taking naps in school. #1- they are only there 4 hours and #2 he takes a nap at 2pm everyday and school is over at 1:30… so I was already annoyed. I love his teacher and this is not her fault, but then I found out that he needs a nap mat… stat. I'm thinking, I have had all summer to craft something and now here it is one day before school starts- I have to buy one?? What is this, a Crafter's Nightmare?

So I started out on my journey… I went to 3 Walmarts, 2 Targets, Babies R Us, called CVS, Walgreens and checked online. All sold out. At this point I did what any other mother would do… I went to meet my family for Happy Hour. I got home that night with nothing but bad lighting and the idea that I had to make a Nap Mat. So here goes… a Nap Mat made with nothing but re-purposed supplies, after 2 margaritas and with horrible lighting. Isn't that what crafting is all about- now I know in crunch time, with no supplies and in about 50 minutes… I can come through, ha! Take that "Sold Out Nap Mats" everywhere!

1

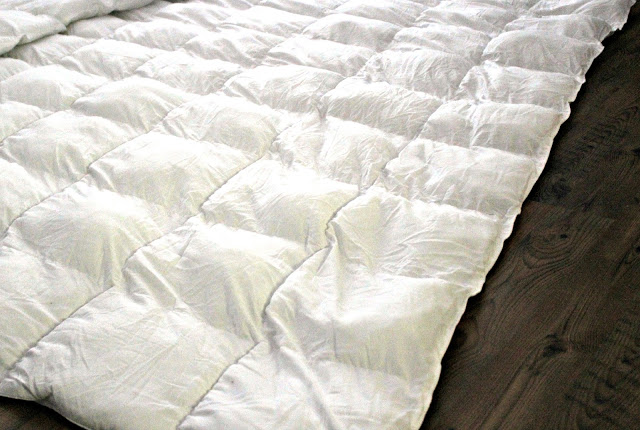
I started with a king size down comforter, it never gets cold enough here so we never use it.

2

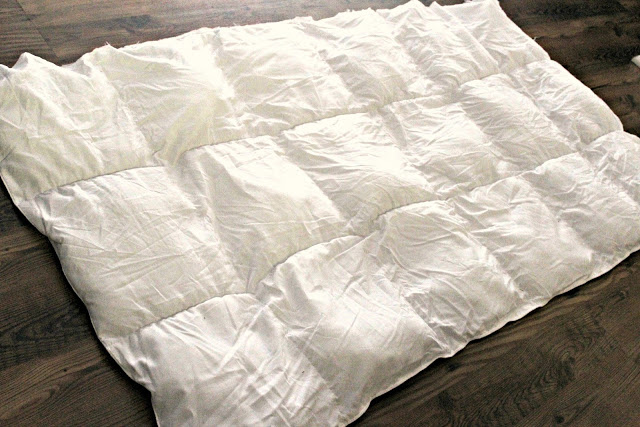
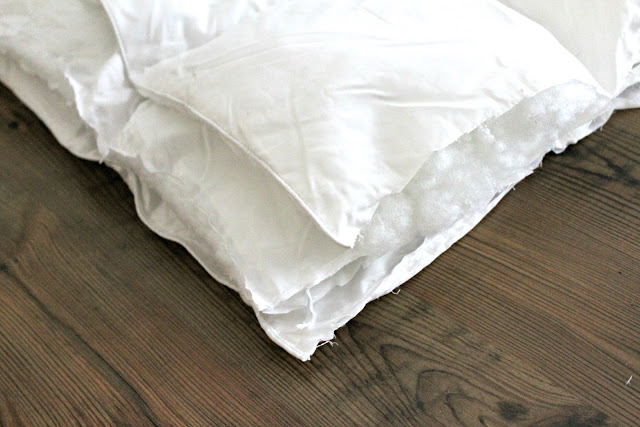
I cut it and then stacked it into 3 layers.

3

4

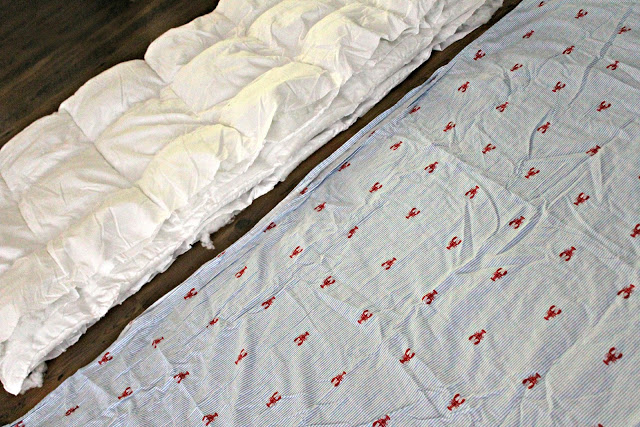
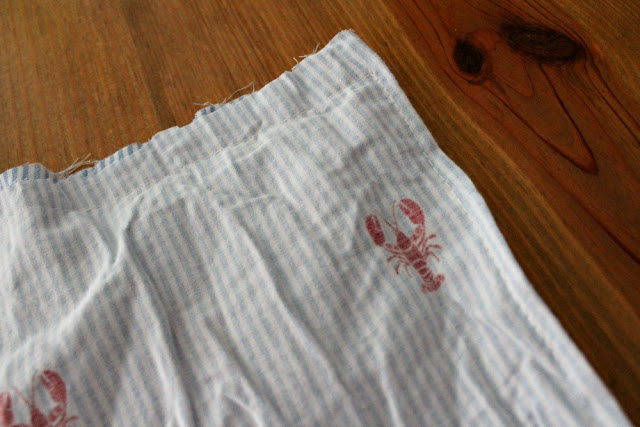
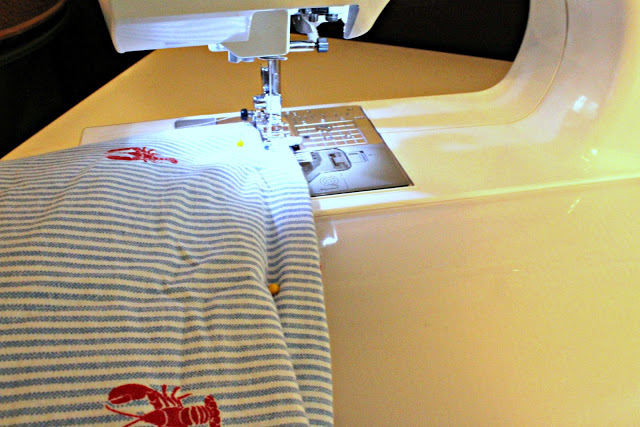
Then I used a full sheet, (obviously not ironed- oops) folded it in half and sewed it up 3 sides, leaving only a short side open. 

5

6

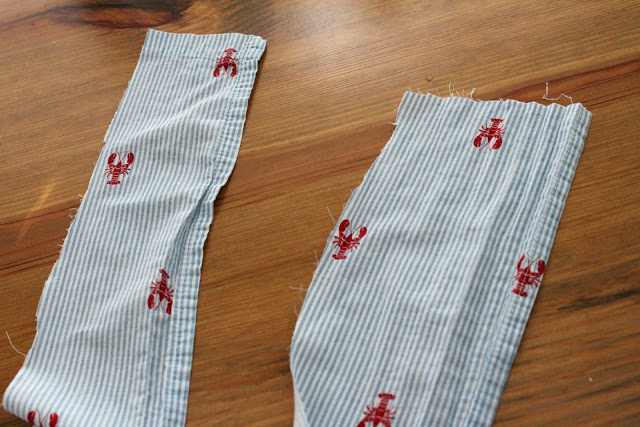
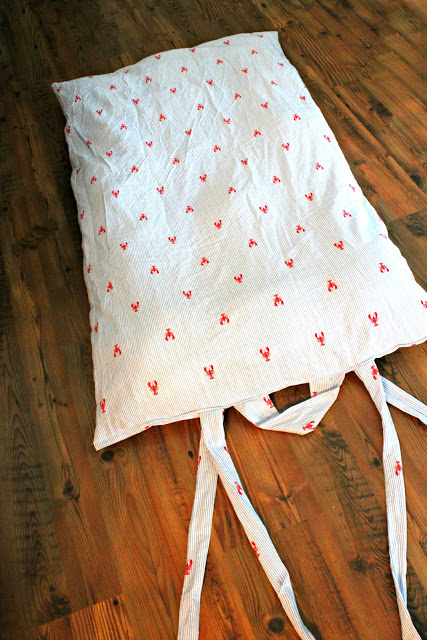
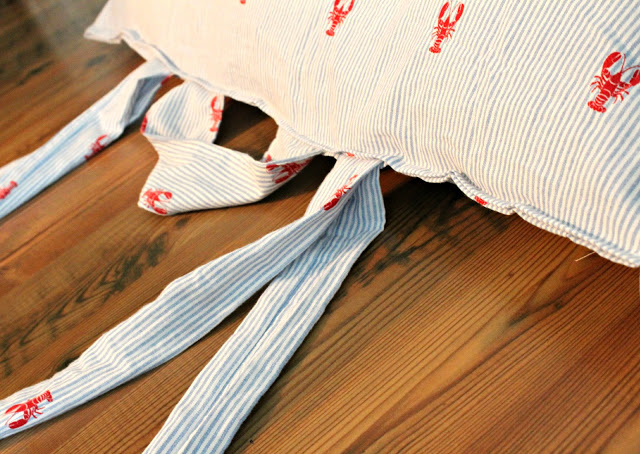
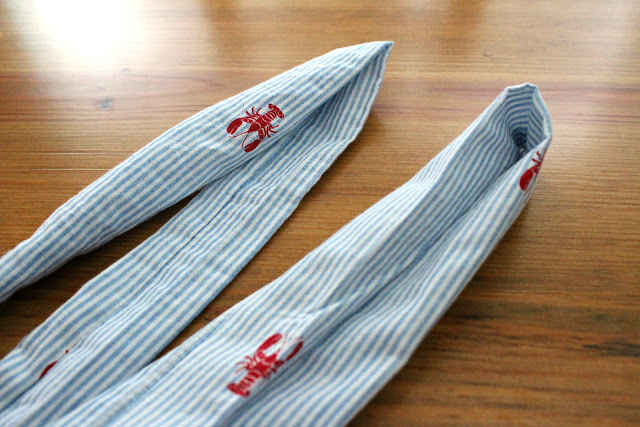
I used scraps to sew up two long ties and a short handle so I could roll the mat up. 

7

8

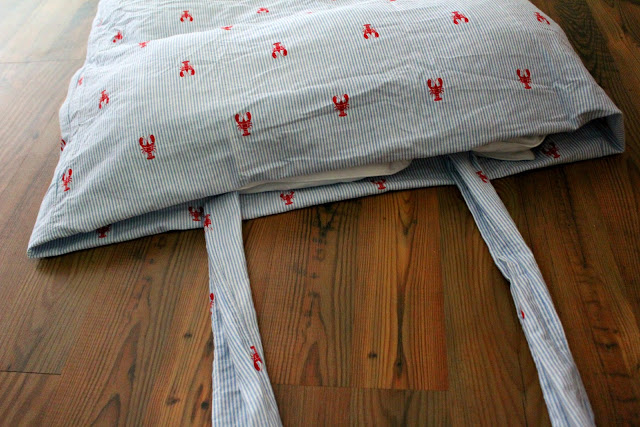
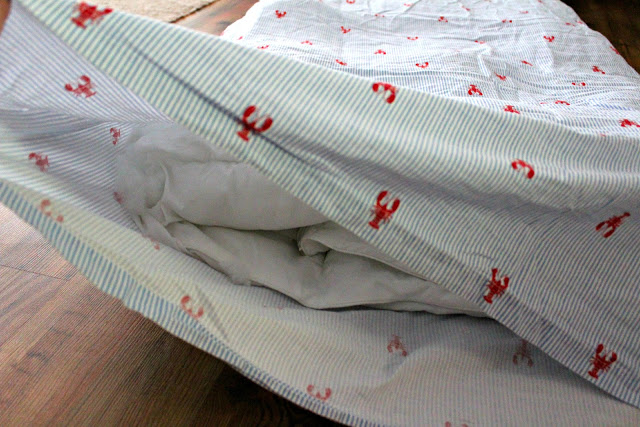
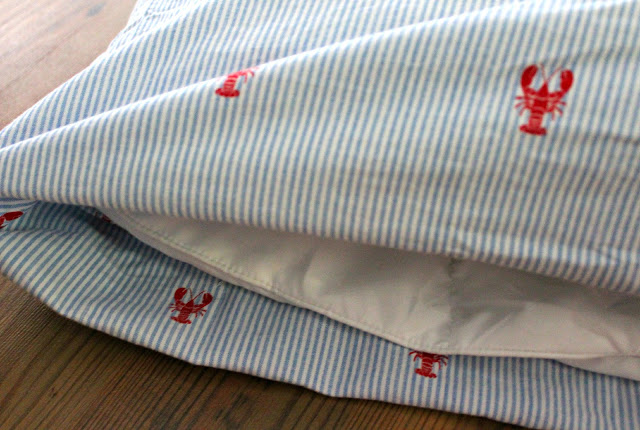
Then just like a huge pillow, I inserted the 3 stacked comforter into the cover.

9

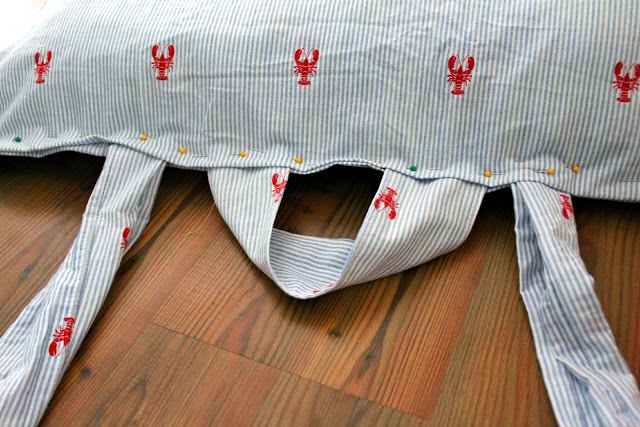
I folded the excess fabric inward then placed the straps and handle where I wanted them to go.

10

11

I pinned and sewed. (Don't forget to fold the long straps in half so it will look like 4 straps after you sew)

12

13

Ta-Da… When I finished I realized the comforter inside was a little too loose, so I tacked it with red embroidery floss in about 16 spots. It looks really cute but I forgot to take a picture.

14

I am happy to report that Clyde loves it and has never missed a nap. I'm sure this wont be the last time I have to craft something the night before my kids need it 🙂

15

Signature
Post by Taylor Urban : www.itstaylormade.com

Peppermint Play Doh Recipe

December 24, 2012

By Raechel Myers at Finding My Feet

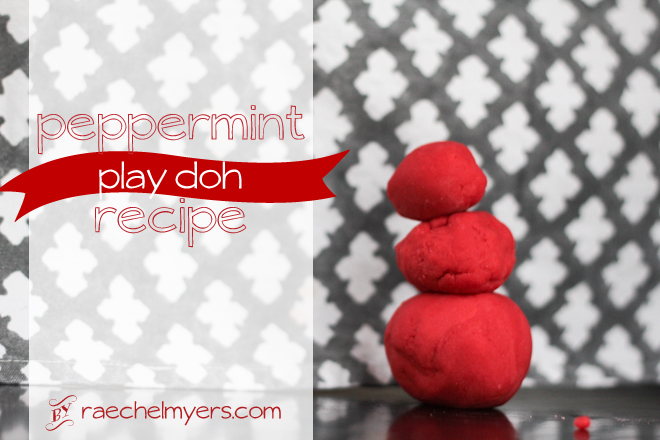
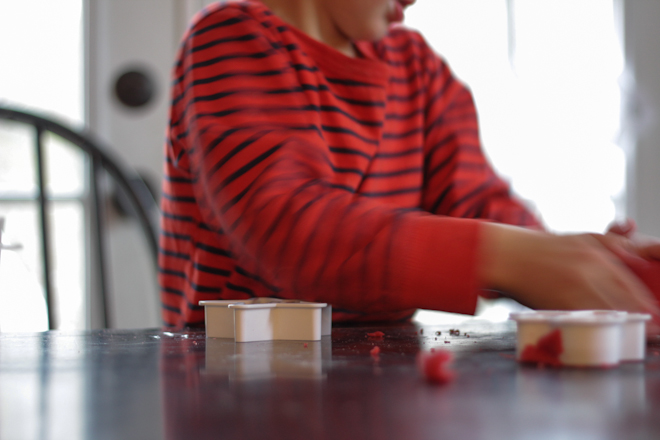
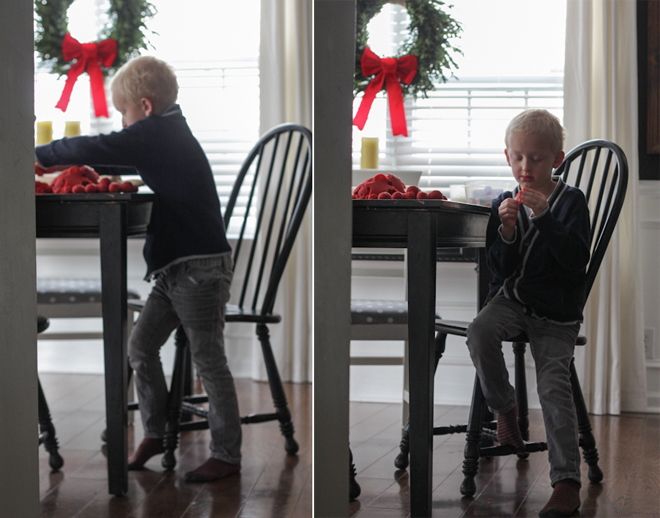
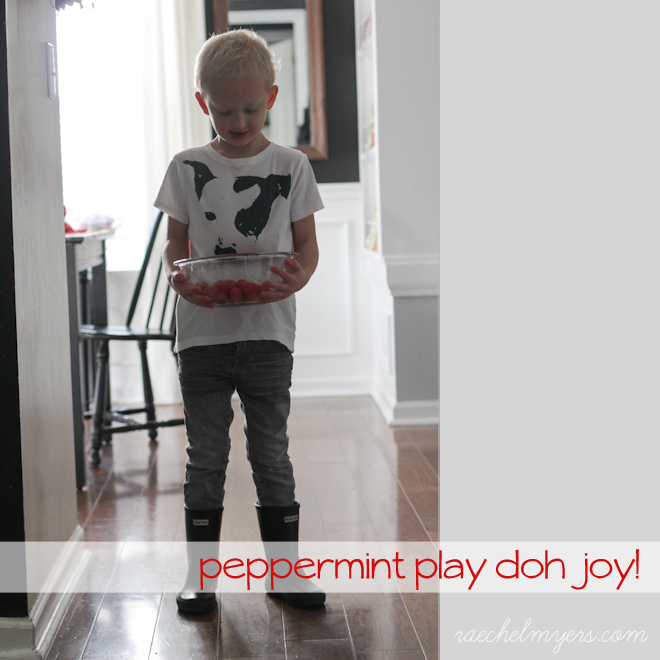
One of our Advent activities this weekend was a family favorite: making peppermint play doh. And boy howdy, we made a giant batch that has kept us creating all weekend!

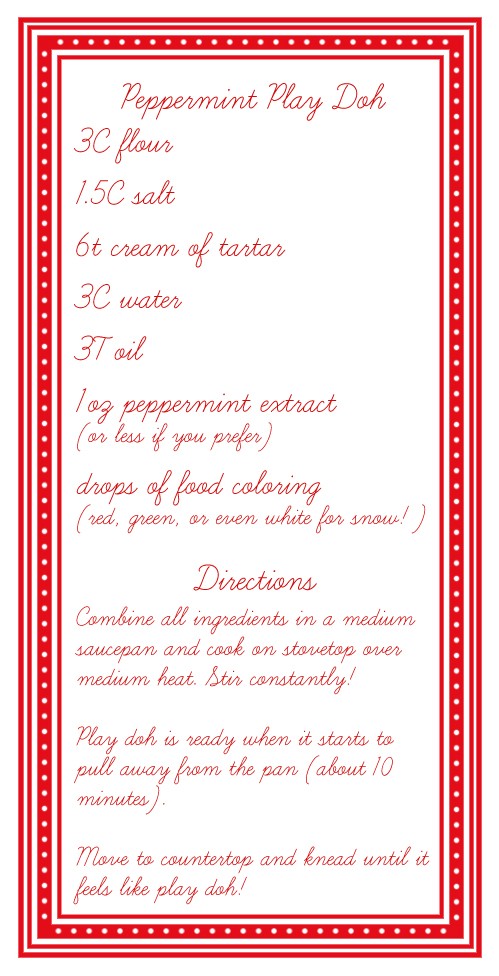
Peppermint Play Doh Recipe

Our family first discovered peppermint play doh about six years ago when our little church compiled a cookbook of favorite recipes and my friend Wendy submitted this one.

We haven’t made it in a few years, and I’d forgotten what a cool, sensory experience the whole process was. Cooking play doh on a stovetop smells like working in a candy cane factory. And for my Tennessee boy who longs for a good Elf-like snowball fight, rolling up little red snowballs and building peppermint snowmen and igloos is the next best thing!

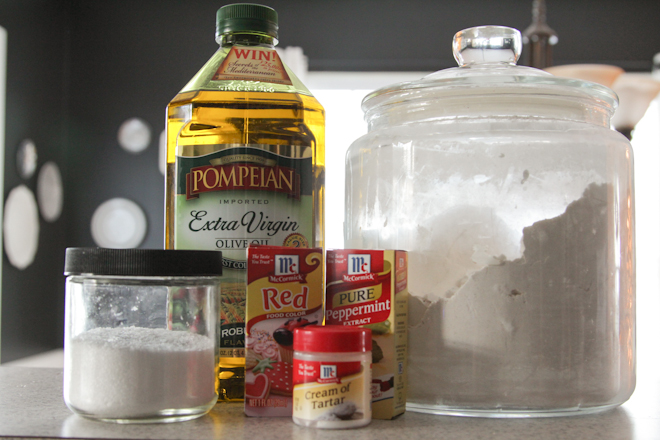
Peppermint Play Doh Recipe Supplies

Peppermint Play Doh Recipe 2

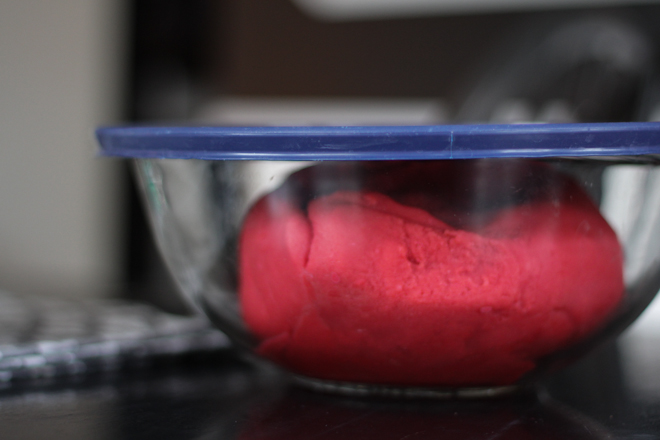
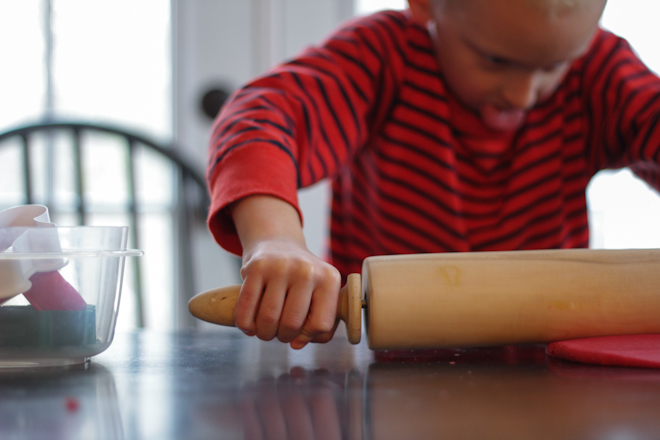
Be sure to store it in an airtight container. We keep ours in the middle of our dining room table for now – just in case anyone is feeling creative or festive – or both. It’s also fun to keep a rolling pin and cookie cutters handy.

Peppermint Play Doh Recipe 1

Peppermint Play Doh Recipe 2

Peppermint Play Doh Recipe 3

Peppermint Play Doh Recipe 4

When Oliver got home from school on Friday he said – and I quote, “I don’t want to play with the iPad! I just want to play with my hands!”

Mama’s heart is happy with that one.

He and Hazel played with this stuff all weekend long!

Peppermint Play Doh Recipe 6

Peppermint Play Doh Recipe 7

By Raechel Myers at Finding My Feet. Raechel is just a mama, trying to raise her children to love the Lord and take their dishes to the sink. She loves sewing, fun design projects, finding killer deals at garage sales, and drinking peppermint mochas all year long! You can also find her at SheReadsTruth.com

DIY Christmas Village Out of Recycled Cereal Boxes

December 21, 2012

Post by Aimée Lowry & Bettijo B. Hirschi from PagingSupermom.com

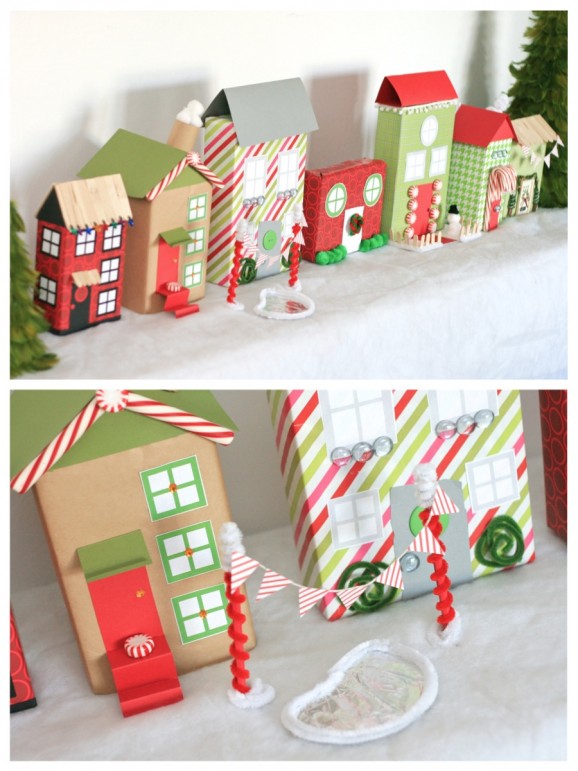
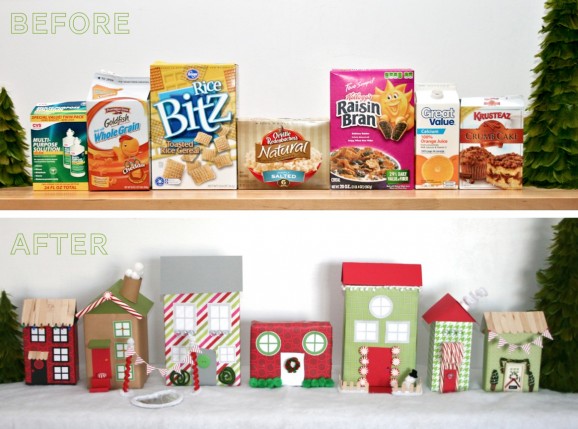
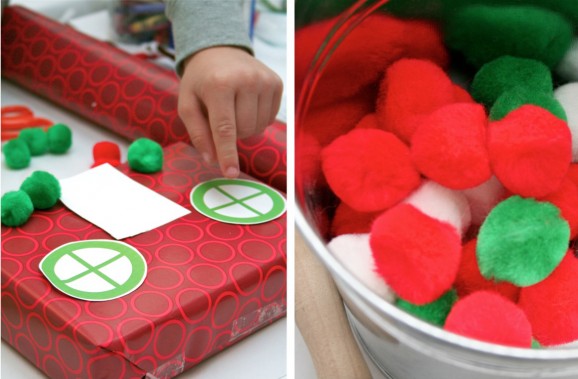
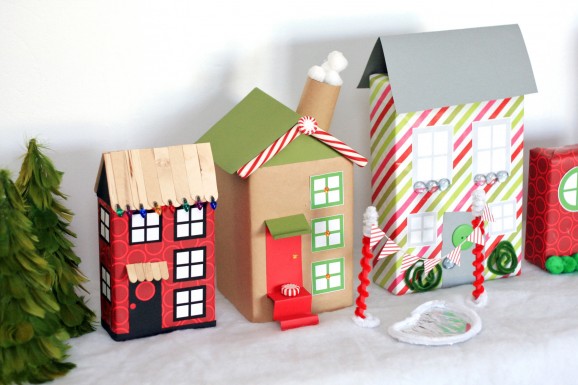
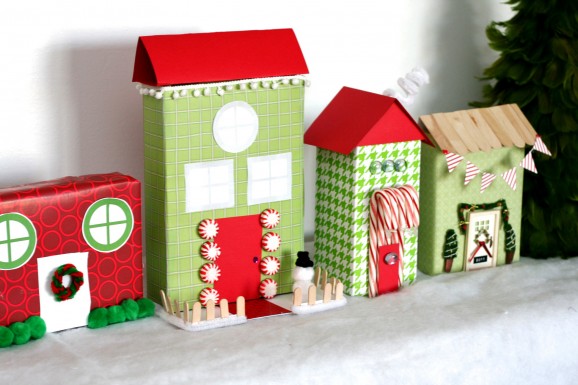
DIY Christmas Village Out of Recycled Cereal BoxesI have fond memories of decorating gingerbread houses with my cousins on Thanksgiving weekend. It’s a fun tradition, except for the whole baking a bunch of gingerbread thing, but that’s not something a kid has to worry about (just one good example of why the holidays are more fun for kids vs. adults). Though now that I’m the mom tasked with all that baking, those gingerbread houses were an endangered tradition. Then there was the light bulb moment… let’s turn our old cereal boxes into houses, like so:
DIY Christmas Village Out of Recycled Cereal Boxes - 2

So we dug through our recycle bin and pulled out various boxes and cartons to be the “gingerbread” in our Christmas village.

DIY Christmas Village Out of Recycled Cereal Boxes -  4

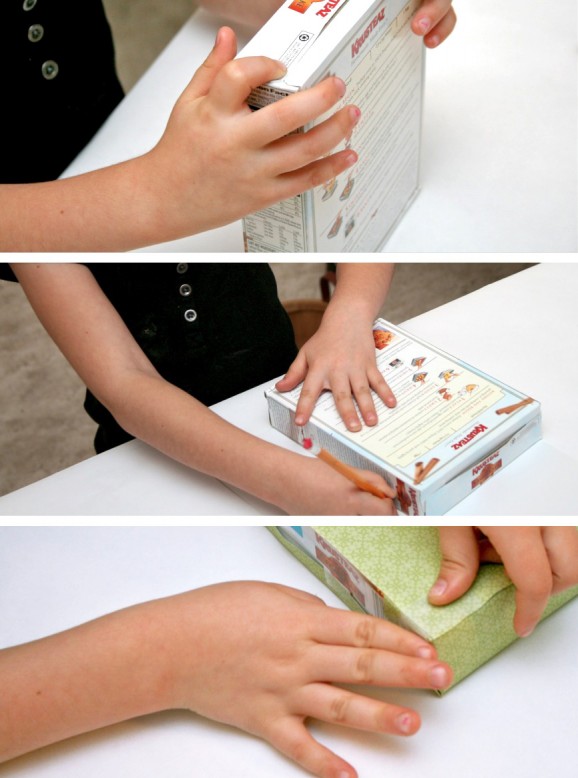
We used both wrapping paper and scrapbook paper to cover he boxes. Ultimately we decided the wrapping paper was easiest, not to mention readily available this time of year!

DIY Christmas Village Out of Recycled Cereal Boxes - 5

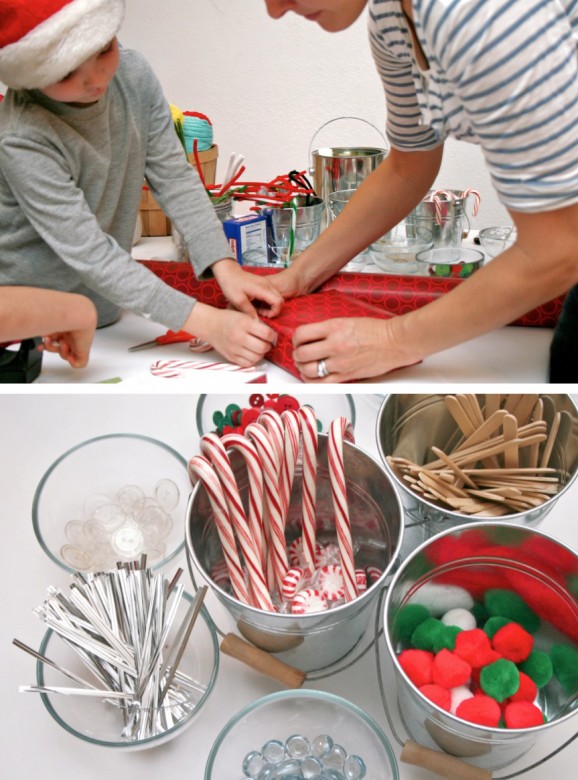
My favorite part of this project is that we didn’t need to buy a single thing for it — Aimee and I grabbed everything red, green and white that was in our craft cupboards; added some candy canes, wrapping paper, tape, glue and scissors; then set to work with our little elves.

DIY Christmas Village Out of Recycled Cereal Boxes - 6

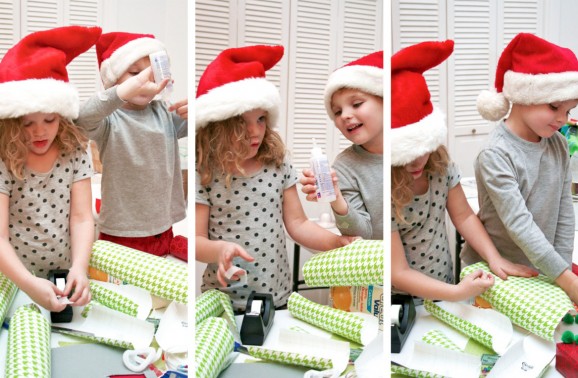
Clearly the kids were having a ball, but even our Superdads were getting in on the fun of playing architect.

DIY Christmas Village Out of Recycled Cereal Boxes - 7

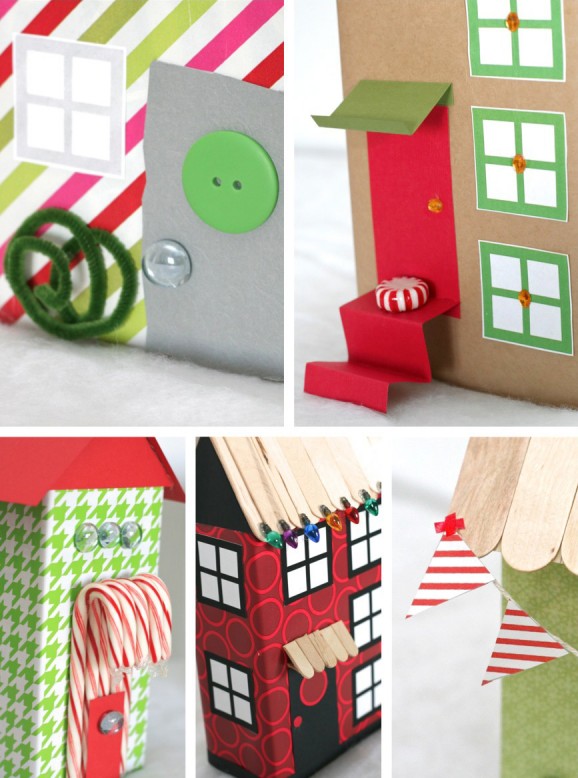
I love Liam’s modern house featuring the printable windows we whipped up. Of course we’re sharing the freebie printable windows in 4 colors!

DIY Christmas Village Out of Recycled Cereal Boxes - 8

I love the mini candy cane bunting — we’ve got a freebie printable of that for you too!

DIY Christmas Village Out of Recycled Cereal Boxes - 10

DIY Christmas Village Out of Recycled Cereal Boxes - 11

Reposted with permission by Aimée Lowry & Bettijo B. Hirschi from PagingSupermom.com

Bow Christmas Wreath

December 20, 2012

Post by Haeley of Design Improvised
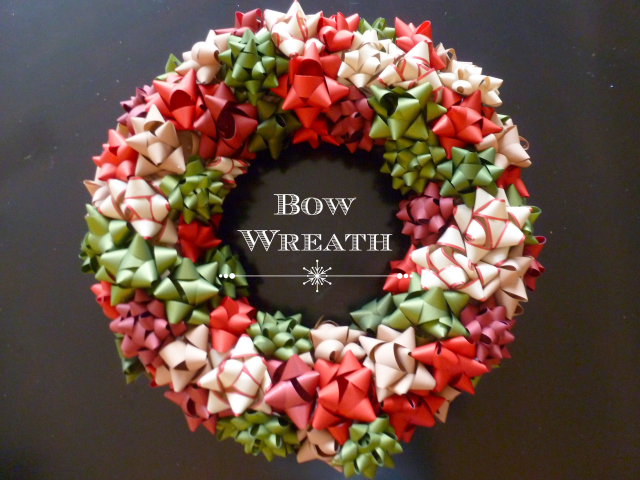
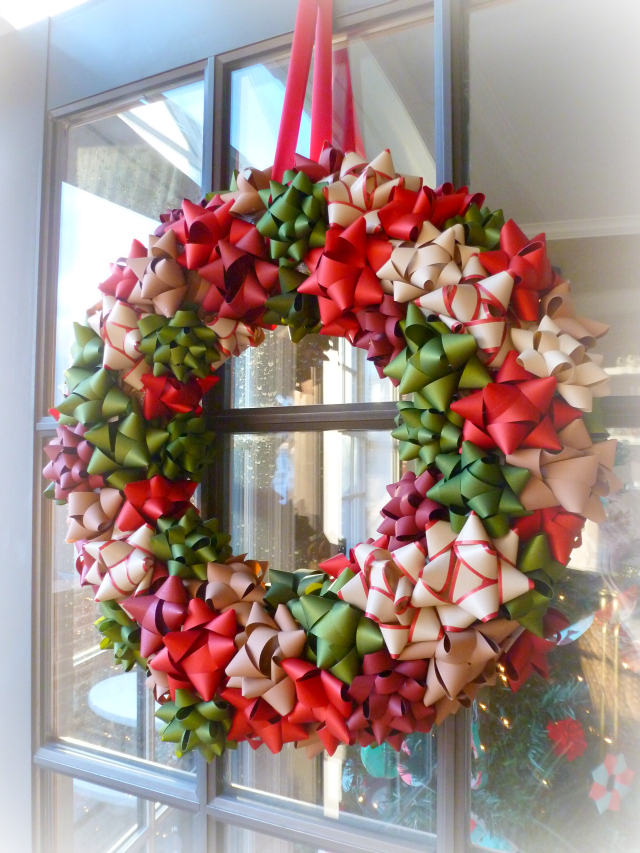
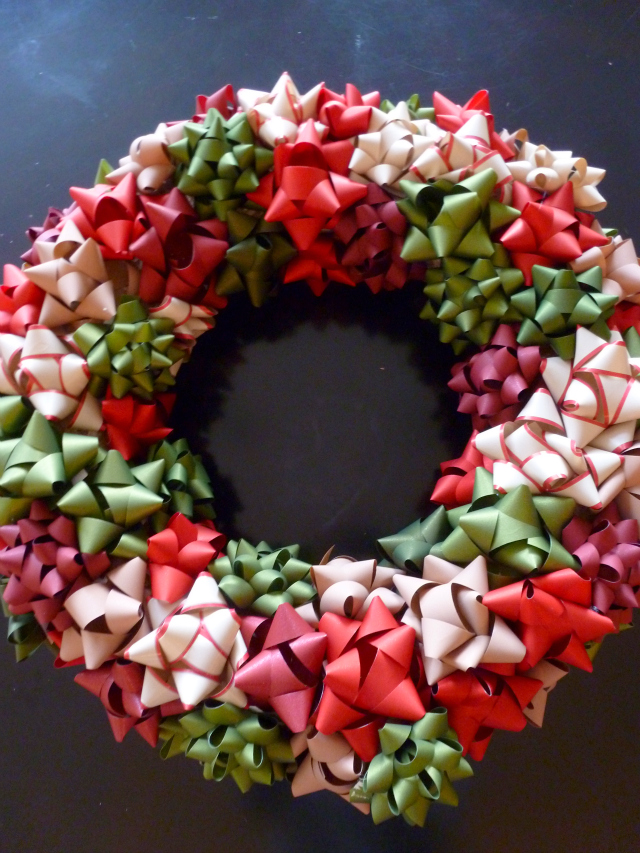
DIY Bow Christmas WreathThe holiday ideas keep coming on Design Improvised this week! Did you catch the DIY snow globesred and aqua Christmas mantelglittery vase, and tree chock-full of Snow & Graham paper ornaments? If not, check them out! On tap for today is a DIY bow Christmas wreath that takes only 30 minutes and $15 or so to make. Talk about my kind of project – little money and time invested for big impact.

DIY Bow Christmas Wreath 2

A quick project deserves a quick post – there is not too much to this tutorial! Here’s what you need:

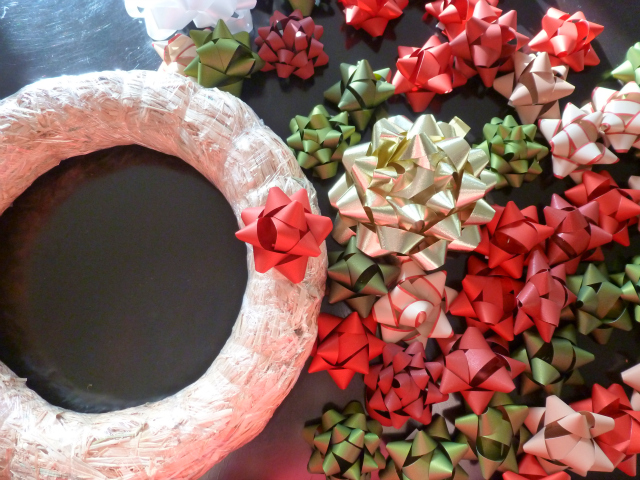
Supplies for Bow Christmas Wreath

  • Wreath form (I used a 14″ straw wreath that I got for $4. You could also use a styrofoam wreath)
  • Lots of cheap bows (I used 3 packages of 30 bows at $2.50 each (90 bows total) for my 14″ wreath)
  • Hot glue

I particularly liked these bows because they were a little different than the traditional shiny metallic bows. The matte finish and range of colors and bow styles in the package caught my eye. I think the key to making this wreath not look too uniform is to use a variety of colors, styles and sizes of bows.

DIY Bow Christmas Wreath 3

How to Make a Bow Christmas Wreath

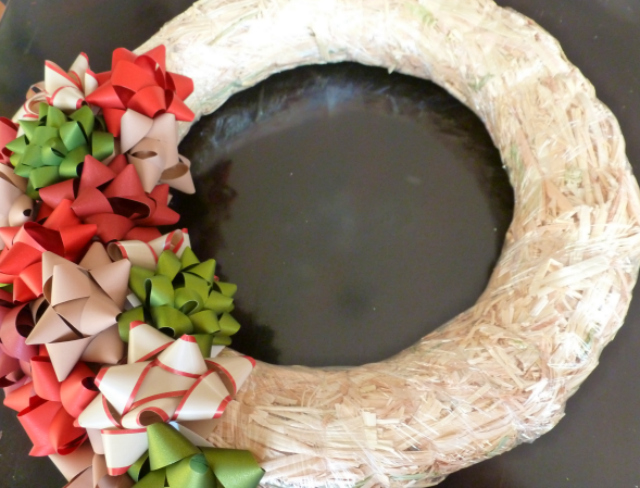
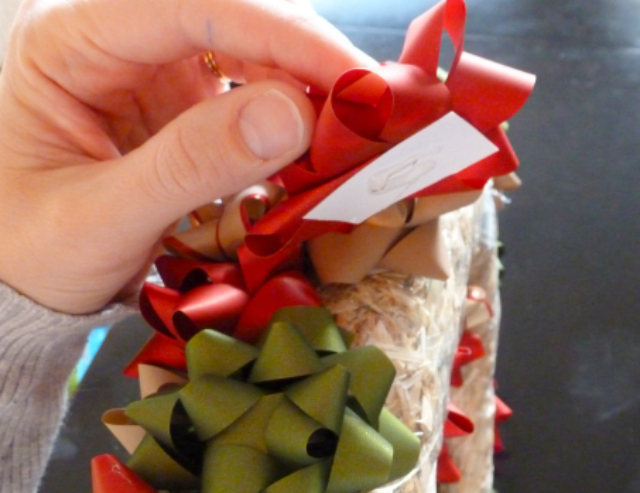
It is so simple, there are hardly any steps to lay out. All you do is peel the backing off the bow and stick to the wreath form. You can add a little dab of hot glue for extra hold. I actually kept the plastic wrap on my wreath form, thinking the bows would stick better to it than the straw. For most of the bows, I just stuck them on and then added hot glue as needed to keep select bows in place.

DIY Bow Christmas Wreath 4

Keep going until you’ve covered the entire wreath form, making sure to cover the sides of the wreath as well.

DIY Bow Christmas Wreath 5

And that’s it! If you don’t have a wreath on your door yet, this one is for you! It really only took about 30 minutes to make – a great project to do while catching up on your favorite show. 😉

DIY Bow Christmas Wreath 6

Post by Haeley of Design Improvised

Christmas Treat: Corn Flake Wreaths

December 19, 2012

Post by Aimée Lowry & Bettijo B. Hirschi from PagingSupermom.com

Today I am super excited to share my most favorite Christmas treat. I remember making these with my mom when I was a little thing, and they still tasted every bit as delicious when I made them with my girls this weekend!

Christmas Treat: Corn Flake Wreaths 1

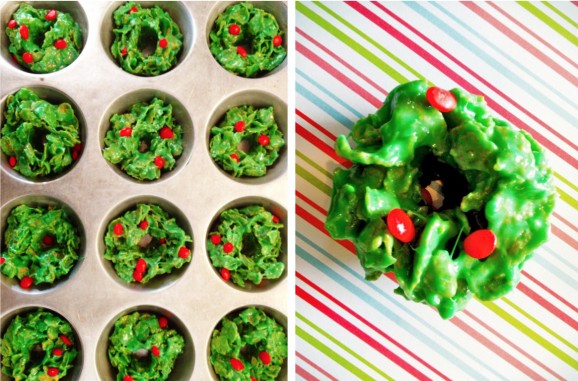
If I’m being brutally honest I think every variation on Rice Krispie treats is no good — I say stick with the original recipe or none at all. I make one exception, however, around Christmas time for these babies. In this recipe you substitute corn flakes and add some green food coloring and vanilla. Since the corn flakes are wider and a bit more difficult to coat with the marshmallow mixture than Rice Krispies, you also cut back on the amount of cereal used. The result is a much more gooey treat that is pure heaven:

Corn Flake Wreaths Recipe
:: 3 TBS Butter or Margarine
:: 1 10-oz package Marshmallows
:: 4 cups Corn Flakes
:: 1 tsp Vanilla
:: Green Food Coloring (about 1/2 tsp or 40 drops)
:: Red Hots (approximately 50 pieces)

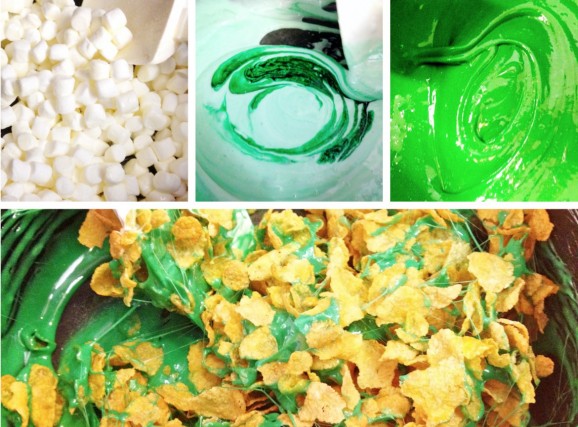
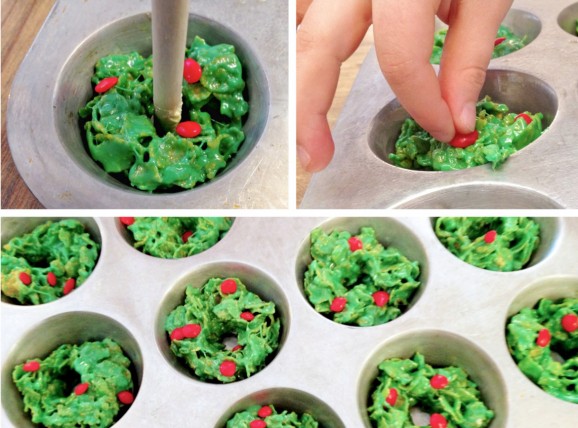
Melt the butter in a large pan over low heat. Add the marshmallows and stir occasionally until melted. Remove from heat and stir in the Vanilla and food coloring. Once well blended, gently fold in the Corn Flakes.

Christmas Treat: Corn Flake Wreaths - 2

Grease a muffin tin as well as your fingers and a couple spoons. Transfer balls of the mixture to fill each cup about two-thirds of the way. Coat the end of a wooden spoon with butter and press down into the muffin cup using a circular motion to create the wreath’s center hole. Have your kiddos practice counting out three red hots and place them on each wreath.

Christmas Treat: Corn Flake Wreaths - 3

Freeze the wreaths for 30 minutes then pop out of the pan. If you’re packaging for gifting, be sure to line between each layer with wax paper because these babies have a tendency to stick together. To help with the sticking-together thing, we actually store these in an airtight container in the freezer and just let sit out for about 20-30 minutes before eating.

So now that you know mine, do share — what is your favorite holiday treat?

Reposted with permission by Aimée Lowry & Bettijo B. Hirschi from PagingSupermom.com

Hazel’s Picks: Christmas Gifts for Little Gals

December 18, 2012

Hazels-Picks1

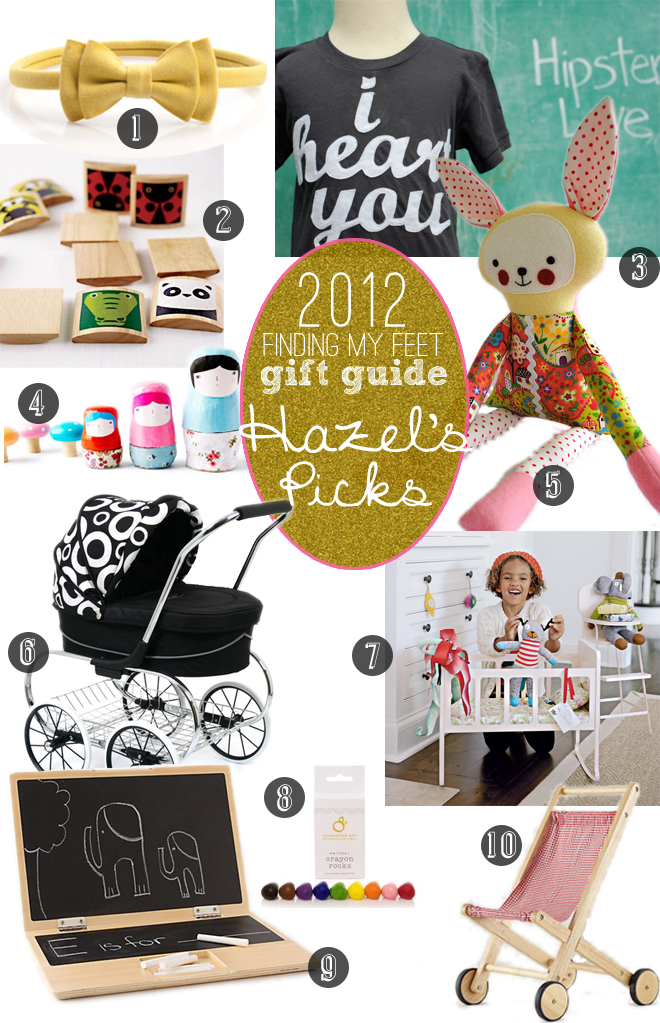
1. Bow Headband | Zuzii | $14

2. Animal Memory Game | Land of Nod | $24.95

3. “i heart you” toddler tee | b.children’s wear | $28

4. DIY Nesting Dolls tutorial | Say Yes to Hoboken

5.  Meet Grace | Rabbit Rabbit Softies | $42

6. Babydoll Pram | Valco | $125

7. Powder coated metal doll bed and high chair | The Land of Nod | $69

8. Crayon Rocks | Clementine | $5.40

9. Chalkboard Laptop | Anthropologie | $69

10. “Merrily We Stroll Along” wooden stroller | The Land of Nod | $49


By Raechel Myers at Finding My Feet

Raechel is just a mama, trying to raise her children to love the Lord and take their dishes to the sink. She loves sewing, fun design projects, finding killer deals at garage sales, and drinking peppermint mochas all year long! You can also find her at SheReadsTruth.com

Cole’s Big Boy Room Makeover

December 17, 2012

Cole_1

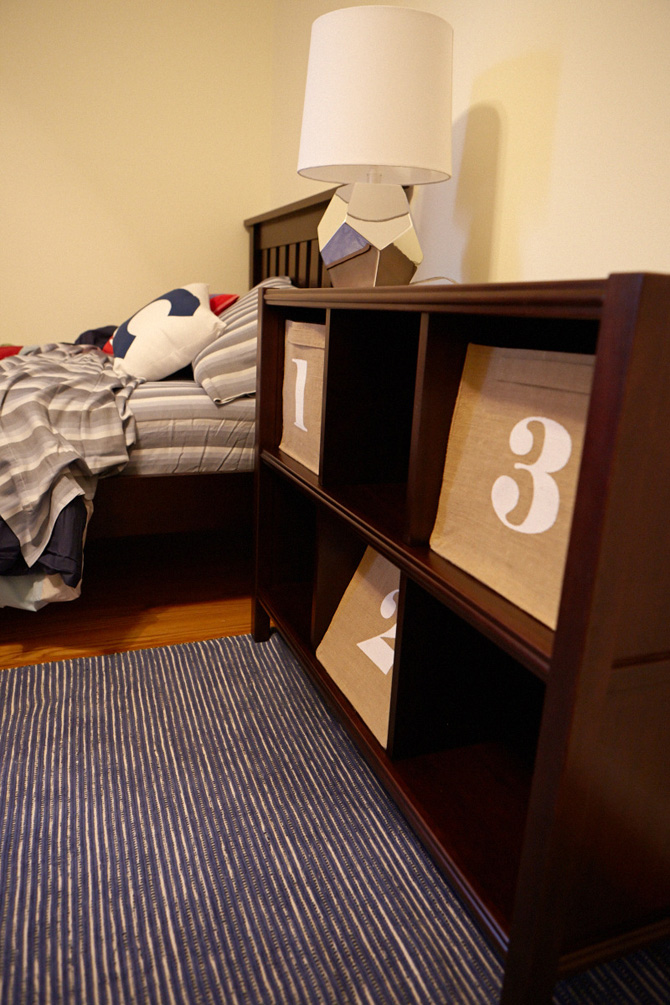
A few months back, while visiting our Oakbrook store, I met a customer named Roslyn. She’d come into the store to ask me some advice on mixing wood finishes in her son’s bedroom. After we got to talking, I offered to design a room for her youngest son, Cole, who’d be transitioning into a big boy bed soon.

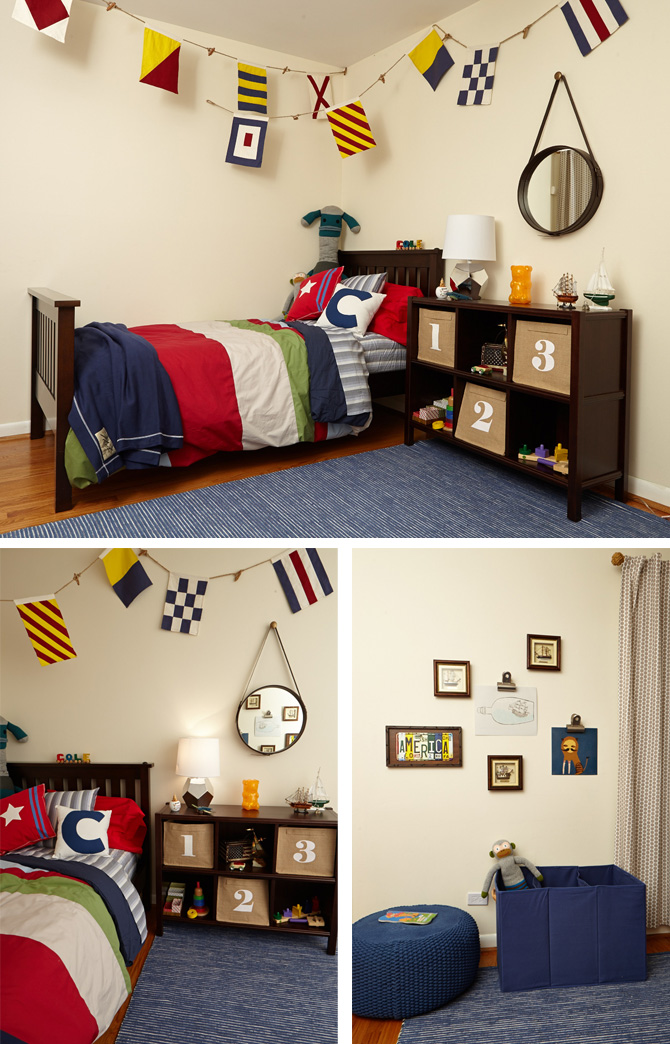
Roslyn already had some of the core pieces for the room, but wasn’t sure how to pull it all together. She knew she wanted a subtle nautical theme. She also wanted pieces that could grow with her son, something we hear often from our customers. And, something we think about carefully in the design of each of our products. Here’s the Pinterest board I put together for the room, http://pinterest.com/bynodforyou/cole-s-big-boy-room/

Cole_2

I added in the nautical touches, stuck with a limited color palette that was present in the rest of her home, and pushed it just a little modern by adding in the metallic rock lamp.

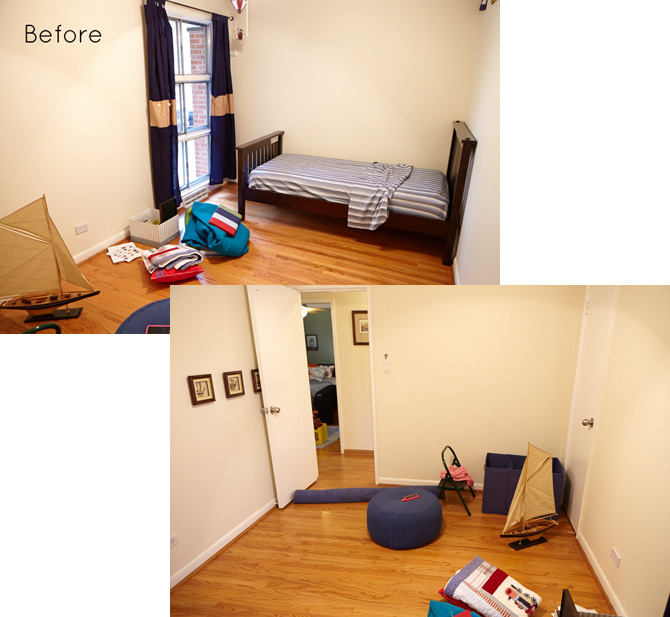
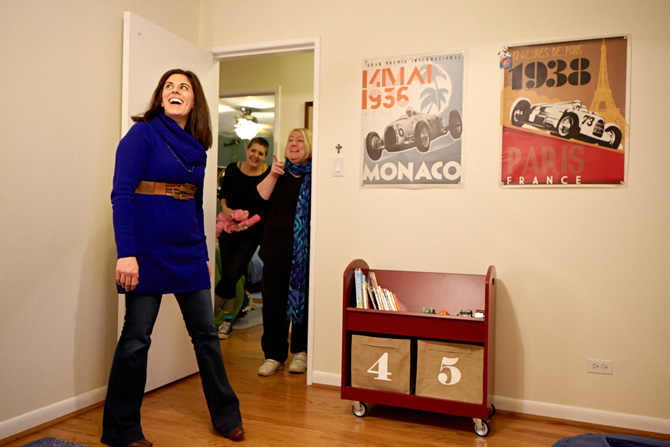
Roslyn was over the moon about the design, but after more chatting, I just wanted to do something more. So, I offered to visit her home and put it all together for her. Last Friday afternoon, along with our Managing Director Michelle, we went to Roslyn’s house and staged our own room makeover “show” replete with big reveal and all! And, we had a blast. Here’s what we did.

The room was a pretty blank slate to start. It’s a small space, so we tried the bed in several positions. We opted for this to maximize open floor space. At just 18 month old, Cole will want a lot of open space to play. Also, by pushing the bed against the wall, that’s one less direction the little guy might roll out of bed!

Cole_3

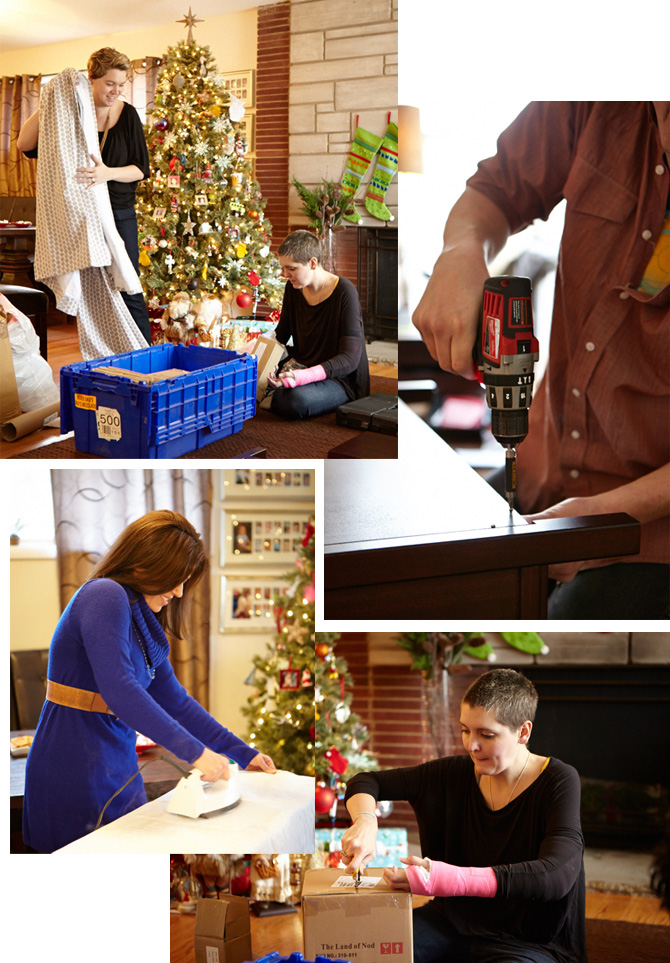
Once we determined a floor plan, we got busy unboxing, assembling and ironing all the products for the room. 

Cole_4

Then we got to setting up the space. Since the room wasn’t huge, we needed things to do double-duty. We positioned the 6-cube bookcase next to the bed to act as both nightstand and toy storage.

Cole_5

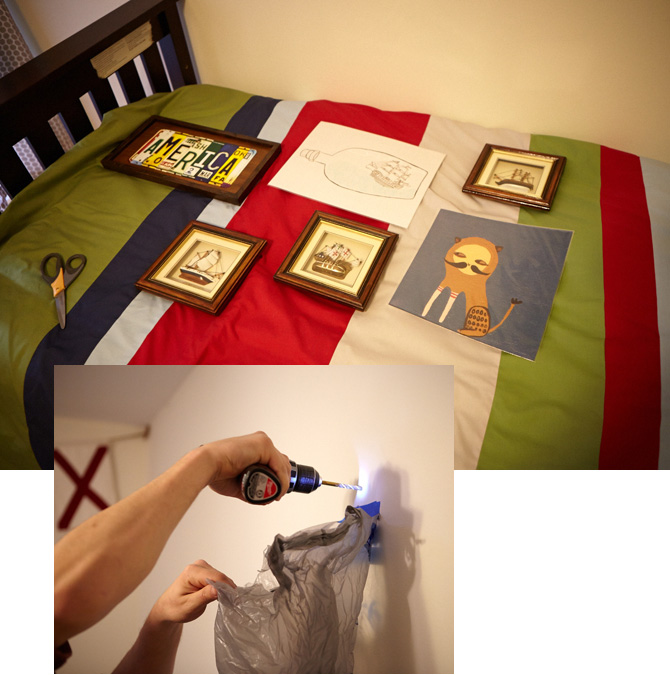
We planned out a gallery wall using Nod pieces and items that Roslyn already had in her home. We did a little rummaging in the other rooms of the house. Here’s a little tip, shop in your own house first. That wall art you’re no longer loving in your family room, may be perfect for your kid’s space. 

Cole_6

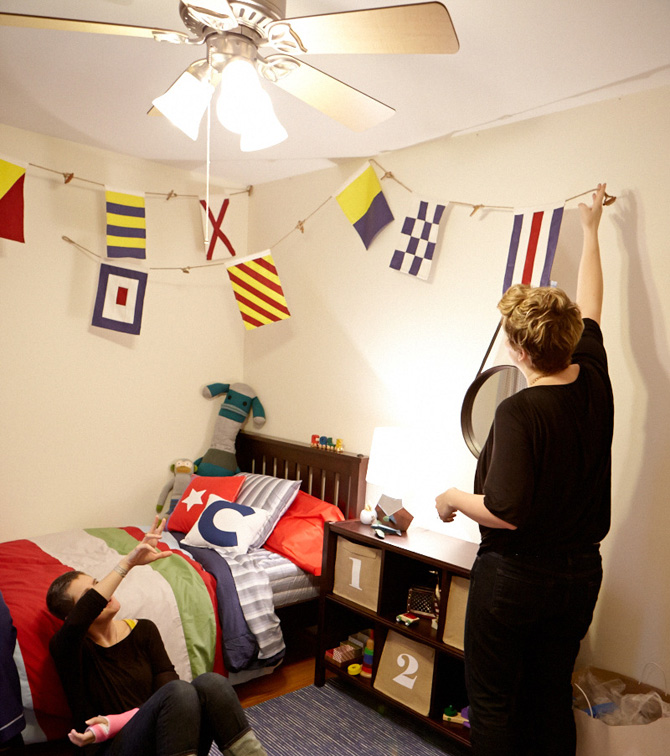
Then we hung, re-hung and re-hung the Nautical Flag banners. That’s the thing about putting together rooms, no matter how much you plan, sometimes you just need to try something to see if it works. Don’t be discouraged if your first attempt doesn’t work. 

Cole_7

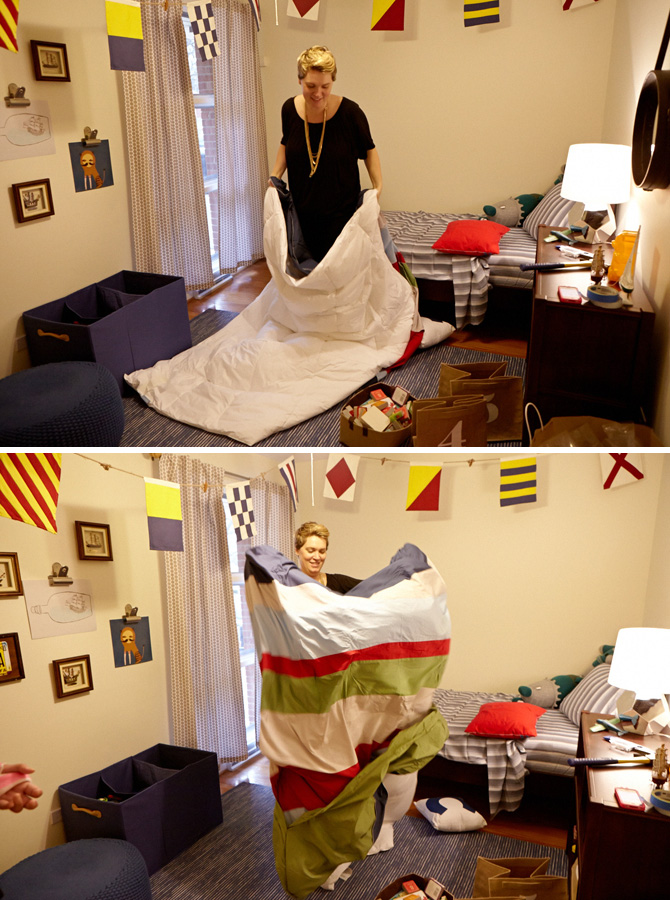
Then, I gave everyone a little lesson on how to stuff a duvet cover. Here’s the trick.

  1. Turn the duvet cover inside out.
  2. Put your arms inside and grab onto the top corners.
  3. Pick up the duvet insert, also at the corners.
  4. And, flip! Voila! Now your duvet is stuffed and you don’t need a nap from wrestling with your bedding!

Cole_8

Then, we were ready for the big reveal.

Cole_9

Here’s how it turned out.

Cole_10

If you need any design advice or would like us to work on a custom mood board for you, just drop me a note danielle.kurtz@Landofnod.com. We’d be happy to help.

 By Danielle Kurtz

Danielle is the Creative Director at Nod and an over-protective mother of two. She’s also completely obsessed with Pinterest, Twitter and her Kindle, but not necessarily in that order. Danielle loves to craft, sew and crochet, but all her supplies have a layer of dust on them about 5-years-thick, wonder if it's just a coincidence that her oldest kiddo is 5 years old?

Unconventional and Uncanny Plush Assortment

December 15, 2012

After I got married, my husband revealed a very big secret.  It wasn't until a few weeks after our wedding that he introduced me to Blackie, a small stuffed dog that he received as a baby gift, and kept throughout his life.  Blackie, at one time, must have been a beautiful Scottie, but when I met him 30 years later, he was tattered.  His eyes had been replaced with buttons, his poor tail had been sewn and re-sewn, his fur was pilled and ragged, but he was still a big part of my husband's life; a connection to his childhood.  Although I was a bit jealous, I had to ask myself; what is it about a stuffed animal that makes it worth keeping around forever?

It's the emotional connection you feel instantly when you first set eyes on these creatures. Our plush collection does just that.  It is unconventional, unexpected, and uncanny.

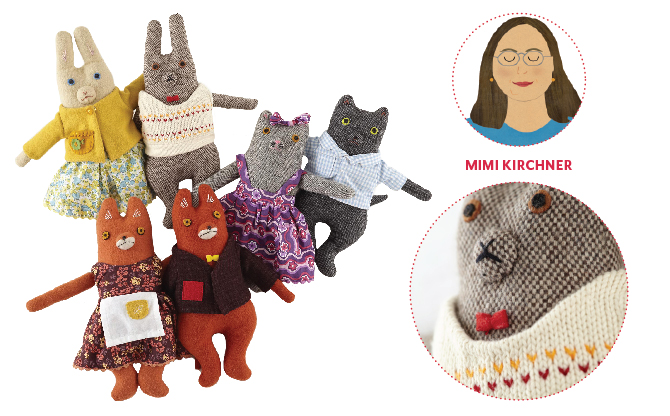
Mr. and Mrs. Fox, Bunny, Kitty.  Brilliant creation of Mimi Kirchner.  These critters are 100% wool felt and each come wearing their own outfits.  Their expressions (or lack of expression) are priceless. I recently visited the factory where these creatures are made with love and attention to detail.  Every critter is hand embroidered, hand stuffed, and hand sewn.  Every eye is placed perfectly with needle and thread (by an actual person). The amount of work that goes into these toys is incredible, and it is apparent.

Plush2_blog_Mimi

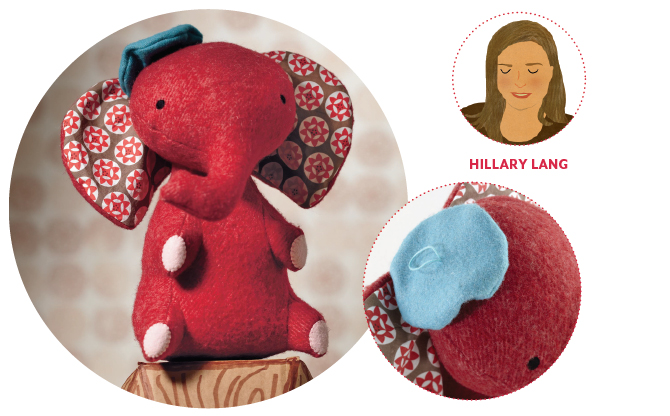
Oliver the Elephant– dreamed up by Hillary Lang, this fuzzy elephant has a personality all his own.  His creativity is apparent, as he wears his beret, off to the side, of course.  (He must be French). His giant ears are lined with a whimsical cotton pattern- he is a keeper.

Plush2_blog_Hillary

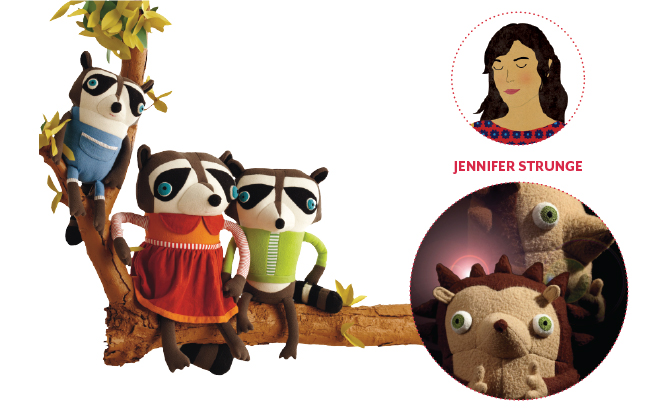
Cotton Monster Hedgehog and Raccoon Mom, Dad and Youngins—who knew you could love such creatures?  Jennifer Strunge invented these crazy, whacky, lovable fleece animals.  They are soft and silly, and you will not find them anywhere but at The Land of Nod.

Plush2_blog_Jennifer

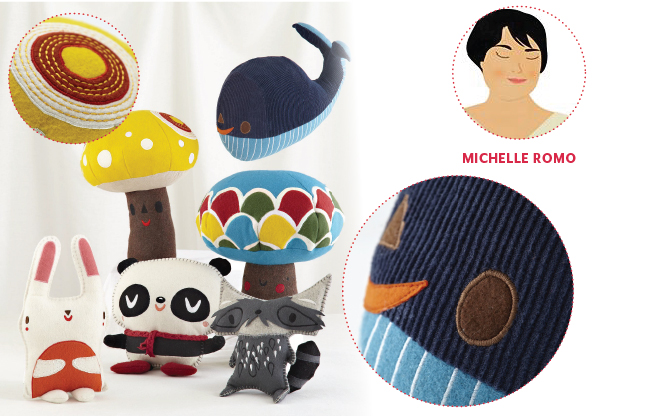
What do Simon the Whale, Mushroom Buddies, Tina the Bunny, Rainbow Happy Tree, Johan the Raccoon and Hug the Panda all have in common?  They are the genius of Michelle Romo.  They are mixed materials of corduroy, wool felt and cotton.  They are made by hand, and made to be handled. 

Plush2_blog_Romo

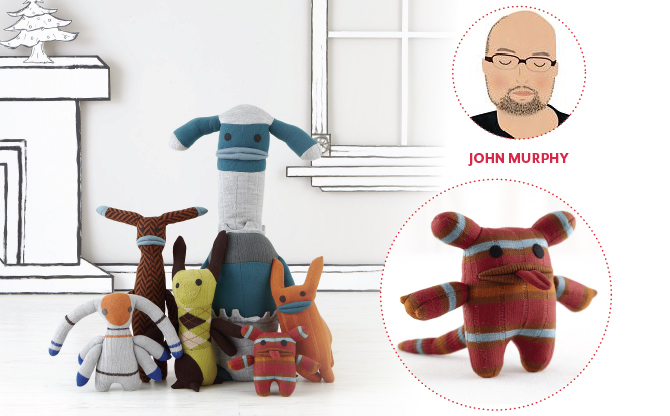
Stupid Sock Creatures are brilliant!  They were dreamed up by artist John Murphy.  He is passionate about his socks, and found some crazy uses for them.  Fabulous colors, extraordinary expressions, bizarre and awkward—I no longer look at my sock drawer the same way.  These socks have lips!
Plush2_blog_JohnM

30 years from now, maybe you will reveal your best kept secret to a loved one, and you will fondly remember the first time you hugged, tugged and loved favorite creature.

Post by Nancy Harris, Accessories Buyer @ Nod
In 1999, I was sitting at my desk as a buyer for a gift company, and my boss brought over a Land of Nod catalog and said, "This is what I want us to be.” I immediately knew two things:  1. We could never be like them, no one could. 2-I had to be a part of The Land of Nod. The nostalgic assortment, whimsical presentation, and clever copy were positively inspired. I spent lots of time dreaming about The Land of Nod. Four years later, I was hired as the toy buyer, a dreamy job—a dreamy atmosphere, a dream come true.
Festive Candied Cranberries

December 14, 2012

Post by Aimée Lowry & Bettijo B. Hirschi from PagingSupermom.com
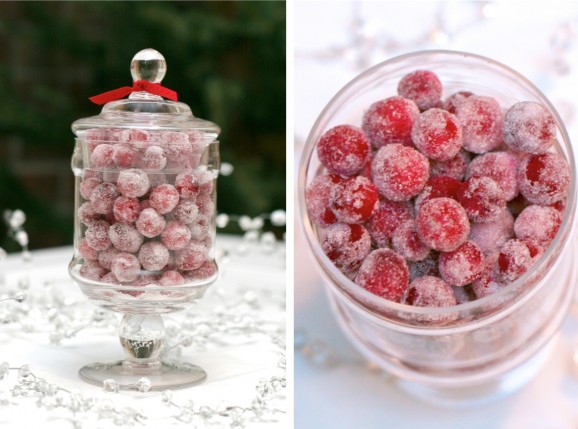
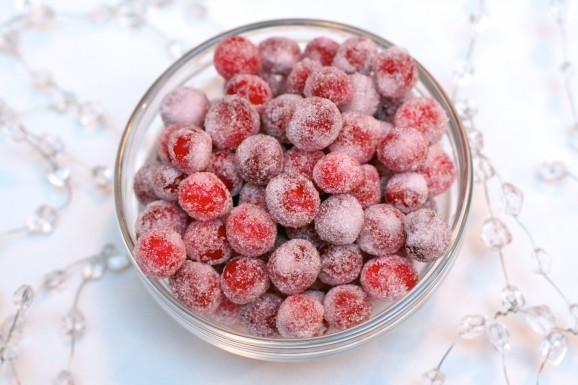
Festive Candied CranberriesWatch out! These candied cranberries are so addicting. Not only do they taste scrumptious, they look festive and are a unique and fun addition to any holiday gathering!

Last year I made these for a snack to serve at our neighborhood Christmas cookie exchange. (Remember the homemade marshmallows?) Just about everyone who tasted the cranberries asked for the recipe. They have the perfect tart-sweet balance and a very satisfying “pop” when you bite into them.

I’m not sure where the original recipe comes from, as my recipe comes from my own Supermom’s kitchen! So, I guess I can credit her?

You will need:
:: Bag of fresh cranberries
:: 2 cups water
:: 3 cups sugar divided

To make:
Rinse and drain cranberries. Remove any stems or over-ripe berries. Make simple syrup by mixing 2 cups water and 2 cups sugar in a saucepan and cooking over medium heat until thickened and sugar is dissolved. (Do not boil. If the syrup does boil, let cool for several minutes before adding to berries to prevent popping berries.)

In a large bowl combine syrup and berries. Cover. Refrigerate overnight.

The next day, drain cranberries and spread on a large baking sheet. Pour 1 cup sugar over berries and gently shake baking sheet until cranberries are coated with sugar. Using a spatula, transfer coated berries to a fresh baking sheet. Let sit uncovered for an hour or so until dry and crisp. Serve immediately or store covered up to 3 days.

Festive Candied Cranberries - 2

Reposted with permission by Aimée Lowry & Bettijo B. Hirschi from PagingSupermom.com

Simple Modern Wood Painting for Kids

December 13, 2012

Little pieces of art made by my children are my most coveted treasures.  Making a modern wood painting is a simple creation for kiddos 3 and up.  The mid-century modern is my favourite design movement, and I was inspired by it's dedication to natural wood and simplified two tone drawings in designing this project.

1

You can find a plain, unfinished wooden painting surface at most art supply stores.  Give it a light sand with fine sandpaper to make it super smooth. 

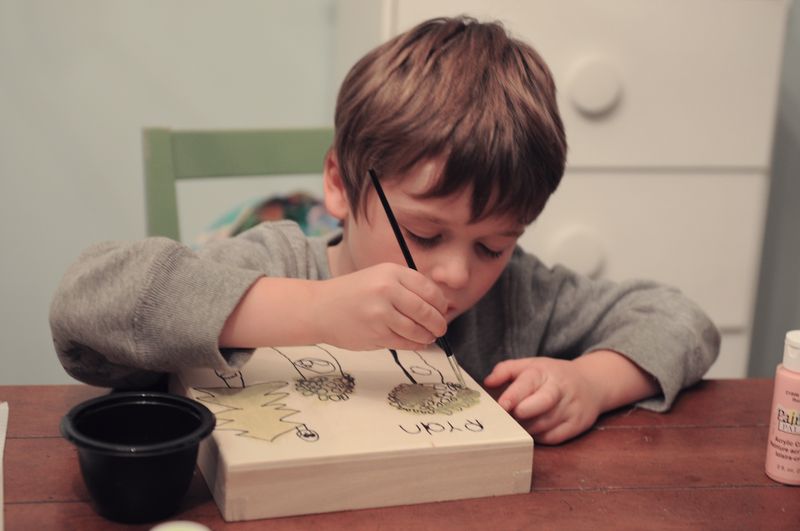
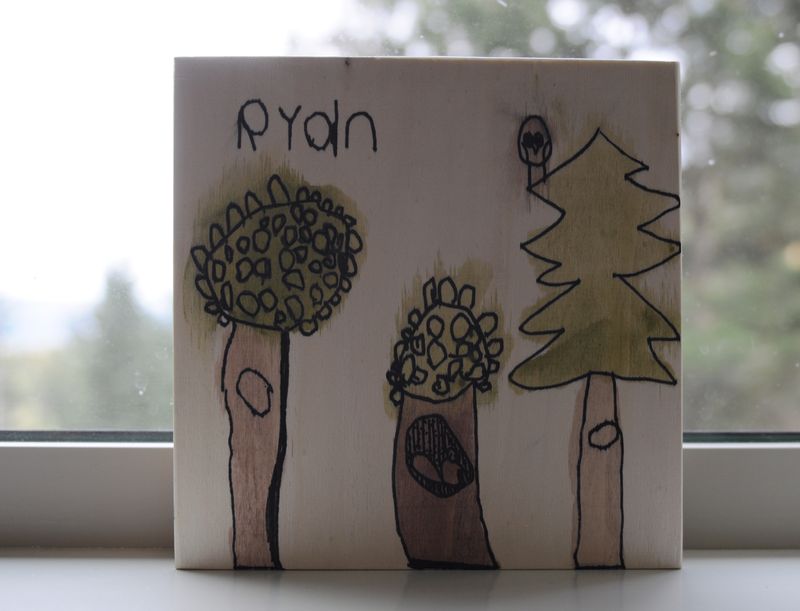
Talk to your little artist about their vision.  We love the forest behind our house so Ry wanted to do trees for his Dad.  He also loves owls and I call him Squirrel Nutkin, so he wanted to incorporate and owl and a squirrel into his design. 

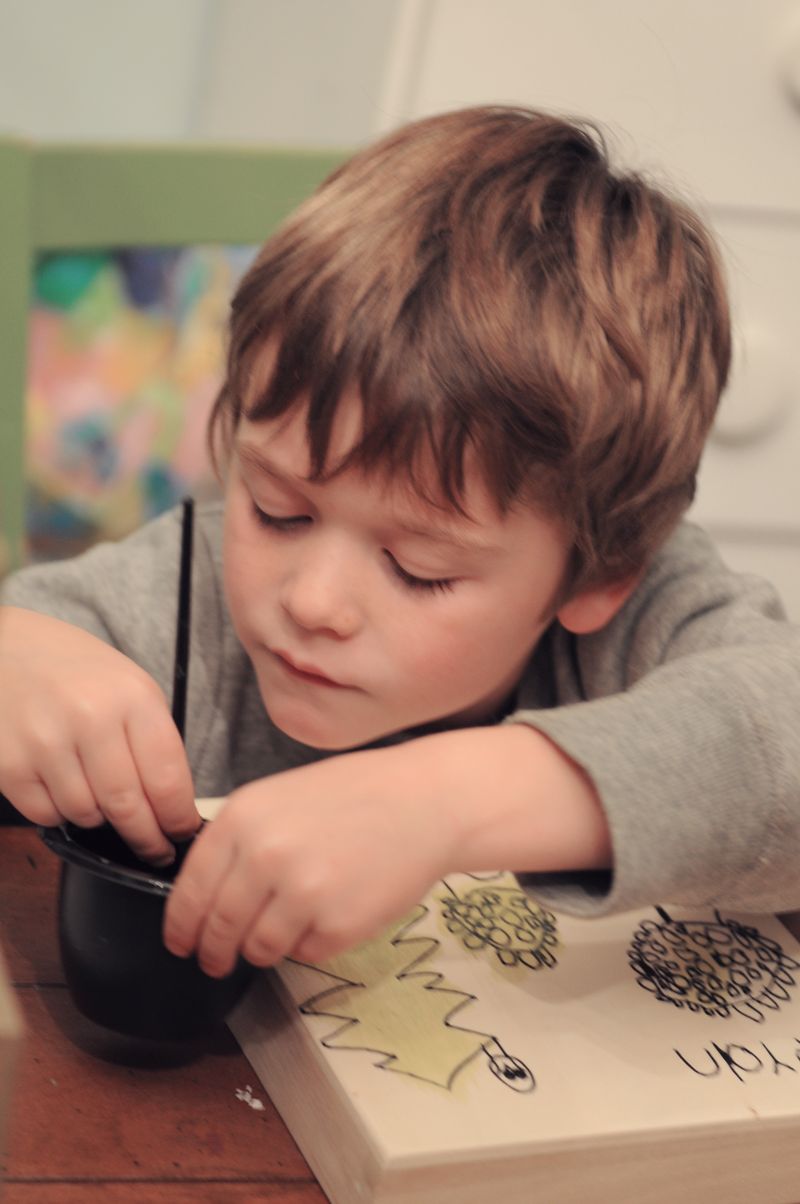
We just went for it.  I gave him a fresh Sharpie marker and he started drawing.  We took small breaks to talk about how things look and to make sure everything he added to his illustration was very intentional and thought out.  There is no erasing Sharpies easily from unprimed wood.

Once the Sharpie was well set we mixed up two washes of colour.  A muted green hue and a brown hue.

2

For wee ones try not to make the paint wash too watery or offer them too much at once.  It will spread quickly on the raw wood and bleed out of the lines.  It can also smear the Sharpie.  Both things happenned to ours but we didn't mind so much, but my older sons would have been disappointed.

Look at some art by Mid-Century Modern graphics artist like Charley Harper for inspiration.  It gave Ry the idea to add some simple patterns as the final finishing touches.

3

Let it dry till the paint completely absorbed and set.   Finish with a couple light coats of a clear, matte varnish to protect the painting and give it a nice patina.

Hang it and swoon for years to come, each time remembering the precious hour you spent with you little one watching them work in deep concentration.  A little piece of their imagination from that exact moment is what the painting will forever portray. 

Snap a photo of that proud little person holding up their masterpiece and paste it to the back with a little note if you like, one day you'll be glad you did.

oxo

Post by Kerry MacLeod : www.snickerdoodles.ca

Get to Know Lisa Congdon

December 12, 2012

LISA-C-TITLE-4
Lisa

Tell us a little about your process. Do you paint everything by hand?

The vast majority of my work is hand painted or hand drawn. I do also make repeat patterns in vector so that they can be scaled to any size, but even those start out initially as drawings on paper with pen. I work mostly in gouache, pencil and ink, mostly.

1-3

How would you describe your style? Did you have to develop it, or did it just come naturally? 

While I think I have definitely developed my illustration style over time, I do think it stems from being naturally drawn to a certain aesthetic, and one that I was attracted to even before I became an artist. I have about two distinct styles in my paintings. One is more painterly and one is more flat and graphic. I work in several different mediums but I try to keep some consistency in my work. Orson Welles once said: "Create your own visual style…let it be unique for yourself and yet identifiable for others." I like to think about this when I am creating new work and expanding my portfolio. I use a very consistent color palette whether I am painting with more depth and dimension or whether I am painting illustrations that are more simple and graphic. I also try to use consistent hand lettering in my work and consistent symbols and imagery so that people begin to recognize what I do as cohesive, even if the medium or painting style is different.

4-6

What advice do you have for all the young artists out there? 

Practice, practice, practice. The only way to become a better artist is to do what you do over and over again, and to continually strive to get better at it. If you are going to practice, you must love what you do. Find mediums and subject matter that you love working with so that practicing will feel fun. Beauty really comes through when you love what you do.

What do you enjoy about the Holidays? Do you have any traditions of your own?

Christmas is definitely my favorite holiday! I love the trees and lights, baking cookies, finding, making and wrapping gifts for people I love and being around people I love. In my family we open most of our presents on Christmas Eve. It is a German tradition. While we open presents we eat cookies and have cider and listen to Christmas music. One person opens a present at a time while everyone else watches, so it can take several hours! But it is great fun, and everyone takes pride in what they have chosen or made to give to other people in the family. The next day on Christmas my mother makes a big meal for everyone and we get very full!

7-9

Tell us about making the 12 Days Ornaments and your inspiration behind it. Which day was your favorite?

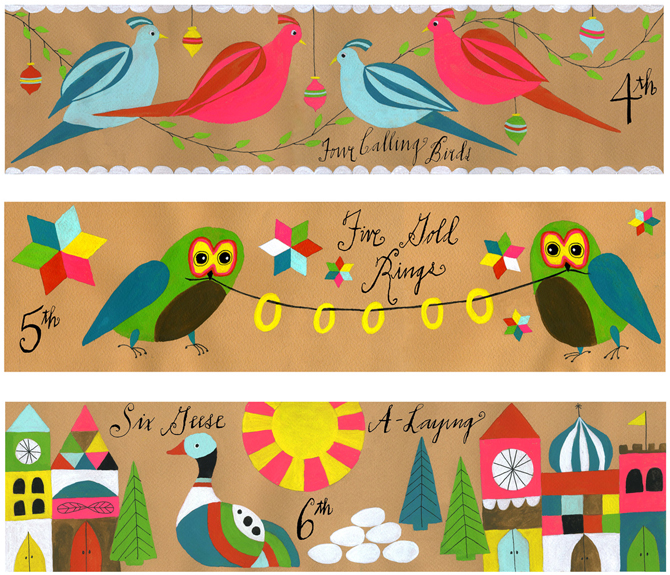
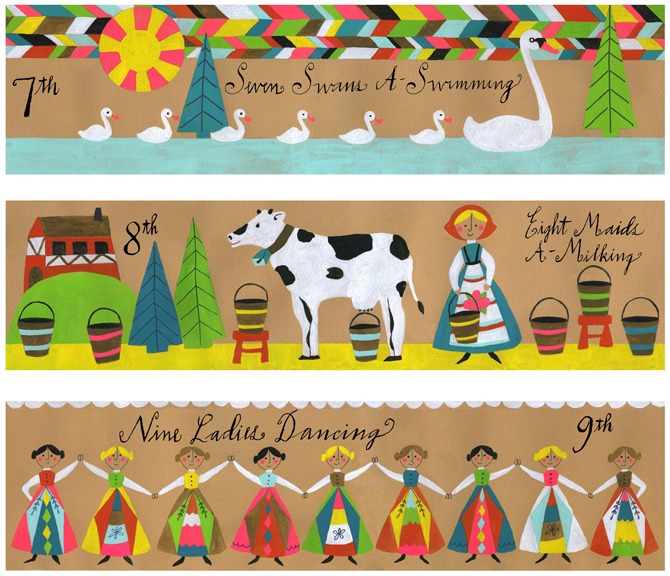
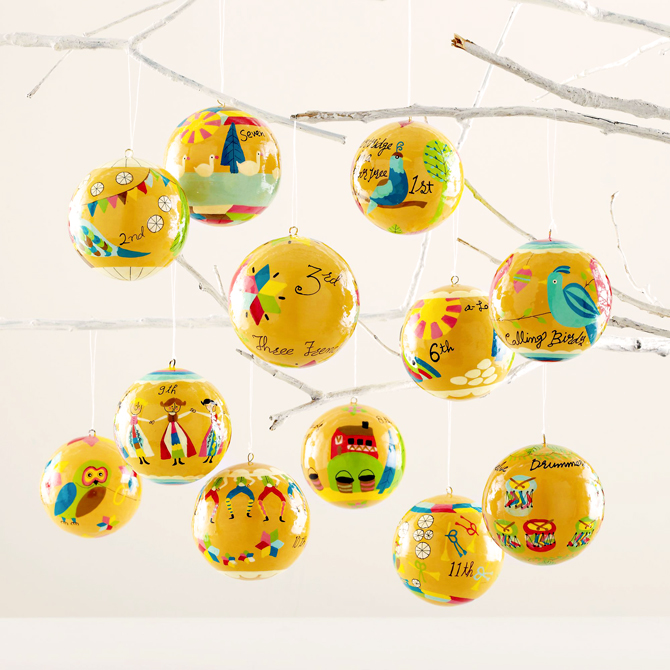
It was a really great project! Because the ornaments would be hand painted by other people (and not me), I decided to keep the designs very simple and graphic with lots of bright color and repetition. I think my favorite of all the 12 is Seven Swans a Swimming! I love the colors and composition of that one. It was fun to come up with ideas for what should go on each ornament design and then to find a way to paint it. I really enjoyed the process. 

12daysOrn

The Lisa Congdon 12 Days of Christmas Ornaments are available exclusively at The Land of Nod. Each one is hand-painted by artisans making each set unique. Available here.

By Anna Passadori 

Anna develops and designs exclusive product for The Land of Nod. She hails from the west coast and has traveled the world to source product. She loves anything Marc Jacobs, Sofia Coppola or stripes! (So, if anyone can get a photo of Sofia Coppola wearing a striped outfit by Marc Jacobs, please send it along.)