Close

Blog

Pinwheel Christmas Cookies

December 11, 2012

Post by Renae Wortz of Mom Colored Glasses

Homemade Christmas cookies were a big deal in my house growing up. I spent many a December afternoon having flour fights with my sisters and licking frosting bowls until I got sick while we baked piles and piles of cookies. Over the years I have collected so many favorite cookie recipes it was difficult choosing which variety to make for this series! I finally decided to make pinwheel cookies because they’re yummy (duh!), pretty and I’ve actually never made them before…..I guess this was what my mom was doing while my sisters and I made cut-outs on the dining room table.

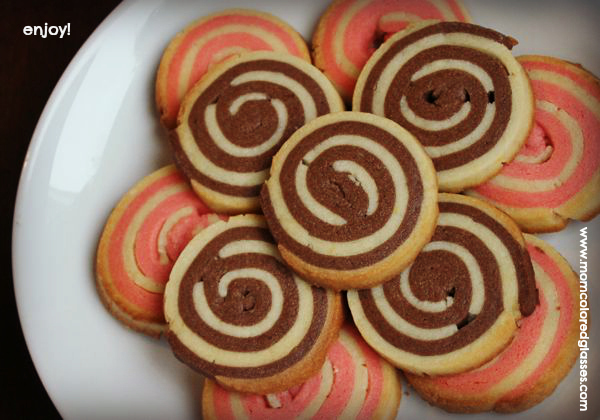
Pinwheels are rolled butter cookies flavored with cocoa or peppermint. They aren’t as easy as simple drop cookies but the extra effort is well worth it! Scroll to the bottom for the full recipe and for a cute packaging idea using a homemade origami star box.

Pinwheel Christmas Cookie Recipe

Pinwheel Christmas Cookie Recipe 2

Pinwheel Christmas Cookie Recipe 3

Pinwheel Christmas Cookie Recipe 4

Pinwheel Christmas Cookie Recipe 5

Pinwheel Christmas Cookie Recipe 6

Pinwheel Christmas Cookie Recipe 7

Pinwheel Christmas Cookie Recipe 8

Pinwheel Christmas Cookie Recipe 9

Pinwheel Christmas Cookie Recipe 10

Pinwheel Christmas Cookie Recipe 11

Pinwheel Christmas Cookie Recipe 13

Pinwheel Christmas Cookie Recipe 14

Recipe: Pinwheel Cookies

Ingredients

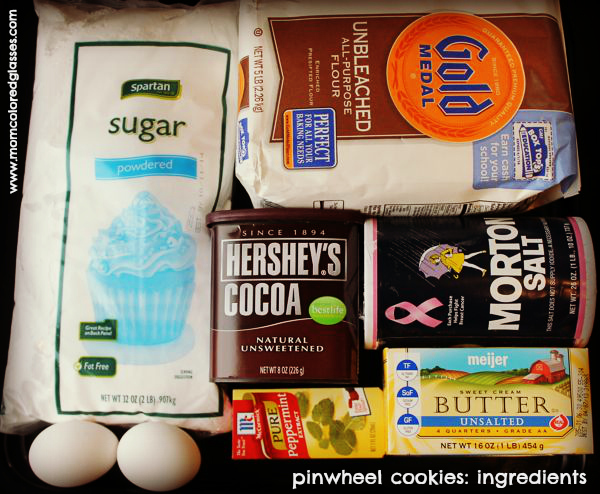
  • 3 cups powdered sugar
  • 2 1/2 cups of softened butter
  • 2 eggs
  • 1/2 tsp. salt
  • 6 cups of all-purpose flour
  • 1/4 cup unsweetened cocoa powder
  • 1 tsp. peppermint extract
  • Red food coloring
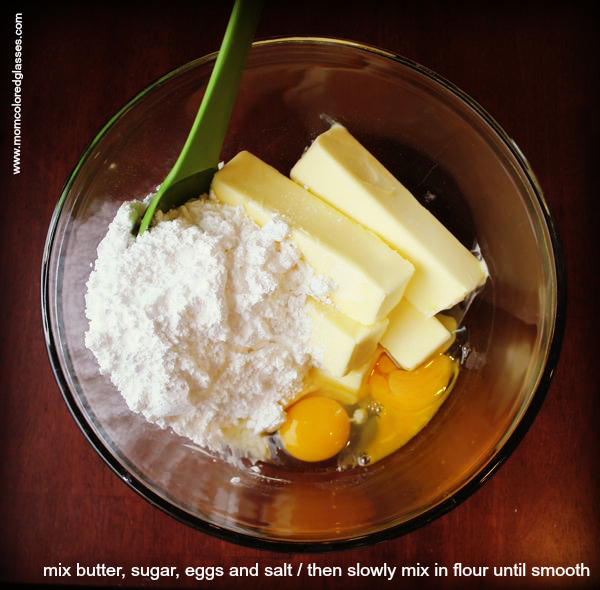
1. Mix butter, powdered sugar, eggs and salt until smooth and creamy.
2. Slowly add in the flour and mix until fully incorporated.
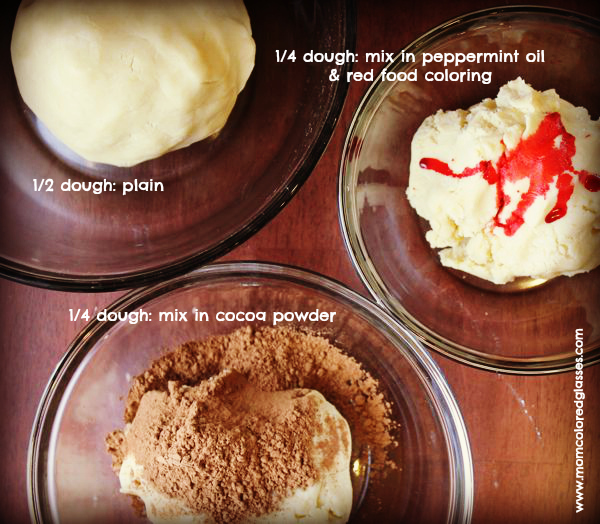
3. Divide dough in half and set one half aside.
4. Divide the remaining dough equally between two bowls.
5. Mix peppermint extract and red food coloring into one bowl; mix cocoa powder into the other bowl.
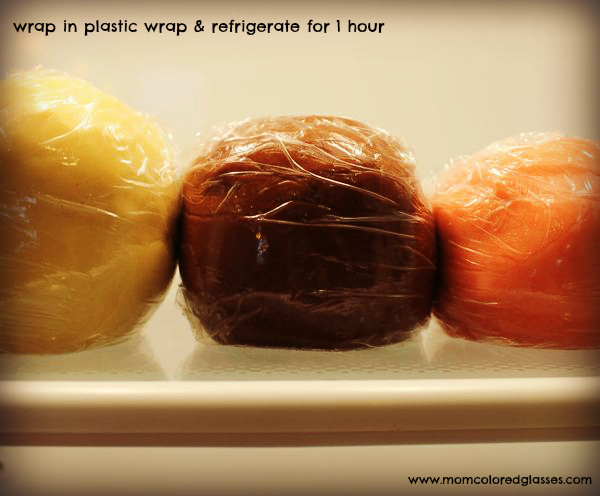
6. Form dough into three separate balls and refrigerate for at least one hour. (If you refrigerate it for longer than one hour, let the dough soften up on the counter for at least an hour for easier manipulation and to prevent crumbling)
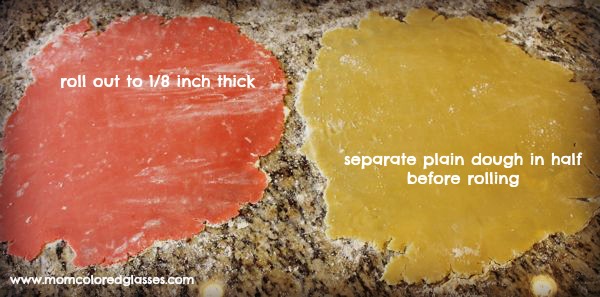
7. Divide the plain dough in half and roll it and one of the flavored dough balls into a rectangle to about 1/4 inch thickness.
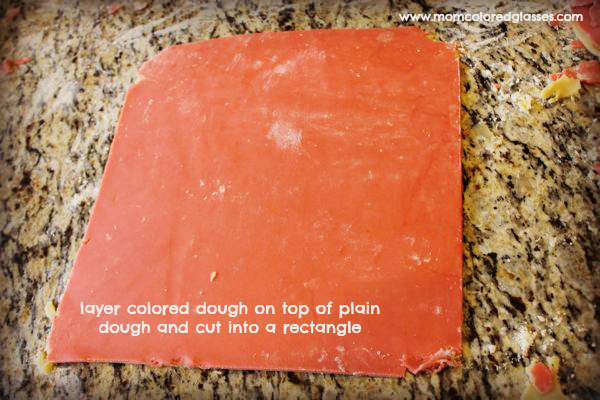
8. Carefully place the rolled-out flavored dough on top of the plain dough and trim the dough layers into a rectangle.
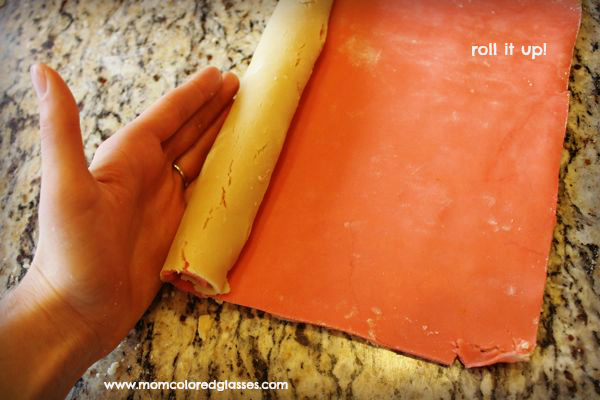
9. Slowly and carefully roll the long end of the dough layers in “jellyroll” fashion until you have formed a long log. Repeat with the remaining dough.
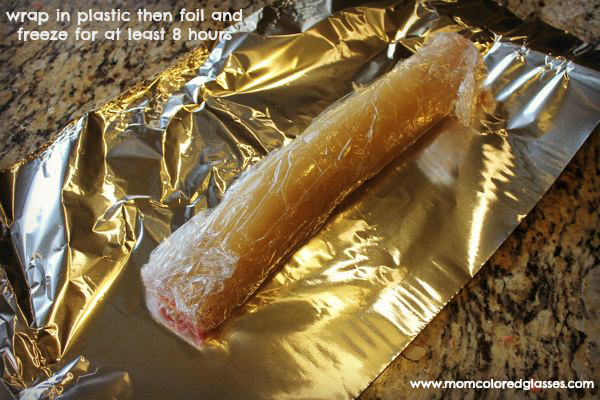
10. Wrap both dough logs in plastic wrap and then foil and freeze for at least 8 hours.
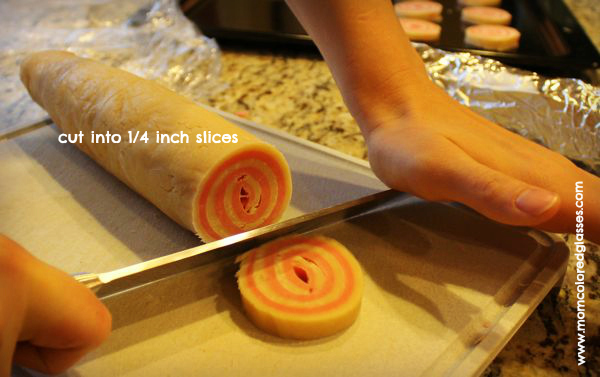
11. Remove the dough logs from the freezer, unwrap and slice into 1/4 inch rounds with a sharp knife.
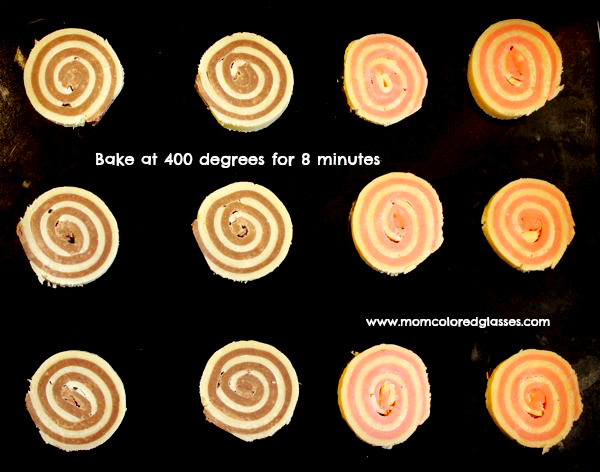
12. Place on a cookie sheet and bake at 400 degrees for 8 minutes.

Makes about 2 dozen peppermint pinwheels and 2 dozen cocoa pinwheels.

Origami Star Box

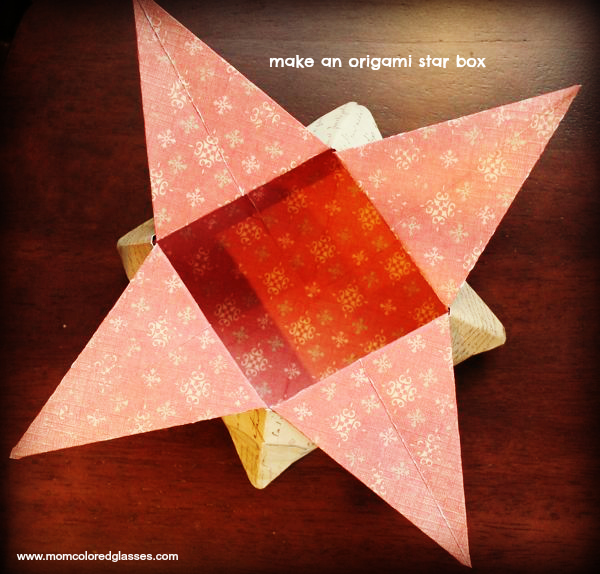
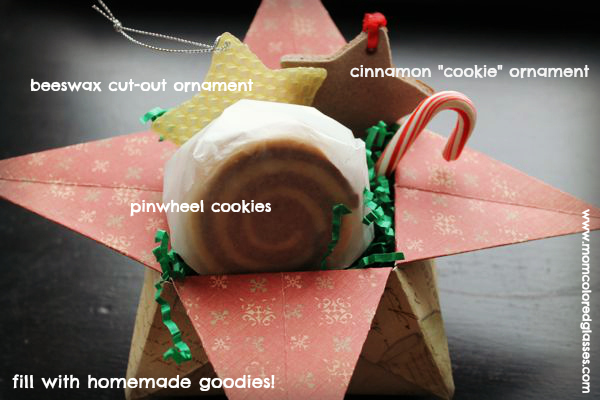
I followed the instructions for making this box at www.origami-instructions.com and used 12 x 12 inch cardstock paper. It is easier than it looks! We featured several homemade ornament ideas last year, two of which are featured in my gift box above, beeswax cut out ornaments and cinnamon “cookie” ornaments.  Everyone loves the charm, thoughtfulness and tastiness of a homemade gift!

Enjoy! And Merry Christmas!

Post by Renae Wortz of Mom Colored Glasses

Mitten Hand Print Holiday Keepsake

December 10, 2012

Post by Julee of Warm Hot Chocolate
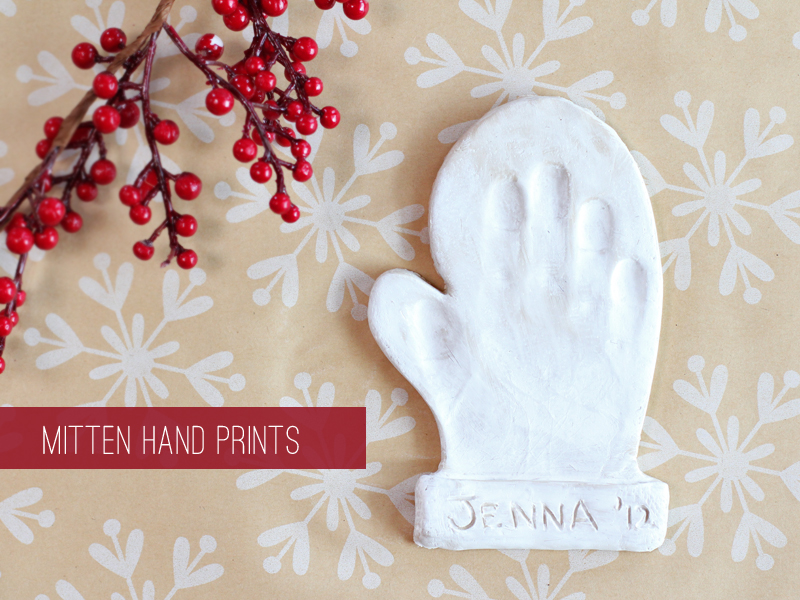
Mitten Hand Prints DIYA couple of years ago I purchased a mitten-shaped pancake mold. Something about watching my daughter play with the mold made me realize that it would make a great hand print keepsake, so I purchased some air-dry clay and took an impression. This weekend, we made an updated version and her little hands almost filled the entire mitten.

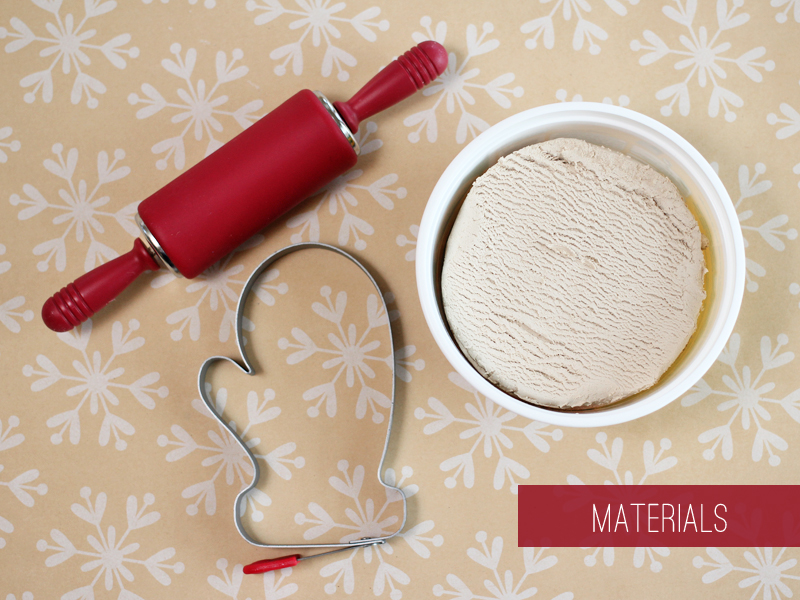
Mitten Hand Prints DIY - Materials

We started with our mitten pancake mold, Crayola air-dry clay and a rolling pin. If you don’t have a mitten pancake mold, a large mitten-shaped cookie cutter would work, or you could use a mitten pattern to trace and cut a shape out of clay.

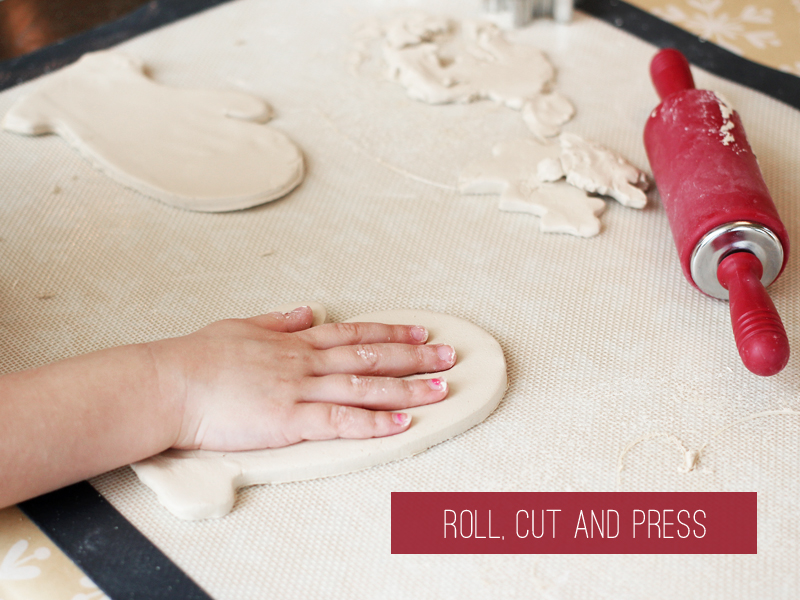
Mitten Hand Prints DIY - Step 2

After rolling and cutting the clay, I let my daughter press her hand down onto the clay. I pressed the tips of her fingers down a bit more to ensure a good imprint.

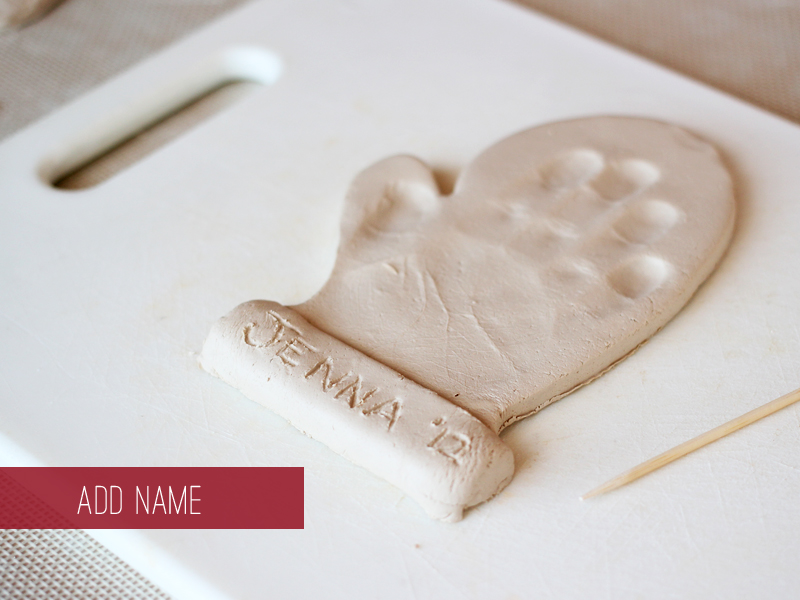
Mitten Hand Prints DIY - Add Name

Next, I cut a small rectangle out of the clay and placed it along the bottom edge of the mitten to create a trim. This makes a great surface for adding a name. You can use letter stamps, a toothpick or a bamboo skewer to write the name and year.

And now you have a cute winter-themed keepsake that could be used as a gift, an ornament or a wall-display.

Post by Julee of Warm Hot Chocolate

Win a Ticket to Alt Summit 2013

December 7, 2012

Yes, you read that correctly!

We’ve been busy planning away to create an imaginative and unforgettable lounge space at Alt Summit SLC 2013. We’re so confident attendees will surely be smiling yet scratching their heads as to what they’ve just experienced. We are offering one lucky duck a chance to win a ticket to attend Alt Summit SLC!

THE SCOOP:

We’ll be hosting an over -the-top tea party all day Friday January 25th. Think Sophia Coppola’s Marie Antoinette with vibrant colors, pops of black and whimsical crowns! So we’re asking you to be the Queen of The Land of Nod Tea Party.

NodAlt_Contest

Photo courtesy of Joosy Card Co http://etsy.com/shop/Joosycardco?section_id=5875344

HOW TO ENTER:

Use your creativity and make a crown.

Instagram @thelandofnod with the hastag #NodQueenBee

Pin with the hashtag #NodQueenBee

 Tweet an image of you wearing your crown creation or

Write on our Facebook Wall with an image of you wearing your crown creation.

On December 10th we’ll compile all the entries in this Pinterest Board & whoever gets the most likes & repins wins!  

We’ll accept submissions today the 7th through Monday the 10th.

Voting will begin the 10th through the 12th and we’ll announce the winner on Thursday December 13th.

Disclosure: One winner will win a single admission ticket to Altitude Design Summit 2013 in Salt Lake City, UT (January 23 – 26, 2013). The ticket includes admission to Altitude Design Summit, as well as dinner on Wednesday evening and entry to the Alt parties. This ticket does not include cost of travel, accommodations, or any other trip expenses. No cash or trade-in value.

Spreading Holiday Cheer To The Nursery

Post by Andrea Howe of For The Love Of

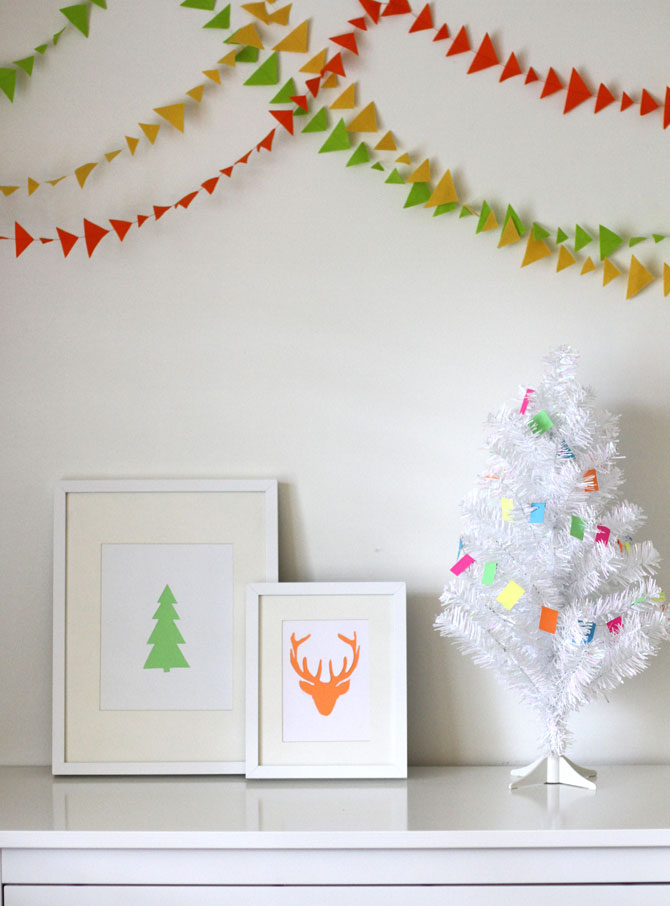
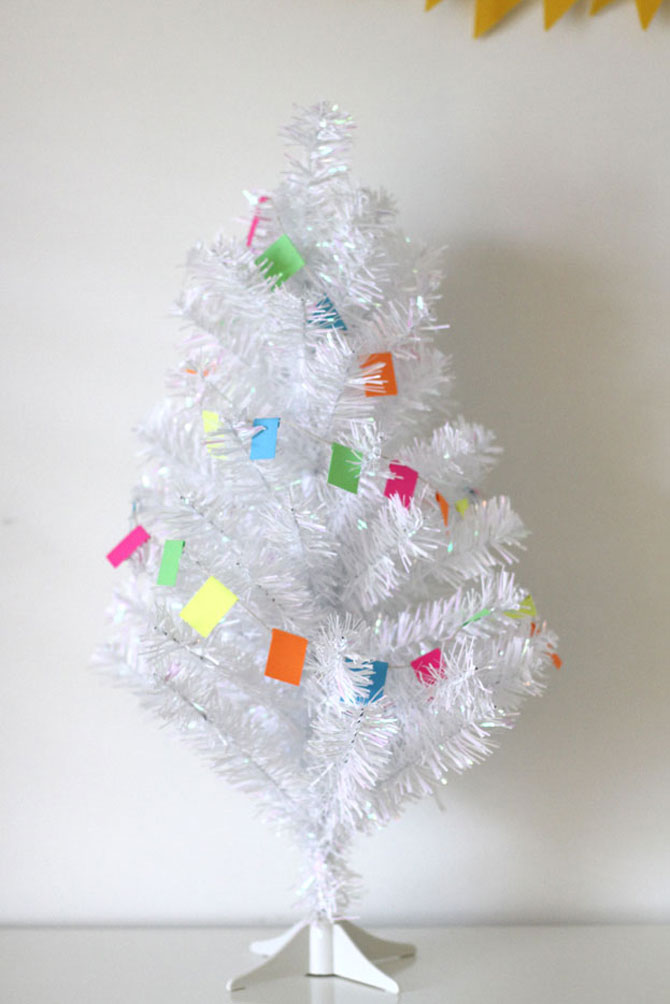
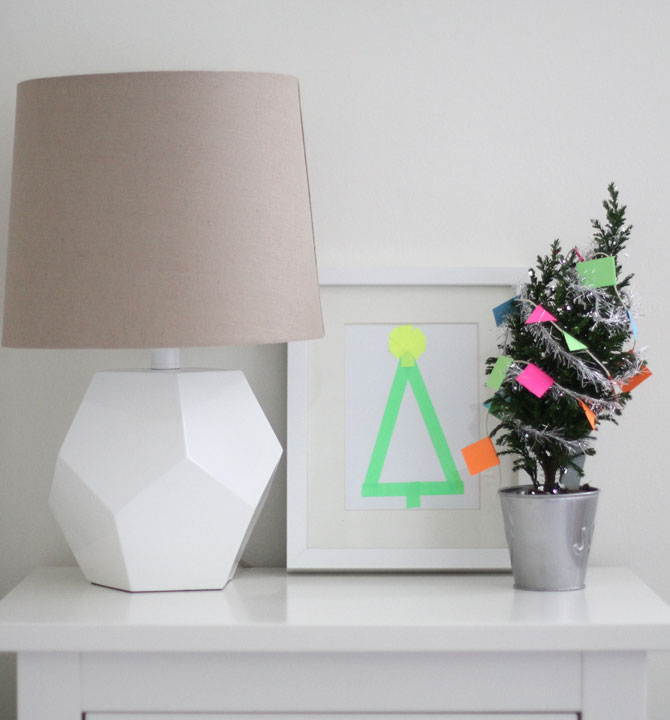
I try not to go overboard with the Holiday decor, and in fact I’m finding that I scale back a teensy tiny bit each year. I’ve learned that the less I put out, the easier it is for me to take down and pack away the Christmas cheer. But I do love to have just a touch of Christmas cheer in each room, whether it be a simple fir tree or a lovely snow globe, the festiveness is in the small details. Last weekend I finished decking the halls by adding a bit of Christmas cheer to the nursery. Since my 3 month old son Hayden’s room is primarily all white with pops of bright color and even some neon thrown in, I decided to add a neon twist to his decor with some DIY artwork and tiny paper garland strung on trees.

Spreading Holiday Cheer To The Nursery

To make the reindeer and Christmas tree cutouts, you simply print out a graphic in the print you want, trace with a pencil onto a sheet of cardstock, carefully cut out with an exacto knife and then place a brightly colored sheet of paper behind the cut out to make it really stand out. Frame and hang, and you have affordable DIY artwork in less than 30 minutes.

Spreading Holiday Cheer To The Nursery

For the garland just cut out an assortment of triangles and rectangles and fold over twine and secure with tape. They look adorable strung on a tree or around a lampshade.

Spreading Holiday Cheer To The Nursery

Spreading Holiday Cheer To The Nursery

These decorations took me less than an hour in total to make and hang, and will take even less time to take down after the Holidays, which makes decorating less of a chore, knowing that it won’t be a pain to de-deck the halls. Other ways to add a touch of the holidays to your child’s room is with twinkly lights, artificial Christmas trees with their own collection of ornaments, snow globes, Christmas music, and a collection of Christmas books set aside in a basket. Last year I wrapped all of our Holiday books in wrapping paper and had the kids unwrap one every few days to read before bedtime and they loved that tradition, and I loved that it gave new life to old books. Do you deck the halls in the kids rooms, and if so, what do you do to add a festive touch?

Andrea Howe is the writer of For The Love Of, a blog dedicated to modern approachable style. She is wife to one, mother to three (5 year old and 3 month old sons and a 7 year old girl), and one lover of style. She spends her days chasing her kids around, taking pictures of them on her phone, cooking, making messes during DIY sessions, reading, blogging, and devising a way to get her dream craft room some day. She is also a regular contributor at Disney Baby where she shares inspiring stories of life with baby.

Apple Cinnamon Muffins

December 6, 2012

1
2
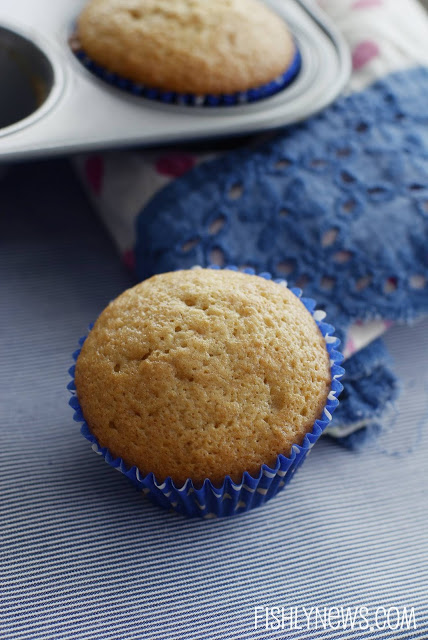
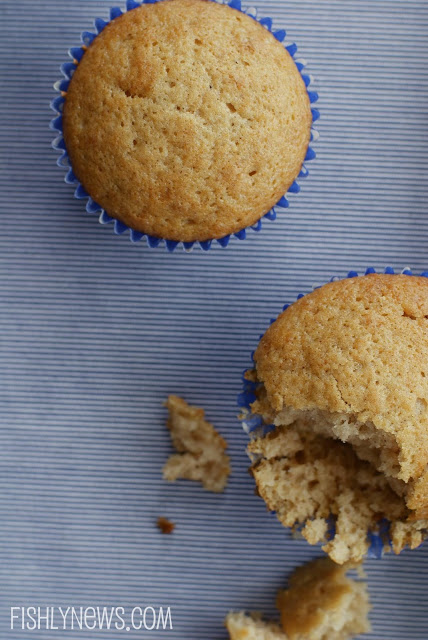
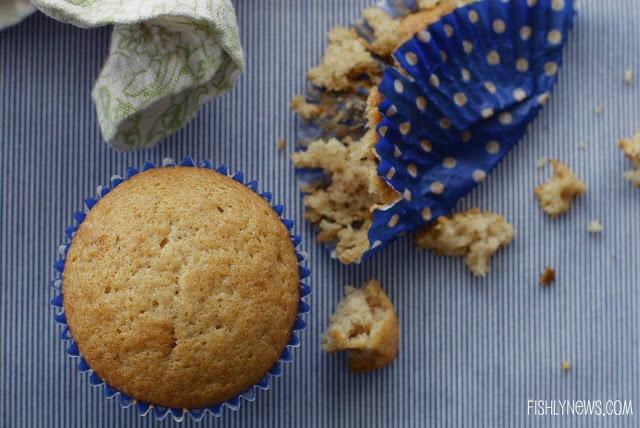
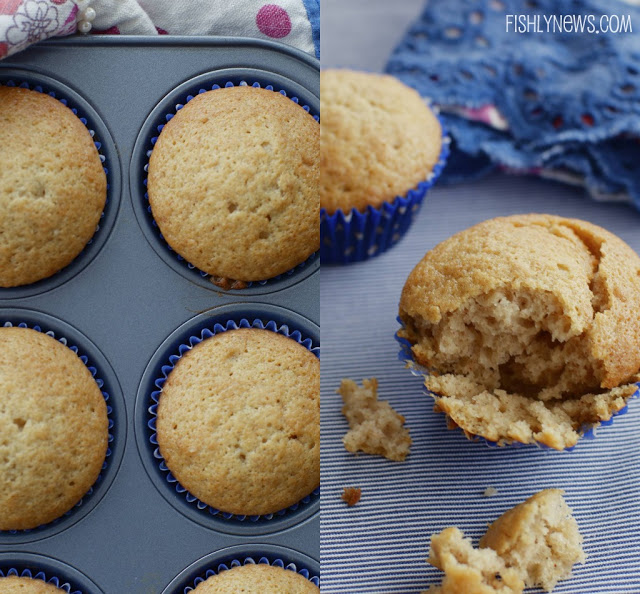
First off, these apple cinnamon muffins are made from a box of organic mix. However, I added a successful recipe below if you want to make them from scratch.

I’m always looking for breakfast options that will make my daughter eat and these work well in the morning and at snack time. They are very low fat and tasty without being sugary.

3

4

Recipe adapted from Martha Stewart

  • 1 medium Granny Smith apple, peeled, cored, and quartered (I use any kind of apple and usually use 2-4)
  • 1 cup sugar
  • 2 cups all-purpose flour
  • 2 teaspoons baking soda
  • 1/2 teaspoon plus 2 pinches salt
  • 1/2 teaspoon ground cinnamon
  • 2 large eggs
  • 1 cup buttermilk, room temperature
  • 1/2 cup (1 stick) unsalted butter, melted
  1. Preheat oven to 400 degrees. Spray a 12-cup standard muffin tin with cooking spray or use liners; set aside. Cut 3 apple quarters into 1/4-inch dice; cut remaining apple quarter into 12 thin slices for garnish.
  2. Whisk together sugar, flour, baking soda, salt, and cinnamon in a medium bowl. Add diced apple and walnuts, if using; toss to coat.Whisk together eggs, buttermilk, and butter in a small bowl. Gently fold buttermilk mixture into flour mixture until just combined; do not overmix. Divide batter among muffin cups, filling each about three-quarters full. Top each with an apple slice. Bake until muffins are brown around edges and spring back when touched, 16 to 18 minutes. Let muffins cool slightly, about 5 minutes, before turning out of tin onto a wire rack. Serve warm or at room temperature.

Need more tasty recipes and delicious bites? Check out our Let’s Eat Pinterest Board.

Post by Giulia Doyle : Fishly News

For the Love of Reading…

December 5, 2012

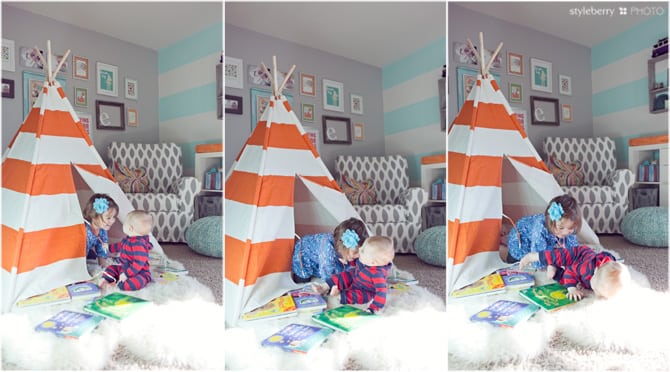
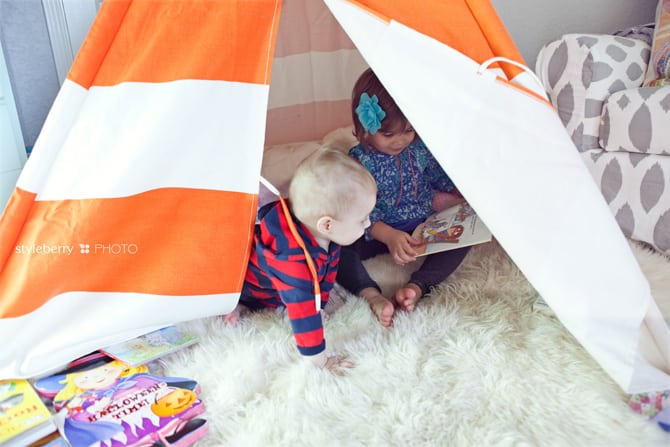
Gifting our kids with a love for reading is something we can give at a very young age. In our house, we read all over, but we have some designated spaces that have naturally become reading nooks. As soon as I laid eyes on the amazing teepees that are all the rage this year, I knew I had to have one. This is by far the cutest one I could find and my kiddies are enjoying it so much! I just snagged some twinkle lights to hang inside and have grand plans for a bunting to grace the interior–we just cannot get enough!

The teepee is a huge hit around here–and quiet time today was filled with "reading under the stars." It doesn't get much better than that for a three years old, right?? 🙂

Post by shawna of styleberryBLOG.com

Despite days full of washing diapers & messy fun, Shawna is determined to make mommyhood a stylish adventure. Married to the military & mother to one feisty girl & a snuggly little guy, she is a passionate DIYer & loves sharing how to make the complicated simple. Shawna talks creativity, style, food, decorating, green-chic living & mommyhood atstyleberryBLOG, a daily-ish dose of something fab.


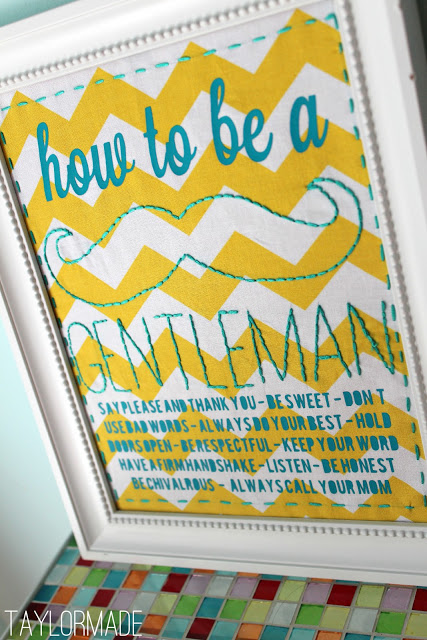
How To Be A Gentleman

December 4, 2012

1
2

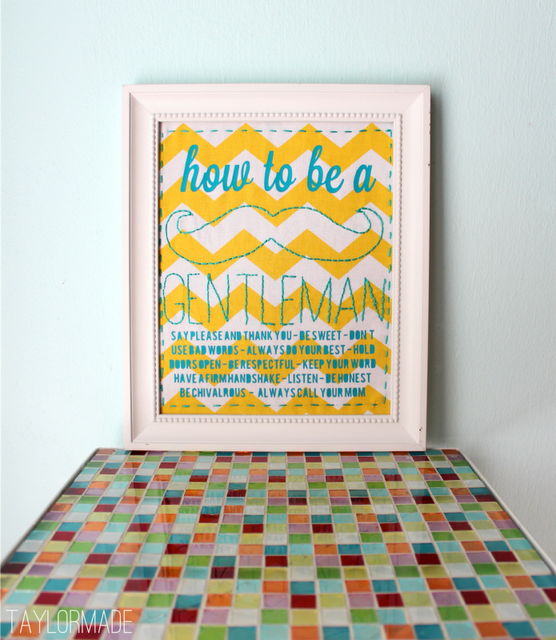
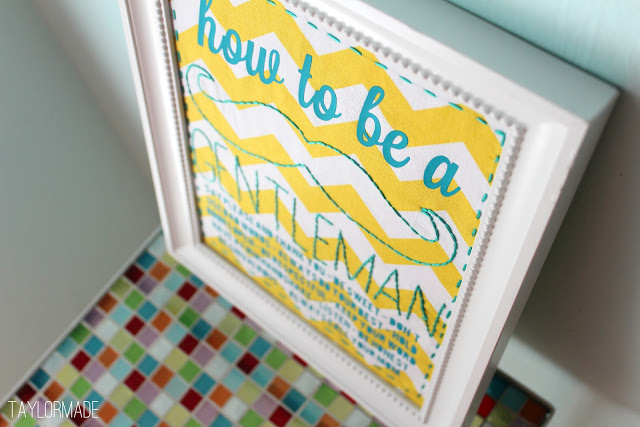
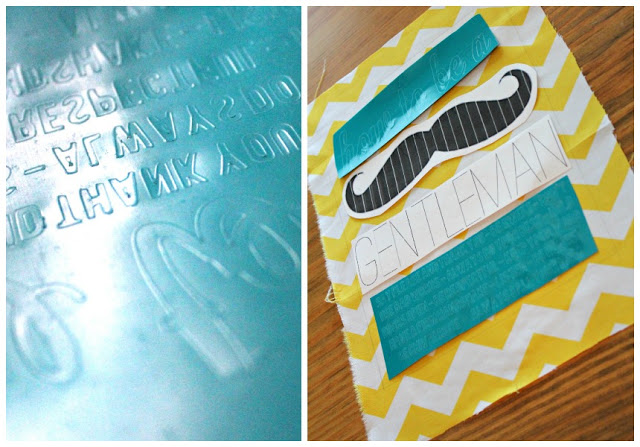
I can't seem to get enough of hand embroidered wall art lately. When I saw THIS PIN a few months ago, I knew I wanted to make something similar for Finn's room. I used it as inspiration but I also changed and added a few rules of my own.
3
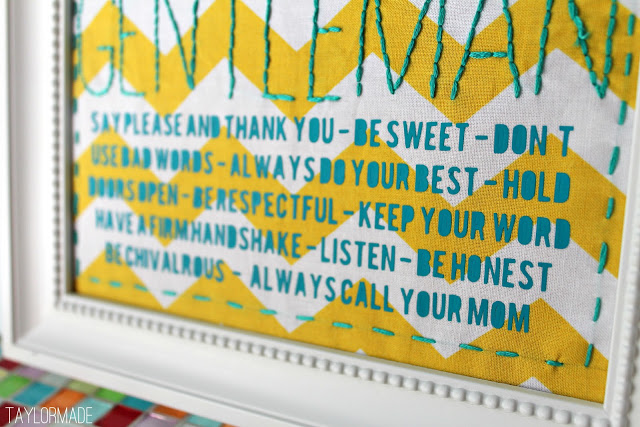
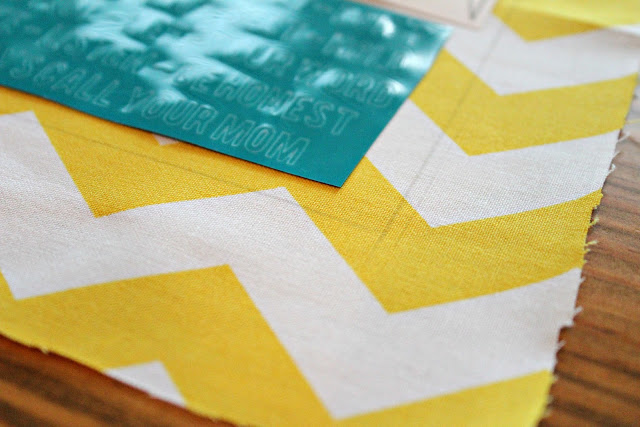
The last rule is totally me… it says "always call your mom". This is my biggest fear of having two boys, I hope they don't turn 18, say bye mom thanks for everything, I'm off to find a new girl then call once every few months. Maybe if I start brainwashing them now they will call me 🙂
4
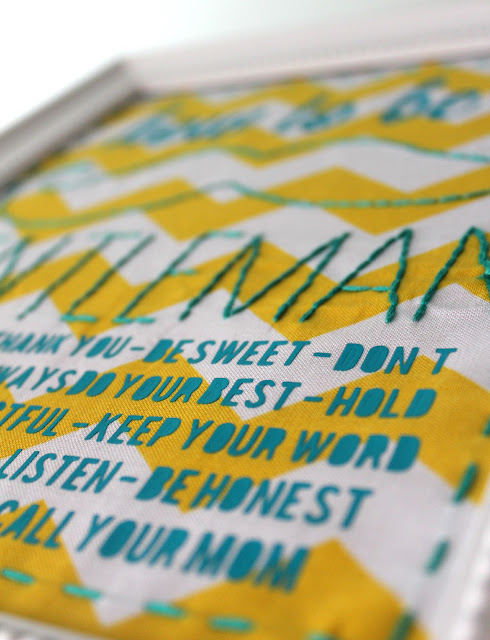
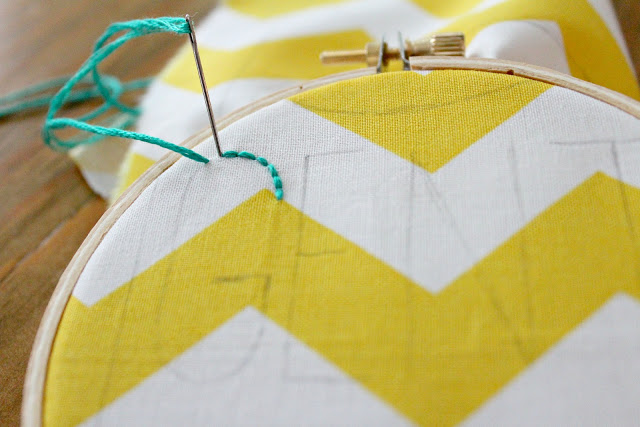
I used iron on vinyl for the small letters but hand embroidered the rest. I printed out a template for the embroidery and then just used a pencil and traced to give myself a guide.
5
I also traced a border around the outside with pencil.
6
Then I started to embroider. I find it very relaxing for some reason… I like to sit in bed and do it while I watch TV… Geez how old am I? My husband calls me the youngest old person he knows.
7
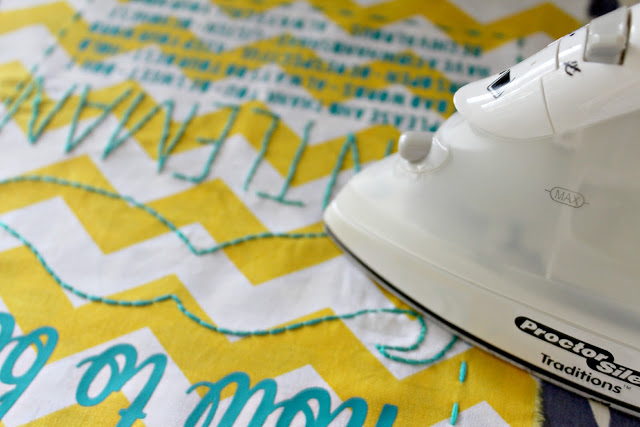
Lastly, I ironed on my vinyl.
8
I love how it turned out. So far this makes one thing to hang on poor Finn's walls haha.
9
So do you have any rules to add? I live in Texas y'all, I have to raise gentlemen. Also, does anyone else have sons and want to weigh in on how often they call? Go easy on me :/Also, I entered this into the Borderline Brilliant Contest, so PRETTY PLEASE vote for me, #14 🙂
Signature
Post by Taylor Urban : www.itstaylormade.com

Vintage Map Wall

December 3, 2012

1
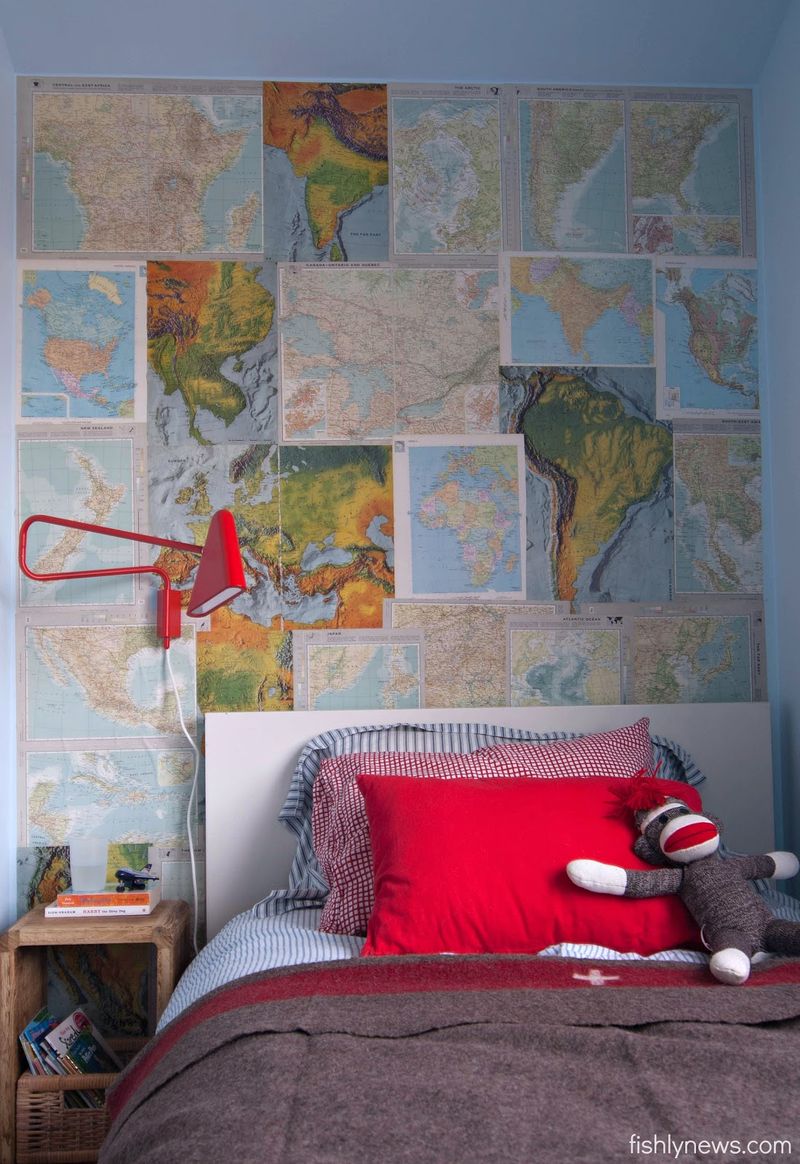
This past weekend we finished D's map wall. I had bought two vintage 1960s Atlases at Goodwill. I went through the books and picked maps we liked in different sizes and colours. We trimmed the edges and used wallpaper paste to adhere the pages to the wall. We overlapped several of them for a more casual look and I had to trim a couple to fit. Because book paper is not formulated the way wallpaper is, we did get some wrinkles – so it's not perfect, but you can really only see that close-up. I'm really happy we finally did this – I saw the Martha Stewart picture of the map wall two years ago! 

We also got the IKEA light, the bed on Kjiji, a small wooden nightstand and I pulled out our vintage Swiss Army blanket. Last things to do are new sheets and a rug - no more actual work in this room!

Post by Giulia Doyle : Fishly News

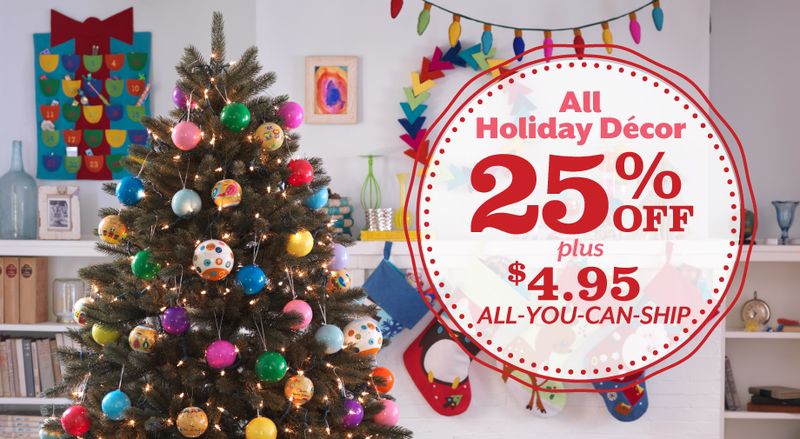
Time to Decorate for the Holidays – all Holiday Décor is 25% Off!

November 30, 2012

113012_HPfeature_HolidayDecor (5)
You've been buzzing and it's time to decorate those trees! 25% off ends December 6th. 

Monster Juice Box

November 29, 2012

2
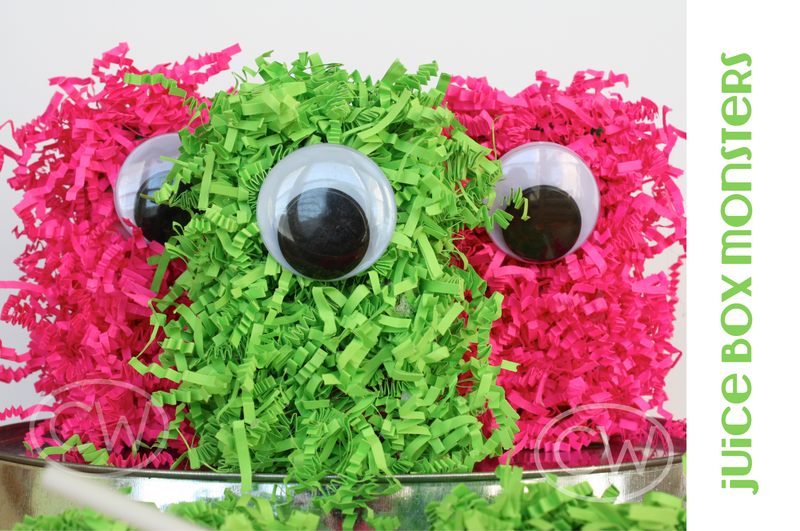
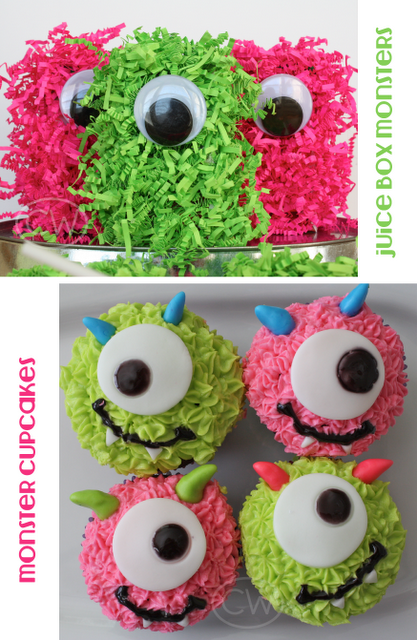
I wanted to do something unique for Charlotte's party. While meandering through the craft store I noticed all the bright packages of crinkle-cut basket filler and I had an idea. I could glue it to juice boxes and make big, fat furry monsters out of 'em. I tried out my theory upon arriving home, and guess what? It worked! It took just about three minutes to make each monster, and I only had to make six, so it was a pretty quick, easy project.

1

Here's how to make them:

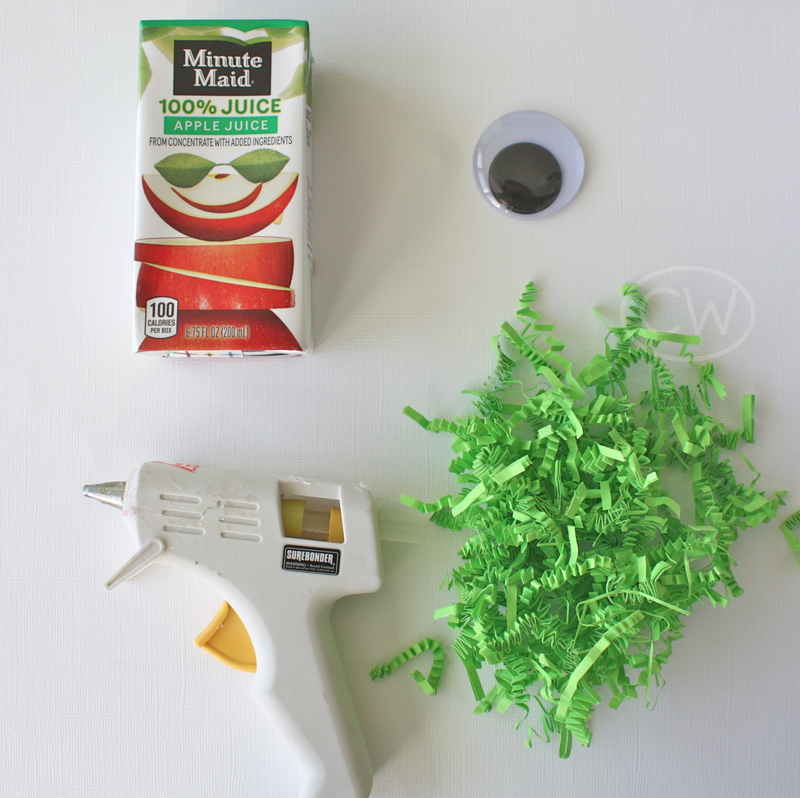
1. Grab your supplies: Juice boxes, hot glue, crinkle paper and a giant wiggle eye

2. Working in 1" sections, squiggle some hot glue onto the box, then grab a handful of paper and press it onto the glue.

3. Keep going until all surfaces are covered with paper. (Make sure to leave some space around the opening for the straw)

4. Glue on the giant eyeball.

Ta-Da! You're done.

Signature
Post by Christina Williams : justcallmechris.blogspot.com

Things to Make – 27 Easy Projects From the Recycling Bin

November 28, 2012

Here's a list of some of the things it has helped us create. What have you made from recycling bin lately? rocketship2 Milk Cartons
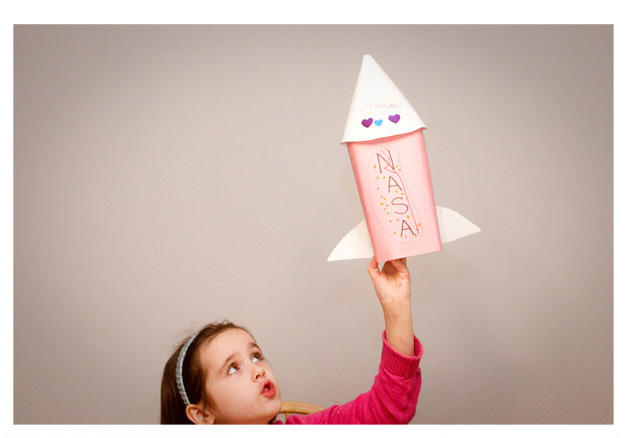
1. Rocketships – Wrap a milk carton in construction paper, fold in the top, add rocket wings and Barbie is ready for the moon.

2. Cradleboards (backpacks to carry dolls in) – An old milk carton + a belt or ribbon = a backpack for carrying dolls. Easy peasy. finish Toilet Paper and Paper Toll Rolls
3. Story sticks – The Pima Indians of Arizona kept records of things that had happened in their lives on story sticks, so we drew pictures on flattened paper toll rolls to tell our own stories.

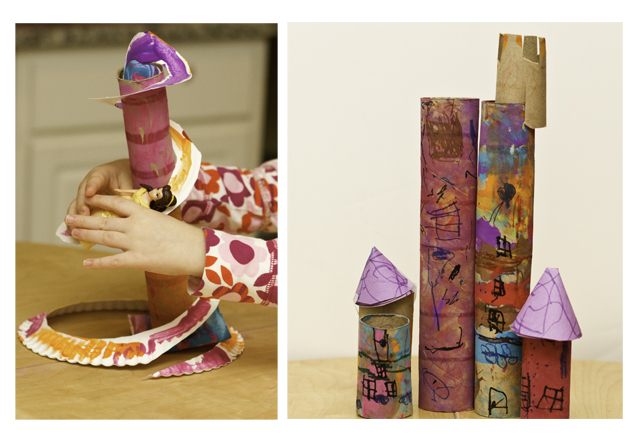
4. Doll slides – All you need is a toilet paper roll and a paper plate for Polly Pocket to have some fun.

5. Doll castles – Once Polly Pocket tires of her slide, she can relax in a beautiful castle.

6. Instruments – Make some noise, just add beans and seal the ends of a paper toll tube. Now you're ready to rock.
untitled (51 of 52).jpg

Large Cardboard Boxes

7. Castle – A large painted box can become almost anything with a little imagination. Why not give your children a kingdom to reign over?

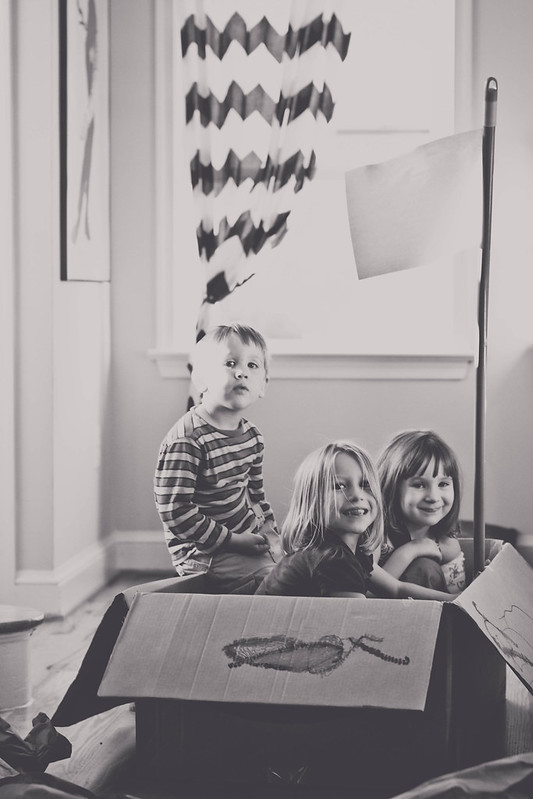
8. Boat – Add a broom with a construction paper flag on top so everyone will know from where you sail.

9. Posters – Just cut up the cardboard into large pieces and decorate. Now hang on the wall and you have some art.
untitled (10 of 15).jpg

Small Cardboard Boxes or Bowls

10. Decoupage bowls – A great use for old shoe boxes or produce bowls.

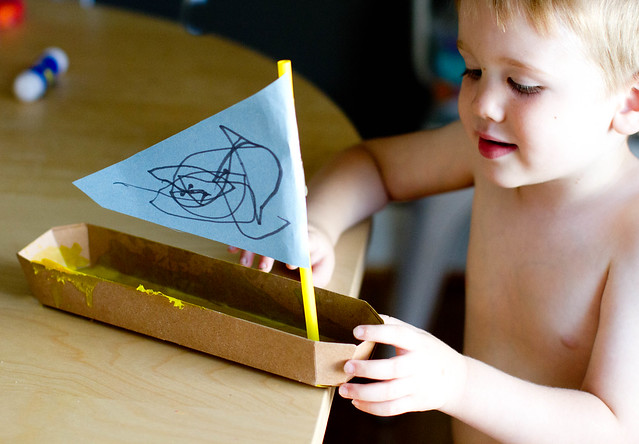
11. Cardboard boats – Use a straw with a construction paper flag to make a sail. Blue construction paper makes great water. Just don't put in real water.

12. A Pueblo Indian house – A great way to learn about American Indians and reuse small old boxes.purses Grocery Store Paper Bags
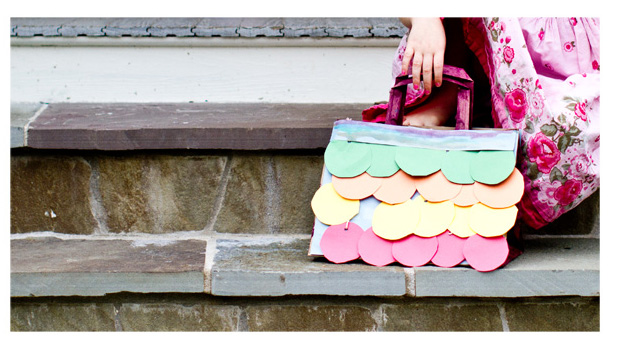
13. Purses – Every girl needs some bling in her life.

14. Mail carrier bags – To make this more fun use stickers as stamps and put some stationary out on the table. Encourage kids to write and deliver notes to each other. sit Plastic 2L Bottle
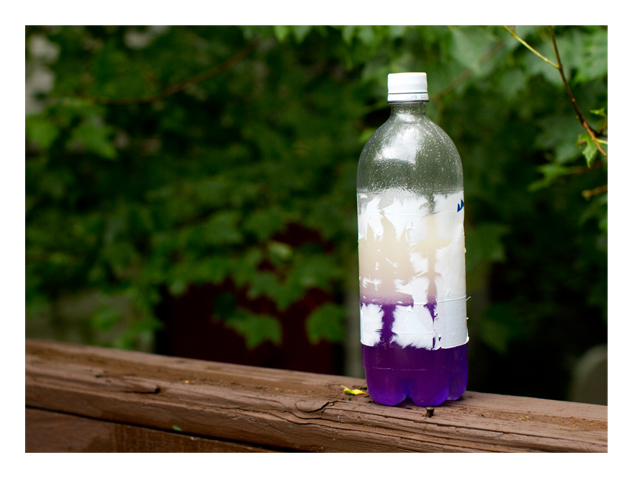
15. A homemade lava lamp – Oil, water, and alka- seltzer = fun.
town

Packaging Paper

16. Tissue paper tie-dye – All you need are liquid watercolors or food coloring and rubber bands to create beautiful (though fragile) tapestries.

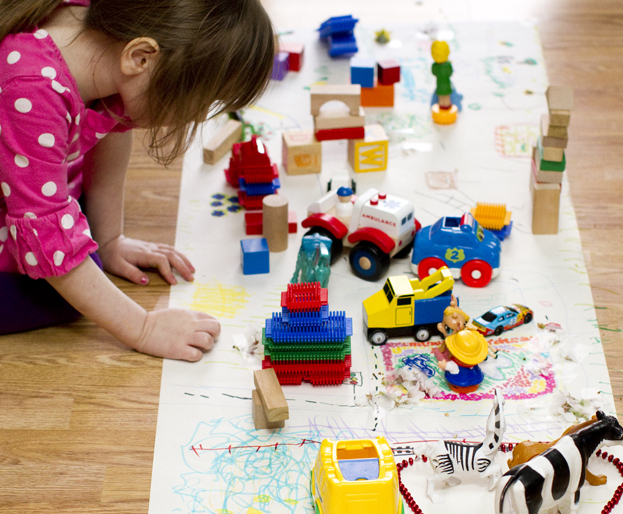
17. Butcher paper town – Just smooth out the brown packaging paper that comes in Amazon boxes and draw a town. Add various toys and lego buildings to decorate. Play. necklace Old Magazines
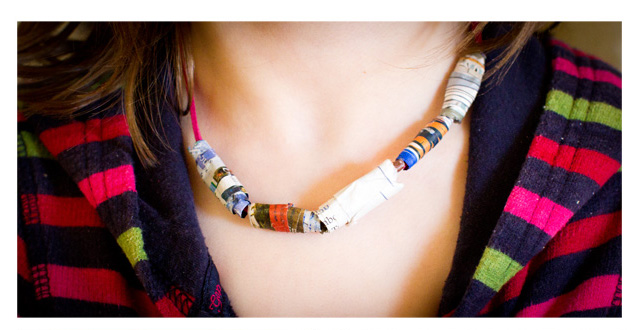
18. Necklace Beads – All you need are old magazines, glue, and cord to make a beautiful necklace.

19. Decoupage bowls – Also included as #10. A great way to use up old magazines, stickers, and other random scraps of paper. And now you have a place to store knick knacks too. dog Gently Used Construction Paper (we often use new construction paper, but if you have some that is slightly used or cut, all these projects would still work)

20. 3D Pictures – Because everything is better in 3D.

21. Sunprints – Leave construction paper in the sun for a day or so with objects on top and check out all of the pretty patterns that result.

22. Ice cream cones – Circles and triangles glued together = delicious fake food.

23. Handprint puppets – Use your imagination and add some popsicle sticks. Now put on a show.

24. Toddler Designed Hidden Pictures (a fun game for older kids to play after a toddler has already doodled on the paper) – This is one of our favorite games to play with T's old "art".

25. Teepees & headbands – A great craft for Thanksgiving. Add a little paint and some homemade paper dolls and you have a whole activity set ready to go. newspaper Newspaper
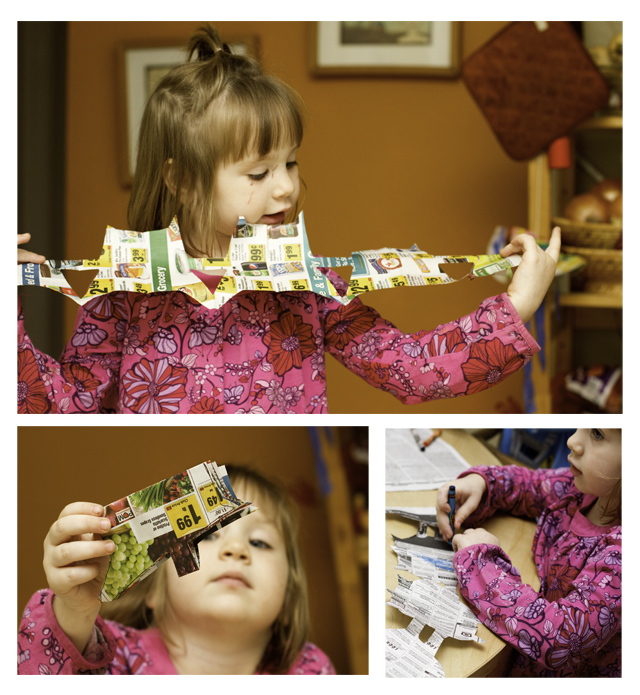
26. Paper Mache Bowls – Add some homemade "paste" (flour, salt, and water) to newspaper, wait until dry and paint – awesomeness.

27. Paper doll chains – Basically an instant toy.


Post by Darcy : bedtimemonsters.blogspot.com
Monster Party

November 27, 2012

Post by Christina Williams of justcallmechris.blogspot.com
My little girl turned three on Halloween, and I know I did the monster thing once before, but that was pretty much limited to cupcakes…so this time I took things a little bit further. Take a peek.

Monster Party-01

The kiddos feasted on fluffy monster juice boxes and one-eyed cupcakes. Most of them just licked the frosting off the cupcakes, but can you blame them? I kinda wanted to do that myself.

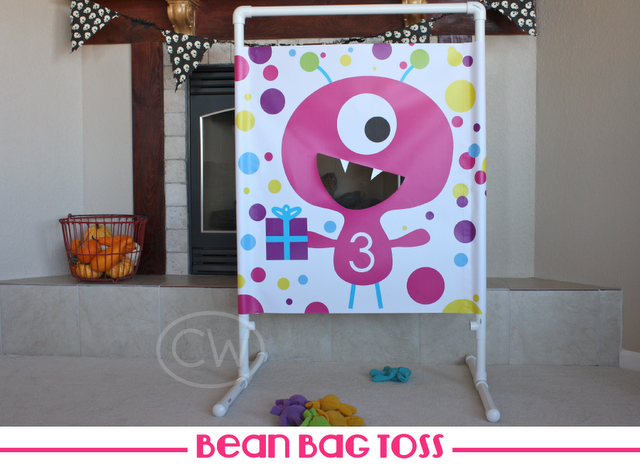
One of our party games was a monster bean bag toss. The monster is one I designed for an invitation a couple years ago. I had this crazy idea to make the beanbag toss out of a vinyl outdoor banner and some PVC pipe. It was a huge hit; and super sturdy. I made beanbags out of knit gloves I found in the dollar section at the craft store. Hint: stock up on dollar-section gloves during the winter…they make great beanbags for games all year long.

Monster Party-03

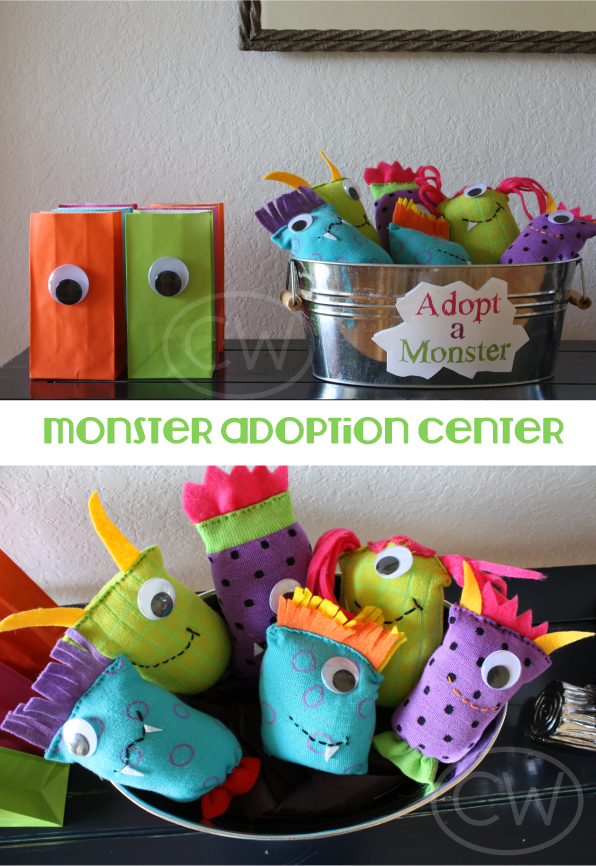
I’ve been wanting to have a monster adoption center ever since I saw this pin on pinterest. (Original idea here). I found some socks in the dollar section of the craft store (I hang out there a lot), cut them in half and added some eyeballs and felt hair. I learned the key to making monsters is not to try too hard. The best thing? Each one of these cuties only cost about .25 each. I had all the felt and the eyeballs on hand. Sidenote: I have a real problem buying wiggly eyes. Really. Somebody needs to stage an intervention. I’ve never met a wiggly eyeball I can resist.

Monster Party-02

Another great thing? Monster parties are a hit with kids any time of the year. So grab some wiggle eyes and get to work!

Post by Christina Williams of justcallmechris.blogspot.com

Pretty Pom-Pom Curtains

November 26, 2012

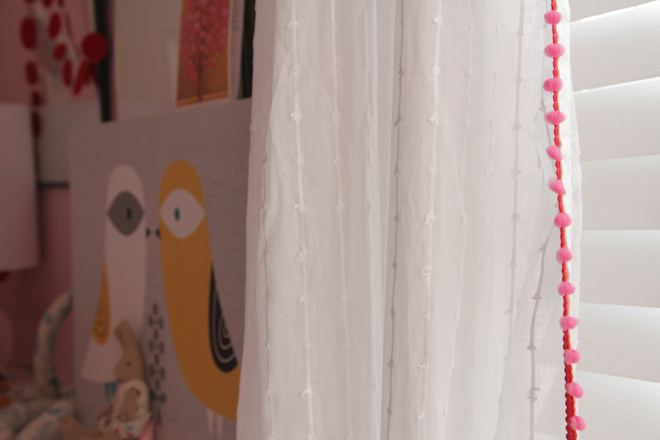
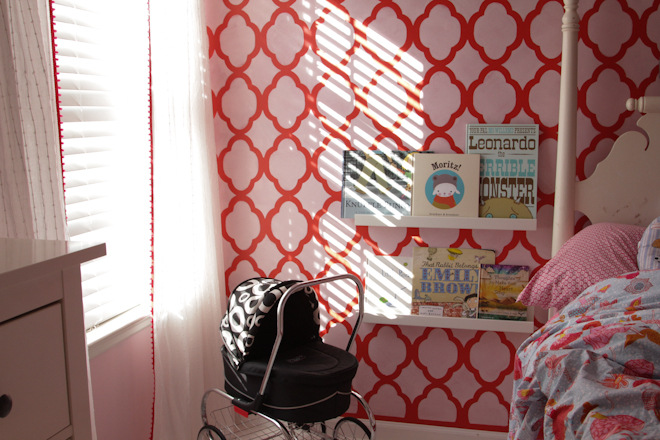
As I was working on the fun little details of putting Hazel’s big girl room together, I realized some new curtains might be in order. I happened to have a spare, plain white, sheer-ish pair on hand, but they just weren’t very interesting. They would work, they just needed to be dolled up a little!

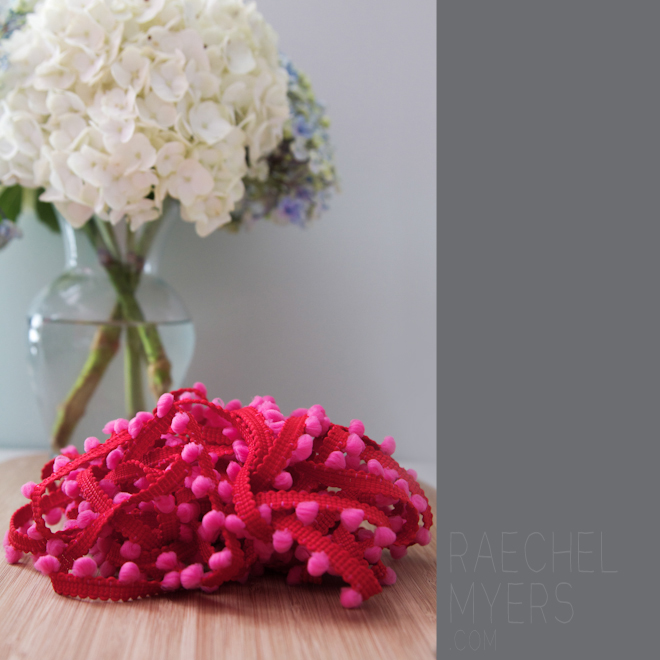
I found this pretty pom-pom trim on Etsy, so I ordered four yards and waited at my mailbox for it to arrive!

1

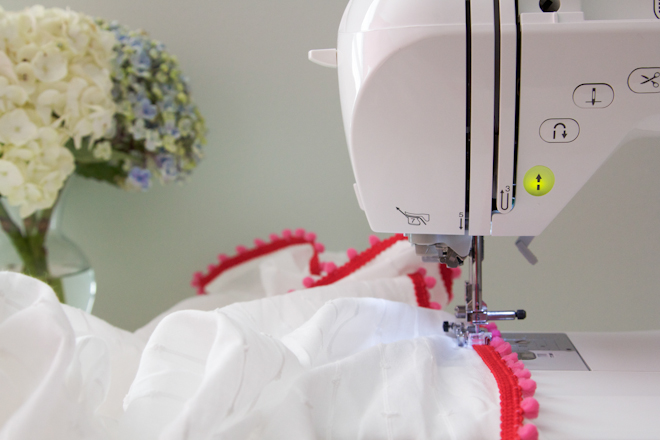
After that it was just as simple as a bit of matching thread and one long stitch down the inside edge of each panel.

2

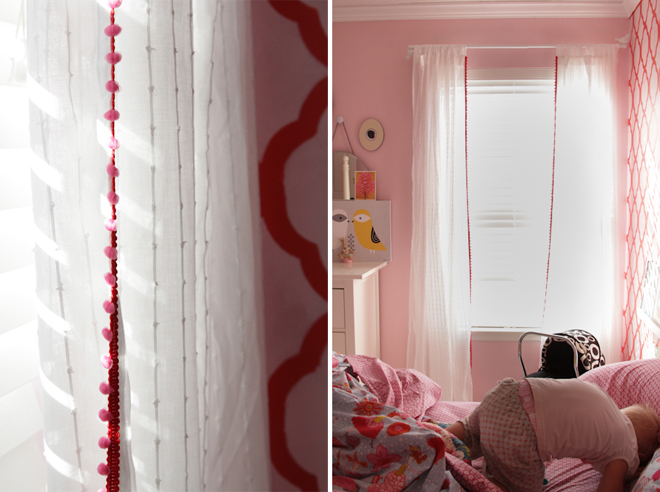
Voila! Pretty, girly curtains that work in the room and were simple as pie to make!

3

Don’t mind the two-year-old who is somersaulting in her bed while Mama takes pictures of her special pom-pom curtains (I think she was enjoying the delayed nap time…).

4

5

Don’t be afraid of putting special little touches in a room. They don’t have to cost a lot of money or take a ton of time or skill! If you don’t have a sewing machine, you could hand stitch or even use fabric glue! Get creative and have fun!

Happy Monday, loves!

By Raechel Myers at Finding My Feet

Raechel is just a mama, trying to raise her children to love the Lord and take their dishes to the sink. She loves sewing, fun design projects, finding killer deals at garage sales, and drinking peppermint mochas all year long! You can also find her at SheReadsTruth.com
Personalized Picture Frames

November 23, 2012

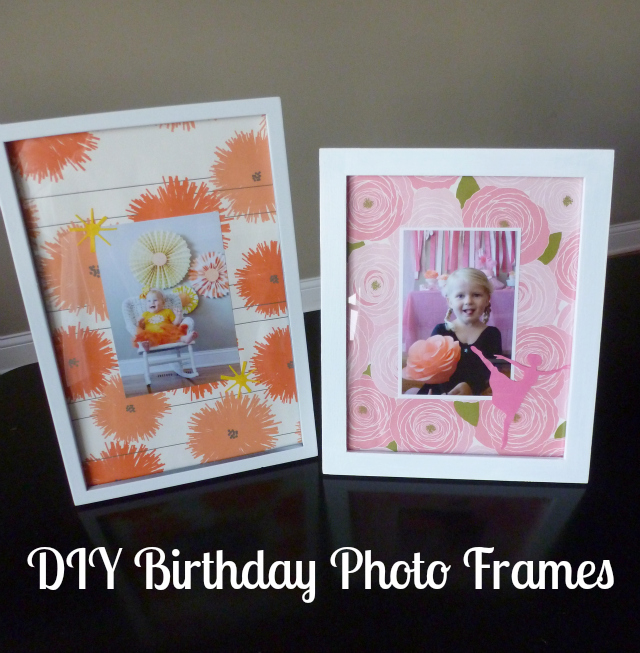
These personalized picture frames are an easy way to capture the special moment from your child's birthday party or the holidays coming up! 

1


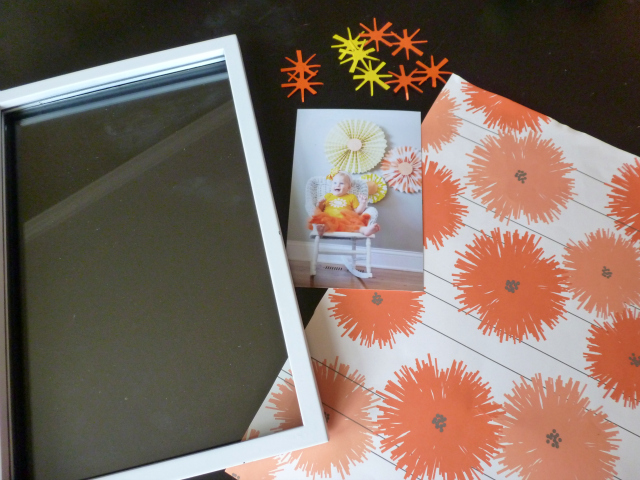
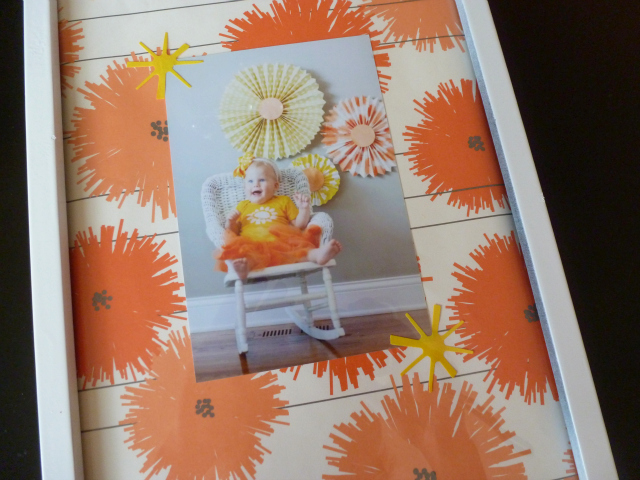
Just pick a favorite photo and save a couple momentos from the day to add to the frame – I used some of the pretty paper from the pinwheels at Hazel's sunshine party, and some of the rose paper from Stella's ballerina party invitations as the mat on the frame. I also kept a couple pieces of confetti from each party to add to the frame as well.
You could save a piece of wrapping paper from a favorite present, the birthday party invitation, the decorations, etc. The options are endless, as long as they are flat! You could also buy a deeper shadow box frame if you had some thicker momentos you wanted to include.
2
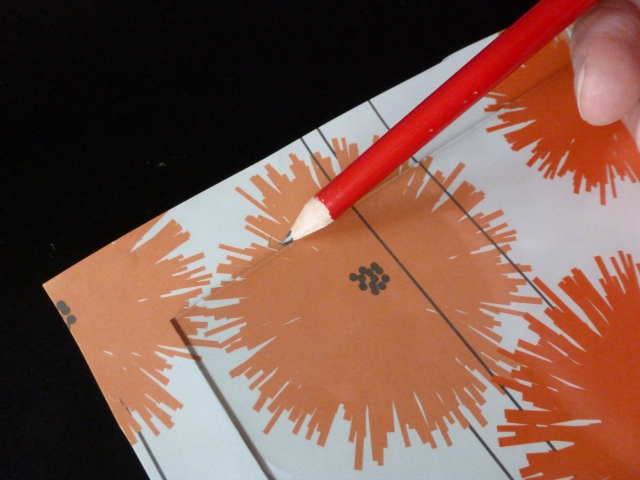
The process is simple. I just traced around the glass and cut out the paper:
3
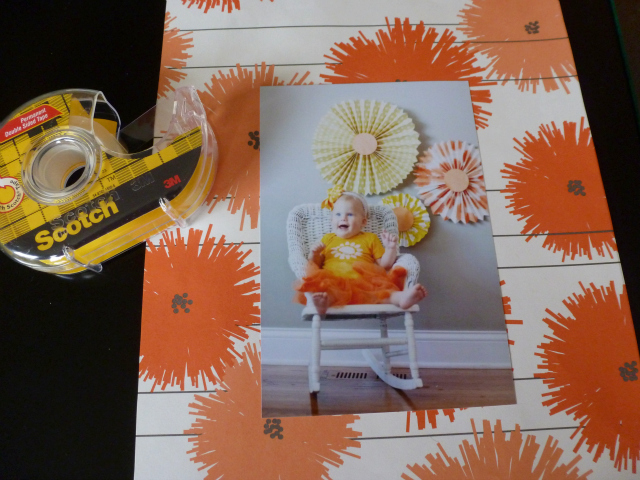
Then I used double-sided tape to affix the photo in the middle of the paper.
4
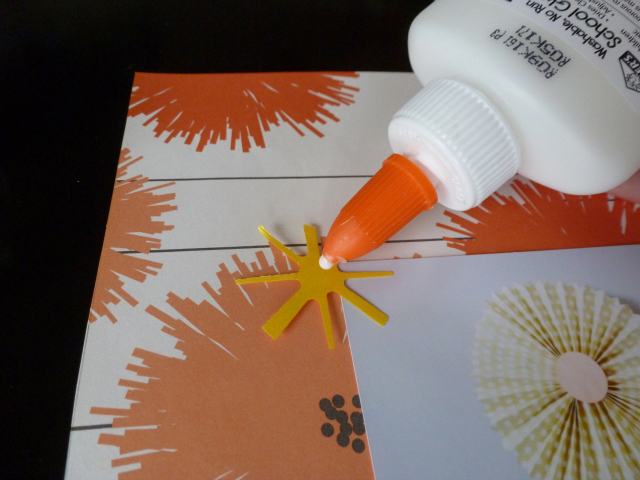
I glued on a couple pieces of sunshine confetti for a final touch!
5
This new frame, along with the one from Stella's party are going up in their new sharedbedroom… more details on that to come!
6
Post by Haeley : Design Improvised


Englewood Project – Thanksgiving

November 22, 2012

Post by Sue, Nod’s Human Resources Director

A few weeks ago, we posted a blog about the classroom makeover we did for a youth group in the Englewood neighborhood in Chicago.  Before we even set foot in the facility where this makeover happened, we decided we wanted to do more than provide them with a fun space to play in, we wanted to help the neediest of families in this community to have a nice Thanksgiving, especially those with children.

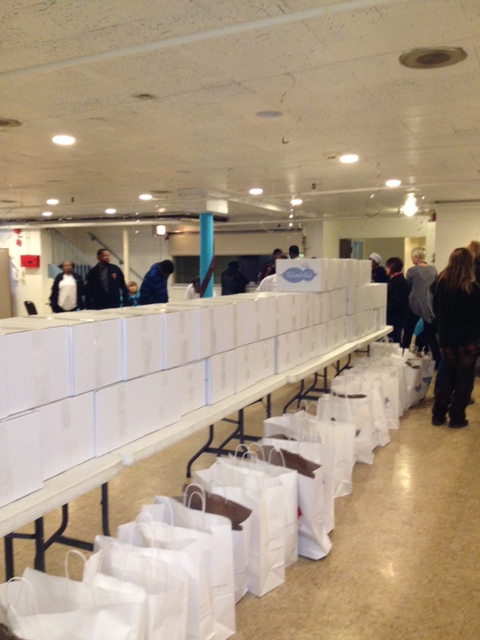
We not only wanted to help as part of our support of the No Kid Hungry Campaign but also to provide our employees with a very tangible and real way to get involved.   Our employees shopped for and donated all of the side dishes for 50 Thanksgiving meals, The Land of Nod provided the turkeys with the help of Sunset Foods, headquartered in Highland Park, Illinois.   When we were making the plan for doing this, we couldn’t figure out where in the world we were going to store 50 frozen turkeys!  Our two refridgerators here at the corporate offices were just not going to work!  Sunset not only offered to store the frozen turkeys for us, but then gave us gift certificates to help offset the cost.  It was a huge help.

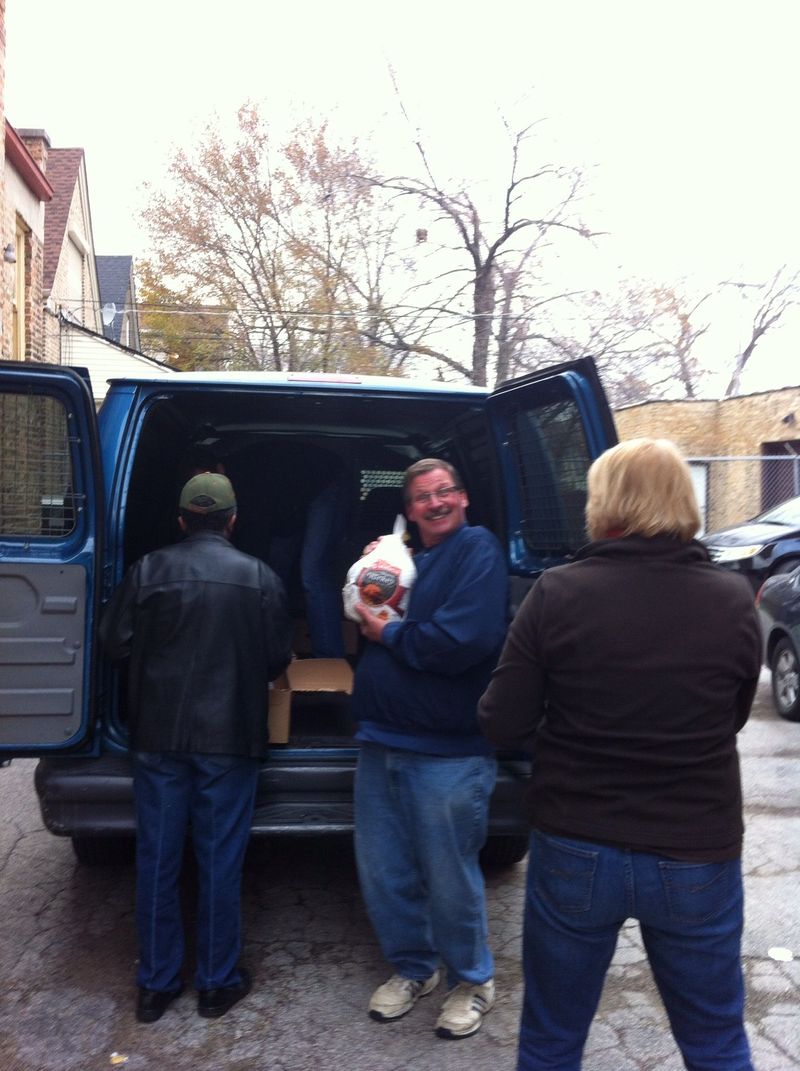
Our next issue was transportation, how were we going to get 50 boxes of food and 50 turkeys safely down to Englewood in one trip?  Again, we found a generous partner in RSL trucking in Chicago, they gave us a rental van free of charge, so we could load up and get everything down there in one trip.

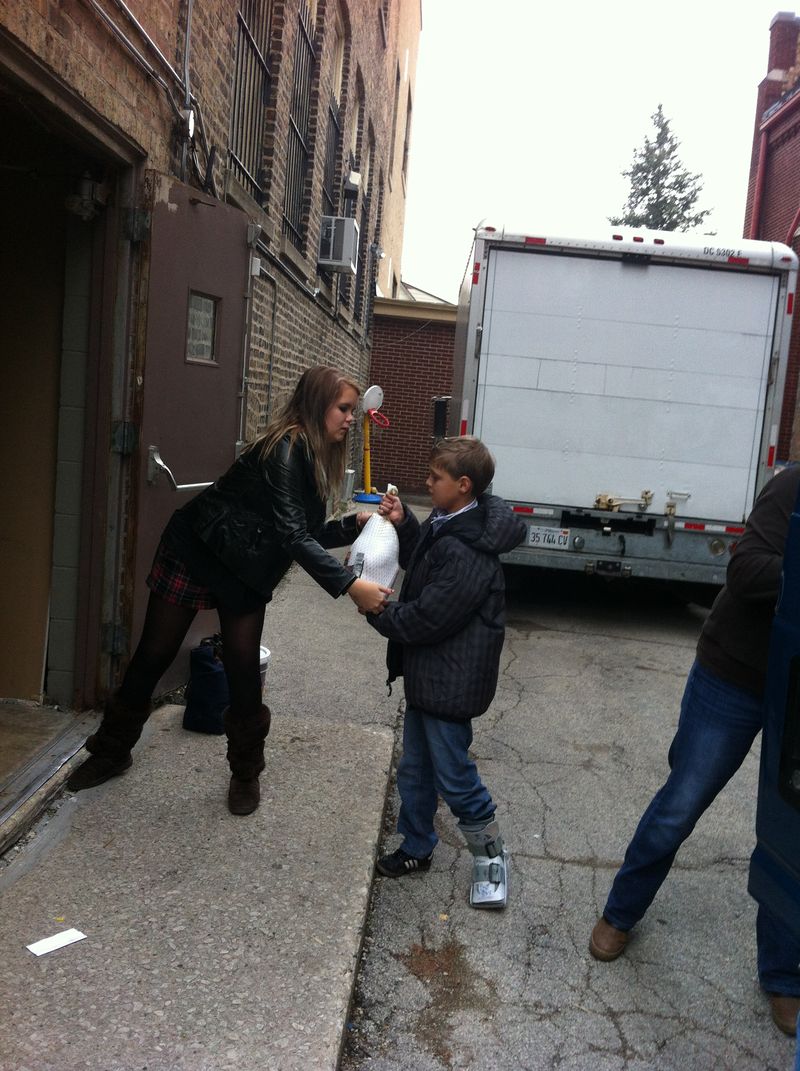
The day of the Thanksgiving meal distribution, we loaded up the truck with turkeys and food and then a small caravan of us, including our Managing Director Michelle Kohanzo and two of her kids, headed down to Englewood.  Yolanda Morris, the director of the youth program along with several volunteers helped us unload and set up for the families who would come to claim their meals.  Everyone was very appreciative of our efforts, and more than gracious in accepting our help.  One of the women who work with this program told me that without our donations, these families would not be able to have a Thanksgiving turkey dinner.

Thanks2

Thanks1

Englewood Thanksgiving

It’s amazing how good it makes you feel to be a part of something like that, but even more, I’m incredibly proud to be working with such an amazing and generous group of people here at The Land of Nod.  It just goes to show you that a small group of people really can work together to make a big difference.  Happy Thanksgiving!

Sue is the Director of Human Resources at The Land of Nod. Not only that, she’s also an avid cook and baker, much to the delight of everybody in the office. In fact, Sue’s famous cranberry recipe took home the grand prize for Taste of Home Magazine’s recipe contest. 

Font Love: Bergamot Ornaments

November 21, 2012

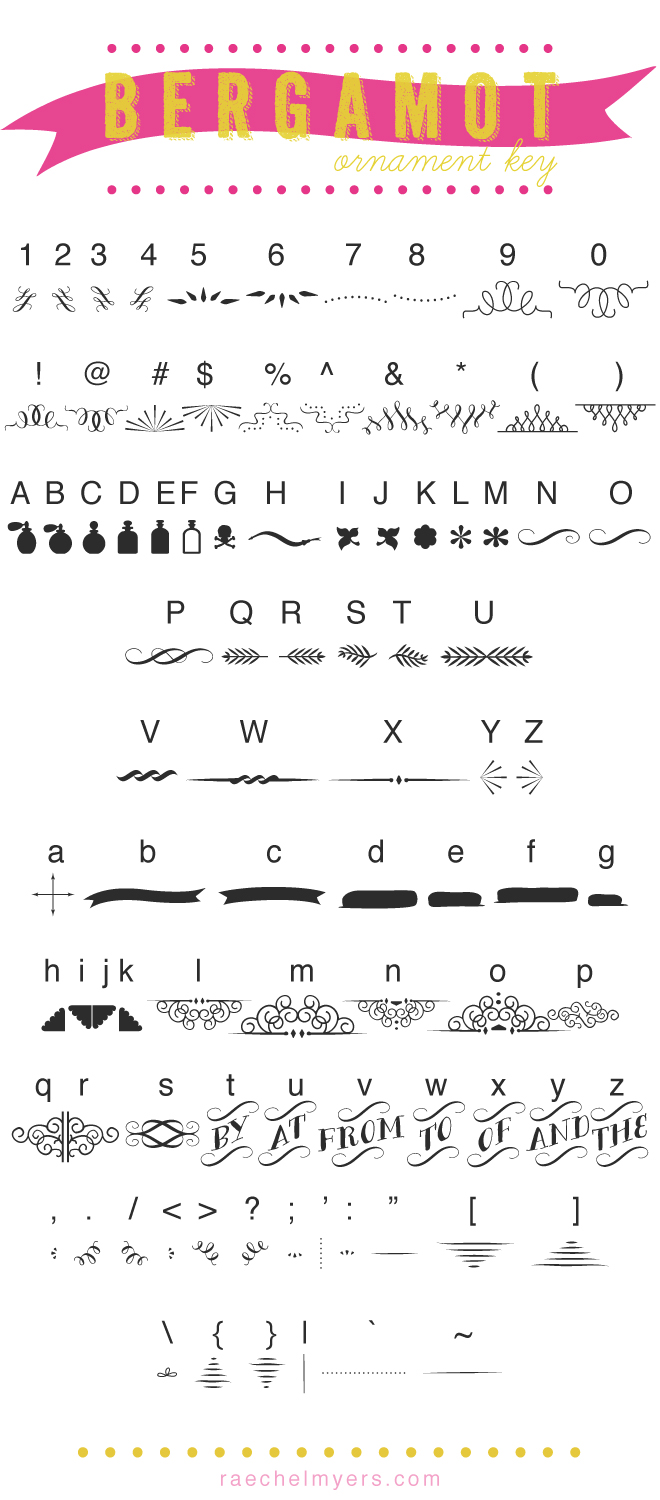
One of my new favorite ding fonts is Bergamot Ornaments. (It’s free here!) But, every time I use it I get all angsty because I have to guess/remember how to get each symbol – plus I’m always wondering if I’m missing something awesome.

SO. I made a pretty and handy little key for myself. And I love to share. So, please enjoy!

Bergamotornaments

By Raechel Myers at Finding My Feet

Raechel is just a mama, trying to raise her children to love the Lord and take their dishes to the sink. She loves sewing, fun design projects, finding killer deals at garage sales, and drinking peppermint mochas all year long! You can also find her at SheReadsTruth.com
 

Get to Know Leah Duncan

November 19, 2012

LEAH TITLE Leah

What are your favorite things to draw?

Animals and nature are what I’m drawn to the most, but sometimes other things strike my fancy like objects I own, shapes, or cityscapes. Mostly I draw things that reflect moments in my life. I also love creating geometric patterns from the ordinary, like the pebbles in a road or the reflectors on a bicycle.
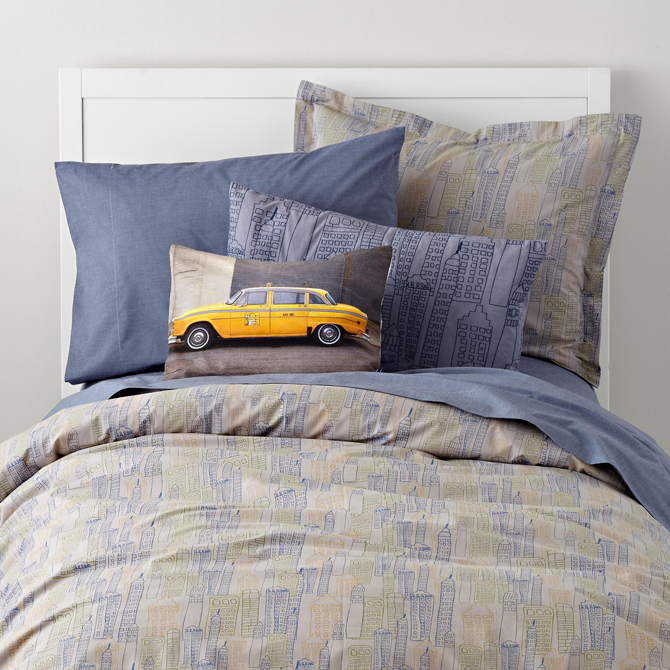
Midtown-bedding

Midtown Bedding, $16-109

How has living in the South influenced your style?

My color palette, which I think could be the most important aspect of my work, is heavily influenced by my life in the south. I tend to lean toward a warmer palette and will almost always choose a warm gray over a cool one. It seems to be a reflection of the warmer, sunnier skies that I miss so much now that I’m in NYC for a little while. I also love girly pastels, which are very much a part of the landscape and architecture of the south.

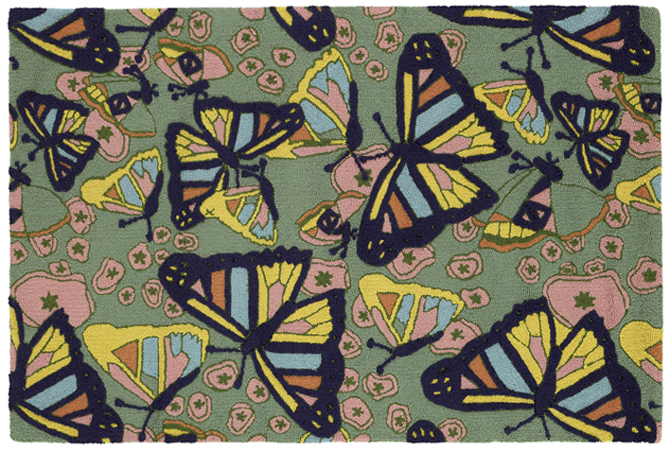
Butterfly

Flutter By Rug, $349-$749

What are the best and the hardest parts about being a full time artist?

The best part is being able to do work I feel good about and put it out into the world. This has all been a dream come true for me so seeing people connect with my work, having it brighten their home or just put a smile on their face – that feels very rewarding. I sometimes feel like my job is selfish because I love it so much, but knowing that makes it feel less so. The hardest part could be how very hard you have to work to make it as a working artist and business owner. I work more than most people I know and so do my friends in this industry. But the truth is I’m much happier working 80 hours a week doing what I love than not. 

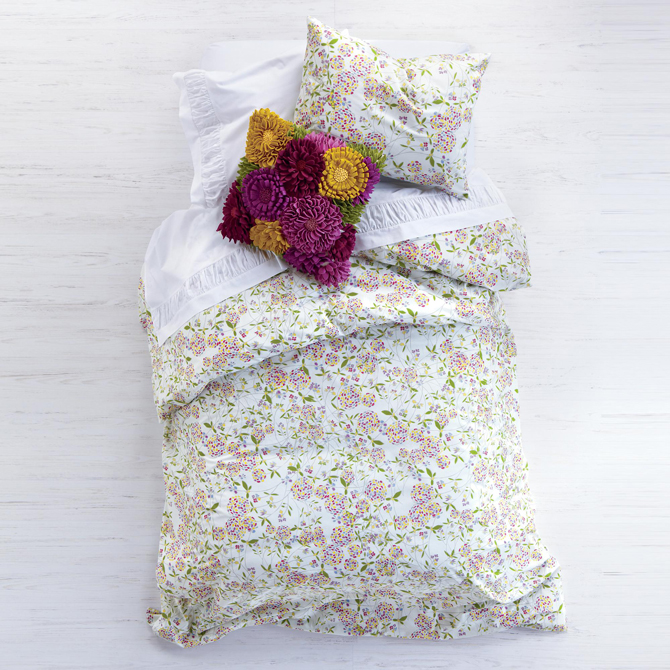
Garden-party-bedding

Garden Party Bedding, $16-$129

What advice do you have for all the young artists out there?

Don’t be afraid to put yourself out there. Prepare to work hard. Be nice. Develop a voice that is purely a reflection of who you are. Most importantly, you will fail and there will be times when you’ll question everything you do. Don’t let that stop you. I’m fully convinced those who make it are the ones who keep going no matter what.

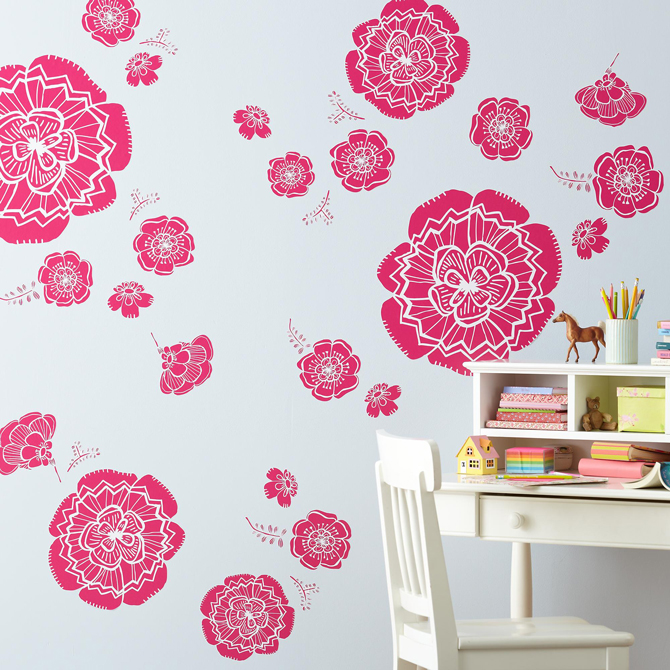
Bursting-bloom-flower-decal-pink

Bursting Bloom Flower Decals, $34.95-$59

What do you enjoy about the Holidays? Do you have any traditions of your own?

I love the holiday spirit this time of year the most! My biggest holiday tradition is probably watching Elf as many times as I possibly can.

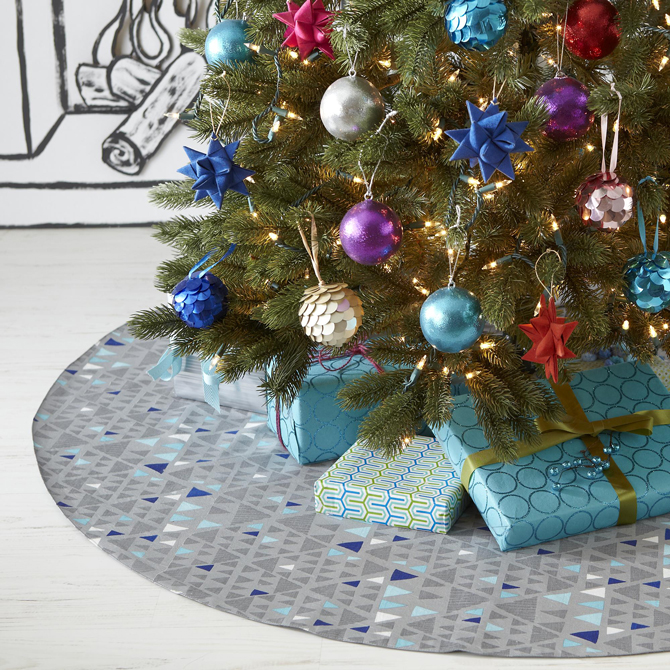
Geometric-forest-tree-skirt-silver

Geometric Forest Tree Skirt, $59

Tell us about making the Geometric Forest and the Bearing Gifts patterns. What was your inspiration behind them?

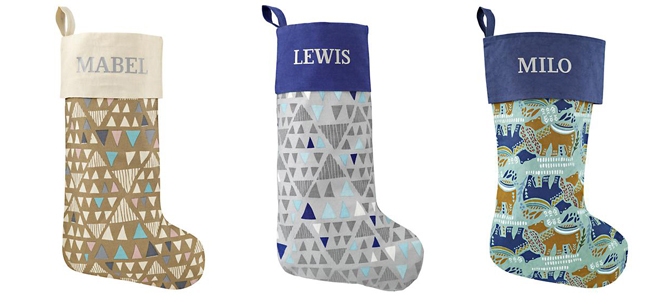
I have a small (or rather large!) triangle obsession. Geometric Forest was created as part of a triangle based collection and ultimately it was perfect for the Land of Nod. Bearing Gifts was inspired by my love of animals and tribal prints, which created a festive twist on the two. 

3-stocking

Leah Duncan Holiday Stockings, $24.95-$28.95

How would you recommend customers style them in their homes?

I feel like these are a modern and fun spin on the holiday season, so they could be styled similarly with modern accessories in blue, white, and silver or gold tones. The holidays are a time when styling should be a little more light-hearted so my best suggestion would be to have fun with it!

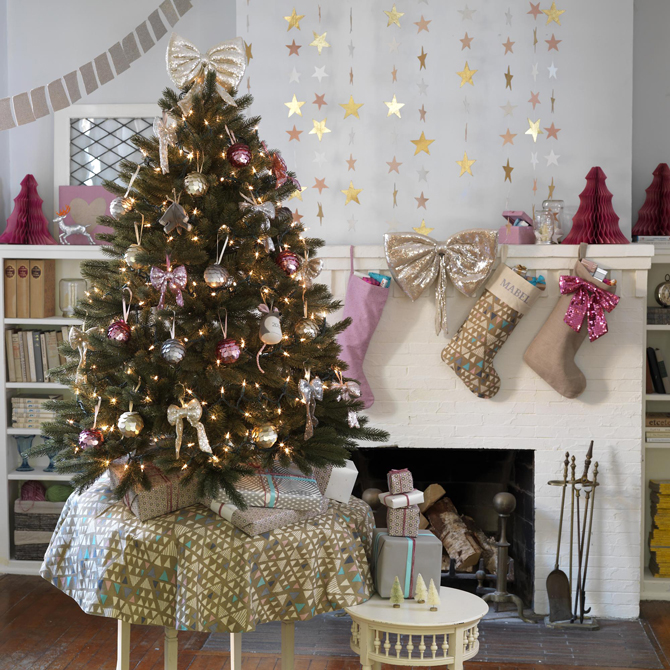
Geometric-forest-stocking-silver

Geometric Forest Holiday Décor, $24.95-$59

See all of Leah Duncan’s work for The Land of Nod here.

By Anna Passadori 

Anna develops and designs exclusive product for The Land of Nod. She hails from the west coast and has traveled the world to source product. She loves anything Marc Jacobs, Sofia Coppola or stripes! (So, if anyone can get a photo of Sofia Coppola wearing a striped outfit by Marc Jacobs, please send it along.)

Embroidery Hoop {Baby Name} Wall Art

November 16, 2012


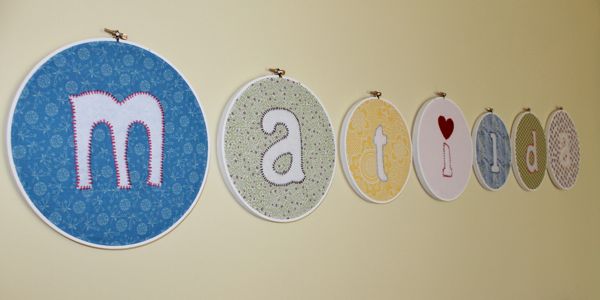
Embroidery hoop wall art is nothing new. I’ve seen countless photos of nursery walls decorated with a collage of embroidery hoops filled with an eclectic assortment of different fabrics….and I always thought it seemed like such a cute and inexpensive nursery decor idea! I knew I wanted to do something similar in my daughter’s room but put my own spin on it by also making it into “baby name” art. Here it is!

Supplies:

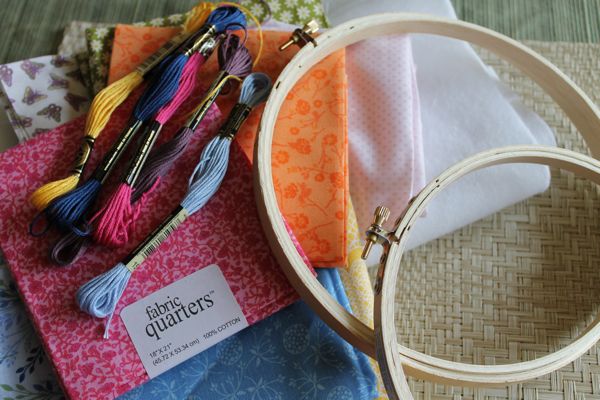
  • Embroidery hoops, various sizes
  • Fabric pieces to fit into each hoop (cotton fabric quarters were on sale which made this purchase quite cheap and convenient; you could also easily use leftover fabric scraps)
  • Felt
  • Embroidery floss
  • Craft paint
  • Paint brush
  • Needle

1

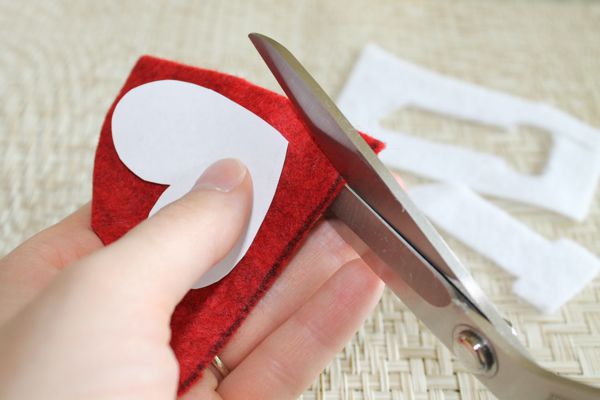
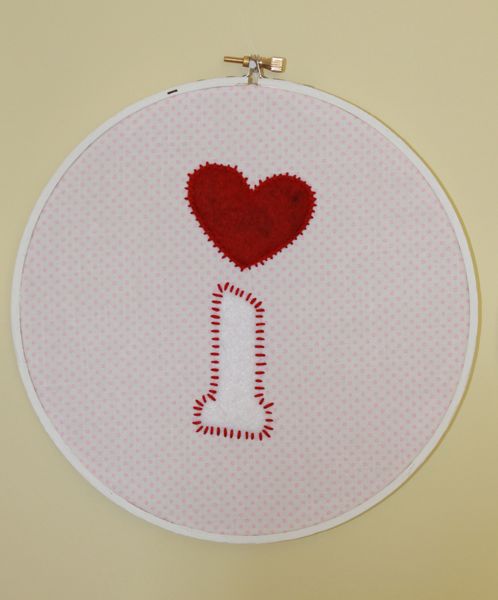
First, cut fabric pieces so they are slightly larger than each corresponding embroidery hoop. Cut letters from the felt to spell out your child’s name. I drew and cut the letters from a piece of paper first to use as a guide when cutting the felt. (I “dotted” my “i” with a heart).

2

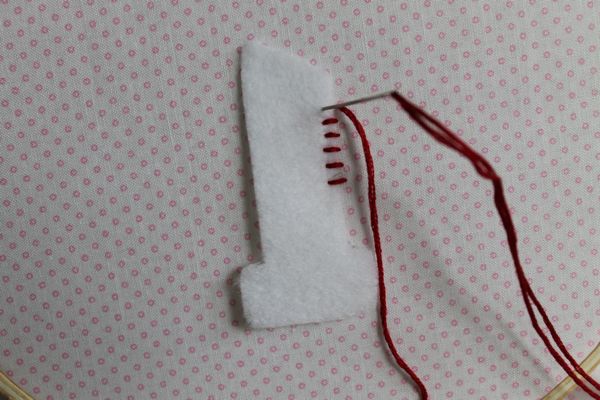
Thread the needle with the embroidery floss and attach each letter to the center of the fabric with simple stitches. This is a great craft to do while catching up on your favorite TV shows in the evening….I always feel better about watching TV if I’m somehow productive at the same time!

3

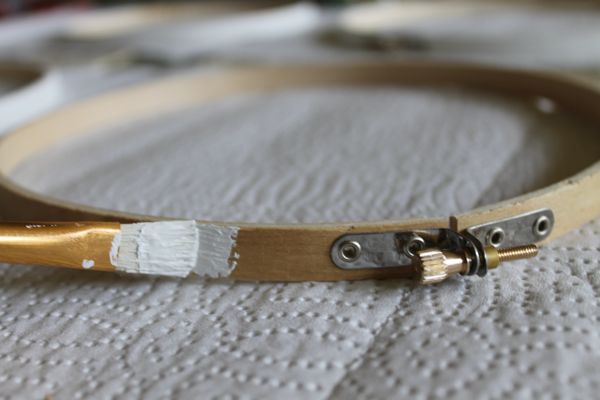
Once you’ve sewed all the letters onto the fabric paint the embroidery hoops the color of your choice.  Of course you could leave them “as is”, but white matched my decor.

4

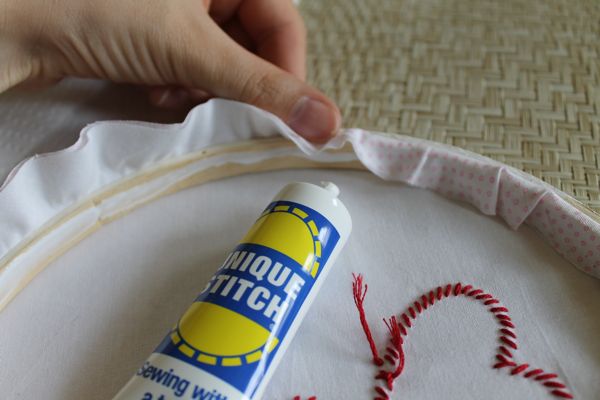
After the paint has dried, center the fabric and tighten the outer hoop. I trimmed off the excess fabric and glued the edges down with fabric glue.

5

There you have it!  Here’s the “i” in Matilda…

6

….and here’s the finished product!

7

Post by Renae Wortz : Mom Colored Glasses

Decadent Hot Chocolate

November 15, 2012

1

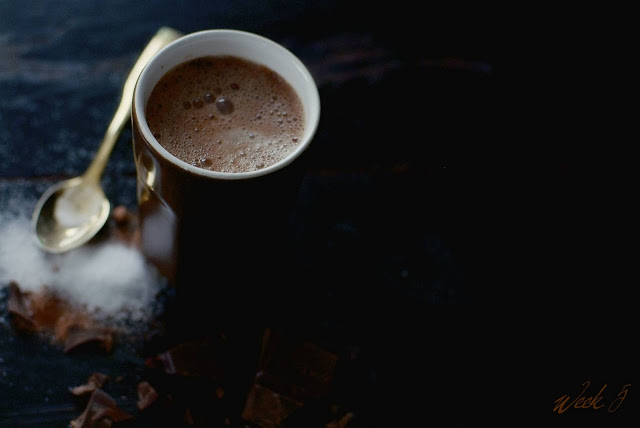
My daughter loves hot chocolate. She usually has it for breakfast, especially on the cold mornings we've been having. Our hot chocolate has to be made with milk – I've never been a fan of water based hot chocolate.

2

Our stand-by easy version is to heat up our milk and add a heaping tea-spoon of Suchard Express (imported from Switzerland, but not at that price!) and mix for a nice frothy hot chocolate.

If you don't have Suchard Express, try the following recipe for one cup:

  • 1 cup of hot frothy milk
  • 1 teaspoon of bakers cocoa (the best quality you can afford)
  • 1-2 teaspoons of sugar (depending on how sweet you like it)
  • 1 dash of vanilla extract
  • sprinkle with salt

Sometimes we'll add mini marshmallows as an afternoon treat, but usually a hot-chocolate is just a simple beverage that warms the soul on a cold winters day.

Post by Giulia Doyle : Fishly News