Close

Blog

White Wood Floors Tutorial

November 14, 2012

It all started with lovely, perfectly good carpet. Then a bloody nose (which looked more like a crime scene) made it not so perfectly good. That, combined with a nearly-ready-to-crawl baby, motivated us to pursue a cleaner, less allergenic (is that a word?) option for the nursery floor.

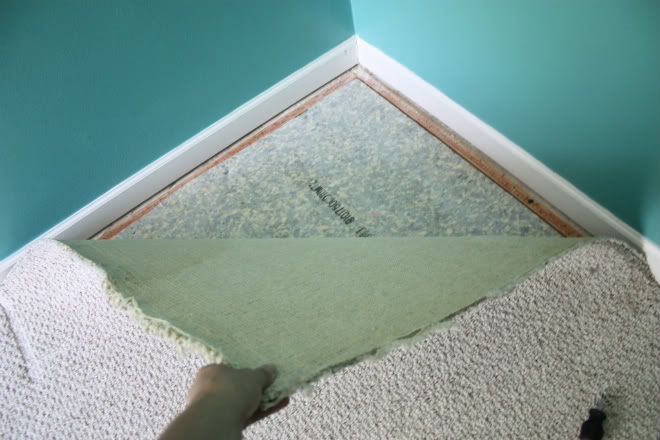
It definitely took some cahones, but one day I just grabbed at one corner and started pulling.

1

I felt a little guilty pulling up perfectly good padding underneath, but I was focused on my goal. After the carpet and the padding came the tedious job of pulling up all the nail strips and staples. I recommend having a buddy or music or something for this part or it can get pretty long and frustrating.

Once all the nails and tack strips are up, vacuum the room really thoroughly. 

Next came the fun part: actually laying the wood and seeing things come together.

2

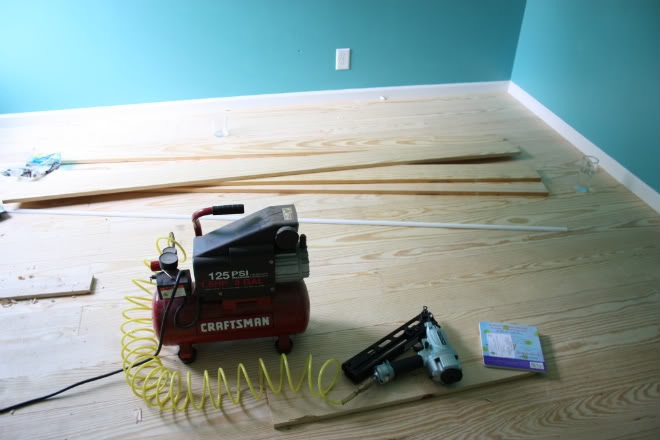
We used 6″ wide southern yellow pine purchased at Lowe’s or Home Depot, I can’t remember which. Ryan spent the better part of an hour in the lumber aisle hand picking each plank for straightness and uniformity. (My job was to cart the kids around the store, gathering our other supplies and finding a quiet part of the gardening section to nurse a very insistent baby. Yes, that happened. Not my favorite moment, but we pulled it off.)

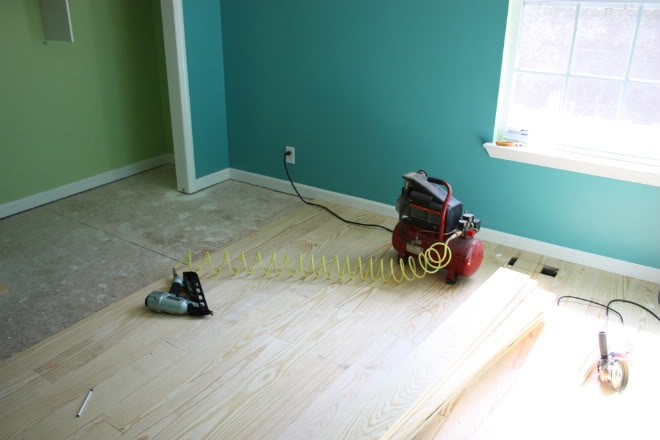
I wish I could tell you lots of useful details about the laying of the wood, but that really was Ryan’s job. He used a pretty hardcore nail gun per the suggestion of the Lowe’s employee who was concerned that the boards might creak if you didn’t tell them who’s boss. He started at the back of the room and made his way to the front, using a chop saw to cut the boards to size.

3

We decided that we definitely wanted the wood to continue into the closet and that was a little tricky but we figured it out. There’s actually a tool you can purchase for about $14 that helps you cut your door frame trim higher to fit flooring under it. Nifty.

Also, at the back of the closet we needed to rip (cut longwise) a few boards. We didn’t have a table saw at the time (bought one at a yard sale the following weekend for $15. Blerg.), so the cuts were a little choppy – nothing a little quarter round couldn’t hide.

4

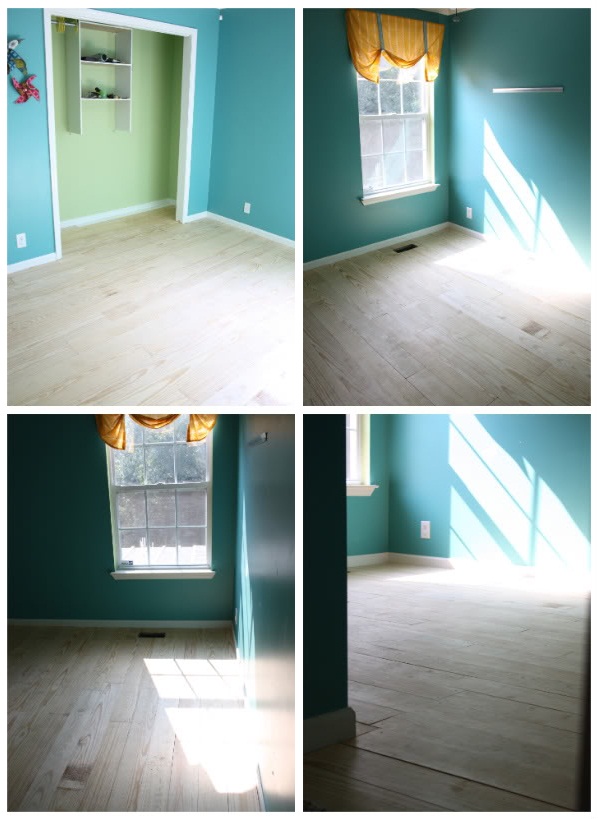
Ryan was tempted to leave it unfinished. It really was pretty, but I was focused.

Besides, I’ve always wanted to roll paint right onto a floor. Kinda hard to mess up.

5

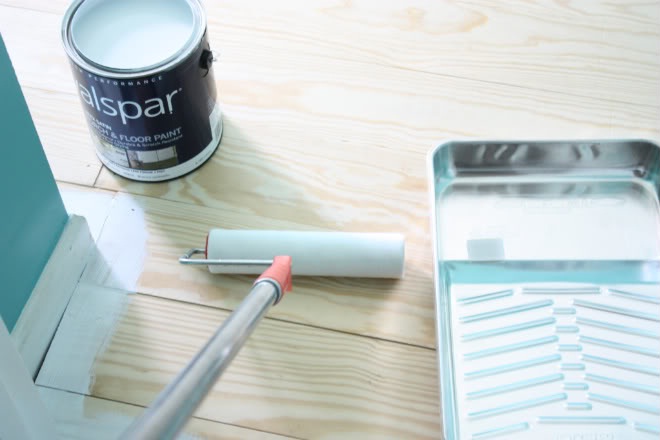
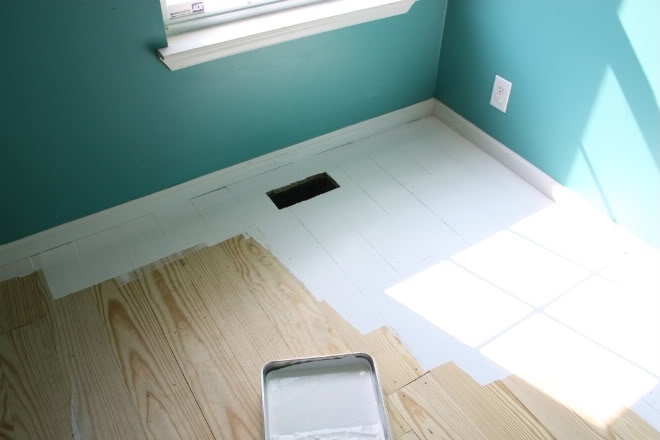
I used porch and floor paint and a really low-pile roller cover. It took about 3 coats and it was honestly so much fun. At one point I threw restraint to the wind and sloshed a big glop on the floor to push around. I’ve always wanted to do that.

6

(Note: if you want more cracks and pits to show in the end, don’t slosh your paint on the floor. It fills the pits, which is just fine and maybe even desired if you want things to look nice and solid. But if you want things to have a more rustic look, no sloshing.)

7

(I think the above picture was taken after the first coat.)

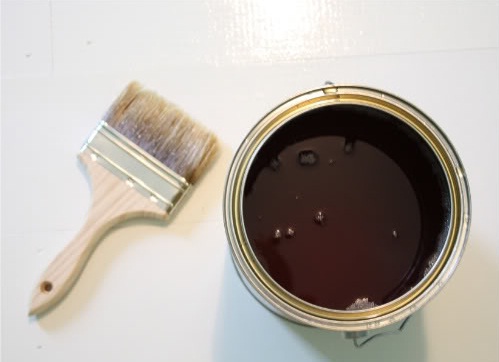
After about three coats, protect your hard work with polyurethane.

This is the part where you get to learn from our mistakes though. We naively purchased clear satin polyurethane thinking it would dry, well, clear. But, when the final coat dried, there was a bit of a yellow cast in some areas. It wasn’t bad – in fact, we thought maybe our eyes were playing tricks on us – but a quick Google search told us that oil based polyurethanes will have an amber cast that will get darker with time. Dern it.

So, hear me now: buy WATER-BASED polyurethane to finish your floors. You’re welcome.

8

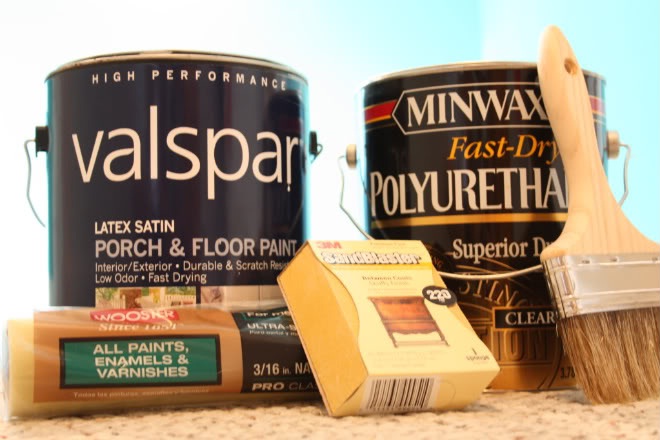
In conclusion, here are some of the supplies we used and what we learned about using them:

Floor-Finishing Tips:

  • Use latex satin porch and floor paint – rolled on with a low-pile roller and cut in the edges with a regular paintbrush.
  • Use water-based Satin Polyurethane
  • We rolled the first coat of the varnish on with a foam roller and quickly learned that it wasn’t the right tool. It left bubbles. You can use a Wooster Floor Applicator (a block of wood with shearling wrapped around it) and you’ll be very happy. Also, you can cut in the edges with a natural bristle brush.
  • We sanded the first coat of varnish really thoroughly with fine sanding sponges and cleaned the floor well before applying a second coat.

9

After we got the carpet up and the wood down, the rest of the steps didn't require a lot of manual labor. The curing time between coats and the odor from the varnish were the hardest parts. Fortunately, we managed to keep everyone out of the house most of the time.

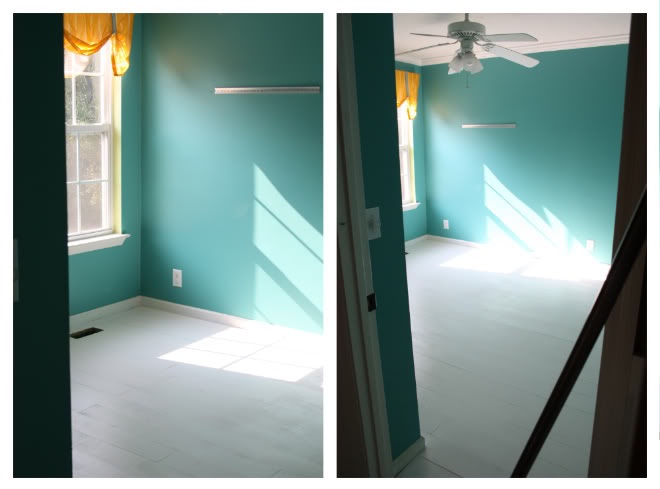
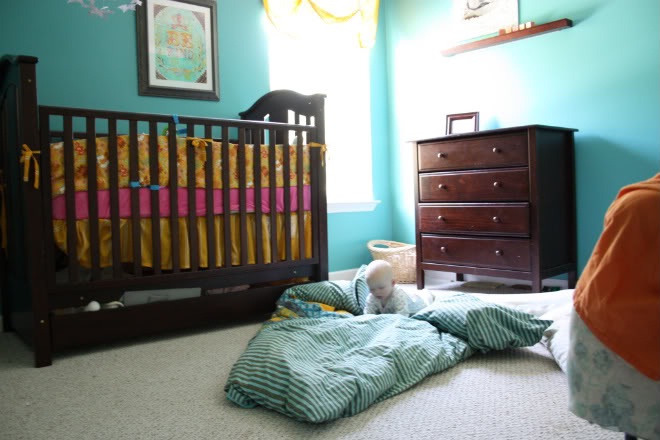
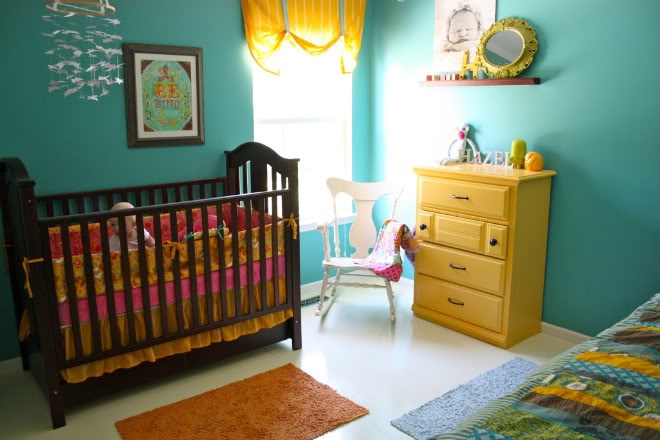
So, 1 weekend, 40 planks of southern yellow pine and a couple of good sloshes of paint on the floor later, we upgraded the kids’ room from this:

10

11

COST:

Each 1x6x8 board ran between $9-$10 for us. You do the math with your own square footage. Other than that, you will need a gallon of paint, a gallon of varnish, brushes, quarter round (if you choose to use it) and a new register cover in our case. All said, for the kids’ room (I think it’s about 11′x12′ or so) we spent $400 give or take. (It will be more if you need to buy or rent a nail gun and air compressor.)

OTHER QUESTIONS:

How smooth is it to walk on? It really is just like any other wood floor. I would say that there are probably places where it’s a little higher or lower than others, but we never notice it.

Does it scratch easily? So far, so good! That was part of why we put down two good coats of polyurethane. That way, if something scratches, it’s the finish and not the paint.

How about showing dirt? How are you cleaning it? I just broom sweep it regularly and I’ve been using diluted lysol liquid floor cleaner less regularly than I should be. :) 

By Raechel Myers at Finding My Feet

Raechel is just a mama, trying to raise her children to love the Lord and take their dishes to the sink. She loves sewing, fun design projects, finding killer deals at garage sales, and drinking peppermint mochas all year long! You can also find her at SheReadsTruth.com

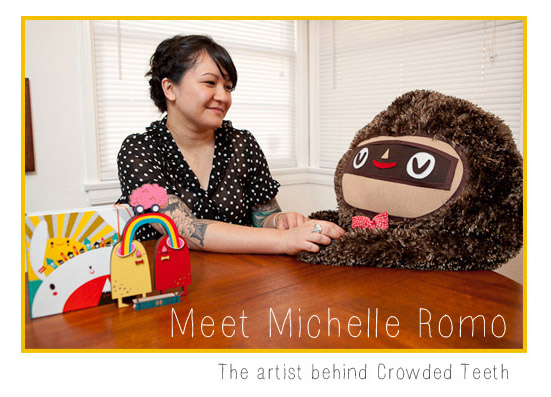
Get to Know Michelle Romo

November 13, 2012

MICHELLE ROMO

(Photo of Michelle Romo by Shannon Cottrell)

What’s your name? (Take all the time you need for this one.)

Ms. Michelle Romo

 Would you rather travel by plane, train, car or ship?

Car! The potential for finding beef jerky is higher via this mode of transportation. 

 I live…

awesomely – in Eagle Rock, CA – with my lovely cat children – and sweet bearded husband.

 I spend most of my work day…

drawing cute things with funny faces. 

 My favorite childhood memory is…

baking cookies and watching ice skating with my mom in the winter time.

 You can find me eating…

COFFEE! for breakfast.


 How many times do you usually hit the snooze button after your alarm goes off?

A million billion times. My actual sleep / snooze button ratio is 1:1.

 Do people tell you that you resemble anyone famous?

No! But in one of those celebrity look-a-like apps I got Robert Downey Jr. once, does that count?

 Is there a story behind your name (are you named after anyone)?

My parents liked The Beatles song Michelle, they thought it was a good idea to give that name to me.

 How long can food be on the ground and still be fair game for eating?

Man. Forever? I am a horrible offender.

On my lunch break, you can find me?

Trying to eat a salad and not frown about it with 2-3 lovely office lady friends.

People describe me as…

a weirdo, but a sweet weirdo.

I walk into work every day with…

motivation to get things done!

My favorite dessert is…

crème brûlée

What is your zodiac sign?

Scorpio

Do you like surprises or to be surprised?

I like to be surprised. Pleasantly – of course.

Anything comments about your Holiday products for Land of Nod?

I am so excited about all of the products! The plush are everything I've ever hoped and dreamed of. And everyone at Land of Nod that I have worked with is so genuinely sweet and wonderful!

Check out all of Michelle’s exclusive products here at The Land of Nod.

PRODUCT

1/2/3/4

By Anna Passadori 

Anna develops and designs exclusive product for The Land of Nod. She hails from the west coast and has traveled the world to source product. She loves anything Marc Jacobs, Sofia Coppola or stripes! (So, if anyone can get a photo of Sofia Coppola wearing a striped outfit by Marc Jacobs, please send it along.)

Painted Leaf Napkin Rings

November 12, 2012

Post by Julee of Warm Hot Chocolate
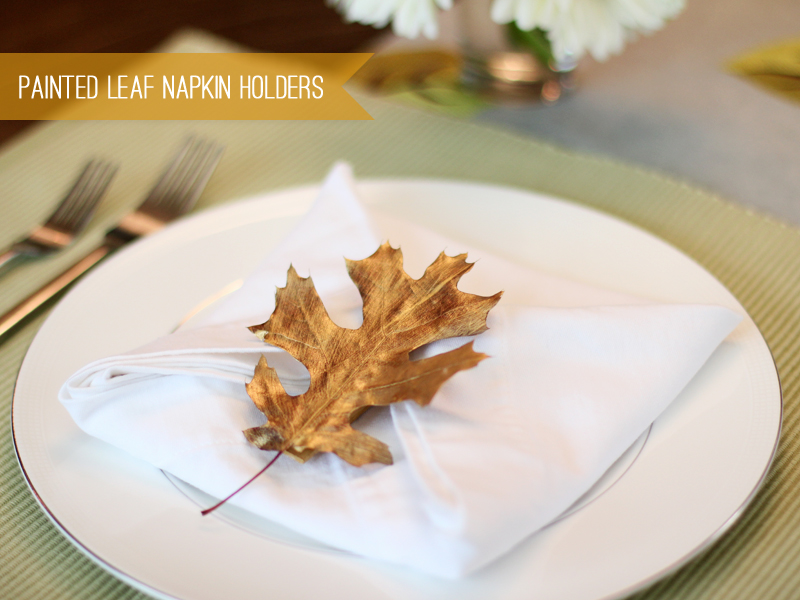
DIY Painted Leaf Napkin RingsLast year for Thanksgiving, my daughter and I made a garland out leaves that we painted gold. Apparently this activity made quite an impression on her because she recently asked me when we were going to “paint the leaves.” Apparently this is an annual event akin to carving pumpkins and decorating the Christmas tree.

Although this year, I thought we’d try something new and this year we tackled making DIY painted leaf napkin rings.

DIY Painted Leaf Napkin Rings - 2

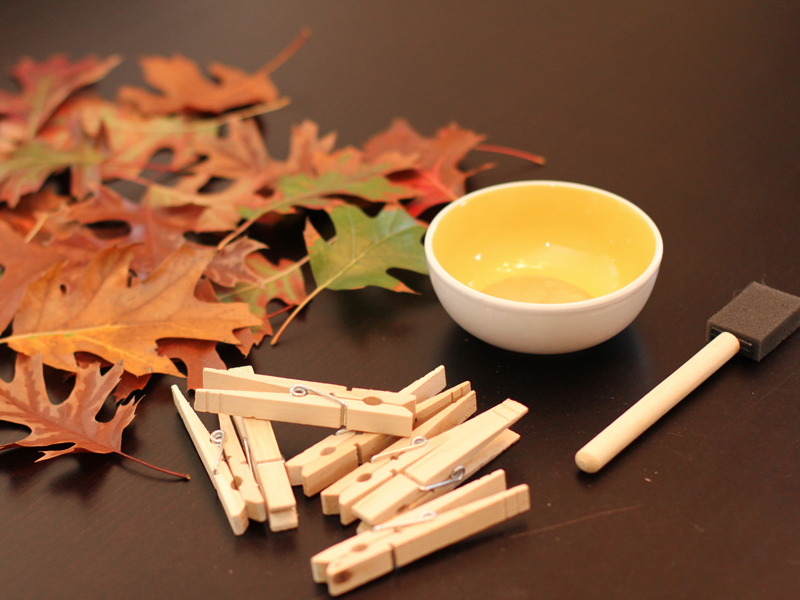
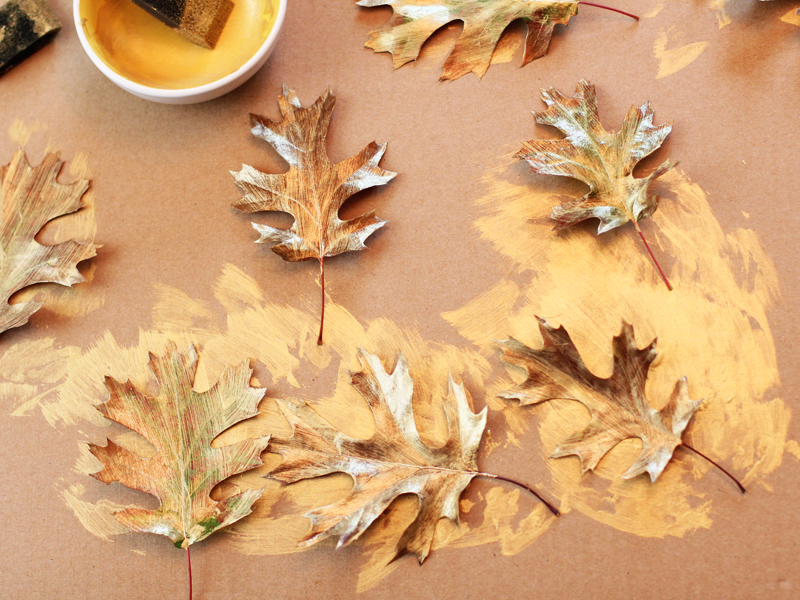
We started by taking a walk to the park and collecting leaves along the way. Once home, we assembled some clothespins, gold paint and paint brushes.

DIY Painted Leaf Napkin Rings - 3

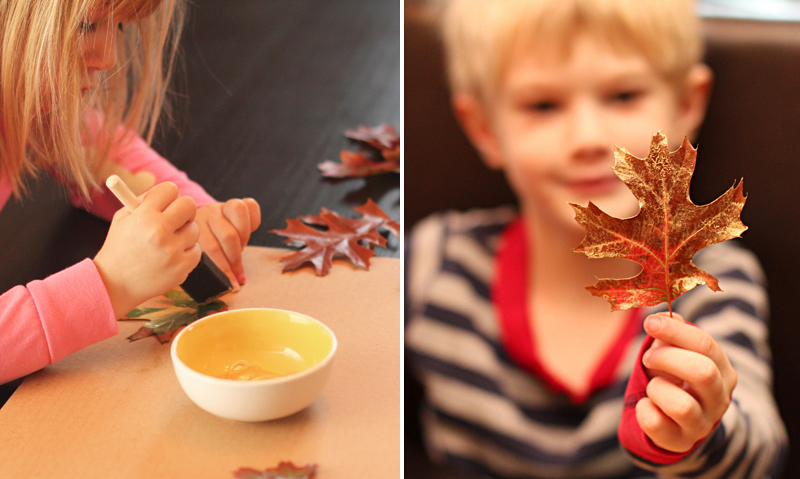
We painted both the leaves and the clothespins in two coats of gold paint.

DIY Painted Leaf Napkin Rings - 4

We let everything dry and then placed the leaves inside of heavy books overnight in order to flatten them.

DIY Painted Leaf Napkin Rings - 5

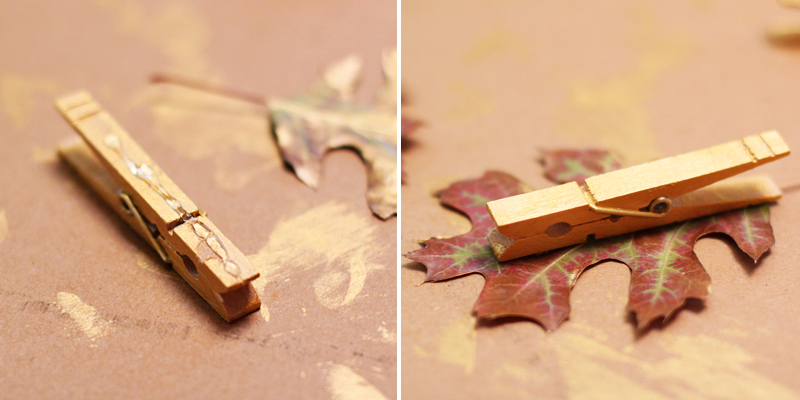
The next day, I used a glue gun to place glue on the clothespins and attach each to a leaf.

DIY Painted Leaf Napkin Rings - 6

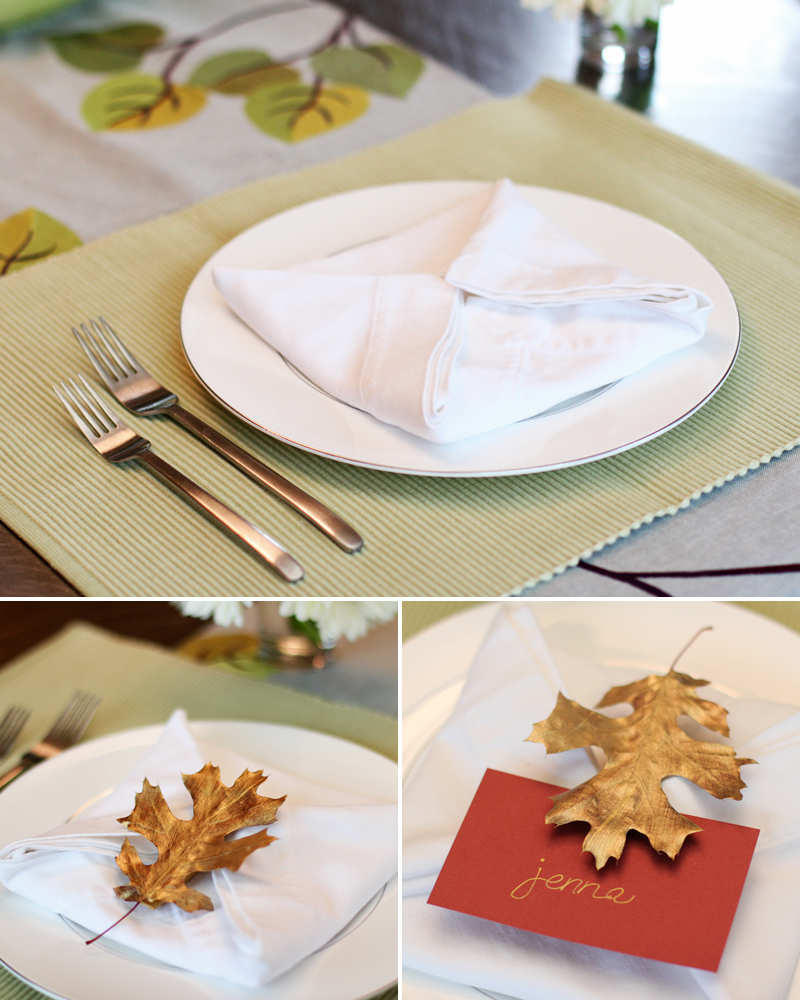
Once the glue was completely dry, I tested our new napkin holders on a few different napkins arrangements. The design I liked the best was a napkin folded inward into a square, with all of the corners meeting in the center and the leaf holder securing the top two corners. The clothespin can also be used to hold a place card.

Post by Julee of Warm Hot Chocolate

The Power of the Green Smoothie

November 9, 2012

Even though being a mom often leaves us short on extra time, every now and then we’ve got to take a moment and make sure we are also taking care of ourselves. I recently had such a moment. I was a couple months out from birthing my second baby, was starting to feel “normal” again, but still in “I-deserve-comfort-food” mode – ie – lots of buttered biscuits, cheese and ice cream. I was definitely not getting enough fruits and vegetables and my diet was certainly not helping my energy level! (or helping me get rid of the extra baby weight!) I brainstormed on ways to incorporate more fruits and vegetables back into my diet that would take little time and effort considering I now had an infant to care for along with my high energy 3-year-old. Enter (drum roll please)…

The Green Smoothie!

What’s a green smoothie? Well, it is not necessarily green in color, but it includes green leafy vegetables along with fruits that are commonly used to make smoothies. Yes, I saidgreen leafy vegetables and yes I mean spinach, chard, romaine and all the other leaves gracing the produce aisle. I know what you’re thinking, and yes, it tastes good! When I say it tastes good, I don’t mean it tastes like those neon-colored, syrup-laden, I-might-as-well-just-spend-these-600-calories-on-a-hot-fudge-sundae smoothies they sell at high end coffee shops and fast food joints. In my opinion, those are treats and not health foods, despite what the advertisement says. But, I assure you, Green Smoothies really do taste good! The sweetness of the fruit is much more obvious than the greens; although I think the mild, grassy taste of spinach rounds out the sweetness of the fruit. The best thing about Green Smoothies? You can get 3-4 servings of fruits and vegetables in one sitting and it’s drinkable. Ever try to eat a salad when you’re nursing a baby or driving your kids to school? By adding Green Smoothies regularly to your diet, you can expand your vegetable intake beyond cooked carrots (because that’s the only veggie your toddler will eat….or maybe that’s just me) and can reap the benefits of nutrient powerhouses like cherries, grapes, blueberries and greens of course!

Here’s my basic Green Smoothie recipe. It can be individualized to suit your tastes and needs. If you would like more sweetness I recommend adding a few dates or 1-2 teaspoons of natural sweetener like honey or maple syrup. Other healthy additives such as flax seeds, wheat germ, whey protein, chia seeds etc. can also be added without compromising taste. I’ve been drinking a Green Smoothie 3-4 times/week for the past month and have noticed a significant improvement in my mood, energy level and sense of well-being. Plus, it is a healthy, low calorie and delicious snack that my picky toddler will (most days) share with me!

Ingredients:

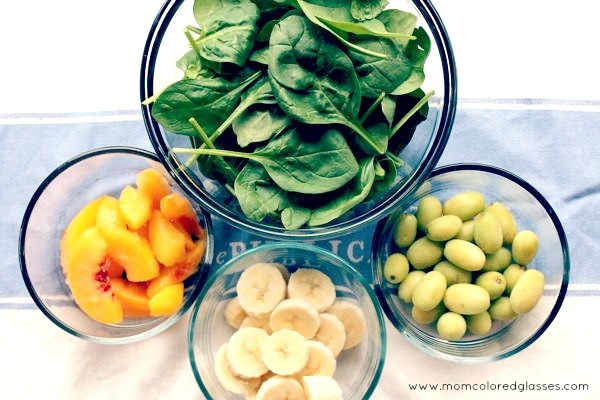
  • 2 generous handfuls of spinach or green leafy vegetable of your choice
  • 1 banana sliced
  • 2 cups of frozen fruit (I used 1 cup frozen green grapes and 1 cup of frozen peaches for this recipe; berries and cherries also taste great in green smoothies)
  • 1/2 – 3/4 cups of water
The great thing about this smoothie recipe is you can easily keep the ingredients on hand. I buy 1-2 packages of organic, pre-washed baby spinach each week and just pull out a few handfuls when I need it, no prep needed! I stockpile frozen fruit in my freezer when it’s on sale and always have bananas hanging around the kitchen.

Using frozen produce allows you to reap the health benefits of antioxidant-rich fruits when they are out of season without breaking the bank. To freeze grapes, simply place washed and dried grapes in a single layer on a small plate and freeze for 1-2 hours.

1

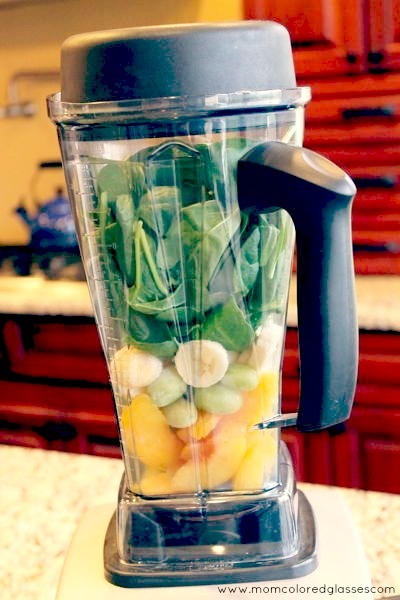
Place the ingredients into a blender, frozen fruit at the bottom and greens on top.

2

Add cold water and blend until the smoothie reaches your desired thickness/consistency and there are no visible bits of lettuce or fruit. I’ve been making my own smoothies at home for a long time, but always with milk (cow, soy, almond) or kefir and was skeptical about using water as the base liquid. After using water for awhile, I love it! It makes the smoothie more like a juice – light and refreshing and also fewer calories.

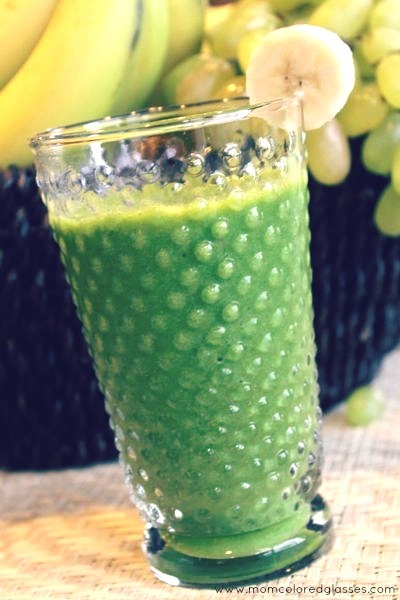
Pour into a glass and enjoy!

3

This recipe makes two 10 oz servings and can be refrigerated for 24 hours if you want to save some for later, although fresh tastes best.

I challenge you to get on the green smoothie bandwagon, you will look and feel like a million bucks!

Post by Renae Wortz : Mom Colored Glasses

A Ballerina Birthday Party

November 8, 2012

1

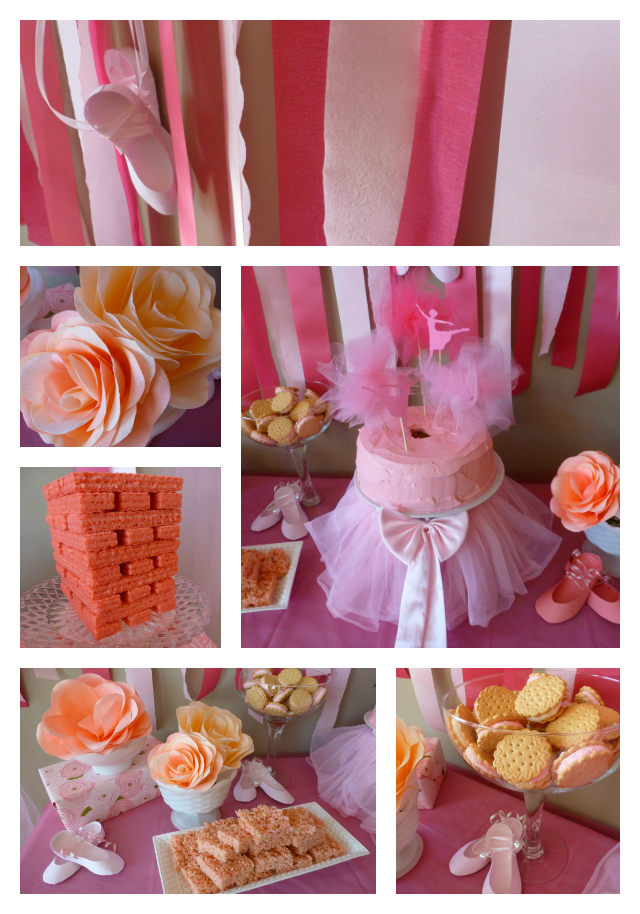
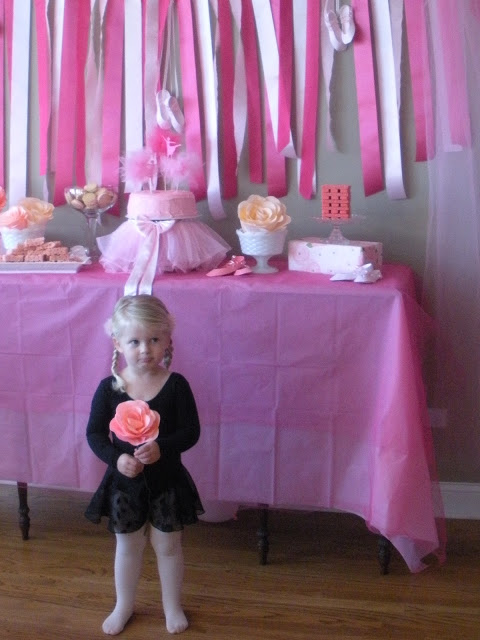
My daughter Stella celebrated her 3rd birthday by twirling around our living room in her tutu during her ballerina party!

2

I had asked Stella what type of birthday party she wanted a few months ago and she immediately answered "ballerina party!" It really came out of the blue – she wasn't all about ballerinas before that – but that's a 3 year old for you. Well, I ran with the theme, and thankfully she never wavered on the type of party she wanted. 😉

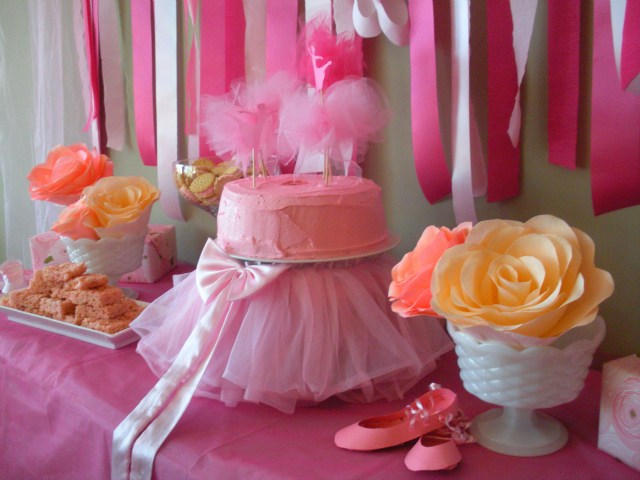
Of course, I went to town with little DIY projects for the party. I am excited to share them with you over the next couple weeks. Here are some highlights:

3
 
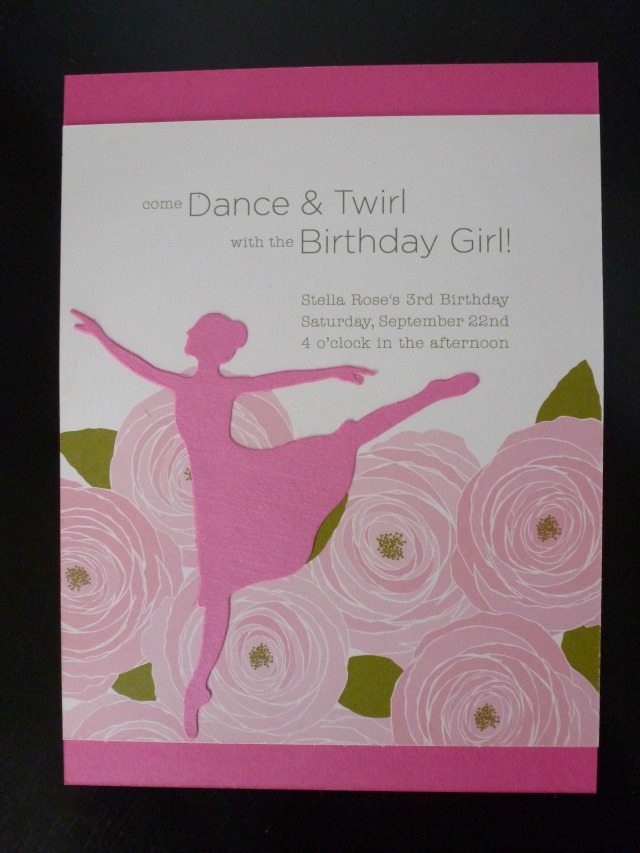
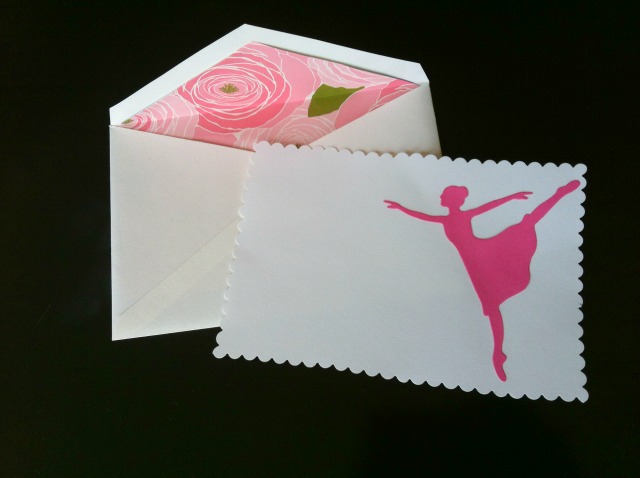
DIY Invites and Thank You Notes
 
The party invites and thank you notes were a fun DIY project using rose patterned paper from Snow and Graham and ballerina paper cutouts from Etsy seller DieCuts4U.
4
5

Ribbon Wall and Ballet Slippers

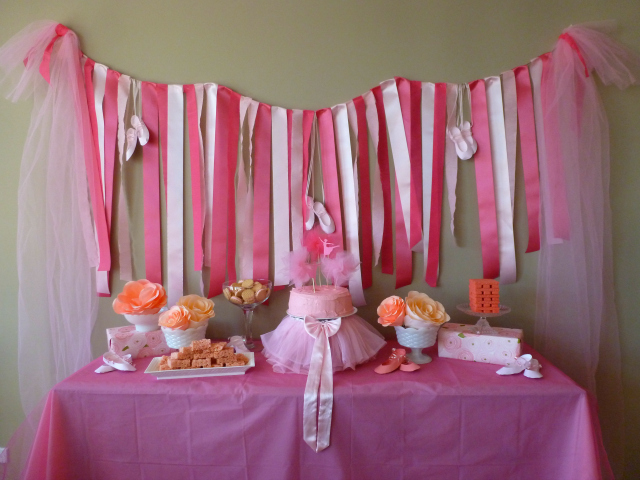
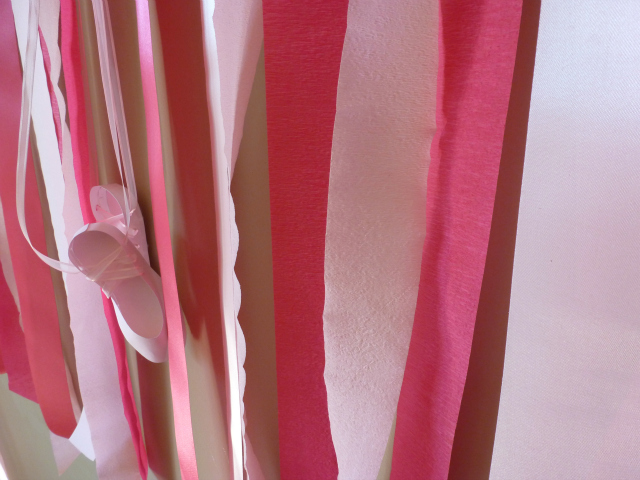
The ribbon wall was as simple as stapling a mix of ribbons and crepe paper to some twine. Here is a full tutorial in case you want to make your own!
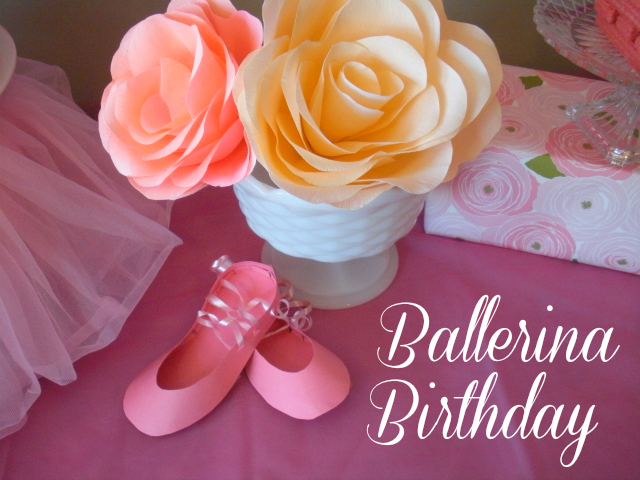
The ballet slippers were made from a paper template by Etsy seller Piggy Bank Parties. They turned out so cute but are definitely time consuming to make (it took me a good 30 minutes of cutting and taping per pair). So if you plan on making these, please don't try to make them the day of the party!
6

Crepe Paper Roses

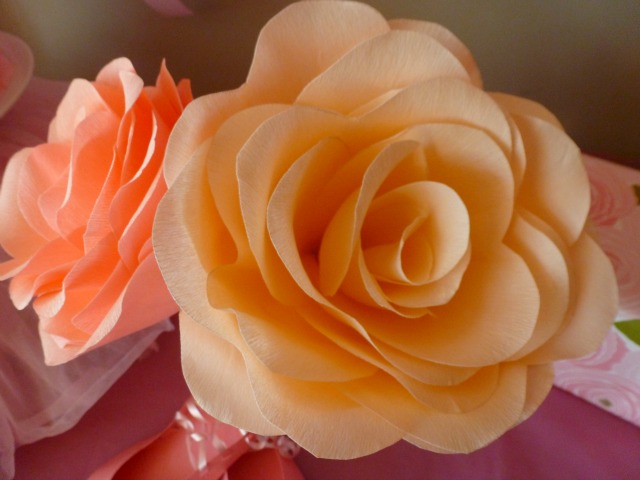
These crepe paper flowers were also time consuming (about an hour a piece), but I had a lot of fun making them and they turned out gorgeous! The best part is Stella can have them as keepsakes for a long time. Stella's middle name is Rose (as is mine!), so incorporating the roses into the party gave it a little personal touch.
Here is my step-by-step paper flower tutorial. 
7

Ballerina Birthday Cake

I made Stella a homemade angel food cake with buttercream frosting (a birthday tradition passed down from my grandmother). The cake was topped with a couple of the ballerina paper cutouts and a few pom-poms I made from tuile. The tutu cake stand was actually a big kitchen pot overturned and covered with one of Stella's tutus!

Click here for how to make the ballerina cake and tulle pom-poms.

8

Stella's Own Touches

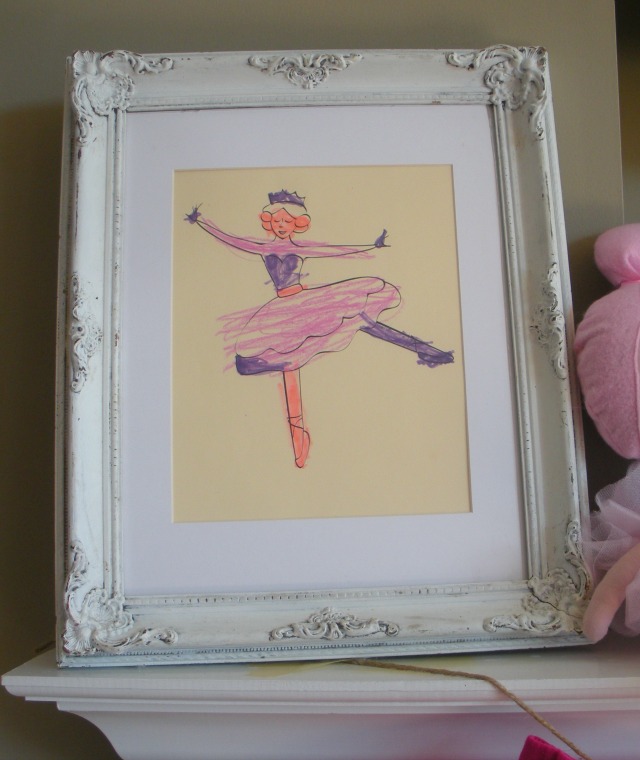
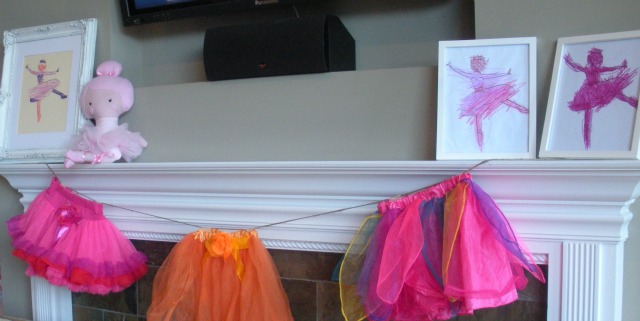
Stella contributed her own DIY projects to our party decor (she is quite the crafty lady herself!) with these ballerina colorings. I framed them and put on the mantel along with some of her tutus.
9
10

The Birthday Girl!

Finally, the little ballerina herself. She had quite the day!
11
12
I've been on a party planning kick lately – you can check out my other parties here!
Post by Haeley : Design Improvised


A Light Peach Trifle

November 7, 2012

1
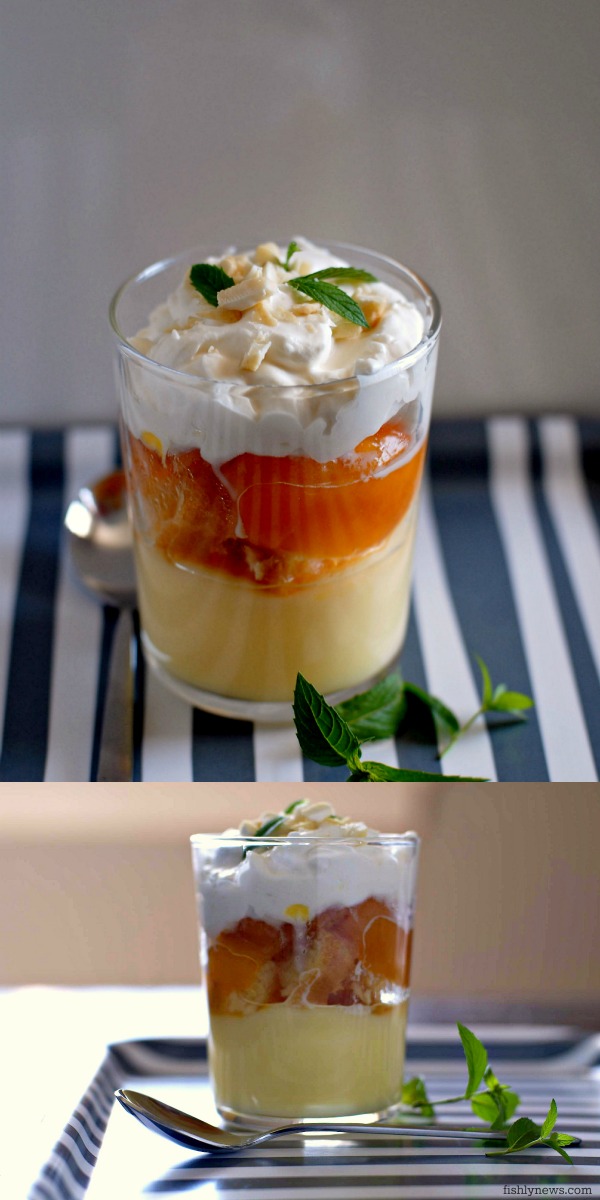
A few weeks back, when we hosted our Pop-Up dinner on the beach, I made these peach trifles. I wanted to make something that looked pretty, but could be prepared in advance and transported easily. These turned out so yummy! I think I'll make another batch, because we still have fresh peaches.

How to:

  • I used this yellow cake
  • this vanilla custard
  • I stewed peaches with two tablespoons of sugar and some ginger
  • I whipped fresh cream with vanilla and one tablespoon of sugar
  • Fill each glass with vanilla custard and let cool
  • Cut cake into small pieces and distribute on top of custard
  • Add stewed peaches
  • Top with vanilla whipped cream 
  • Sprinkle with chopped nuts (I used cashews, but pistachios would be nice as well)

2

Post by Giulia Doyle : Fishly News

What a Doll

November 6, 2012

When I was a child, I had no shortage of dolls–Barbie, Ken, Skipper, Chatty Cathy, Chrissy, Betsy Wetsy, Raggedy Ann, you name it, I had it.  Then I grew up, got married, had a daughter, and bought her dolls—Cabbage Patch, Bratz, American Girl, the list goes on and on.  When my daughter was born, I bought her a Cabbage Patch Doll named Julie.  This doll has been sitting on her bed for 18 yearsshe cannot part with it.  So if I learned two things, they are a big girl can never have too many shoes, and a little kid can never have too many dolls. 

Last year, we were trying to figure out what we were missing from our assortment, and it hit me– we don't have any dolls.  How could that be? We sell toys, but no dolls? We immediately got to work, and came up with what I think is the most beautiful assortment of dolls anywhere. Here are some of my favorites.

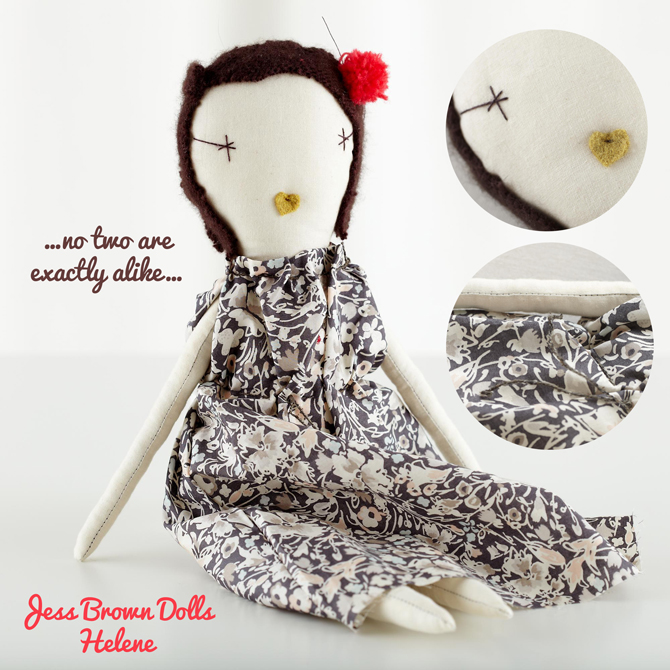
Jess Brown dolls are exquisite.  They are all handmade by Jess herself.  We carry them in a very limited way because they are so special.  In the spring and the fall we only carry 50 small dolls and 20 large dolls. And although they are expensive, they sell out almost immediately. Each one is handcrafted- no two are exactly alike, they are made with the finest natural materials–cotton, cashmere, lambs wool, angora, and they are hand sewn and dressed in magnificent outfits.  There are girls and boys in this assortment.   Each is a wonderful keepsake to be passed down from generation to generation.  And, each one is named by our Managing Director, and I personally gift wrap ( yes–I gift wrap them) each and every one with tender loving care.  We take great pride in these dolls. They are truly stunning.

Helene-doll-17_blog

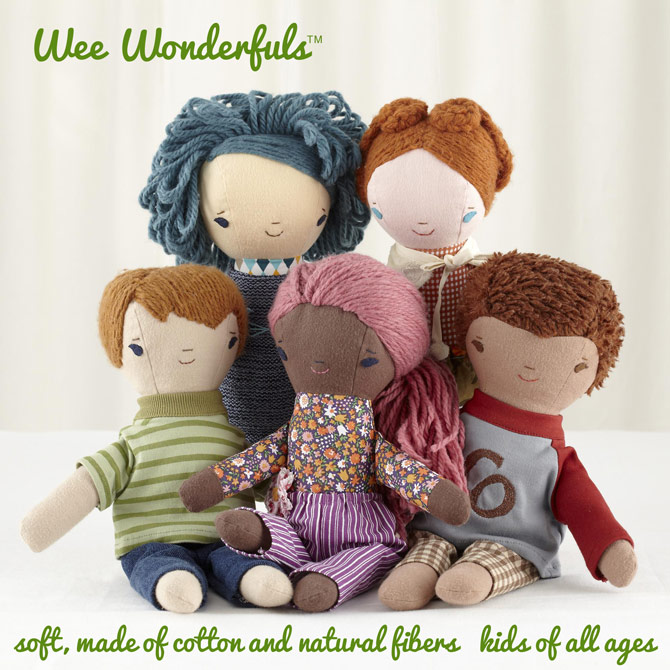
Wee Wonderfuls are exactly what the name implies.  These handmade dolls were created by artist Hillary Lang.  She crafts dolls in her studio right in our backyard, and came up with 5 designs that we created for this holiday season. We will welcome 3 girls and 2 boys to our happy doll family.  They are named by Hillary herself– Fern, Winx, Bertie, Charlie and Skip.  We produced these wonderful dolls, which are made of cotton and natural fibers.  They are soft, and will appeal to kids of all ages.

Wee-wonderfuls-dolls_blog

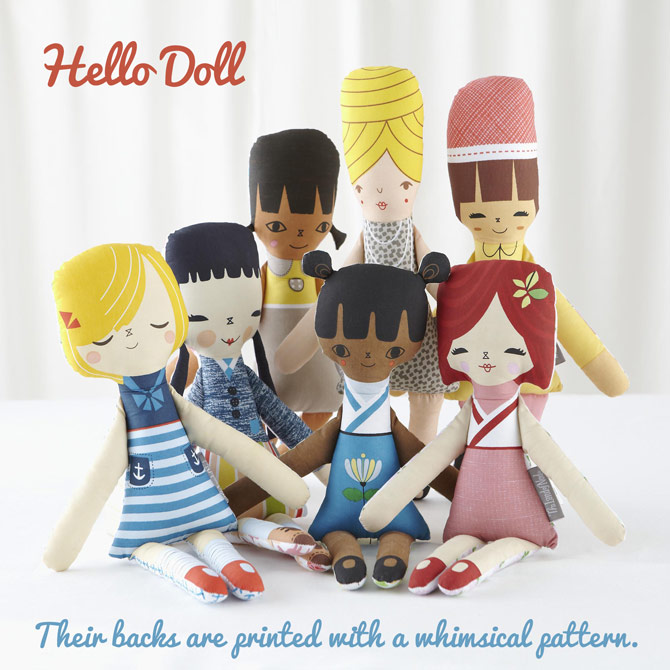
Hello Doll. Suzy Ultman's genius was the inspiration for these soft printed dolls.  There are 7 in all– Fia, Honey, Kiki, Jojo, Mary T., Suzy Q, and Stella. Suzy created these dolls based on people who have had a powerful impact on her life.  And one of them is Suzy! The front of the doll has a personality specific to that doll, and the back is printed with a whimsical pattern.

Hunny-hello-dolls_blog

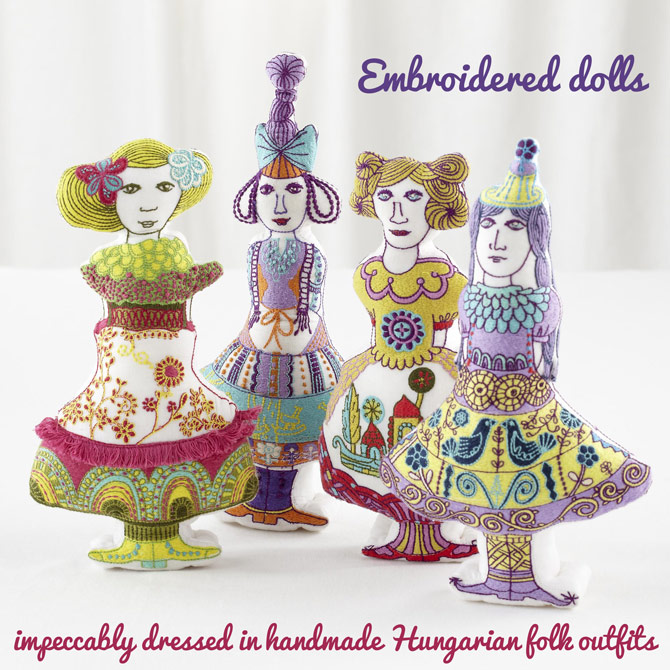
Embroidered dolls– created by Sarajo Freiden.  These dolls are based on drawings by the talented artist.  Hungarian folk art was the inspiration. Sarajo had Hungarian neighbors that gave her dolls impeccably dressed in handmade Hungarian folk outfits they made themselves. Plus Sarajo's grandparents ran an embroidery shop that made costume and clothing for Hollywood designers. Each of the 4 dolls stands alone– the images do not do them justice.  They are hand sewn and embroidered– their skirts all have very intricate patterns, and if you turn them around, they are each holding a surprise.

Embroidered-belles_blog

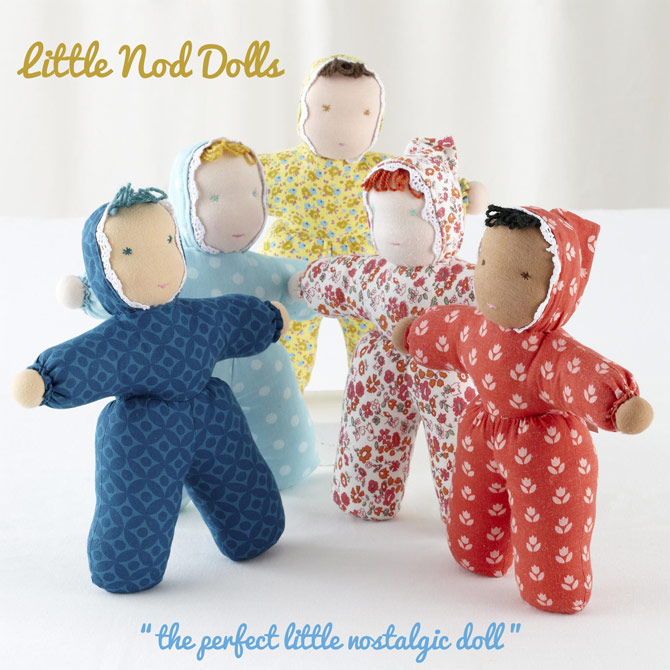
Little Nod Dolls, created by our in-house designer, are the perfect little nostalgic doll.  The 5 dolls each come in jammie's and matching cap, with just a hint of hair peeking out from their caps.  They are simple and sweet, and are the perfect first dolls. They are soft and cuddly– I love them.

Dollies_blog

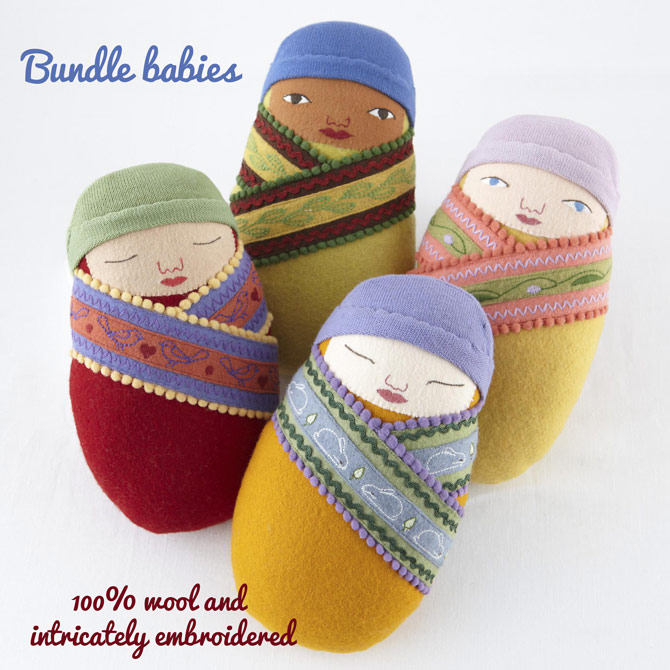
Bundle babies–is it a doll, or is it a stuffed toy?  The answer is yes.  100% wool and intricately embroidered, these babies are perfect.  On one side, they are awake and ready to be played with, but turn them over, and they are asleep.  These were created by artist Mimi KirchnerA keepsake for sure!

Bundle-babies_blog

I really believe this collection of custom and exclusive dolls will evoke a connection with children, just as my daughter has connected with Julie.  There is truly something for everyone.  I know which one speaks to me.  Can you find yours?

Post by Nancy Harris, Accessories Buyer @ Nod

In 1999, I was sitting at my desk as a buyer for a gift company, and my boss brought over a Land of Nod catalog and said "this is what I want us to be.” I immediately knew two things:  1. We could never be like them, no one could. 2-I had to be a part of The Land of Nod. The nostalgic assortment, whimsical presentation, and clever copy were positively inspired. I spent lots of time dreaming about The Land of Nod. Four years later, I was hired as the toy buyer, a dreamy job–a dreamy atmosphere, a dream come true.


Classroom Makeover

November 5, 2012

Back in August, our Managing Director, Marketing Director and Human Resources Director attended a partnership summit for No Kid Hungry here in Chicago.  The day started out with a trip to the Greater Chicago Food Depository where they had a tour and over lunch they listened to a few speakers.  Among the speakers was Yolanda Morris who runs a youth program in the neighborhood of Englewood in Chicago.

For those of you who do not know, Englewood is an area with extremely high crime, gang and drug rates. This youth program was created to provide the children of Englewood a safe haven where they are fed, educated and most importantly, cared for.

During the summer months, Yolanda and a group of volunteers take in an average of 150 children from 8:30am until 2:30pm, Monday through Friday. During the day, these children are fed a nutritious breakfast and lunch, which for some kids are the only meals that they receive. They get to play, read and learn about the positive opportunities that are available to them beyond what they may know.

During the winter months, the youth program is available on Thursday evenings, where the children can go after school. Those who attend the winter program are fed dinner and receive assistance with their schoolwork.

Yolanda shared her passion and concern for the kids in the youth program. She spoke of Share our Strength and how it has helped her with grants which have allowed the youth program to become available to more children. Her story was very moving, so moving in fact that we asked Yolanda to come and talk to The Land of Nod employees at our corporate office. She made the trip to the northern suburbs and gave a presentation on what life is like for the kids and the struggles she faces in running the youth program.  Our employees were completely engaged by Yolanda’s presentation, we decided that we had to find some way to help this youth group in particular.

Being a children’s furnishings company, the first thing we decided to do was to take some of our product and makeover one of the children’s classrooms for them.

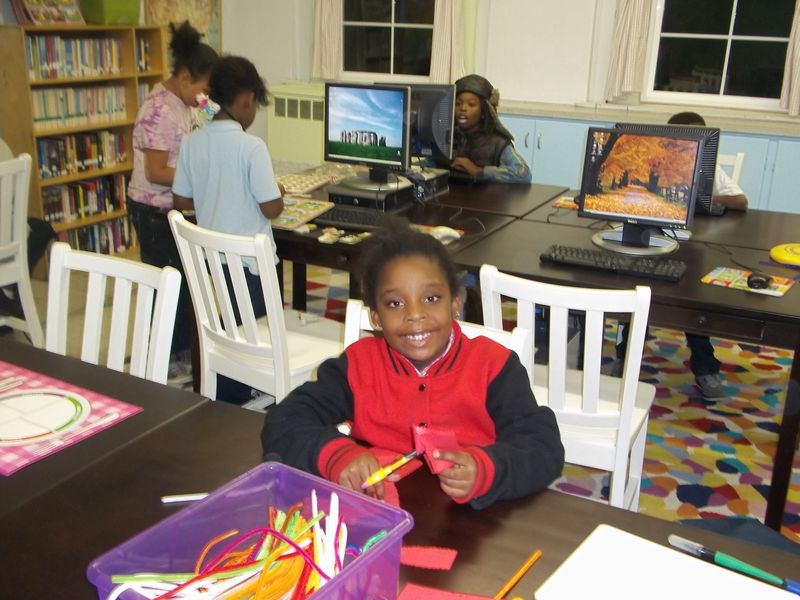
Our employees donated art supplies, games, DVDs and children’s books. We planned out the classroom space and took a group of volunteers down to Englewood where we spent the day painting and setting up the room with The Land of Nod product. We also donated 5 repurposed computers, a printer and a projector with DVD player for entertainment.

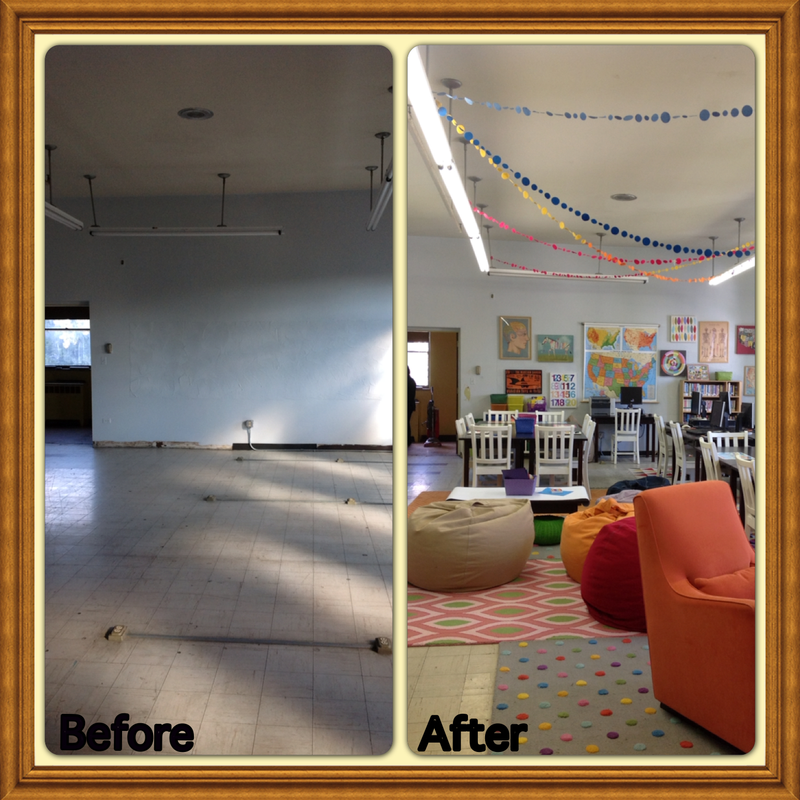
The end result turned out amazing as you can see in the before and after photo. We were able to transform the room into a vibrant, colorful, and inviting space for them to use. 

Englewood

The relationship we have formed with the Englewood Youth program has just begun. We have already started plans for making over another room this winter; this one will be for the younger kids.

Our employees are currently donating Thanksgiving meals to share with some of their more needy families.  And we are planning to provide “Letters to Santa” gifts to the children in December.

Our partnership with No Kid Hungry has allowed us to make this very special connection. It has provided our employees an opportunity to be involved in a very tangible way to help people right here in Chicago.

100_1306.JPG

100_1355.JPG

By Becky Phillips

Becky works in Nod’s HR Dept. doing everything from booking the hot dog cart for our kickball parties to training our store staff on all the details of our latest products. In addition to cooking, she learned how to knit last year, but has yet to finish her first project…a scarf. So, if you come across any good, quick, knitting patterns, send them her way!


Cherry Almond Cookies

November 2, 2012

You know that Rolo cookie that makes the rounds on Pinterest?  The one that is so good you have could eat the entire batch by yourself?  Well, I got to thinking, “There has got to be a way to to use the same idea as the Rolo cookie but with a different flavor.”  So my mom and I started brainstorming ingredients that we could use in the center of the cookie that had a similar consistency to Rolo’s.  And since we could both pretty much eat slices of almond paste like other people eat slices of cheese we decided we had to go with it.  And why not throw in some cherry preserves too since cherry and almond is a common flavor pairing.  The result?

The Rolo cookie’s prep school cousin, classy cousin, tea at Harrods cousin, and pretty much just totally amazing cousin.  It’s different than the Rolo cookie, even though it uses the same concept,–but just as fantastic and just as tempting to eat a whole plate of them by yourself.  And the ultimate stamp of approval?  My husband, who doesn’t have a sweet tooth to speak of, thought they were fantastic.

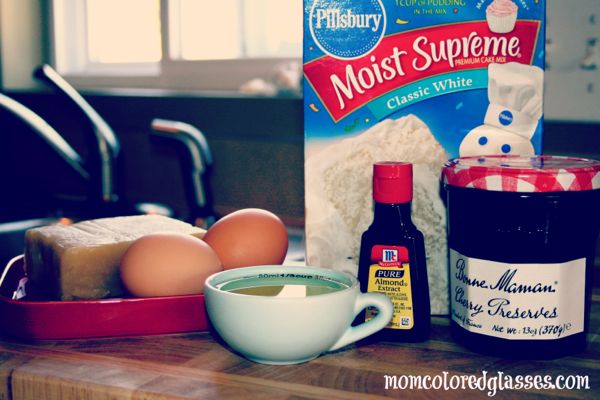
Here’s what you need for the cookie:

1

  • One box of classic white cake mix
  • Two eggs
  • 1/3 cup of oil
  • 1 1/2 teaspoons of almond extract
  • A small brick of almond paste (you won’t use the whole thing and you could definitely use canned almond paste as well)
  • Cherry preserves (or cherry jelly….it won’t matter)

2

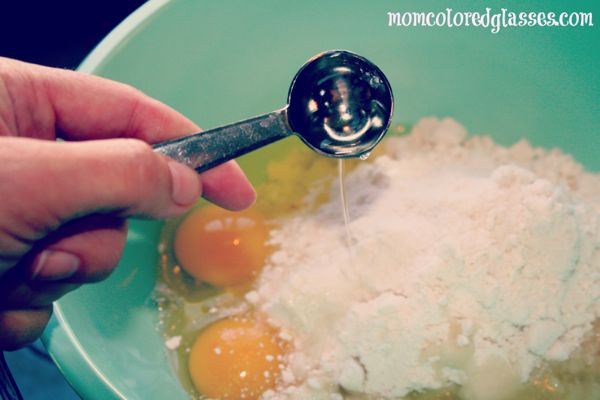
Mix all of the ingredients together.  And if you want to add more almond extract to the dough for more flavor…by all means.

3

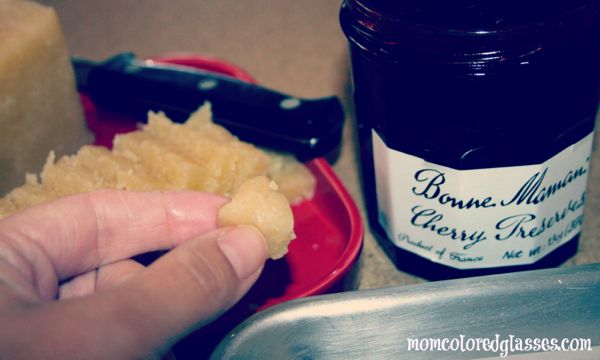
Cut your almond paste into little pieces and roll into one inch balls.

4

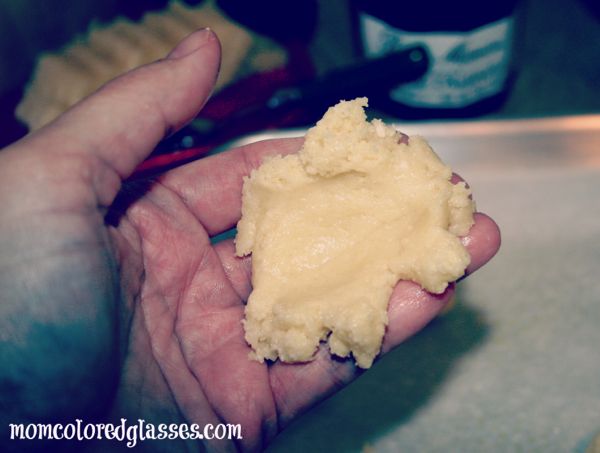
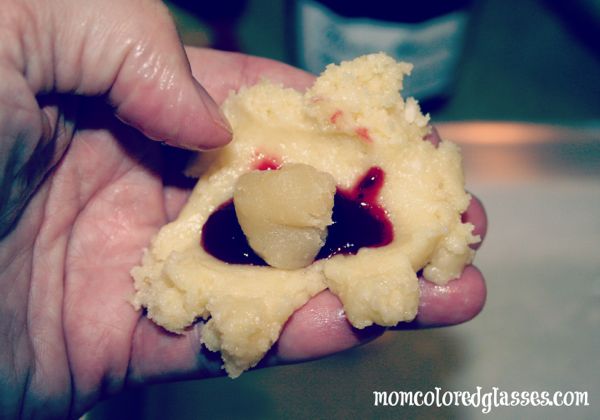
Make a well in a tablespoon sized ball of dough.  I just pressed a divot into mine with my thumb.

5

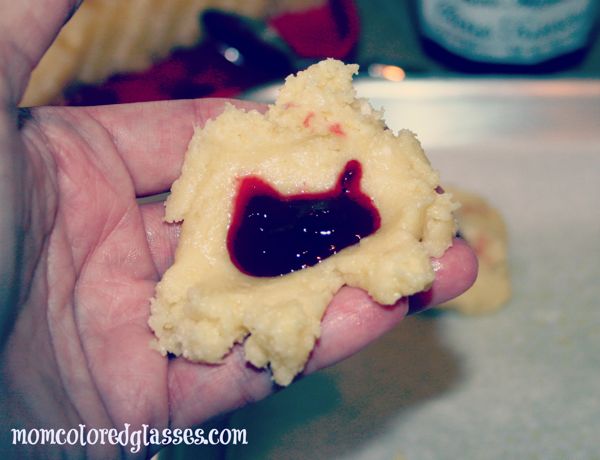
Spoon in about a teaspoon of cherry preserves.

6

Lay one of your almond paste balls on top of the preserves.

7

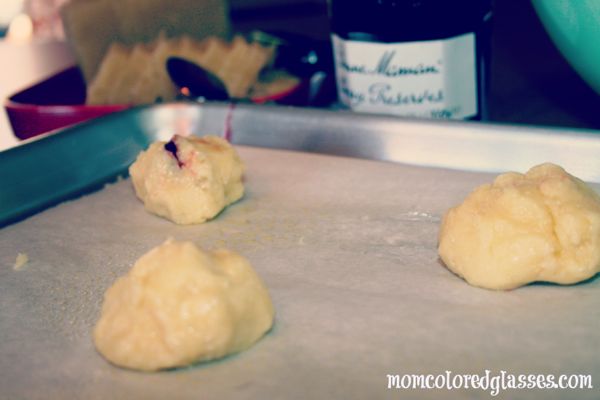
Close the dough around the filling and lay your cookies on a greased cookie sheet about two inches apart.

8

Bake at 350 degrees for about eleven minutes. You want these cookies to be soft, and since all ovens vary in baking speeds and accuracy, make sure eleven minutes will really work for you.  You might need to go up or down a minute or two to get the perfect texture.

9

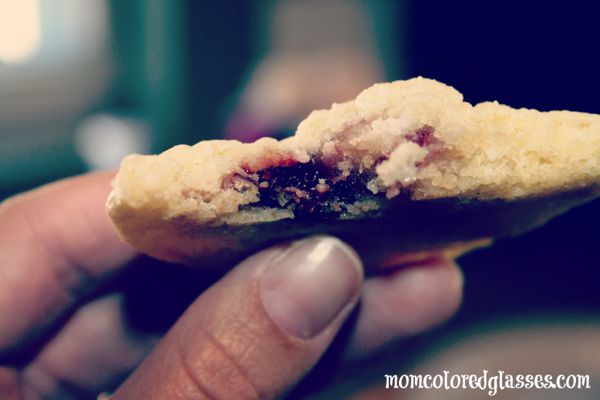
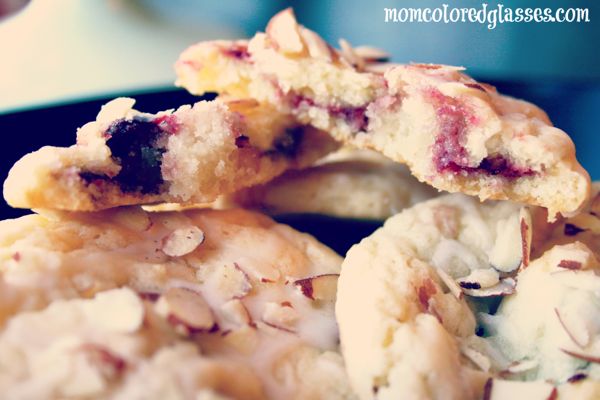
Once they come out of the oven let them cool on a drying rack and marvel at how beautiful all that cherry is peeking through the cookie.

10

How awesome does that look?

Here’s what you need for the glaze:

And this step is totally optional–the cookies are amazing without the glaze, heavenly with it. Another FYI–this glaze is perfect for any cookie and tastes way better than Royal Icing.  We use it for sugar cookies and gingerbread cookies in my family and it makes your cookies second-to-none. Just make it thicker for cookie decorating and use whatever color food coloring you like to make it beautiful.

11

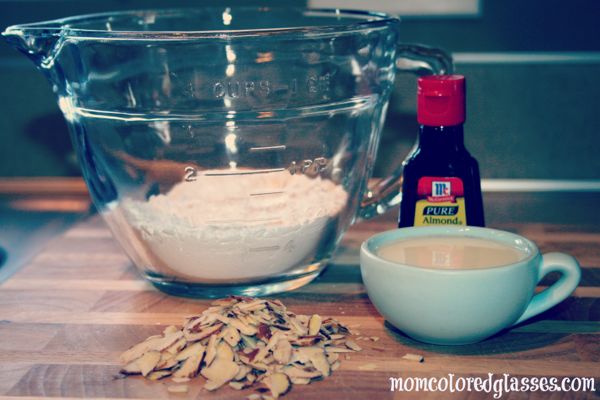
  • A cup of confectioner’s sugar
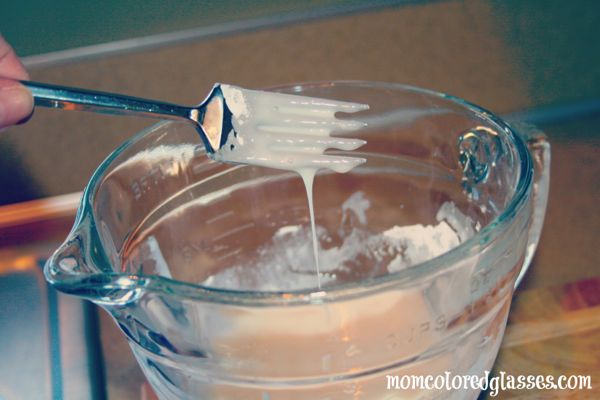
  • About a tablespoon of milk (I show more here….because you can always adjust the amount of milk based on how thick or thin you want the icing)
  • Almond extract
  • Slivered almonds

12

I made my glaze a little runny because I wanted it to just add a hint of flavor to the cookies.

13

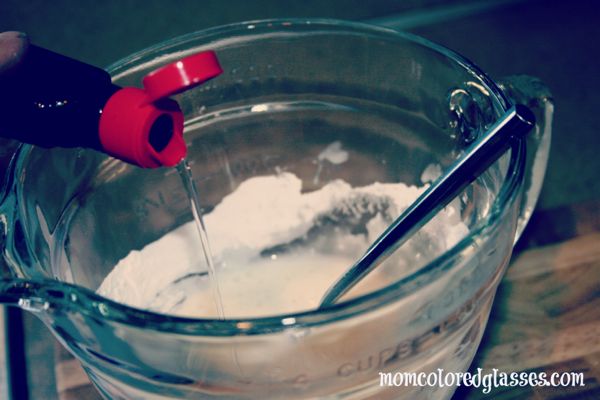
A quick splash of almond extract to taste.

14

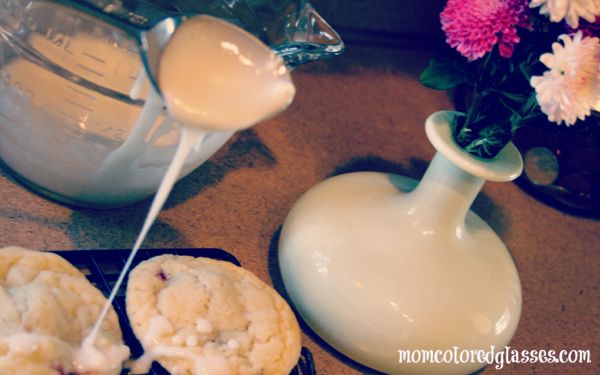
Drizzle the icing on the cookies–the messier the better.

15

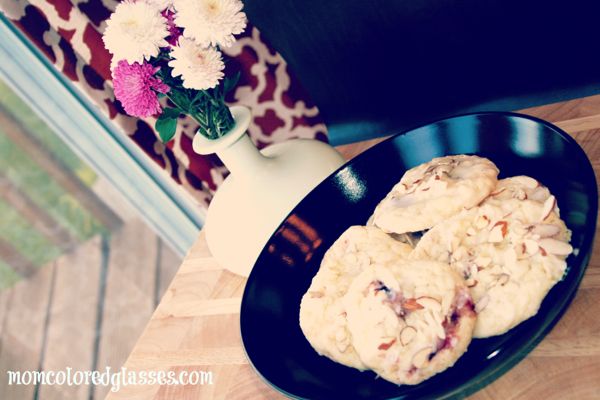
Sprinkle with the slivered almonds, let them dry, and then…

16

Try to eat just one.  Oh my word. I’m going to eat one right now.

Other ideas for this cookie that I had while concocting them:  Add some white chocolate chips, stir the cherry preserves right into the dough so it’s laced through-out, and/or cute up smaller chunks of almond paste and fold that into the dough too….however, there is nothing like biting right into a huge center of almond paste–so maybe keep that part the same!

Need more tasty recipes and delicious bites? Check out our Let’s Eat Pinterest Board.

Post by Maggie Terryn : Mom Colored Glasses

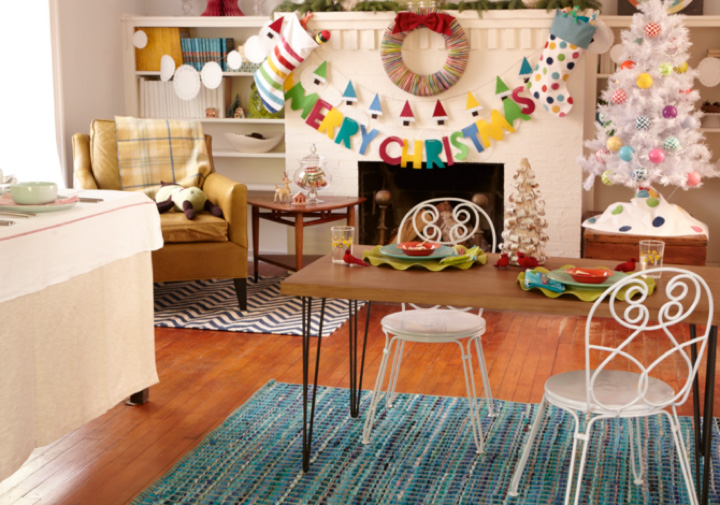
Shared Spaces: Holiday Dining

November 1, 2012

SS_Holiday_Dining

So, you’ve figured out how to fit 4 people around your dinner table every night (even if you haven’t figured out how to get them to sit still). And, when you have friends over, you even know where a couple spare chairs are stashed to squeeze in a few more (so what if you’re sitting on the step stool from the kitchen). But, what happens when you’re entertaining A LOT of people?

At no time is sharing spaces more important than when entertaining during the holidays. Your kid’s room becomes grandma and grandpa’s room. Your bed becomes the coat closet. Your remote control becomes Uncle Al’s remote control. Every space and item in your house has to pull double duty. So, guess what, that play table you use for the kids’ art project can also double as a dining table for the little ones.
And, being relegated to the kids’ table doesn’t have to be a bad thing. Get the kids involved in creating their own centerpiece and place cards. Use festive dishes and “glassware.” (What kid doesn’t love drinking a kiddie cocktail from a plastic champagne flute?) Create a space that’s fun and festive, and no one will care, or notice that they’re dining in your living room.
By Danielle Kurtz

Danielle is the Creative Director at Nod and an over-protective mother of two. She’s also completely obsessed with Pinterest, Twitter and her Kindle, but not necessarily in that order. Danielle loves to craft, sew and crochet, but all her supplies have a layer of dust on them about 5-years-thick, wonder if it's just a coincidence that her oldest kiddo is 5 years old?
 

Have yourself a Colorful Christmas video from Oh Joy!

October 30, 2012

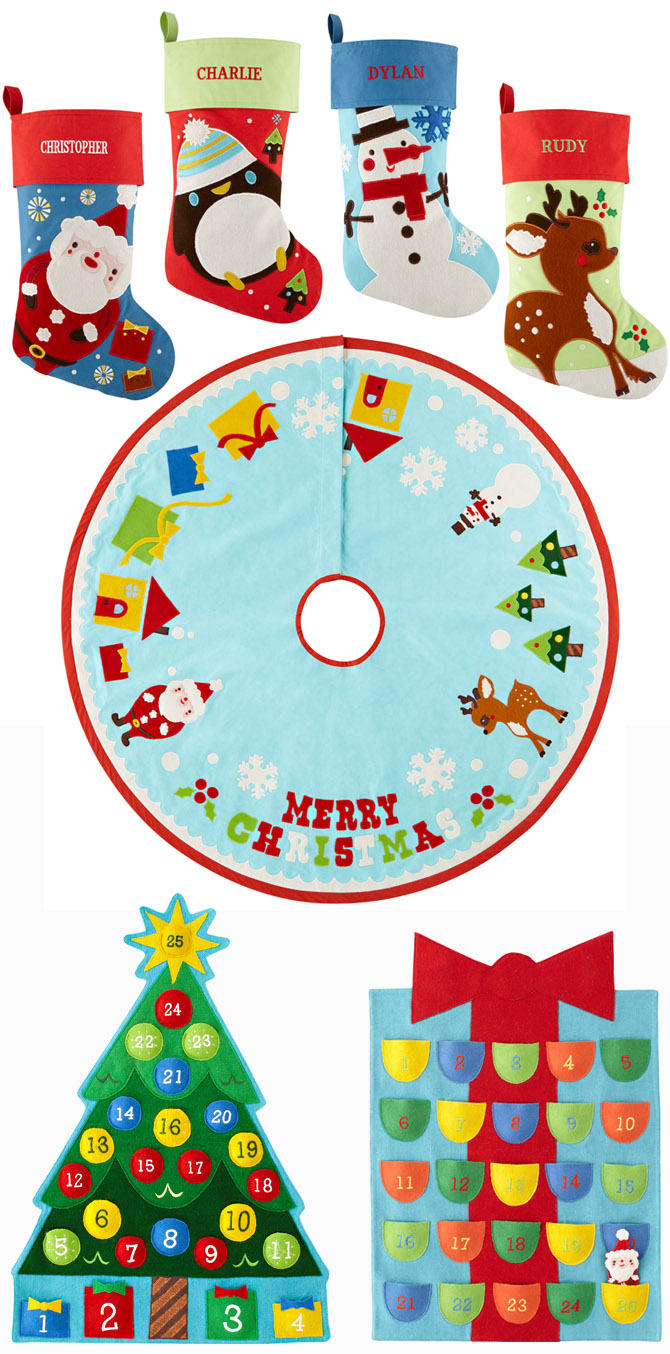
Our friend Joy from Oh Joy! made us a video featuring tons of our new holiday décor. Enjoy $4.95 all-you-can-ship on holiday décor.

Joy Deangdeelert Cho is a graphic designer, blogger and food enthusiast who worked with numerous fashion clients in New York before launching her own business and blog Oh Joy! in 2005. She now designs textiles, packaging and branding for clients in the fashion and food industries, consults other creative businesses through her Rx program, and sells her licensed stationery, home office, baby clothing and wallpaper lines nationwide. She co-wrote Creative, Inc., a book about becoming a freelance creative talent, and recently authored Blog, Inc., about the business of blogging. 

Black Thumb Friendly Houseplants

I do not come from a family of gardeners, but I always had dreams of a tangled English garden gracing my front stoop or perhaps a collection of intricately manicured bonsai trees in my living room window (this may or may not have been inspired by Mr. Miyagi from Karate Kid). While my horticultural talents are still quite modest, I have discovered how to grow houseplants with some measure of success….and now I LOVE growing houseplants in my home! For me, houseplants inspire creativity, provide beautiful, natural decor and are a sight for sore eyes in the middle of a gray, slushy January afternoon. They also provide health benefits by absorbing formaldehyde and other volatile organic compounds that compromise the indoor air quality in your home (here’s an interesting article about this topic).

Right now I have ten houseplants in my home that are flourishing, but I admit, more than a few have ended up in the compost pile in the backyard throughout the years. Here are a few tricks I’ve got for growing houseplants:

  • Don’t buy a plant if you don’t have the right growing conditions. I killed a large, beautiful pot of English ivy because I didn’t have it in a sunny-enough window. Pay attention to the growing instructions…the first step to growing success!
  • Underwatering is better than overwatering. I’m definitely more of a plant-neglector than a plant-micro-manager, but usually that’s good for easy care houseplants…..and make sure the pot has a drainage hole in the bottom so the extra water can drain out!
  • Make sure your plants are non-toxic or placed in a safe spot if you have pets or small children. Some plants are downright poisonous, others have toxic qualities if they are ingested….it’s better to be extra careful!
  • Start with an easy, impossible-to-kill plant. Once you get used to caring for one easy plant, buy another one, or get something that is more finicky if you want a challenge. All the plants in this post are easy to grow, and all but one are very safe for kids and pets.

I bought my very first plant, a Jade plant, during a paint-supply shopping trip to Lowe’s eight years ago. It was a nostalgic purchase as my grandmother always had a huge Jade plant in her front window….and I also think their succulent leaves are very beautiful. I placed Bob (yes, I named my plant Bob!) on top of our TV armoire and watched him grow from 3 inches to 2 feet tall in height. Jade plants need a lot of sunlight but keep growing even if you don’t water them for weeks….I know this from experience!

1

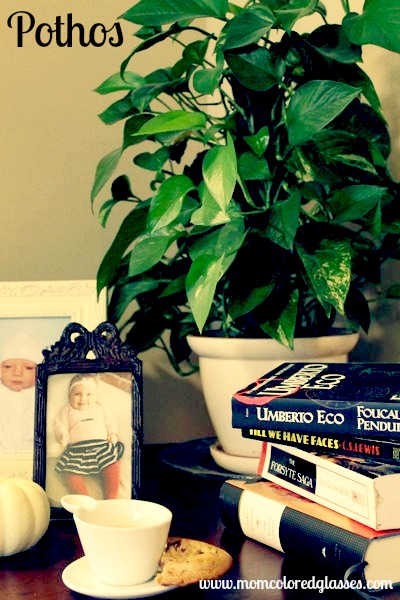
If you want an easy impossible-to-kill plant, go buy a Pothos right now! I actually have three Pothos plants (also called Devil’s Ivy); they can grow in almost any condition, including the dark corner in your TV room and can survive on bi/tri-weekly watering. You can grow them up a post like the one pictured or let their fast-growing tendrils trail over a hanging basket or along the top of your kitchen cabinets. Pothos are also on the list of plants that are especially good at cleaning the air. One caveat: The leaves can cause mild illness if ingested so keep them away from little hands and paws.

2

My African Violet plant is gorgeous and just keeps blooming! African Violets are one of the easiest flowering houseplants to grow if you follow a few simple steps. Most importantly, African Violets grow best if you water them from the bottom up and avoid getting water on the leaves (there are special “African Violet” pots you can get if you want). Here’s a very informative article on how to grow African Violets, but in my experience, they grow well with minimal care.

3

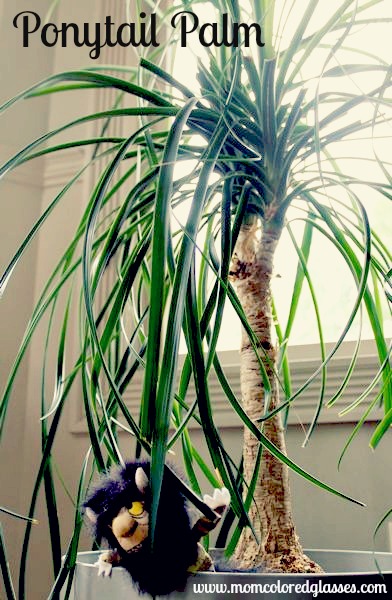
My husband salvaged this Ponytail Palm from his former office building before they were relocated and it has become a nice addition to my plant collection after a little TLC. Again, this plant requires a bright window but minimal watering. It’s non-toxic so I feel okay about it sitting on the floor vulnerable to curious toddler fingers (and they are curious as you can see in my photo).

4

My husband salvaged this Ponytail Palm from his former office building before they were relocated and it has become a nice addition to my plant collection after a little TLC. Again, this plant requires a bright window but minimal watering. It’s non-toxic so I feel okay about it sitting on the floor vulnerable to curious toddler fingers (and they are curious as you can see in my photo).

5

A few other plants I have grown:

  • Spider plant – Excellent air-cleaning abilities, non-toxic, indestructible and will eventually reproduce and supply you with little spider plant babies to grow or give away.
  • Peace Lily – Requires too much watering for my lifestyle but it has pretty green leaves and white flowers. Not safe for children or pets.
  • Snake plant – Another one that will grow with almost NO sunlight or water! Somehow I still managed to kill mine because it was sitting in a rarely used room and I just forgot about it.
  • Orchid – I actually have one growing in my bathroom right now but it’s not in bloom so I didn’t include  a photo. A beautiful and surprisingly easy plant to grow! It does need a special orchid potting mix and weekly watering.
  • Umbrella tree – I loved this easy care plant but we just couldn’t fit another pot in our car when we moved across the country a few years ago!
  • English Ivy – Once I learned how to care for English Ivy it grew beautifully, however, it is not safe for small children so I gave my plant away. It is also an excellent air cleaner.
I promise you can grow beautiful houseplants too, even if you claim to have a “black thumb”!  And, fellow gardeners, what do you grow in your house?  (if you grow bonsai trees please give me your insider information….I think I’m ready to take on Mr. Miyagi).
 
Post by Renae Wortz : Mom Colored Glasses

DIY Night Light Canvas (a grown up version of light bright!)

October 29, 2012

FINALLY. You don’t think I have *just* been caring for a newborn & toddler, do you? Well. Mostly I have, but I have been able to sneak in a few projects here & there. Finding the time to blog them is a whole different story… You’ll be seeing more instagram pictures on here than I’d like. Anything square is IG. 🙂

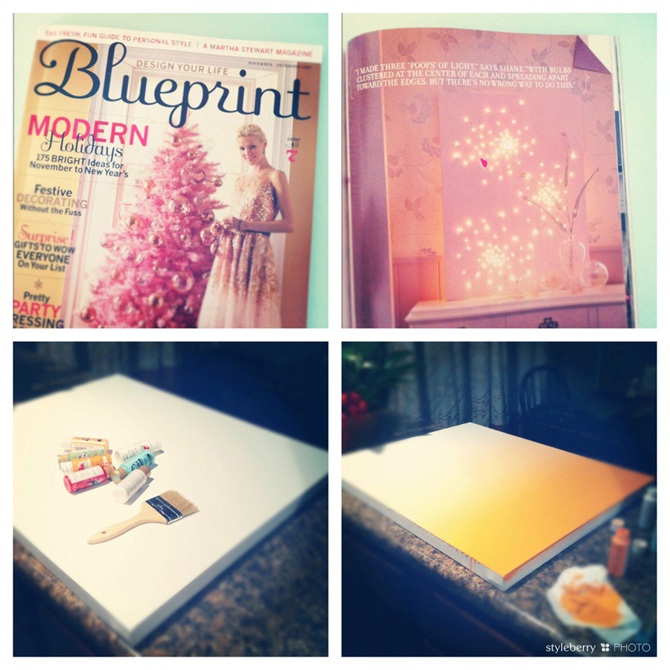
This project has been on my to-do list since I first saw it in Blueprint (RIP) in 2007. Yep. That’s my original copy, complete with red ink stain & all! This was going to be on the feature wall in my nursery if caroline was a boy…but…she wasn’t! & I decided to wait to use it should I get the chance to decorate another nursery. & hip, hip hooray. I DID! It’s now all over pinterest & my version was additionally inspired by Kelly’s ombre version. I cannot tell you how much I love it. I spend plenty of time staring at it in the middle of the night. & I could not be happier with how it turned out! Here’s how I did it:

SUPPLIES

  • canvas (mine is 24×30″)
  • white twinkle lights (found mine at target in the garden section, 100ct)
  • acrylic paint in desired color/s. (You’ll need white & at least one colored shade if you want to do the ombre effect–ombre means “shaded or graduated in tone” just in case you aren’t familiar with the term)
  • paintbrush
  • water in a squirt bottle
  • exacto knife

1

HOW-TO

  • I wasnt sure what I was going to do with the colors, so I grabbed a few from my stash & started to play. I ended up squirting white on one end & orange on the other.
  • I started on the orange side & worked the paint over towards the white, but not all the way. I washed the brush clean, then started on the white side working towards the orange. I did this over & over until I had the colors blend just the way I wanted to. I also squirted the canvas with water a bit to help the paint blend better.
  • once the top was dry, I painted the edges of the canvas celedon green, just to cover up the runny orange.
  • I then took it up to the nursery to decide which color I wanted on top. White it was!
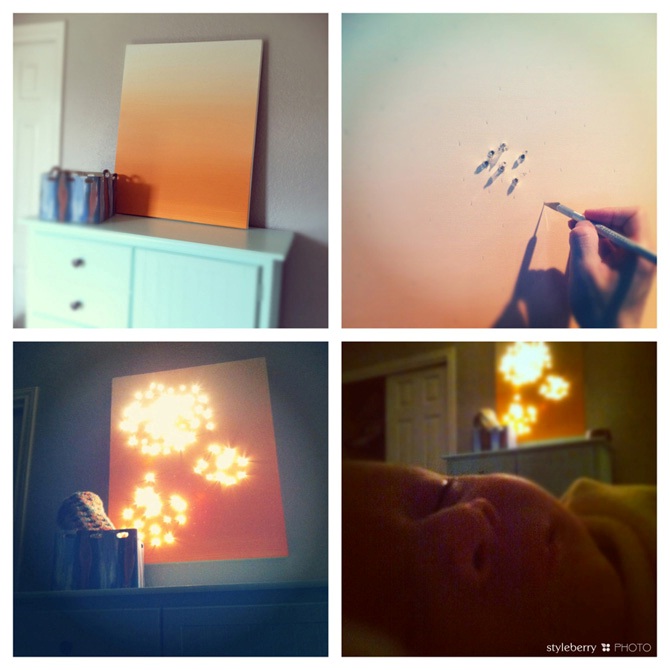
  • I marked the middle of my three “fireworks” and started poking holes with the exacto knife.
  • After the holes were pierced, I punched the twinkle lights through & just kept going until I liked the pattern. I kept a rough count of the lites, knowing that I should split them into thirds for each firework, a little heavier on the top & bottom two.
  • Once it was done, I used an extension cord to reach the lites on the back of the canvas & put them on a remote for an extra easy on/off during those never ending nighttime feedings.

2

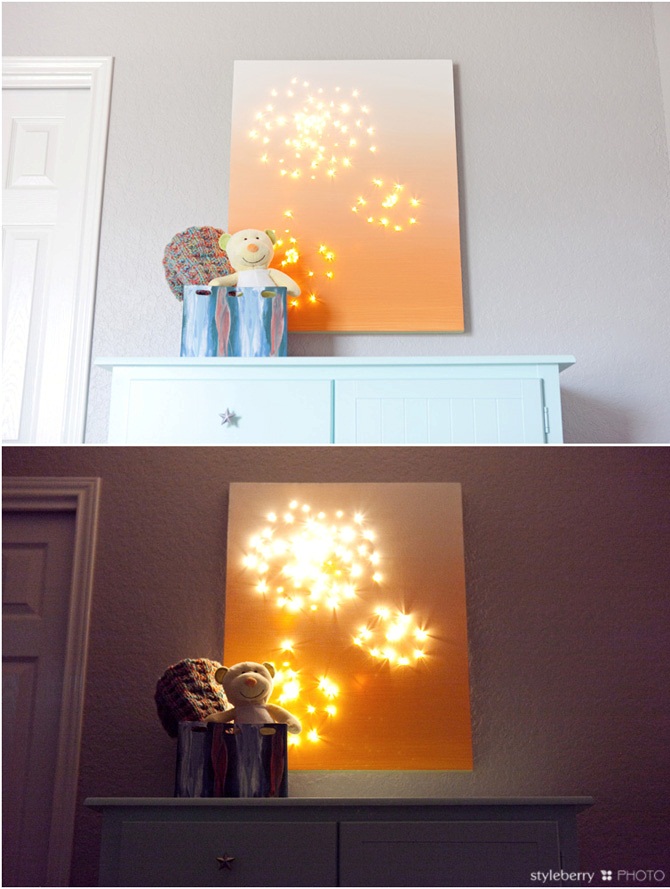
I can’t tell you how much I love it! The best part of the whole thing is how affordable it is–the only new supplies I needed to buy were a canvas & lights. I got the canvas half off at JoAnns Fabrics ($25) and the twinkle lights were $5 at Target. The rest was stuff I had laying around the house.

3

& now on to decorating the last wall in the nursery! I’ve got three of four done…yea!!

Post by shawna of styleberryBLOG.com

Despite days full of washing diapers & messy fun, Shawna is determined to make mommyhood a stylish adventure. Married to the military & mother to one feisty girl & a snuggly little guy, she is a passionate DIYer & loves sharing how to make the complicated simple. Shawna talks creativity, style, food, decorating, green-chic living & mommyhood atstyleberryBLOG, a daily-ish dose of something fab.


How to Make Paper Pinwheels – The Easy Way

October 26, 2012

Post by Haeley of Design Improvised

1
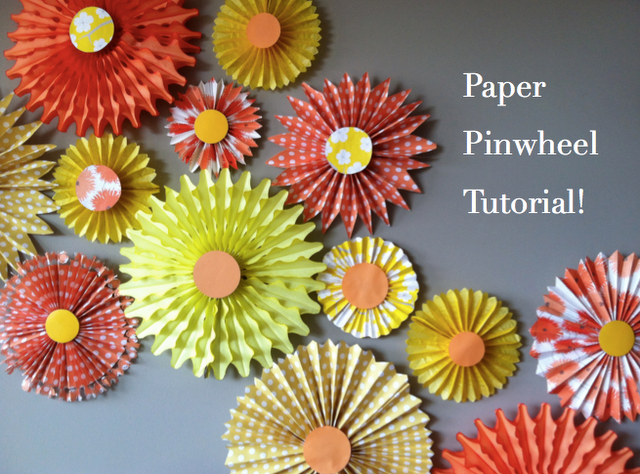
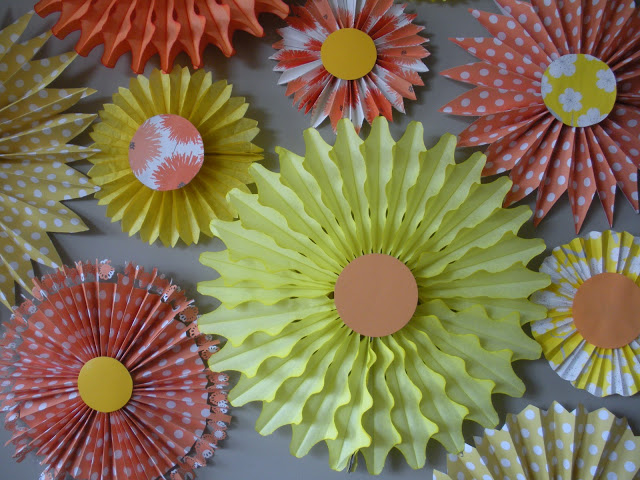
I have been meaning to do a tutorial on these paper pinwheels or medallions, however you prefer to call them, that served as the backdrop for Hazel’s sunshine birthday party. When I was figuring out how to make these, I found there are already plenty of pinwheel tutorials out there, but I’m going to give you some shortcuts and tricks that you won’t find elsewhere. So if you want to make a bunch of medallions relatively quickly, that are going to look great, actually stick to the wall, and not require precise measuring – read on!

Supplies for Paper Pinwheels

  • Colorful scrapbook or wrapping paper (the larger the sheets, the bigger the pinwheels you can make)
  • Scissors
  • Ruler
  • Double sided tape
  • Hot glue
  • Stapler
  • Cardboard scraps

2

How to Make Paper Medallions (the Easy Way!)

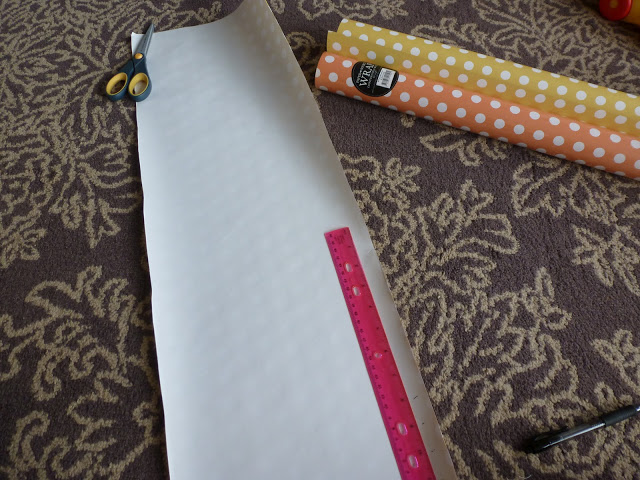
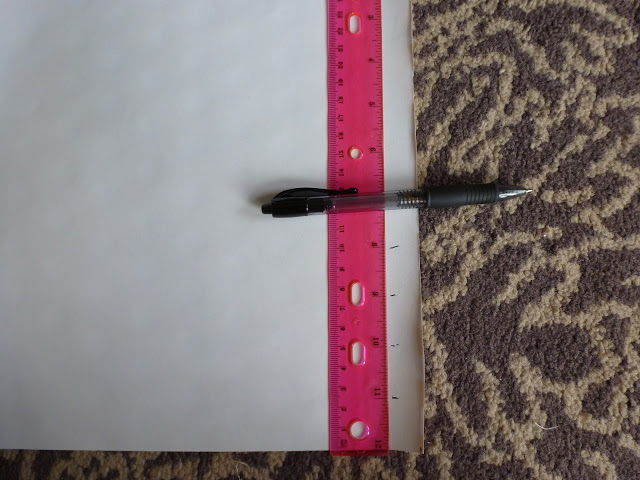
1. First cut a strip of your paper however wide you want it (this will determine the ‘radius’ of the pinwheel). Somewhere between 5-10 inches wide works well. Just eyeball it. Then use your ruler to start marking off a few folding guides. The wider the paper, the more space you want between the guides. So for a 10 inch wide strip of paper, the folding marks might be 1 inch apart, while a 5 inch wide strip of paper might have marks 1/2 inch apart. You can play around with it.
3
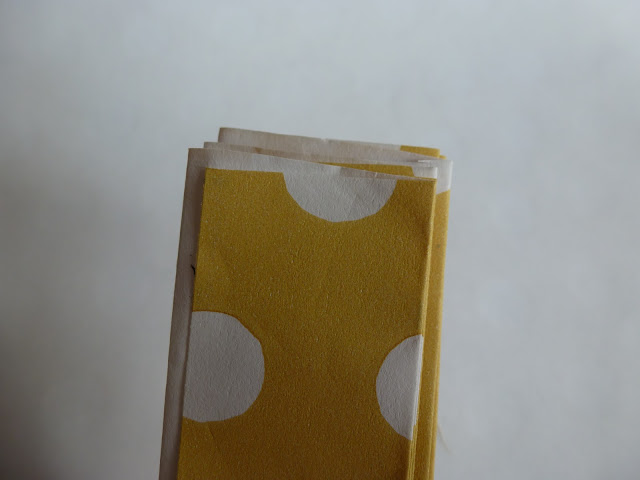
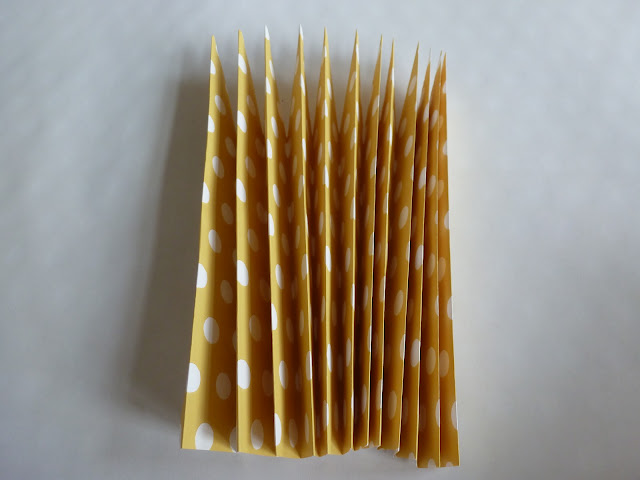
2. Here’s a big shortcut – a lot of tutorials tell you to measure out folding marks along the entire length of the paper and then score them. That takes way too long, and there is no need to be that precise! I just made 4-5 marks and then started folding the paper accordion style (just like you used to do in grade school to make a fan). I used the marks as a guide to start folding and then kept folding the paper back and forth over each other until it looked like this:
4
You’ll notice that the paper isn’t lined up perfectly (like it would be if I scored each fold in advance), but that is totally ok!
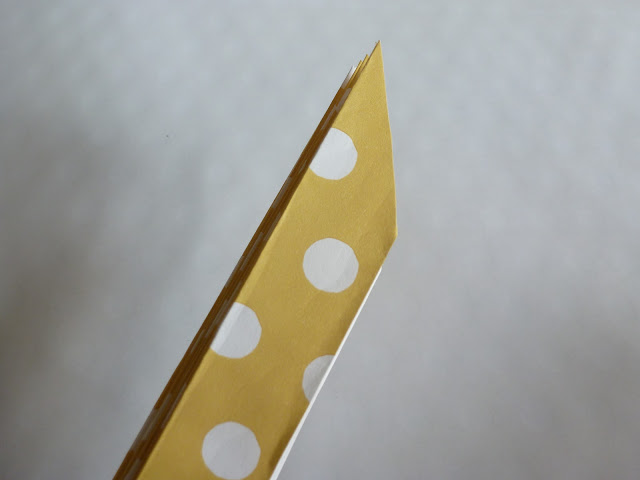
3. Then snip off one end at an angle to make pretty points on the medallion:
5
It will look like this when you unfold it. Repeat the same process by making two more of these (be sure to cut the same width of paper and make the same sized folds on each of them).
6
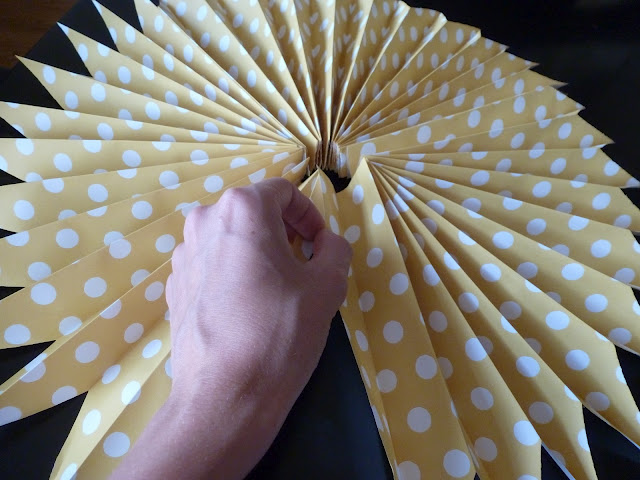
4. Once you have 3 pieces of accordion folded paper, attach them together using double sided tape. The pinwheel starts to take shape!
7
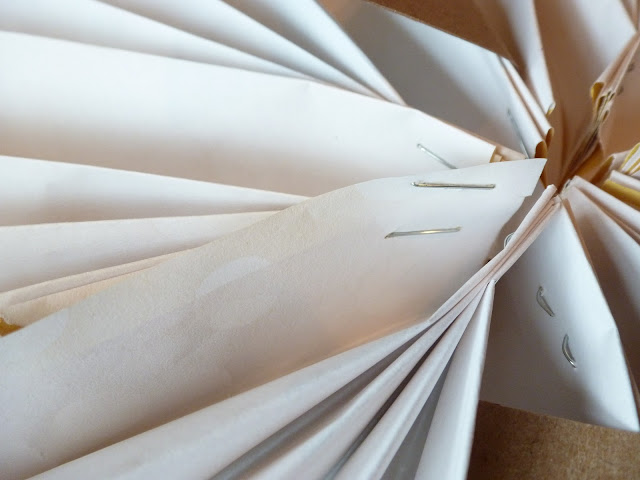
5. Another tricky step that the tutorials I read didn’t do a great job explaining is how to get the pinwheel to hold together nice and tightly in the middle. I found that stapling a few of the folds together on the backside of the pinwheel did the trick. You’ll be covering up the center of the medallion with a circle so the staples will never show:
8

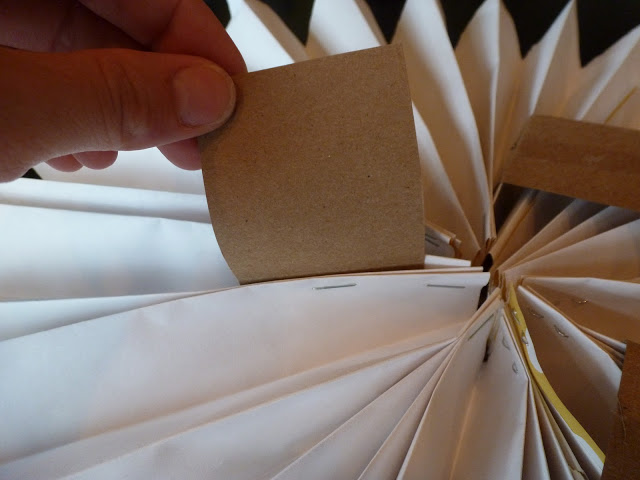
6. Here’s the best trick of all! I owe my husband for coming up with this genius idea for how to create a flat, sturdy surface for the pinwheel to adhere to the wall. As you can see the folds of the pinwheel don’t make for a great surface. You could try putting a bunch of masking tape on the back and hope it sticks, but there’s a good chance it will fall off the wall at some point during your party.

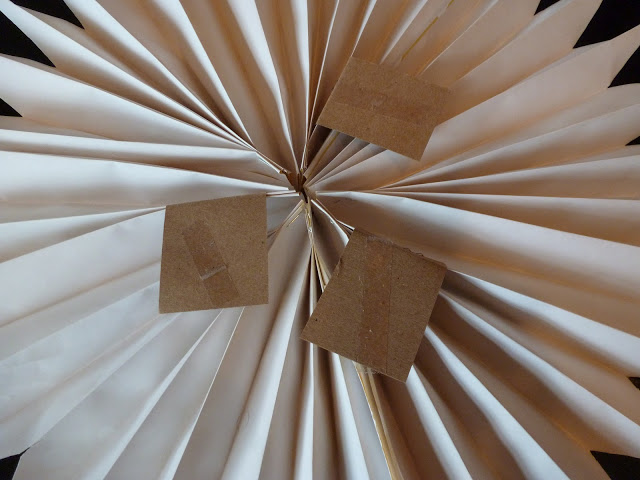
So what we did was first cut 3 small strips of cardboard and stapled them to the back side of the pinwheel and then folded them over:

9
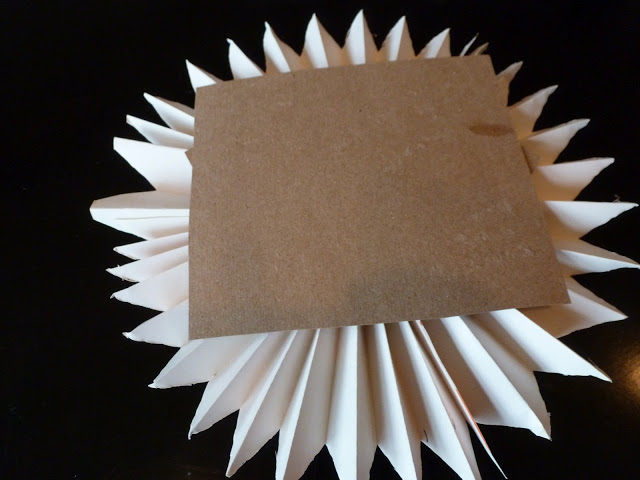
We then put a piece of double-sided tape and hot glue on top of each, so we could adhere a bigger piece of cardboard to create a flat hanging surface:
10
From here you could just put a couple big loops of painters tape or masking tape and hang on the wall! Mine stayed up on the wall for several days before I finally brought myself to take them down. They are so pretty, I think they would make a neat permanent arrangement in a nursery, dining room, office, etc.  If you plan to do something more permanently, you might want to try something more like 3M Command Strips.
11
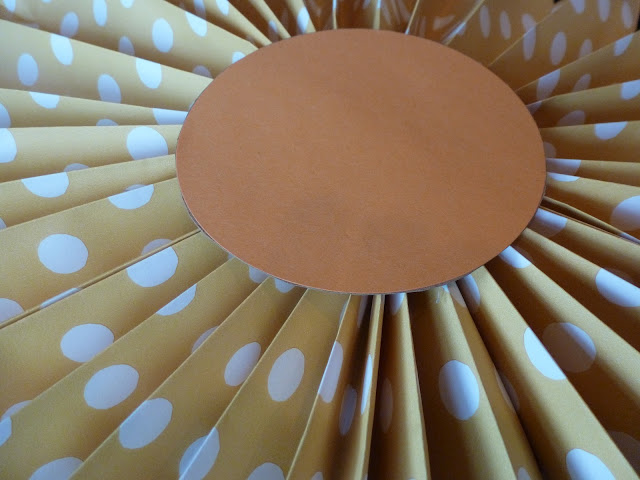
7. Finally, on the front of the medallion, I hot-glued a circle of card stock to form the middle:
12
And that’s it!  You can see I purchased a few tissue paper fans to incorporate into the paper ones I made.  I just hot-glued a card stock circle in the middle of those as well:
13
 
Post by Haeley of Design Improvised

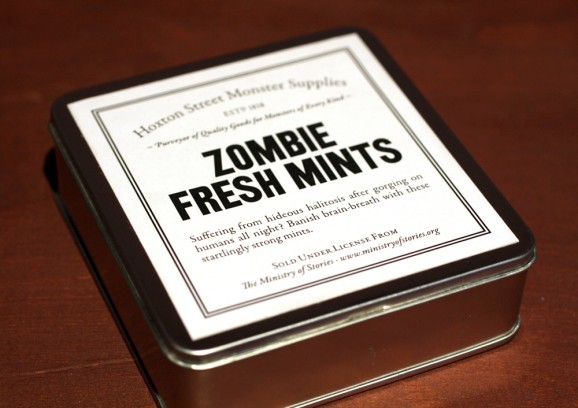
Monster Grocer: Hoxton Street Monster Supplies

October 25, 2012

Post by Aimée Lowry & Bettijo B. Hirschi from PagingSupermom.com
Monster Grocer

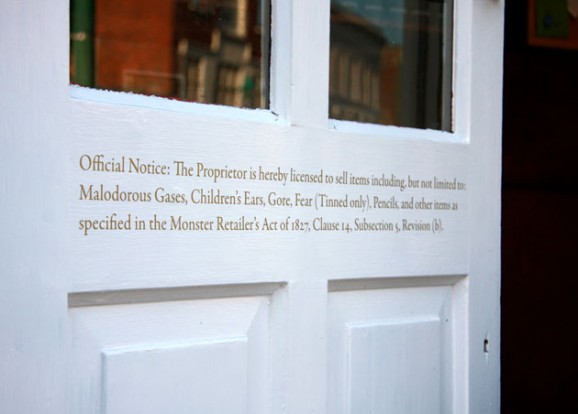
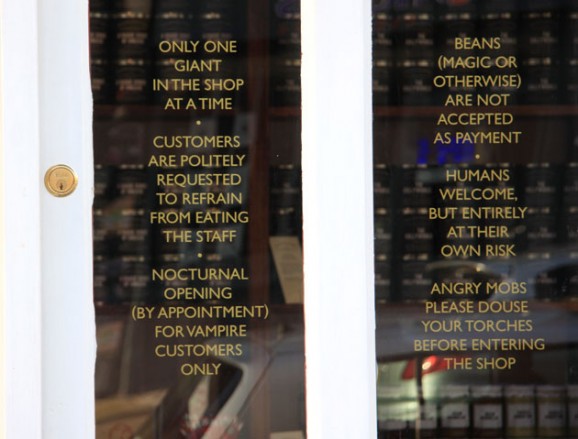
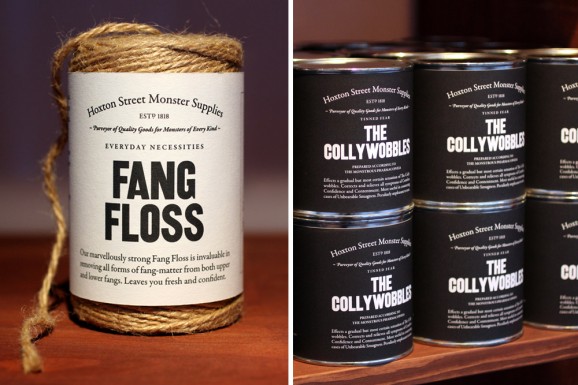
I was recently browsing Pinterest looking for party favor ideas for my annual Halloween dinner party, and I came across the very clever Hoxton Street Monster Supplies, East London’s premier purveyor of everyday goods for the living, dead and undead. According to their website, they stock a pharmacopoeia of different types of fear, a complete range of edible human preserves and everyday household essentials like Fang Floss and Zombie Mints. Sort of reminds me of this book, which is one of my favorite Halloween picture books.

I wish I could visit their store — but I’m afraid I don’t get to London much (or ever!) I fell quickly in love with the entire, clever concept of it, and if I ever have a monster supply store (you know, because there is such a big market for it), I would do it exactly like this.

Monster Grocer 2

Monster Grocer 3

Even cooler, the Monster Supply shop is really just a front for the Ministry of Stories, a volunteer organization (partially funded by sales from the Monster Supplies) that assists young people in writing stories and provides workshops and one-to-one mentoring from adult writers. Neat-o, right?!

Monster Grocer 4

Back to the Monster Supplies… the packaging is totally polished and so clever I could just die! You really have to read the labels; they are so well written and will crack you up. Everything is so completely thought out and perfectly executed. It makes me wish I was a monster and needed some Fang Floss!

Monster Grocer 5

And how cute is this?

Monster Grocer 6

Monster Grocer 7

Each year I have a tough time finding the perfect party favors for my Halloween party — I want something that is somehow spooky but still fitting for a more sophisticated event. Most of the traditional Halloween favor ideas are too cutesy or childish.

The first year that I did my now annual All Hallow’s Eve dinner party, we gave out these hard-backed Frankenstein and Dracula books — Barnes and Noble used to sell cloth-bound miniatures of the classics that were the perfect size and price to be a party favor. We have also given the Ghost playing cards, a metal candle snuffer and in more recent years I have opted for making something homemade like the poisonous lip balms from 2009.

So clearly I was giddy to see the Hoxton Street Monster Supplies, which are pretty much a gold mine of classy but frightful party favor ideas. Which Monster Supply is your favorite??

Reposted with permission by Aimée Lowry & Bettijo B. Hirschi from PagingSupermom.com

Meet Mimi Kirchner

October 24, 2012

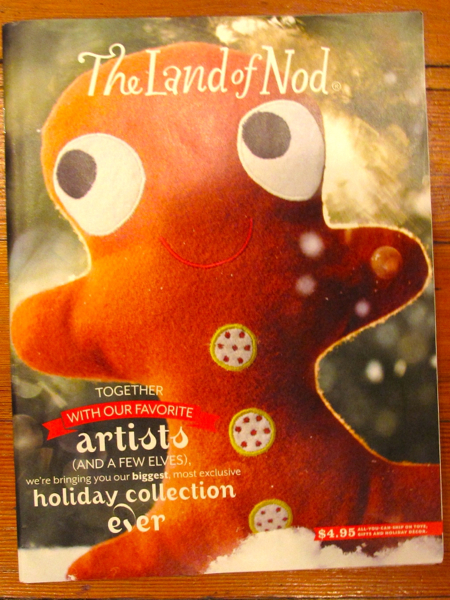
Today is the target day for the Land Of Nod Holiday catalogs to arrive in peoples’ homes- So now I can shout out the news!

1

A target date means that some people already have them and others not quite yet. Luckily I received a special delivery catalog so I’ve seen my dolls on paper and also at the website.

2

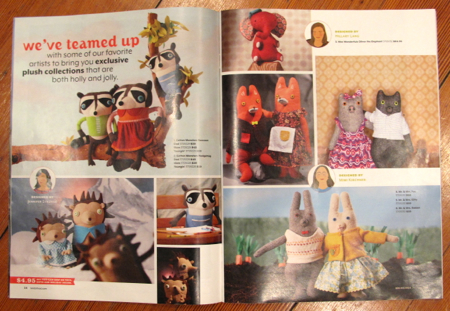
As you can see, they are producing a fox couple, a kitty couple and a bunny couple. The dolls are being made in India. At the top of the page is a sweet elephant designed by Hilary and on the left are some fantastic Cotton Monster creatures. I will confess that when I was in Chicago in September, I visited the Land Of Nod offices and the Cotton Monster hedgehogs were the ones I wanted to sneak into my bag and take home!

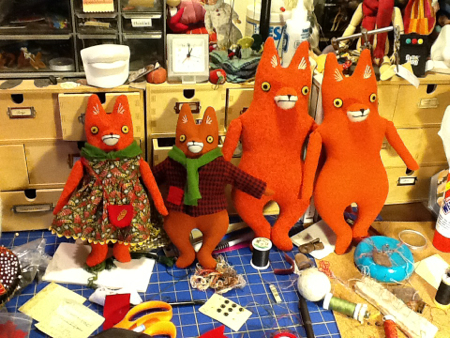
It is hard to understand the scale from these photos, but they are smaller than the ones I make and sell. Here is a photo I took (a YEAR ago!) when I was working on the prototypes-

3

In the course of the project, various bits and pieces changed because of child safety or problems with getting the right materials. The finished foxes have not got scarves, shawls, purses… but, if you wanted to, you could make your own, right?

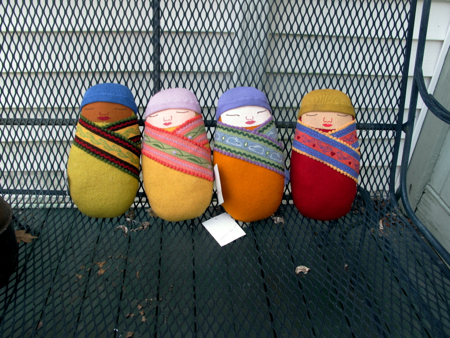
There are also 4 babies- what I call swaddled babies and they are calling Bundle Babies (Love that name!) The Land Of Nod version has an awake side and an asleep side and is also smaller than my art pieces. Here is a photo of the prototypes (asleep side) they sent me for approval last Spring.

4

Here is a link to the catalog pages- limeyelloworangered

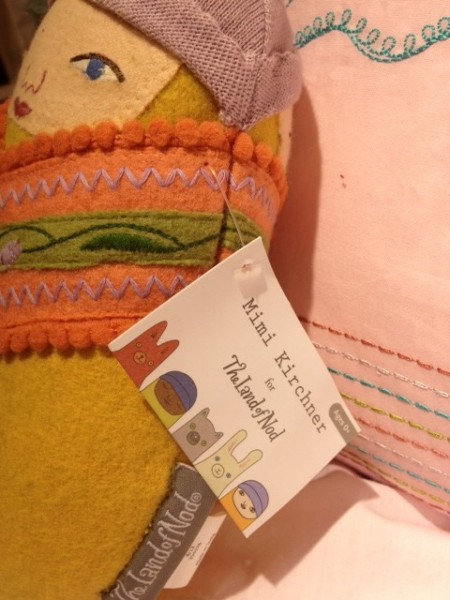
If you click over to Wee Wonderfuls, you can read how Hilary went to a Land Of Nod store and was able to see a few things in person. She sent me this photo of the doll and also the tag- how exciting is that!

5

It has been a long process- more than a year. This introduction is just one more step in a journey that has been all new to me. I am now going to watch with curiosity, excitement, anticipation, how these babies make their way into the world!

Mimi Kirchner is a Boston-based artist who creates original, one-of-a-kind, handmade dolls.

Four Ingredient Chicken Chili

October 23, 2012

In a nod to football season, crunchy leaves, and limited time for making dinner now that everyone’s back on a schedule this might be the tastiest and easiest “home-made” chicken chili this side of the canned soup aisle.  The highlights of this soup?  It requires four ingredients.  My three year old ate it.  It’s low-fat. My chicken chili loathing husband had three servings.  It takes about 20 minutes to make it and cook it.  It doubles easily. You can freeze it.  It’s delicious!

Here we go:

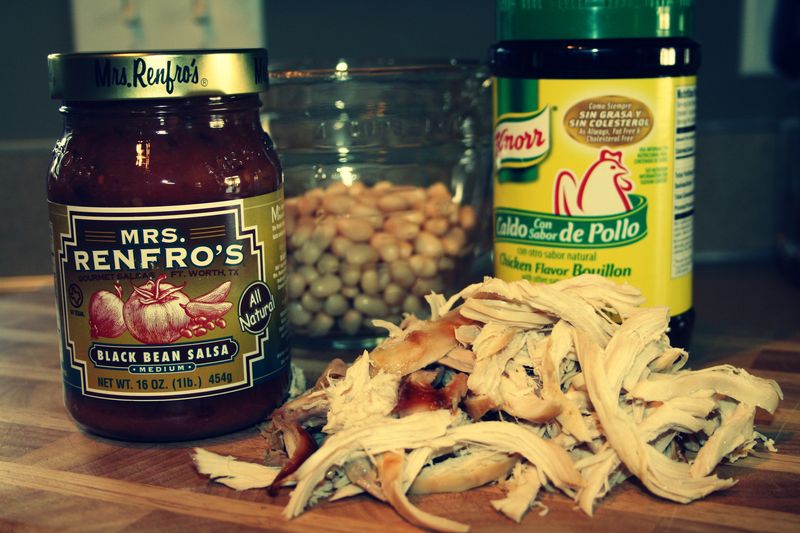
Chicken-Chili-1

You need:

-1 jar of salsa (I like to use black bean salsa because it has more “stuff” in it, thus giving the soup more flavor and texture–but any you have in your pantry will do.)

-1 can of Great Northern Beans, drained and rinsed

-2 cups of cooked chicken (I use left-overs from those rotisserie chickens you get at the grocery story.)

-2 cups of chicken broth (Or more….depending on how thin or thick you like your chili.)

Serves about four people.

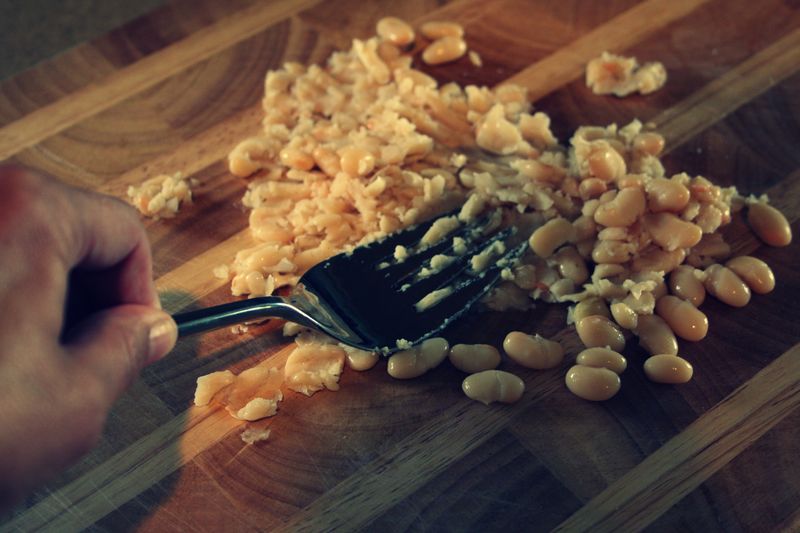
Step 1:

Chicken-Chili-2

Smash 1/2 of your beans to create a paste.

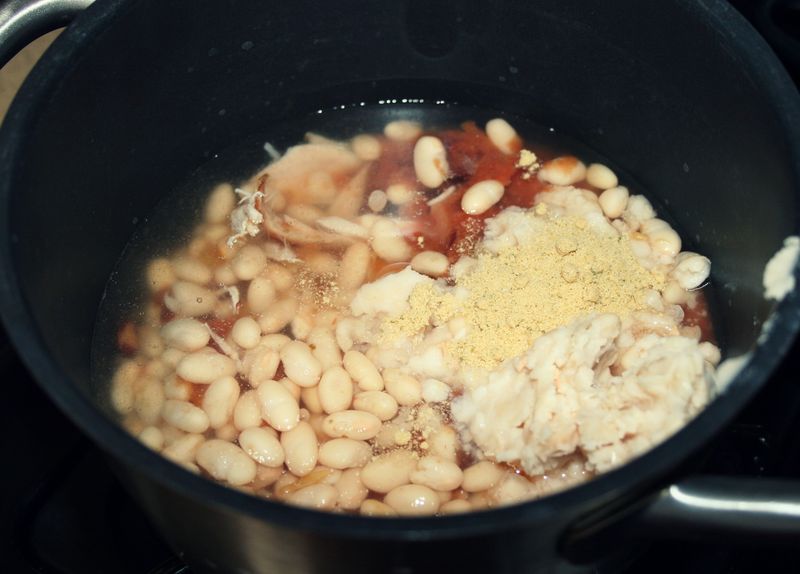
Step 2:

Chicken-Chili-3

 Throw everything in a pot together.

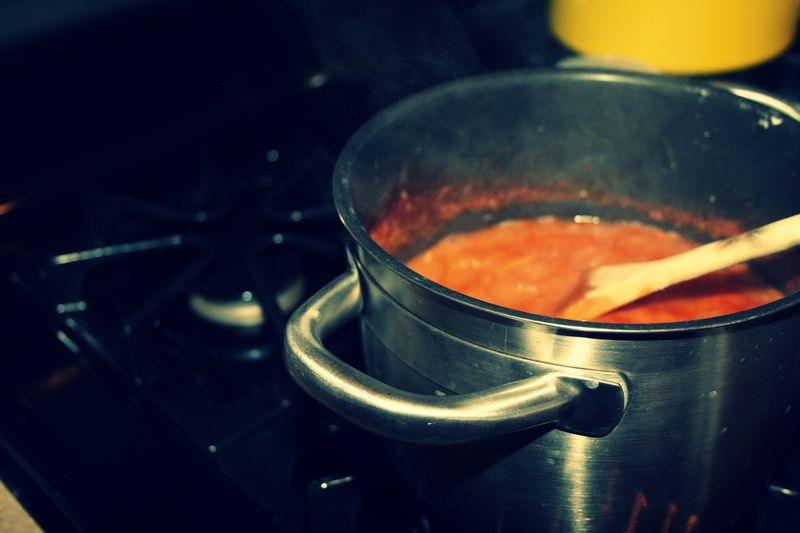
Step 3:

Chicken-Chili-4

Let it all simmer together.  It will be ready in as little as fifteen minutes but you can absolutely let it simmer longer if you’d like it to really thicken up.

Step 4:

Chicken-Chili-6

Top with sour cream, cheese, and avocado and eat, eat, eat.  I served mine with tortilla chips and corn bread and fall goodness was just oozing out of my kitchen.  I think throwing in some canned corn would be a fantastic addition to this chili as well!

Post by Maggie Terryn : Mom Colored Glasses

DIY Miniature Enchanted Forest

October 22, 2012

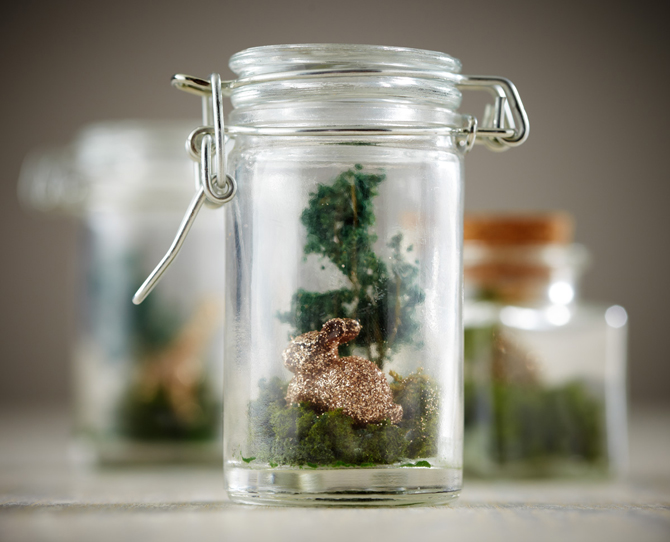
Blog_Mini_Forest_Final

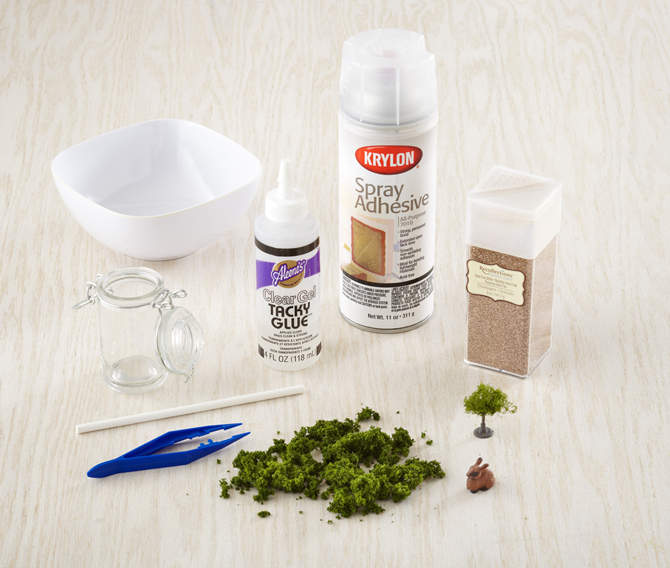
Whattya need?

  • Miniature animals
  • Spray mount
  • Glitter
  • Glass jar
  • Clear glue
  • Fake moss
  • Model tree (available at most hobby shops)

Blog_Mini_Forest_Materials

How do I make a Miniature Enchanted Forest?

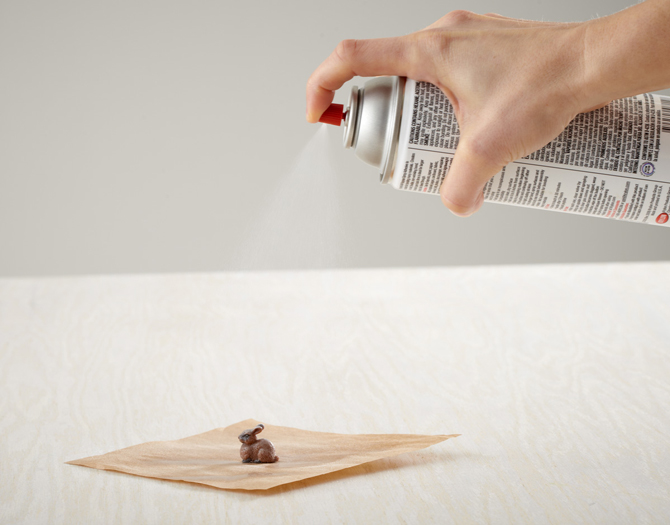
Step 1: Grownups only. In a well ventilated area, lightly spray your tiny animal with spray mount.

Blog_Mini_Forest_Step_01

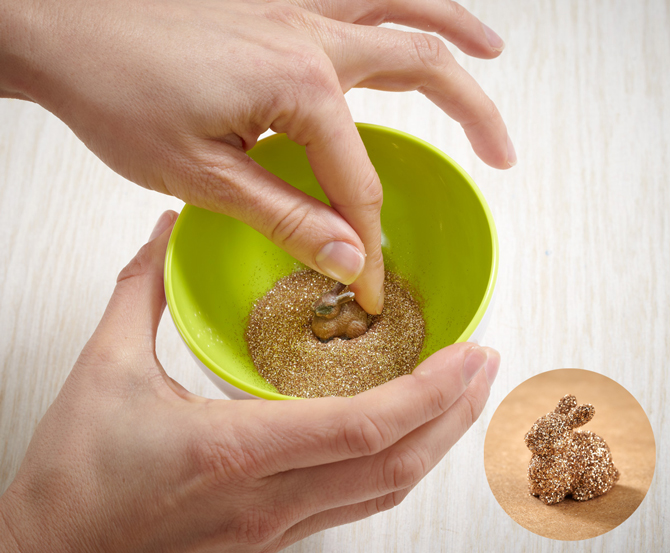
Step 2: Toss the animal in a small bowl or baggie of glitter until completely coated.

Blog_Mini_Forest_Step_02s

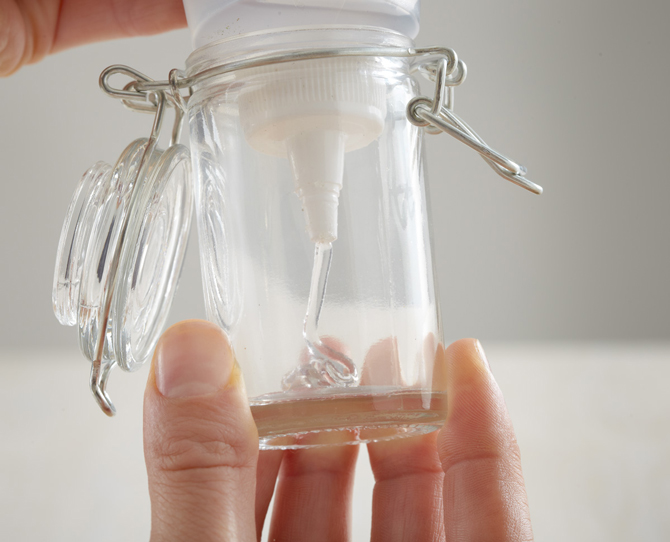
Step 3: Squirt clear glue into the jar to coat the entire bottom portion.

Blog_Mini_Forest_Step_03

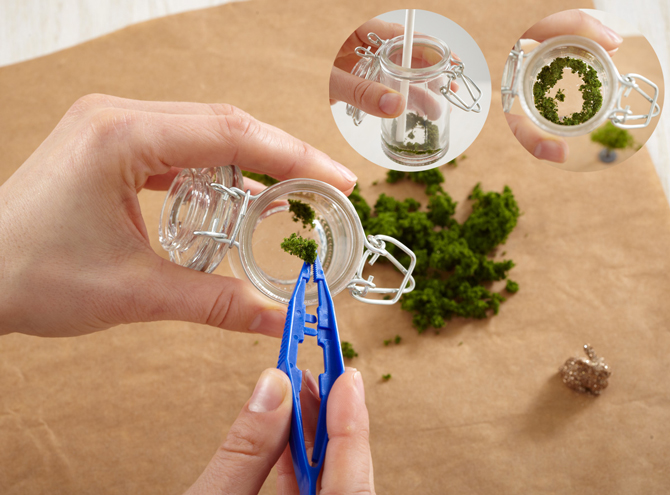
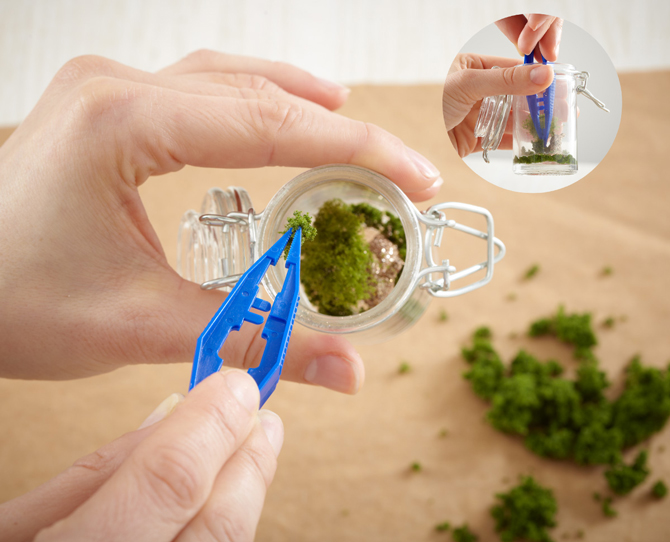
Step 4: Add fake moss around the perimeter of the jar. It may be helpful to use a small dowel rod to position the moss in place.

Blog_Mini_Forest_Step_04s

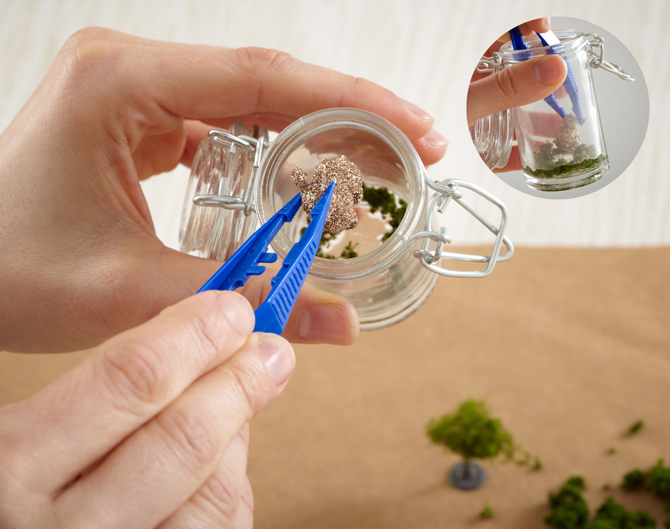
Step 5: Place the tiny animal into the jar and position towards the middle. Press down to be sure it adheres well to the glass.

Blog_Mini_Forest_Step_05

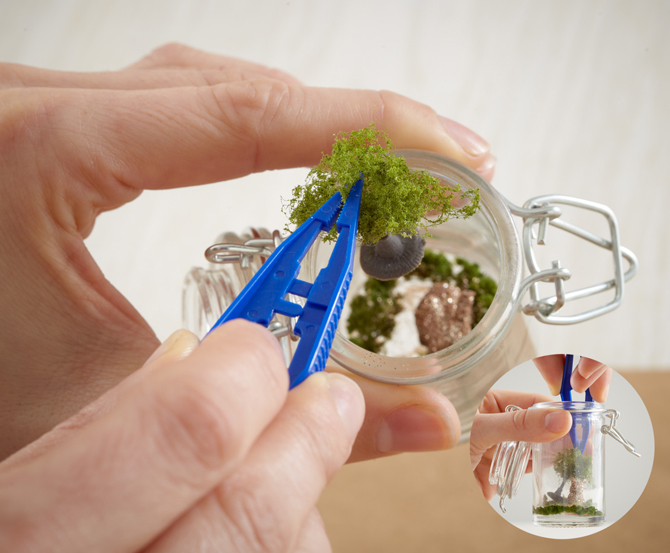
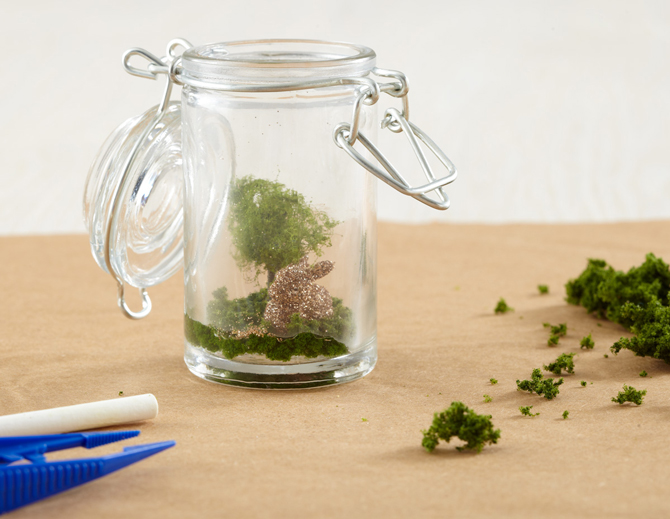
Step 6: Place the model tree next to the animal. Again, press down to be sure it adheres to the glass.

Blog_Mini_Forest_Step_6s

Step 7: Fill in any empty spots with more moss.

Blog_Mini_Forest_Step_7s

Blog_Mini_Forest_Step_8

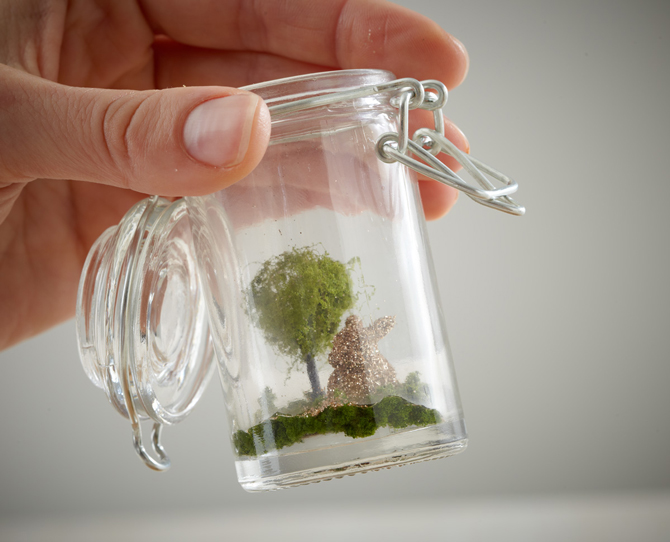
Step 8: Leave the jar open overnight to allow the glue to dry completely.

Blog_Mini_Forest_Step_9

*To see a full size enchanted forest, visit our Pop Up Toy Shop in New York City at 136 Prince St. Opens November 2.

A Very Un-Scary Halloween Pumpkins 3-Ways

Post by Niki of Papery & Cakery
Unscary Halloween Pumpkin Decorations

Oh Halloween. You’re back in my life again. My, how I have missed you.

Who doesn’t love Halloween? I prefer to think of it as the “gateway” holiday. A nice, easy way to enter the tunnel towards the biggies like Thanksgiving, Chanukah/X-mas and New Years Ever.

I love costumes. I adore candy. But I don’t really dig the scary stuff. Horror movies have never been my style {I’ve never even seen one, the commercials are enough to give me nightmares}. So you won’t find scary skulls, mummies and headstones in front of our house this year. Oh no. This year I’ll have the most “un-scary” Halloween house on the block. But it will still be awesome. Very very awesome.

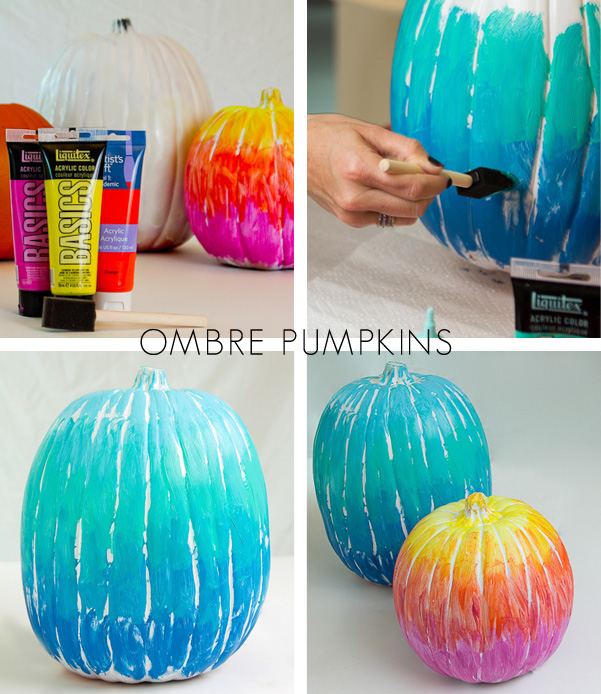
Let’s start today with pumpkins three ways.

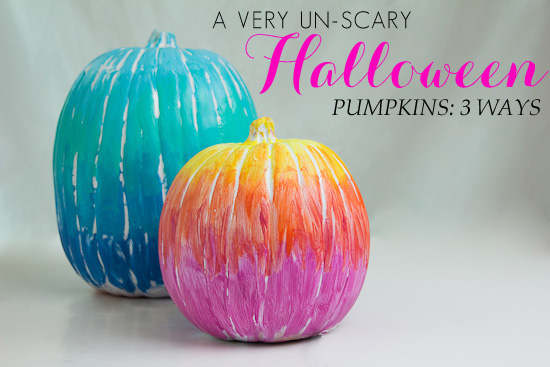
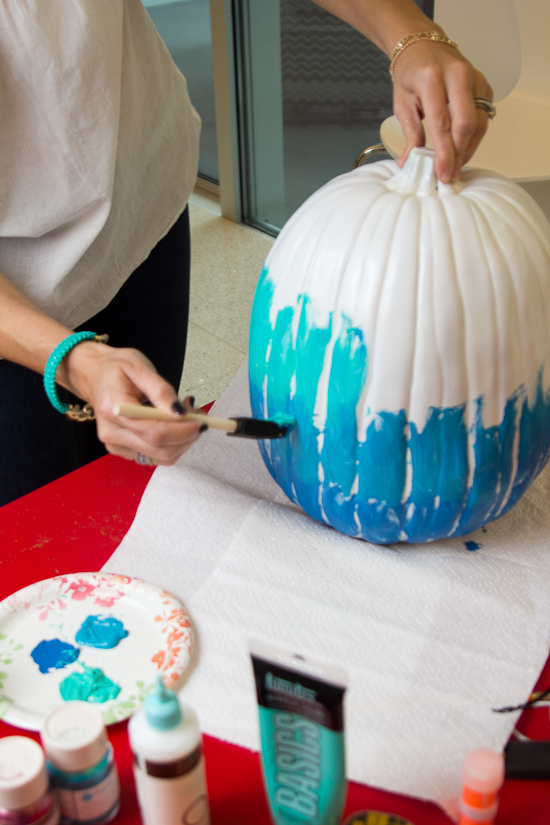
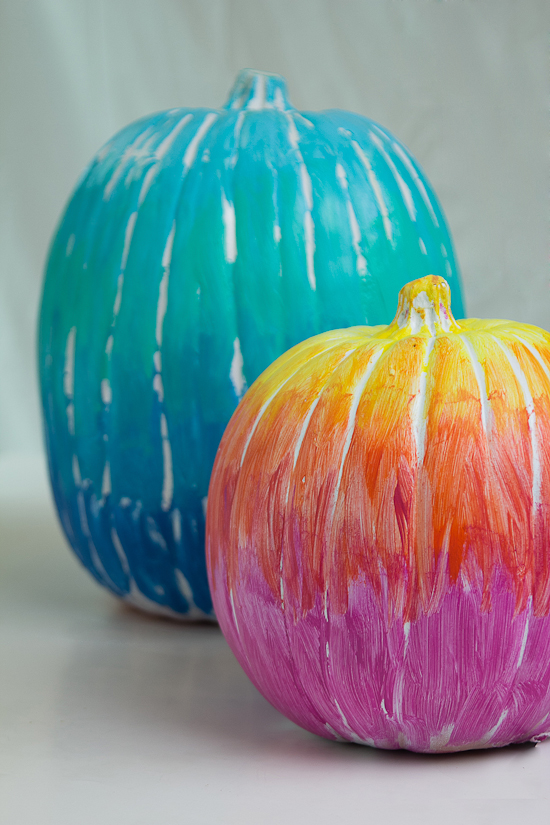
1. Ombre Pumpkins

Unscary Halloween Pumpkin Decorations - Ombre Pumpkins

Unscary Halloween Pumpkin Decorations - Ombre Pumpkins 2

Unscary Halloween Pumpkin Decorations - Ombre Pumpkins 3

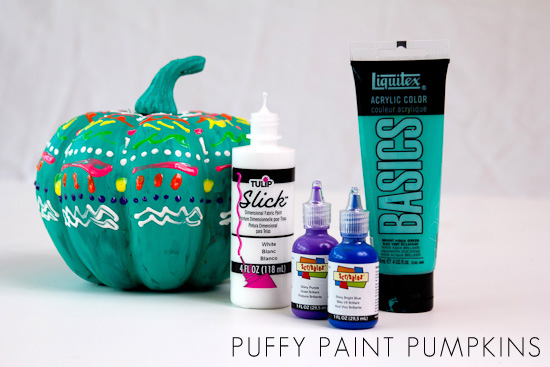
2. Puffy Paint Pumpkins

Puffy Paint Pumpkins

I spotted this and had to try my own version. Again, a great kiddo project!

Step one: Paint the base of the pumpkin as you’d like. I used turquoise acrylic paint.

Step two: Cover with puffy paint in your colors/design of choice. I wanted bold neon colors in fun and quirky patterns.

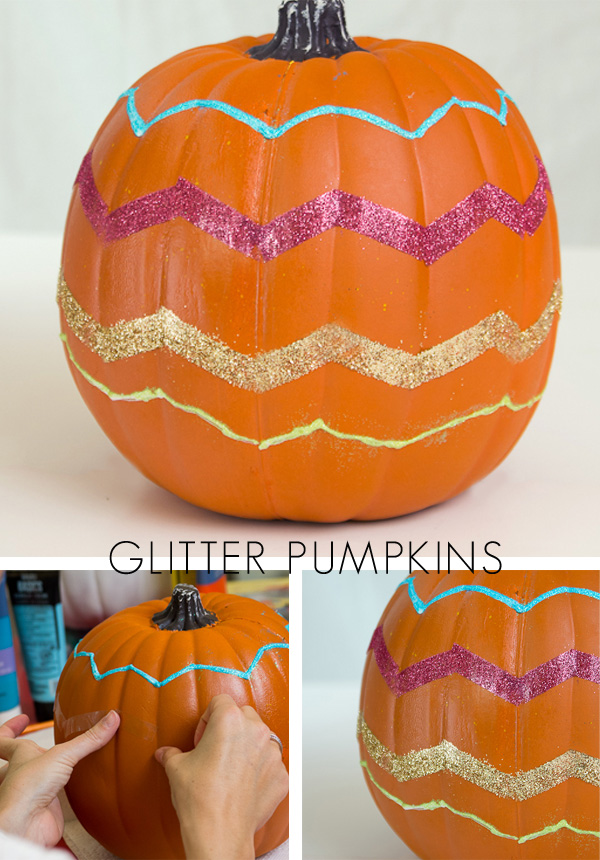
3. Glitter Pumpkins

Glitter Pumpkins

Obviously I couldn’t make it through a DIY post without adding a touch of glitter.

Step one: Use glue {I actually used puffy paint as my glue in this case because Elmers was running down the sides} or ddouble sided tape {or both} to come up with a pattern. I stuck with chevron.

Step two: After each adhesive is applied, sprinkle glitter on top. Let the glue/paint dry and dust excess glitter off. You can dust the excess off of the double sided tape immediately.

Happy Un-Scary Halloween!

xoxo,

Niki

Post by Niki of Papery & Cakery and images via Stephanie Soraya Photography {954}-579-7761