Close

Blog

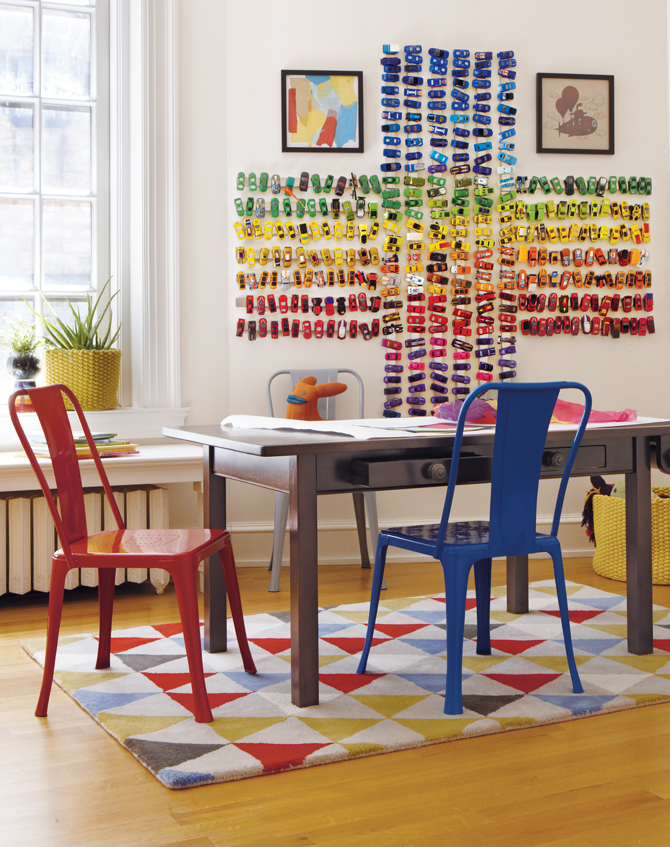
DIY Magnetic Car Mural

September 21, 2012

Magnetic_MatchboxA_25

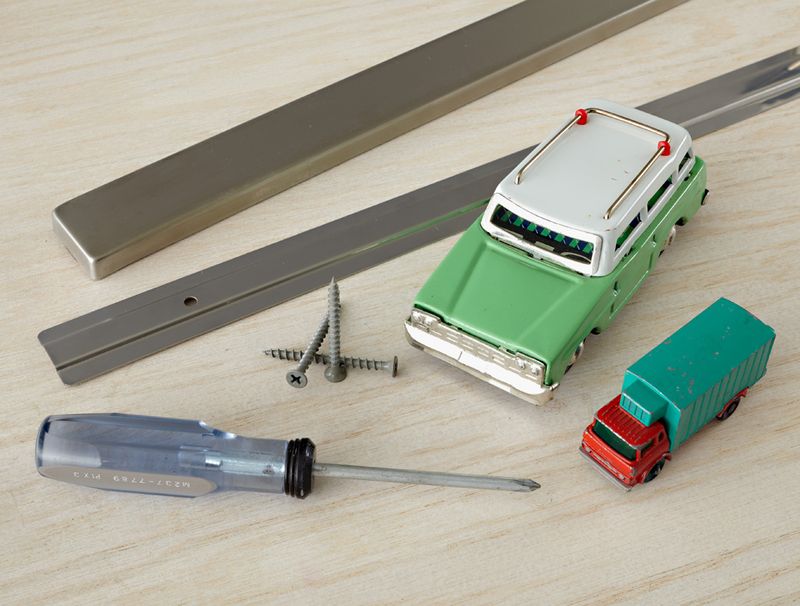
Whattya need?

  • Wall-mounted magnetic strip
  • Screws
  • Screwdriver
  • Metal toy cars* (toy driver’s license not needed)

CraftBlog_MagnetGrid_Materials

How do I make a Magnetic Car Mural?

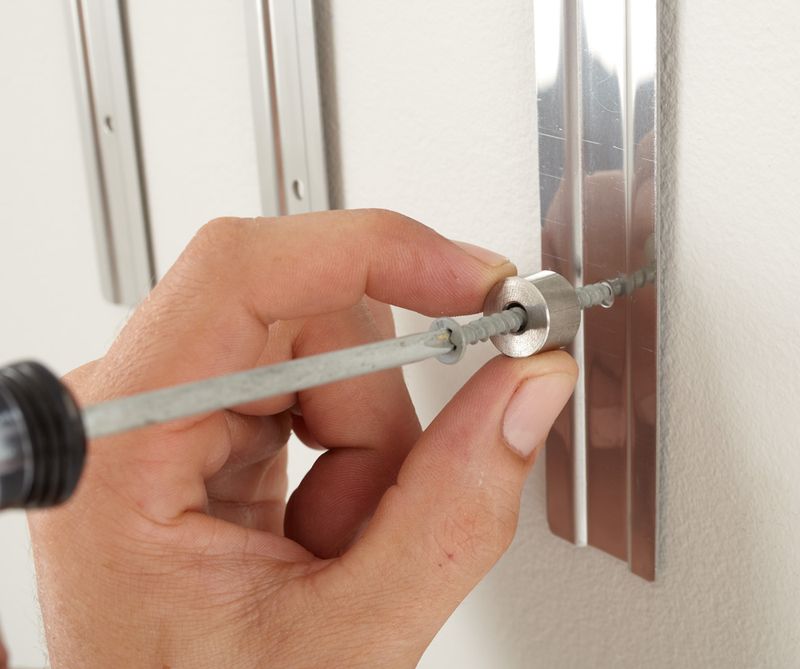
Step 1: Screw the mounting plate for the magnetic strip to wall.

CraftBlog_MagnetGrid_Step_1
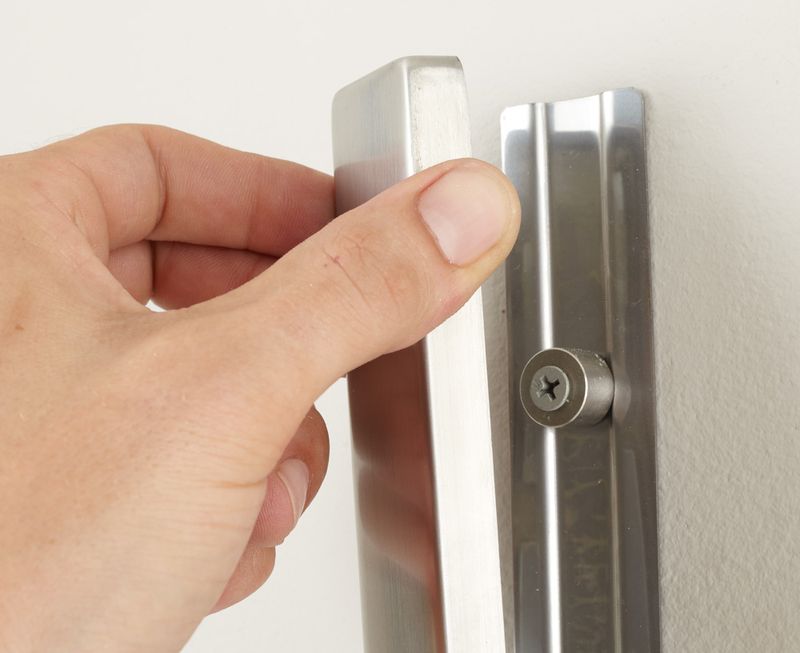
Step 2: Lock magnetic strip onto mounting plate.

CraftBlog_MagnetGrid_Step_2

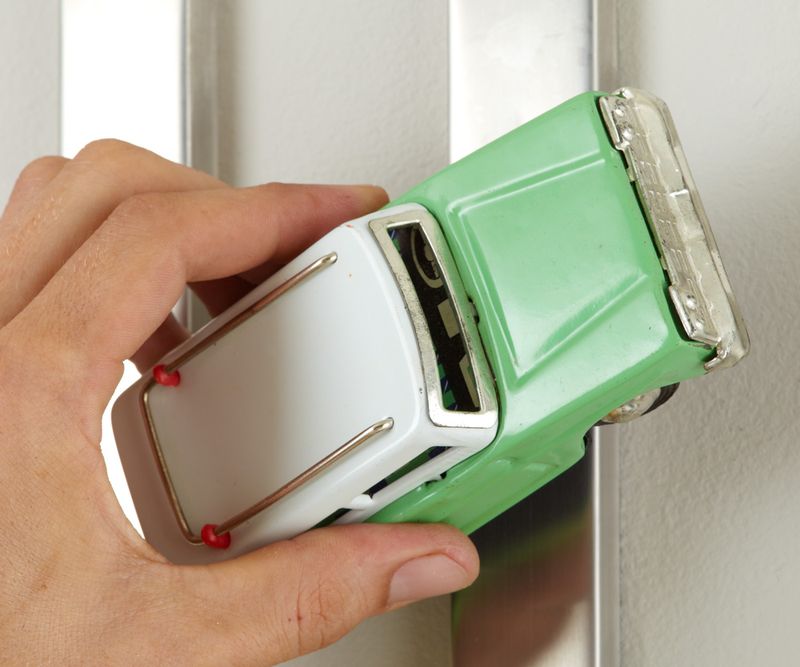
Step 3: Attach metal cars to magnetic strip, arranging them by color if desired.

CraftBlog_MagnetGrid_Step_3

 *We used very old cars, the new ones aren’t really made of metal that’s magnetic

Shared Spaces: Sharing with the New Baby

September 20, 2012

SSBigSisLilSis

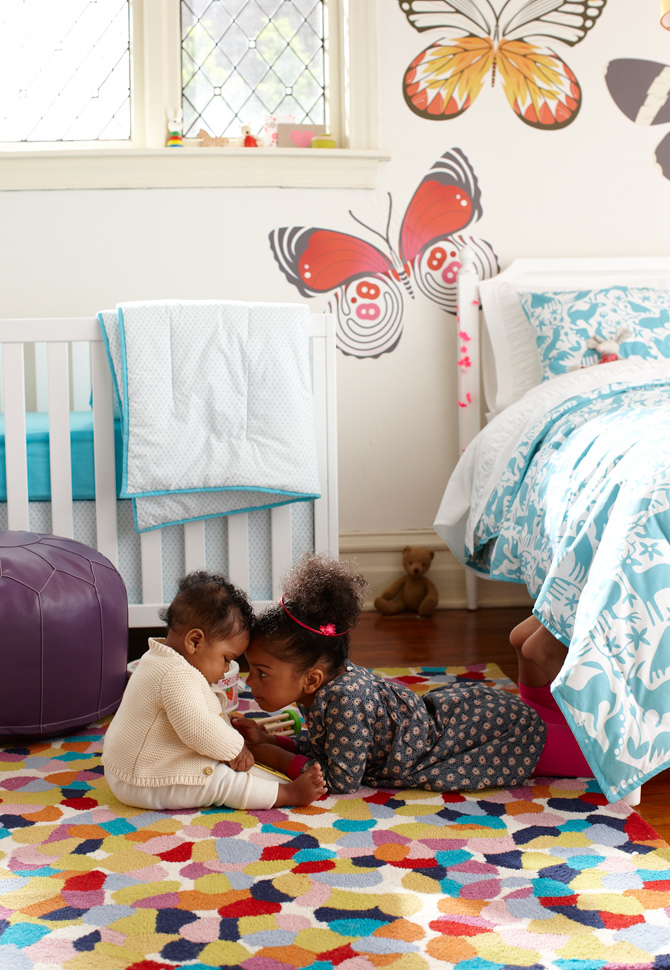
Many children share rooms, and putting a baby and preschooler into one bedroom is a common challenge for many of our customers. So how do you make a nursery that’s sweet enough for baby, but also works for big sister? There are certainly a lot of ways to go about doing this, but I think the key is to edit, edit, edit. Functionally you need a lot of stuff in this room, so the simpler the design elements the better.

Start with the textiles. If you like the idea of a themed bedding set (Princess, Zoo, Solar System) that’s definitely an option. But, choose a themed set for ONLY the crib or the bed, but not both. For example, if big sis wants a Princess & the Pea Quilt, go with that, then choose a simpler textile for the crib that pulls some of the colors from the Princess Quilt but doesn’t have a theme of its own. Conversely, if you want a circus crib set, then choose a more classic pattern for the big kid bed, like plaids or dots.

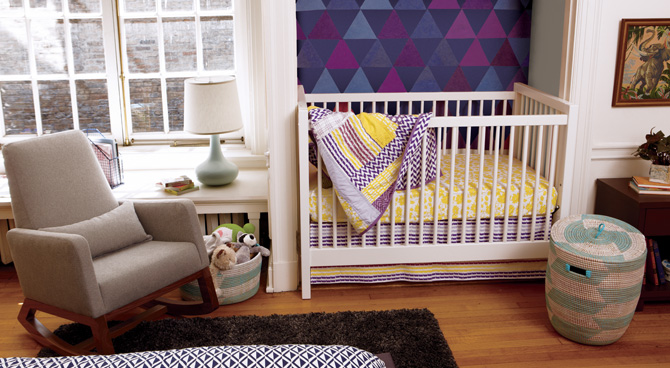
For the room shown above, we opted to stick with a common color and not incorporate a theme into the bedding. The aqua is serene enough for baby, but still packs enough punch to be a playful choice for big sis. Also, it would work nicely for a boy/girl version of this room as well.

Choose one element in the space that has a lot of color, then you can pull from that for the other pieces in the room. In this case, the rug is the focal point. I recommend a plush wool rug that baby can play on and will hold up to a lot of abuse. The design of this rug will definitely grow with the children. Down the road you can incorporate more bits of navy and purple or even red, so it gives a lot of flexibility.

Also, it’s important to make the space flexible. One afternoon it might be a place for baby to learn to crawl. The next, big sis may transform it into a tea party for her dolls. So, think about options like poufs or a Nod Chair that can be easily dragged around by the kids to transform the space.

And to decorate the space, decals are a really nice option. Again, they’re flexible so you can change them as your kids’ tastes evolve and change. Another option would be a gallery wall where you can incorporate a mix of photographs, art and creations made by your children. This can be flexible and change over time as well. Also, it’ll give both kids a place to express themselves in the room.

Lastly, any of the above could also work for a nursery/guest room. We see the need for these spaces quite frequently. Using the above ideas and healthy dose of editing, you can make a space that works equally well for the daily routine of a nursery and holiday visits from Grandma.

By Danielle Kurtz

Danielle is the Creative Director at Nod and an over-protective mother of two. She’s also completely obsessed with Pinterest, Twitter and her Kindle, but not necessarily in that order. Danielle loves to craft, sew and crochet, but all her supplies have a layer of dust on them about 5-years-thick, wonder if it's just a coincidence that her oldest kiddo is 5 years old?


Teaching Location DIY

September 19, 2012

We have this amazing parent at the school where I work who volunteers in one of our kindergarten classrooms on her days off.  And she doesn’t just volunteer in the sense that she’ll make copies, record scores, sort papers, or help run centers…..she’ll create incredible learning activities for kids on her own time and bring them in and donate them to the classroom.

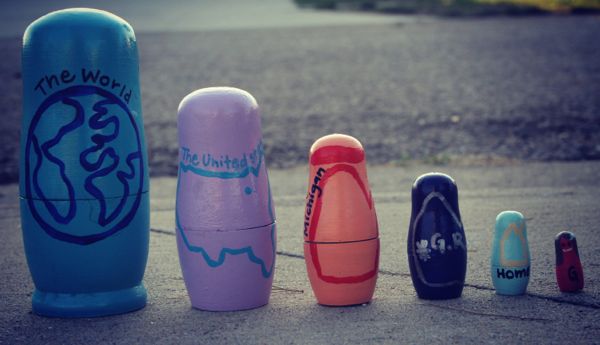
When I saw the set of Russian nesting dolls that she made last spring to help teach kids general location I knew I had to make my own set to use with Georgia and share with all of you.  General location is a tricky thing to understand for young kids.  The idea that we live in a city that is inside a state that is inside a country that is part of a continent that is part of the world is tough.  And kids older than kindergartners have a tough time with this too.

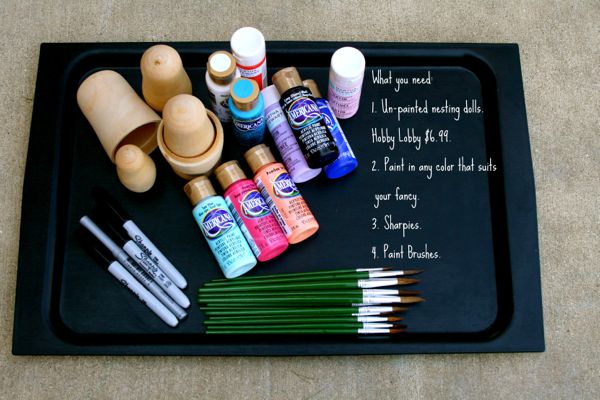
These nesting dolls are a perfect illustration of how this concept works and helps students ‘see’ that a city is smaller than a state.  Here’s what you need to get started:

Nesting-Dolls-DIY-1

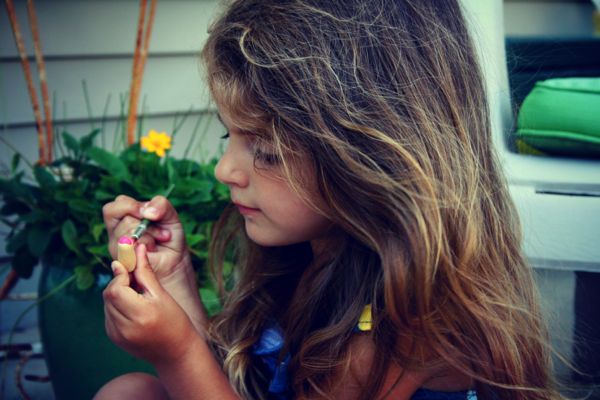
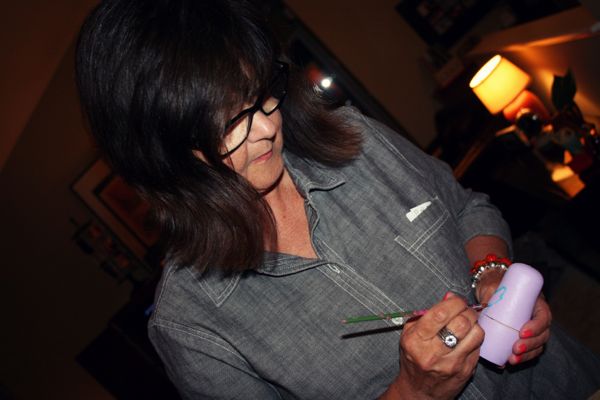
First:  Paint each of your dolls a different color.  I let Georgia help me with this part.  And it wasn’t the neatest thing to do together–but she loved it.

2

3

4

Second:  Let your dolls dry completely.  I let mine sit for about 24 hours.

5

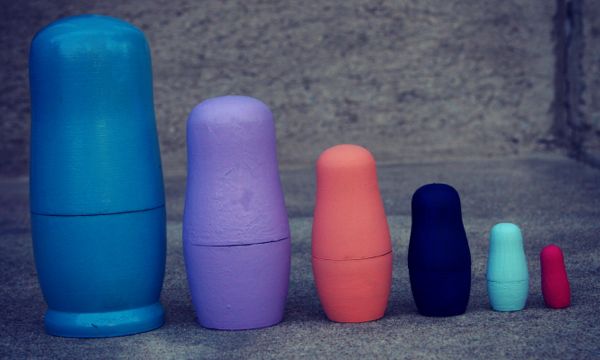
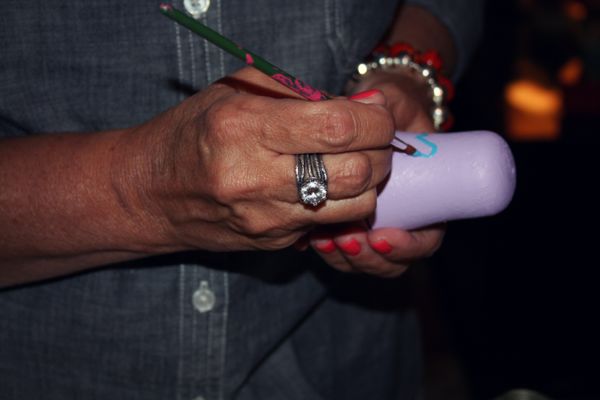
Third:  Paint your dolls with the appropriate locations.  I painted Georgia, our house, our city, our state, our country, and the world on mine…..from smallest to largest. I had to employ the help of my very talented mom to paint a few things.

6

7

When they’re all done, spray them with a shiny acryllic spray and let them dry.  It won’t take more than an hour for the dolls to dry.

8

9

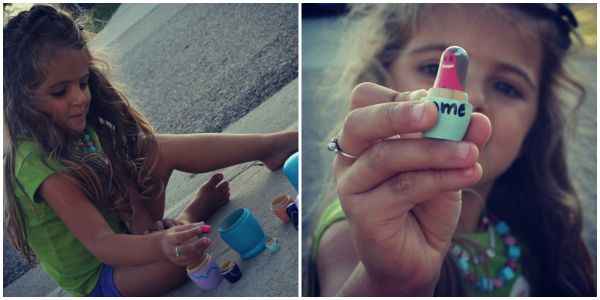
Then, show your kiddo how the dolls fit together and explain to them why each one goes into the next one.  Georgia loves the little one that I painted to look like her and thinks it’s great how perfectly it fits inside her “house.”

10

And once we went through it a few times it was amazing how a three year old could tell me when I asked her, “We live in Michigan and it’s in the United States, and it’s part of the world.”  She loved telling it to me while she placed each doll inside the next one.  Hands-on learning is fantastic at any age, but especially for the pre-school set who learn best by doing.

11

Do this!  It’s so much fun and the gratifying feeling that comes with watching your child grasp a tricky concept is a pay-off you deserve as a parent.  Location, location, location…….it’s important!

Post by Maggie Terryn : Mom Colored Glasses

Shared Spaces: Sisterly Love

September 18, 2012

SharedSpaceTwins

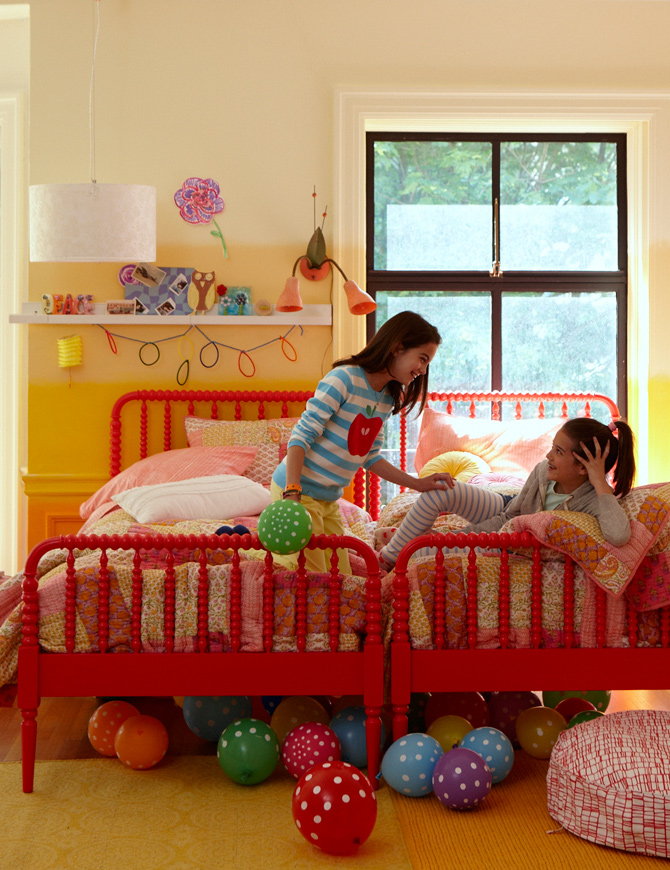
I love this room! It absolutely takes me back to my own childhood. My big sister is definitely my best friend, and though we do occasionally disagree, we’ve been close our whole lives. In fact, when I was about 9 we moved into a larger house and I got my own bedroom (yeah!), but most nights you could still find me sleeping in my sister’s room, we were (and still are) a bit inseparable.

When designing a bedroom for twins (or siblings very close in age), I think the most important thing to remember is, don’t make them compromise on everything. Even though most nights they may want to push their beds together and gossip all night, it’s likely sometimes they’ll want something just for them.

From a design perspective, see if you can get them to agree on a pretty simple color palette, then let loose a bit and allow them each to bring in elements they enjoy within the confines of that palette. In this example, the bedding set is the inspiration for the color scheme in the space. So, if you can settle on one bedding set that works for both kids, that’s a great place to start.

You’ll notice here that there are two rugs pushed together. Each with a very different aesthetic, but both working because of the golden hues. So, the girls can each express their tastes. Having something like the shelving ledge or bulletin boards allows the girls a space to decorate themselves. We also painted the walls in a soft ombre horizontal stripe, this helps pull together the tonal effect in the room.

By Danielle Kurtz

Danielle is the Creative Director at Nod and an over-protective mother of two. She’s also completely obsessed with Pinterest, Twitter and her Kindle, but not necessarily in that order. Danielle loves to craft, sew and crochet, but all her supplies have a layer of dust on them about 5-years-thick, wonder if it's just a coincidence that her oldest kiddo is 5 years old?


Orange Pop

September 17, 2012

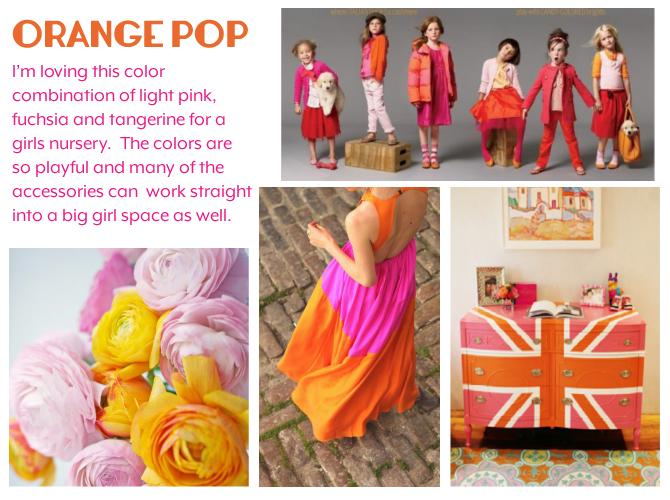
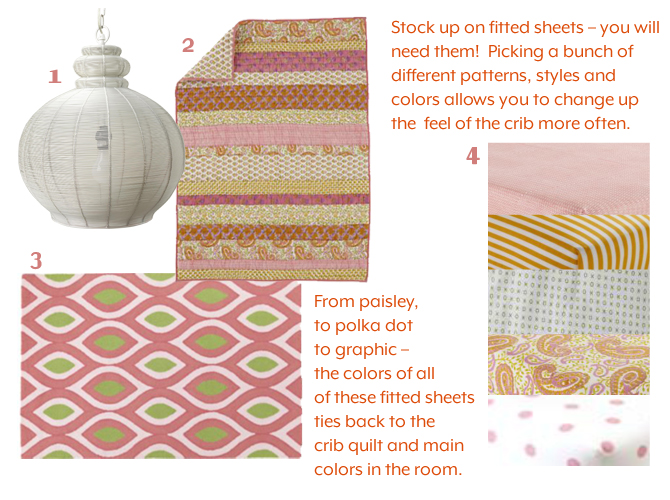
OrangePOP_1                                                                                1/2/3/4

OrangePOP_2
1/2/3/4

OrangePOP_3
1/2/3/4/5/6/7/8/9

OrangePOP_4
1/2/3/4/5/6/7/8/9/10

By Sarah Culbertson 

Once upon a time a fashion plate from Seattle met a childrens retailer from Chicago, and it was love at first sight.  After spending a lot of time together at the mall, they both knew it was a perfect match. So Sarah packed up her fabulous Kate Spade suitcase and headed for the Windy City. Where they lived happily ever after, designing and developing textiles for little kiddos everywhere.


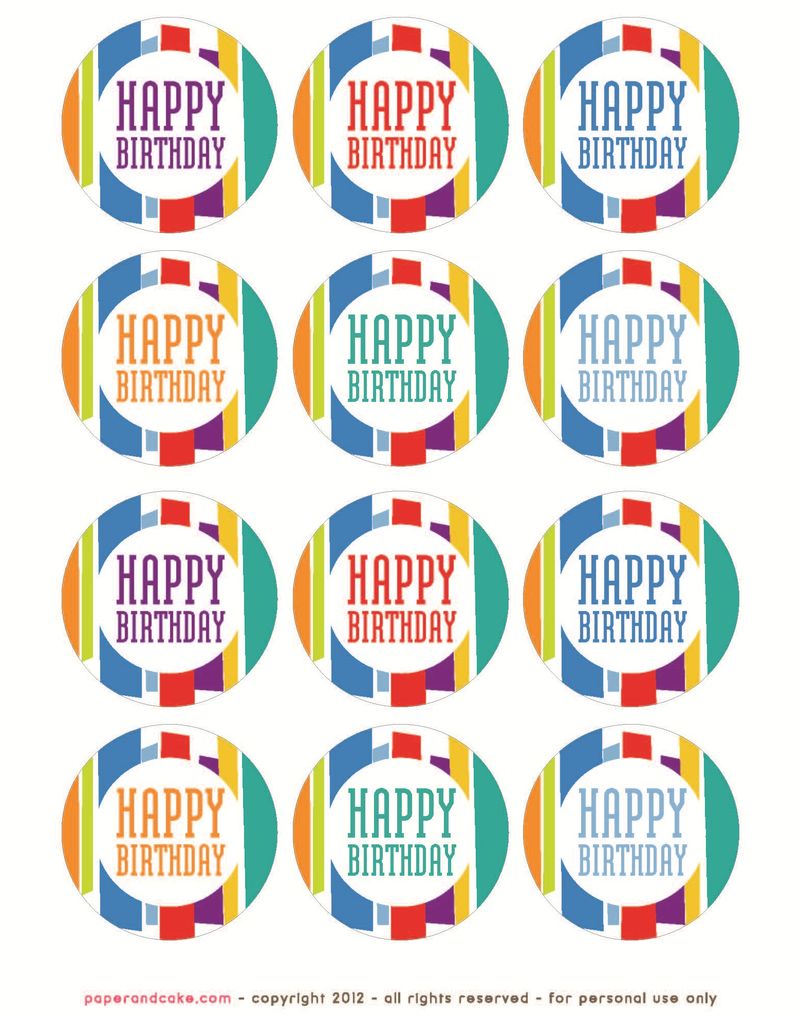
Colorful Birthday Supplies – Free Printable

September 14, 2012

Hi, Abigail here from Paper & Cake. We may just know a thing or two about birthdays, we've been designing printable party decorations since 2008. Paper & Cake offers original themed-party collections that can be download, personalized and printed out – at home.

Whether you are planning Baby's First Birthday or a Sweet 16, from Dinosaurs to Damask, we've got you covered!

Image

Designing this retro striped Birthday Party set for the Land of Nod has us celebrating! Photos of this ultra cool party are featured in this month's catalog as well, we hope they inspire your next birthday bash.

Download free printable partyware for next birthday bash or check out customizable items.


Post by Abigail: Paper and Cake

A Fun Way to Transform Kids’ Art

September 13, 2012

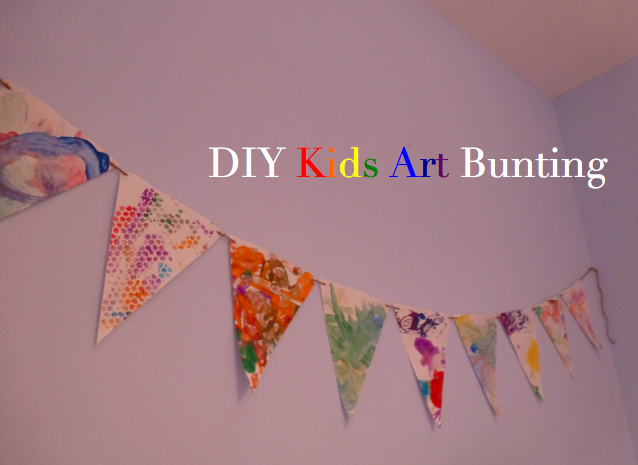
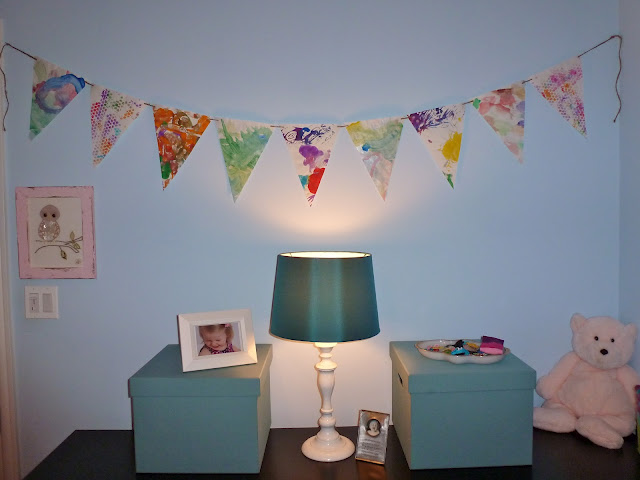
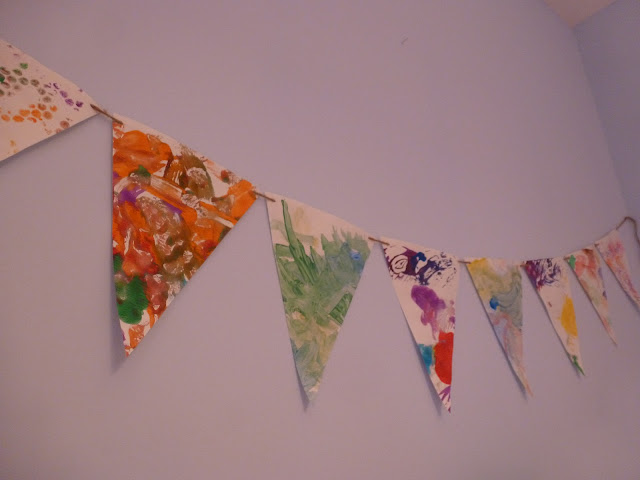
My two year old has been on a painting spree lately, and has actually produced some pretty good looking pieces.  While I tend to throw away the majority of her scribbles over time (shhh, don't tell!), I have been wanting to make an art wall in her room to showcase her best work.  This custom bunting was the perfect way to transform her paintings:

1

2

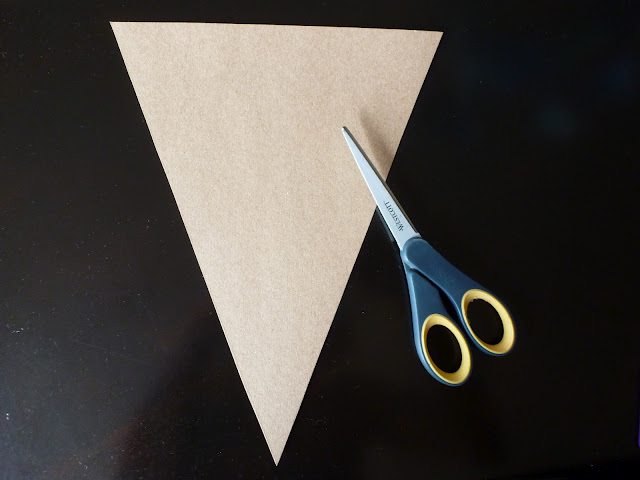
The lighting in that part of her room isn't great so it was hard to get a good picture, but it really is pretty!  Making the bunting was super simple.  I first cut out a triangle template from a piece of card stock:

3

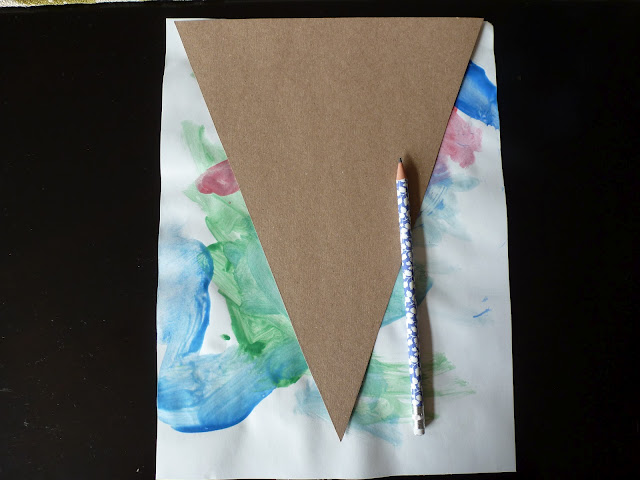
Then I traced around it on all her artwork, trying to include the most colorful parts of her painting:

4

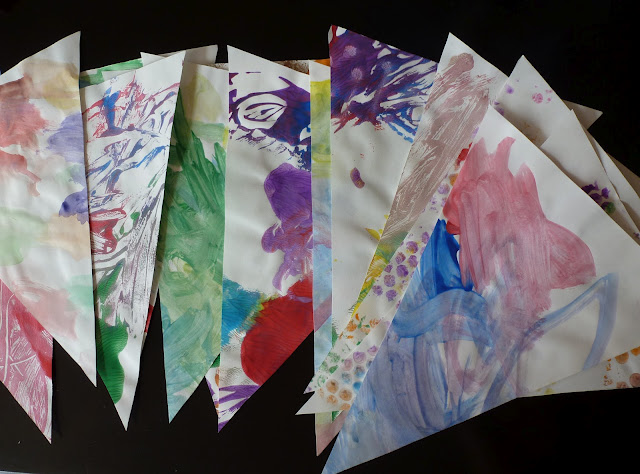
When I was cutting these out, my daughter said "Ooh, pizza slices!"… ah, to see the world through a 2 year old's eyes!! Quite a colorful array when put together:

5

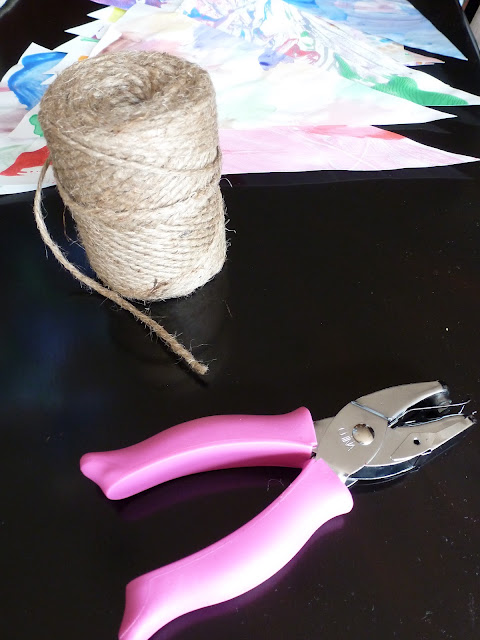
Then all it took was some of my trusty twine (buy yourself a roll…it comes in handy for so many things), and a hole puncher to make a hole at the two top corners of each triangle and then string the twine through:

6

I then tied the twine around a nail at each end of the wall and voila!

7

Have you found some unique ways to transform your child's art?  Please share!

Post by Haeley : Design Improvised

Fish Soap Party Favor – a Tutorial

September 12, 2012

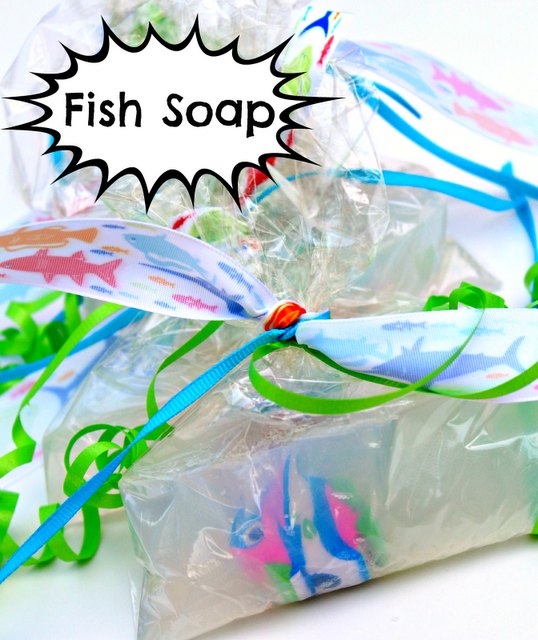
IMG_2973intropicpng

 
Remember Finn's Fish Party last week? I was pretty casual about the whole thing because the biggest slip-n-slide ever was the main event 🙂 But I did make the kiddies party favors. It was almost a craft fail, but I saved it and it ended up OK. Seriously though, I almost ruined the only homemade aspect of the bday party… tragedy! When I was looking up fish party ideas, I came across this Martha Stewart Tutorial. Of course, Martha's "Fish in a Bag Soap" were way better looking than mine- in my defense I found this the Thursday before the Saturday party. My BFF and my mom totally came to the rescue with supplies!
 
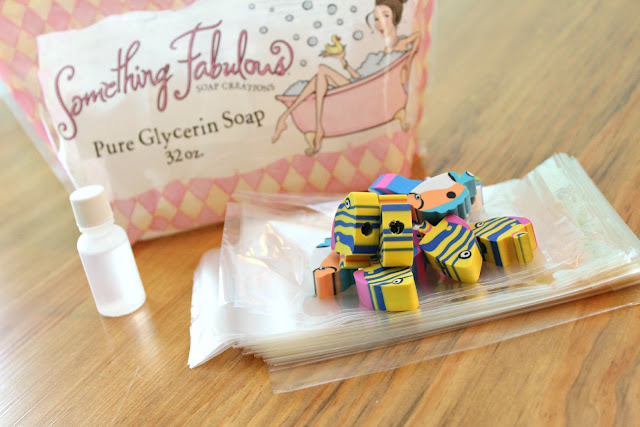
What you need:
Pure Glycerin
Scented Oil (optional)
Plastic Treat Bags 
Fish
IMG_2930
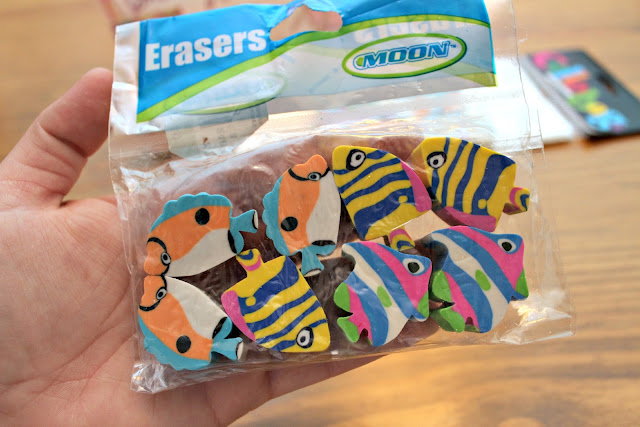
I wanted to find plastic fish but I couldn't find them anywhere. My BFF called me and told me she found these erasers, perfect! I later found out the fish I wanted were available on Oriental Trading.com and Amazon. But the erasers looked good too.
IMG_2921
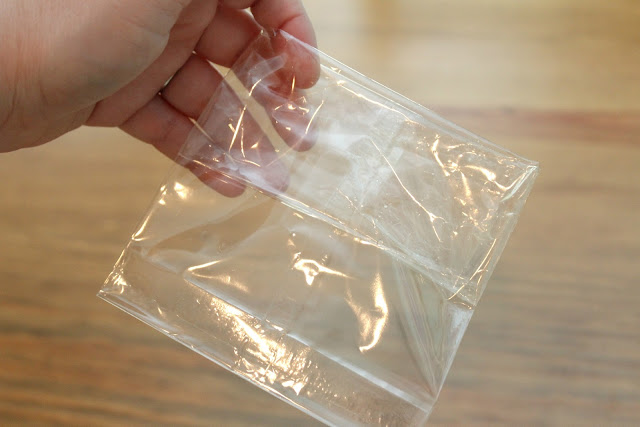
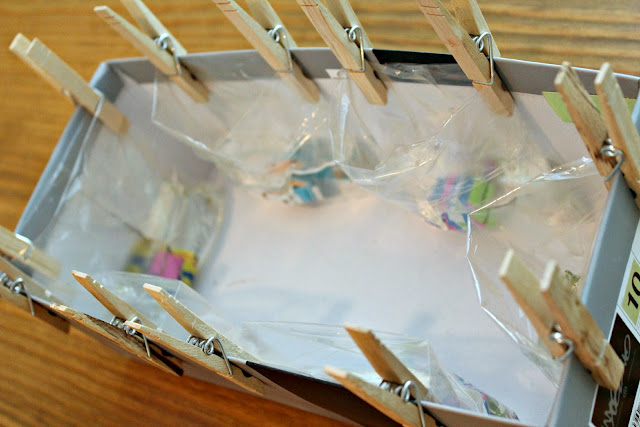
About the bags, I originally bought craft bags with a pleat on the side, and the soap got stuck after drying… boo! You HAVE to get the bags with only one seam on the side and no folds. My mom came to the rescue because I found this out the day before the party.
 
What I Did:
Fold the bag down (about halfway)
IMG_2933
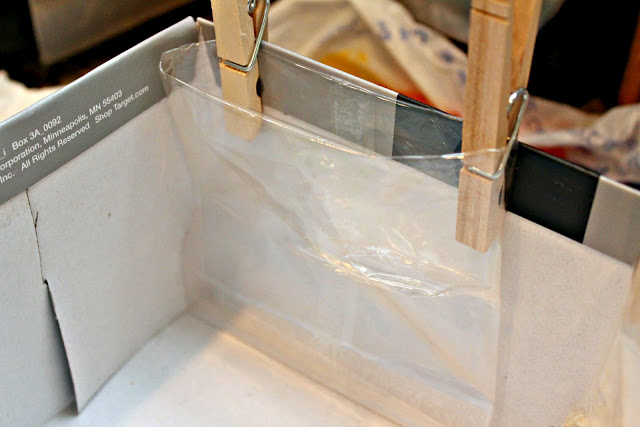
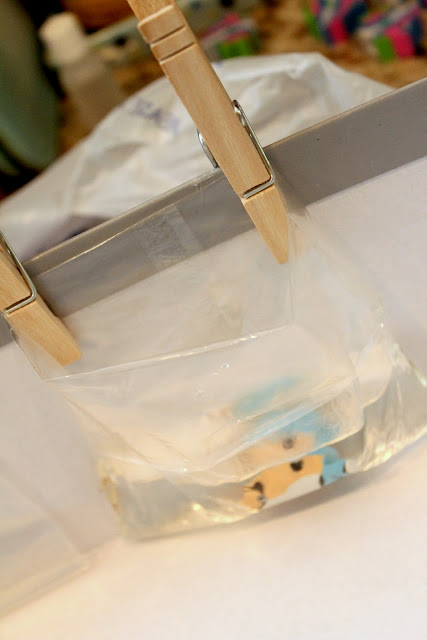
I used clothespins and an old shoe box and clipped the bag to the side of the box, making sure the bag was touching the bottom too.
IMG_2934
 
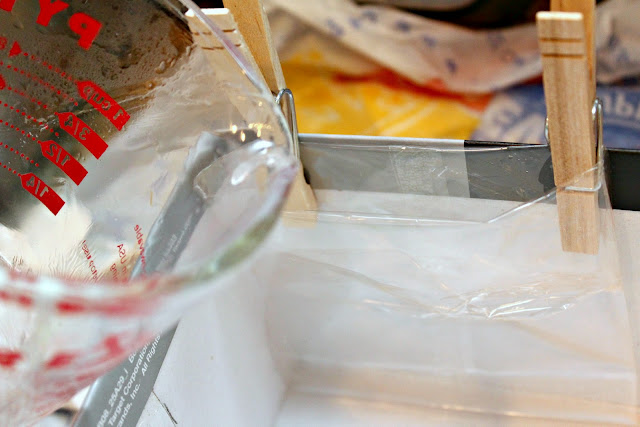
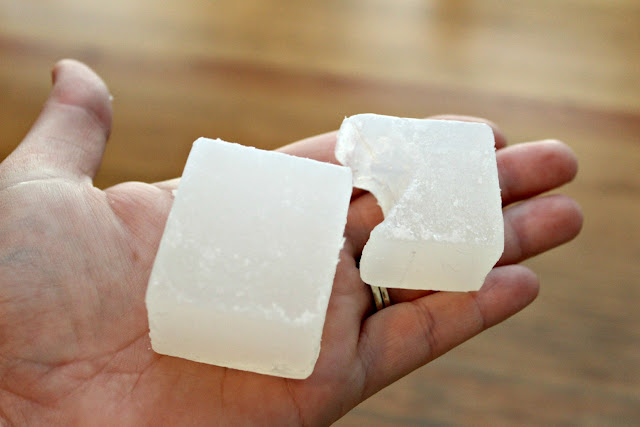
My glycerin came pre-cut, so I used one and a half squares of glycerin. Then using a glass measuring cup, I melted it in the microwave for 45ish seconds. That is when I added my Grapefruit Citrus oil, just one drop.
IMG_2938
Then pour the melted soap into the bag carefully, you don't want to get soap on the sides of the bag, a funnel would help but I didn't have one… procrastinator.
IMG_2935
 
Carefully place a fish eraser into the bag, make sure not to splash.
IMG_2937
Continue with these steps and let them cool.
IMG_2939
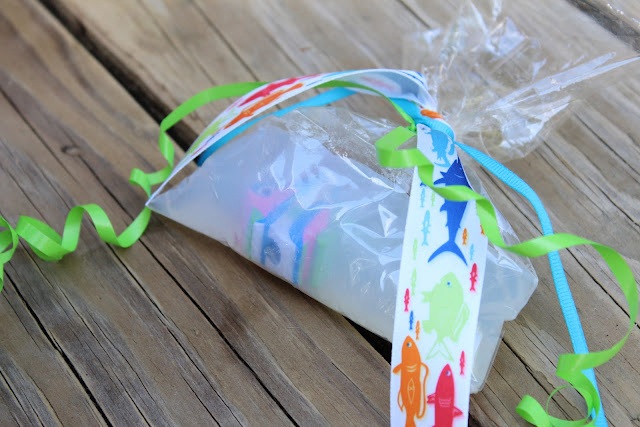
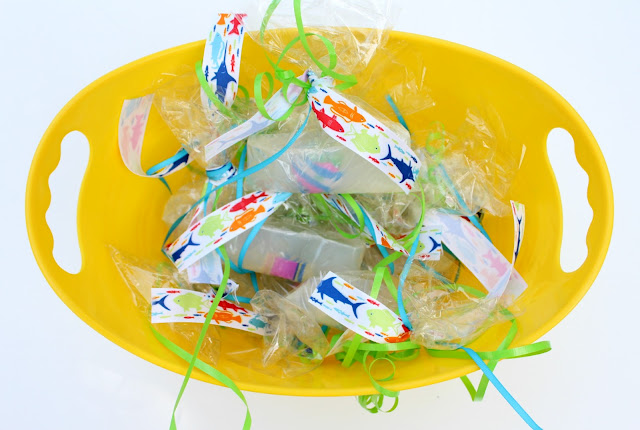
I used ribbon to tie them up. Because of the clear color they are kind of hard to photograph but they turned out really cute. And for twelve fishies I spent about $15ish which I was pretty happy with.
IMG_3121
IMG_2976
Have you ever made your own soap? I really liked doing it, I want to do another girl craft party with different girly soaps. We could use mint leaves and lemons and other cool fresh ingredients!
Signature
Post by Taylor Urban : www.itstaylormade.com

Magnetic Case DIY

September 11, 2012

MagneticCase01

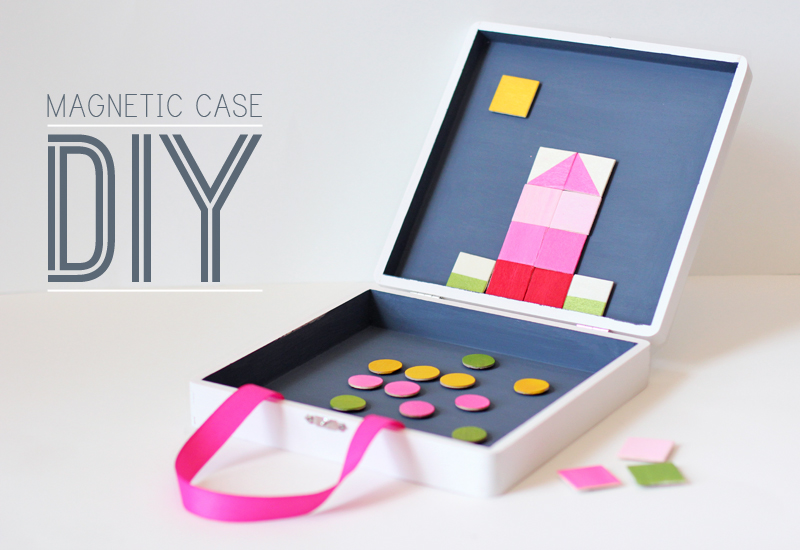
Every Fall, we take a roadtrip to visit Grandma and Grandpa. We fill our car with lots of books, toys and an iPad or two and head off on an eight-hour trek. Our kids are pretty good about keeping themselves entertained, but I have to admit, I’ve responded to more than my share of “I dropped my toy and need it back right now” requests while driving. This year, I’m making a couple of magnetic toy cases to take things on the road and, hopefully, keep them (somewhat) in place.

For the first one, I decided to create a series of colorblock magnets that Jenna can arrange and rearrange into different compositions.

Here are the materials I used:

  • Craft box (I purchased mine from Michaels)
  • Magnetic Paint (Martha Stewart brand, also purchased from Michaels)
  • Small wooden squares and circles
  • Magnet tape
  • Paint and paint brushes
  • Masking tape
  • Ribbon (optional)

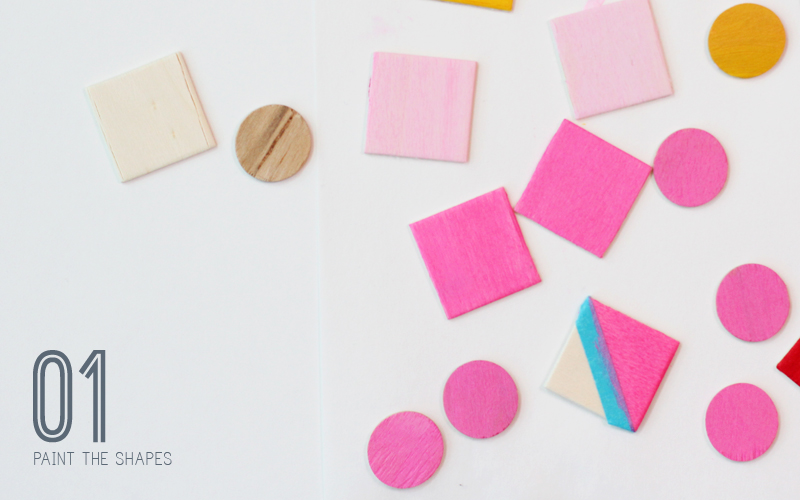
Step 1: Paint the wooden shapes

MagneticCase02

I started by painting a series of wooden squares and circles in a variety of colors. I also taped some of the squares in order to create different shapes and patterns.

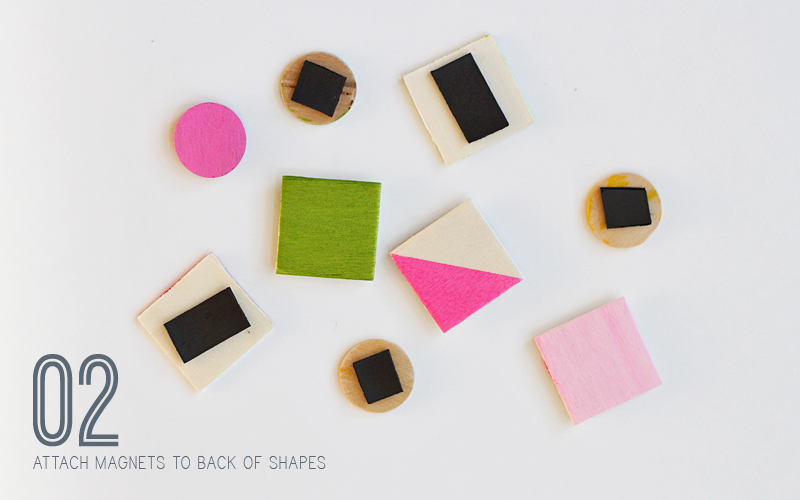
Step 2: Attach magnet tape to the shapes

MagneticCase03

Once the paint was dry, I cut the magnetic tape into small pieces and attached them to the back of the shapes. I used a magnetic tape that already had adhesive on one side, but you could also glue, if necessary.

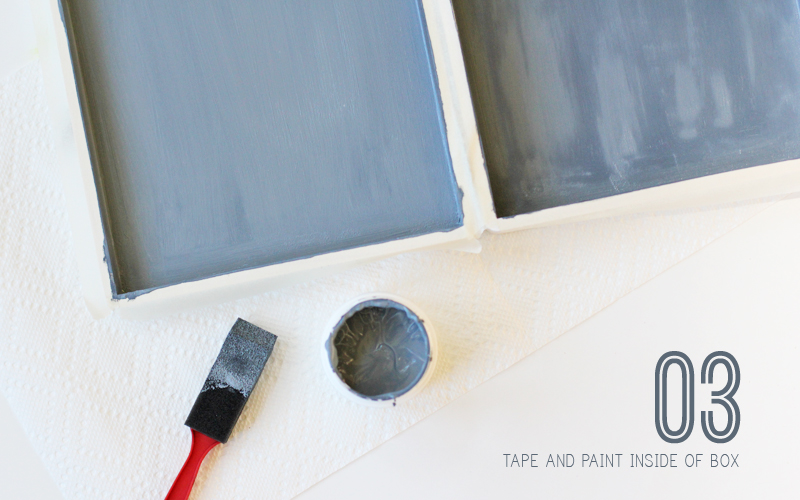
Step 3: Apply the magnetic paint to the inside of the box

MagneticCase04

I painted the inside of the box with Martha Stewart magnetic paint. I used 3 coats per the instructions and let dry completely between coats. You can also paint over this with another paint (if you want a different color surface), but I preferred to minimize the steps involved.

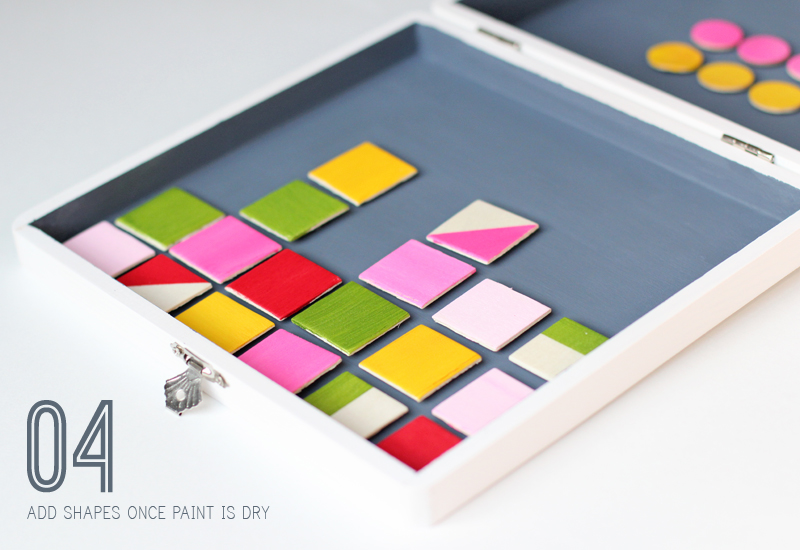
Step 4: Add the magnets

MagneticCase05

Once the magnetic paint was completely dry, I attached the magnets. I also added a ribbon to the inner edge of the box by gluing it with fabric glue. I’m going to see how this holds up, but might end up using a staple gun to make it more secure.

Although I chose to create my own magnets for this one, I’m also looking at ways to “magnetize” existing toys like Legos, notepads and crayons, etc. Maybe this year, we can also avoid losing any toys!

Post by Julee Dyer : Warm Hot Chocolate


Shared Spaces: Make Room for Baby

September 10, 2012

SmallSpNursery

Unfortunately, babies don’t come equipped with instruction manuals. They also don’t come with additional living space. So, this often means taking a space you’d previously been using for something else (an office, a guest room or even a closet in your bedroom) and turning it into a nursery.

Carving out extra space in a home that’s already filled to the brim is definitely a challenge. The best thing to do is to try to throw away all your preconceived notions about how the space functions and look at every nook and cranny as an option. In the room shown here we removed the doors off a closet to create a nursery nook within the master bedroom. While this may not work for a two year old, it’s definitely an option for an infant. We painted the inside of the closet a lively triangle pattern. It gives the “nursery” some personality, while allowing the rest of the space to still remain sophisticated for mom and dad.

You’re probably wondering what you’d do with all the stuff that used to be stored in the closet. We’d suggest investing in some under bed storage for the time being. They’re a great option for storing out of season clothes and linens.

If a closet or nook isn’t an option, just go ahead and create a space. The use of a screen or bookcase as a room divider would work well in a master bedroom. Simply designate a corner of the room for the baby and have some fun with it.

The fact is when you start sharing your home with a baby, you’re going to have to make space, a lot of space. The bedroom is just the beginning, prepare to pack away those martini glasses, too because bottles and sippy cups will also need a home! But the needs for space will ebb and flow, so the more flexible you can be, the better your home will function. Reminds me of my husband’s childhood home. His folks added an addition with a dining room, which was then walled off to be a bedroom for his brother, sure you had to enter it through the kitchen, but it worked. Then when he left for college, the wall came down and his mom got her dining room back. So, don’t get rid of those martini glasses, you’ll have space for them again at some point, I promise.

By Danielle Kurtz

Danielle is the Creative Director at Nod and an over-protective mother of two. She’s also completely obsessed with Pinterest, Twitter and her Kindle, but not necessarily in that order. Danielle loves to craft, sew and crochet, but all her supplies have a layer of dust on them about 5-years-thick, wonder if it's just a coincidence that her oldest kiddo is 5 years old?


Shared Spaces: Sibling Revelry

September 7, 2012

SharedSpaceBoyGirl

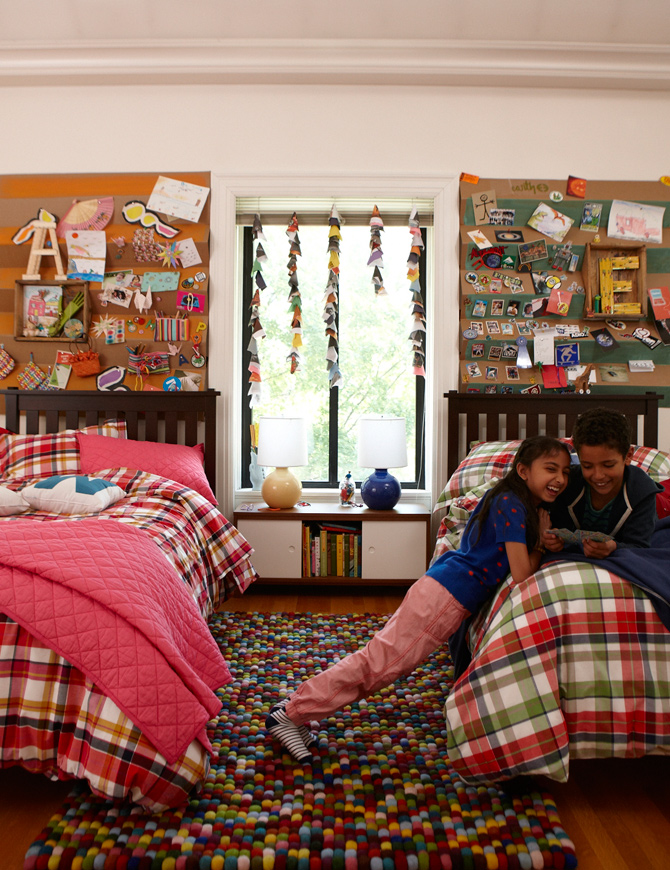
I love the idea of a brother and sister sharing a room, and with a few simple steps, it’s actually not too hard to pull off a cohesive look. When designing a bedroom, I most often start with the bedding. It tends to make the biggest statement in the room. In the case of a boy/girls shared room, I suggest sticking with classic patterns. Think plaids, dots, stripes, ginghams. The patterns are timeless and can work for boy and girl. Use the same pattern for both beds, just change up the color palette based on their preference. (Quick aside, the plaid duvet in the pink is AMAZING!!! It’s the first thing I bought for my daughter from the new fall collection.) Also, mix in some basics in solid colors, so the prints don’t overwhelm. Our sweatshirt and moving blankets are good options.

Next, I’d choose a rug. You can go one of two ways with this. You can pick one that has a lot of color in it, including the colors in the bedding. This will help pull everything together and add a little punch to the room. Or, if there’s a common color in both beds, in this case it would be navy, choose a solid rug in that color. Again, this will help the two beds make sense together.

Then, for the furniture, I’d opt for classic, clean lines. With, ideally, both beds being the same.    If you do have one child that’s particularly opinionated, let’s say a super girly, girl that wants a dramatic headboard, then at least try to stick with the same finish on the two beds.

For the accessories, I’d suggest a color-coding system. Since you have so much color already happening in the bedding and rug, think about choosing one color for each child and getting them a lamp, storage and other accessories in their colors.  It should cut down on arguments, and look visually pleasing.

Lastly, be sure you give each child a space to make their own. In this case, we used bulletin boards over their beds, so each could display their collections and art.

By Danielle Kurtz

Danielle is the Creative Director at Nod and an over-protective mother of two. She’s also completely obsessed with Pinterest, Twitter and her Kindle, but not necessarily in that order. Danielle loves to craft, sew and crochet, but all her supplies have a layer of dust on them about 5-years-thick, wonder if it's just a coincidence that her oldest kiddo is 5 years old?


A Home the Whole Family Can Agree On

September 6, 2012

SSIntro_1

Decorating a functional and beautiful room for your child can be quite a challenge. But, imagine creating a bedroom that has to work for a 2 year old girl and her 6 year old brother. Or a kitchen that must also function as a playroom. Or a nursery that’s also a guest room. Or, even a master bedroom that’s now home to a newborn, as well. These are all real challenges that parents face on a regular basis.

Kids don’t just live in their rooms, they live in the whole house. And creating a home with harmony of function and design can be extremely challenging. So, throughout the course of the next several weeks, I’ll be blogging about some shared space solutions.

And, if you have a challenge that we’re not addressing, I’d love to hear about it. And, I’d be happy to offer some suggestions to help.

By Danielle Kurtz

Danielle is the Creative Director at Nod and an over-protective mother of two. She’s also completely obsessed with Pinterest, Twitter and her Kindle, but not necessarily in that order. Danielle loves to craft, sew and crochet, but all her supplies have a layer of dust on them about 5-years-thick, wonder if it's just a coincidence that her oldest kiddo is 5 years old?


On The Wall

September 5, 2012

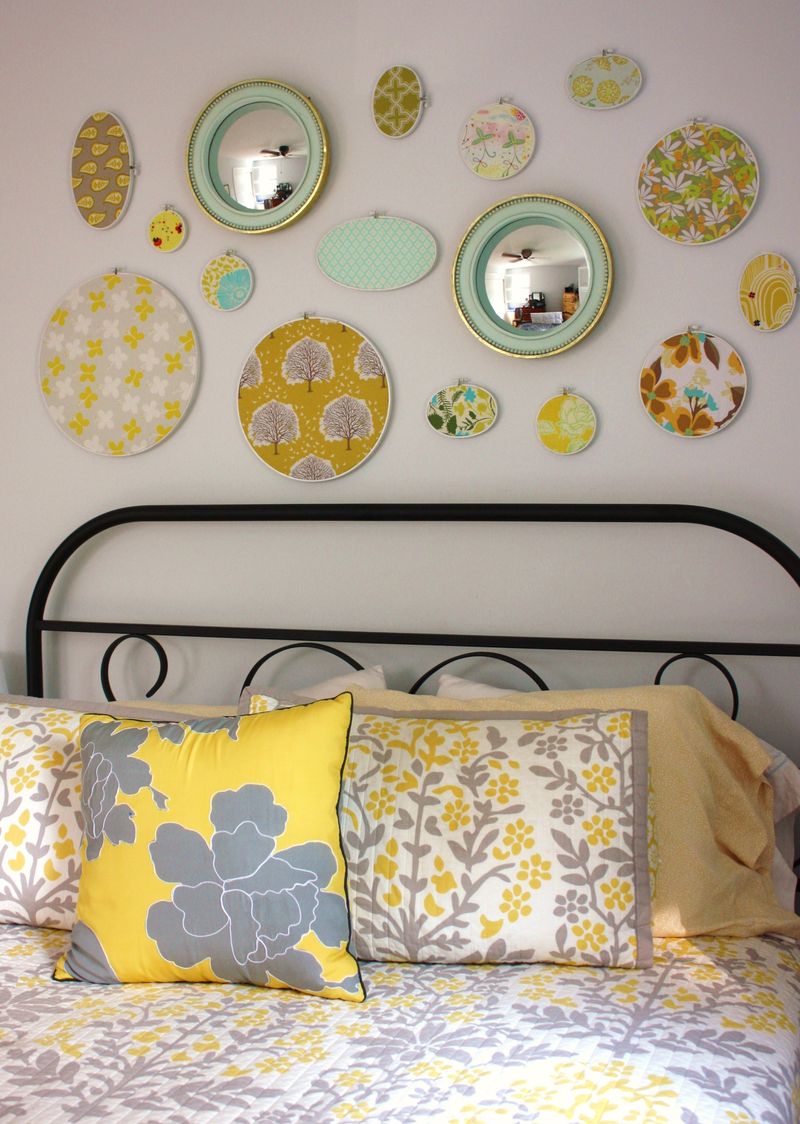
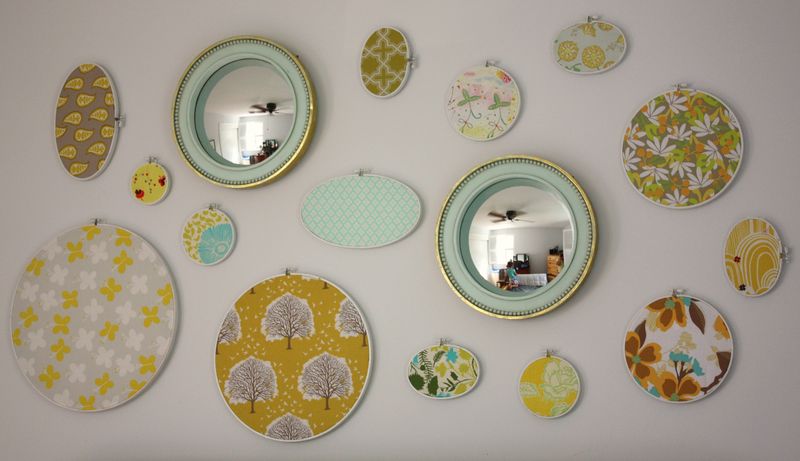
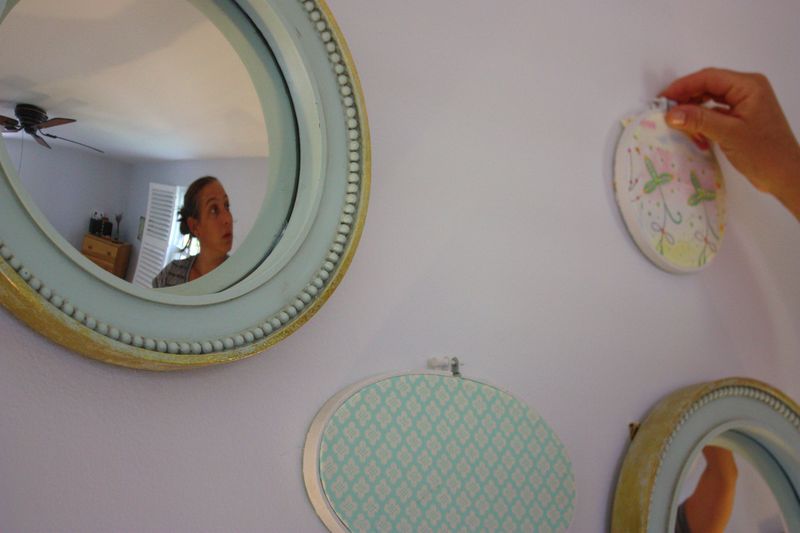
I am finally getting around to posting the pictures of my mirrors with my embroidery hoops…maybe this is silly, but I really do love the way it all came together.  This is the first time we have any sort of "design" in a bedroom of ours so it sort of makes me feel extra "proud", haha!  The mirrors do help to open the room up a bit, which is definitely needed because it is quite small.

1

2

Don't those bullseye mirrors do such funny things to those on the other end!

3

Oh, and if you plan to do this sometime…my suggestion is to use Command Strips to hang the embroidery hoops.  It really makes things much easier.  There is no need to bang a bunch of holes in the wall because the hoops are so light, plus, using the strips makes the puzzle of placing them much easier.  You probably won't get it right the first time (at least I didn't) and when you don't you can just start all over again!

Post by Jane : Buzzmills

DIY Laundry Detergent

September 4, 2012

Post by Megan Mulder of Mom Colored Glasses

I’m a big believer in a little more work upfront for the benefit of an easier life in the future, especially when it comes to saving money.  So when I usually spend my upfront time scouring ads for my favorite laundry detergent deal (Dynamo, buy 1 get 2 free), I am usually rewarded for my efforts by eventually finding this sale and stocking up.  However, I haven’t found such a great deal in a long time, but I have been honing my addiction to Pinterest where I am continually tempted by the homemade laundry detergent I see there.  The powder detergent recipe I have been eyeing is supposed to be quite cost efficient and relatively easy to make, so I decided to give it a go and was pleased with the results.

This recipe appeals to me for many reasons.  First of all, I know what’s in it.  Similar to cooking, making your own anything puts you in control of the ingredients and what is being released into your environment.  Secondly, it was cheap.  The blog writer states that this recipe lasted 9 months for her at 8 loads a week.  That’s 288 loads.  I only do 3 loads a week… this recipe will be lasting me 2 years if my math is correct and with ingredients costing under 20 dollars, I think it’s a pretty good bargain.  Lastly, the idea is downright nostalgic, and I love that.  I love the idea that I’m doing something my grandma may have done.  The process of making soap links me to a communal history that I have the honor to share with countless other women in time, and there is just something sacred about that.  Maybe I’m just sappy and sentimental, but grating soap gives me an awful lot of satisfaction.

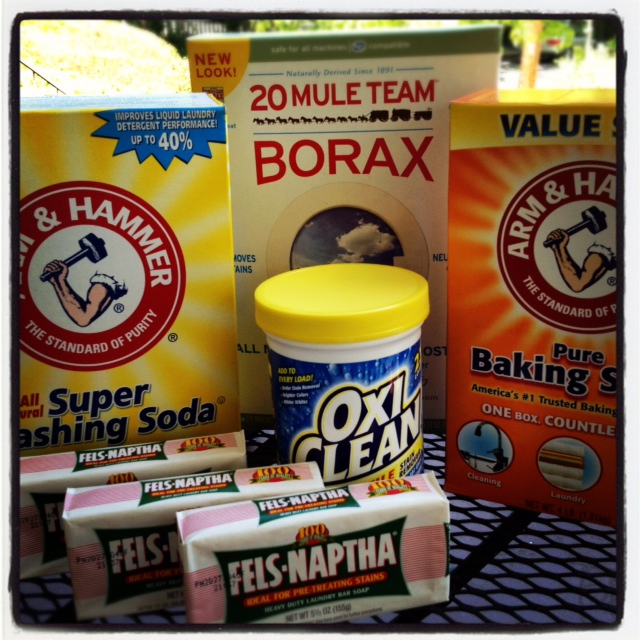
So here’s the original recipe, where I got the ingredients, and how much each item costs:

Photo1

  • 1 (4 lb, 12 oz) box of Borax (Meijer, $3.49)
  • 1 (4 lb) box Arm & Hammer Baking Soda (Target, $2.51)
  • 1 (3 lb, 7 oz) box Super Washing Soda (Meijer, $3.29)
  • 3 bars Fels-Naptha Soap (Meijer, $1.04 each)  These smell SO good!  I think if I could put a smell to the word ‘clean’, this soap would be it!
  • 1-2 small containers of Oxi Clean (Meijer, $3.99 each)  Optional – I only used 1 container because there is a serious lack of grass and food stains between my husband and I. I’m assuming that will change shortly.

My total price – $16.40 (with 1 Oxi Clean)

Instructions:

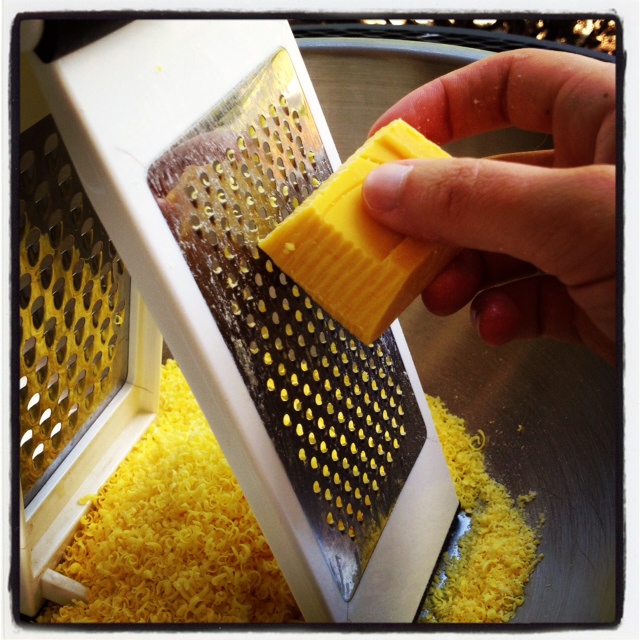
Step 1:  Grate the Fels-Naptha soap.  Because I have a HE washer, I grated the soap using the fine side of a box grater and then used my hands to break down the soap into powdery pieces.  You could also use a food processor to do this.  If you don’t have a HE washer, you can grate it into larger pieces.

Photo2

Step 2:  Mix all ingredients together and toss.  I had to use my hands again because the Borax had a lot of clumps in it that needed breaking down.

Photo3

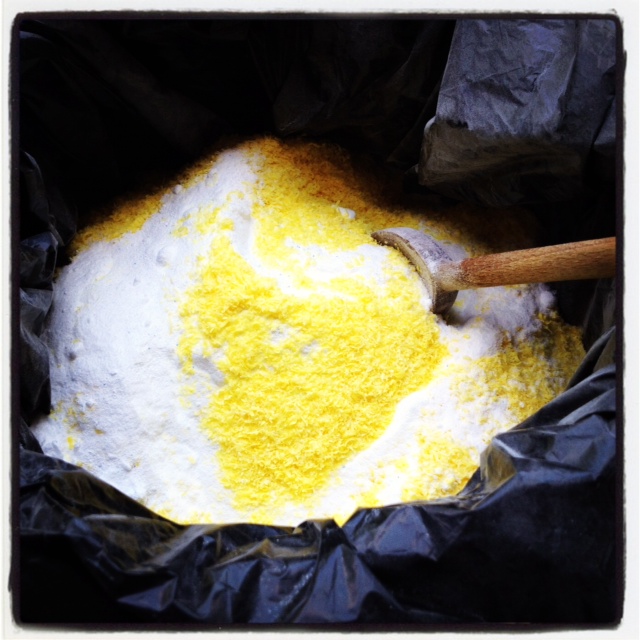
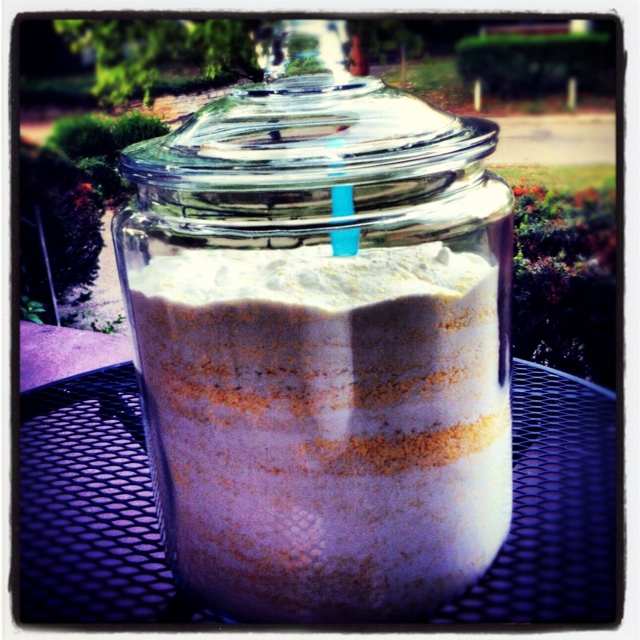
Step 3:  Place homemade laundry soap into container of choice.

Photo4

To use, place 1-2 Tablespoons in with each load (the Oxi Clean even came with a convenient scoop just the right size – how lovely!)  If using with a HE washer, put soap in the barrel instead of the dispenser.

A couple of more helpful hints from the original post:

  • Don’t use with cloth diapers.  Baking soda affects the absorbency.
  • May not be safe for septic tank… do your research first on this.
  • Safe for sensitive skin.
  • If you can’t find Fels-Naptha soap, Zote is a good substitute.  Use 2 bars instead of 3 then.

AND, because I’m kind of a math freak this way, here’s some cost breakdowns for comparison sake.  For the following brands (all found at Target), I found out how much it would cost to buy 288 loads and then how much each load would cost to run.

7th Generation- $54.54 so 19 cents a load

Tide Free and Gentle- $53.97 so 18.5 cents a load

All Free and Clear- $41.97 so 14.5 cents a load

Arm and Hammer for Sensitive Skin- $24.08 so 8 cents a load

Target Brand Up and Up- $35.95 so 12.5 cents a load

Homemade detergent- $16.40 so 5.5 cents a load (or possibly less depending on whether you use 1 or 2 tablespoons per load).  No contest.

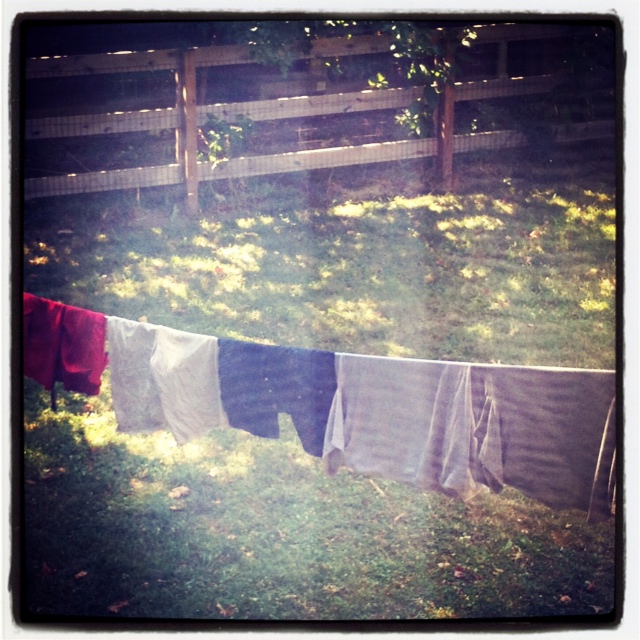
If you’re being really good, save even more money and hang your freshly cleaned laundry on a line in the back.  Renae wrote a great article last year about how to create your own laundry line.

Photo5

Post by Megan Mulder of Mom Colored Glasses

Taco Soup

August 31, 2012

So, I went to a Bible study Tuesday night with a group of ladies from my church. And, in true Southern lady fashion, there was FOOD! Four different soups, eight different desserts, 2 veggie trays, loaves of bread, hot and cold beverages, and real, grown-up dishes.

Because it’s easier to hear the Lord speaking to you if your tummy isn’t growling. I’m pretty sure that’s why.

Oh, I love the South so much.

And, apart from the Advent reflections and preparing of my heart to be still before the Lord, I was introduced to the wonderful world of taco soup.

We had to leave a bit early because I rode with my sister (who  was a nursing mother with a hungry baby at home), so I departed without getting the recipe. Hence, my appeal for help on Twitter Wednesday morning. And my frantic Pinterest search.

I read through 4 or 5, took what I liked, tossed what I didn’t, and ordered my groceries based on my plan.

And this morning, I got up early, tossed all the loveliness into my crock pot, and whizz bang, it was ready by lunchtime! Mind if I share the recipe?

1

Ingredients:
1 pound boneless, skinless chicken breast (You could also totally do a pound of ground beef instead. In fact, that was the meat in my Bible study soup)
1 can black beans, drained and rinsed (some folks also like to add chili beans or pinto beans. not me. yuck.)
2 cans yellow corn, rinsed (really, one is plenty, but I’m a corn gal)
2 10oz cans Rotel diced tomatoes with green chiles
1 8oz can tomato sauce
2 cups low sodium chicken broth (you may be able to get away with water here, but I had it on hand and so I used it)
1 packet taco seasoning (I buy my taco seasoning in bulk from Penzeys, so I just used 1T+ from my jar)
1 onion, diced (I didn’t saute the onion in advance, though you could. I didn’t want to take the time/dirty another pan and it turned out totally fine!)
Shredded cheese, sour cream and Scoops tortilla chips, for serving

Directions:

Cook your meat. I just drizzled some olive oil on my chicken and put it in a glass dish in a 350-degree oven for 45 minutes. If you’re using ground beef, just brown it. I also think you can put thawed/frozen uncooked chicken in there if you plan for it to cook all day, but I just roasted mine and it was quick.

Shred your meat. If it’s chicken, shred it. I use forks to shred it. I’ve also heard that you can use a hand beater. Never tried that but could work!

Open all your cans. Tricky stuff, I know.

Dump them in. (drain and rinse the black beans, drain the corn)

Dice your onion.  Plop that in, too.

Add your chicken stock/water and taco seasoning. Some folks might wan to add tabasco sauce, cayenne pepper, or even a packet of ranch dressing mix. Whatever makes you glad.

(Confession: I added a heaping Tablespoon of brown sugar. It’s the salt of the South, y’all)

I left it all in the slow cooker on high for 3-4 hours and it was all piping hot and delicious by lunchtime. Ryan came home, served himself a big bowl (complete with cheese and scoops) and declared: “I dig.”

2

I think that means it’s a success! (And I didn’t tell him about the brown sugar until after he passed his judgement.)

Post by Raechel : www.raechelmyers.com
Bright & Bold: Rainbow

August 30, 2012

1st

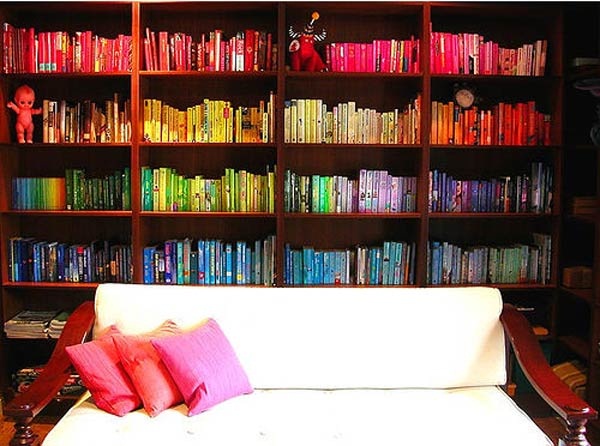
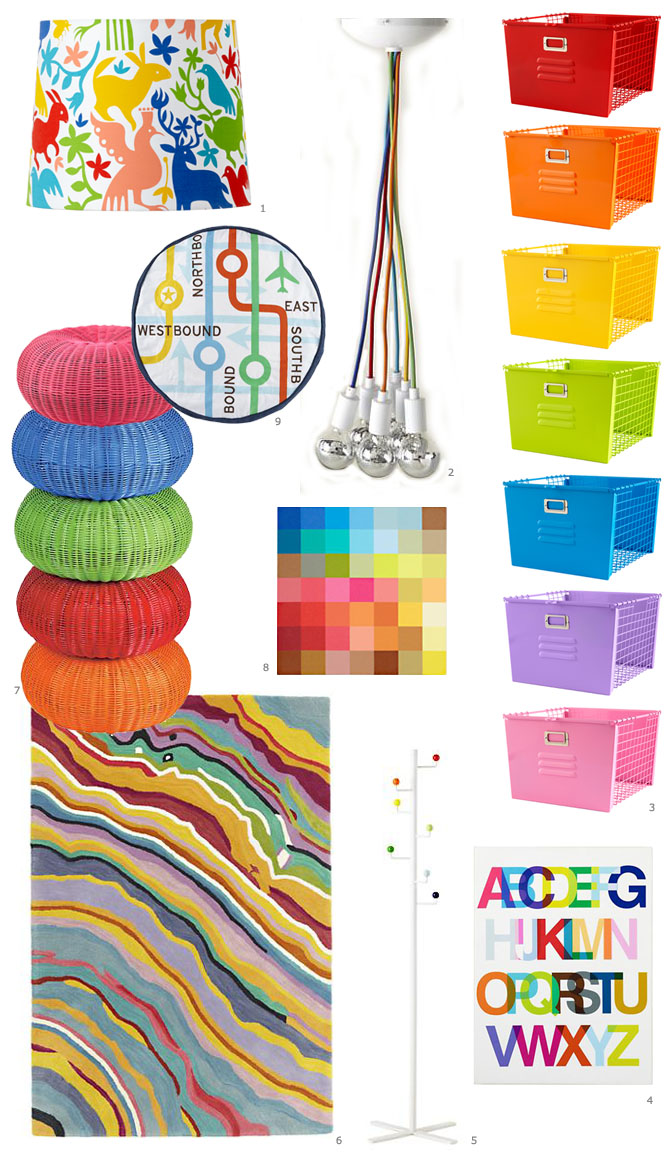
Decorate with color! Instantly turn a bland bookcase into a pretty rainbow by organizing books and accessories in rainbow order.

218072806926062970_eblmS2lC_c.jpg

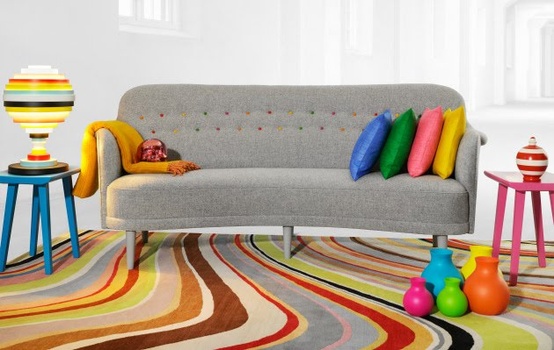
A graphic rug or lamp is a fun way to liven up a room.

23432860531621118_uuCPJ5v8_c.jpg

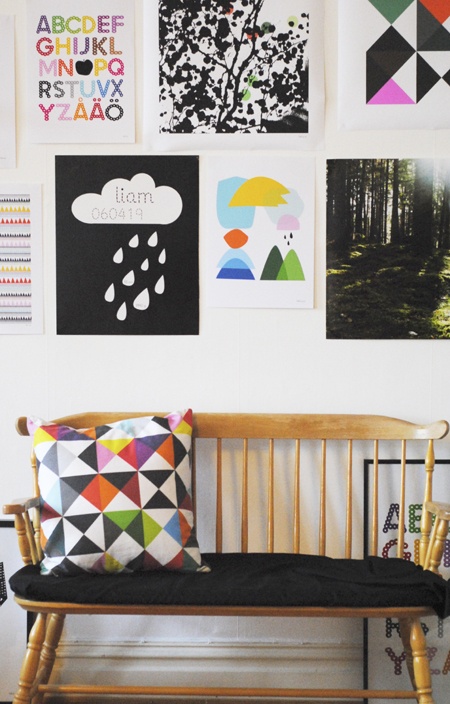
Dress up those boring white walls by installing a mini gallery of your favorite colorful art.

Photo sources: 1  2  3

GET THE LOOK!

RAINBOW.jpg

1 Otomi Lampshade, $24.95  2 Licorice Rope Rainbow Pendant, $149  3 Saved by the Bins Locker Baskets, $24.95 each 4 Helvetica Alphabet Wall Art, $129  5 Orbit Coat Rack, $99          6 Tectonic Floor Rug, $299-$399  7 Tuffet Seaters, $39 each  8 Digital Wall Art, $69  9 Transit Authority Throw Pillow, $29

By Anna Passadori

Anna develops and designs exclusive product for The Land of Nod. She hails from the west coast and has traveled the world to source product. She loves anything Marc Jacobs, Sofia Coppola or stripes! (So, if anyone can get a photo of Sofia Coppola wearing a striped outfit by Marc Jacobs, please send it along.)

Pirate Birthday Party Printables

August 29, 2012

PiratePlaydateCoverShot1-578x385

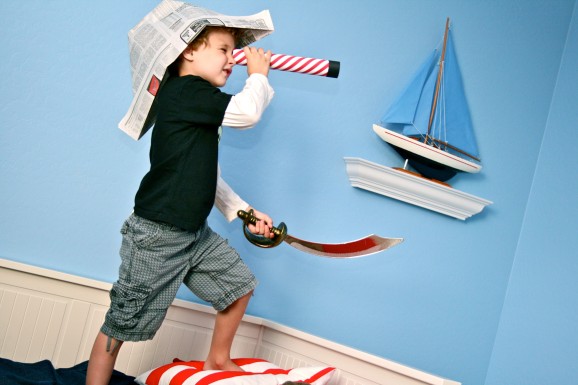
Ahoy there! We know hoards of ye enjoyed the Pirate Playdate. Some of ye mateys pointed out these ideas would make great party games and activities for a pirate-themed birthday party. Aye Aye! We couldn’t agree more.

PirateJelloBoats-578x385

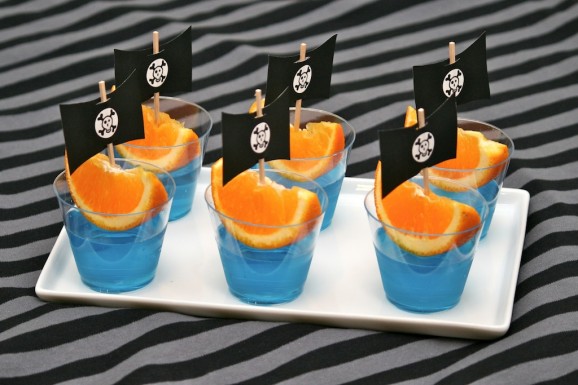
Avast! September 19th is International Talk Like a Pirate Day (a big thanks to Aleah for reminding us). We been decidin’ to share a few more freebies to round out our swashbuckling Pirate Party collection. Arrr!

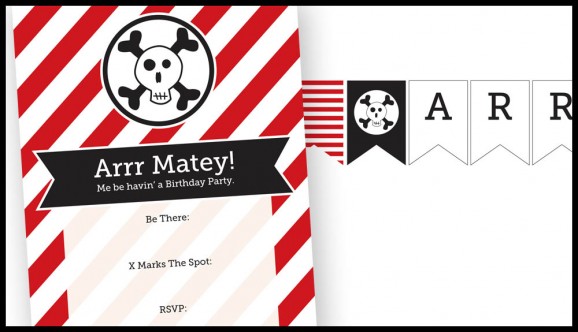
PirateBirthdayPartyFreePrintables-578x332

What else do ye need to have a terrrrrrific Pirate Birthday Party? How about printable Cupcake Toppers that double as decorative stickers for party favors or plastic cups. Trim the sails with this here printable Pirate Banner (we also included instructions for how to customize the banner with your wee lad’s name). Shiver me timbers, o’ course you can’t be havin’ no party without a way of spreadin’ the word to the other scurvy dogs. So here be a free Printable Invitation to fill in with all the party details.

Also, this invitation can also be personalized with your party details!

Aye! Aye! Ye be welcome.

Reposted with permission by Aimée Lowry & Bettijo B. Hirschi from PagingSupermom.com
Bird Inspirations

August 28, 2012

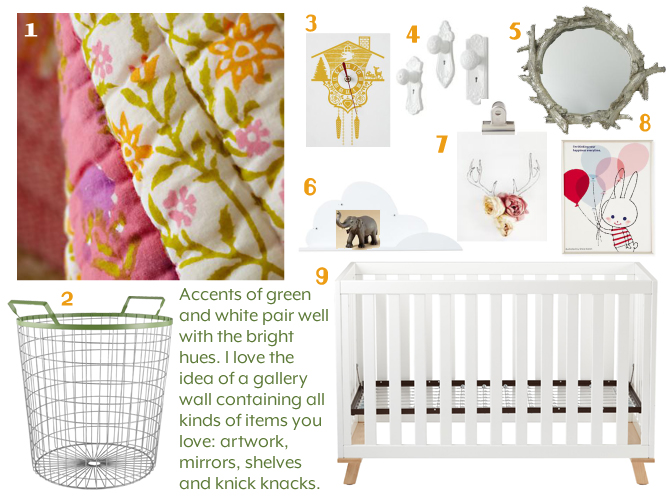
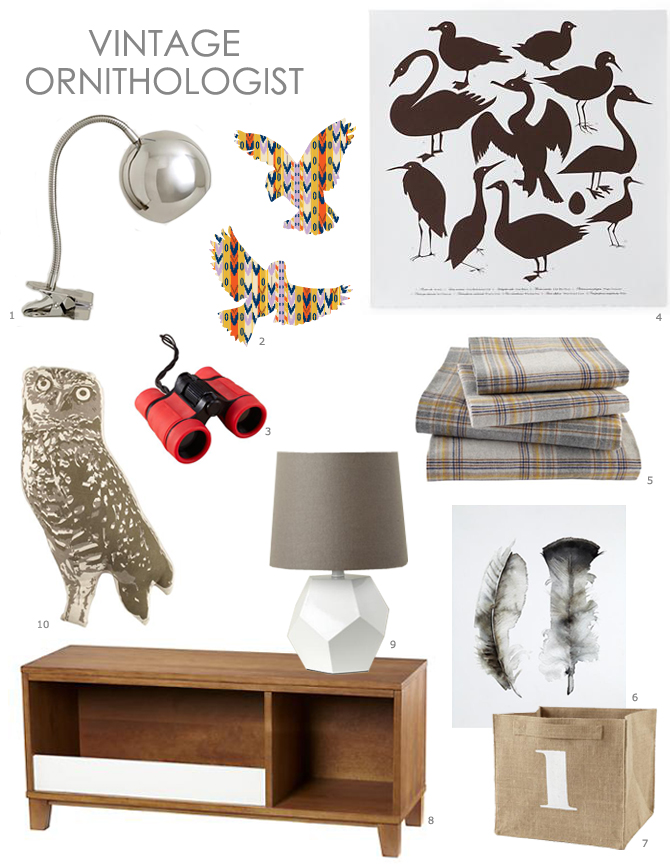
American Kitsch: For an adventurous bird-watcher, here is how to style a room inspired by the study of birds.
VINTAGE

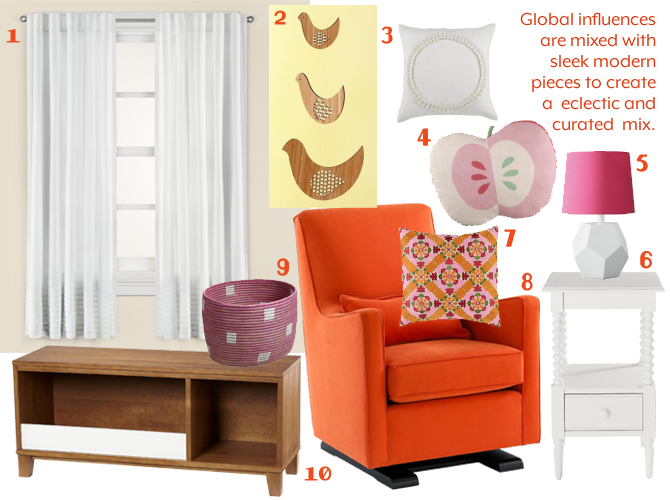
1 Modern Clip Lamp  2 Flashy Forest Wall Decal  3 On the Lookout Binoculars  4 Waterbirds Wall Art 5 Grey Plaid Sheet Set  6 Turkey Feathers  7 Store By Numbers Bin  8 District Storage Bench  9 Rock Lamp  10 Camp Owl Throw Pillow

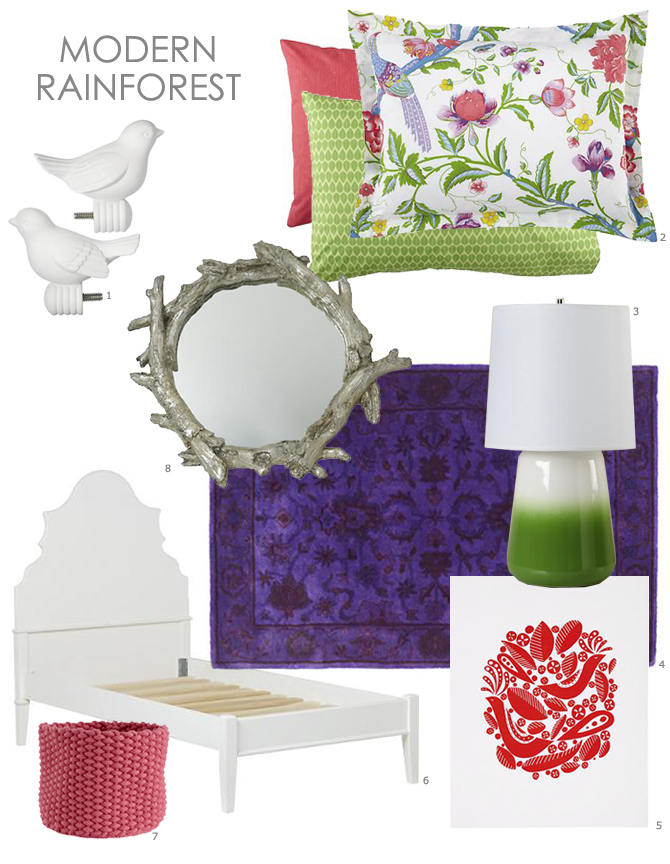
Soft & Quiet: Create a soft and luscious retreat with these bird-inspired pieces.

RAINFOREST

1 Bird Finials  2 Singing in the Rainforest Bedding   3 Gumdrop Lamp  4 Overdyed Rug  5 Red Birds  6 Monarch Bed  7 Knit Storage  8 Little Twigs Wall Mirror

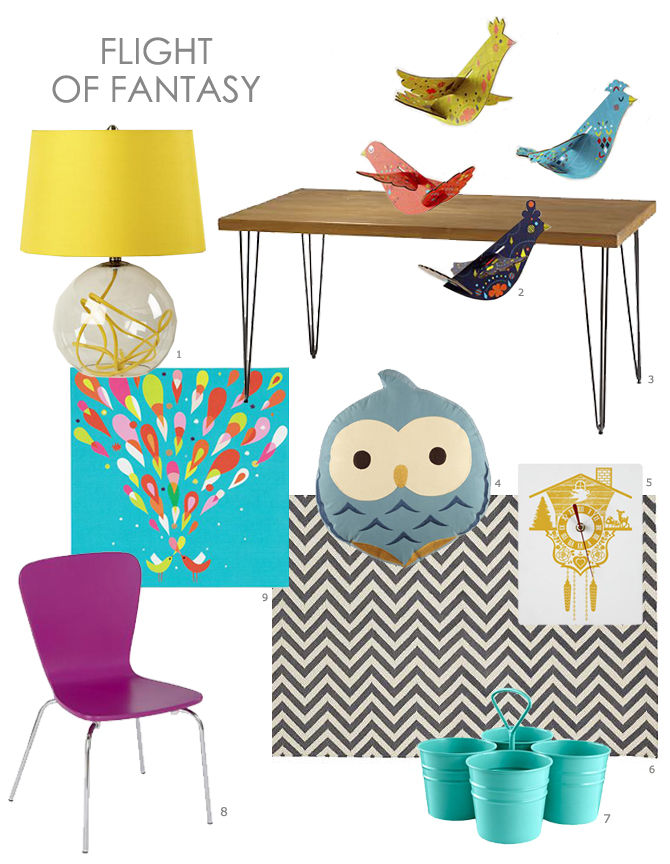
Bright & Bold: A bright and fun playroom inspired by quirky birds.
FLIGHT

1 Crystal Ball Table Lamp  2 Hang Your Birds High  3 Ansel Teak Play Table  4 Owl Throw Pillow  5 Coo Coo Clock  6 Chevron and On Rug  7 Art Caddy  8 Little Felix Chair  9 Twitter Birds Wall Art

By Anna Passadori

Anna develops and designs exclusive product for The Land of Nod. She hails from the west coast and has traveled the world to source product. She loves anything Marc Jacobs, Sofia Coppola or stripes! (So, if anyone can get a photo of Sofia Coppola wearing a striped outfit by Marc Jacobs, please send it along.)

Alt NYC

August 27, 2012

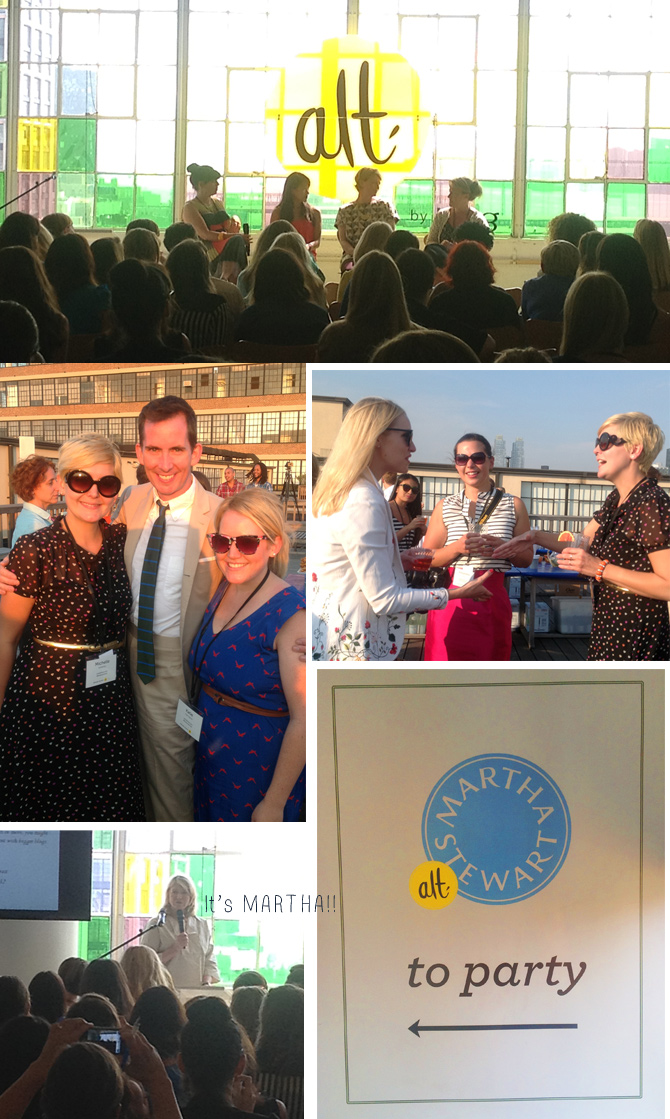
We're back from NYC after a whirlwind/amazing/inspirational trip at the Alt Summit! We decided just 13 days prior that now was the time to see what the hype was all about and join the blogosphere forces for the day…it was marvelous! We met a plethora of creative bloggers, photographers, designers – you name it.

AltCollage

We started the morning touring the offices at Martha Stewart Living Omnimedia crafting with new friends, Paul, Rachelle and Alexandra. We also got to meet our very own HTN contributor, Julee from Warm Hot Chocolate! My jaw literally dropped when I ran into Megan Gilger – one of my favorites! She mentioned this was her first trip to NYC, but of course her ah-mazing outfit said otherwise!

From there we were delighted to listen to the fabulous Tina Roth-Eisenberg, the founder of SwissMiss & Tattly – stay tuned, we've got some exciting plans with Tattly for our holiday season! A panel of Martha Stewart's top editors then shared information about their creative process from start to finish. Their team was more than accommodating to the 150+ attendees – in fact, we even got to meet Kevin Sharkey, Martha's right hand man!

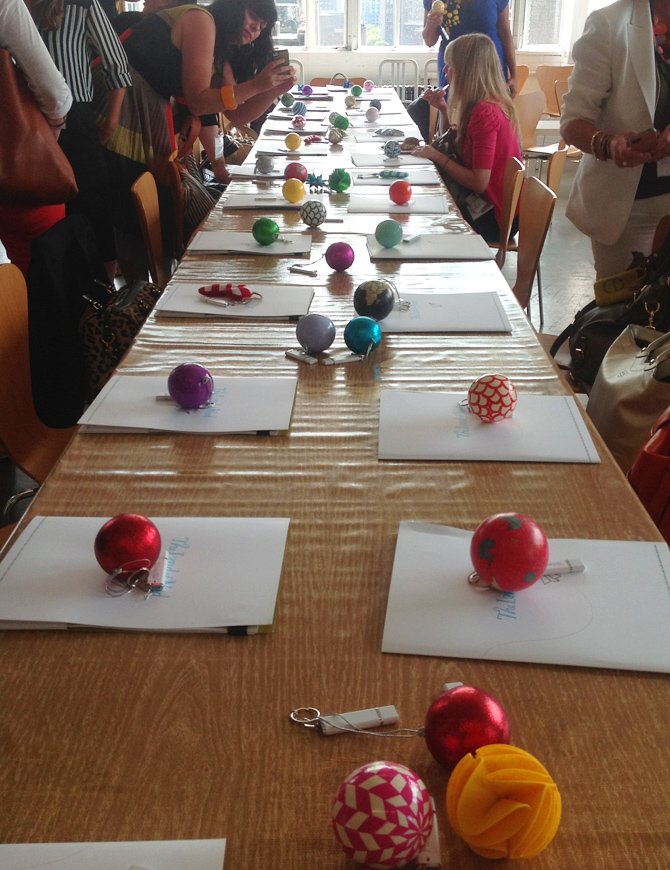
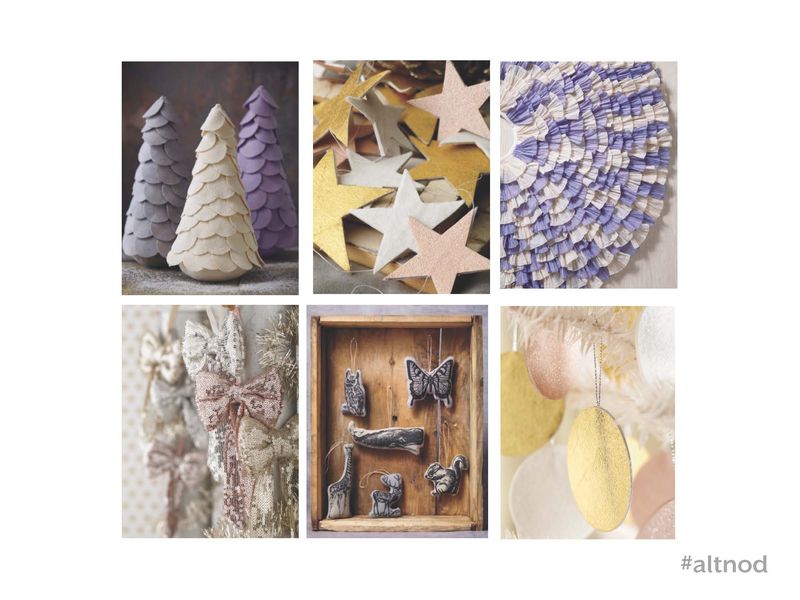
We were so honored to sponsor lunch and network with all of the attendees. The holidays are right around the corner, so we wanted to give a sneak peek of our holiday assortment!

NodLunch

Here's a bit of what was presented:

TheLandofNod_AltSummit_Page_04

We then listened to helpful social media tips from a panel including the founder of Matchbook Magazine, Katie Armour when Martha herself popped in to say hello! We also had a wonderful conversation with Emily Meyer, founder of Tea Collection after she presented clever things they were doing with their branding.

We then wrapped up with an after party up on the roof that overlooks Chelsea Piers. Sipping delicious cocktails and engaging in fun conversation was the perfect way to end such an incredible day! All in all we were overjoyed meeting new friends, customers and brands from all over the United States. Alt 2013, perhaps!?

By Katie Harrington

In addition to being the mom to heart-throb toddler, Gavin, Katie’s in charge of all things social media and PR at Nod. She’s exceedingly energetic, which is good since, like the rest of us, she’s just trying to figure out how to be an incredible mom, while working and still having a blast being young herself! (BTW, we think she’s nailing it, but she’d probably disagree…darn mommy guilt.)