Close

Blog

Things to Make – Watermelon Mojitos

August 27, 2012

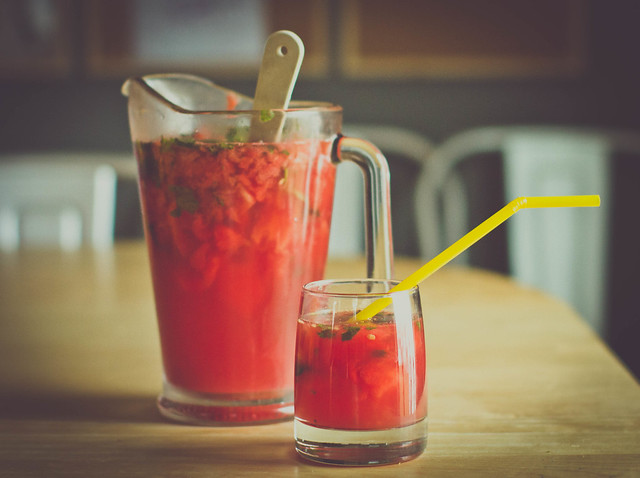
untitled (7 of 7).jpg Ever since we visited New Orleans, I can't stop raving about the watermelon mojitos at Jacques Imos. When I asked our waitress their secret, she said peach rum. So I came home and tried to make my own version. Pretty yummy. If I do say so myself. Here's my imprecise recipe:

INGREDIENTS: 1 small watermelon, 1 bunch of mint, 1 lime, peach rum, ginger ale, ice

1. Slice a small watermelon into medium-sized chunks. Remove the seeds and dump the chunks in a pitcher.

2. Cut up mint (at least 6 sprigs, if not more) and dump in the pitcher.

3. Dump at least a cup of peach rum into the pitcher.

4. Slice up a a lime and add the pieces to the pitcher.

5. Fill up the pitcher with ginger ale (or sprite). You can also add a few tablespoons of sugar, but I found that this made it too sweet.

6. Use a large spoon to muddle. The goal is to have the watermelon become kind of slushy but not completely liquified.

7. Add ice and drink with a straw.

Post by Darcy : bedtimemonsters.blogspot.com

Make Your Own Stamps!

August 24, 2012

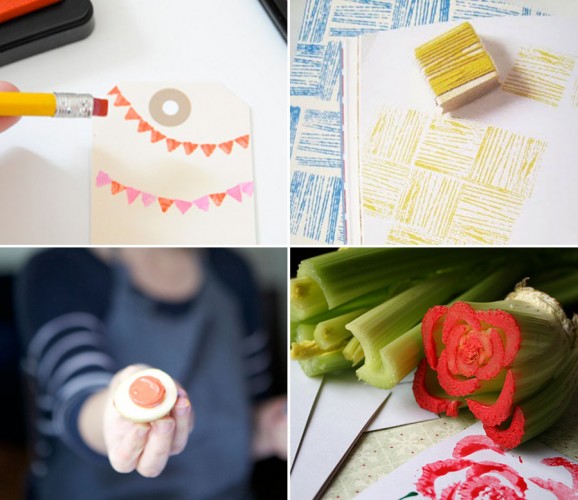
Summer is just about over. (I know — it’s hard to believe!) If you’re all out of ideas for things to do with your kids, we recommend some stamping fun. Don’t have stamps? No problem! It’s so much more fun to make your own anyway. We’ve been collecting lots of ideas for homemade stamps:

1

E R A S E R S… Using both the top of pencils or the block variety.

Y A R N… This clever make-shift stamp creates cool, textured lines.

P O T A T O… Can’t forget this classic. Your kids will definitely get a kick out playing with their food.

C E L E R Y… Cut off the bottom of your stalk and stamp to make a pretty rosette. What to do with the rest of the celery? Cut into sticks and keep in the fridge for snacking, of course!

Have you ever made your own stamps before?

Reposted with permission by Aimée Lowry & Bettijo B. Hirschi from PagingSupermom.com

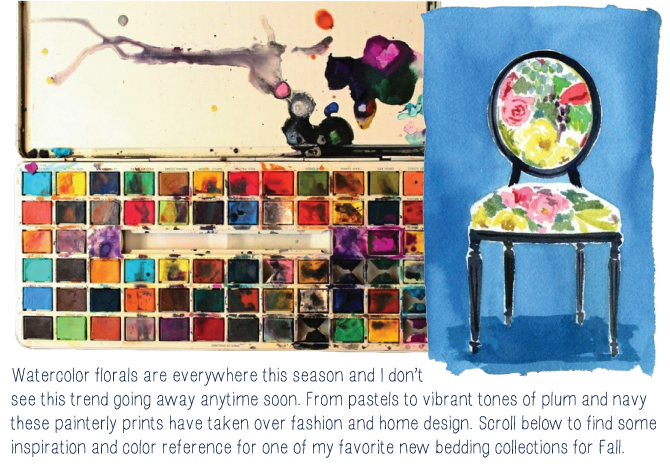
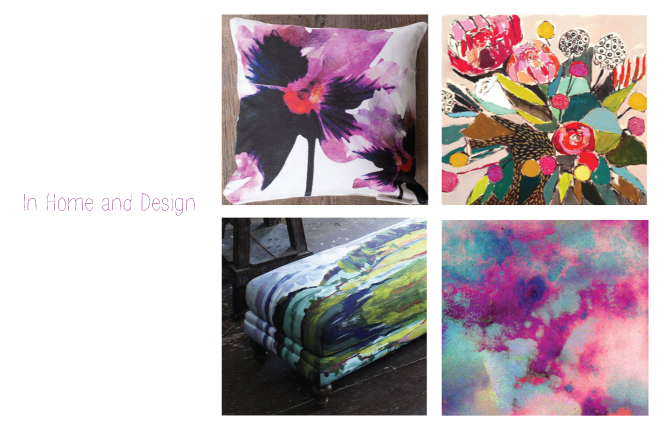
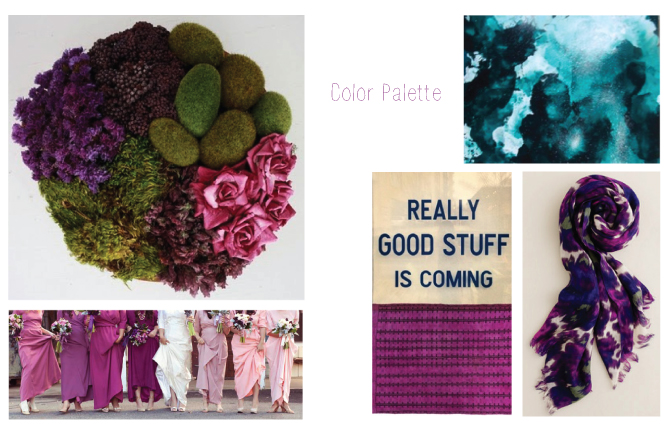
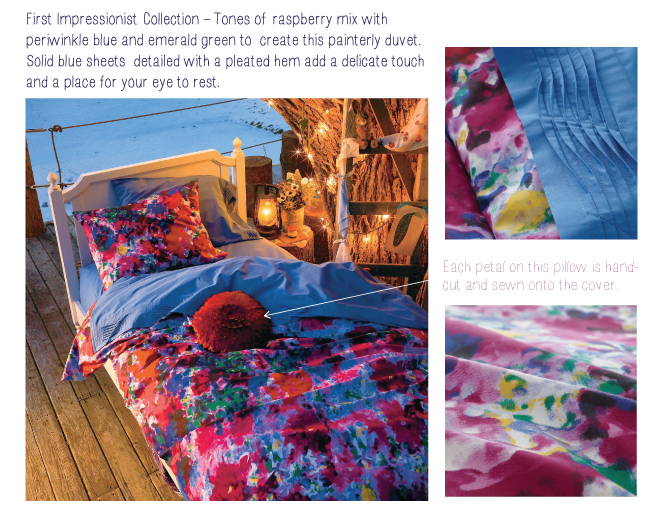
Watercolor Floral

August 23, 2012

WatercolorFloral_1
1/2

WatercolorFloral_2
1/2/3

WatercolorFloral_3
1/2/3/4

WatercolorFloral_4
1/2/3/4/5

WatercolorFloral_5
1

By Sarah Culbertson

Once upon a time a fashion plate from Seattle met a childrens retailer from Chicago, and it was love at first sight.  After spending a lot of time together at the mall, they both knew it was a perfect match. So Sarah packed up her fabulous Kate Spade suitcase and headed for the Windy City. Where they lived happily ever after, designing and developing textiles for little kiddos everywhere.

DIY Crate Bookshelf

August 22, 2012

Post by Christina Williams of justcallmechris.blogspot.com

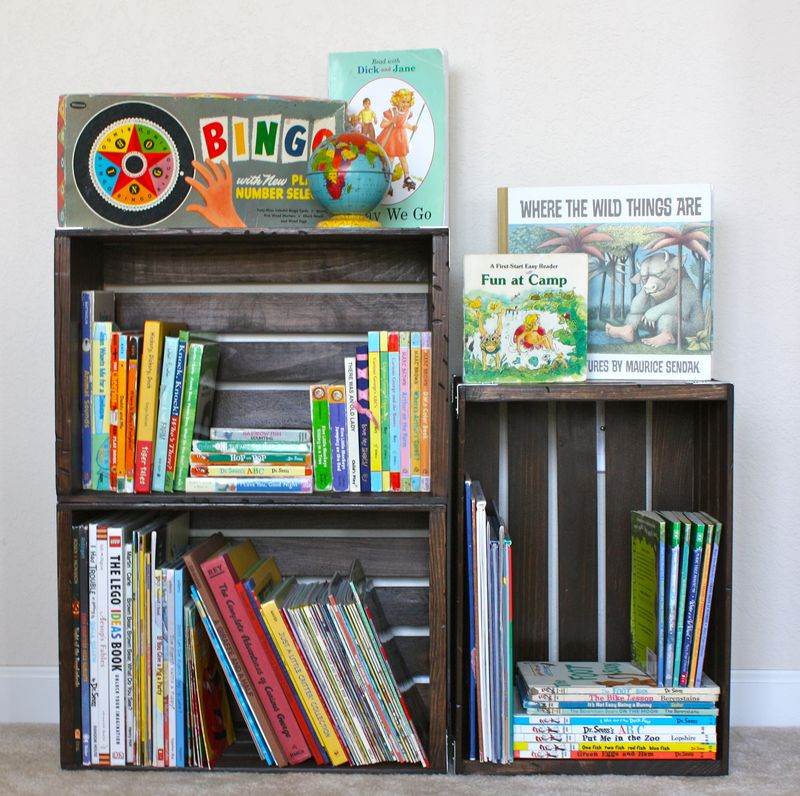
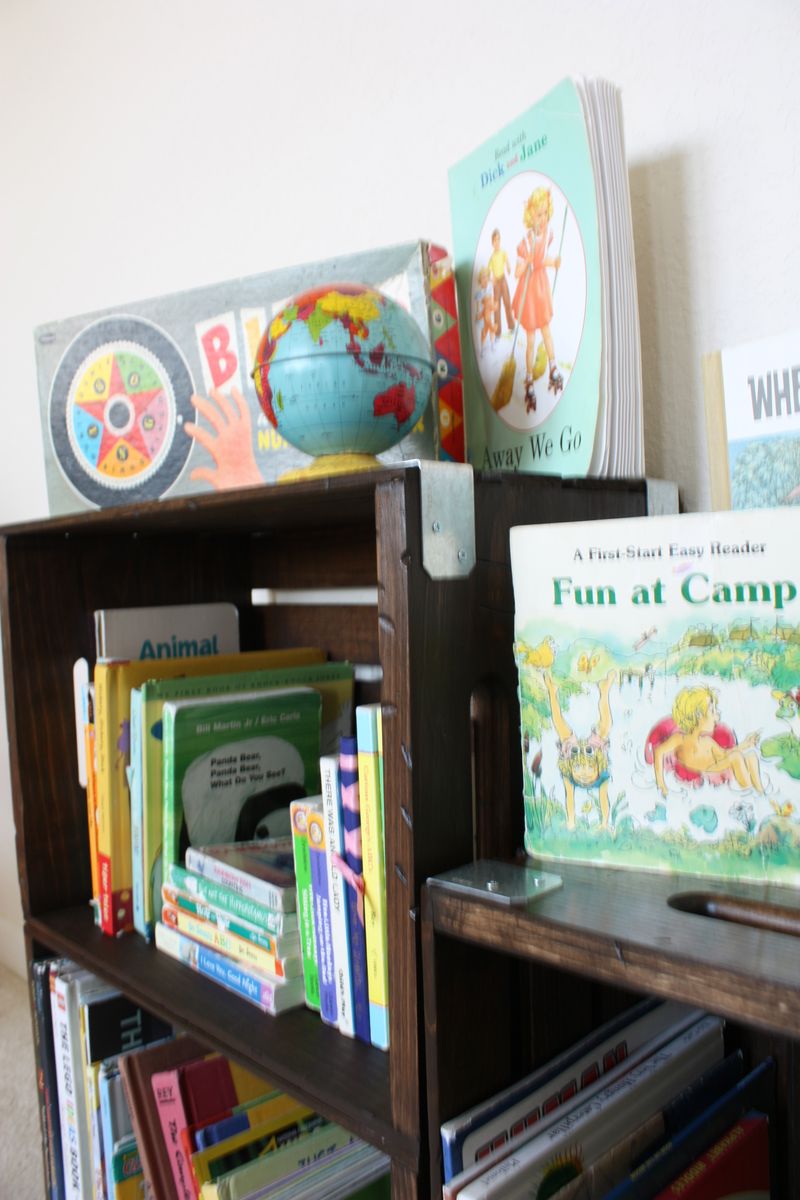
When we moved into our new home I realized pretty quickly that we needed a new storage solution for the kids’ books. I was in the mood for a little project so I decided to make something myself. I grabbed a few unfinished wooden crates and set to work. These things are a dime a dozen. You can find them at most craft or home improvement stores. If you have a coupon, you can usually get them for 7-10 bucks a piece.

IMG_8955

Here’s a little play-by-play:

  1. Sand them down. Ugh. Sanding’s the worst part, right? My crates were pretty rough when I got them, so started with 80 grit, then 100, then 150. They’re not exactly silky smooth; my main goal was to smooth them up enough so the kids wouldn’t get splinters on their new bookcase.
  2. Beat ’em up. My kids LOVED this part (maybe a little too much). Get creative here…use nails, hammers, chisel, chains, anything to make scratches and dents. If your scrapes leave any rough edges, you may want to sand them down a bit.
  3. Stain. Make sure your crate is clean and free of dust, then stain it your desired color. I used my favorite stain (Rust-oleum Dark Walnut). They’ve got these nifty half pint cans that are perfect for a small project like this.
  4. Seal. Finish with a coat of polyurethane. I used Satin finish, because I didn’t want too much shine.
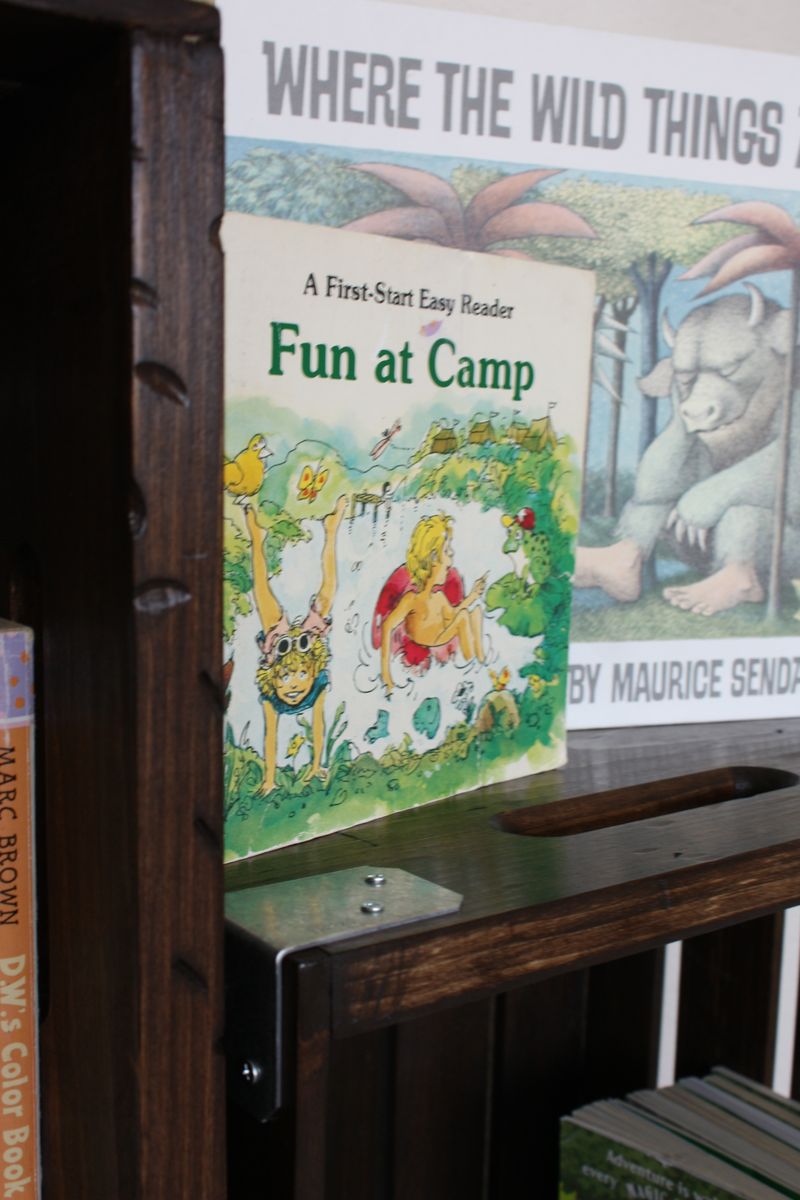
  5. Finishing touch. Screw on some corner brackets. (optional) They’re technically called “angles” and you can find them in the roofing section.

IMG_8965

  IMG_8966

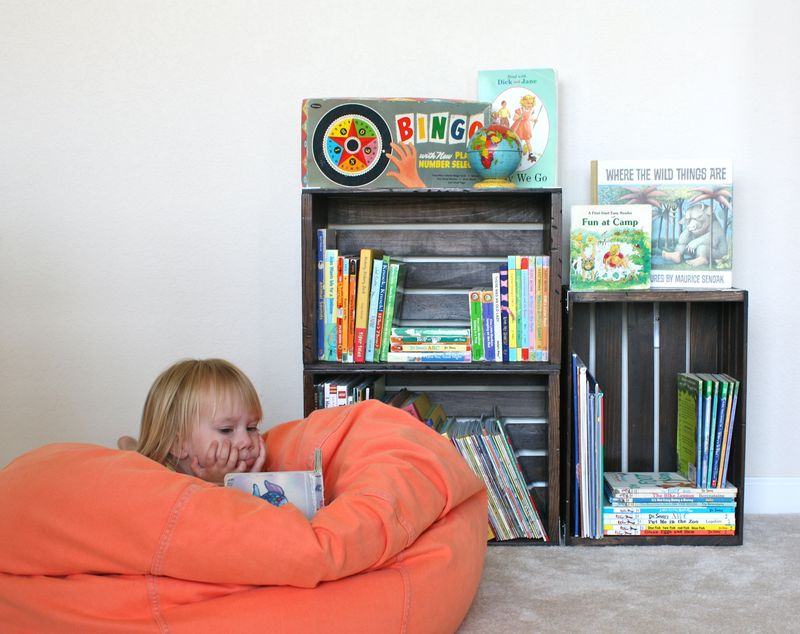
6.  Configure & attach. I attached the two horizontal crates to one another with wood glue and some screws underneath. The vertical crate I left unattached so it can also double as a handy carrying crate/nightstand if needs be.

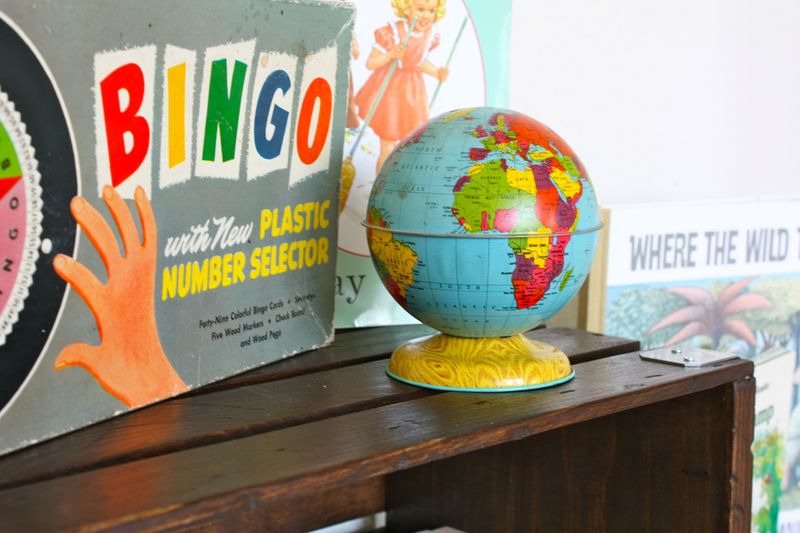
Now just fill up those shelves. We gathered all of our books inside the crates (the tall crate is perfect for those extra-tall books. We displayed a few of our favorite vintage goodies up top. And what reading nook would be complete without a comfy reading spot? Now the kids can add their favorite artwork to the walls and we’ll be all set.

IMG_8960

IMG_8980

Post by Christina Williams of justcallmechris.blogspot.com

Things to Make – Bleach Pen T-Shirts

August 21, 2012

make    My husband's weekend wardrobe needs a bit of a shake up. It's time for Phi Gam shirts circa 1995 to go in the trash. So we decided to make him some new t-shirts. The easy way. Who doesn't love a bleach pen?

HERE'S THE SCOOP:

1. Purchase plain t-shirts, preferably from a craft store (like AC Moore) where they are super cheap

2. Purchase a bleach pen, located by the bleach at target

3. Put a paper bag or piece of cardboard on the inside of the tshirt (so the pen won't leak through)

4. Tell your kids to draw with the pen

5. Let t-shirt sit with bleach on it, when the color looks "done" wash off the bleach in the sink (we let our tshirts sit for about 10 minutes)

6. Wash t-shirt in laundry machine

7. Gift t-shirt Also, click here to see someone else's really snazzy bleach pen t-shirts. There's an art to this, we just haven't mastered it yet. done

Post by Darcy : bedtimemonsters.blogspot.com

This One’s for the Boys

August 20, 2012

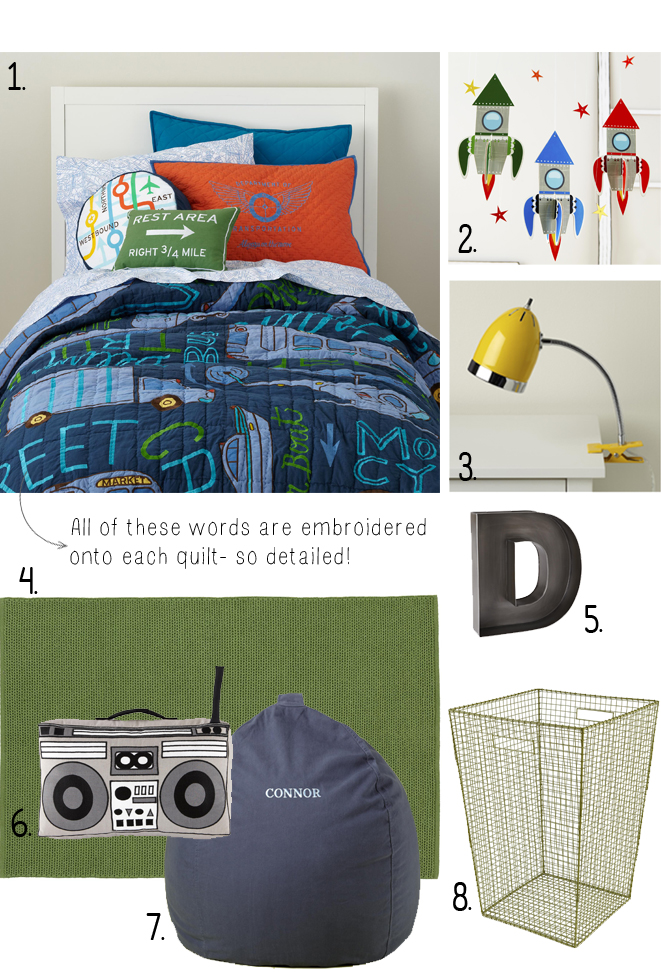
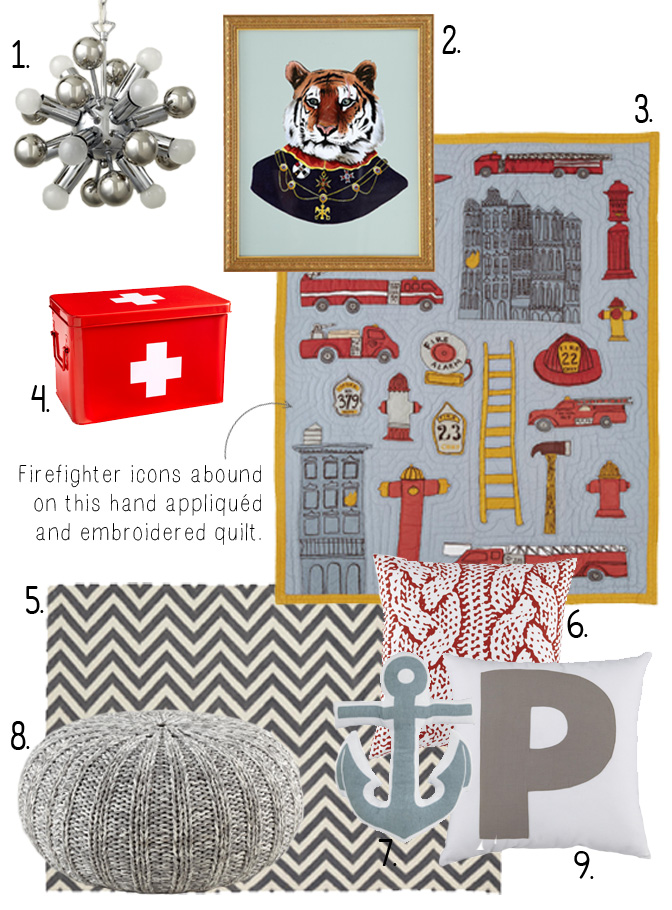
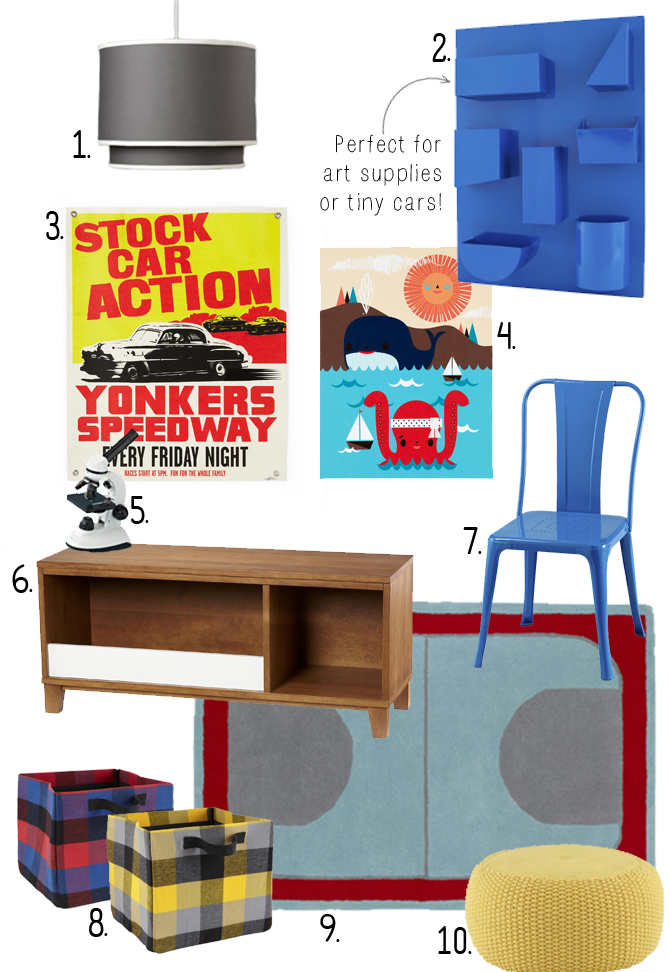
Cars, Fire Trucks, Monsters,  Nautical- sometimes boys rooms can turn into one big theme park. Here are three takes on incorporating these true “boy” themes  without loosing your eye for design… or your sanity.

BoyBlog_1
1/2

Traditional blues and greens are brightened with spots of yellow, orange and green.

BoyBlog_2
1/2/3/4/5/6/7/8

A sophisticated palette  of neutrals is accented with fire engine red.

BoyBlog_3
1/2/3/4/5/6/7/8/9

Varied textures and materials creates an eclectic look. The use of three main primary colors keeps everything pulled together.

BoyBlog_4
1/2/3/4/5/6/7/8/9/10

By Sarah Culbertson

Once upon a time a fashion plate from Seattle met a childrens retailer from Chicago, and it was love at first sight.  After spending a lot of time together at the mall, they both knew it was a perfect match. So Sarah packed up her fabulous Kate Spade suitcase and headed for the Windy City. Where they lived happily ever after, designing and developing textiles for little kiddos everywhere.

Roasted Corn Salad

August 17, 2012

This salad is a fabulous combination of the Summer’s finest crops (well, at least here in Northern MI): corn and tomatoes.  It was last year when I discovered the joy of roasting tomatoes when trying a recipe from Heidi Swanson’s Super Natural Everyday cookbook.  These are fabulous and enhance the flavor of sweet, fresh tomatoes into something magical.  Then, recently I was reading a recipe from the Meatball Shop Cookbook for Roasted Corn Salad and thought I could combine the two recipes into one. So, here it is!

Preheat the oven to 450.

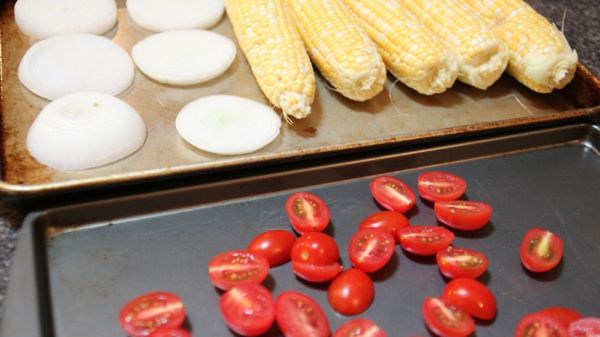
Husk five ears of corn.  Slice the onion into 1/4″ rings and arrange on a baking sheet with the corn.  Halve the tomatoes and place them on another baking sheet. Brush the corn and onions with olive oil and sprinkle with salt and pepper.  Drizzle the tomatoes with olive oil and sprinkle with salt and sugar.
Roasted-Corn-1

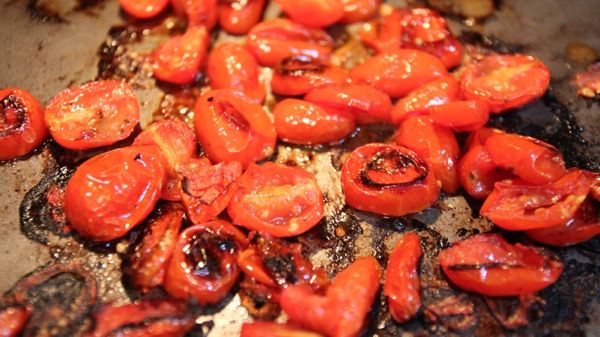
Roast the tomatoes for 25-30 minutes.
Roasted-Corn-2

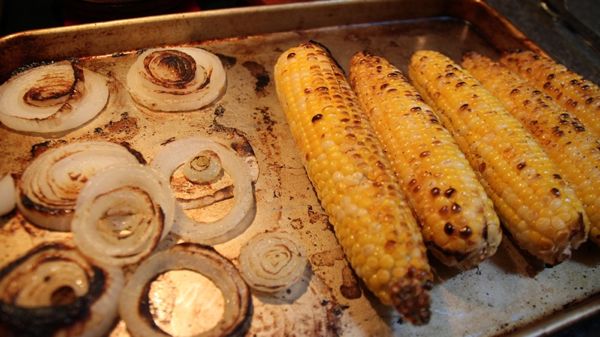
I roasted the onions and corn for about 35 minutes and then put them under the broiler (turning once) until char marks appear.
Roasted-Corn-3

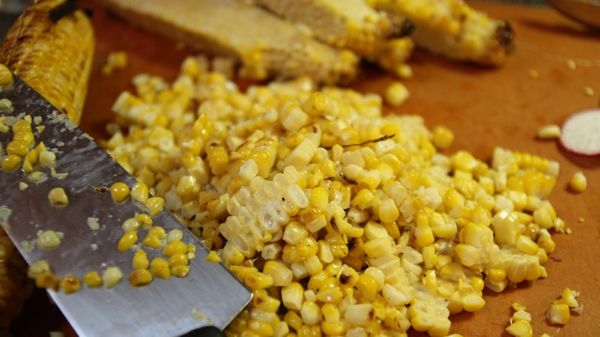
Once the corn is cooled, shave the kernels off.  Slice the onions in half.
Roasted-Corn-4

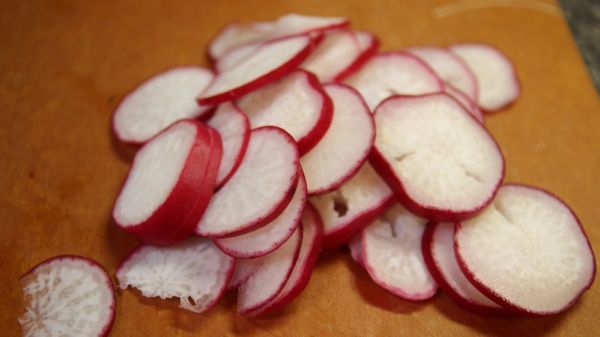
Slice 4-6 radishes thinly.

Roasted-Corn-5-1

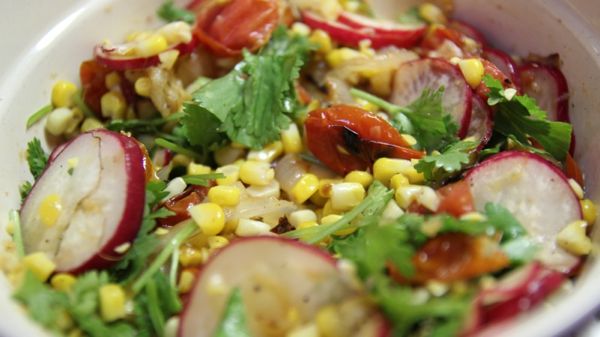
Add everything to a bowl and and coat with 4 TB (to taste) of lime juice.  Add salt and pepper to taste.  Top with roughly chopped cilantro.
Roasted-Corn-6

Recipe:

5 ears sweet corn, husked

1 large yellow onion

1 pint cherry tomatoes

4-6 radishes, sliced

4 TB lime juice

1/4 cup chopped cilantro

Preheat oven to 450

1. Slice onion into 1/4″ thick slices and place on baking sheet with husked corn.  Brush with olive oil, salt and pepper.

2. Halve tomatoes and coat with olive oil. 1/2 tsp salt and 1 TB sugar.  Place tomatoes on baking sheet.

3. Roast tomatoes* for 25-30 minutes until tender and caramelized.

4. Roast corn and onion for 30-35 minutes. Place under broiler for a few minutes each side until char marks appear.

5. Let corn cool then shave kernels. Slice onions in half.

6. Thinly slice radishes.

7. Combine tomatoes, onions, corn and radishes into serving bowl.

8. Top with lime juice (to taste). Adjust salt and pepper and top with chopped cilantro.

*You could easily grill the vegetables!

Post by Meredith Falconer : Mom Colored Glasses
Chalkboard Notebooks

August 16, 2012

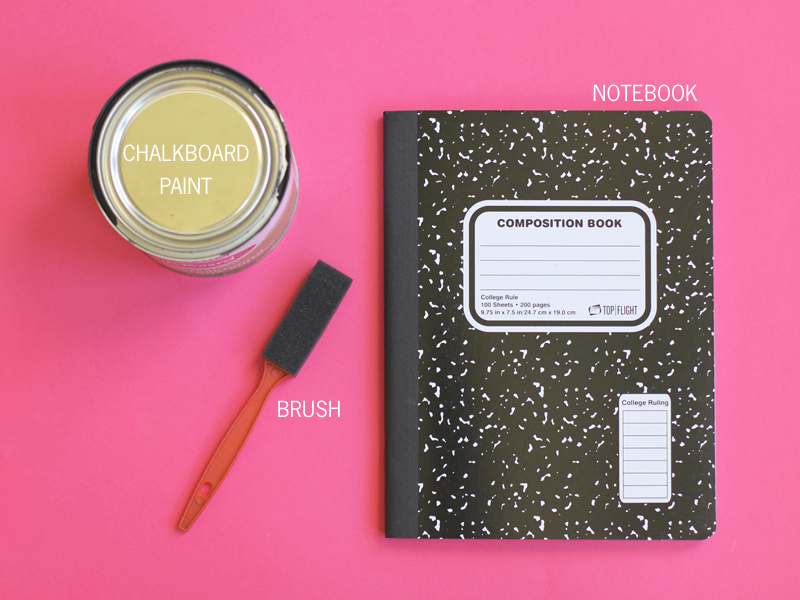
Earlier this summer, I painted the surface of an old table with chalkboard paint. The table has been a huge hit with my kids, and I've become a huge fan of chalkboard paint. I recently tried painting a few composition notebooks with the leftover paint. I wasn't sure how well notebooks would hold up after being painted, but it worked out perfectly. The chalkboard paint dries very quickly, so I don't think the cardboard surface had time to absorb much paint.

The notebooks were super easy to paint and the result was pretty cool. It's a great way to label a set of notebooks for different subjects or projects, and it's a great way to doodle in class without wasting paper. But, of course, I'm not recommending that last part.

Here's What You'll Need:

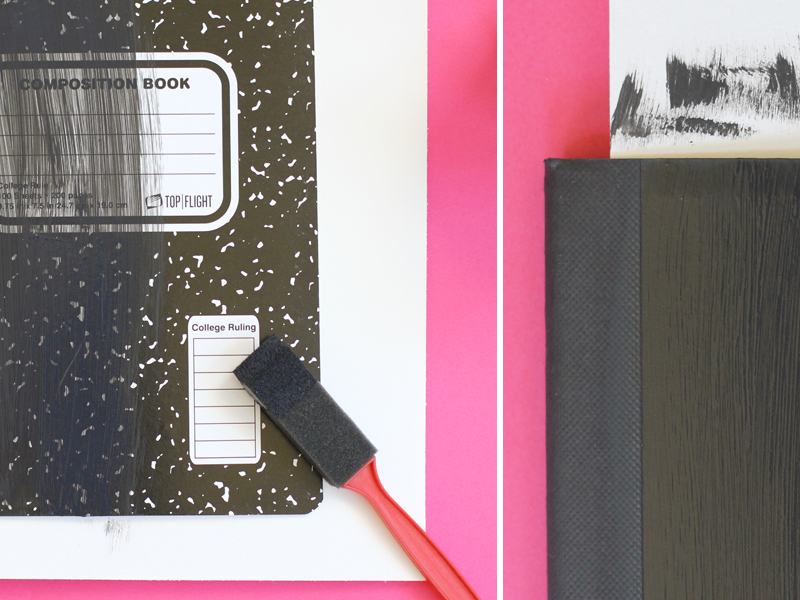
Notebook-01

Notebook/s (composition books work best)

Chalkboard Paint

Paintbrush (sponge brushes work really well)

Here’s How I Made Them:

Notebook-02

I started by inserting a sheet of paper between the cover and the pages of the notebook so that the paint wouldn’t get on the edges. I painted about 4 very thin coats of paint on each cover, letting the paint dry between coats (about 20 minutes).

Notebook-03

Once the notebook surfaces were well-covered with paint, I let the notebooks completely dry overnight.

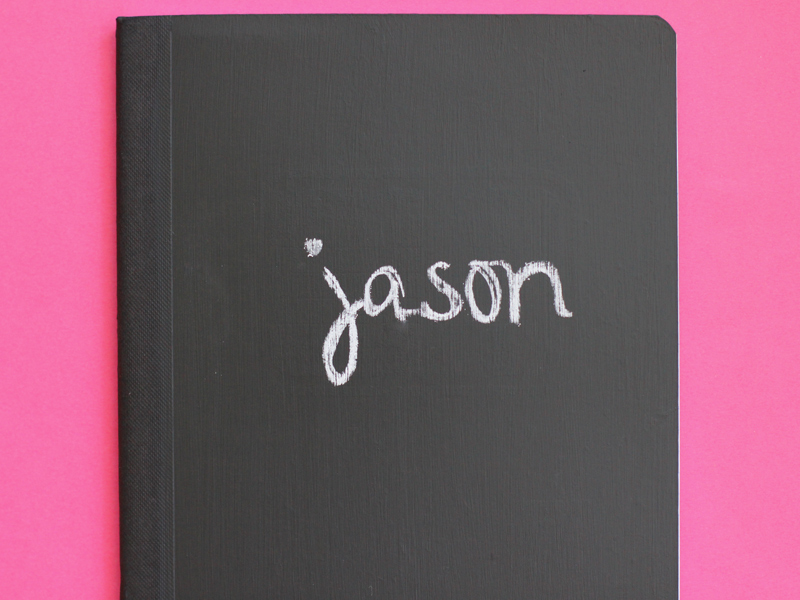
Notebook-04

The next day, I started labeling my notebooks. I haven’t given them to the kids yet, but once I do, I’m sure my labels will be replaced by drawings of flowers, houses and maps (my daughter’s current favorite subject).

Post by Julee Dyer : Warm Hot Chocolate

Floral Explosion

August 15, 2012

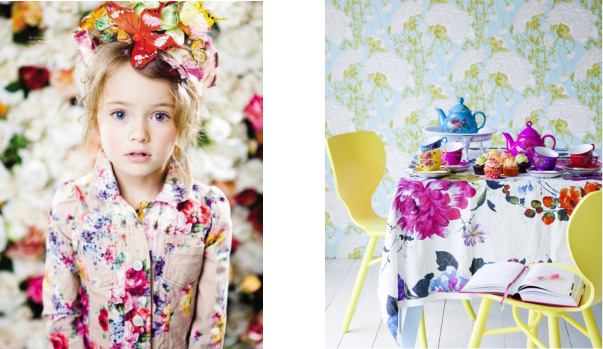
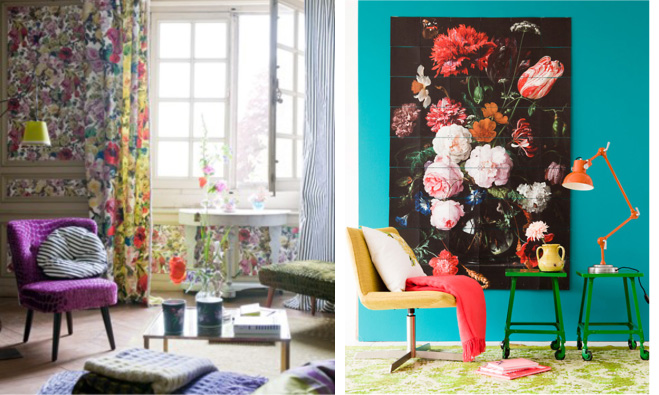
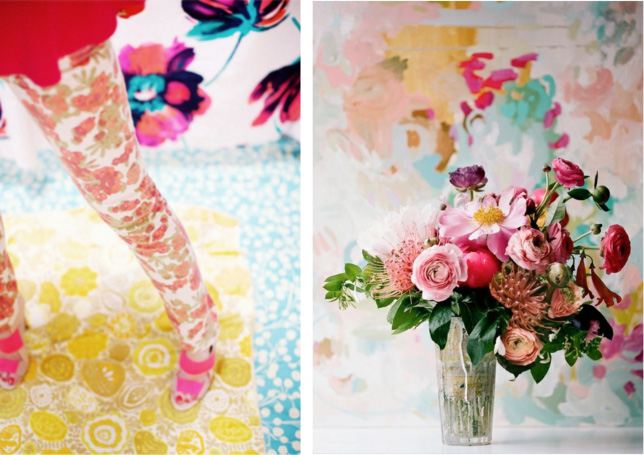
Florals are popping up all over the place lately…especially on…other florals. This floral on floral trend can be a bit tricky to pull off. Here are a few ways to add this trend to your room without looking too pattern crazy.

FloralFloral1
1/2

The main floral patterns in this room follow the rule of small, medium and large patterning- allowing your eye to read them separately instead of a jumble of pattern.  The color palette is also helpful here- there are a few pops of bright color but items such as the rug and vintage floral sheet set read as a solid from a far.

FloralFloral2
1/2

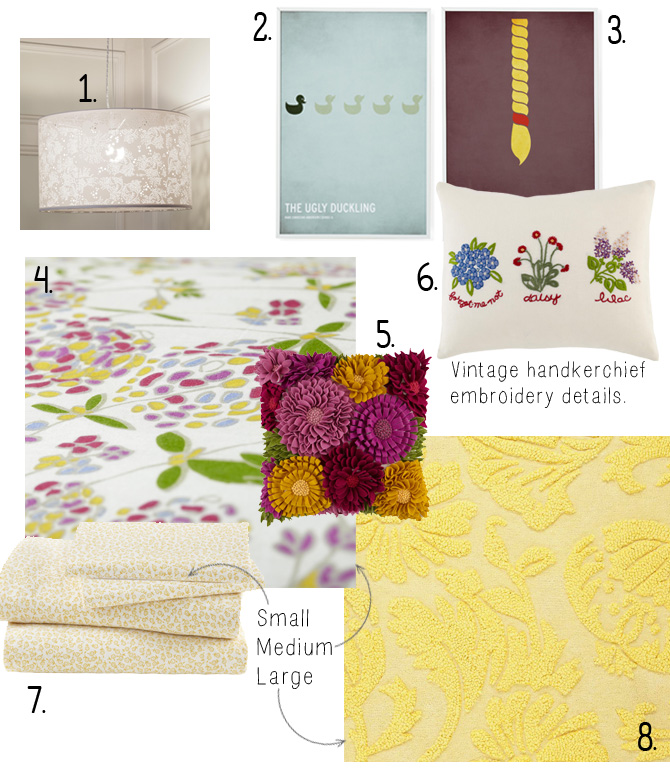
FloralFloral3
1/2/3/4/5/6/7/8

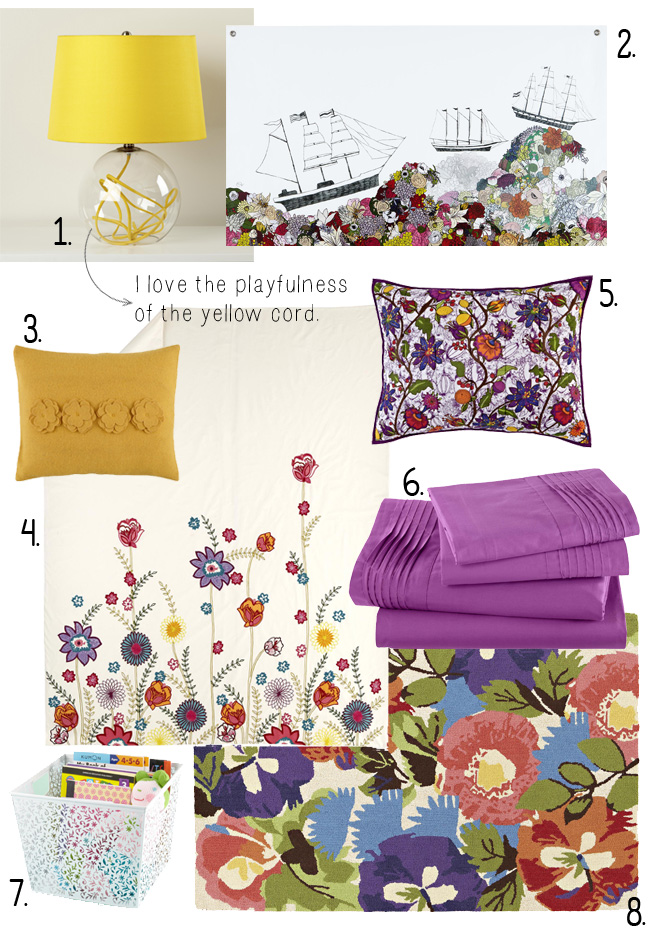
Rich tones of plum and mustard add a sophisticated flair to these florals. With a embroidered duvet, printed sham, pleated sheets, wool rug and felt cut pillow, textures abound in this room.

FloralFloral4
1/2

FloralFloral5
1/2/3/4/5/6/7/8

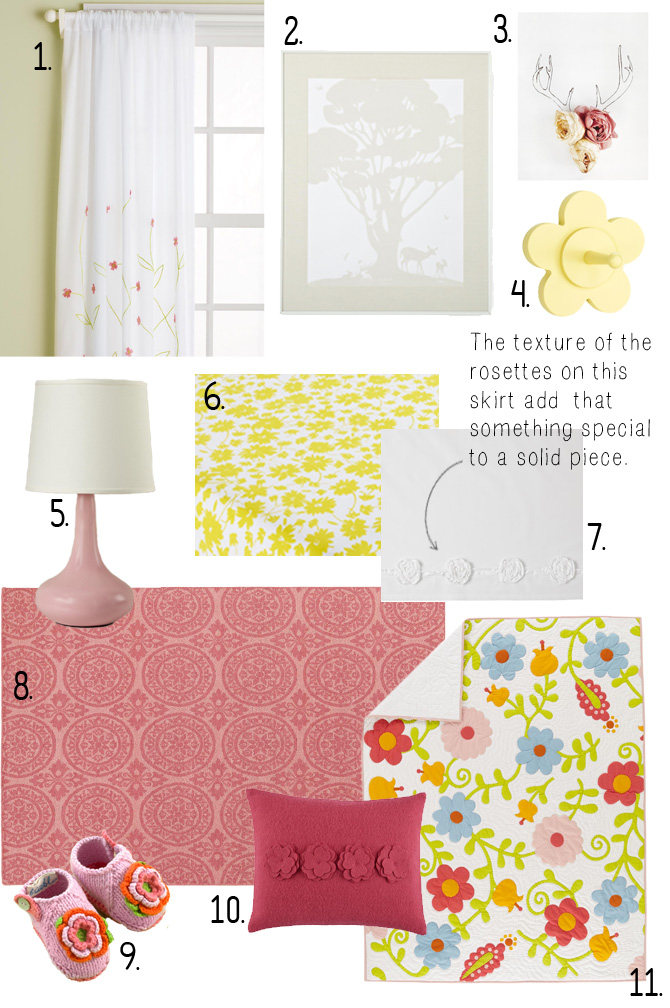
A softer palette of pale pinks, lemon yellow and sky blue allow for a calming feel to this floral nursery.  Large placements of white add to the overall relaxing vibe. Don’t be afraid to play with different components to get the look you want. None of the below pieces come from the same collection!

FloralFloral6
1/2

FloralFloral7
1/2/3/4/5/6/7/8/9/10/11


By Sarah Culbertson  

Once upon a time a fashion plate from Seattle met a childrens retailer from Chicago, and it was love at first sight.  After spending a lot of time together at the mall, they both knew it was a perfect match. So Sarah packed up her fabulous Kate Spade suitcase and headed for the Windy City. Where they lived happily ever after, designing and developing textiles for little kiddos everywhere.

Rainbow Transfer Drawings

August 14, 2012

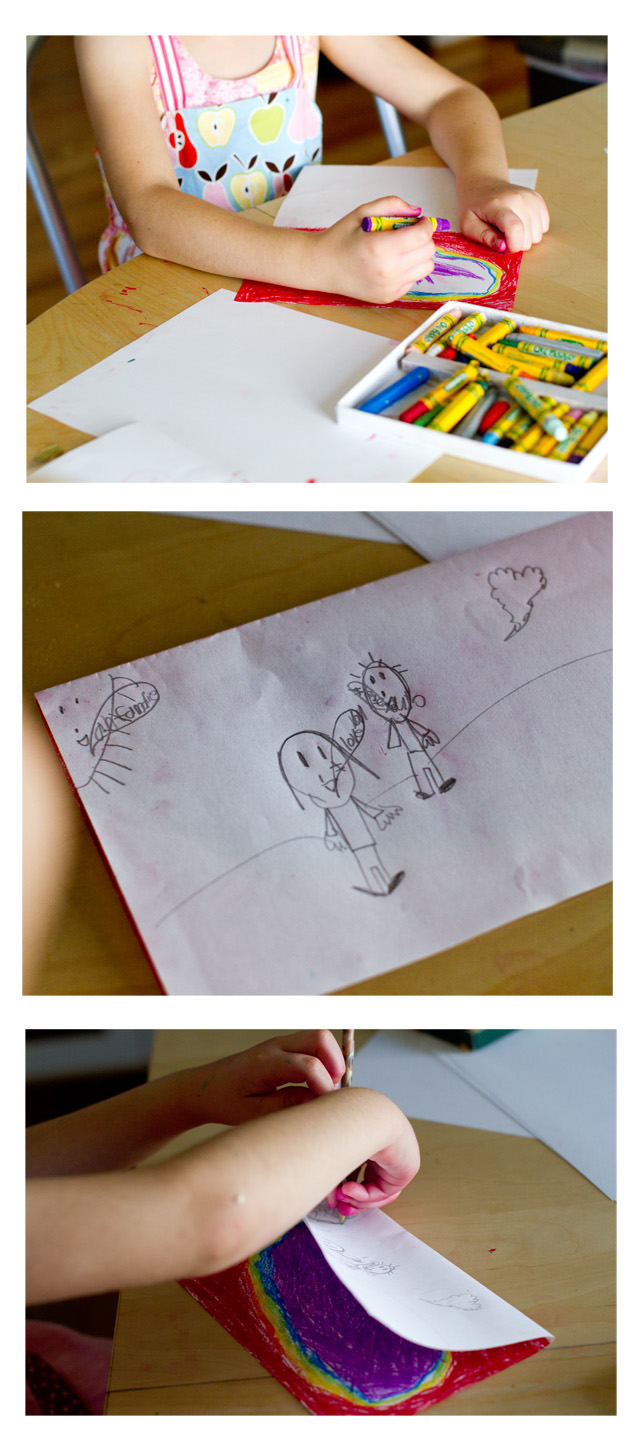
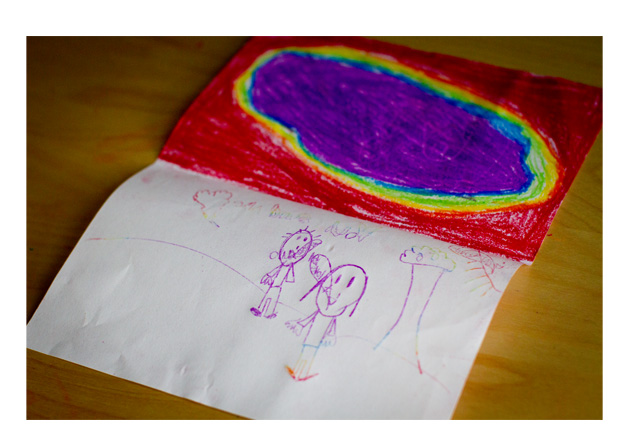
three one   We learned about rainbow transfers on The Chocolate Muffin Tree (lots of good stuff over there). This is an easy and fun project that requires almost no materials – great for entertaining the kids while you make dinner.

Here's the scoop: Materials – Oil pastels (we use these) or crayons (though oil pastels work much better), plain white paper, and a pencil.

1. Fold the paper in half as if you're making a greeting card.

2. On the inside of the "card" (where the message usually goes) color with the oil pastels, make sure to fill up all of the space.

3. Close the card and draw a picture on the "front" using the pencil. Make sure to press down hard.

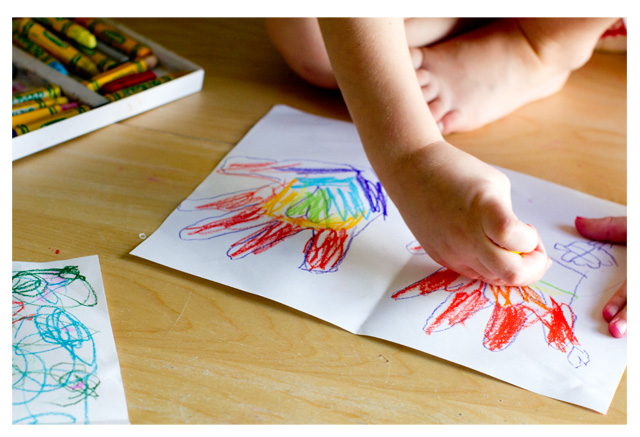
4. Now open the card and inside you'll have a rainbow drawing. Like magic. hands When the kids finished rainbow transferring they colored their hands for awhile.

Post by Darcy : bedtimemonsters.blogspot.com

Every Girl Needs Her Own Set of Tools

August 13, 2012

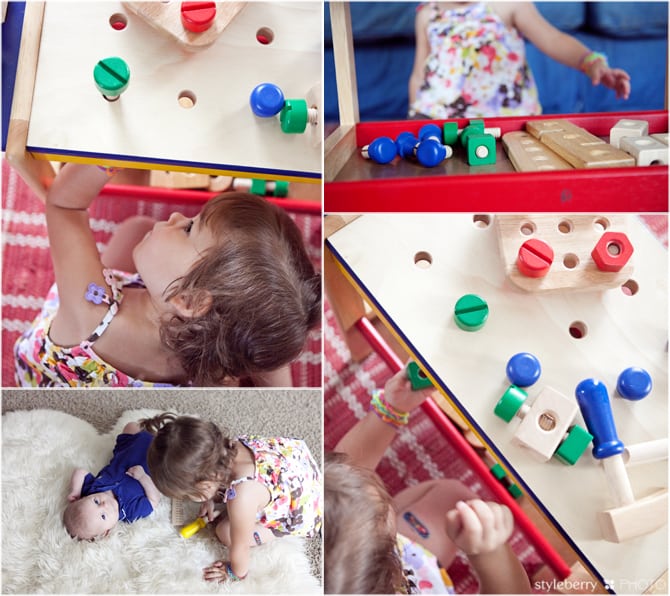
Some of my fondest memories as a kid were in my garage with my dad. We built stuff. We painted stuff. We did a lot of messy things, and I loved it. I knew how to use a drill & a paint brush at a very young age. & despite being very into all things girly, I certainly loved my tools and garage time. & I hope my kiddies do too.

Although my first born was a girl, the last thing I wanted was a playroom exploding with pink. Don't get me wrong, we have plenty of babies & strollers, but we've got lots of hammers and cars & dump trucks too. 🙂 I want her to play with it all. & when my son starts playing, I will encourage him to love on babies just as I encourage her to use her screwdriver. As gender roles are defined early, I think it is vital for a little girl to know she can do all the things little boys are supposed to love–and is more than capable of doing them herself.

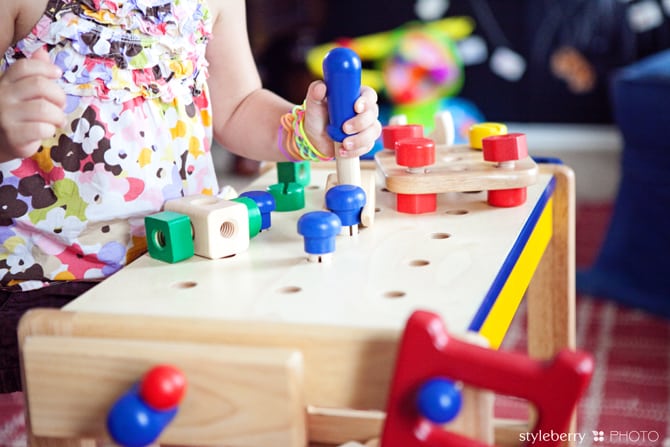
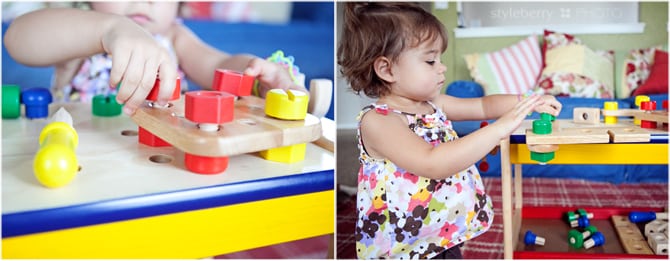
Which is exactly why we are loving this workbench! It's one of my favorite things from Land of Nod. & my girl is loving it. As you can see! 🙂

'Cause every girl needs her very own set of tools. Swear. 🙂

Post by shawna of styleberryBLOG.com

Despite days full of washing diapers & messy fun, Shawna is determined to make mommyhood a stylish adventure. Married to the military & mother to one feisty girl & a snuggly little guy, she is a passionate DIYer & loves sharing how to make the complicated simple. Shawna talks creativity, style, food, decorating, green-chic living & mommyhood at styleberryBLOG, a daily-ish dose of something fab.

Hungry Alligator

August 10, 2012

1

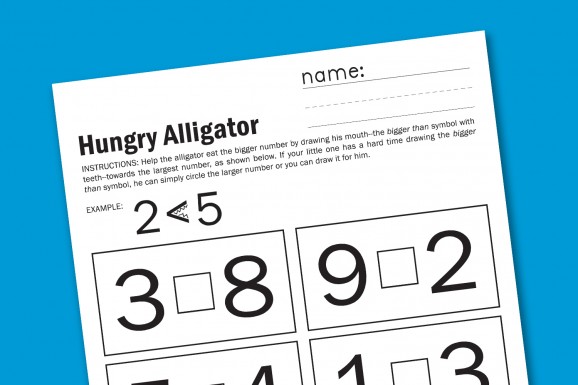
I still remember my Third Grade teacher, Mrs. Imus, teaching my class the bigger than symbol. She explained the symbol as an alligator’s mouth eating the bigger number, and her drawing of the alligator’s teeth chomping the bigger number is forever ingrained in my head.

So, as I was thinking about what kind of worksheet to share, I thought we could all use a little Hungry Alligator action. I used small numbers (1-9) so even the youngest preschooler can participate in this week’s worksheet!

Reposted with permission by Aimée Lowry & Bettijo B. Hirschi from PagingSupermom.com

Road Trip Survival Kit

August 9, 2012

School supplies are filling the store shelves, which means summer is almost over. But if you're planning a last-minute road trip, here are a few helpful hints I learned this summer. We made two long road trips, for a combined total of 21 hours of driving with all three kids (and we lived to tell about it!)

Road Trip Survival Kit

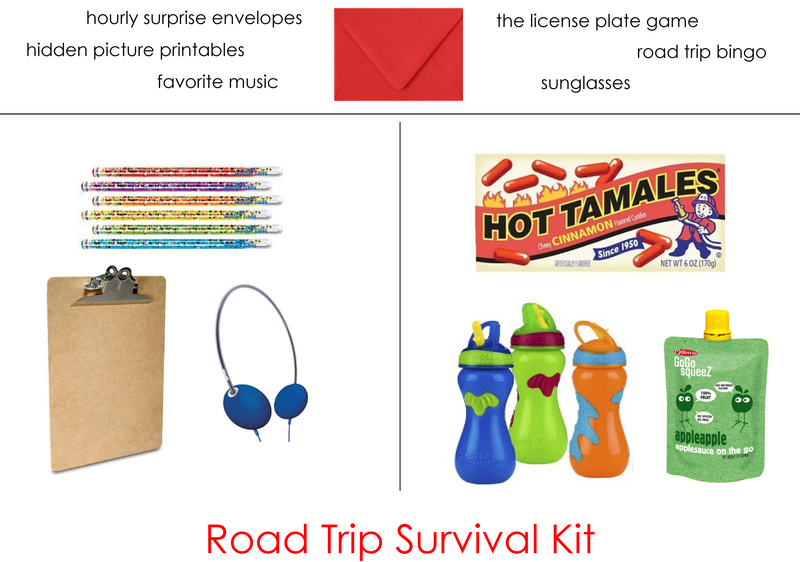
  • On our longest trip, I made an envelope for each hour of the trip. Every hour, the kids got to open an envelope to reveal a surprise. Sometimes it was a snack, other times a new game to play or a coloring book, or some new music to listen to. The surprise envelopes were a HUGE hit.
  • One of the favorite surprises (shown above) were the I Spy Wonder Tubes. I picked some up at the last minute, but I'm sure they'd be a pretty easy DIY project, as well. 
  • The license plate game is a great activity for older kids. I kinda like it, too. And don't forget to print out the road trip bingo sheets from last year.
  • I also snagged a good old-fashioned clipboard for each kid. I filled them with plain paper, coloring pages I found online and some Highlights hidden picture printables.
  • Kid-sized earphones are a must-have. Solves several problems…I don't have to listen to their movies, and they don't have to try to keep adult-sized earphones on their tiny little heads. Added bonus: these have a volume lock.
  • Spill-proof water cups for everyone, so you don't have to stop to change clothes when bump in the road causes a soaking wet toddler. My children absolutely, positively will NOT wear clothing with the slightest drop of water on it…please tell me I'm not alone. Oh, and while you're at it, make sure you throw in a change of clothes just in case. 😉
  • Fruit sauce packets are a great, healthy on-the-go snack, and it makes me feel better about all the junk food they consume while on the road.
  • Sunglasses or a suction-cup window shade are fantastic so you don't have to hear, "It's too sunny. The sun is in my eyes. It's too bright." Over and over and over.
  • And don't forget a stay-awake snack for the driver. Hot Tamales are my personal favorite

Happy trails!

Signature
Post by Christina Williams : justcallmechris.blogspot.com

Tips for a Great Children’s Party Photo Booth

August 8, 2012

I love taking pictures, so it’s no surprise that photo booths are a must-have at my children’s birthday parties. I’ve learned a few things along the way, so I thought I would share some tips alongside images of my children’s recent parties.

Less Posing, More Playing

Photobooth1

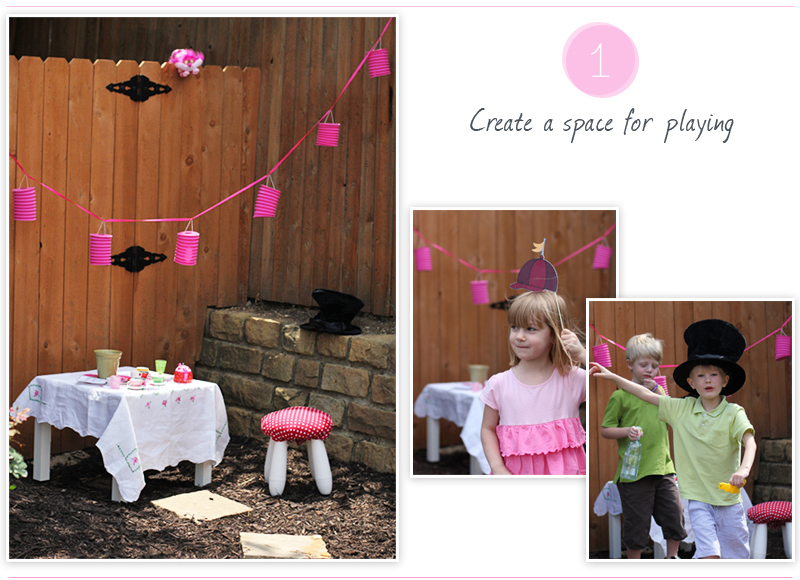
For my daughter’s second birthday, I created large cardboard characters with cut-out spaces for the heads. I expected the kids to stick their heads through the holes and stand patiently while I took their pictures. Very few children interacted with the cardboard panels, and I realized that it wasn’t very realistic to expect a bunch of preschoolers to stand still solely for the purpose of me taking their pictures. Since then, I’ve created a space for playing as much as photographing. At Jenna’s fourth birthday, for example, I set up a small table with a tea set and a few other props that the children could interact with while I (stealthily) snapped pictures. Incorporating costumes, toys and signage also goes a long way toward increasing the fun-factor.

Consider Your Location and Light

Photobooth2

When it comes to photo booths, location is key. Light is the top factor I consider when choosing a location.

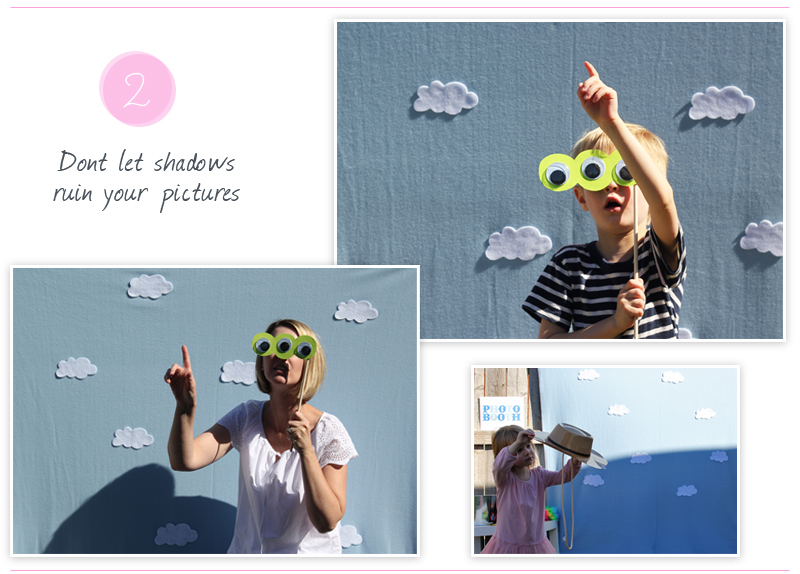
For my son’s Toy Story birthday party, I set up a backdrop facing the direction of the sun, with the intention of shooting my subjects with the light source directly behind me. This worked fairly well at the beginning of the party, when the sun was still pretty high. But as the sun fell later in the afternoon, it cast a strong shadow against the backdrop. It also caused guests to squint, which is never results in great photos.

Instead, I recommend a spot with some dappled light, such as near a tree. If your photo booth will be inside, look for a spot with lots of natural light, such as one facing the windows.

Make Use of the Photos

Photobooth3

The photos are a great reminder of the fun your children have at their parties, but they can serve more practical purposes as well.

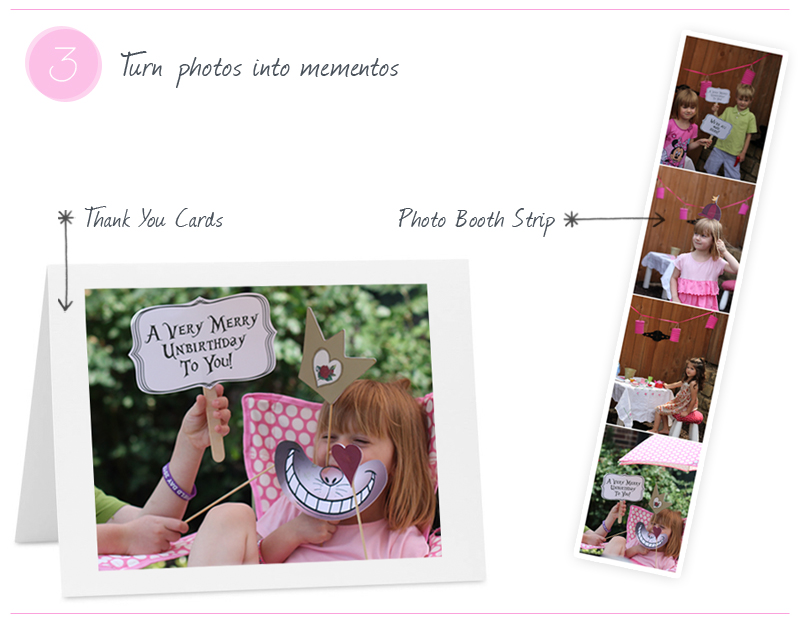
  • Thank you cards. Have 4×6 photos printed and then glue them to folded cards to create personalized thank you notes.
  • Party Favors. If you plan on having photo booths at most of your children’s parties, consider investing in an instant camera such as this one by Fuji. You can print pictures immediately and incorporate them into the party favors. Let children decorate frames during the party and then send them home with a personalized frame and photo.
  • Photo Booth Strips. My children love looking at pictures of themselves, and the photo booth strip is a great way to illustrate the fun they had with their friends during the party. You can use a template like this one to format and print a series of photos into a fun memento that can be sent out with your thank you cards.

Post by Julee Dyer : Warm Hot Chocolate

Soft & Quiet: Clouds

August 7, 2012

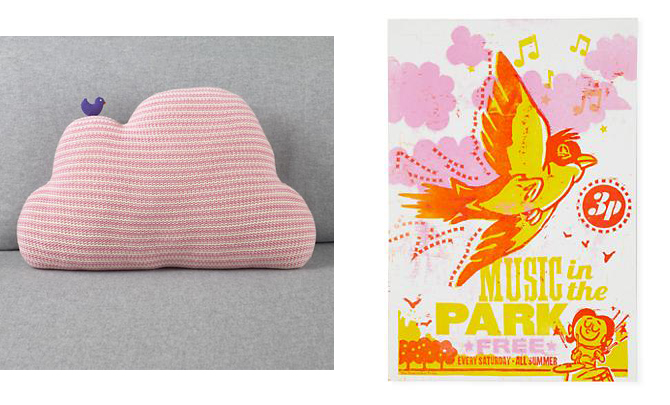
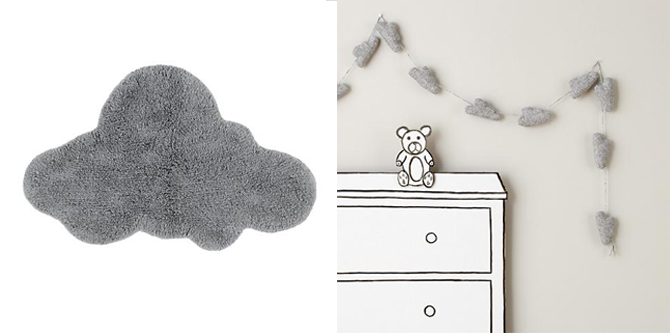
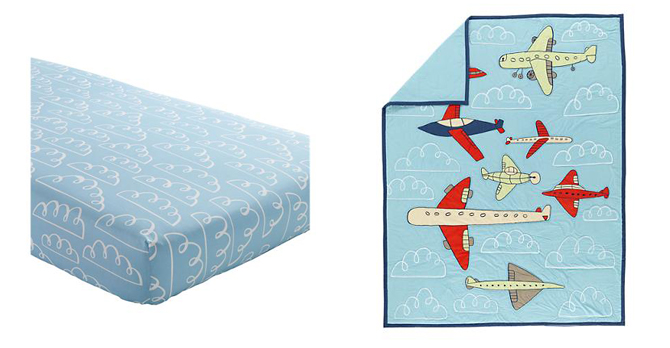
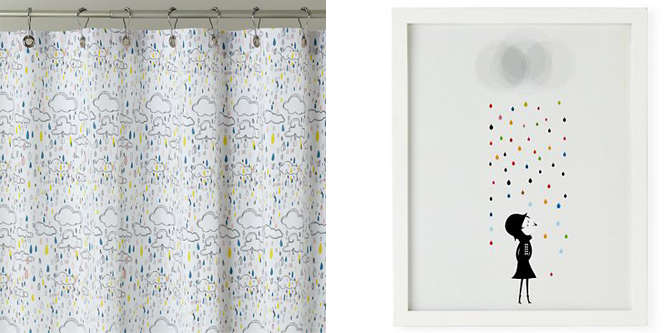
On a recent trip to Colorado, I was in awe of the clouds and sky that were ever changing and quite magnificent. It got me thinking about how amazing the sky is and how different it can look depending on the weather and where you are. Here are some atmospheric inspirations:

AQUA

Aqua 1
here

Aqua 2

Art Clips / Lampshade / Pillow

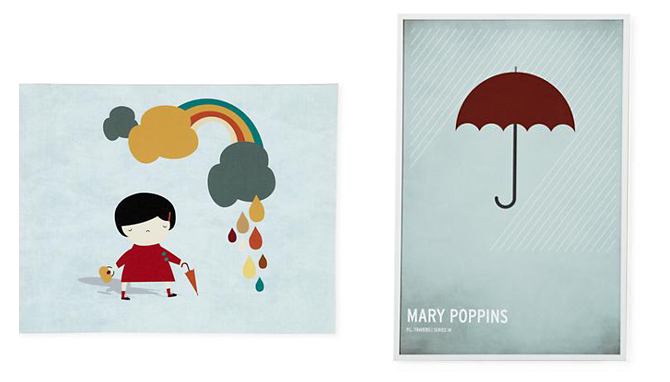
PURPLE

Purple 1
here

Purple 2

Canvas Print / Framed Poster

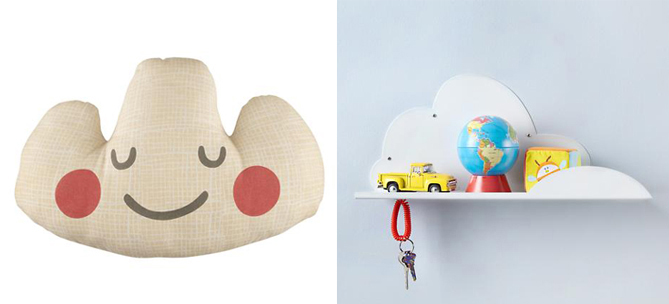
WHITE

White 1
here

White2

Pillow / Shelf

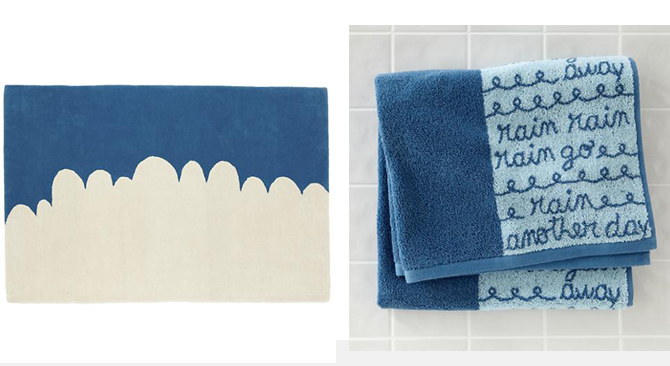
NAVY

Navy 1
here

Navy 2

Rug / Towels

PINK

Pink 1
here

Pink 2

Pillow / Poster

GREY

Grey 1
here

Grey 2

Bath Mat / Garland

BLUE

BlueSky
here

Blue 2

Sheet / Blanket

RAINBOW

Rainbow 1
here

Rainbow 2

Shower Curtain / Art Print


By Anna Passadori

Anna develops and designs exclusive product for The Land of Nod. She hails from the west coast and has traveled the world to source product. She loves anything Marc Jacobs, Sofia Coppola or stripes! (So, if anyone can get a photo of Sofia Coppola wearing a striped outfit by Marc Jacobs, please send it along.)


Healthy Painted Spoons

August 6, 2012

1

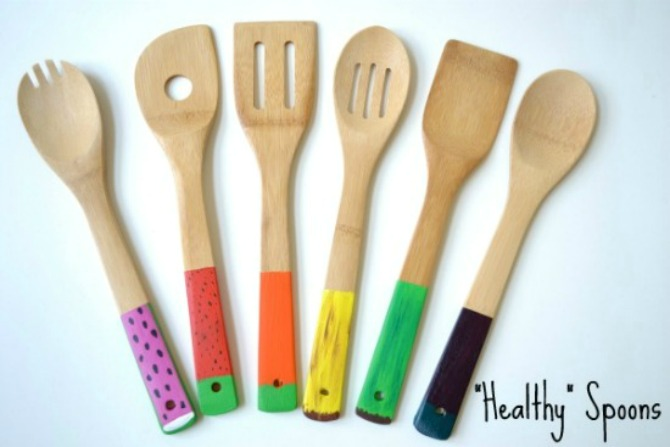
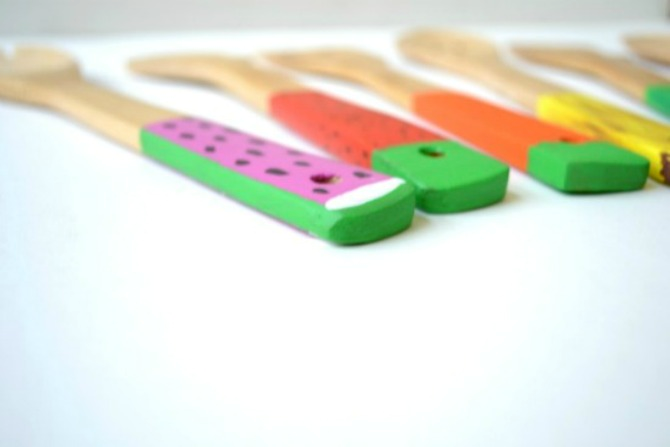
I'm all about the painted spoon trend these days. It takes an ordinary household item {wooden spoons} and kicks them up a healthy notch. Sweet!

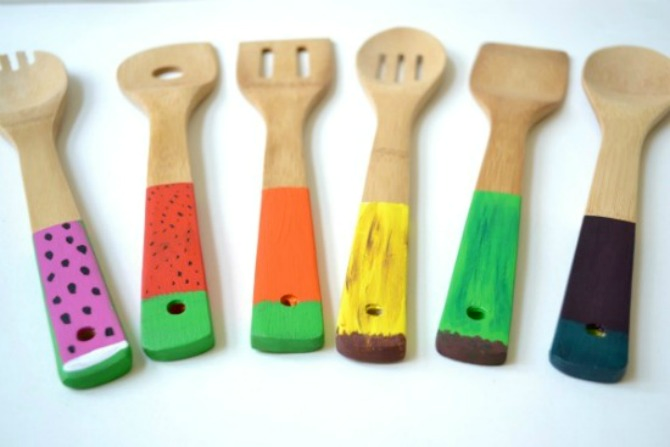
Here's a way to bring your kids into the mix. Instead of simply painting your spoons a solid color, how about painting them to look like healthy fruits + veggies your kids {sometimes} actually eat!

Here's how you do it.

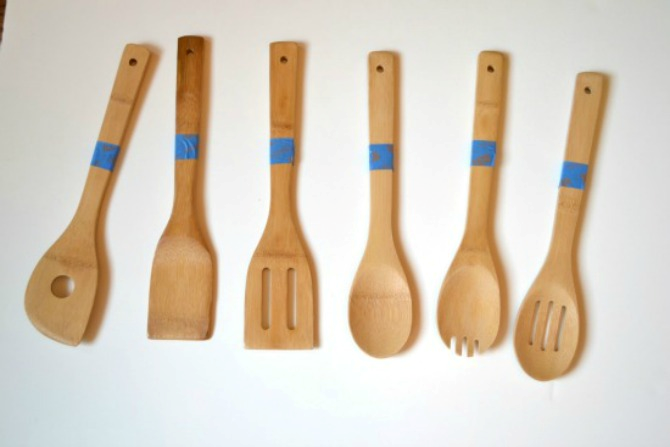
1. Take a pack of wooden spoons and gently sand/scuff them up so the paint will adhere better

2. Wrap a piece of painters tape a few inches up from the base. Try to line the tape up so they can all be the uniform

Spoons4

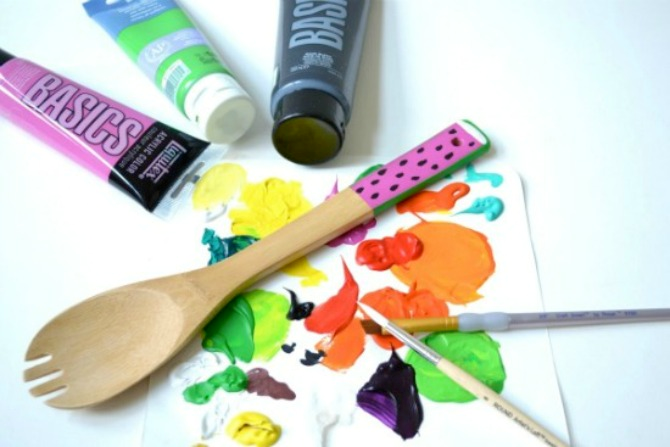
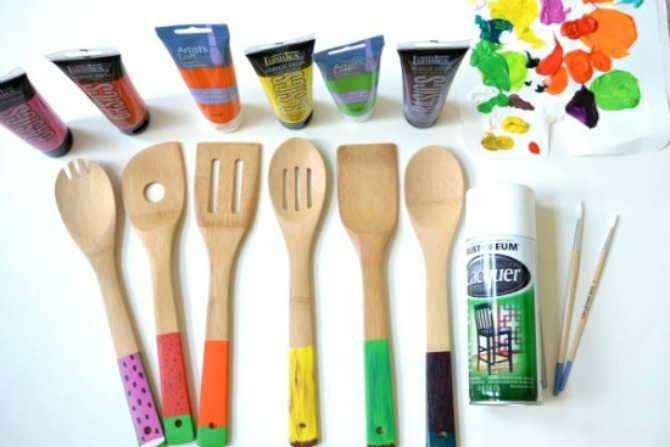
3. Now let your kids paint away to resemble your favorite healthy eats: we chose watermelon, strawberry, carrot, banana, zucchini and eggplant but the sky is honestly the limit. We used acrylic paint.

Spoons5

Spoons

4. After the paint dries, spray the spoons with a food safe shellac {just spray the painted part, and leave the painters tape on}. Let it dry. Remove painters tape and hooray! Wooden spoons that might even encourage your kids to eat something good for them!

Spoons3

Spoons6

Post by Niki Papery & Cakery

Instatime: A DIY Instagram Photo Clock
August 3, 2012

Instatime01

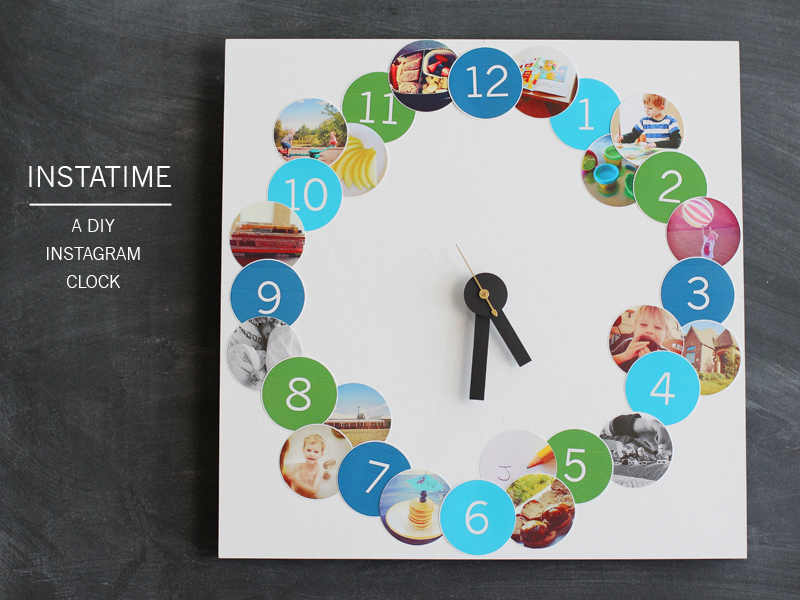
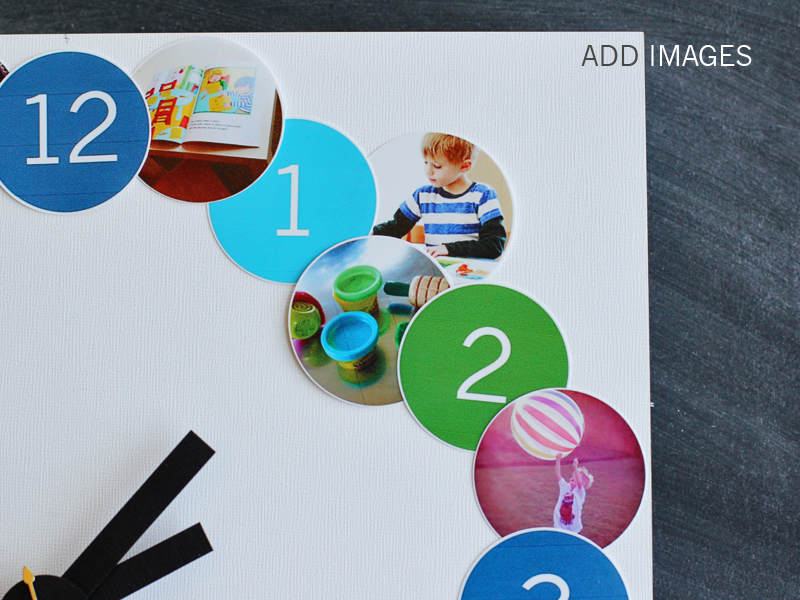
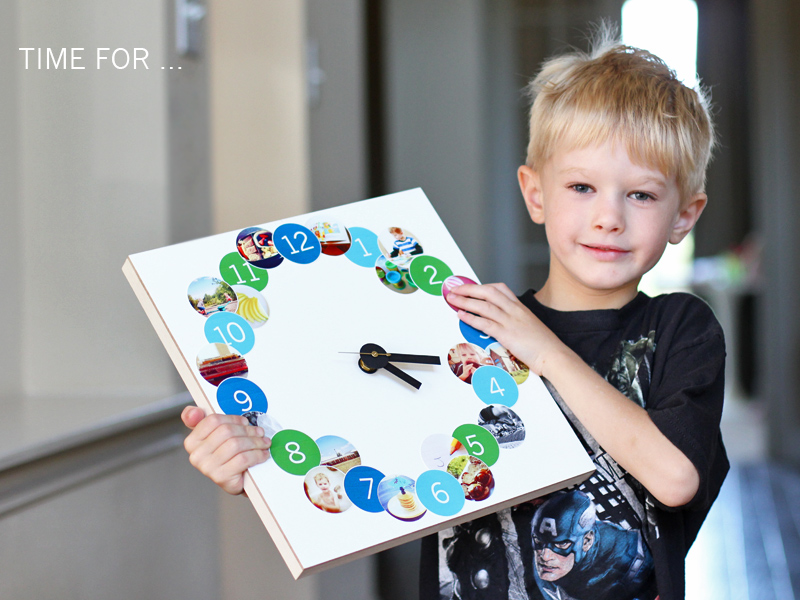
My son is starting kindergarten this year, and I’ve recently started talking to him about all of the things he’ll be doing at school.  And since I’m pretty obsessed with Instagram, I decided to make a clock out of recent photos to illustrate ‘a day in the life’ once he starts school. This way, he’ll have a visual depiction of what to expect – and helping him learn how to tell time is an added bonus!

Instatime02

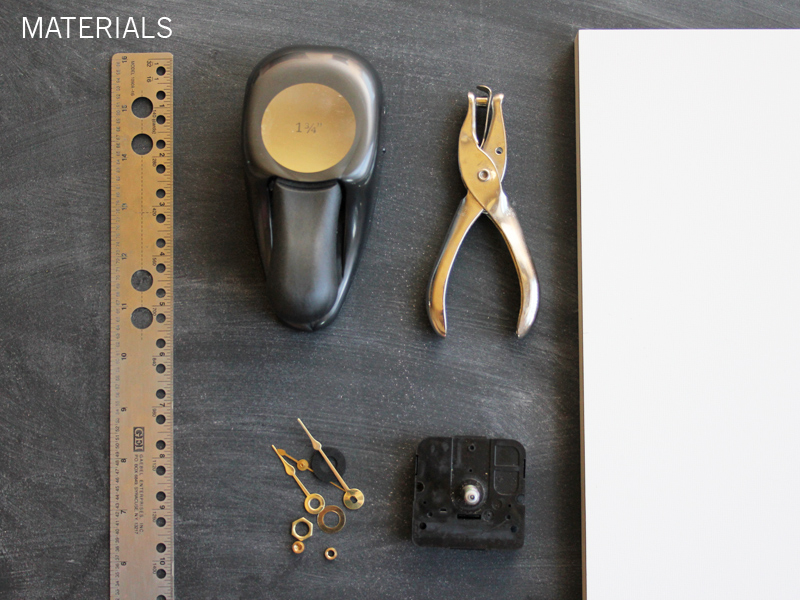
I started with the following materials:
  • Ruler
  • Clock kit (purchased at a craft store)
  • A 12 x 12 canvas mounted on wood
  • Hole punches
  • An Instagram feed filled with the daily activities of my children

Instatime03

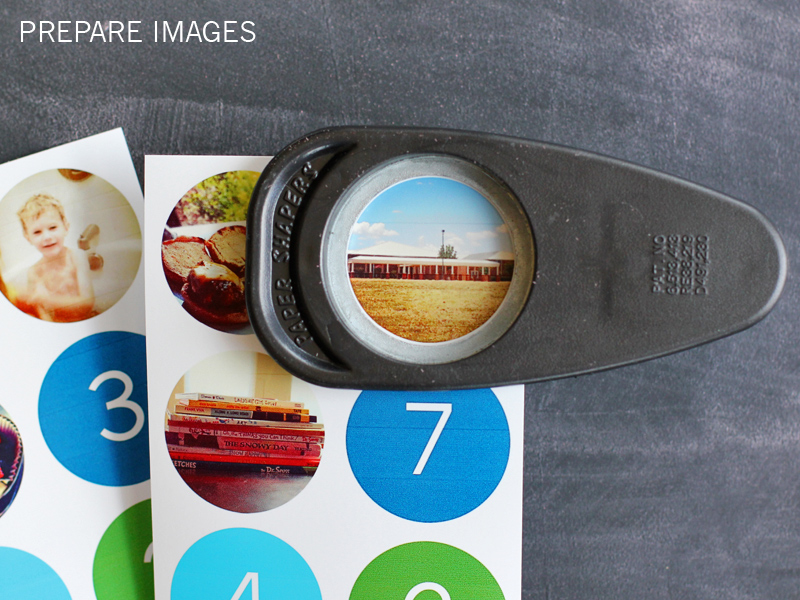
I started by making a list of all the activities I wanted to illustrate and then went through my Instagram library (using followgram.me to view my photos on a desktop computer). I saved the selected photos to my desktop computer and then used Photoshop to format the photos into small circles. I chose a 1.75 diameter circle because I have a hole punch in that size, but you could work with any size that suits the base of your clock. I printed my circle photos along with similarly formatted numbers for the hours of the day and cut them out using my hole punch.

Instatime04

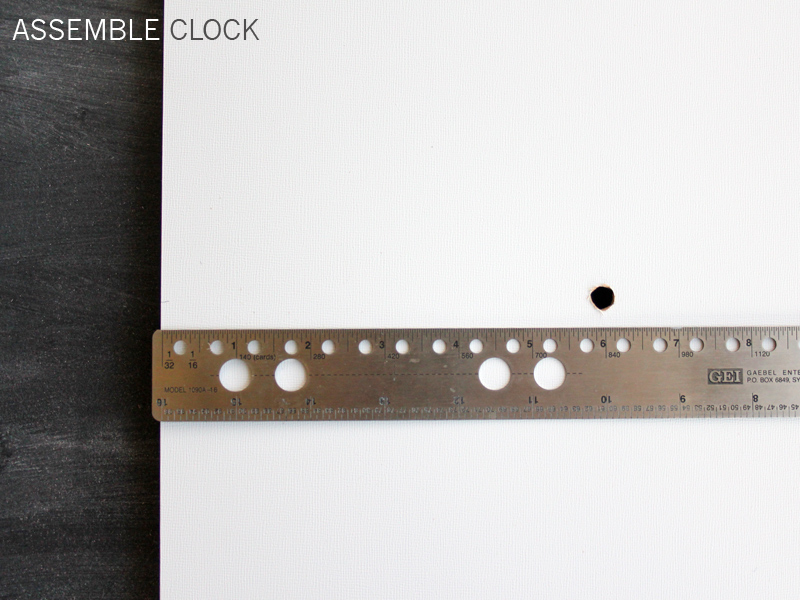
Next, I turned my attention to the clock itself. I started by measuring the center of the canvas and cutting a hole through it. I had to use a drill because the canvas had a wood backing.

Instatime05

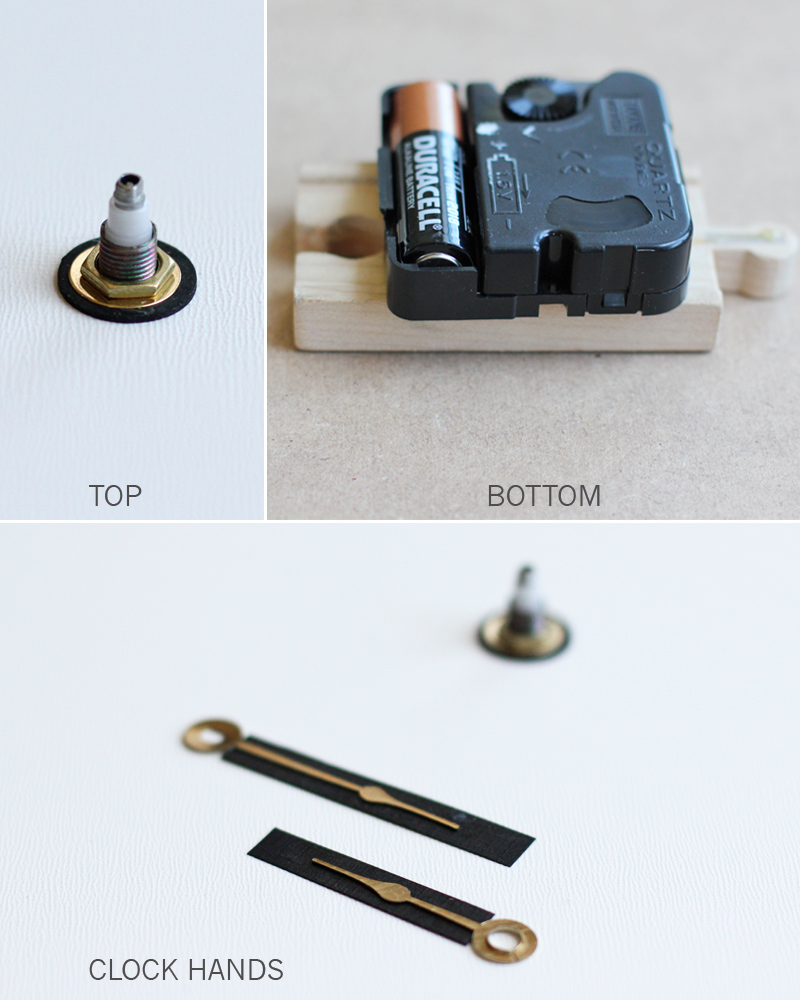
I assembled the clock pieces on the canvas base following the instructions on the packaging.       I realized that the canvas/wood base was too thin and caused the arms of the clock to extend out too far, so I got creative and inserted a piece of wood (from a wood train track) between the clock and the canvas base. I also decided to cover the clock hands by gluing black cardstock to them and cut a cardstock circle to cover the clock parts.

Instatime06

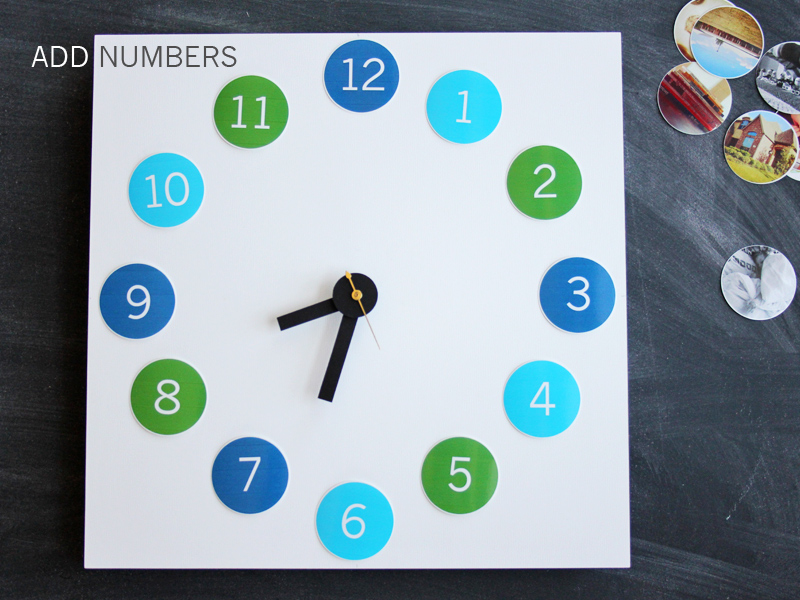
Once the clock was assembled, I arranged the numbers in a circle (but didn’t glue them at this point).

Instatime07

Once the numbers were arranged, I started arranging the photos in their respective timeslots. Once I arrived at a layout I liked, I started gluing everything to the canvas. I did this by dabbing glue in the center of the circles so that I could rearrange the photos if necessary. I also plan to cover the entire surface in decoupage glue, but I’m going to wait until after the upcoming school open house. I’m hoping to add a couple of pics of his classroom before I completely finish it.

And here’s Jason with his new clock:

Instatime08

Post by Julee Dyer : Warm Hot Chocolate

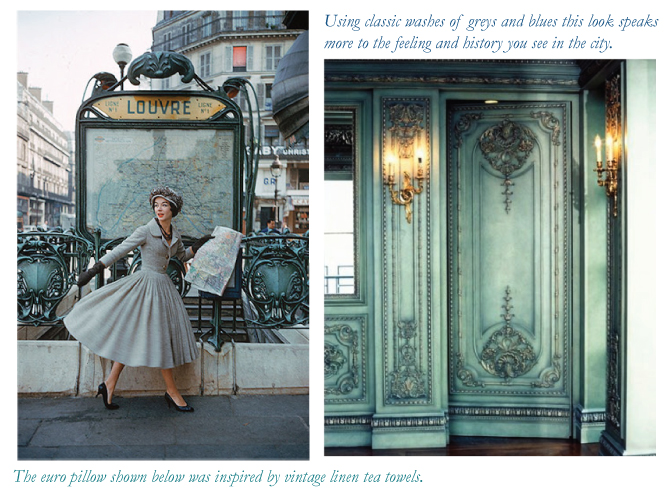
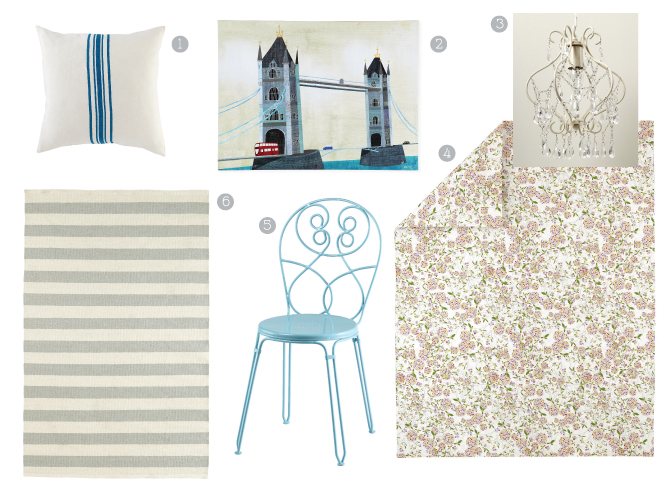
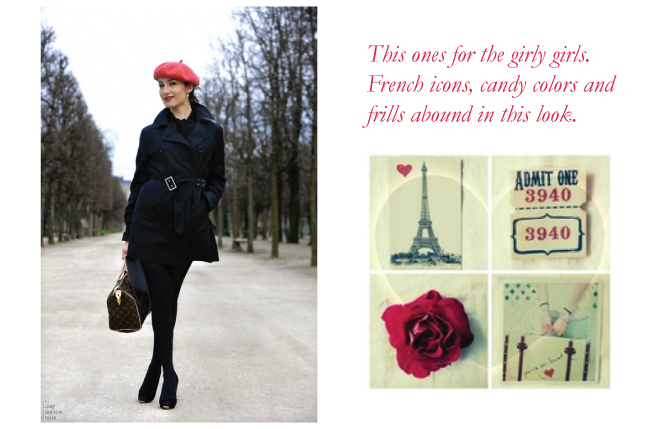
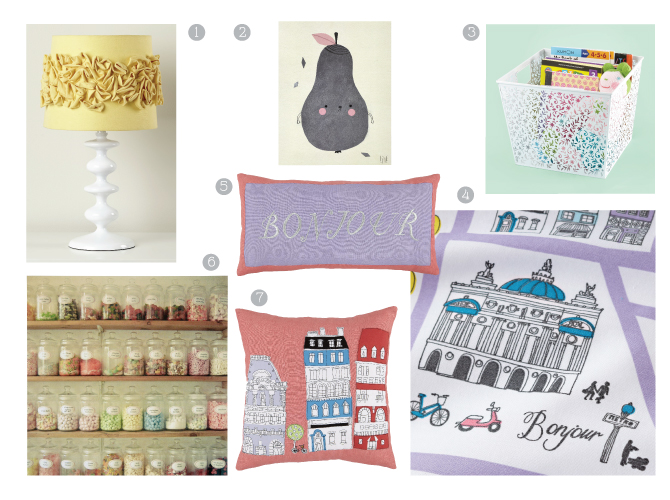
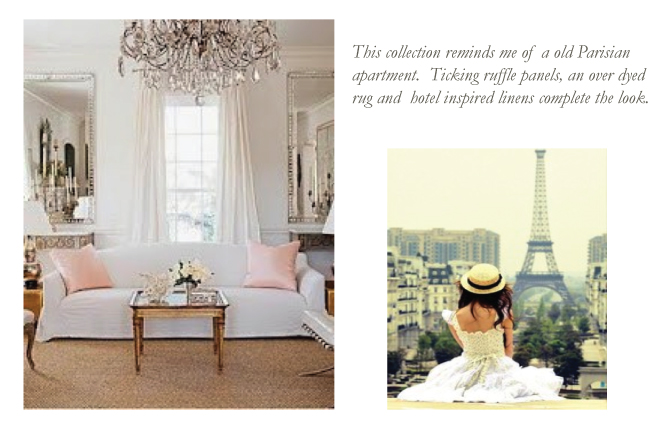
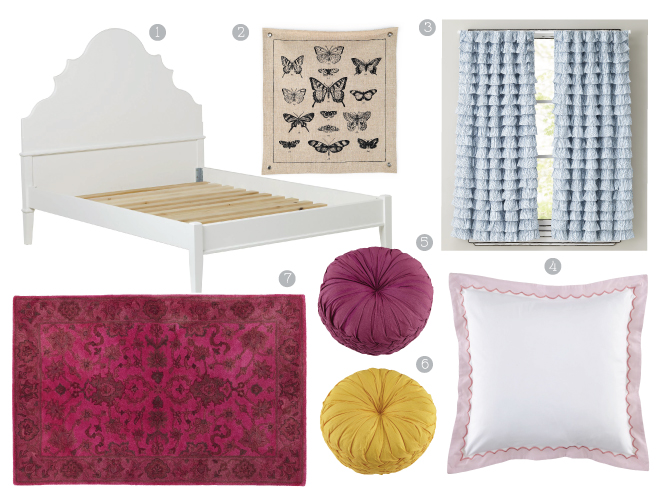
French Inspired

August 2, 2012

Text

SoftQuiet_French1

                                                                              1/2

SoftQuiet_French2
1/2/3/4/5/6

SoftQuiet_French3
1/2

SoftQuiet_French4
1/2/3/4/5/6/7

SoftQuiet_French5
1/2

SoftQuiet_French6
1/2/3/4/5/6/7


By Sarah Culbertson

Once upon a time a fashion plate from Seattle met a childrens retailer from Chicago, and it was love at first sight.  After spending a lot of time together at the mall, they both knew it was a perfect match. So Sarah packed up her fabulous Kate Spade suitcase and headed for the Windy City. Where they lived happily ever after, designing and developing textiles for little kiddos everywhere. 

Creating a Kids’ Picking Garden

August 1, 2012

Garden - POSTED

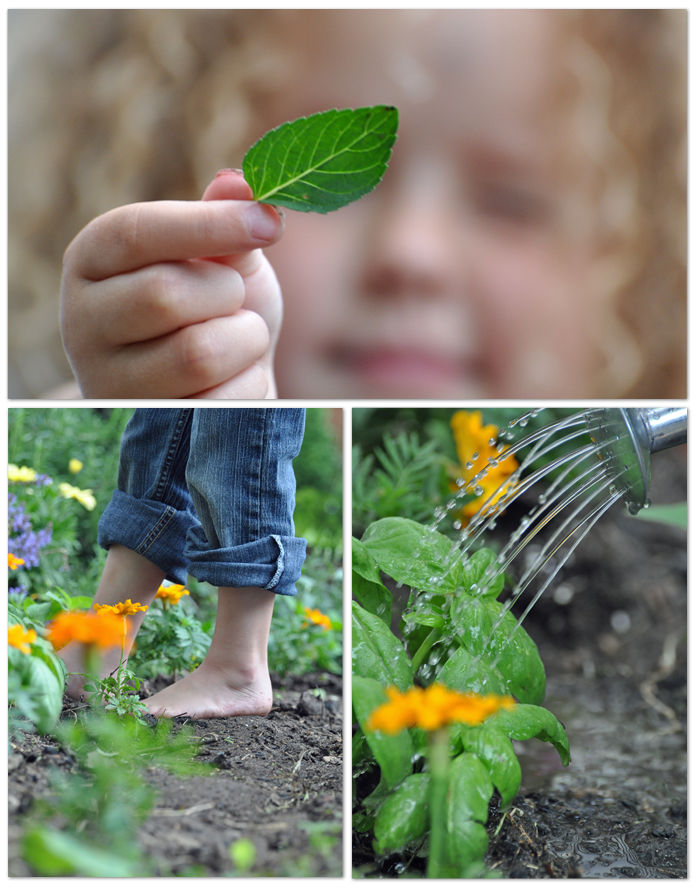
This is one spot to call their own.

Full of herbs, favorite veggies and flowers.

For busy hands and feet to stomp, water, pick, and eat.

Edible Flowers

Poisonous Flowers 

We included rosemary, mint, thyme, basil, sage, carrots, cherry tomatoes, marigolds, lavender, chamomile, daisies, hollyhocks, and sunflowers. It only took one sunny afternoon to choose, buy, and plant. Phew!


Post by Helen Bird : www.curlybirds.typepad.com

Inspiration to Room – Natural Science

July 31, 2012

NaturalScience_1
1.

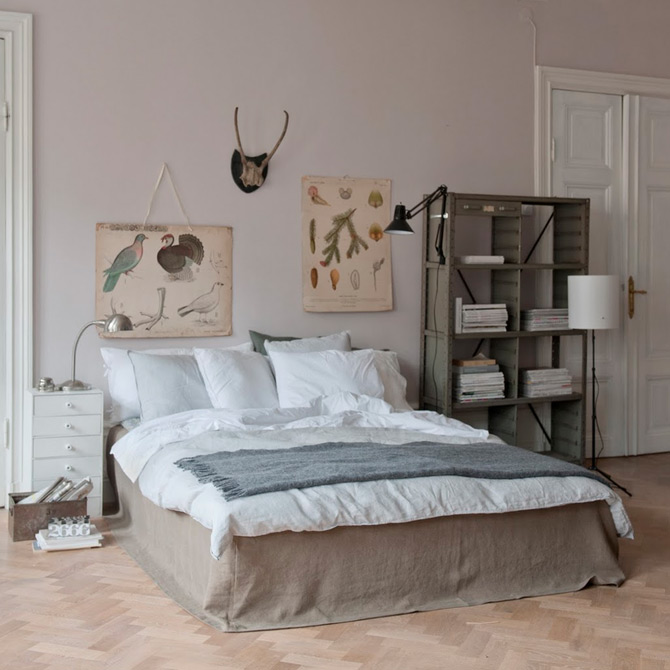
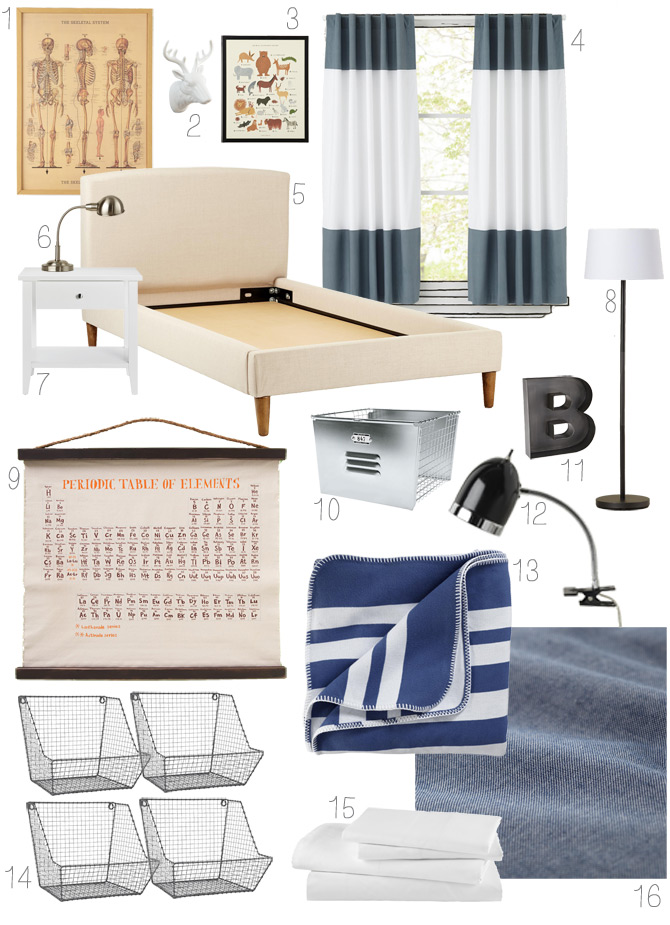
I’m crazy about the mix of natural materials, muted colors and vintage science elements in this bedroom. While this is an adult’s room, I think it’s the perfect recipe for a boy’s room.          Here’s how I’d put it all together.

NaturalScience_2
1. 2. 3. 4. 5. 6. 7. 8. 9. 10. 11. 12. 13. 14. 15. 16.


By Sarah Culbertson

Once upon a time a fashion plate from Seattle met a childrens retailer from Chicago, and it was love at first sight.  After spending a lot of time together at the mall, they both knew it was a perfect match. So Sarah packed up her fabulous Kate Spade suitcase and headed for the Windy City. Where they lived happily ever after, designing and developing textiles for little kiddos everywhere.