Close

Blog

DIY Wooden Growth Chart

July 30, 2012

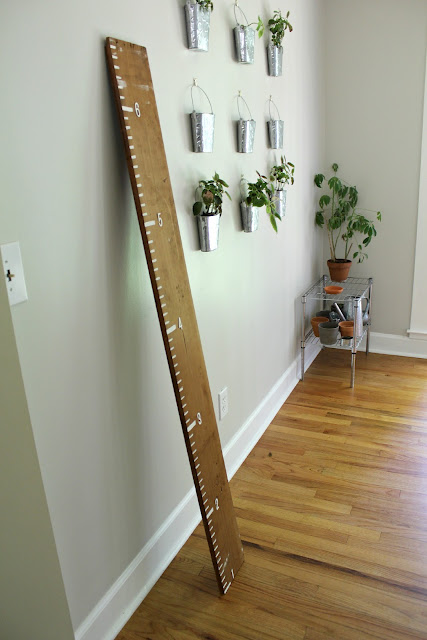
For some time now, I've been pinning and eyeing extra-large ruler projects like this. I love the simple wooden decor and the whimsical addition of a giant ruler to your house. But I didn't think it really made a lot of sense to put one of these in our home until David and I had a bambino who's growth we could measure along the way. 

And now that we do have a baby (almost) on board at the Ten June house? Oh yeah.

1

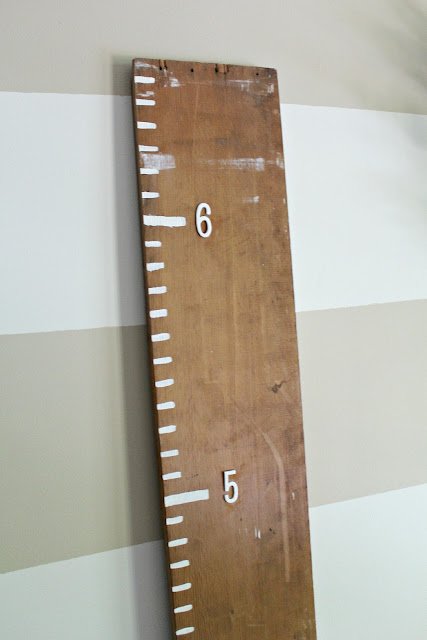
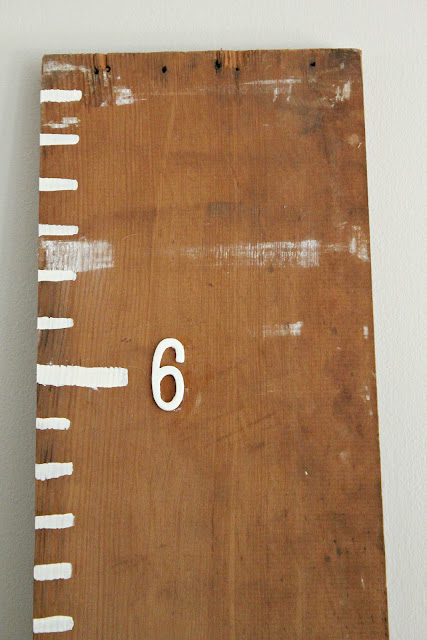
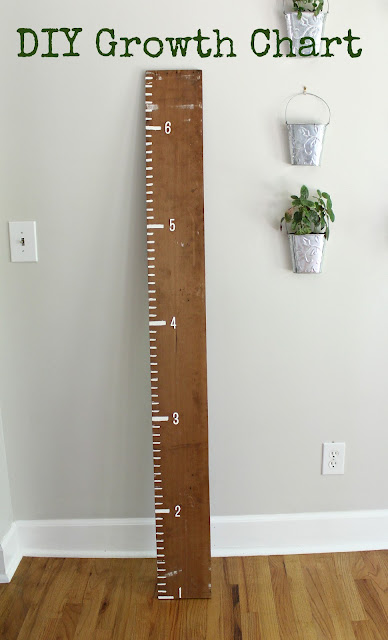
This project was really simple. I grabbed an old wooden board from our scrap wood pile in the basement. If you don't have any scrap wood available, you can pick up a board from your local hardware store. I grabbed a piece of wood that was completely beat up and had white paint all over it, just because I wanted to give this project a completely rustic effect.

2

I'm lucky in that my board was already stained, but you could stain or paint yours easily.

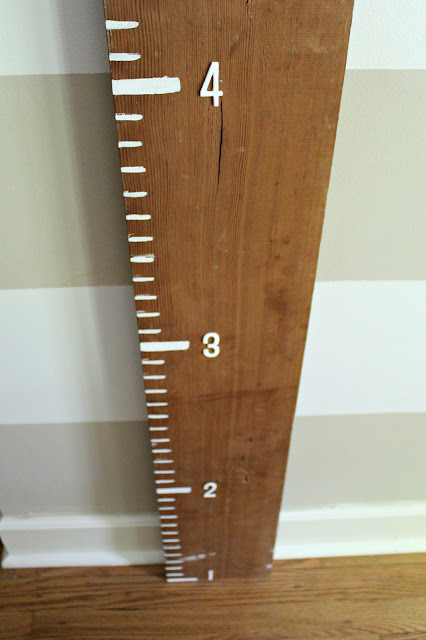
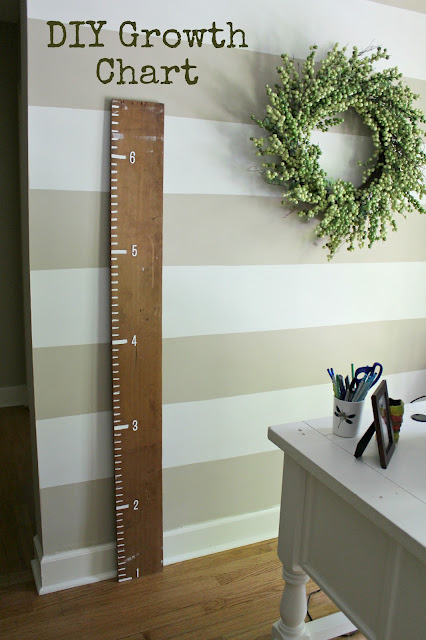
I measured the board and penciled off tick marks for every inch. I decided to start the board at one foot, so that I could eventually hang the piece on the wall, slightly off the ground. I'll just need to remember to always hang it so that the bottom is exactly one foot above the floor. Makes sense to me!

3

I was thrilled to be able to break out my non-toxic craft paint for this project (one of the biggest things I miss since I've become pregnant is painting!). As you can see, I almost haphazardly painted ivory lines over each of the tick marks. I wanted this project to be fun and rustic, not too formal.

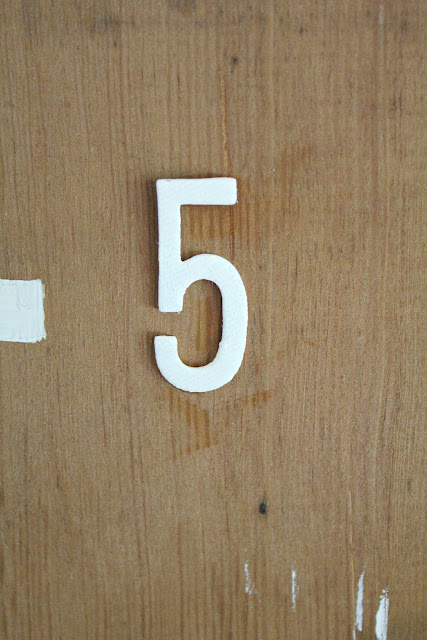
My initial thought was to create my own stencils to paint the numbers on the growth chart (just because I freehanded the tick marks doesn't mean I could freehand the numbers and have them actually resemble numbers, ha!), just like I did with my DIY rustic wooden board sign. But then I got lazy realized I had some old chipboard stickers I could use and they'd be a heck of a lot easier cuter than any stencil I made. So a coat of ivory craft paint went over the chipboard stickers and… voila! Automatic ruler numbers.

4

5

And that's all she wrote, folks. Easy peasy project, right?

Right now, our new growth chart ruler is leaning against the wall in our office (and clearly it was hanging out in the breakfast room for awhile, too). Once we find a final location for it (the nursery?), I'll screw in a bracket to the back so we can basically hang it like a heavy picture frame. 

6

I just love the big ol' ruler's rustic look. I can picture all of us crowded around it one day, measuring our growing little man and his siblings. Functional + sentimental art… I love it!

7

PS. Since I've been hanging on for dear life to Picnik, this was my first post that I edited photos via PicMonkey… not too shabby!

Post by Michelle : Ten June
Top 10 Accessories For Dorm Rooms

July 27, 2012

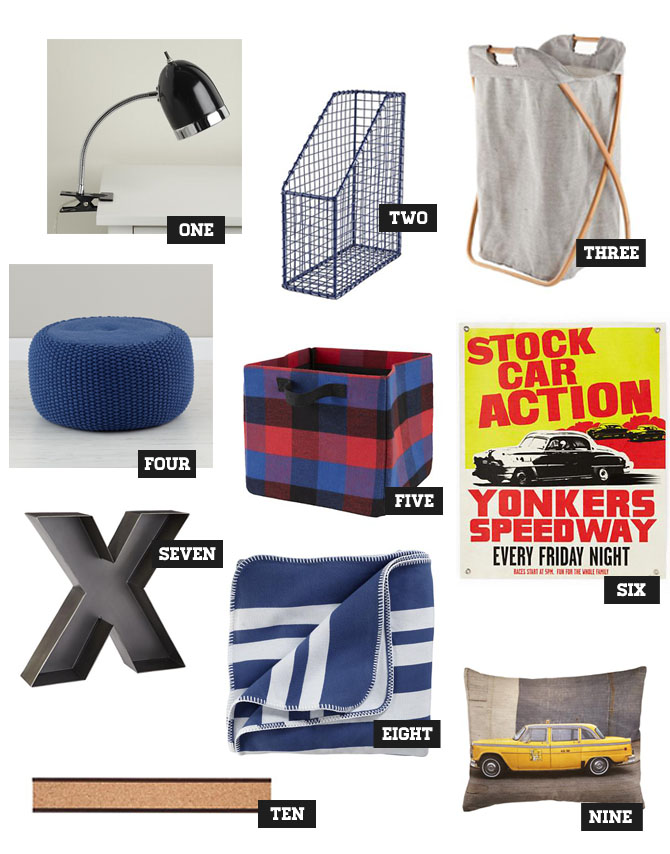
Here’s my top 10 picks for a dorm room for guys:

DORM_GUY

1) Clip this on your desk before you pull another all nighters. Clip Lamp, $29 2) Stock up on these wire storage accessories to keep books and school supplies organized. Down to the Wire Storage Collection, $24.95-&79 3) This no-fuss laundry hamper has a masculine tweed fabric he’ll love. Load Bearing Single Laundry Hamper, $35. 4) A navy floor seat is perfect for late-night video gaming or extra seating for get-togethers. Pull Up a Pouf, $129 5) Stash away extra clothes and shoes in these plaid bins. Buffalo Check Storage Collection, $24.95-$49 6) Graphic wall art adds a punch of color to the room. Racecar Banner, $69 7) Metal letters are a fun way to express your personality. Magnificent Metal Letters, $34 8) A graphic striped throw keeps you warm and is super-soft too. General Store Blanket, $99 9) Add humor and color to a drab room with this photo-real throw pillow. Midtown Taxi Throw Pillow, $29 10) Tack up photos and notes easily with this space-saving bulletin board. Straight and Narrow Cork Rail, $21.95   And the top 10 accessories for a girls dorm room:
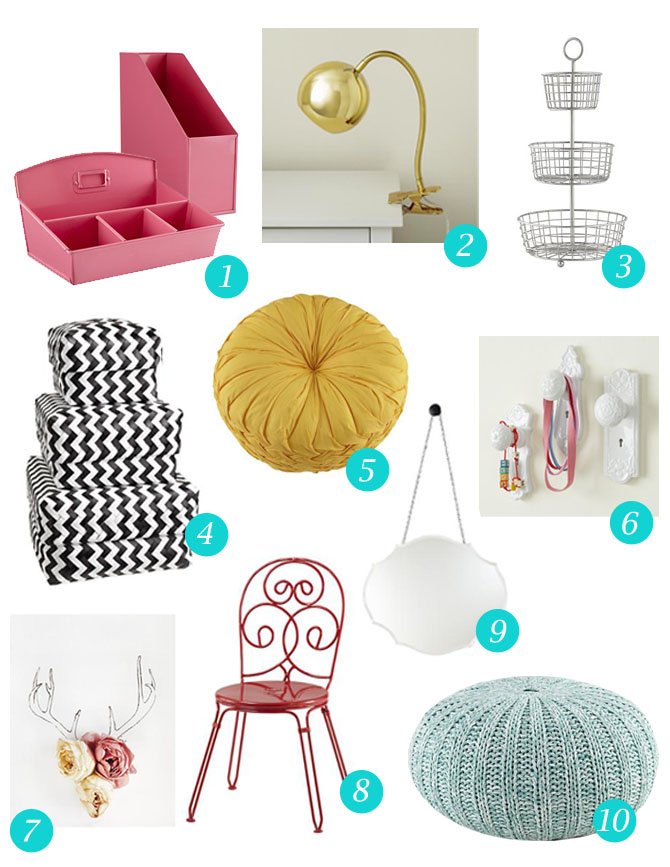
DORM GIRL

1) Brighten up her desk with these metal storage accessories. I Could’ve Bin a Container, $4.95-$65 2) A glamorous and stylish lamp for late-night study sessions. Modern Clip Lamp, $59 3) Organize small accessories with this vintage-inspired bin. Three-Tier Flea Market Bin, $39 4) Keep extra scarves and socks handy with these funky zig zag baskets. Zig Zag Strapping Baskets, $49 5) You can never have too many throw pillows! The ruching detail adds texture and charm.  Ruched Throw Pillow, $29 6) Add a bit of cleverness and style with these porcelain wall hooks. Doorknob Wall Décor, $69 7) Inexpensive art prints for your ever-changing tastes. Nod Institute of Art Prints, $19.95 8) Desk chairs don’t have to be boring- add some color and style to your desk.  Cheshire Cat Desk Chair, $149 9) Add chicness to an otherwise dull room with this scallop mirror. You Look Mahvelous Mirror, $49 10) Perfect extra seating for when friends come over.  Pull Up a Pouf, $99 By Anna Passadori Anna develops and designs exclusive product for The Land of Nod. She hails from the west coast and has traveled the world to source product. She loves anything Marc Jacobs, Sofia Coppola or stripes! (So, if anyone can get a photo of Sofia Coppola wearing a striped outfit by Marc Jacobs, please send it along.)
DIY Memory {Shoe} Box

July 26, 2012

This might be my new favorite DIY of all time because of the sentimentality behind it and because it memorializes THEE original PINK SHOES that I believe were a turning point in my life.  Don’t believe me?  Read the story!

But I think that little baby shoes can be significant in any moms life.  They remind us of those early days, the excitement of putting those adorable little sandals, tennis shoes, moccasins, and slippers on our babies feet for the first time.  They’re what we ooooo and ahhhh over at our baby showers and we can hardly resist paying way more money than we should on tempting, novelty footwear for our new ones.

Anyone that has saved some of those cute shoes from those first few years of their child’s life can do this DIY.  And when we look at them hanging in their rooms, in a hallway, in an entryway–wherever you choose to hang them they’ll remind us of simpler days and those first steps that our children took as we loaned them some of our confidence and courage to step out on their own.

Here’s what you need:

1

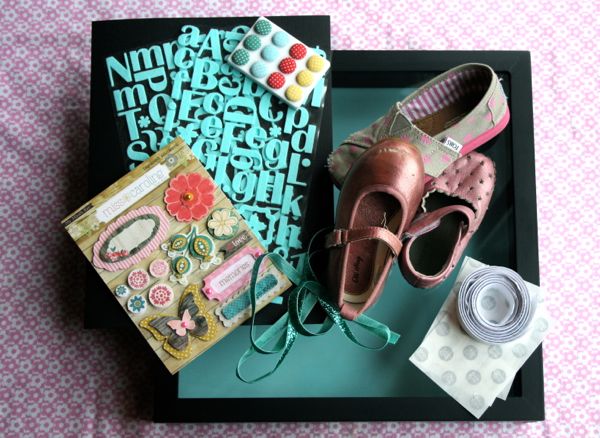
  • A DEEP shadow box.  I found mine at Michael’s.  They aren’t the cheapest DIY accessory but if you wait a bit you can probably find one on sale.  The one I found was 40% off, making it around $18.  Take the thickest pair of shoes you’ll be putting in the box with you to make sure you can fit them in there without them looking smushed.
  • Adorable paper and sticker ephemera to decorate the box with.
  • Velcro and glue dots.
  • Background paper for your shadow box.
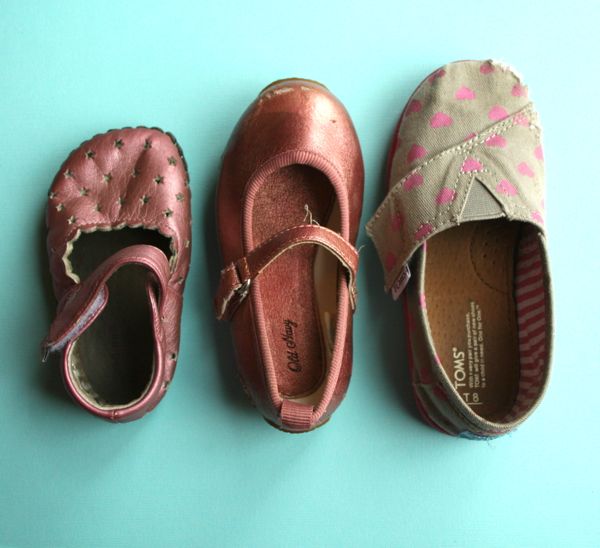
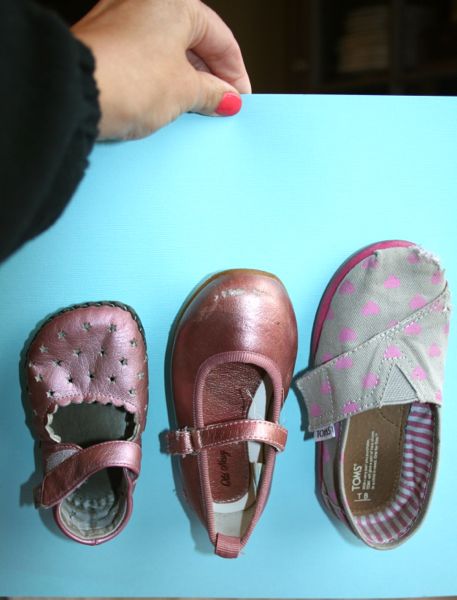
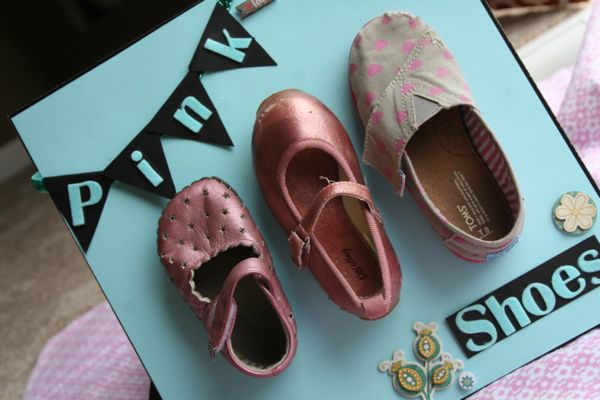
  • SHOES! I picked three pairs–one from the first three years of Georgia’s life.

Step One:

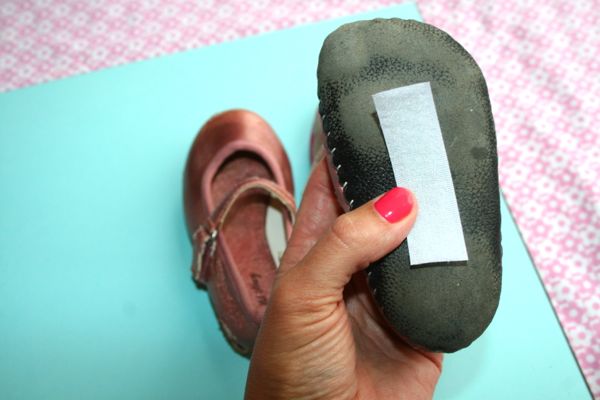
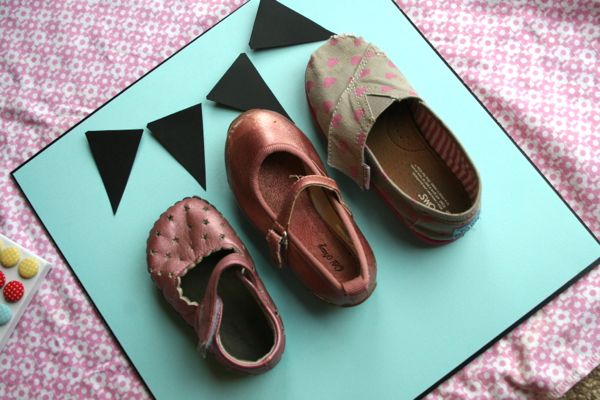
Lay your shoes out on the background paper.  Once they are in the positions that you want them to be attach Velcro to the bottoms of them and affix them to the paper.  Press hard to make sure they are securely in place.

2

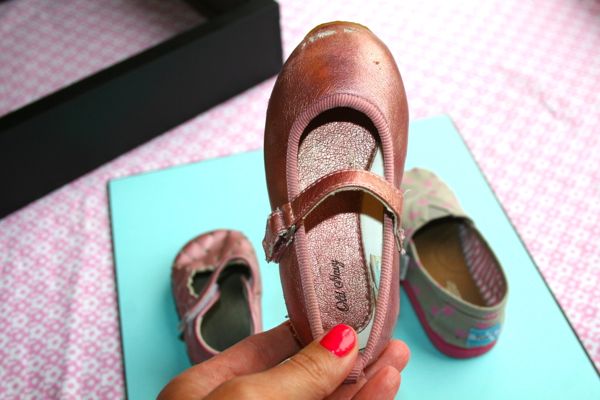
Here they are….the originals.  My Pink Shoes.

3

4

5

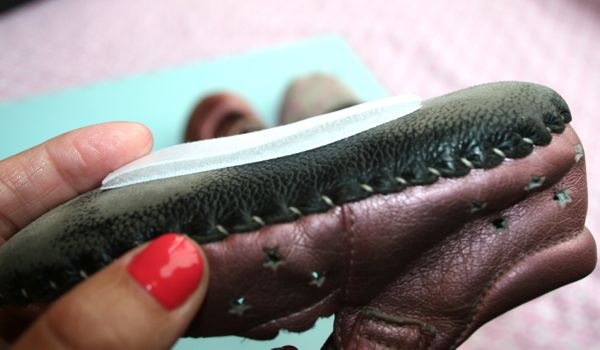
I put both sides of the Velcro onto the bottom of a shoe, removed the paper backing and just stuck it to the paper where I wanted it. It honestly holds very well.  I’m holding my sheet of scrap book paper up below and the shoes are securely in place.  I even wiggled it a few times to make sure.

6

Step Two:

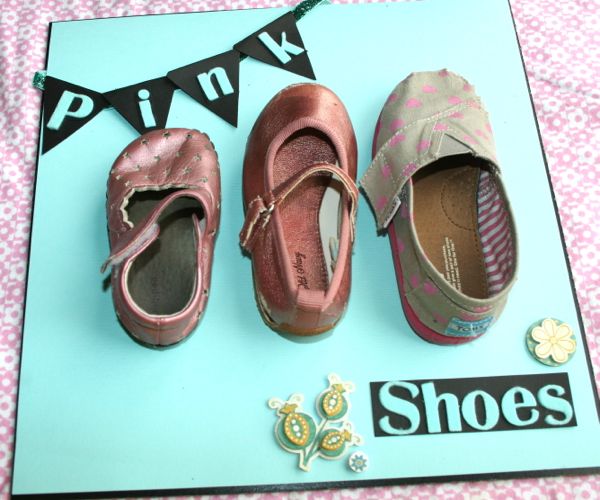
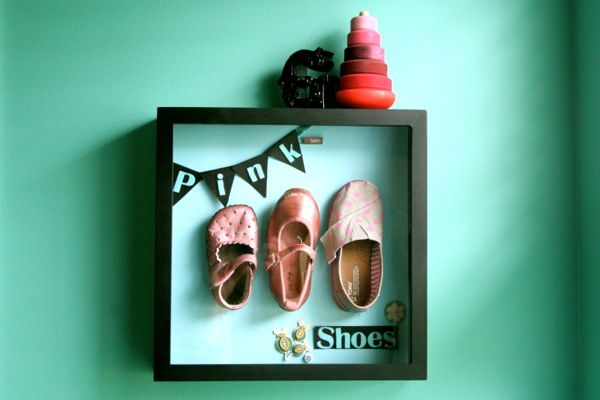
From here it’s really about decorating the inside of the box the way you want to.  My biggest challenge was that Georgia doesn’t have one drop of pink in her room so I needed to figure out a way to incorporate this display into her room in a way that made sense.  I experimented with different letters, stickers, arrangements, and so on.  I decided on little bunting flags, a few embellishments that matched her room, and a bit of glitter ribbon.

7

8

9

Step Three:

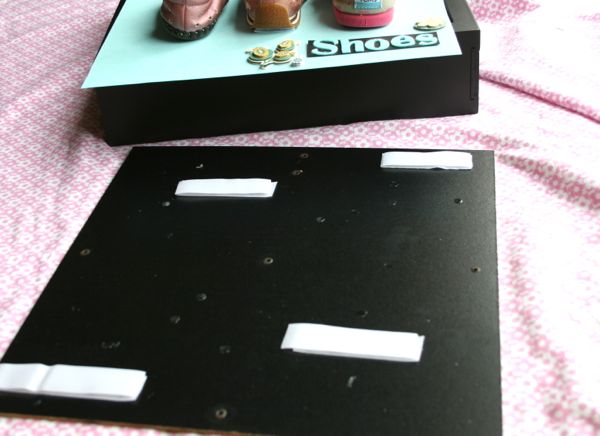
I stuck three large chunks of Velcro and glue dots all over the back of the box backing that my scrap-book paper with the shoes would adhere to.  And then carefully, I took my ‘pink shoes’ display and laid it on top of all the glue and Velcro.

10

Step Four:

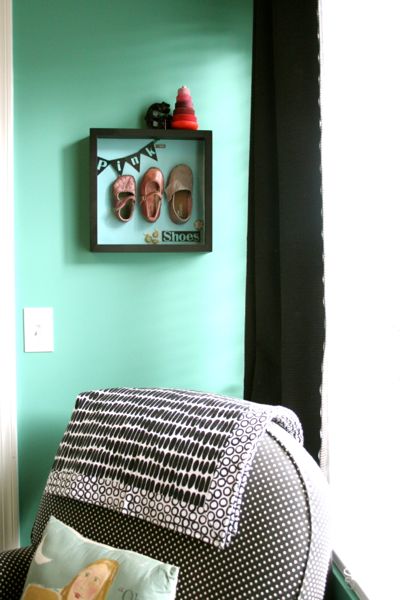
Hang it up!  And step back and admire your work and let all those memories of those pudgy little feet walking in those shoes for the first time come flooding back.

11

12

Post by Maggie Terryn : Mom Colored Glasses


DIY Vintage Paint by Number Mural

July 25, 2012

PBN_1

PBN_2

PBN_3

(its as easy as it looks)

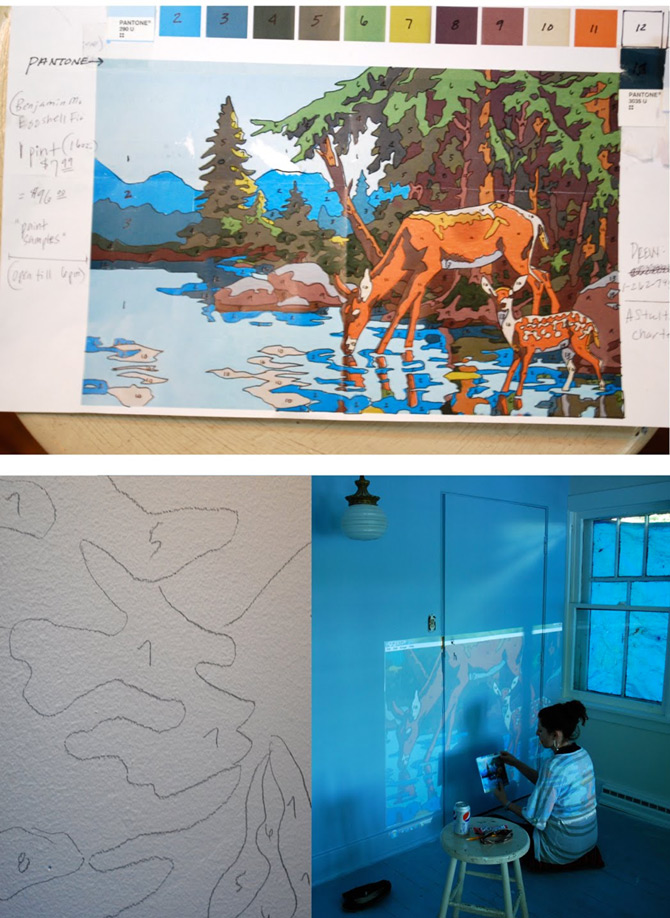
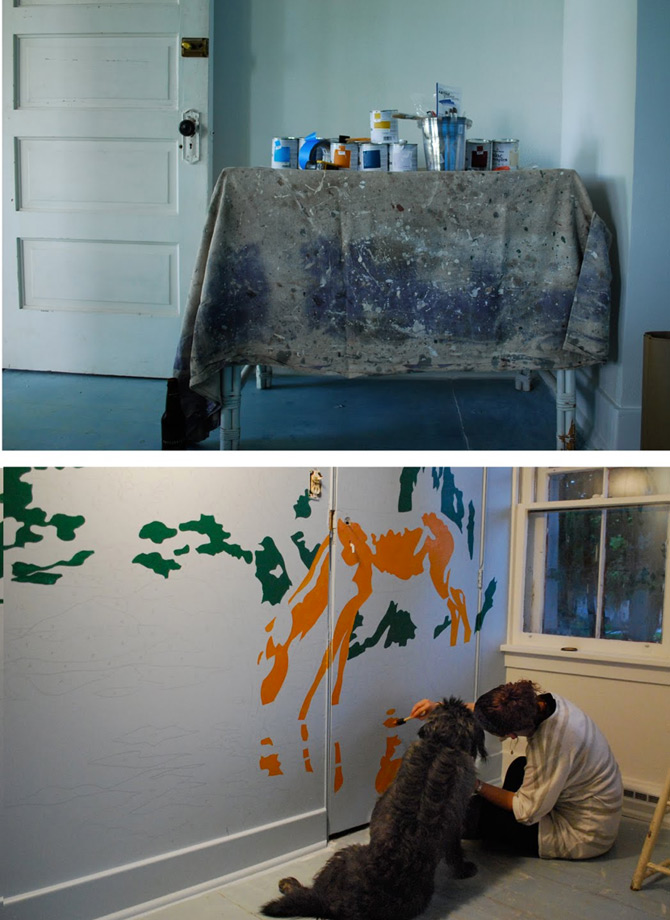
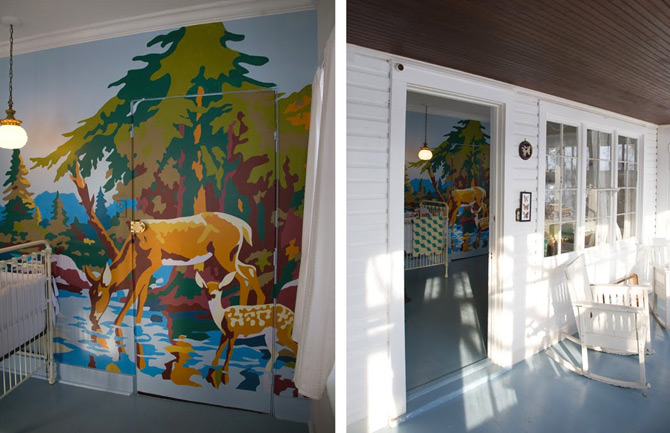
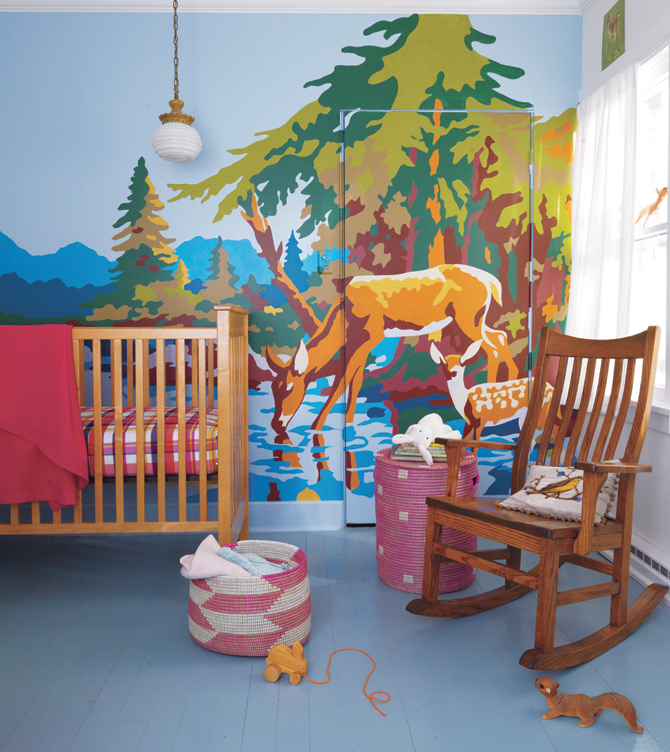
Find an old school paint by number painting on ebay. Customize it to fit the wall size you're painting (in my case, nursery wall). Break down the colors by hand numbering, matching each to a pantone chip to assign the palette. Take your pantone colors to the paint store. Now shoot a pic of your paint-by-number painting guide, download it, print it. Project it on your wall- trace it out, then start filling in your numbers. (used foam brushes & latex paint)

Post courtesy of Tereasa Surrat, author of Found, Free and Flea, and A Very Modest Cottage, and owner of Camp Wandawega.

http://averymodestcottage.blogspot.com/2011/01/project-vintage-paint-by-number-mural.html

Little Vases

July 24, 2012

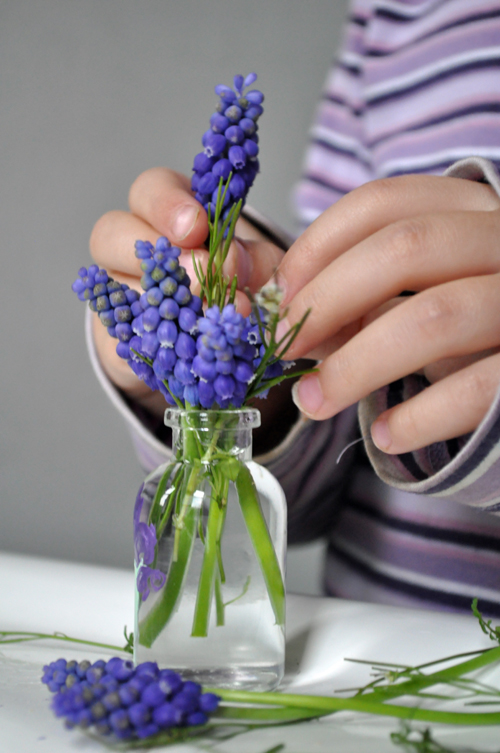
From early spring through to late autumn, my girls pick the sweetest little bouquets of flowers for me. It is another one of those perfect little girl things to do that I try to savor with all my heart as I know their beautiful offerings will not last forever.

1

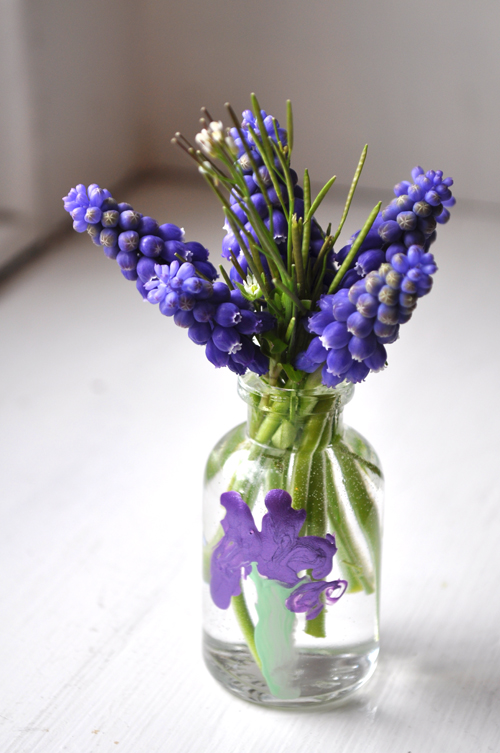
When I found these little bottles in an antique shop last month, I knew they would be perfect for spring arrangements.

2

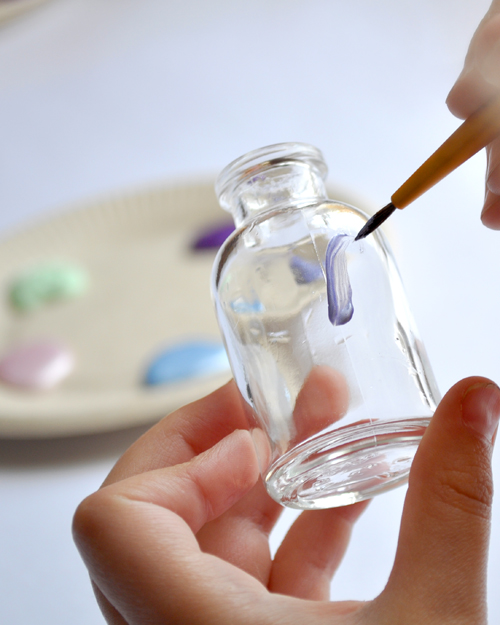
Using Martha Stewart Crafts Multi-Surface Acrylic Craft Paint, the girls painted their own designs onto the glass.

3

4

I had just read this article and it reminded me not to hover or 'help' the girls with their art.        I am completely in love the dainty flowers and pretty designs that the girls made.

5

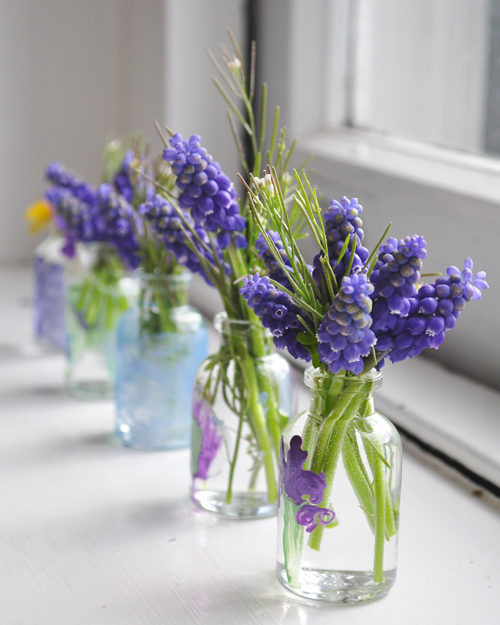
These little vases sit on my kitchen window sill and make me smile every time I walk by.

Post by Helen Bird : www.curlybirds.typepad.com

Camp Wandawega

July 23, 2012

When I was a kid, I spent my summers with my brother and sister at my grandparents’ house in Wisconsin. They live in a town of about 700 people just a few hours north of Chicago. At the time the town had no stoplights, and the only nearby place to buy groceries also happened to be the town gas station. We spent the entire summer outside. Building forts, catching frogs and grasshoppers, fishing, exploring. We were free to wander the small town at will, just had to report back in time for dinner. We entertained ourselves, and had a blast. So, it would be a gross under estimation to say that I have a fondness for rural Wisconsin.

Wandawega_1

I first learned about Camp Wandawega in late 2010 from a photographer I work with at Nod. His good friend, Tereasa Surratt owns the camp. He told me it was located in Elkhorn, WI, just north of the Illinois border. And that Tereasa, along with her husband, had bought the old boy scout camp and turned it into an incredible homage to all things vintage Americana.  Wisconsin + Vintage Americana! I fell in love with the camp before ever stepping foot on its property.

I had the opportunity to visit the camp earlier this year with my daughter to see if there was potential to shoot there in the future. Here are some pics of our visit.

Wandawega_2

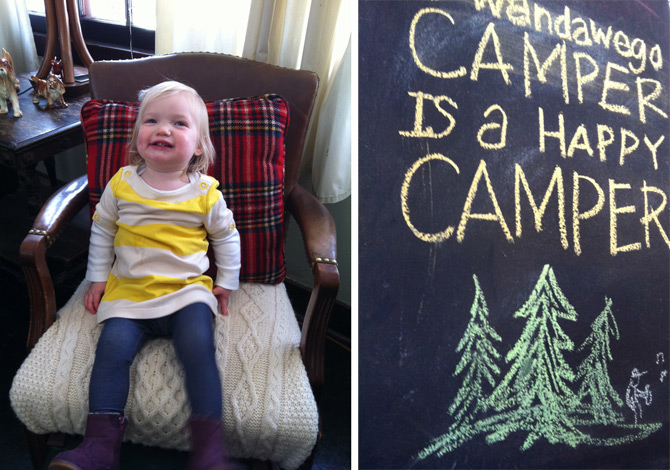
My daughter, Lottie, certainly was a happy camper. Who wouldn’t be in this fabulous chair reupholstered in a vintage fisherman sweater?!

Wandawega_3

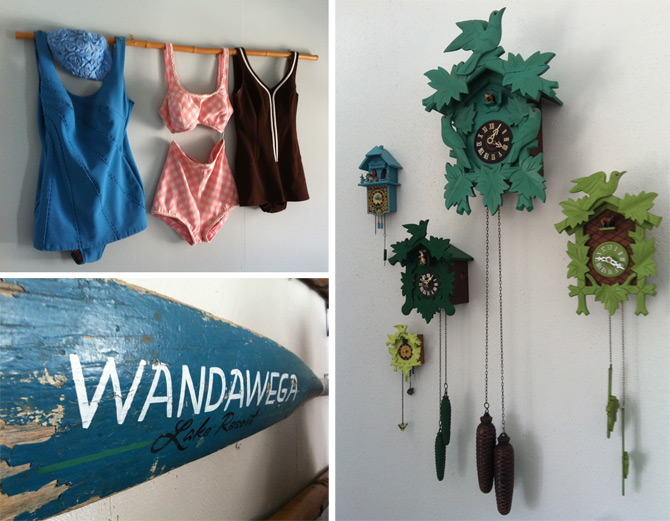
Each room in the old hotel is decorated with a “theme.” I love the old swimsuits that adorn one wall. And, I’m a sucker for cuckoo clocks. Tereasa took spare parts to make these and painted them in shades of blue and green. The effect is a modern take on this classic clock.

Wandawega_6a

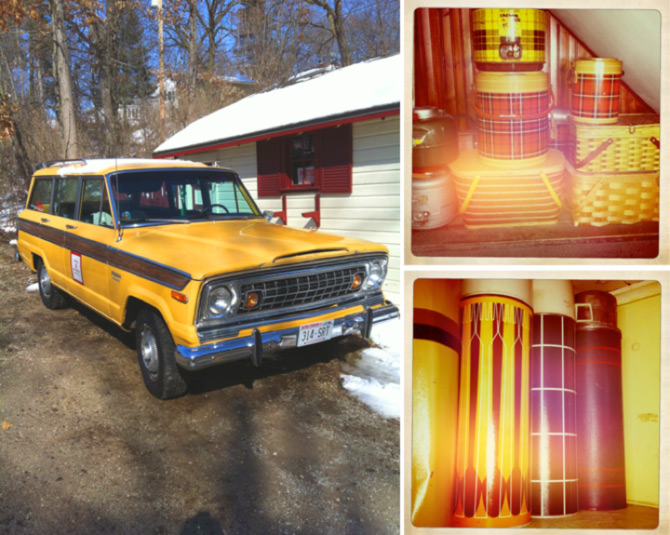
Well, of course they would have a camp woody Wagoneer! And in every nook and cranny there are thermoses, tins, baskets and blankets just oozing with the most incredible plaids and stripes.

Wandawega_4

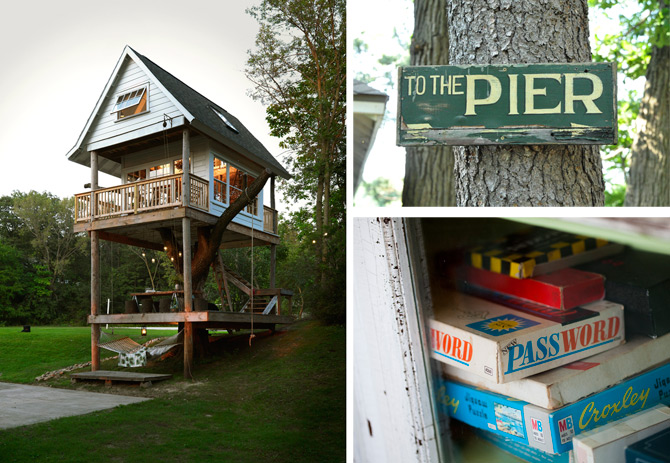
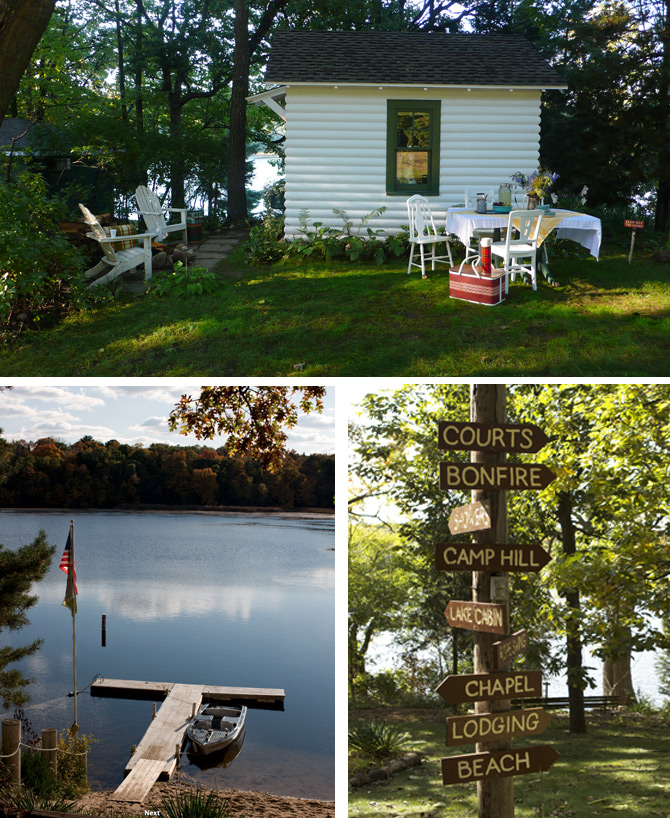
The tree house was built by Tereasa and her friends. It’s the most dreamy, yet campy space I’ve ever visited. I wanted to move in.

Wandawega_5

The camp is situated on a quiet lake, with several small cabins and plenty of north woods activities to keep visitors busy. But, also plenty of views to just sit back and enjoy.

So when our merchandising department showed me the inspiration behind the American Kitsch story in our new fall collection, I knew Wandawega would be the perfect backdrop for the photo shoot. Once we arrived at Camp Wandawega, none of us ever wanted to leave. So, we decided to hang out for a week and photograph a bunch of rooms to bring you a little of the joy from camp. Here’s what we came up with, hope you enjoy it!

Wandawega_6

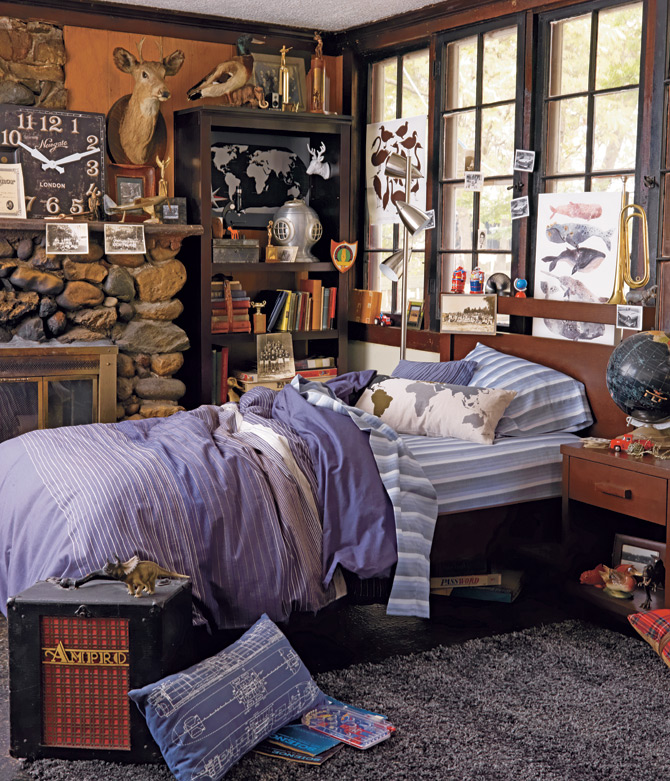
Our Faculty Mixer Bedding Collection was inspired by leather bound books and classic men’s clothing. So the lodge with the huge stone fireplace seemed the perfect choice to show this rich group of products.

Wandawega_7

This was actually photographed in Tereasa’s daughter’s nursery. Tereasa created the paint-by-number mural by projecting a vintage art piece onto the wall and hand painting it…stay tuned for a blog how-to on this one. I love the simplicity of the bedding paired with the classic rocker and over-the-top old-school paint-by-number.

Wandawega_8

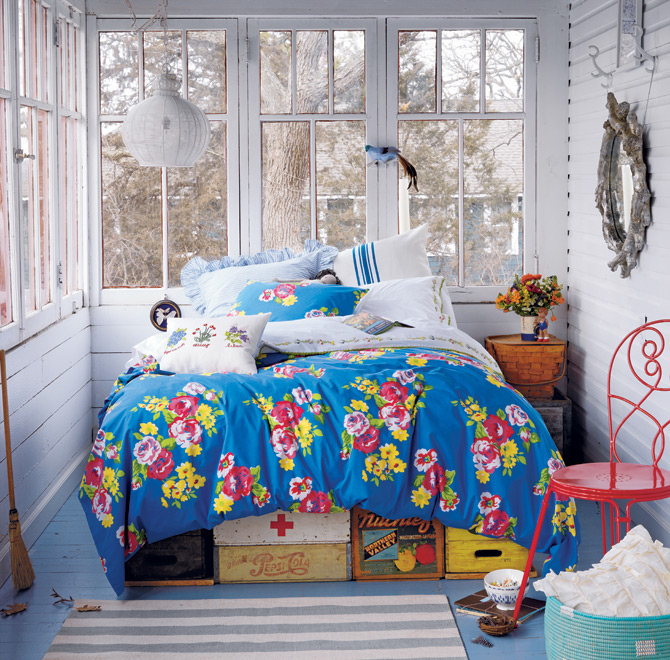
Our Petite Chateau Bedding was inspired by classic French country design. I love how its rich linen and embroidered textures are offset by the distressed environment of this old porch. While it’s a bit on the sophisticated side, I think it would work nicely into a girl’s room by adding just a few whimsical touches, like the iron bistro chair.

Wandawega_9

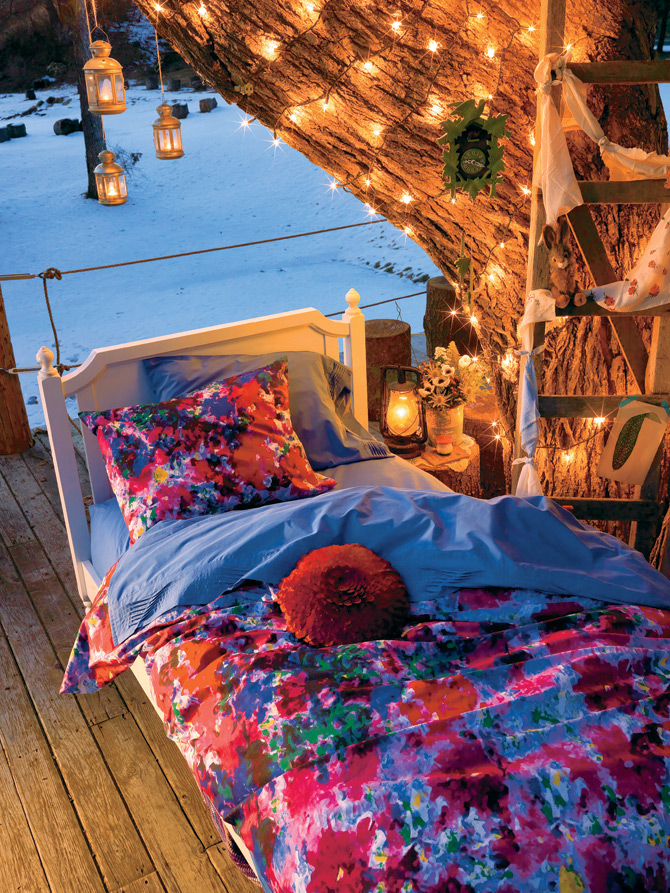
We photographed the First Impressionist Bedding on the platform of the tree house at dusk. While not a real room, we hoped to play off the dreamy, evening quality of the painterly floral bedding set. You could re-create the mood of this look by adding some twinkle lights to a wall in your daughter’s room to achieve that dreamy glow.

Wandawega_10

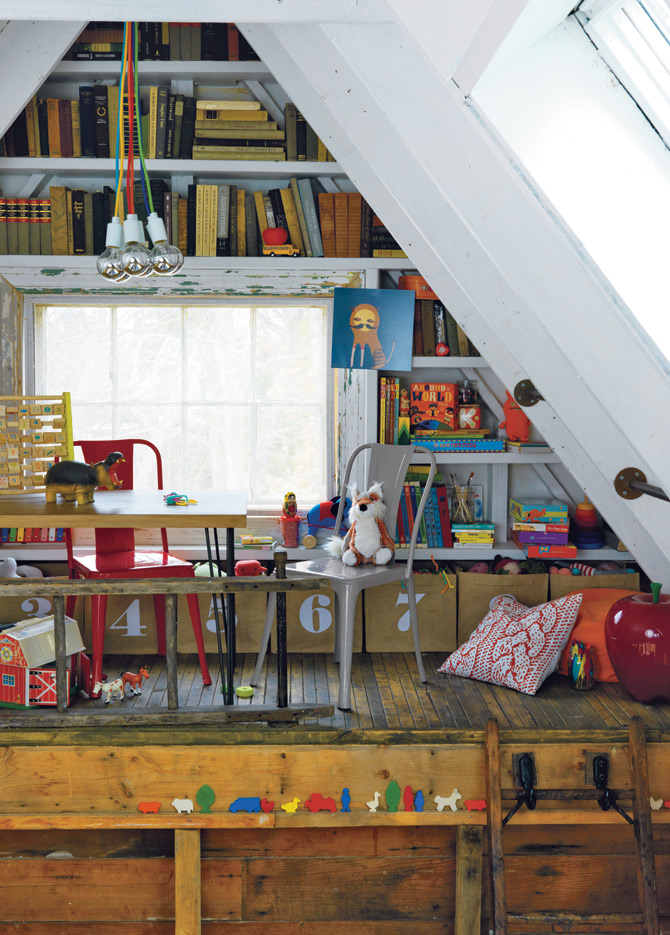
We headed inside the tree house to shoot this playroom in the loft. The mix of old and new creates a really warm and playful environment.

Wandawega_nodConserv

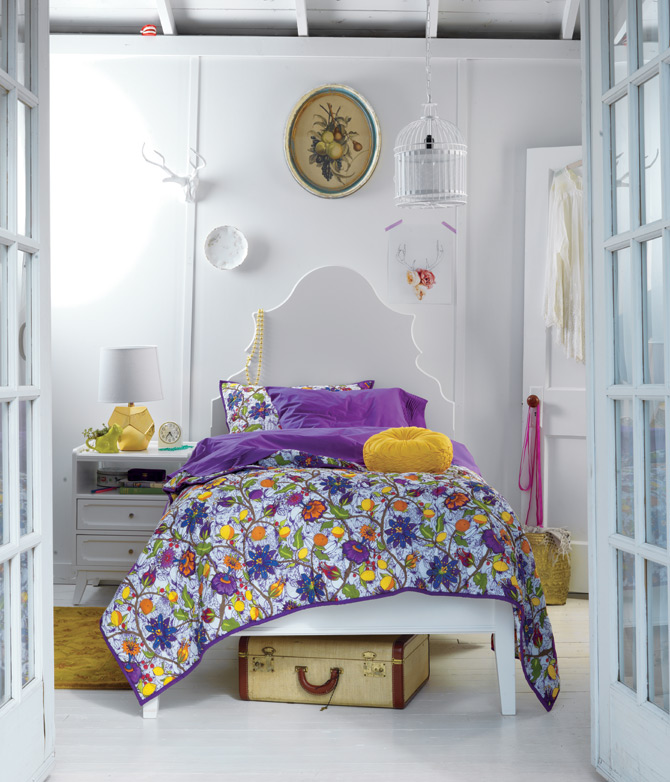
And camp doesn’t necessarily equal kitsch. We were able to create this elegant look in one of the cabins that had an all white interior and lovely french doors that opened to a spectacular view of the lake. So, when can I move in?

Wandawega_11

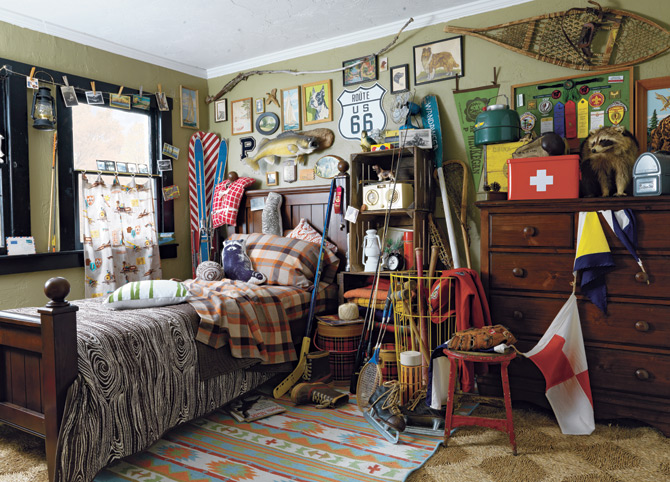
Last, but certainly not least, is the epitome of our American Kitsch story. This is the real reason to travel to Wandawega. From the mounted fish to the snowshoe on the wall, this is pure camp. I love the mix of glossy metals and rustic wood.

While you may never camp-up your kid’s room to this extreme, we hope we’ve inspired you to bring a little summer vacation into your home. After all, why not be as happy as a kid in the dirt all year round?

Wandawega_12

To learn more about Camp Wandawega visit their website at www.wandawega.com

By Danielle Kurtz

Danielle is the Creative Director at Nod and an over-protective mother of two. She’s also completely obsessed with Pinterest, Twitter and her Kindle, but not necessarily in that order. Danielle loves to craft, sew and crochet, but all her supplies have a layer of dust on them about 5-years-thick, wonder if it's just a coincidence that her oldest kiddo is 5 years old?


Summer Measures Up

July 20, 2012

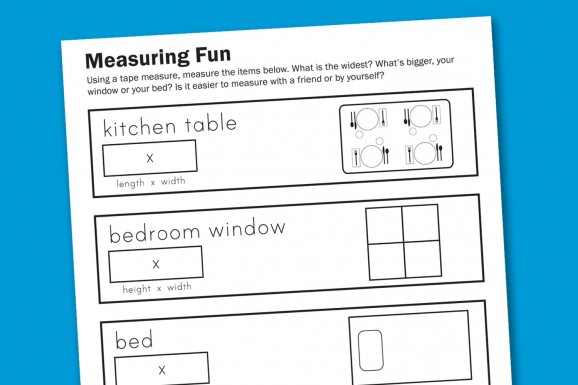
Ever since my boys discovered my husband’s fancy auto tape measure, they have been measuring everything. To take advantage of this new love (and perhaps to teach them a skill or two), I whipped up this worksheet. I figured I would pull out a couple clip boards, sharpen their pencils and let them measure away — with a purpose. Perhaps your kids like measuring too? Download our Measuring Fun worksheet here.

1


Reposted with permission by Aimée Lowry & Bettijo B. Hirschi from PagingSupermom.com

Big vs. Small – Hotel Pop

July 19, 2012

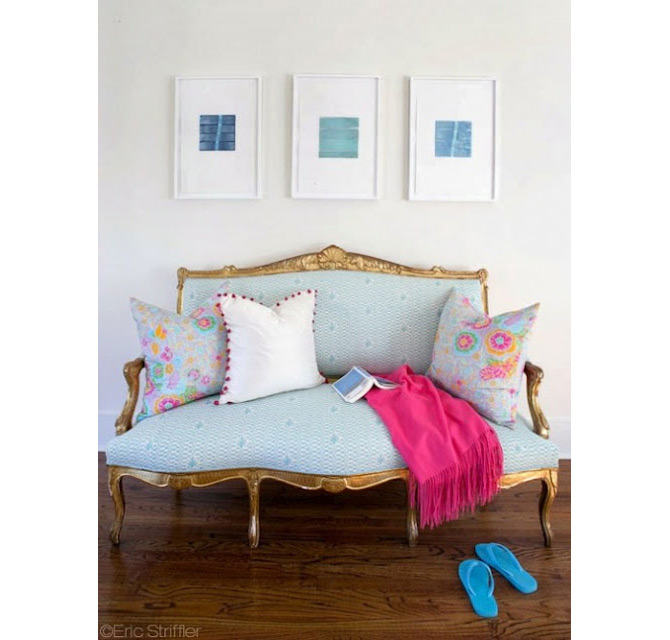
Modern geometric patterns mix with florals and gilded details in this fresh and updated seating area. Teal, gold, fuchsia and yellow mix to create this lively palette. Moments of solid white allow for the eye to rest and creates a nice balance to all the color and pattern.

HotelPop_1

1.

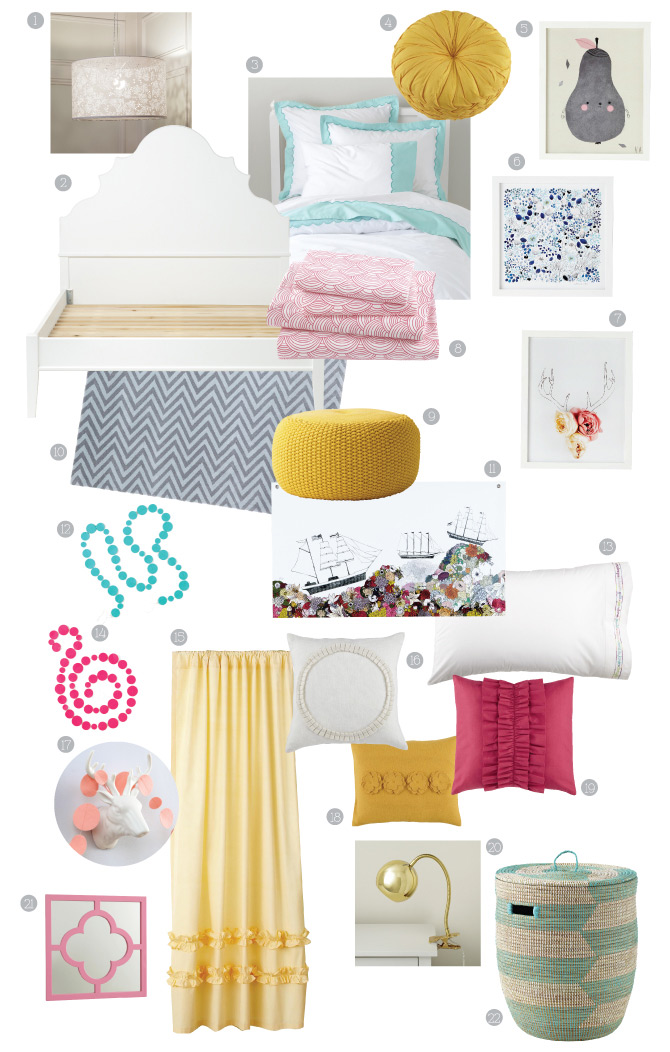
Using this lovely space as my inspiration, here’s how I’d put together a girl’s room. Lots of white to balance punches of pink, and just enough pattern to keep it interesting.

HotelPop_2
1. 2. 3. 4. 5. 6. 7. 8. 9. 10. 11. 12. 13. 14. 15. 16. 17. 18. 19. 20. 21. 22.


By Sarah Culbertson

Once upon a time a fashion plate from Seattle met a childrens retailer from Chicago, and it was love at first sight.  After spending a lot of time together at the mall, they both knew it was a perfect match. So Sarah packed up her fabulous Kate Spade suitcase and headed for the Windy City. Where they lived happily ever after, designing and developing textiles for little kiddos everywhere.  

25 Tips for Hosting a Lemonade Stand

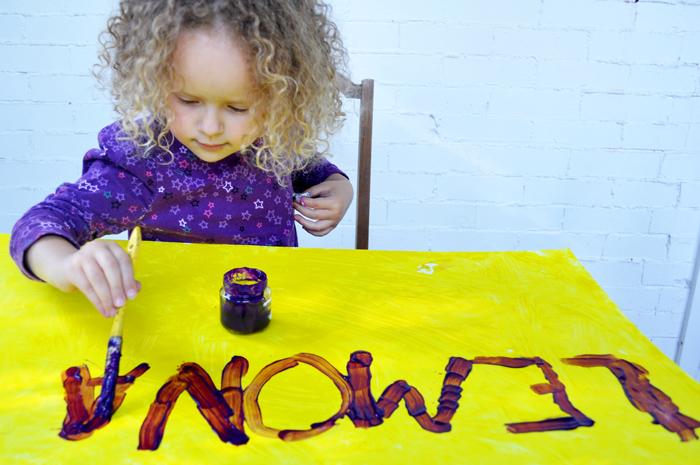
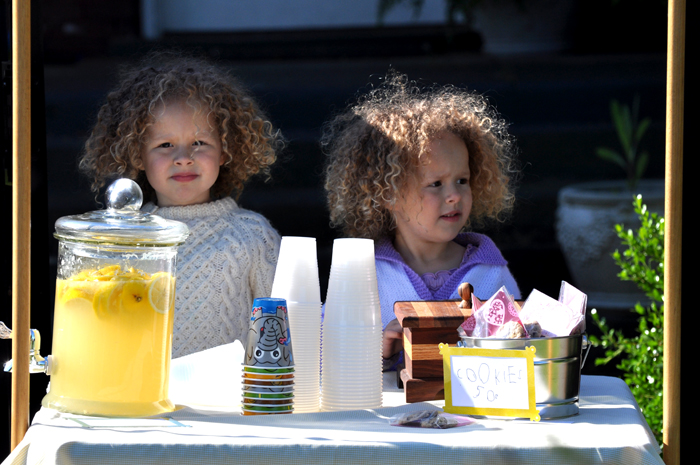
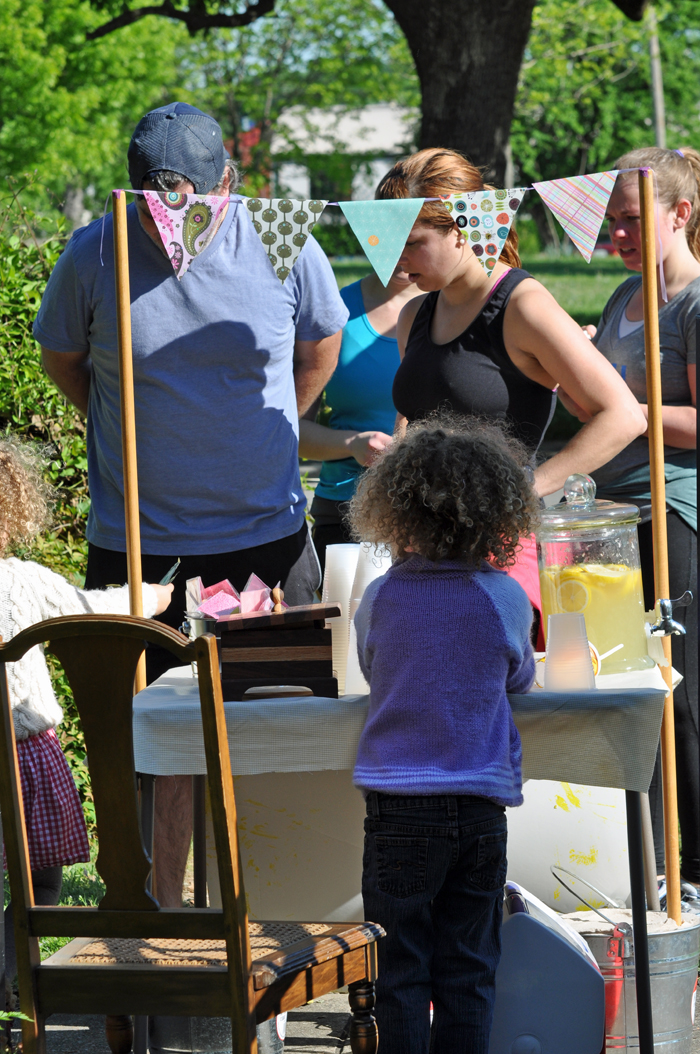
This weekend the girls held their first lemonade stand. It was a family memory to be cherished forever, another event that makes our house a home, and great fun. We are all looking forward to doing it again next year…

Here are my family tips for hosting a lemonade stand:

1

1.  Involve your kids in the process – planning, buying, making, and setting up

2.  Plan ahead, make signs a few days before, and make lemonade/cookies the day before

3.  Let kids help make the lemonade/cookies

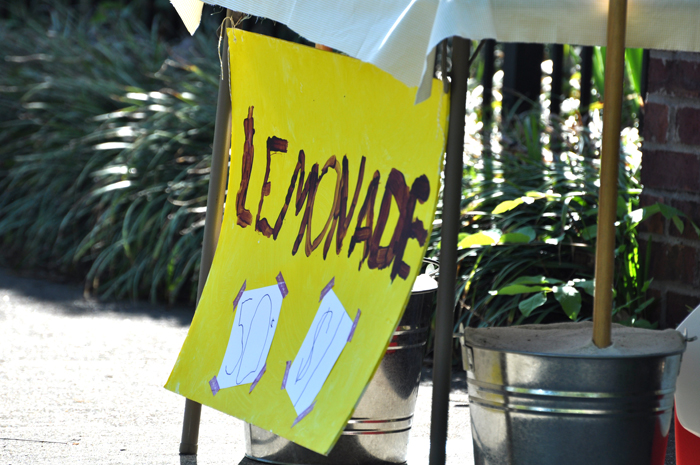
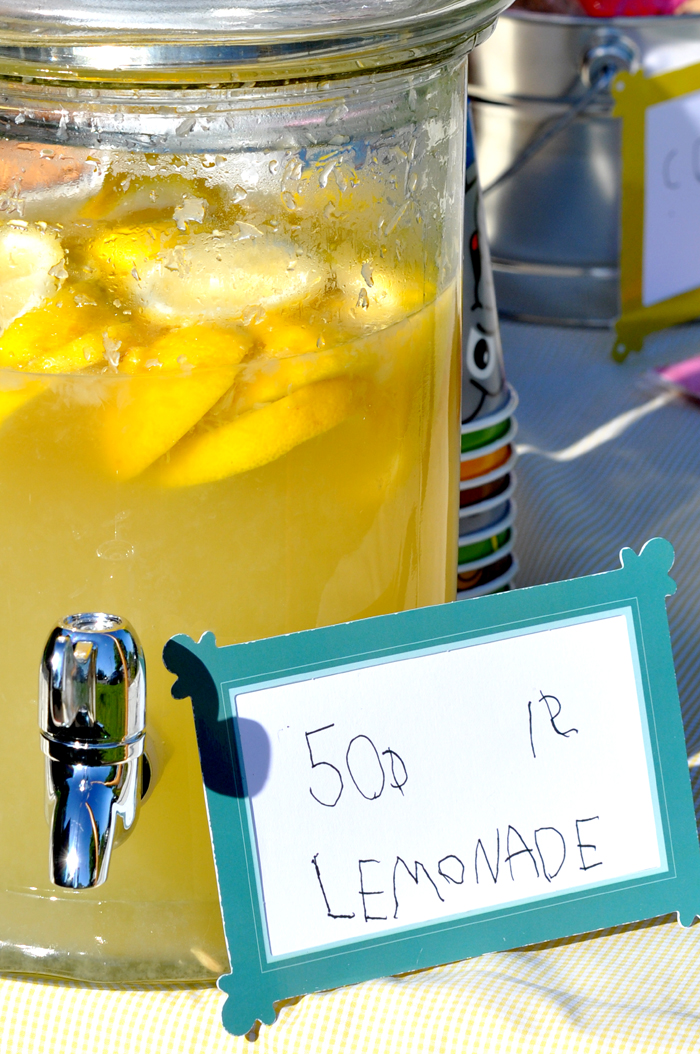
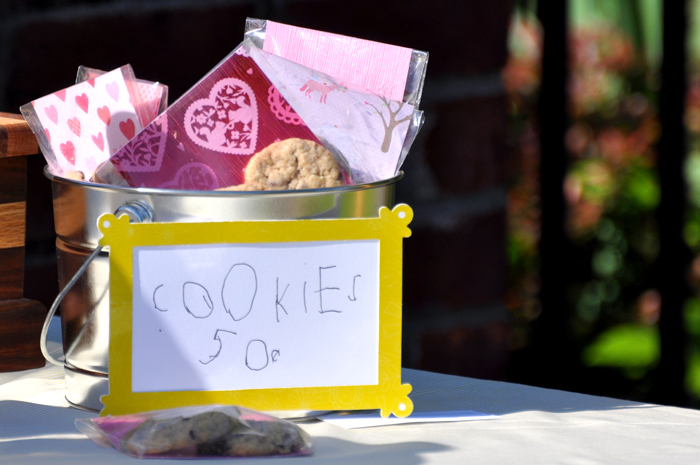
4.  Price it right – we made lemonade 50 cents and $1, and cookies 50 cents for two

2

5.  Waiting for the first customer is tough

6.  Invite neighbors, family and friends

3

7.  Make lots of signs to advertise sale

8.  Remember – your kids’ writing is way cuter than yours!

4

9.  Make real lemonade (note from Nola: have your Daddy make the lemonade)

10.  Add lemon slices to the container

11.  Borrow extra ice from a neighbor

12.  Keep some lemonade cool inside and replenish often

13.  Consider a beverage container with a tap – easier for little hands to pour

14.  Make lemonade ice cubes the day before – they will keep lemonade cool in the sun

5

15.  Sell more than just lemonade – cookies and/or flowers

16.  Let kids decide on their favorite cookies to make/sell

17.  Include an ingredients list for people with allergies

18.  Keep a trashcan close by

19.  Wear sunscreen

6

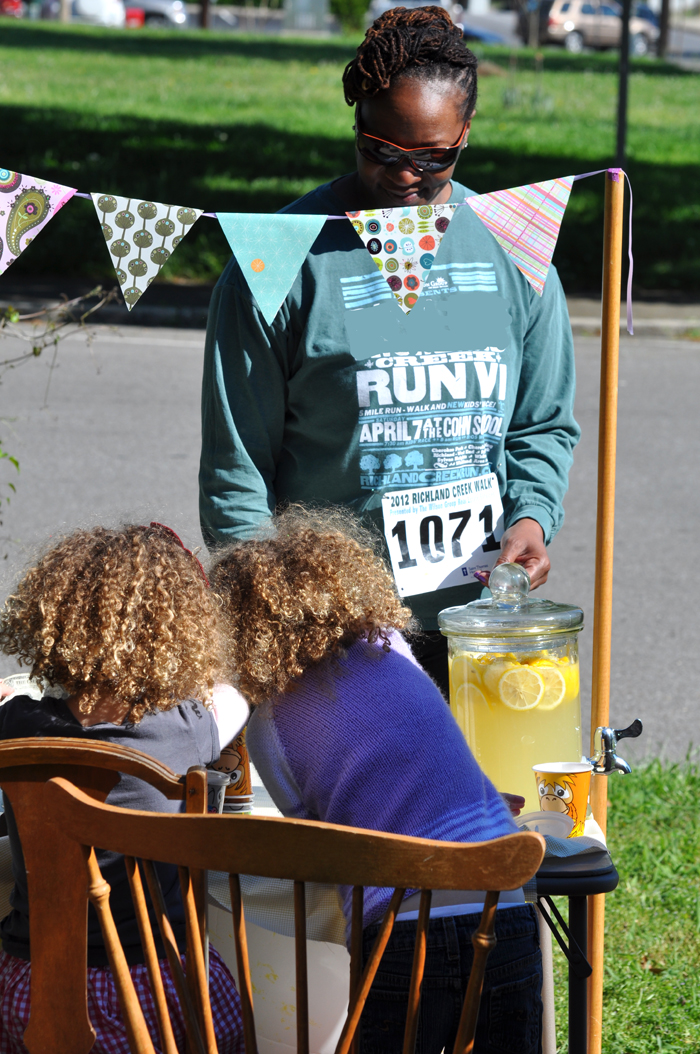
20.  Schedule lemonade stand on a special day – community yard sale, neighborhood  fun run, or farmer’s market

21.  Prepare for success – we made 3 gallons of lemonade and used it all

7

22.  Remember it is your kids’ stand!

23.  Stay back and let your kids run the show (always be present)

24.  Know when to quit – BEFORE your kids are completely worn out and no longer having fun

25. ENJOY GOOD FAMILY FUN!!

8

Not that it is all about the money… but Nola and Kira made $58!! $58? Yes! I know – CRAZY! After counting the money they pretty much ignored their earnings and focused on stories from the day. We have put the money up and will remind them of it next time they are begging to buy something special.

Here is our lemonade recipe

Post by Helen Bird : www.curlybirds.typepad.com

Peanut Butter Banana {Soft Serve}

July 18, 2012

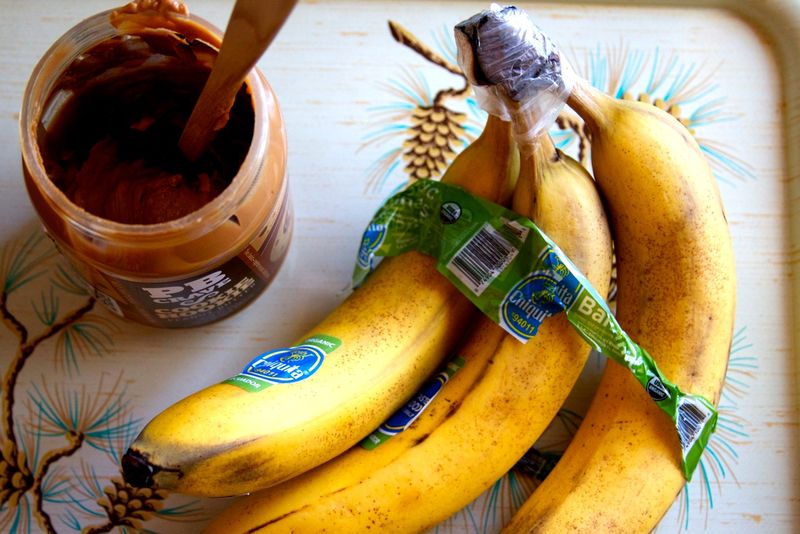
If you spend any time on the internet cruising health food blogs, you’ve seen some version of this DELISH non-ice-cream ice cream. It is made without sugar, cream or egg yolks…. And in fact needs only two recipes you probably have in your kitchen right now: bananas and peanut butter.

My kids FREAK when I make this (they just call it banana ice cream) and honestly they don’t really understand that there’s technically no ice cream in it. It’s super quick to make, requires essentially no cooking skills (can you peel a banana?), and is a super healthy nice cold treat on a hot summer day. You’ve gotta try it.

1

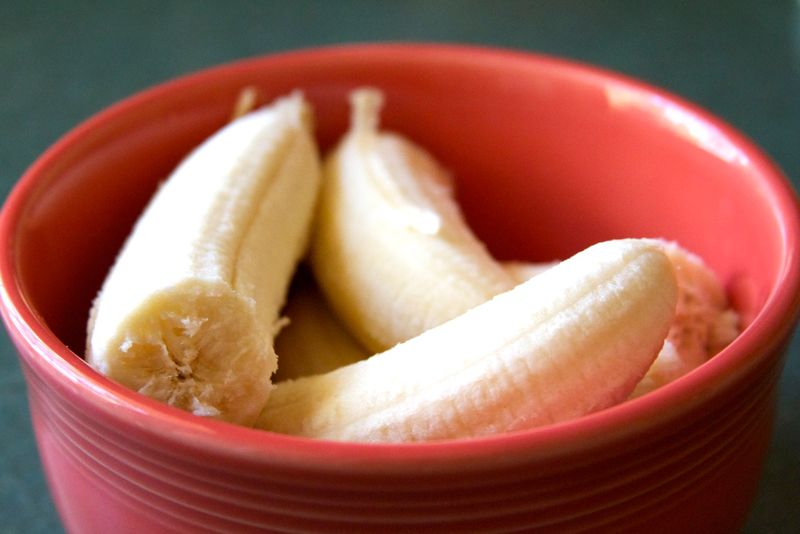
To start, peel the bananas, put in a bowl and set in the freezer until firm – at least an hour.

2

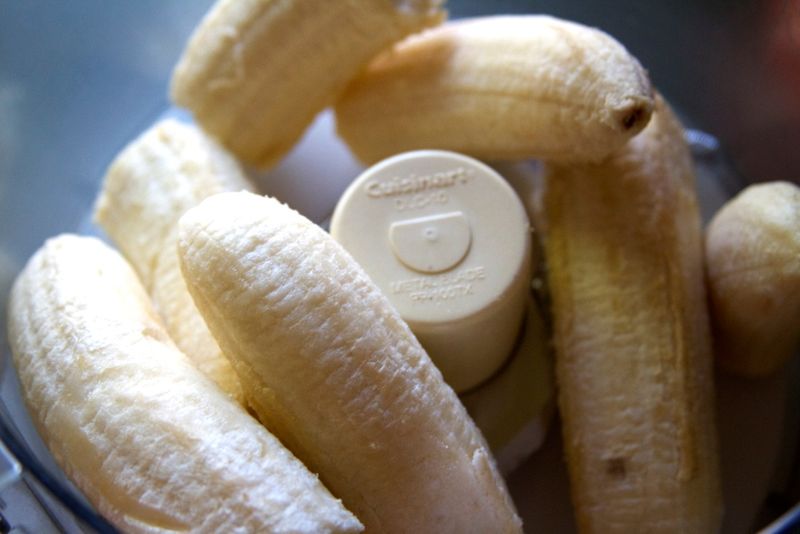
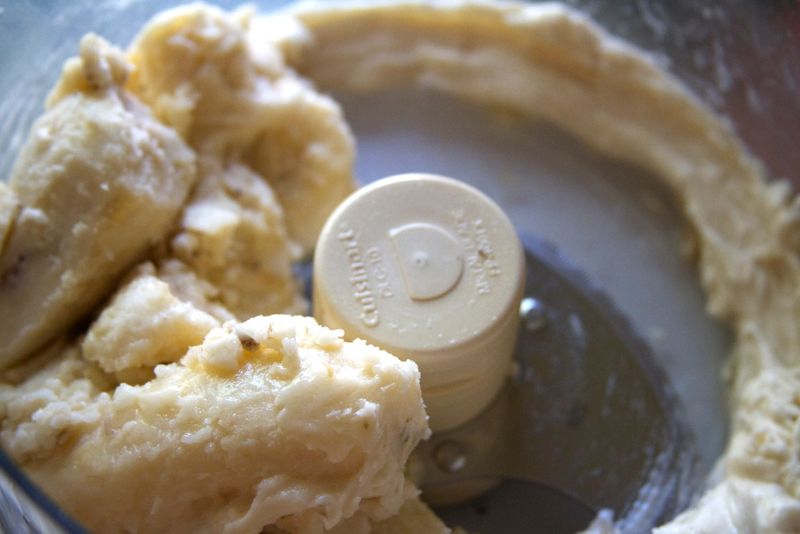
Remove bananas from freezer and place them in the bowl of a food processor.

3

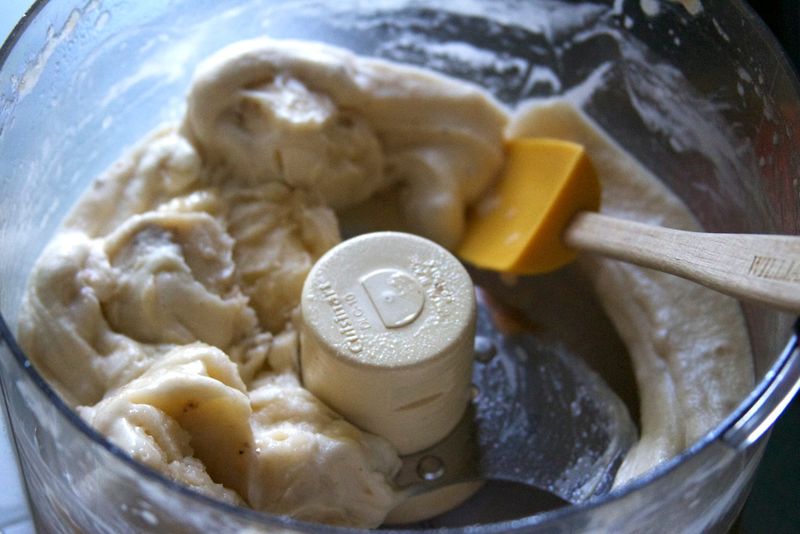
Turn food processor on and let it run while your bananas magically turn into soft serve. WARNING: Your food processor might shake a little at first depending on how frozen your bananas are.

4

5

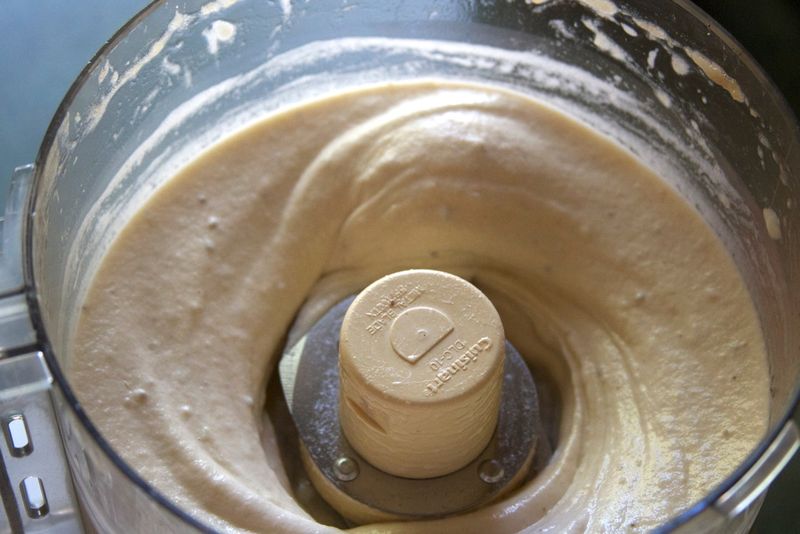
This is what your bananas should look like when they are done. At this point, add a scoop of peanut butter and process again until it is well combined.

6

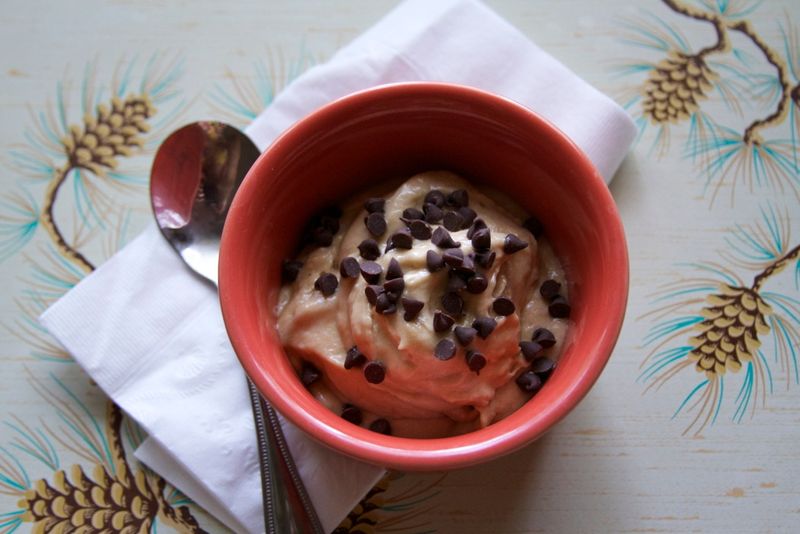
Scoop the soft serve into individual bowls and, if you’re feeling generous, top with mini chocolate chips.

7

Instructions:

Peel and freeze bananas for at least 1 hour, until firm. Process frozen bananas until creamy and no lumps remain. Add a scoop of peanut butter and process until well combined. Serve topped with mini chocolate chips.

*I used 3 bananas and two generous spoonfulls of PBCrave’s Cookie Nookie peanut butter. This was enough to serve 3-4 people.

*Toasted coconuts, peanuts, and berries also make delicious toppings. You can also experiment by swapping the peanut butter for pureed berries, cocoa powder and more. Don’t be afraid to be creative!

Post by Jen Wise : Mom Colored Glasses

DIY Tape Window Decoration

July 17, 2012

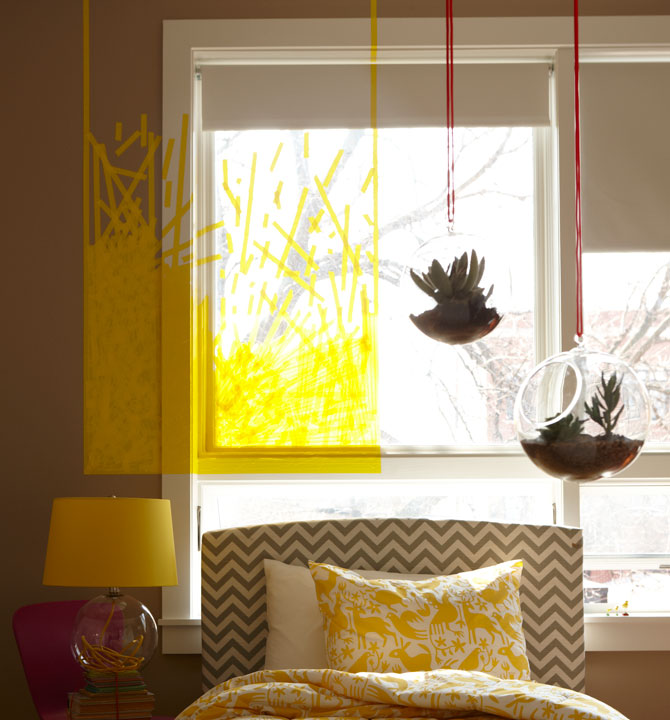
TapeWindow

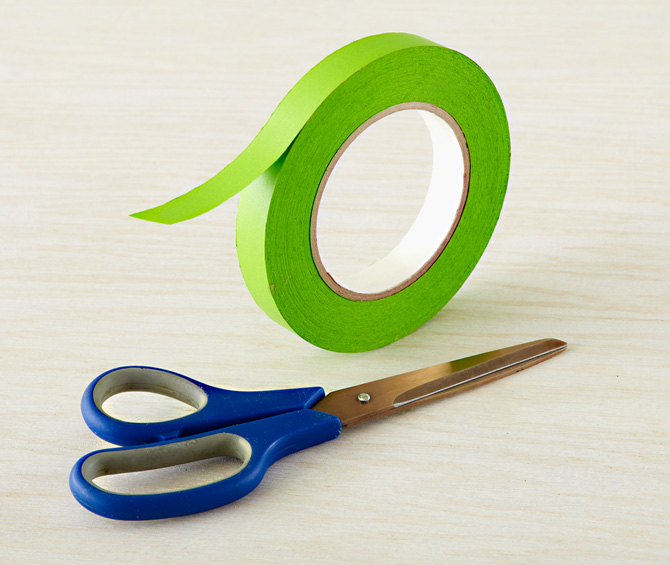
Whattya need?

  • Colored masking tape
  • Scissors
  • A window

CraftBlog_TapeArt_Materials_B

How do I make a Tape Window Decoration?

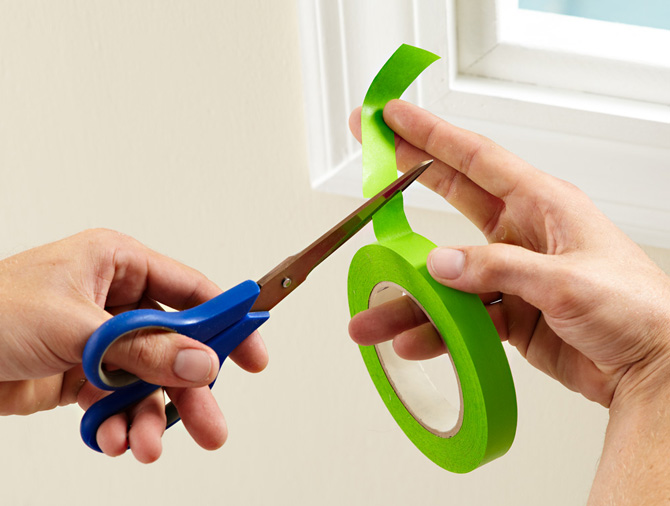
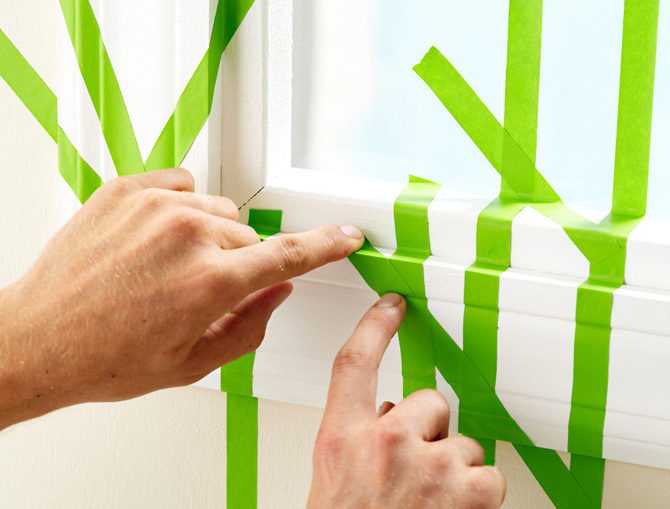
Step 1: Cut tape to desired length (you will use a variety of different lengths).

CraftBlog_TapeArt_Step_1_B

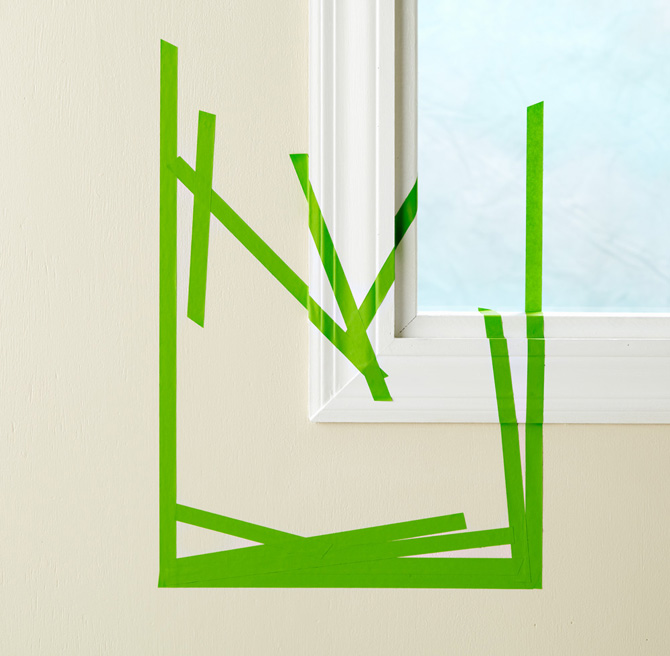
Step 2: Apply tape pieces to create a basic outline of the shape you want.

CraftBlog_TapeArt_Step_2_B

Step 3: Add more tape to fill inside of shape. Use care to smoothly apply tape to wall, window sill and glass.

CraftBlog_TapeArt_Step_3_B

Vintage Floral Pop

VintageFloralPop_1
1.

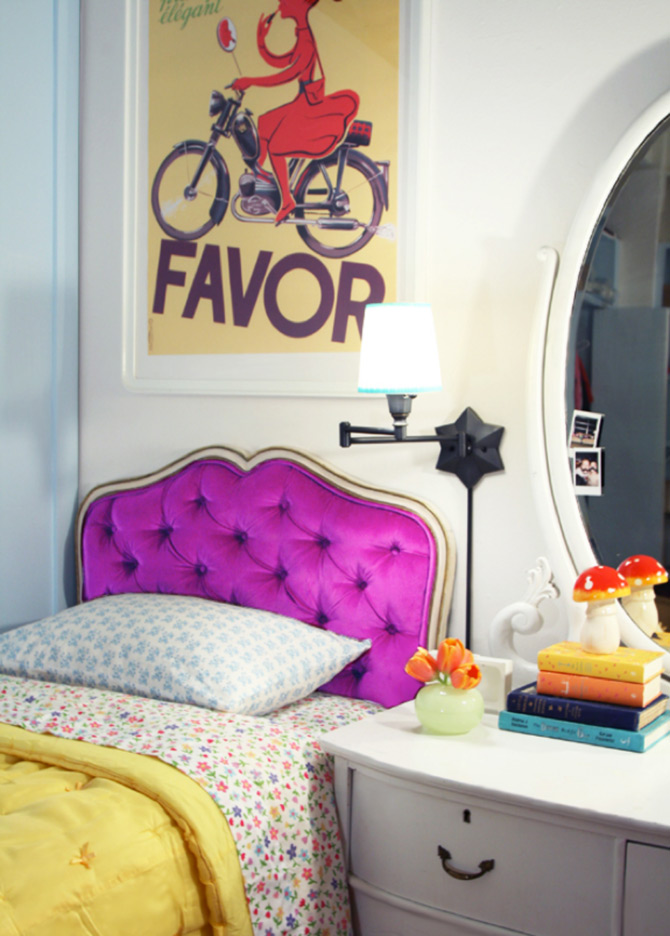
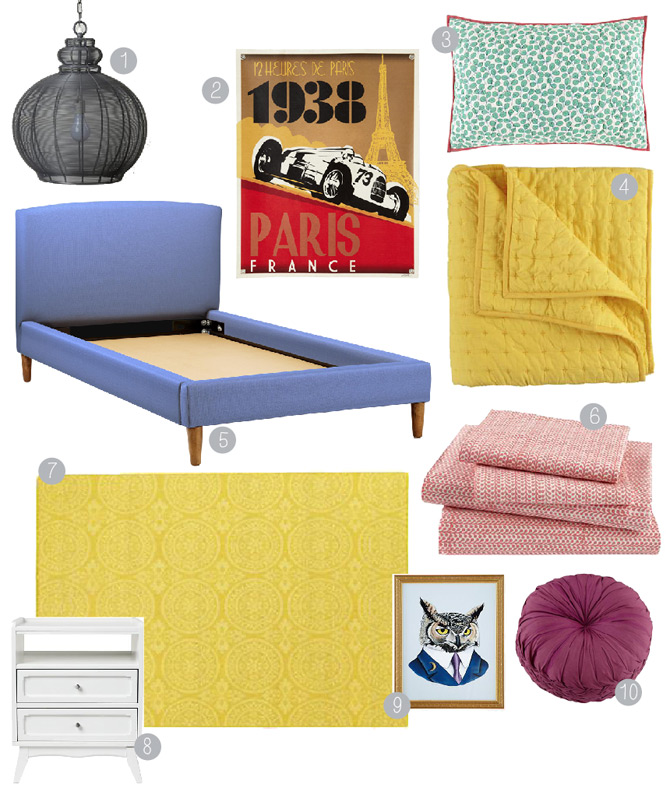
I love the mix of saturated colors and small vintage florals in this fun inviting space. Using this room as my inspiration, I’ve put together a girl’s room that I think captures the same retro joy.

VintageFloralPop_2
1. 2. 3. 4. 5. 6. 7. 8. 9. 10.


By Sarah Culbertson

Once upon a time a fashion plate from Seattle met a childrens retailer from Chicago, and it was love at first sight.  After spending a lot of time together at the mall, they both knew it was a perfect match. So Sarah packed up her fabulous Kate Spade suitcase and headed for the Windy City. Where they lived happily ever after, designing and developing textiles for little kiddos everywhere.  

Oh Boy! Baby Shower Brunch

July 16, 2012

Here is a simple and elegant baby shower for a little boy. Shanna, a good friend and Supermom, recently had her third little boy. Before he was born my friend Ashley and I collaborated to create a simple brunch for a few close family and friends of Shanna. A couple things about Shanna: she’s simple, earth-friendly and an excellent momma. As we were brainstorming a theme, we wanted it to feel fresh and easy and give her a chance to relax before another little boy would be demanding her attention. We quickly decided a sit-down brunch would be perfect.

1

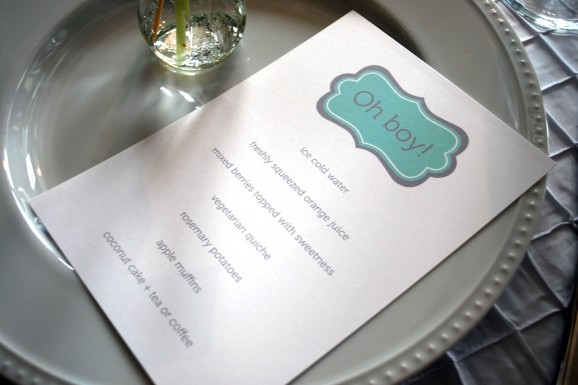
We started with the menu — this is where Ashley really shines. She’s excellent at selecting delicious recipes and pulling together party menus like a chef. Once we settled on quiche for the main course, we did a quick brainstorm to come up with sides. Shanna was craving raspberries at the time, so we were sure to include those in our mixed berries. Our menu:

:: Vegetarian Herbed Quiche
:: Rosemary Potatoes
:: Apple Muffins
:: Mixed Berries
:: Freshly Squeezed Orange Juice
:: Water

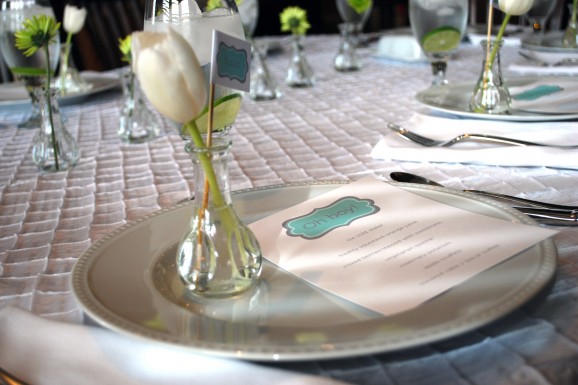
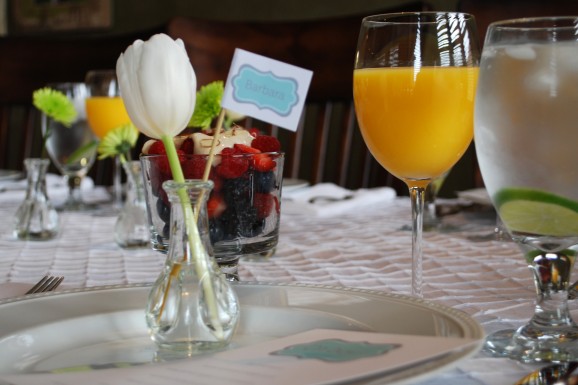
We prepared a place setting for each guest, complete with place card, menu and pre-poured drinks. We wanted to have as much done as possible before guests arrived so we, too, could enjoy the time together.

2

The menu mimicked the invitation and gave a brief description of each food item. We thought the description was an important detail because we had vegetarians and other food-restricted guests. The printed menu let the guests know each food item met their dietary needs, without an awkward announcement.

3

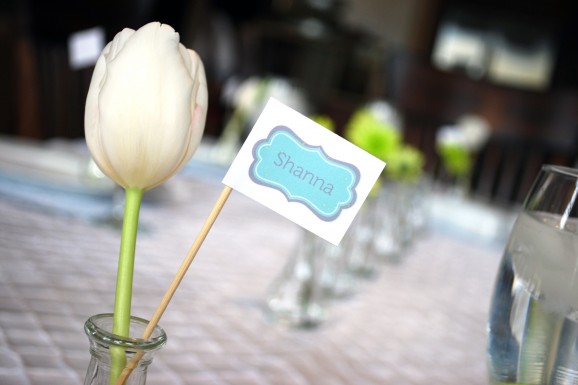
Ash found cute single-flower glass vases at Target, so we filled each with a simple white tulip and a personalized flag. They served as place cards and favors. (The vases are not available online, so check your local Target if you’re interested.)

4

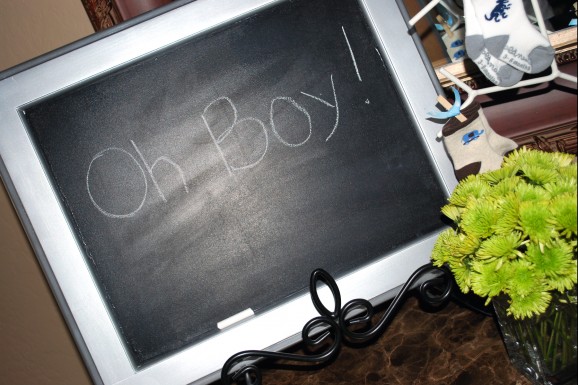
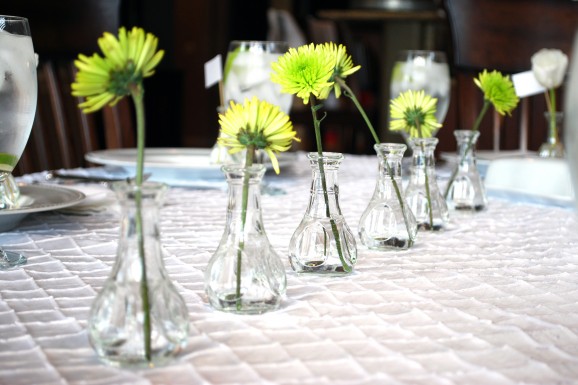
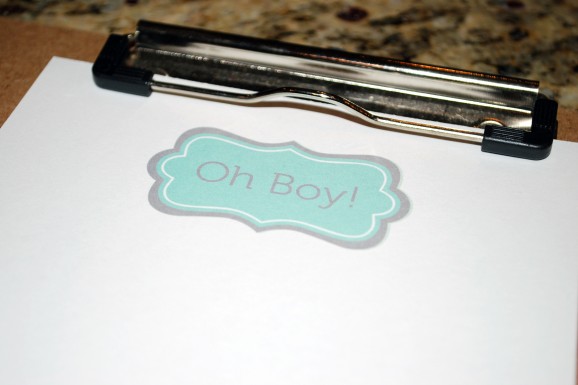
Originally the brunch was going to be held outside on Ashley’s back patio. It backs a mountain and feels so peaceful (unless you have her twin boys playing with my two boys — then it’s loud). However, the weather forecast called for wind and rain, so the night before the party, we decided to host it inside. Since we couldn’t have her beautiful gardens and view as our backdrop, we decided to decorate with fresh flowers. Although neither of us are florists by any stretch of the imagination, we managed to stuff a small vase full of green mums to our satisfaction. We set the vase by a handwritten Oh Boy! sign and a metal tree with blue baby socks clipped on with embellished clothespins.

5

The extra mums were slipped into more small vases and lined down the middle of the dining table. We both felt low, simple centerpiece would provide the best conversation.

6

As Shanna opened her gifts, we recorded them on a coordinating paper, ready for Baby Boy’s scrapbook.

7

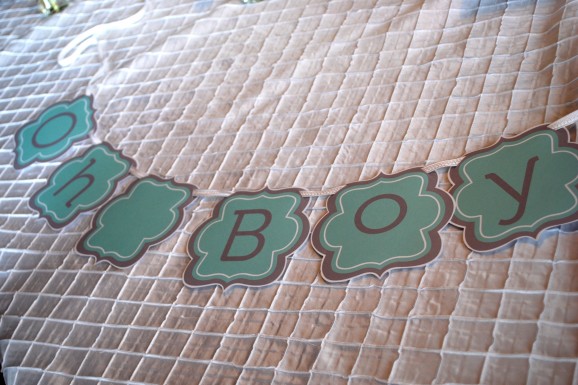
We made a simple Oh Boy! banner to hang near the dining area as well.

8

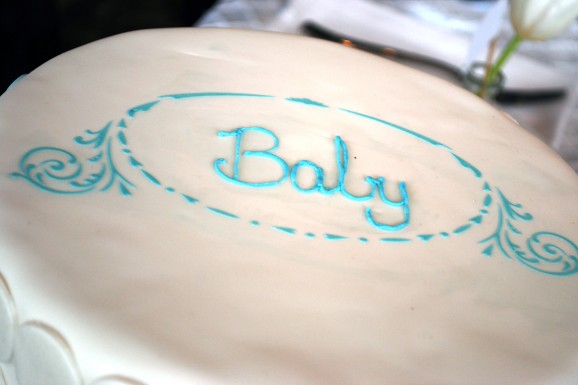
After breakfast we all enjoyed a slice of coconut cream cake.

9

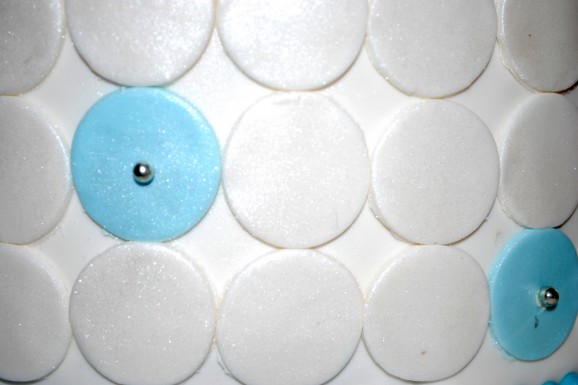
I thought the circle details on the side of the cake were especially fun.

10

Download free printables here!

Reposted with permission by Aimée Lowry & Bettijo B. Hirschi from PagingSupermom.com

That Depends, Is Your Homework Done?

July 13, 2012

Study_1

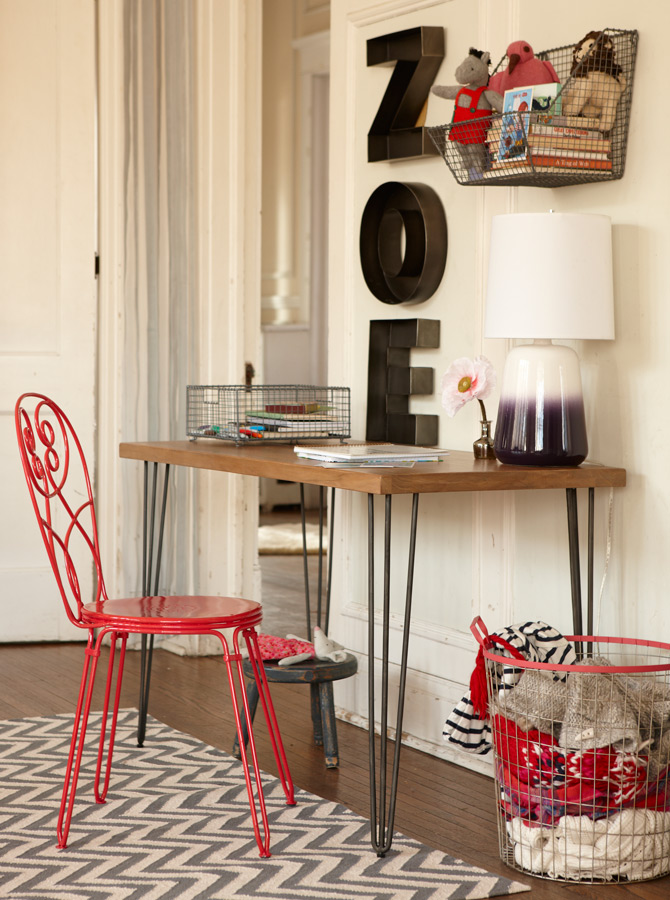
Once your kids reach school age, parenting is often a series of reminders and negotiations. So, while we can’t guarantee a desk will mean your kids will do all their homework without being asked, begged and nagged, we can guarantee that they can’t use having to move their books off the table because it’s dinnertime as an excuse anymore.

The key to a successful study space is to make it both comfortable and accessible. Here are a few steps to putting together the perfect study space.

Study_2

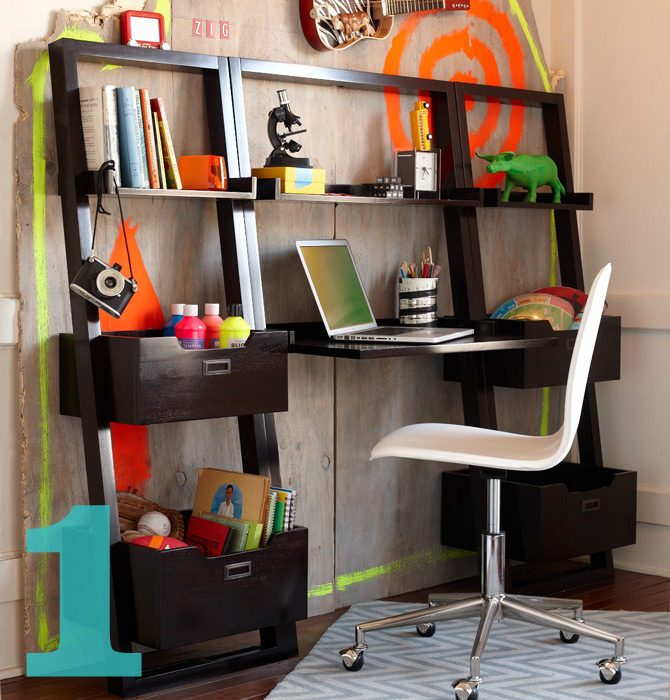
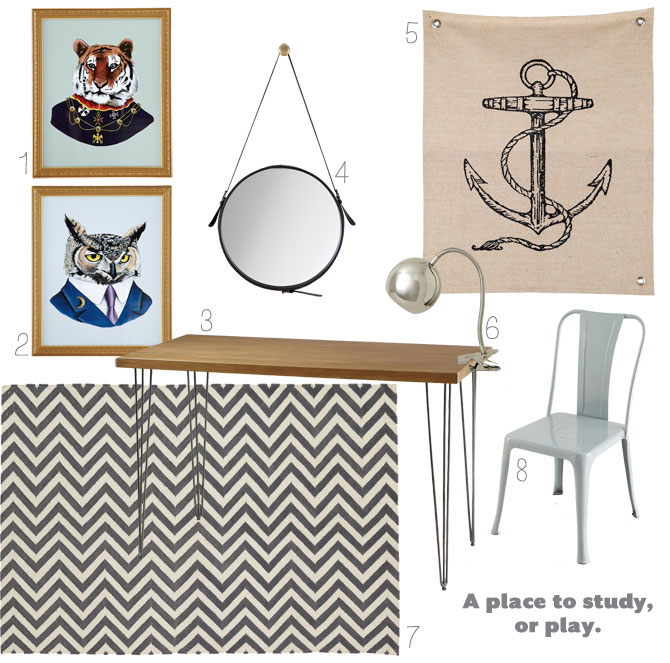
Step 1: The desk is the focal point here, so that’s the best place to start. Think about just how much space your child needs to work. If he has a desktop computer, be sure that there’s enough room to accommodate the monitor, while still leaving space to spread out books and papers. If they use a laptop, a smaller desk will work just fine, as they can move the laptop out of the way when needed. I’d suggest choosing a desk that can work through high school. So, opt for neutral colors and a more sophisticated design. Also, size is a big factor here. Be sure the desk accommodates a standard sized chair, so your child can fit comfortably as he grows. Lastly, you may want to consider a desk that can serve another function once it’s no longer needed as a desk, perhaps as a table elsewhere in your home.

Study_3

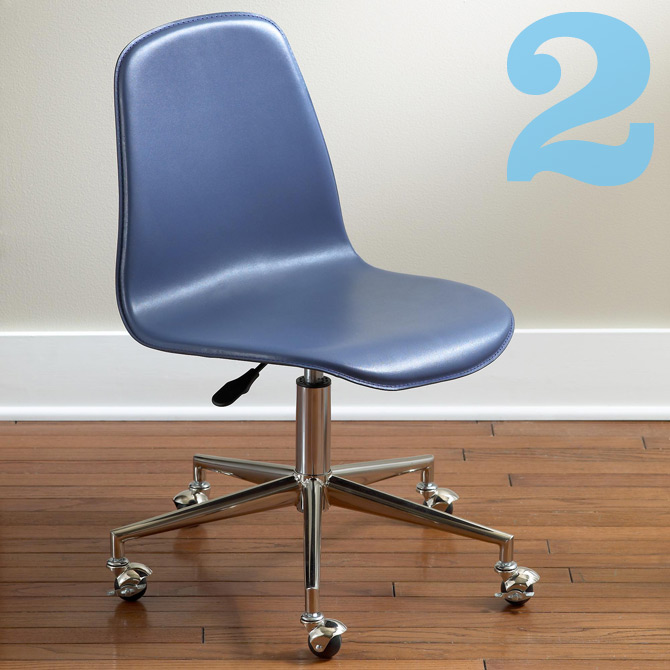
Step 2: A comfy seat is key. If you’re counting on a scholarship to pay that lofty college tuition bill, the kid’s going to need a place to sit and study. Choose a chair that’s comfortable, but not so plush that it puts them to sleep on the job. An adjustable seat height is a good idea, since it can get taller as your kid does.

Study_4

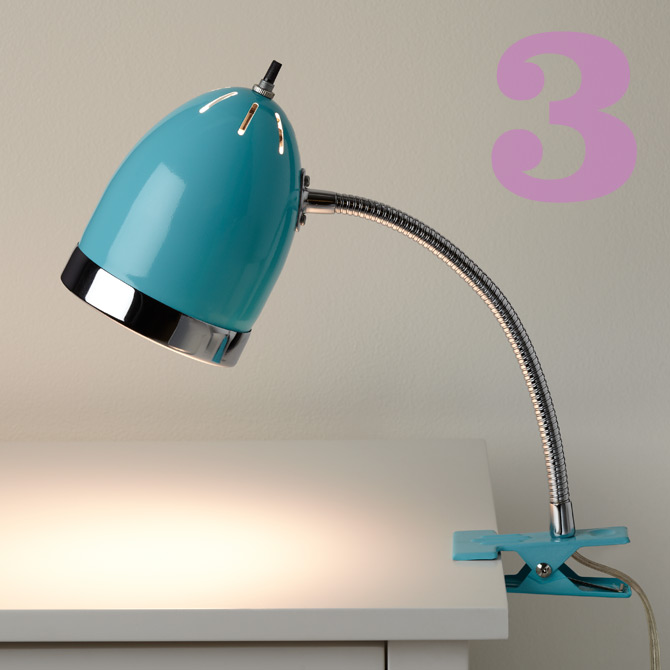
Step 4: Your child may be bright, but chances are they’ll need a lamp to pull that all-nighter.   A bendable, task light is a great option for a desk. It’ll allow them to shed light wherever’s it’s needed. Plus, they can put on killer shadow puppet shows when the homework’s all done.

Study_5

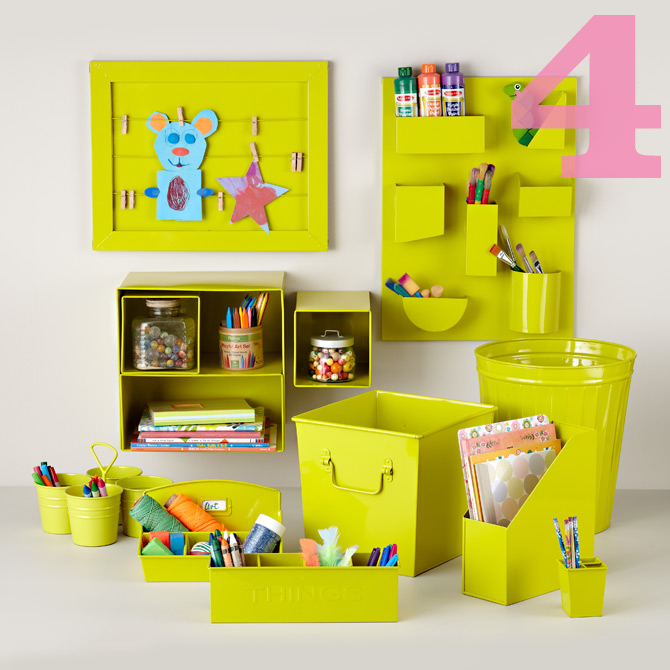
Step 5: Now you just need a place for all the supplies. Pencil cups, magazine butlers and a trash can will all help your child stay organized, so she can focus on more important things, like learning the state capitals. Our I Could’ve Been Storage Collection comes in a variety of bright colors, and can hold anything your kid can throw at it.

Overall, the more comfortable your child is in the space, the more likely it is that they’ll want to spend time there. So, think about their interests when designing the space. And, don’t discount the fact that their needs will continue to change as they grow. Investing in furniture that can last and change with your changing needs is key to building a study space. Class dismissed.

By Danielle Kurtz

Danielle is the Creative Director at Nod and an over-protective mother of two. She’s also completely obsessed with Pinterest, Twitter and her Kindle, but not necessarily in that order. Danielle loves to craft, sew and crochet, but all her supplies have a layer of dust on them about 5-years-thick, wonder if it's just a coincidence that her oldest kiddo is 5 years old?

Happy Birthday Honest to Nod!

July 12, 2012

0712_LONhappybirthday_blog

Our blog, Honest to Nod, is celebrating its 1st Birthday today! We've had a fantastic year sharing design tips, scrumptious recipes, arts & crafts, family activities and much more.        Many thanks to all of our designers and contributors who have helped make Honest to Nod so wonderful.

In honor of the festivities, we're offering one lucky reader a $100 Land of Nod gift card. All you have to do is comment below on what has been your favorite Honest to Nod post. Be sure to comment by 12 p.m. CST Friday July 13th and we'll announce the winner shortly after. Giveaway closed:

Congratulations to Amy Anderson! 

"Happy Bday! I loved steps to setting up a nursery, perfect as we are expecting:)"

Eco-Friendly Moon Painting

July 11, 2012

What parent doesn't crave an hour of time to catch up on some work or maybe even pick up a book and read?

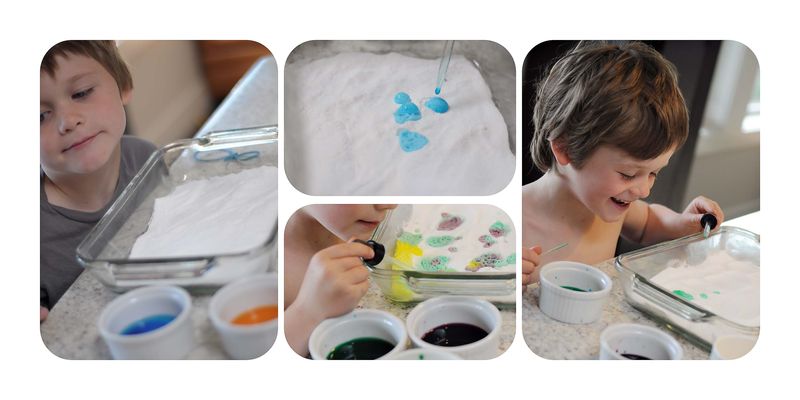
This craft we call "Moon Painting" is just what you need to open up that hour of freedom. It kept Ryan busy for well over an hour the first time and at least an hour the other two times I put it out for him. Not only is it entertaining, it's easy and eco-friendly. When they are done creating their masterpieces, the mixture can be used to clean out and polish your kitchen sinks or anywhere else needs a little scrub that won't be affected by a bit of food colouring.

All you need is a bar pan, a re-used dropper from essential oils or used up medicine, baking soda, food colouring and vinegar.

Mix up small amounts of food colouring with a splash of white vinegar in pretty hues

Spread an even layer of baking soda across the pan

Have your kiddo suck up the magic moon paint with the dropper and squirt it into the baking soda, it will fizz up and then soak in slightly. There is no right or wrong way to paint the moon and this little activity will surely bring about big smiles and lots of giggles.

Bigsharpmoon (2)

enjoy friends,

oxo,

Post by Kerry MacLeod : www.snickerdoodles.ca

Introducing The Land of Nod Fall 2012 Collection

July 10, 2012

FallLaunch_1

About a year and a half ago I locked myself in a room with a handful of the most brilliant women on the planet, (The Land of Nod buying and development team) to imagine our fall 2012 collection – my expectations were ridiculous.  I wanted everything to change.  I wanted to amp up the color palette, I wanted new product categories, new artists to design products,        I wanted to see trend, and I wanted more cleverness, more nostalgia, better quality, and more exclusive product.

In short I wanted everything, and I wanted it for the Fall 2012 season.  After 18 grueling months of travelling, negotiating, reviewing, editing, changing, crying, editing, laughing, crying and reviewing again – I am so pleased to introduce to you The Land of Nod 2012 Fall Collection.  The creation of this assortment was truly a labor of love from all of us here at Nod. And we made it just for you. I hope you like it.

XO,

Michelle

Michelle is the mother to four kids (yes, FOUR!), a gourmet cook and a retail junky. She’s painted her dining room countless times and changes rugs like most people change their bedsheets. When she’s not living and breathing retail, she’s weaving amazing works of art with her sister for Bourbon+Gin Weaving.


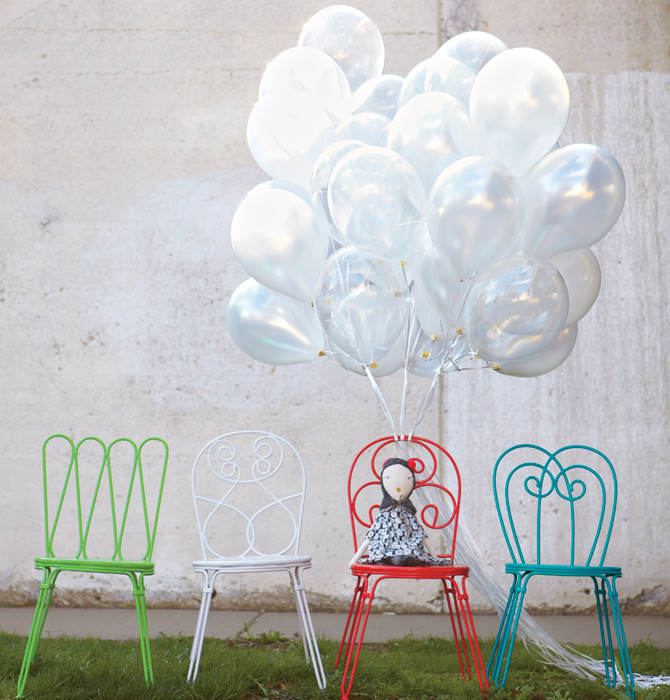
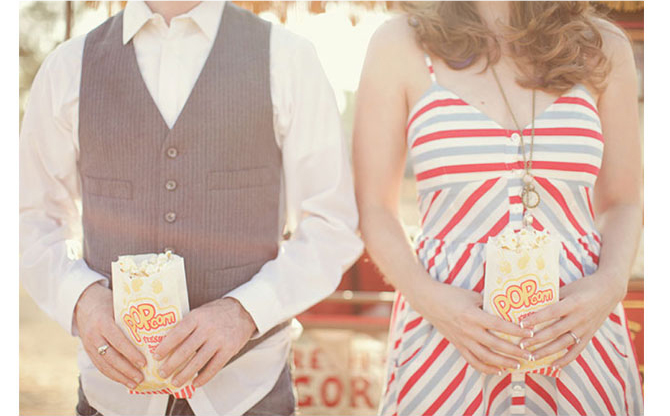
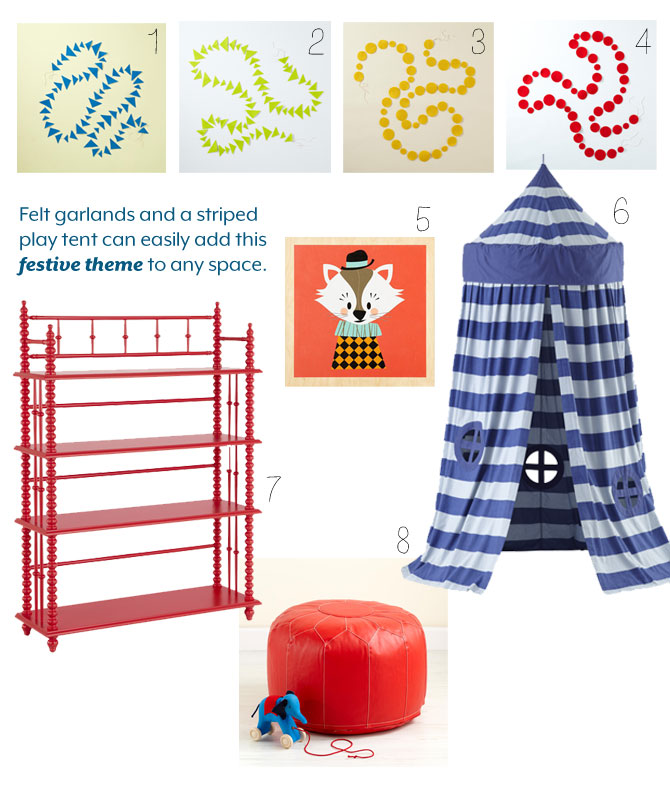
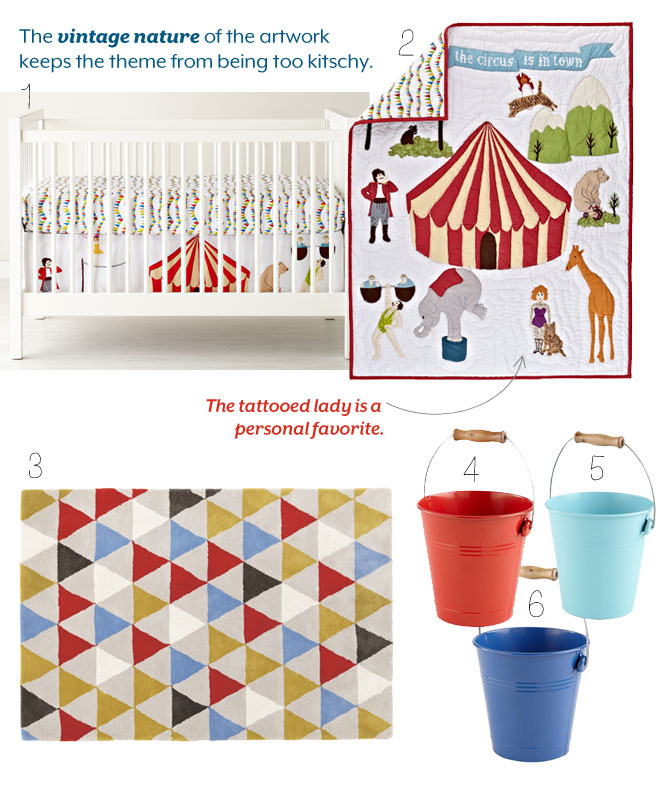
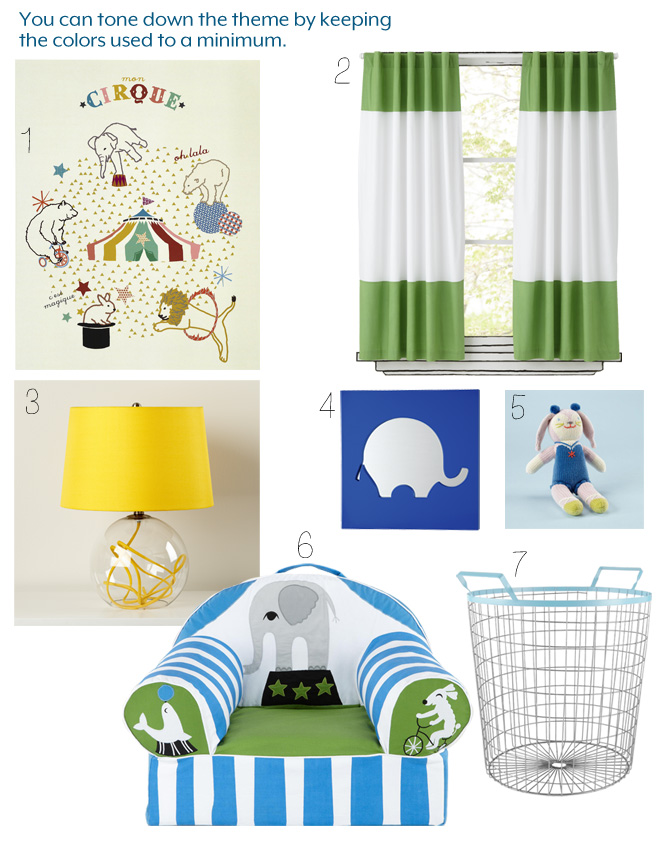
Bright and Bold – Circus Theme

NEWBrightBold_1

BrightBold_2

BrightBold_3
1. 2. 3. 4. 5. 6. 7. 8.

BrightBold_4
1. 2. 3. 4. 5. 6.

BrightBold_5
1. 2. 3. 4. 5. 6. 7.


By Sarah Culbertson  

Once upon a time a fashion plate from Seattle met a childrens retailer from Chicago, and it was love at first sight.  After spending a lot of time together at the mall, they both knew it was a perfect match. So Sarah packed up her fabulous Kate Spade suitcase and headed for the Windy City. Where they lived happily ever after, designing and developing textiles for little kiddos everywhere.

Soft & Quiet: Pink Room, 3 Ways

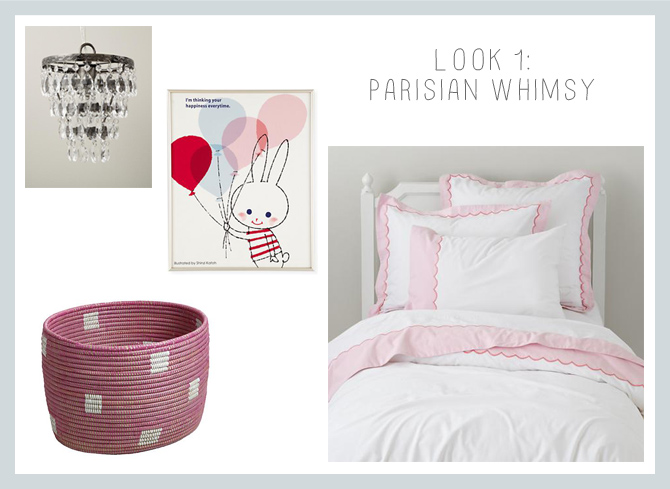
So your little girl loves pink. She’s obsessed. But maybe you are not? Pink doesn’t have to be all princesses and crowns. For our Soft & Quiet theme, I’ve put together three different ways to style a pink room in ways you can both live with.

LOOK 1: PARISIAN WHIMSY

S&Q 01

Feminine details like scallops, dots, balloons and crystals keep this look lighthearted with a Parisian feel.

1) Top Tier Chandelier, $129
2) Think Your Happiness Wall Art, $89
3) Charming Baskets, $45-$89
4) Extended Stay Bedding, $16-$119

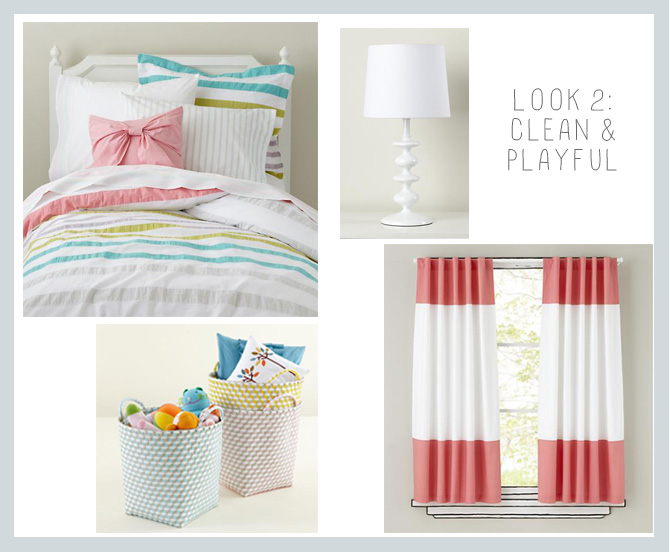
LOOK 2: CLEAN & PLAYFUL

S&Q 02

Touches of white keep the pink from becoming overwhelming. Subtle patterns like stripes add texture and interest.

1) Sherbet Stripes Bedding, $89-$119
2) Checkmate Table Base & Shade, $16.95-$59
3) Strapped for Storage, $19.95-$29
4) Color Edge Curtain Panels, $35-$49

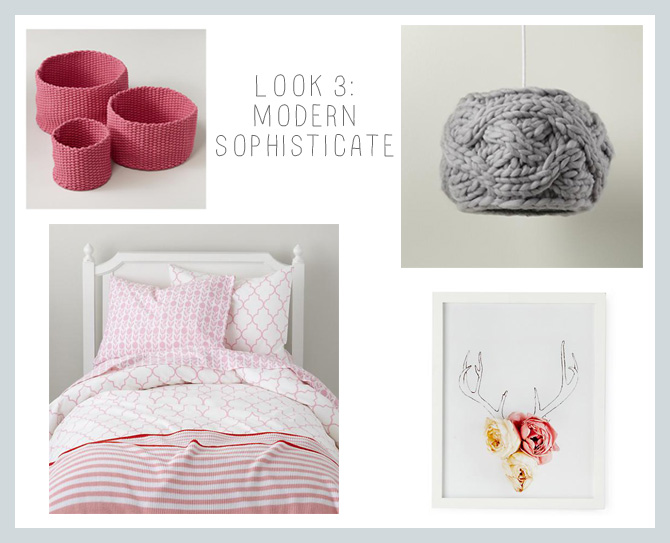
LOOK 3: MODERN SOPHISTICATE

S&Q 03

To create a sophisticated mix of patterns and textures, try mixing chunky handwoven knits with delicate, modern patterns.

1) Kneatly Knit Storage Bins, $24.95-$49
2) Cardigan Pendant, $69
3) In the Mix Bedding, $79-$99
4) Flowers & Antlers, $19.95

By Anna Passadori

Anna develops and designs exclusive product for The Land of Nod. She hails from the west coast and has traveled the world to source product. She loves anything Marc Jacobs, Sofia Coppola or stripes! (So, if anyone can get a photo of Sofia Coppola wearing a striped outfit by Marc Jacobs, please send it along.)

American Kitsch: Boys Study

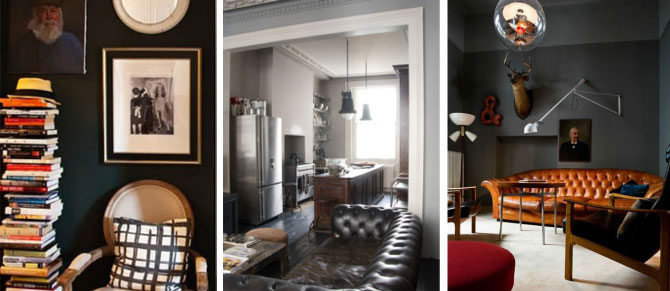
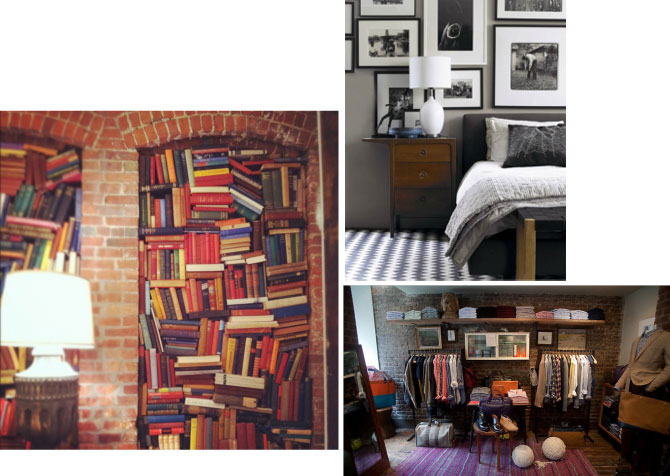
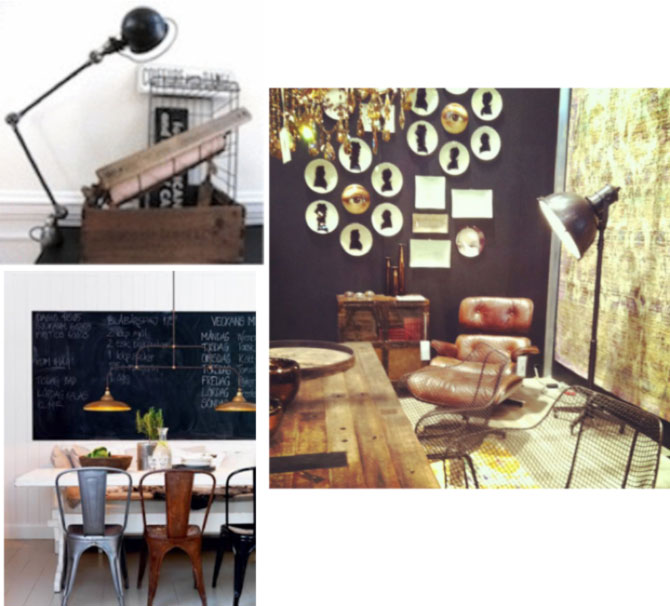
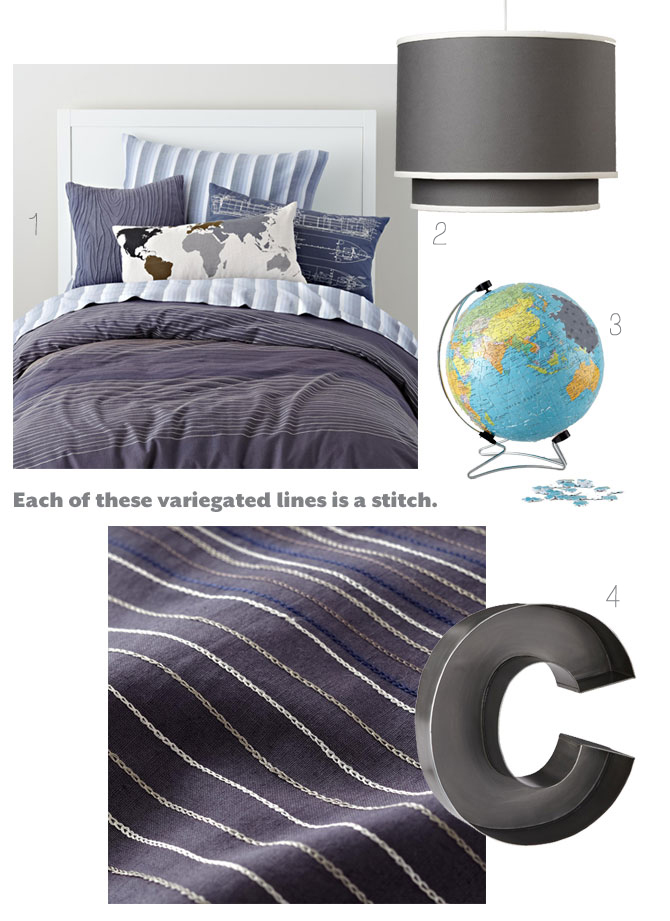
Creating a boys room that can last beyond the years of dinosaurs and make believe can be a challenge. This was the inspiration behind our boys study collection, to create a room that brings together the sophistication, style and retro flair of a men’s study. Think leather seating, dark rooms filled with books, vintage details and warm tones. With a sophisticated palette and attention to detail, this collection is here to stay.

AKBoysStudy_1
1.                                                 2.                                                 3.

AKBoysStudy_2
1.         2.         3.

AKBoysStudy_3
1.        2.       3.

AKBoysStudy_4
1.  2.  3.  4.  5.  6.  7.  8.

AK_BoysStudy_5
1.  2.  3.  4.  5.

AK_BoysStudy_6
1.      2.     3.     4.


By Sarah Culbertson  

Once upon a time a fashion plate from Seattle met a childrens retailer from Chicago, and it was love at first sight.  After spending a lot of time together at the mall, they both knew it was a perfect match. So Sarah packed up her fabulous Kate Spade suitcase and headed for the Windy City. Where they lived happily ever after, designing and developing textiles for little kiddos everywhere.