Close

Blog

Herb Butter & Goat Cheese Pasta

July 9, 2012

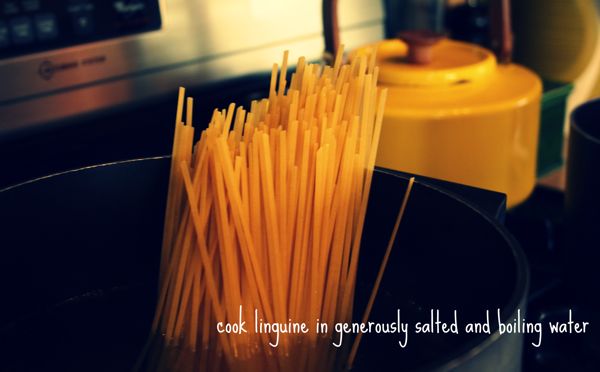
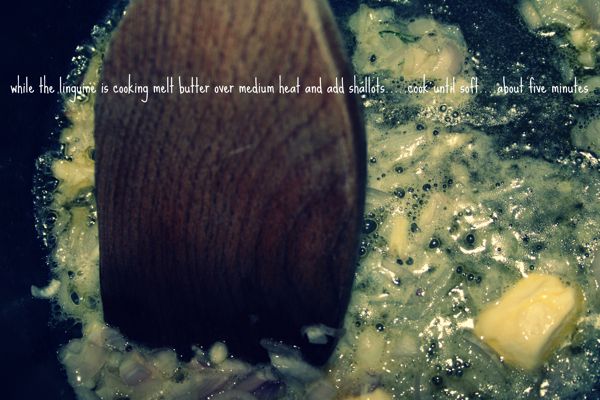
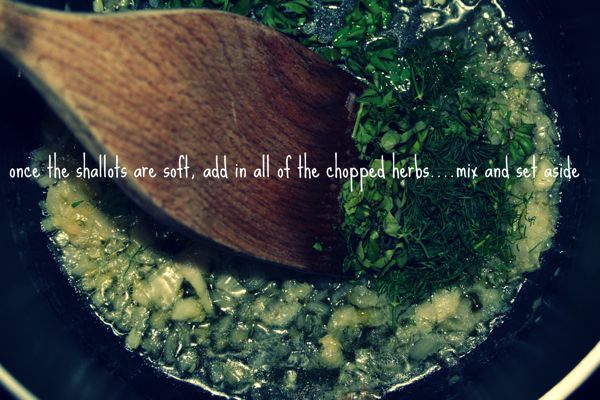
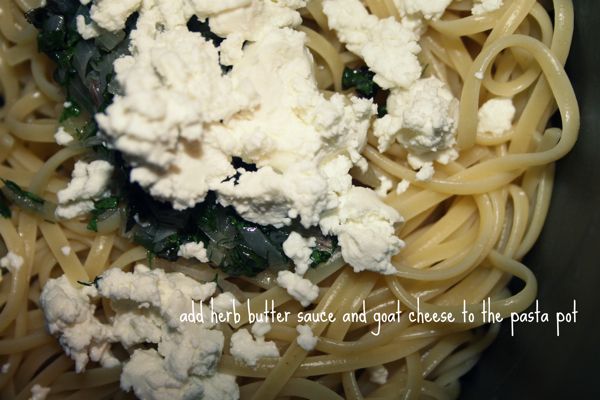
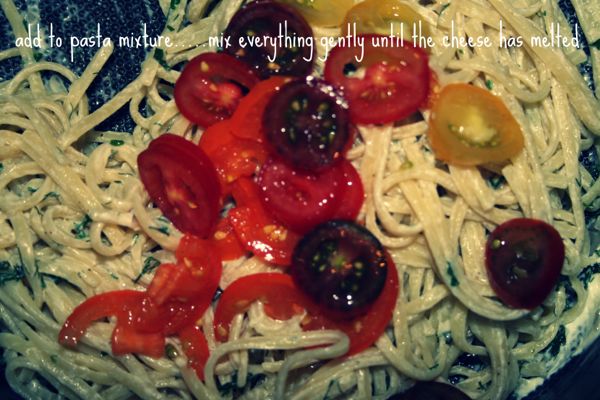
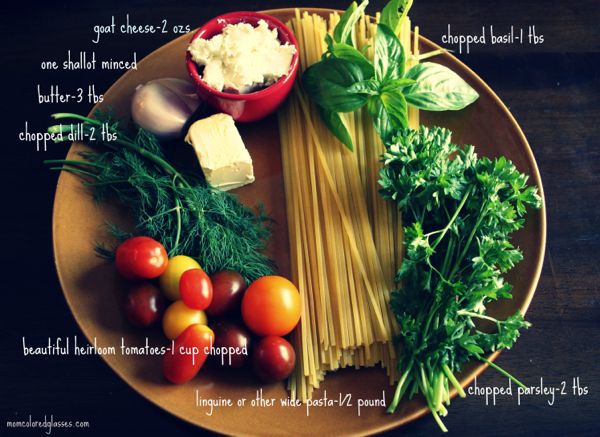
This simple and delicious pasta dish is easily one of my favorites for summer.  It’s light and the goat cheese adds a depth of flavor that you just can’t get with any other cheese.  If goat cheese isn’t your favorite you could try using boursin–I’m sure that would be fantastic. To make this a heartier meal try adding chicken or shrimp.  Either way–it’s delicious!

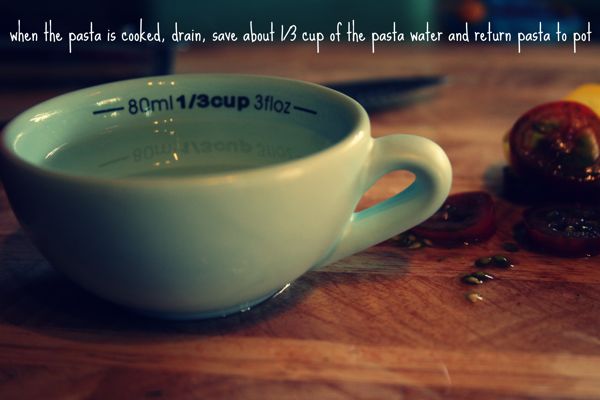
**You can make the sauce for this pasta as thick or thin as you like it just by adding some of the reserved pasta water that I mention to the pot after you add in your goat cheese!  I like mine to be a little thick–more flavor!

1

2

3

4

5

6

7

8

9

10

11

Post by Maggie Terryn : Mom Colored Glasses

5 Favorite iPhone Apps for Kids

July 6, 2012

02.11.12 (12 of 74).jpg

I have such mixed feelings about kids and the iphone (and adults and the iphone for that matter). One one hand, it seems like one more gadget – like TV and videogames – that hampers imaginative creative play. On the other hand, the iphone really is a waiting room lifesaver (esp. when I have to take all three kids to the doctor or dentist). Oh well, I'll leave it to the experts to hash out the iphone's influence on society and child rearing (which I'll probably read and repost). When my kids do play with the iphone, here are the five apps they fight over the most (and I mean FIGHT).

1. Cakedoodle – This is listed as number one for a reason. Kids find it addictive. The whole game is as simple as making a cake – the iphone lets you squish the bananas, crack the eggs, pour in the vanilla, etc – decorating a cake, and eating a cake. My kids can play for hours, I kid you not. They also fight over who gets to "eat" the imaginary cake, which boggles me. ($0.99)

2. Toca Doctor – Very odd, yet beautiful graphics with intuitive games (no need for written directions). I've heard great things about the other toca games as well, but have yet to download them. ($1.99)

3. Paper Town Friends – This app is so visually stunning that I play it sometimes. It's a paper doll-type game, with gorgeous illustrations of quirky animals (frogs, ducks, monkeys, etc.). ($1.99)

4. Doodlecast for Kids – Draw pictures using different colors and backgrounds. Then a video plays which recorded you drawing. My kids love it. ($1.99)

5. Balloonimals – Beautiful graphics allow kids to create their own balloon animal by blowing, shaking, and moving the phone. ($1.99) What about everyone else?

Any great app recommendations? We're always looking for new ones.

Post by Darcy : bedtimemonsters.blogspot.com

Wall Stencil Tutorial

July 5, 2012

My daughter was born almost two and a half years ago, but until recently she and my son shared a bedroom because we loved the thought of them being together. I loved the challenge of creating a boy/girl nursery for them, but now that he's five and we're giving them their own spaces, I finally – after having a little girl for over two years – get to flex my pink design muscles!

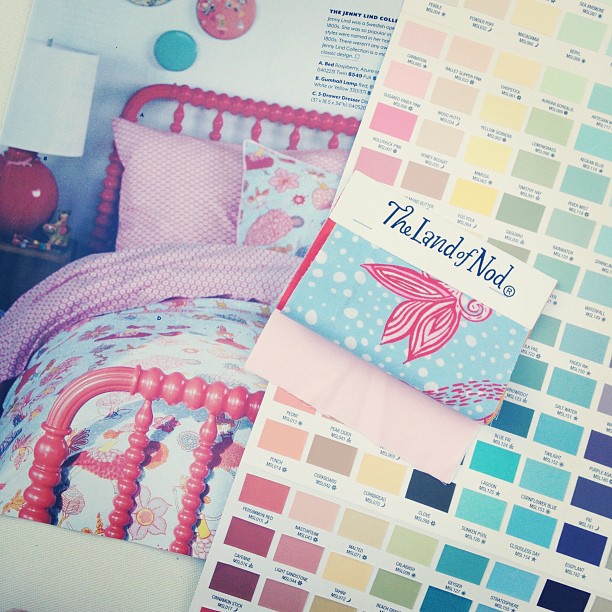
I expected to be overwhelmed by options for her new room and to have a terrible time finally settling on something I could commit to for a long time. But within a week of looking, I fell in love with some girly bedding in this month's catalogue from  The Land of Nod. I ordered swatches (they're free!) to see if the fabric was really as dreamy in person (it was) and was inspired by the pale pink and orangey-red in the swatch pack. The color scheming began and before I knew it the room started taking shape in my mind!
1

I had a stencil in the closet of my studio that I won in a blog giveaway about a year ago and I'd been saving for a fun project.

You see how all of the stars are aligning here?

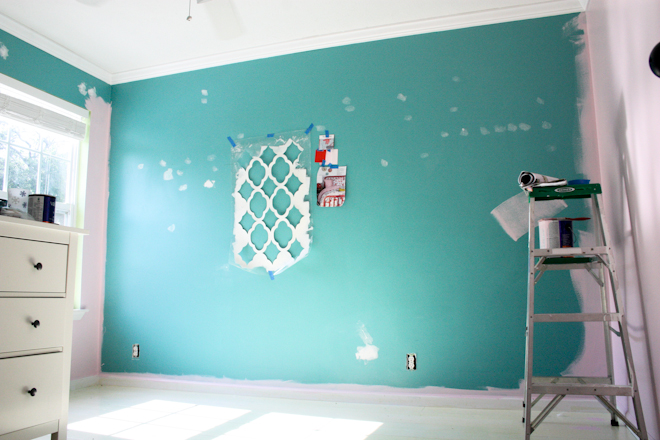
So: Pretty fabrics. Pretty paint colors. A big, bold, geometric stencil. And a week to make magic happen while my son spent the week at my in-law's.
2
So, here was the plan:

3

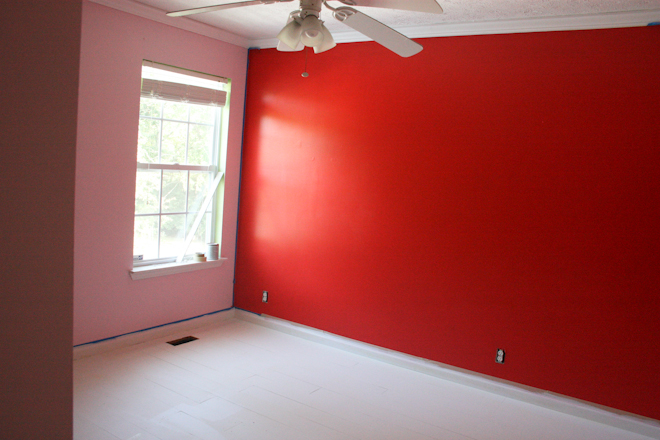
I knocked out the pale pink (Lauren's Lullaby A35-2, Olympic) fairly quickly, and the red (Fairmont Suite Clay Red 2009-4, Valspar) took about three coats to make right. But man, it was a really good-looking red!
4

Still, somehow it just wasn't coming together as I'd imagined. The red was so intense.             Our nanny was here keeping our daughter so I could paint and she and I both wondered if maybe I'd crossed a color line with this one. That stencil was going to have to bring in some major pale pink to make this feel okay. I knew this was the plan all along – but I had no idea if I'd just signed myself up for something crazy.

Well, there was only one way to find out: Keep going!

Graphic Stencil Wall Tutorial

What You'll Need:
A great big stencil
Coordinating edge stencil
clip-on level
fresh coat of paint on your walls
1 qt paint for the stencil (that is, if you're just doing one wall)
small foam roller and tray
2" paintbrush or stipple brush
ladder
snacks
lots and lots of tape
a great Pandora station

Now, I'll be perfectly honest – most of this how-to is coming from personal experience as I really only skimmed the included instructions. You know, because I didn't want to waste time getting started.

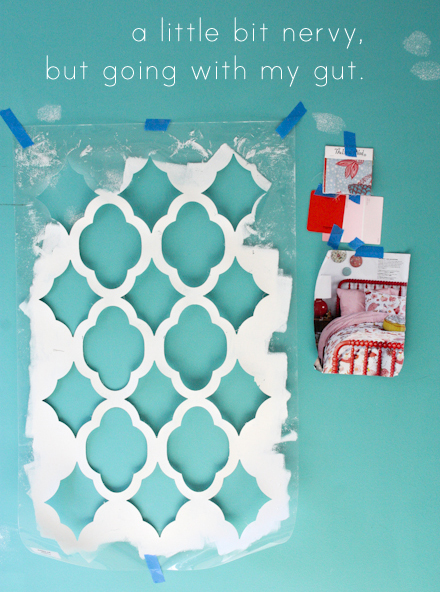
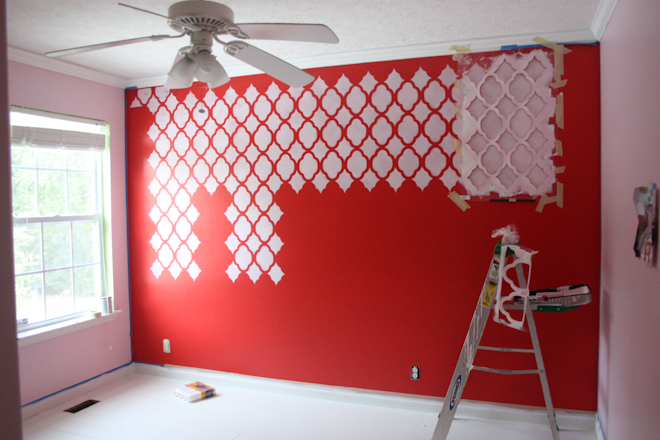
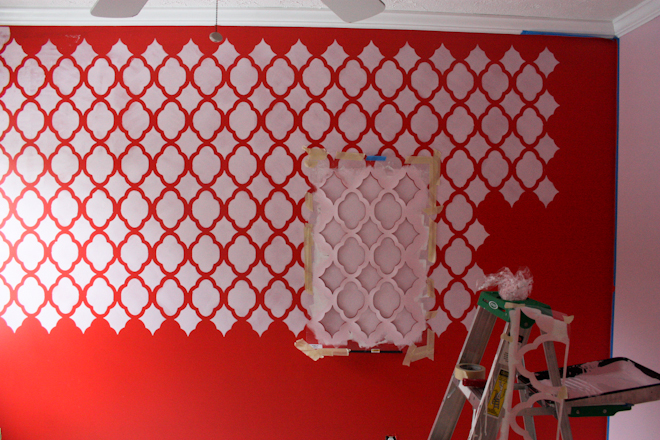
I just began in one corner with the edge stencil as a space guide and worked my way across and down.

{I found that once I completed the top row, painting every-other section made things go more quickly because I could avoid waiting for paint to dry between steps.}
5
It really is as simple as getting your stencil positioned (I painted my first reference marks in the top left corner of the wall with my edge stencil), taped in place, and rolling the paint on (very light coats). I learned a few tricks as I went – like rolling the foam roller almost dry on the tray before taking it to the wall, and rolling one little opening at a time at an angle to prevent stroke lines – but if you practice on some cardboard or something before you dive into the real project, you can iron all of those techniques out for yourself.

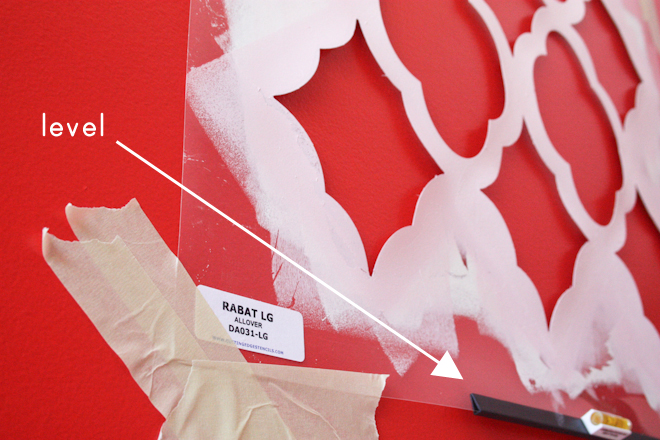
Oh, and do definitely invest in the clip on level. Not sure what would have become of my wall without it!
6

7
By the time I got the hang of it I was much happier and far less stressed. Still, this project was very time-consuming and stressful at the onset.

Fortunately, I love projects that are precise and definite (part of why I love sewing), and stenciling can have a lot of exactness to it. It's the times that things don't quite line up and you have to fake it that cause me to sweat a bit.

But what's a project without a little sweat and grey hairs, right?
8
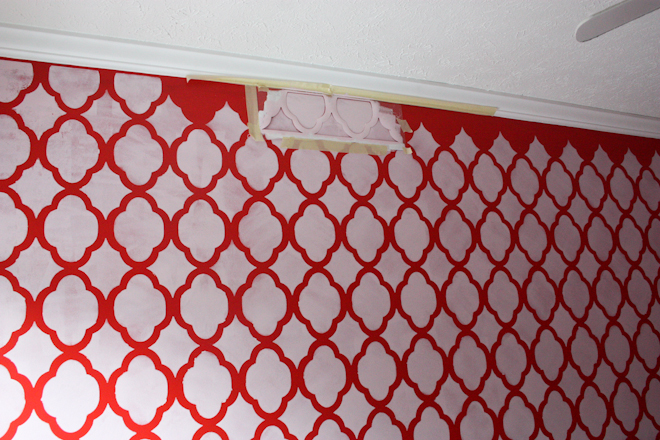
Once you've knocked out all of the big stencil stuff, just go along ceiling and baseboard with your edge stencil to make things look tidy and finished. (And do tape your trim to protect it. It will just make the whole process easier.)
9
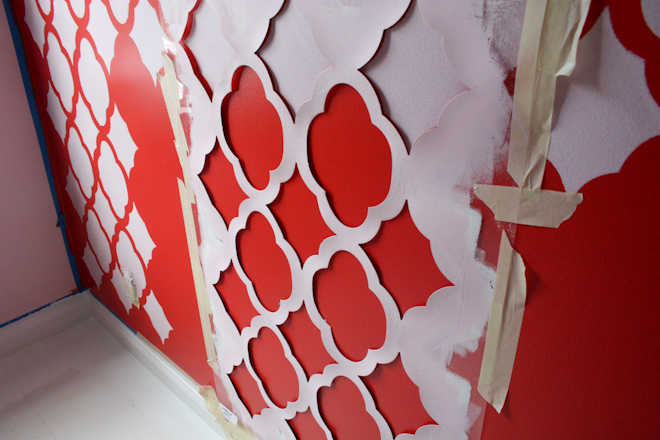
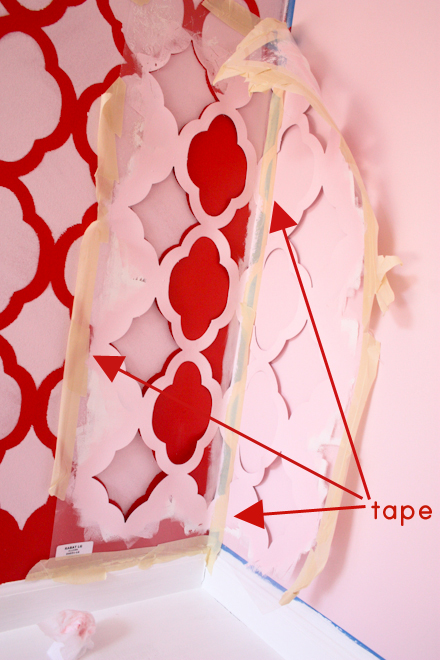
Corners: I think this was the trickiest part. And, I didn't really figure out the best technique until I was almost finished. The instructions suggested that I just gently curve the stencil into the corner and roll, but that's malarkey. I was getting paint everywhere it shouldn't be.

I never creased it, but I got the best results when I actually taped the stencil all the way down on the opposing wall as close to the corner as possible (I already had the corners precisely taped off from when I painted the red wall after the pink walls, this taping was strictly for holding the stencil in place). I was able to roll most of it, and then sort of stippled the tight corners with my 2" brush to fill in where my roller didn't reach.
10
With all of the stenciling finished (main, top, bottom and sides), it was clear that I wasn't going to be totally at peace with my project as it was. Stencils bleed, paint sneaks out of the lines, accidents happen. I needed to tidy things up.

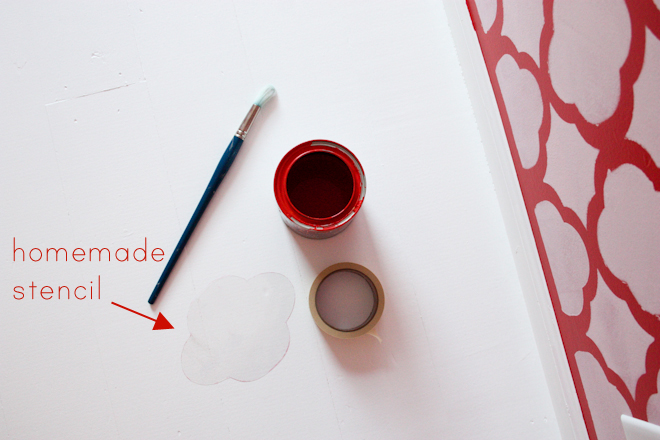
So, I found some rigid plastic (I used the packaging from our festive Target patio lights) and traced the shape from the inside of the main stencil with a pen. Then I cut it out to create an inverse stencil of each of the two shapes in my design.
11
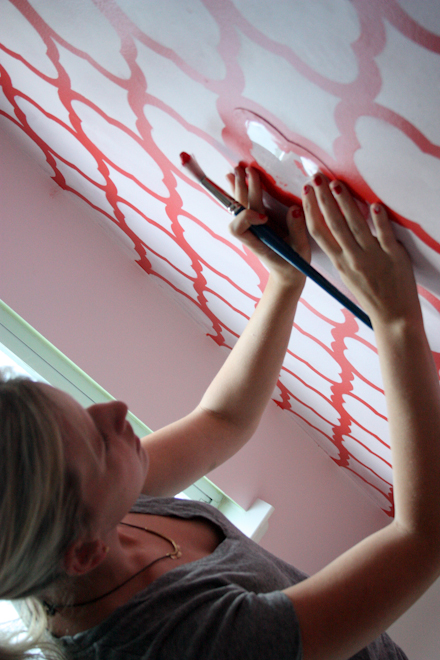
Honestly, this was probably the most satisfying part of the whole project. I did it one afternoon and evening and I almost got obsessive about it. It was almost sad when I couldn't find any more places that needed to be touched up.
12
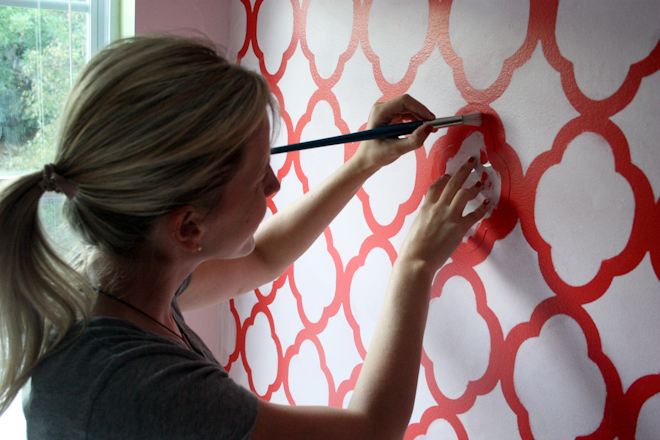
Just situate the stencil in place, and brush over any spillovers to create crisp, pretty lines. Mmmm… so, so tidy!
13
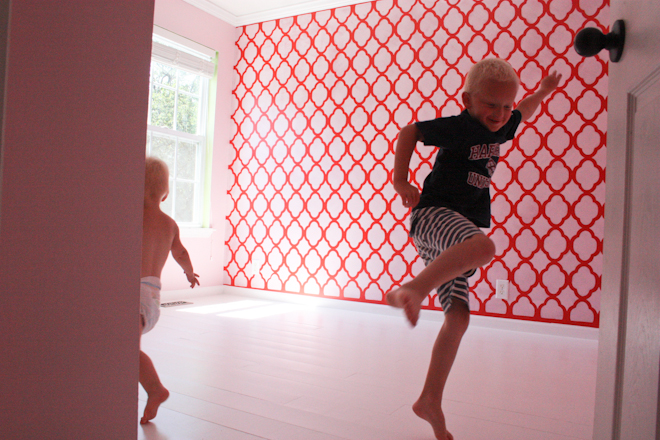
All told, the project took two full days. When Oliver got home from Michigan on Saturday he was delighted to see such a pretty room for his little sister, (big, fat, happy room reveal yet to come – it's worth it!) and I really couldn't be happier with the results.
14
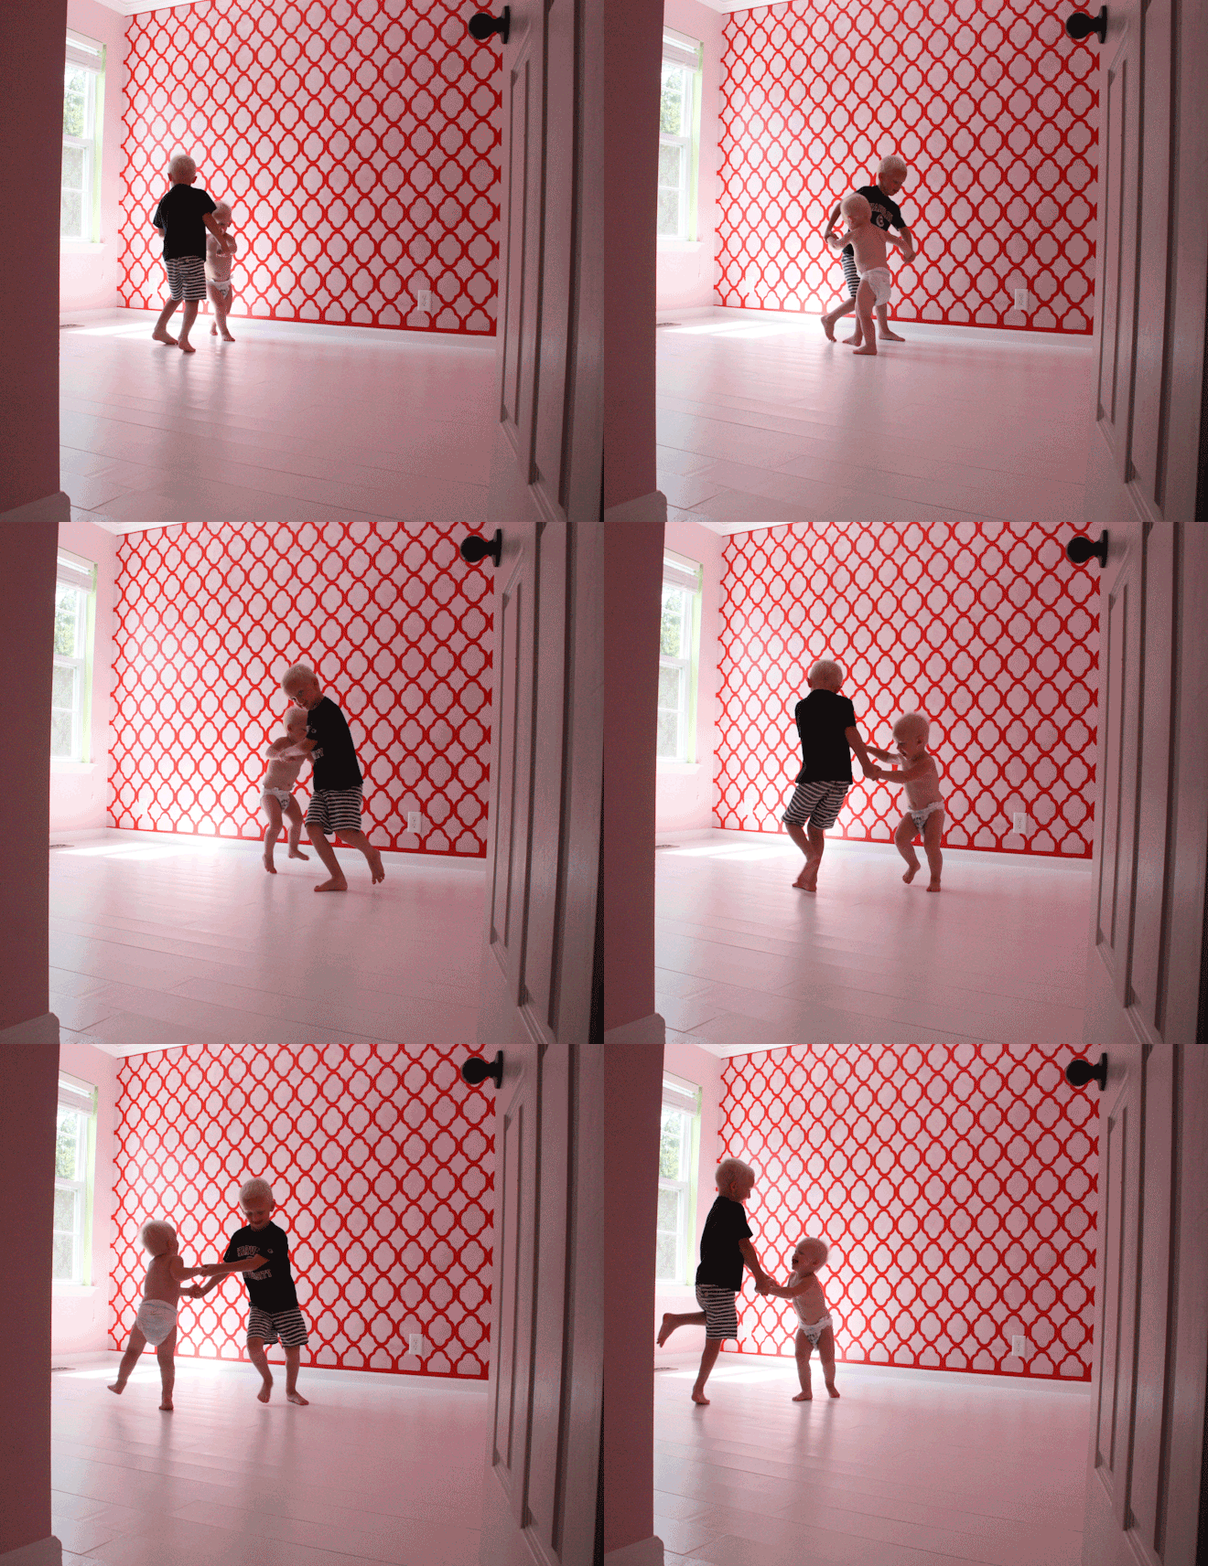
To close (and in the meantime as we wait for the entire room to be completed for the big, happy reveal), please enjoy a moment of my babies dancing together in the big, empty space (because that's what you do in a big, empty space when you're a kid!), and their Mama just feeling lucky enough to capture it with a continuous shot!
Dance1
By Raechel Myers at Finding My Feet

Raechel is just a mama, trying to raise my children to love the Lord and take their dishes to the sink. She loves sewing, fun design projects, finding killer deals at garage sales, and drinking peppermint mochas all year long!
The Nod Institute of Art

July 4, 2012

Have you checked out our newest edition of the Nod Institute of Art which features twenty limited edition prints from some of our very favorite artists? Well, what are you waiting for? Judy Kaufmann, Blanca Gomez and Julia Rothman are back, plus we’ve added a bunch of new artists into the mix.

NIA_1

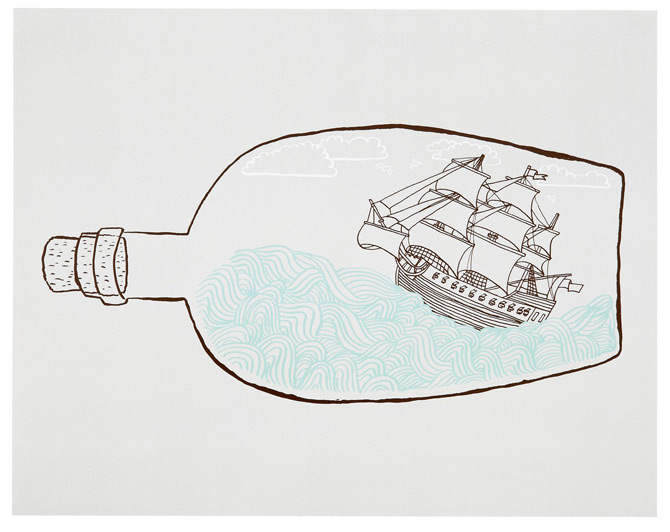
Your little pirate will appreciate the nautical nature of This Paper Ship’s Ship in a Bottle print.

NIA_2

We’ve found that Amy Sullivan’s Motorcycle Bear appeals to bikers and non-bikers alike.

NIA_3

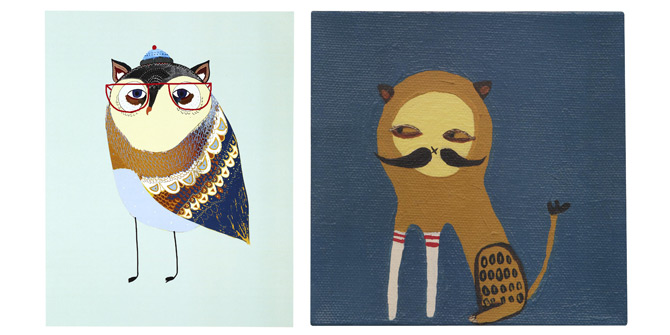
And who doesn’t want to welcome The Coolest Owl or a little Tiger Kitten in their home?

The Nod Institute of Art has a little something for everyone! Be sure to check out the other sixteen prints at www.landofnod.com. Plus, for a limited time we’re offering FREE SHIPPING on all Nod Institute of Art frames prints, frames and nickel wall clips until July 12th.

By Brittany Saveley, Lia Mensinga and Jessa Strasse, members of our merchandising department. When they’re not scouring the world to bring you fresh, and usually a little silly, accents from your home, you can usually find them posing for a group pic in the nearest photo booth.

Let Freedom Ring!
July 3, 2012

HappyFourthLandOfNod (2)

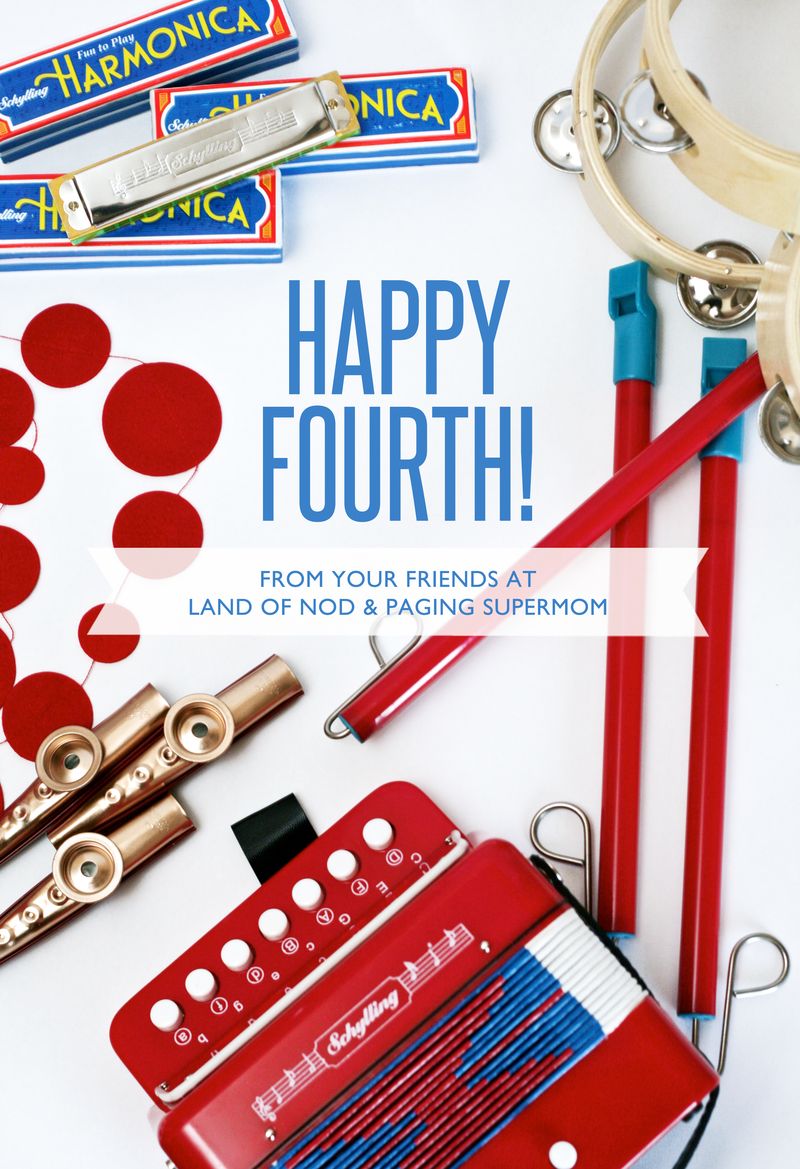
Here’s wishing you and your family a very happy Fourth of July! Don’t forget about all our free printable party decor — inspired by Land Of Nod’s great collection of musical instruments —  to make your Independence Day celebrations all the more festive:

"Let Freedom Ring" Party Favors and Table Sign

USA Banner and Water Bottle Wraps

Party Flags and Tray Liners

"Let Freedom Ring" Door Sign

My Favorite Palette

July 2, 2012

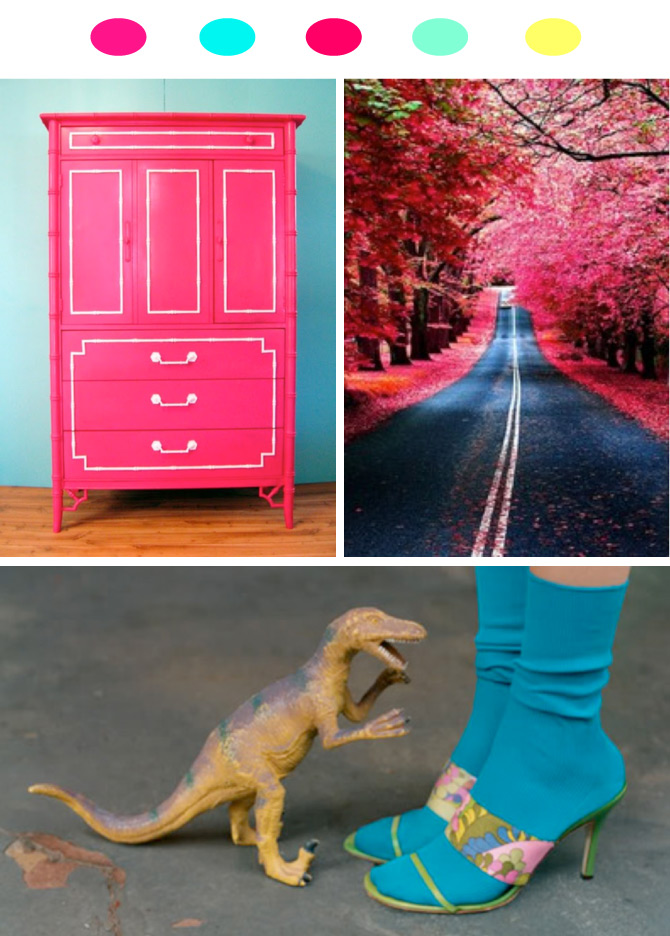
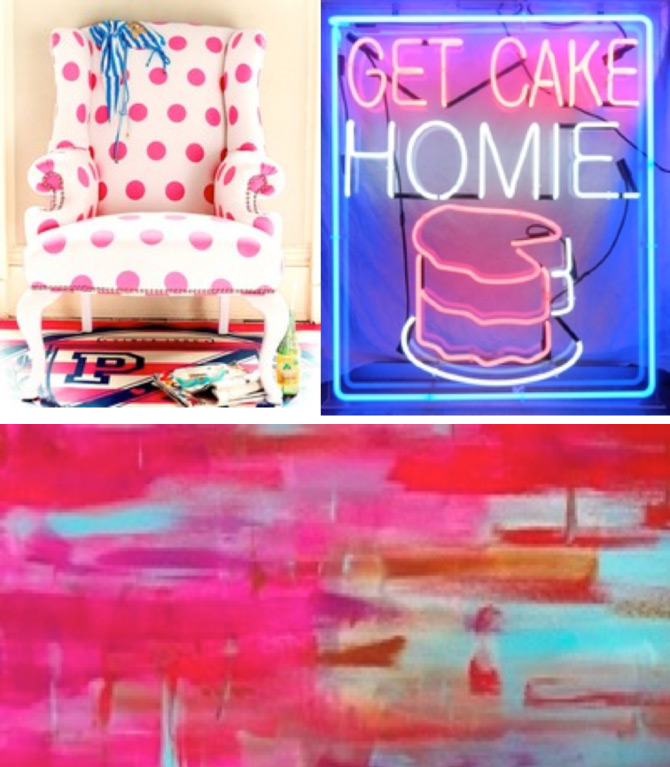
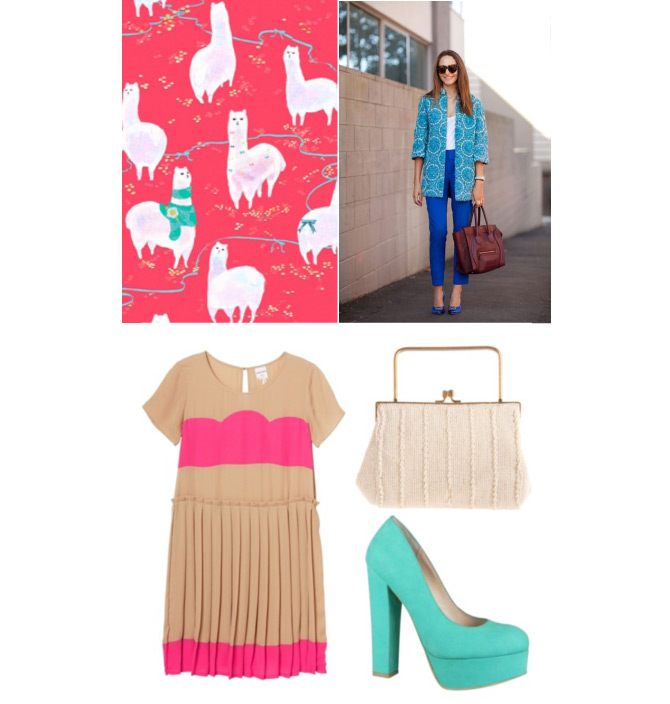
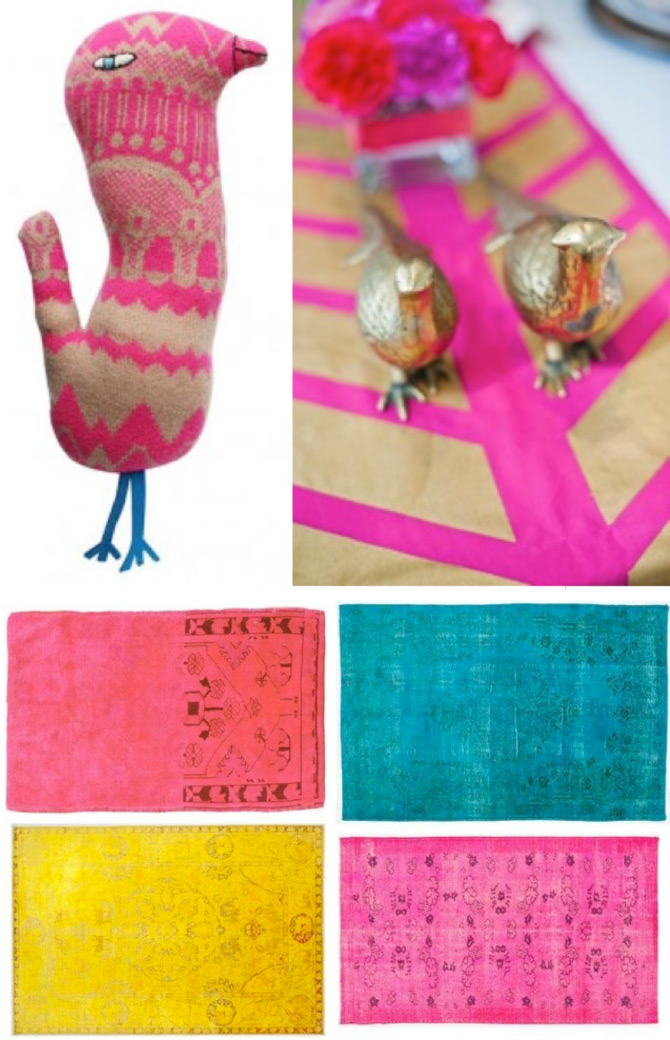
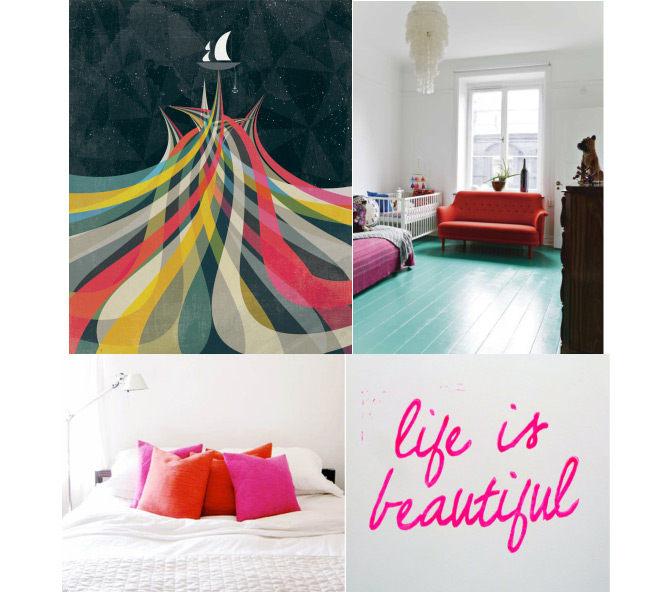
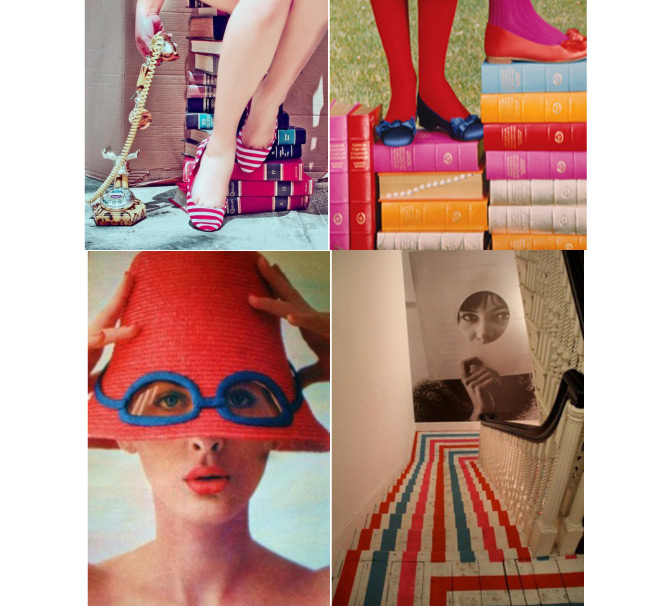
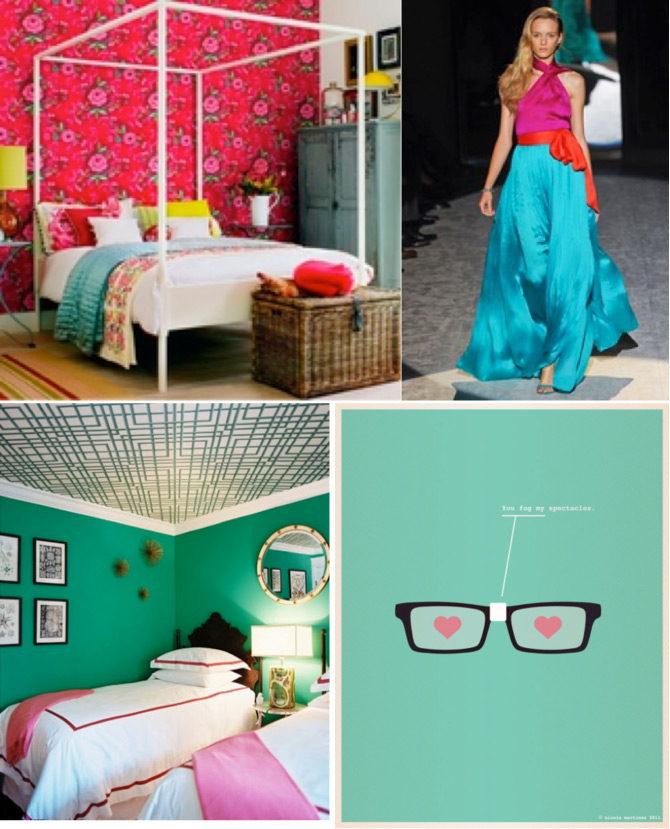
Peony Pink and Aqua will forever be one of my favorite color pairings. Much like their classic cousins red and navy (also known as my daily outfit palette), these secondary colors are a perfect match.  The cool aqua hue is balanced well with the warm pink creating a combination that always makes me feel happy. Together they can add a pop of brightness to any space. Additional accents of mint, red and lemon yellow mix in well. Below are some of my favorite images created in these cheerful hues.

FavColors_1

1. 2. 3.

FavColors_2

1. 2. 3.

FavColors_3

1. 2. 3.

FavColors_4

1. 2. 3.

FavColors_5

1. 2. 3. 4.

FavColors_6

1. 2.  3.  4.

FavColors_7

1. 2. 3. 4.

 By Sarah Culbertson  

Once upon a time a fashion plate from Seattle met a childrens retailer from Chicago, and it was love at first sight.  After spending a lot of time together at the mall, they both knew it was a perfect match. So Sarah packed up her fabulous Kate Spade suitcase and headed for the Windy City. Where they lived happily ever after, designing and developing textiles for little kiddos everywhere.

Initiative Chore Board

June 29, 2012

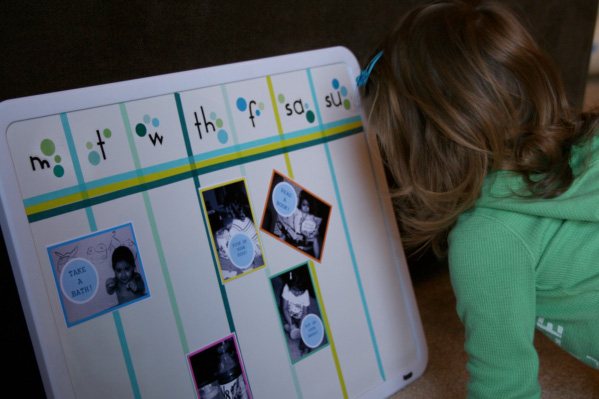
The idea of a “chore-board” or “star chart” or whatever you called it while growing up is not new.  But, one of the things I learned as a teacher is that kids understand directions and expectations much better when they see actual pictures of what the appropriate behavior looks like…especially if they are the ones in the pictures modeling the action.  So, that’s the different twist I put on this chore board. And….on top of this board helping to encourage initiative in your children, it’s a fun thing to do together…especially the picture taking part!

What you need:

  • A magnetic white board
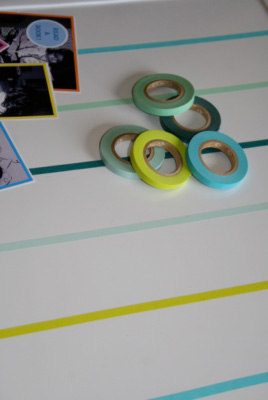
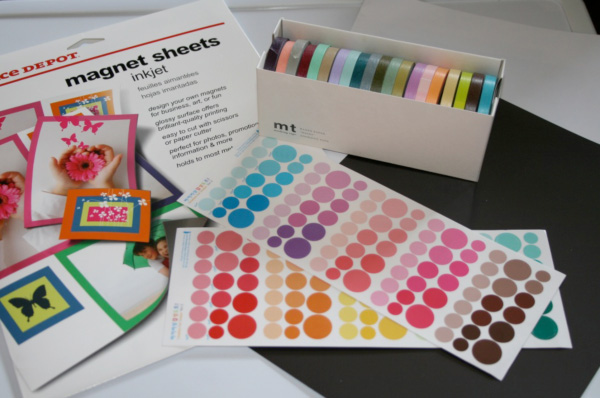
  • Colored masking tape (I order mine on Etsy through a shop called Wonderland Room)
  • Magnetic sheets that are compatible with printers
  • Letter stickers and any other stickers that you like to decorate with
  • A camera
  • A printer
  • A willing child who loves to model appropriate behavior

1

Step 1:

Figure out what you’d most like your child to work on when it comes to getting things done.  Obviously, the younger the kid, the easier the tasks.  My little girl is tiny, so we focused on things like putting away toys and putting on your own shoes.  But the possibilities are endless….

  • Making your bed
  • Putting away dishes
  • Taking out the trash
  • Reading a book
  • Doing your homework
  • Practicing the piano
  • Raking leaves
  • Vacuuming
  • Dusting
  • Cleaning the bathtub
  • Unloading groceries
  • Folding laundry
  • Playing with your little brother
  • Walking the dog

All of these are fun things you can pose for pictures.  And be silly with it.  It’s part of the fun.

Step 2:

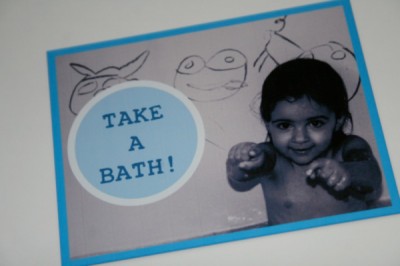
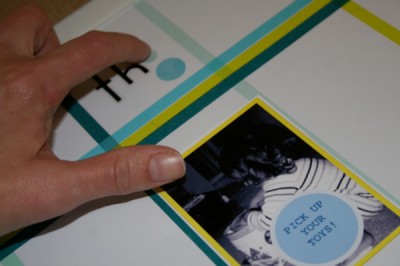
Transfer your pictures to a document on your computer and play around with them to make them look cool.  I added a color border to each of mine and labeled what was happening in the pictures.  Then, I printed them out on my magnetic sheets (available at Office Depot) and cut them out.

2 2nd

Step 3:

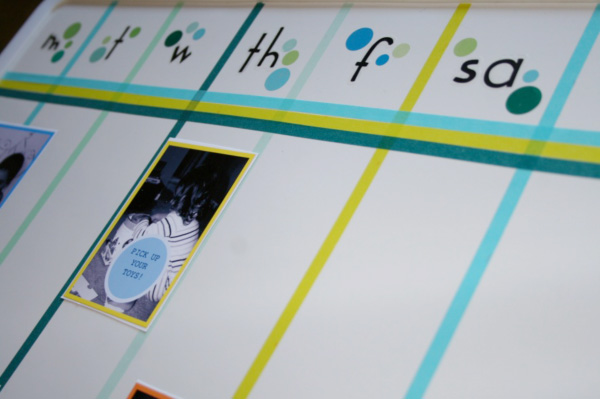
Divide up your magnetic white-board with the colored masking tape.  I made one column for each day of the week.

3

Step 4:

Decorate the board with letters for each day of the week and some cool stickers.  If your kids are old enough let them help too.  I gave Georgia one sticker to put on the board and she was content to just stick it on her leg over and over….so I moved on without her.

Step-41

5

Step 5:

Use it!  Show your kids how to move their pictures from one day to the next every time they finish one of their “pictures.”

6

Post by Maggie Terryn : Mom Colored Glasses

Make Room to Play in Any Room

June 28, 2012

Post by Danielle Kurtz, Land of Nod Creative Director

Make Room to Play in Any Room | Honest to Nod

Whether you have a whole room or just a corner in your kitchen, putting together a play space for your child should be as easy as ABC. Here are a few tips that’ll help you put a playroom or play space together quickly, so you can concentrate on more important things like who can build the highest block tower.

Make Room to Play in Any Room | Honest to Nod

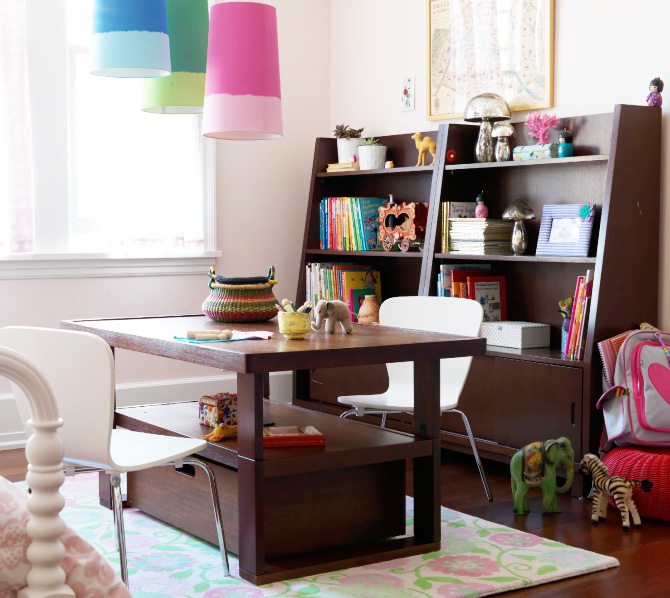
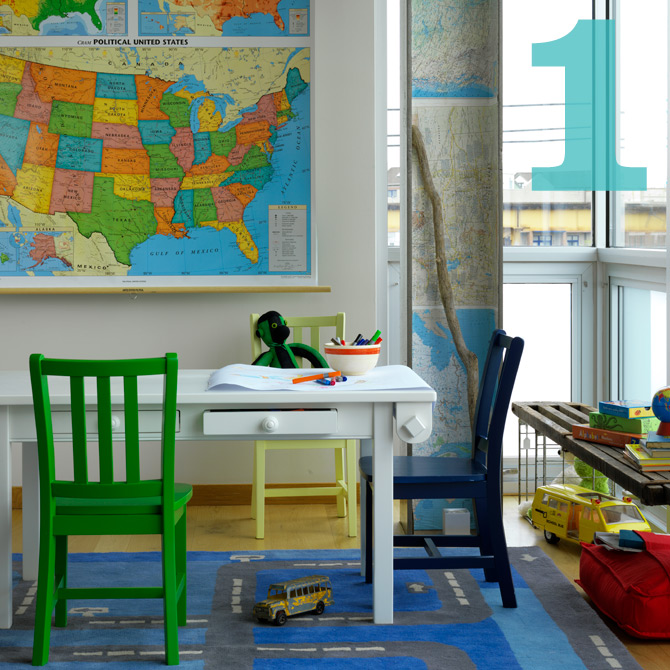
Step 1: Start with the play table. Since most playrooms are in shared areas of the home, we tend to create our tables in wood stains and painted neutrals, so that they can play nicely with the other furniture in your space. Choose a small square option, like our Anywhere Table, if you have just a corner to dedicate to the space. But, if you have room, I’d suggest an adjustable height table. I have our Extracurricular Play Table, which goes from toddler height to chair height in just a couple easy steps. It looks great in my mixed-use family room and has tons of functional storage.

Make Room to Play in Any Room | Honest to Nod

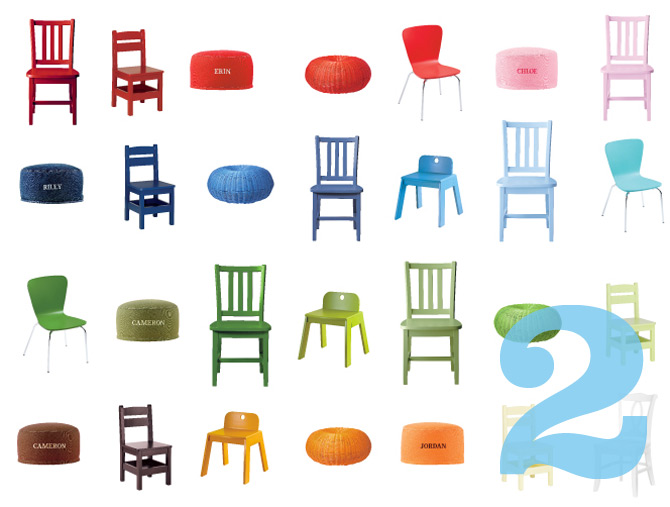
Step 2: Speaking of parking, the kids will need a place to park themselves. Since I’m recommending a more traditional color for the table, I’d say the play chairs are the place to have a little fun. You can create a bold look by choosing them all in the same color. Or opt for a combination of colors, so each of your kiddos gets their own. The Mojo Stool is great for the younger kids that are still into climbing, as it’s nearly impossible to tip due to its splayed-leg design. And all of our seats are sturdy enough to hold mom and dad, since you’ll likely be spending many hours at the table, too.

Make Room to Play in Any Room | Honest to Nod

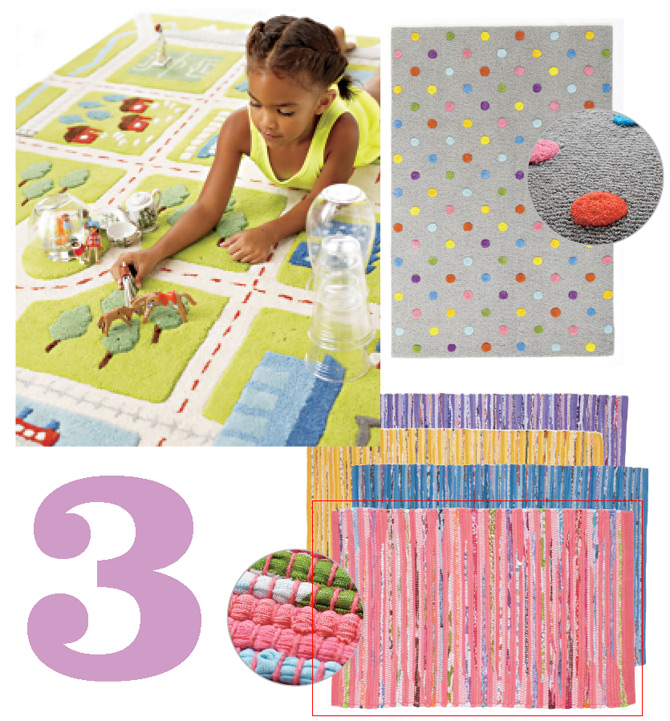
Step 3: A rug will help define the space, no matter how big or small. You can go one of two ways with this. There are rugs that in and of themselves are interactive, like our Over the River and Through the Rug. Or, you can choose one that adds a burst of color. While you may opt for serene hues in a bedroom to encourage calm and sleep, I’d suggest more vibrant and saturated hues in a playroom. The space is all about imagination and play. So, have a little fun with the rug and try a brighter hue or bolder pattern than you might normally use.

Make Room to Play in Any Room | Honest to Nod

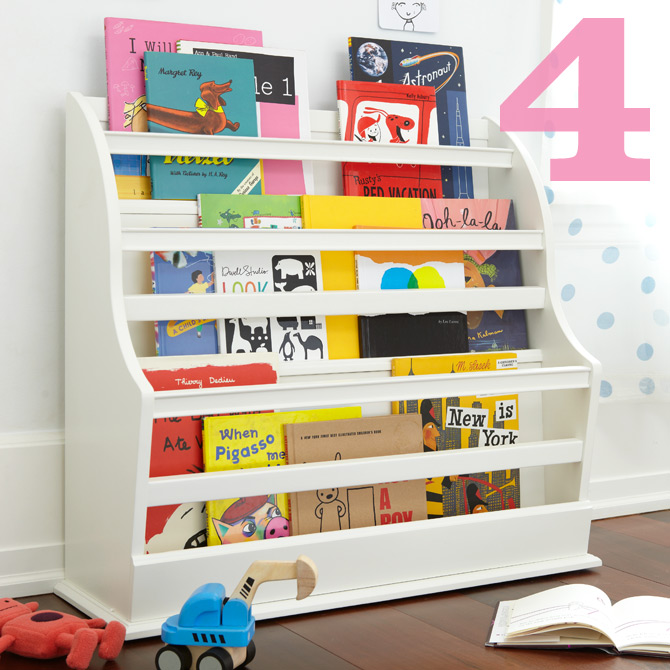
Step 4: If your kids are anything like mine, they’ll have lots and lots and LOTS of books. So, you can never have enough book storage. When looking for the right piece, be sure to pick something that keeps the books within arms reach. If you have a lot of space, you might opt for a book-only piece like our Next Chapter Book Bin. But, if space is at a premium, choose a bookcase that can also hold bins and baskets for toys. If it’s a shared space, you can even use the higher shelves for mom and dad’s stuff. We have a 6-cube bookcase in our dining room. The three lower cubes are book storage for the kids, while the higher cubes hold mail, art supplies and other miscellany that needs to stay out of the kids’ reach.

(A quick aside regarding bookcases, if you want to add a little personality, but don’t want to commit to wild paint colors. Cut decorative paper to the size of the back panels on the bookcase and adhere it with double-stick tape. Just this weekend I backed our 5-cube with polka dot paper from www.paper-source.com. For about $5 and 20 minutes of my time, I gave my bookcase a whole new look. And when I decide I want a plaid or striped one instead, I can just peel the paper off and replace it. Low commitment, huge impact!)

Make Room to Play in Any Room | Honest to Nod

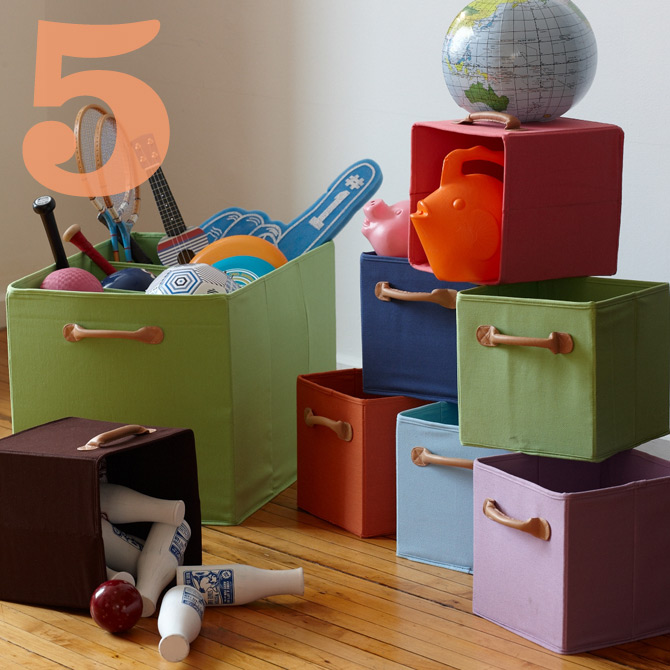
Step 5: Next you’ll need a place to put all those toys kids seem to accumulate. If you have more than one child sharing the space, I’d suggest color-coding the storage to avoid any disputes on what belongs to whom. Bins and baskets are a great way to keep small items sorted, and allow for easy access for the kids to make a mess, and, more importantly, easy access for them to clean it back up.

Make Room to Play in Any Room | Honest to Nod

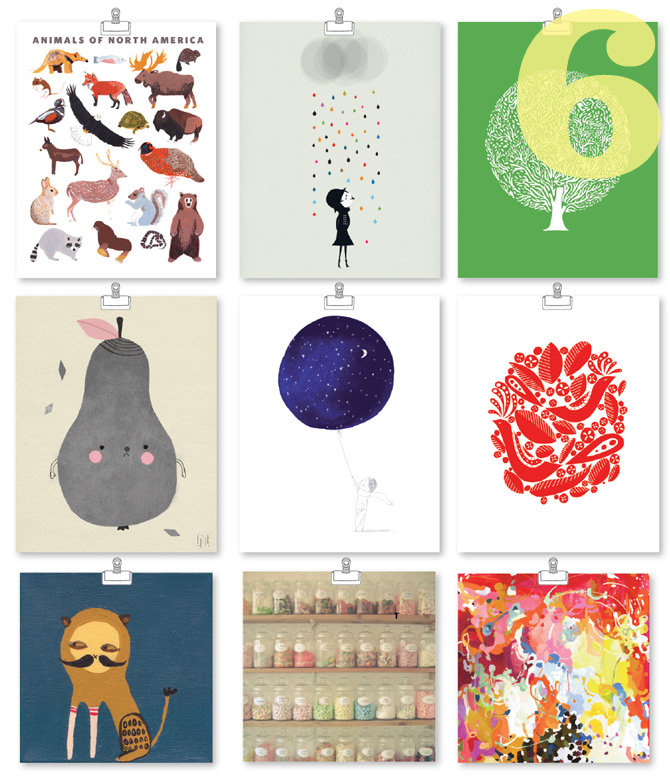
Step 6: Next, add a little personality. Wall art’s a great way to express your kid’s taste du jour. A gallery wall is a great option for a playroom space. By using frames in all one hue, all sorts of aesthetics and media will look right at home together on one wall. I’d opt for plain white frames, and mix a combination of kid art, family snap shots, typography and illustration. Think of it as an ever-changing, ever-improving work of art, just like your kids themselves.

The idea is to create a space that draws your little one in, and invites them to stay and play a while. But, also think of what you’re attracted to, as you’ll likely be spending just as much time in the room as they will. So, is it time to play yet?

Post by Danielle Kurtz. Danielle is the Creative Director at Nod and an over-protective mother of two. She’s also completely obsessed with Pinterest, Twitter and her Kindle, but not necessarily in that order. Danielle loves to craft, sew and crochet, but all her supplies have a layer of dust on them about 5-years-thick, wonder if it’s just a coincidence that her oldest kiddo is 5 years old?

Looking for even more playroom inspiration? Check out our Playroom Board on Pinterest.

DIY Q-Tip Printmaking

June 27, 2012

Post by Darcy by bedtimemonsters.blogspot.com

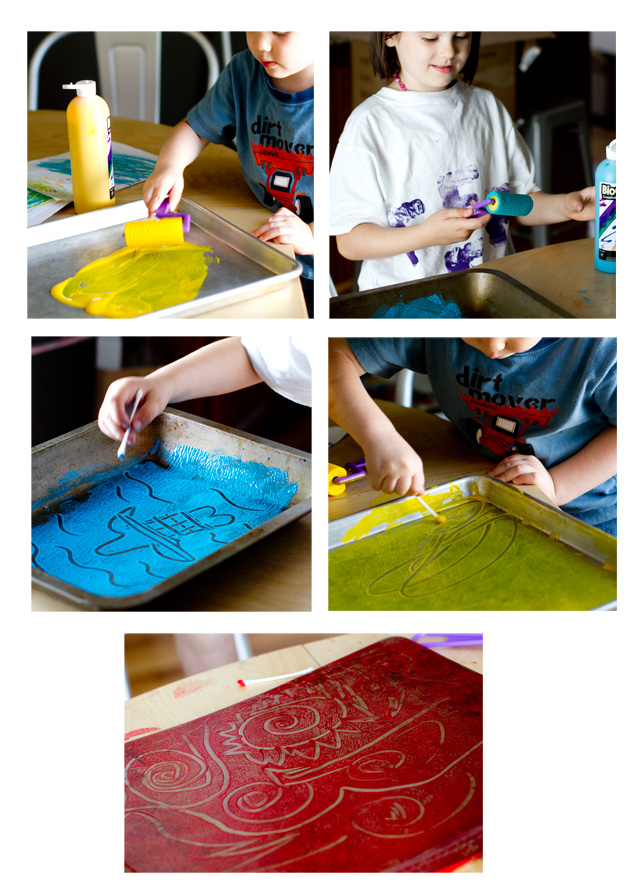
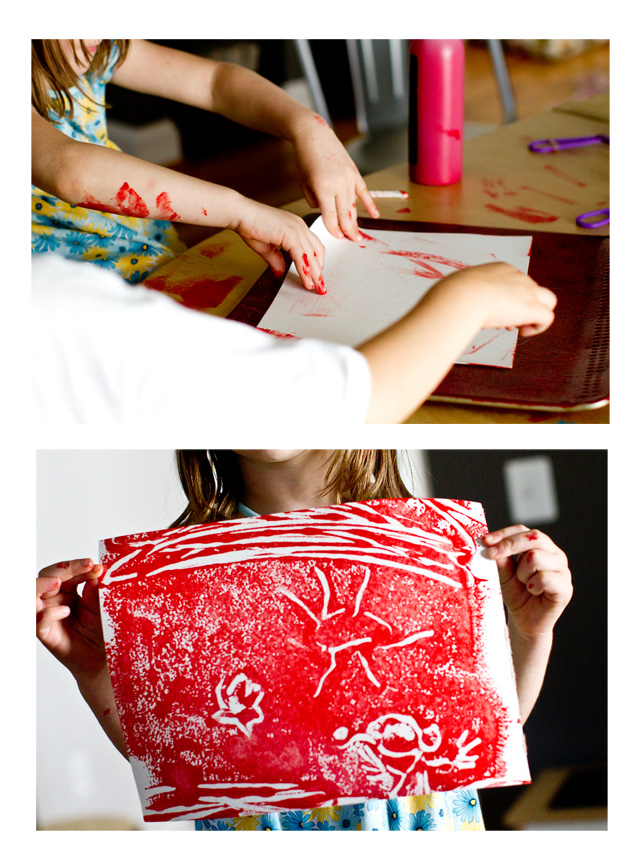
top Lots of printmaking ideas have circulated the blogosphere lately. I read about q-tip printmaking on Under the Pecan Tree and figured this activity would work well with all three kids, even almost-three-year old T. On the upside, the kids loved creating pictures in the paint and getting messy. On the downside, only P’s prints turned out. P also kept her paint layer the thinnest, so I think that’s the trick. Eventually the whole project turned into finger painting, which was fine with me.

Here’s the scoop:

1. Use a roller brush to THINLY spread paint on a long pan (we used Biocolor Paint, after hearing so many wonderful things about it from Not-So-SAHM).

2. Draw a picture in the paint using q-tips

3. Press a sheet of paper (we chose heavy watercolor paper) onto the picture

4. Voila! you have a print. draw

printThe great part about this project is that you can keep reusing the same paint and pan – just roll over your last design and start a new one.

Post by Darcy by bedtimemonsters.blogspot.com

Baby’s First Year in 52 Photos – A Great Idea for New Moms!

June 26, 2012

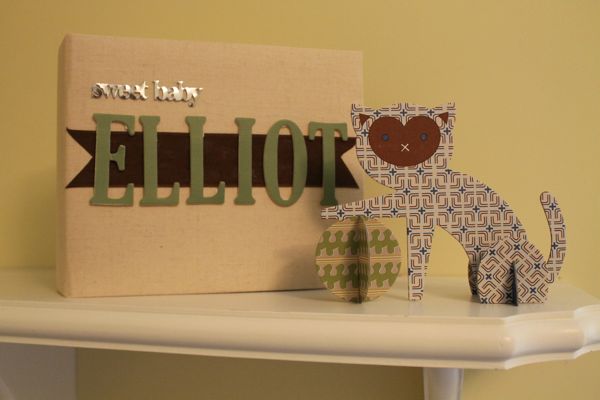
As my due date looms closer and closer, I’ve been spending most of my extra time decorating the nursery, pulling out onesies and burp cloths from storage, reading lots of “new baby” books to my toddler and reminiscing on my first year of motherhood. How life has changed since we brought our son, Elliot, home from the hospital on that bright September day almost three years ago! Thankfully, I’ve had my share of “mom paparazzi” moments and have many, many photos to help me remember all those special times….BUT, since the advent of digital photography, do you ever feel like all your photos are buried in the black hole that is your computer hard drive? Aren’t photos meant to be looked at? I admit, I’m not a scrapbooker and if I’m not mailing photos to my grandma or filling a picture frame, I rarely actually print-out photos, which is a shame!

Thus, one of my favorite baby shower gifts I received when I was pregnant with my son was….a photo album.  My mom made me this adorable album with the specific purpose of cataloging a photo of my baby every week for the first year of his life…what a wonderful gift and such a great idea! It’s amazing to remember how much a baby grows over those first 52 weeks, and this album highlights those small but dramatic changes as the weeks pass. AND, it forced me to be intentional about taking photos and actually printing out a physical copy of each photo for anyone browsing through the album to enjoy….no computers needed!

This is a thoughtful and special gift for any new mom and can be easily created with a small scrapbook album, decorative paper and other embellishments as desired. If you want one for yourself but don’t have time to get fancy, a simple photo album will suffice as long as it holds at least 52 photos and has space for writing the date next to each photo.

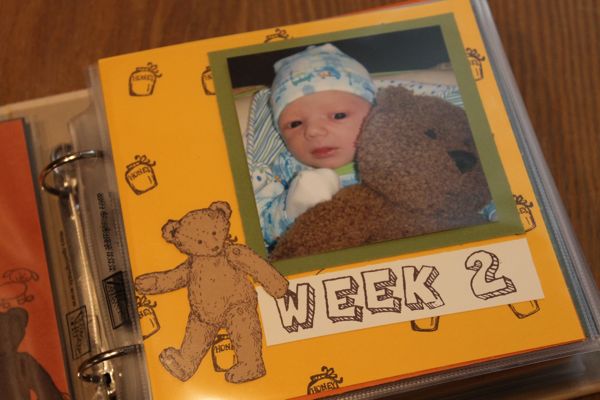
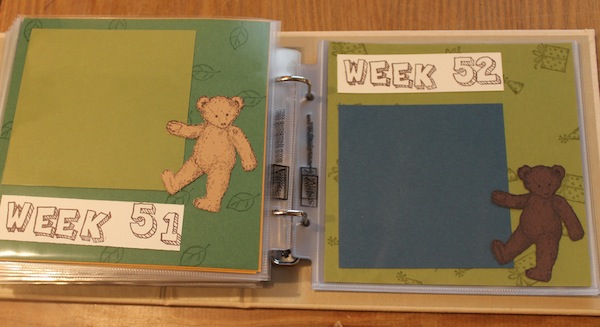
Here’s the album my mom created for Elliot.

Babys-First-Year1

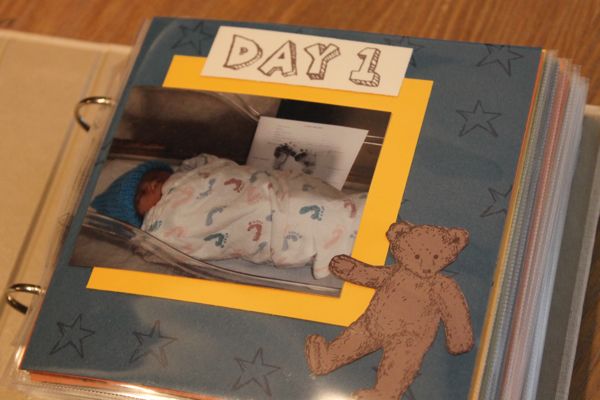
The first page is for “Day One”…. the day your baby was born!

2

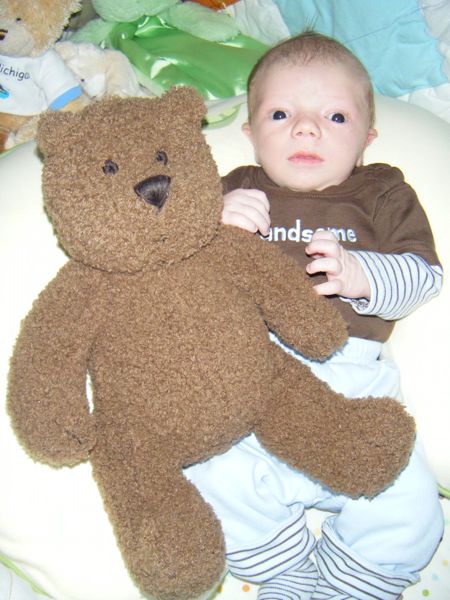
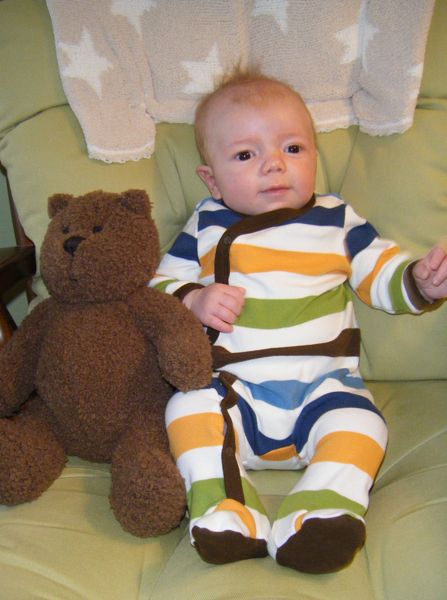
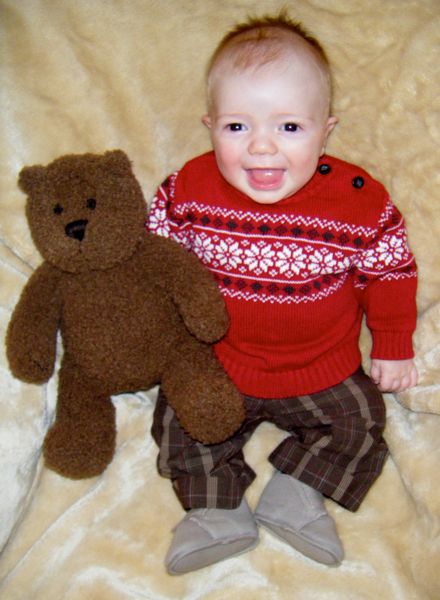
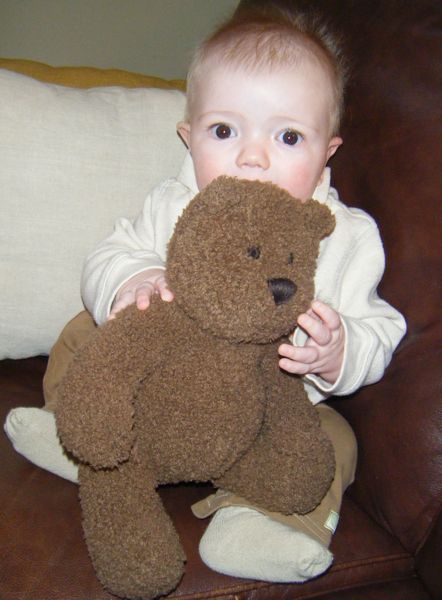
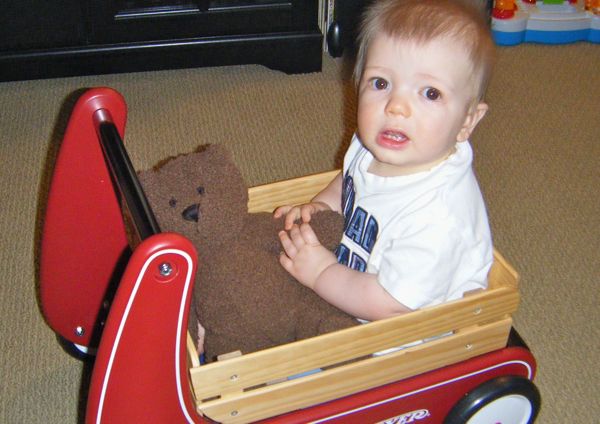
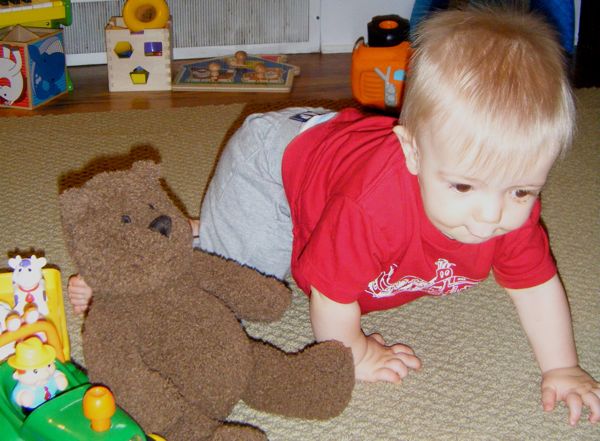
The following pages are labeled by weeks. My mom also bought Elliot this teddy bear to be photographed with him each week in order to provide a reference point for his growth. (another great idea!) I didn’t always remember to get the bear into each weekly photo but it’s included often enough to notice a difference. As you can see, she found a bear stamp to match the teddy bear…so cute!

3

If you are giving this as a gift or making it ahead for yourself, just cut a square or rectangular piece of cardstock and attach it to each page for a quick and easy border as each photo is mounted. I carefully removed the photos from these pages to show you an example.

4

Here are some of my favorite “bear” photos from Elliot’s first year…now that I have a digital SLR camera I can’t wait to start snapping pics of my next baby!

Week 4 – Elliot and his Teddy are about the same size.

5

Week 9 – Starting to get chubby.

6

Week 14 – Christmas!

7

Week 22 – Sitting up….apparently Teddy looks good enough to eat!

8

Week 35 – He found a ride…

9

Week 44 – Crawling

10

Week 52 – Happy 1st Birthday Elliot!

11

Post by Renae Wortz : Mom Colored Glasses

Nod Fall Collection Presale on Gilt

June 25, 2012

I’m so excited to present to you our new fall collection.  We have spent the past 18 months collaborating with artists and designers, travelling the world, refining, and perfecting what I believe to be our best product offering ever.  We have left no detail unconsidered; we focused on quality, workmanship, and safety.  More than anything we hope we have created something that makes you happy, that makes your children’s spaces a little more special and helps you create a beautiful and inviting home.

Land of Nod Collage FINAL for Blog Post

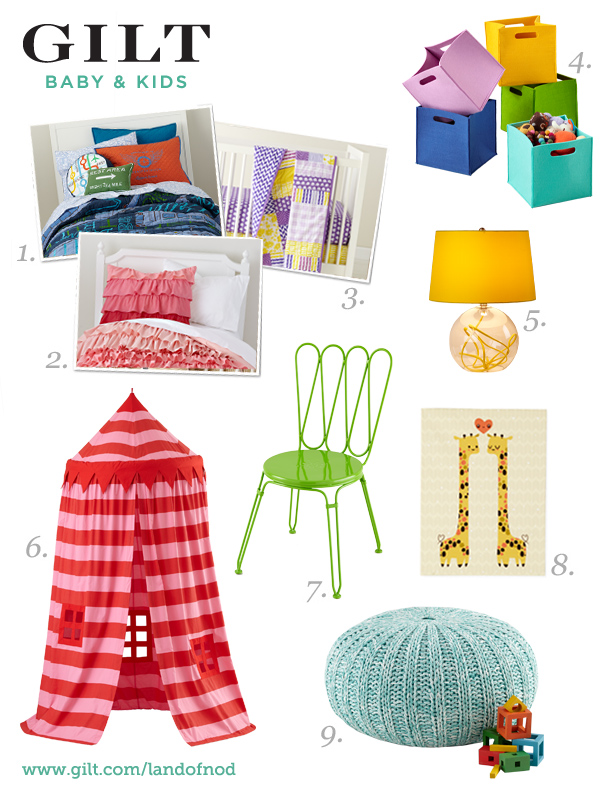
Thanks to our friends at Gilt, you now have the chance to preview and order select pieces from our fall collection before we launch them online.  Shop on Gilt.com now through June 29th for this special opportunity and check out landofnod.com later in July for the full assortment.  Enjoy!

XO,

Michelle

Prepping for Baby: Setting up the Nursery

June 21, 2012

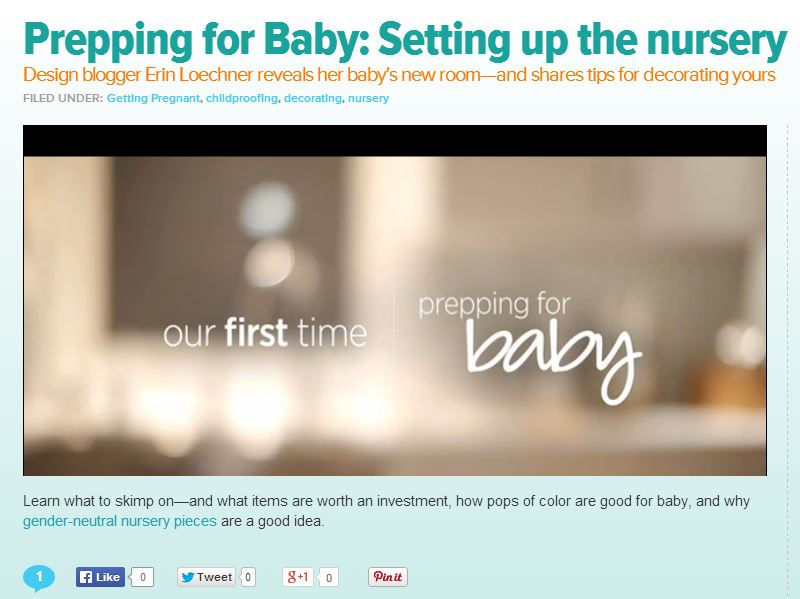
We are thrilled to help share design blogger, Erin Loechner's baby nursery:

Prepping for Baby: Setting Up The Nursery

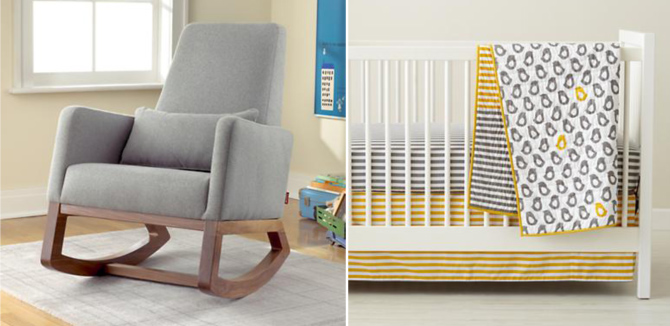
Did you spot the Nod products? Our whimsical Doorknob Wall Décor, gender neutral Andersen Dresser, modern Heather Grey Joya Rocker, lively Yellow Raised Floral Rug, Pink Garden Crib Quilt and both our Grey Stripe Crib Fitted Sheet & Changing Pad Cover are part of Erin & Ken's STUNNING nursery.

Erin Loechner is the founder of the design blog, Design for Mankind – sharing her favorite fabulous finds all acorss the web. A special thank you to our friends at mom.me (a new parenting and lifestyle web site for moms) for sharing the nursery reveal. 


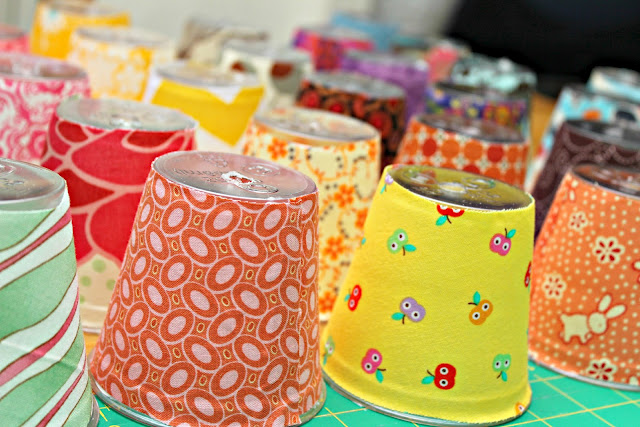
Mini Fabric Lamps

June 20, 2012

Post by Taylor Urban of www.itstaylormade.com

1

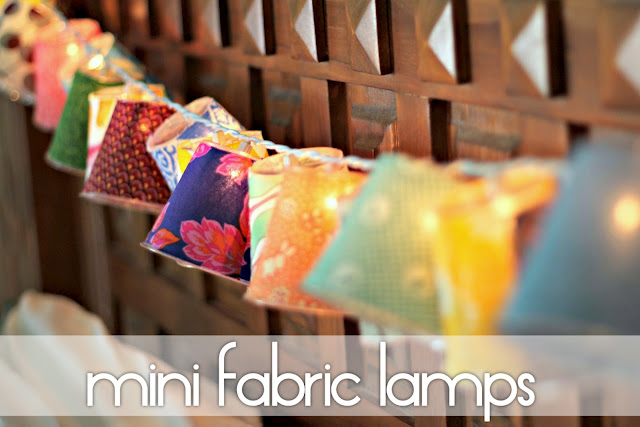
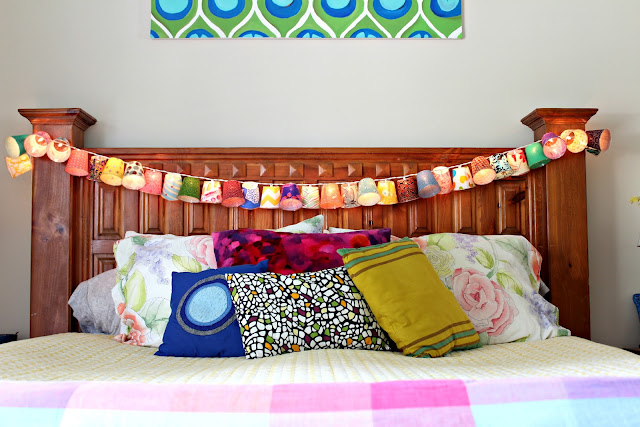
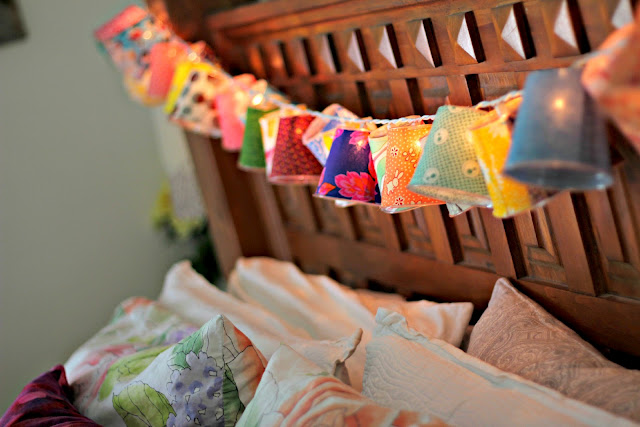
One of the very first things I ever “pinned” were these “Lamp Shades on a String” from Rebeccas DIY. They have been on my to-make list for months. When I first found this little project, it was only written in Swedish but I think she has an English version now. These are so cute and actually really fun to make, Finn even helped me a little 🙂 I love a simple project, and one that uses scraps.

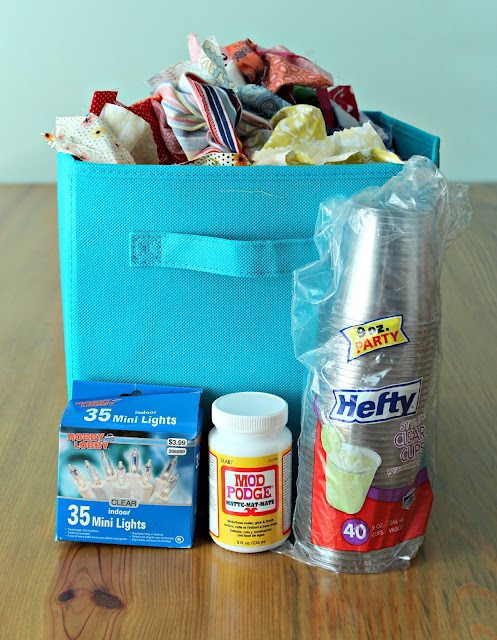
What you need:

  • Fabric Scraps
  • Lights
  • Mod Podge
  • Clear Cups

2

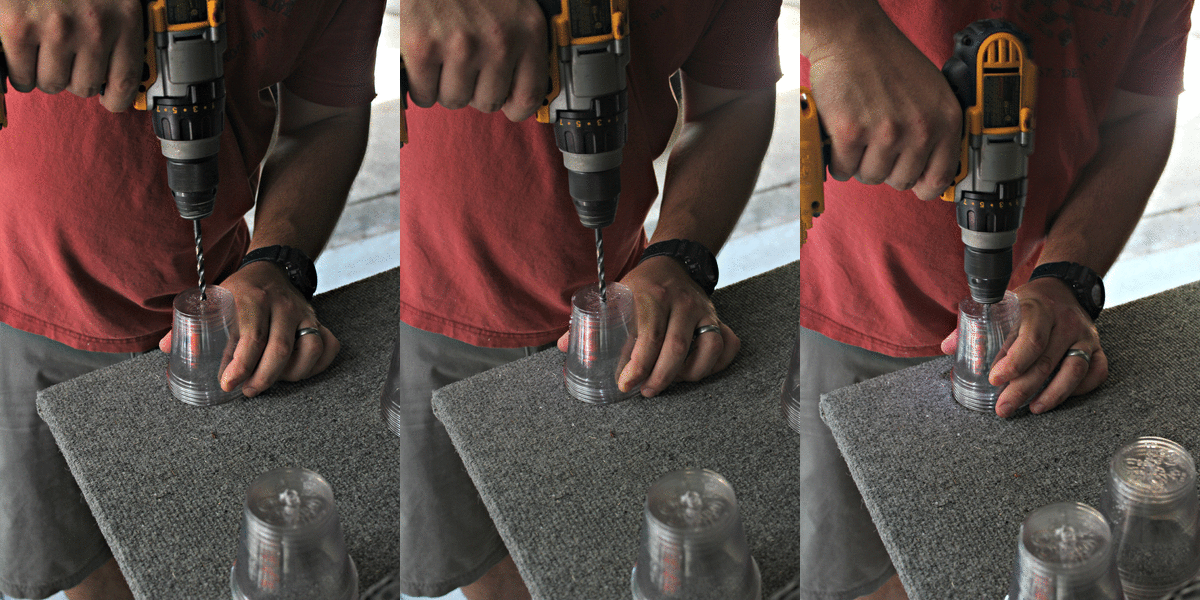
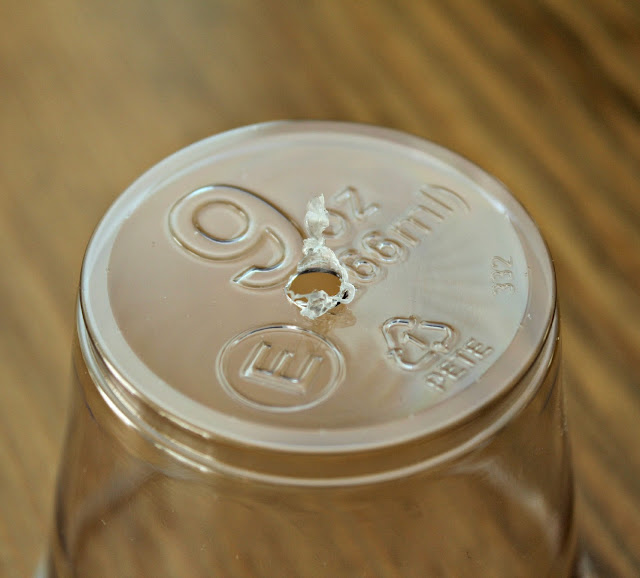
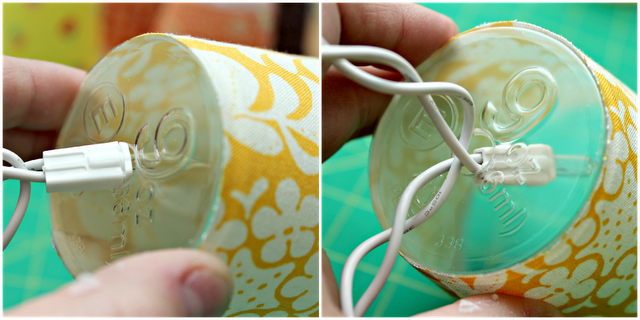
Then you need holes in your cups…

3

4

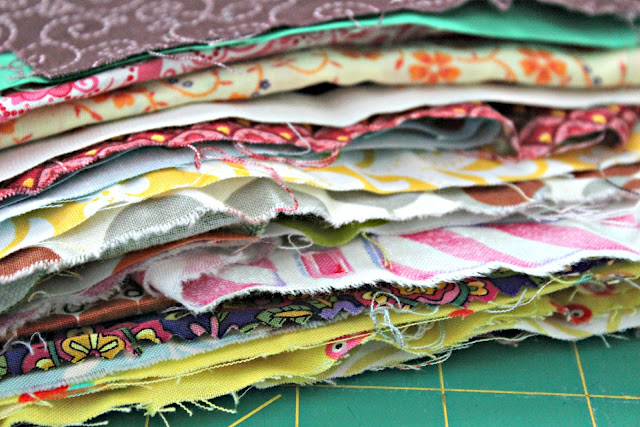
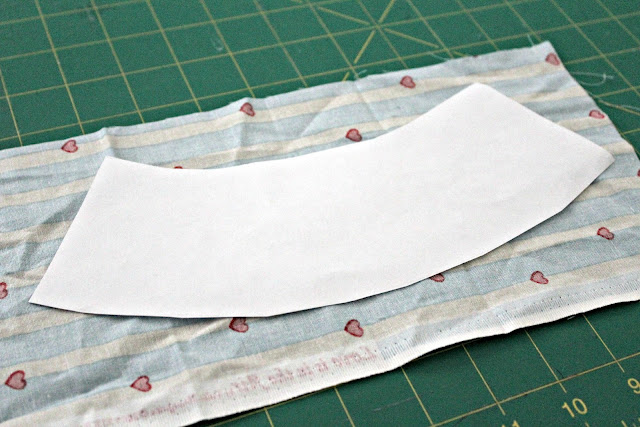
Iron all of your scraps and then start cutting. I have a template HERE if you are using the same cups (9oz Hefty Brand).

5

6

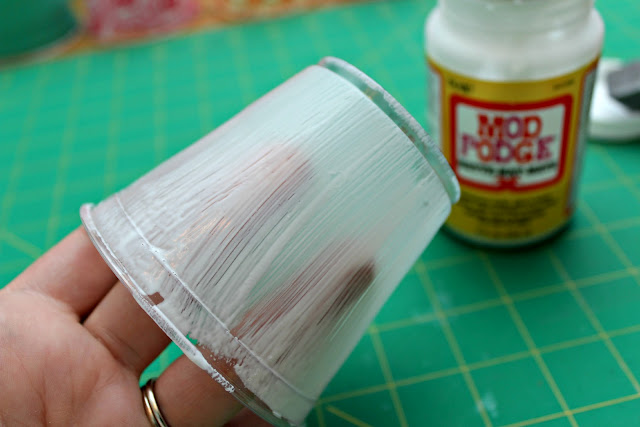
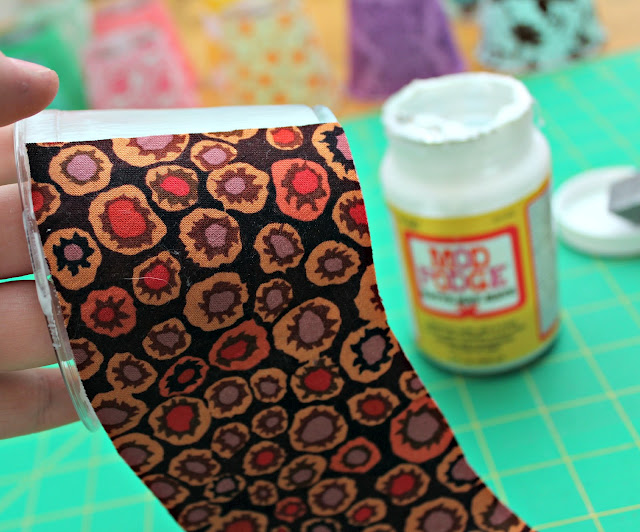
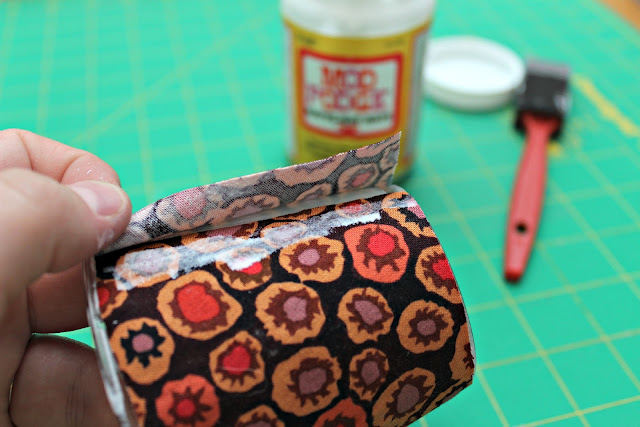
Cover your cups with the Mod Podge and wrap fabric around. The template is cut for a little excess fabric and I just used more Mod Podge on that little lip.

7

8

9

Let them dry…

10

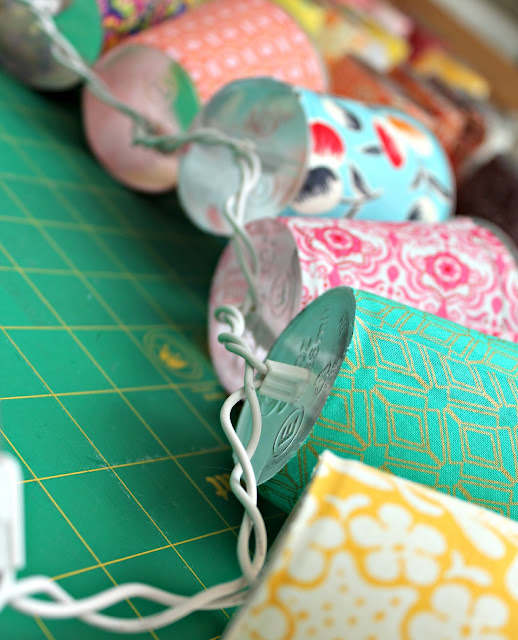
Push the lights into the holes.

11

Here is a little PSA: I posted a project about a year ago that involved tealights in a metal container near plastic and some commenters thought I had a death wish or something. I thought “its just a tealight people” and obviously I am always around when I burn candles. I write a craft blog not a manual on life…but if this project isn’t for you, just don’t make it and as always please be safe 🙂

12

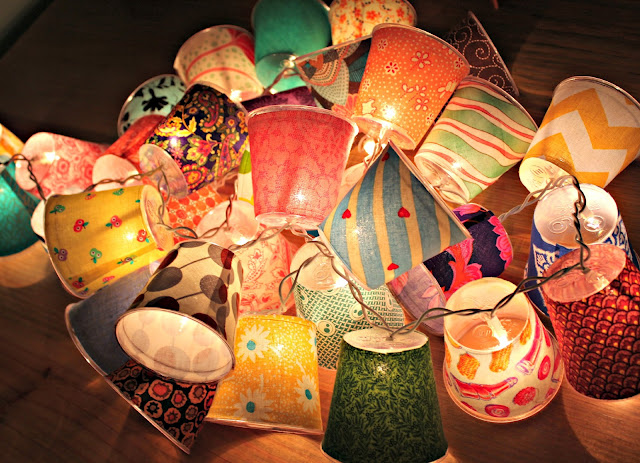
The best part… plug them in, yay!

13

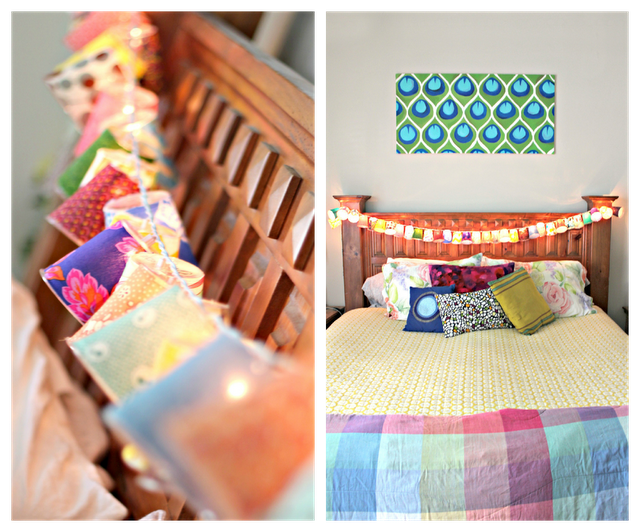
Look where they live now

14

15

16

I love them, I want to make some for every single room. Stay tuned later this week for a very ModPodge-tastic giveaway that I know you will LOVE!!

Post by Taylor Urban of www.itstaylormade.com

Grey Is The New Neutral

June 19, 2012

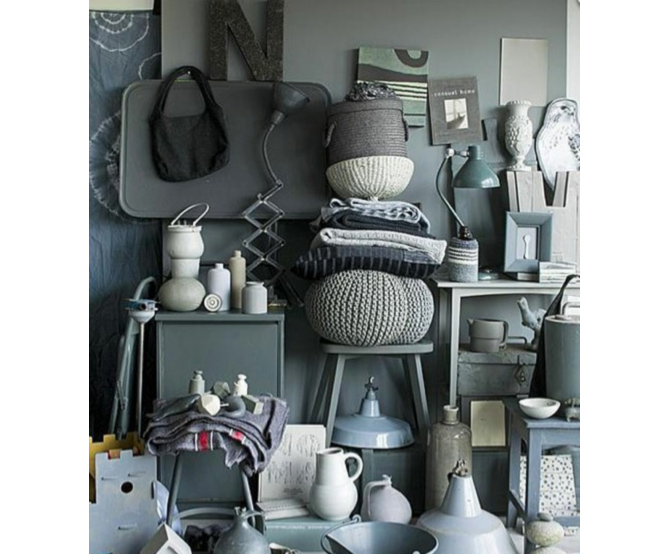
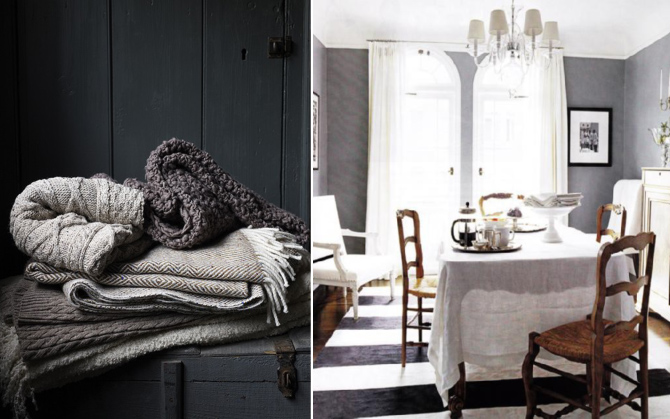
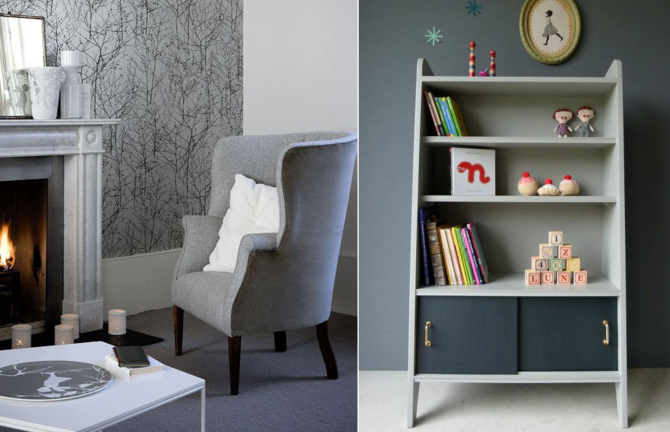
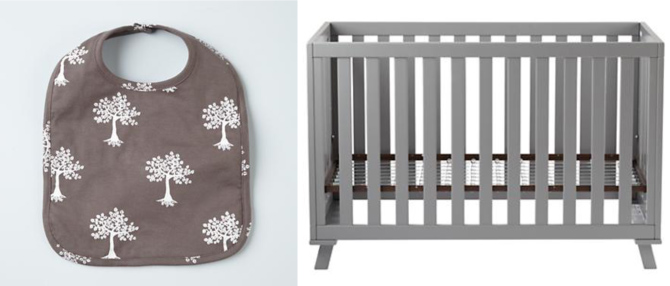
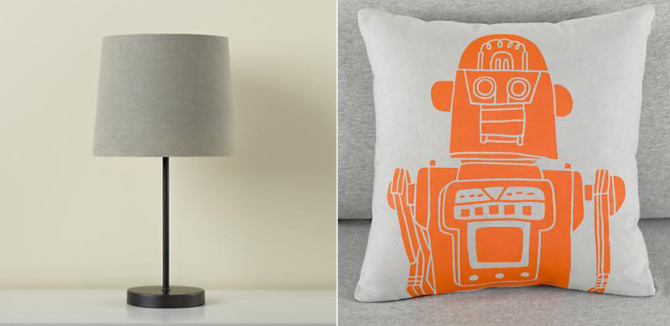
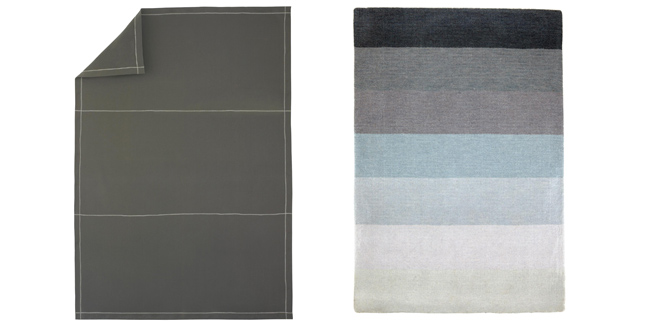
Taupe, tan, khaki these are the hues that typically come to mind when we think of neutrals. Lately another color has crept more and more into their mix…grey.  In shades ranging from light smoke to dark charcoal, grey is quickly becoming the go to neutral. Combined with texture, pattern and other colors, grey can be very warm and welcoming.

Grey_1
1.

Grey_2
2.                                                                           3.

Grey_3
4.                                                            5.

Grey_4
6.                                                                             7.

For the nursery:

The nursery is a great place to play with grey. It is gender neutral and works exceedingly well with yellow, another great basic.

Grey_5
8.                                                                                   9.

Grey_6
10.                                                                            11.

For the boys:

Paired with navy, green or black, grey is a great neutral for boys. Brighter tones such as Orange can add a pop of color against this neutral backdrop.

Grey_7
12.                                                                       13.

Grey_8
14.                                                        15.

For the girls:

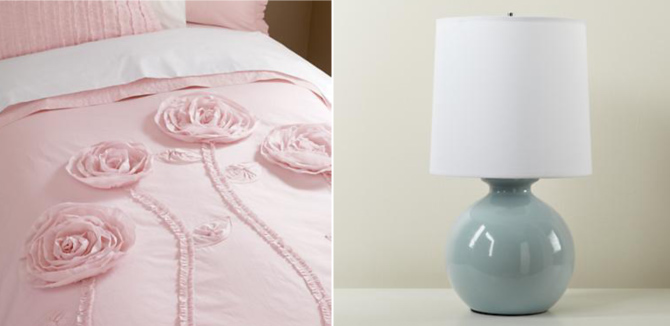
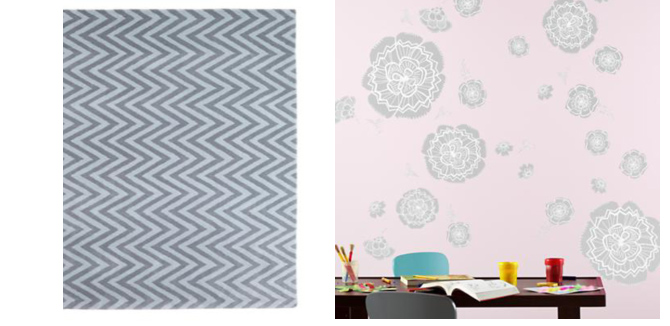
Grey can add a delicate and sophisticated touch to a girl’s room. Paired with this palest of pink the grey helps to ground the room.

Grey_9
16.                                                                        17.

Grey_10
18.                                                               19.

For the playroom:

Grey in the playroom allows you to introduce a variety of colors without them all competing with each other. It helps to calm the room and allows for brighter tones to live together without screaming, “too busy!”

Grey_11
      20.                                       21.                                                    22.

Grey_12
                               23.                                                             24.             

By Sarah Culbertson  

Once upon a time a fashion plate from Seattle met a childrens retailer from Chicago, and it was love at first sight.  After spending a lot of time together at the mall, they both knew it was a perfect match. So Sarah packed up her fabulous Kate Spade suitcase and headed for the Windy City. Where they lived happily ever after, designing and developing textiles for little kiddos everywhere.

Stuffed Artichokes

June 18, 2012

1

There is no better recipe for me to share with you than my grandma’s stuffed artichokes. Nini, as we called her, was  a consummate Italian grandma.  Her basement was filled with drying racks that were always laden with home-made pasta, just waiting to be packaged. She made her own tortellini from scratch and I kick myself regularly that I was never cool enough to want to learn when she was alive.  She always had real Italian salami, the kind with the big peppers in it, a huge carafe of wine in her pantry that my grandpa used every night at dinner, jars of figs, loaves of white Italian bread, and jars of home-made spaghetti sauce. And when my grandpa, Nono, and her were having a heated conversation, it was in Italian.

2

One of her hallmark dishes was stuffed artichokes.  She made them as a side-dish with veal, spaghetti, eggplant, and pretty much just for no reason other than we could all eat our weight in them.  My dad is still a rock-star at making them and we are sure to get a batch going every summer when we’re up at the cottage that we rent.  They are the MOST delicious!

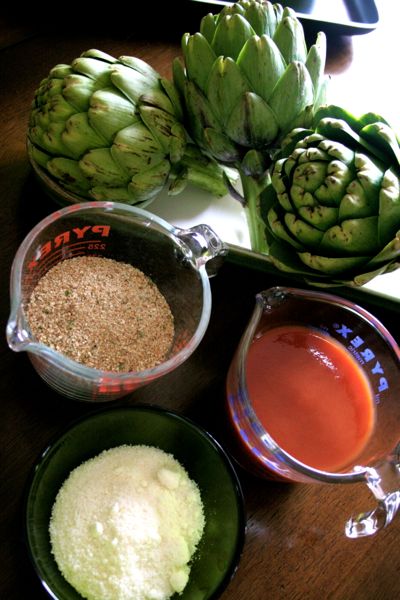
Here’s what you need:

3

  • One artichoke per person (about).
  • 1/4 cup of bread crumbs per artichoke.  I use the Italian bread crumbs for some extra flavor, but it’s not necessary.
  • About 1/2 cup of grated parmesan per artichoke.
  • A little bit of tomato sauce–about 1/4 cup.
  • Olive oil.

Step 1:

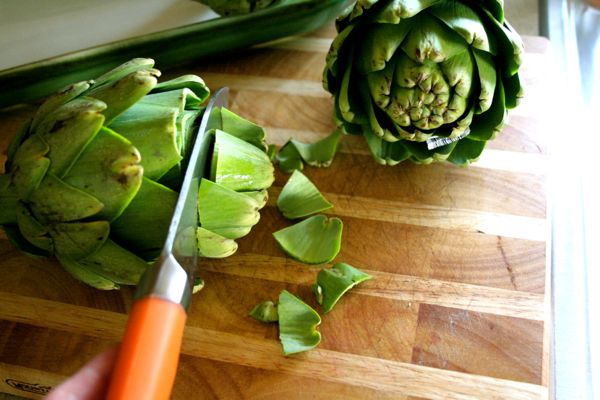
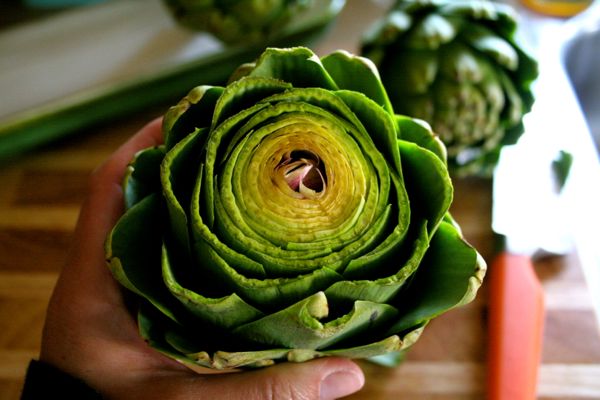
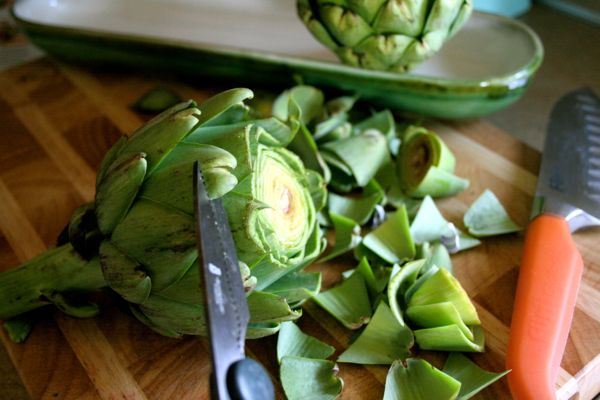
Prepare the artichokes.  Trim about  1/2 inch off the top of the artichokes, then trim the rough and sharp leaves from the outside of the artichoke (1-2 layers of leaves).  You can use a knife or kitchen scissor for this.  Lastly, cut the stem down so the artichoke can almost sit flat on your work surface.

4

5

6

7

8

Step 2:

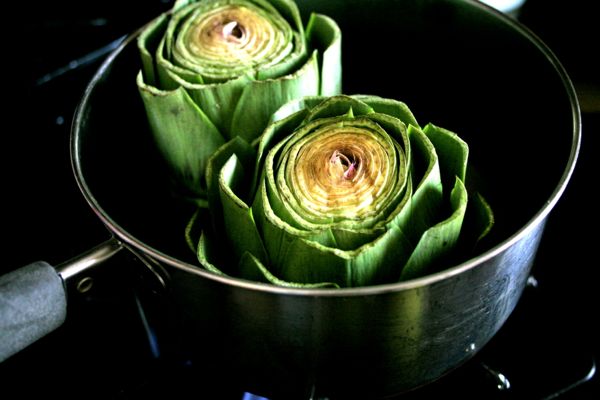
Pre-cook the artichokes.  You’ll want to steam them a bit in a pan with about 1/2 cup of water so that they’re easier to work with later.  Let them steam for about fifteen minutes.

9

Step 3:

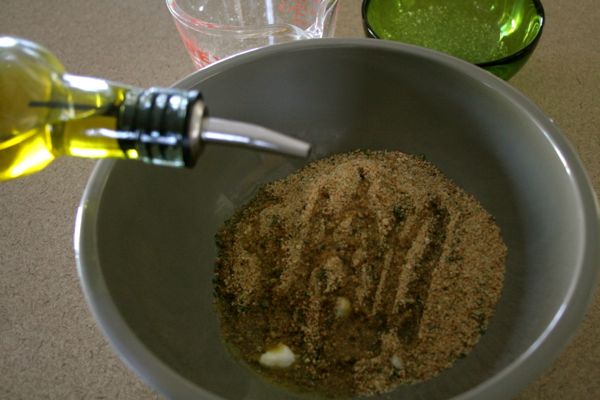
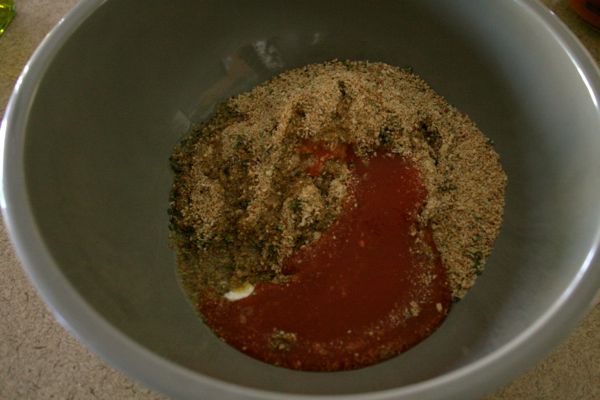
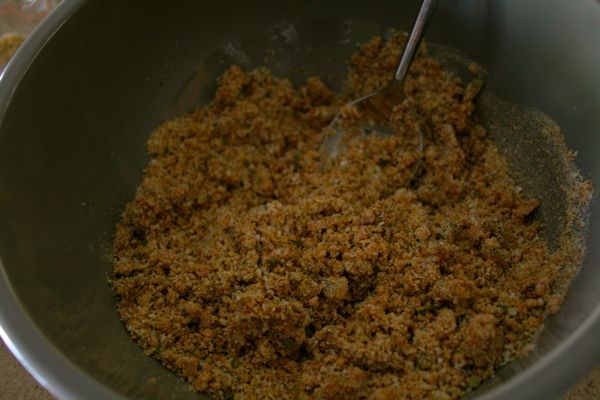
Mix your bread crumbs, parmesan cheese, a bit of tomato sauce, and a few tablespoons of olive oil together.  You’ll really need to eye this.  The consistency of your mixture should be a little sticky, but mostly dry.  You don’t want it to be as wet as cookie dough.

10

11

12

Step 4:

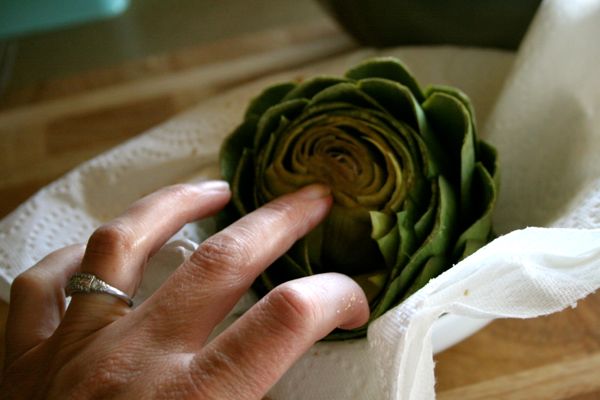
Take your steamed artichokes out of the pan and gently pull them apart just enough so you can stuff the leaves.

13

Step 5:

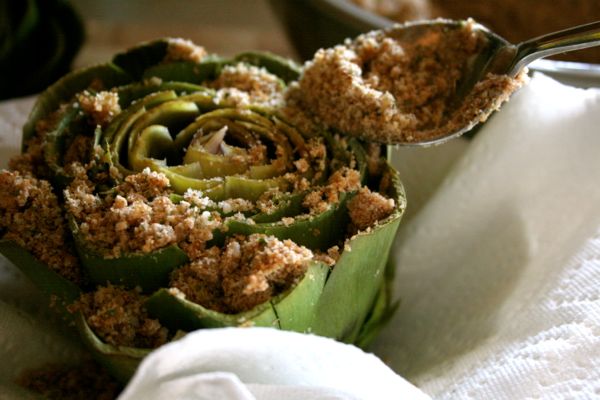
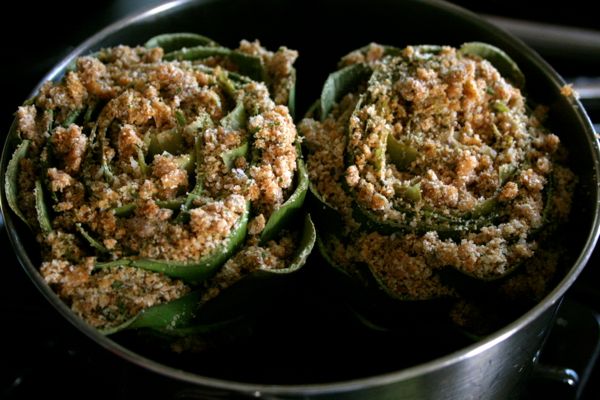
Stuff  your artichokes.  Generously spoon your bread crumb mixture into the artichoke.      Shove as much of it as you can deep down into the leaves.  Don’t worry about being too neat with this process–there is no such thing as too much stuffing here.

14

Step 6:

This step is touchy.  Place your artichokes in a pan, drizzle a little tomato sauce on top of them, cover, and simmer your artichokes in a mixture of water, olive oil, and tomato sauce that never gets lower than the bottom fourth of the artichoke.  You’ll need to baste them every ten minutes or so and probably add some more water, and olive oil on occasion. To get the stuffing to turn into a custard like consistency you’ll need to simmer the artichokes for about an hour and a half.

15

16

Step 7:

Once the cheese is melted and gooey and the stuffing can be scraped off the artichoke with your teeth when you sit down to eat them you’re good.  Unfortunately–these are about the least sexy thing to watch someone eat.  Something about putting a leaf in your mouth and scraping it with your teeth and building a pile of discarded artichoke leaves on your plate does not a beautiful eater make–but you won’t care!  Because these are amazing!
Post by Maggie Terryn : Mom Colored Glasses

The Carousels of Paris

June 15, 2012

ParisCarousels_01

My husband and I recently went on vacation to Paris, sans kids. It was an amazing trip, but we missed our children tremendously. I had never thought of Paris as a kid-friendly city, but it seemed as if everywhere we turned there were parks and other public spaces designed with kids in mind. We were especially amazed by the carousels. Every major monument or neighborhood seemed to have its own double-decker carousel. We didn't visit all of them (and I think one could spend an entire vacation just visiting the carousels of Paris) but we did hit quite a few. For anyone considering a Paris trip with the kids, I highly recommend adding the following stops to your itinerary:

Tuileries

ParisCarousels_02

ParisCarousels_03No visit to Paris would be complete without a stop at the Louvre. A major museum might seem daunting with young children, but the nearby Jardin des Tuileries offers a nice break from the crowds and confined spaces. In fact, the Tuileries carousel is neighbored by a large playground – perfect for getting some energy out before or after a museum stroll.

The Eiffel Tower

ParisCarousels_04

ParisCarousels_05The Eiffel Tower is tourist central, but despite the crowds going up the elevators for an amazing view of the city, the carousel remained nearly empty. We visited at dusk (nearly 10pm in Paris), so perhaps most young children were already in bed. But if your children (and you) can handle a late night, I highly recommend visiting just after sundown. Each night, the Eiffel Tower features a show of lights sparkling up and down the tower. The carousel also looks pretty beautiful illuminated at night.

Trocadero

ParisCarousels_06

ParisCarousels_07Just across the river from the Eiffel Tower is Trocadero, which has its own carousel. At a slightly higher elevation, this area has one of the best views of the Eiffel Tower and offers a large open area for kids to run around.

Sacre-Coeur

ParisCarousels_08

ParisCarousels_09If you can make it past the peddlers selling jewelry at the base of Sacre-Coeur, you will find one of the loveliest carousels in Paris. In fact, this is the carousel that was featured in the movie, Amelie. It’s definitely a nice stop before walking up the 200+ stairway to Sacre-Coeur.

Abbesses


ParisCarousels_10

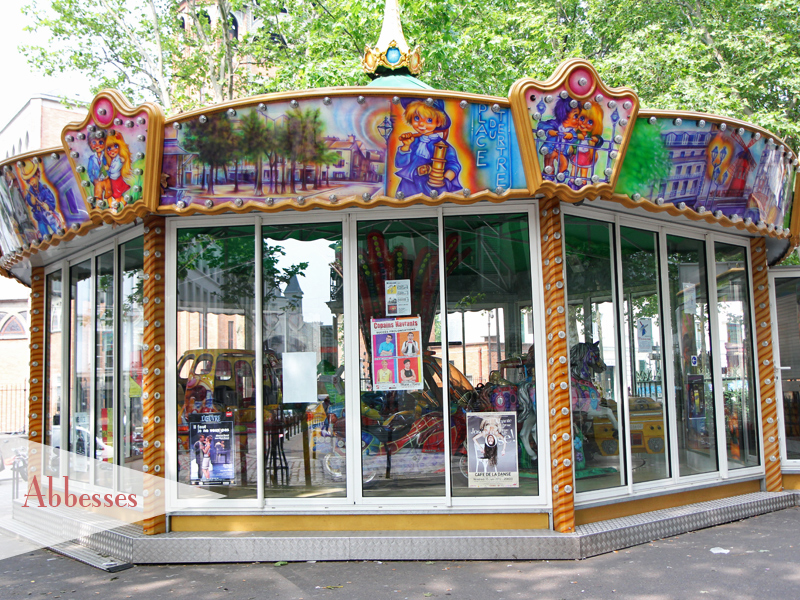
ParisCarousels_11The carousel at the metro stop Abbesses is not the most picturesque. In fact, it looks more like the coin-operated amusement rides found outside some U.S. grocery stores. I recommend a visit, however, for the chance to stop at the wonderful shops lining the nearby streets. I especially recommend Ets Lion, a tiny general store featuring culinary treats and kitchen accessories. 

Post by Julee : Warm Hot Chocolate

Meet Wolfum

June 14, 2012

Wolfum_1

How did you get into the décor industry?

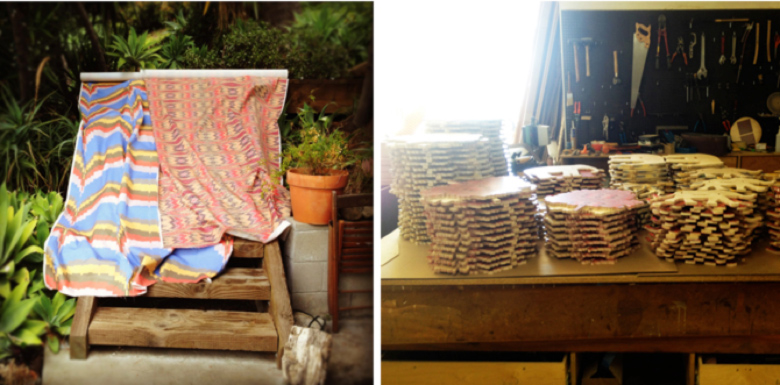
I worked as a designer in the apparel industry for about 9 years, specializing on print driven pieces and textile design.  But my history with décor, print and pattern goes way back.  My oldest memories consist of picking out wallpapers for my room, my aunt’s floral shower curtain she brought back from Brazil in the 60’s and of course, my mother’s extensive cloth napkin collection. It is also in our family as my Italian grandfather was a textile importer and fostered in us a love of contemporary Italian household items.

When I married a furniture designer I was suddenly immersed in home décor, and realized that was truly where my passion was.  In December 2010 I took the leap and launched Wolfum.

Wolfum_2

At work in the studio

Was it difficult to start your own business?

It is a challenge every day, but I work well under pressure and love to multi task.  Wolfum was an idea I had had for years, but when I found out I was pregnant, I realized it was a “now or never” type moment.  So I gave myself the challenge of getting the business up and running by my due date.  I had left my design job, so I took those 9 months to design and pull the business side together.  It was a lot of research, manual labor and trial and error.  I launched Wolfum two weeks after the birth our daughter and then opened up the wholesale side in August 2011.  I will not say it was easy to do, but perhaps the delirium of exhaustion somehow made me insane enough to push through. 

I also have a very supportive husband and am lucky enough to have access to a woodshop where I can play and experiment.  Brendan has been integral to the creation of Wolfum and he, along with the amazing support of family, has really made it possible. 

Wolfum_3

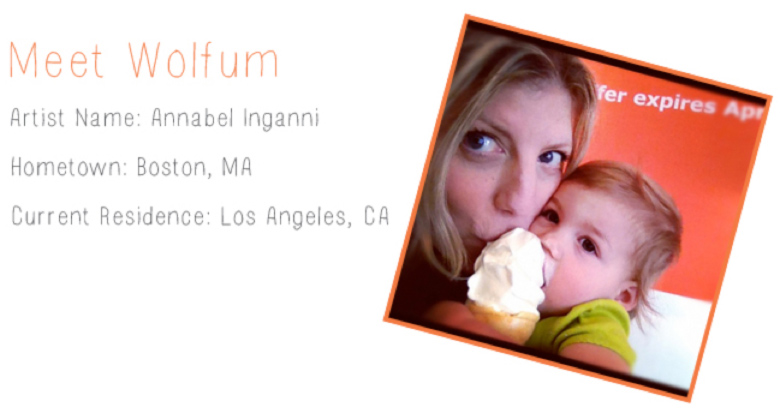
Annabel at home with daughter Birdie

Where do you get inspiration for your patterns?

It’s funny because I have never been the type of designer who chooses one inspiration and designs around that.  There is a wonderful Chuck Close quote which I feel best expresses my work ethic- “inspiration comes from working”.  That said, it is not just a random process.  I of course reference vintage items and like to re-imagine traditional styles (like reworking a classic chevron or flame stitch).  I imagine what my dream home would look like and then design for that space.  But it’s cool because some days it’s my imaginary cabin in the Pacific Northwest, and other days it a chic townhouse in Brooklyn.  I am somewhat of a chameleon and I like Woflum to reflect that.

That said, I strive for each piece to have a classic, timeless feel- I am not easily swayed by trends.  Color is also extremely important to me.  It has to feel fresh and unexpected and can have so much to do with whether a particular pattern is appealing or not.  Color has so much power to charm and can easily elevate a design.

Wolfum_4

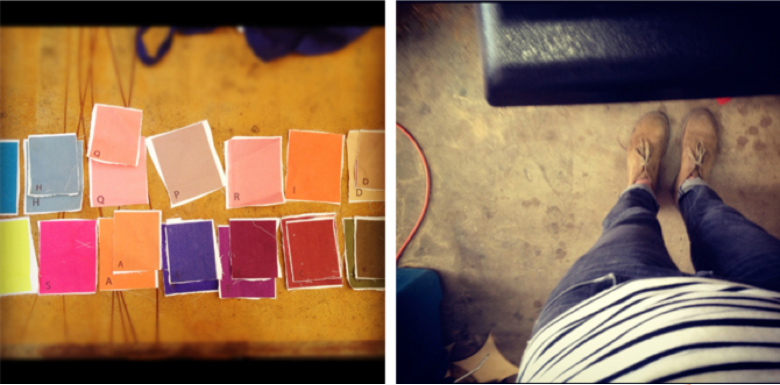
Textiles and wall hooks in the studio

How has being a mother influenced your work?

Birdie inspired from the womb!  We live in a small home and while designing her space,  it was challenging to find the right room accents that were both durable and elegant enough to live nicely in a well curated home.  I believe children’s items should be able to grow with the child.  Wolfum prints are designed to be fanciful, but not cliché.  Solid wood is beautiful and enduring, creating a special, heirloom feel-not just in quality, but in an aesthetic sense.   
Now that my daughter is a strong willed toddler, I realize the importance of setting an example of a working woman.  I want Birdie to understand the importance of hard work and self-expression.  I have to be more disciplined with my time now, and really be able to be present and focused- both on work and on her.

Any tips on incorporating wolfum products into a room?

 With a child’s room, I love the idea of mixing and matching prints within a color scheme.           Find those few dynamite pieces and use them as the stronger focal points of the room.           Then you can accent with simple accessories or furniture that will more easily transition as your child grows older.  I think a child’s room should spark imagination, create comfort and security and give space for them to express themselves. 

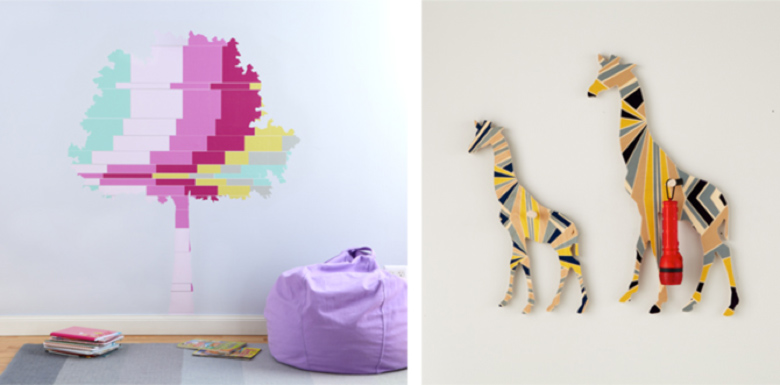
If your taste is more minimal, have a Wolfum wall hook be the bright spot within the neutrals. If you love a more colorful and energetic space, use a few hooks across the wall to create a story.  It is up to the individual, which it what makes it so fun.  Several animal hooks in the same print create a bold statement, while mixing and matching gives a wonderful sense of play.  They are truly customizable.

Wolfum is functional and fun to look at; the pieces are traditional in that sense, but still forward and modern.

Wolfum_5

Wolfum decals and wall hooks are available here.


By Anna Passadori

Anna develops and designs exclusive product for The Land of Nod. She hails from the west coast and has traveled the world to source product. She loves anything Marc Jacobs, Sofia Coppola or stripes! (So, if anyone can get a photo of Sofia Coppola wearing a striped outfit by Marc Jacobs, please send it along.)

 

Let Freedom Ring: Printable “USA” Banner

June 13, 2012

It's Bettijo and Aimée from Paging Supermom back for the last day of our "Let Freedom Ring" party!

BannerOverview

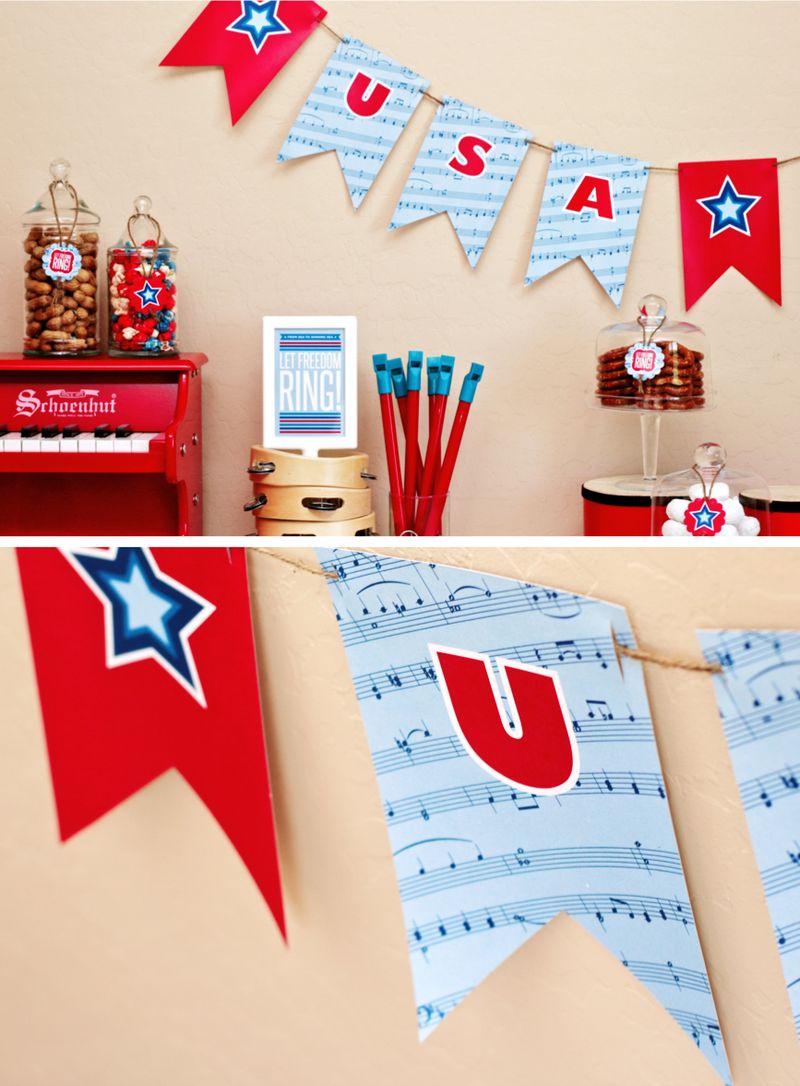
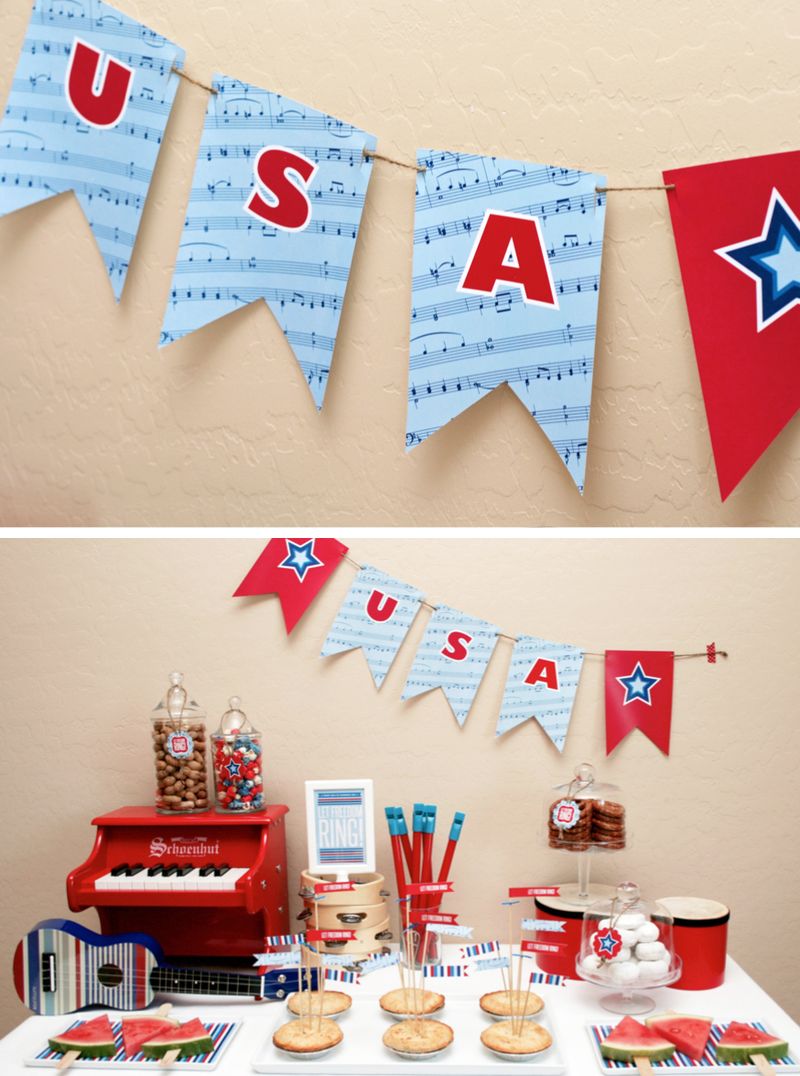
Nothing dresses things up faster than a patriotic banner, and it's simple to make. Download our free Printable "USA" Banner, cut out and string onto twine.

BannerOverview3

Our "Let Freedom Ring" party table is now complete, but don't forget the drinks!

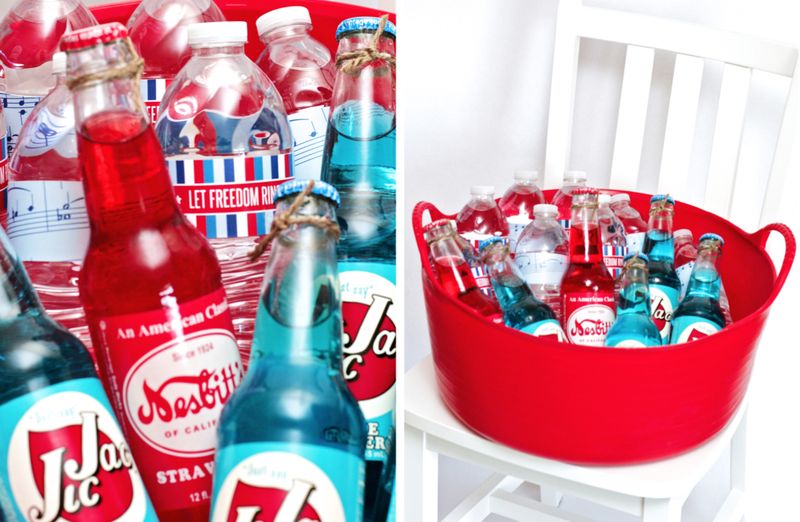
DrinkTub

In Land of Nod's Small Shallow Tub, we served vintage sodas in patriotic colors along with bottled water.

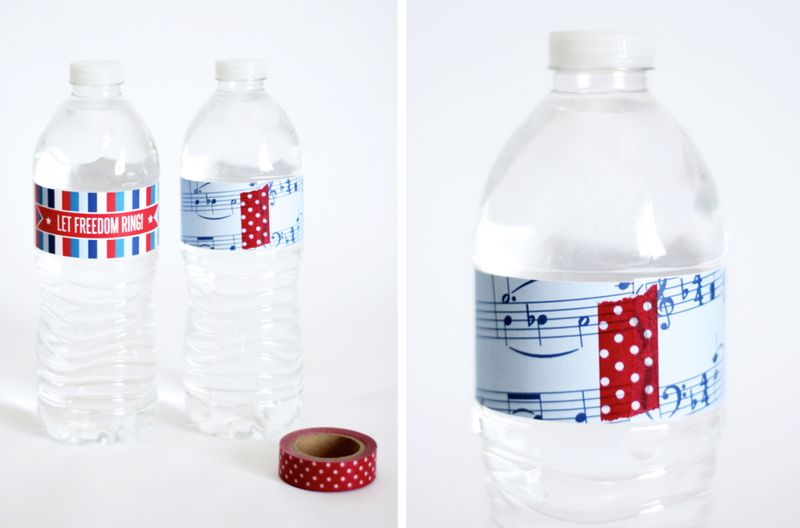
WaterBottleWraps

Make the drinks more festive with our Let Freedom Ring Bottle Wraps (download here).         Print on regular paper, cut out each label then secure to bottle with decorative tape.

FREE PRINTABLES

"USA" Patriotic Banner

Let Freedom Ring Bottle Wraps

Photography, design and styling by Bettijo B. Hirschi and Aimée Lowry, the amazing ladies from PagingSupermom.com.

Let Freedom Ring: July 4th Parade of Treats

June 12, 2012

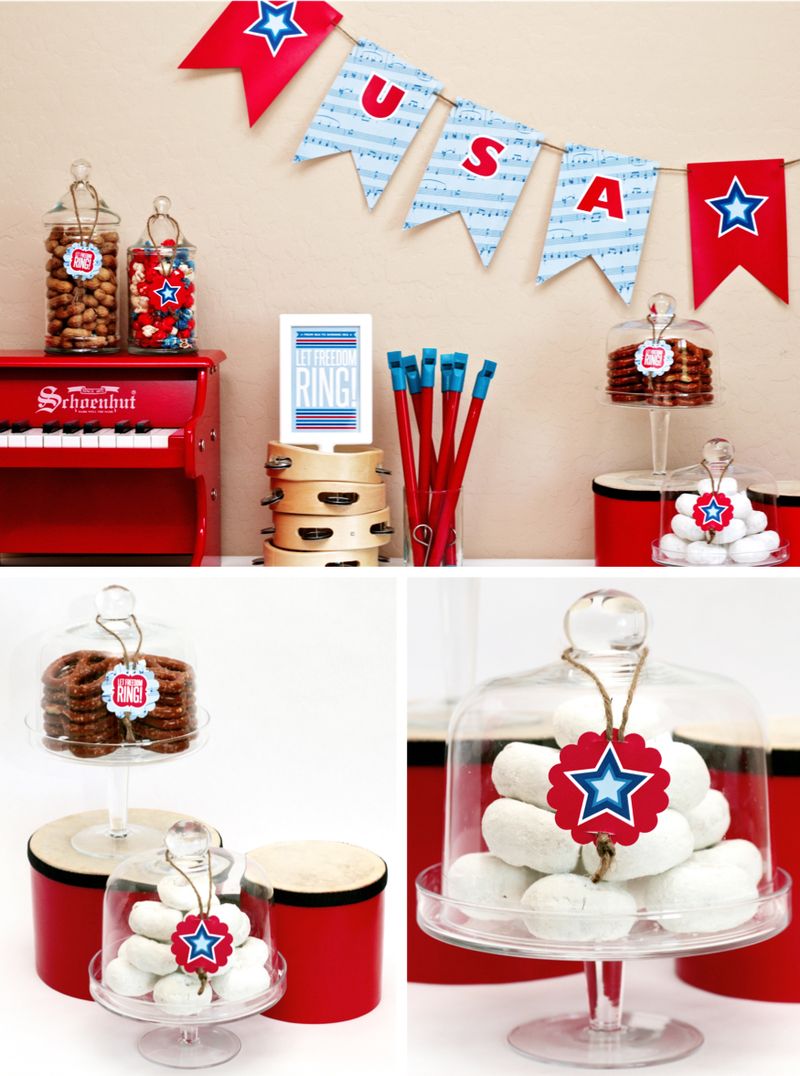
It's Bettijo and Aimée again from Paging Supermom to continue our "Let Freedom Ring" party for the Fourth of July. Let's take a look the cool toy instruments we used to create our harmonious tablescape.

OverviewPartySign

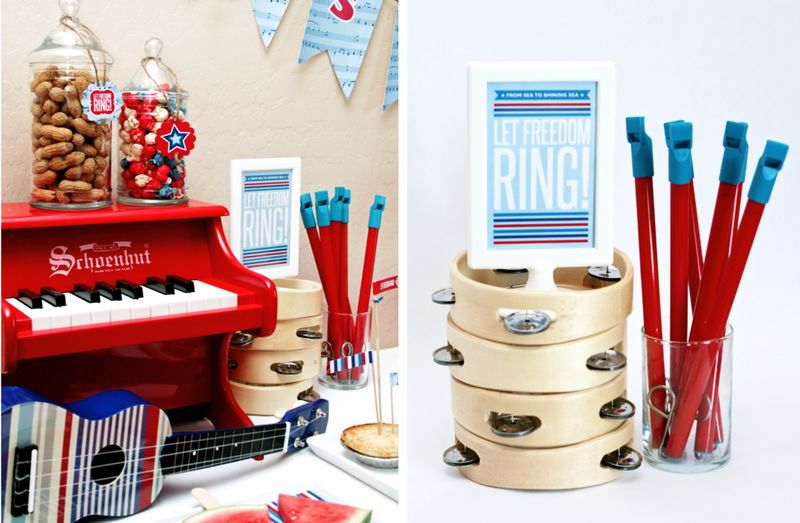
We stacked up four wooden Tambourines and hid an inverted clear glass inside as a pedestal for our "Let Freedom Ring" party sign (download here). A clear vase corrals plenty of Slide Whistles where they'll be on hand for any impromptu parades. Be sure to get your free coordinating "Let Freedom Ring" door sign here.

PartyPunchables

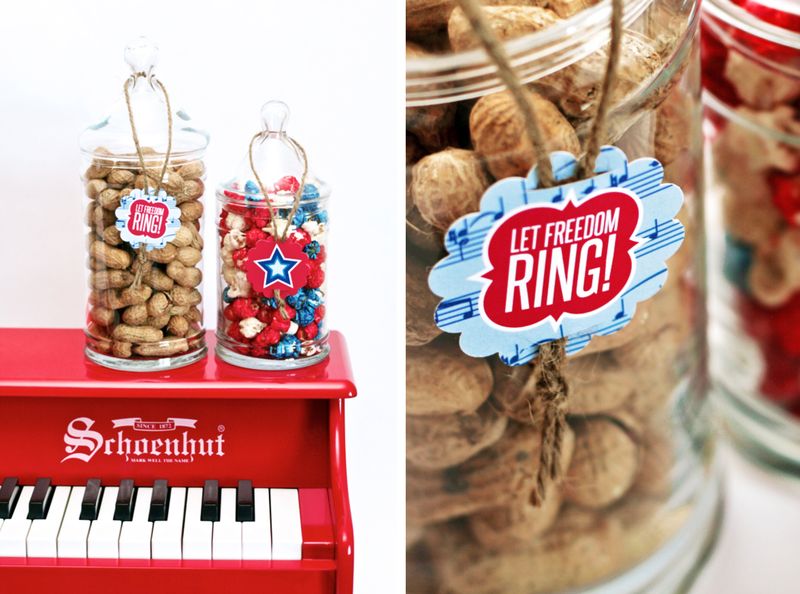
We're sure party guests won't be able to resist thumping out a beat while they fill their plates with the goodies stacked on the red bongo drum. We hung a party punchable star with twine from the lid's handle for a ba-da-BOOM of color!

TreatsonPianoCloseup

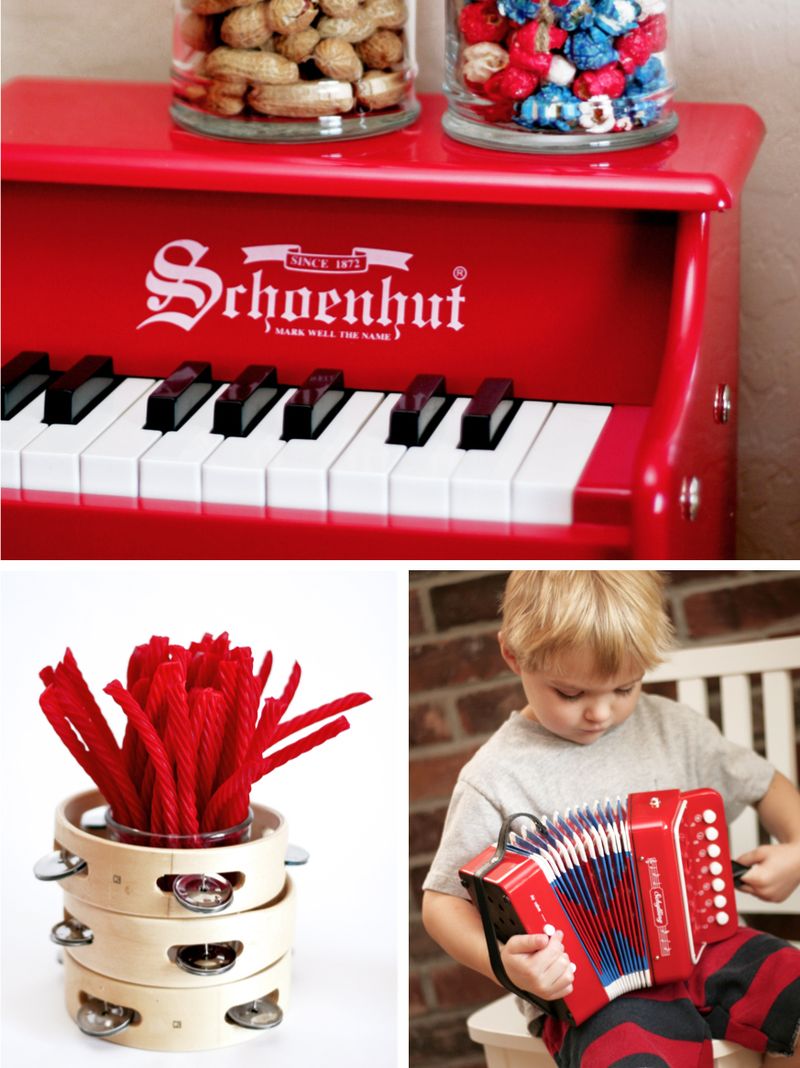
That darling, red miniature piano is the perfect perch for classic apothecary jars filled with patriotic treats.

PianoTambourineAccordion (2)

A short stack of Tambourines, with a glass cup hidden, is a fun way to serve licorice. The colorful Accordion was the kids' favorite, and we couldn't keep it on the table. Every time we turned around a new child was marching around with it!

PartyFavors

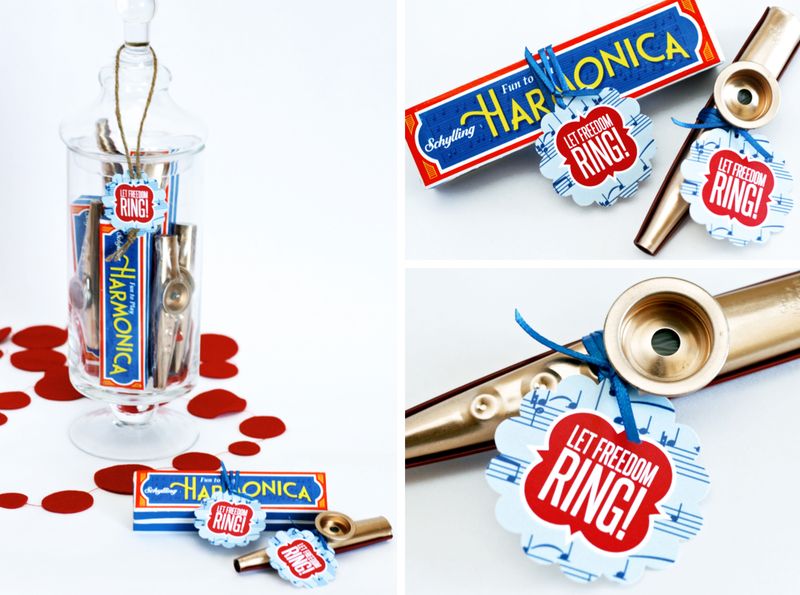
Send guests home with a few musical instruments of their own. These shiny silver Harmonicas from Land of Nod will resonate even with adults. We love the old-fashioned look of the harmonica's box. Plus be sure to have plenty of the classic Kazoos for all the kids.

How to make July 4th Party Favors: We dressed up the party favors with Patriotic Party Punchables. Download and print the free template, cut out with a 2-inch scallop circle punch then hole punch and tie on. The free Printable USA Banner is up next. Be sure to check back tomorrow!

FREE PRINTABLES

"Let Freedom Ring" Party Sign

Patriotic Party Punchables

Photography, design and styling by Bettijo B. Hirschi and Aimée Lowry, the amazing ladies from PagingSupermom.com.