Close

Blog

Let Freedom Ring: Free Printable Party Decor for July 4th!

June 11, 2012

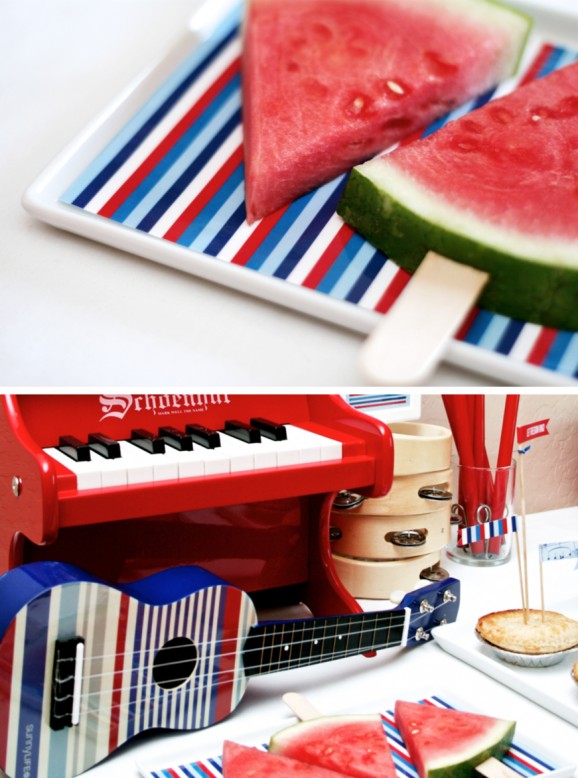
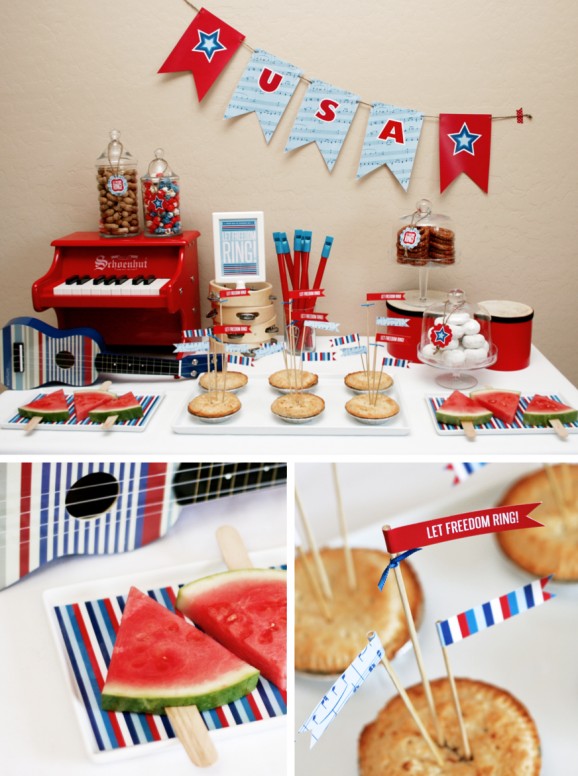
It's Bettijo and Aimee from Paging Supermom here to share our new July Fourth Printable Party Collection. We were inspired by all the fun musical instruments that Land of Nod carries — in those patriotic colors too — and we couldn't help but think of a good, old-fashioned Fourth of July Parade! These toys combined with classic American favorites like watermelon, peanuts, popcorn and apple pie, create a July 4th dessert table no one can resist.

OverviewTrayLinerFlags-578x776

We chose simple, white serving platters since we wanted the instruments to be the stars of the show. The watermelon is served on our favorite, versatile trays — Medium Cuatro Platters, which are just $3.95 at CB2.com. For this party we dressed them up with a printable Patriotic Stripe Tray Liner (download the free file here) inspired by Land of Nod's striped ukulele.

TrayLiners-578x778

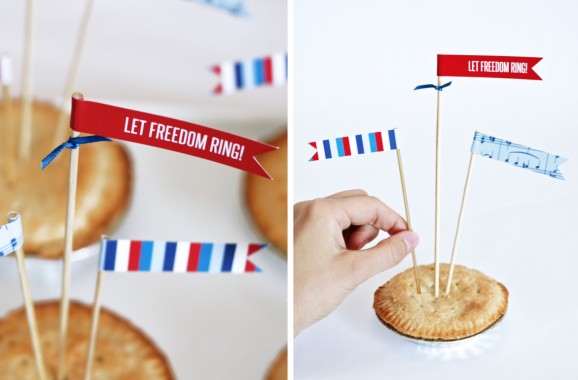
We served Firecracker Apple Pies on a Large Cuatro Platter. Of course nothing's more American than apple pie, but to make ours even more patriotic we added explosive party flags in varying heights.

PartyFlagPies2-578x380

To make your own Firecracker Apple Pies: Download and print the free party flag template, cut to size, and glue to barbecue skewers. Trim the length of each skewer so they will be uneven when placed in the pies.

More party ideas and free printables coming over the next few days. Be sure to check back tomorrow for a Fourth of July Party Favor idea that will Let Freedom Ring!

FREE PRINTABLES

Patriotic Stripe Tray Liner

Blue Music Print Tray Liner

Let Freedom Ring Party Flags

Photography, design and styling by Bettijo B. Hirschi and Aimée Lowry, the amazing ladies from PagingSupermom.com.

Bucket of Fun

June 8, 2012

In the past, packing for the beach for me entailed, bathing suits, a few dresses and skirts, a beach chair, a towel and some sunscreen…let's just say that I was a bit more thoughtful this time around…

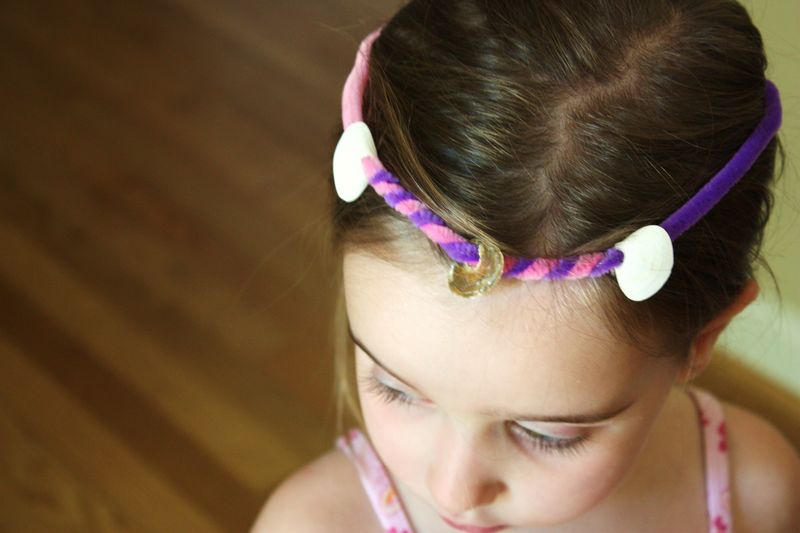
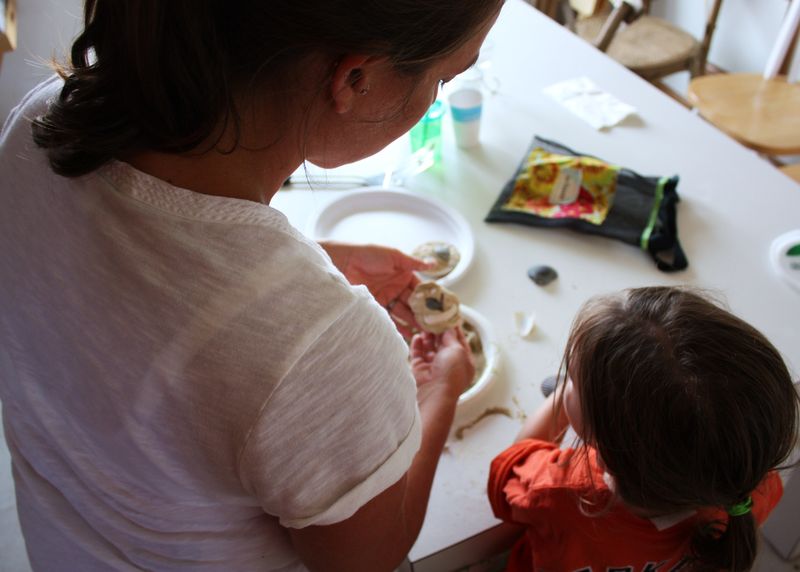
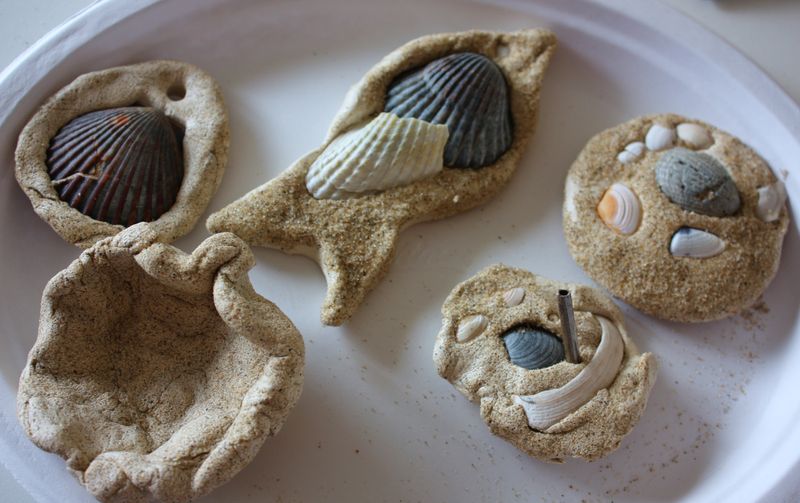
In the event of rain, extreme heat, dislike of the beach or the ocean, or just because we needed a little bit of down time…I wanted to make sure that we had some things to keep us occupied, thus the bucket of fun!  Packed into the bucket of fun were some lacing cards, playing cards, bubbles, punch balloons, air dry clay, coloring books and crayons, and a bag full of crafty stuff like pipe cleaners, foam stickers, sticky eyes, clothespins and mini popsicle sticks.  We were fortunate enough to have rain only after dark each night that we were there.  Also, as it turns out, Violet loves the beach (but we weren't too concerned about that since ladybug girl loves the beach).  But, it was hot and there were a few moments of inside time where we were able to pull some things out of the bucket of fun…we made some clothespin people, some popsicle stick people, some shell necklaces and bracelets and crowns, and some clay sculptures.

1

2

3

4

5

6

7

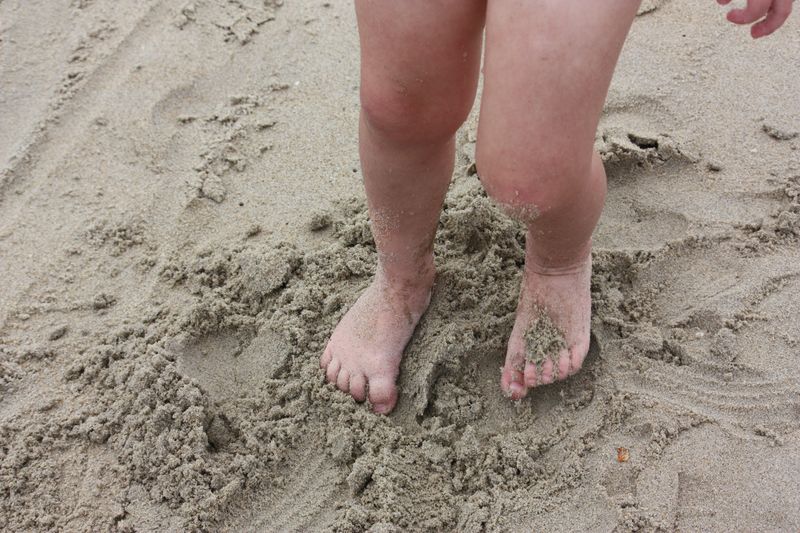
While much of the time these little feet were playing in the sand…

8

the little hands were happy to have a little crafting to do…even at the beach.  So, while the bucket of fun did take up a bit of space in the car, in the end it was worth it, especially because now we have a fun new ornament to hang on our Christmas tree this year!

Post by Jane : Buzzmills

No-Bake, {Gluten-Free} Energy Balls

June 7, 2012

Post by Ali of Papery & Cakery

No Bake Gluten Free Energy Balls

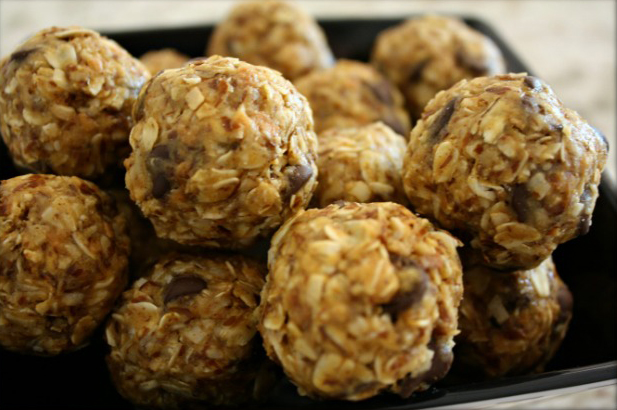
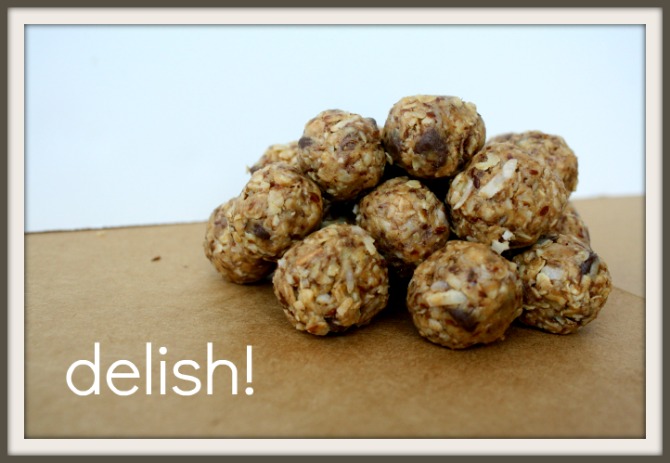
These balls are fabulous for kids, gluten free + healthy! They will definitely add an extra kick to your day!

They are packed full of energy-filled goodness {and then some other goodness that might not give you energy, but will definitely taste delicious}.

I chose to make my version with peanut butter, but these could be made with whatever butter you prefer {almond, hazelnut, or whatever your diet allows}. They would be the perfect addition to any hiking or biking trip, a trip to the beach or even the mall. Whenever you opt to eat them, beware: they are highly addictive. Kids will go crazy {and grown-ups too}! They are a great recipe to make with your kids as well, and not a lot of clean up.

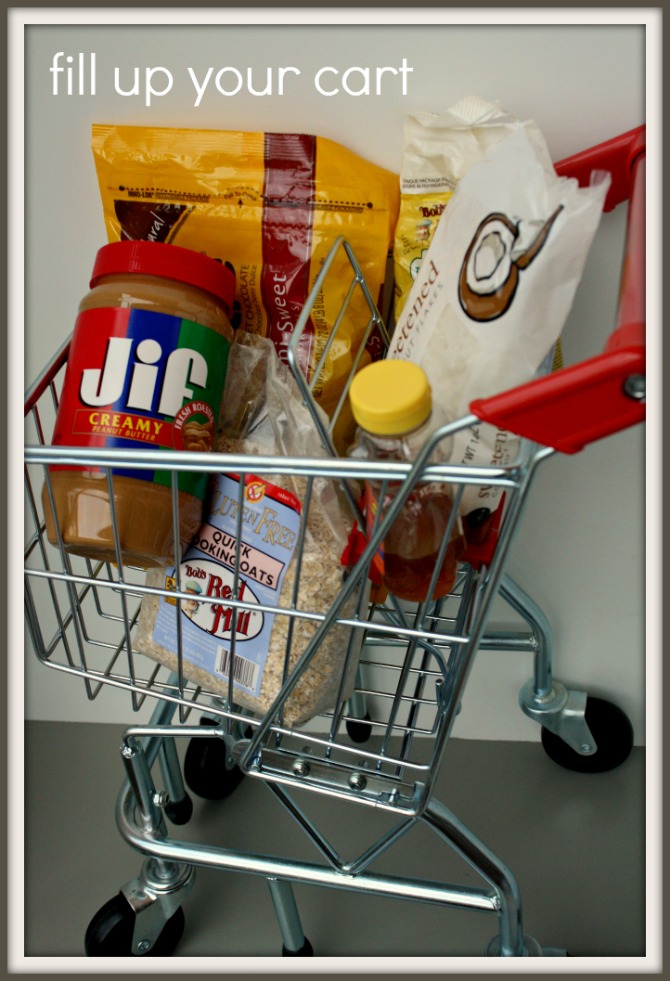
GF Energy Balls shopping cart

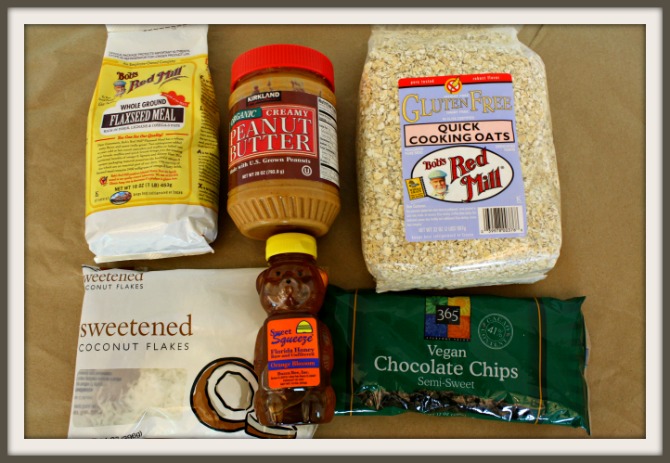
Gather all of the ingredients.

GF Energy Balls ~ Ingredients

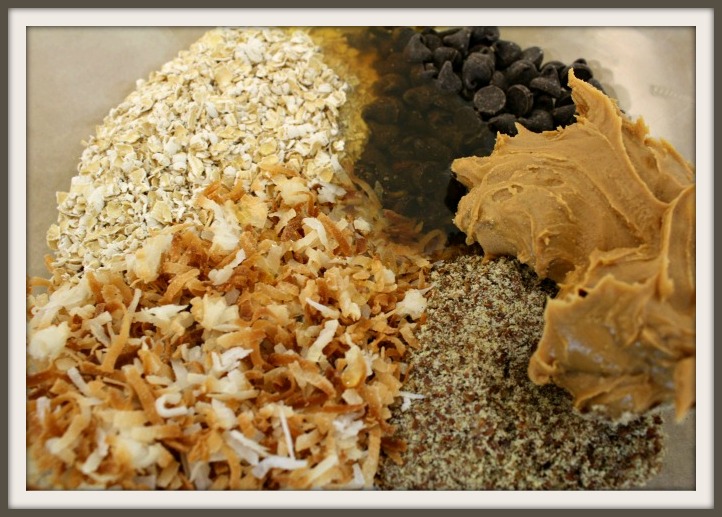
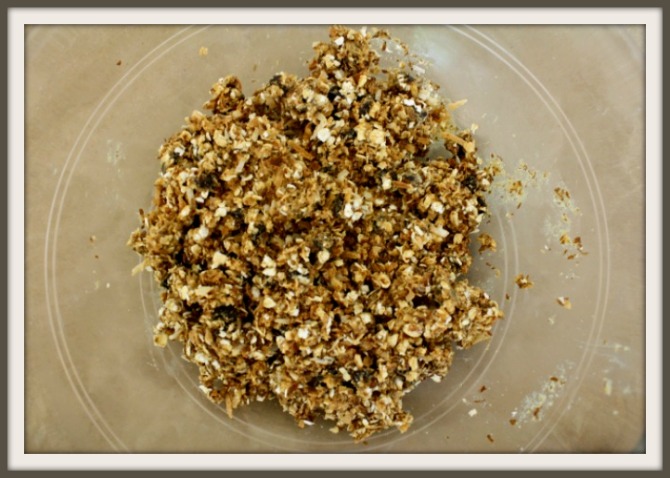
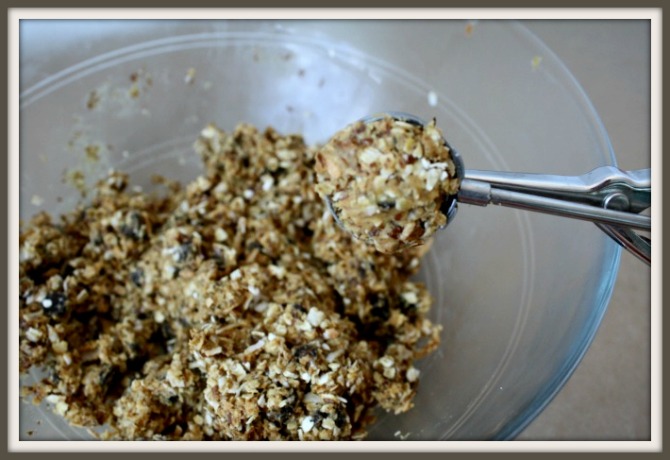
In a large bowl mix together: 1 cup of gluten free oats, 1 cup of toasted coconut flakes, 1/2 cup of vegan chocolate chips, 1/2 cup of ground flax seed, 1/2 cup of peanut butter and 1/3 cup of honey. Mix until all of the ingredients are blended well.

GF Energy Balls ~ Dry & Wet Ingredients

GF Energy Ball Mixed Ingredients

Refrigerate batter for at least a 1/2 hour. Scoop the batter into balls. I chose to use a 1″ ice cream/cookie scoop, but you can always eyeball.

GF Energy Balls ~ Scoop

GF Energy Balls - Final Pic 2

Best served chilled.

Happy No-Baking!!

xoxo,

Ali

Post by Ali of Papery & Cakery

Pattern Play

June 6, 2012

PatternPlay_1

1.

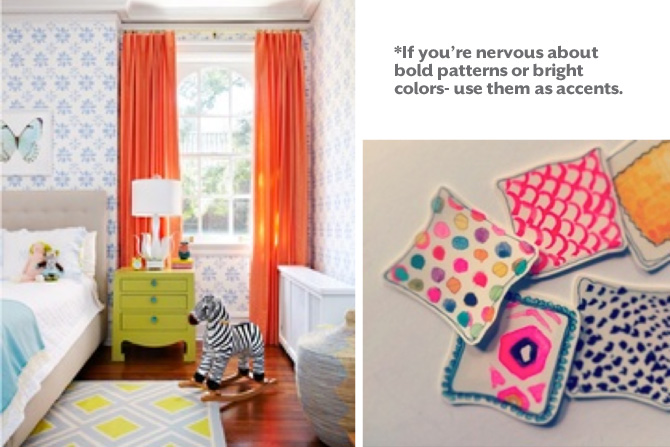
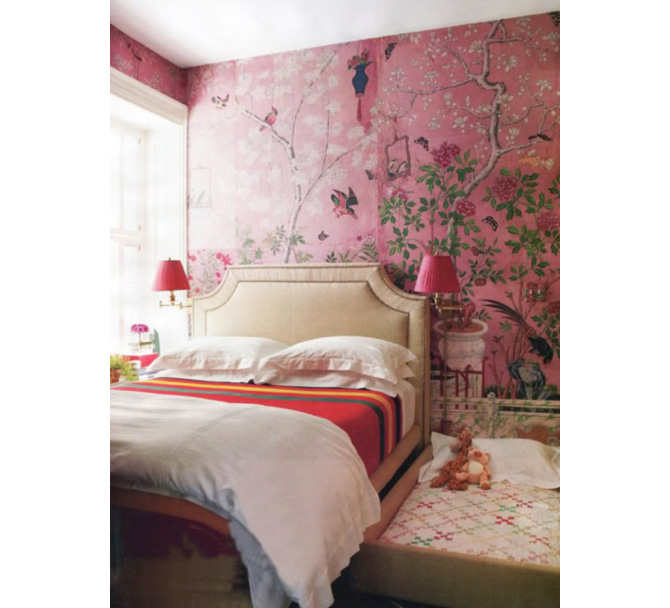
Sometimes mixing patterns can be tough, polka dots, stripes, modern motif’s, dinosaurs- there are so many to choose from! Here is a small guide on how to mix pattern together in a way that works for any room.

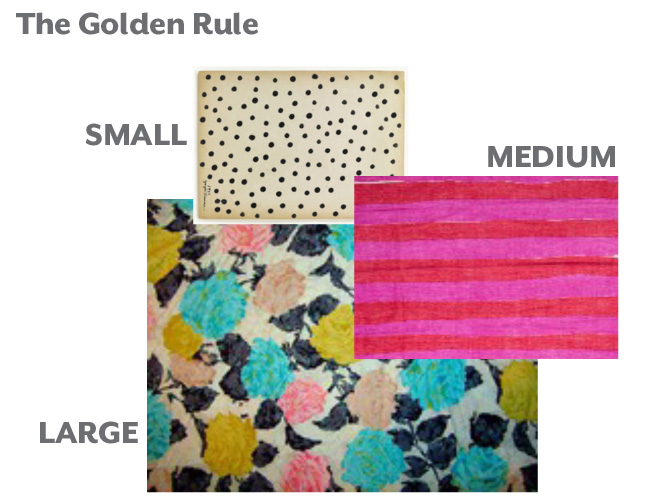
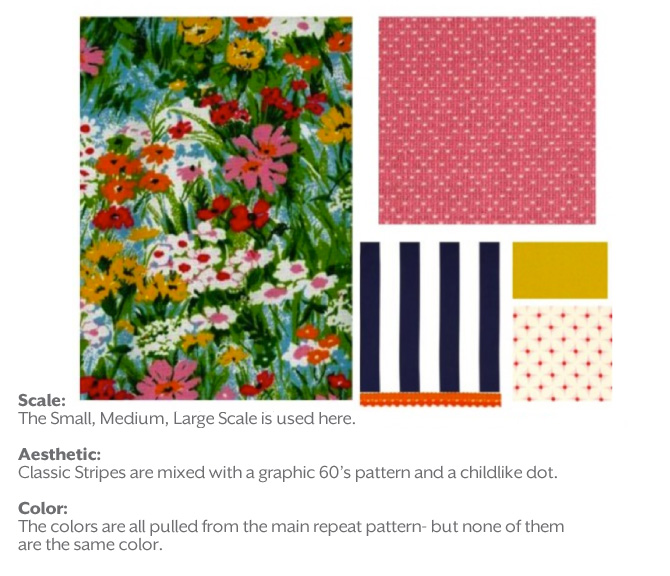
Let’s start at the very beginning- the golden rule of pattern play. Generally speaking it is good to have a mix of a small, medium and large pattern. Of course, this can change based on scale, color and number of patterns- but it’s a great rule of thumb to end up with a room that is beautiful- not busy.

PatternPlay_2

1.          2.          3.

Pattern Placement

Remember that your room is more than the bedding. Do you have pattern on the wall? On a rug? On a lampshade?  The scale of these should all be in line for a complete room.

Counter big, bold patterns with areas of solid color or neutrals. The more patterns you mix in a room, the more you need to layer in visual relief. You need areas where you can pull back, so you can enjoy the prints you have. This will also allow you to highlight the patterns.

Decide where you want your statement to be, where you want the eye to focus. For a bed- generally your biggest pattern should be on the duvet or quilt. Smaller patterns work well for sheets, lampshades and curtains.

PatternPlay_3

1.          2.          3.

Mixing Color

  1. Monotone Colorway-  Monotone colorways are usually one to two colors, like yellow and white. This colorway can take more patterns because the colors are all the same.
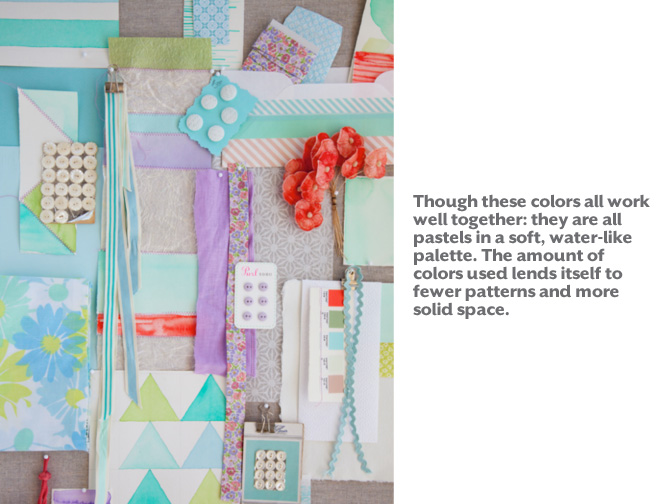
  2. Multiple Colorways-  Multiple colorways  have more colors used in them. Because of this they tend to be able to take less pattern in the space. All colors should be pulled from your “main” fabric. With this it is most important that you follow the “golden rule”.

PatternPlay_4

1.          2.          3.          4.          5.

Multiple Colorways

PatternPlay_5

1.                                                                     2.  

PatternPlay_6

1.

Mixing Aesthetic

For me this is what makes or breaks a room.

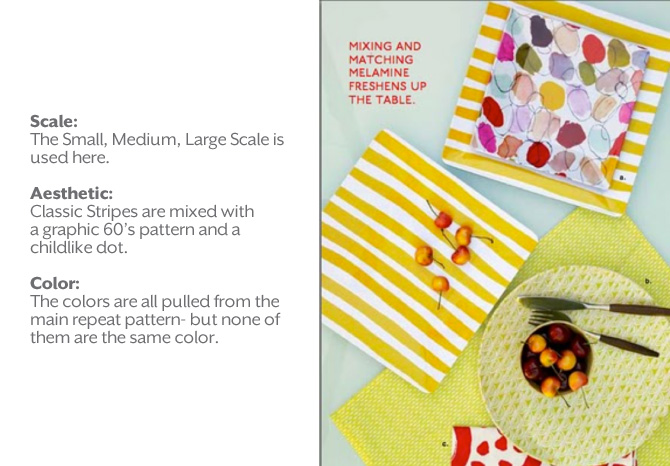
This can be the trickiest part of pattern play. In mixing aesthetics it is good to keep the number of patterns to a minimum and to keep the color range very tight and collaborative.

Adding classic styles and solid materials allows for these patterns to live more cohesively together.

PatternPlay_7

1.

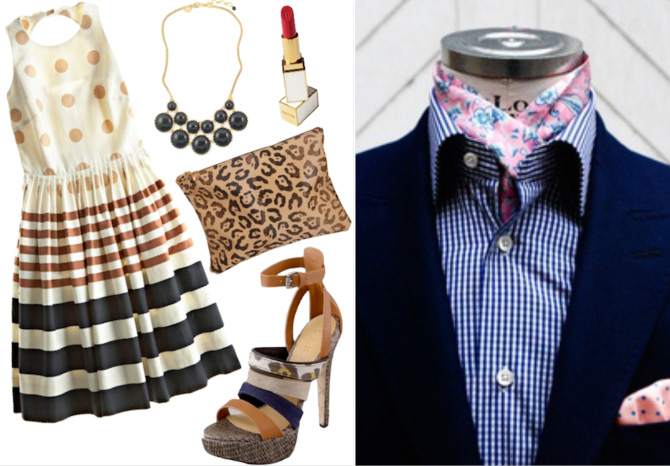
Here’s a tip: Look to Fashion!

“I always recommend bringing bold patterns and pops of color into a room to give it personality and depth,” says Thom Filicia. “Very often, we’re more daring with mixing patterns and colors in shirts and ties, and scarves and skirts, than in sofas, chairs, window treatments, rugs, and pillows. I always say to those leery of pattern and color: Take inspiration, guidance, and lessons from fashion.”

PatternPlay_8

1.                                                                          2.

What Does Work

Lets take a look at a few pattern mixes and see what makes them cohesive.

PatternPlay_9

1.

PatternPlay_10
1.


By Sarah Culbertson
Once upon a time a fashion plate from Seattle met a childrens retailer from Chicago, and it was love at first sight.  After spending a lot of time together at the mall, they both knew it was a perfect match. So Sarah packed up her fabulous Kate Spade suitcase and headed for the Windy City. Where they lived happily ever after, designing and developing textiles for little kiddos everywhere.

Rag Wreath

June 5, 2012

It's summertime & the bright colors are ABUNDANT! I am so inspired to liven things up around my home this time of year & what better way to say "hello" than to add a funky & fresh wreath to the front door! This is such a simple project–one that you can do as long as you know how to tie a knot! I completed this wreath over the course of three meals…as I watched my daughter eat. We chit chatted & I tied knot after knot, after knot. So easy! All you need is a wire wreath form ($3, Michaels), a bunch of fabric scraps, a scissors & the ability to tie knots.     I first found the idea during Kelly Moore's awesome 12 days of DIY series. Then Julie of ZozoBugBaby had a box o' scraps sale (I purchased one!) and well…this is what happened:

This is made out of about 95% Zozo scraps & I needed a bit extra to fill in the gaps & make the flower & leaves. I also learned that it goes faster if you use longer strips–like 1 or 2 x 5ish inches. I made the mistake of starting with strips too small & it was taking forever! So make them a little longer than you think. You can always trim.

I made the flower out of a long ruffled strip, like I showed you how to sew here & how to make into flowers here. 🙂

I kind of don't want to hang it outside…it's too cute! 😉 Happy summer! & you could totally do this with seasonal fabrics/colors for a fun holiday project for the front door! Halloween…Thanksgiving…Valentine's Day…ooh. So many ideas!

Post by shawna of styleberryBLOG.com

Despite days full of washing diapers & messy fun, Shawna is determined to make mommyhood a stylish adventure. Married to the military & mother to one feisty girl & a snuggly little guy, she is a passionate DIYer & loves sharing how to make the complicated simple. Shawna talks creativity, style, food, decorating, green-chic living & mommyhood at styleberryBLOG, a daily-ish dose of something fab.

Hooray for Baby! A Baby Shower Brunch

June 4, 2012

Hello again from Becca of CAKE.

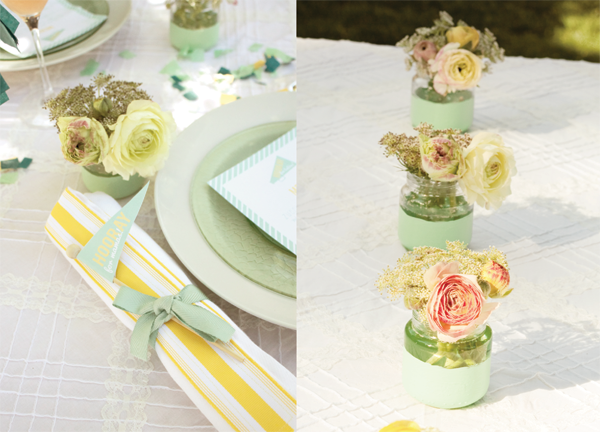
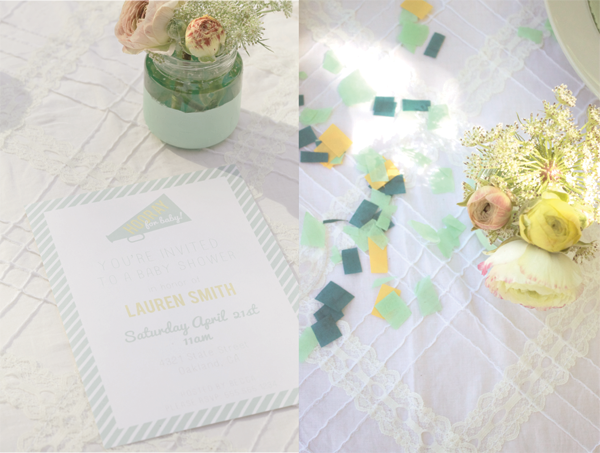
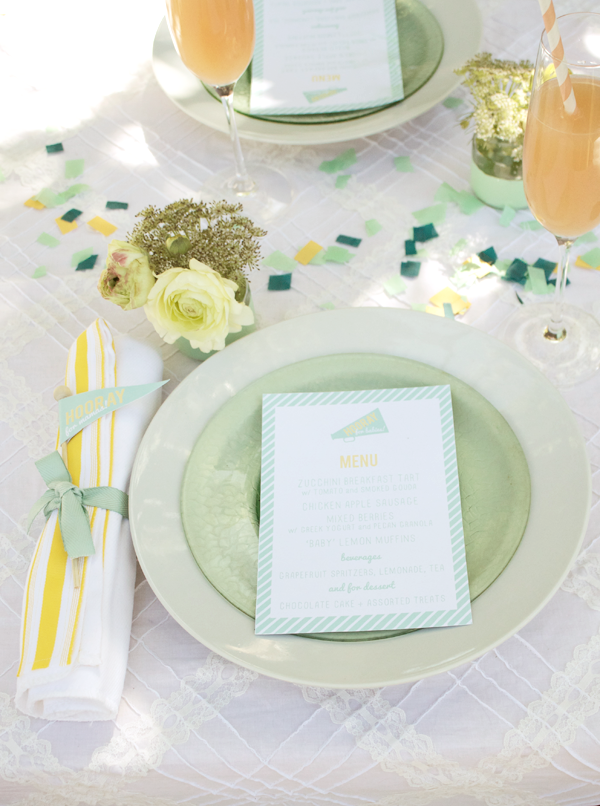
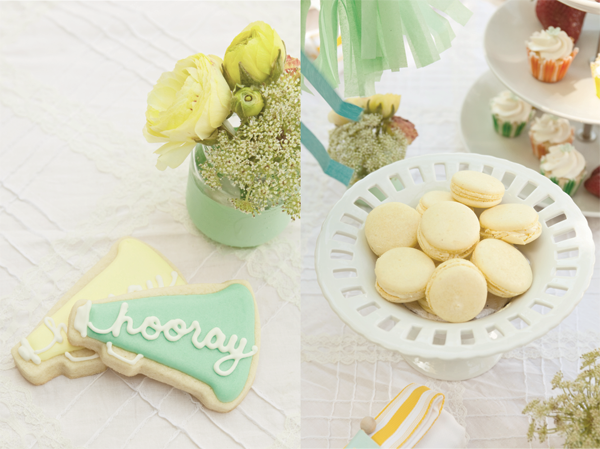
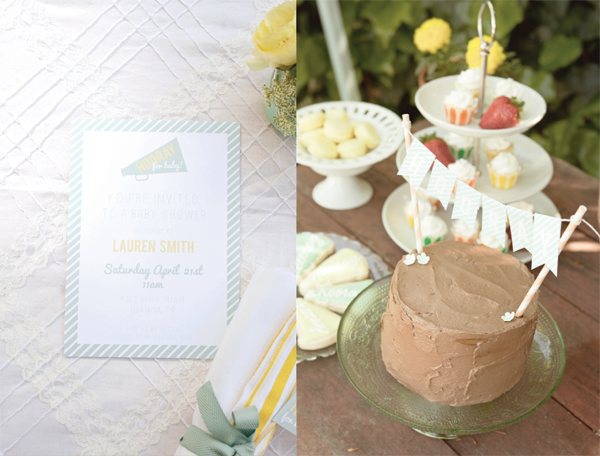
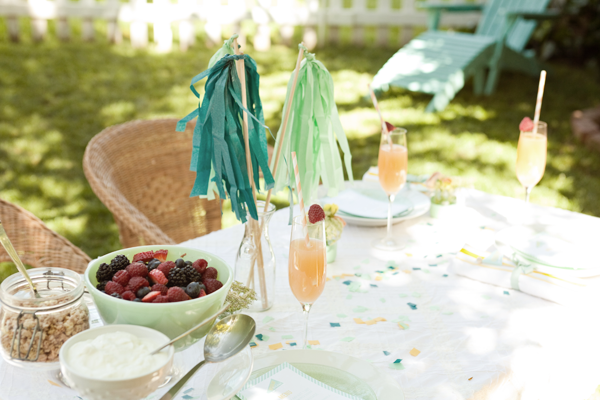
Last month I put together a small baby shower to celebrate three dear friends who all happen to be pregnant at the same time.  The ‘Hooray for Baby!’ theme started oddly enough as the subject of an e-mail I sent wishing them congratulations.  The more I thought on it, the more it felt like the perfect concept for a shower.  Because two of the moms-to-be opted not to find out what they’re having, I picked a gender neutral palette of mint green + yellow.  I’ve always loved these colors for spring, and they worked especially well for an outdoor brunch.  I wanted to keep things simple and budget friendly, so I put together my own menu and a few DiY projects to make the morning special…

1

The little floral arrangements were created from baby food jars that I partially dipped in mint green paint.  I wasn’t sure how it would work out, but the effect was charming and allowed me the opportunity to send one home with each guest.

2

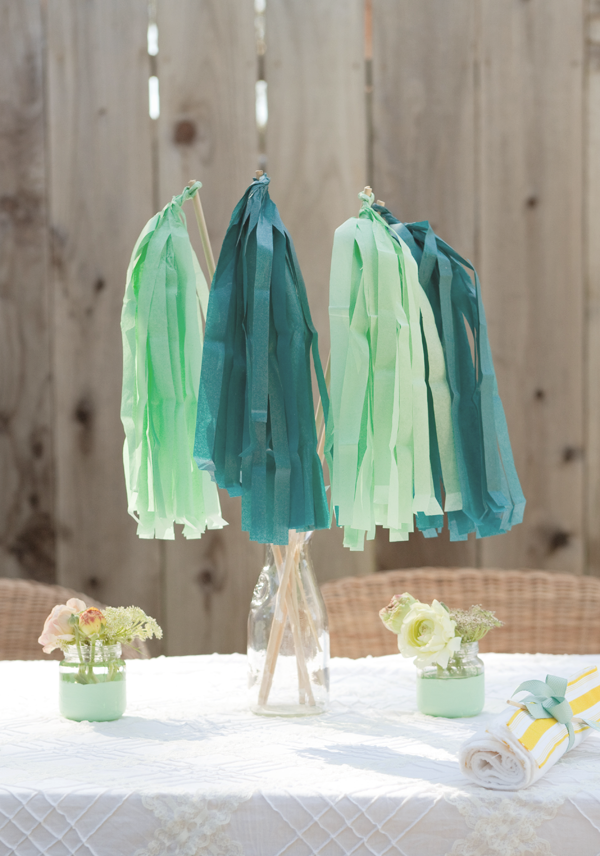
My favorite project to make was actually the tassel poms, a new take on the popular tassel garlands.  I created the tassels from this tutorial, and fixed them to wooden dowels with a bit of hot glue.  They looked great as a centerpiece on the brunch table and held up well when waved around as pom-poms. (Okay sure, the shower was for grown ups, but these would be a great activity to make with your kids!).  I even used the extra tissue to make bits of confetti and tossed it along the table… hooray indeed.

3

4

5

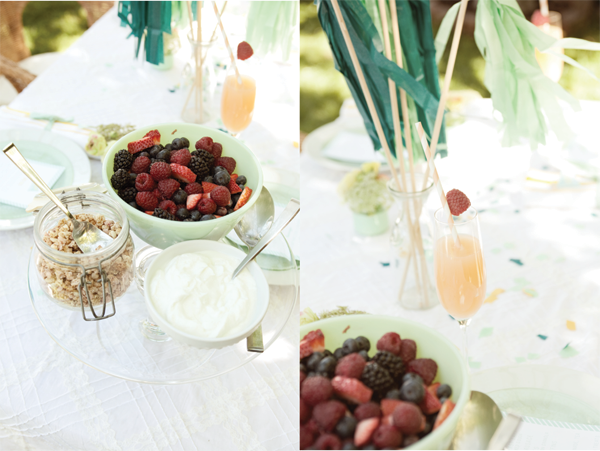
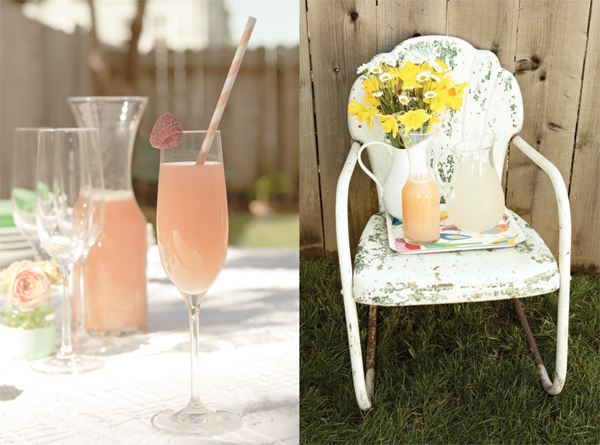
The brunch menu included the following: Zucchini Tart w/ Smoked Gouda + Tomato*, Chicken Apple Sausage, Mixed Berries with Greek Yogurt and Pecan Granola, ‘Baby’ Lemon Muffins with Cream Cheese* and Grapefruit Spritzers (2/3 grapefruit juice + 1/3 sparkling water with lime) to drink.  See below for recipes with an *.

6

7

8

9

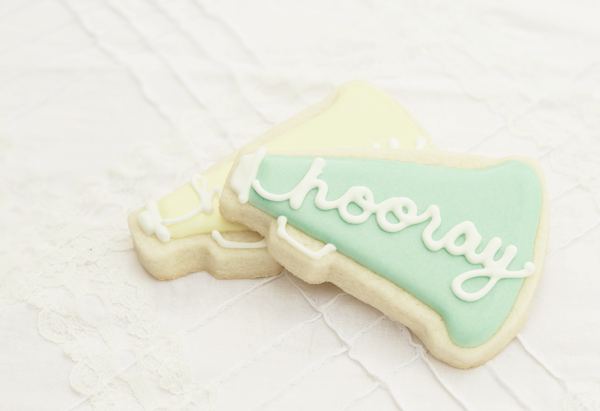
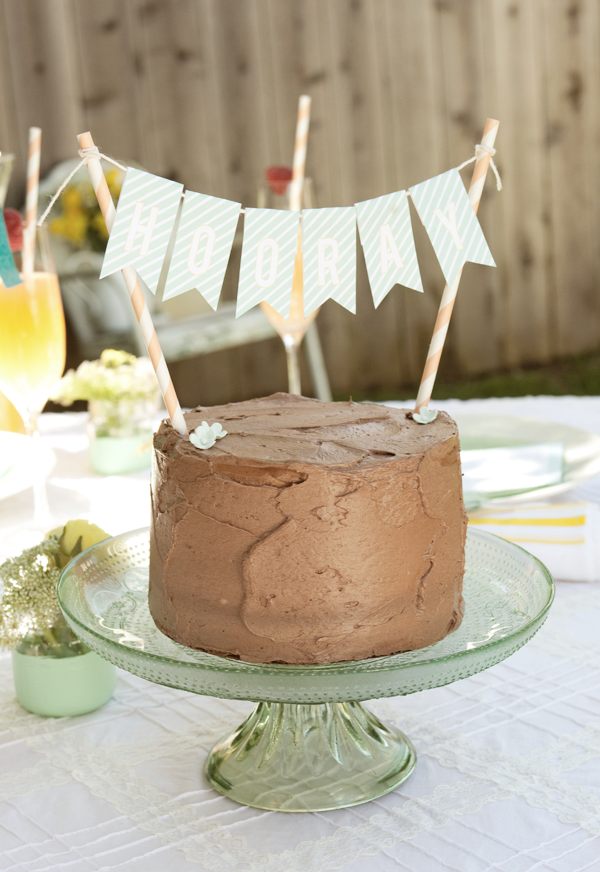
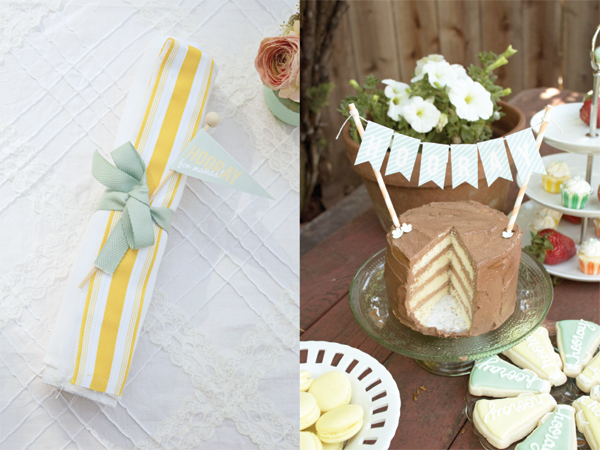
For dessert, Michele of Cakewalk Baking served as my partner in crime once again and baked up the most moist & delicious yellow cake with chocolate frosting… and as a special treat she brought over some incredible homemade french macarons.  Just for fun, I designed a set of hooray bunting flags and strung them across the cake between paper straws.  I also ordered custom megaphone cookies from Auntie Bea’s Bakery with a script hooray to coordinate with the invitation- they were a huge hit!

10

11

The favors were ribbon trimmed burp cloths that I made with Michele’s help (because I can’t sew to save my life), to which I attached custom ‘Hooray for Mamas!’ pennant flags.  The sticks are actually just wooden rock candy sticks, ordered from Confetti Sunshine.

12

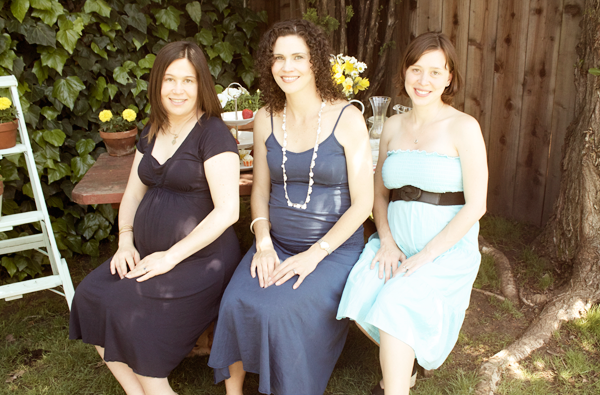
I have Sherry Heck to thank for all the beautiful photos of the shower details.  As special treat for the moms though, I offered up a little maternity photo shoot for each of them after brunch.  I never had maternity photos taken while I was pregnant with my daughter and I regret not having made it a priority… so I thought it would make a nice keepsake whether or not they were professionally done.  The last image is one I took of all three soon to be moms together.  You’ve gotta love that they unintentionally coordinated in ombre shades of blue.

13

Credits
Graphic Design & Party Styling: CAKE.
Cake & Macarons: Cakewalk Baking
Cookies: Auntie Bea’s Bakery
Rock Candy Sticks, Paper Straws, Cupcake Liners: Confetti Sunshine
Photography: Sherry Heck
—————————————————————————————–
Zucchini Breakfast Tart w/ Smoked Gouda
adapted from Food Network
Ingredients 
1 sheet (half of a 17-ounce package) frozen puff pastry
2 tablespoons olive oil 1/2 onion, finely diced
2 garlic cloves, minced
2 medium zucchini, quartered lengthwise and thinly sliced
1 (14-ounce) can ready-cut diced tomatoes, well drained
4 large eggs
1 cup grated smoked gouda
1/2 teaspoon salt
1/4 teaspoon freshly ground black pepper
Directions 
Remove the puff pastry from the package and let thaw at room temperature for about 30 minutes, or until no longer frozen but still cool. Meanwhile, heat the oil in a large skillet over medium heat. Add the onion and garlic, and cook 5 minutes, or until the onion is slightly tender. Stir in the zucchini and saute just until it begins to soften, about 5 minutes. Mix in the drained tomatoes and raise the heat to medium-high. Cook, stirring often, until the zucchini is tender but not mushy and the juices have evaporated. Let cool.
Lightly butter a dark-colored 9-inch tart pan. On a lightly floured surface, roll the puff pastry into an 11-inch square. Fit it into the tart pan. Trim off the overhanging pieces of pastry with scissors. Refrigerate the crust, uncovered, for 15 minutes, or up to 8 hours, covered.
Preheat the oven to 425 degrees F. Beat the eggs in a large bowl. Stir in the cheese, salt, pepper, and cooled vegetables. Spoon the mixture into the tart pan. Bake 25 to 30 minutes, or until the pastry is brown and a knife inserted in the center of the tart comes out clean.
Let the tart cool on a wire rack for 20 minutes before slicing. It is best to serve this tart very warm rather than piping hot.
‘Baby’ Lemon Muffins with Cream Cheese
Ingredients
1 2/3 cups all purpose flour
1 teaspoon baking powder
1/2 teaspoon salt
1 cup sugar
1/2 cup (1 stick) unsalted butter, room temperature
2 large eggs
2 teaspoons (packed) grated lemon peel
 1 tbsp lemon juice
1/2 cup whole milk
Directions 
Preheat oven to 350°F. Stir flour, baking powder and salt in medium bowl to blend. Using electric mixer, beat 1 cup sugar and butter in large bowl until light and fluffy. Beat in eggs 1 at a time. Add grated lemon peel and juice. Mix in dry ingredients alternately with milk.
Pour batter into lined mini muffin cups. Bake about 12-15 minutes, until toothpick inserted into muffin comes out clean.
When muffins have cooled, beat cream cheese and powdered sugar until texture is light and whipped like frosting. Add to piping bag and pipe onto muffins.
Post by : Becca www.cakeeventsblog.com

A Message from Billy Shore

June 1, 2012

For many kids, summertime means food, friends and fun. For families who count on school breakfast and lunch, however, the summer months can be stressful, and limited family food budgets have to stretch even further.

With one if five kids in this nation struggling with hunger, these are children we all know, who live on our streets, go to our churches and play on our Little League teams.

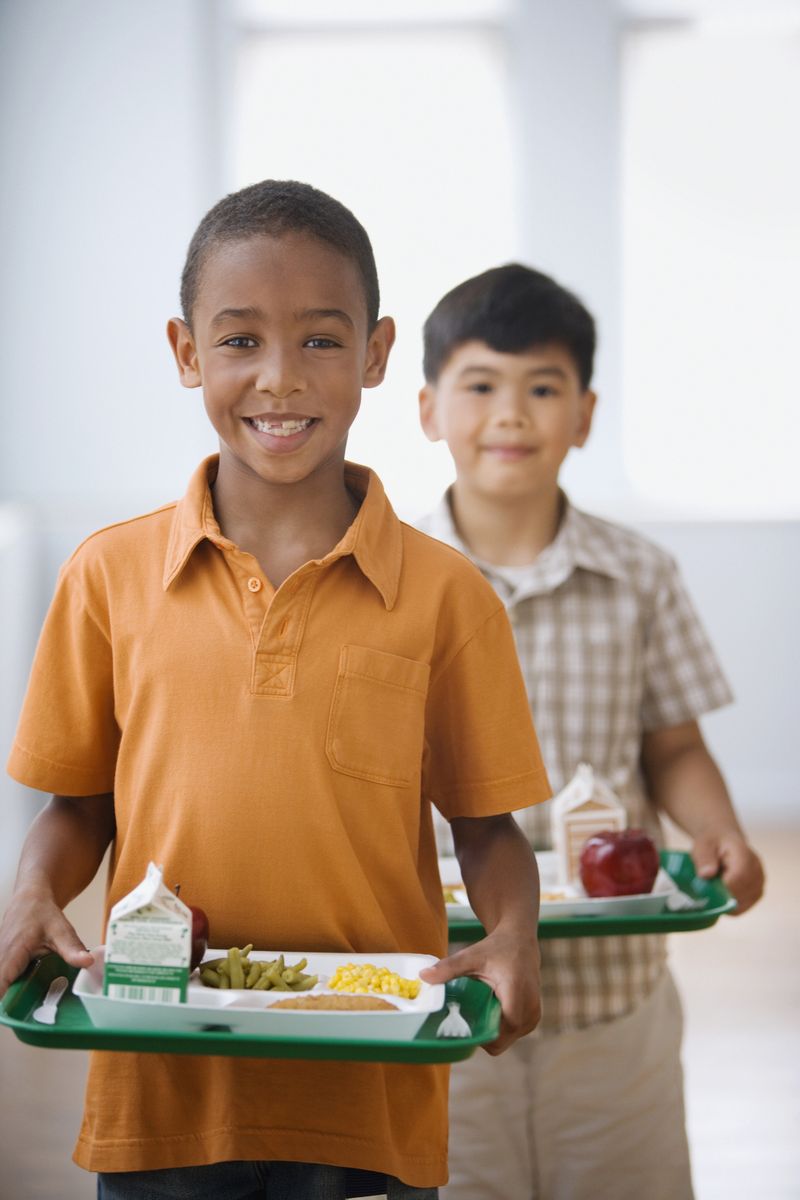
Yet while more than 21 million U.S. kids rely on free or reduced-price school lunch every day during the school year, just over 3 million receive a free meal during the summer. But there is good news. Free summer meals are available to kids at thousands of summer meal sites across the country. These sites – funded by the U.S. Department of Agriculture – help families who may need an extra hand this summer feed their kids.

2-boys-lunch-tray

The problem? Too many families don’t know this program exists or don’t have the means to access it.  This summer, the No Kid Hungry campaign is hard at work with local partners across the country to connect kids with meals this summer. We’re also holding local events across the nation to draw attention to the problem.

Childhood summers shouldn’t be a time for stress. This summer, working together, we can make sure that kids can take a break from worrying about food and just be kids.

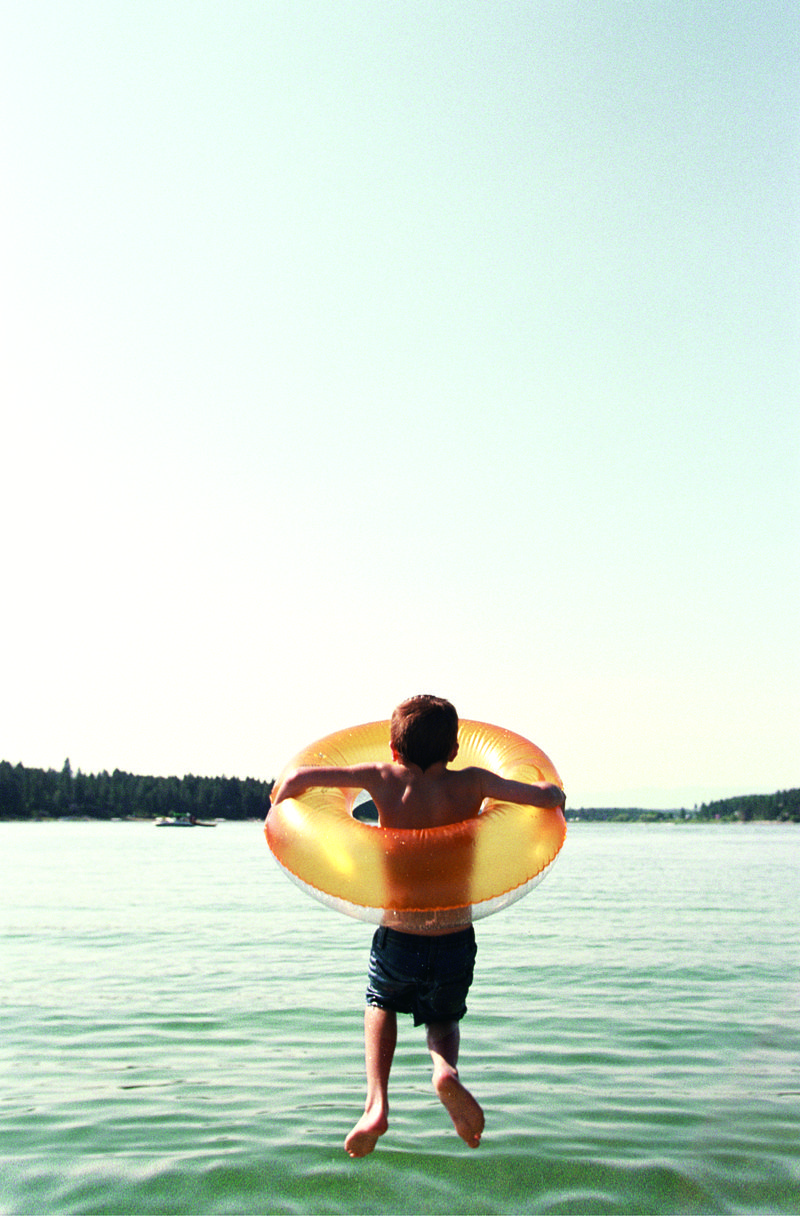
Innertube

Thank you for all you do to support Share Our Strength.

Sincerely,

Billy Shore, Founder and CEO, Share Our Strength

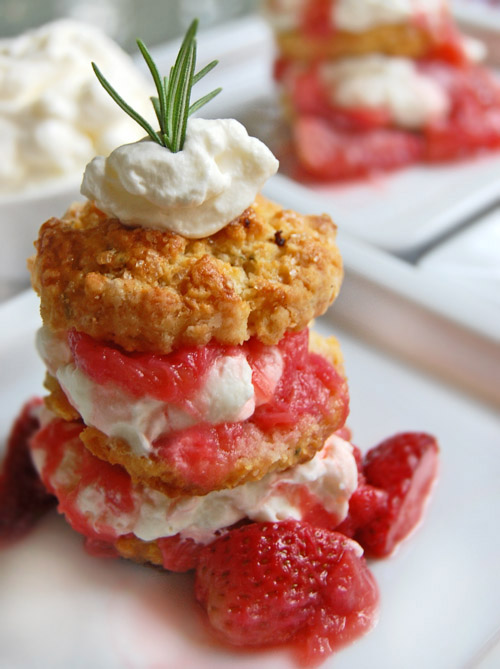
Rhubarb Strawberry Shortcakes with Rosemary and Chantilly Cream

May 31, 2012

1

Although typically paired with fruit, rhubarb is a stalky vegetable, similar in appearance and texture to celery, but bearing no resemblance in taste. It is extremely sour, both raw and cooked, and is often heavily sugared to overcompensate for it’s pucker-power.

You’ll find stalks of varying sizes, with ruby red, pink and grassy green streaks, in stores and farmer’s markets from late March through June. If the stalks have leaves, or if growing your own, leaves should be trimmed and discarded before cooking, as they contain a high oxalic acid content and are potentially toxic to people and pets.

If you give rhubarb’s tart bite a fighting chance by holding back on sweeteners just a bit, it’s distinctive flavor will add balance and complexity to any recipe. And it won’t bite back, promise.


Rhubarb Strawberry Shortcakes with Rosemary and Chantilly Cream


Yields: 6 shortcakes

Method: biscuit method
Allergy Info: contains wheat, gluten, dairy
Fancy Equipment: parchment paper

Ingredients for the Shortcakes:
2 cups all-purpose flour
3 tablespoons sugar, plus extra for sprinkling
1 tablespoon baking powder
1 teaspoon kosher salt
12 tablespoons unsalted butter, cold, diced
2 eggs
2 teaspoons fresh rosemary leaves, finely chopped
1/2 cup heavy cream
1 egg beaten plus 1 tablespoons milk, for egg wash
6 small top sprigs of rosemary

Ingredients for the Strawberry-Rhubarb Compote:
3 cups rhubarb, leaves removed, washed and cut into 1/2-inch pieces
1/2 cup sugar, or to taste
1/4 cup orange juice
Pinch of salt
1 pint strawberries, washed and quartered

Ingredients for the Chantilly Cream:
1 cup heavy whipping cream
2 tablespoons powdered sugar
1 teaspoon pure vanilla extract

Make the Biscuits:
Preheat oven to 400 degrees Fahrenheit.

Sift the flour, sugar, baking powder, and salt into a large bowl. Using a pastry blender, cut in the butter until the mixture resembles a course meal with pea-sized pieces of fat. In a separate bowl, lightly whisk the eggs, rosemary and heavy cream. Add to the flour and mix until just blended. The dough should be sticky, but not wet.

Place the dough out onto a well-floured surface and form the dough into a rough circle, one inch high. Cut 6 biscuits with a fluted or straight cookie or biscuit cutter and place on a baking sheet lined with parchment. Brush the top of each biscuit with the egg wash and sprinkle with sugar.

Bake for 20 minutes or until the outside is slightly golden around the edges. Do not open the oven door during the first 15 minutes, to allow the biscuits to rise properly. Remove from oven and cool on a wire rack.

Make the Compote:
Add the rhubarb, sugar, orange juice and pinch of salt to a sauce pan. Bring to a boil and reduce to a simmer. Simmer for 10 minutes and add half of the strawberries. Simmer for another 15 minutes, or until the rhubarb is just tender but still toothy. Remove from heat and allow to cool. Add the rest of the strawberries to the cooled mixture and stir to incorporate.

Make the Chantilly Cream:
Beat the cold cream with a wire whisk or hand mixer until soft peaks begin to form. Add the powdered sugar and vanilla and continue to beat until stiff peaks just barely begin to form.

Assemble the shortcakes:
Split shortcake in the middle, like a hamburger bun. Place the bottom of the biscuit into a shallow bowl and spoon some of the compote over the biscuit. Add a generous spoonful of Chantilly cream. Place the top part of the biscuit on the cream and top with a small amount of compote and another dollop of cream. Place a small sprig of rosemary on the cream. Repeat for each shortcake.

Chef’s Notes:
Combine the dough scraps to create additional biscuits if desired. The second batch of biscuits will be slightly tougher and will not rise as high as the first, but will have the same flavor.

Biscuits can be split into three layers if sliced carefully. This will allow you to stack more ingredients for a more dramatic presentation.

Thyme or lavender in place of the rosemary also works well in this recipe. Lemon zest can also be added.

Need more tasty recipes and delicious bites? Check out our Let’s Eat Pinterest Board.

Post by Dawn Viola : dawnviola.com

100 (More!) Things to do This Summer

May 30, 2012

Post by Christina Williams of justcallmechris.blogspot.com

Our school isn’t out till mid-June, but I know many of you are officially done with school by now. If your house is anything like mine, the novelty of summer break will wear off quickly, leaving you with many days of “What should we do now?” Last year’s Summer List was a tremendous hit with my kids that we’ve written an entirely new list for this year.

Anyone up for a challenge? Try completing BOTH lists this summer.

Two hundred fun, easy activities should pretty well annihilate the summer boredom phenomenon. At least, for a week or two. Then you’re on your own. 😉

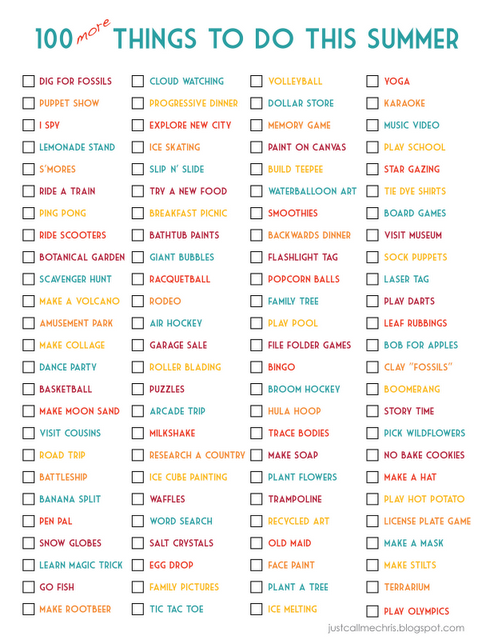
I’ve noticed last year’s list making the rounds on Pinterest, so I thought some of you might like them as free printables.

100 More Things-01
I’ll be back later with some follow-up posts detailing the adventures we checkoff the list.

Have a great summer!

Post by Christina Williams of justcallmechris.blogspot.com

Things to Make – 3D Construction Paper Pictures

May 29, 2012

roll     A few weeks ago, while the kids spent the morning painting, I sat at the table with them and cut construction paper into strips. I then "tinkered" with the strips (for lack of a better term) – rolling them up, cutting patterns onto them, folding them in different ways. I didn't really have a plan, it just felt nice to make something three-dimensional for a change (other than food). Anyways, the kids started to watch what I was doing and soon they started folding and crafting their own strips. We spent the rest of the morning making pictures with our scrap-art – dogs, flowers, faces. We treated the strips like blocks and everyone (even two year old T) had some creative ideas. I think we might try this again some time, see what else we can come up with. dog

Post by Darcy : bedtimemonsters.blogspot.com

Great American Bake Sale

May 28, 2012

There is one staggering fact that drives people to get involved with Share Our Strength; there are more than 16 million kids in America struggling with hunger.  It can’t be ignored.  I am proud to say that there are volunteers across the country who have said they won’t stand to see kids go hungry.  I have gotten to know so many of our Great American Bake Sale volunteers.  And I have to say, some of our most dedicated volunteers are kids! 

I don’t have to tell you about the power of kids and their ability to make a difference.  I get to see it every day.  Kids of all ages hosting bake sales in their communities with their friends and families.  They put together incredible events that bring attention to and raise vital funds for a cause they care about.  To me there’s nothing more powerful than kids helping kids. 

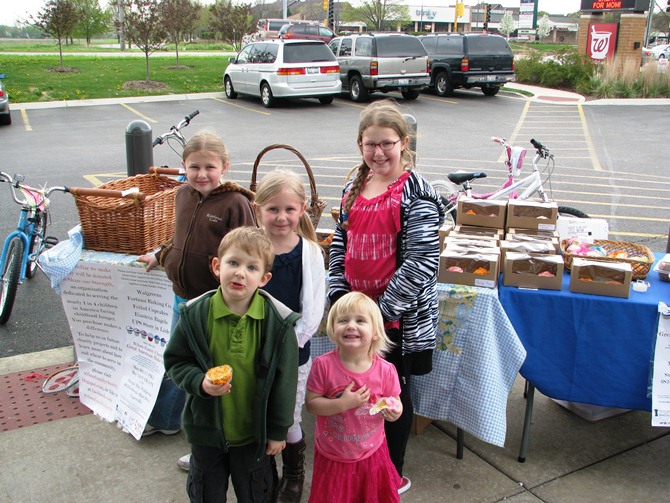
Here’s a story from one such kid, 11 year old Kate from Naperville, IL.  Kate and her entire family hosted their first bake sale last year and I want you to hear all about it!

“My mom came up with the idea of having a bake sale for Share our Strength and I loved it. For one, it would benefit the children in America who really are starving and in need of food, and, I would be able to give back while doing one of my favorite activities: baking.

While I really love to bake, I knew I wasn’t just baking for fun. There are kids in America, 1 in 5, who are not getting the nutrition they need to be healthy. From the very beginning, I knew that by baking and selling goods, I would be able to help make a difference to those who need food. I have always been blessed to have enough and my heart goes out to children who don’t have enough. The whole experience of giving to others has been incredible.

The reaction from people in the neighborhood was really immense. We had more than 30 families and businesses donating goods or supplies. We had volunteers helping with set up, clean up, delivering goods to the sale location, and my entire family worked the sale. We raised over $2200! Our sale was so large that a reporter interviewed us.

My experience with the first sale has motivated me to serve more. The Share our Strength organization is incredible, and I am really happy to know that people care about others who have less than we do. If you are considering doing a sale but you’re not sure if you can, just try a small one because every dollar you raise can really make a huge impact on the children in America who don’t have enough food to eat every day.”

Bakesale

Thanks to Kate and kids just like her, Share Our Strength is making strides in the fight to end childhood hunger in America.  You too can play a part by hosting a bake sale of your own.  Signup today at www.GreatAmericanBakeSale.org/signup and together we can bake a difference!

By Jessica

Jessica Bomberg is the Manager of Great American Bake Sale, Grassroots Fundraising and Youth Engagement at Share Our Strength.  Jessica truly enjoys helping volunteers across the country give back to a cause that everyone cares about.

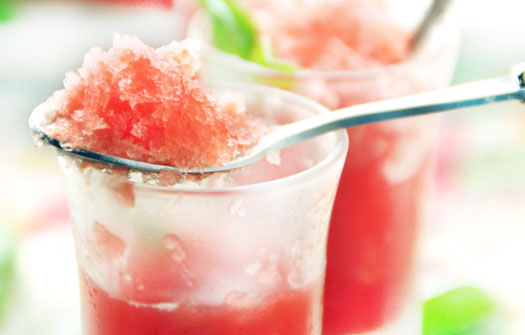
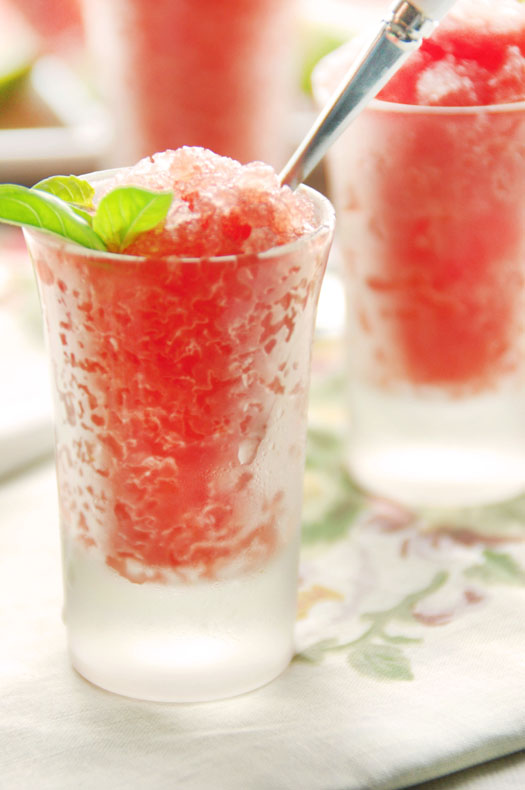
Watermelon Granita with Fresh Basil

May 25, 2012

1

A prelude to summer hit our farmer's market with the first appearance of organic watermelons last weekend. We brought home two: one to eat, and one for granitas.

Granitas are the Italian version of an American snow cone/water ice/shaved ice, but better. Originating in Sicily, the texture of the granita varies depending where on the island from which it came. Here in the states, we simply use the tines of a fork to scrape the fruit mixture as it's freezing, creating a unique texture that is both smooth and slushy, and slightly chunky.

2

Watermelon Granita with Fresh Basil

Prep time: 10 minutes + 6 hrs. freeze
Allergy info: soy-free, dairy-free, gluten-free

Ingredients:
1 (4 to 5-lb.) organic seedless watermelon
1/4 teaspoon kosher salt
1/4 cup organic sugar
1/2 cup whole fresh basil leaves, washed and dried

Directions:
Remove colored flesh from the watermelon rind. Discard seeds, dice watermelon flesh. In the bowl of a food processor add diced watermelon, salt and sugar; pulse until smooth. Place a fine mesh strainer over a large bowl. Pour watermelon mixture into strainer. Using a spoon or spatula, press watermelon mixture through strainer; discard any seed pieces and large pieces of pulp.

Pour strained watermelon mixture into a large baking pan or into two large rimmed baking sheets. Cover pan with plastic wrap. Place pan in freezer; freeze 3 hours. Lift plastic wrap and using the tines of a dinner fork, gently scrape the frozen watermelon creating the appearance of shaved ice; cover and freeze 2 hours. Uncover, scrape frozen watermelon; freeze 1 hour or until all liquid is frozen.

Place glasses or bowls in freezer at least 15 minutes before serving granita. Remove granita from freezer, scrape with fork to loosen and fluff ice crystals. Spoon granita into frozen glasses or bowls. Garnish with fresh basil leaves. Serve immediately.

Post by Dawn Viola : dawnviola.com

The Perfect Hike

May 24, 2012

1

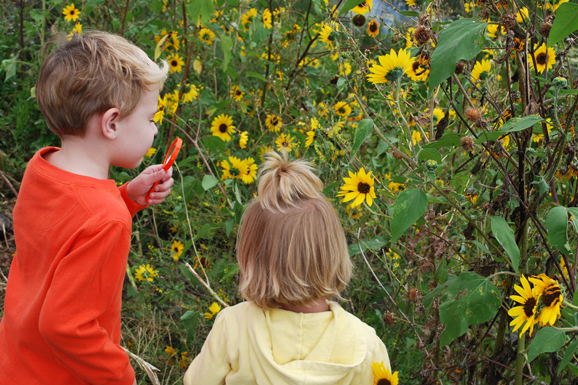
Make your next outdoor hike an adventure with one simple toy: a magnifying glass.

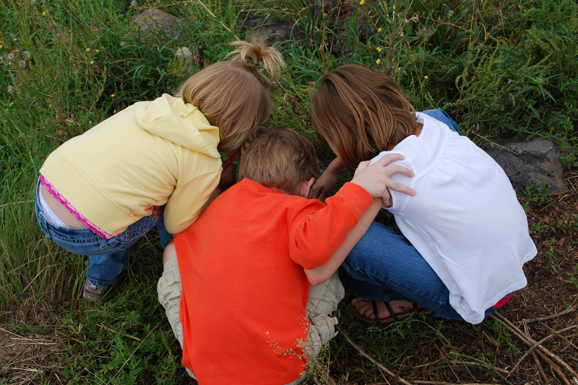
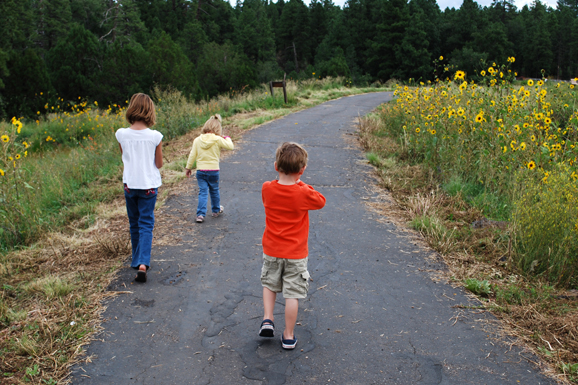
Last weekend our family took a weekend trip up to Pinetop, Arizona to get out of the hot Phoenix sun and to explore the great outdoors. We went on a hike (read: glorified walk on a paved pathway around a tiny lake). Before we left I picked up a few new toys. The clear winner of the trip: small orange magnifying glasses, used on our hike. The kids, ranging in age from 2 to 7 years, loved them. Let me repeat that: luh-ved them!

Superkids inspecting flowers…

2

Superkids inspecting a lizard…

3

Superkids inspecting as they walk…

4

The magnifying glasses were such a hit, here’s Liam two days later still inspecting everything—even at the resort playground!

5

Mark this purchase down as an official Supermom Moment!


Post by Aimee and Bettijo : www.supermommoments.com


Clothespin People

May 23, 2012

Summer is coming…which means school will soon be out and there will be many little hands looking for things to do.  

With a bit of imagination, a handful of craft supplies and a maybe a little help from some bigger hands you can turn simple clothespins into little friends.   Carosel, train, lazy days and clothespin people 036

Our project supply list included:

Clothespins

Fabric scraps

Pipe cleaners

Markers

Yarn

Popsicle sticks

Glue

Scissors

Imagination

Sit back and watch how your child thinks about what they want to do and then tries to figure out how to make it happen.  Step in to help with cutting or gluing or holding something in place for them.  And soon enough you will have some fun little handmade friends for them to play with!

Carosel, train, lazy days and clothespin people 040

Carosel, train, lazy days and clothespin people 042

You can get your hands "dirty" too and make them some fairy friends.   IMG_6468

Fairy friend craft supply list…

Clothespins

fabric scraps (cut into a rectangle for clothes)

hot glue (to glue on cap and clothes)

acorn caps (to use as hats)

acrylic paint (for faces)

felt (for wings)

This little project can be done with the help of little kiddos by letting them pick out their favorite colors, etc.  Of course older kids can do this project on their own, or you can make them as a special surprise to take along on a road trip or to give as a gift.   IMG_6462

This little one is ready for a ride in the pocket of a little bag… IMG_6504

There you have it…with a little bit of imagination you've busied eager hands, had some fun and made new friends!!  

PS.  This is a fun project to do with lots of little hands all at the same time.  It's so interesting to see how each child comes up with different ideas!  

Post by Jane : Buzzmills

DIY – Children of the ’80′s

May 22, 2012

I posted this DIY a while back on my personal blog and I thought I should share it with all of you too.

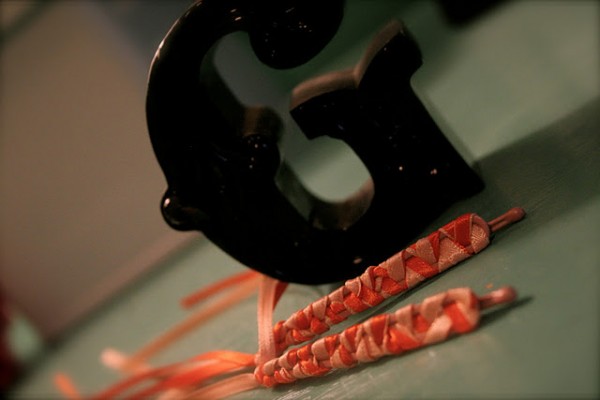
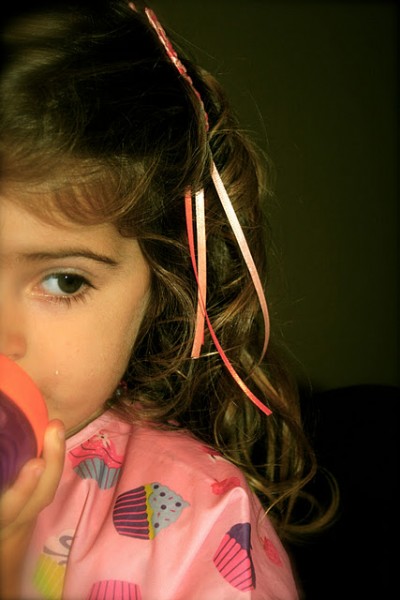
Remember those laced up ribbon barrettes from the mid-80′s that had long strands of ribbon falling from them?  You know you had a pair. Mine were purple and light purple and I think I often wore them with a pair of mint green (yeah, I said mint-green) linen over-alls that my mom’s friend made for me. I don’t know why I loved them so much (the barrettes, not the overalls); they created the illusion of long hair?, all the cool kids had them?, they were purple?, all of the above? Probably.

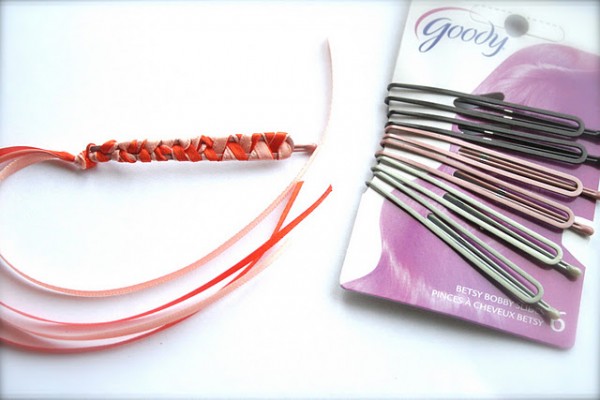
Well–I think they’re cool again, especially for two year olds named Georgia, and most definitely your own girlie girls. And if you have a little cutie it’s way easy to make these for them! I modified them a little bit and didn’t use barrettes but these big bobby pin/clips that Goody makes. They stay in my daughter’s hair better and they hold more hair than the old school barrettes did.

1

2

All you need is some fabric ribbon…the kind that comes on a spool for about $1 at Michael’s, Joanne’s, or Hobby Lobby and these bobby pins that you can pick up at any drugstore USA.

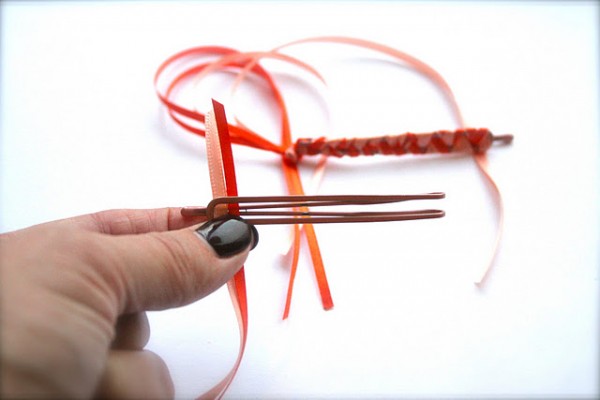
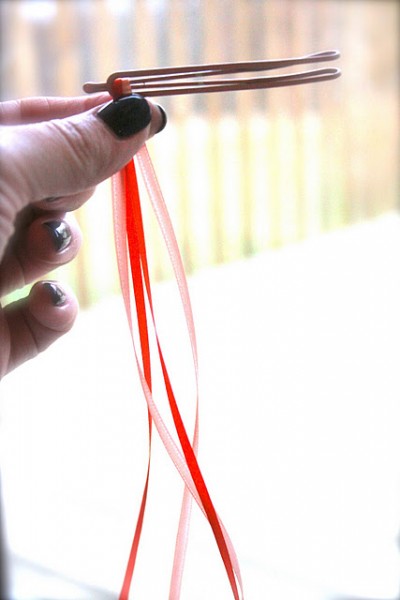
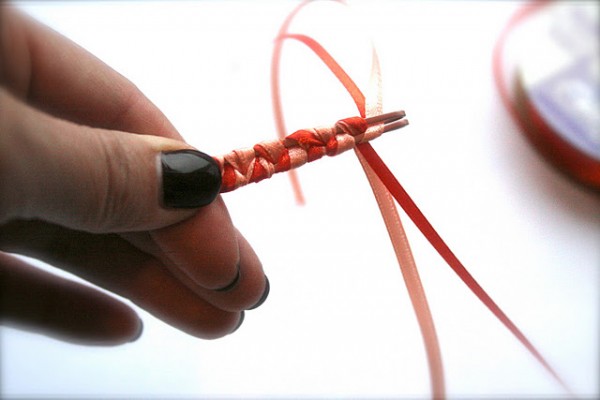
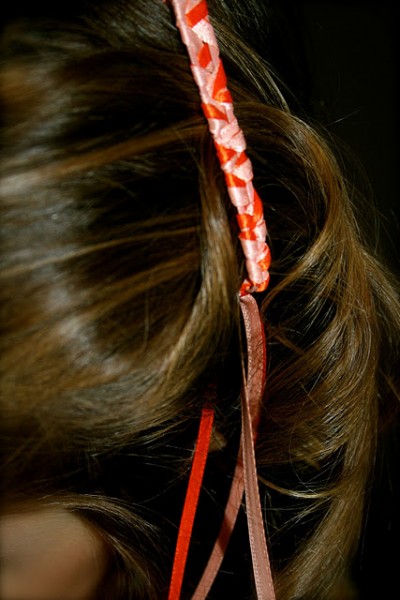
Cut about a foot of ribbon. Use two different colors.  Put them together and thread them through the top of one side of the bobby pin (when I say top I’ll be referring to the part of the bobby pin that will still show once you put it into your hair).  Start at the front of the bobby pin too–the part that would slip into your hair first.

3

Pull the ribbon all the way through the top of the bobby pin until it hangs evenly in two sections.  In this picture it looks like I have the ribbon hanging over the part of the bobby pin that would be underneath your hair–it wasn’t, the picture just looks weird.

4

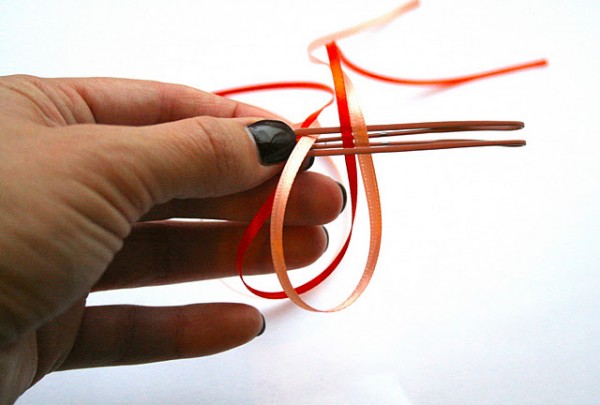
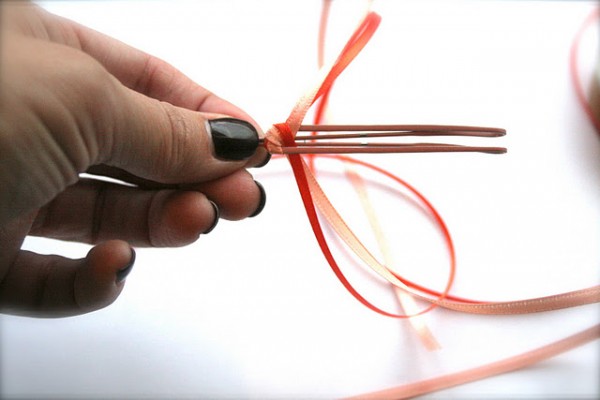
Bring one section of doubled ribbon under and up through one side of the bobby pin and pull it tight. Then weave it around the other side of the bobby pin from the top and pull it back through to the other side. Continue to do this alternating from one side to the other kind of like you’d do if you were braiding hair.

5

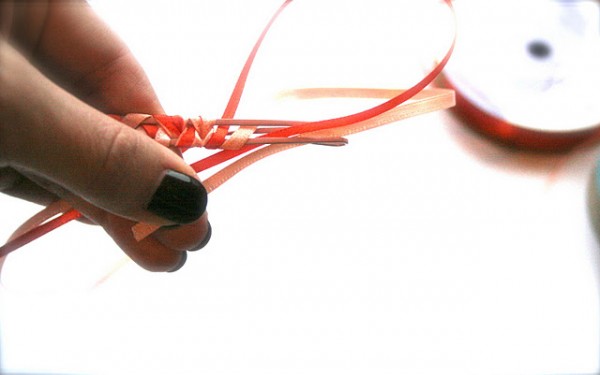
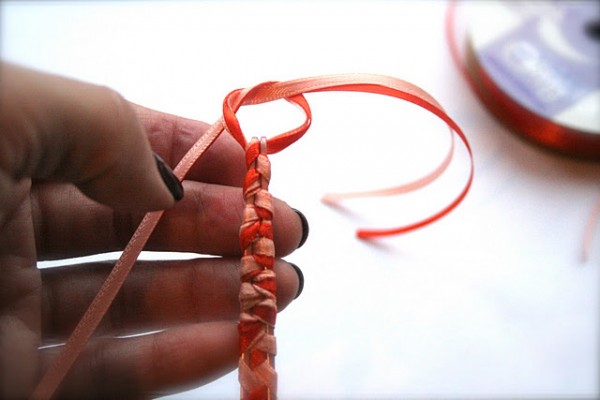
It’s okay if it looks messy as you work. Just keep pushing the “braid” tighter as you work down the entire length of the bobby pin.  It will look better at the end and it’s okay if it isn’t perfect.

6

7

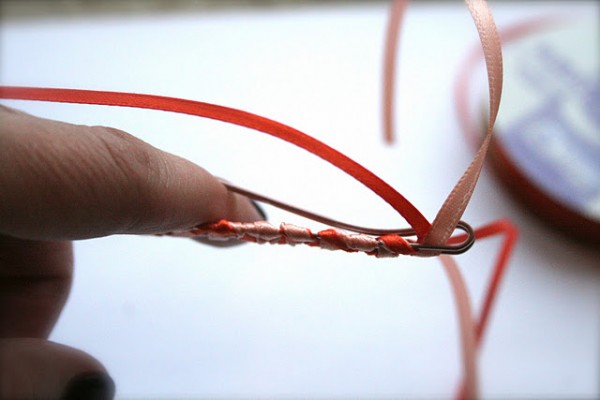
A helpful hint…..I spread the bobby pin apart (like above) and leave my finger in there…..yep….it does kind of hurt…..but this will ensure that you don’t loop the ribbons around the bottom of the bobby pin–which would “lock” the bobby pin and not allow you to open it when you put it into your hair.

8

9

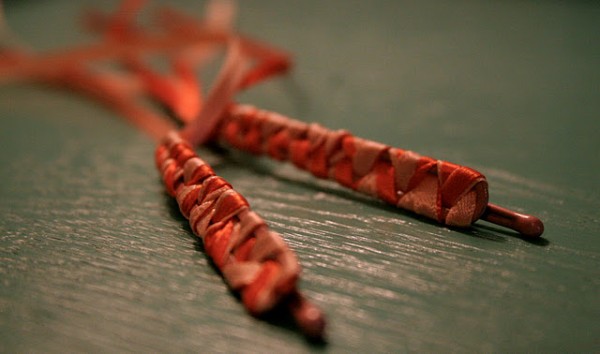
When you get to the end you should have about seven inches of ribbon left – tie the two sections in a knot to finish off the barrette.  This will keep the braid tight and give you that truly 80′s flair…you know you want it!

10

11

12

13


Post by Maggie Terryn : Mom Colored Glasses

Global Influences

May 21, 2012

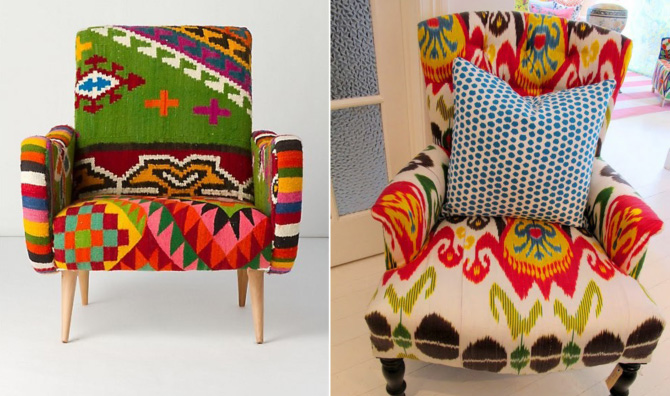
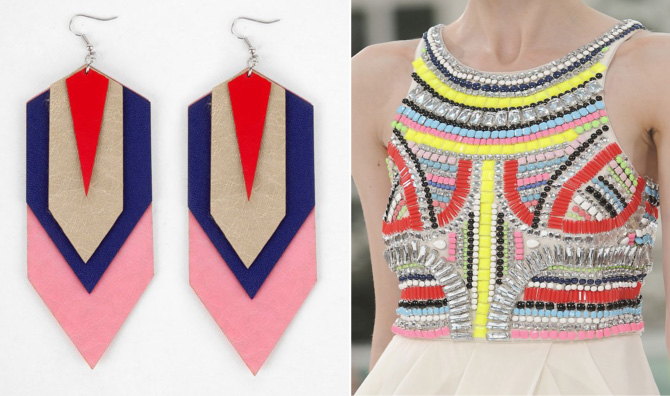
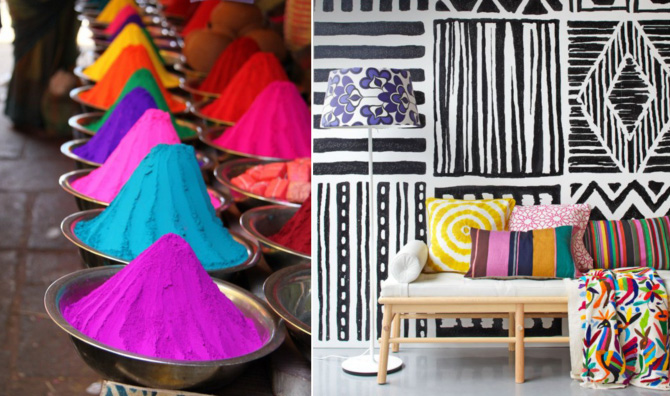
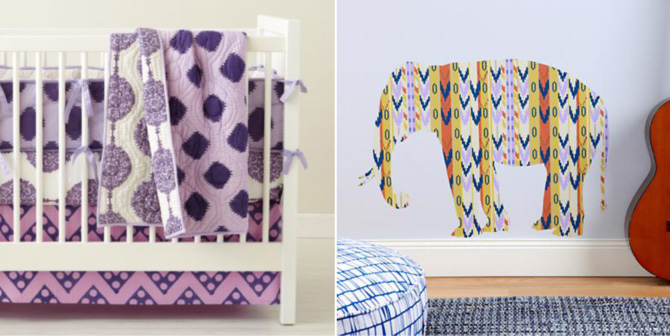
Global Influences abound in fashion and home décor right now. From rugs, to chairs to jewelry these patterns and saturated colors can be spotted in all shapes and sizes. Below are some inspiration and product that can bring this trend into your own home. 

Think bright and bold patterns and graphic pairings:

Global_1

                                             1.                                                                        2.    

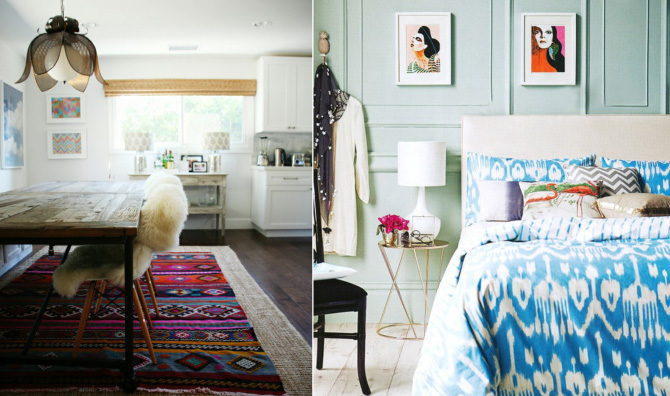
Geometric shapes and mosaic motifs:

Global_2

                                                3.                                                                        4.

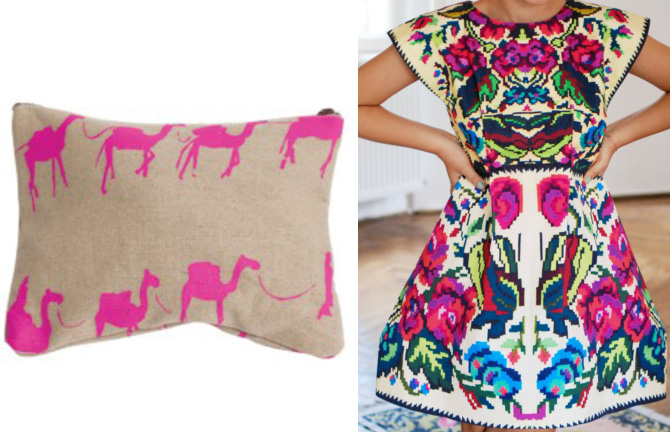
Punches of color, brights and jewel tones:

Global_3

                                            5.                                                                                6.

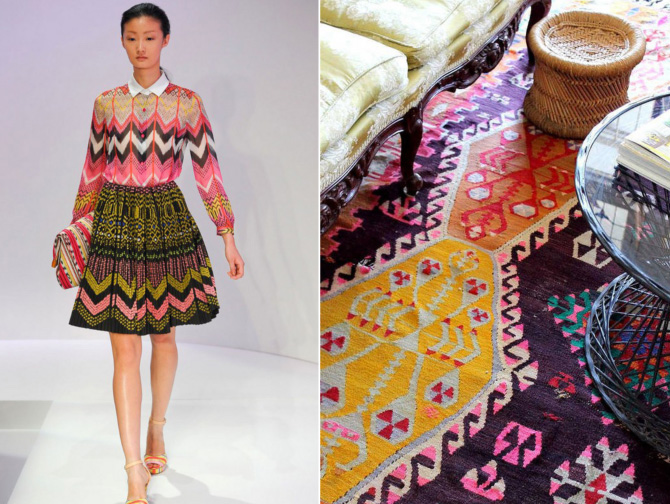
Aztec and Batik Patterns:


Global_4

                                            7.                                                                                        8.

Tribal and Eastern Influences:

Global_5

                                                    9.                                                                    10.

Global_6

                                                    11.                                                                        12.

Whether you go all out and deck out a whole room, or just add a hint of the trend through an accent piece, the below Land of Nod pieces are a great way to add this global influence into your space:

This Moroccan inspired bedding is hand blocked using traditional techniques; each stamp is made by hand and individually printed on the fabric.

Global_7

                                              13.                                                                        14.

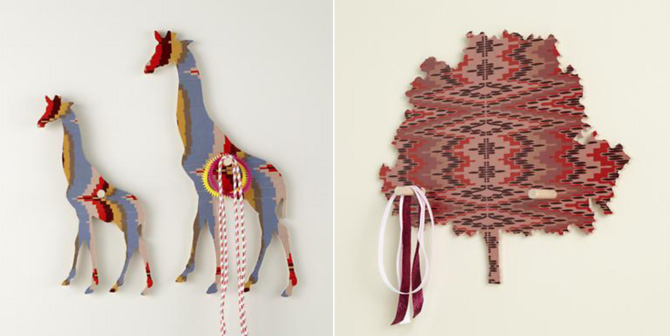
African inspired shapes meet graphic prints in these wooden hooks:

Global_8

                                                15.                                                                    16.

Our Totally Tubular baskets are all hand woven in Thailand.

Global_9

18.

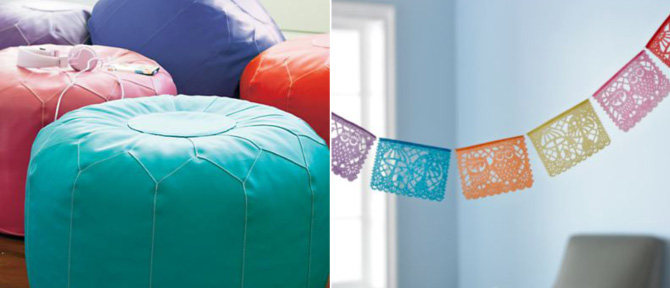
Bring in some great geometric color with these felt garlands:

Global_10

19.

Jewel tones meet a traditional Moroccan inspired pouf.

Global_11

                                                20.                                                                    21.

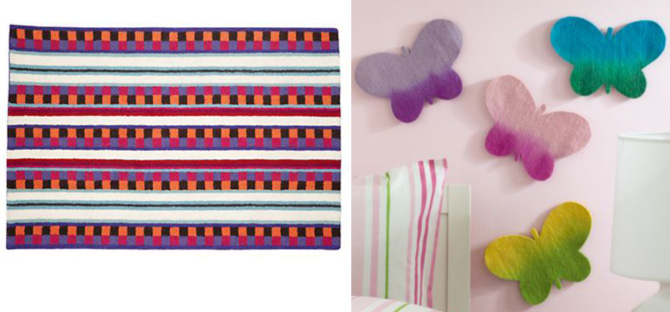
This geometric tribal inspired rug has just the right pop of color. Pair it with our hand felted ombre butterflies on the wall.

Global_12

                                                22.                                                                            23.

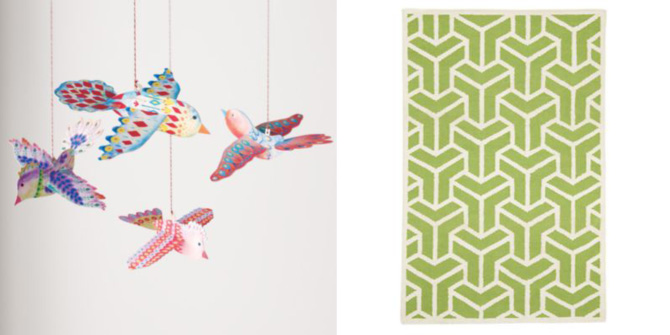
Graphic patterns abound on these brightly colored birds. Fly them over a bold geometric rug.

Global_13

                                    24.                                                                                25.

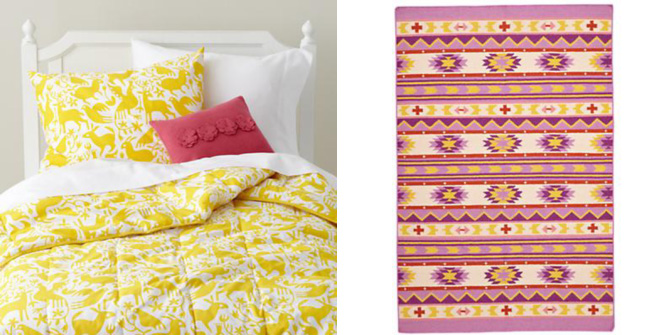
A print inspired by traditional Mexican otomi pairs nicely with an Aztec durrie rug hand made in India.

Global_14

                                                    26.                                                                    27.


By Sarah Culbertson  

Once upon a time a fashion plate from Seattle met a childrens retailer from Chicago, and it was love at first sight.  After spending a lot of time together at the mall, they both knew it was a perfect match. So Sarah packed up her fabulous Kate Spade suitcase and headed for the Windy City. Where they lived happily ever after, designing and developing textiles for little kiddos everywhere.

Yarn-Wrapped Letters

May 17, 2012

Post by Raechel of www.raechelmyers.com
Yarnlettershero

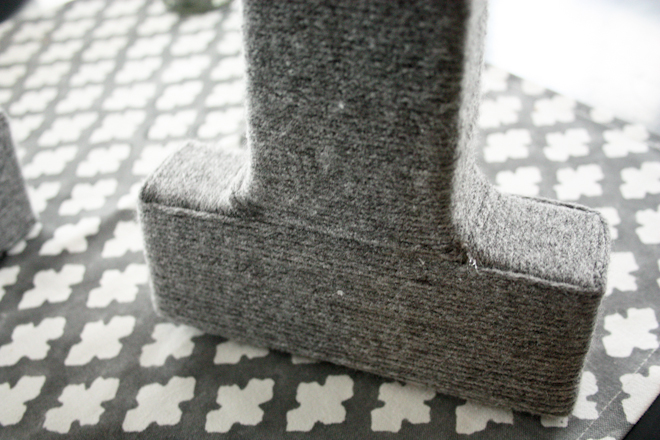
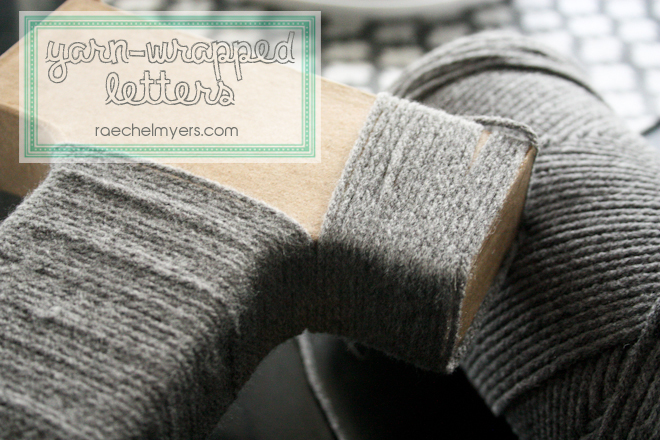
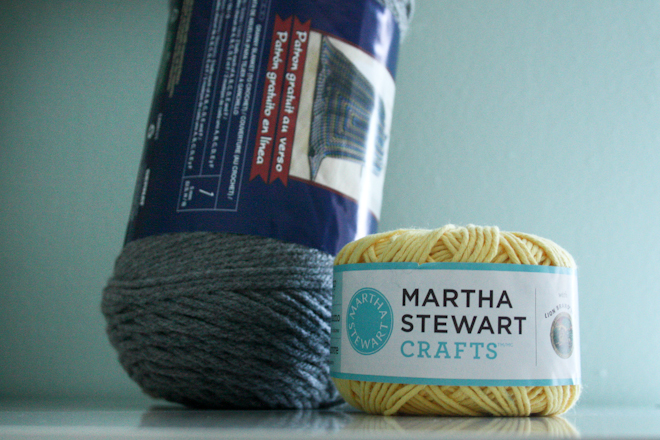
When I re-did the playroom in February, I wanted to add a crafty, personal touch to the window wall. I love a good project, and I needed something big, so I bought two giant cardboard letters (“O” and “H”, of course) and some pretty grey yarn at JoAnn’s one day while I was there with my neighbor.
2

(I grabbed a small yellow too because I thought I might like to add rugby stripes to Oliver’s “O” to make it boyish.)

I really had no idea how I was going to pull it off, but I figured if I just started in one place and kept going, I would figure it out as I went. I photographed my progress on the “H” (I thought it would be a lot more tricky than the “O” and I was right!) because I thought it could be helpful to show y’all what I learned along the way.

Join me?

WHAT YOU’LL NEED:

  • yarn – 1 skein did it for each letter
  • hot glue gun and glue
  • scissors
  • big cardboard letter or symbol (I got mine at Jo-Ann, but that was before I knew the folks at The Land of Nod sell a great font in a good size for only $3.95/ea!)

GETTING STARTED
Before you begin, one thing I would suggest in retrospect that I did not do: paint (spray or brush) your letters the color of the yarn you’re using. That way, if you have any inadvertent gaps in your wrapping, it won’t be a big deal.

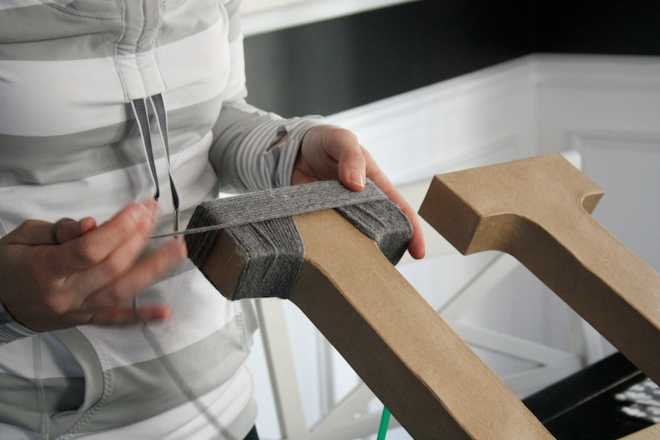
I began on one of the four ends, making sure the curves of my serif were covered nicely. I dabbed the end of the yarn with hot glue to get it started, but I didn’t use a lot of hot glue along the way because I didn’t want it to mess with the neatness of things.

I also decided not to be concerned with the very top and very bottom ends of the “H” because they were initially going to be set up on a shelf so no one would see that. With that in mind, I let the tops be messy and moved from the inside curves to the front and sides of the serif.
3

Working my way down the serif easily transitioned into the straightaway because I’d already covered the curves sufficiently.
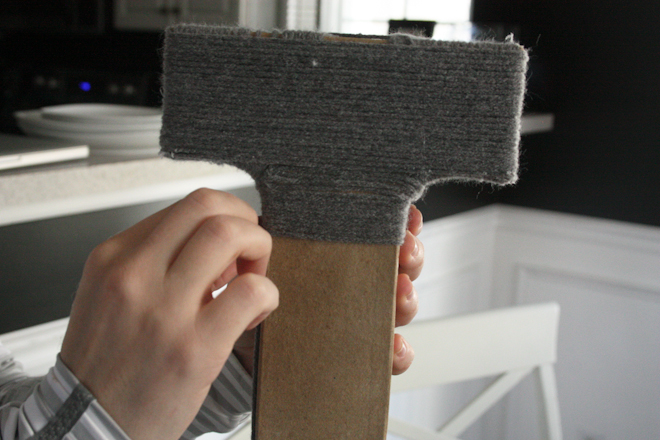
4

I just wound my way down the straight part, sometimes fast and imprecisely a bunch of times, then I’d go back and slide it all gently up to make things look tidy and even again. It seemed to make things go faster.

And when I got to the intersection, I had to make a decision.

My best idea was to fire up the hot glue gun again and make-believe a bunch of back and forth weaves until I got past the intersection. This took a little more care, of course. But I’m on the other side of it now and I can bear witness to the fact that this is totally the way to go!
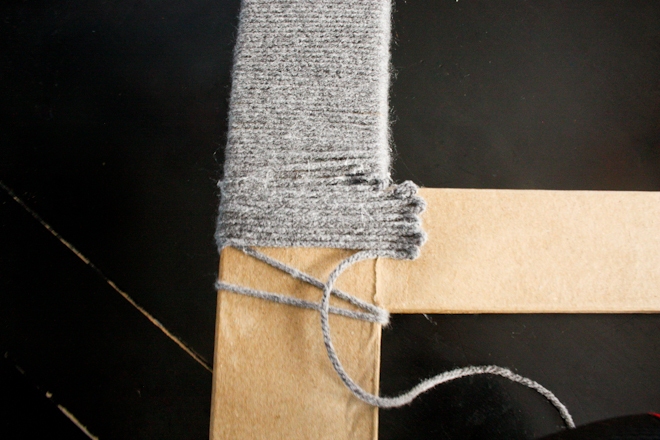
5

This is how it will look when you’ve gone down both sides.
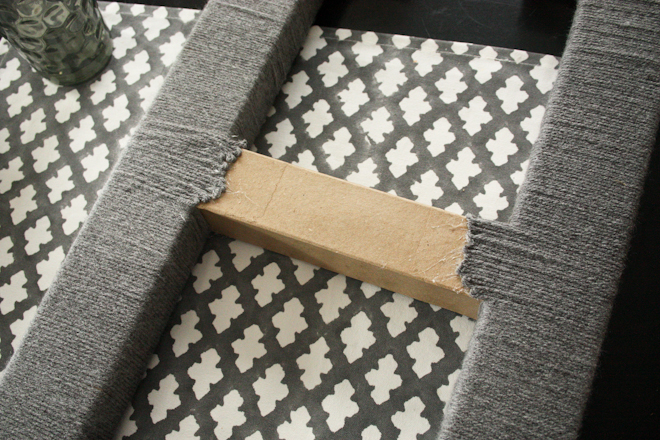
6

See how it looks legitimate when I cover up all the crazy?
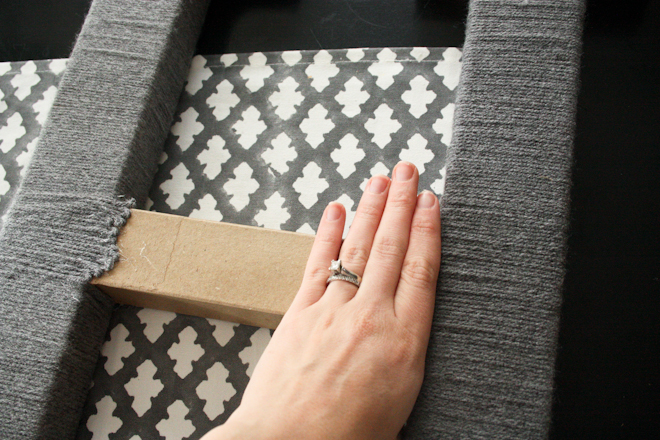
7

Okay, so after the intersection, go down the rest of the straightaway until you get to the serif on the other end. You’ll do this one a little differently.

Transition directly from the straightaway into the curve. It’s so neat and tidy – feels awesome.
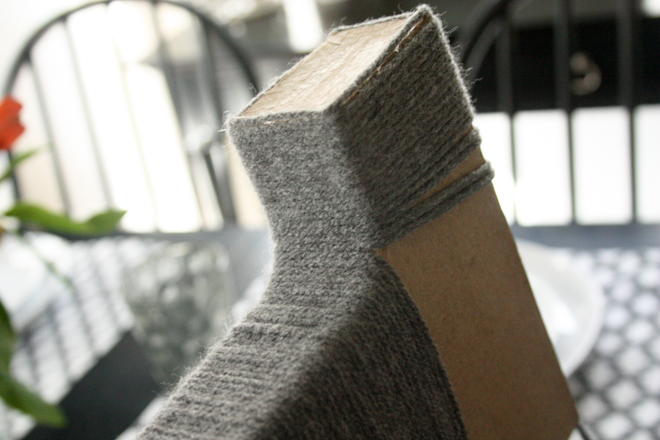
8

Be generous with your hot glue as you reach the edges, then, as seamlessly as you can, begin wrapping in the other direction to cover the front side of the serif.
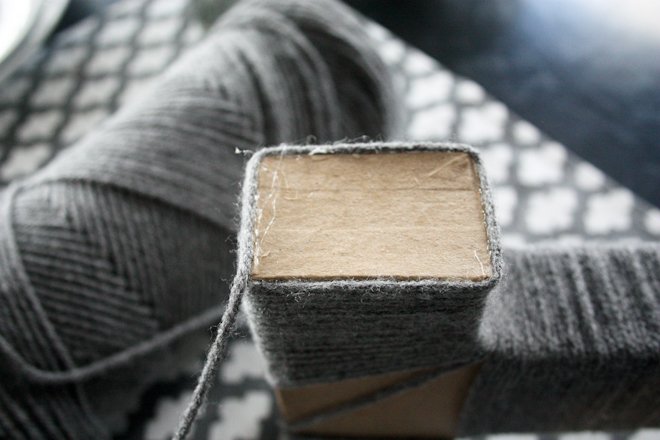
9

See what I mean?

10

So now, once you’ve done that on both sides of the “H” (yes, I realize that there’s a pretty good chance you’re not actually wrapping the letter “H”, but hopefully these method will work for lots of letters!), all that’s left is the middle!
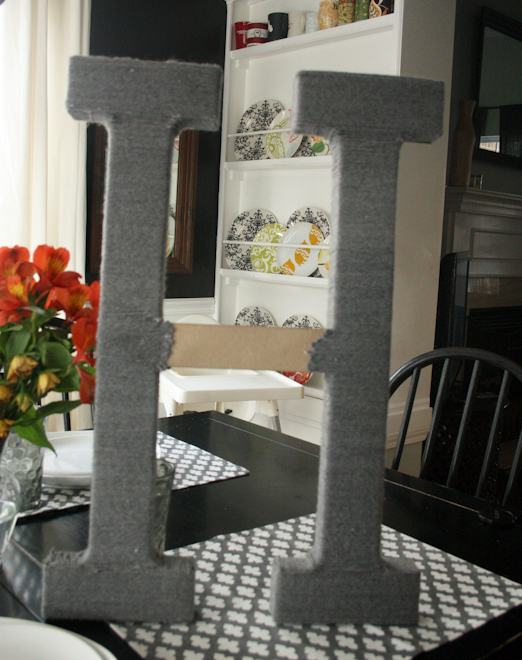
11

Start with a dab of hot glue and wrap all the way across. And that’s it – you’re finished!
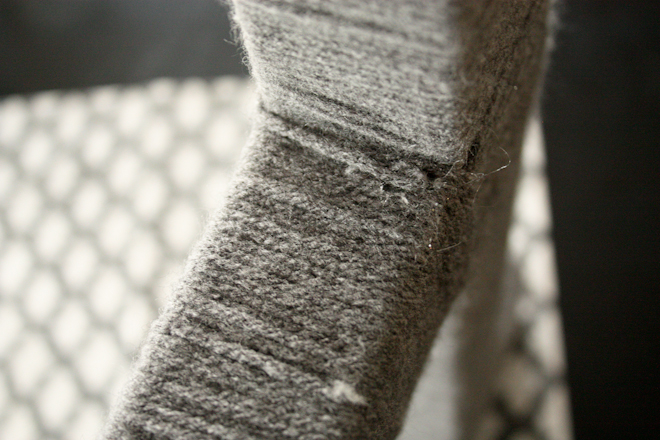
12

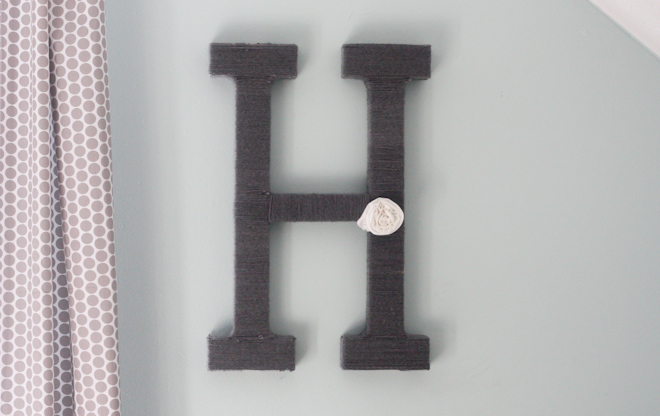
Here’s my pretty little “H” all finished. I made a pretty little flower with some white knit fabric and pinned it on. You know, to make it girly.
IMG_7457

And in case you were wondering about the “O”, it’s really just as simple as you would imagine.
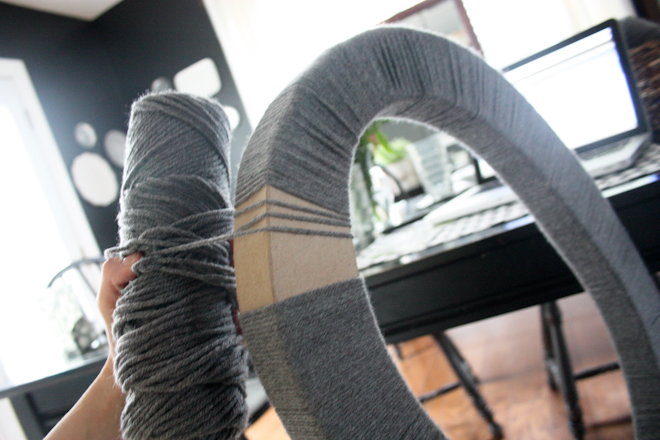
13

Just wrap and wrap and wrap! (And hope that your skein is smaller than the hole in your “O”!) Because of the curve, it will naturally be tighter on the inside and looser on the outside. Just find a happy medium  so that none of the brown letter shows through your wrapped yarn.]
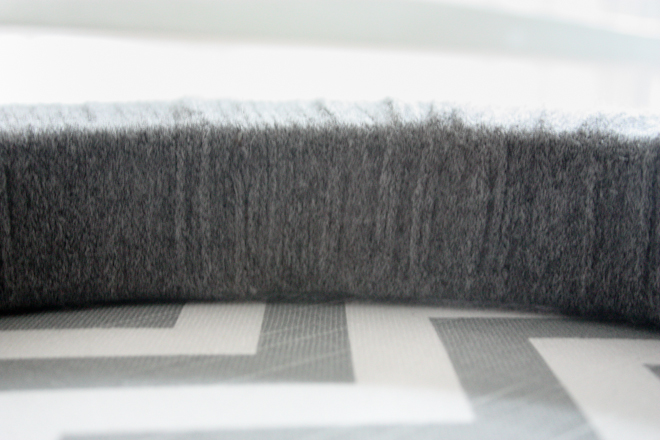
14

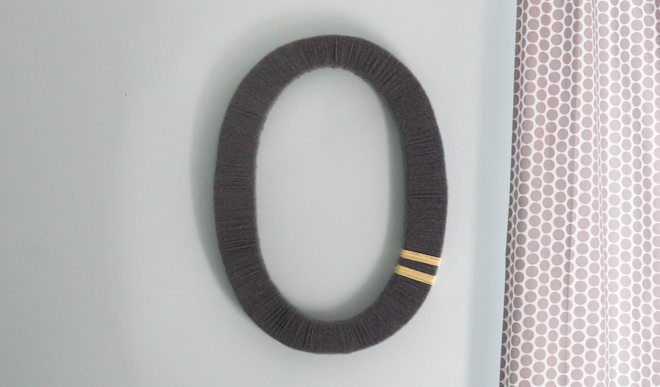
And here’s Oliver’s completed “O”. I went ahead and wrapped a couple of yellow rugby stripes over the grey on one side to make it boyish. I like it!
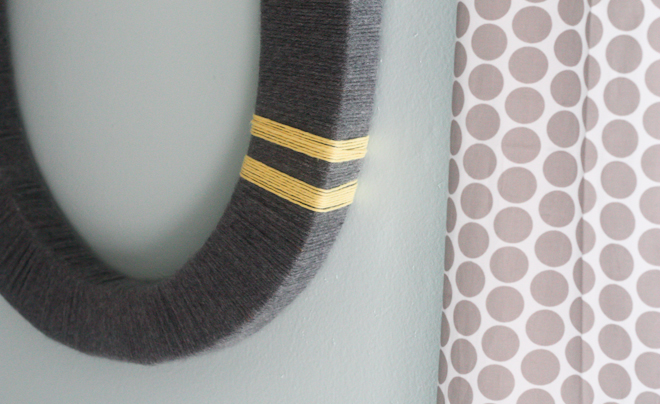
15

16

And just like that, I got to do a really fun and relatively mindless project that made a big splash in the kids’ playroom.
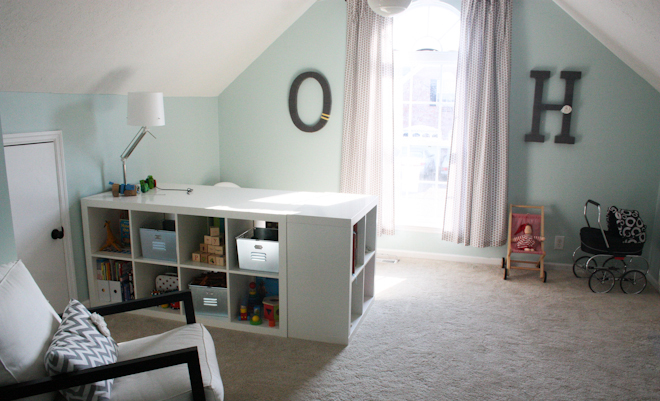
17

It could be fun to get fancy with colors and things. My internetty friend Jodi wrapped an ampersand in a cool, oat-y color for her twins’ nursery. Oh, the possibilities!

Have a lovely Thursday, friends! Go – get crafty!

Post by Raechel of www.raechelmyers.com
Sand Cast DIY

May 16, 2012

1

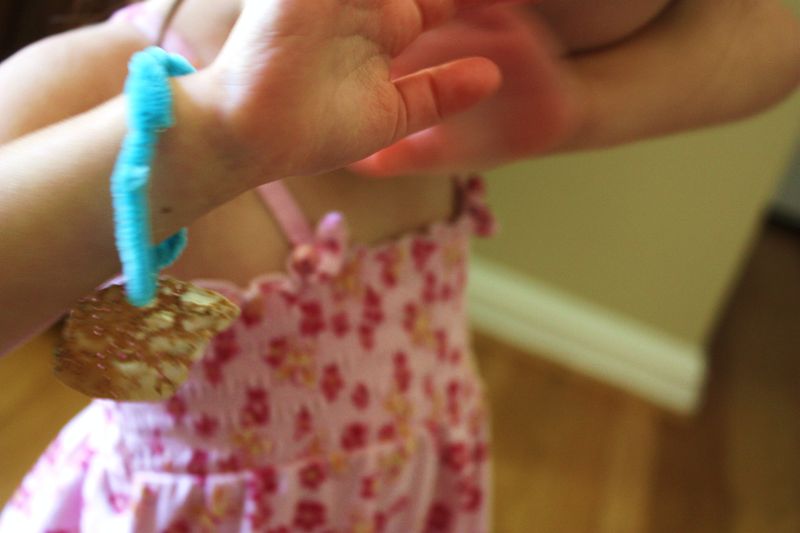
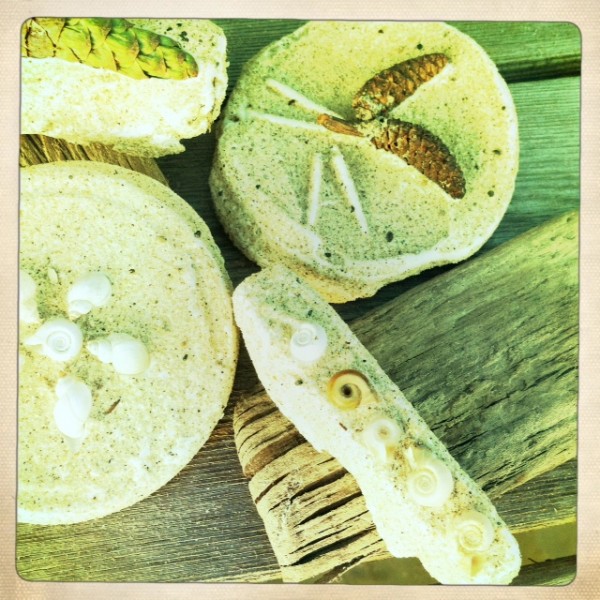
This DIY for you and the kids definitely allows for creativity as we celebrate our theme this month.  And as an added bonus you can do it while you’re hanging out at the beach and you can make a ton of these for less than $5.  I made these on almost every cottage vacation I ever went on growing up and as an adult…..including the cottage vacation I just got back from two weeks ago.  And what’s really cool is that I have a lot of them saved…..reminding me of great times, different beaches I’ve been on, and when I was where.  These rustic little memories are a snap to make and may just become a beach tradition of yours for years to come!
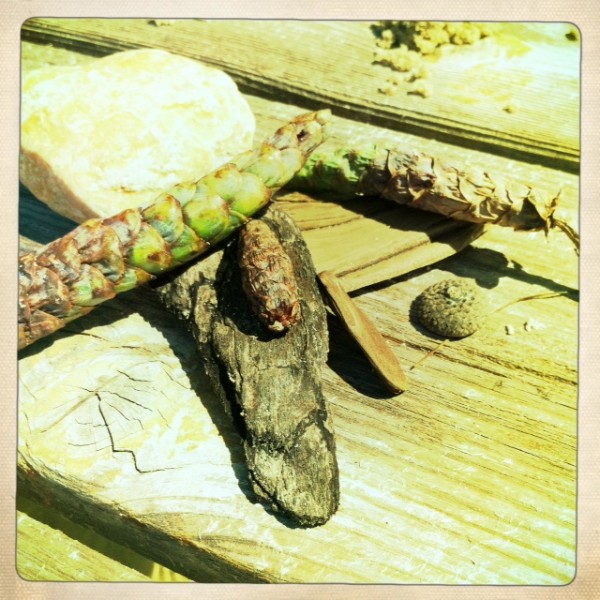
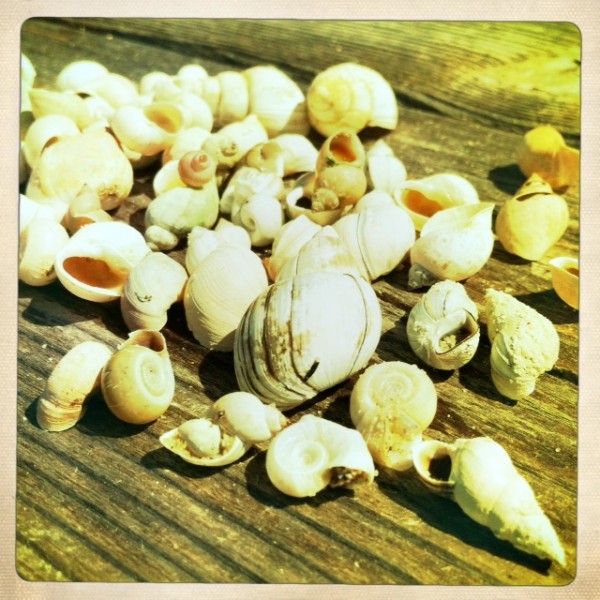
If your kids are anything like my Georgia or like me for that matter you know that a lot of time on beaches is spent collecting shells, cool pieces of wood, and unique stones.  All of that can go into this DIY project…..additionally you can put your sand toys to good use here too.

Here’s what you need:

1.  A collection of shells, pine cones, stones, beach toys, sticks, drift wood, or whatever else you can find that will last a long time.

2

3

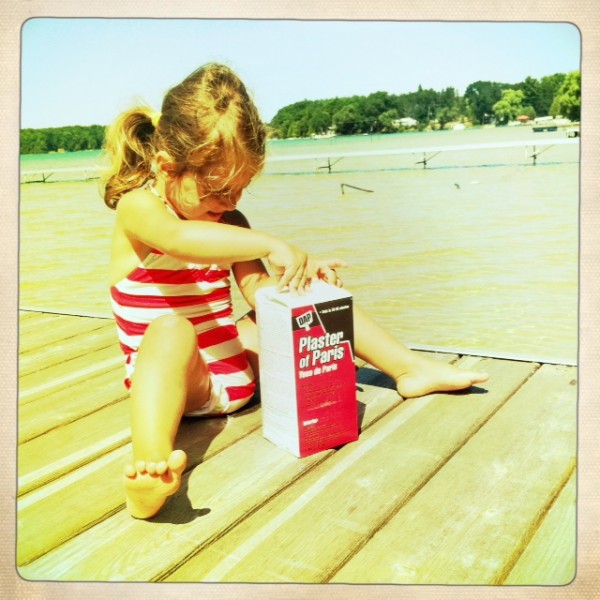
2.  Plaster of Paris.  You can buy this at any hardware store……one container of it is plenty for all of your kids to make a sand cast…..unless you’re the Duggars from “19 Kids & Counting.” You’ll also want a plastic container to mix up the plaster in that you can just throw away when you’re done.

4

Whoa…..who needs their swim diaper changed?

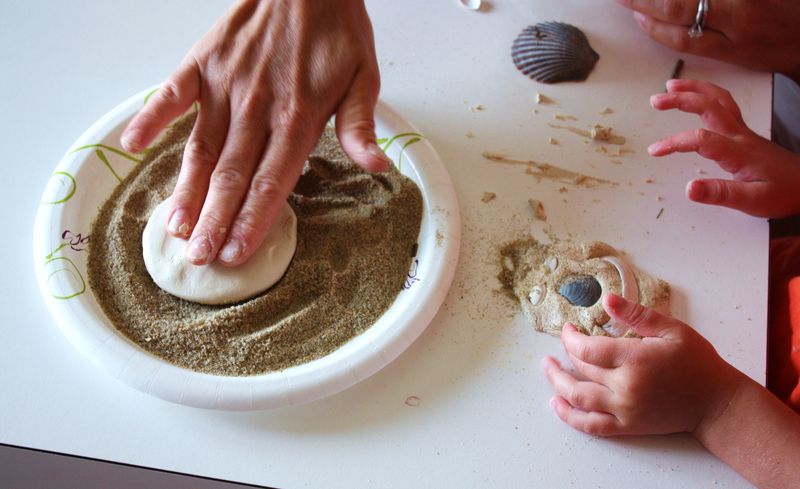
3. Firm, damp sand–the kind that is about a foot away from the waters edge….almost like brown sugar.  You don’t want the soupy sand or the powdered sugar sand….just nice damp sand that packs well. 

To create your masterpieces:

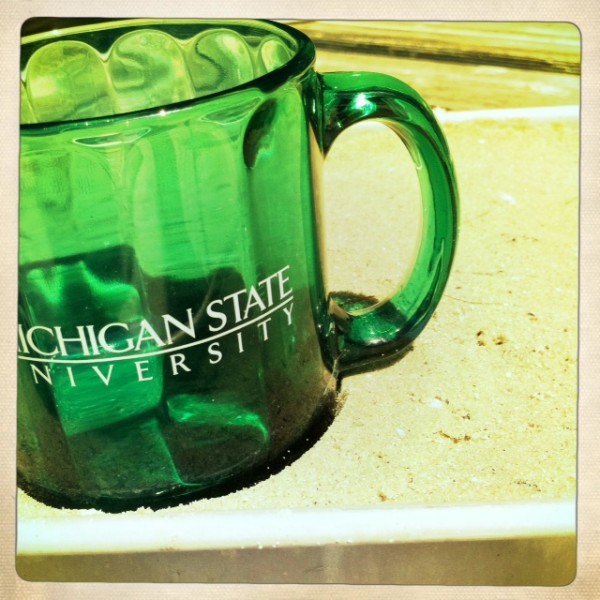
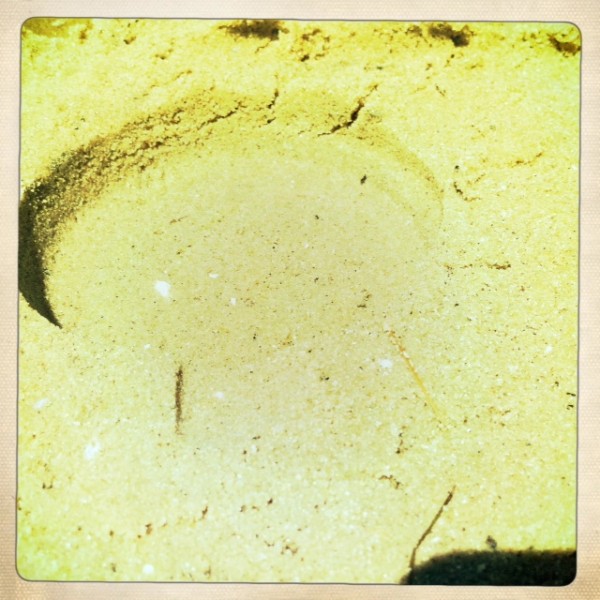
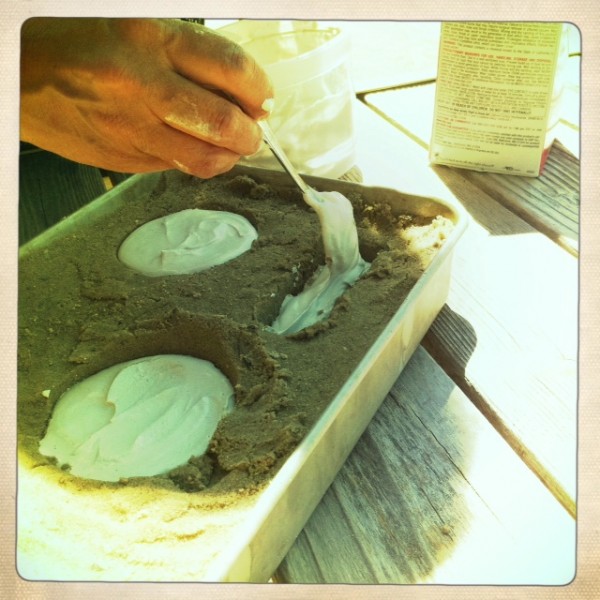
1.  Create a well in the sand that is the shape you want your sand cast to be; a square, a circle, a triangle, a rectangle…whatever.  It doesn’t have to be perfect, however it should be at least 6-7 inches deep.  Make sure the sides and bottom are packed well and even.  I used a coffee mug to make a perfect circle for some of mine.  (Also….you’ll notice that I’m doing this in a brownie pan – we couldn’t find the right consistency sand at our cottage…way too wet, so we just put a whole bunch of sand in this pan and let it dry a little bit and did it right in there. It’s way cooler right on the beach though.)

5

6

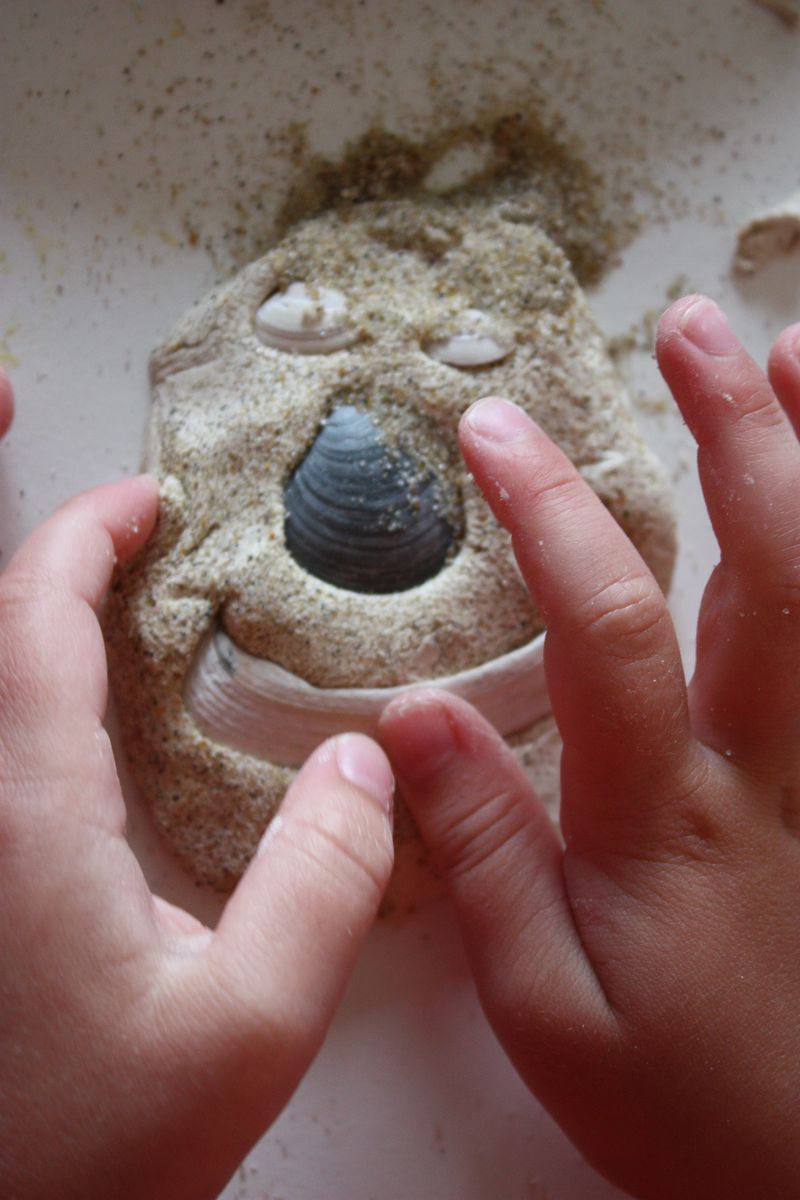
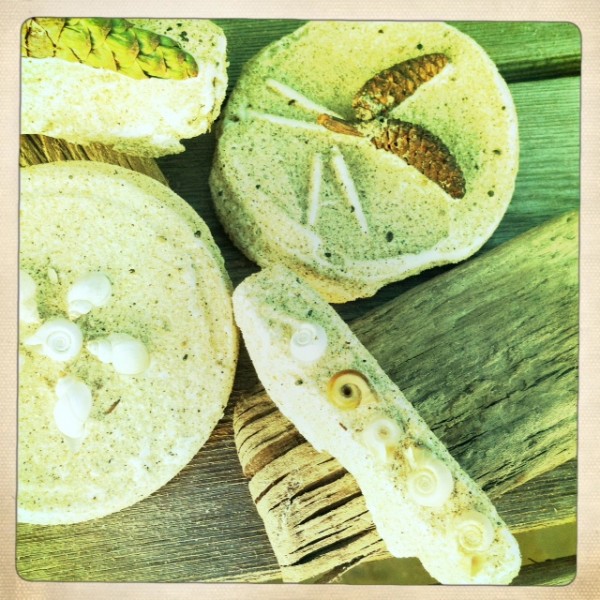
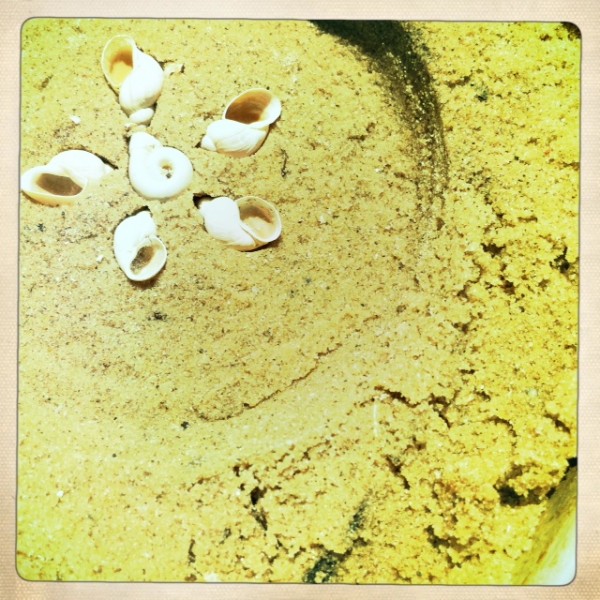
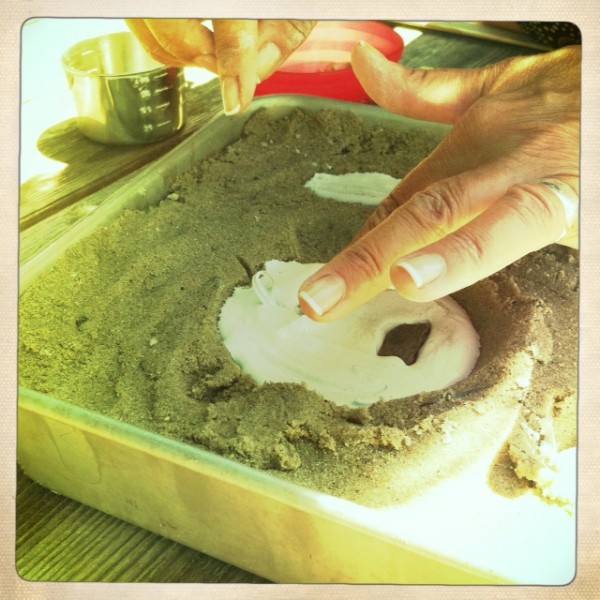
2.  Next add in any decorations you want to be a part of the finished product.  We put seashells and pincones in ours this time.  However, if you don’t want tangible “things” in your sand cast you can just make indentations, letters (make sure you “draw” them in backwards though so when they are flipped around once the plaster drys they are the right way–”draw” them with a stick or your finger), or any other random shape that you fancy.  Just press your objects or indents firmly into the sand.  Arrange them in a pattern or don’t—this is your chance to be creative!

7

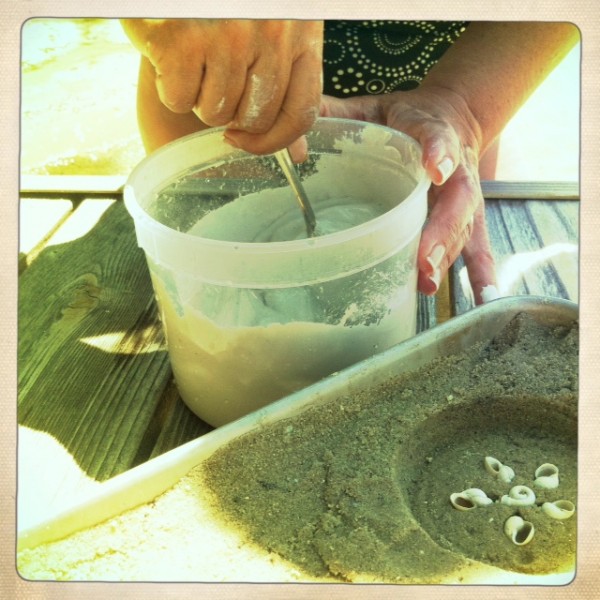
3.  Mix up your plaster.  The box will tell you exactly the ratio of water you need to plaster–follow those directions! We just use lake water and a junky plastic container and usually a stick to mix it up.  Once it’s mixed up pour your plaster over your creations.  Make sure you spread the plaster evenly into your wells so that it touches all sides and provides a thick layer of plaster over the top of your designs – about 2-3 inches.

8

9

10

We always put a little “hanger” into the plaster so we can hang it up if we want once it’s completed.  You can see it ever so slightly here–we just used a little twist tie.  We looped it around once and just stuck into the plaster to dry there.  You can also use pop can tabs or just use nothing at all!

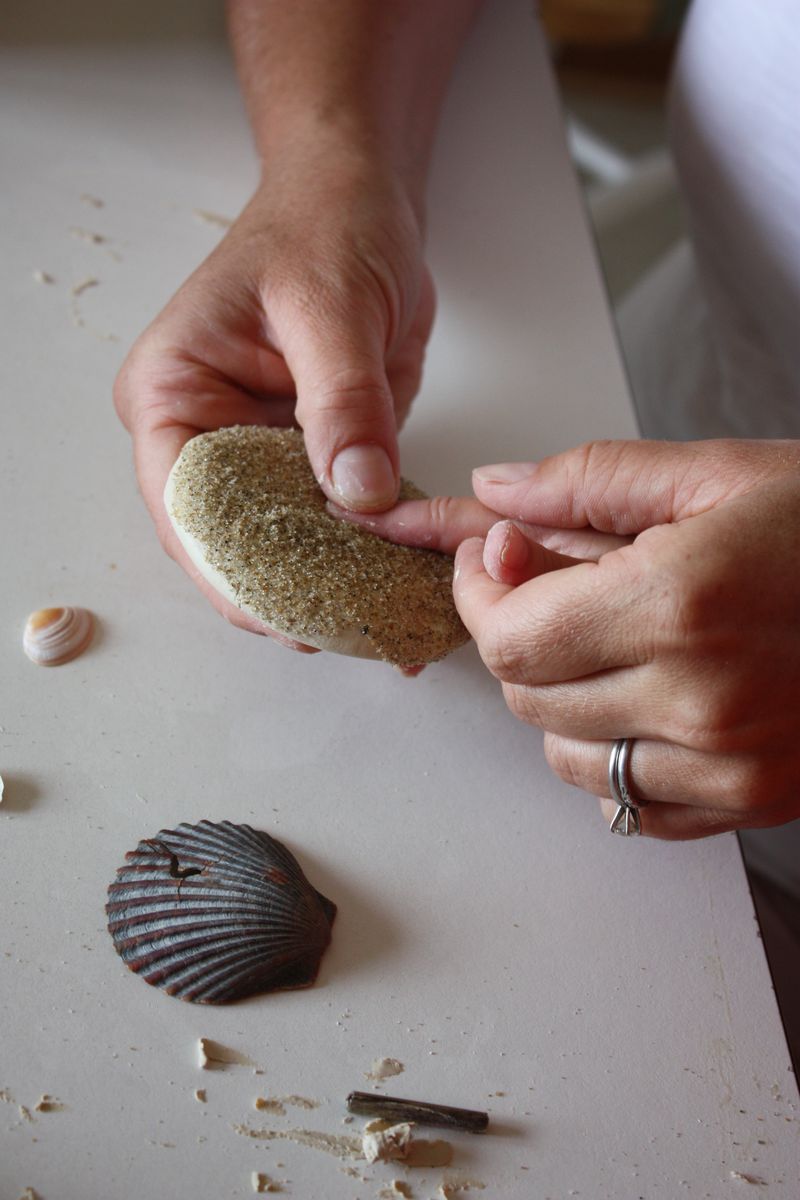
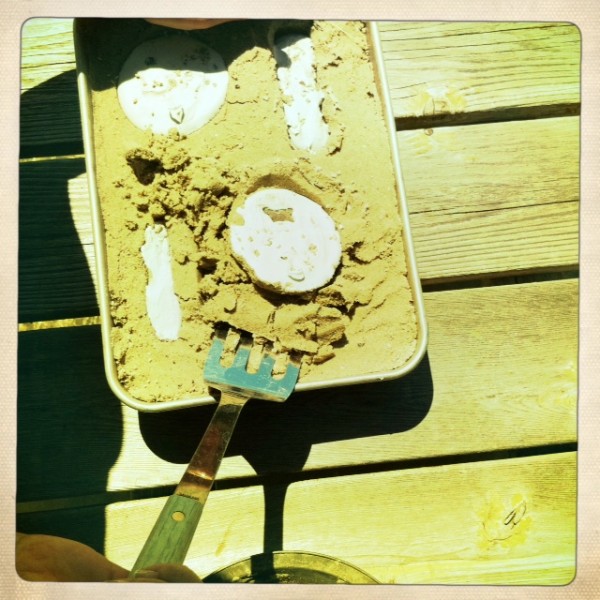
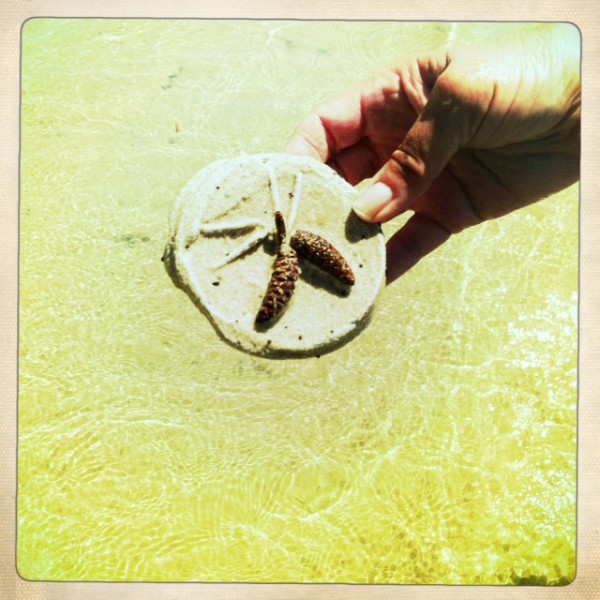
 4.  Let them dry!  For at least an hour–that’s why if you’re going to do these on a beach trip do it early in the day so while you play they can get good and dry.  They need to be rock hard before you remove them from the sand.  We gently took ours out of the sand with a spatula and then rinsed them off in the lake quickly to remove any excess sand.

11

12

Here’s my mom’s pinecone cast.  She used a knife to make indents for little branches and she’ll glitter them later on with dark green glitter–she knows how to use that stuff like no one else–well, my sister holds her own too. 

That’s it!  Stupendously easy.  When we were kids we’d bring them home and paint them too.

Have fun with this and enjoy your last few weeks of days at the beach–and if you’re not at the beach, steal some sandbox sand, get it wet, and do it in a brownie pan like I did.


Post by Maggie Terryn : Mom Colored Glasses

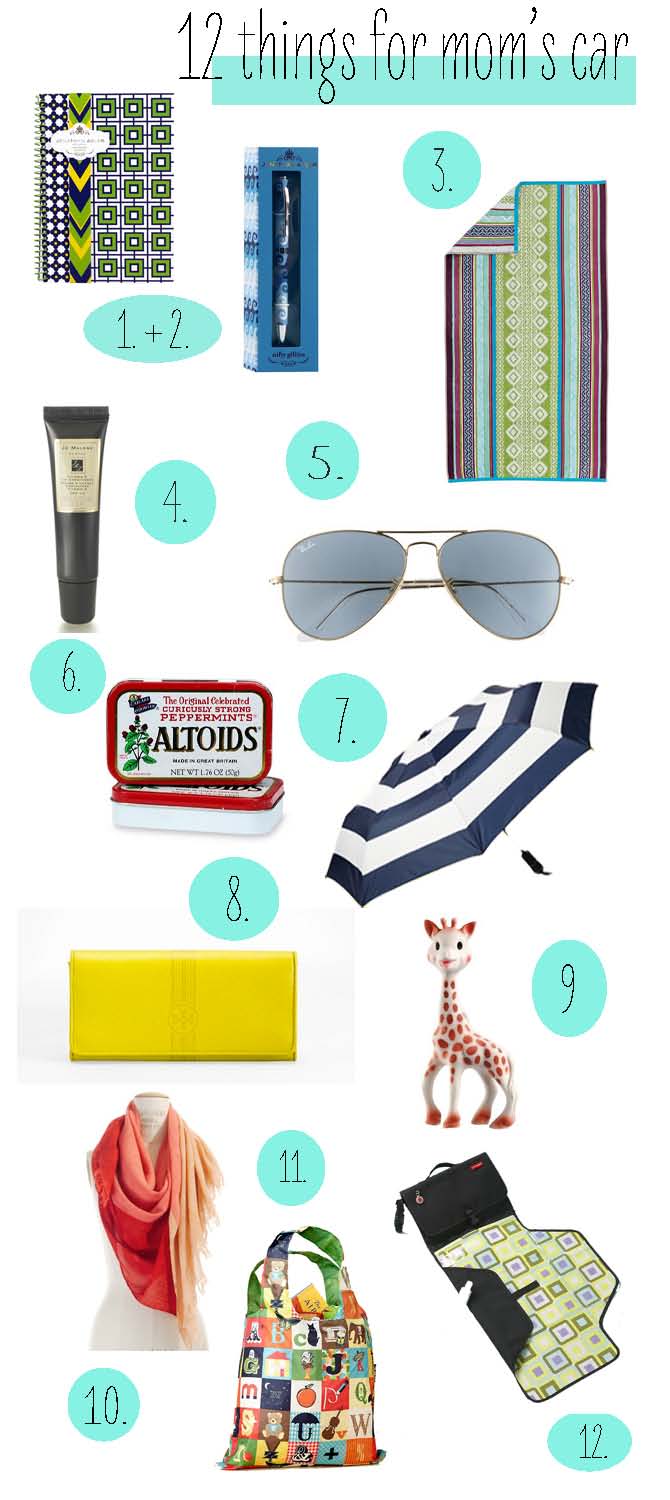
12 Things for Mom’s Car

May 15, 2012

I try to stay prepared no matter where I am or where I’m going. Since I spend a significant amount of time in my car, here are a few things I just can’t live without.

Nod Car Stuff

1. Notebook 2. pen 3. towel 4. lip balm 5. sunglasses  6. mints 7. umbrella 8. wallet 9. toys 10. scarf 11. reusable grocery bag 12. diaper kit

1. Notebook + Pen: a must for last minute thoughts on the road {obviously not while driving}. 

3. A towel: never know when you’ll be caught in a down pour or just in need to dry off and clean up.

4. Lip Balm: never leave home without it. I keep one in my purse, one in my car, one in my desk, one by the bed, one in the bathroom. You get it.

5. Sunglasses: duh. I even have a spare pair in the glove compartment.

6. Mints.

7. An umbrella. Preferably a a fashionable one. Never let the weather get in the way of looking chic.

8.  A wallet that holds my checkbook and deposit slips. For quick trips to the bank.

9. Toys to keep the kids entertained. Sophie is a fave.

10. A chic scarf. You never when you’ll be chilly, or when the kids will.

11. Reusable grocery bag{s}. I try to do my part to help the environment. These have tons of uses.

12. A diaper kit. Even though I usually have the diaper bag with me, I leave this emergency kit stocked with diapers, wipes and hand sanitizer in every car. I love that the changing pad is a part of it. And yes, I’ve changed the twins in the trunk!

xoxo,

Niki

Post by Niki: Papery & Cakery