Close

Blog

Grey & Yellow Neutral Nursery

June 6, 2017

The anticipation of waiting to discover the gender of your new baby can be a fun way to celebrate your pregnancy journey. It can also present a slight challenge when creating a baby registry and styling your nursery.

Until you’re ready to start customizing your kiddo’s wardrobe and living space, I recommend sticking to a neutral color palette for nailing down the essentials. For the nursery design, a yellow and grey color scheme is perfect for either a boy or girl.

To accomplish this, I love the idea of using an unexpected pop of bright yellow in the crib linens, opting for patterns over a specific theme or character. For wall décor, a whimsical Roxy Marj pennant and sweet Rifle Paper Company print are perfect for creating an assortment of art above the crib or changing table.

Grey & Yellow Neutral Nursery


Happy Styling!

Post by Stephanie, Home Stylist & Event Designer  from The Land of Nod’s Design Services Team. Our Design Services team offers free one-on-one design advice, mood boards and space planning. You have a room to decorate? They’d love to hear from you. Visit The Land of Nod’s Design Services page to get started today.


Kids Room Makeovers: Boho Nursery & Boys Room

June 2, 2017

We recently swapped skyscrapers for evergreens and moved from NYC to Portland, OR where we purchased our first home. Transitioning from apartment living to suburban home living has been an adjustment, but one that we’ve loved. There are plenty of things we miss about NYC, but one thing we don’t miss is the lack of space! We’re loving all of our new square footage and feeling like we have more than enough room to grow for years to come.

We worked very hard to get our kiddos here and jumped at the opportunity to create fun, playful rooms for them to grow up in. We worked with the Design Services team at Land of Nod to help us come up with a design plan that incorporated existing pieces that we owned and loved, along with a few new pieces from LON that we felt would carry them through their teenage years. We are beyond thrilled with the results and my heart skips a beat each time I walk into their rooms. I get a lot of satisfaction out of watching my kids really use their rooms – for playing, sleeping, reading, etc. I feel like we’ve successfully created spaces where we all want to spend time!
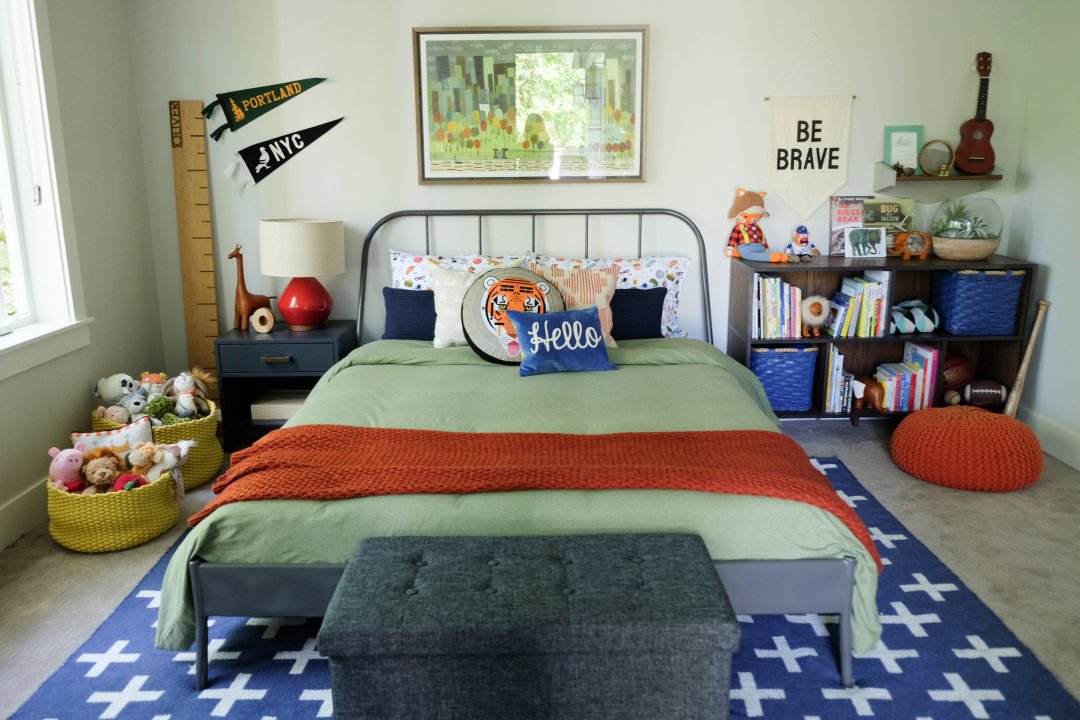
OLLIE’S ROOM

Kids Room Makeovers: Boho Nursery & Boys Room


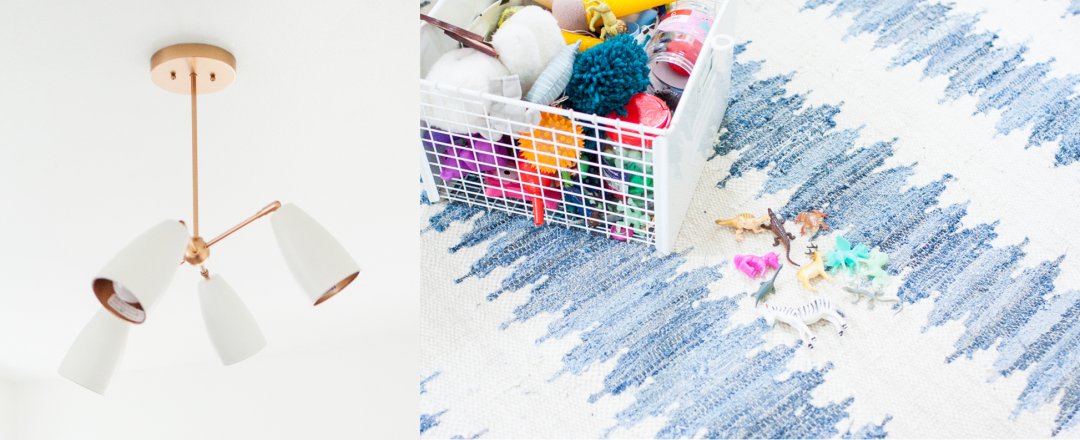
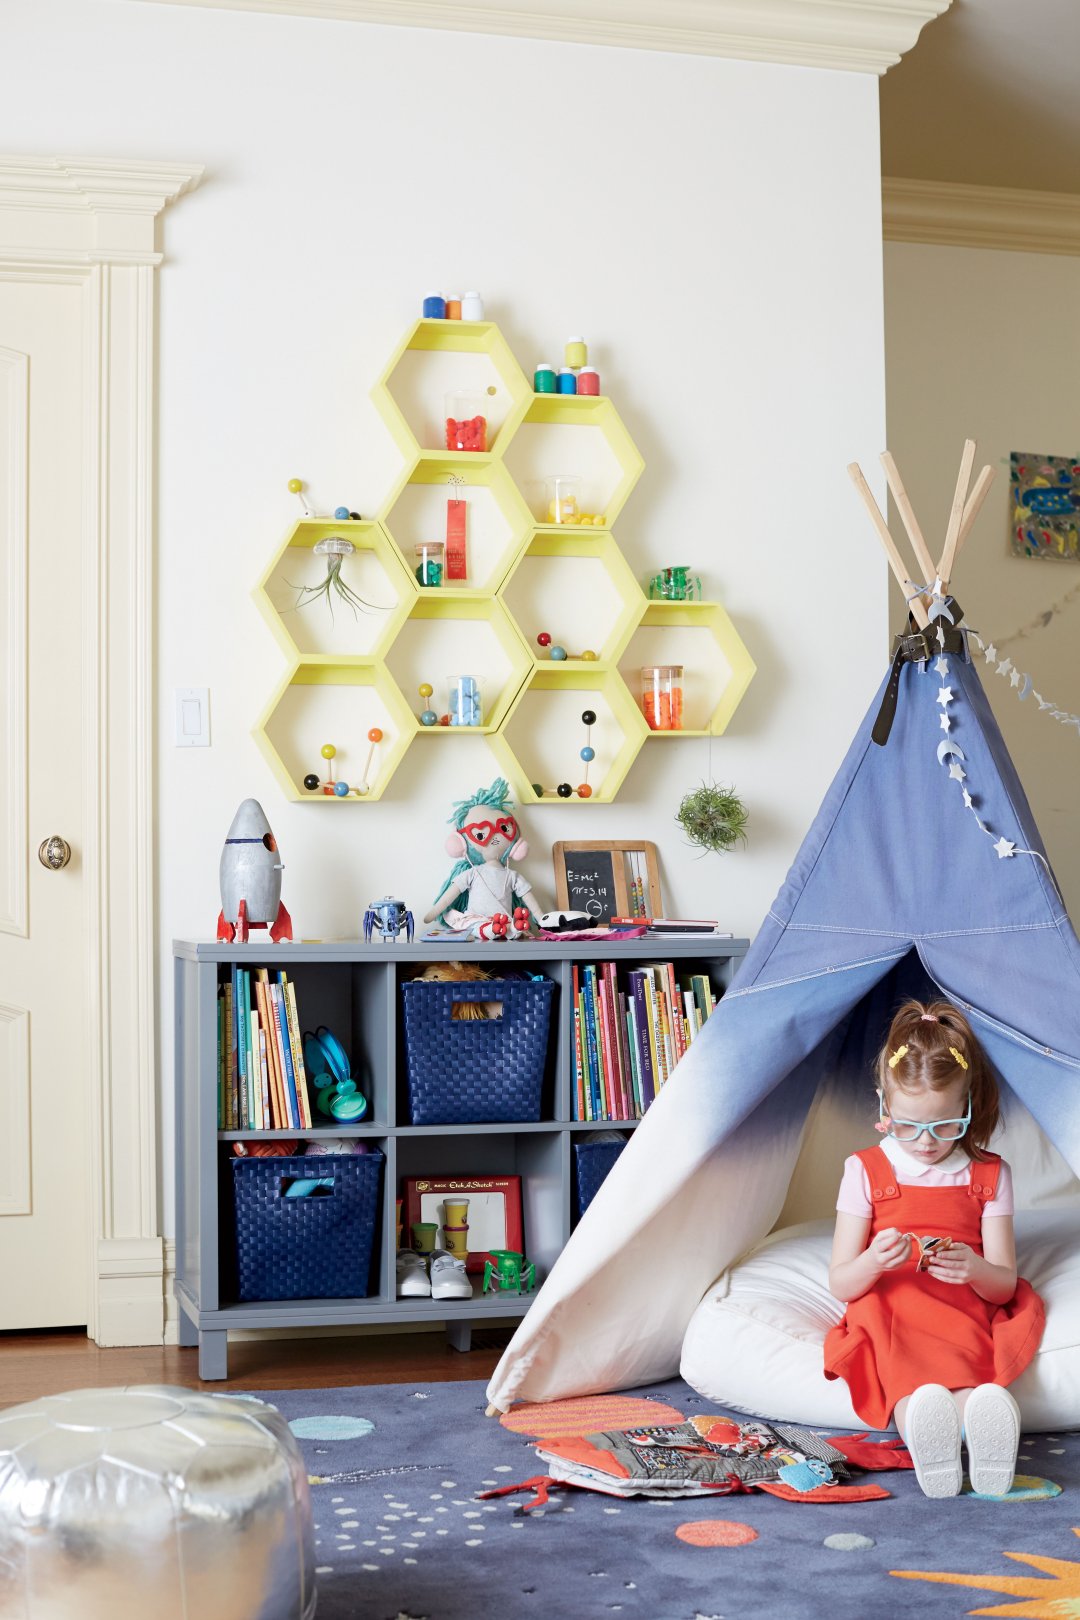
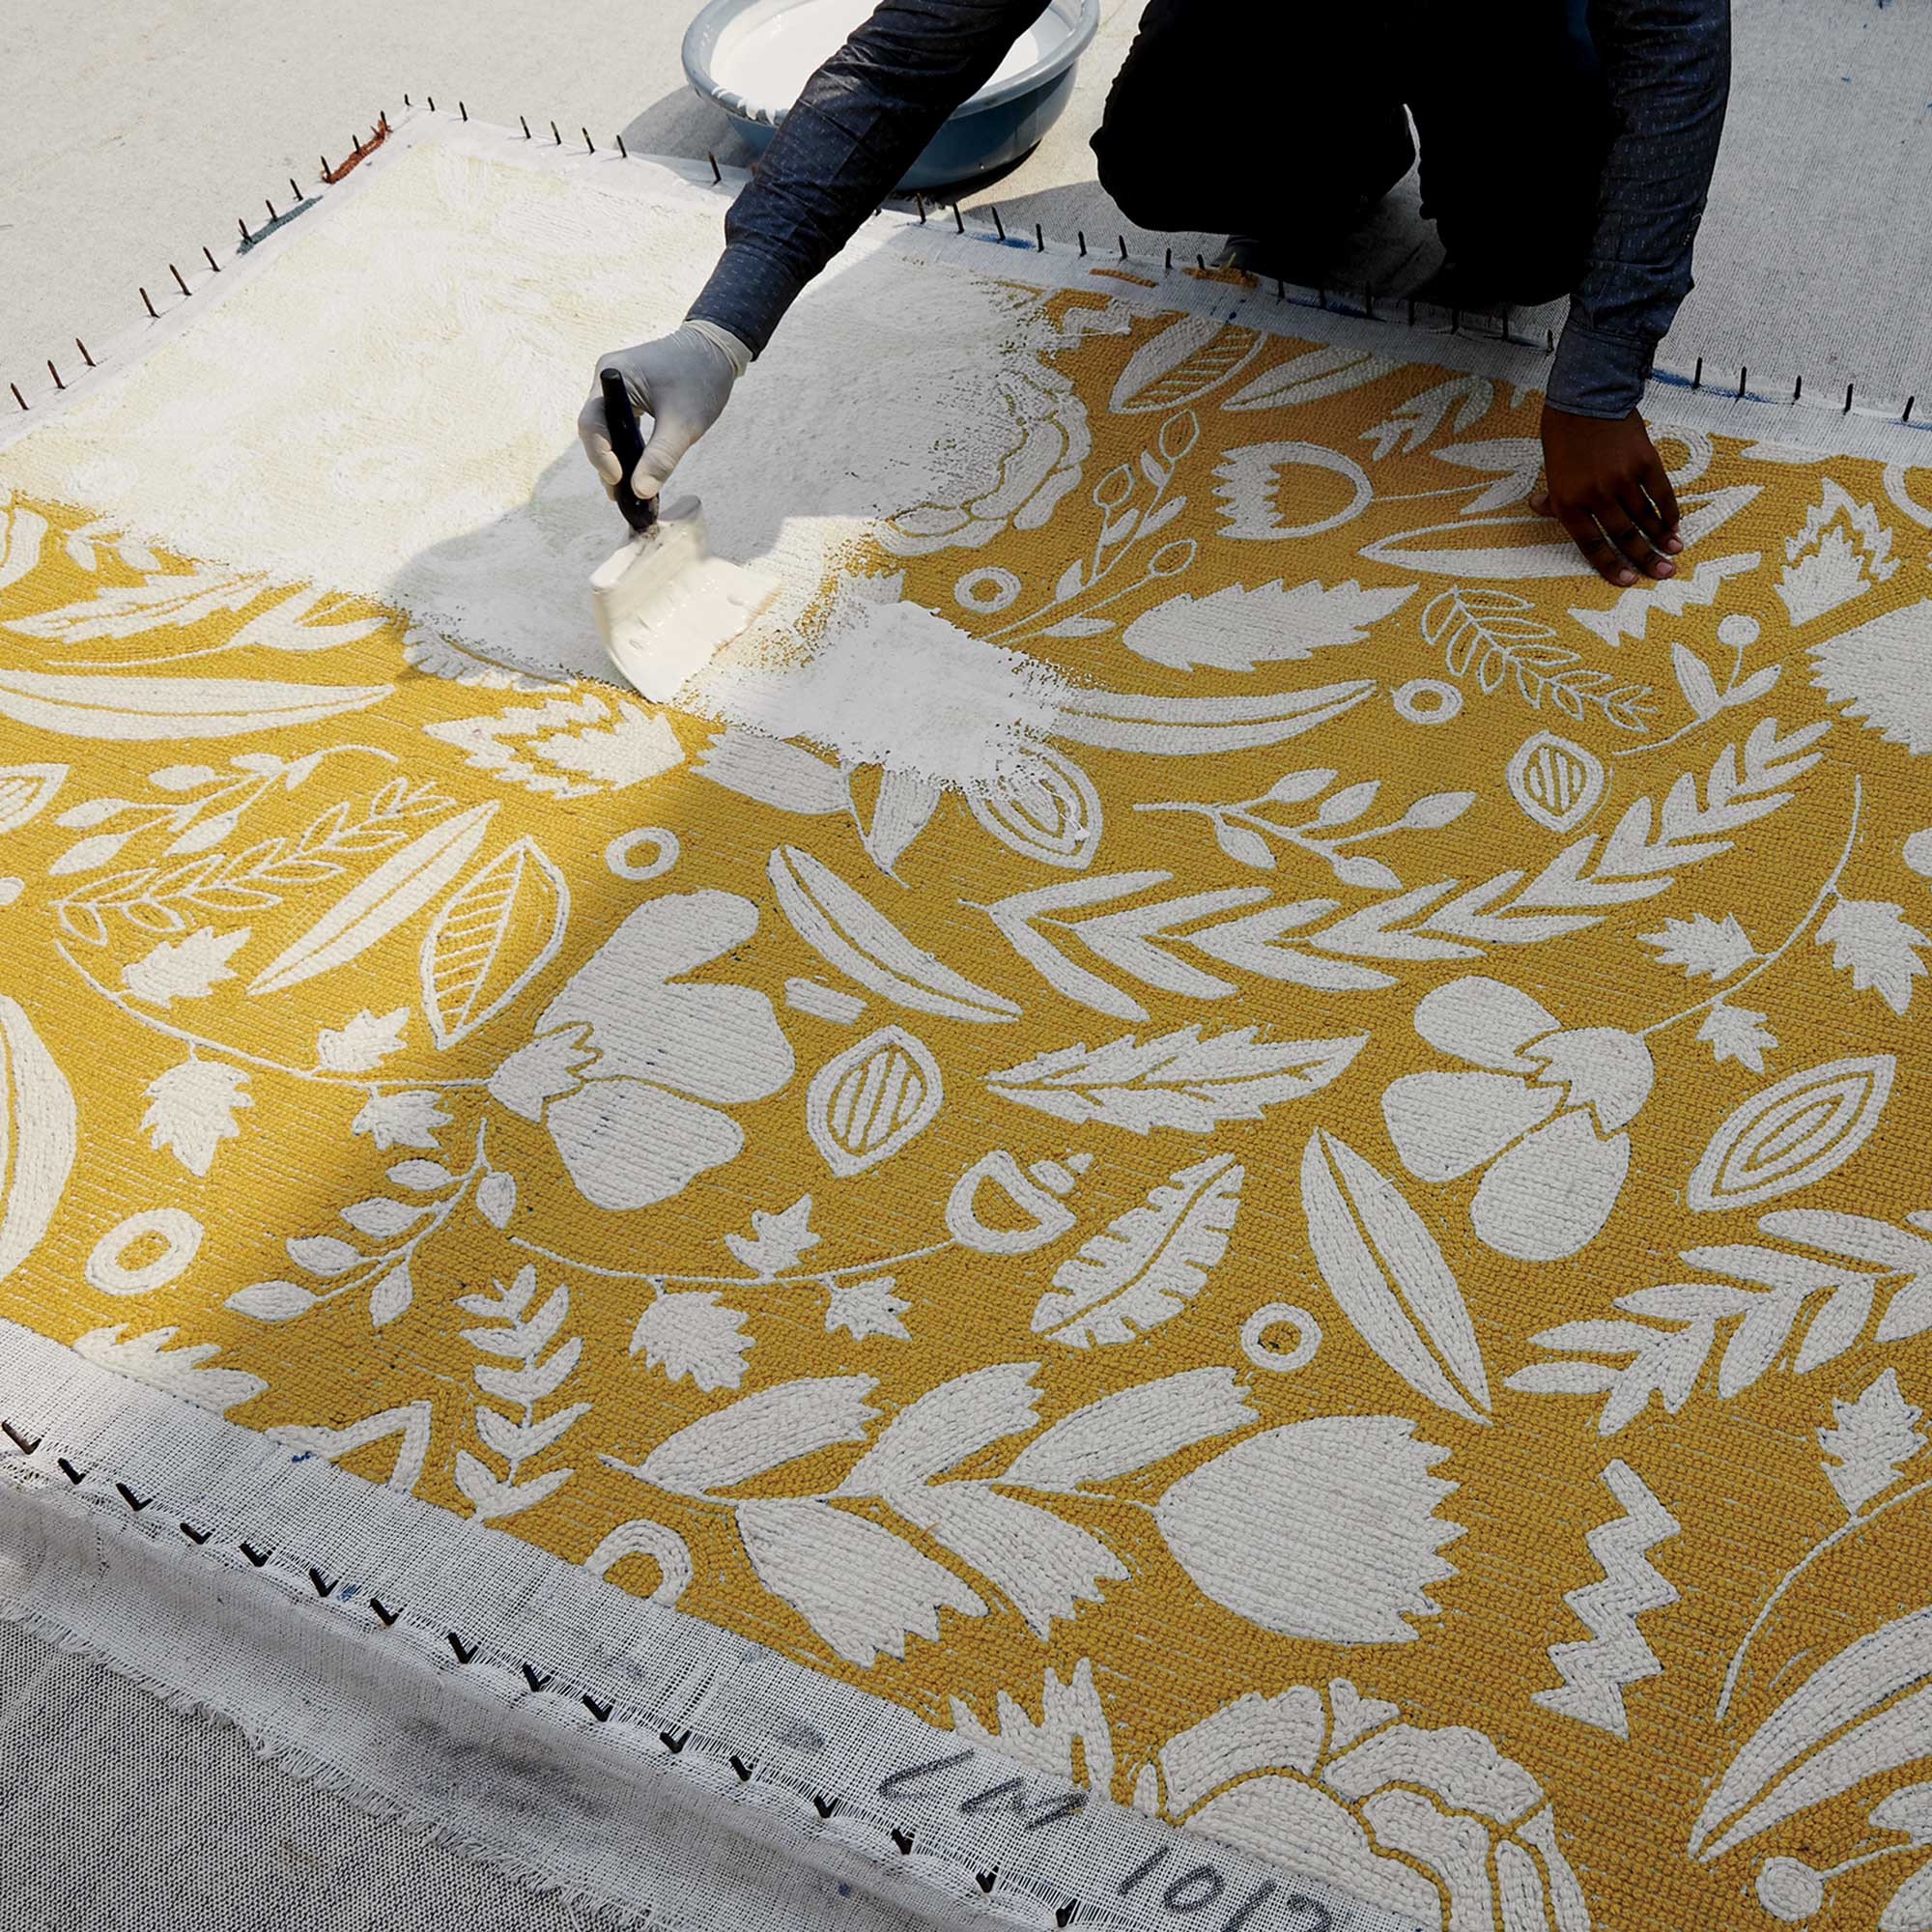
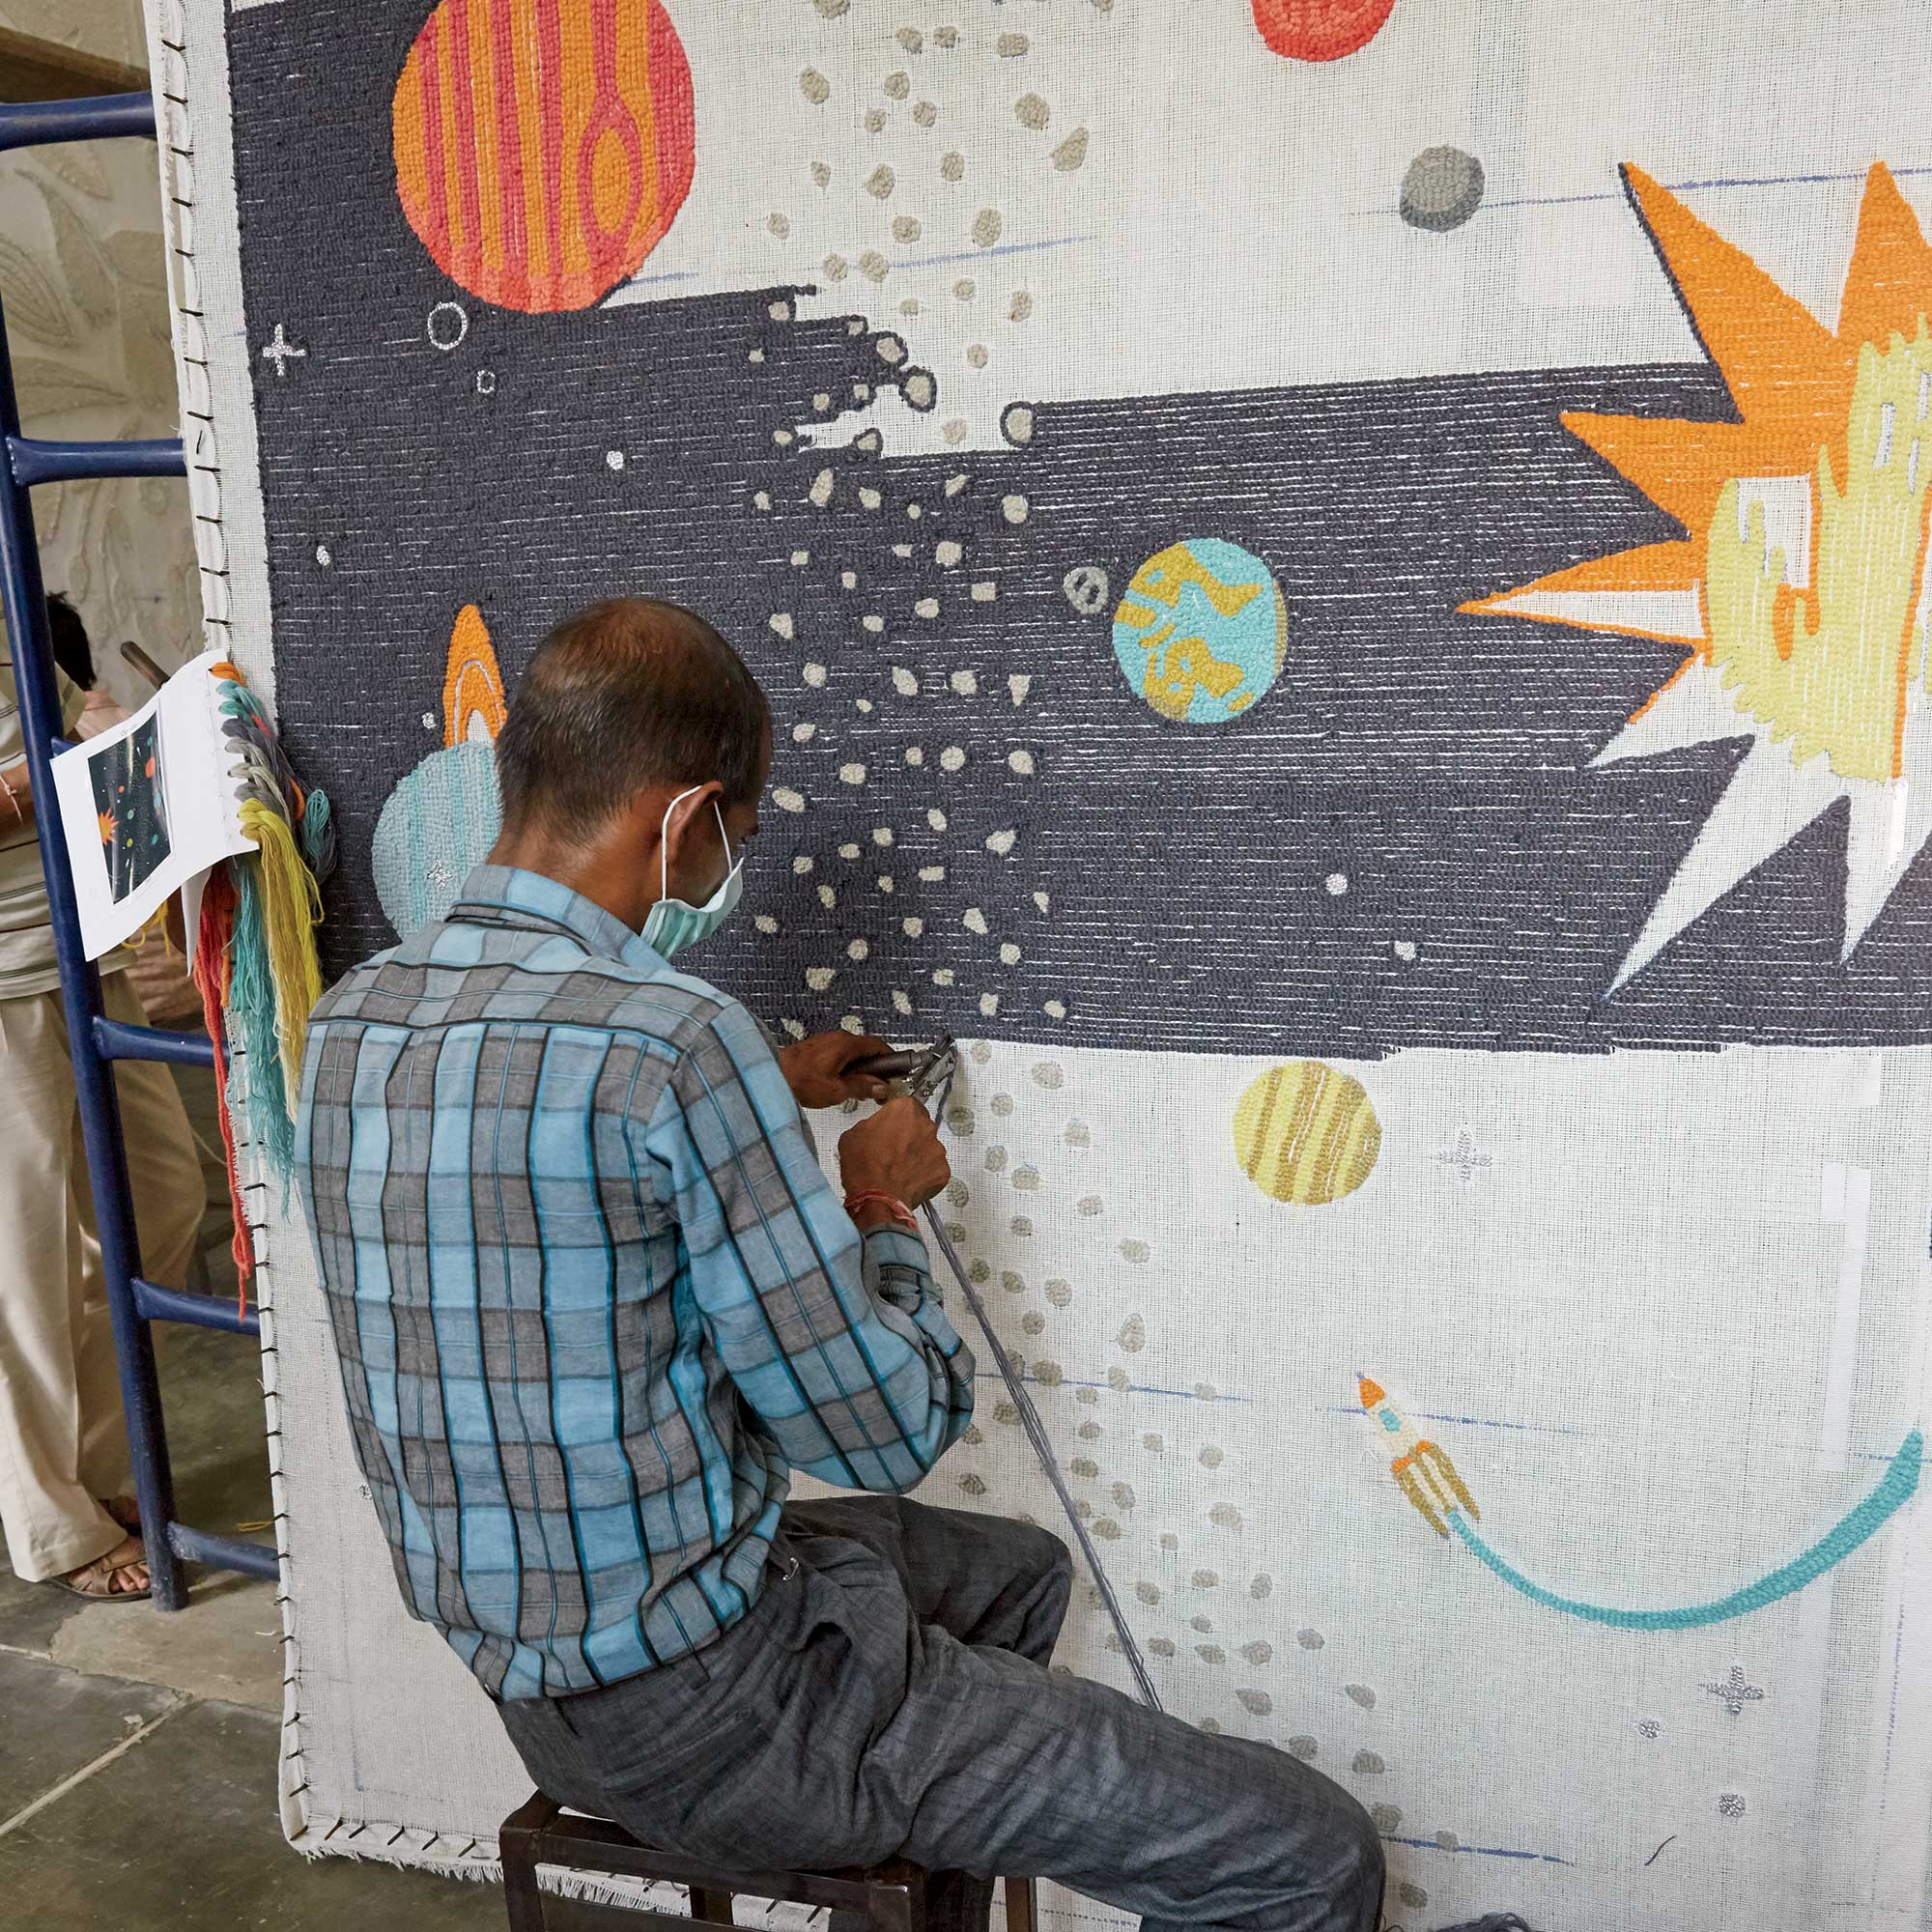
Ollie is 5 and loves Legos and Star Wars. We wanted to transition him to a big boy bed with our move and opted for a queen sized bed (here is one similar) so that if we have guests staying with us, his bed is large enough to accommodate adults. We had so much fun selecting his bedding. I let him pick the playful pillowcases and throw pillows which we paired with a soft jersey duvet cover and fun sheets. The graphic rug adds a pop of color and makes for a cozy play surface. It’s incredibly soft and the perfect landing spot for toys or building legos.

We have owned these yellow knit baskets since he was a baby and they’ve always stored his most loved stuffed animals. The nightstand was a great choice that works well for him as a toddler, but will continue to be a handsome detail in his room as he gets older. The pennants represent where he came from and where he just landed!

Kids Room Makeovers: Boho Nursery & Boys Room


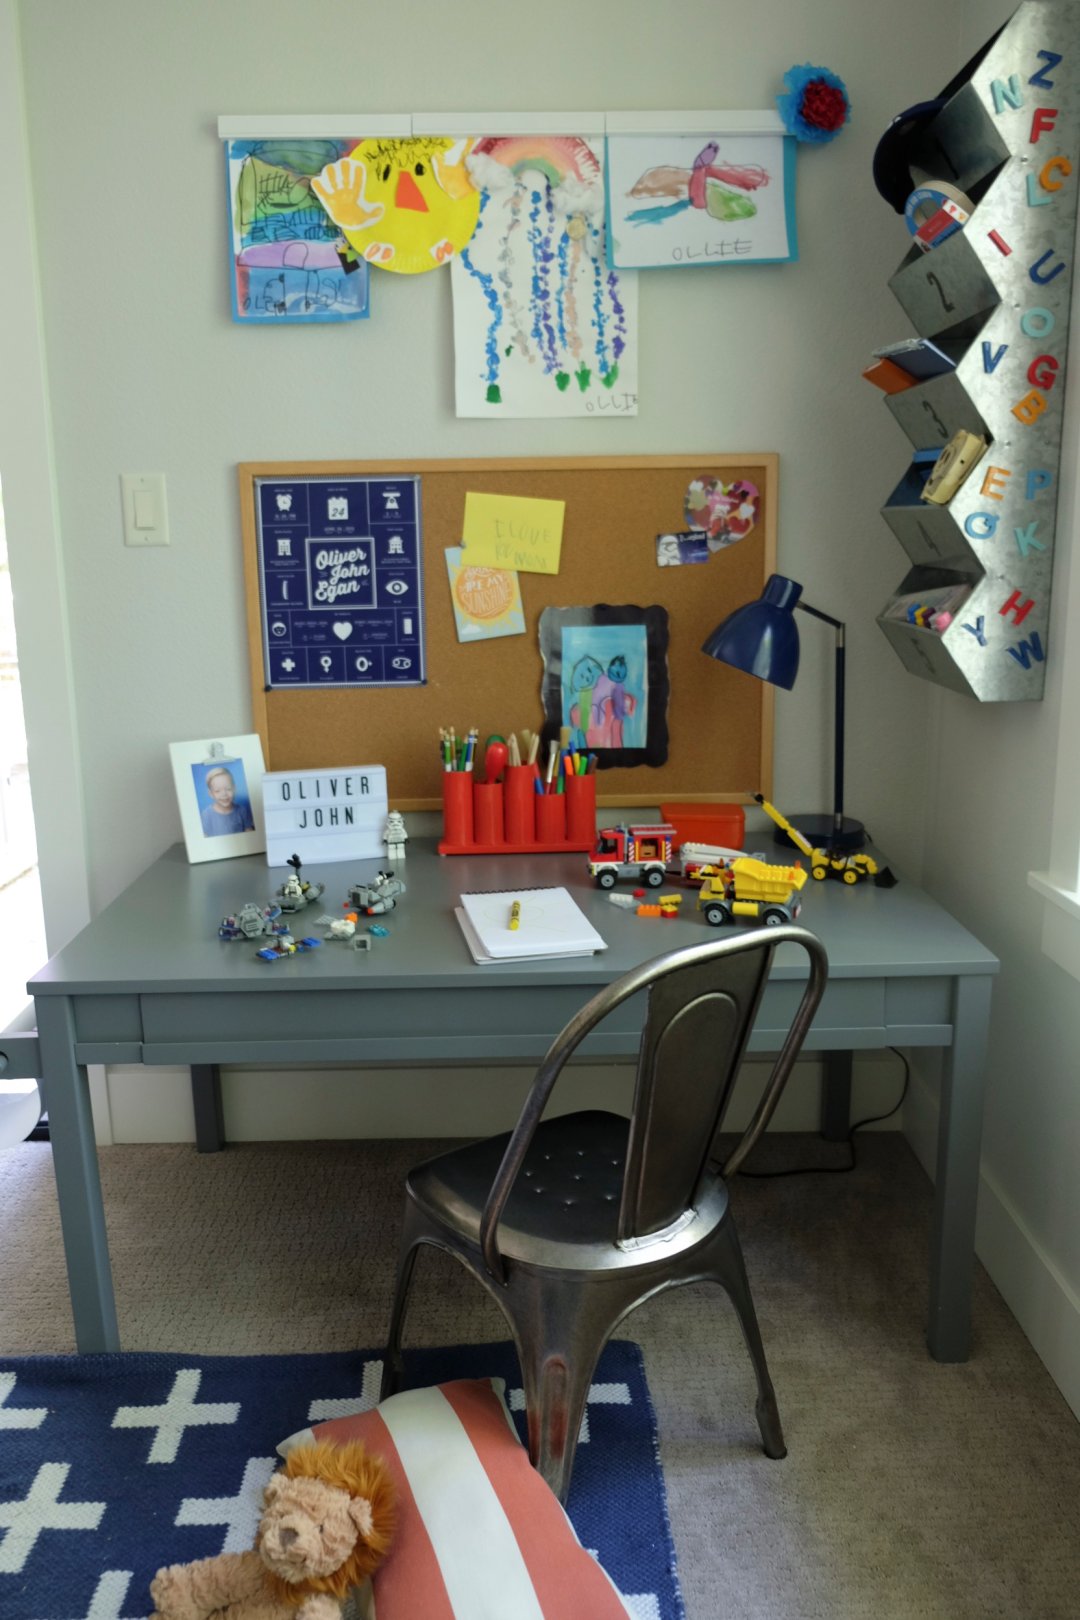
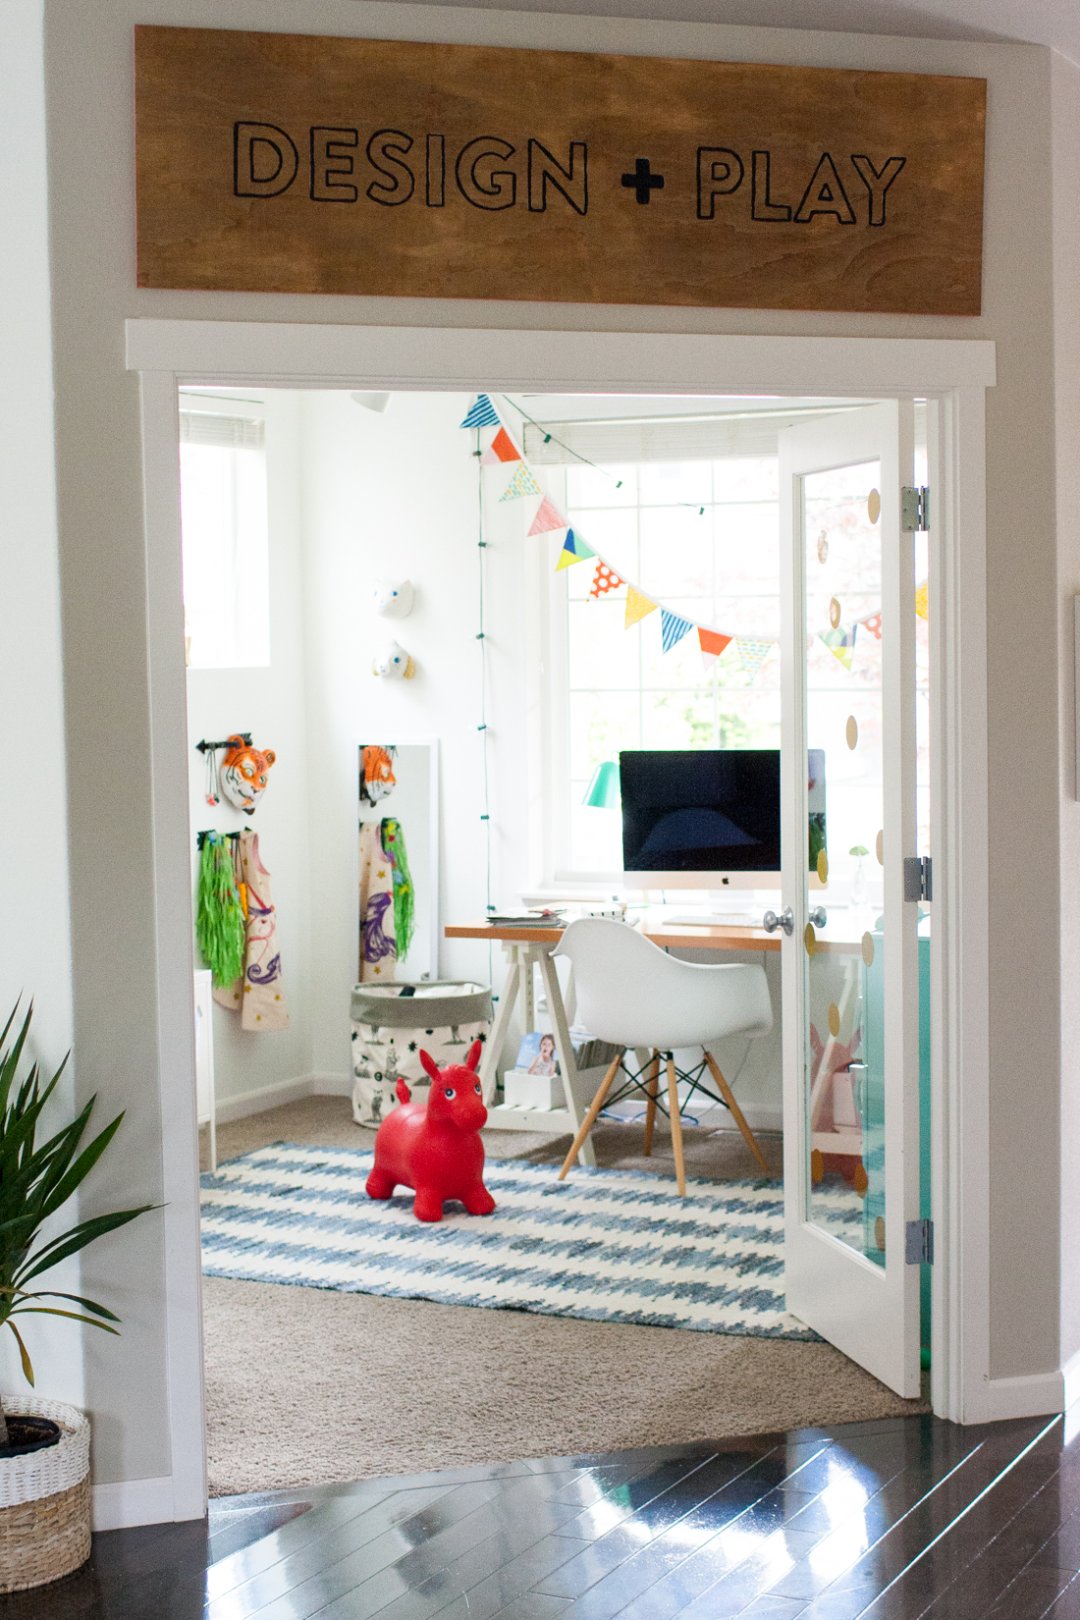
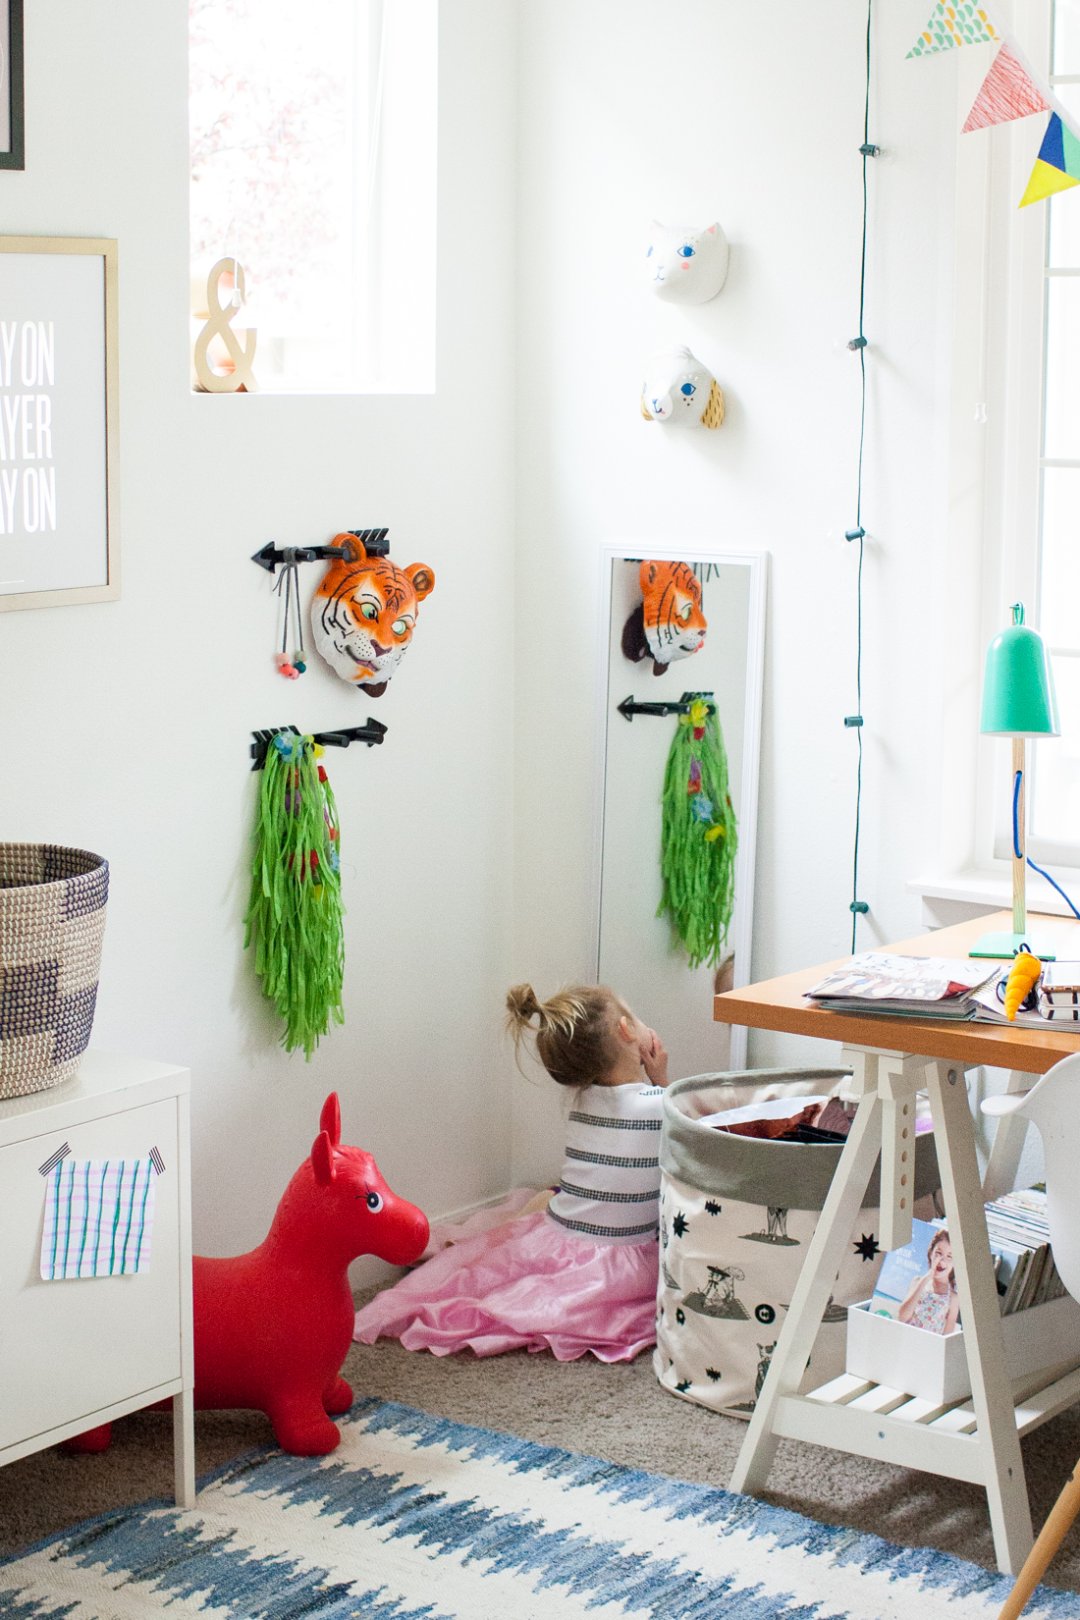
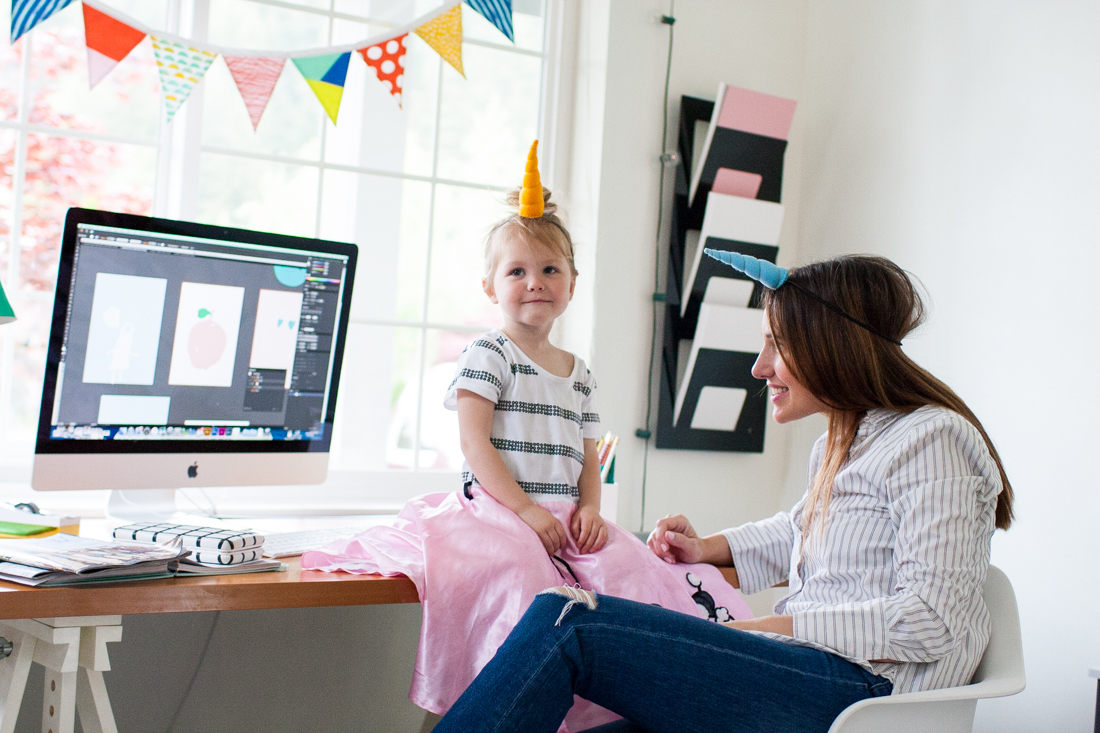
His desk corner has been a big hit. He spends endless hours there building legos and tackling art projects. We intend to use the leg extensions to make the desk taller as he grows and his needs change (homework!). His markers, colored pencils, and paint brushes are neatly organized in the perfect pitch storage caddy. We’re constantly swapping out his school art projects using the gallery art rail and use the Take 5 Wall Bin for all sorts of knick knacks and school week organization.

Kids Room Makeovers: Boho Nursery & Boys Room


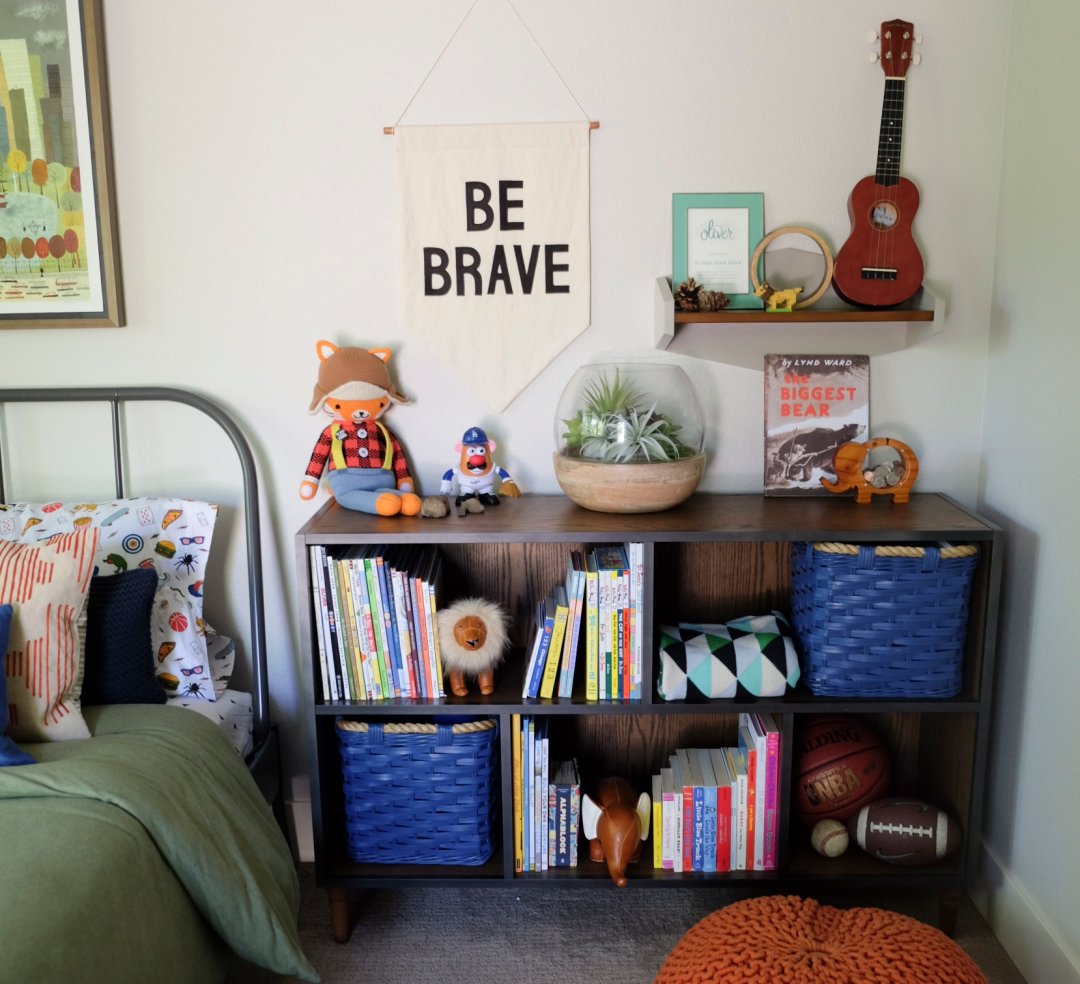
The bookcase is a beautiful and useful piece where we store books, baskets of toys, and other things. The orange pouf is a cozy spot to flip through favorite books. We hung the mid-century shelf above the bookcase right next to a pennant displaying our family motto to “Be Brave.” It holds some of his favorite treasures like pine cones from our last trip to see his grandparents.
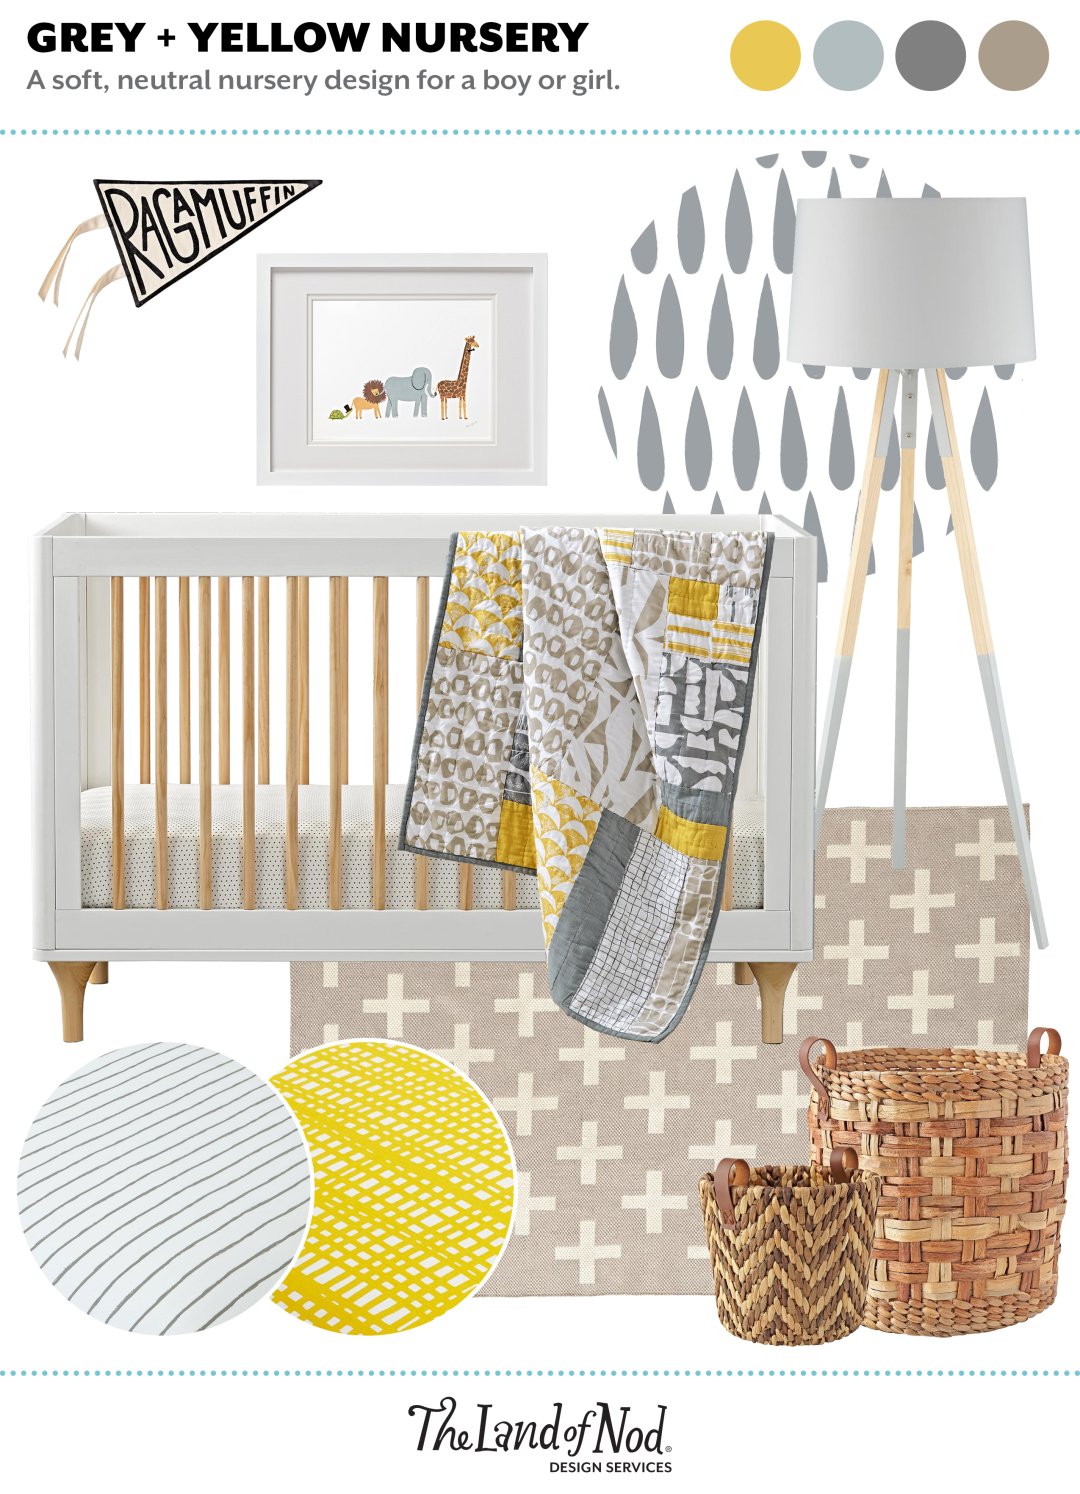
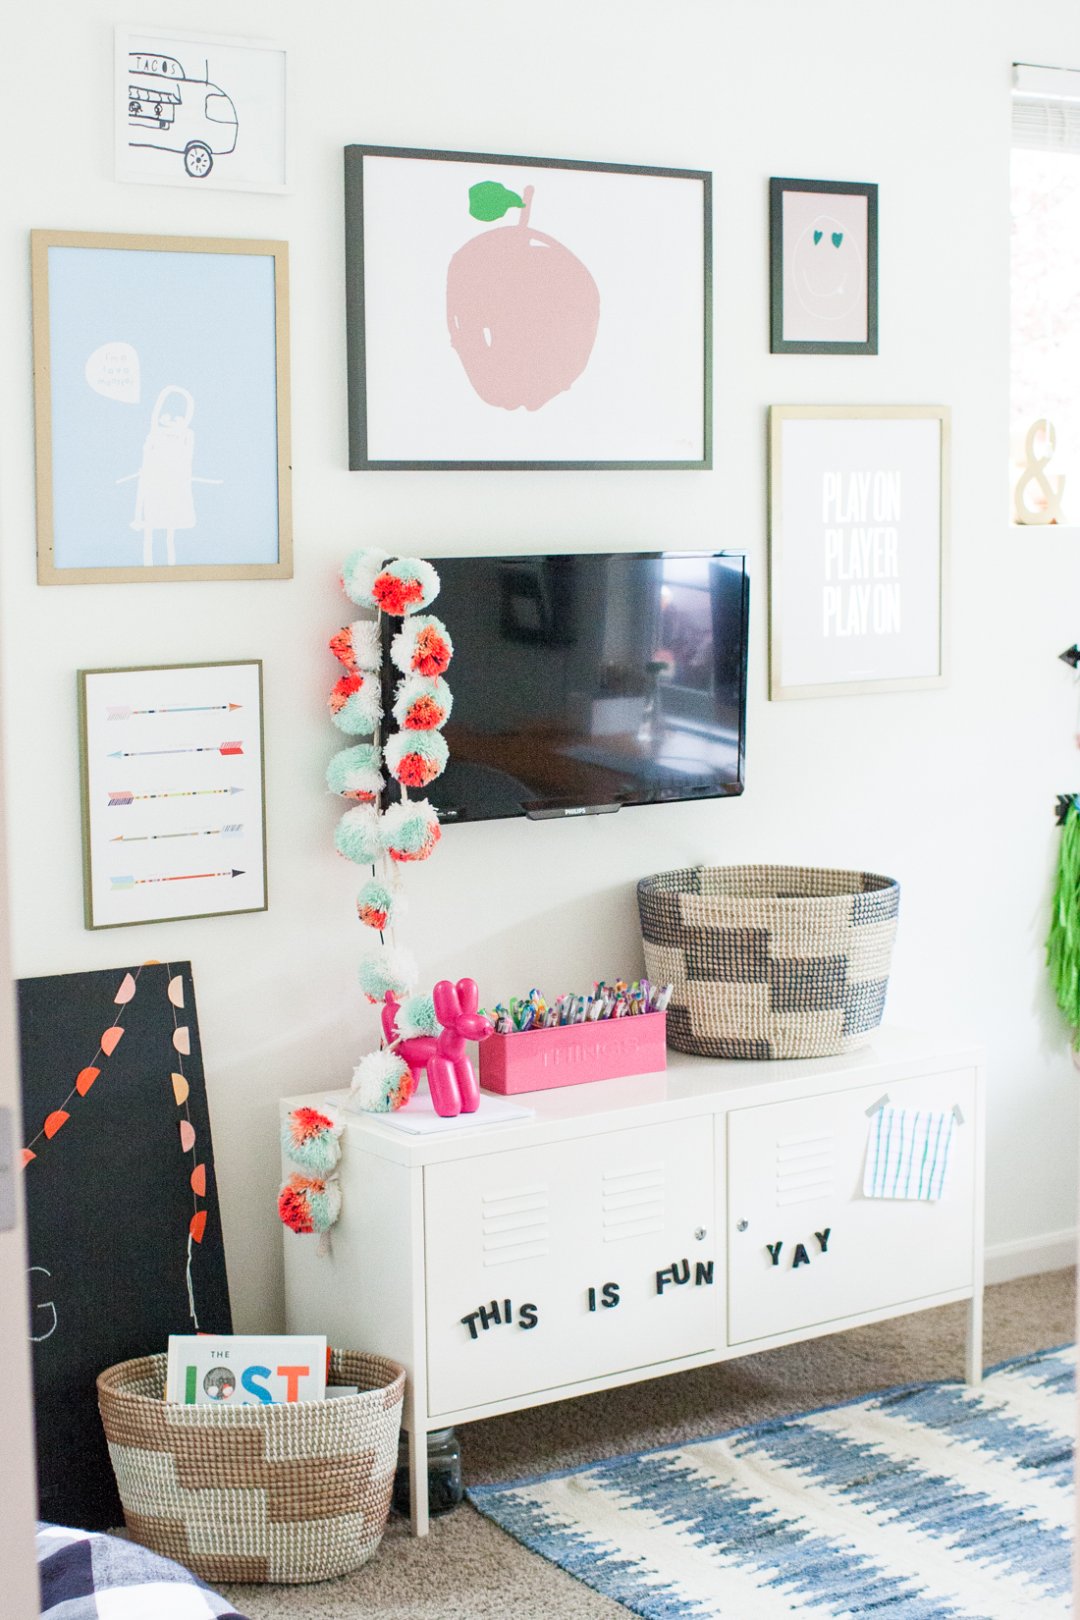
NORA’S ROOM

Kids Room Makeovers: Boho Nursery & Boys Room


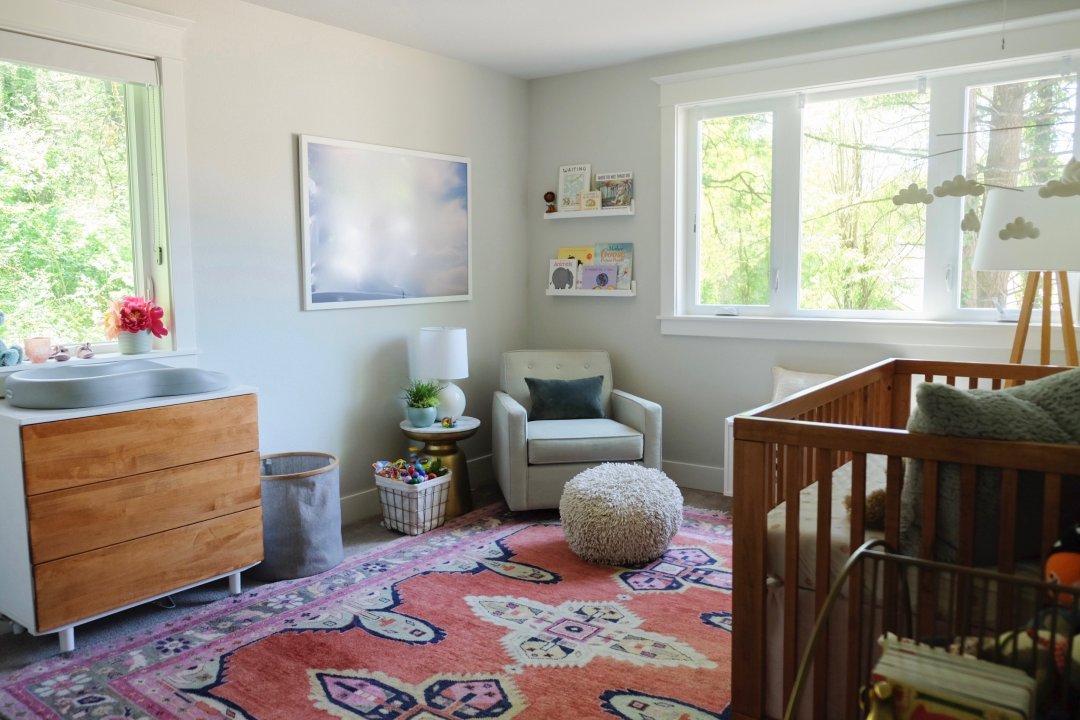
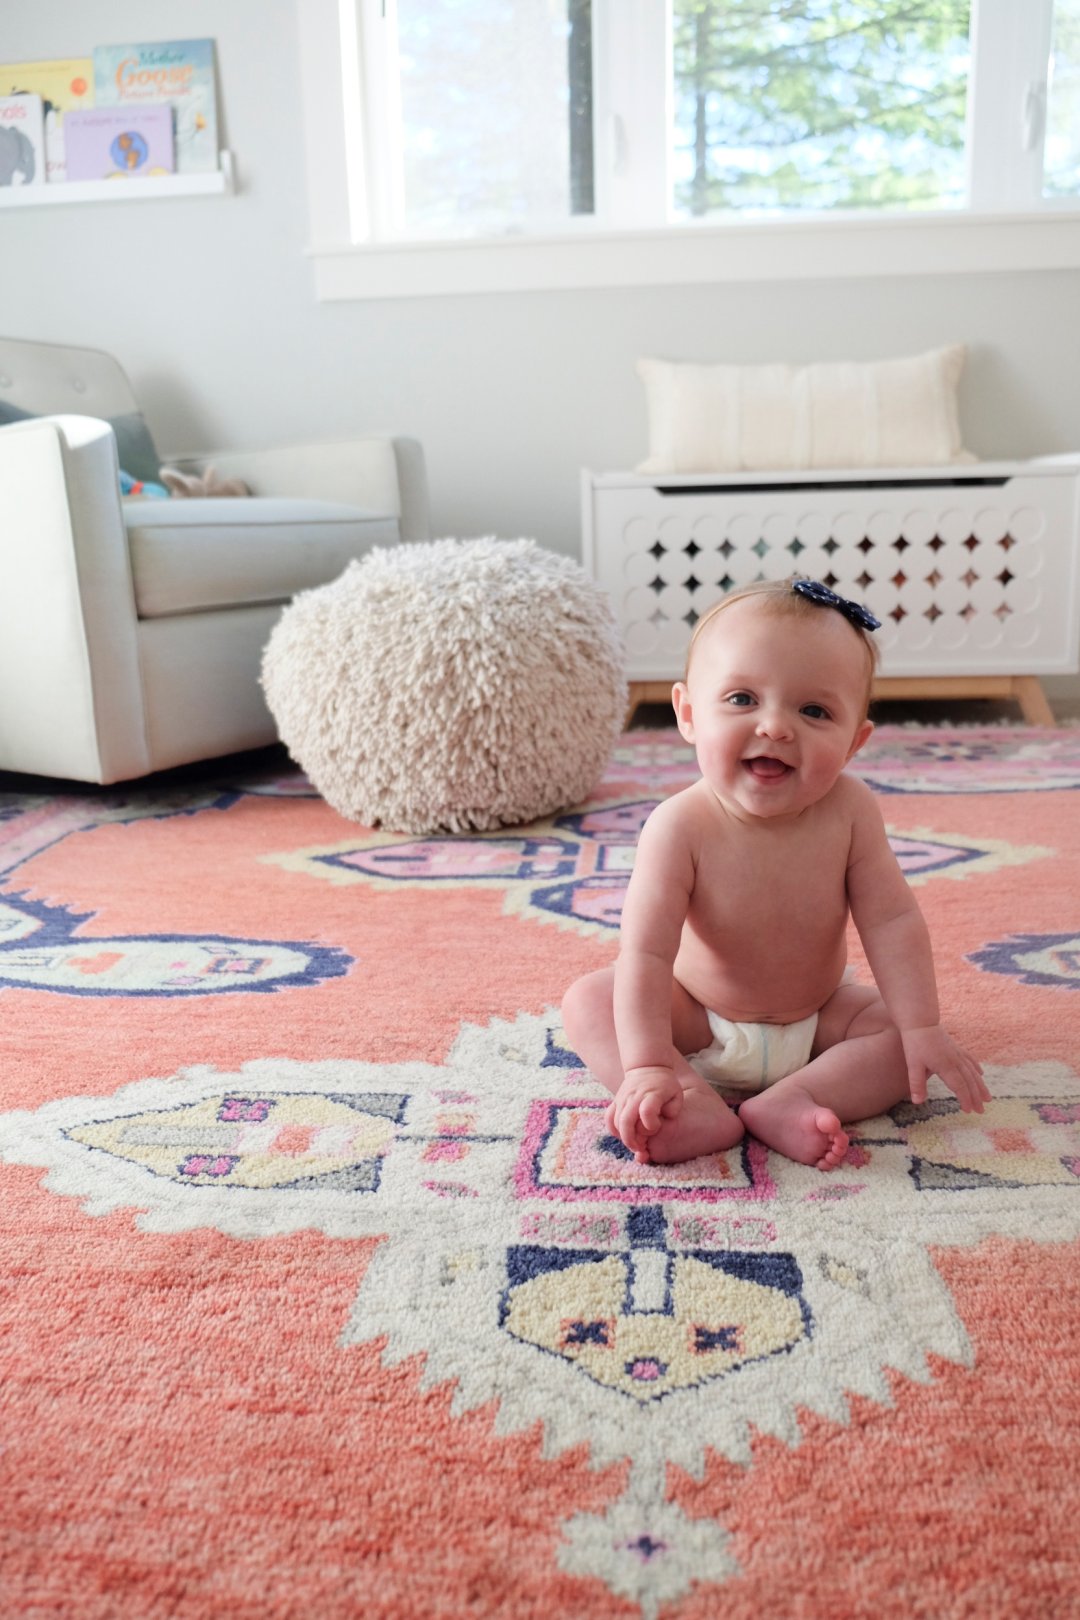
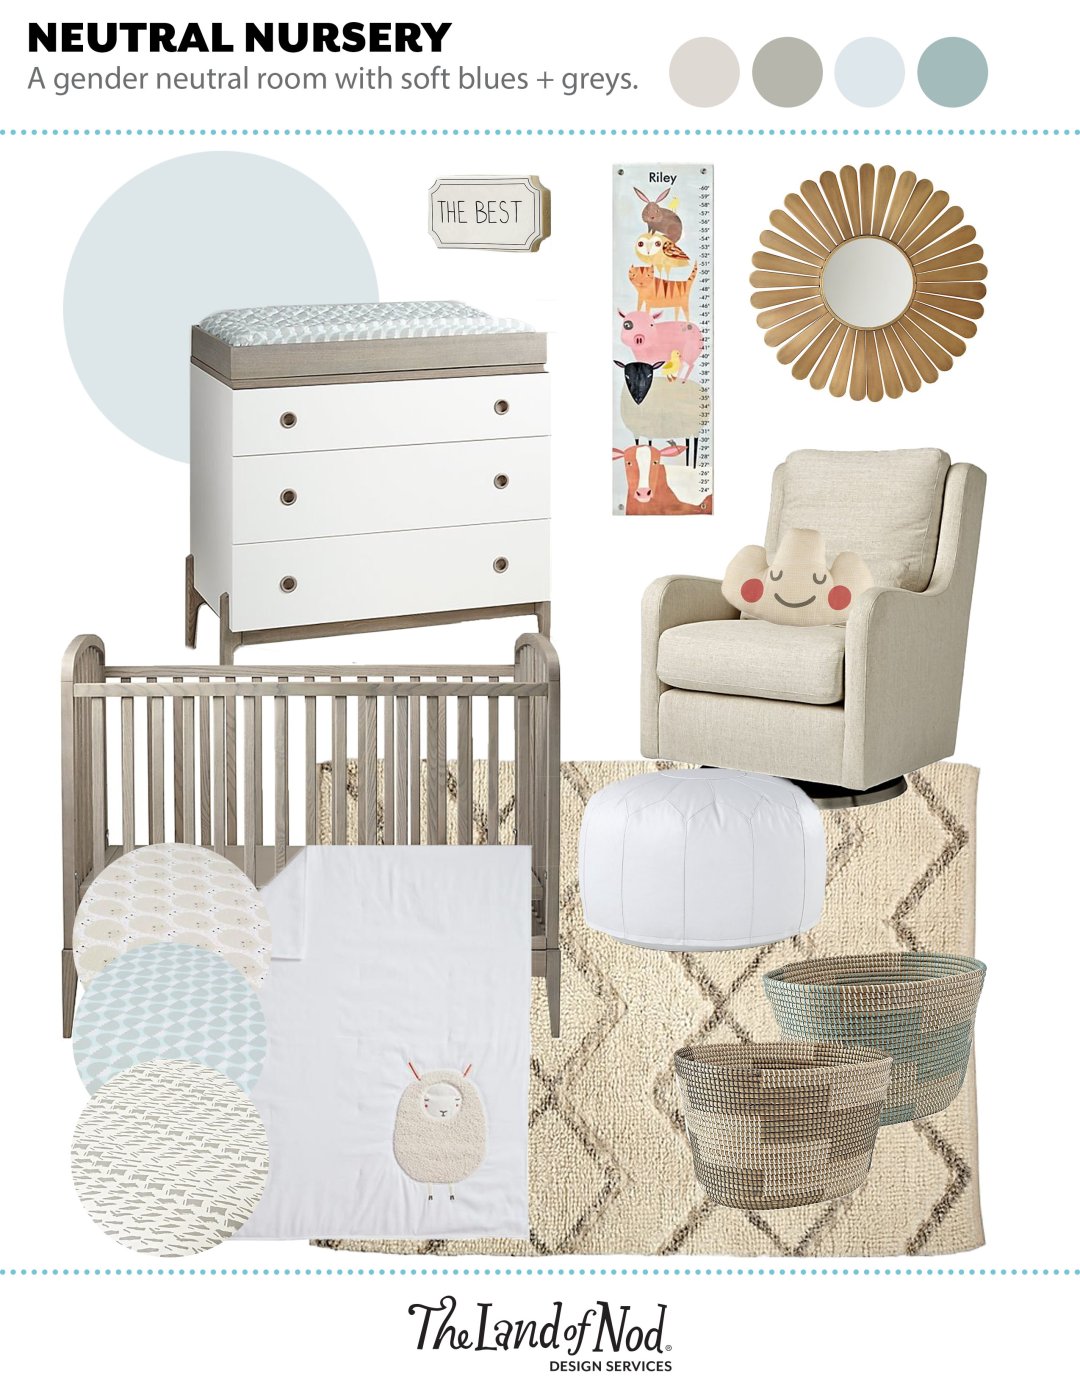
Nora is 6 months old and loves attention! (especially from her big brother) Her room turned out beautiful. Thanks to the Design Services Team we were able to use almost all of our previous nursery furniture that we used with Ollie, yet give the nursery a completely different look and feel. The crib, dresser, and rocker are all hand-me-downs from her brother that were still in great condition.

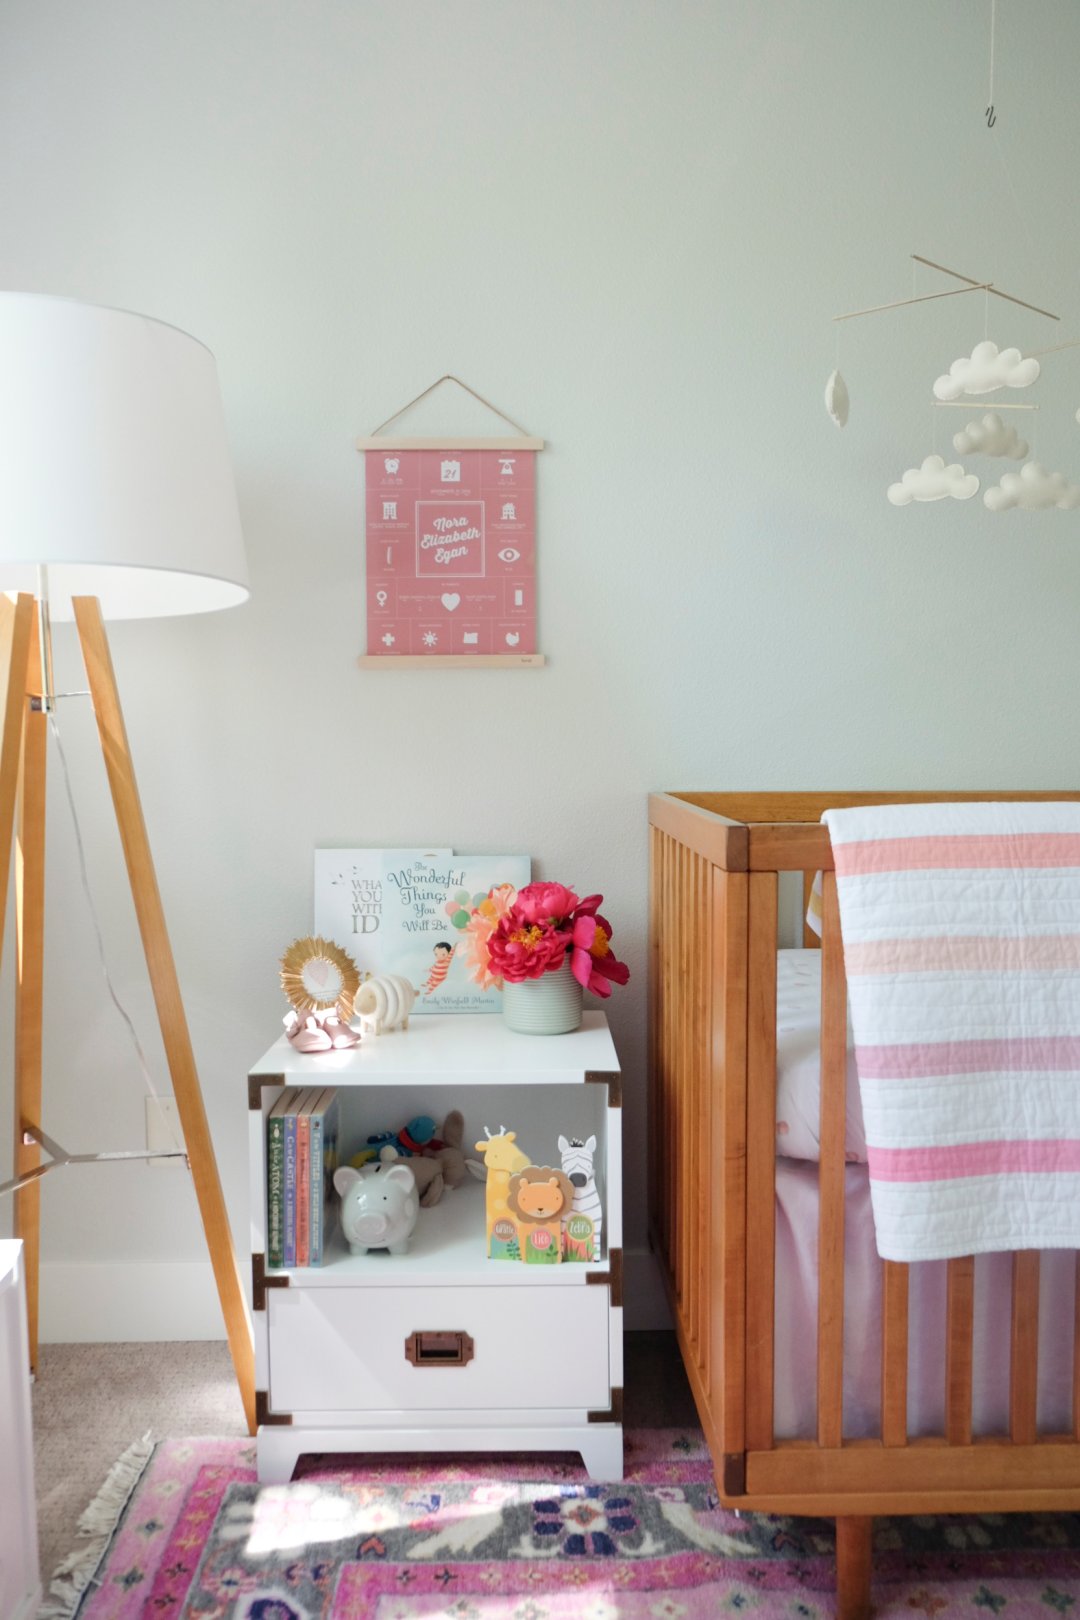
One of the focal points of the room is the beautiful pink Turkish inspired rug. It was designed by my friend Caitlin Wilson and set the perfect tone for the room. It had previously been in our dining room and living room, but the color palette with pinks, coral, mint green, and navy seemed perfect for a baby girl nursery. it inspired the decisions for many of the details in the room like the crib bedding.

Kids Room Makeovers: Boho Nursery & Boys Room


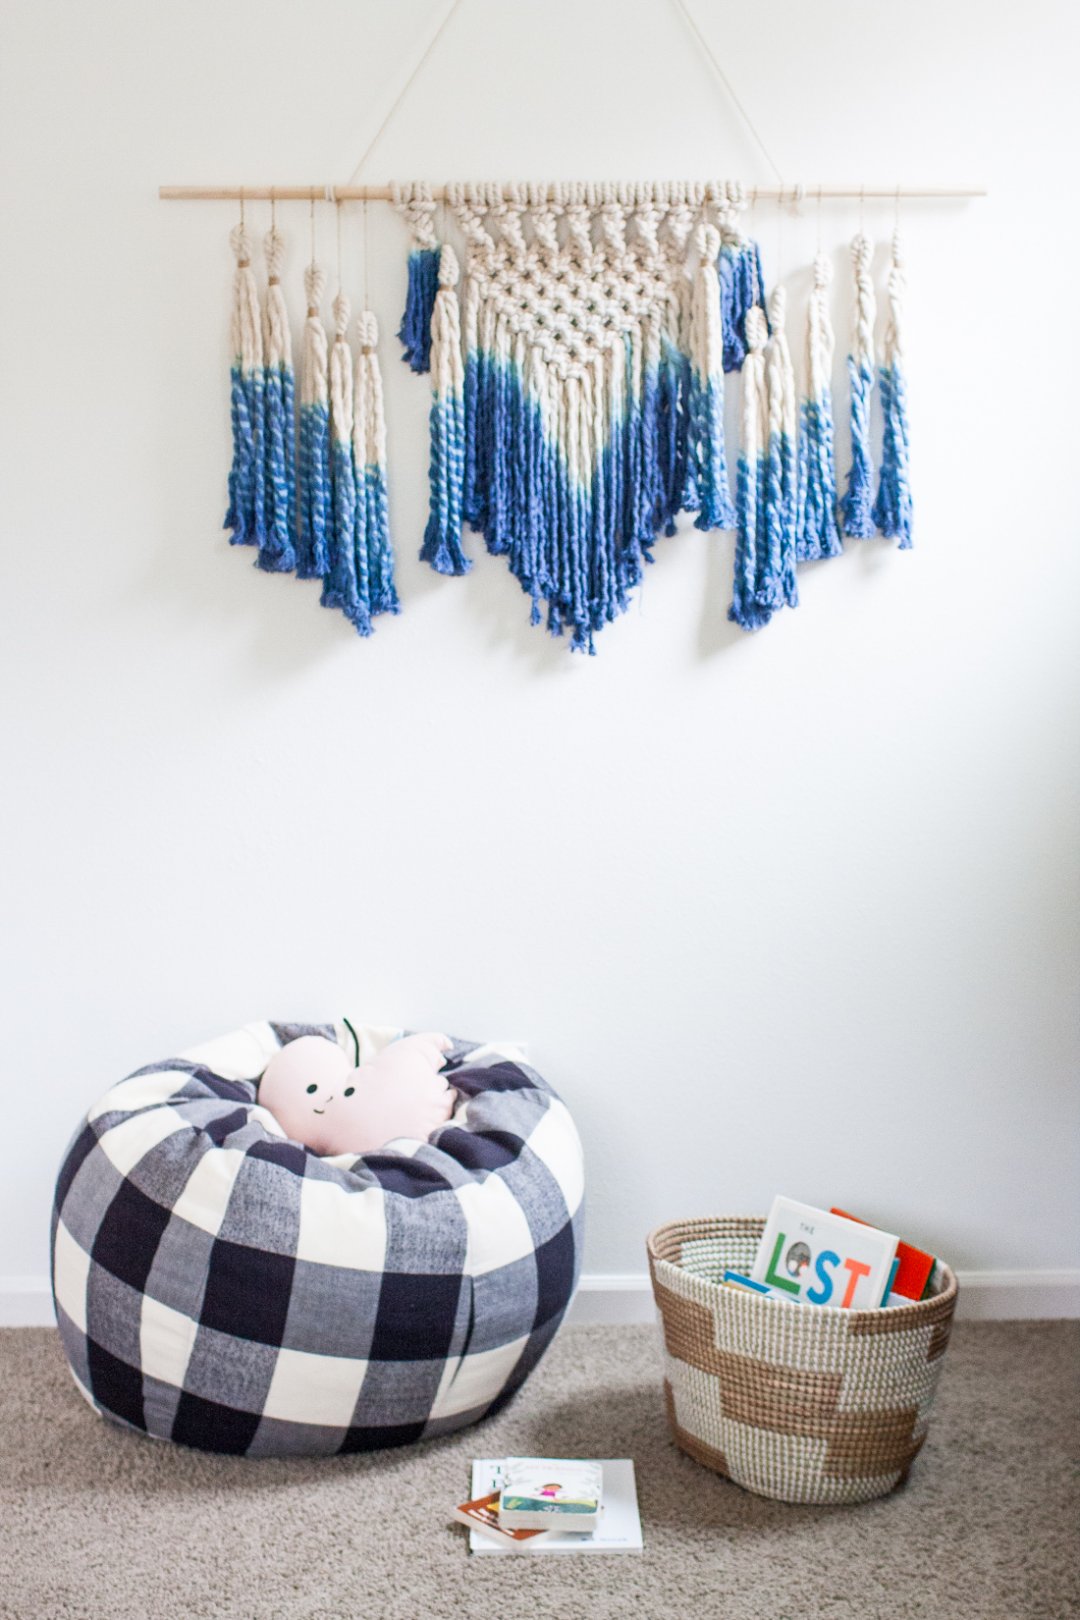
The reading corner is cozy and inviting with the cream shaggy pouf perfect for propping my feet up in the middle of the night or lounging while flipping through books with Nora in my lap. The book ledges are both beautiful and practical for keeping our favorite books organized. Her toys are often nestled in an index cube bin making them easily accessible for tummy time play. The toy box feels so special – like a piece that can eventually be passed down. The quality and design is top notch for storing blankets and stuffed animals.

Kids Room Makeovers: Boho Nursery & Boys Room


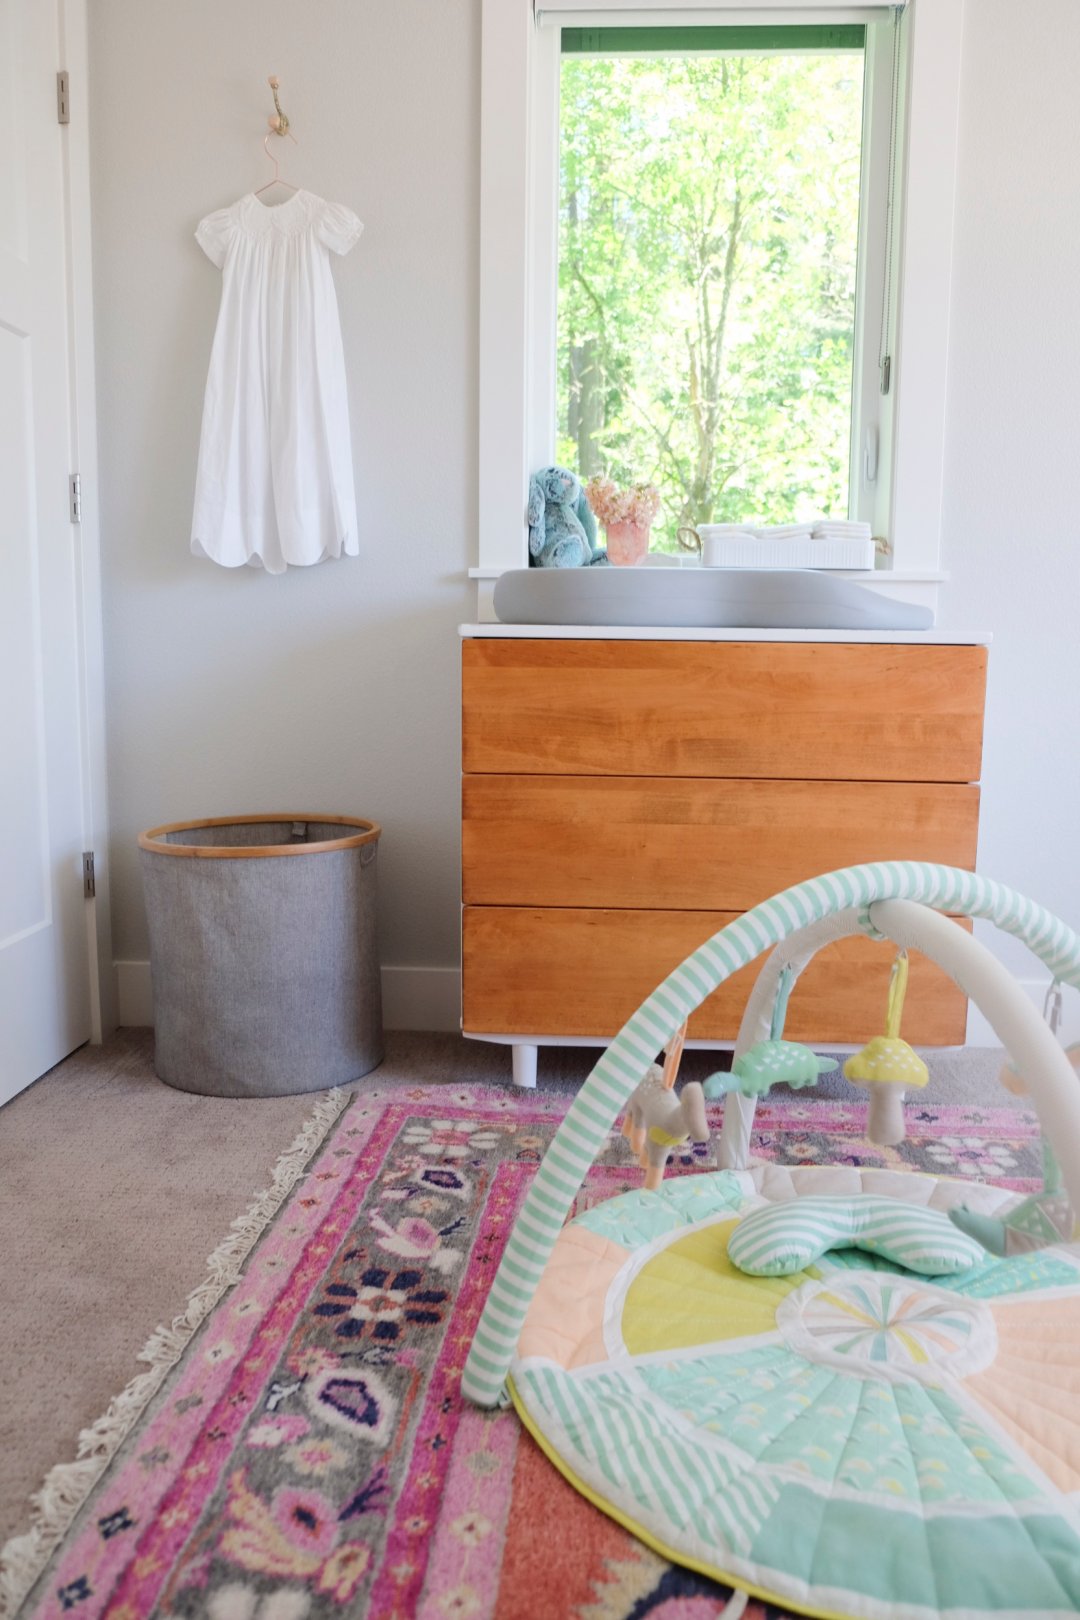
This corner is where dressing and diaper changing happens. Her beautiful blessing dress hangs on the wall and Nora spends plenty of time kicking and playing on her activity gym that rotates rooms throughout the house. Her hamper was purchased from LON for Ollie’s nursery years ago and has been a well used item that has stood the test of time, it’s no longer available, but here is something similar.

Kids Room Makeovers: Boho Nursery & Boys Room


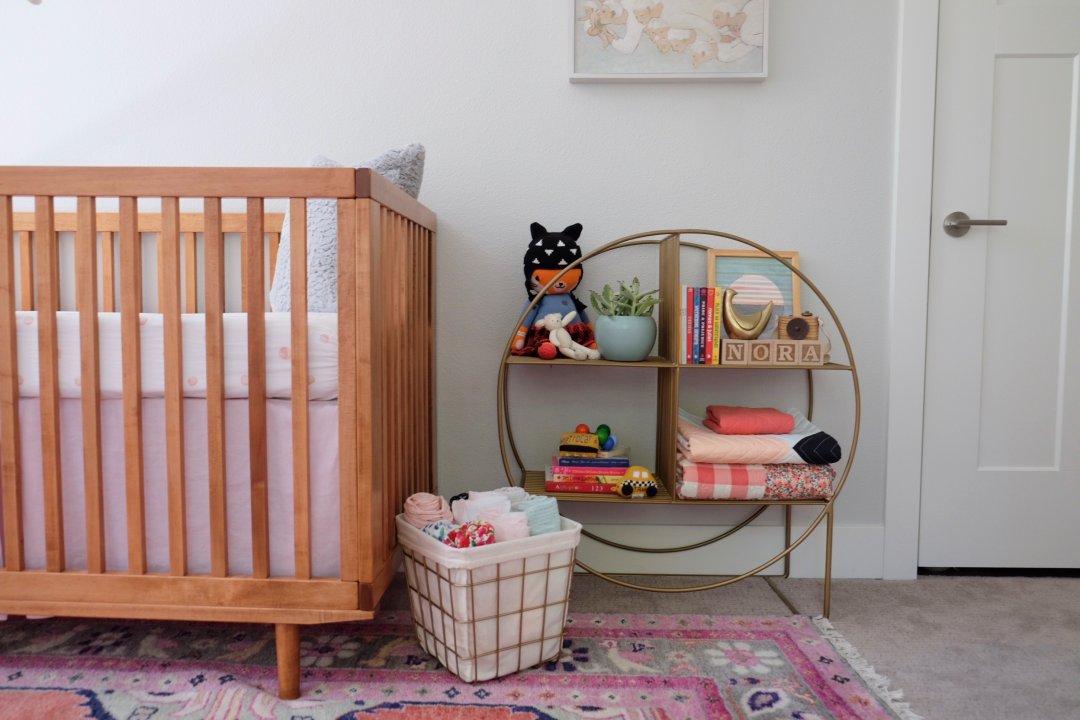
I fell in love with the design of the Wheelhouse Bookcase and envision it being used for many years to come. It’s stylish yet practical and a great shape for the room. Another index cube bin is used to store swaddle blankets for easy access anytime of day.

Kids Room Makeovers: Boho Nursery & Boys Room


I’ve really enjoyed having a small nightstand next to the crib – it’s an easy landing spot for a bottle in the middle of the night and to store things like lovies and books. It will be a great piece to have once she’s old enough for a big girl bed as well. The wood picture frame holds a modern birth print that my sister Kylie Whiting designed sharing all the important details from the day she was born. The mobile (here is one similar) adds a touch of whimsy and the floor lamps (similar) provides perfectly soft light as we’re winding down before bedtime each night.

My thanks to the incredible Design Services team who went above and beyond to help me create such lovely rooms for my kiddos. We look forward to years of memory making in these spaces!

Post by Kelsey Nixon, an Emmy-nominated TV personality, author, wife, mom, and cooking show host. Her show, Kelsey’s Essentials on Cooking Channel, centers around a tip, technique or tool that shows the home cook how to navigate the kitchen. You can also catch Kelsey dishing about her experiences as a new mom on Family Food and First Time Mom. Follow her on Facebook, Twitter, Pinterest and Instagram.


Our Design Services team offers free one-on-one design advice, mood boards and space planning. You have a room to decorate? They’d love to hear from you. Visit The Land of Nod’s Design Services page to get started today.

Slumber Party Ideas

June 1, 2017
Slumber Party Ideas


Summer vacation is approaching fast! And that means slumber parties any day of the week! I’ve recruited a couple of my favorite cuties to share our tips for no-fuss slumber party ideas!

A sleeping bag that matches your bedding makes your guest feel right at home! Now take advantage of that super cute sleeping bag and snap a few selfies to help you remember your big night!

Slumber Party Ideas


Makeovers are always a must. Either whip up a few of your favorite DIY spa recipes, (like this scrumptious watermelon lip scrub) or grab a couple inexpensive mud masks from the drugstore. Your favorite candy-flavored lip gloss is the perfect finishing touch.

Slumber Party Ideas


Crafting is always a great sleepover activity. We suggest making sparkly beaded bracelets!

Slumber Party Ideas

Next, move on to manicures. Maybe even use some mermaid-inspired colors so you look super fancy when you drift off to sleep.

Slumber Party Ideas

While you wait for your manicures to dry, put on your favorite movie. Don’t forget the popcorn! Make even the most simple snack super snazzy with some fancy mermaid plates, cups and napkins! I seriously can’t get over how cute these are!

Slumber Party Ideas


Now when the grow ups say it’s time for sleep, make sure to lay very still and quiet for a while so they think you’re sleeping. Get cozy with piles of pillows while you catch up on your favorite YouTube videos.

When the coast is clear, bust out your favorite pillows for a pillow fight. Then, when you’re all worn out from that, make sure you stay up all night talking and giggling. Because everybody knows that sleepovers aren’t for sleeping!

Christina Williams is a blogger and graphic designer living in Salt Lake City, Utah. She’s a night owl and a bookworm, as well as a mother to three children ranging in age from two to eight. She shares her latest DIY and design projects along with her adventures in parenting on her self-named blog, Christina Williams

Office Playroom Ideas

May 31, 2017
Office Playroom Ideas


Our play-office makeover is finished and even though I never in a million years thought I would be willing to share an office with my little people, I couldn’t be happier to be sitting and working in a freshly painted, decorated and kid friendly office space. It’s been getting lots of use, staying relatively clean (thanks to lots of baskets and hooks) and working out really well for everyone so far! Now, instead of my kids annoyingly moaning and rolling around on the floor while I finish up an email or save design files, they have lots of toys and activities to keep them busy. For all the mamas who understand what it’s like to try and finish a task while kids are awake, you know what a blessing that is.

Enough of me chit-chatting… welcome to our play-office! Keep scrolling for a full tour and details.

Office Playroom Ideas


A dress up corner was a must as it’s one of the things my younger two kids love to do. To tame the pile of tutus, capes and masks we’ve collected over the years, we used this cute floor bin. However, it can be easy for kids to forget about their playtime options when everything is hiding so we also added these arrow hooks and an inexpensive mirror for endless entertainment.

The cute cat and dog duo above the mirror are a favorite addition to the room… we recently started talking about giving them names!

Office Playroom Ideas

My desk area… Wasn’t sure if I would like my desk and computer in front of the window, but really love it! Bonus that it makes keeping an eye on scooter riding, street hockey playing, baseball throwing kids, super easy. Something I will be extra grateful for come summer!

Office Playroom Ideas


Nothing like a pretty ceiling light and rug to make a room feel pulled together and a bit more sophisticated. Couldn’t resist this gold and white spotlight pendant light…and this beautiful denim rug!

Office Playroom Ideas


The kids’ play kitchen dreams came true when this retro refrigerator arrived. I also love that it’s roomy enough to hold lots of kitchen accessories. Makes playing and picking up super easy! And I can’t get enough of these play food sets!

Office Playroom Ideas


Favorite part of the room makeover is this wall. I asked the kids to draw simple pictures and then scanned, made some small edits and had them printed as posters. Working on a full tutorial to share! The TV was another thing I was unsure of, but it’s been nice to have… you may have seen the kids following along with a yoga show on my Instagram stories last week 🙂

Office Playroom Ideas


Last but not least, a comfy reading area complete with an oversized beanbag and cute rose gold basket to hold books.

Post by Rae Ann Kelly, graphic designer, blogger, kid wrangler. She shares fun stuff @ raeannkelly.com & can’t stop (won’t stop) insta @raeannkelly


Gender Neutral Blue Nursery

May 26, 2017

Traditionally, people think of a blue nursery for a boy and pink for a girl. And for a gender neutral nursery, grey is the go-to shade for walls. But for those of you looking for a paint color option that would work for either gender, I recommend the light shade of blue grey in Sherwin William’s Sky High. The trick is to keep the color very light—I often recommend starting with 50% of the tint and adding from there as needed. A blue with grey undertones helps to neutralize the space and differs from the bright baby blue that is so commonly associated with little boy’s rooms.

I like to bring in a variety of textures and shades of grey, cream and wood in a neutral nursery to create a cozy base for the room, and then use the smaller décor and accessories to bring in more gender-specific and personalized touches after the baby is born. The room shown here could easily be accessorized with touches of navy for a boy or pink and pastels for a girl.

Post by Danielle, Home Stylist from The Land of Nod’s Design Services Team. Our Design Services team offers free one-on-one design advice, mood boards and space planning. You have a room to decorate? They’d love to hear from you. Visit The Land of Nod’s Design Services page to get started today.

DIY Jewel Storage Boxes

May 25, 2017

Hi friends! It’s M.J. here from Pars Caeli, back with an easy and gorgeous DIY for you! When my three children were all bundles of energy and under 7, they spend a ton of time with buckets of crayons, sitting at our kid-sized table. Hours and hours of construction paper projects and cardboard tubes came to life thanks to those buckets of supplies and open surface.

DIY Jewel Storage Boxes

Now I have three children 12 and under, and they need a bigger table and more containers for their sophisticated supplies. Our kid-sized table has been moved aside for a rolling craft table with drop leaf sides so that we can have a giant surface for poster boards and canvases and even the occasional jigsaw puzzle.

Since we’ve added size to the art table, it resides in my office studio (the only place it fits). I’m making it over with some handy white paint and these gorgeous knobs (and they’re on sale) from The Land of Nod. I also decided to use them some storage boxes to dress them up!

DIY Jewel Storage Boxes

For this simple project, you’ll need:

The ones that I purchased have a cord that goes over a button closure, and they’re great for carrying around bunches of markers and a combination of emergency scissors/glue/erasers to keep handy.

DIY Jewel Storage Boxes

Directions

1. Paint the boxes your desired colors. I kept one of my boxes the unfinished light wood because I really like the contrast with the gem knobs. I painted another with two coats of white and the other in a peony pink.

DIY Jewel Storage Boxes

2. Using the screw provided with your knob, press into the center of the box lid in a back and forth motion. Push and twist to create a hole in the top of the lid. From the interior of the box, push the screw up through to the outer surface and screw on the knob.

3. Follow this same process for all of the boxes. If you’re having trouble puncturing the lid, use the end of a scissor blade to make a small hole and then push the screw through.

DIY Jewel Storage Boxes

>Now we have the grown-up version of our crayon buckets that can be carried outside or to another room in style. And when the kids leave the space, these jewel stone boxes look pretty amazing as accessories in my space, too!

Can’t wait to show you the finished art table next month! We found a 100-yr+ beauty free on the side of the road (as you do), and I’m giving it Nod style.

Until then! Xoxo, MJ

MJ is a graphic and product designer, wife, and proud momma to three. She founded Pars Caeli (meaning a piece of heaven), a delightful blog and shop, to add more creative to the everyday. MJ worked with our team to bring her lunchbox jokes to life in our product Lunchtime LOL Notes, now available at The Land of Nod to bring on a case of the giggles! 


Navy and Gold Boys Bedroom

May 24, 2017

Presenting: a traditional-meets-luxe kids room design fit for a king! In this navy and gold boys bedroom, your little guy will reign supreme. A bunkbed becomes a castle and a throw pillow becomes king’s treasure. This rad room includes a more traditional desk and chair that’s sure to last well beyond his days in the kingdom.

Navy and Gold Boys Bedroom

Post by Shawna, Home Stylist from The Land of Nod’s Design Services Team. Our Design Services team offers free one-on-one design advice, mood boards and space planning. You have a room to decorate? They’d love to hear from you. Visit The Land of Nod’s Design Services page to get started today.

DIY Postcards from Outer Space

May 23, 2017

Post by Michelle of Avery & Augustine

DIY Postcards from Outer Space


Put a twist on the next piece of snail mail you send out with these DIY postcards from outer space—perfect for a kid who is in love with all things galactic!

DIY Postcards from Outer Space

SUPPLIES

DIRECTIONS

1. Cut the black card stock into postcard-size pieces.

DIY Postcards from Outer Space

2. Use scissors or a circle confetti punch on your patterned paper. The great thing about this particular punch is that it generates different sizes of circles, which is exactly what you need to create your planets.

DIY Postcards from Outer Space

3. Use scissors or a star punch on different patterned paper to create stars.

DIY Postcards from Outer Space

4. Attach planets and stars onto your postcards using the adhesive of your choice.

DIY Postcards from Outer Space

5. Use a star-shaped rubber stamp and white ink pad to get a few more stars in your solar system.

DIY Postcards from Outer Space


6. Allow the ink to dry before you write your galactic message on the other side.  “Greetings Earthlings” is one of our favorite ways to begin a message!

DIY Postcards from Outer Space


You can see Michelle’s work and read about her two young children and their first forays in cooking, art, reading and everything in between at Avery and Augustine.  You can also find her sharing the latest in children’s books on Instagram at @averyandaugustine.

Let the countdown to bedtime begin with Space themed items that are out of this world!


Tips to Organize Sports Equipment

May 19, 2017

Post by Rebecca of Not-So-SAHM

Tips to Organize Sports Equipment

Our kids really never met a sport they didn’t like (well, they like watching baseball more than playing it. But given that the stands are where the popcorn is, who can blame them?). And I love that about them. But sports equipment has started to overtake our house. In addition to the regular 8,324 pairs of shoes by our front door, lacrosse sticks, wrestling headgear, and soccer balls had started to pile up. And even though most of the gear was laying right out in the open, it’s a sure bet that no one could find their soccer cleats five minutes before game time.

So I got serious about some organization. We have a little nook in our basement perfect to corral everything. And even though it’s in the most narrow and dark corner of our house with very little natural light (so hard to photograph), it happens to be by the basement entrance which is key after wet and muddy games. I used a few new items from Nod and repurposed others to organize everything.

We’ve had a few weeks to try the new layout, so I thought I’d share a few lessons learned that might help you get your own athletes under control:

1. Keep Most Things Kid-Accessible

My main goal with the new space was to organize items so that the kids could take out and put them away themselves. Even the littlest of littles can help when they know where things go. The key there is to use storage the kids can see through. I love The Land of Nod’s Flea Market Wire Ball Bins are fabulous for this! We have them in grey and gold and the kids can easily locate whatever ball they need at the moment.

Tips to Organize Sports Equipment

2. Think Outside the Box (or bin!)

Sports equipment can be odd shapes sometimes and I like to look for unusual storage for these items. Remember our Unpack Your Backpack Station? Well that same Linear Book Cart we used for backpack and shoe storage has been repurposed for unwieldy bike helmets. And the X-Ray Storage Boxes hold a few of our biking accessories on the top shelf.

3. Use ALL Available Space

Think linearly! We mounted the kids’ bikes on the wall and I am SO happy to clear the floor space a bit. Even a small area can work wonders when you use all the space.

Tips to Organize Sports Equipment

4. Group Items By Sport

Nod’s Stack Up Metal Bins were an easy way to separate items by sport. Each of the kids’ main sports got a separate bin and I put the corresponding items for both kids in one bin. Need one kiddo to grab everyone’s wrestling gear? All in one place. (Even our new doggy Penny can help out).

5. Rotate Items Seasonally

place the items you need most immediately in the most accessible areas. Right now we are in the midst of lacrosse and soccer season. So soccer cleats and balls are at the top of the bins. Most of their lacrosse equipment is in gear bags ready to go. That means the equipment for other sports, such as wrestling and football, is put away and the bags folded under the Book Cart. I’ll switch it all out when the season changes.

It’s not fail safe, but I’ve been pleased with how it’s working out so far. Although those Saturday 8.30 a.m. soccer games are still killing me.

Rebecca is a mom to two young kiddos and, in her spare time (ha!), likes to pretend she’s a back-up dancer, craft cocktails, and run long distances. A relatively recent SAHM, she blogs family-friendly activities, DIYs and celebration fun at Not-So-SAHM.

Quick & Easy DIY Sugar Scrub Recipes

May 18, 2017

Post by Christina of Christina Williams Blog

Quick & Easy DIY Sugar Scrub Recipes

We’ve been making lots and lots of slime around here lately. Classic slime, clear slime, glitter slime, puffy slime. You name it, we’ve tried it. Multiple times. Honestly, I’m a little over slime at the moment, so I’m redirecting our efforts to something new for a while.

These DIY sugar scrub recipes are just the ticket! Most of them are just 2-3 ingredients, that you most likely have on hand! Each recipe takes just one bowl and a fork, so the mess factor is low. And all the ingredients are edible, so if you have any little taste-testers in your crew, they’ll be in good shape! Plus, it’s easier to clean off the counter/floor than dried slime. All of my kids (even the boys!) had just as much fun with these recipes as they do with slime.

We made watermelon lip scrub and strawberry lemonade body scrub. Most of the recipes we found online use coconut oil. I LOVE coconut oil. But my kids are another story. So we used safflower oil instead, since it’s lightweight and unscented. But you can use any type of oil you like for this: olive oil, coconut oil, grape seed oil, etc. Same goes for the scents. I used candy flavoring oils for ours, but you could totally use your favorite essential oils for these recipes. Keep it stress-free and use what you have!

Quick & Easy DIY Sugar Scrub Recipes

Body Scrub

  • 1 C sugar
  • 2 Tbsp. oil
  • 2-3 drops of red food coloring
  • 4-6 drops each: Lemon & Raspberry flavoring oils (you can find these in the candy making section of the craft store. They’re like $3-4 each; and you can use the leftover flavoring oils to whip up a batch of homemade lollipops during summer vacation!)

Note: As I mentioned earlier, you could also use essential oils rather than the flavoring oils; but my kids had specific flavor requests for this project.

Simply pour all the ingredients in a bowl and fluff with a fork until it’s well mixed. Feel free to adjust the ingredients until you’ve reached the desired consistency/color/scent. I prefer bath products that don’t have a lot of color, so I don’t end up with a stained shower. Once you’ve got a finished batch, put it in an airtight container and you’re ready for a little at home spa day!

Quick & Easy DIY Sugar Scrub Recipes

Lip Scrub 

The lip scrub is much the same. The only difference is the quantities:

  • 6 Tbsp sugar
  • 3 tsp oil
  • 1-2 drops food coloring
  • 3-4 drops flavoring oil

Mix with a fork until well combined.

Quick & Easy DIY Sugar Scrub Recipes

Note: If you want a two-colored lip scrub like we made, separate the ingredients into two bowls. Dye one green and one pink. I didn’t use the scented oil in the green scrub, as the watermelon flavoring is pink, and it would distort the green portion of the scrub. Once you have the separate colors mixed up, layer them into an airtight jar and you’re in business!

While you’re at it, mix up a double-batch so you have some cute teacher gifts ready for the end of school!

If you’re in the mood for a more grown up spa recipe, hop over to my website for a super easy Citrus + Mint Bath Salts Recipe.

Quick & Easy DIY Sugar Scrub Recipes

Christina Williams is a blogger and graphic designer living in Salt Lake City, Utah. She’s a night owl and a bookworm, as well as a mother to three children ranging in age from two to eight. She shares her latest DIY and design projects along with her adventures in parenting on her self-named blog, Christina Williams

Playroom Organization Using Bins & Baskets

May 17, 2017

Post by Krista Aasen from The Happy Housie

Playroom Organization Using Bins & Baskets


A separate playroom is both a blessing and a curse. A blessing because it provides a spot for your kids to play and keep their toys that is outside of the regular family zone. A curse because it can quickly and easily become a disorganized and messy nightmare of a room; so scary that even your kids don’t want to go back there…

I recently undertook the challenge of organizing our entire home; over ten weeks I went through each room one at a time and purged, tweaked, and organized every space in our home. Our playroom was one of the last areas that I tackled. Even though we had recently given it a decorative makeover the previous year; it was not functioning well. The truth was, we had too much stuff.

Step 1: PURGE

Purging kid’s toys can be tricky, especially when you are in the thick of early childhood. But it’s an important step: go through and get rid of all toys, books, and decorative objects that you are not using or that your kid’s don’t truly love.  Alternatively, pack away half of them and rotate the toys in an out on a monthly basis. This keeps the excitement for their toys alive as they seem new each time they are rotated back in.

Step 2: SORT & ORGANIZE

I ordered eight of the Stripes Around The Cube Bins (11″x11″) from Land of Nod because they fit perfectly inside of our existing cube shelf unit. I also ordered four of the Stripes Around The Floor Bins (16″x16″) because some of the larger items store a lot better inside a big bin.

Playroom Organization Using Bins & Baskets


I laid out all 12 of the bins and began sorting all the toys that had survived the purge.  This step will vary, of course, based on your children’s ages and toys and needs.  But I do highly recommend using bins as it makes cleanup super quick and easy!

Sort your toys into like categories that make sense grouped together. We ended up with smaller bins for: (1) cars and the car mat; (2) puzzles; (3) log building set; (4) train set; (5) pingpong and air hockey accessories (6) costume/dress up accessories (7) superhero toys (8) small dress-up accessories.

In the large bins I sorted out and stored the: (1) stuffed animals; (2) costumes; (3) indoor sports accessories; (4) large Paw Patrol set.

Step 3: TEACHING TIME

Your children will not naturally and magically figure out how to keep their toys in these neat little categorized bins just because they’ve been set up and organized. This is where the teaching comes in. I went through each bin and I showed my boys how they were organized and where to put things away. Not just once, but several times. Kids need support and refreshers as they learn new skills; and how to clean up and put their toys away neatly is definitely a new skill for most.

Kids will generally be able to pick up after themselves easily on a daily basis after they’ve been taught; but over time things will likely migrate into the incorrect category.  Labeled bins (words or pictures for younger children) can definitely help with this process. For me, I go downstairs with the boys every month or so and we re-sort out the bins together.

Once you’ve gotten the toys purged, sorted, organized, and done the teaching and support as your children learn the skills to be tidy and organized then it’s much less likely that your separate playroom will become quite as messy and scary as it did before. Or at least, when it does, everyone in the family knows how to tackle it!

Krista Aasen blogs over on The Happy Housie where she decorates (and re-decorates), DIYs, crafts, organizes and just has fun living. There’s always something new happening and her blog is all about enjoying the journey. In her spare time from all her blog related exploits, she juggles being a mom to two boys and teaching kindergarten. Check her out on Instagram @thehappyhousie


Bookcase Storage Styling Tips

May 16, 2017

Post by Stephanie, Home Stylist & Event Designer from the Land of Nod’s Design Services Team

As any parent will tell you, the struggle to maintain an organized, stylish home with kiddos is a real challenge. Arming yourself with a robust assortment of storage options is paramount in fighting the battle of toys, books, games, and other kiddo paraphernalia.

Bookcase Storage Styling Tips


When it comes to building up your defenses, there is no better hero to have on your side than a member of the classic Cubic Bookcase family. With five different shapes and sizes in the collection, there are a multitude of possible configurations to adapt to your specific needs. Each cubby in the bookcase fits anywhere between an 11 to 12” bin or basket, so you can easily bring some enclosed storage into the mix to help corral any of those tiny blocks and balls that require a little bit of extra organization assistance.

My personal favorites are the Wood and Wire Cube Bin and the Stripes Around the Cube Bin. The wire bins are great for playrooms or bedrooms where you may want to give your kiddos some visibility into where their toys are hiding. The striped canvas bins are great for living rooms or any places where you may want to conceal toys when they’re not in use.

Bookcase Storage Styling Tips


Once you’ve gotten your storage needs nailed down, the final step for styling your bookcase is adding personal decorative touches. Whether this is an array of bright yellow Honeycomb Shelves hung above the bookshelf or a few favorite toys positioned next to a table lamp, anything can be a propping element. Don’t be afraid to use vessels filled with army men, glitter or pom poms to fill spaces between books and games. Gather up those seemingly random, tiny objects and put them to work as artful display pieces.

Happy Styling!

Post by Stephanie, Home Stylist & Event Designer  from The Land of Nod’s Design Services Team. Our Design Services team offers free one-on-one design advice, mood boards and space planning. You have a room to decorate? They’d love to hear from you. Visit The Land of Nod’s Design Services page to get started today.

DIY Super Simple String Art

May 11, 2017

Post by Tonya of Toluka Paper

Hi there! I’m Tonya from Toluka Paper and I had SO much fun sharing this craft at the Lincoln Park store last month. Did you miss it? No biggie…you can either join us in Oakbrook, IL on May 20th for another super session…or…because sharing is caring, I’m sharing the deets here with you to give it a go at home.

This is a great way to practice color and shape recognition, and hone those fine motor skills….not to mention HAVE FUN and BE CREATIVE! The thing that makes this craft perfect for all ages is it doesn’t have to be perfect to be awesome!

Supplies

  • Styrofoam
  • Patterned paper, construction paper, etc (optional)
  • Crayons/markers (optional)
  • Tracing paper (options)
  • Flat toothpicks String (I used embroidery thread, but any thin string or yarn would work)
  • Scissors

DIY Super Simple String Art

Step 1 Start with a piece of Styrofoam. Here is an opportunity to upcycle! Mine is 5×7”, but yours can be any size or shape.

DIY Super Simple String Art

Step 2 Cover Styrofoam with patterned paper to create a background. You may also draw or color a background using crayons or markers (pssst…make sure the markers dry and don’t leave a wet, inky mess on the styrofoam 😉

DIY Super Simple String Art

Step 3 Decide what shape you want your string art to be. If you would like to do a house shape like the sample pic place dots in a simple house shape on tracing paper . Have a different shape in mind? No problem! Either plan out your shape on tracing paper, or skip the tracing paper all together and create a free-form shape of your choice by inserting toothpicks* in your choice of shape or random placement. Anything goes!

DIY Super Simple String Art

Step 4 Knot the end of your string around a toothpick. Hint: It works best to start the loop before slipping it over the toothpick – then pull to secure (as shown). The littles will need help with this part.

DIY Super Simple String Art

Step 5 Now WRAP away! When you have reached the end of your string or want to switch colors, just cut the string and knot it on the last toothpick.

Repeat steps 4 and 5 until desired number of colors is reached.

Step 6 If you used tracing paper, you can remove it now by tearing it out from in between the toothpicks. Voila!

DIY Super Simple String Art

Toluka Paper began when owner/designer Tonya Kauffman designed her own Save the Dates and wedding accessories. From there family and friends began asking her to perform her ‘paper magic’ and soon the word of her talents spread and Tonya learned her true passion for design. As her orders increased, she decided to start her own stationery business and founded Toluka Paper in 2007 . She continues to grow her business while balancing the demands of being a mother and a wife.


Nature Inspired Girl’s Bedroom

May 10, 2017

Post by Danielle, Home Stylist on The Land of Nod Design Service’s Team

Maybe you have a daughter who is not into princesses, ruffles or anything too “cutesy”, or maybe your kiddo is simply looking for a more grown-up vibe to her bedroom. Where do you even begin to look for design inspiration for her room? More often than not, a great place to start is to look outside your window.

For this nature inspired girl’s bedroom I used the Charley Harper Lucky Lady Bug Quilt to create a fun, lively room with lots of color and outdoorsy accents like bugs, plants and different wood tones. The accent wall behind the bed features this beautiful succulent wallpaper that pairs nicely with the bedding, or you could try a soft peach shade like Benjamin Moore Peach Parfait. To balance out the colors and patterns, I chose the Larkin bed and nightstand in white, along with the white Rags to Riches rug.

Nature Inspired Girl's Bedroom


Post by Danielle, Home Stylist from The Land of Nod’s Design Services Team. Our Design Services team offers free one-on-one design advice, mood boards and space planning. You have a room to decorate? They’d love to hear from you. Visit The Land of Nod’s Design Services page to get started today.

Hand Woven Rugs

May 8, 2017

Post by Rachel, Nod’s Brand Marketing Manager

The artisans who fashion our hand woven rugs in India have been doing it for generations, and their unrivaled craftsmanship shows with every beautiful detail. From start to gorgeous finish, each one is crafted entirely by hand, from tufting to dying to weaving to hand-carving details.

These artisans are incredible at what they do, and our rugs are incredible as a result. And, not only do they look gorgeous, they’re also incredibly durable. You can be sure that our rugs will handle whatever walks their way, because they’re made to last. Which means you and your feet can enjoy them for years to come.

Watch the video below to find out more about our hand woven rugs.


Ever wonder who’s behind The Land of Nod social media accounts? That’s Rachel! When she’s not telling anyone who will listen that she’s not meant to live in cold, snowy Chicago, you will find Rachel hanging out with her husband and new baby and binge-watching Netflix after baby’s bedtime. Or starting crafting projects that never get finished.

Boho Toddler Room

May 5, 2017

Post by KJ, Retail Home Stylist from The Land of Nod’s Design Services Team

A nursery doesn’t have to mean baby blues and soft pinks – nowadays anything goes! Why not make your baby’s nursery something you enjoy?

Bohemian design is a style you’ve probably heard quite often. Boho really gives you the chance to express yourself; you can choose to create more of a basic layout using neutral, calming colors, or really have fun with a mix of bold patterns. It doesn’t matter if you have a boy or girl, this is a look everyone can love.

For all you Boho mamas and dads looking to incorporate some of your style into your kiddos room, take a peek below for inspiration.

To keep this look from getting too overwhelming, I used minimal wall decor, but added color from our new line of Color House wall paint and our new Heritage rug. My favorite thing about this style is being able to incorporate plants. If you’re like me and don’t have a green thumb, maybe some faux plants or plants that don’t require a ton of care would work well for you. Otherwise, check out some plants that grow well in your climate – just make sure any real cacti are out of reach of your little adventurer!

Enjoy!

Post by KJ Burkland, Retail Home Stylist (Seattle),  from The Land of Nod’s Design Services Team. Our Design Services team offers free one-on-one design advice, mood boards and space planning. You have a room to decorate? They’d love to hear from you. Visit The Land of Nod’s Design Services page to get started today.

DIY Watercolor Masking Art

May 4, 2017

Post by Tiffany Wong Art

This DIY watercolor masking art is a great craft project for the kids of all ages, and it’s practically fool proof! Perfect for a Mother’s Day gift, just use your tape to spell out MOM and you’ve got yourself a gift!

Materials needed

  • Watercolors
  • Watercolor paper
  • Paint brush
  • Painters tape (0.5 inch is my favorite)
  • Scissors optional

Directions

  1. Tape where you want white to appear
  2.  Paint the whole piece of paper
  3.  Wait until the paint has completely dried – then carefully peel off the tape

DIY Watercolor Masking Art

Tiffany Wong is a painter/illustrator based in Chicago. She is inspired by nature, story, and her connection with people. Check out her work at tiffanywongvisualart.com and @tiffanywongart.

Printable Mother’s Day Gift

May 3, 2017

Post by MJ of Pars Caeli

Mother’s Day is a two-way holiday, right? You can’t hold the role of mother without the gift of a child. My children often ask me when is “Child Day” if we’re celebrating Mother’s Day in May. Well, I usually say that everyday is child day, but all kidding aside, why not celebrate both?!

Hi friends, this is M.J. of Pars Caeli, and I’ve made a non-traditional Mother’s Day printable that I hope you and your child love! Presenting our Mother’s Day Questionnaire card:

On one half, your child fills in your favorites like your favorite color and activity… even the words you most often say (I had to great curiosity to see what these would be!). She or he can fill in what activity you love to do together and then add a portrait of you to the frame.

While they are completing their side, you get to show them share the joy, too! What do you love most about them? What do they say a lot? You complete the other side of the card. Your child is going to remember what you wrote about him or her. I’d love to have a memory of what my mom and I loved doing together at 6 or 8 or 10. I suspect it would have involved stuffed animals. Imagine how those answers change over the years!

Download the printable here!

If you’re a teacher or a group moderator, this is a fun printable to have children create and surprise mom!

You can also use this card as an interview sheet to find out more about one another! You might know one another’s favorite color, but new favorites pop up all the time. This would be fun to do with your adult mom, too. What a fun Mother’s Day activity to add some laughter and smiles to the day!!

Happy Mother’s Day to all the special women out there who’ve mothered and loved. And happy child’s day to all of the kids – thanks for making us mothers!

Xoxo, MJ

MJ is a graphic and product designer, wife, and proud momma to three. She founded Pars Caeli (meaning a piece of heaven), a delightful blog and shop, to add more creative to the everyday. MJ worked with our team to bring her lunchbox jokes to life in our product Lunchtime LOL Notes, now available at The Land of Nod to bring on a case of the giggles! 

Unconventional Ways to Incorporate Greenery

May 2, 2017

Post by Taylor Spellman

 Unconventional Ways to Incorporate Greenery
Photo by Lorraine Lea

Each year DIY-ers love to find ways to incorporate Pantone’s ‘Color of the Year’ into their homes. I was really excited when the color as announced as Greenery for 2017. It is a yellow-green shade that will make fresh and earthy tones pop and can really revitalize a room.

There are so many options for incorporating this bright and calming color into your life. Whether it is a large changes, like buying new furniture or making an entire theme for the room or a small changes, like getting new rugs and accessories for the bathroom, the warm tones of Greenery will create a light and airy space that will make you feel awake and alive.

Whatever you choose to do, it’s important to find unconventional ways to incorporate the color into your home so that your DIY updates are long-lasting improvements instead of trends that you’ll have to revamp again next year.

Here are some quick tips to bring this “life-affirming” color into your family home:

Kid’s Room

Greenery as the Pantone Color of the Year is so refreshing as it gives a new spin on children’s décor other than the traditional blue, pink or neutral color scheme.

Take this opportunity as a time to make some family-friendly artwork with the kids. The perfect playroom art piece would be a simple white canvas that you paint Greenery and then have your children stencil shapes over. You could also leave the canvas white and use finger paints in the color of Greenery to give them more freedom and expression with their artwork. Make sure you join in on the fun and throw some of your own finger painting in there!

Unconventional Ways to Incorporate Greenery

If paint isn’t their idea of sensory enjoyment, these green chalkboard decals can function as an evolving piece of art for your kids to decorate or simply keep them organized.

By crafting, you’re not spending that much money, and as I said before – things are always changing. For more ideas for the kids’ rooms, check out Land of Nod’s very own Home Stylist, Shawna’s, post on incorporating Greenery.

Family Room

If you want a project for yourself, get on the computer and print out some photos of the family in a Greenery tint. To do so, open the photos up in Microsoft Word and use the ‘Format Picture’ to ‘Recolor’ the image to a Greenery tone. Then place the photos in a variety of frames collage style on the wall in the living room or dining room for a fresh medley of family! The frames are a one-time buy, and you can reprint the photos again at home next year in a different color! Be sure to get neutral colored frames (brown, black, or white) that match your current room set-up. Mix it up with some matching shelves that hold the newly framed pictures, and put natural ‘greenery’ alongside them with some fresh plants, which you’ll be able to keep for years to come.

Unconventional Ways to Incorporate GreeneryAnother way to bring in the new trend is to focus on small accents that make a big impact in the room. Get throw pillows for the living room or, to make a bolder statement, consider repainting your main entryway door to welcome in new guests and make conversation for old friends.

If you’ve been looking to spruce up that boring beige room that hasn’t changed colors since the realtor first showed the home to you, now is the time to paint the ceiling. Painting the ceiling is a huge trend for 2017, and Greenery is the perfect choice. You can bring the outdoors in and the smiles upwards.

Recognized as a top interior designer, Taylor Spellman has the unique and unteachable talent of mixing high end one of a kind pieces with treasures found on an afternoon in the Goodwill. Her penchant for witty banter paired with her signature bold design style has made her a standout in the design community at large. She is a contributor to several outlets, has been a brand ambassador and regularly appears on-air as an entertaining and lifestyle expert, recently starring in her own show on BRAVO. Follow her on Instagram for #thetaylortouch.

Handcrafted Bedding From India

May 1, 2017

Post by Rachel, Nod’s Brand Marketing Manager

The skilled artisans that we team up with to create our textiles are truly the backbone of Nod. Their immeasurable craftsmanship bring our handcrafted bedding to life, and seeing these talented artists’ magic up close in India is an unforgettable sight.


Quilts Crafted by Hand

Every single one of our quilts is crafted entirely by hand in India. From the intricate embroidery to the delicate appliqué, each detail is the work of true artisans who have honed their skills for generations.

Handblock Printing

Many designs on our bedding are created using a method called handblock printing. After intricate designs are hand-carved onto wood blocks, they’re dipped into ink and pressed onto the bedding. The result: Gorgeous patterns that have a truly one-of-a-kind feel.

From Sketchbook to Textile 

There’s no greater thrill for an artist than seeing their bedding design come to life. Artist illustrations are first etched onto giant rollers and then pressed onto endless lengths of cotton sheets.

Check out this video to learn more about how we work with skilled artisans to create handmade goods, including bedding, sheets and quilts.

Ever wonder who’s behind The Land of Nod social media accounts? That’s Rachel! When she’s not telling anyone who will listen that she’s not meant to live in cold, snowy Chicago, you will find Rachel hanging out with her husband and new baby and binge-watching Netflix after baby’s bedtime. Or starting crafting projects that never get finished.