Close

Blog

Vivian & Daniel’s Playroom Design

March 29, 2012

Post by Danielle Kurtz, Land of Nod Creative Director

One of our customers, Armanda C., reached out to us on Facebook because she was having a hard time putting together a playroom that could serve the needs of her family, which includes Vivian (4 ½) and Daniel (2 ½). Armanda has a space that needs to function as a playroom, an office, a family room and, most importantly, a soothing oasis for her son Daniel who is on the autism spectrum.

In Armanda’s own words “I want it to become a functional space for the whole family, playroom (which is the main focus), an area the whole family can play games and watch movies together, but also office/craft space. My biggest concern is my son and his needs. He is autistic and gets sensory overload so the space has to exude calm. Need lots of storage and organization to reduce stimuli, things need to be within his reach but hidden away. Safety is another big issue, he will climb and get into anything (no items with sharp edges but must be sturdy). He loves soft textures (similar to your Chenille Schlimazel Blanket) it’s very relaxing for him.”

Vivian & Daniel’s Playroom Design | Honest to Nod

1 2 3 4 5 6 7 8 9

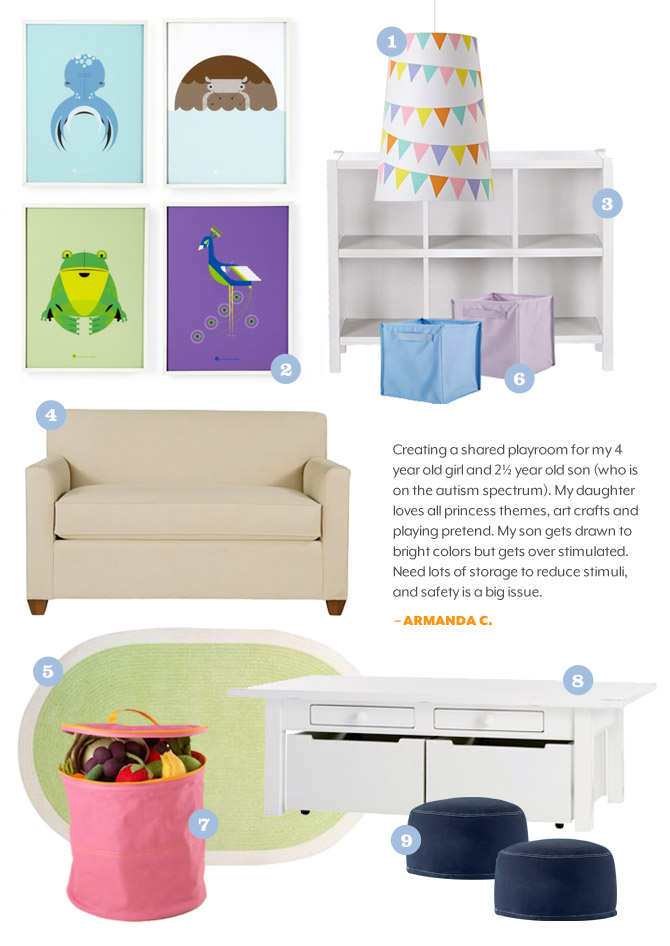
To put together the room, I started with a play table. This our Activity Table can function as a coffee table, a play table and a game table. Also, it has tons of storage beneath it to keep the toys within reach, but out of sight, something Armanda said was important for her kids. Along with the table, I added a couple of our one-seaters, this will give the kids a comfy place to sit when playing at the table.

Since the family would be watching movies in the space, a couch was in order, but the room’s just 12 x 12’, so I didn’t want to overwhelm it. Our Sofa Sleeper is perfect for this. The microfiber upholstery is easy to clean, and soft to the touch. Plus, it opens into a twin sleeper, so it gives the room one more function, guest room! I chose a cameo color, to keep it neutral.

Next, the rug. Armanda mentioned that Daniel enjoys the feel of Chenille. So, our super-soft Shaquille Chenille Rug is the perfect fit. It’s durable, easy to clean, and adds some color without being overwhelming.

No playroom is complete without some storage. Our cube collection is a great solution for a shared space. Mixed with the canvas bins, it provides a place to keep everything, and you don’t have to see the mess. Also, our Grab Bag Storage is a great place for Vivian to keep her dress-up clothes. And, as a safety note, all of our large furniture comes with safety anchors that can be used to secure them to the walls. Many kids like to climb, so it’s important to be super-diligent about anchoring bookcases and dressers to the wall to avoid injuries.

Finally, to add a little fun I mixed our Modern Menagerie Prints designed by A Modern Eden. Their soothing color palette and graphic illustration style provide interest without being overly-stimulating. And, of course, we need some lighting. Our Pennant Pendant Lamp adds a little touch of color and playfulness to tie the room together.

Overall, I think it’s a very functional space that the whole family can enjoy. Hopefully this helps point Armanda in the right direction. If you have any decorating dilemmas of your own, post to our Facebook page or comment below and it may be featured in an upcoming post.

Post by Danielle Kurtz. Danielle is the Creative Director at Nod and an over-protective mother of two. She’s also completely obsessed with Pinterest, Twitter and her Kindle, but not necessarily in that order. Danielle loves to craft, sew and crochet, but all her supplies have a layer of dust on them about 4 ½-years-thick, wonder if it’s just a coincidence that her oldest kiddo is 4 1/2 years old?
Looking for even more playroom inspiration? Check out our Playroom Board on Pinterest.

Moxie Bombs

March 28, 2012

6

My daughter is always STARVING when I pick her up from school. Usually I’m thinking about what to make for dinner, whether or not I actually sent that last email for work, and wondering why my son is saying “uh-oh” in the backseat. I certainly have not had the forethought to actually PLAN a snack.

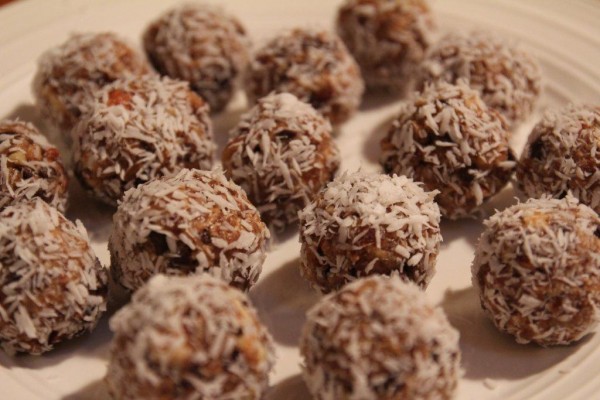
Enter my recipe for Moxie Bombs. These super-easy, healthy snacks can be made in batches and kept in the fridge for a week. Lazy Sunday afternoon? Go ahead and whip these up for the week ahead! Chances are they won’t last that long (especially if your husband notices….ahem…). They are easy to grab in between school and dance/gymnastics/soccer/swim etc. A nourishing snack with lots of protein that will keep kiddos energized until dinner.

This is just one small step toward gaining balance this month. You might have to spend a little more time fine tuning the details of your routine, but rest assured, you can eat a tasty snack while doing so! Did I mention these require NO COOKING?!

To begin:

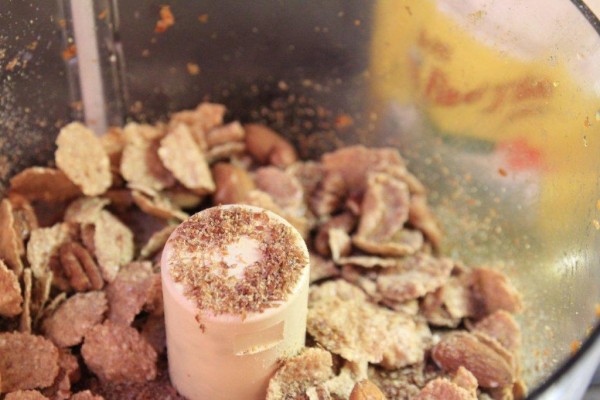
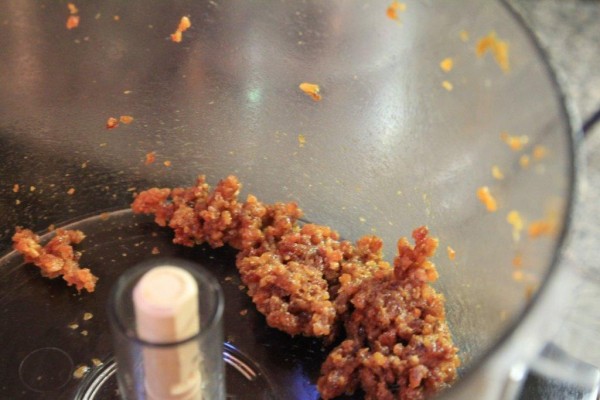
Pulse dates (and a dash of water if needed) in a food processor until a paste forms. Removed and place in mixing bowl.

1

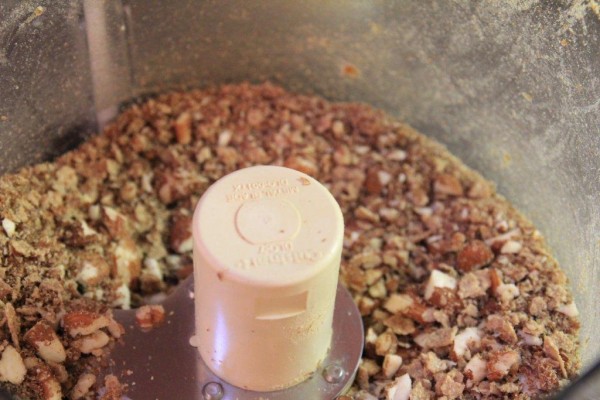
Add cereal and nuts to food processor and pulse into course crumbs. Add to date mixture.

2

3

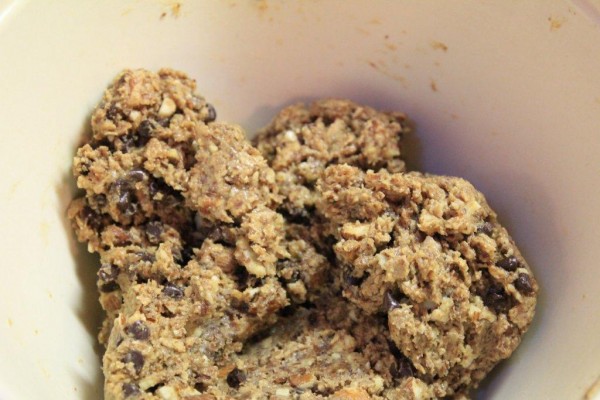
Add the flax, peanut butter, honey, salt and chocolate chips and stir well to combine. I usually heat the honey up to make this step easier.

4

Refrigerate for 30 minutes.

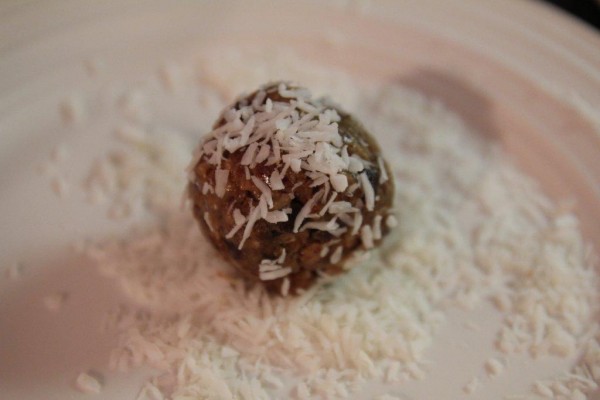
Roll rounded TB of dough into balls and then coat in shredded coconut.

5

Keep refrigerated in airtight container for up to one week.

Recipe:

6 Medjool Dates, pits removed

1 c. multi-grain cereal flakes

1 c. raw nuts (I used 1/2 c. almonds and 1/2 c. pecans)

1/2 c. ground flaxseed

1/4 c. honey

1/2 c. creamy peanut butter

1/4 c. mini chocolate chips

pinch salt

1/2 c. unsweetened shredded coconut

1. Place dates in food processor and pulse until paste forms, adding water if necessary. Remove and place in mixing bowl.

2. Add nuts and cereal to food processor and pulse until course crumbs form. Remove and add to date mixture.

3. Add flax, honey, peanut butter, salt and chocolate chips to bowl and mix to combine well.

4. Refrigerate for 30 minutes.

5. Measure out rounded tablespoons of dough and roll into ball. Coat balls with shredded coconut.

6. Keep refrigerated in airtight container for up to one week.

TIPS:

Nut allergies? Replace nuts and peanut butter with your favorite seed and seed butter!

Only have salted nuts? Omit pinch of salt!

Sub chocolate chips for peanut butter chips or carob chips!

Add your favorite dried fruit (cut into bite size pieces)

Pop these in the freezer the night before and put them in school lunches the following morning!

BE CREATIVE!


Post by Meredith Falconer : Mom Colored Glasses

Easy Easter Décor

March 27, 2012

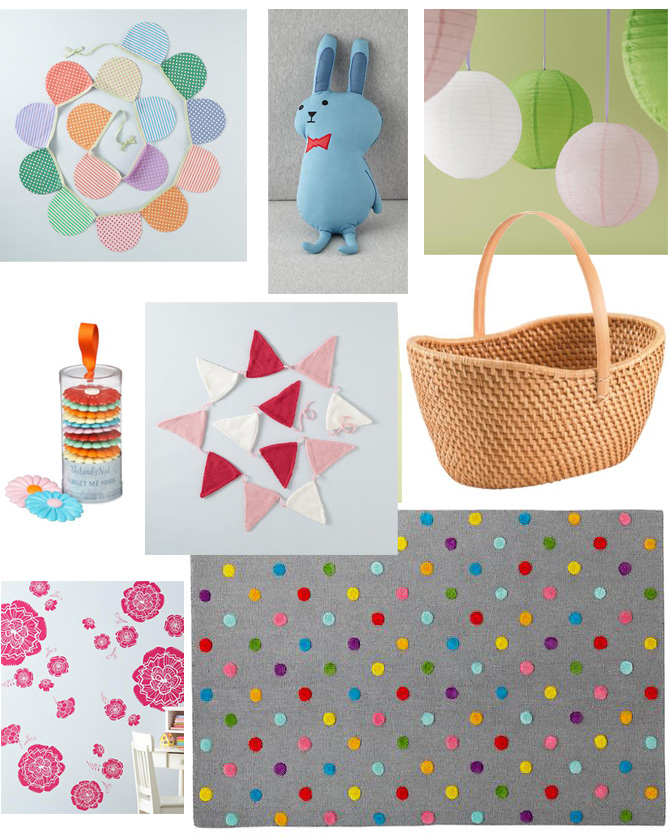
We’ve picked a few of our favorite décor pieces to bring a little cheer to your holiday celebrations!

EasterDecor_1
EasterDecor_2

Top Image: Spell Ya Later Letters Boy & Girl
Bottom Image Clockwise from Top Left:
Garland, Bunny Pillow, Paper Lanterns, Rattan Basket, Dot Rug, Flower Decals, Knit Garland, Wall Flowers

Check out more inspiration on our Pinterest page!

By Anna Passadori

Anna develops and designs exclusive product for The Land of Nod. She hails from the west coast and has traveled the world to source product. She loves anything Marc Jacobs, Sofia Coppola or stripes! (So, if anyone can get a photo of Sofia Coppola wearing a striped outfit by Marc Jacobs, please send it along.)

We Love Chicks! – DIY Easter Chicks Garland

Post by Aimee and Bettijo of www.supermommoments.com

We Love Chicks! - DIY Easter Chicks Garland 1

My boys love fuzzy yellow chicks. I partially blame this sudden chick obsession on Liam’s preschool—his class is currently helping chicks hatch. (How cool is that?!?!)

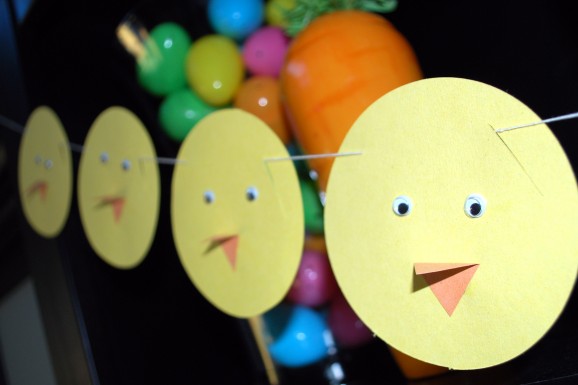
Last week when we decorated for Easter Liam and Harrison requested more chicks. We did pick up a fuzzy chick from Pier1, yet it just wasn’t enough for them. So, we created a DIY Easter chick banner yesterday. The banner was very easy to create, so we wanted to share it. To make this you will need:

We Love Chicks! - DIY Easter Chicks Garland 2

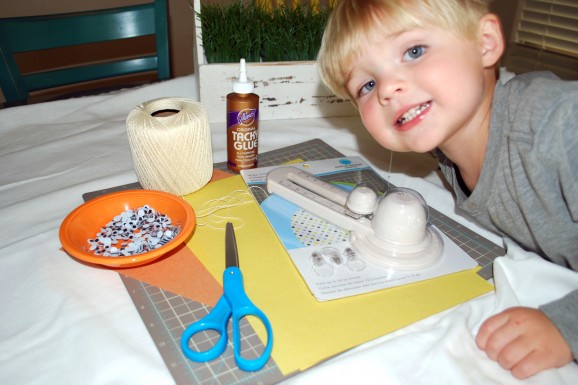
Here’s what you’ll need for your DIY Easter Chicks Garland:

  • Circle cutter
  • Yellow and orange paper
  • Glue
  • Wiggly eyes (or small black buttons or a black marker)
  • Scissors
  • Craft knife
  • Twine (or better yet: yellow fuzzy fun fur)
  • Energetic, chick-loving superkid

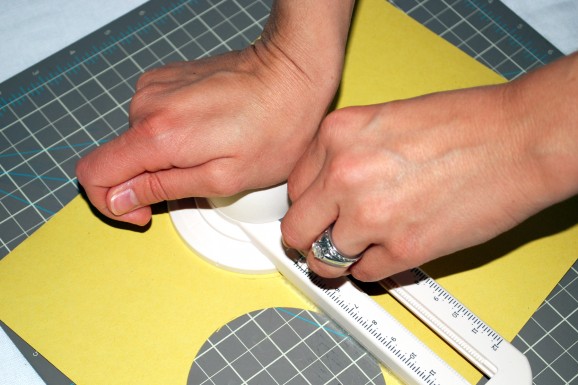
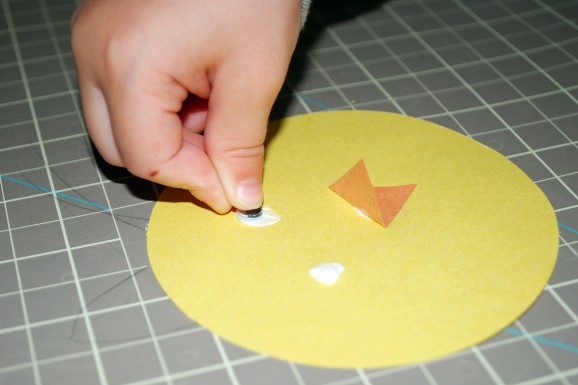
To get started, cut out 16 4-inch yellow circles.

We Love Chicks! - DIY Easter Chicks Garland 3

Cut an orange beak for each circle.

We Love Chicks! - DIY Easter Chicks Garland 4

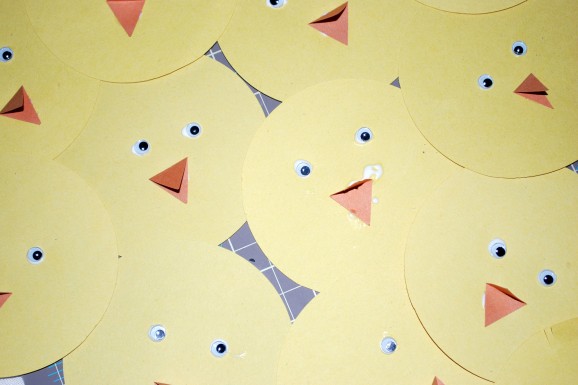
Then Harrison happily glued eyes and beaks onto each circle, creating a chick.

We Love Chicks! - DIY Easter Chicks Garland 5

Let dry. If you’re anywhere as enthusiastic about glue as Harrison, the drying will be the longest step.

We Love Chicks! - DIY Easter Chicks Garland 6

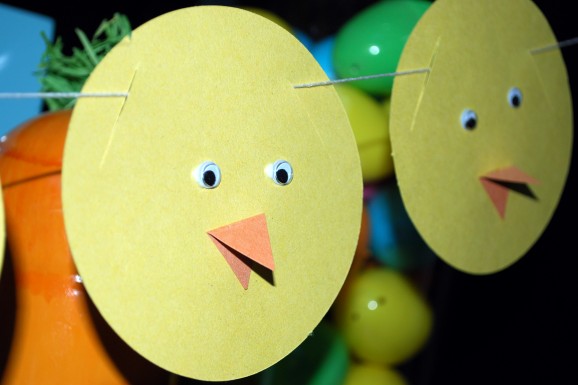
Using your craft knife, cut slits, and thread the twine. Hang.

We Love Chicks! - DIY Easter Chicks Garland 7

Now our entertainment center feels a little more like Easter and my boys are happy to have more yellow chicks around our home!

Post by Aimee and Bettijo of www.supermommoments.com

Not just for the boys….

March 26, 2012

Some girls like pink ponies and butterflies, others like dinosaurs and playing with cars…and some girls…well they like BOTH! Here are a few looks for those girls out there that want a greater mix of décor, a mix that is as vast as their great interests.

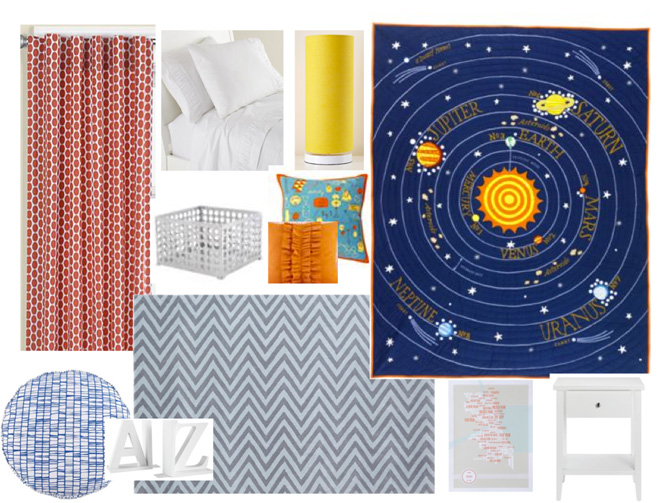
Why not mix your love of constellations with a few funky graphic patterns and a ruffle or two.

GirlThemes_1

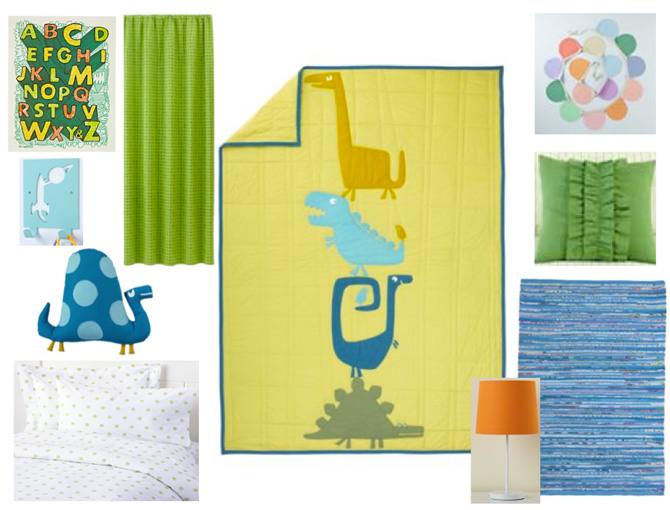
You can really play up some pops of color with this dinosaur quilt. The polka dot sheets, fabric banners and recycled cotton rug add additional color and pattern without overwhelming.        The dot graphic curtains add depth to the room- and they are borrowed from a crib set!     Don’t be afraid to look all over for those perfect accents when creating a room, you never know where you might find it!

GirlThemes_2

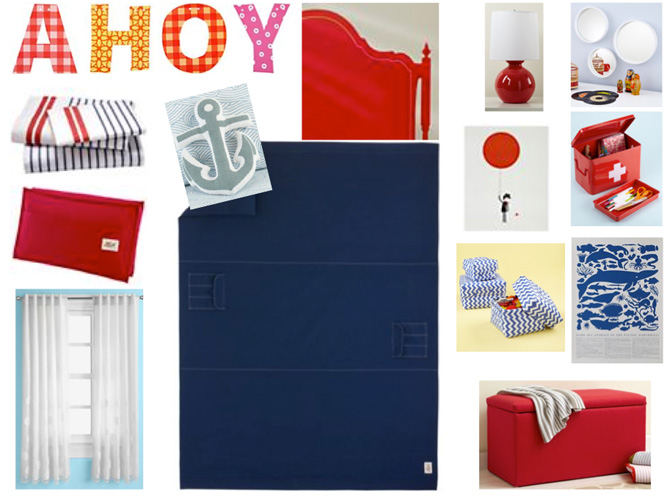
A personal favorite of mine- the nautical look is a classic color combination that can fit into any room! These graphic stripe sheets adds some punch- especially paired with cherry red accents.  The tiny bubbles curtain panels add a bit of lightness to the space.

GirlThemes_3

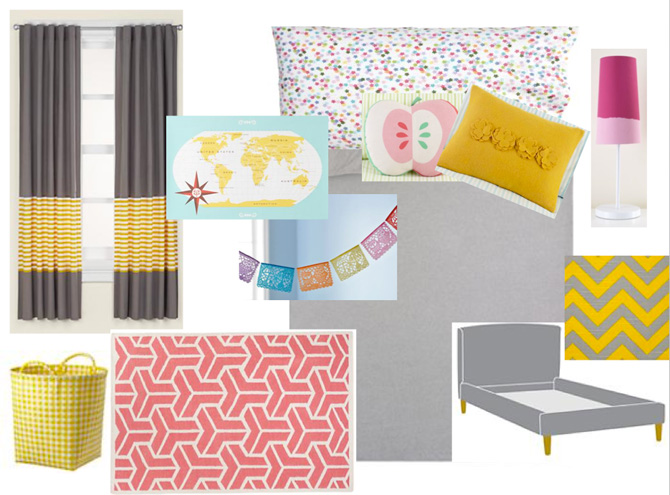
For those who want to be on trend- but not trend driven, yellow and grey is a great palette to work off of. You can add accents of pink and aqua for a cheery and bright look now and change the accents later to reflect a more monotone and sophisticated color palette.

GirlThemes_4


Interested in these looks? All the products shown are available at The Land of Nod.


By Sarah Culbertson  

Once upon a time a fashion plate from Seattle met a childrens retailer from Chicago, and it was love at first sight.  After spending a lot of time together at the mall, they both knew it was a perfect match. So Sarah packed up her fabulous Kate Spade suitcase and headed for the Windy City. Where they lived happily ever after, designing and developing textiles for little kiddos everywhere.

Vintage Handkerchief Bunting

March 23, 2012

No Sew Vintage Handkerchief Bunting

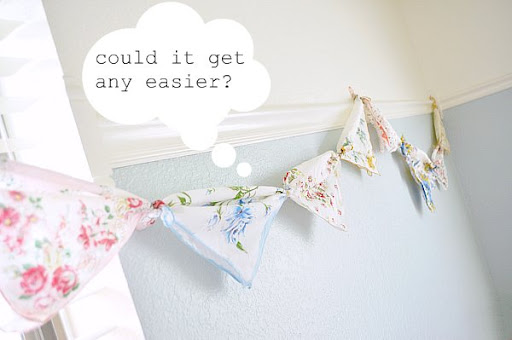
It started a few years ago in my local antique store. I was walking along when I came across a vintage carousel covered in pretty vintage handkerchiefs. Right there and obsession was born. I bought twenty that day, and too many to count since then. I can't drive past an antique or vintage store without stopping to take a peek at what's inside, and there are always at least a couple. Some might call this a problem *cough (my husband) cough* but I like to think of it as a hobby. The only problem? I have found I can't cut them up. I find all these great ways to use them, and they mostly involve a pair of scissors. I think to myself, "but what if I find the perfect use for it later, and then I don't have it!?" Issues, I know.

Tied Vintage Hankie Bunting

Then I found a fun a simple way to not only use them – but showcase them. Just fold in half and tie the ends together and hang. You have a beautiful bunting full of color and charm. A fun and easy way to add a little whimsy to any space. This was hung in my little girls room and she loved it. Now when I am tired of using them this way, I can just untie them and use for something else…phew :).


I did get the nerve to make a few into hair bows, they're super cute so it was worth it. Plus I didn't have to cut them, just glue :). If you're interested I have the tutorial for making vintage handkerchief bows here. Now, happy hankie hunting!


Post by Destri : www.themotherhuddle.com

DIY Easter Terrarium

March 22, 2012

Post by Julee of Warm Hot Chocolate

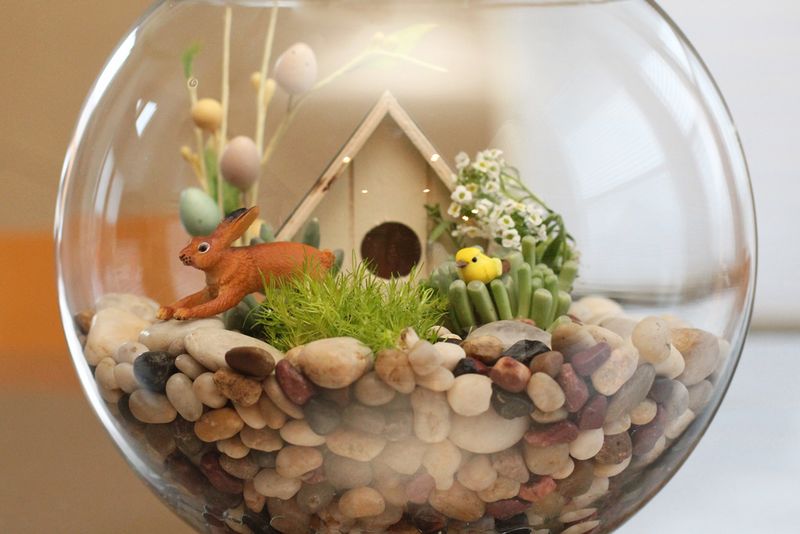
DIY Easter Terrarium

Now that it’s Spring, I’m incredibly eager to be surrounded by plants and flowers at home, both indoors and out. It’s still a bit cold for an outdoor garden, so instead I’ve been incorporating potted plants around the house and patio.

While looking at Easter decorations at the craft store last week, I realized that I could combine my plant obsession with Easter decorating. Hence, the idea for an Easter terrarium was born.

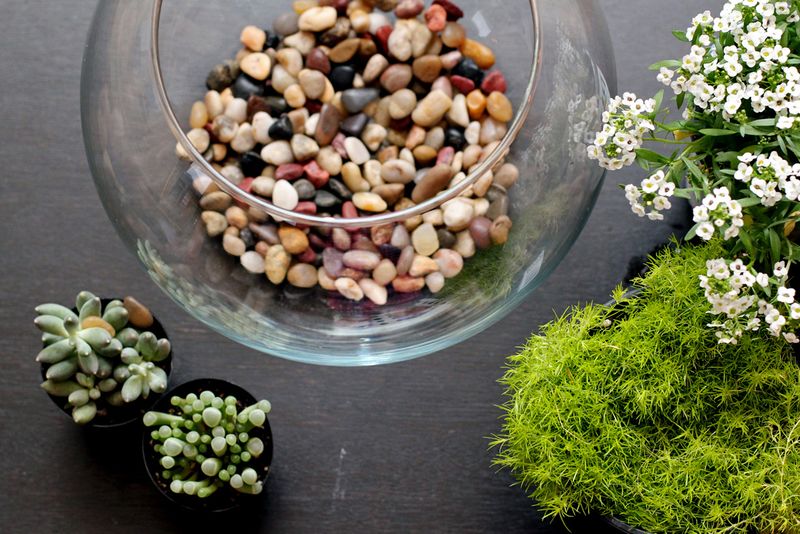
I started out by assembling my supplies.

DIY Easter Terrarium Supplies

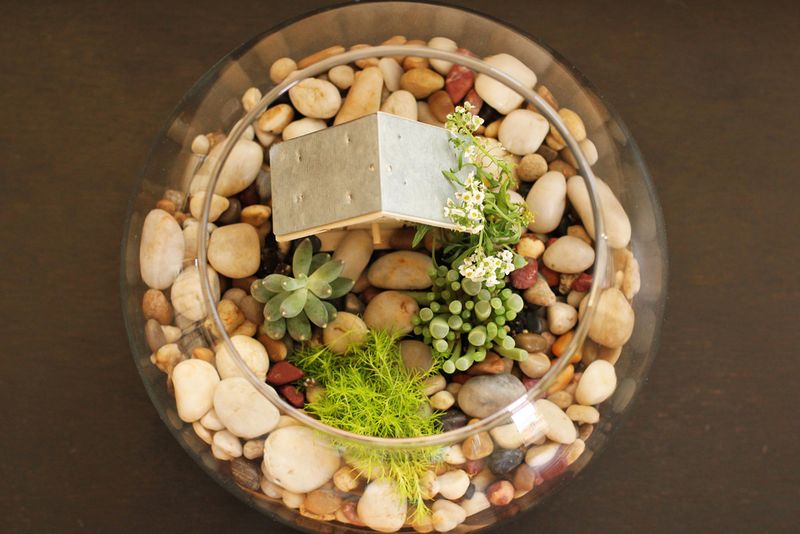
For the terrarium, I purchased a large, round glass vase along with some river rocks and an assortment of small plants, including a couple of succulents which seem to do well in terrariums.

DIY Easter Terrarium 2

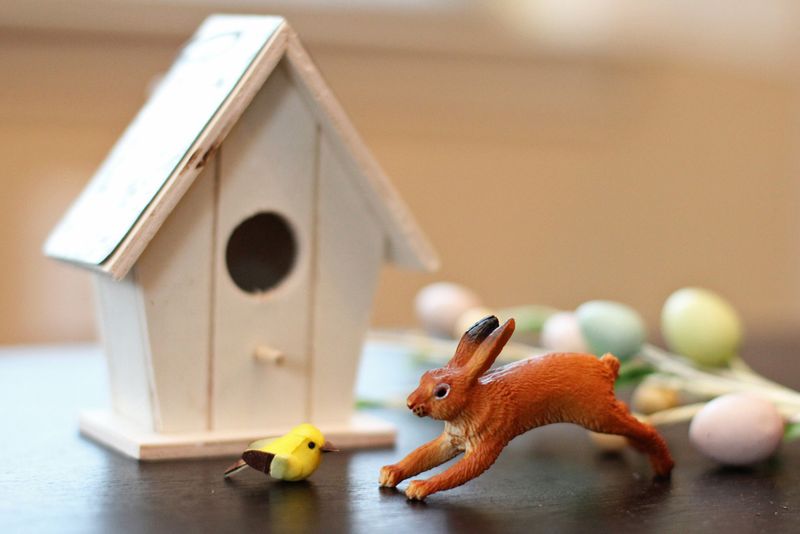
I also purchased a few Easter decorations, including a birdhouse, bird, rabbit and an Easter egg ‘tree.’

DIY Easter Terrarium 3

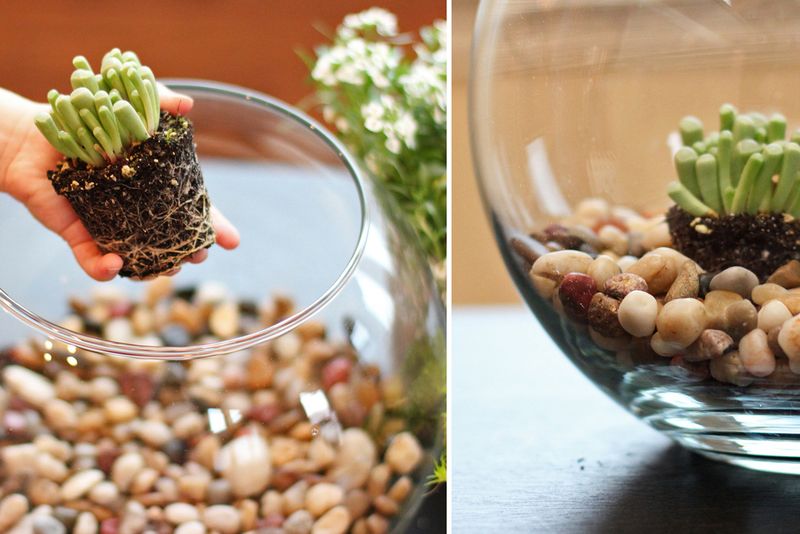
To create the terrarium, I filled the glass container with river rocks until it was a little less than 1/4th full. I placed the succulents in the vase first, followed by the remaining plants.

DIY Easter Terrarium 4

Once all the plants were arranged in the container, I added the birdhouse and then filled the container with more rocks until the plants were properly covered.

DIY Easter Terrarium 5

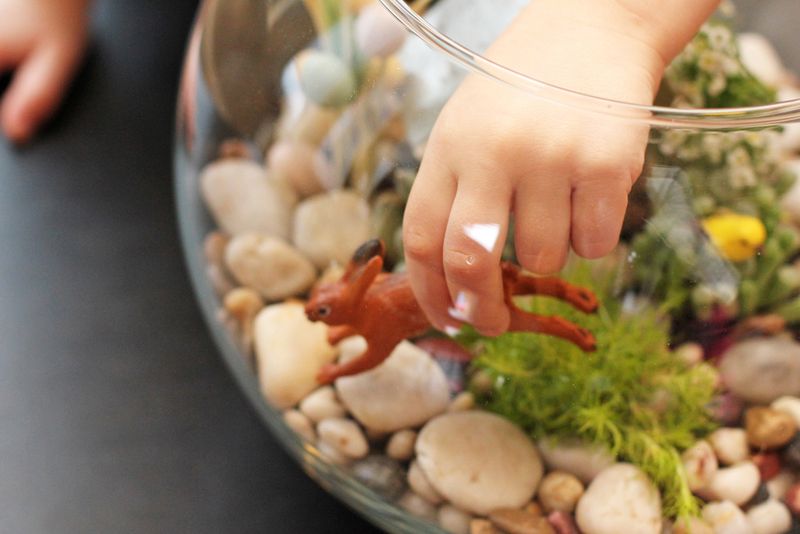
Now for the fun part: adding the Easter decorations. This is where eager little hands can help out. My daughter saw me working on this project and couldn’t wait to get her hands on the bunny rabbit, so I let her add the finishing touches.

DIY Easter Terrarium 6

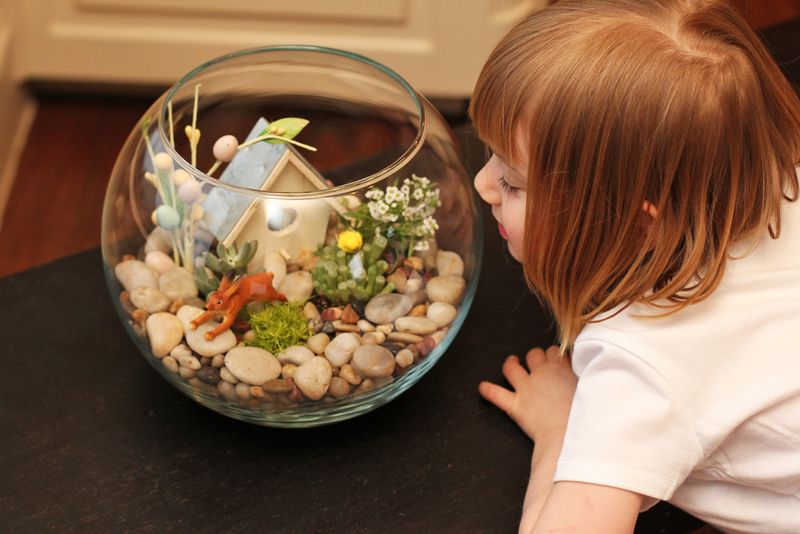
I’m pretty happy with our first Easter terrarium, mostly because I love watching my daughter play with it every morning at breakfast — something I didn’t expect when I started this project. I think it just might become an annual tradition.

Post by Julee of Warm Hot Chocolate

Nan Lawson

March 21, 2012

Nan01

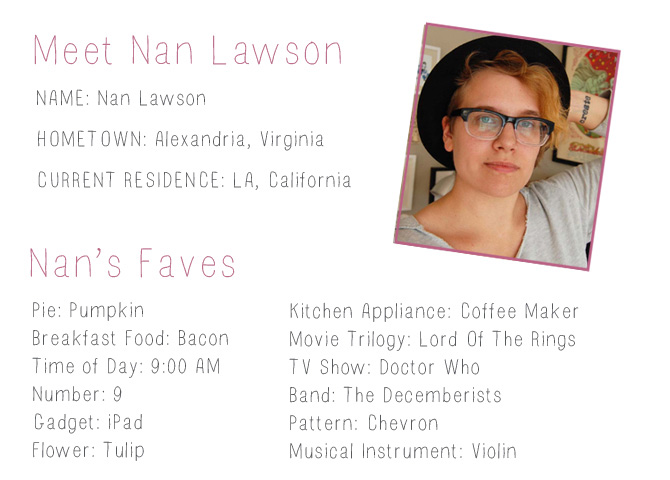
Nan02Nan Lawson’s City of Heart can be found in the Land of Nod’s Nod Institute of Art.

By Anna Passadori

Anna develops and designs exclusive product for The Land of Nod. She hails from the west coast and has traveled the world to source product. She loves anything Marc Jacobs, Sofia Coppola or stripes! (So, if anyone can get a photo of Sofia Coppola wearing a striped outfit by Marc Jacobs, please send it along.)

The Taste of Springtime – Making Jelly from Violets

March 20, 2012

1

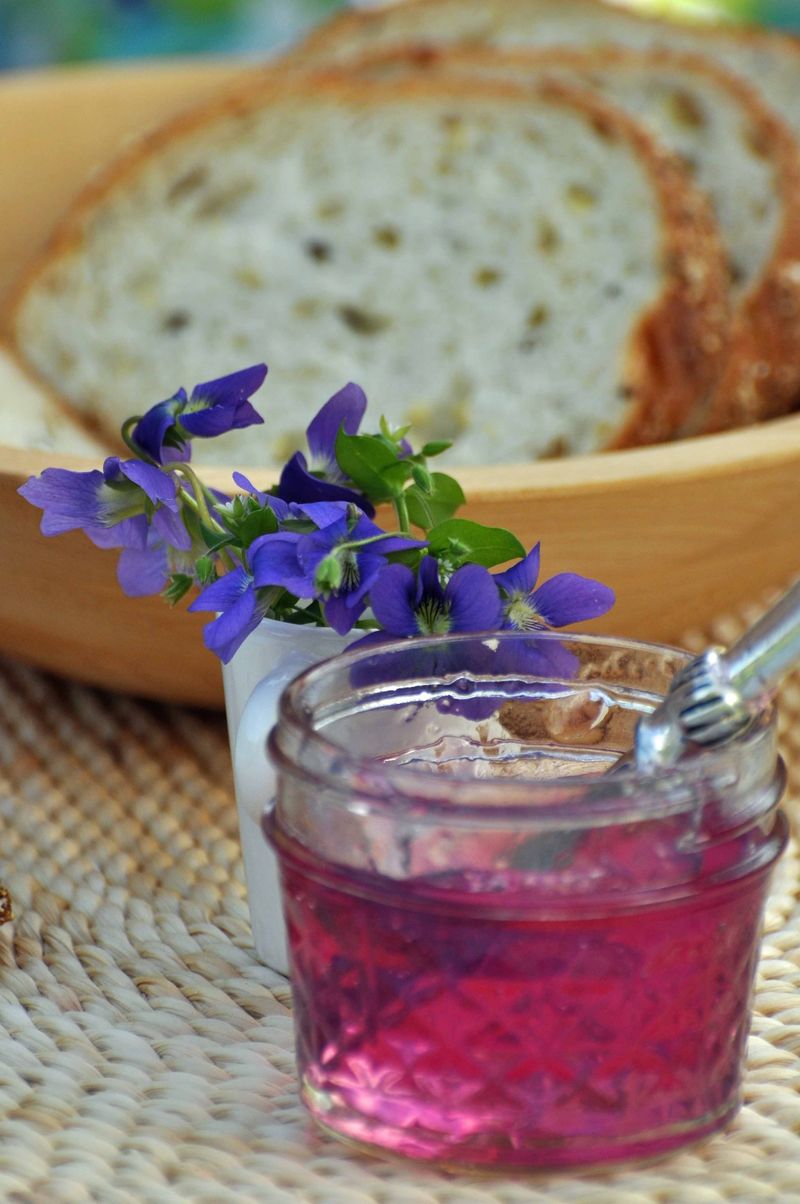
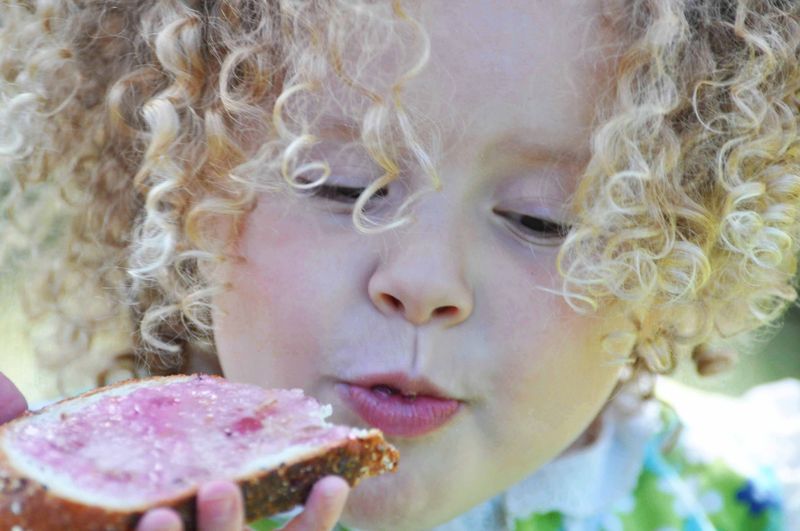
The excitement began last week when the girls' class picked violets to make jelly. And today the jelly was ready. The best part? Everyone got a little jar to bring home.

Violet Jelly

(makes 4 or 5 half-pint jars)

2 heaping cups of fresh violets- no stems

2 cups boiling water

1/4 c. well-strained, clear lemon juice

4 cups sugar

3 ounces liquid pectin (Certo)

(optional: 1/2 tsp. rosewater)

1. wash violets, drain and place in heat-proof glass/non-reactive bowl. Pour boiling water over violets and steep for 2 hours. Strain through a fine sieve, reserving the clear, purple infusion.

2. place jars & lids in stock pot deep enough to cover by 2". Bring water to a boil, then reduce to simmer & keep hot till ready to fill.

3. to make the jelly: stir lemon juice & sugar into reserved infusion in a 2 qt. pan. Bring to a full rolling boil that cannot be stirred down. Add the liquid pectin and continue to boil for 2 minutes, skimming any foam that may rise to the surface.

4. ladle quickly into jars to within 1/8" from the top. Clean rim & threads and place tops before filling the next jar. Screw bands tightly & invert jars on tea towel for 5-10 minutes. Jars should seal and pop shut within 10 minutes, as they cool. Sealed jars will last for up to 1 year in cool, dark storage. Open jars will keep for 3 weeks in refrigerator.

Thank you, Brydget, for the recipe.

2

The taste of spring indeed.

Post by Helen Bird : www.curlybirds.typepad.com

Mini Flower Pots

March 19, 2012

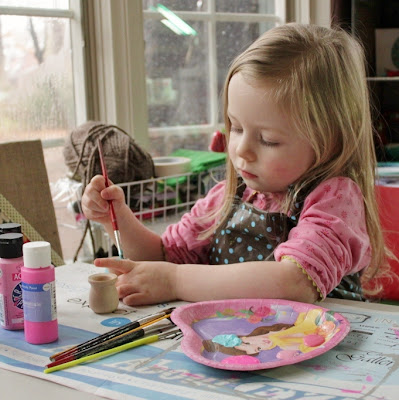
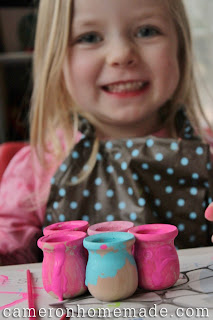
Here is a project to make some flowers that should be able to stand up to anything – frost included!  I found these little wooden pots on clearance, and my design assistant was so excited to paint them for our daily "project."  (We try to do a project every day – she's a pretty strict task master – won't let me slide even when I'm tired from work!)

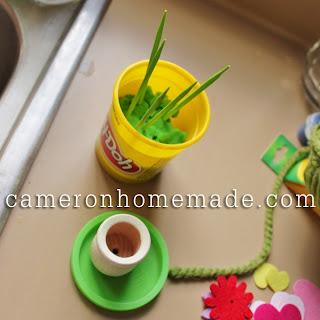
I painted the sticks – it seemed a little scary to hand a 4-year-old pointy wooden skewers and a paint brush.  I am very proud of the drying method I came up – old Play-doh?  Give it one last hurrah as a place to keep the sticks upright while drying! 

My pots got painted first – I didn't put quite as much creative energy (or as many coats of paint) into them as my design assistant.

To attach the "stems" to the pots, I put a blob of hot glue around the base and then put it into the pot (mine came with holes in them – perfect!).  Stick it into the pot pretty quickly and then hold it straight for a few seconds while the glue firms up. And look – the glue doesn't come out the bottom – it's like a miracle!

Since I had some time to kill while I waited for the diva to be done painting, I added some crackle finish to my pots . . . think it's hard – it's not – I show you how cheap and easy it is here.  And then, repurpose that play dough again and stand the pots up til they dry.  Now the bottoms are all pretty and painted, too!

Ah, she's finally done – and SO proud of herself.  I love how much she loves to get crafty with me.  It's fun, it keeps us both happier while I'm doing stuff, and I think she probably is learning important skills that she'll use someday – maybe in a toy factory . . . just kidding!

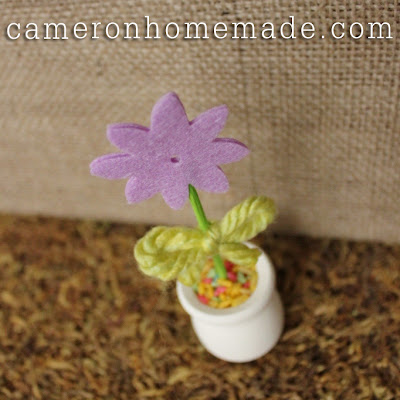
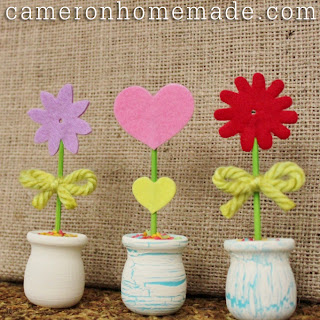
For some reason, I stopped taking pictures after this step.  This is very unusual for me…and I apologize.  Anyway, it's not too hard to explain without visual aids – I took two felt shapes, put a bit of hot glue between them, and carefully placed the "stem" skewers in the center. Then, we added a yarn bow or more felt shapes for "leaves." Finally, we took that worn out play dough and stuck a little in the pots, then topped it with glue and rainbow rice.  

My design assistant immediately took hers and put them in the dollhouse – so they didn't make the final picture.  Too bad, because we added some extra rhinestone bling to them! She also took two of them in to give to her teachers – she really loves giving people her art. I think she thinks that's what I'm doing when I ship out orders from my shop . . . ah well, still a good lesson.

Set them around the house (or the dollhouse) to brighten up these last few days of winter!


Post by Cameron : Homemade by Cameron

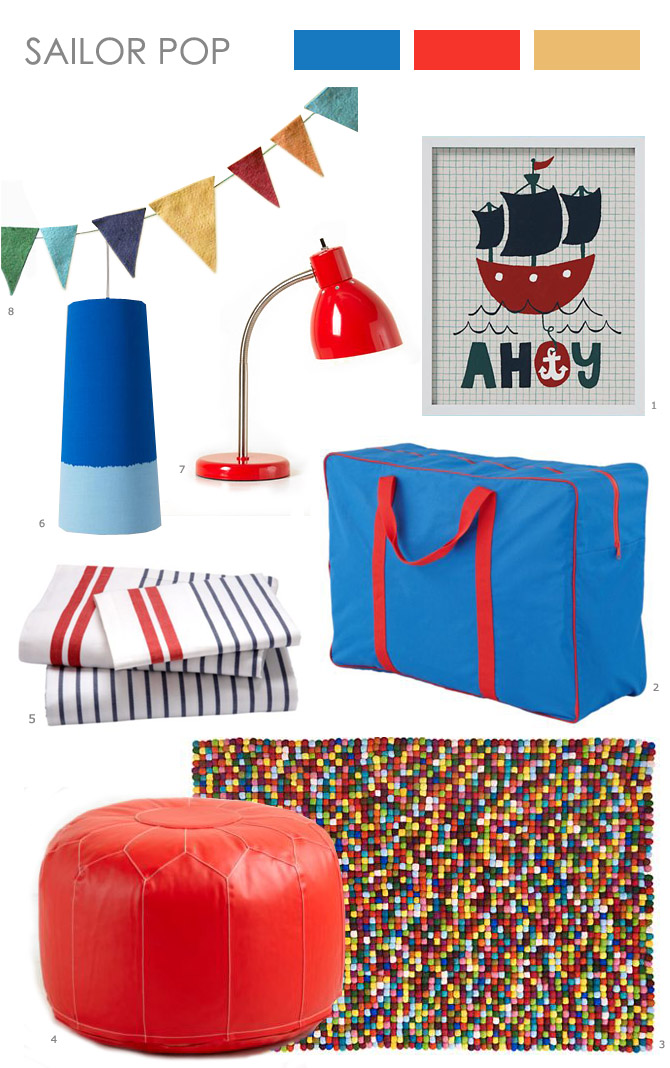
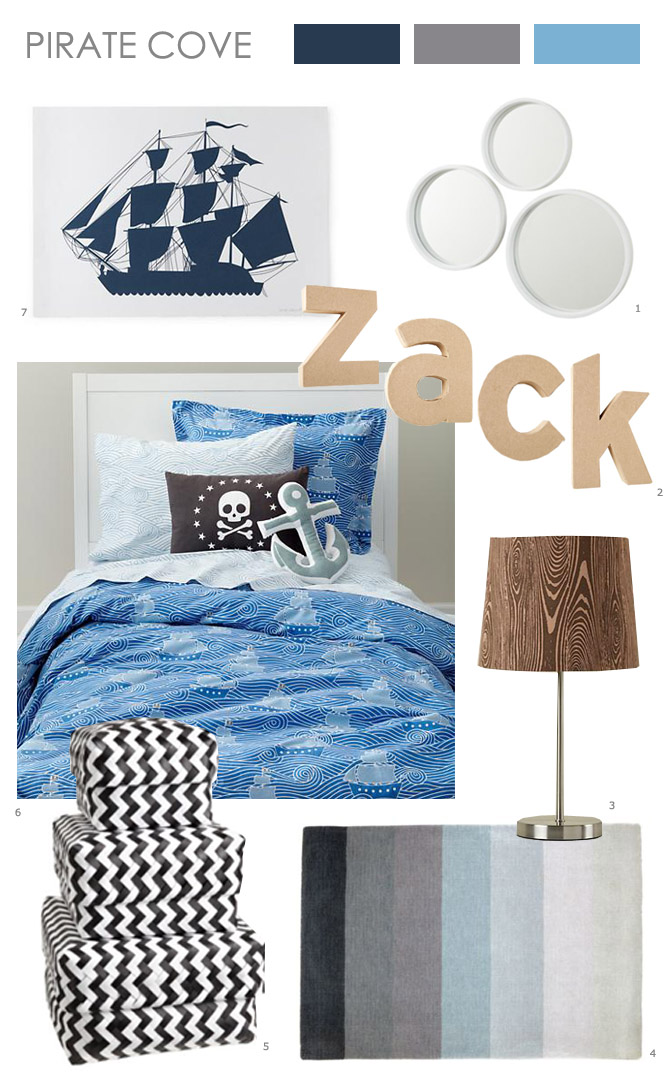
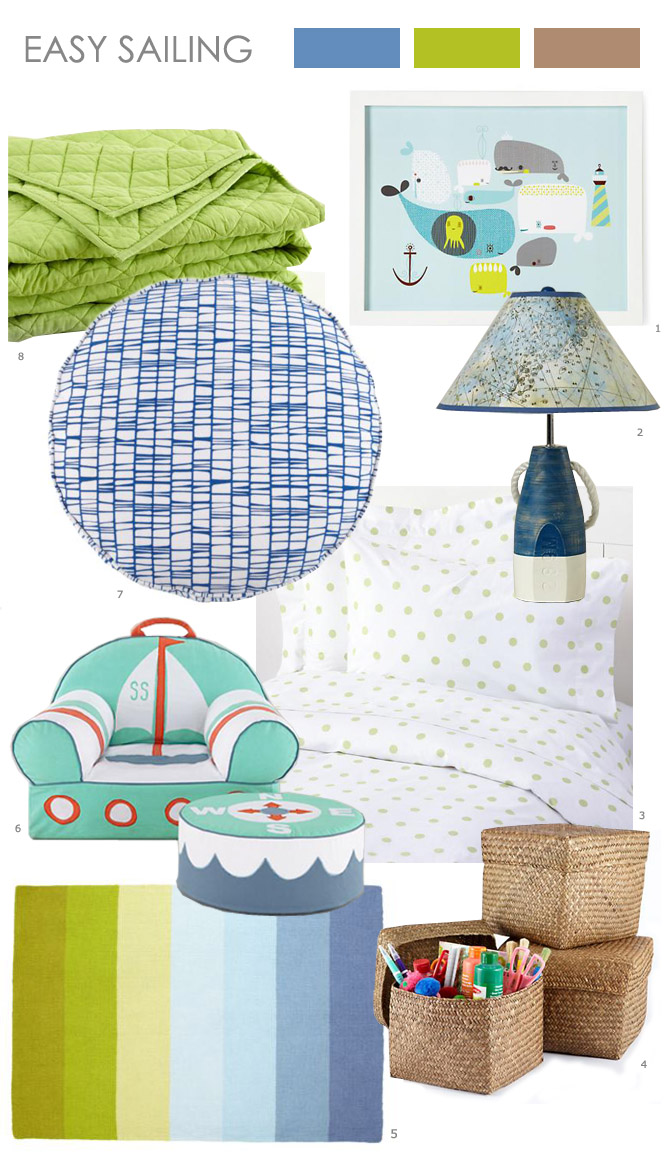
Nautical Kids Room, 3 Ways

March 17, 2012

We’re loving nautical rooms, because they never go out of style! There are so many different ways to incorporate this style into a room. Here are a few:

Room 1: Sailor Pop
For a bright and whimsical look, try these fun pops of blue & red!

Nautical_1

Clockwise from Top Right: 1 2 3 4 5 6 7 8

Room 2: Pirate Cove
For an older child, try mixing in grey, navy or black and patterns like wood grain, stripes and zig zag.

Nautical_2

Clockwise from Top Right: 1 2 3 4 5 6 7

Room 3: Easy Sailing
Bright green adds a soft feel, and makes it a great option for girls, too!

Nautical_3

Clockwise from Top Right: 1 2 3 4 5 6 7 8


By Anna Passadori
Anna develops and designs exclusive product for The Land of Nod. She hails from the west coast and has traveled the world to source product. She loves anything Marc Jacobs, Sofia Coppola or stripes! (So, if anyone can get a photo of Sofia Coppola wearing a striped outfit by Marc Jacobs, please send it along.)

Paper Mache Bowls

March 16, 2012

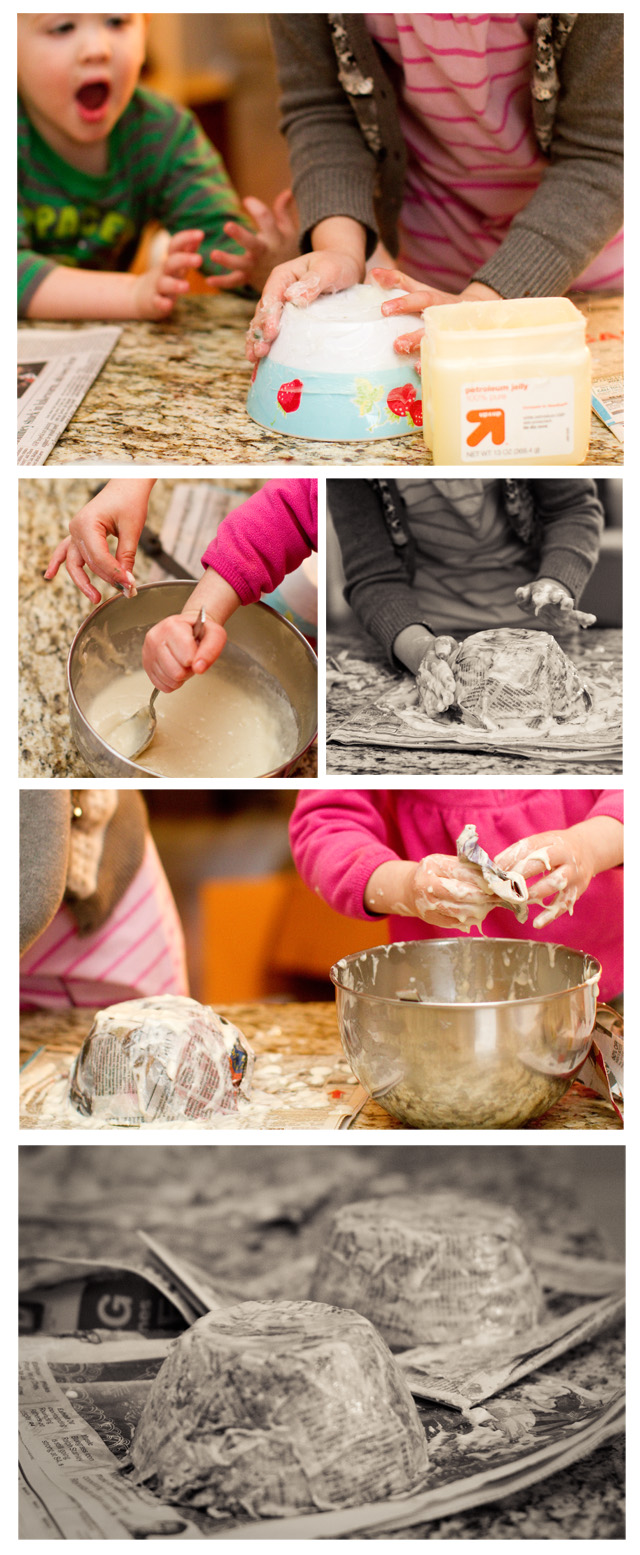
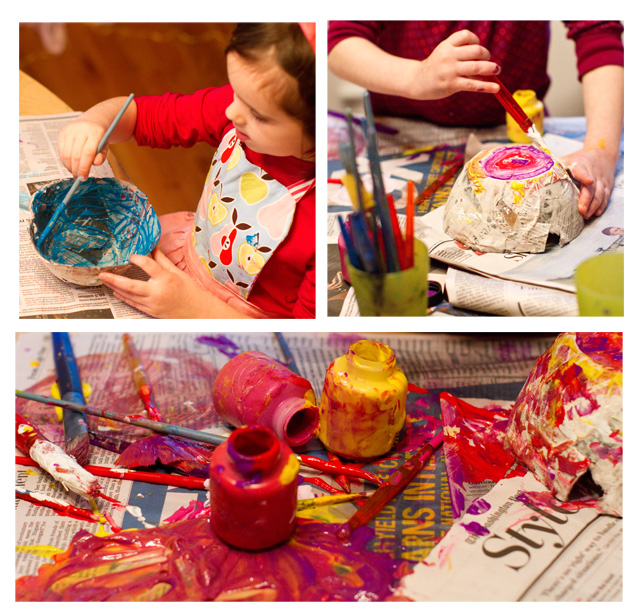
finish This was a messy project, but amazingly enough, we had a crazy amount of fun working on it. Sometimes messy is good, especially when you're prepared. And the best part was that the bowls took three "rounds" to complete – thus allowing us to extend one project over a multi-day period. I think the kids also enjoyed having a longer-running project as they keep saying they worked on these bowls "really hard." And they're actually kind of pretty.

Here's the scoop:

ROUND 1

1. Use an existing bowl as a "mold" and coat it with a thick layer of petroleum jelly.

2. Mix together 1 cup flour, 2 cups water, and 1 tablespoon salt to form a liquid with the consistency of a thick paste.

3. Tear pieces of newspaper, dip them in the paste and assemble in layers over the "mold."

4. Let dry for a few days.

ROUND 2

5. Remove the hardened paper mache bowl from the "mold." (I had to use a knife in areas to pry it away.) Cut the rim of the paper mache bowl to make it even and smooth. Remove the petroleum jelly from the paper mache bowl with a damp, soapy cloth.

6. Paint the outside of the paper mache bowl (we used Crayola Washable Kids Paint set of 10 Bottles (2 fl oz/59mL)). Let dry for at least a day.

ROUND 3

6. Paint the inside.

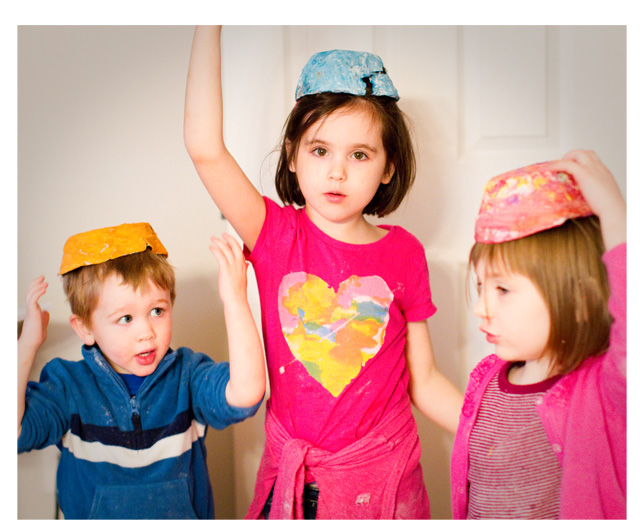
7. Use the bowls to store jewelry, keys, American Girl accessories, chapstick, etc. Or wear as a hat, just because. round1 Round 1 – The girls did really well, but I had to assemble T's bowl for him. He kept saying "but why so messy? why?" round2 Round 2 – F's become really interested in outer space and the planets (more on this next week), so she painted her bowl to look like the night sky. Both the girls have shown an interest in color mixing, so we used the newspaper to experiment. round3 Round 3 – T overcame his aversion to messes and painted for a good thirty minutes. Painting is the one craft where T can outlast the girls, by a lot. hats  We planned on using them as bowls, but then F decided the kids NEEDED hats. So they're sort of multipurposeful right now.


Post by Darcy : bedtimemonsters.blogspot.com

Modern Villagescape

March 15, 2012

1

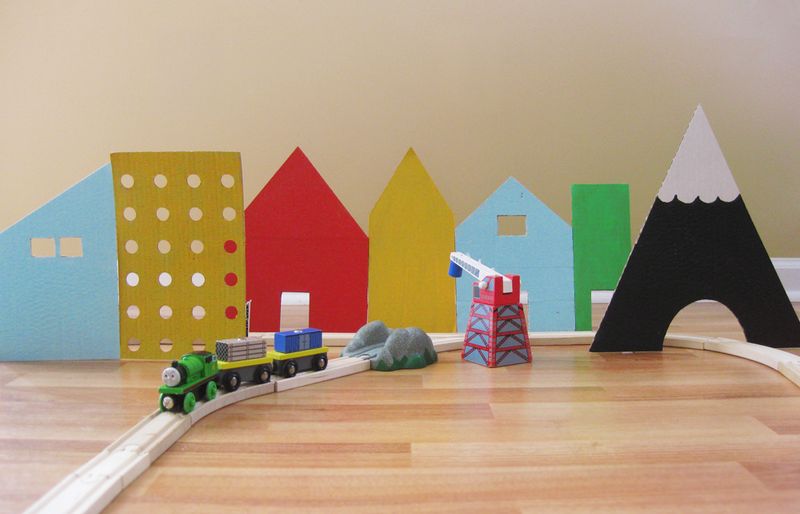
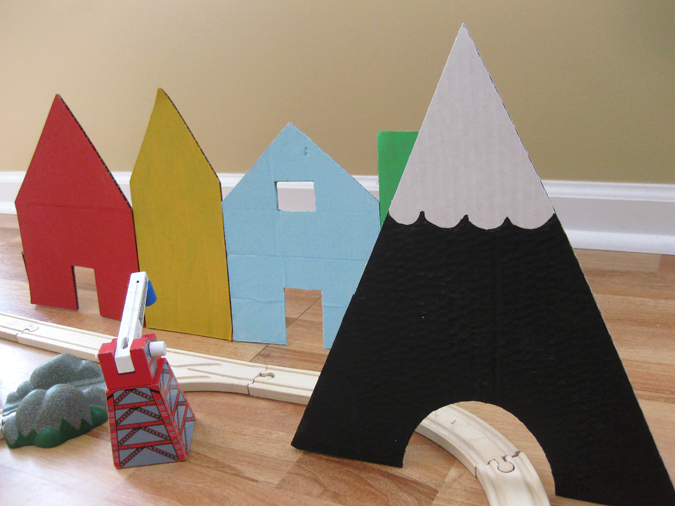
After the holidays died down, I found myself with quite a few boxes and some interesting cardboard packaging. I wasn't willing to yield so much good corrugated to the recycling just yet, so I hung on to some hoping to make a quick, easy craft that involved my boys. A simple villagescape of sorts was the result.

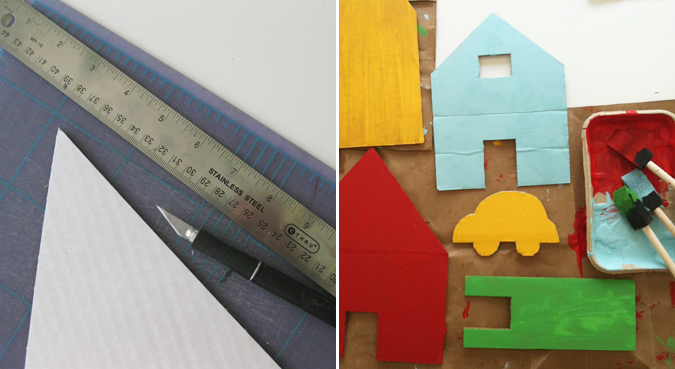
In addition to corrugated boxes, other materials you will need are: clear scotch tape, acrylic paint, sponge brushes, metal ruler, craft knife, and some paper to protect your work surface. 

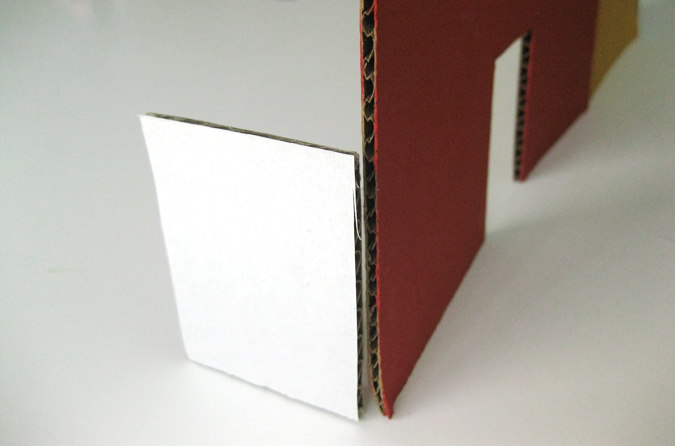
Begin by sketching out building shapes onto flattened corrugated boxes. Carefully cut out with craft knife using the metal ruler as a guide for your blade. Cut out windows and doorways with the knife. We made sure our doorways were tall enough for toy trains and cars to pass through.

2

Give each building a few coats of acrylic paint, letting dry between coats. When dry, attach little cardboard tabs with tape to the backside to prop up buildings. Group buildings together and even add a mountain or some trees and you have yourself a little modern village.

3

4


Post by Jenn : Ambrosia Creative


Eye Spy!

March 14, 2012

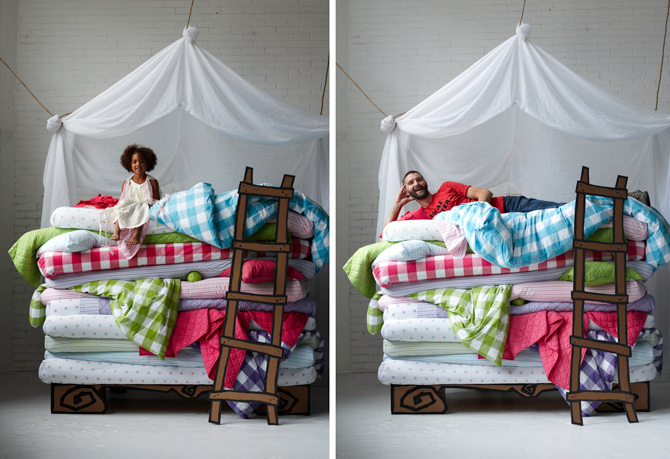
Imagine resting on 10 mattresses. Talk about super comfortable, except just one thing…all of that laundry!

After our photo shoots, we like to have some fun.

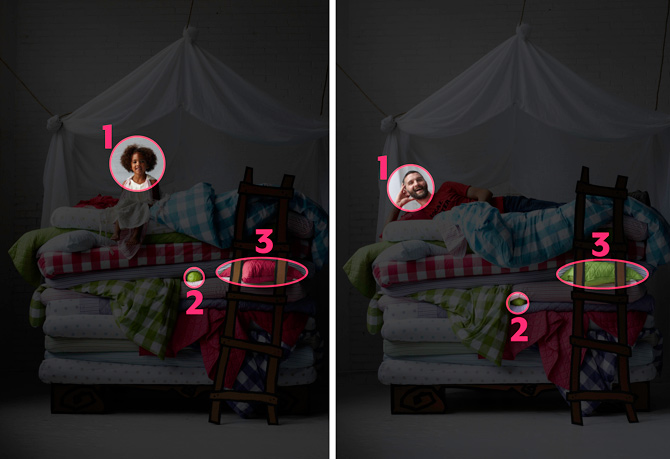
Play our eye-spy, and see if you can find at least 3 differences between these 2 photos.

PrincessPea_1
PrincessPea_2


SPOILER ALERT!

Scroll below for the answers.


PrincessPea_3


By Cara Reche

When young, Cara had two imaginary friends. As their friendship grew, so did her imagination. Cara loves to “get crafty with it” and is the Associate Art Director at the Land of Nod.


I love Pi.

PiDay_1

I admit it.  Now, I’m not a math guru or someone who was a mathlete in high school, though I do get excited when I get to create a spreadsheet in Excel.   Nope, I just like the entire enigma that is Pi.  Why?  Because almost every person in the world has heard of it and can recite at least the first three digits (3.14), though almost no one over the age of 17 knows what it actually is.  For those who don’t remember, Pi is the circumference divided by the radius of a circle. If you don’t know what the circumference or radius of a circle are, Google can help with that.   

So getting back to my love of Pi, how many mathematical formulas have a movie named after it?  How many mathematical equations get a fancy name and Greek symbol to represent it (to all of those mathletes out there, this is a rhetorical question – please don’t ruin my illusion and tell me there are hundreds…).  Pi Day (3/14, naturally) has not one, but two websites dedicated to its celebration (again, I’m sure there are more, but how many Pi related website favorites must one visit to be a fanatic?).  There are also hundreds of school activities teachers can do with kids of all ages – how many mathematical formulas can say that?  (Again mathletes don’t ruin my moment).  There are pages and pages of Pi related apparel on many websites – I don’t see that for sine waves, do you?  And you can combine your love of math with all things Twilight by purchasing the Vamπire T shirt I stumbled upon online while purchasing my official Pi Day T shirt (www.cafepress.com/pi).

Another favorite part of Pi?  It is an irrational number.  For all of us who don’t remember calculus, this means that Pi cannot be expressed as a ratio (like “1.5” being represented as “3/2”).  Who doesn’t identify with the underdog that does not fit in with standard, rational numbers? 

I’m ready to take Pi to the next level here at The Land of Nod.  Why not Pi bedding?  Pi wall art?  Add Pi to the wallpaper letter program?  Pi baby apparel?  The list goes on and on. 

I know everyone is still thinking, wow, how did he get π typed in this article.  Did they add it to the keyboard (if I had my way…)?  Unfortunately, no.  So my parting Pi related present to you is this:  in Word, hold down the ALT key while typing 227 on the number pad and you get π. 

By Mike Janecek

In addition to being our Director of Stores, Mike Janecek is a collector of mid-century modern furniture, which he sells at various antique shops throughout Chicago. He also has an extensive collection of vintage paint-by-numbers. And, impressively, challenged himself to wear fun patterned socks for 365 days in 2011, a feat which he very stylishly accomplished!

St. Patrick’s Day Money Cakes

March 13, 2012

Post by Christina Williams of justcallmechris.blogspot.com

St. Patrick's Day Money Cakes

My grandma used to make a money cake every year on my birthday. I decided St. Paddy’s Day was the perfect time to reinstate the tradition. After all, those sneaky little leprechauns like shiny golden coins, no? Here’s the gist of the money cake tradition: Grandma would scrub up all her special coins (silver dollars, fifty cent pieces, etc.), wrap them in wax paper and bake them into a birthday cake. The birthday kid chooses his/her piece of cake first; whatever they find in their slice of cake is theirs to keep.

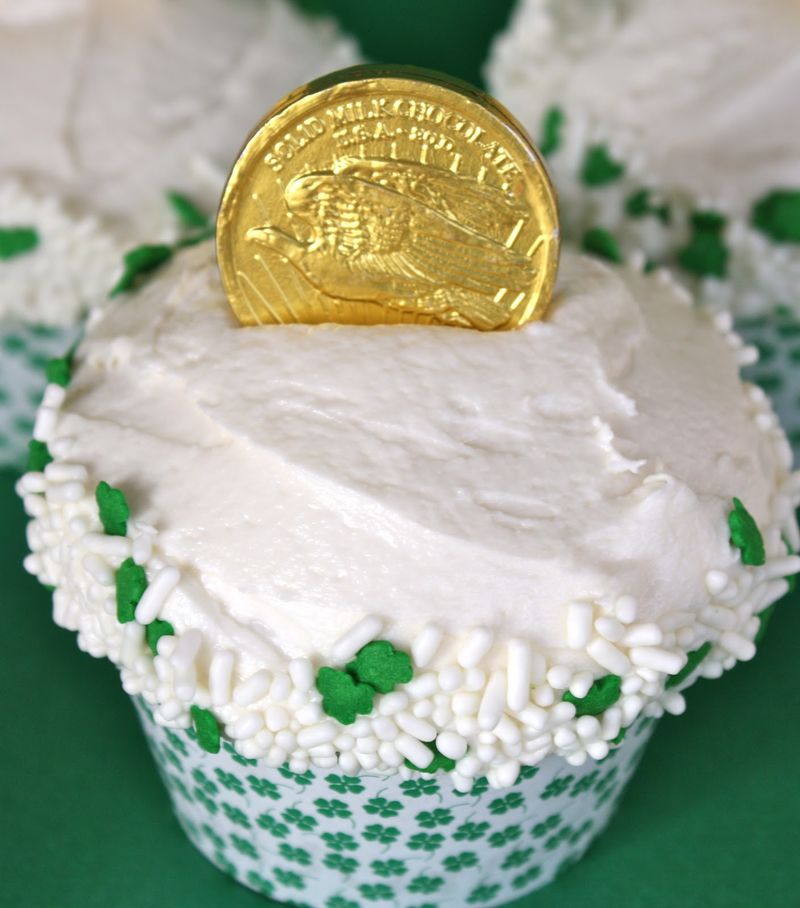
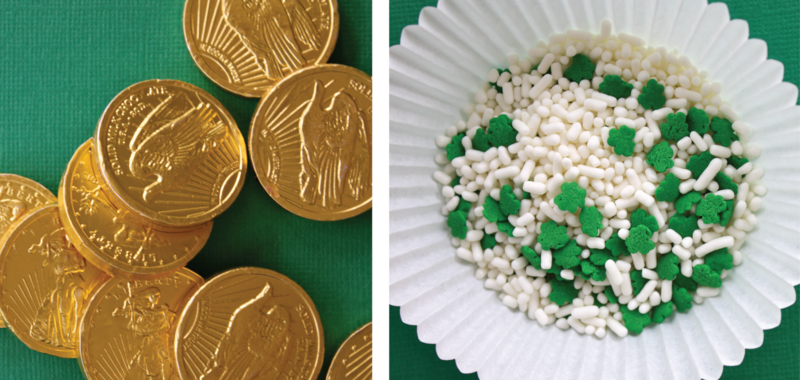
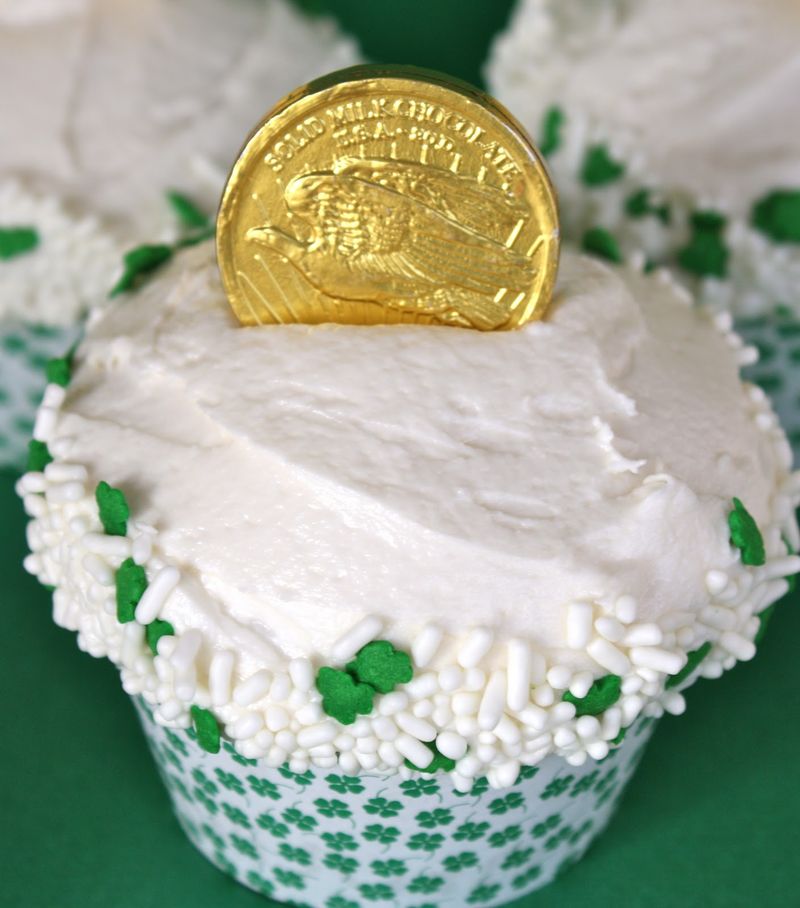
My version is a tiny bit different. Cupcakes. Each baked with a shiny gold dollar inside; and topped off with a chocolate gold coin as a hint at what’s inside. We’ll devour a few ourselves and deliver others to our friends. If you’re not totally grossed out by the thought of baking money into a cake, here’s a quick how-to:

1. Gather up the goods: Coins (I asked for new gold dollars, so I wouldn’t have to wonder where they’ve been), cake mix, wax paper, sprinkles, chocolate coins and frosting (I’m a frosting snob: I don’t do store-bought. Sorry. That’s just how I roll. So check out my vanilla buttercream recipe if you need a good one).

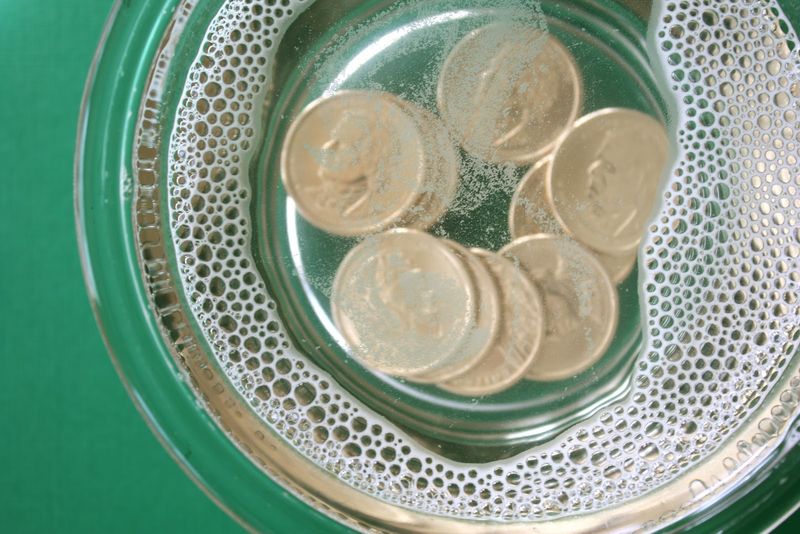
2. Scrub those coins. I simply use hot, soapy water and a scrub brush. But if it makes you feel better, run those puppies through the dishwasher, boil them or whatever you have to do.  Just don’t tell me if baking money is hazardous to your health…I’ll cover my ears and shout “lalalalala” till you’re done.

St. Patrick's Day Money Cakes 2

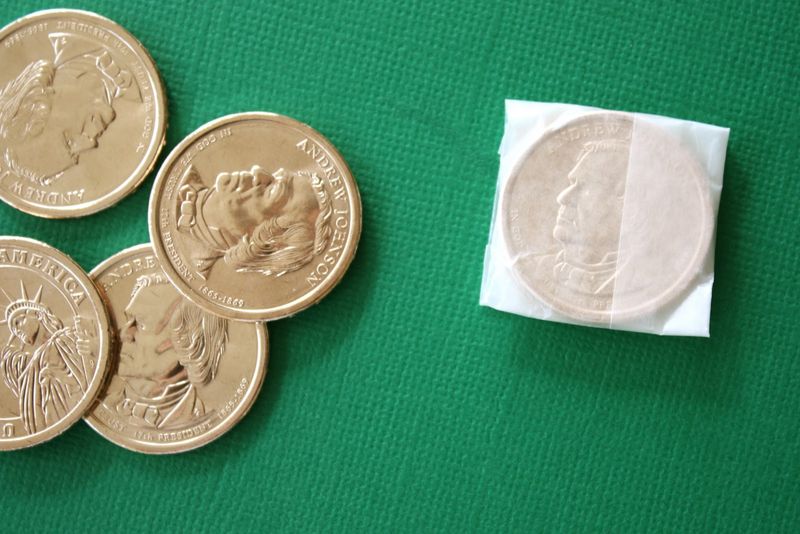
3. Cut squares of waxed paper (approx. 3″ x 3″). Wrap each coin individually in wax paper. Set aside.

St. Patrick's Day Money Cakes 3

4. Mix up the cake batter.

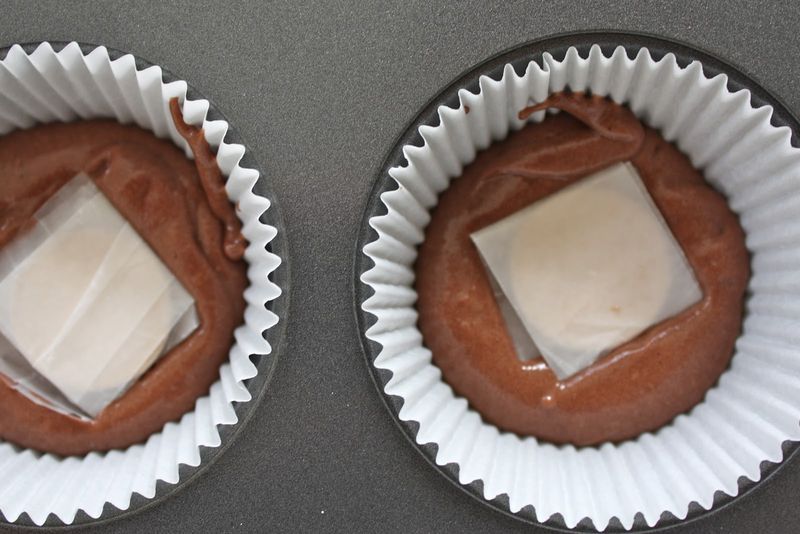
5. Fill the muffin tins half-full of batter, and place a little coin packet on each. Put the remaining batter on top of the coins.

St. Patrick's Day Money Cakes 5

6. Bake the cupcakes according to package directions.

7. Cool the cupcakes on a wire rack.

8. Frost when completely cooled.

9. Decorate as desired.

St. Patrick's Day Money Cakes 6

10. Eat. Enjoy the surprise on their faces when they find the treasure hidden inside their dessert.

St. Patrick's Day Money Cakes 8Happy St. Patrick’s Day!

Post by Christina Williams of justcallmechris.blogspot.com

Kiss Me I’m Irish! Free Printable Gift Tags

March 12, 2012

Post by Aimee and Bettijo of www.supermommoments.com

This week is Spring Break, which was a bit of a bummer to my oldest who was looking forward to wearing her St. Patty’s Day finest to school. As a consolation I decided to have the girls help me make a little gift to deliver to our neighbors. This way someone will get to see their festive St. Patrick’s Day outfits.

Kiss Me I'm Irish Free Printable Gift Tags

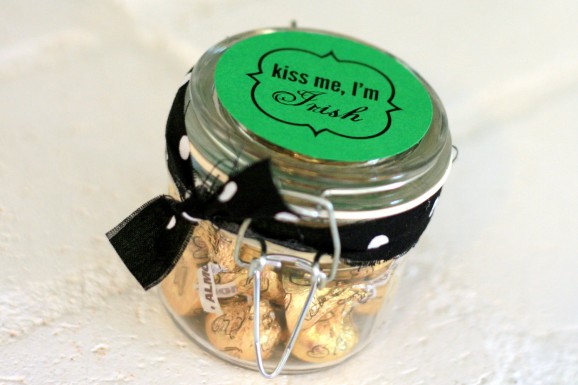
It’s so easy to fill jars with Hershey’s Kisses that even young kids can help. We used the Kisses with almonds since they come in gold wrapping — perfect for St. Patrick’s Day. We got our glass bail jars at Hobby Lobby, but you can really use any kind of container. Even a plastic baggie would look cute with the label tied on.

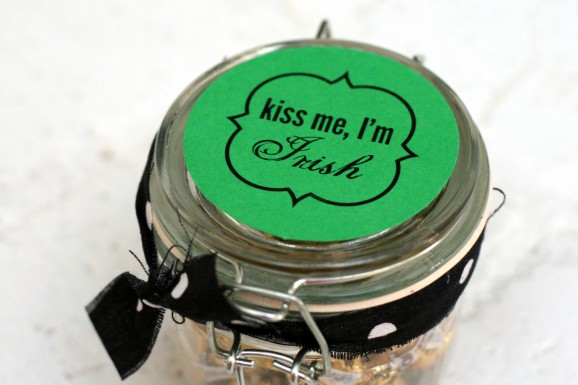
I designed “Kiss Me I’m Irish” labels (download free printable template here), and cut out using a 2.5-inch circle punch. Then the girls stuck the labels on the jar tops with glue dots.

Kiss Me I'm Irish Free Printable Gift Tags 2

It tied the jars with some black-and-white polka dot fabric scraps, and now they’re all set for giving!

Post by Aimee and Bettijo of www.supermommoments.com

Lucky You…Free Printables for St. Patrick’s Day

March 9, 2012

Post by Becca of www.cakeeventsblog.com

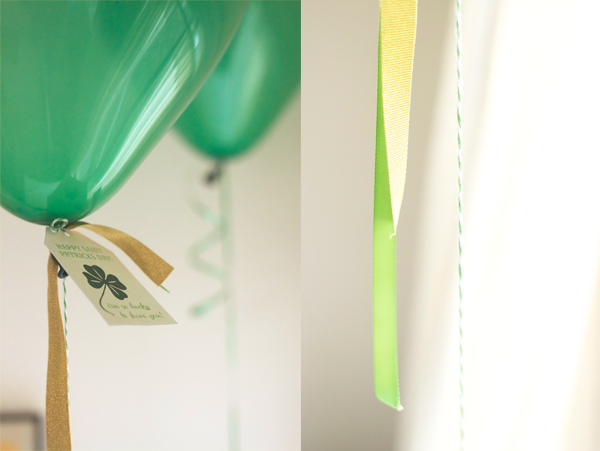
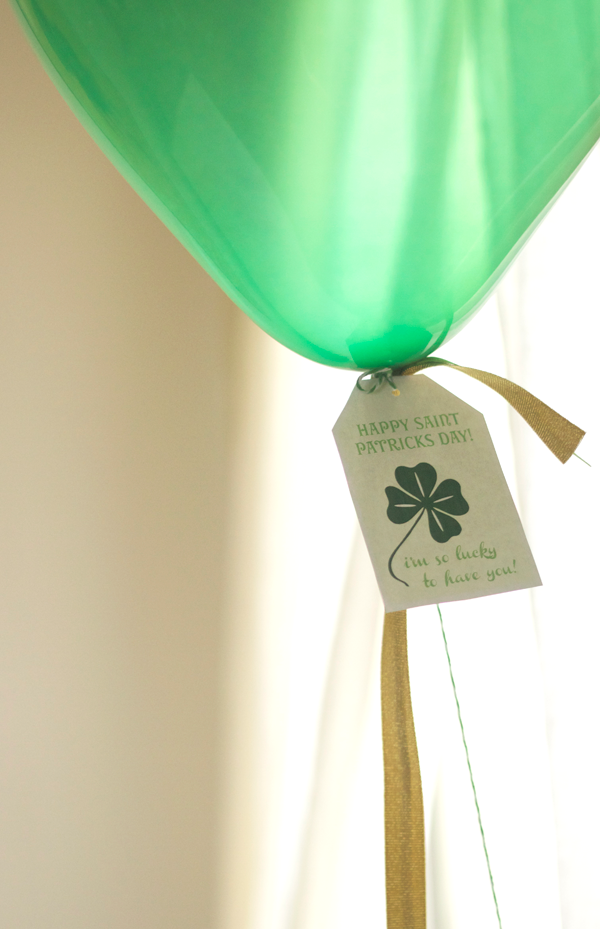
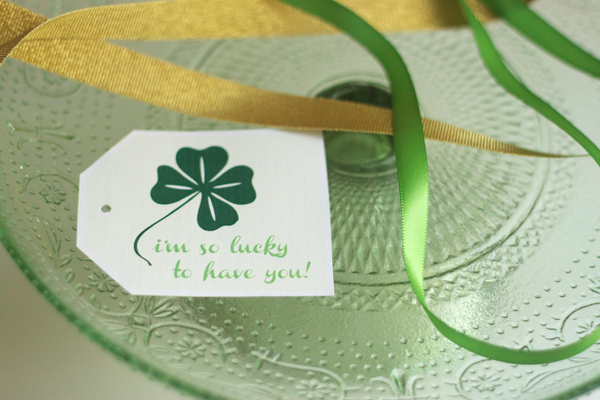
It’s your lucky day… I got inspired to design a new little freebie for you.  This gift tag comes in two versions, with or without the St Patrick’s day mention… because you never know when you might want to share your luck with the ones you love, right?  I had some fun styling it on a green + gold ribbon trimmed balloon.  Unfortunately the wind didn’t cooperate with my plans, so the photos are a bit dark due to shooting indoors.  C’est la vie… hope you enjoy!

Free Printables for St. Patricks Day

Free Printables for St. Patricks Day 2

Free Printables for St. Patricks Day 3

Free Printables for St. Patricks Day 4

Click-here-to-download-green

 Post by Becca of www.cakeeventsblog.com

Baby Steps to Building a Nursery

March 8, 2012

Nursery_1

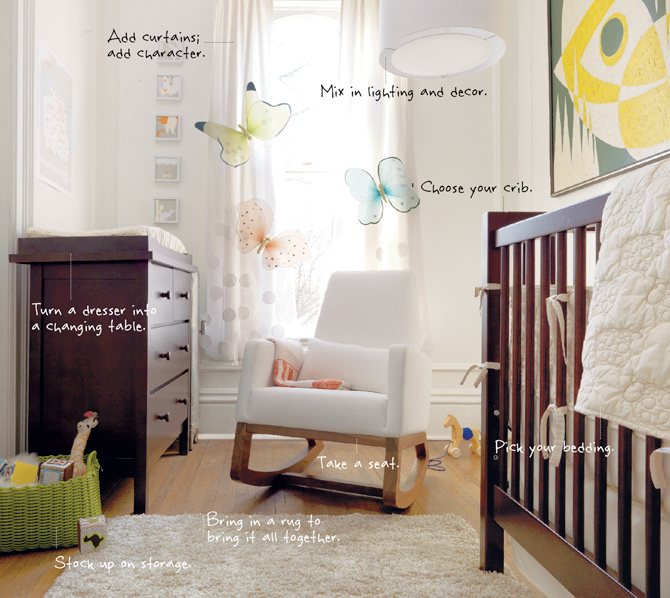
Preparing for a new baby is stressful enough, decorating the nursery shouldn’t add to the stress. Here are some helpful tips on how to put together a cozy, functional room that will make you and your baby feel right at home.

Nursery_2

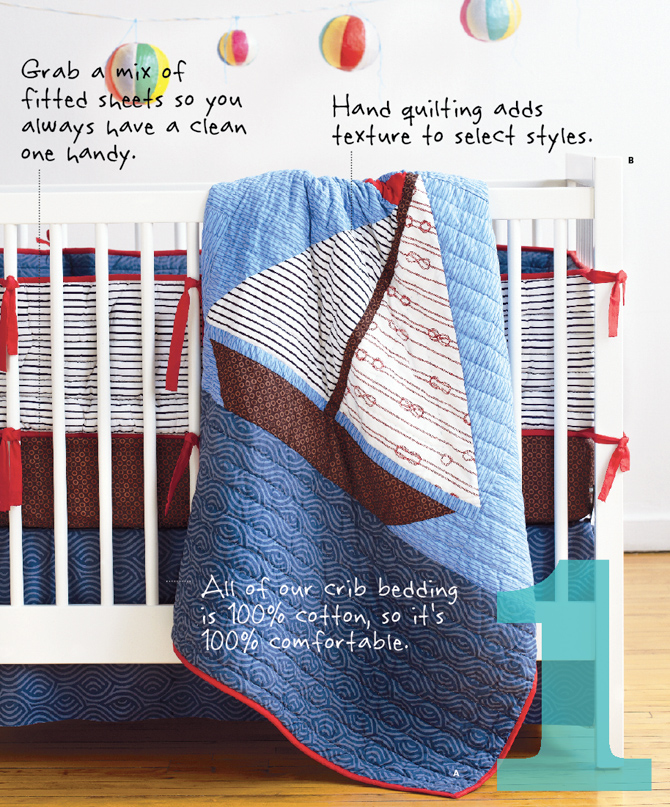
Step 1: Choose your crib bedding. The bedding is a great starting point, it can really inform the color palette of your nursery. Have fun with it, this is a baby’s room after all. But be sure you find a set that meets all of the safety standards and is machine washable. You’ll be washing it A LOT, trust me! Oh, and don’t forget to buy lots and lots of fitted sheets. You’ll be amazed at how many a newborn can go through, and unless you want to spend the first three months of motherhood in your laundry room, you might want some extras on hand.

Nursery_3

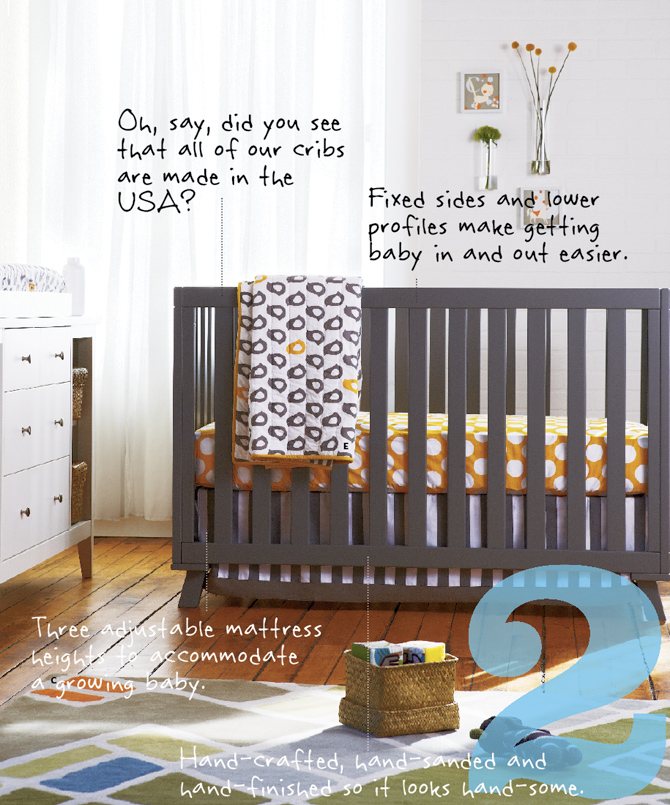
Step 2: Pick a crib. The crib will be the centerpiece of your nursery, and more importantly the one place you’ll leave your little bundle unattended. Look for one with adjustable mattress heights and sturdy, durable construction. I know it’s hard to imagine now, but soon that tiny baby will be a toddler and toddlers are rough on their cribs (and parents!). This needs to be a serious piece of furniture that can stand up to their abuse. Also, if you plan to have more kids, it’s one that will hopefully get abused multiple times. Be careful about hand-me-downs and second-hand cribs, as they may not meet current standards or be in full working order.

We’re obsessed with safety here, as we’re sure you are too. I have our Straight Up Crib and every time I have to pull it away from the wall to retrieve a stray binky, I’m shocked at the shear weight of it. But when my oldest was 2 and jumping around in there I was grateful for it’s strength.

Nursery_4

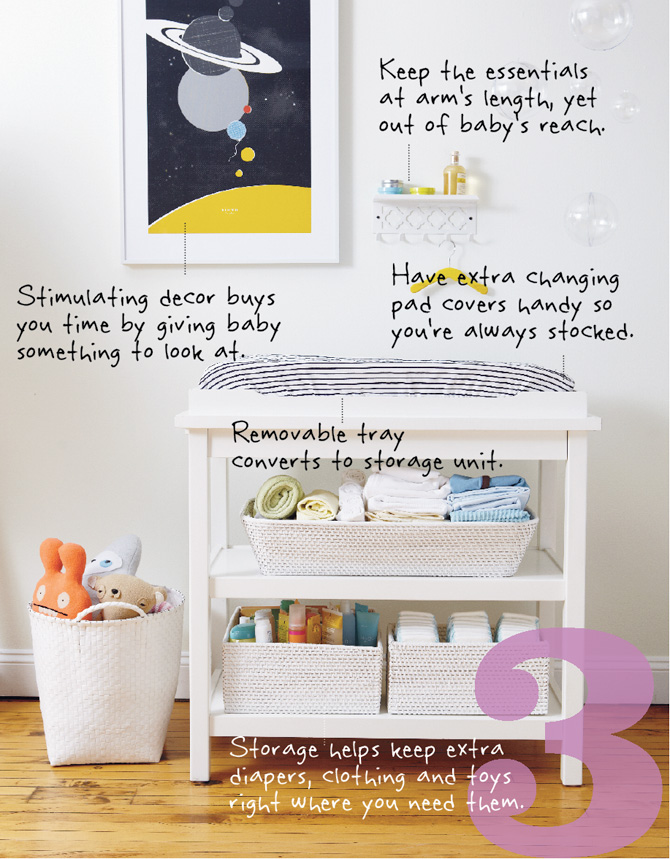
Step 3: Be prepared for all the change(s). You’ve probably heard about all the diapers, and it’s no exaggeration. So, be sure you make a place where you have everything close at hand because before you know it, baby will be rolling over. Adding a changing tray to an existing dresser is a great cost-saver. If you do purchase a changing table, be sure it’s something that has a life beyond the nursery. You’ll need a place for the diapers, wipes, lotions, etc. And, keep some entertainment close at hand. In my daughter’s nursery, I hung her mobile over the changing table, it provides enough distraction so I can get her diaper changed before she tries to squirm away.

Nursery_5

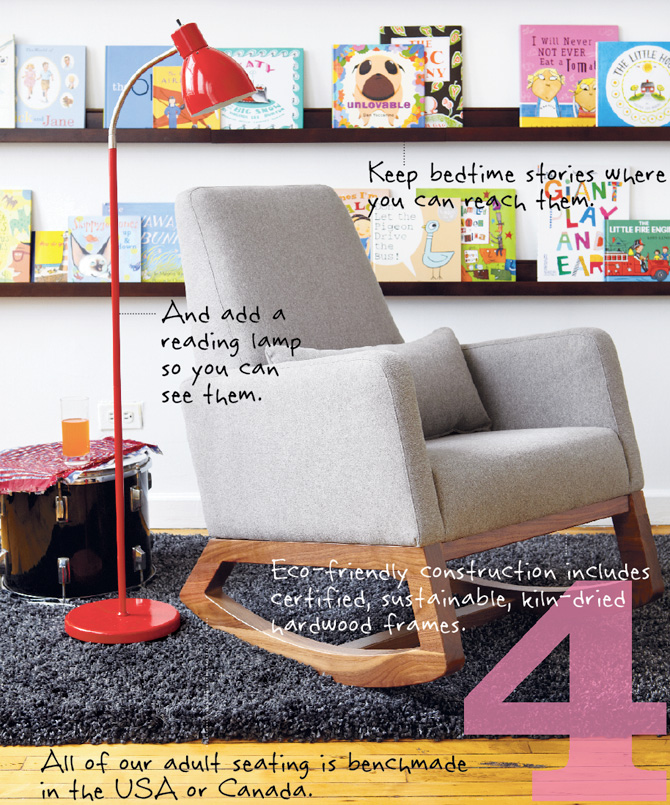
Step 4: Create a cozy nook for cuddling. It’s essential to invest in a comfy seat, you’ll be spending a lot of hours sitting in your nursery feeding, reading and just enjoying your baby.       For best results, choose a chair that can live on in your home. Choose a style that will fit into another room. In my son’s nursery I had our American Rocker, and it’s now hanging out in our family room/playroom.  Also, be sure you have the essentials at hand. You’ll need a lamp that you can reach from the chair. A place to set a glass of water or reading material for you, and some books for the little one. When my niece was a baby she’d only sleep while being held perfectly still. So, if that Kindle was just out of reach, you were out of luck. It would be hours spent reading yourself Goodnight Moon.

Nursery_6

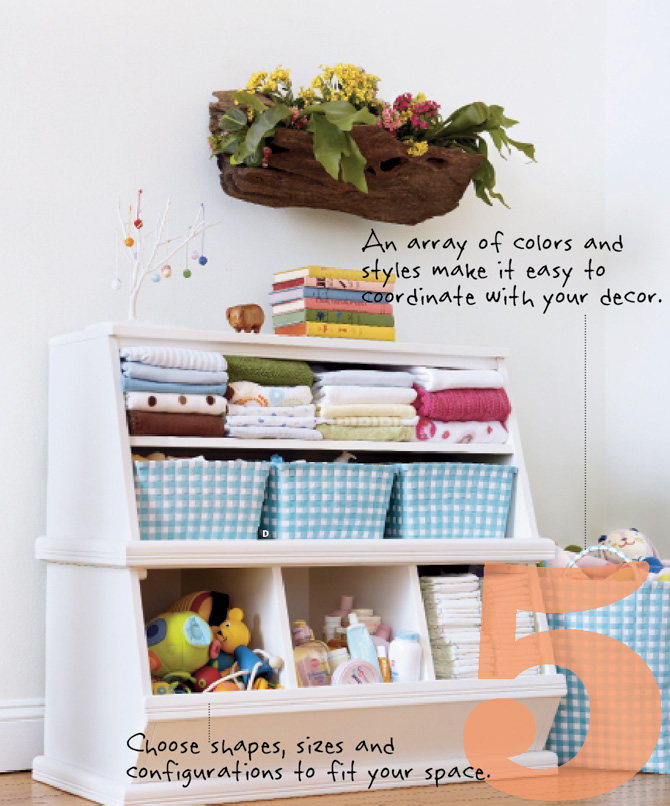
Step 5: Storage, storage and more storage. If you haven’t already noticed, babies need A LOT of stuff. And you’ll want a place to keep it all. Invest in a larger bookcase or toy box that can grow with your child. Then be sure to supplement with plenty of bins and baskets. You can fill them with diapers now, then legos, then put ‘em in your pantry and fill them with snacks. Once kids move into your house, you can never have enough places to chuck all the “stuff” when you want to get reacquainted with your floor! I literally have dozens of our strapping baskets in all sizes and colors, filled with socks, diapers, onesies, superheros, stuffed animals, dirty laundry (sometimes clean laundry), potato chips, I could go on and on.

Nursery_7

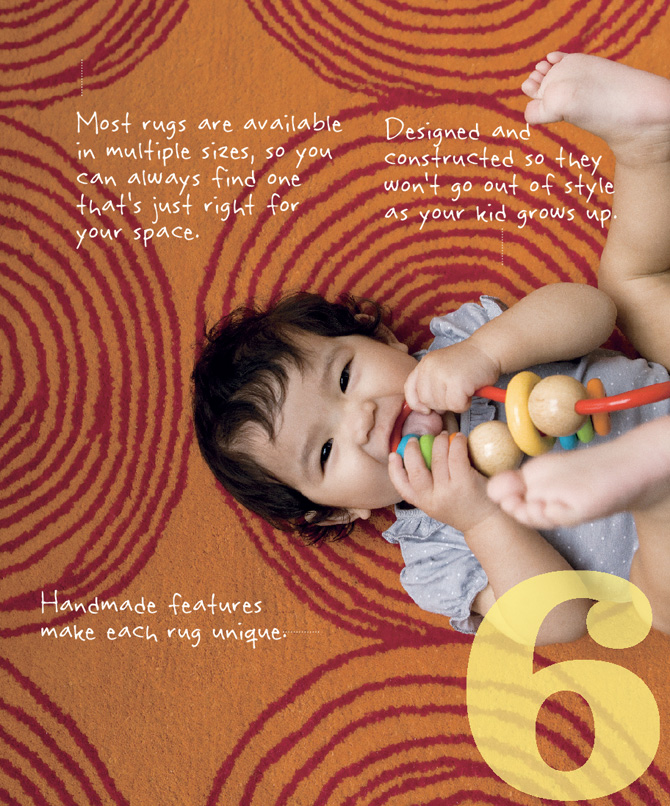
Step 6: Add a rug. If you have hardwood floors, you’ll definitely need a rug for the kiddo to play on. Since they’ll just be learning to roll over, sit up, crawl, walk, you’ll want one that’s thick and plush to cushion the inevitable spills. And, speaking of spills, be sure it’s pretty easy to spot clean. In terms of size, I’d opt for one that can cover the most floor in front of your crib.      Leave a lot of floor space when you setup the furniture, you’ll spend most of the time playing on the floor, so you’ll want as much room as possible to move around.

Nursery_8

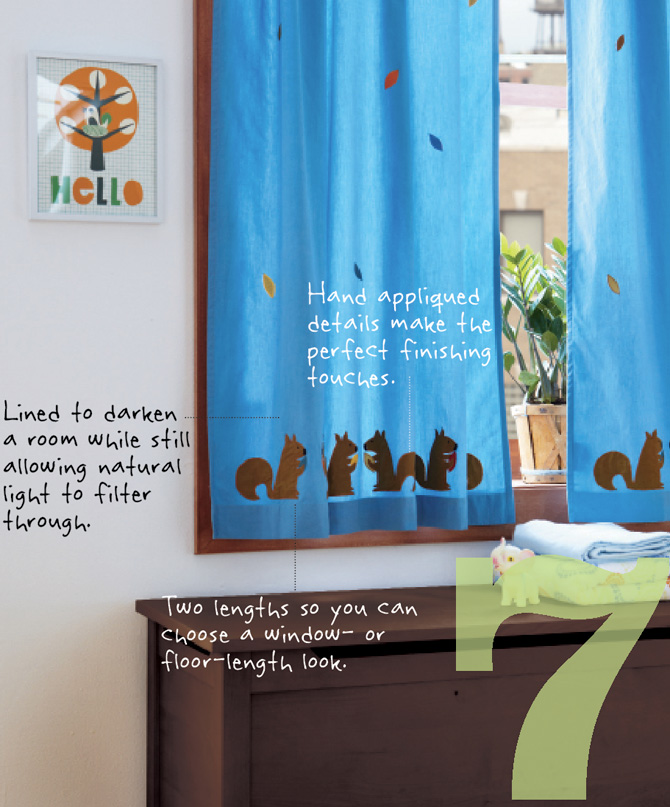
Step 7: Cover up the windows, the baby needs to sleep! When it comes to curtains, just be sure you have either heavy fabric or a black-out shade. You’ll want the baby to nap during the day, and a dark quiet room will definitely help. In terms of length, I’d opt for a shorter length. Inquisitive toddlers tend to pull on everything, so floor length may not be the way to go.

Nursery_9

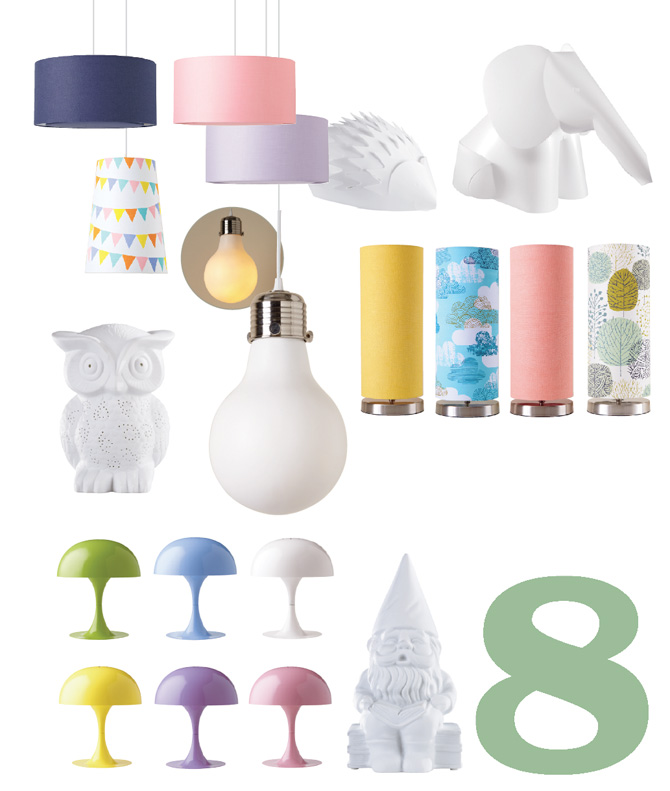
Step 8: Lights! You’ll want a nightlight for those midnight feedings and diaper changes. And a table or ceiling pendant lamp to light up the room in the evening. Lamps are a great way to add some color and personality into the nursery.

Sounds like a lot, I know. But it doesn’t have to be difficult or break the bank. In my son’s nursery I mixed items I already had in the house, with vintage finds, items I made myself and some special brand new items I splurged on. I also added in some items that were mine as a child, which gave his nursery a sense of history. Then I let the room evolve over time, adding items as I found them and as he developed tastes of his own. Be sure to have the functional items, and beyond that, just have fun….it is a baby’s room after all.


By Danielle Kurtz

Danielle is the Creative Director at Nod and an over-protective mother of two. She’s also completely obsessed with Pinterest, Twitter and her Kindle, but not necessarily in that order. Danielle loves to craft, sew and crochet, but all her supplies have a layer of dust on them about 4 ½-years-thick, wonder if it's just a coincidence that her oldest kiddo is 4 1/2 years old?
Hang on, I’m pinning!

Similar to many of you in the blogosphere, many of us at Nod have caught the Pinterest bug! It’s so powerful; I feel like Christopher Walken’s character in the infamous SNL skit, “I got a fever and the only prescription is more cowbell” except, for me, the only prescription is more pinning!

Its genius really – one can find DIY projects, recipes and design inspiration from any bit of information on the web.  It’s often that I say, “Why didn’t I think of that?” or “I NEED this gold sparkle top, like right now”.  I love that I can find Tuesday night’s taco dinner and a fun activity for my 15 month old son to save and review at any time.

Take a look at some of our favorite Pinterest Boards:

Pinterest_1

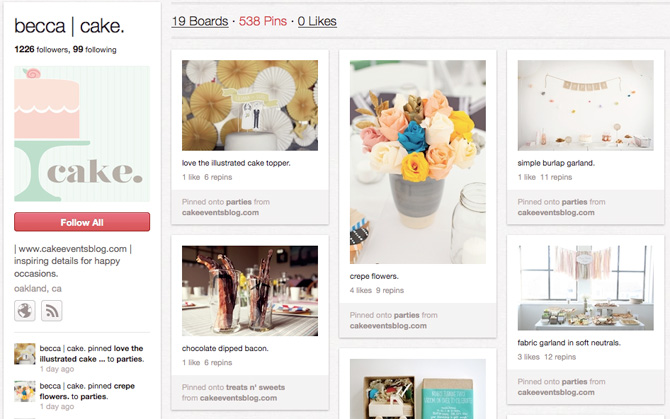
Cake:  Who doesn’t love a reason to celebrate? Whether you’re looking for inspiration for a baby shower, a garden party or all things Phillies (go Cubbies) – Becca’s boards highlight custom events to a tee.
 

Pinterest_2

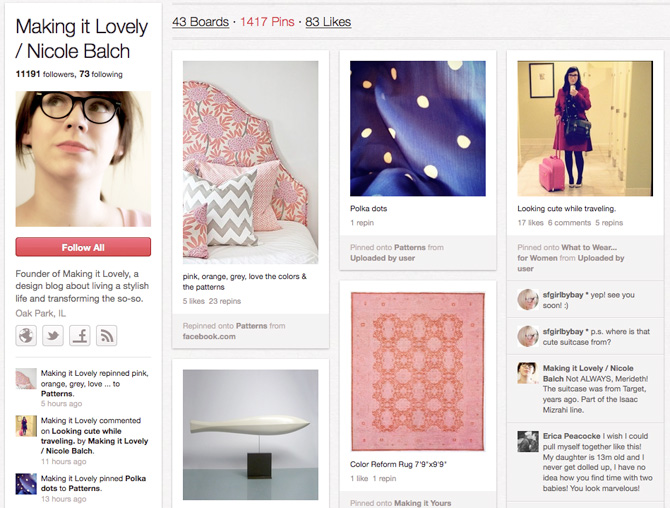
Making It Lovely: Live for style, design and parties? Nicole not only showcases her amazing home décor finds, but covers what to wear for every member of the family.


Pinterest_3

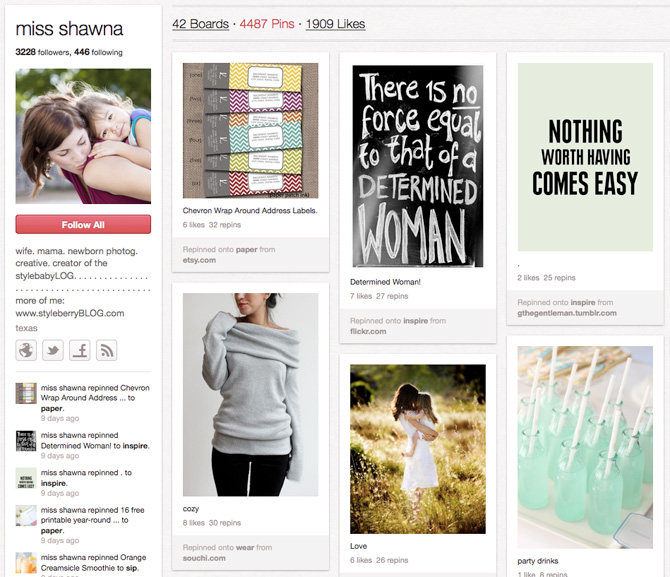
Miss Shawna: Young, hip & modern mom – Shawna’s board’s tour all four seasons mixed with sweet & funky finds for baby. Shawna has an eye for style that is sophisticated yet approachable.


Pinterest_4

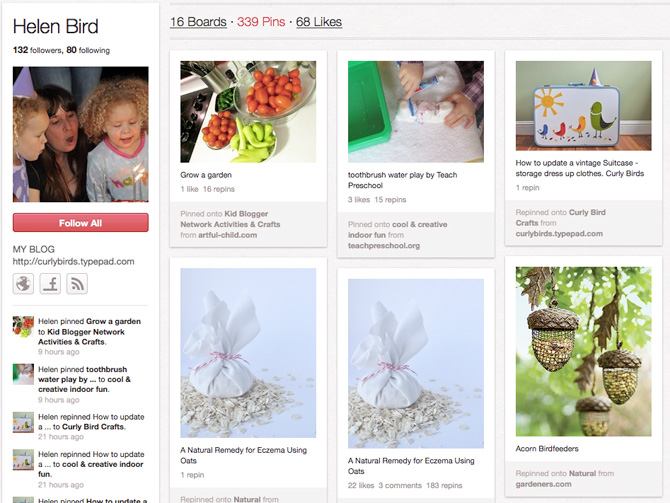
Curly Birds: Helen’s boards are very organic, natural and crafty. Specializing in kids’ activities, you’ll find hundreds of things to keep them occupied on a rainy day.

You’re sure to find a wide variety of inspiration from these four accounts.

Pinterest_5

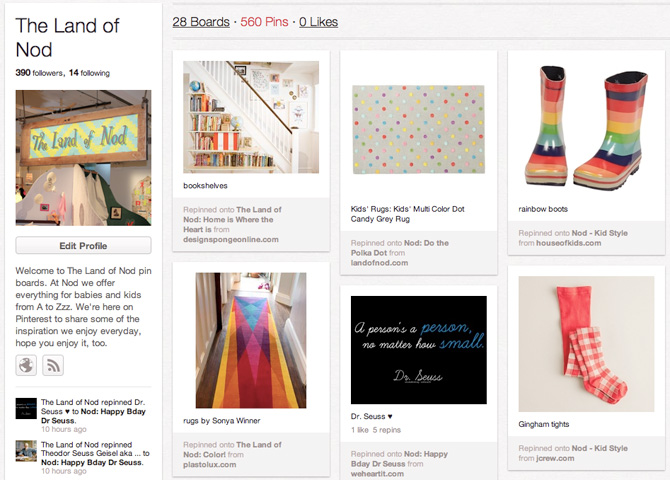
While you’re there, take a look at our Pinterest page. You’ll find our favorite Etsy items, patterns and off the chain pancake recipes!


By Katie Harrington

In addition to being the mom to heart-throb toddler, Gavin, Katie’s in charge of all things social media and PR at Nod. She’s exceedingly energetic, which is good since, like the rest of us, she’s just trying to figure out how to be an incredible mom, while working and still having a blast being young herself! (BTW, we think she’s nailing it, but she’d probably disagree…darn mommy guilt.)