Close

Blog

DIY St. Patrick’s Day Shamrock Pinwheel

March 7, 2012

Post by Destri of www.themotherhuddle.com

It’s almost St. Patrick’s day, can you believe it? Growing up, we had never made a very big deal about the holiday; it was always just a day you wore green to make sure you didn’t get pinched. Now that I have kids, it’s a another reason to celebrate. Really, just give me a Friday and I’ll celebrate it – but on this day when there are rainbow steamers run through my house I have an excuse :). We are currently living temporarily in a different state, in a “furnished” apartment without all of our things – kids without 90% of their toys. At first I thought this would be a bad thing but it has forced us to get creative, and art supplies are inexpensive, easy to store, and fill up hours of the day. It’s amazing what you can do with a little glue, pipe cleaners, and paper. Like pinwheels, shamrock pinwheels to boot!

DIY St. Patrick’s Day Shamrock Pinwheel Craft

DIY St. Patrick's Day Shamrock Pinwheel 2 Supplies:

  • Green pipe cleaners
  • Green construction paper
  • Scissors
  • Glue stick
  • Little hole punch if you have one, if not a tack or pin

DIY St. Patrick's Day Shamrock Pinwheel 2

Fold one piece of paper in half twice as shown. DIY St. Patrick's Day Shamrock Pinwheel 3

Now cut out the shape of a clover leaf like shown. Ours were about 4 inches long, but if we make them again I would keep them at about 3 inches tall. This should give you four leaves. DIY St. Patrick's Day Shamrock Pinwheel 4

Now fold over one corner and slightly bend the leaf to curve as shown. Use the glue stick to secure. Next glue them to each other forming a four leaf clover. I used a little flashlight to hold them together on the table for a few minutes. Let the glue dry completely. DIY St. Patrick's Day Shamrock Pinwheel 5 Use a hole punch or a tack to make a small hole through the center of all four leaves. DIY St. Patrick's Day Shamrock Pinwheel 6 We used two pipe cleaners twisted together to make them sturdy. Just leave an inch at the top of single pipe cleaner to put through the hole. DIY St. Patrick's Day Shamrock Pinwheel 7 Insert the end of the pipe cleaner through the hole on the flat side of the shamrock, then bend the pipe cleaner to create a 90 degree angle. DIY St. Patrick's Day Shamrock Pinwheel 8 Then simply loop the end on the front to secure…..

…..and blow! They really are fun to make, and could be made into any shape. Maybe flowers for spring? I hope everyone has a great St. Patrick’s day. I am taking an idea from our contributor Aubrey and having a Green Party. Just invite friends and their kids and tell everyone to bring something green to eat. Then see how creative everyone gets with the things they bring!

Post by Destri of www.themotherhuddle.com

Introducing: Hsinping Pan

Hsinping_1

I’m so happy to introduce Hsinping Pan www.hsinpingpan.com as our latest cover illustrator. I’ve been a long-time admirer of her work. The bright colors and adorable beings just make me happy. So, I was so pleased when Hsinping agreed to illustrate a whole slew of catalog covers for us.

Hsinping_2

The first in the series is this joyful hot air balloon. I love the translucency in the balloon, and who can resist the smiley basket!

Hope you enjoy her work as much as I do. Stay tuned, there’s more to come from Hsinping.

By Danielle Kurtz

Danielle is the Creative Director at Nod and an over-protective mother of two. She’s also completely obsessed with Pinterest, Twitter and her Kindle, but not necessarily in that order. Danielle loves to craft, sew and crochet, but all her supplies have a layer of dust on them about 4 ½-years-thick, wonder if it's just a coincidence that her oldest kiddo is 4 1/2 years old?

Leprechaun Rainbow Mobile

March 6, 2012

1
I was noticing that I really don’t have many St. Patrick’s Day decorations, and after shopping a couple of my favorite decor and craft stores it is pretty clear to me why my stash is so lean — there just aren’t many St. Patrick’s Day decorations out there that I love. I wanted something modern and fun and decided that rather than pursuing a shamrock theme, I’d focus on rainbows and Mr. Leprechaun’s pot of gold. I remembered seeing these colorful vellum mobiles and decided to make one using cardstock in true rainbow colors. I had originally hoped to find a miniature pot to fill with gold coins, but no luck. So I used a little artistic license and decided that a gold, glitter-covered, styrofoam ball would be my “abstract” pot of gold.

2

The Rainbow Mobile has certainly added some color to our family room. It’s fun how it is always twisting and turning so every time I glance over it looks different.

To make your own Leprechaun Rainbow Mobile you’ll need:
:: 2.5-inch styrofoam ball
:: school glue and gold glitter
:: one sheet of 12×12 paper in red, orange, yellow, green, blue and purple
:: paper cutter
:: needle, white thread, and scissors
:: sewing machine

3

Since I do my scrapbooking on 8.5×11 sheets, I’m always looking for ways to use the many paper scraps created by cutting 12×12 scrapbook paper down to size. So I was excited when I realized I could design this Leprechaun Rainbow Mobile to use the scrap pieces that would be cut off a 12×12. I ended up being left with fully usable 8.5×11 sheets and pretty much nothing wasted — very fitting to be “green” on my St. Patty’s day project.

4

To make it work with the scraps, I first cut the 12×12 paper down to 8.5 inches. Then I took the 3.5×12-inch scrap and cut it down long ways into three, 1-inch strips. I placed my main paper (which now is measuring 8.5×12) back in the cutter long ways and cut off the extra inch — this created my final mobile strip measuring 8.5×1 inch. I set aside my 8.5×11 sheet for a future scrapbook page and stacked the four, 8.5×1-inch strips in a neat pile. I then repeated this process for all of the colors.

5

On to the gold ball! I took a 2.5-inch styrofoam ball and covered it with school glue, using a foam brush to help spread the glue around evenly. Then I sprinkled on gold glitter and set the ball aside to dry.

6

While the glitter ball was drying I stitched up the mobile. First I measured 4.25 inches from the needle on my sewing machine and placed a blue piece of masking tape on the machine as a guide for feeding the paper strips evenly. I loaded white thread and used a straight stitch to sew the paper strips together. Be sure to leave about a 20-inch tail of extra thread at the beginning and end for hanging.

7

The top tail gets tied into a loop to hang from the ceiling. Thread the bottom tail onto a needle and then attach to the dried gold ball. I poked my needle through perpendicular about a quarter-inch down from the top of the ball. Go straight through then tie off the thread with a square knot. Trim the extra thread and dab on a little more glue and glitter to hide the knot.

8

That’s it! Now you have a lucky little rainbow to enjoy be it rain or shine.

Post by Aimee and Bettijo : www.supermommoments.com

The land of the free is the home of our cribs.

March 5, 2012

ElGreco1

I recently had the pleasure of visiting our crib manufacturer. I’d heard a lot of stories around the office about El Greco Woodworking, but was reluctant to believe they were totally true. After all, how could ALL of our cribs be HANDMADE by a family run woodworking shop in Jamestown, New York? Surely someone was exaggerating. But I was going to have a chance to find out when we decided to do a feature about them in our March catalog.

ElGreco2

So, our photographer and I bought tickets to Buffalo NY, packed our equipment and off we went. If nothing else, we were hoping to get some good buffalo wings (which we did at the Anchor Bar, self-proclaimed home of the Buffalo Wing).

When we arrived at El Greco, we were greeted by Alexis Theofilactidis, daughter of the company’s founder George. She took us on a tour of their new facility, a metal building nestled at the top of a hill in the charming town. The minute we entered the workshop, I was in love. The smell of sawdust filled the air and everything was coated in a thin layer of the aromatic dust. Alexis tried to give us a quick tour, but we were so entranced, we took about 300 pictures within the first 5 feet of the space.

ElGreco3

But, who could resist the beauty of spindle upon spindle of solid maple stacked perfectly, waiting to be made into a finished crib. But, Alexis assured us that the real showpiece was at their older location. So we hopped in our rental car and followed her down some REALLY steep hills to the original location of El Greco Woodworking. And, as soon as the building came into view, we knew she was right.

ElGreco4

The shop is located in an old wool mill. The 4-story all brick building is located alongside the river, as that’s how the wool was originally transported to and from the mill. And, as it turns out, Jamestown is historically the home to many furniture makers for several reasons.              It’s halfway between New York and Chicago, there’s access to a river for transport and the Allegheny forests are flush with American hardwoods. We could feel the history in the air around this building.

So, why did they move into the new space, they couldn’t have possibly out-grown this enormous building. Sadly, several years back there was a fire at the original location, rendering much of the space unusable. Luckily no one was hurt, but the building still bears the scars.

ElGreco5

Once inside, it didn’t take us long to realize that all the stories were true. Lead by George Theofilactidis, the family and their small crew of employees, are hand-crafting EVERY crib. Hand-milling, hand-sanding, hand-staining and inspecting each and every components to build cribs that are truly of heirloom quality.

ElGreco6

George founded El Greco Woodworking in the mid 70s and has been handcrafting furniture ever since. Alongside his wife and three kids, George crafts cribs he’d be proud to give to his own grandchildren, who can often be found hanging around the shop.  His passion for quality has clearly been passed on to the next generation.

ElGreco7

Though, he’s not ready to hand over the reigns just yet. On the couple days we were visintg, George was the last to leave the shop. Not until the floor was swept, was George ready to call it a day.

ElGreco8

I got home from this whirlwind trip late on a Friday evening. My youngest daughter was already asleep in her crib, a crib from Nod, built by the Theofilactidis Family. I snuck into her room to give her a kiss goodnight, and I have to say, I always knew she was safe in her crib, but I as I looked at my sweet baby fast asleep, I was so grateful to George for keeping her safe, while I got a much-needed good night’s sleep.

By Danielle Kurtz

Danielle is the Creative Director at Nod and an over-protective mother of two. She’s also completely obsessed with Pinterest, Twitter and her Kindle, but not necessarily in that order. Danielle loves to craft, sew and crochet, but all her supplies have a layer of dust on them about 4 ½-years-thick, wonder if it's just a coincidence that her oldest kiddo is 4 1/2 years old?

Half Apron Tutorial

March 2, 2012

Your ruffle is all one piece, so let’s jump right to the hemming. Hem one long edge and both short edges in 1/4″, then another 1/4″ to conceal the raw edges.

14

Now, stitch that pretty little hem in place.

Begin on the raw end of the fabric and stitch toward the corner. Do this rather close to the edge.

15

When you get to the corner, drop your needle, lift your presser foot, rotate the ruffle fabric 90-degrees, drop the presser foot, and keep on going. Fancy.

16

Nice looking hems, y’all!

17

Okay, last bit of hemming, I promise. And, this will be quick!

On the two short ends of your main body fabric, turn your raw edges in 1/4″ two times (just a typical narrow hem). Stitch them in place and be excited that you’re halfway through for sure!

18

Now, things get interesting.

This is where we adjust some setting on our machine. Don’t worry if you don’t have a digital machine, you can adjust your dials the same way. We want to ruffle our ruffle fabric, so set your stitch length as long as it goes (5 for me) and increase your tension as well (5.4 for me). (Don’t worry about the 3.5 – that’s just my needle position and it was just a personal preference at that moment.)

19

Now, run this stitch about 1/4″ from the raw edge of your ruffle fabric. Be sure to leave plenty of thread at the beginning and end for grabbing/gathering.

See the fabric going in straight and coming out ruffled? Pretty fancy, eh?

20

Now, it’s pretty unlikely that your ruffle came out the exact same length you’ll need to match with your apron body. You’ll have to make some manual adjustments and that’s perfectly normal. Just hold tight on one thread while sliding the ruffle along the line until you’ve got it evenly dispersed and the length (or width or whatever you’d call it) you need. Definitely nothing to get nervy about – ruffles are flexible!

21

Once your ruffle is the same length as your main body fabric, pin it in place, because it’s time to attach it!

22

PSA: Don’t forget to switch your machine back to its normal settings. You will be sad if you further ruffle your ruffle with the body fabric. *ahem* not that that’s ever happened to anyone here… *cough*

(I keep my tension at 4 and my stitch length at 2.5 or 3 most of the time and I’m very happy there.)

23

Now, stitch away! Stitch just on the inside of your gathering stitch so it (the gathering stitch) won’t show when you’re all finished. Keep your pincushion nearby – pins will be flying at this point. (Oh, and take your time on this step. Definitely not a race – be sure and get it right the first time so you don’t have to spend the next 30 minutes muttering unkind words under your breath while wielding the seam ripper of grief and angst.)

24

Now, this is an extra step, but I’ll include it for those of you that have a serger. This is definitely a serging moment. Tidy up your raw edges and tell this garment who’s boss. (And, if you don’t have a serger, you might like to trim loose threads here and maybe even secure these edges with a zigzag stitch.

25

Just a few pretty photos of Sergio (my serger) in action. He trims and stitches and smiles as he goes. This bad boy will not fail to simultaneously terrify and thrill you just about every time you turn him on.

26

I call the trimmings confetti. It’s always so pretty. Keight calls it cole slaw. Do y’all call it anything?

27

Okay, sorry. Back on track! Oh, we’re getting close!

28

Now, press that ruffle down (or really, try to avoid the ruffle with your iron – just try to press the seam allowance up so that you can topstitch it in place. Nice and close to the edge, of course.

29

Beautiful.

30

Okay, we’re gathering again. Switch your settings again to a longer stitch length and a higher tension. (Yes, I realize my tension is a little higher here than last time. Pardon my waffling.)

31

Gather the top raw edge of your main body fabric just like you gathered the top raw edge of your ruffle. Then, adjust it to fit your target length (this time, it’s the inside measurements of your sash opening), just like last time.

32

As you get things in place for stitching, use lots of pins to keep it in place. Now we really are almost done!

33

Pinned and ready to stitch!

34

But first! Get those setting back before you have sad time with seam ripper. You’re welcome.

35

Begin your stitch this time at that first vertical joining seam you made and run it all the way across to the other joining seam. Backstitch on both ends and try to stay about 1/8″ from the edge. This stitch will show, so take it slow, keep it straight, and use thread that matches your fabric. (I used white the first time, then ripped it all out and used grey when I shortened my apron. Sorry it’s white here. Also, sorry I had to sit down and rip it all out. Sheesh.)

36

All finished! Congratulations!! (Hazel was napping when I finished my project, so my sewing machine served as my model. Told you that bad boy was versatile!) 

37

See how that topstitching makes such a nice difference? And a nice, even hem stitch makes things look so carefully made. It’s nice to have projects that aren’t difficult and don’t take weeks or months to complete, but it’s still worth it to take time to make little details just right!

38

Variations: embellish your apron! Add pockets, ricrac, appliques, whatever! And definitely don’t feel like these baby & kid aprons are only for baking – it’s one of Hazel’s favorite accessories for going out! Tres chic!

Oh, and definitely feel free to poke around my Tutorials Pagefor other fun handmade Christmas project ideas!

Post by Raechel : www.raechelmyers.com

Alphabet Soup – the non-edible version

March 1, 2012

AlphabetSoup_1

We’ve all done it while eating our alphabet soup…spelled out words, names and even the try to put together the ABC’s. Part of the fun, while eating the soup, is to pick out the letters and see what you can spell.  Well, we took that concept and translated it into wall art. 

Our Alphabet Soup wall art program is stunning in person as the large letter is made up of the entire alphabet.  Even better, you can personalize the wall art with your name in three different colors – Pink, Green and Blue.   You can also choose a white or black frame to really finish off the stretched wall art.  The placement of the personalized name is strategically placed on the letter to make the entire piece a real stand out.

Make sure to check out the preview feature on our website to see how your name will look on the wall art.  It’s much easier than opening a can of alphabet soup and finding your name.

Here are some fun facts about soup.

  • January is national soup month! 
  • On average, American consumers stock six cans of Campbell’s soup in their pantries at all times.  I have six in my pantry…how’d they know?
  • Andy Warhol liked tomato soup so much that he ate it every day for 20 years
  • Frank Sinatra always asked for chicken and rice soup to be available to him in his dressing rooms before he went on stage.
  • Women seem to be more than twice as likely to eat soup as men.
  • Why did thin soups become popular in Europe during the 17th century? The spoon was invented. I can’t image trying to eat soup without a spoon!


By Lia Mensinga

When Lia’s not out hunting for the latest and greatest décor items for Nod, she can be found painting, and re-painting, and re-painting her finger nails. Her current obsession is an ombré technique and water marbling. She’s also recently started a collection of all things robots, including a costume she made herself.

Hipstamatic Photo Tray DIY

February 29, 2012

15

This might be one of my favorite DIY’s I’ve posted to date.  It’s totally original–dreamt up in my own little crazy brain, it involves photos which is always a home run in my book, and hipstamatic photos from my iPhone at that–so I’m pretty excited about it.  But, let me say right from the get-go…if you don’t have an iPhone or you do but don’t use hipstamatic (which is an awesome app) no fear.  You can do this with ANY photographs that you take, no matter what you take them with.

I dreamt this up though because I take all these little pictures with my phone, that have cool filters on them, unusual borders, and are just all around awesome, but then I don’t necessarily do anything with them like I do with the pictures that I take on my actual camera.  And I thought…that’s ridiculous because they’re part of the memories of our life too.  And I have a whole year’s worth of these neat little pictures on my phone and they’re just sitting there.  They need to be on display!

So here’s what I did. I e-mailed all of the little files to my photo printing guys at the place I use to print pictures.  I told them I wanted them all printed 2×2.  This was pretty easy for them to do since they could just drop about 20 of them onto an 8×10 sheet and cut them apart.  And to that end, you could do this yourself too in any photo editing software.  I just didn’t feel like dealing with it, so I opted to pay $10 to have my trusty photo friends do it for me.  So once you have these darling little pictures printed you’re ready to go.

Step 1:  Gather your supplies.

1

  • An old cutting board!  FREE. But really, any old board will do–I just have a penchant for cutting boards so I always have an old one laying around.
  • A can of spray paint.  $4.  I have two cans pictured because at the time I couldn’t decide what color I wanted to go with…..cream won in the end.
  • Rubber cement. FREE for me, I have tons.  Otherwise about $3.
  • Mod Podge.  Also FREE if you have it on hand.  Or, $4 from a craft store.  I used the matte version.
  • A small sponge brush.
  • A tape measure.
  • Your pictures.  I used 25 total for a 12 x12 cutting board.

And really, how cool are these little pictures?

2

4

Step 2: Plan your layout.

5

I laid out exactly how I wanted my pictures to be ordered.  This helped me decide to paint my cutting board cream.  I saw a lot of cream in the pictures, or tones of it, and decided that’d look best.

Step 3:  Paint your board.

6

I put about three coats of paint on my board, both on the top and bottom.  I let each coat dry over-night to make sure it was perfect.  You probably don’t need to wait that long but I got busy too…so it was no big deal.

Step 4:  Measure out your layout.

This is important because you want your design to be centered on whatever you’re using.         You need to lay out your pictures, measure how much space they take up compared to how big your working surface is and subtract the two to figure out how much of a margin you’ll need on each side.  Whew.  That’s the extent of my math right there.  I had to break out a calculator.  I’ll admit it.

7

8

9

Step 5:  Glue down your pictures.

Once you know exactly where everything needs to go start gluing.  Just like when you tile a floor–start in the middle and work your way out.  I used rubber cement for this. And again–I let them dry overnight with the mutha’ of all dictionary’s on top of it to make sure everything dried flat.

10

11

12

Step 6:  Mod Podge.

No matter how many times I use this stuff I always have this moment of hesitation that it won’t really dry clear right before I use it.  I hover over my project, brush in hand, and take a deep breath before I swipe that first stroke.  And it’s always fine, so don’t worry.

I put about six coats of Mod Podge on this project since pictures have a good edge to them.        I let each coat dry for about an hour.

13

Step 7:  Love this totally original piece of art work that is both utilitarian and beautiful!

14


Post by Maggie Terryn : Mom Colored Glasses

DIY Napkin wall

D6439_Matilda_098

Whattya need?

  • Napkins
  • Spray adhesive
  • Cardboard
  • Small nails
  • Hammer
  • A wall

Blog_NapkinWall_01

How do I make a napkin wall?

Step 1: Using spray mount cover a corner area of your cardboard. Next, lay a fully unfolded napkin onto the sprayed corner of cardboard. Gently smooth out. Some wrinkles are OK.

Blog_NapkinWall_02

Blog_NapkinWall_03

Step 2: Spray and apply another napkin next to it, letting them overlap a bit. Repeat to cover entire cardboard piece.

Blog_NapkinWall_04

Step 3: Hang or mount your cardboard to the wall. A small nail in each corner is a very clean method.

Blog_NapkinWall_05

Blog_NapkinWall_06

Created by Dane Holweger

Lemon and aqua Citrus Sweets

February 28, 2012

Hello again from Becca of CAKE.

One evening last week my husband hosted an event for his business at a local med spa, and I offered to do the planning for him.  Keeping the spa locale in mind, I designed the graphics around a yellow & aqua citrus theme, and arranged a dessert table to showcase baked goods from Cakewalk Baking. 

Michele did an incredible assortment of citrus treats for us including sandwich cookies, two kinds of cupcakes, meringue tarts and lemon bars.  I accented the table with seasonal flowers, fresh lemons and coordinating ribbon, but everyone's favorite touch was the sour lemon balls lining the jadite cake plates- a whimsical way to add a pop of color!  Though the photos and the lighting don't really do the event justice, I was incredibly pleased with how everything turned out.  I hope you enjoy the fresh colors… a great combo to consider for your spring or summer birthday celebration.

1

2

3

4

5

6

7

8

9


Post by Becca : www.cakeeventsblog.com


Simple Pennant Banner

February 27, 2012
My name is Amy Smart and I write about my sewing and quilting adventures at Diary of a Quilter. I have to admit, I like projects that are quick and easy. Some might say I'm lazy.            I thought I'd share my super-simple and very quick method for putting together a cute pennant banner for anyone else out there like me.
I like to use two fabric triangles per pennant, just to give some more body to the pennants and help them hang nicely.  (I die cut my pennants using my Accuquilt Go Cutter, but you could cut them with a rotary cutter as well.) To sew them together I just match the triangles wrong sides together and sew a 1/4 inch seam along the two-hanging sides, leaving the edges raw.  After sewing, I starch and press the pennants.

I then use Wrights Extra Wide Double Fold Bias Tape (available at any sewing store, Walmart, etc.) to string the pennants together.  I tried pinning once, but it was more of a pain then a help.  I've found it much easier to tuck the top (unsewn) edge of the pennants inside the fold of the Bias Tape and sew across the bottom edge of the tape, sewing the pennant in the process. As I get about an inch and a half away from the end of the pennant, I insert the next pennant, overlapping about an inch and continue sewing the tape shut across the top of the triangle.

Thats it. Easy, peasy. No pinning, no turning triangles right-sides out.  It's not the most Martha way to assemble pennants, but it goes together quickly. I like to let the fabric do the hard part of making it look cute.  
All of these pennants were cut from vintage linens (sheets) found at local thrift stores. (After they had a VERY good wash.) I love their cheerful prints and colors. I also made a baby quilt from vintage linens and now I want to make a big one for myself!
If you're interested in other sewing tutorials, I've got a bunch. Please stop by and say Hello!

Post by Amy Smart : www.diaryofaquilter.com

A Shared Space for Sophia and Nicolas

February 26, 2012

I recently asked our Facebook fans to share their decorating dilemmas. Kristin F. had the following to say, “Wrestling with putting a toddler girl and baby boy in the same room for a few years. How to mix genders in decorating, which seems to be especially gender… um… ful.”

After talking to Kristin some more, I learned that Sophia and Nicolas currently share a very purple room that was more appropriate when it was Sophia’s nursery, but didn’t work well as a shared space.

Moodboard_1

To put together the room, I first started with the bedding. When mixing two sets, it’s important to keep at least one more simple. I chose an aqua palette for the bedding because it works well for both boy and girl, and offered a nice starting point from which to build the room. The bedding I chose for Sophia is from our Easy Breezy Collection, it’s mixable and can grow with her. It also paired well with the colors in our Come Fly With Me Crib Bedding. The nice thing about this set is we also offer it in kids size. Since Kristin indicated this shared setup was temporary, I wanted to show her pieces that would allow the room to transition into a permanent home for either Sophia or Nicolas, no painting or massive redecorating required.

From there, I chose a rug that, again, could work long-term. The pop of green adds to the snappy color palette. And, the rug is super soft and plush, giving a nice play surface for Nicolas while he’s learning to sit, crawl and walk.

Kristin indicated the room was on the small size, so I thought some storage was probably in order. Our 6-Cube Bookcase doesn’t take up much space, but holds a ton. It can start out as diaper and book storage and transition to craft supplies and toys as the kids grow up. Plus, the Top Box Storage Bins add some really great color to the room and make clean up a breeze.

Then it was time to accessorize. This is where you can really personalize the room. If you keep the furniture, bedding and rug more neutral, you can cater to each child’s tastes through wall art and other small décor items. The great thing about this approach is the cost commitment is low, so you can change it out with your kid’s changing taste. I love the idea of giving each child a growth chart, so they can track their growth together. Also, be sure to incorporate some wall art that reflects their interests. This can be anything from purchased prints and family photos to your kid’s own artwork.

It’s also important to allow each child their own “space” within the room. Even if it’s as simple as color-coded baskets to keep their toys apart. After all, no matter how much you love your little brother, sometimes you just want him to stay outta your stuff!

Overall, I think it’s a bright, cheerful space that can grow with the kids and feel like it belongs to them both. I hope I’ve at least given Kristin a few ideas she can incorporate into her kiddos’ room, I know I had fun putting it together.

By Danielle Kurtz

Danielle is the Creative Director at Nod and an over-protective mother of two. She’s also completely obsessed with Pinterest, Twitter and her Kindle, but not necessarily in that order. Danielle loves to craft, sew and crochet, but all her supplies have a layer of dust on them about 4 ½-years-thick, wonder if it's just a coincidence that her oldest kiddo is 4 1/2 years old?

Maria Carluccio

February 24, 2012

We’ve worked with and loved all things Maria Carluccio for many years.  So, when we came across yet another opportunity to work with her again, we jumped at the chance.  Take a look at our new ‘The Birds and the Leaves’ Tree Decal

Maria'sTree_1

Reasons why I love this product:

  1. This is a Land of Nod exclusive
  2. It’s non-toxic, green and PVC free, fabric decal
  3. The decal is repositionable which means you can use it over and over and over…
  4. The set includes over 25 decals for you to create a scene that’s your very own design
  5. It’s 68.5” tall, which 8.5” taller than me so that makes it almost giant like!


By Lia Mensinga

When Lia’s not out hunting for the latest and greatest décor items for Nod, she can be found painting, and re-painting, and re-painting her finger nails. Her current obsession is an ombré technique and water marbling. She’s also recently started a collection of all things robots, including a costume she made herself.

A Red Birthday Party

February 23, 2012

1
Remember when I told you that my little man turned one last week. Well… I was about to get the award for worlds worst mother to a second child. I had a party when Finn turned 1 and 2 so how could I tell Clyde when he is 13 that we just "didn't have enough time"? I gave myself a guilt trip, but I'm glad I did because we had a really good time. Clyde was born last year on Superbowl Sunday. So this year when his birthday fell on a Monday we celebrated with our families. The color RED has been readily available so I went with a RED theme. I had red food, red balloons and I even told everyone to wear red.

Red Food:

Caprese Salad Appetizer

Red Bell Pepper and Hummus

"Red" Chips

Homemade Cherry Limeades

Meatball Subs (with Homemade Meatballs) & Coleslaw 

Mimaw's Chocolate Cupcakes with Strawberries (compliments of my Mom)

2

3

4

5

6

7

8

He had a cupcake, and was curious as to why everyone was staring at him…

9

 He was spoiled with gifts and attention. As it should be on your birthday!

10

11

And of course big brother had to help him figure some things out.

12

 It was the red party of the year! Happy Birthday Sweet Boy xoxo

13

Have you ever done a color themed party?


Post by Taylor Urban : www.itstaylormade.com

Mom’s Apple Crisp: Lightened Up

February 22, 2012

Hello again from Becca of CAKE.

I wanted a lighter dessert to bring to a few parties and this Apple Crisp has delivered twice already.  It’s called Mom’s Apple Crisp (not my mom mind you, but whoever she is I’m sure she’s a very nice lady) and it’s easy as pie.  On second thought, maybe easier.  I know ‘healthy’ can be a dirty word, but believe me- it’s so wonderfully delicious, you won’t even miss the crust.

1

2

3

4

5

photos © cake. 2011

Mom’s Apple Crisp

Ingredients
1/2 cup all-purpose flour, plus 2 Tbsp
1/2 cup old fashioned oats (not instant)
1/4 cup packed brown sugar
1/2 teaspoon ground ginger
1/4 teaspoon cinnamon
1 pinch salt
3 tablespoons light stick butter, diced
1 teaspoon water
1/4 cup granulated sugar
1/4 teaspoon ground nutmeg
1 pinch ground cloves
3 lbs golden delicious apples, peeled and thinly sliced
1 teaspoon vanilla extract
topping variation: 1/2 cup dried cranberries, raisins or currants

Directions
1. Preheat the oven to 375°F Spray a shallow 1-1/2 quart baking dish with nonstick spray.
2. To make the topping, combine the 1/2 cup flour, the oats, brown sugar, cinnamon, ginger, (dried fruit if desired), and salt in a medium bowl. With a pastry blender or 2 knives used scissor-fashion, cut in the butter until the mixture resembles coarse crumbs. Add the water and firmly press mixture to form clumps.
3. To make the filling, mix the granulated sugar, the 2 tablespoons flour, the nutmeg, and cloves in a large bowl. Add the apples and vanilla; mix well. Transfer to the baking dish. Sprinkle the topping over the filling. Bake until the filling is bubbling and the topping is golden, 55 – 60 minutes.
Serve warm or at room temperature.

Need more tasty recipes and delicious bites? Check out our Let’s Eat Pinterest Board.

Post by Becca : www.cakeeventsblog.com

Circle Knit Shirt Tutorial

February 21, 2012

Post by Raechel of www.raechelmyers.com

Circle Knit Shirt Tutorial 2

So. I have a favorite shirt. I’ll be honest, it’s probably my favorite because it’s the most comfortable shirt I own, AND my husband bought it for me and he thinks I look cute in it. That’s really all I need. Oh, and it’s a great backdrop for a pretty necklace! That too.

Anyway, I wear it with a long tank top, leggings and either boots or black Toms, depending on the weather. It’s my uniform right now. And I wanted to make one for my daughter Hazel because I thought she’d dig it too. (Or, at least I’d dig making it for her and seeing her wear it.)

Circle Knit Shirt Tutorial

So, I worked this week on developing a 2T-sized version of my shirt. I’ve got to say, once I figured it out, this is a really simple project and it turned out beautifully! Since it’s flowy and not fitted, it’s not hard to get a good fit. The key is not making the arms too long so your little gal doesn’t look dumpy or frumpy. But once you’ve got that under control, you’re good!

Circle Knit Shirt Tutorial 3

What you’ll need:

  • Rotary Cutter
  • Cutting Mat & Ruler
  • Knit Fabric, 34″ L x 20″W
    • Get creative! Go neutral or find patterned knits, you can always embellish your top with a pretty pocket or flower applique. This is your basic starting point – have fun and make it yours!
  • Coordinating Thread
  • Sewing Machine
    • Though technically not necessary, I used one because, well, I own one and I like the extra-finished look. Knits don’t fray though, so really don’t worry.

Directions:

Get your fabric piece laid out on your cutting board, folded on the top so it looks 21″x17″.  (My piece started out longer than 34″, so I needed to cut it still at this point.)

Circle Knit Shirt Tutorial 4

There. Now it’s all cut and square and tidy. Better! (That’s a fold on the top – you want your rectangle intact!)

Circle Knit Shirt Tutorial 5

This might be a good time to tell you how to measure for a size other than 2T…

How to measure for your own sizing:

Width: Arms straight out, you want the sleeves to fall just on the hand-side of your elbow. So measure that distance – for Hazel it was about 20″, so I added 1″ for hemming, thus the 21″ width.

Length: For length, you’ll have to pardon my sailor language, but you want the front and back them to land right about at the crotch. So measure up and over the shoulders, from crotch-to-crotch. Was that really necessary? Anyway, Hazel’s measurement was 33″, so I added 1″ for hemming, thus the 34″ length.

Neck: And for the neck – I don’t like huge neck holes on little people, it just looks like a worn out onesie. I kept it small and had no problem getting it over her head. Remember: after you cut, you’re still going to turn it in, which will make the hole larger.

Okay, on to the task at hand:

Mark the center point of the top of your fold. If you’re using my dimensions, it’s at the 10.5″ point.

Circle Knit Shirt Tutorial 6

Okay, now fold the fabric in half vertically (so the top and the right sides are folds). Because this is a symmetrical garment, we’re going to make it easy on ourselves and cut everything just once.

Below are the dimensions for cutting:

Circle Knit Shirt Tutorial 7

Now unfold it and it should look like this. It’s taking shape really quickly!

Circle Knit Shirt Tutorial 8

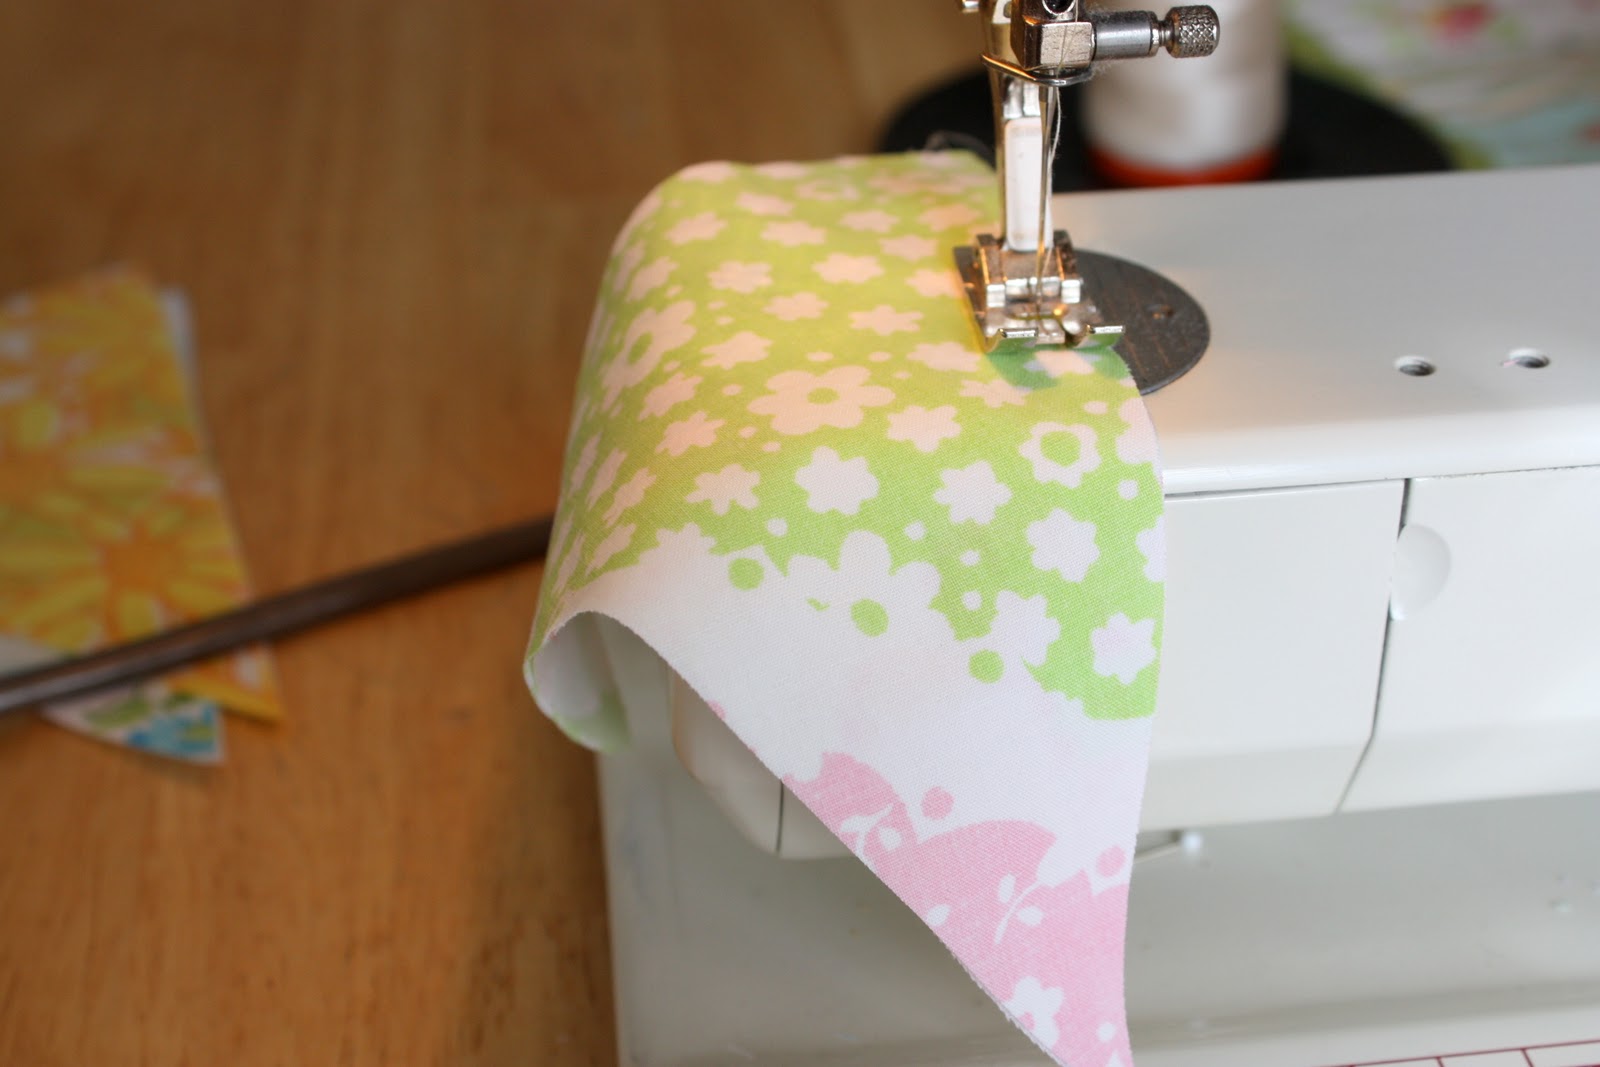
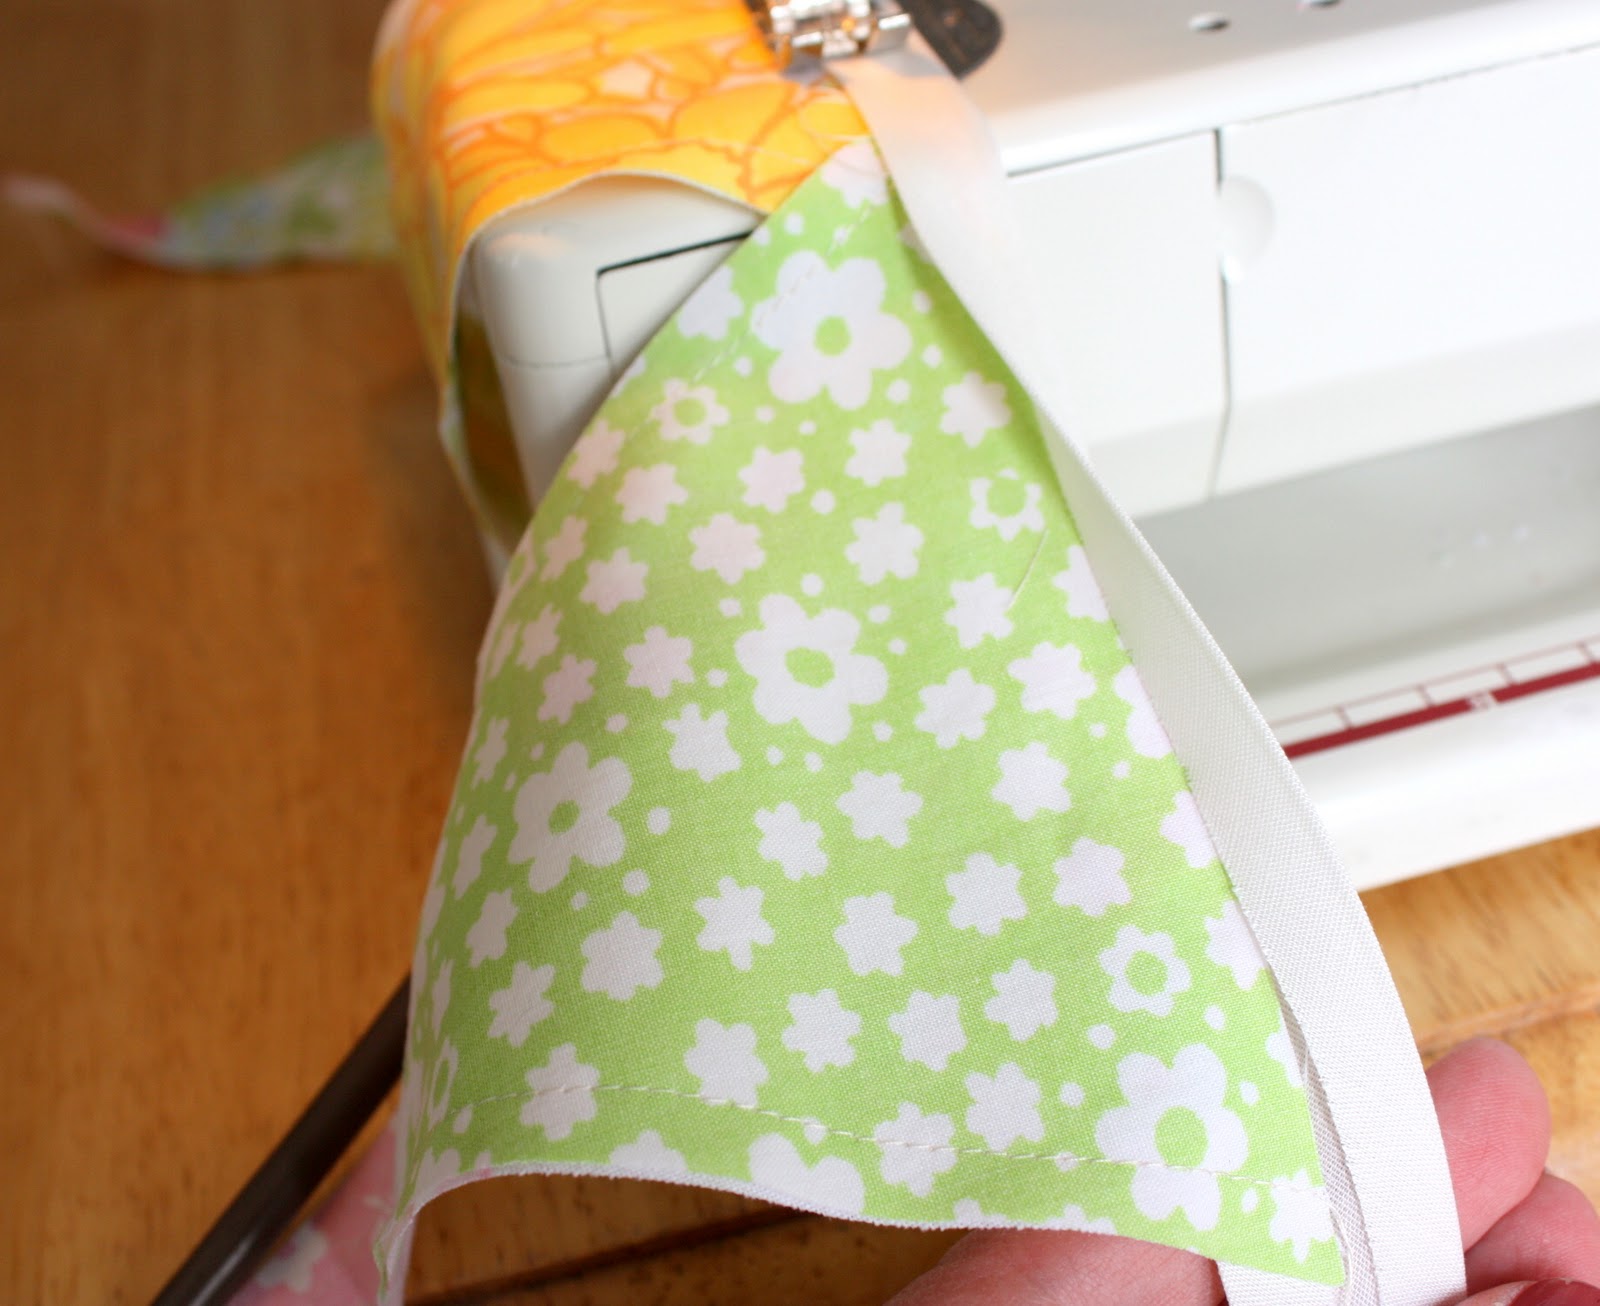
Now comes the sewing! You can skip this if you don’t have a sewing machine, of course.

Run a stitch all the way around the outside edge of the garment. Also, run a stitch around the inside of the neck hole.

Circle Knit Shirt Tutorial 9

When you’re done, your edges will look like this. Lovely!

Circle Knit Shirt Tutorial 10

know you’re looking at that neck hole and wondering how on earth this is going to go right; curves and hems are not friends. But it’s okay – this is stretchy! It will go right.

Circle Knit Shirt Tutorial 11

If you serged your edges, turn them all in 3/8″ or so and press. If you did not serge, turn your edges in 1/4″ and press, then another 3/8″ and press again.

Really don’t fret about this. Do your best, but remember that this garment is going to be forgiving, too!

Circle Knit Shirt Tutorial 12

Pressing the neck hole. It’s almost like it wants to be turned out. So friendly, this stretchy material is!

(Yep. Been watching Star Wars with Oliver this week. Love me some Yoda I do.)

Circle Knit Shirt Tutorial 13

Okay, back to sewing. Set your stitch length to 3 (just a little longer than normal) because this is a hemming stitch and not a construction stitch.

Circle Knit Shirt Tutorial 14

Beginning on a straightaway, backstitch once, then get going and don’t stop until you are back where you started. Easy hem!

Circle Knit Shirt Tutorial 15

Now, the same with the neck hole. It’s a little trickier than the outside hem just because it’s in the middle. Still, you can do this! (And feel free to take your time to make this stitch nice and even. Even with coordinating thread, this one will show just because it’s near the face.) Remember: slow and steady!

Circle Knit Shirt Tutorial 16

So close! Seriously, we’re almost finished!

Just a few simple instructions: using a fabric ruler or any straight edge, make a line that goes from the center of the neck line to the corner of the sleeve. DO NOT actually draw this line – it only needs to be imaginary!

Make a small dot with a disappearing fabric marker 4″ in from the corner of the sleeve. Just a little one. (If you’re not confident in your ink’s ability to disappear, you can mark with a tailor tack, which is just a contrasting thread stuck through that point with a needle.)

Do the same on the other side and pin the shirt closed so nothing shifts while you’re stitching.

Circle Knit Shirt Tutorial 17

Back to the sewing machine for the final time! Sew a straight line from your mark to the corner of the sleeve on each side. Be sure to backstitch really well at the beginning and end – this is a construction stitch, so it matters that it stays in place!

Circle Knit Shirt Tutorial 18

Press all of your hems so they lay nice and flat. Hang your little lady’s shirt on a hanger, then stand back and admire! All finished!

And for your viewing pleasure, here is a shot of  Miss Lady, rocking her comfy-yet-stylish circle knit top this morning (and it only took five mini marshmallows and a little Super Why for her to cooperate!):

Circle Knit Shirt Tutorial - Hazel

{After putting the finished product on her this morning I realized two things. 1. this bad boy is going to fit for a long time! Honestly, this size could fit 3T or bigger, and I maybe could have stood to make hers a little smaller. She’s not quite fitting into 2T yet.) 2. I should have used a darker color knit – what was I thinking trusting her with a pretty white canvas, just begging to be tainted? Sheesh.}

Post by Raechel of www.raechelmyers.com

Sarajo Frieden

February 20, 2012

Sarajo Frieden has long been a favorite artist of mine.  We are so happy to have worked with her on several exclusive designs for our spring collection.

Sarajo works from her studio in LA creating whimsical and finely detailed art. She includes a host of vocabularies from the worlds of fine, folk and decorative art, including Persian miniatures, Shaker trance drawings, Japanese ukiyo-e, and her Hungarian great aunt’s embroidery, as inspiration for her images. Using open ended narratives, folk tales, abstraction and the juxtaposition of discordant images, she tries to give form to the human experience as she sees it.

As you can see from the below, the world of Sarajo is full of color and fancifulness. It is a world that I would love to live in.

You can follow Sarajo on her blog: http://sarajofrieden.blogspot.com/

Sarajo_1

1.


Sarajo_2

2.

Below are several products that we have worked with Sarajo on for our spring line. All items are exclusive to The Land of Nod. From textile to paper- Sarajo’s work brings a little bit of playfulness to your room.

May I Please Plie Bedding-

Sarajo_3

For some time now we have been trying to build a dancers bedding set that was strong in design and playfulness. With leaf and petal tutu’s and ships and bird houses on their heads these ballerina’s are unexpected and charming.

Sunshine Day Bedding-

Sarajo_4

This bright and fun floral pattern is great for girls of all ages! The broad range of bright colors allow you to mix and match several sheet, pillow and room décor options.

Where the Wild Flowers Are Bedding-

Sarajo_5

This set feels so fresh for spring! The quilt features a floral and vine pattern that is printed and then embroidered over the top. The quilt and shams are done in a cotton voile making them light weight and so very soft!

 Be sure to take a look at the detailed embroidery on the sham below- it is beautiful!

A to Zed Wall Art-

Sarajo_6

This artwork piece shows off some of the great lettering techniques that Sarajo uses in her art. This piece is part of our Nod Institute of Art Collection and is limited edition!

Hurry- you won’t want to miss it!

By Sarah Culbertson
Once upon a time a fashion plate from Seattle met a childrens retailer from Chicago, and it was love at first sight.  After spending a lot of time together at the mall, they both knew it was a perfect match. So Sarah packed up her fabulous Kate Spade suitcase and headed for the Windy City. Where they lived happily ever after, designing and developing textiles for little kiddos everywhere.

Children’s Book Pages as Photo Mats

February 17, 2012

The ‘bunny’ book = Goodnight Moon in our house.  And we read it over and over.  Georgia loves the ‘bowl of mush.’  She even told my mom the other day that we were going to have a bowl of mush for dinner–she loves saying that.  And then there’s this other book called All Kinds of Families that my sister gave Georgia when she was a baby.  It’s about grouping like objects into categories.  And we read that over and over too. And to prove it to you, below is a picture that I used in a post on Mom Colored Glasses back in November…and she’s reading the book!

1

I know that when Georgia is grown up I’ll always remember reading those books to her.         I’ll tuck them away in her memory box that I keep for her and pull them out and run my hands over those well loved, wrinkly pages that she accidentally stepped on or carried the book by or sat on or whatever else toddlers do in their squirminess.

I know that every family in America has “those” books in their house.  Books that remind them of snuggling up after a bath, or laying on the floor before nap time, or listening to your husband read to your daughter from the other room and falling in love with him even more.  But those books go away as your kids get older, and even when they’re not older.  A four year old might not love the same book that they loved when they were two….but the two year old book is still nostalgic for you.

So, with this month’s theme being history I thought this was a perfect way to memorialize a book that your children love for a long time to come.  Hang this in their rooms, in a back hall-way, a study area, a play room, or with the rest of your family pictures.

Here’s what you need:

1.  Your child’s favorite book (or two or three).  Pick out a page from the book that you can make work with a picture you already have of your child…..preferably from the age they were when they loved this book.  And I’m sure like all moms you have some of the most random pictures of your child doing things you look back on and think, “Why did I take a picture of them doing that?”  Well–because those pictures might just come in handy for this project.

2.  Color phot0 copy the page or pages you want to use.  Shrink them or blow them up depending on how large of a frame you’ll be using, how big your picture is, or any other variable you can think of.  Remember….you can also mount the page on another piece of paper to make it bigger if you think blowing up the original image will cause distortion.

2

3

Look how great the words are in this “All Kinds of Families” book….you could make countless photo mats with the pages from this book….there is one about grandma’s and grandpas, cousins, brothers and sisters….it’s awesome!

4

I matted (I just used double sided tape) a picture of Georgia about to fall asleep on some red paper and affixed it to the last page of Goodnight Moon.  I did have to mount my book pages to a piece of scrap-book paper to make sure they’d fit in the frames….I used 8×10 frames and my photo mats were just a tad under that size….stay tuned for a finished product!

3.  And then……put your finished photo’s in a frame.  It’s really that simple.  This project cost me $0.  I always have random pictures laying around that I’ve never gotten around to doing anything with, I have scads of un-used scrap-booking paper (I don’t even scrap-book), and I just used some frames that were due for an upgrade in the picture department.  This has become a mental addiction of mine.  Whenever we are reading a new book from the library or we’ve resurrected one from our own bookshelves I’m always thinking as we come across every page, “Oh….this page could work as a photo mat….I love what it says.”

5
This picture was taken when Georgia was one week old…..it fits perfectly on this page and now sits on her dresser.

6
Post by Maggie Terryn : Mom Colored Glasses


Try this: Decorated Kraft Paper Letters

February 16, 2012

Alphabet_CraftyKraft_A

Whattya need?

  • Kraft paper letters
  • Glue
  • Plastic googly eyes
  • Hot glue gun
  • Scissors
  • Colored string
  • Colored cotton balls
  • Chalk
  • Glitter
  • Paintbrush
  • Chalkboard paint
  • Newspaper clippings

Blog_KraftLetters_01

How do I make Decorated Kraft Paper Letters?

Glitter letters

Using a paintbrush apply a thick coat of glue to letter. Sprinkle glitter onto wet glue.          Reapply glue and glitter as it is drying until it is fully covered. Allow to dry.

H2n_1 (2)

Cotton ball letters

Apply a small amount of glue to letter. Apply colored cotton balls (from The Land of Nod’s I’m Not Bored Anymore Art Jar). Repeat until covered. Allow to dry.

H2n_3 (2)

Newspaper letters

Apply glue to letter by smaller area so glue does not dry before you finish. Apply newspaper clippings to glued areas. Repeat until covered. Allow to dry.

H2n_2 (2)

Googly eye letters

Apply a small amount of glue to letter. Apply plastic googly eyes (from The Land of Nod’s I’m Not Bored Anymore Art Jar). Allow to dry.

H2n_4 (2)


Felix for Kids

We’ve been long-time admirers of the Felix Chair from our partners at Crate and Barrel.

Felix_1

So it seemed only natural for us to shrink down this classic bentwood design, and offer it for children. Enter our new Felix Play Chair.

Felix_2


Felix_3

Available in 5 colors, Felix plays well with any décor.

Free Printable: Shhh… Door Hangers for Mom + Baby

February 15, 2012

I designed these printables for the lovely Jordan of Polka Dot Prints while she’s away spending time with her beautiful new baby girl…

Every new mama has heard the advice ‘sleep while the baby sleeps’, but with so many people (big + small) crying out for your attention, sometimes a nap begins to feel like an impossibility. I designed these door hangers as a little gift to Jordan during her maternity leave, and for all moms who could use some serious R+R.

Simply print the file onto heavy cardstock, cut and hang over your door knob- either on your front door to warn off guests that unexpectedly drop by, or outside your bedroom and nursery to remind your family to keep the volume down during naptime. Hope you enjoy… and finally get the rest you deserve.

Download PDF here.

1

2

photos © cake. 2012

Post by Becca : www.cakeeventsblog.com