Close

Blog

Teacher Appreciation Gift – Class Book of Love

January 26, 2012

1

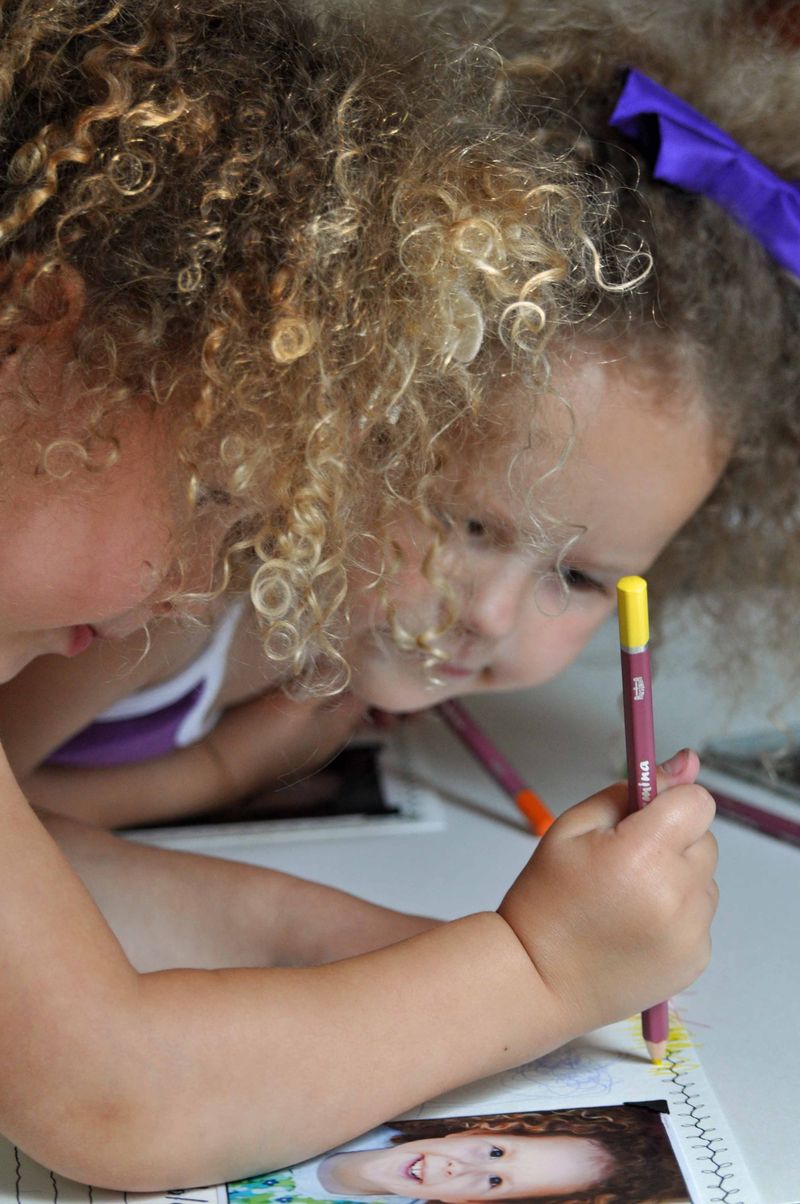
My girls' attend Walorf preschool and as a teacher apreciation gift, I organized a book for each of the two teachers.

My firend Anri, who is a talented illustrator, designed the pages. We included the beautiful school pictures taken by Brydget. Both mums of kids in the class.

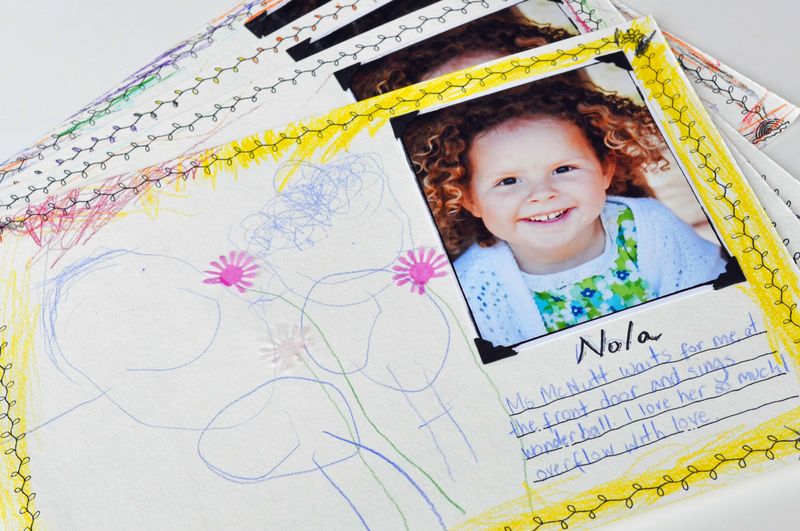
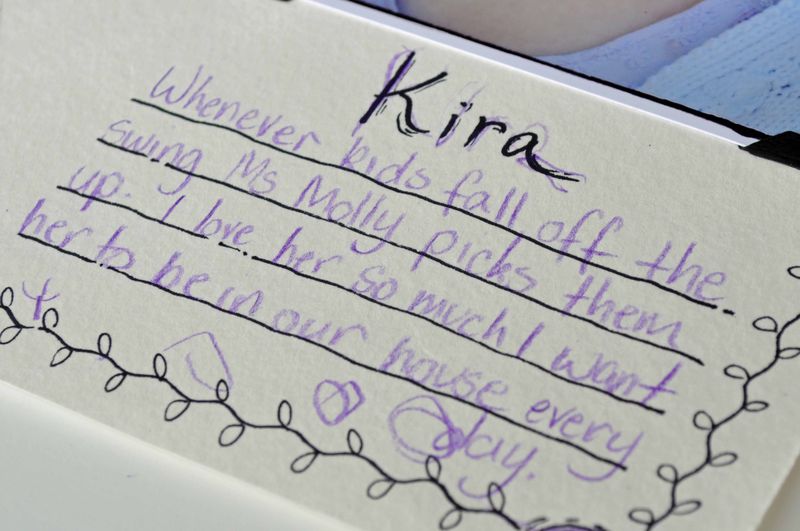
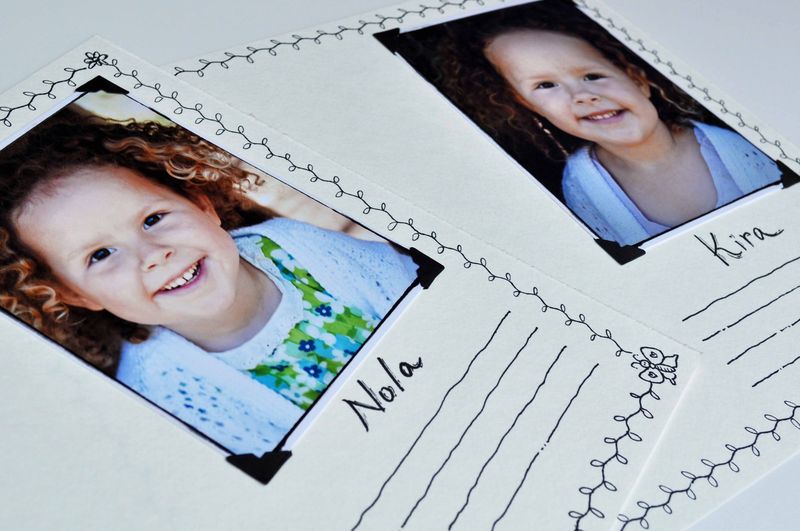
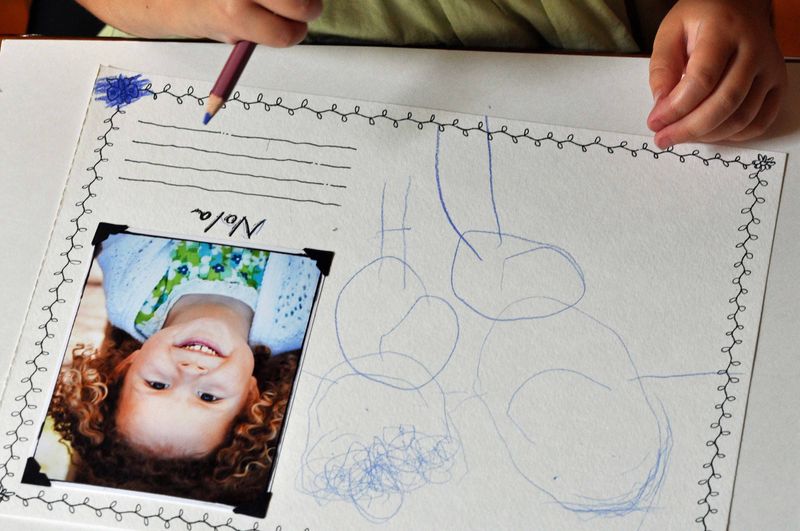
Each Daisy, as our class is named, was given two simply and sweetly designed pages with their name, photograph, and a few lines for a special memory.

2

3

4

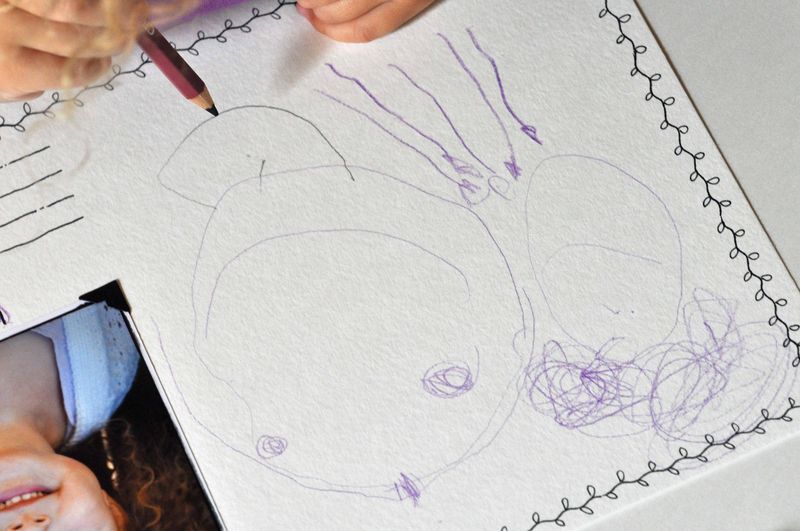
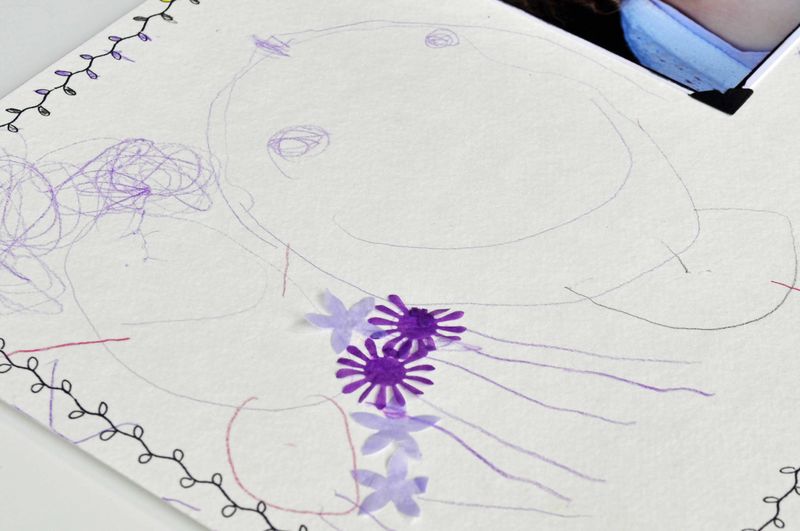
On Monday mornings we often make it outside a little early to pick flowers to take to class.       It started with violets and we have moved through daisies and heather as our 'weeds' have changed. So it was fitting for the girls to draw pictures of them giving flowers to their teachers.

5

6

7

I am amazed at how well the girls are able to communicate their feelings in such and honest and unguarded way.

Next week Anri and I will collect all the pages and make each teacher a book filled with smiling faces, happy drawings, beautiful memories and exubing love. Perfect!

Post by Helen Bird : www.curlybirds.typepad.com

Thumb Print Valentine’s Day Cards

January 25, 2012

Post by Maggie Terryn of Mom Colored Glasses
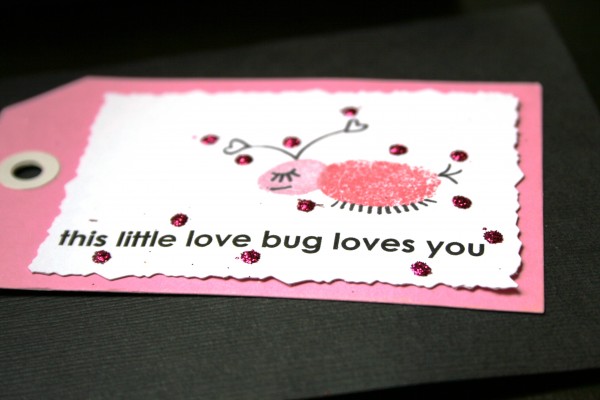
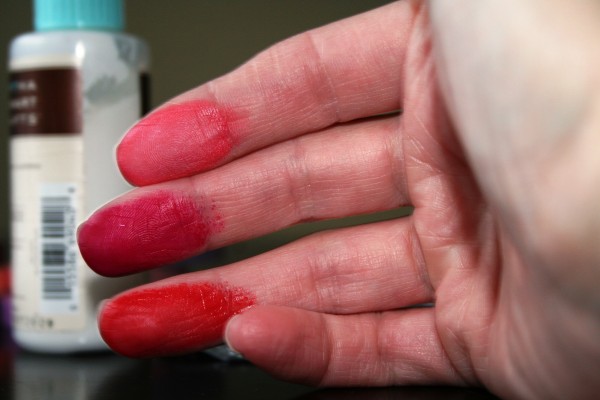
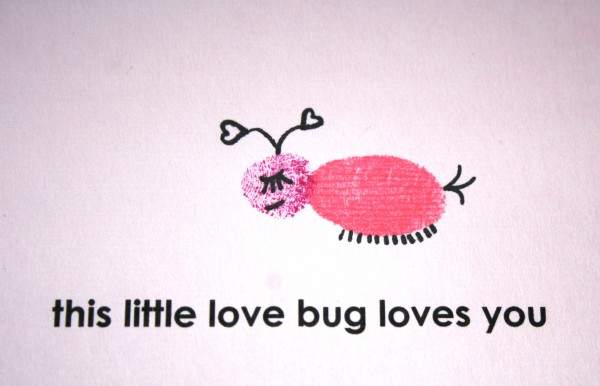
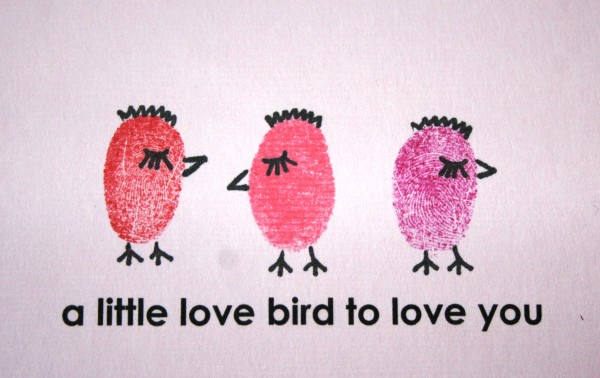
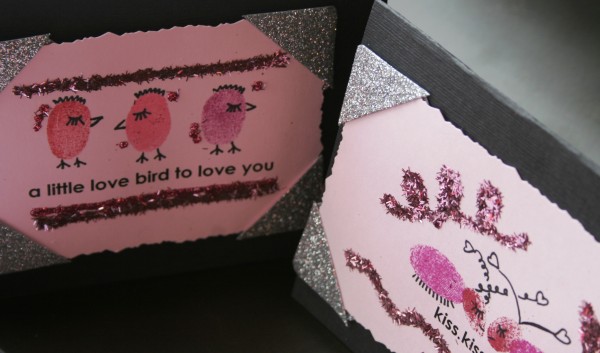
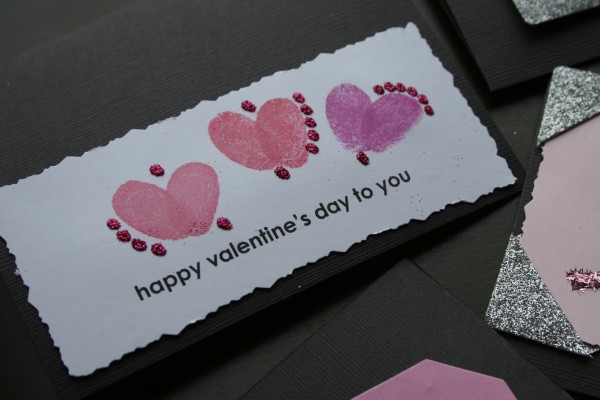
Thumb Print Valentine’s Day CardsAgain, all props for this craft must go to my mom as she was the first person (and only really) that I’ve ever seen make these.  I don’t know if she ever used them as Valentine’s Day cards but she made Christmas ornaments out of them and little framed pictures for our bedrooms.  It’s a super simple craft to do with your kids and really, what’s more basic for our “back to basics” month than your finger-prints.

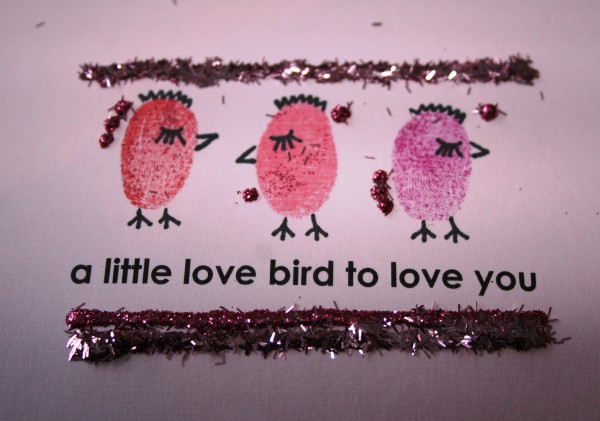
We’re posting this prior to February so you have plenty of time to make these for Valentine’s Day cards if you want to.  You can mount the fingerprint cards on different colored pieces of paper, blank cards, or leave them as is.  I’ve included pictures for you to reference that detail a number of different ways the finished product could look.  I don’t know about you but I think these would make adorable Valentine’s for your child’s school Valentine’s Day party—if your child is lucky enough to go to a school where they still do that! Otherwise, grandmas, grandpas, aunts, uncles, neighbors, and all kinds of special friends will love these.

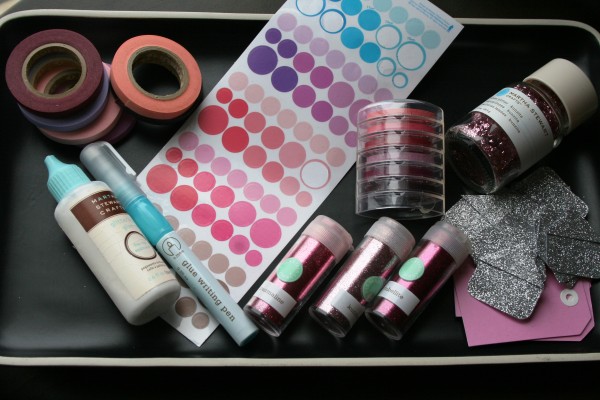
What you need:

  • Valentine’s Day colored paper
  • Valentine’s Day colored ink pads
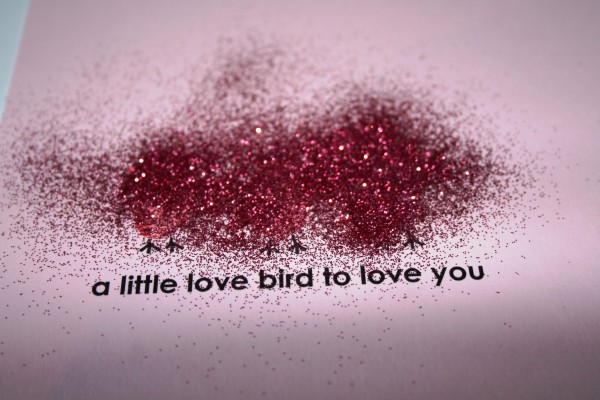
  • Glitter…the more the better!
  • Fine tip black marker
  • Glue
  • I also recruited Martha Stewart glitter photo corners, stickers, borders, and glitter glue….but really, it’s completely up to you.

Thumb Print Valentine’s Day Cards 1Step One:

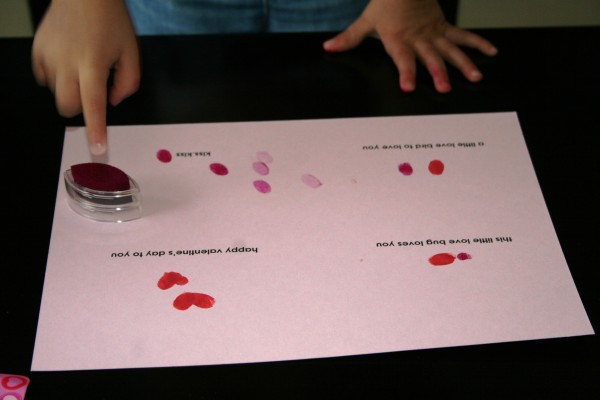
If you’re doing this with someone as little as my Georgia….almost two….make sure you pick a very “agreeable” time of day…like one where she won’t mind getting her fingers dirty, sitting still for a few minutes, and not bolting out of her seat as soon as possible  to touch other stuff with her inky fingers.

Cut your papers to size.  Decide how big you want your Valentine’s cards to be and cut your colored papers appropriately before you ink them up.

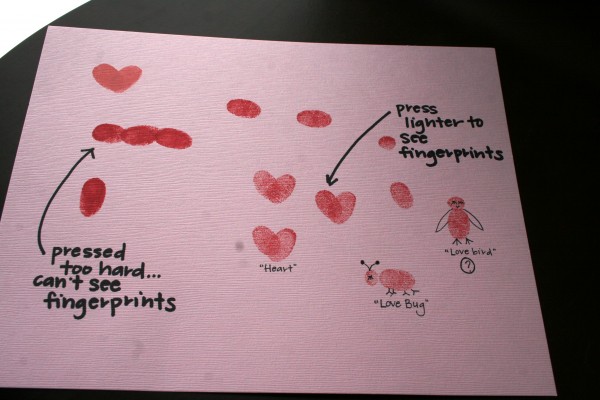
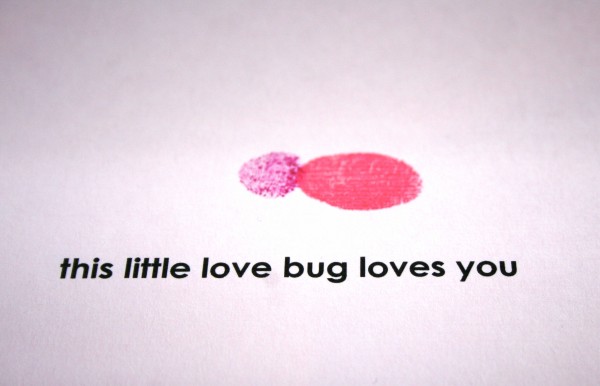
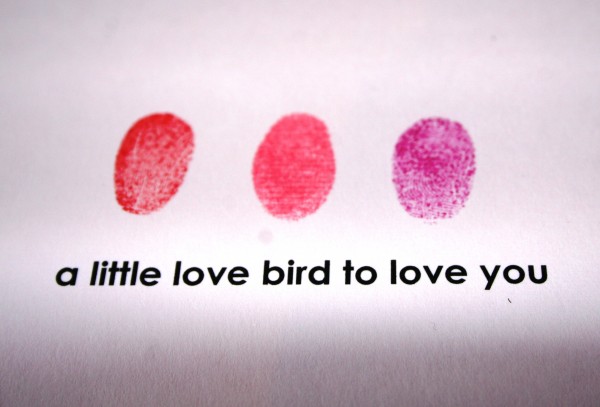
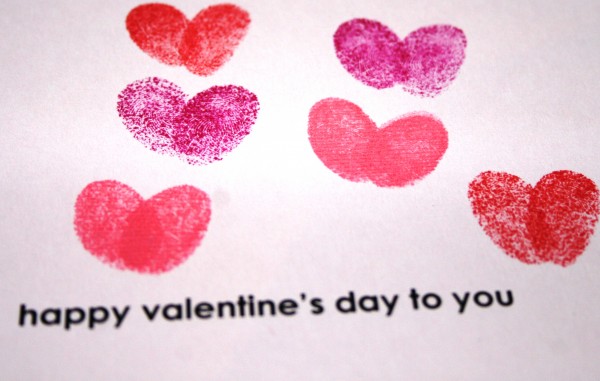
Decide on a few thumb print ideas….love bugs, love monkey, love birds, hearts, etc.

Thumb Print Valentine’s Day Cards 2Step Two:

I decided on four sayings for my cards and printed those on the paper I wanted to use.  I made sure they were spaced far enough apart that when I cut the paper to size it would be a reasonable size for a card.  And then…… I started the thumb-printing.  This in no way was meant to be a topless craft, however, not ruining Georgia’s favorite “birdy” shirt necessitated it in the end.  Also, please note….the finished products that I include below are not the ones that Georgia “helped” with.  She ended up just playing with stickers.  However, should you have kids that are a bit older they can take part in 100% of this craft….and will do just fine!

Thumb Print Valentine’s Day Cards 3

Thumb Print Valentine’s Day Cards 4

Thumb Print Valentine’s Day Cards 5

Thumb Print Valentine’s Day Cards 6

Thumb Print Valentine’s Day Cards 7Step Three:

Once your thumb-printing is complete begin the decorating.  Add whatever you need to to the thumb-prints to finish what they are; antennas, eyes, legs, polka dots, glitter of course… your choice.  And then…mount them on a different colored paper to complete the cards!  Happy Valentineing!

P.S. My finished product pictures are a bit dim…I thought it was a brighter day out than it actually was apparently.

Thumb Print Valentine’s Day Cards 8

Thumb Print Valentine’s Day Cards 9

Thumb Print Valentine’s Day Cards 10

Thumb Print Valentine’s Day Cards 11

Thumb Print Valentine’s Day Cards 13

Thumb Print Valentine’s Day Cards 14Post by Maggie Terryn of Mom Colored Glasses

I’m so excited that I can barely sit in my chair!

I have had the unmitigated pleasure of managing The Land of Nod Merchandising department for the past 9 months.  I know, serious dream job.  Honestly, not really work at all, more like a dream where you get to play with dolls, sit in piles of gorgeous linens, and travel the world creating anything you can dream up and trust me I can come up with some wacky stuff. So, unfortunately for me my dream job is coming to an end, (don’t feel bad – my new gig at The Land of Nod is pretty good).

So, why am I so excited?  In the last 9 months we have been putting together the most exciting product collection I have ever seen, (obviously I am biased).  There has been so much creativity here, that at times I thought we might burst with the excitement.  And I’m excited, because the initial assortment is available right now!  It’s bright and bold and has a great sense of humor.  The assortment is amazing and it will just keep getting better over the next year.

Some of my favorite items:

ChelleSpring_1

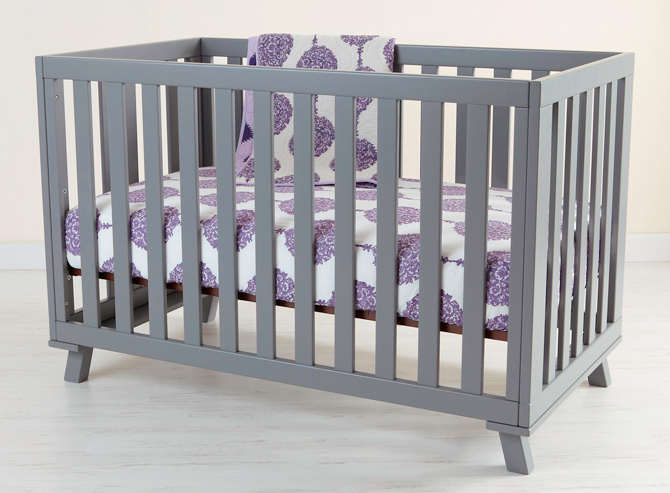
Grey Low-Rise Crib. My children no longer sleep in a crib, but this one is so good looking it makes me want to have another.

ChelleSpring_2

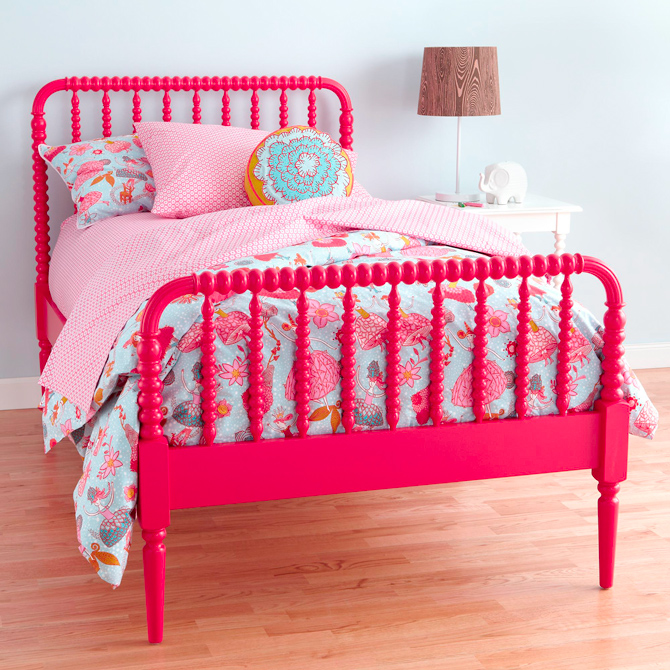
Rapsberry Jenny Lind Bed. It’s been a personal dream of mine to “color” our Jenny Lind bed, you better believe it was the first thing I did!

ChelleSpring_3

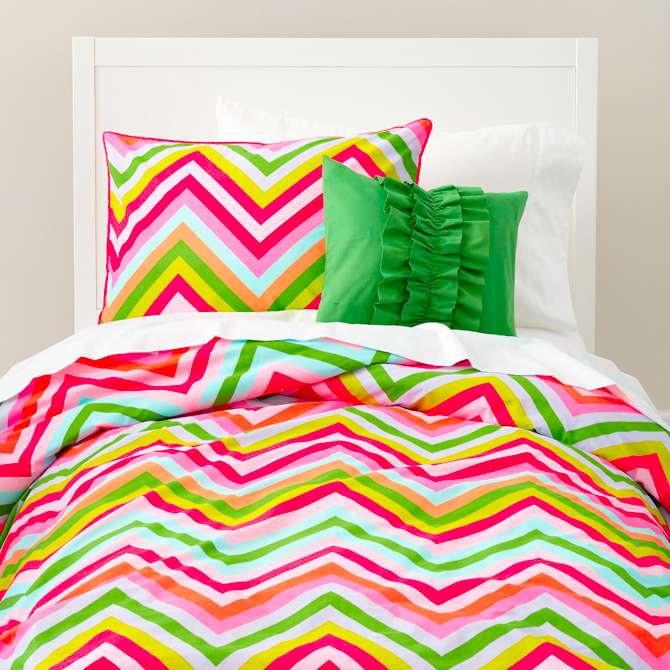
Watermelon Stripe Bedding. This is the anti-thesis to Chicago in January (where I am) – delicious!

ChelleSpring_4

Head in the Clouds Pillow. A smiling cloud – who wouldn’t be happy!

ChelleSpring_5

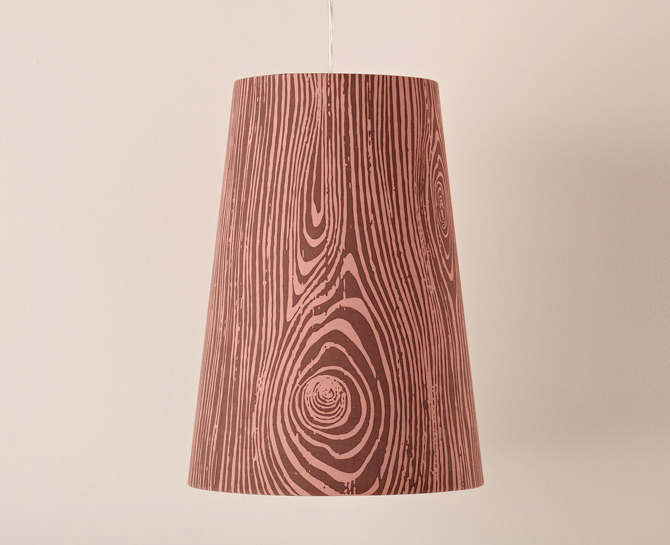
Woodgrain Ceiling Lamp. I love all things woodgrain.

I hope you enjoy the new product, as much as we’ve enjoyed creating it.  Stay tuned for more to come.

XO

Michelle

Michelle is the mother to four kids (yes, FOUR!), a gourmet cook and a retail junky. She’s painted her dining room countless times and changes rugs like most people change their bedsheets. When she’s not living and breathing retail, she’s weaving amazing works of art with her sister for Bourbon+Gin Weaving.


A Trip Down Memory Lane

January 24, 2012

Hello fellow-LON-lovers. My name is Amy and I write about my sewing projects and my love of collecting vintage items at my blog, Diary of a Quilter.  I especially love those great vintage finds at thrift stores. They are few and far between, but I love finding those rare vintage gems. One of my latest obsessions is vintage school books.

This is one of the finds from my most recent trip: a spelling book from 1963.
My favorite part is the illustrations. This one was more of a proper text book with actual work in it, so there are fewer illustrations. But what there is is good stuff.
 Over time, I am starting to gather a small collection of them.  
This is from the 1951 classic "I Wonder Why." Such stimulating content: "Picture of Weather. See this picture of weather." But  I'm sure the charming illustrations captured the hearts and imaginations of many young students.
 Look. This one explains where babies come from!
And that's about as much detail as you get. 🙂
This one is my favorite. It must have been for really young students because it is full mostly of illustrations with very little text. And the illustrations are fabulous. 
The book has already been used as a cutter so I don't feel any obligation to keep it pristine.       I'd like to cut it up some more but I don't actually know what to do with the illustrations.           Any great ideas? I'd love suggestions. (I'm so not creative in these areas.)  I want to live in that house with the red roof.

Oh no! Someone opened the chocolates, smashed the walnut shells on the table, left out the newspaper and their blue sweater!  Those pesky kids! What should June Cleaver do??         (Are you glad no one expects you to wear a lovely dress, heels and pearls every day?  Or do you wish you could?)

Machines! 

And last, but certainly not least, another fabulous vintage school find from the thrift store.           I LOVE IT!  I got it for $14.  It's not in mint condition (has anyone ever seen a school desk that was?) But it looks good. I gave it a good Lysol job when it got home. I'm now trying to decide whether to spray paint the metal or leave the 'aged patina.' I wonder what the Keno brothers would tell me to do. They'd probably say leave it.

My little guys love it too. Sweet!
(Which is good, because as much as I'd like to, I can't actually fit in it myself.)
Post by Amy Smart : www.diaryofaquilter.com

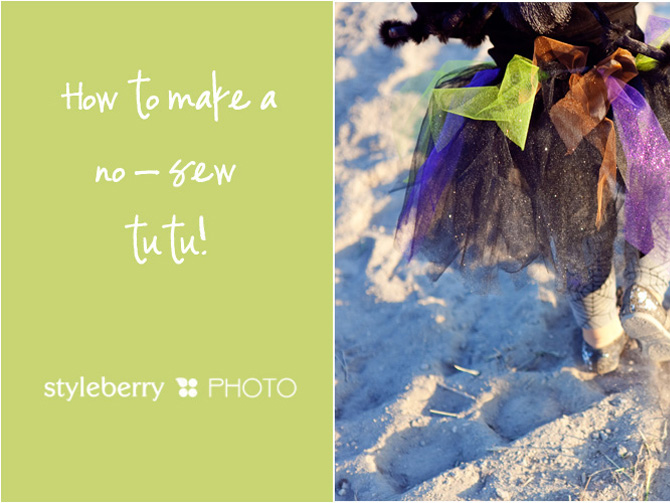
DIY No-Sew Tutu

January 23, 2012

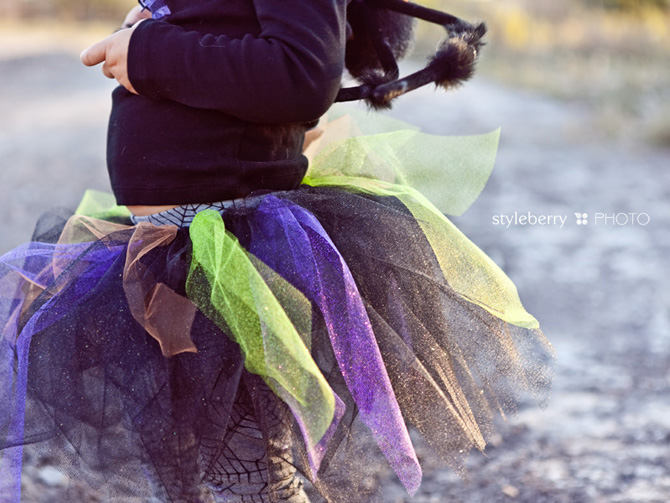
We've hit the "dark ages" as we call them around here. While it's not terribly cold here in South Texas, it does get dark pretty early & we are forced to get creative with inside activities. Imaginary play is one of our favorite ways to pass the time & what better way than to play princesses! 🙂 We like props–especially DIY props–so here is one of my favorites! I took these pictures back on Halloween, but have recently made tutus in every color of the rainbow–pink, purple, orange…they are well loved & a breeze to do! They just take a little bit of time.           Here's how! 

1

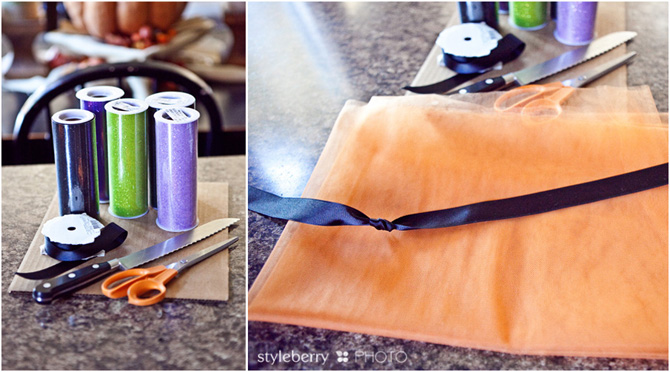
SUPPLIES

  • ribbon (2-3 yards, about a half inch to 3/4 wide)
  • scissors
  • tulle (if using spools like below, about 3 spools at 10 yds each OR on the bolt, about 5 yds)
  • a bread knife
  • cardboard (between 10-18 inches long)

*If you are more of a "watch it" not "read it" kind of gal, there is a video at the end. 😉

1) Begin by making a knot about a foot into the piece of ribbon. Measure the ribbon around the little girl's waist, tying another knot to mark the circumference of her waist, leaving another foot of ribbon at the end. Knot to knot should wrap around the child's waist perfectly, with a foot of ribbon on each end to tie a pretty bow. 

2

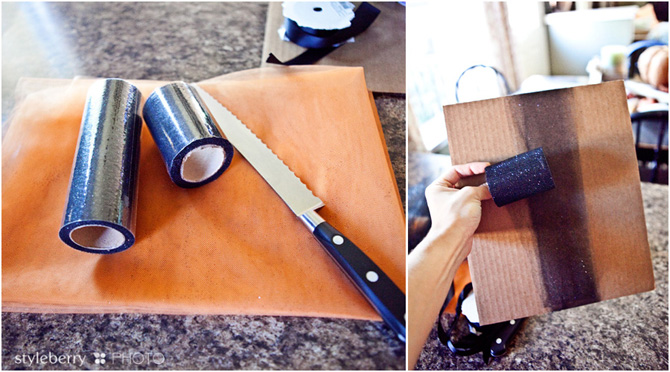
2) Next, take your spool of tulle & use the bread knife to cut it in half.

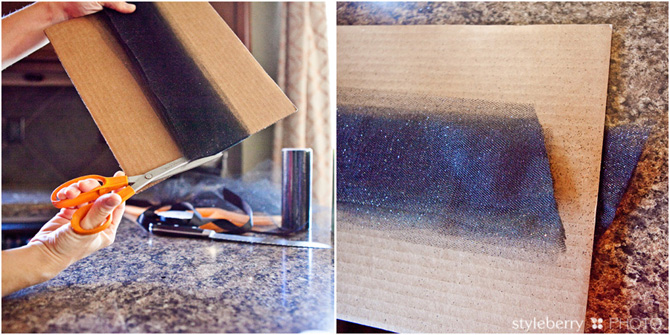
3) Wrap the tulle around the piece of cardboard until you run out. My cardboard piece was 10 inches long. You can make yours shorter or longer, but this will be the length of your tutu, waist to knee. 

3

4) Cut the tulle that you have wrapped, which will produce a bunch of pieces that are the same length. I like to cut mine at an angle, resulting in a pointy edged tutu, but you can cut it straight across if you'd prefer. 

4

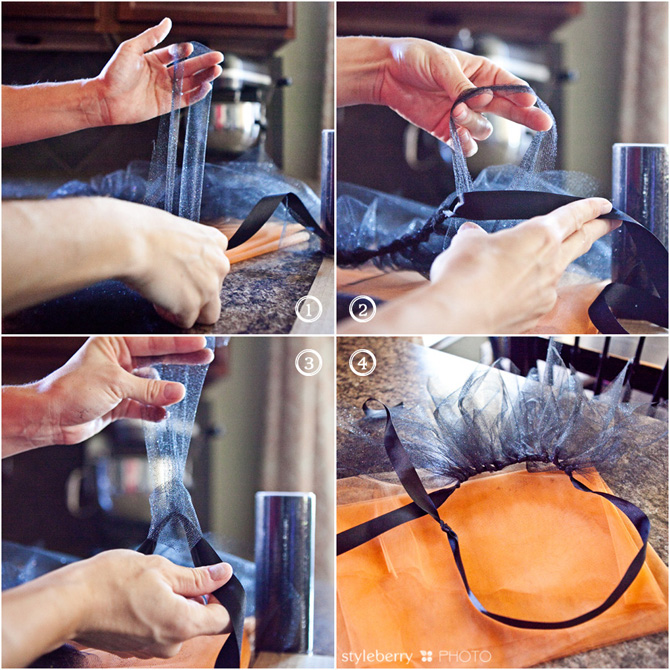
5) Next you are going to tie the tulle pieces to the ribbon. Take one strip of tulle & fold it in half.

6) Feed the tails of the tulle through the loop, around the ribbon. & pull tight. Repeat.                 If you need a visual, watch the video–it's much easier to show than to photograph.

7) Continue to tie the tulle to the ribbon, sliding the pieces as tight together on the ribbon as you like. 

5

Other things you can do:

  • mix colors during or after, by sliding the tulle on the ribbon & adding little pops of color in.
  • add patterned/textured ribbon to the tutu in the same way that the tulle is attached.
  • add a bigger bow to the back.
  • make extra long for a real princess effect.
  • experiment with the different kinds of tulle–"shiny" or "glitter" or "flat"
  • make as gifts for little girls for special occasions. add a crown & a wand and your gift will be a huge hit! My nieces are getting fairy kits for Christmas. 🙂
  • what else??

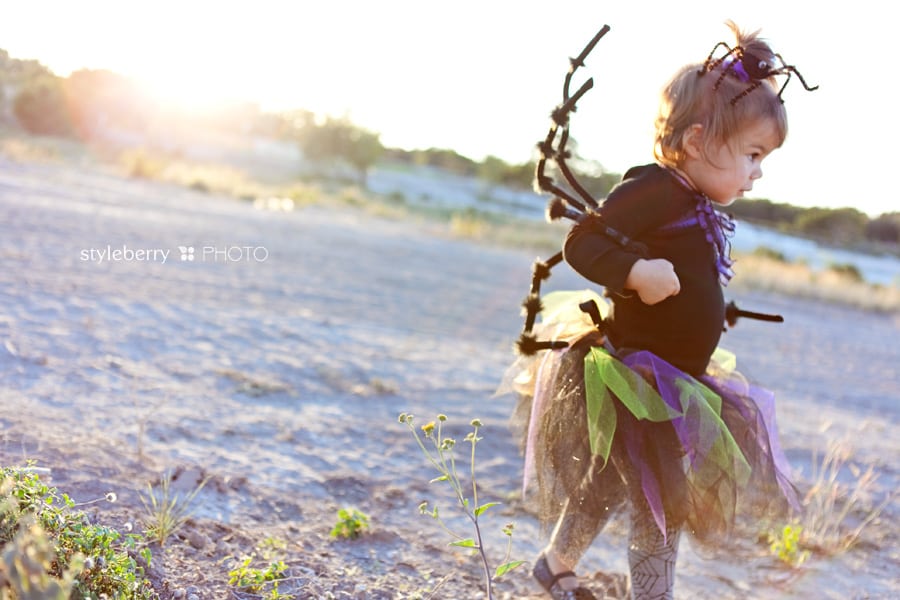
Here is our finished spider princess tutu. :) 

6

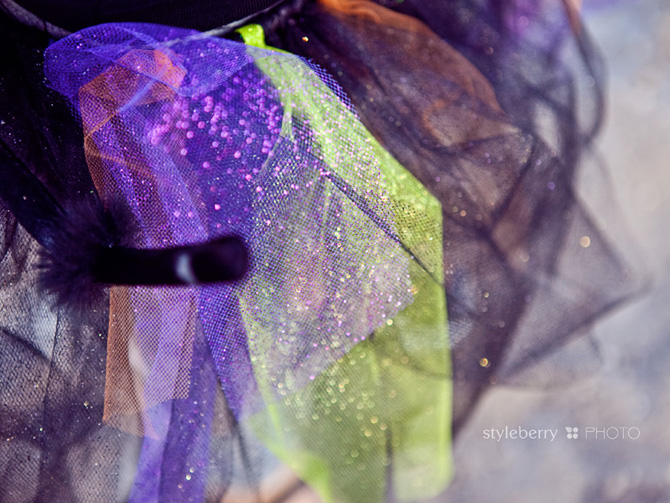
glitter tulle is not the easiest to work with & it does get sticky (as in, it does not really "float" or lie flat) but it sure is pretty!

7
 We had quite a battle to get if off on Halloween…so I do believe there will be more of these in our future, just for everyday play around the house! 🙂

Do you need to watch instead of read? Well here's a video tutorial showing you how to make a no-sew tutu. Enjoy! & if you are feeling like putting on a show (or delighting in the imagination of your kiddos)          I think these would pair SO nicely with the Home Sweet Play Home.

I would have LOVED this as a little girl! My own stage! & tutu! DREAMY!


Post by shawna of styleberryBLOG.com

Despite days full of washing diapers & messy fun, Shawna is determined to make mommyhood a stylish adventure. Married to the military & mother to one feisty girl, she is a passionate DIYer & loves sharing how to make the complicated simple. Shawna talks creativity, style, food, decorating, green-chic living & mommyhood at styleberryBLOG, a daily-ish dose of something fab..

Melt my Heart Valentines Decorations

January 20, 2012

Post by Cara Reche
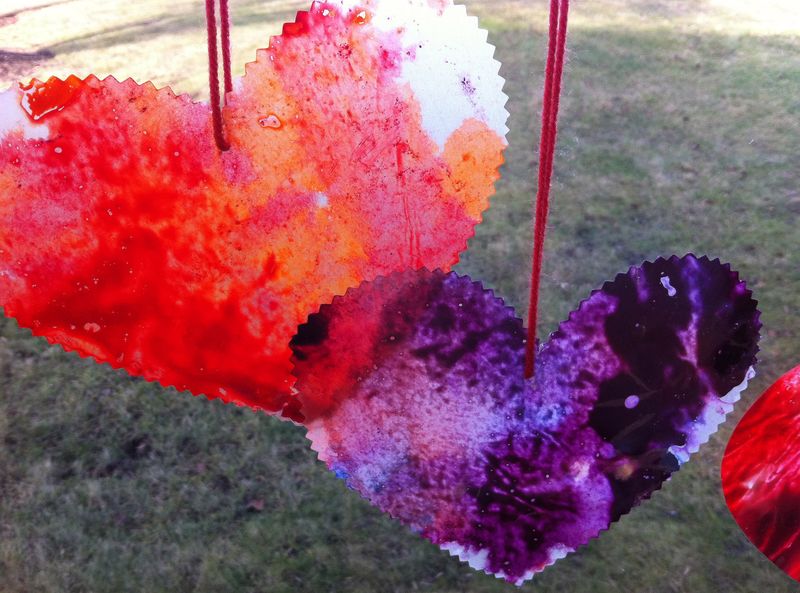
Melt my Heart DecorationsValentine’s Day, in my opinion is the very best day for crafting. The color palette bursts with poppy reds, hot pinks, juicy oranges and purples…from grape candy to dark plum.

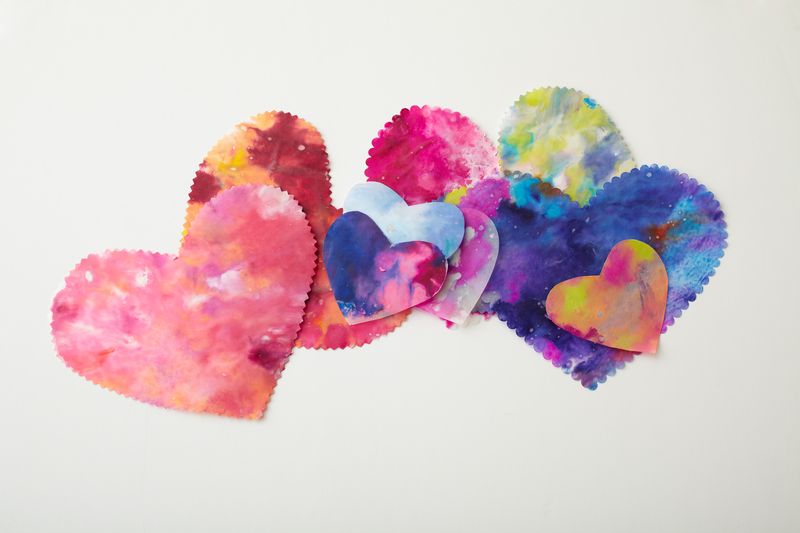
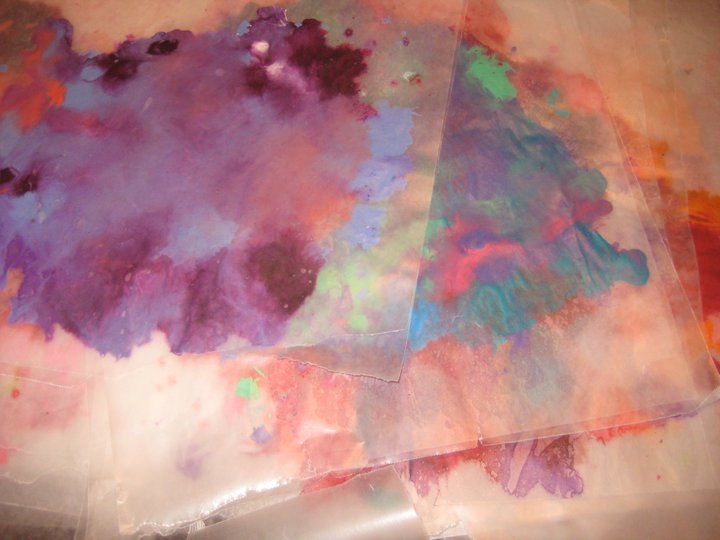
Then there is the heart, which in this project will symbolize the love of “getting crafty with it!” These waxy creations look stunning when the light shines through. They are so easy, you’ll fall in love!

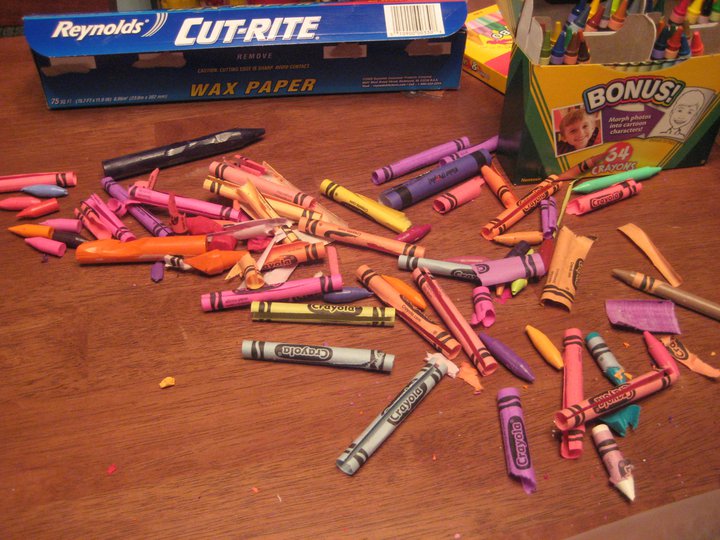
Supplies for Melt My Heart Valentines Decorations:

  • Wax paper (12 x 16” sheets)
  • Crayons
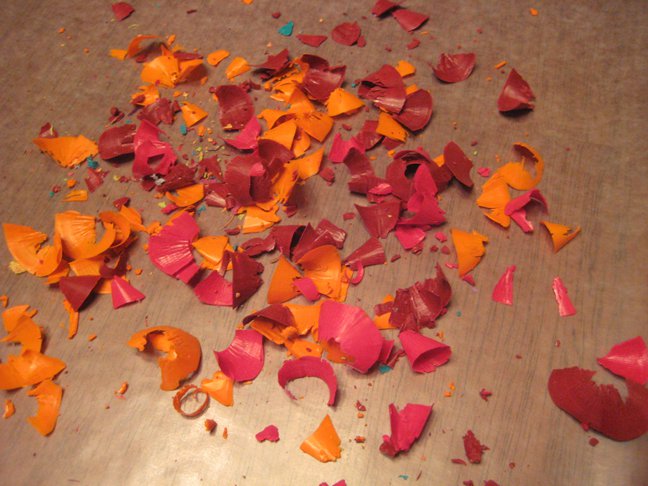
  • Sharpener
  • 2 large paper bags
  • Iron
  • Pinking shears or scissors
  • Hole punch
  • Yarn or String

1.    Remove the paper from your crayons, and determine your colors.

Melt My Heart Valentines Decorations 12.    Sharpen a small handful of different colored crayons and distribute evenly on one side of the wax paper.

Melt My Heart Valentines Decorations 33.    Fold the wax paper over, creating a “sandwich.”

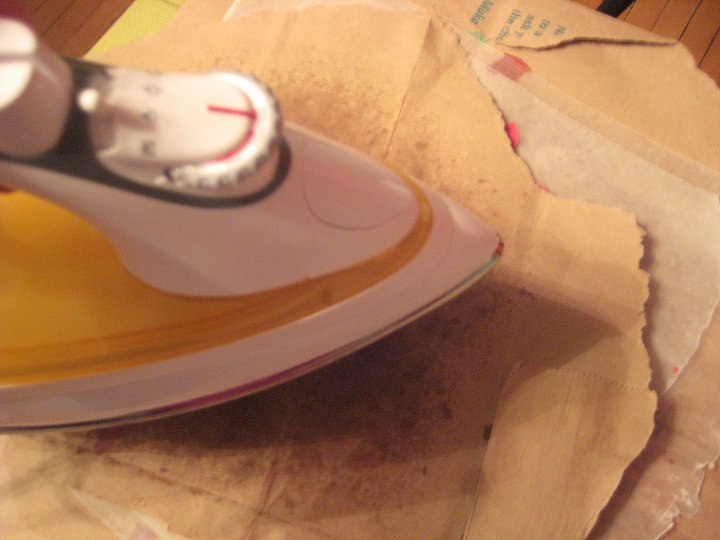
4.    Lay down a brown paper bag on your ironing surface. Then place the wax paper “sandwich” on top of it.

5.    Protect your iron by using the 2nd paper bag to cover everything.

Melt My Heart Valentines Decorations 26.    On medium heat, carefully iron in a circular motion, but not too long!

7.    Set the iron aside and slowly peel back the brown bag. Check to see if all the shavings have melted. Repeat to make several sheets.

Melt My Heart Valentines Decorations 48.    After the sheets have completely cooled, cut a heart shapes with your pinking shears or scissors.

9.    Punch a hole and string yarn through.

10.  Hang your beauties in the window!

Melt My Heart Valentines Decorations 10Post by Cara Reche. When young, Cara had two imaginary friends. As their friendship grew, so did her imagination. Cara loves to “get crafty with it” and is the Associate Art Director at the Land of Nod.

Inspiration to Crib

Inspiration can come from so many places, and in so many ways- it can be a mood, a color, a feeling, a texture, an item. I always have my eyes peeled (and my camera ready) for something to strike me.

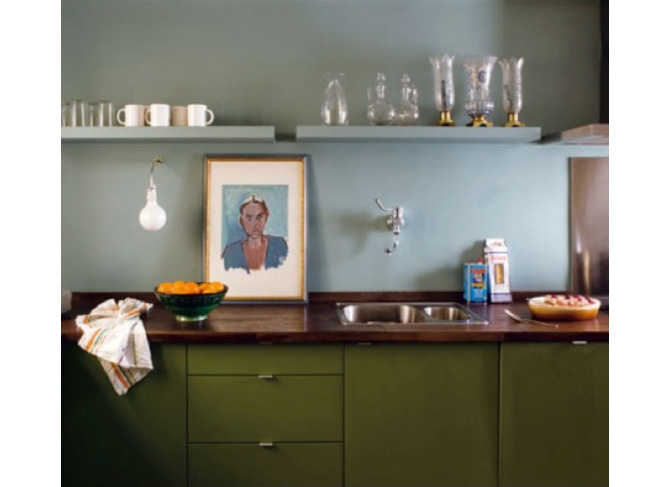
The below two images were the jumping off points for our new Clothes Make the Crib- Boy’s Bedding Set. I loved the contrast colors and somewhat grayed out hues of the below kitchen.    It is an updated- more modern color palette and something different than the go to of navy or light green for Nursery.

1.

CribInspire_1

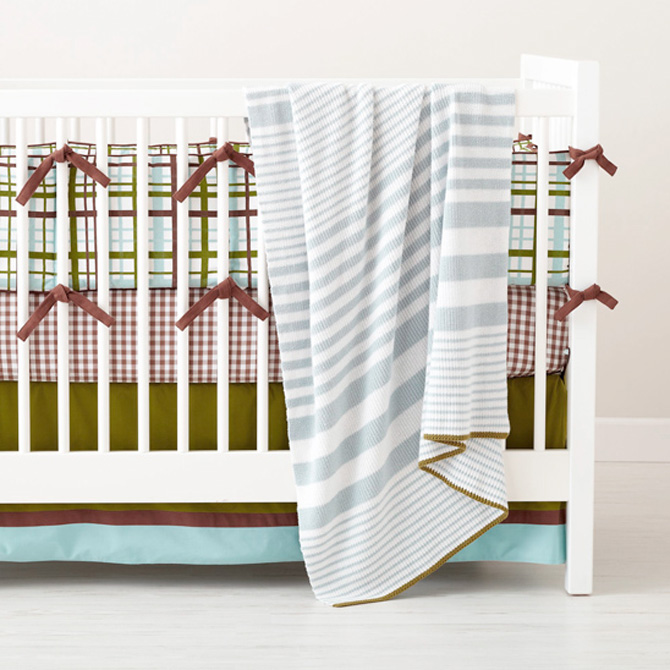
This reference is something I’ve kept around for a long time. I love the mix of multiple patterns. To me- it just reads BOY. The combination of plaids, gingham, stripes and solids used in the set where derived from this idea of pattern play. 

2. (Reference unknown)

CribInspire_2

Though there are a lot of patterns in this set- it has been designed to mix and match to suit your taste and style. A gingham fitted sheet and plaid bumper is too much for you? Try a light blue striped fitted sheet or a solid. You can mix in several different styles of rug and room décor options to give this set a funky modern or truly traditional spin.

I also love that we went a bit untraditional with the knitted blanket instead of a quilt. Throw it over a rocker, use it when your snuggling, this blanket adds texture to the set and is very user friendly!

3.

CribInspire_3

By Sarah Culbertson
Once upon a time a fashion plate from Seattle met a childrens retailer from Chicago, and it was love at first sight.  After spending a lot of time together at the mall, they both knew it was a perfect match. So Sarah packed up her fabulous Kate Spade suitcase and headed for the Windy City. Where they lived happily ever after, designing and developing textiles for little kiddos everywhere.


Monkey Cupcakes & Toppers

January 19, 2012

Hello again from Becca of CAKE.

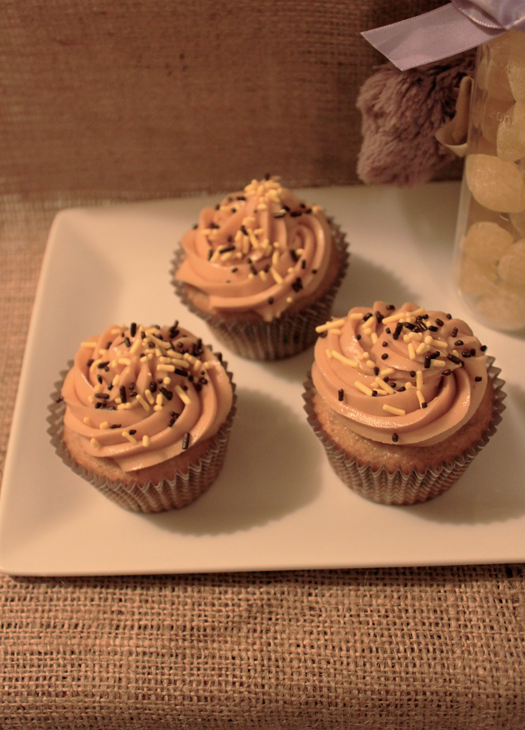
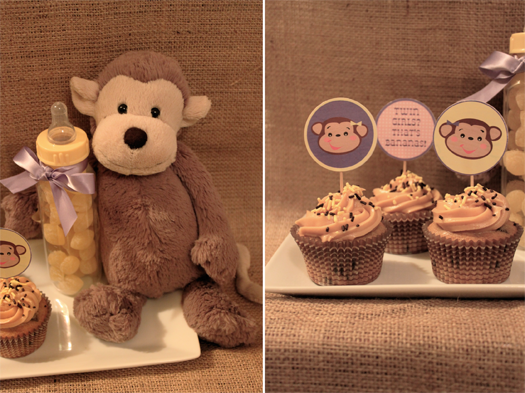
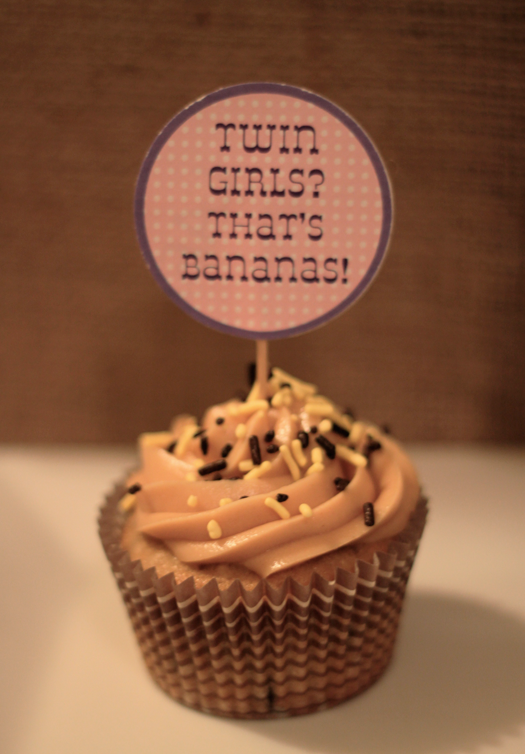
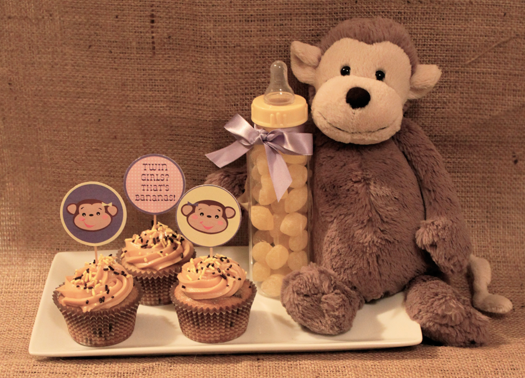
Last week my office celebrated a co-worker with a ‘little monkeys’ themed baby shower and lunch.  His wife is having twin girls, so I decided to have some fun with a purple and yellow color scheme.  Since there wasn’t much space to decorate at the restaurant, we brought in a few stuffed monkeys, balloons and baby bottle centerpieces for the tables {in retrospect we should have filled them with banana candy, but all I had on hand was lemon}.  Naturally I baked cupcakes for dessert, and what better flavor for a monkey party than banana, right?

This indulgent recipe for Banana Chocolate Chip Cupcakes with Peanut Butter Frosting was simply to die for.  The cupcakes themselves were moist & rich, and paired with the frosting they were over the top delicious.  I highly recommend giving them a try.

I also designed some simple toppers, and though I doubt many of you will have a chance to throw a shower for twin girls… I’m happy to share them with you HERE.
1

2

3

4

Banana Chocolate Chip Cupcakes with Peanut Butter Frosting

adapted from Bon Appetit

Ingredients

-1 1/4 cups all purpose flour

-1 1/2 teaspoons baking powder

-1/2 teaspoon baking soda

-1/4 teaspoon salt

-2 very ripe large bananas, peeled

-1/2 cup sour cream

-1 1/2 teaspoons vanilla extract

-3/4 cup sugar

-1/2 cup (1 stick) unsalted butter, room temperature

-1 large egg

-1 large egg yolk

-10oz semisweet chocolate chips


Directions

1. Position rack in center of oven and preheat to 350°F.

2.Line 12 standard (1/3-cup) muffin cups with paper liners.

3. Whisk flour, baking powder, baking soda, and salt in medium bowl to blend.

4. Mash bananas with fork in another medium bowl until smooth.

5.Mix sour cream and vanilla into bananas.

6. Using electric mixer, beat sugar and butter in large bowl until light and fluffy, about 3 minutes.

7. Add egg and egg yolk and beat until well blended.

8. Add flour mixture in 3 additions alternately with banana-sour cream mixture in 2 additions, beginning and ending with flour mixture and beating just until blended after each addition.

9. Add chocolate chips and stir by hand.

10. Divide batter among prepared muffin cups (generous 1/4 cup for each).

11. Bake cupcakes until tester inserted into center of each comes out clean, about 20 minutes. Transfer cupcakes to rack and let cool completely.


Peanut Butter Frosting

Ingredients

2 cups powdered sugar

1 8-ounce package cream cheese, room temperature

1/2 cup (1 stick) unsalted butter, room temperature

1 cup smooth peanut butter (do not use old-fashioned or freshly ground)


Directions

1. Sift powdered sugar into large bowl.

2. Add cream cheese, butter, and peanut butter.

3. Using electric mixer, beat mixture until smooth.

4. Spread frosting over top of cupcakes, dividing equally.

Tip: Frosting can be made 1 day ahead. Store airtight at room temperature.

Download cupcake toppers HERE.

Need more tasty recipes and delicious bites? Check out our Let’s Eat Pinterest Board.

Post by Becca : www.cakeeventsblog.com
Apple Cider Bar + Printable Freebies

January 18, 2012

1

Hello again from Becca of CAKE.

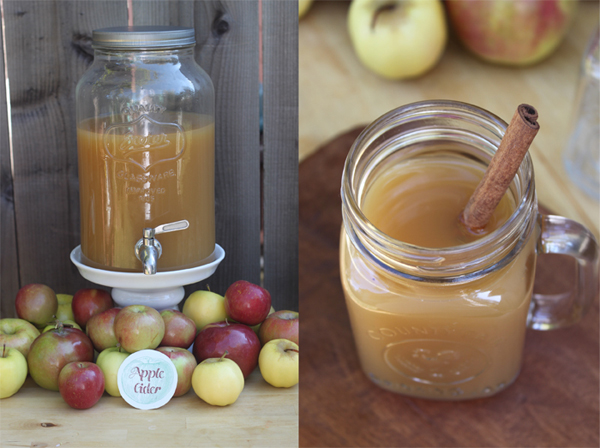
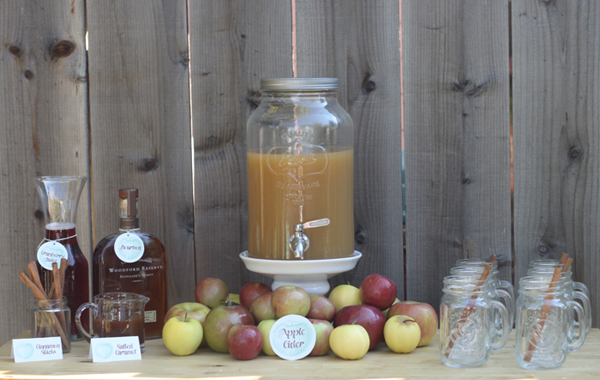
Apple Cider is a staple in our house this time of year… the smell alone makes me dream of warm and cozy places, like nestling by a fire after a day of skiing or opening the first present under the tree on Christmas eve.  Everyone prefers their cider prepared a bit differently, so I decided to put together a complete apple cider bar, to be enjoyed by all whether at a large party or small family gathering. 

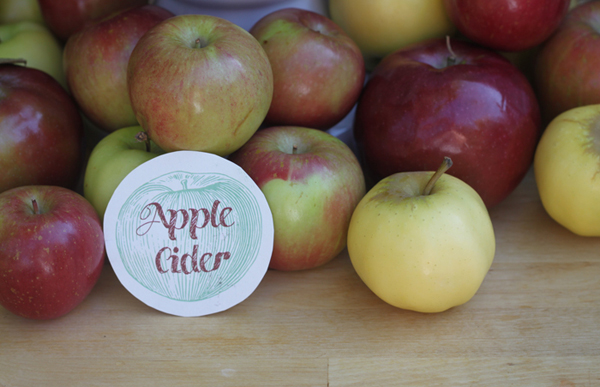
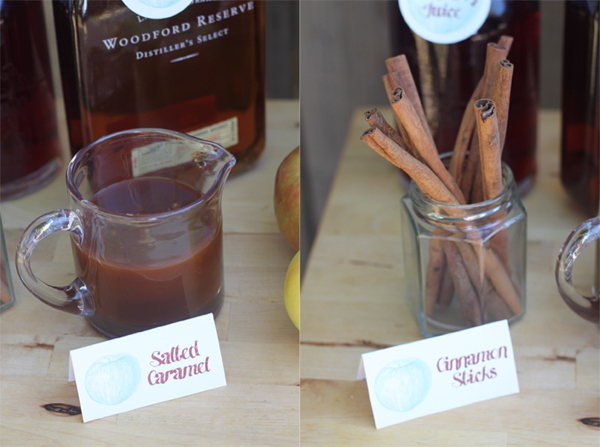
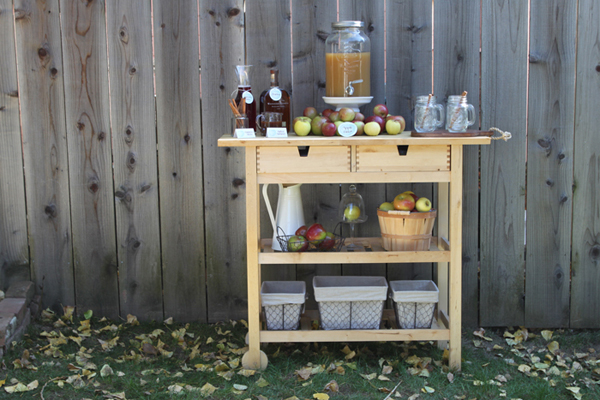
To encourage people to get creative, an assortment of cider toppings includes cinnamon sticks, cranberry juice, bourbon and salted caramel sauce.  A variety of fresh apples (Macintosh, Gala, Fuji, Golden Delicious) garnishes the wooden kitchen cart and adds a pop of fresh, seasonal color.  Tip: whether you serve your cider cold in a dispenser or warm from the stove, cut some thin slices of whole apple from the center of the core, and toss them into your cider for garnish.

The recipe for homemade cider is below, along with a link to FREE printable labels, designed by yours truly and available in either round or standard labels.

2
3
4

5

 photos © cake. 2011
 
Download Free Printable LabelsHERE
Homemade Apple Cider

Ingredients 
10 apples
quartered 3/4 cup white sugar
1 tablespoon ground cinnamon
1 tablespoon ground allspice

Directions 
Place apples in a large stockpot and add enough water cover by at least 2 inches. Stir in sugar, cinnamon, and allspice. Bring to a boil. Boil, uncovered, for 1 hour. Cover pot, reduce heat, and simmer for 2 hours. Strain apple mixture though a fine mesh sieve. Discard solids. Drain cider again though a cheesecloth lined sieve. Refrigerate until cold if desired.

Post by Becca : www.cakeeventsblog.com
It’s All Black and White to Me

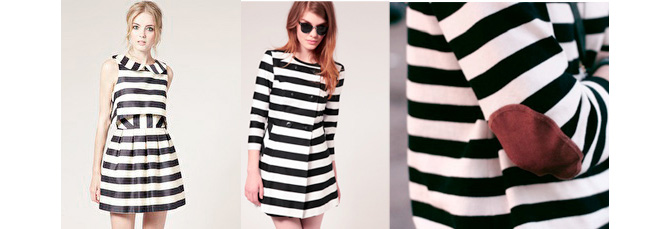
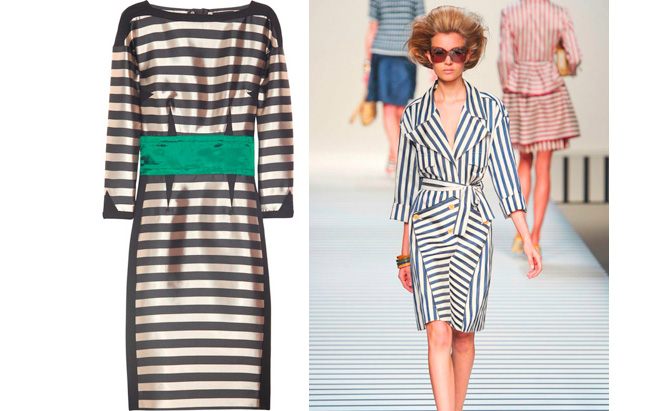
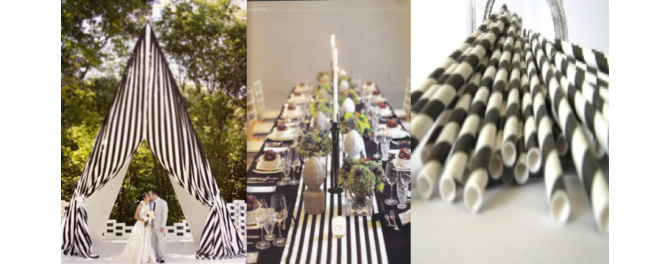
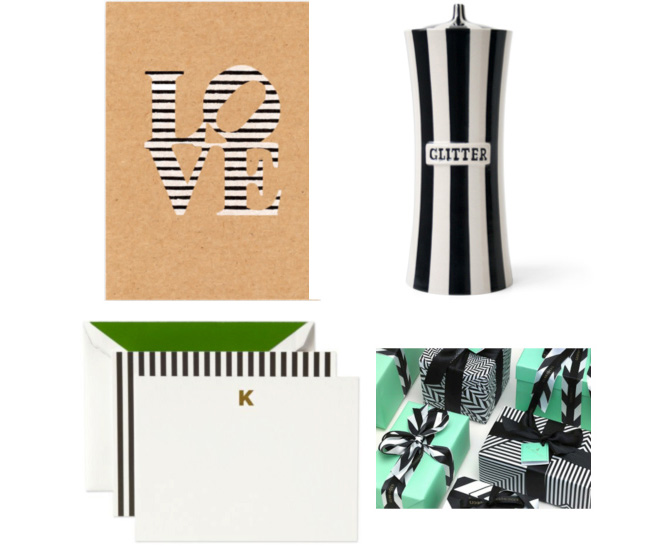
I have never met a stripe I didn’t like! Pair them with a classic black and white pallette and you’ve got a perfect combination for any and all occassions!

To Wear Daytime:

Stripes_1
                            1.                                  2.                                           3.


To Wear Night time:

Stripes_2
                                       1.                                                           2.


To  Accesorize:

Stripes_3                               1.                                       2.                                          3.


To Celebrate:

Stripes_4
                                  1.                                      2.                                     3.


To Live in:

Stripes_5
                                 1.                                       2.                                      3.


To Give:

Stripes_6
                                                      1.          2.          3.          4.


By Sarah Culbertson
Once upon a time a fashion plate from Seattle met a childrens retailer from Chicago, and it was love at first sight.  After spending a lot of time together at the mall, they both knew it was a perfect match. So Sarah packed up her fabulous Kate Spade suitcase and headed for the Windy City. Where they lived happily ever after, designing and developing textiles for little kiddos everywhere.


Roald Dahl

January 16, 2012

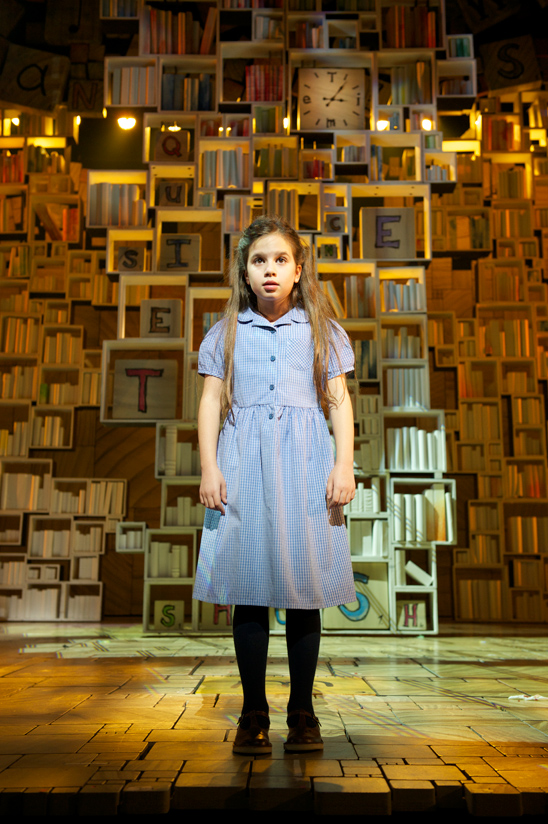
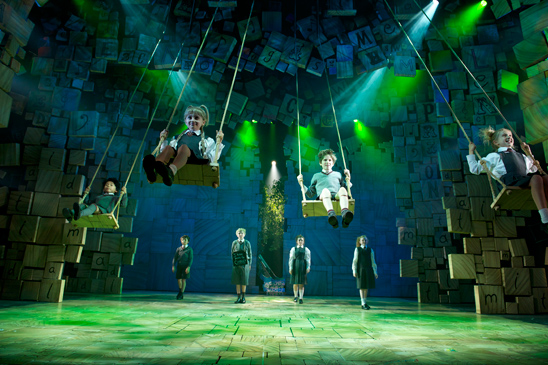
I am a huge fan of anything Roald Dahl and was so excited to hear that Matilda the Musical has hit London.  Take a look at the below link for further information regarding its run and more images. Don’t the sets look amazing!?!

Here’s hoping it makes its way to the US!

1.

RoaldDahl_1

2.

RoaldDahl_2

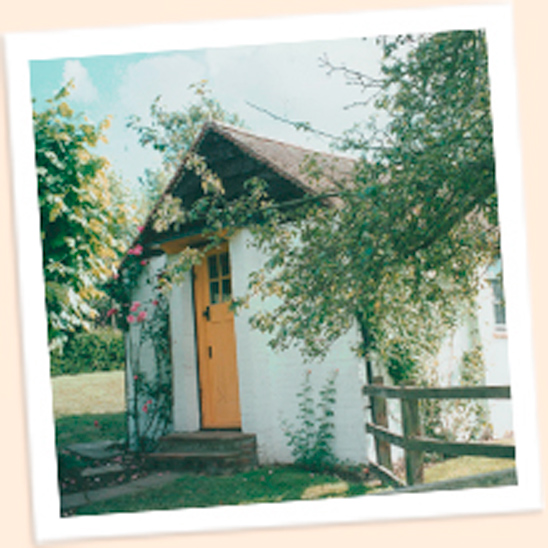
Also, have you seen this virtual tour of Roald’s writing hut- where many of his classics where penned? Take a peek inside!

3.

RoaldDahl_3

4.

RoaldDahl_4

By Sarah Culbertson
Once upon a time a fashion plate from Seattle met a childrens retailer from Chicago, and it was love at first sight.  After spending a lot of time together at the mall, they both knew it was a perfect match. So Sarah packed up her fabulous Kate Spade suitcase and headed for the Windy City. Where they lived happily ever after, designing and developing textiles for little kiddos everywhere.


Homemade Granola In Less Than An Hour

January 14, 2012

1

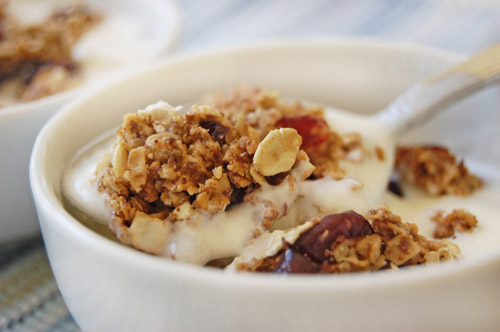
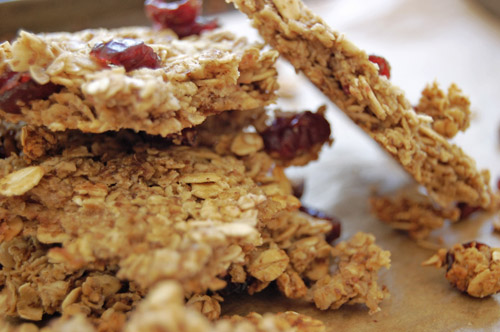
One of the healthy changes we've incorporated into our routine this year is making our own granola.

After reviewing dozens of brands, I found that even those advertised to be "healthy" or "naked" contained a few disguised chemicals and allergens at the tail end of the ingredient list, often labeled as "natural flavors."

2

Making granola at home takes less than a minute to mix, less than an hour to bake and allows you to control ingredients and flavors; which is especially good for people with food allergies.

Following is a base recipe that is perfect on its own, but also once mixed, provides an ideal flavor base for your favorite seeds, nuts or dried fruits.

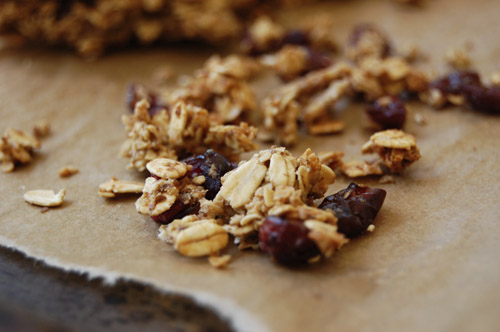
Brown sugar and dark, grade B maple syrup add a deep caramelized flavor to the oats, enhanced by the oat's nutty notes after being toasted in the oven. The addition of egg white provides a boost of lean protein and helps form crunchy clusters with slightly tender, chewy centers.

3

Wicked Good Granola

Servings: makes 2 cups
Allergies: soy free, gluten free, nut free, dairy free
Fancy equipment: parchment paper

Ingredients:
3 tablespoons organic brown sugar
3 tablespoons organic grade B dark maple syrup
1 tablespoon olive oil
1 egg white, lightly beaten but not foamy (optional)
pinch of Kosher salt
2 cups gluten-free thick cut rolled oats (not instant)
1/4 cup each seeds, nuts, dried fruits (optional)

Directions:
Preheat oven to 300 degrees Fahrenheit. Line baking sheet with parchment paper.

Mix the sugar, maple syrup, olive oil, (optional) egg white and salt in a small bowl until well incorporated and the sugar is well moistened.

Place the oats in a large mixing bowl. Add the sugar mixture to the oats and gently stir until the oats are well coated. Mixture will be sticky. Add (optional) seeds, nuts or dried fruits at this time and stir to incorporate.

Pour the oats onto a parchment-lined baking sheet and, using the back of a spoon, spread and press into a thin, single layer.

Bake 40 minutes or until granola is golden and just crisp around the edges. Remove from oven and allow to cool 15 minutes on the baking sheet. Break into clusters and store in an air-tight container for up to two weeks.

Can I omit the egg white?
Yes, but the texture of the granola will be different. The egg white acts as a binder, resulting in clusters of granola. Without it, the oats remain somewhat separate and flake-like. The flavor is the same, but the mixture will be loose and more like a cereal.

I think this is too much sugar for me. Can I reduce it?
Yes. We found that 3 tablespoons each of brown sugar and maple syrup added the perfect amount of sweetness to two cups of oats, but if you prefer to use less, you can reduce to 2 tablespoons of each without changing the texture of the recipe. If reducing to 1 tablespoon of each, you'll need to adjust the liquid by adding a little bit more olive oil or water to ensure the oats are moist enough before baking. Fruit juice (straight from the fruit) can also be used to replace moisture — half an orange should do the trick.

Can I make this fat-free?
Yes. You can omit the olive oil, but will need to replace the moisture with water or fruit juice.

A pinch of salt hardly seems like enough. Can I add more?
Nope, only us a pinch. The Kosher salt doesn't have much time to dissolve into the mixture and sets up on the outside of the oats. Because of this, the salt is more easily tasted on the tongue. A small pinch goes a very long way.

Can I omit the salt?
Yes, you can omit without much change in flavor.

Can I make granola bars out of this recipe?
Yes! Place the mixture into a parchment-lined baking pan or casserole dish(like one you would use for brownies). Press the mixture into the pan to flatten and make even, then score the desired bar size with a knife. Bake for 40 minutes and immediately cut along the score lines again. Allow to cool for 15 minutes and break the bars apart. If you like a chewier bar, increase the egg white to 2 instead of 1.

Post by Dawn Viola : www.wickedgooddinner.blogspot.com
 

Headboard Wall Decals

January 13, 2012

The New Year brought a big girl bed for my daughter. It was a little bittersweet for me as it officially drained her room of the last remnants of her as a baby.  I looked long and hard for an antique wrought iron bed and just couldn’t find one I liked enough to spend the money on they were asking.  

And then…….I happened to be flipping through my Land of Nod catalog one day and came across these wall decal headboards.  They had some in the shape of antique wrought iron headboards to boot! And they had a red one!  Which for me, was perfect…..as Georgia’s room is turquoise and red.  And even better……..I could get one for $40 and it wouldn’t take up any room in my daughter’s relatively small space.

So…….if you find yourself in the market for a bed for your kids, don’t want to spend a lot of money, don’t want to take up a lot of space, and want something totally original–these decals are for you.  And, in the event that you get one I’m providing step by step directions for how to apply one to your wall.  The directions they come with are written a little cryptically and the writers of them tried to incorporate some humor into the directions which is really more confusing than clever.  So…….here’s to being straight-forward.

Step #1:  Put the bed in the room and figure out how high on the wall you want your decal to be.  Take into consideration pillows, and comforters and anything else that will cover up a portion of the headboard to ensure that you put it high enough so you still see a good chunk of it when the bed is made.  I just stuck the who decal on the wall (paper backing still on) and measured where I’d want it to hit.

2

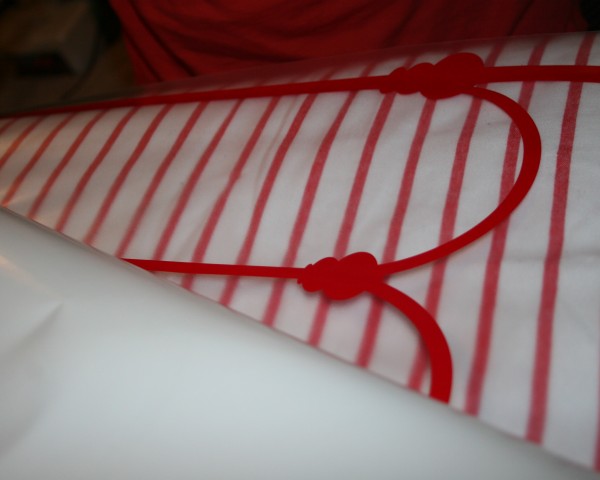
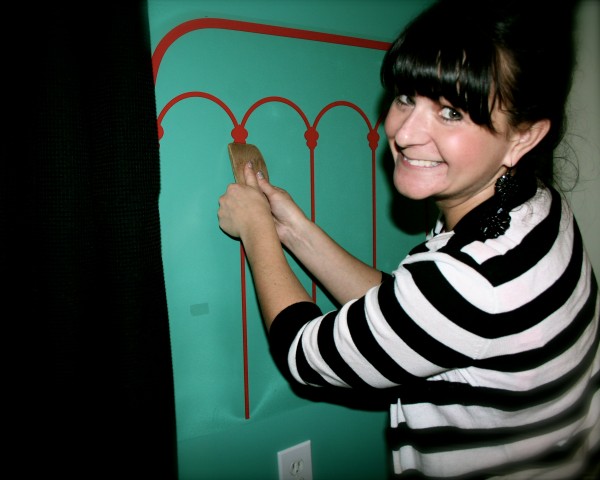
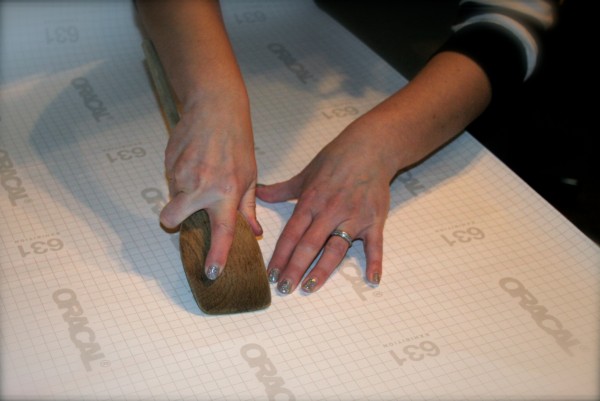
Step #2:  You have to turn the decal upside down and rub the paper backing.  This transfers the decal to the sticky part of the backing, which will allow you to adhere it to the wall.                You have to put a lot of muscle into this step and both my husband and I took a turn at this to make sure it was really transferred.  I used the back of a wooden spatula.

3

Step #3:  Peel the paper backing off of the decal.  If you start peeling and you notice that part of the decal is not adhering to the clear plastic sticky part lay the paper part back over the part that needs help and rub a little more.  That should do the trick.  I highly recommend that you do this with two sets of hands.

4

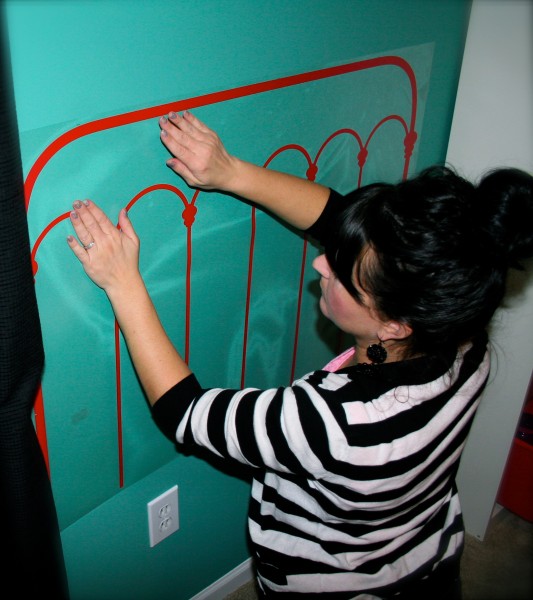
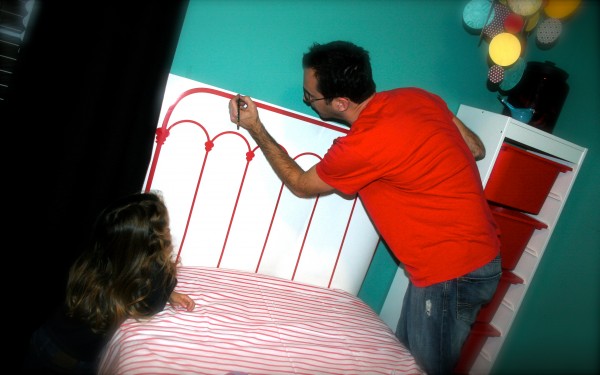
Step #4:  Carefully place the sticky part up against the wall according to the measurements that you took prior to starting the whole process.  Again–four hands here is key! Then, start pressing and rubbing methodically.  You are working to transfer the actual decal to the wall now. I used the end of the spatula for this too.

5

6

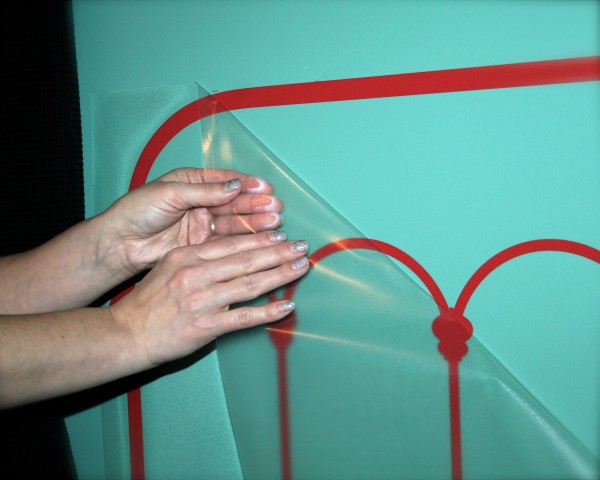
Step #5:  Now the cool part.  Start peeling the plastic backing off of the wall to reveal the decal on the wall.  Do this slowly and carefully.  And…….if some of the decal sticks to the backing just put the backing back into place and rub a little more.

7

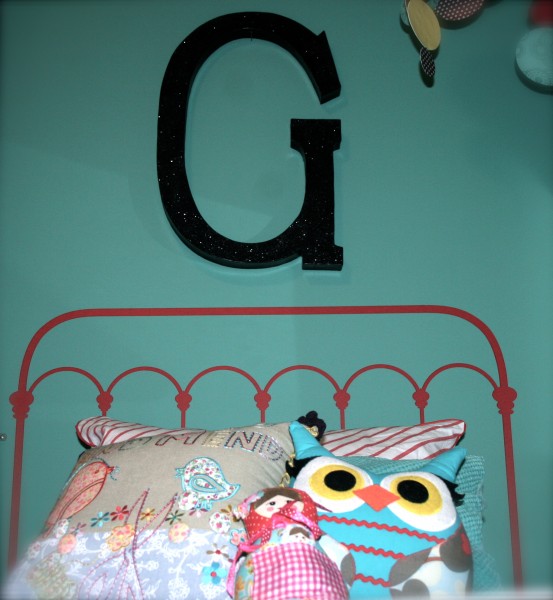
That’s it!  So simple and so fabulous!

8

And these head-boards come in a variety of looks and colors too!

9

Post by Maggie Terryn : Mom Colored Glasses

Recycled Baby Blanket

January 12, 2012

Once upon a time,

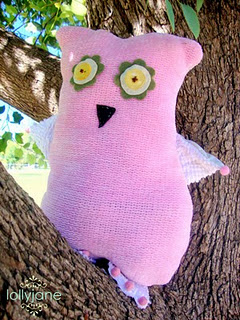
I had a beautiful baby girl who adored her pink blankey.

1

Fast forward 7 years to a now small blanket for a growing girl.

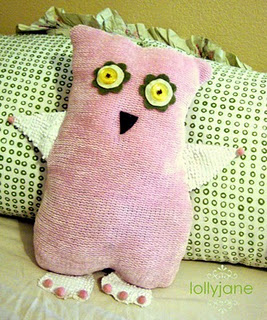
Instead of putting it away, I decided to recycle it into something she would use:

2

Keep in mind I made this strictly with a little ♥ and not experience with a sewing machine ;)  Ha ha.

DIY:

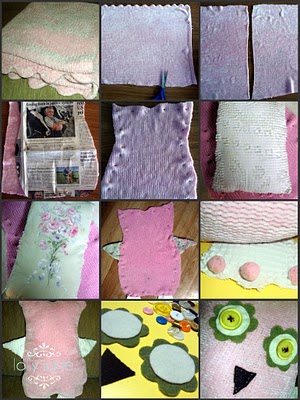
Here's how you can make your very own owl…maybe from your special piece of fabric, too.

3

Instructions:

  • Decide on how big your want your owl; measure.
  • Cut fabric based on measurements.
  • Use {newspaper} template of owl shape, {I simply freehanded mine.}
  • Cut out template on 2 pieces of fabric.
  • Place back-to-back and pink in place.
  • Add triangle "wings" {from her baby pillow that matched her crib set.}
  • Pin into place, ready to sew {pin INSIDE body, otherwise wings/feet will be inside out!}.
  • Sew all pieces together, leaving a small slit for stuffing.
  • Stuff, stuff, stuff until your owl is nice and plump!
  • Add eyes {mine is layered in freehand felt daisy's, a circle and buttons from my grandmother,} triangle nose and feet {added some poms for toenails} and stitch into place.
  • Give to your daughter to ♥ on.

4


 Post by Kelli and Kristi  : www.lollyjaneboutique.blogspot.com
Catch us on “Extreme Makeover: Home Edition”

January 11, 2012

Tune in to ABC’s “Extreme Makeover: Home Edition” Friday, January 13, at 8 p.m. CST.

We joined with Crate and Barrel to lend a hand to seven families affected by last year’s tornado in Joplin, MO.

Crate_Truck_Promotion_k (2)

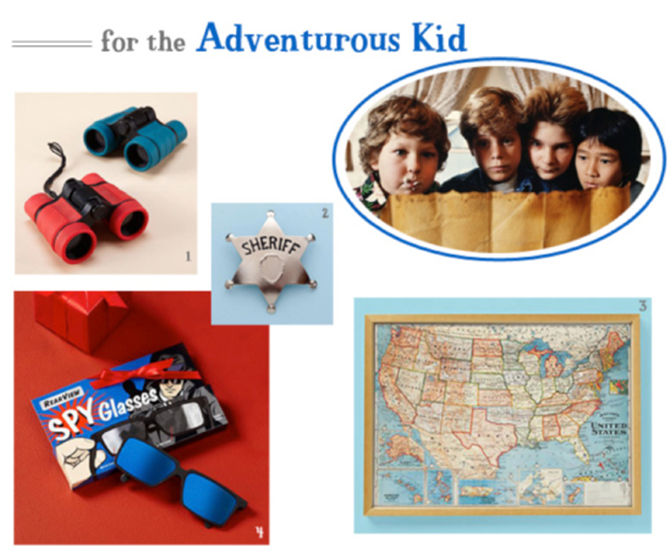
Gifts for Every Kid in Your Life

Personal_1

1 On the Lookout Binoculars $12.95
2 Sheriff Badge $2.95
3 Keeping It Continental Map $99
4 Private Eyes Spy Glasses $2.95


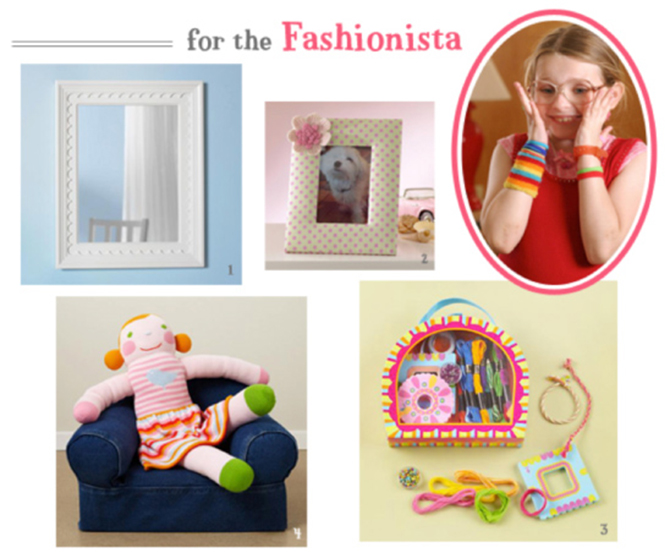
Personal_2

1 Fresh Scallops Mirror $99.00
2 Fantabulous Fabric Frame $14.95
3 Best Buds Bracelet Kit $29.00
4 blabla® Giant 3' Pumpkin Doll $156


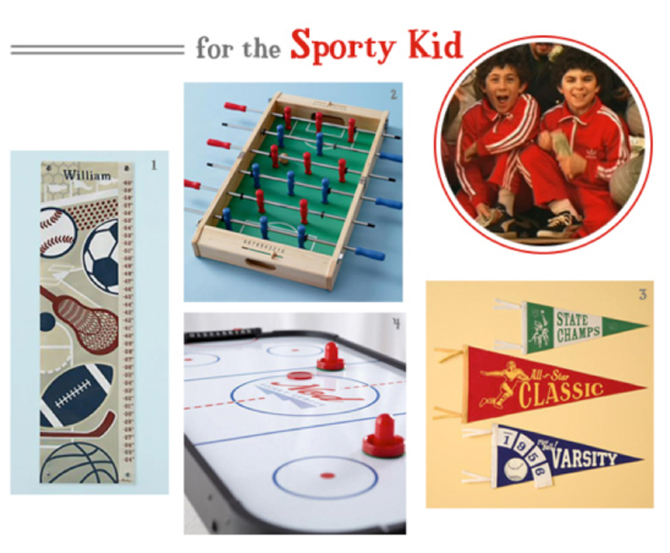
Personal_3

1 Star Athlete Growth Chart   $59.00
2 Honey I Shrunk the Foosball Table  $79.00
3 Sports Pennants  $15.95
4 A League of Its Own Air Hockey Table $89.00


Flubber

January 10, 2012

"The weather outside is frightful…"  

Here in central Illinois, we've had rain, rain and more rain!  No fun snowmen to build, no sledding, just a big, muddy mess.  So, we've turned to indoor activities to keep us (me, mainly) sane.  One of my "rules" is to have a kid project at least twice a week – that way, when I need a few minutes of kid-free time to finish up one of my projects, I can promise them that we'll soon be doing something fun that's just for them!  Making flubber turned out to be a spectacular success!!  Even my kids agreed – the oldest said, "This was a super fun project, Mommy.  I just love gross play dough."  

(This is what we called the Flubber we made using a recipe I found here.)  Gross play dough indeed – it is hard to believe that we started with two completely liquid mixtures, added them together . . . and initially got this:


. . . which quickly took over the entire bowl . . .


. . . and finally ended up as this rubbery, squishy, moldable but oozing pile of awesome!  They loved it – the little one doesn't speak much English (at least as I interpret), but he played with it for nearly an hour. 


 So, here are my tips for the recipe:


I found that the original recipe would have made a HUGE amount of one color.  So, I took the original recipe and divided it by 3, to make 3 different colors.  Here's text of the recipe (in case my cool graphic is too small to read!):

Flubber:
In first bowl, mix together:
mix 2/3 c. Elmer's Glue
1/3 c. + 8 tsp. warm water
food coloring
In second bowl, mix together:
1 tsp. borax
1/3 c. warm water
combine two mixtures
stir if desired, or just sit and watch the magic happen
once all ingredients have become on big blob,
knead to remove excess moisture
Now, play!

These three colors fit into one 32 oz yogurt tub for storage.  I also accidentally bought Elmer's Glue-All for one of my bottles of glue (you'll need about 2 and 1/3 big bottles), instead of regular Elmer's.  The batch made with straight Glue-All was way more watery,      but I could still pick up the blob and knead it, there was just lots of water left in the bowl. 

I used glass bowls and plastic forks because I wasn't sure what the magic behind this little project would do to my "real" dishware and cutlery. The kids thought this was so fun, I'm sure we'll be making more and more!  I've got to find a way to buy Elmer's by the gallon!   The yogurt container keeps it nice and gross…er, I mean fresh.  Bonus – when you flip it over and squish it out, it flattens into that nice circle I used as a backdrop for the recipe!

Post by Cameron : Homemade by Cameron

Snow Day

January 9, 2012

1

With my family’s first annual ski trip coming up, snow is on our mind here. I spent a few minutes brainstorming and floating around various websites to get some fun snow ideas to incorporate into our busy week. Here are a few fun ideas that are on our winter activity list:

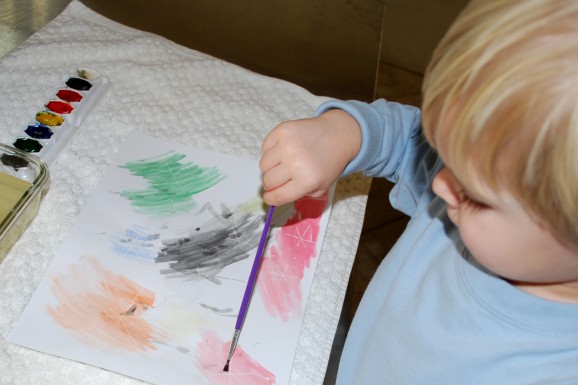
* Watercolor Snowflakes * Using a white crayon, draw simple snowflake shapes onto white paper. Have your kids paint the paper with water colors, and the snowflakes will shine through.

* Cut Snowflakes * What kid isn’t excited at the thought of using scissors? I know, right?      So, bring on some snowflakes! We used origami paper for ours because it’s thinner and easier to cut through several layers. String snowflakes together to make some garland; hang them from your dining room light fixture or simply tape them to your windows. Find a very simple snowflake solution here and more advanced snowflake directions here.
* Puffed Snow Art * Mix an equal amount of flour, salt and water for your kids to paint a snowman. As the measurements suggest, this is quite wet….so I highly recommend using thick paper or cardboard. Although it looks a little nasty, it dries puffy and sparkly—just like snow! (We used construction paper, and it worked just fine, but it would look better on thicker paper.)

* Cotton Ball Blizzard * Give each kiddo a straw then lay out some cotton balls on a table or on the floor. Using the straw, blow the cotton snowballs across the table or room. Race to see who can blow their snowball across the table first. Make an obstacle course with plastic cups for the kiddos to blow the snowballs around. Forget blowing bubbles in the milk, my boys are now addicted to seeing what else they can blow across the table. (Good thing their blows aren’t too powerful!)

* Carpet Skating * Heather, a Supermom of two from Chesapeake Beach, MD, shared a great idea for indoor carpet skating. Wearing just socks on your feet, wrap wax paper over the socks and secure with scrunchies. Now skate on your carpet. She explains, “Be careful, it’s really slippery… but super fun!” If you don’t have wax paper handy or if you prefer something less slippery, parchment paper may used in place of wax paper.

* Indoor Snowball Fight * Crumple up a few sheets of white paper to resemble a snow ball, then fight, fight, fight! You may have to set up a few ground rules since this is an indoor snowball fight, but it is sure to bring some giggles!

* Hot Chocolate * No snowball fight is complete without a cup of hot chocolate! Trying to be healthier? Try this homemade recipe.

* Snow Play * If you have snow, bundle up and build some mini snowmen. Or fill a squeeze bottle with water, add a few drops of food coloring and squirt your name in snow! If you don’t have snow, check out instant snow—this stuff is awesome!

Post by Aimee and Bettijo : www.supermomments.com

Meet Artist Jon Cannell

January 6, 2012

JonCannelle_1

Jon Cannell is one artist we love to work with! We thought we would get to know him a little better…

What is your favorite memory from science class when you were in school?

Looking through the microscope. The sense of another world living on that small plate of glass was amazing. It reminded me of looking into space and wondering what else was out there that couldn't be seen by the human eye.
Which is your favorite scientific element?

Carbon. It is the element that is in all known life forms. It is also used to determine the age of organic remains from an archaeological sites (Carbon dating). Pretty cool.
 If you weren't an artist, what career do you think you would have? 

An architect or a tennis coach.

What are your favorite things to draw?

I love drawing mechanical objects, buildings, robots, space. 

What advice do you have for all the young artists out there?

Don't worry about what other people think about your art. Have fun! Experiment and explore. Use materials and surfaces that you aren't used to (various papers, clay, linoleum blocks, pencils, paints, sticks etc…). Keep a sketchbook (or many!). It is fun to go back through your ideas later. Who knows, it may inspire your next masterpiece!

JonCannelle_2

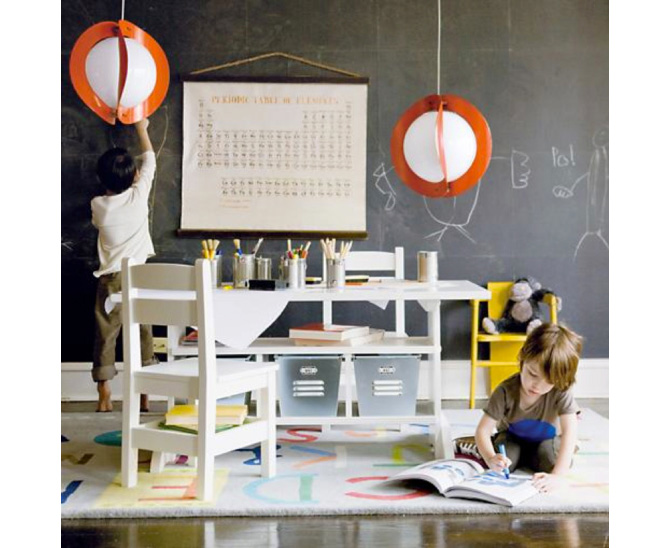
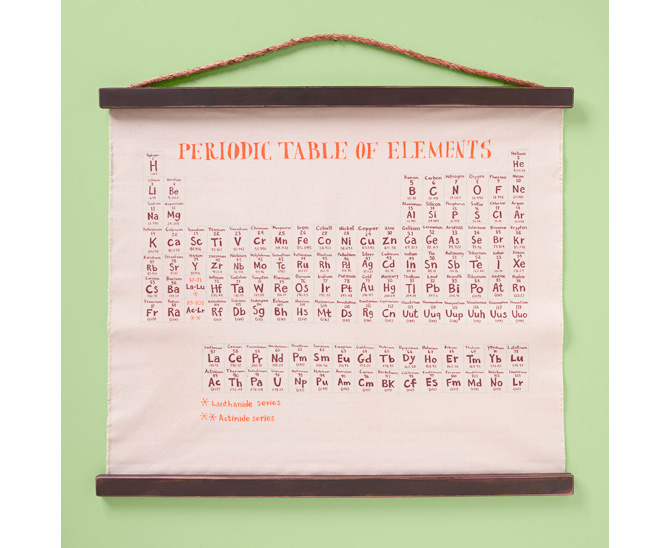
Jon Cannell’s Periodic Table (Periodic Chairs Not Included) $119.00, available exclusively at The Land of Nod.