Close

Blog

Recycled Candle DIY

January 5, 2012

1

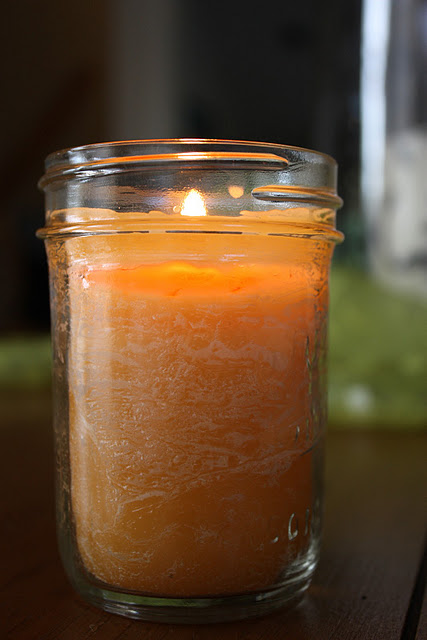
I have these orange pillar candles I bought on clearance years ago. The scent was discontinued, and I'd really grown to love it. I was sad when they reached the end of their wick, so I held onto them, not wanting to throw them out. I decided I could melt them down, insert a new wick and start over. If you've got a few dwindling pillar candles, here's a little walk-through on how to turn them into new candles.

Here's a list of supplies: 
disposable foil pan
scissors
prewaxed wick and clip
popsicle stick
glass jar
hot glue gun 
foil
oven
old pillar candle(s)

 Let's get started:

1. Preheat the oven to 200 degrees.

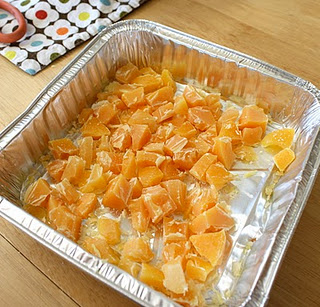
2. Remove any stickers or labels from the candle and cut it into 1/2" chunks. Make sure to discard the old wick and metal clip.
2
(Tip: cut over the foil pan so all the shaved off bits get in there, too).

3. Put the foil pan on a foil-lined cookie sheet for stability and put into the preheated oven.

4. While the wax melts, put a dot of hot glue on the wick clip and adhere to the bottom of the glass jar.

5. Set the timer for 5 minutes. Stir the chunks with the popsicle stick.

6. Repeat every 5 minutes, (heat, stir, heat, stir) until the wax is completely liquefied. The total time will vary depending on the amount of wax to be melted.

Important: don't be tempted to turn the heat up…if the wax gets too hot it can combust.      Just keep it slow & steady to avoid any disasters.

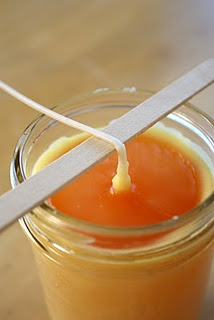
7. Once the wax is completely melted, carefully pour it into the waiting glass jar.
3
8. Lay the popsicle stick over the top of the jar and gently bend the wick over it to hold it upright until the wax hardens.

9. Once the wax is cool, trim the wick to 1/4". 

10. Light your new old candle and enjoy.

Signature

Post by Christina Williams : justcallmechris.blogspot.com
DIY Colored Cellophane Mosaic Window

January 4, 2012

Window_mosaic_04

Whattya need?

  • Scissors
  • Colored cellophane from craft or party store
  • Clear tape

How do I make the mosaic window?

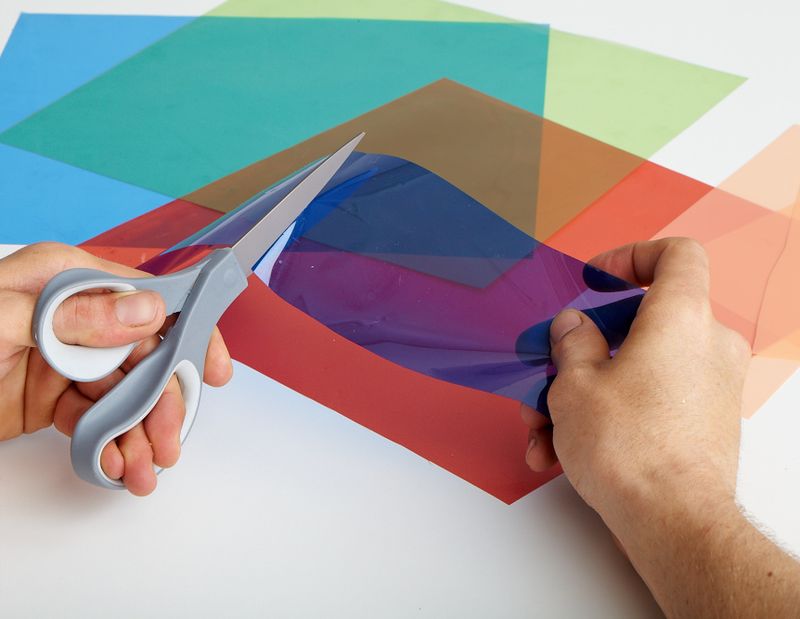
Step 1:  Cut cellophane into various shapes.

Window_mosaic_02

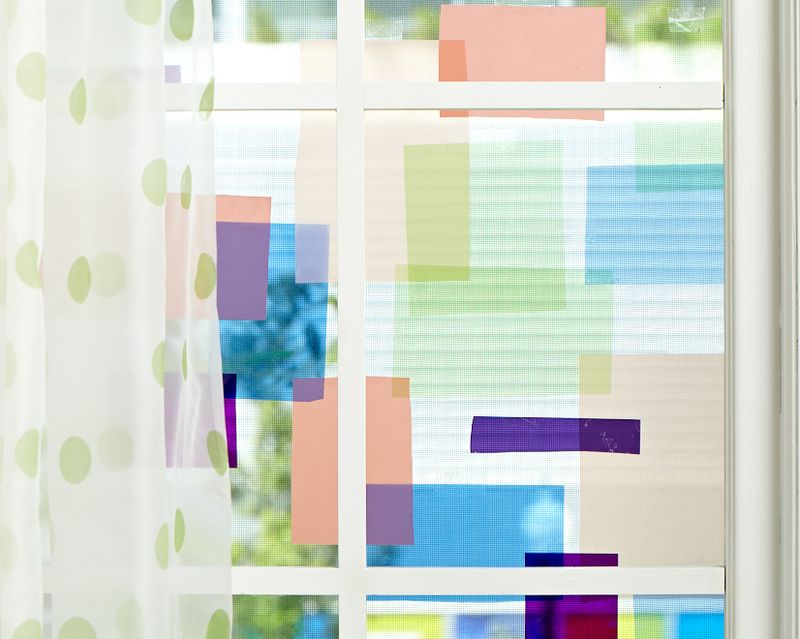
Step 2:  Apply shapes to window with tape.

Window_mosaic_03

Step 3:  Enjoy your view.

Window_mosaic_05

Created by Dane Holweger

Healthier Chicken Broth

January 3, 2012

1

Since it’s still early in the new year, I suspect I’m not alone trying to eat healthier? I mean, isn’t it customary each year for Moms everywhere to resolve to eat better and to prepare healthier meals for the family? I’ve invested many hours already this year scouring the internet to find good recipes, and I’ve found many recipes call for small portions of chicken stock. I don’t use bouillon cubes, and much of the canned chicken stock had ingredients I couldn’t pronounce or a lot of sodium, so I went to Plan C which turned out to be so simple and essentially free. (Anyone resolve to save more money this year?)

After I cook and de-bone a chicken, I have been using the carcass to make broth. It’s incredibly simple and especially frugal!

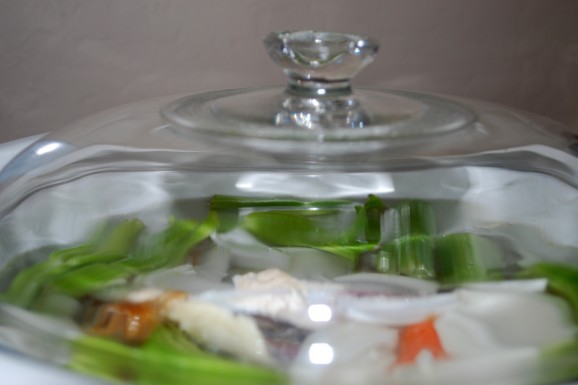
Simply throw the chicken bones into a large crock pot with whatever vegetables you have on hand. I raided my refrigerator vegetable drawer to find onion, celery stalks and baby carrots. I pealed the onion then quartered it. I washed then chopped the celery into large chunks. As for carrots, I dumped the bag in as-was. Then I filled the pot with water.

2

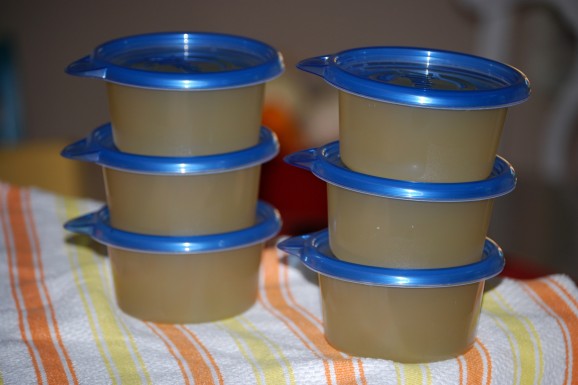
I cooked the broth on medium-low all day. That night after my boys were in bed I strained the broth then poured it into a gallon pitcher to refrigerate overnight. As the broth cools, fat floats to the top of the pitcher, so the next morning I scraped it off. I poured the remaining broth into one-cup freezer-safe plastic bowls and stored them in our freezer. Now, everytime I make something that calls for a cup of chicken broth, I pull out a bowl.

A couple notes: Any fresh (or dried) herbs you have on hand can be added to the broth before cooking. I didn’t add any salt to my broth, yet it tasted great. If you don’t feel up to cooking an entire chicken, check your local grocer for a rotisserie chicken. Freezer-safe bowls come in all sizes, so freeze your broth into portions that will accommodate your family’s favorite recipes.

Post by Aimee and Bettijo : www.supermomments.com

The Cover Story

December 30, 2011

CoverStoryW_1

The inspiration for our Winter 2012 catalog cover came from the many collective hours our team spends on pinterest. We came across the work of maricor/maricar, twin sisters from Australia who are making the most beautiful type from embroidery and cut paper.

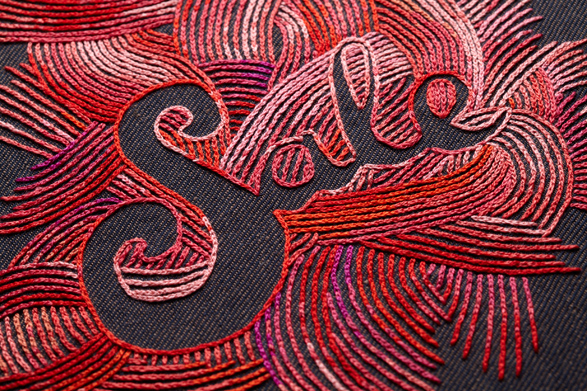
We met them via email and commissioned a custom embroidery of the word “sale.” We knew we wanted it to be red, but left the rest up to them.

CoverStoryW_2

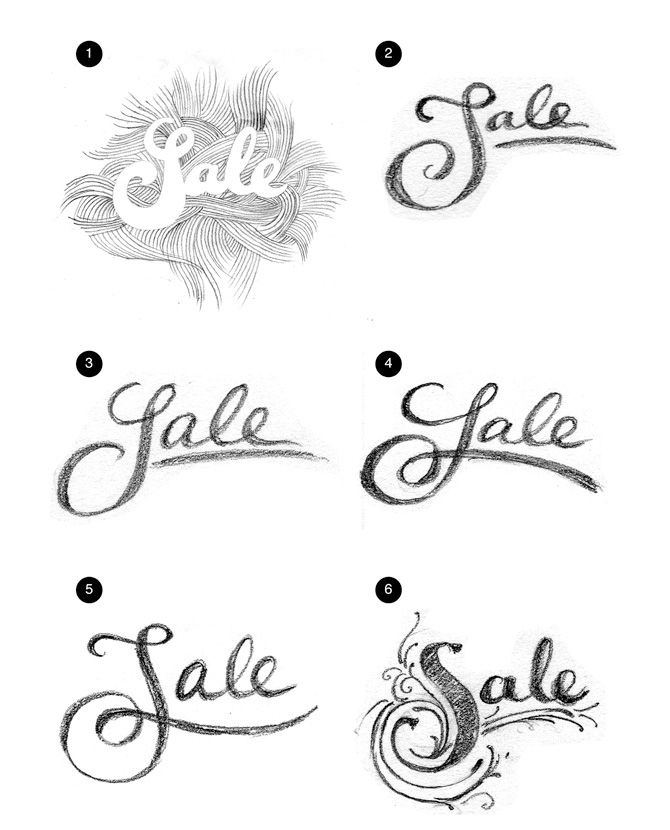
They did the work first in pencil, sending us several options.

CoverStoryW_3

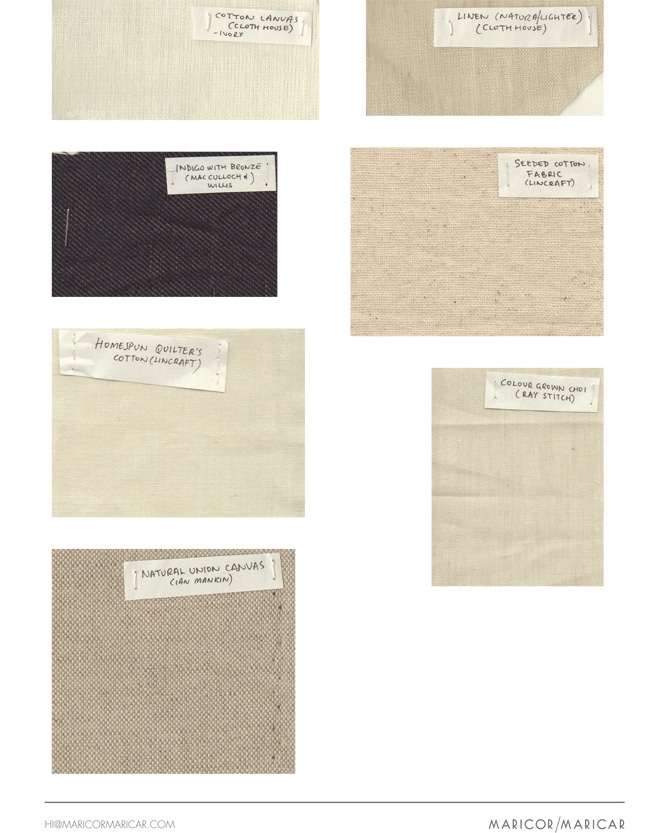
Then they provided fabric swatches for us to choose our background. Love the denim! Then they worked their magic.

CoverStoryW_4

Once the piece was completed, they shipped it to us in the states and we took about a million pictures of the very photogenic little piece of art.

CoverStoryW_5

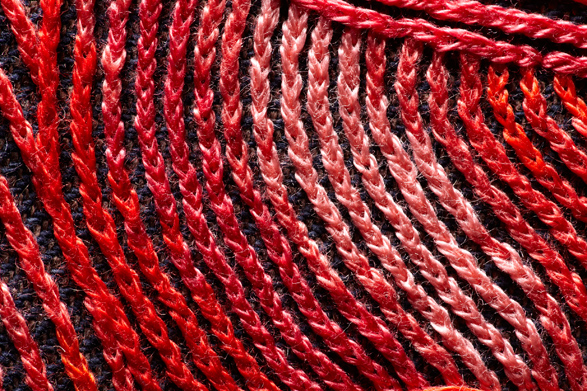
The detail and craftsmanship are astounding.  Hope you enjoyed this month’s cover. We’d love to hear what you thought.

Feel free to comment below, or email me anytime at danielle.kurtz@landofnod.com.


Danielle Kurtz

Creative Director @ Nod

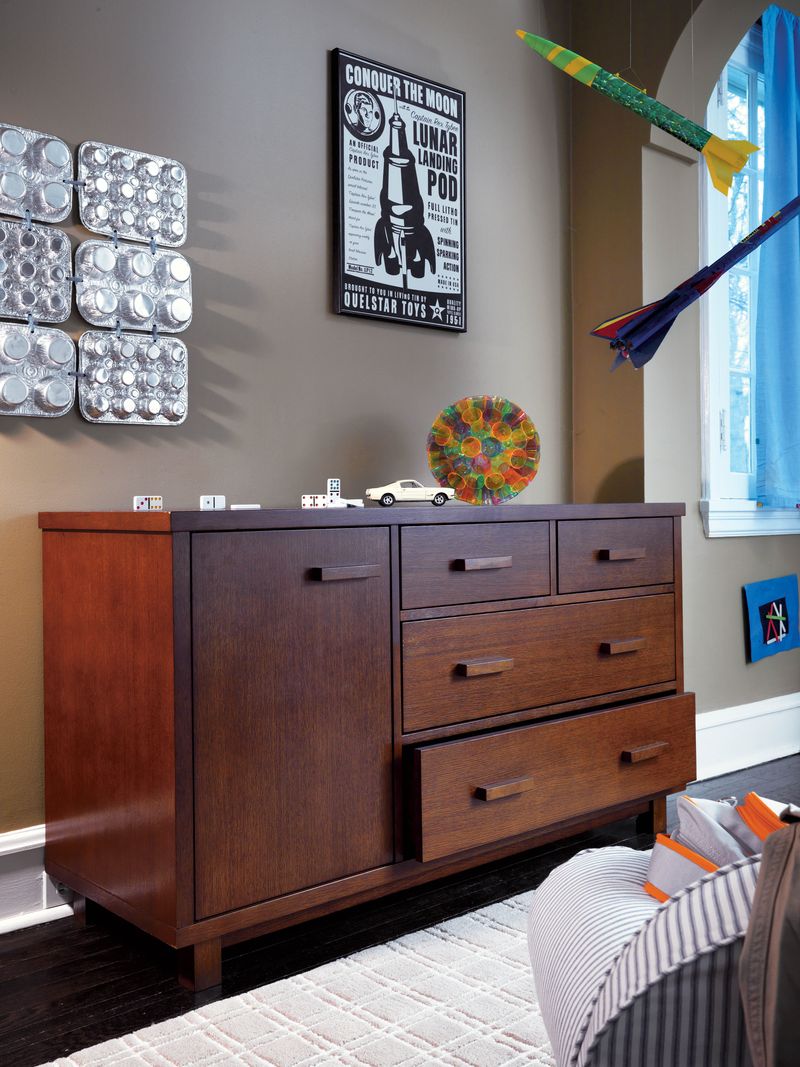
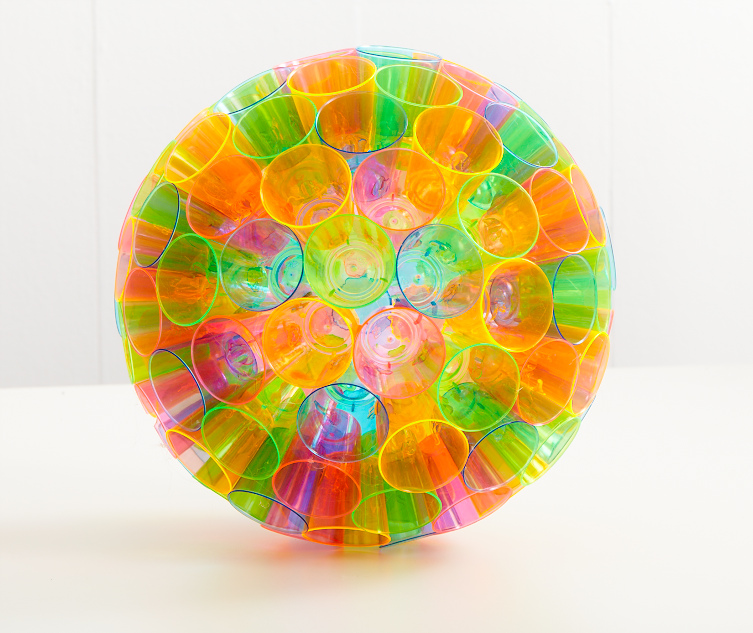
DIY Cup Sphere

Post by Dane Holweger

D4355_ParkDresser_0079

Whattya need?

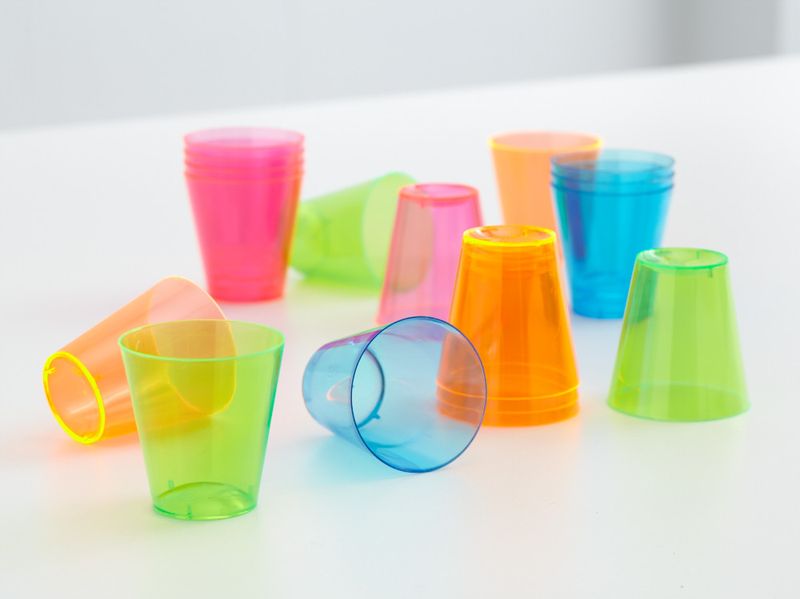
  • Small plastic cups
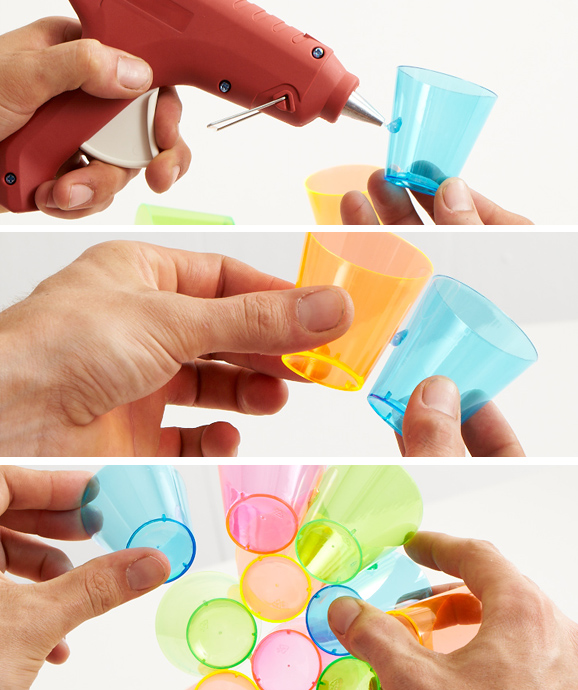
  • Hot glue gun

ShotGlassBall_blog

How do I make the spheres?

Step 1:  Glue cups to each other at the base. (Keep rims and bottoms level.)

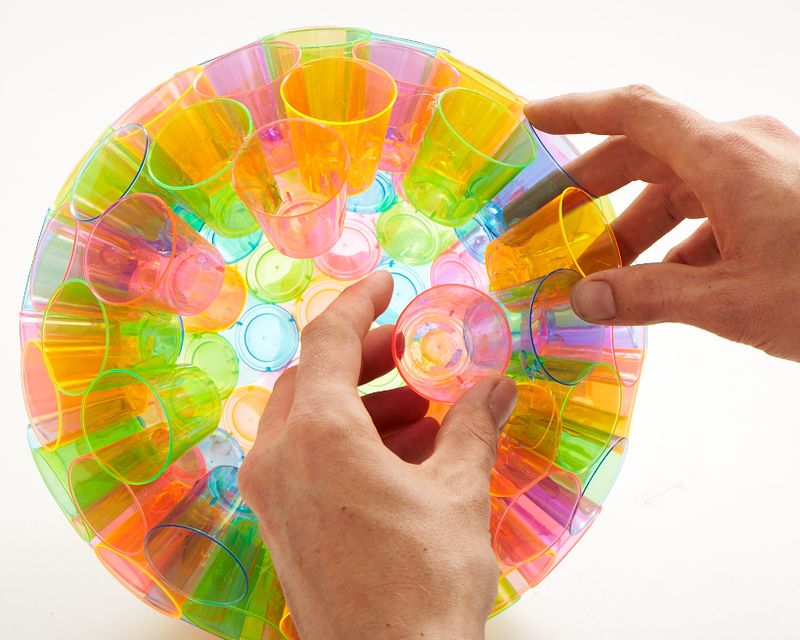
H2n_shotglassball

Step 2:  Continue gluing cups to each other until sphere is complete.

Shotglassball_17

Shotglassball_26

Post by Dane Holweger

Snickerdoodles

December 29, 2011

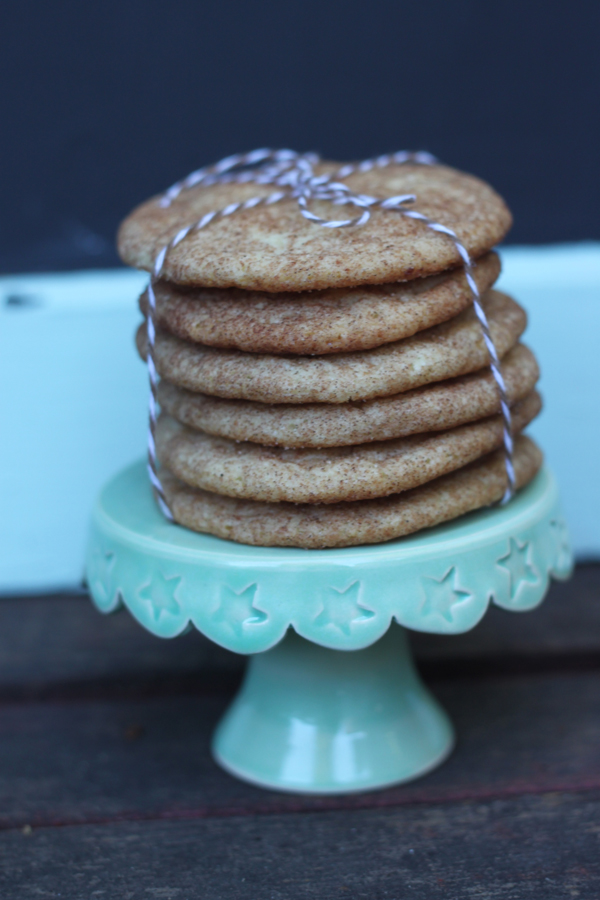
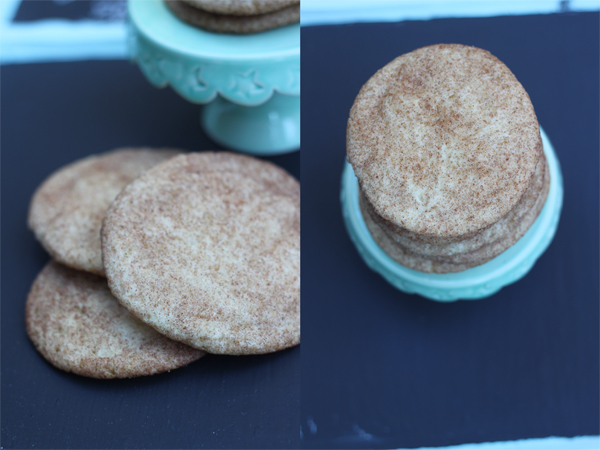
These snickerdoodles are a favorite recipe and so simple to make… comfort in a cookie.

1

2photos © cake. 2011

Snickerdoodles
adapted from Martha Stewart
makes three dozen 3 to 4-inch cookies

Ingredients
2 3/4 cups all-purpose flour
2 teaspoons cream of tartar
1 teaspoon baking soda
1/4 teaspoon salt
16 tablespoons (2 stick or 8 ounces) unsalted butter, at room temperature
1 3/4 cups sugar, plus more if needed
2 tablespoons ground cinnamon, plus more if needed
2 large eggs

Directions
Preheat the oven to 400°, with one rack in top third and one rack in bottom third of oven.         Line baking sheets with parchment paper; set aside.
Sift together flour, cream of tartar, baking soda, and salt; set aside. In the bowl of an electric mixer fitted with a paddle attachment, combine butter and 1 1/2 cups sugar. Beat on medium speed until light and fluffy, about 2 minutes. Scrape down sides of bowl. Add eggs, and beat to combine. Add dry ingredients, and beat to combine. (tip: chill the dough for an hour or two before scooping).
Once dough has chilled, in a small bowl, combine remaining 1/4 cup sugar and the ground cinnamon. Use a small ice-cream scoop to form balls of the dough, and roll in cinnamon sugar. Place about two inches apart on the prepared baking sheets. Bake until the cookies are set in center and begin to crack (they will not brown), about 10 minutes, rotating the baking sheets after five minutes. Transfer the sheets to a wire rack to cool about five minutes before transferring the cookies to the rack.

Need more tasty recipes and delicious bites? Check out our Let’s Eat Pinterest Board.

Post by Becca : www.cakeeventsblog.com

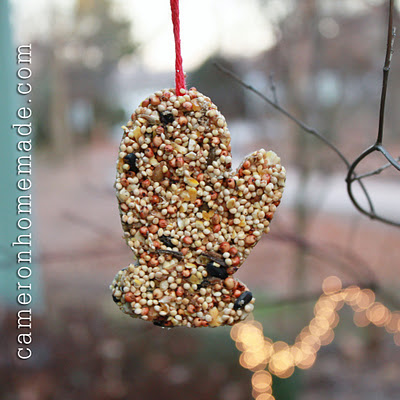
For the Birds – Mitten Shaped Bird Seed Ornament

December 28, 2011

Post by Cameron of Homemade by Cameron

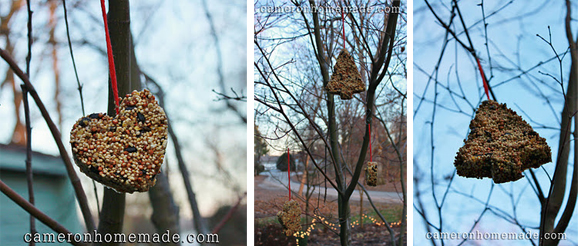
Ornaments make great gifts for everyone – but what about our little feathered friends? Well, these bird seed ornaments have been all over Pinterest, so I thought we’d make some. We had the most fun and they turned out just beautifully!

Mitten Shaped Bird Seed Ornament

You will need:

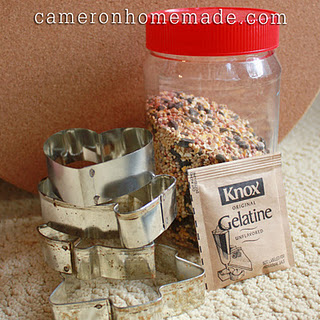
3-4 cups of birdseed

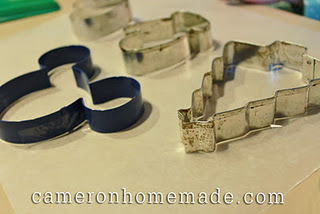
cookie cutters (or molds of some sort)

gelatine

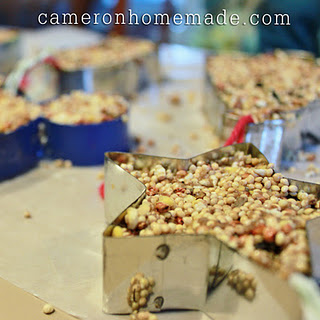
Mitten Shaped Bird Seed Ornament 2Boil 1 cup of water and dissolve gelatine in it.  I used a 4 c. glass measuring cup so I could just dump the birdseed in once it was all dissolved up.  Add the birdseed (we didn’t quite have enough, so I added some All Bran – birds like fiber, right?)  Your mixture should be spoonable but not watery.  Since we only had cookie cutters, I taped them down to a piece of wax paper so (hopefully) the seed wouldn’t ooze out the bottom.  Hot tip – next time, I will put the wax paper on a cookie sheet before we filled ’em up.  Whoops!

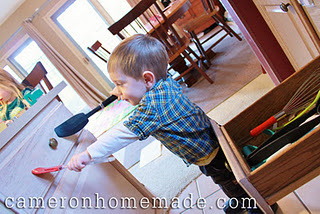
Mitten Shaped Bird Seed Ornament 3In case you wondered what my youngest does while we girls are having fun crafting . . . this is it.  Meet…Spatula Man!

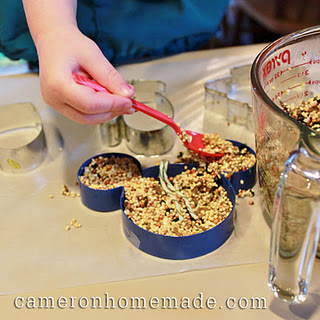
Mitten Shaped Bird Seed Ornament 4Once your mixture is ready, fill your molds halfway up, then lay a piece of yarn tied in a loop for the hanger.  I heart this little 3-year-old hand holding a spoon – she’s getting too big too fast!

Mitten Shaped Bird Seed Ornament 5All filled up and ready to set!  We set ours outside so they would set up faster (although it only got down to 40, so it wasn’t exactly freezing out).

Mitten Shaped Bird Seed Ornament 6Look how pretty!  I hope the birds do come and enjoy them – this tree is right outside the window of our landing, so it is a great spot to sit and watch.

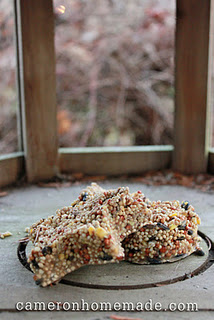
Mitten Shaped Bird Seed Ornament 7Ahhh, yes, these little guys fell off their hangers as soon as we tried to pick them up. Welcome to the Land of Impatient Crafters – oh well, now the chipmunks will get some, too!

Mitten Shaped Bird Seed Ornament 8Post by Cameron of Homemade by Cameron

Thank You Postcards

December 27, 2011

Postcard Pink


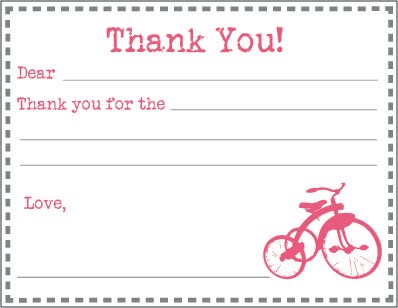
I hope you all had a nice Holiday. Now that I'm nearly done clearing away all the debris and finding room for all the new stuff, it's time to think about writing thank you notes. I'll admit, that even though I design cards, I don't send nearly enough thank yous. I made these little postcards for my kids to send out. I love the idea of letting them help, and I think it's a great teaching opportunity.

My kindergartener is pretty good at writing brief sentences, and these offer plenty of space for him. I created girl and boy versions for you to use. The cards come in four colors…simply print them on letter sized card stock, cut in quarters, and help your kids fill in the blanks.

Then stick them in the mail and Ta-Da! Your little ones just learned a great lesson about showing gratitude.

Get your free postcards here:

Boy Postcard

Girl Postcard


Signature

Post by Christina Williams : justcallmechris.blogspot.com

String Beads

December 26, 2011

1

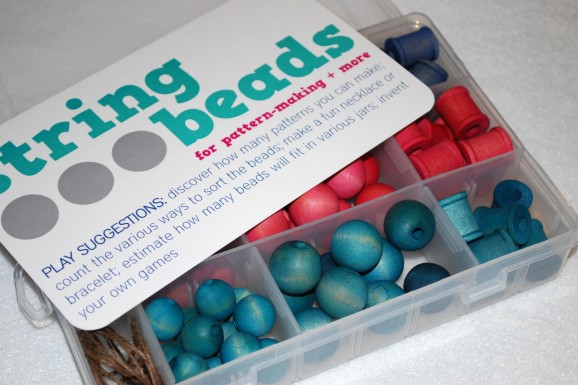
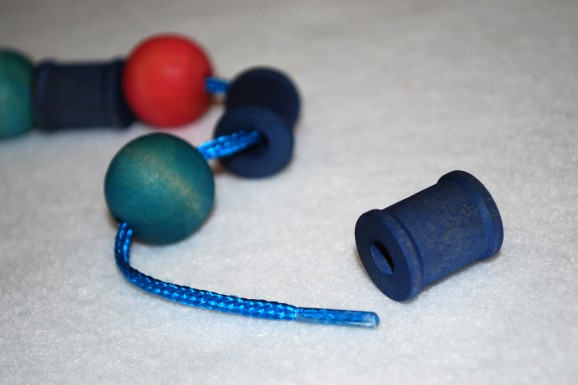
We’ve mentioned here and here how much our kids like to make patterns. And I like it when my kids are busy, so I put together this String Beads kit with hope that my boys will stay busy using these beads to make patterns, sort colors and shapes and practice their fine motor skills.

2

3

4

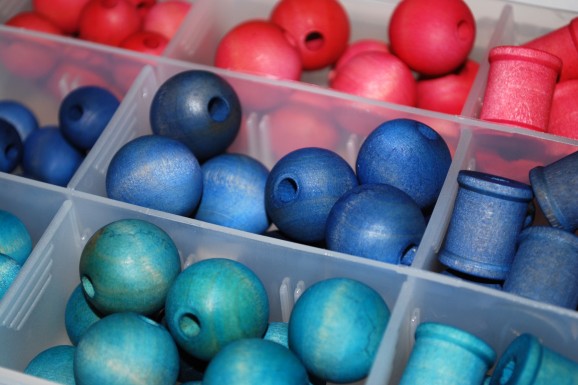
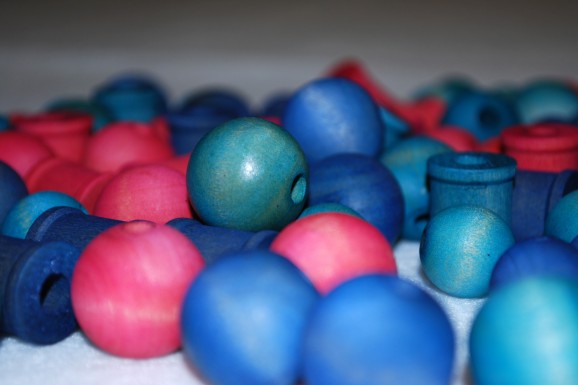
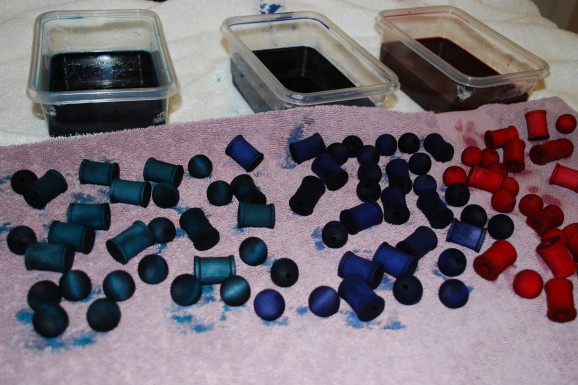
I love the look of wood toys, so I wanted to use wooden beads. Rather than painting the beads, I decided to dye them. The dying process was quick and simple—although slightly messy.

You will need
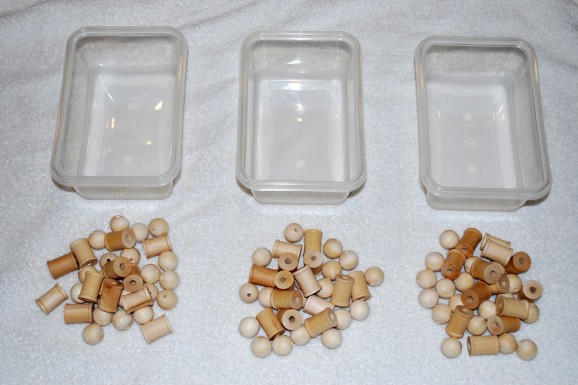
:: Unfinished wood beads in various shapes and sizes (most any craft store sells them)
:: Rit dye of various colors (I used fuchsia, teal and royal blue)
:: Spray polyurethane (optional)
:: Bowl for each color
:: Plastic spoon for each color
:: Old towel that will get dye on it
:: Hot water
:: Plastic sorting container
:: Leather cording, shoelaces or similar string
:: Printable template for labeling your box

1 :: Set up bowls you’ll be putting the dye in. Next to each bowl set out the beads you plan to dye in that color. (I evenly divided each bead type among the various colors.)

5

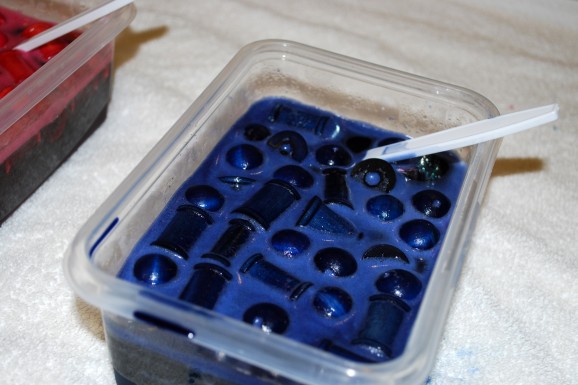
2 :: Make the dye according to the directions on the package. (I used only 1/3 of the dye powder in each package and adjusted the water accordingly.) Add your beads to the bowls.       Stir the beads immediately to coat with color. Let soak, if necessary. (Each set of beads was in the dye solution for under one minute, so be prepared to move quickly.)

6

3 :: Remove beads from the dye bath. Place wet beads on the towel to soak up extra dye mixture that runs off the bead. Let dry. If you choose, spray beads with polyurethane according to manufacturer’s directions. Let dry again.

7

4 :: My favorite part—package and gift.

A couple notes: (1) Wood beads soak up color fast! The first set of beads I dyed got too dark too fast. I tried running water over the beads to dilute the color—didn’t work. I found the teal dye to work especially quickly. (2) After I had so much fun dying the beads, I decided to dye more. I saved my dye overnight by putting a lid on the containers (and moving them where no little helping hands could reach). The dye seemed to work just as well the second day. (3) Just to state the obvious: these beads are NOT for teething, and children should be supervised when playing with string and small objects.

Post by Aimee and Bettijo : www.supermomments.com

Gluten-Free Waffles

December 23, 2011

1

Although I’m not allergic to gluten, I can’t get away with eating much of it without some discomfort for a day or two. I’m usually good for one bagel, or two slices of pizza and then have to wait a few days before my system can tolerate more. And since I put myself through the ringer this week while sampling whole wheat breads from a local, organic bakery for recipes I’ve been testing at work, husband declared today would be gluten-free day.

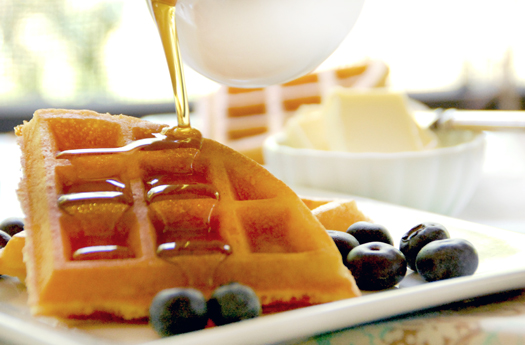
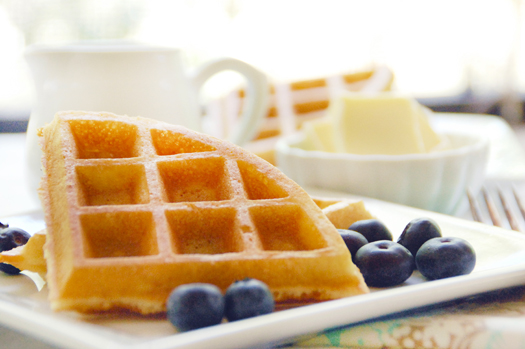
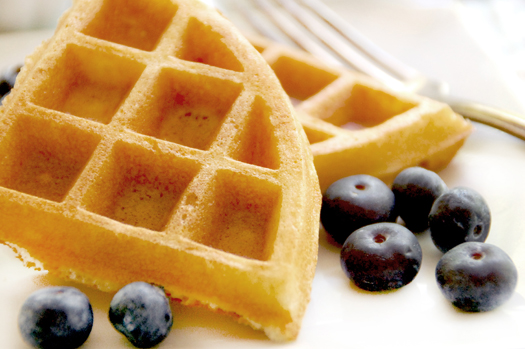
He whipped up a batch of his most requested waffle batter, but replaced the all-purpose flour with King Arthur Multi-Purpose Gluten-Free flour. I’m not sure what magic took place in that waffle iron this morning, but these waffles were crispy on the outside, fluffy on the inside — not at all what I had expected.

2

There is often a gritty texture associated with gluten-free flours that, for whatever reason, didn’t happen with this waffle recipe. I’m not sure if King Arthur changed their grind to something finer or if the waffle iron had something to do with it (or both).

Regardless, we had the most perfect, vanilla-kissed waffles this morning, and didn’t miss the gluten one bit.

3

Gluten-Free Waffles with Vanilla-Cardamom Maple Syrup

Yields: approximately 6 large waffles
Allergy info: soy-free, gluten-free; contains eggs, dairy

Ingredients:
2 cups King Arthur Multi-Purpose Gluten-Free Flour
1 teaspoon kosher salt
4 teaspoons baking powder
2 tablespoons organic cane sugar
2 eggs, beaten
1 1/2 cups warm whole milk
1/3 cup salted butter, melted
1 teaspoon vanilla extract
12 ounces grade B maple syrup
1 vanilla bean, split, seeds scraped
1/4 teaspoon ground cardamom

Directions:
Preheat waffle iron according to manufacturer’s directions. In a large bowl whisk together flour, salt, baking powder and sugar; set aside. In a medium bowl whisk together eggs, milk, butter and vanilla. Pour egg mixture into flour mixture, stir until well combined.

Meanwhile, in a small sauce pan heat maple syrup, vanilla bean seeds and cardamom over low heat; steep 15 minutes, stirring occasionally. Set aside, keep warm.

Working in batches pour approximately 3/4 cup of the batter onto the waffle iron.                       Cook according to manufacturer’s directions or until golden brown and lightly crisp on the outside. Serve warm with vanilla maple syrup.

Notes:
Most at-home waffle makers can cook only one waffle at a time. Keep cooked waffles warm by placing them on a baking sheet in a 165 F degree oven.

Save your vanilla bean pod — place it in your sugar bowl to create vanilla sugar.

Need more tasty recipes and delicious bites? Check out our Let’s Eat Pinterest Board.

Post by Dawn Viola : www.wickedgooddinner.blogspot.com

fan-tastic fans…

December 22, 2011

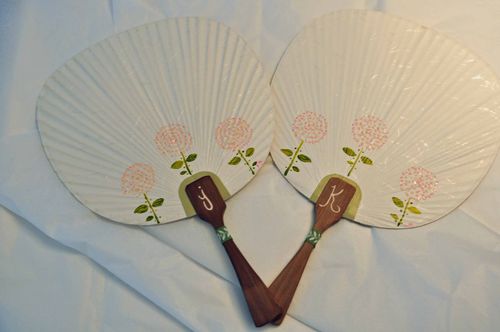
A while back I found these lovley white fans with soft teak handles at a Japanese store. I was immediately smitten and bought them with my sister's August wedding in mind.

I debated between keeping them pristinely white or decorating them…in the end I did a subtle leaf pattern with my sis's wedding colour, clover green. Then I added some baby pink blooms as it's her favorite hue.

1

Then I painted each bridesmaid's initials on the handle and added a small Martha Stewart ribbon accent. One of my favorite new craft products is a gloss medium that comes in a fine squeeze bottle, I gave the blooms a little sparkle with that.

Only one side was decorated incase we wanted some photos with blank fans.

Finally they were wrapped and ready for the shower…

2

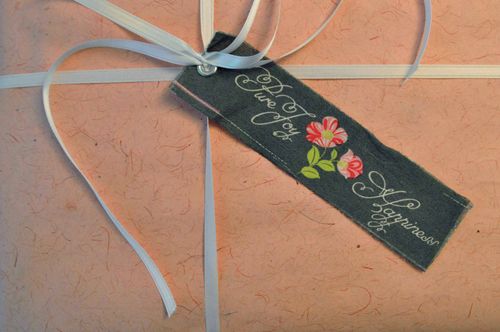
Instead of a card I opted to use one of my beloved Amy Butler fabric tags. I hate to part with these, I hoarde them, they are my crafty addiction…but my little sis is worth it.

Wishing I had bought more fans to decorate with the kiddos, the possiblities are endless.        Get some, get creative, be…

fan-tastic.

Post by Kerry MacLeod : www.snickerdoodles.ca

Chase Away the Rainy Day Blues

December 21, 2011

1

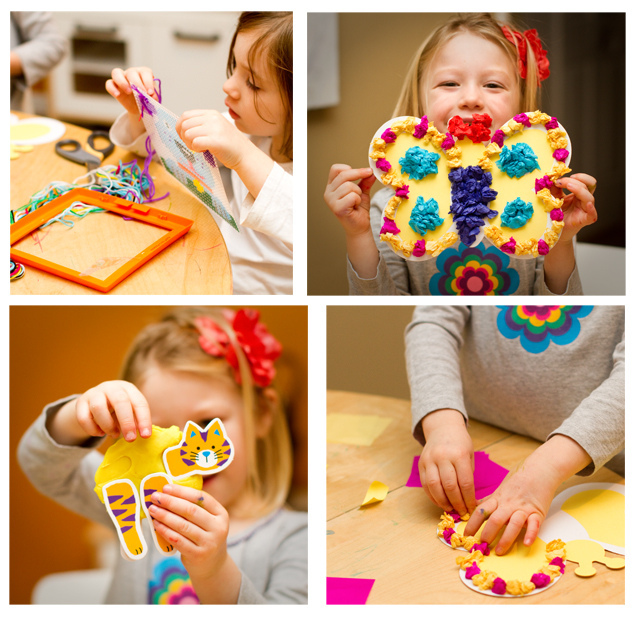
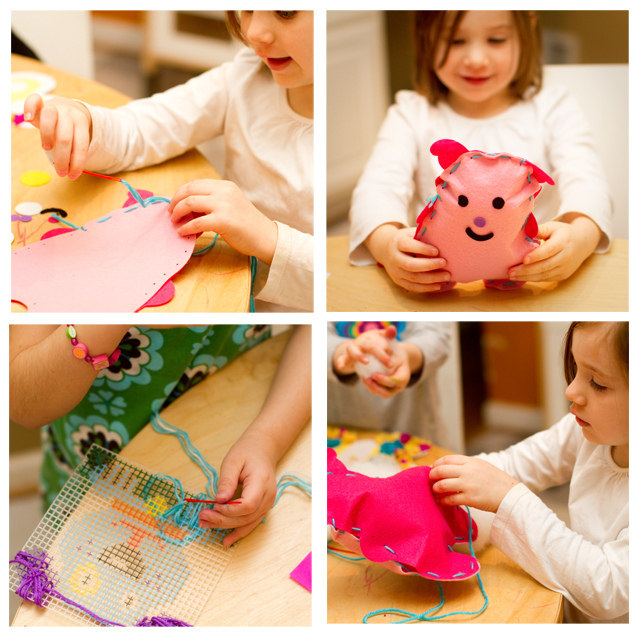
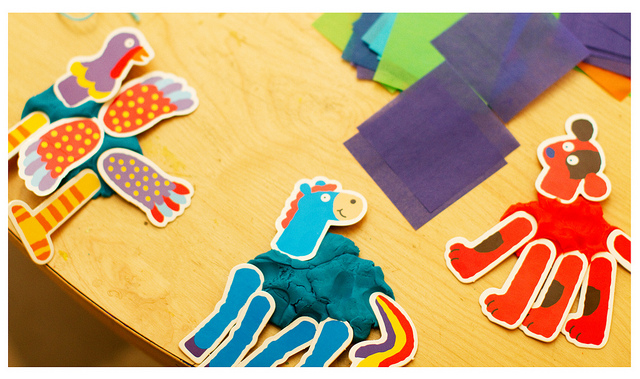
I was pretty psyched when Land of Nod sent us their Rainy Day Art Kit to review, as it includes SO MANY projects – two "felt friends" to sew, two tissue paper art projects, a needlepoint kit, and animal molds with play clay. F insisted we wait until an actual rainy day to open the box (she's very literal). When the first rainy day finally arrived we had the girls' cousin, C, over for a playdate; this made me a little nervous as all the projects come in packs of two, but I figured that the box included enough projects that we could make it work. F and C quickly gravitated to the tissue paper art, which was wonderful – lots of fun with little adult supervision. But P decided she wanted to try the needlepoint kit. Um, I can't sew. At all. Zip. Zilch. Nada. So we tried to learn together and it was a mess. F tried too. No success. Luckily, the "felt friends" project saved the day. On the downside, I had to help P sew her dog, as she struggled with finding the holes and keeping the stitching consistent. On the upside, this was P's favorite art project ever. She carries her new "homemade" doll ("pinkie pie") with her everywhere, explaining to everyone that she made it herself.

2

Finally, all three kids decided to spend thirty minutes or so sculpting animals with the play clay and cut out shapes. When I looked at the clock a whole hour and a half had gone by since we opened the box. A great morning. Even if we couldn't master the sewing.

All in all I think this is a really wonderful project box, with 1-2 kids it could last a whole day.

3

Post by Darcy : bedtimemonsters.blogspot.com
The Tastes and Smells of Christmas

December 20, 2011

Post by Brittany Egbert for One Charming Party of onecharmingparty.com
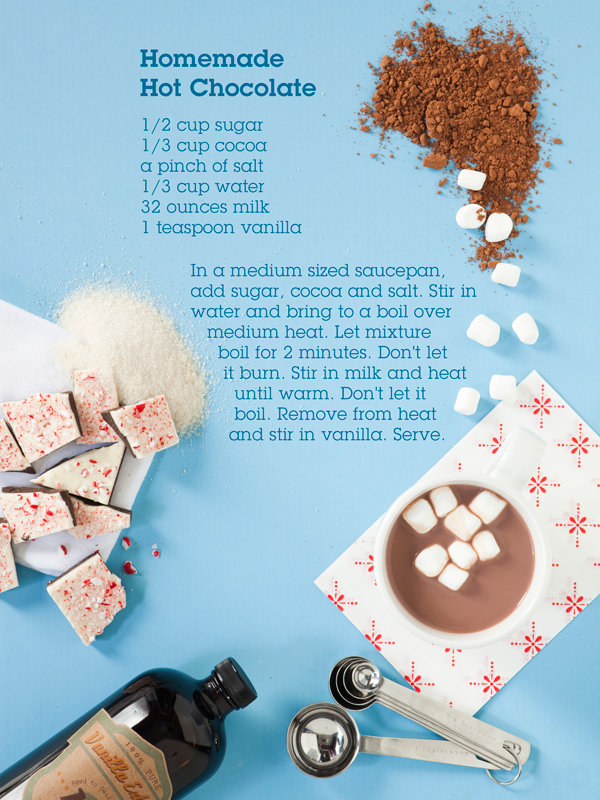
Nothing tastes like Christmas more than hot chocolate. We think this homemade version is fit for Jolly Old Saint Nick himself! But even if your holiday agenda doesn’t include flying in a reindeer-drawn sleigh or delivering presents around the world, you too will need a break from the hustle and bustle at some point. Relax and enjoy this recipe—a perfect pairing with some peppermint bark or a couple of warm sugar cookies.

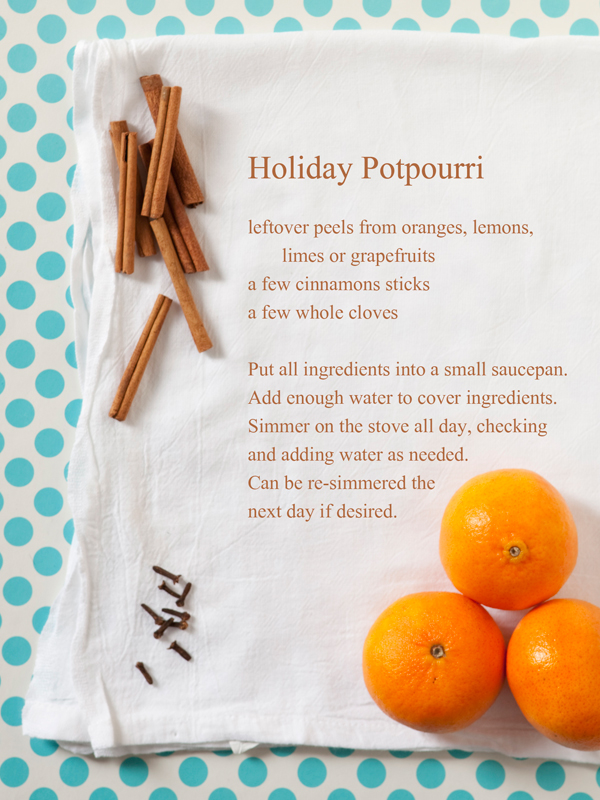
Homemade Hot Chocolate Recipe Now that your lights are up and your tree is trimmed, make your house smell like Christmas, too. This delicious-smelling potpourri recipe is sure to do the trick.  It’s so easy to make with items you probably already have in your cupboard.

DIY Holiday Potpourri Post by Brittany Egbert for One Charming Party of necharmingparty.com
We’ve Got Spirit, Yes We Do! – Nod Ugly Christmas Sweater Party

December 19, 2011

Land of Nod Ugly Christmas Sweater PartyHoliday cheer was running rampant through the Nod office last Friday. It was the day the Creative Department hosted its 3rd Annual Ugly Sweater Party and Contest. Entrants were treated to the taste of delicious cheeseburgers and fries from the golden arches, the sounds of holiday music and the sights of a few too many holiday turtlenecks.
Land of Nod Ugly Christmas Sweater Party WinnerIn the end the best sweater trophy (trophy courtesy of our copywriter, Dan) was awarded to Tony, our Sr. Copywriter. He set the bar high with his head-to-toe ensemble consisting of plaid wool pants, a snowflake turtleneck and, the icing on the cake, a Santa sweater vest straight from his mother-in-law’s closet. Congrats Tony!
Marble Painted Christmas Tree

Post by Aimee and Bettijo of www.supermomments.com

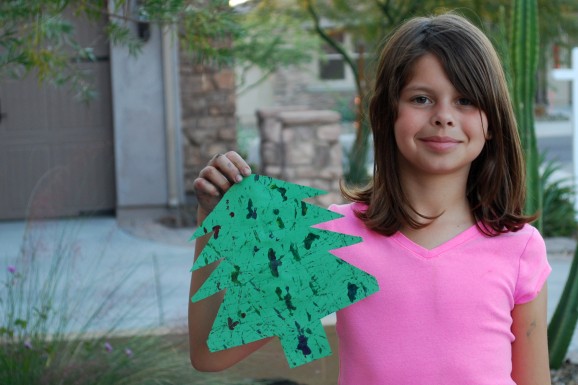
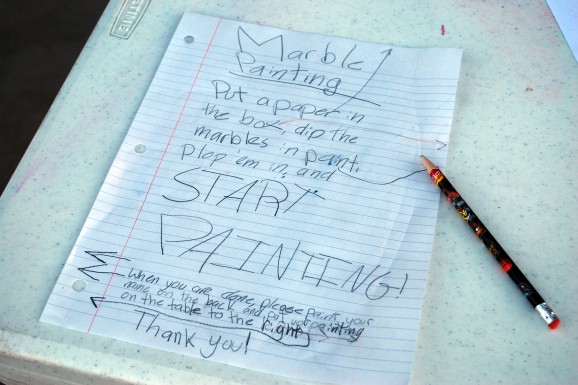
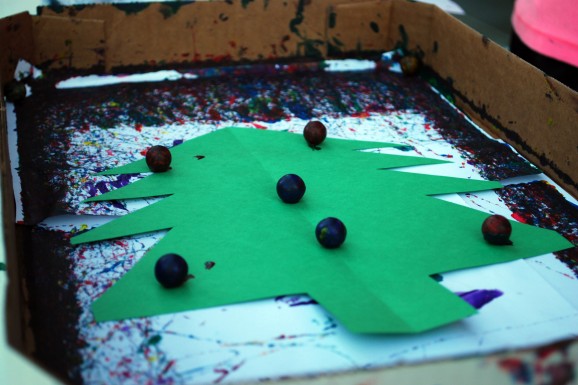
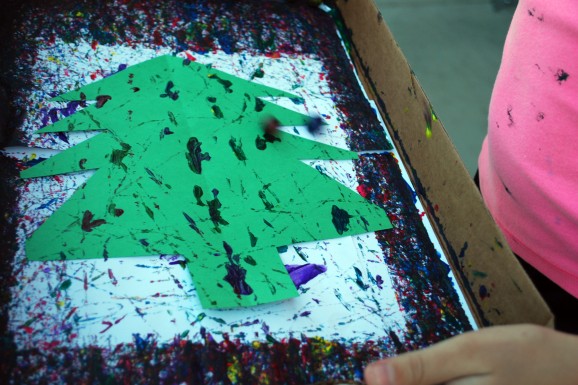
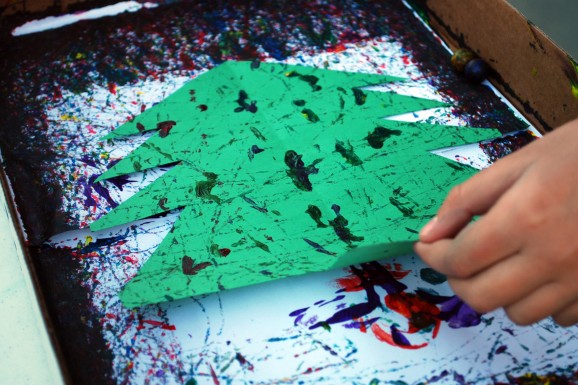
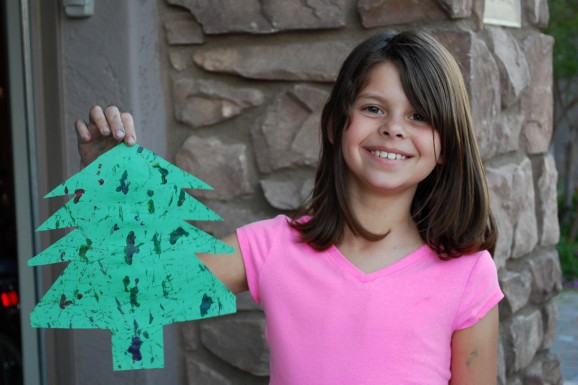
Marble Painted Christmas TreeOur neighbor, Superkid Sara, put together an activity for the kids at our block party a couple weeks ago. She did an excellent job–all the kids were lining up for their turn to marble paint. Although Sara wrote the directions for the participants, I was lucky enough to get a tutorial from her towards the end of the evening. Check it out… this could be a great way to squeeze in one last Christmas craft this week.

Marble Painted Christmas Tree Supplies
:: Paint (3-5 colors)
:: Marbles (at least one per paint color)
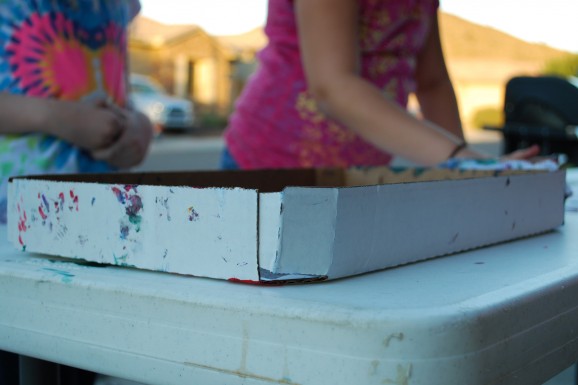
:: Cardboard box lid (a lid from a Xerox paper box would be perfect)
:: Paper (Sara used green construction paper cut into the shape of a Christmas tree)

Directions
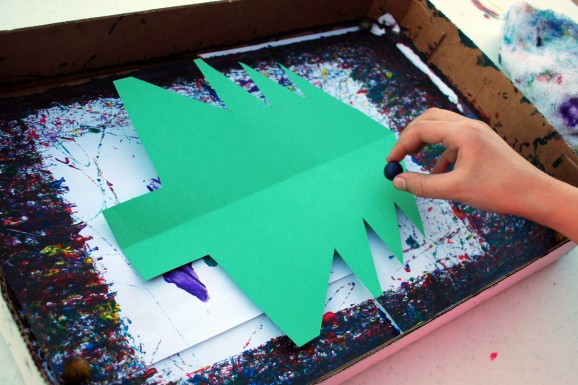
Place paper in the bottom of your cardboard box lid. Dip marbles in paint then set in lid.

Gently lift lid and tilt side to side so marbles roll and spread paint.

Set lid down; remove picture. Let dry.

Marble Painted Christmas Tree Directions

Marble Painted Christmas Tree 3

Marble Painted Christmas Tree 4

Marble Painted Christmas Tree 5

Marble Painted Christmas Tree 6

Marble Painted Christmas Tree 7

Marble Painted Christmas Tree 8

Marble Painted Christmas Tree 9Don’t I have the best neighbors?

Post by Aimee and Bettijo of www.supermomments.com

Unique Holiday Present Wrapping Ideas

December 18, 2011

Post by Brittany Egbert of One Charming Party

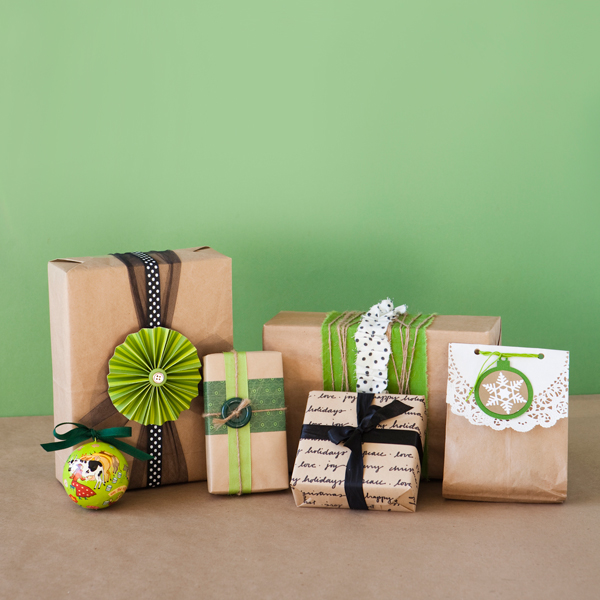
Take paper bags from trash to treasure by using them as your holiday wrapping paper. Up-cycle your grocery and lunch bags and add little embellishments such as buttons, ribbon, leftover scraps of paper and fabric, and paper doilies.

Unique Holiday Present Wrapping IdeasHere are our ideas for easy, inexpensive, and green present-wrapping:

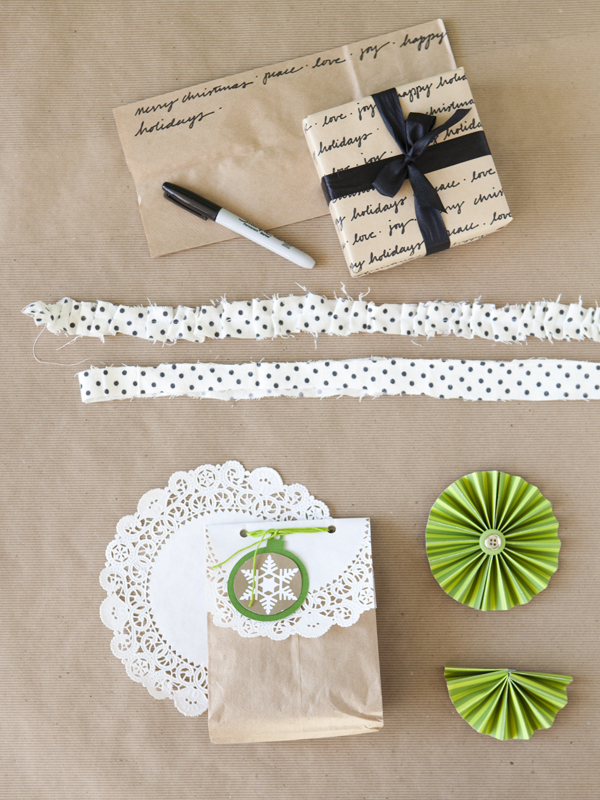
  1. With a sharpie marker and your best handwriting, write festive holiday words onto a paper sack; wrap the present in the paper sack and tie with a black ribbon.
  2. Tear strips of leftover fabric scraps into long pieces; scrunch up and sew the fabric in a straight line, then tie around a present.
  3. Fold a simple doily over the top of a bag; trim the sides, and add a tag.
  4. Accordion fold a piece of colored paper and glue or staple the inside edges together to form a half circle; repeat with another piece of paper to form a circle; glue the two halves together at the ends and embellish the center with a button.

Unique Holiday Present Wrapping Ideas 2

Post by Brittany Egbert for One Charming Party of onecharmingparty.com

Easy Homemade Bead Christmas Ornaments

December 17, 2011

Post by Destri of www.themotherhuddle.com

Easy Homemade Bead Christmas Ornaments

Every year we have a handmade tree for Christmas; making ornaments, garlands, and something to top the tree. The kids have fun and it’s a great way to get everyone in the holiday spirit. Of all the ornaments we have made these easy homemade bead Christmas ornaments are my most favorite. They are perfect for little fingers, require only a few inexpensive supplies and last for years, unlike most of the ornaments we have made that barely survive the season! Oh, and mess free. Definitely a plus.

We made these as a family one night, and then as a craft at our Christmas party as well. They are perfect for groups as you can just pass around a bowl of beads and felt. Try sitting on a carpeted area, or laying down a tablecloth so when beads are dropped they are easy to find. Of course you need to be smart with beads around kids under three. Our two year old loved this activity, and momma was there to make sure she didn’t mistake them for candy.

Easy Homemade Bead Christmas Ornaments 2

Easy Homemade Bead Christmas Ornaments Supplies:

  • beads – I picked mine up at wal mart in the craft section, and the kids craft section
  • large metal ornament hooks – they are thin enough that even jewelry beads fit over them
  • cheap felt cut into circles – I say cheap because my nice stuff was to tough to put the hook through!
  • needle nose pliers – you really could get by without them

Easy Homemade Bead Christmas Ornaments - Step 1

Take your hooks and pinch the bottom loop so that it looks like shown. The first bead you put on should fit over the end to secure. Then straighten out the top so you can thread the beads on.

Easy Homemade Bead Christmas Ornaments - Step 2

I set up shop on the floor, so if they dropped a bead it was easy to find. Then just put the beads and felt on! My three year old could do all the threading on his own, including the felt. I did have to pinch the bottom, and loop the top for him.

Easy Homemade Bead Christmas Ornaments - Step 3

With the last bead about 3/4 of an inch from the end, loop the end into the last bead if it will fit, or just pinch at the top if not. This is where the needle nose pliers came in handy.

Easy Homemade Bead Christmas Ornaments - Step 4

All done! Now just hook it onto a regular ornament hook to hang on the tree. I was worried that the holes on some of the beads were not going to be big enough, but even the jewelry beads slid right on.

Easy Homemade Bead Christmas Ornaments - Finished

So fun! We made a garland to go with them too. It has cotton balls and felt. So how about you, any favorite homemade ornaments?

Post by Destri of www.themotherhuddle.com

Holiday Giving

December 16, 2011

Giving_1

The holidays are upon us, and as I do every year, I remind my children that giving is as important as receiving.  We celebrate in a pretty typical way, decorating our tree, writing letters to Santa, and circling the latest and greatest ‘must have’s’ in new catalogs.  We also celebrate Hanukkah, with small gifts every night after we light the Menorah.  All of the presents can lead to some pretty hefty expectations, so I try to encourage my children to give back.

Opportunities to help others are all around us this time of year, but I’ve found that my children do more when we give to a cause in which they can relate. As we were leaving school one day,   I took my daughter over to a huge board that lists tons of necessities, and a few fun things, that we can get for families in need in our community.  My daughter Tessa is 5, and I thought she would like to give something to a girl her age.  When I asked her what she wanted to choose, she replied “I’m not really up to it, Mommy.  Maybe next year.” I was discouraged that wanted all the gifts for herself.  That night we discussed that my older daughter, Annika’s class is responsible for collecting Toys for Tots for the entire school.  It’s a huge commitment and the second graders are taking it very seriously.  We decided that each of my kids would choose a toy for Annika to bring to school and contribute.  Once again, Tessa bowed out. 

After many days of discussion and gentle encouragement, my older kids and I were able to explain how happy the other children will be when they too can have some games, toys, and clothes for the holidays.  We gave Tessa the time she needed to come up with the idea to give a bead set to an 8 year old girl and a toy to a 3 year old boy.  She had a huge smile when choosing and wrapping the presents, and decided on her own to join the fun the other kids were having choosing games for Toys for Tots.  What’s great for me is to see not only how proud she is of her good choices, but that her big brother and sister are proud of her too.

By Michelle Moody
Michelle is a Supervisor in our Customer Service Department. She’s also the mother of 4 and she moonlights as a professional organizer. She must also either be a superhero or the proud owner of a time travel machine to be able to fit that all in and still find time to write for our blog.

Oh What Fun! 15% off All Toys

Holiday_toys15-Email

How does it work?
1. Add qualifying items to your shopping cart.
2. When all of your items are in your cart, click on Shopping Cart at the top of the page.
3. In the shopping cart, click on "Promotion Code? Click here." link.
4. Enter promo code: OHWHATFUN
5. Click "apply to order."
6. All qualifying items in your cart will reflect the 15% discount once the code has been applied.
7. Proceed through checkout and the discount will be reflected on your final confirmation page.

*This promotion expires at 11:59 p.m. CST on 12/16/11. Offer valid on in-stock items only. Not valid on previous purchases. Cannot be combined with any other promotion codes.