Close

Blog

Say Hello, Wave Goodbye…

December 15, 2011

Hellogoodbye
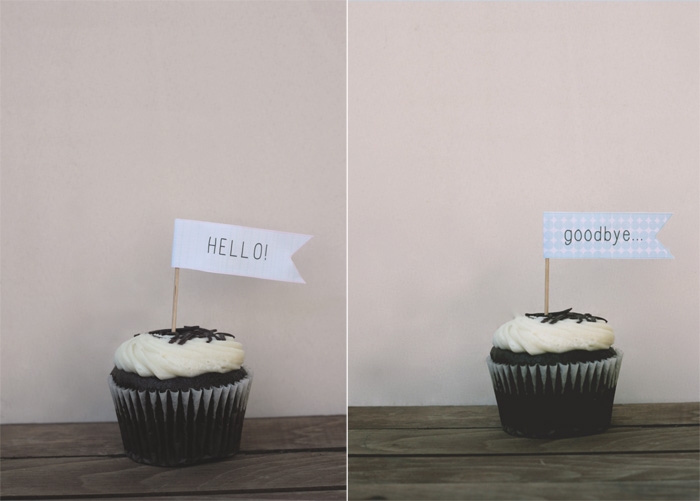
I designed these 'hello' and 'goodbye' cupcake flags to announce the redesign of my blog from Birthday Girl to Cake.  I also happen to think they'd make the perfect little topper for these occasions… 

{Hello} Welcome a new neighbor with a basket of homemade muffins or drop a cupcake at the doorstep of a friend in need of some good cheer. 

{Goodbye} Use the goodbye flags at a going away party, last day of camp… or even as a non-confrontational way to initiate a breakup! Not that I'm endorsing that last idea, but it never hurts to think outside the box. 😉

Here's the link to print them for your very own: Hello/Goodbye Flags by Cake.

Post by Becca : www.cakeeventsblog.com

Big vs. Small

December 14, 2011

Map covered walls, a blue and green palette, and fun accents adorn these two table settings. Perfect for both big and small.

Big-Vs-Small_1

Holiday Dining Room by Emily Henderson


Big-Vs-Small_2

Activity Table and Parker Play Chairs


By Sarah Culbertson
Once upon a time a fashion plate from Seattle met a childrens retailer from Chicago, and it was love at first sight.  After spending a lot of time together at the mall, they both knew it was a perfect match. So Sarah packed up her fabulous Kate Spade suitcase and headed for the Windy City. Where they lived happily ever after, designing and developing textiles for little kiddos everywhere.
 

Things to Make – Candycane Soap

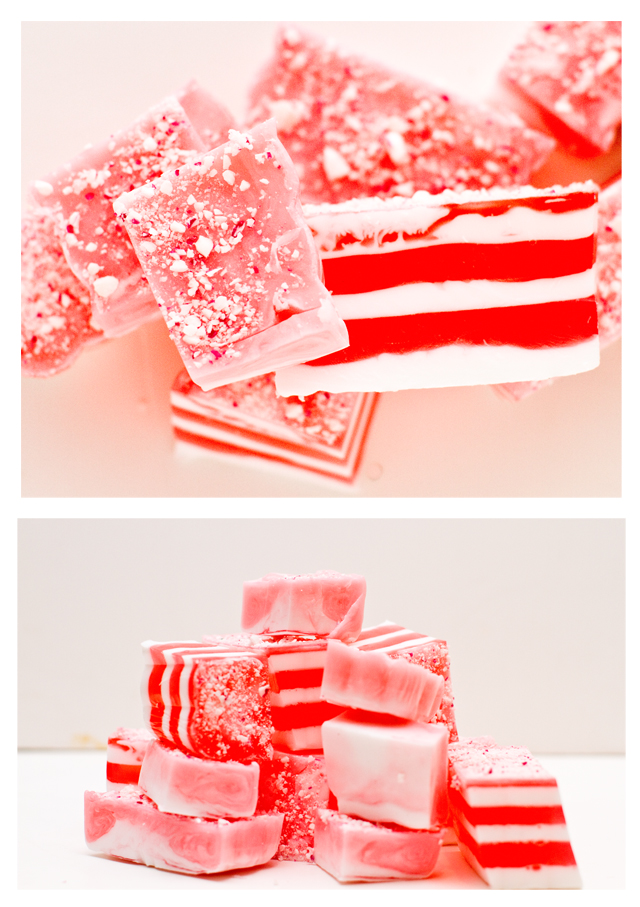
soap One of my friends surpasses Martha Stewart in her craftiness. She told me about making candy cane soap for an easy Xmas gift and I decided to try it. Once I purchased the materials the process was super easy with beautiful results. The idea of adding real candy canes came from this blog.

Here's the scoop:

You will need:

(1) a block of clear glycerin (such as clear glycerin block)

(2) a block of white glycerin (such as white glycerin block)

(3) peppermint essential oil (such as Peppermint)

(4) red food coloring or soap dye (such as Soap Dye)

(5) a mold to pour the hot glycerin into, I used small cake pans

(6) crushed candy canes (optional)

Heat the glycerin in the microwave for about 40 seconds. Continue to heat in 20 second intervals until melted. Mix red dye/food coloring with the clear glycerin. Add a few drops of the peppermint essential oil. Pour melted white glycerin into the mold or cake pan. Let sit for about two minutes, until the layer seems somewhat set. Then add a layer of the red-dyed glycerin. Continue to alternate layers every few minutes until you fill the mold. For added decoration, sprinkle crushed candy canes on the top layer. Once the brick of soap dries, remove from the mold and cut into bars. Easy peasy. On the downside, my kids keep asking to eat it.

Post by Darcy : bedtimemonsters.blogspot.com

Chalk Dinner Up to an Organized Pantry

December 13, 2011

There’s one space in my house that I just love going, the pantry. Behind the old farm doors is just about everything I need to make a perfect meal. And since I love to cook, I find myself collecting lots of pantry staples.

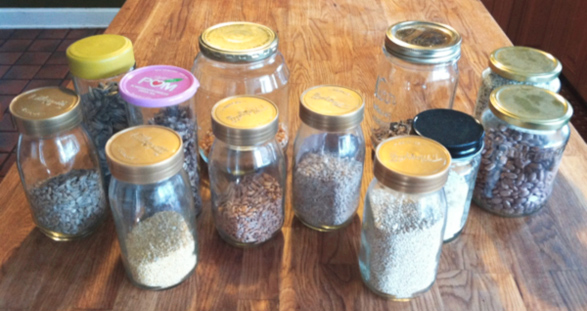
One thing I learned is that buying grains from loose bins is much more fun than buying them pre-packaged. That way, you can get exactly what you need for a recipe and can keep a reasonable amount of extras on hand. To store my grains I save old jars from pickles, salad dressings and glass beverages.

Pantry1

I can recognize these ingredients easily, but the challenge is when I ask my husband to start cooking the quinoa before I get home from work. Let’s just say he’s not as well versed in grain identification as I am. I‘ve seen the idea of using a can of spray paint chalk to label jars, but I didn’t want to paint my jars.  So when I came across our chalkboard wall decals, I realized that this was a perfect temporary solution for making labels!

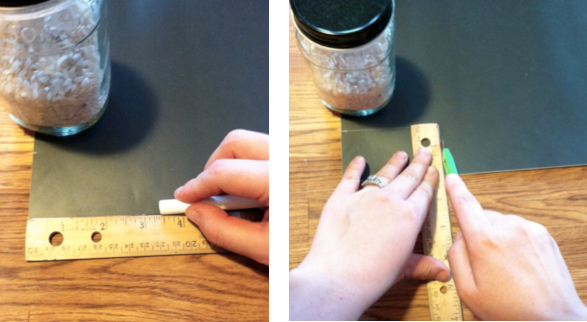
All you need is a set of chalkboard wall decals, a ruler, chalk and a crafting blade or scissors.        I decided that I would make all of my labels the same size for consistency purposes. I eyeballed it and figured  they should be 3 œ x 2”h. Once I measured my label I used a crafting blade to cut the rectangle.

Pantry2

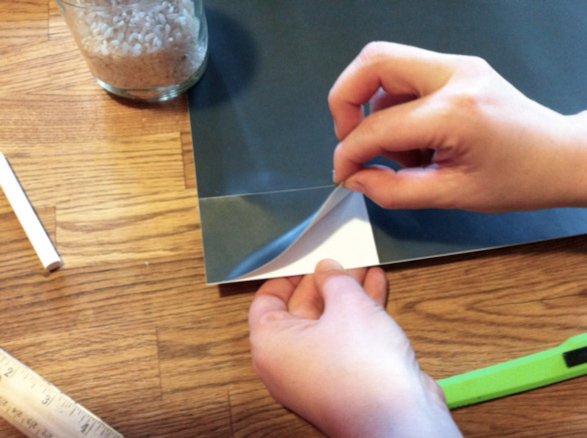
I didn’t cut all the way through, making it easy to remove my label from the backing.

Pantry3

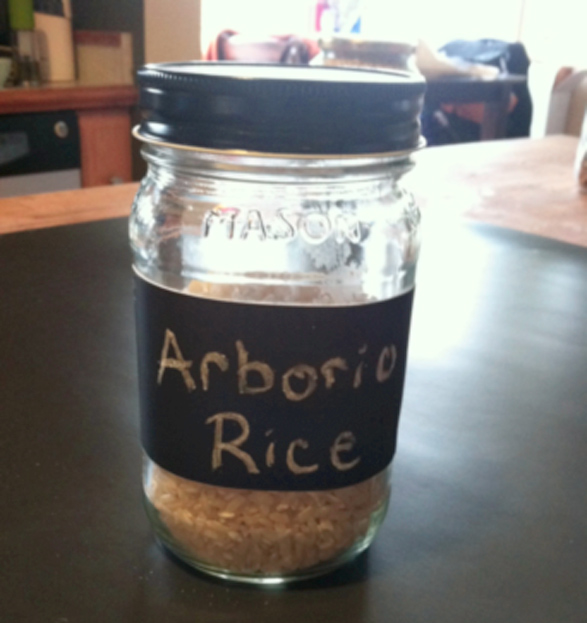
Then all you need to do is stick the label to the jar and write in the name with the chalk!

Pantry4

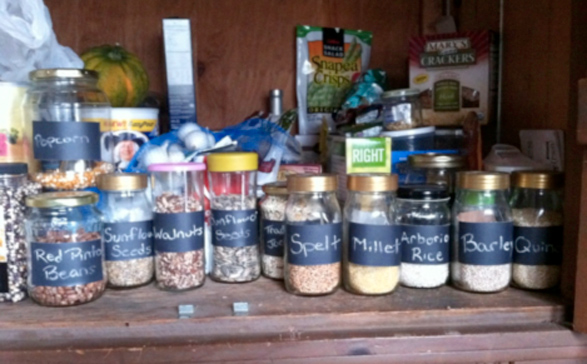
There, that’s much better! And next time I call home to ask hubbie to start cooking the barley, I won’t be surprised with a pot full of risotto.

Pantry5

By Becky Phillips

Becky works in Nod’s HR Dept. doing everything from booking the hot dog cart for our kickball parties to training our store staff on all the details of our latest products. In addition to cooking, she learned how to knit last year, but has yet to finish her first project
a scarf. So, if you come across any good, quick, knitting patterns, send them her way!


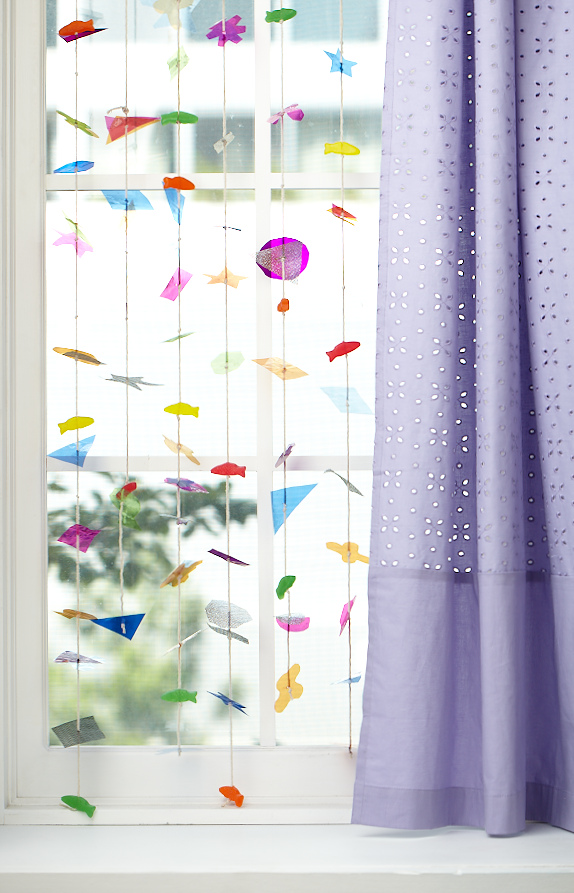
DIY Colored Cellophane Garland ‘Curtain’

December 12, 2011

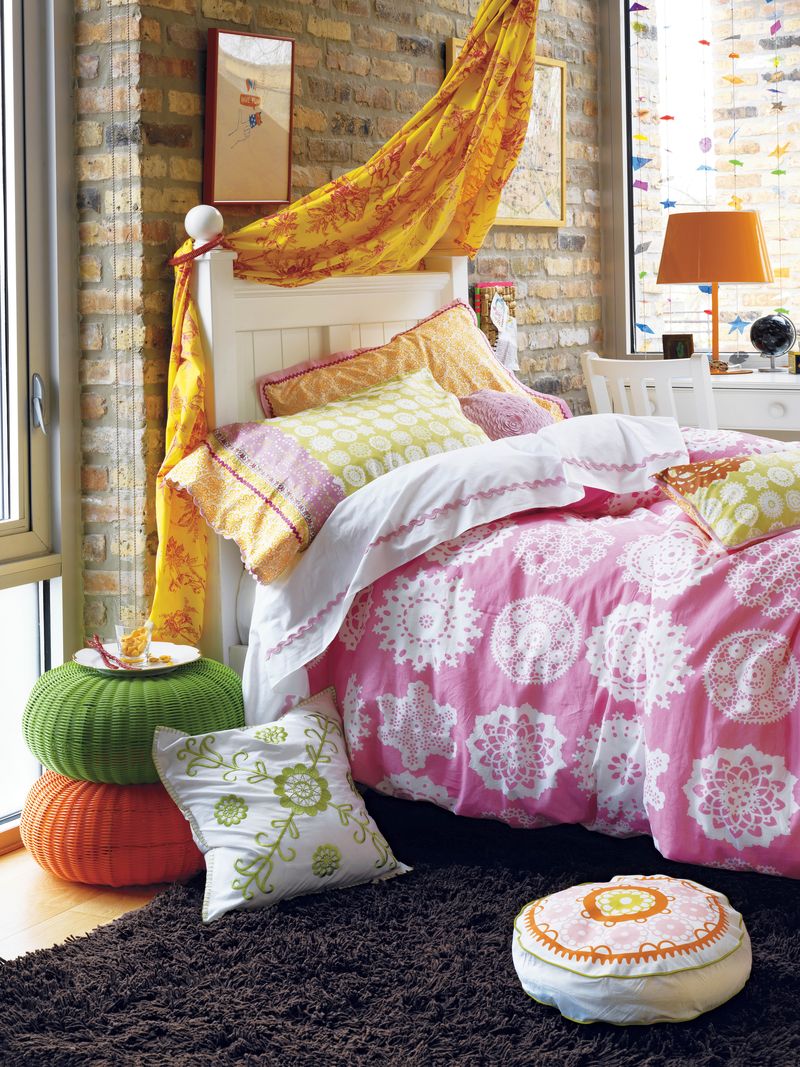
D4355_TeaTimeBdg49

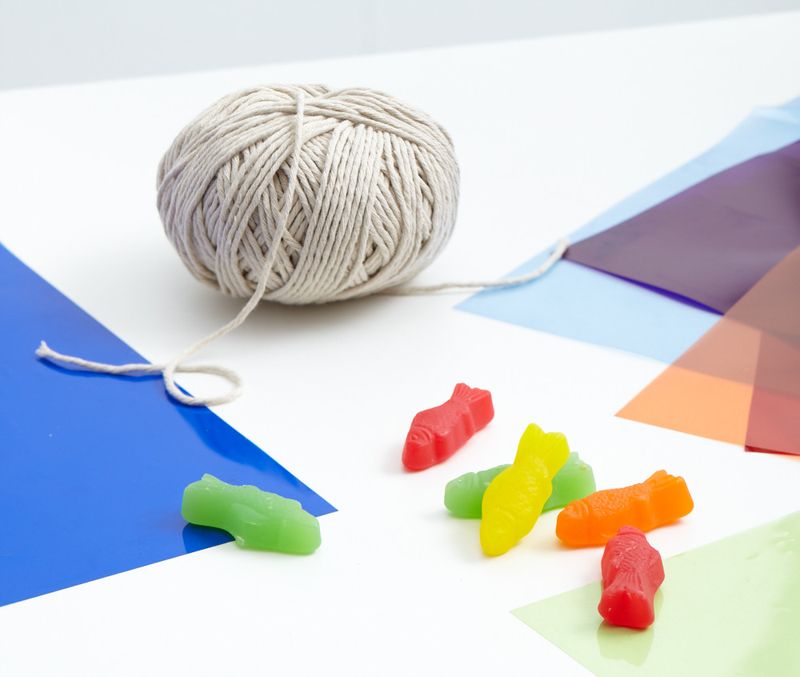
Whattya need?

  • Embroidery needle
  • Colored cellophane
  • String
  • Gummies

Cellophane_garland_1390

How do I make the garland ‘curtain’?

Step 1: Cut string to desired length and width to fill your space. (We’d measure before cutting.)

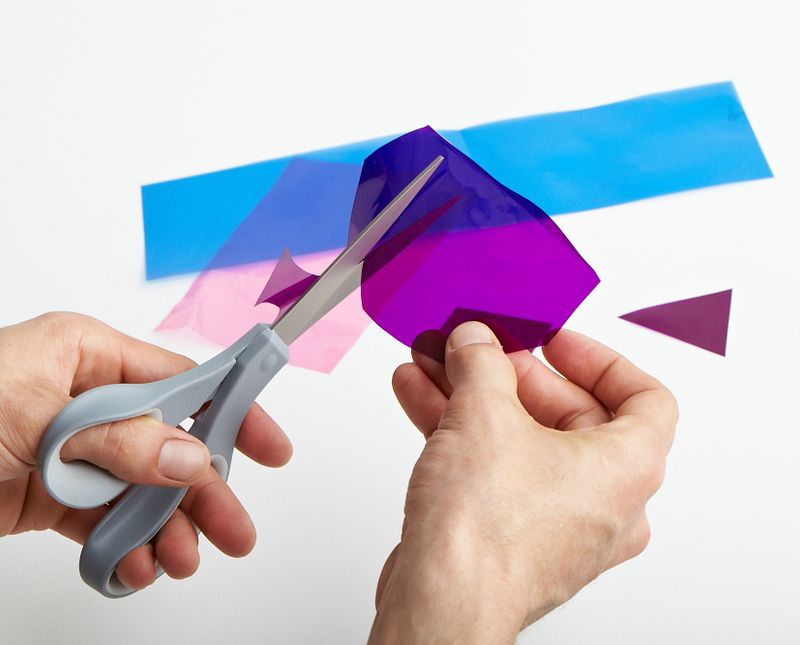
Step 2:  Cut shapes from cellophane.

Celophane_garland_01

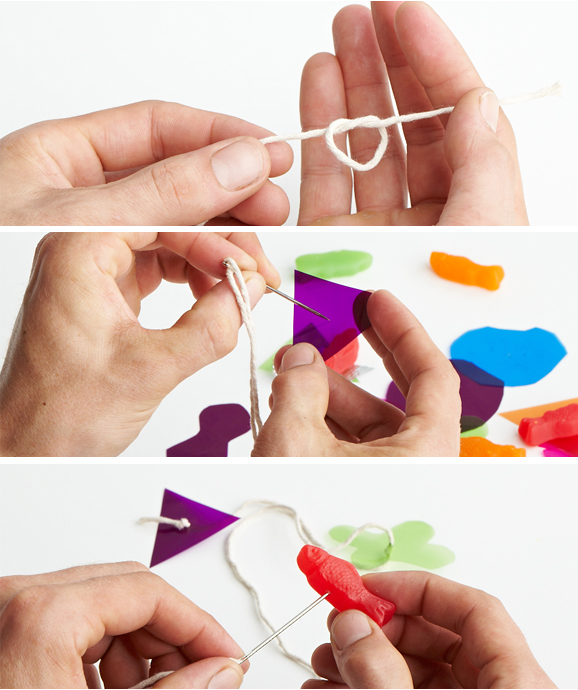
Step 3:  Tie knot in string, then thread with needle through center of cellophane shape.             Tie another knot at desired interval and thread a gummie onto string.

H2n_celophane

Step 4:  Repeat for length of string.

Step 5:  Repeat for the amount of strings you desire to hang.

Step 6:  Hang strings.

Celophane_garland_21

Created by Dane Holweger

A Winter Getaway

December 9, 2011

It is that time of year when the air is turning frosty and the signs of the season are all around.  

Winter_2

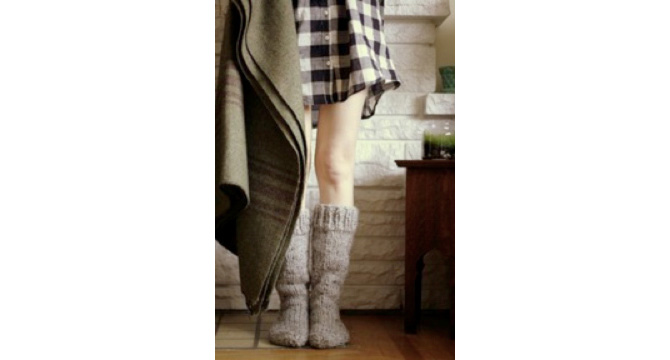
  I wish this was me

Winter_3

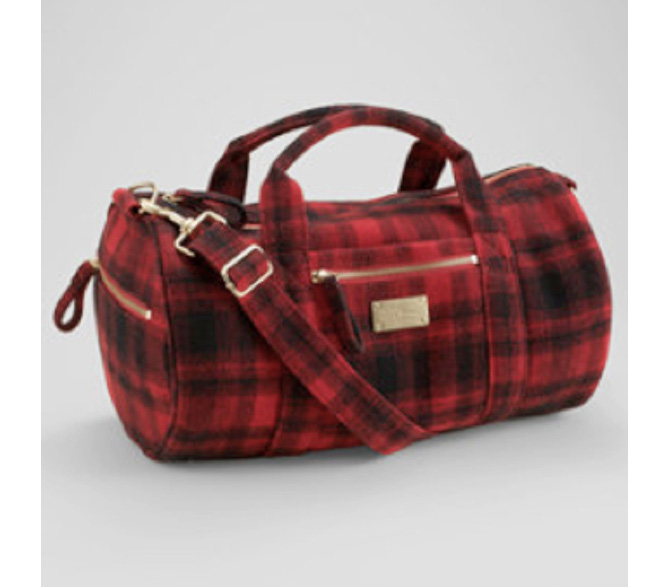
Plaid Weekender

Winter_4

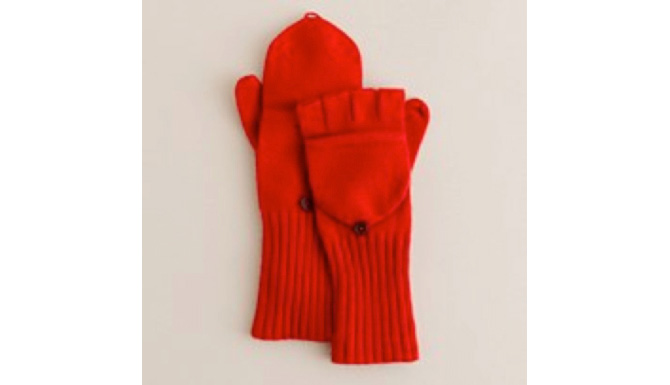
Glittens

Winter_5

A cozy sweater

Winter_6
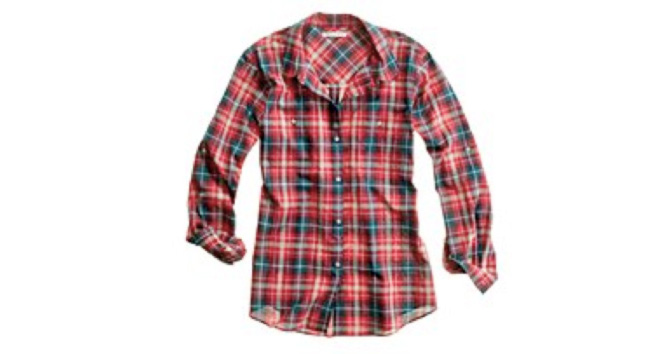
A perfectly plaid shirt


Winter_7

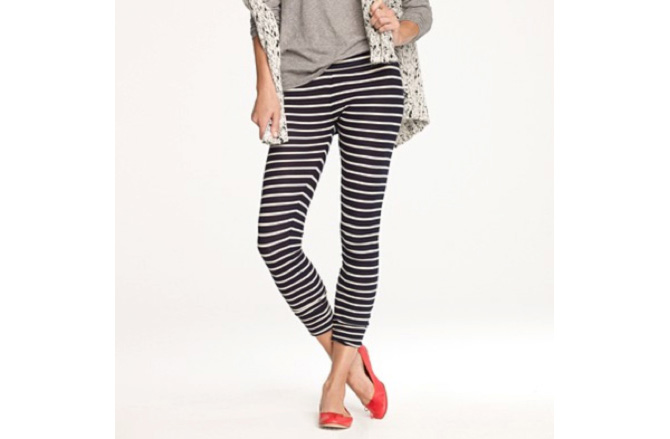
Lounging leggings


Winter_8

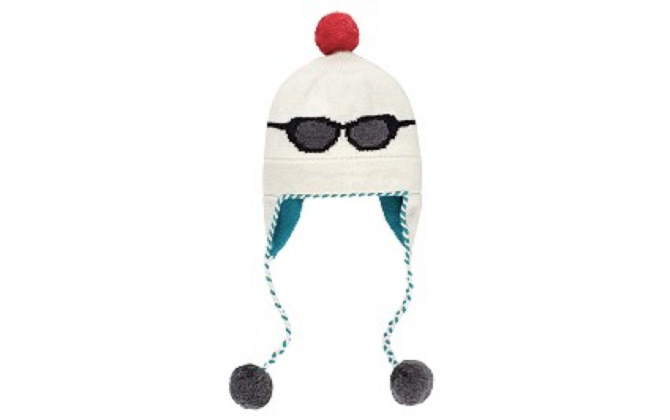
Snow Hat


Winter_9

Snow Boots

Winter_10
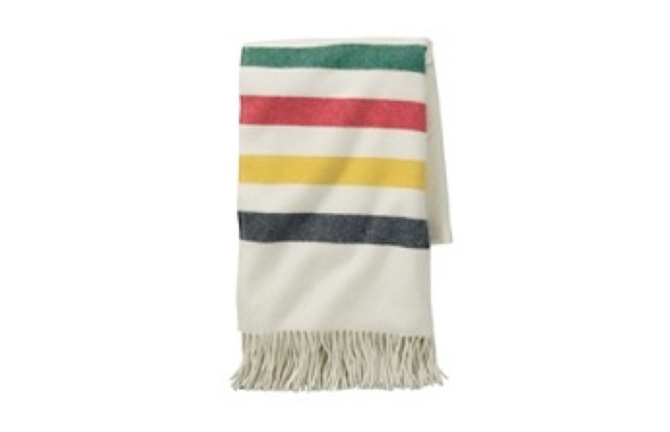
A warm and cozy throw


Holiday tunes

Winter_11

Christmas sparkle

Winter_12

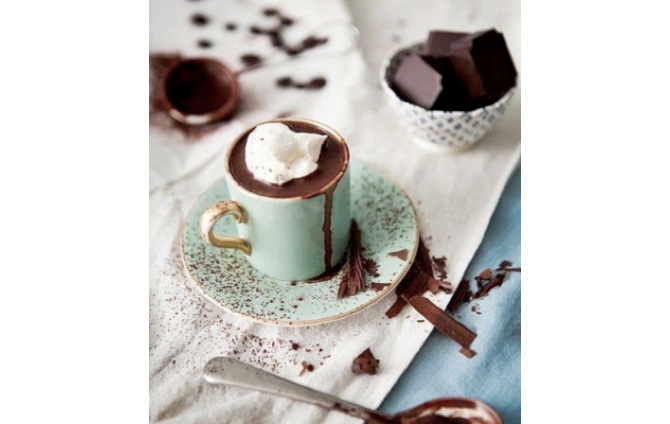
A hot drink to sip

Winter_13

That pile of books I keep meaning to read


Winter_14

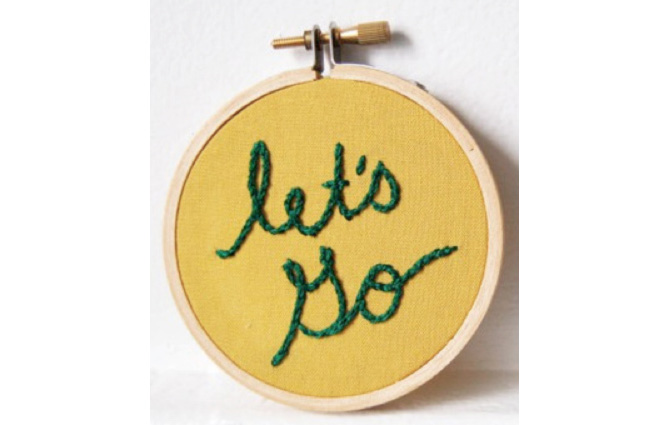
I agree! Let’s go!


By Sarah Culbertson
Once upon a time a fashion plate from Seattle met a childrens retailer from Chicago, and it was love at first sight.  After spending a lot of time together at the mall, they both knew it was a perfect match. So Sarah packed up her fabulous Kate Spade suitcase and headed for the Windy City. Where they lived happily ever after, designing and developing textiles for little kiddos everywhere.
  

DIY Fuzzy Little Felt Trees

Post by Kerry MacLeod of www.snickerdoodles.ca
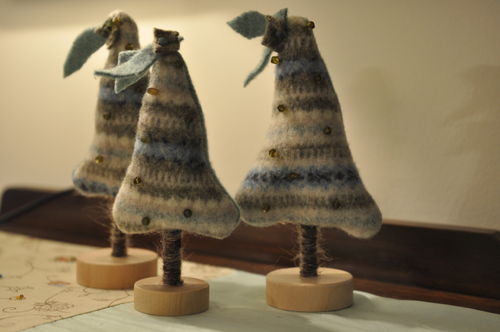
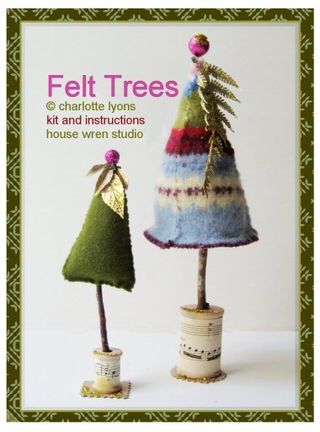
DIY Fuzzy Little Felt TreesThese fuzzy little felt trees was our Make & Take project last night and they turned out really cute. I was inspired by Charlotte Lyons and her amazing blog House Wren Studio. This was the image I found on her site that I used to lure friends to come craft with me…

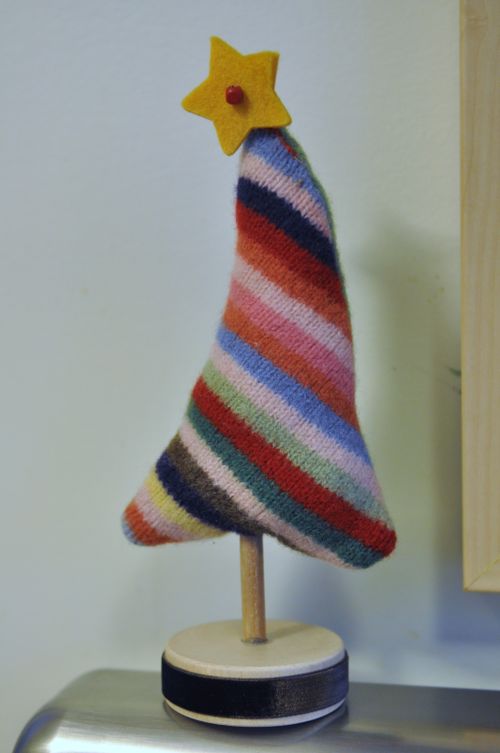
DIY Fuzzy Little Felt Trees 2Here is how we made our DIY fuzzy little felt trees:

  • Over the last two years I have been saving up wool and lambswool sweaters, by washing them in hot then cold water and shrinking them they get really thick and felty.
  • The stands are small, pre-drilled pieces I bought at Windsor Plywood, they were about $1.80 each, then the trunks are just doweling cut into 5 inch lengths.
  • Make a tree template out of stiff cardboard and trace it with chalk onto your fabric of choice. Hilarie used a lovely mossy velvet on the backside.
  • Cut out the shapes. Make the sizes a little different to keep them interesting.
  • Sew on any decorations or beads you would like to decorate your tree, leave about a half an inch around the outside to allow the machine foot to pass.
  • Put the pieces right side in and stitch all the way around…leave about an inch and a half at the bottom to stuff your tree and insert the stick.
  • Once stitched turn it right side out and stuff through the bottom. Sneak a little white glue in the bottom them insert the tree trunk and stitch tightly around the stick and close the opening.
  • Now you can add a little decoration to the top if you like. Use your imagination.
  • The bases can be decorated with wool, glitter, paint or a simple clear coat.

This one is my favorite and I’m keeping it. It was a bit of a fluke that turned out well. It is a little bit Dr.Zeussy and I love anything Christmas with colour and whimsy. I am going to do a few more with an outside blanket stitch and maybe attempt a 3-D version…also love her idea to use spools.

DIY Fuzzy Little Felt Trees 3

Post by Kerry MacLeod of www.snickerdoodles.ca

This & That

December 8, 2011

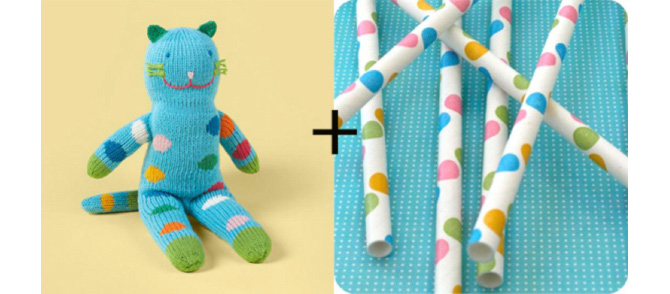
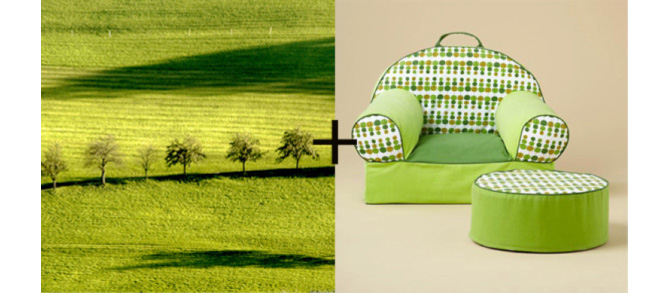
As a product designer, people often ask where I get my inspiration from. It can come from anywhere!

Thisthat_1

blablaℱ Mini Bubbles + Confetti Straws


Thisthat_2

Autumn Trees + Leaf Nod Chair and Noddoman Ottoman


Thisthat_3

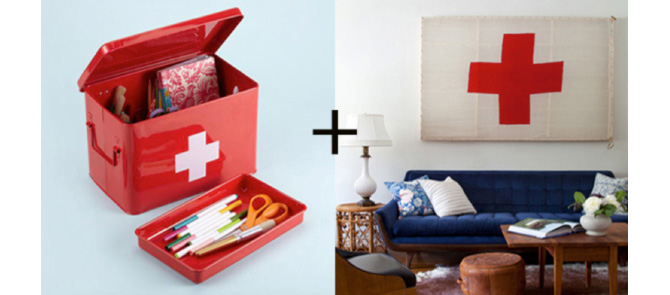
Storage is the Best Medicine + Emily Henderson Room


Thisthat_4

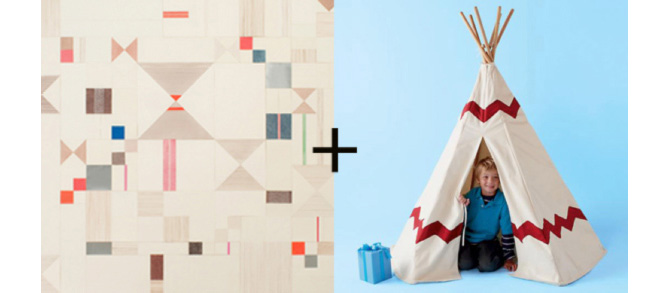
Lena Wolff Paper Quilt + Meet Me in the Teepee


By Anna Passadori
Anna develops and designs exclusive product for The Land of Nod. She hails from the west coast and has traveled the world to source product. She loves anything Marc Jacobs, Sofia Coppola or stripes! (So, if anyone can get a photo of Sofia Coppola wearing a striped outfit by Marc Jacobs, please send it along.)

Merry Peppermint Marshmallows

Post by Aimee and Bettijo of www.supermomments.com
Merry Peppermint Marshmallows Wednesday was our neighborhood cookie exchange party. One word to describe the evening: YUM! This year I decided to stretch the cookie theme, so instead of making a traditional cookie, I made marshmallows from scratch. They were well-received, so I think my gamble paid off.

My friend had sent me this link for a great recipe. And a great recipe it is. In fact, it’s so delicious, I single-handedly ate at least 500 marshmallows during the dipping process. (I highly suggest buying enough supplies to make a couple batches in case you find yourself downing a few too many, as well.)

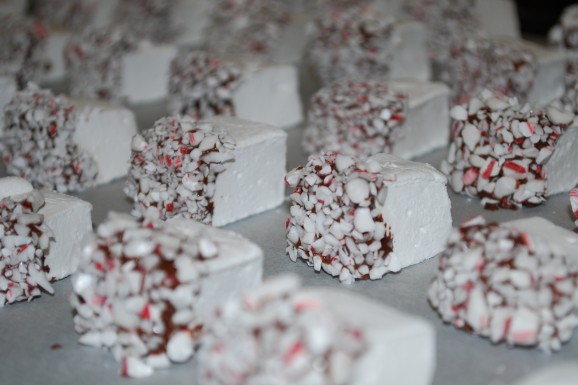
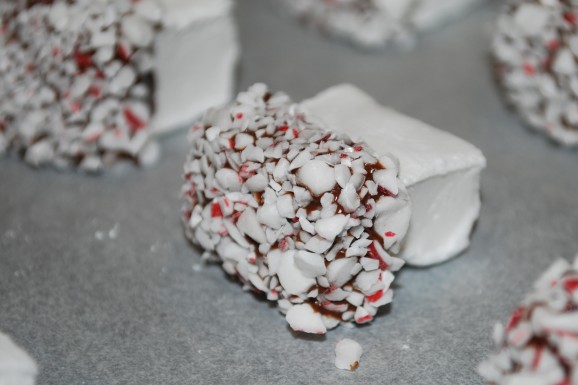
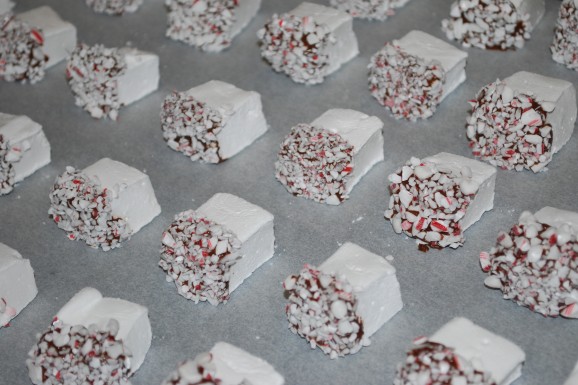
After allowing the marshmallows to dry over night, I cut them into bite-sized pieces before dipping. I dipped my marshmallows in milk chocolate then in crushed peppermint.

Merry Peppermint Marshmallows 2

Merry Peppermint Marshmallows 3Before we get to the recipe, here are a few notes:

(1) One of my batches seemed extra sticky, so as I cut each square, I dipped the edges in powdered sugar. Worked beautifully.

(2) Cutting the marshmallow with a knife was nearly impossible for me. Instead, I used our kitchen shears, which worked like a charm!

(3) My friend Michelle told me she dipped her marshmallows in crushed candy canes and white chocolate shavings—that was her ultimate favorite combination. So you may want to try that, too.

(4) To crush the peppermint, I simply ground up candy canes in my mini food processor—so much easier than smashing with a rolling pin!

Here’s the recipe, adapted from Hot Off the Garlic Press:

Ingredients
:: 1 cup cold water, divided
:: 2 1/2 Tbsp unflavored gelatin
:: 1 3/4 c sugar
:: 1 cup light corn syrup
:: 1/4 tsp salt
:: 1 tsp vanilla
:: Powdered sugar

Directions for Making Merry Peppermint Marshmallows:

  • Place gelatin in bowl of electric mixer fitted with a whisk attachment. Pour 1/2 cup cold water over and let sit for 15-20 minutes.
  • In the mean time, in a heavy saucepan combine remaining 1/2 cup water, sugar, corn syrup and salt.
  • Cook over medium heat until mixture comes to the boil. Cover and let cook for 3 minutes.
  • Remove lid, and increase heat to high. Cook without stirring for an additional 5-10 minutes, until it reaches 244F.
  • While cooking, prepare a 9×13 or equivalent pan by greasing with not stick spray. Then line with baking paper, and dust liberally with powdered sugar.
  • After 10 minutes or when 244 degrees is reached, remove sugar mixture from heat. Turn mixer with the hydrated gelatin on to low. Slowly incorporate by pouring sugar mixture down the side into the bowl. Gradually increase the speed of the mixture.
  • Once all sugar mixture is poured in, whip on high for about 10 minutes, or until marshmallow mixture has increased in volume by 3 times and is fluffy white. Add vanilla at this point.
  • Carefully and patiently pour marshmallow into prepared pan and smooth out as best you can. Leave overnight or for 12 hours to set fully. Cut into squares and dust top and sides with powdered sugar. Store in an airtight container for up to a few weeks.

Post by Aimee and Bettijo of www.supermomments.com

Countdown to Christmas – Kids DIY Activity Advent Calendar

December 7, 2011

Post by Christina Williams of justcallmechris.blogspot.com

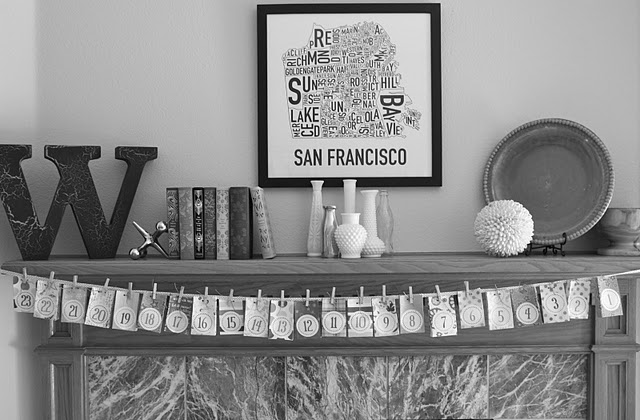
Last year, I scrambled around to come up with a fun advent calendar the day before I needed it. Well, here’s what I came up with. It actually turned out to be such a hit that we’re using it again this year.

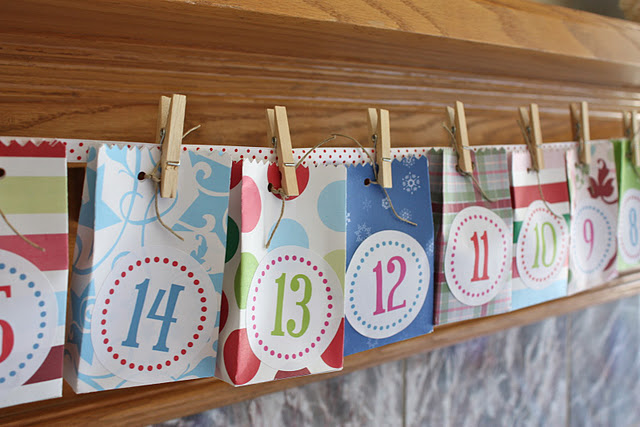
Kids DIY Activity Advent Calendar We made these little bags out of holiday paper, printed a sticker for each day, filled the bags with little activity cards and pinned them up on the mantle.

Kids DIY Activity Advent Calendar I actually used a cutting machine to cut the bags. And I had some mini clothespins that worked perfectly for pinning them up. Inside each bag is a fun (inexpensive) holiday activity that we can do together.

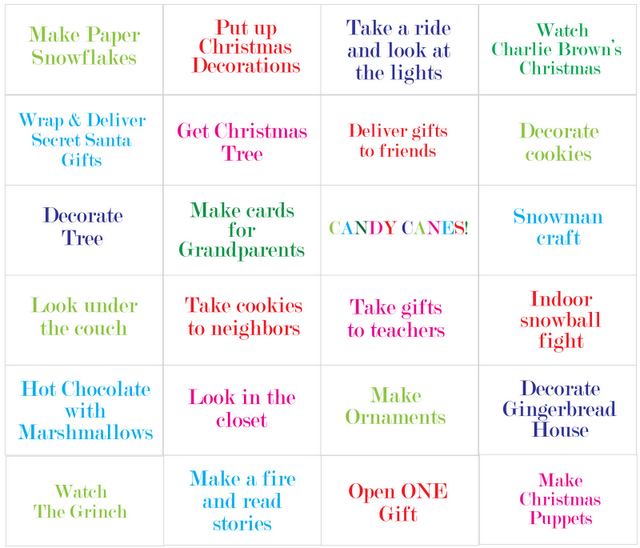
Here’s a little peek at this year’s activities:

Kids DIY Activity Advent Calendar - Activities Looking under the couch and in the closet are activities that reveal a fun surprise: this year, it’s an Elf on the Shelf, and a gingerbread man kit. I also took to pinterest to find some inspiration for other fun activities. I can’t wait for our indoor snowball fight and the snowman craft.

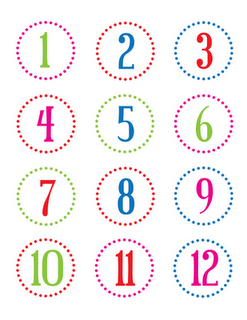
Kids DIY Activity Advent Calendar 4And in case you’re like me and do your best work at the last minute (or a bit on the late side), I’ve created some free printables for the number stickers and the activity cards. I think this would be so cute with little envelopes or tiny brown bags instead of the paper bags.

Kids DIY Activity Advent Calendar - Number Stickers

Post by Christina Williams of justcallmechris.blogspot.com

Organization to rival the Dewey Decimal System

December 6, 2011

LibraryCart_1

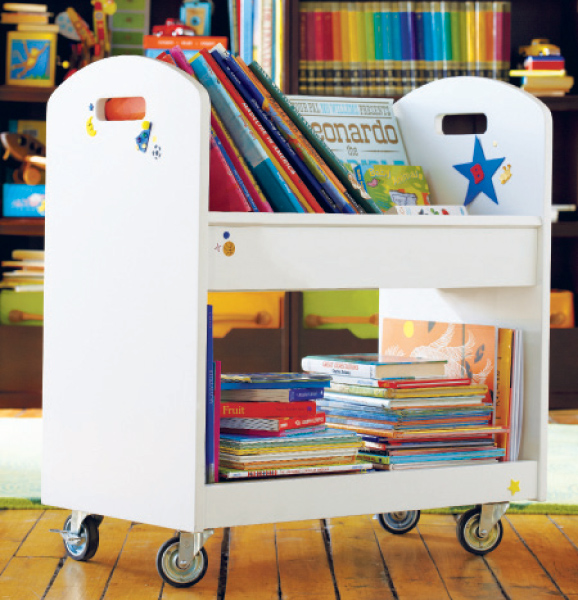
One of the best parts of my job is hearing excited customers anticipate the arrival of their orders.  The other day I spoke with a mom who was so pumped up about her purchase that her enthusiasm was contagious. She was buying two Library Carts, one for each of her sons.          She described how one would fit perfectly in the nursery. She thought the red would coordinate with his window treatments and bring the room together.  The espresso, for her older son, seemed more mature to her.  It would add a sophisticated element with his desk and new non-sports-themed sheets.

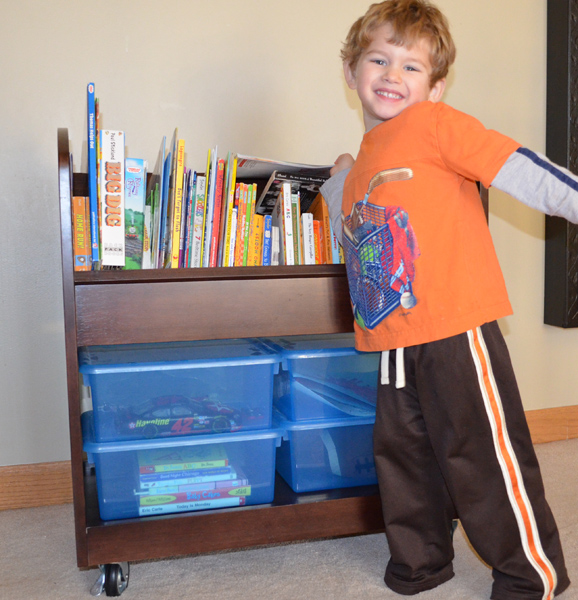
As you can imagine, my home is filled with Nod products. And, as luck would have it, I own, and love, our Library Cart.  I told her that I’d bought the espresso for my son’s room when he moved from his crib to his big boy bed.  I’d  realized that he couldn’t reach the bookshelves on the wall, and this seemed like a perfect solution.  It arrived while my husband, and resident handy man, was out of town.  I enlisted my 8 year old son to help me, and together we tackled the assembly project.  I was pleasantly surprised with the ease of putting it together.  We stood admiring our work and couldn’t wait to show my younger son his new bookcase.  A year later we still love the Library Cart.  My son chooses his bedtime story every night, and I am teaching him to put his books away!  We use Top Boxes underneath to house completed art projects and his beloved cars.

LibraryCart_2

Our customer seemed relieved to hear that my 8 year old and I had no trouble putting it together.  I hope she and her sons enjoy theirs as much as we love ours.  I’m hoping to someday claim it because I see it as the perfect home for cookbooks in my kitchen.  Then again, maybe I’ll just have to treat myself to a second one. 

By Michelle Moody
Michelle is a Supervisor in our Customer Service Department. She’s also the mother of 4 and she moonlights as a professional organizer. She must also either be a superhero or the proud owner of a time travel machine to be able to fit that all in and still find time to write for our blog.


Pecan Blondies

Post by Dawn Viola of DawnViola.com

1
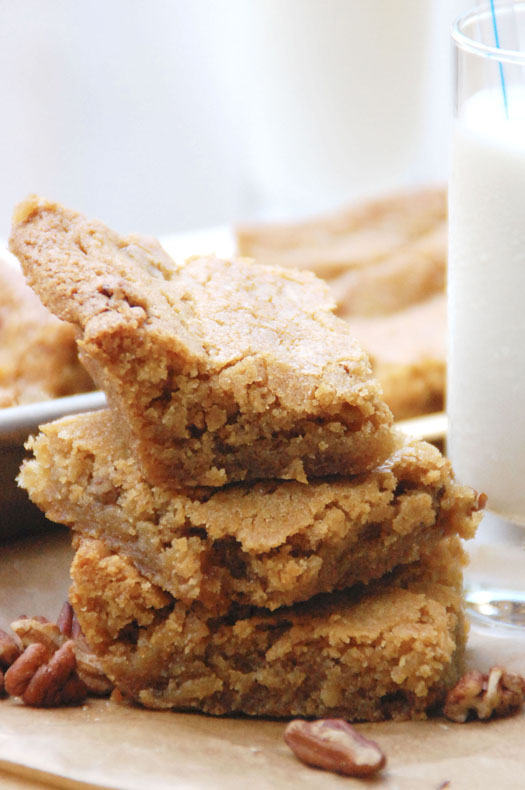
I don’t know about you, but I adore chocolate chip cookies made without the chocolate chips. I was laughed at, teased, picked on for years over my chipless cookie fetish, until I found validation in blondies and spitefully shoved one in someone’s mouth to keep them quiet. They asked for another.

Blondies are chewy brownie-like cookie bars that get their flavor from butter and brown sugar (blond[e]) rather than chocolate or cocoa powder (brown) in traditional brown(ies). The ingredients, in fact, are the very same ingredients that go into chocolate chip cookies, without the chocolate chips. And just like chocolate chip cookie dough, blondie batter can be baked into bars, as we’ve done here, or baked as drop cookies.

Pecan Blondies

Yields: 16 large bars
Prep time: 10 minutes
Cook time: 40 minutes
Allergy info: soy-free; contains gluten, dairy, eggs, pecans

Ingredients:
2 cups unbleached all-purpose organic flour
1/4 teaspoon baking soda
1 teaspoon baking powder
1/4 teaspoon kosher salt
1 cup butter (2 sticks), softened
2 cups firmly packed organic brown sugar
2 large eggs, beaten
2 teaspoons vanilla extract
1/2 cup chopped pecans

Directions:

Preheat oven to 350 degrees F. Coat a 9×12-inch baking pan with butter; line with parchment paper. Coat parchment with butter; set aside.

In a small bowl whisk together flour, baking soda, baking powder and salt; set aside. In a medium bowl, using an electric mixer on medium speed, mix together butter and sugar until well combined. Add egg and vanilla; beat until incorporated. Using a mixing spoon stir in flour mixture until moistened. Stir in pecans.

Spread batter evenly into prepared baking pan. Place pan in oven. Bake 40 to 45 minutes, turning half way through bake time, or until a wooden toothpick comes out with a wet crumb when inserted into the center of the batter. Let cool 30 minutes. Cut into squares. Store in an airtight container up to 3 days, or freeze up to 1 month.

Need more tasty recipes and delicious bites? Check out our Let’s Eat Pinterest Board.

Post by Dawn Viola of DawnViola.com

Trend Alert: Foxes

December 5, 2011

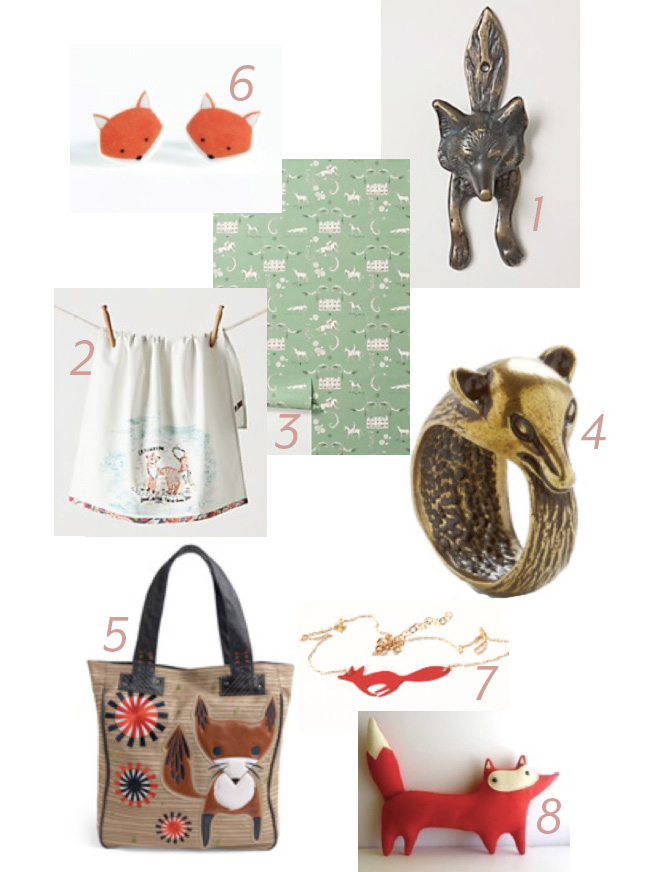
These sly little guys are popping up all over, from jewelry to dĂ©cor.  

Foxes1

From Anthropologie.com

1. Sly Fox Knocker

2. Lady Of The Manor Wallpaper

3. Wild Wisdom Dishtowel


From modcloth.com

4. Crafty Campanion Ring

5. Think Inside the Fox Tote


From etsy.com

6. Fox Earrings

7. Wild Thing- RED running FOX pendant and chain

8. Liam – The Woodland Fox

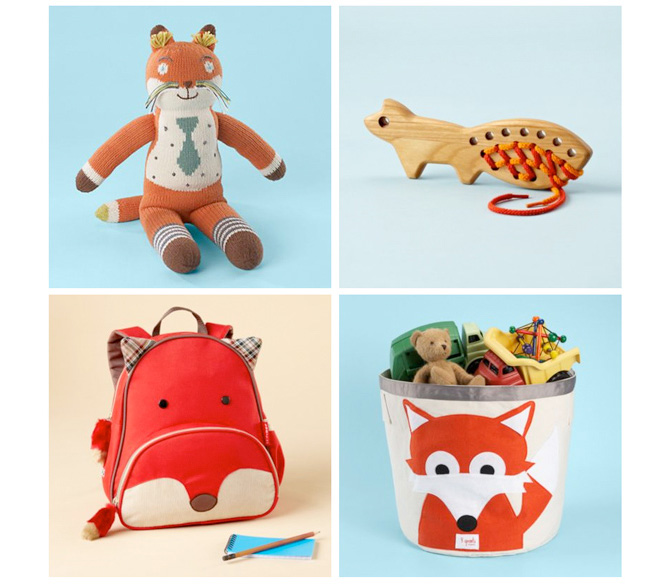
Now you can add a few sneaky creatures to your kid’s rooms too:

Foxes2

Socks Fox $46

String Theory Lacing Game $14.95

Smart as a Fox Backpack $20  

Like a Fox Storage Bin $40 

By Sarah Culbertson
Once upon a time a fashion plate from Seattle met a childrens retailer from Chicago, and it was love at first sight.  After spending a lot of time together at the mall, they both knew it was a perfect match. So Sarah packed up her fabulous Kate Spade suitcase and headed for the Windy City. Where they lived happily ever after, designing and developing textiles for little kiddos everywhere.


I’m Not Bored Anymore Art Jar

December 3, 2011

1
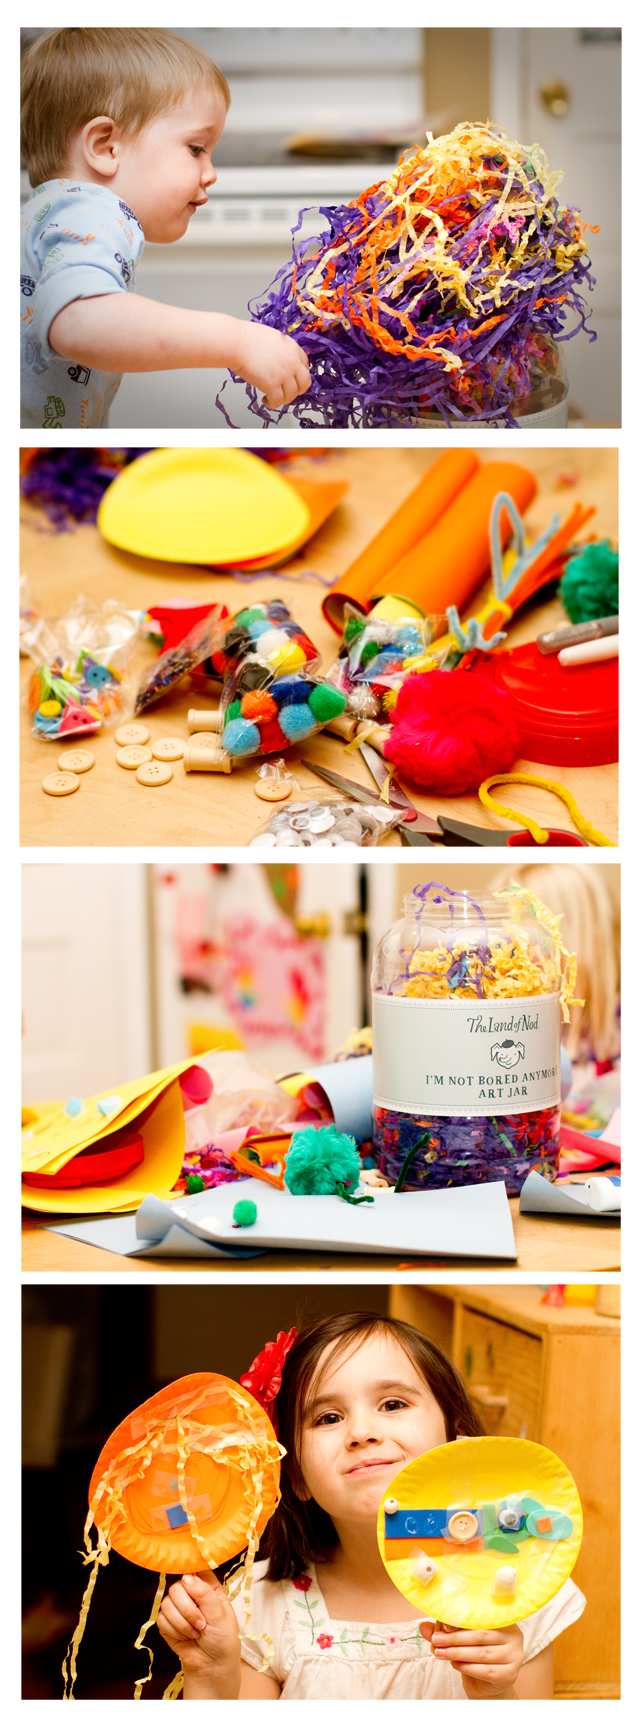
When Land of Nod contacted me about the possibility of hosting a review at first I was elated (yay! free stuff, we love free stuff!). But then I became somewhat hesitant. I don't want to become one of those blogs that is always hawking other people's stuff and saying things along the lines of – "today we drank yummy Minute Maid juice with our breakfast (so nutritious, I wouldn't drink any other kind) then we packed up our safe, wonderful Odyssey mini-van so we could stay for free at the Ramada, which was seriously the best hotel ever." On the other hand, I work hard at blog and if companies want to give me free stuff (especially stuff that appeals to my readers) I'm okay with that. All of this is just to say that I promised myself that when it came to reviewing the "I'm Not Bored Anymore" jar I would be honest. If we hated it, well, then we hated it.

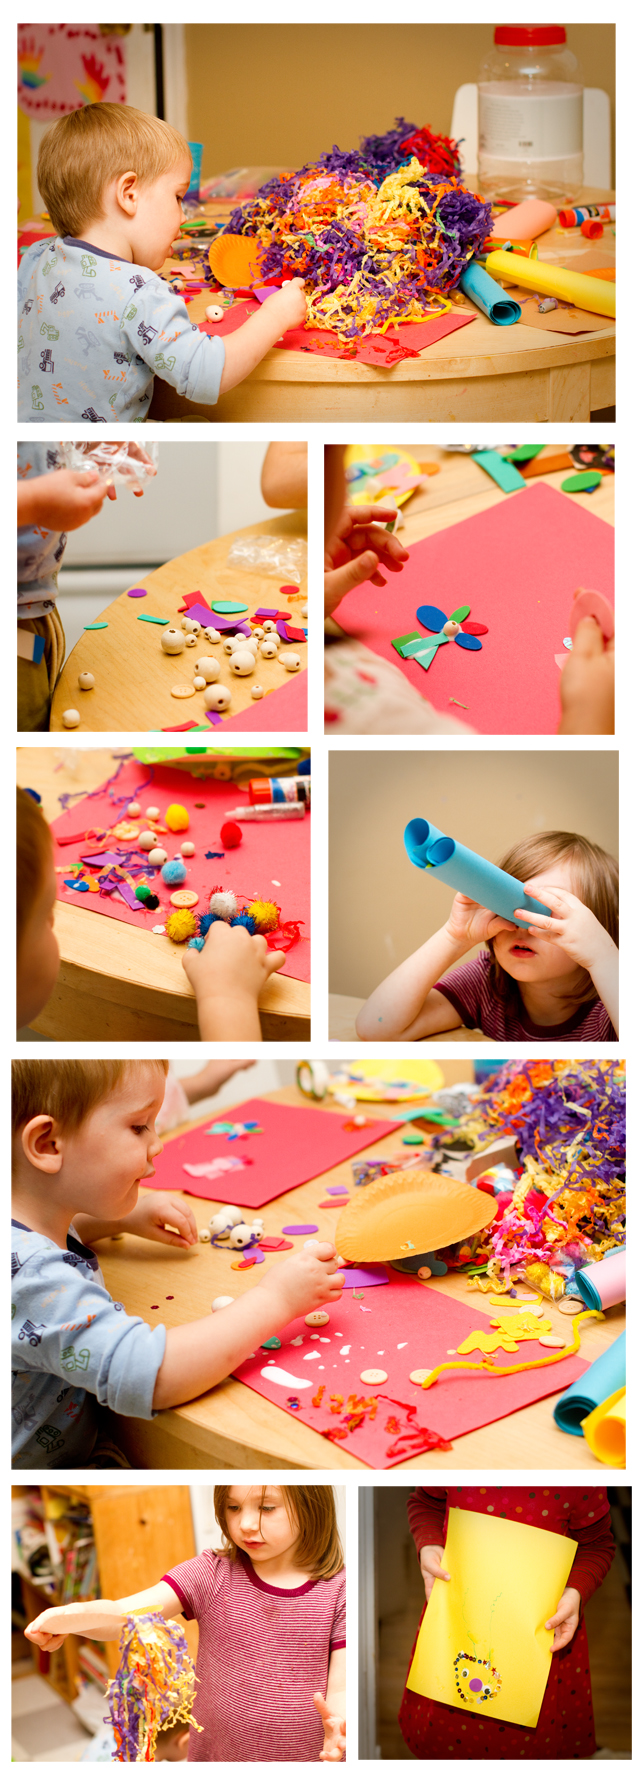
Luckily, the jar was a HUGE HIT. F actually called it "the coolest thing I've ever done" (seriously? even better than Disney? why do I even try?). The jar's magic apparently stems from the fact that it lets kids create on their own terms. Nobody is telling them what to do, yet at the same time they're being provided with all the "tools" that kids love – a whole jar full of confetti, googly eyes, glitter, pipe cleaners, pom poms, funky scissors, wood knobs, beads, foam shapes, felt letters, brightly-colored paper plates (these were a huge hit), etc. Even T had a blast "I like it mommy, I like it" (the jar is recommended for kids 6 and over but T scoffs as such age restrictions).

We now take out the jar every few days, as it has become our solution to those after-school BLAHs. And I really enjoy seeing the -sometimes odd – stuff my kids come up with – F decided to make her own "I spy" letter picture (I hate to be a downer, but the letters were pretty easy to spy), P created all these beautiful drawings with glitter details, and T lined up balls and pom poms in little rows. On the downside, the jar comes with glue and glitter-glue but we quickly ran out, so I'd make sure to have some extra around (extra scissors and scotch tape also proved helpful).

5Post by Darcy : bedtimemonsters.blogspot.com

Fresh Beats + DiY Record Cakestands

December 2, 2011

Post by Becca of CAKE

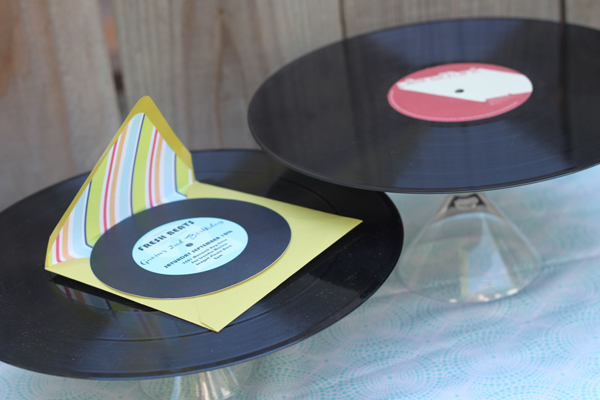
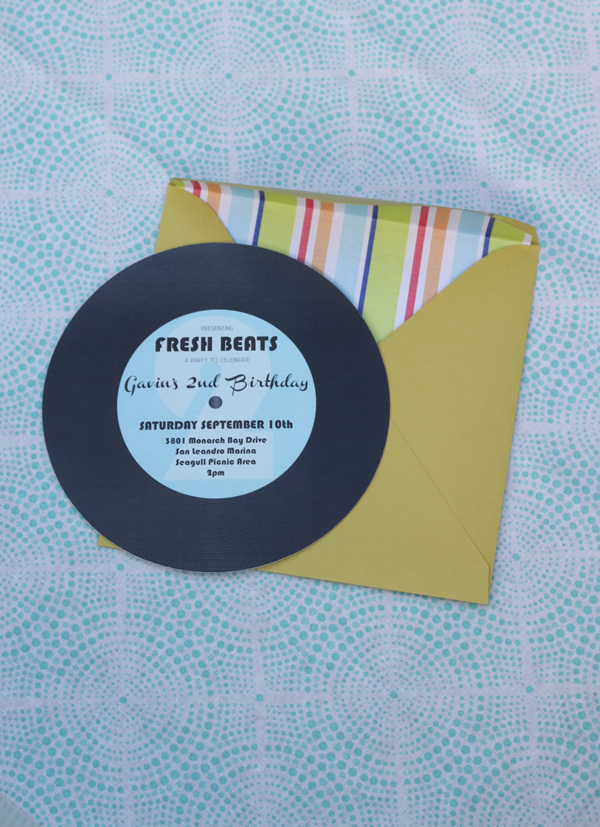
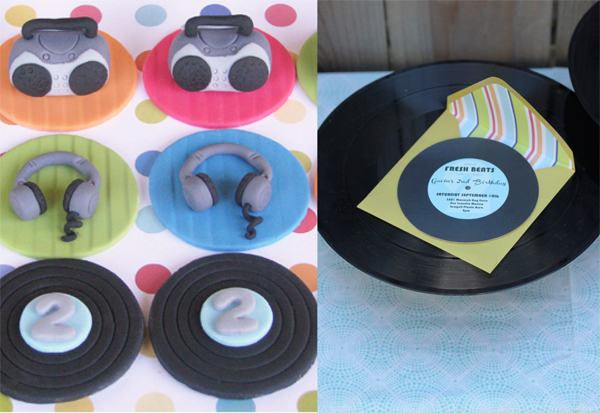
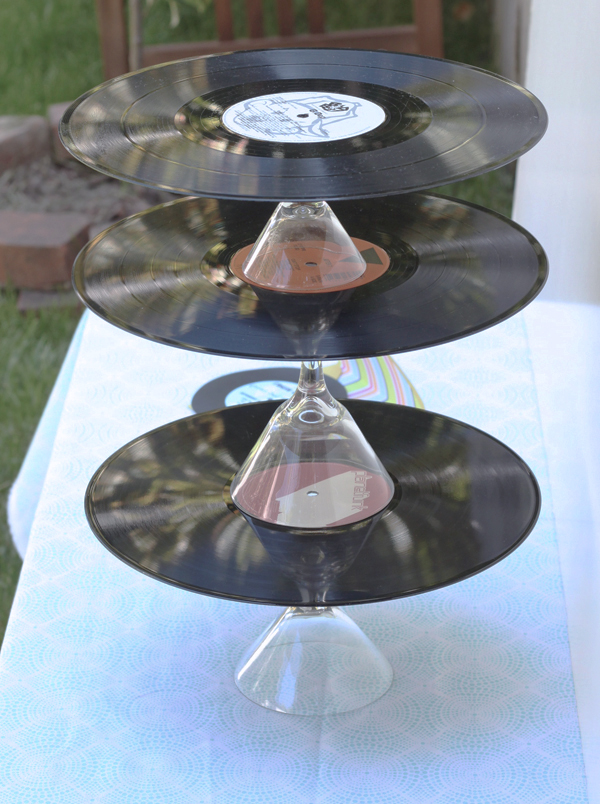
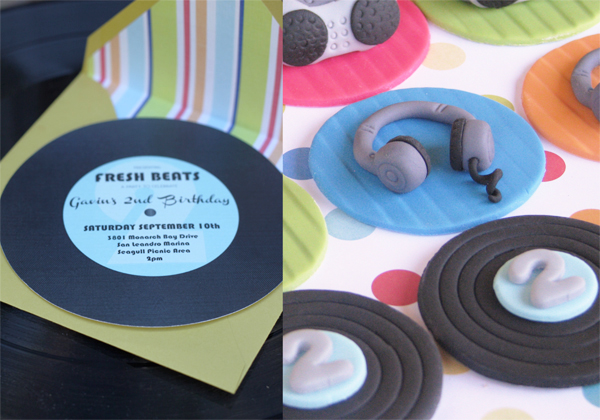
A few new projects to share with you this week… naturally, I think this one rocks. A client wanted a DJ for her son’s 2nd birthday in the park, so we came up with a ‘Fresh Beats’ theme, incorporating bright colors and a throwback style. I designed a record invitation and retro envelope liner, as well as creating these simple record cake stands by hot-gluing upturned martini glasses to the base of some classic vinyl. So easy! The cupcakes were blue velvet {a twist on red velvet} as a nod to rock icon Elvis. We ordered toppers from Lynlee’s Petite Cakes in the shape of records, headphones + boomboxes and she completely out-did herself with these detailed designs. The favors were small musical instruments and custom CDs.

1

2

3

4

5

photos + styling © cake. 2011

Invitations + Liner: Designed by CAKE.
Envelopes: Paper Source
Records: Rasputin Music
Fondant Toppers: Lynlee’s Petite Cakes

Post by Becca of www.cakeeventsblog.com

Take a Letter

December 1, 2011
Land of Nod (a)

Hi, Taylor Made here with an exciting review…

The awesome people at The Land of Nod decided that for Christmas they were going to let me choose a toy to review with my kids then I get to give the same toy away. First of all…deciding on the toy was hard , it was like I was 10 again with a permanent marker and a toy catalog. Then I remembered I am a mom…oops. I wanted something that both of my boys could play with and I wanted a toy that would last a long time. One good thing about their toys is that they are high quality, and constructed well. My husband wanted the golf set or the race cars, both good options but I went with the ABC Puzzle. A classic.

Someone liked it…


What we love… the bright colors (from water based paints) and ease to find the right letter for each spot. It was also fun to spell out other words.

The exciting part- we all played for 45 minutes. This is not common is our house!

The box said the puzzle is for 3+ and my boys are 10 mos and  2yrs. I am the type of Mom that doesn't pay close attention to that as long as I have a close eye on them. Now, either my son is a prodigy (quite possible 🙂 or this puzzle is appropriate for a 2 year old to actually use. He did this by himself (ps how creative is the" E" turned sideways for the "W"?)

Brother joined in too.
we…
Thanks Land of Nod! Come stop by Taylor Made for DIY, crafts, and kids.

Scrunched Scarves

November 30, 2011

1

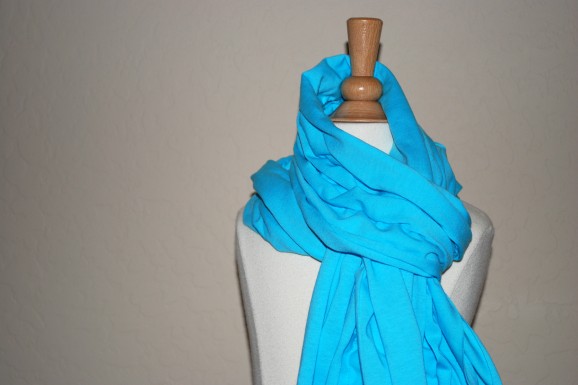
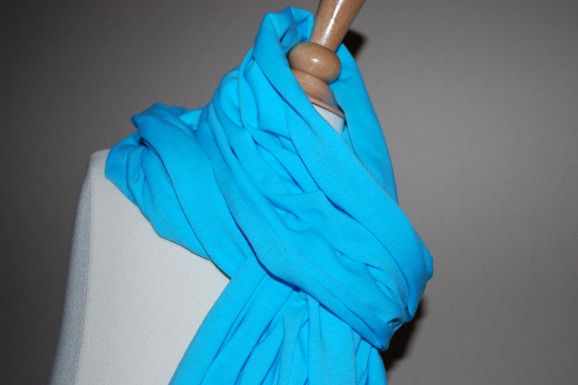
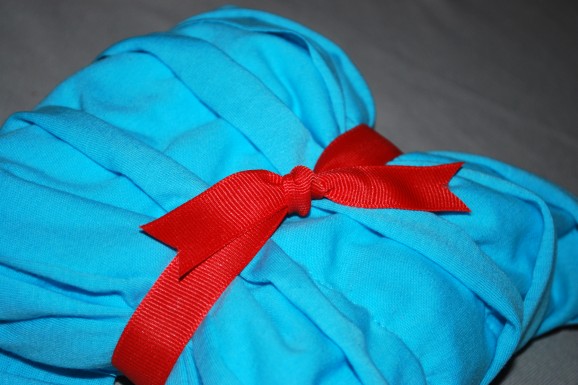
This scarf is so fun, quick and economical, I just had to pass the idea on to you. Plus, this is a handmade gift you can give to all the Supermoms you know.

So I was shopping a few weeks ago and came across several really cool scrunched scarves.       In my very Aimee-esque way, I refused to buy them. (I would love to allow myself to buy something I am capable of making, yet for some reason I always deny myself that privilege.)      So on the way home I stopped by the fabric store to buy supplies to make some “special recipients” a handmade, scrunched scarf! Of course, I had never used elastic thread before, so I read up a little and went at it. So simple. You can do this even if you think you don’t sew!

2

You will need:
:: Light-weight fabric (I used knit so I could leave the edges raw)
:: Elastic thread
:: All-purpose thread (that coordinates with your fabric)
:: Yard stick
:: Tailor chalk
:: Hand sewing needle

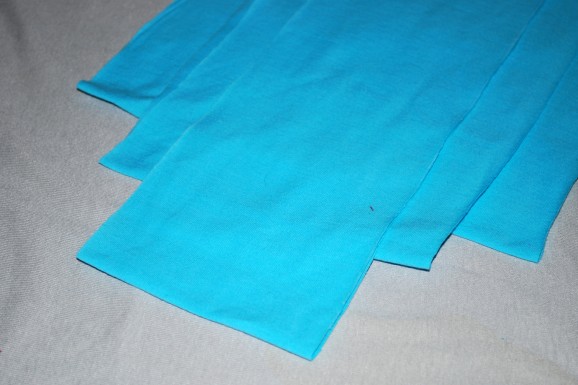
1 :: Cut your fabric to your preferred length and width. I decided to layer three strips for added fluff, so my pieces were 8”, 6” and 4” wide. Each piece was 72” long.

3

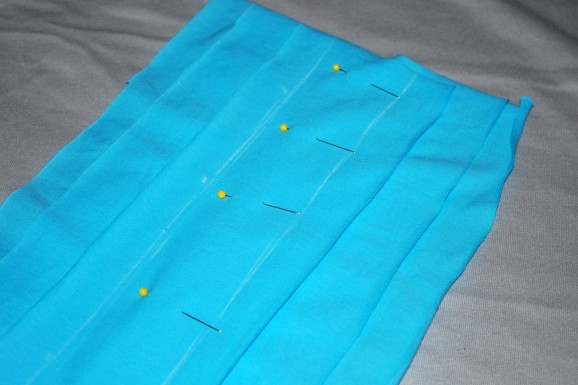
2 :: Layer your pieces and pin in place. Using your yard stick and tailor chalk, mark your stitching line. I decided to stitch about 1” inside the edges of the 4” wide top piece.

4

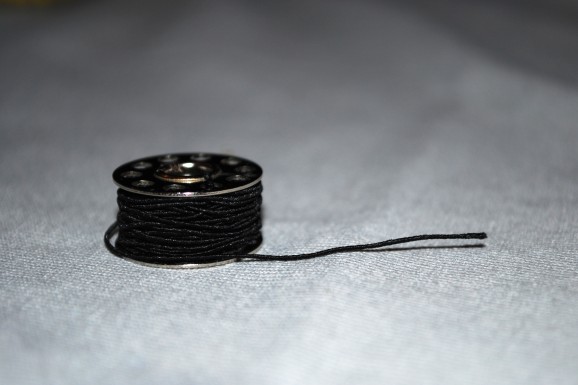
3 :: Loosely wind your bobbin with the elastic thread by hand. Be sure not to stretch the elastic as you’re winding. Use your coordinating all-purpose thread on top and your elastic thread in the bobbin. Set your machine to a long straight stitch.

5

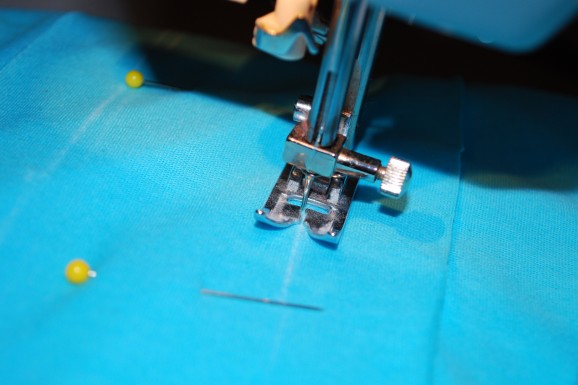
4 :: Remembering not to back stitch, sew along your chalk line. Repeat with the other chalk line.

6

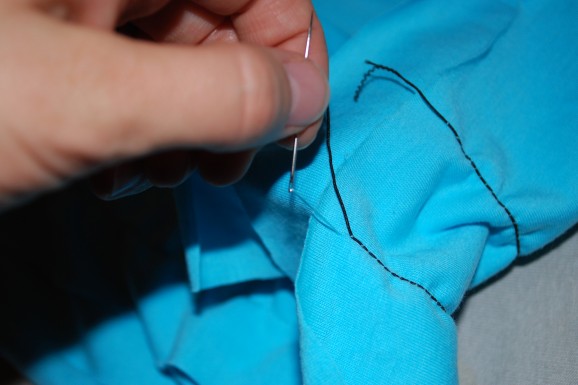
5 :: After stitching, use a hand sewing needle to pull the top thread through to the bottom (elastic side) and hand knot with the elastic to prevent unraveling. Trim the thread.

7

6 :: Fluff and gift!

8

As with every handmade gift, you can adapt these instructions to fit your needs. Shorten the length to make for a young girl; use several colors and patterns of fabric to add some texture; try this technique on an inexpensive store-bought scarf. Either way, if you make a scarf, let us know!

Post by Aimee and Bettijo : www.supermomments.com

The 13 Toys from the Nod Catalog that Made the Connor Approval

November 29, 2011
Connor_1By Connor K., Age 10


Connor_2

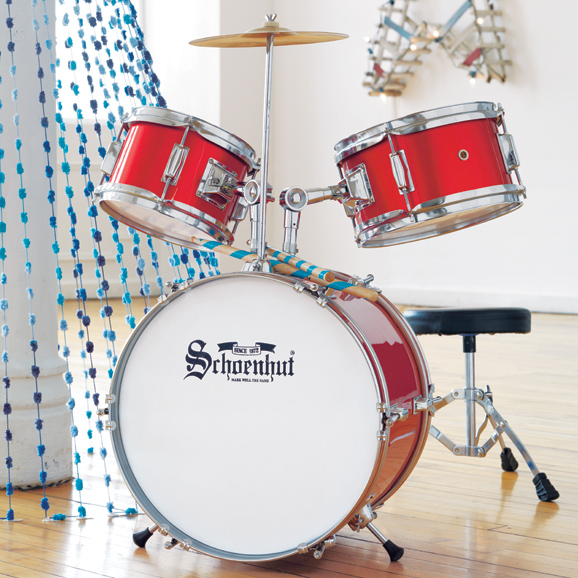
1. Drum Set

Why? Because who wouldn’t want a drum set to bang on and annoy your parents to the edge.
Connor_3

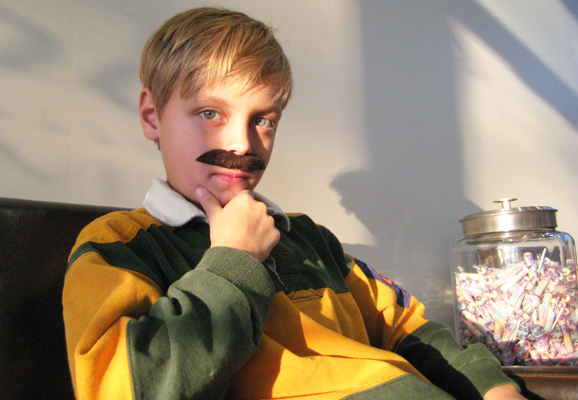
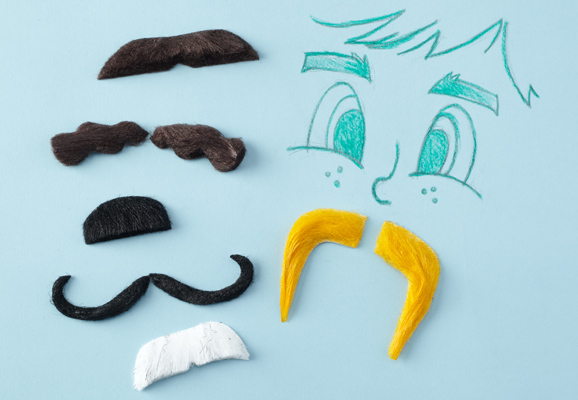
2. Mustache Set

Why? Because I’ve had them before and they are some of the best mustaches I’ve   ever had. {But remember they get itchy after a while.}
Connor_4

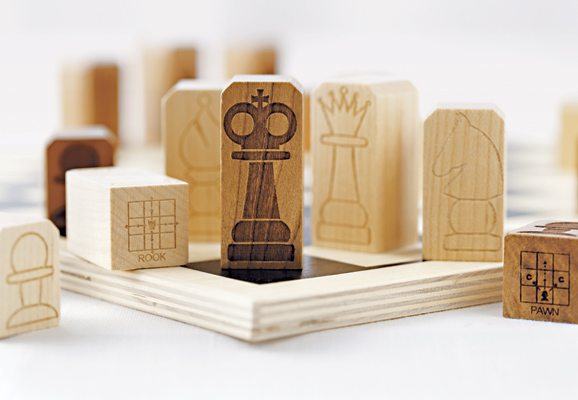
3. Chess Set

Why? Because who doesn’t enjoy a game of chess, and if you don’t know how to play its never too late to learn, and if your too lazy to even do that, get off your bum and do something.
Connor_5

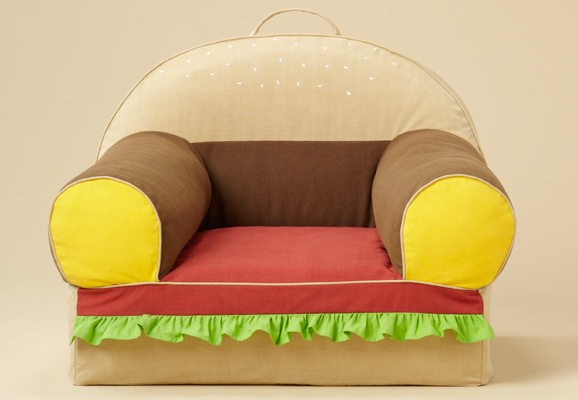
4. Hamburger Nod Chair

Why? Because did you hear the name? Hamburger Chair. And who on earth {beside vegetarians} wouldn’t want a hamburger chair, and it’s the best selling chair this season.
Connor_6

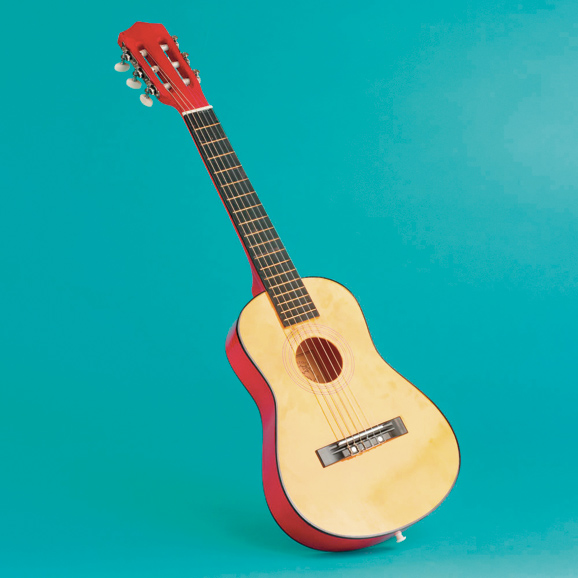
5. Acoustic Guitar

Why? Because wouldn’t like to have a friend over and tell him that you can play the guitar. But the next thing is a little cooler than this


Connor_7

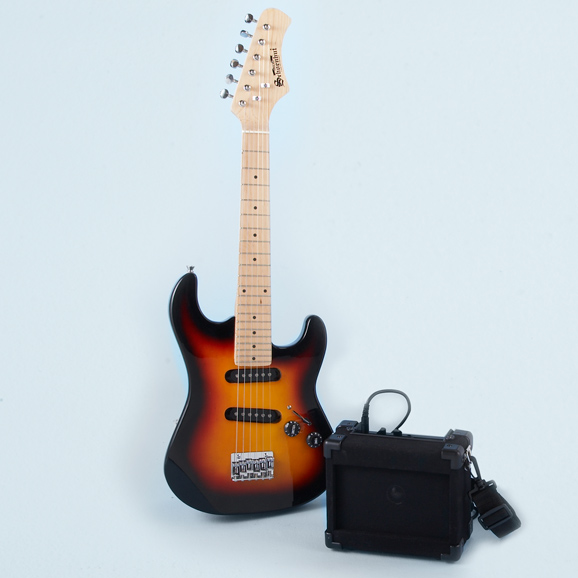
6. Electric Guitar

Why? Because then you can really rub it in your friend’s face that you are a rock star, and you can show off to impress the girls.
Connor_8

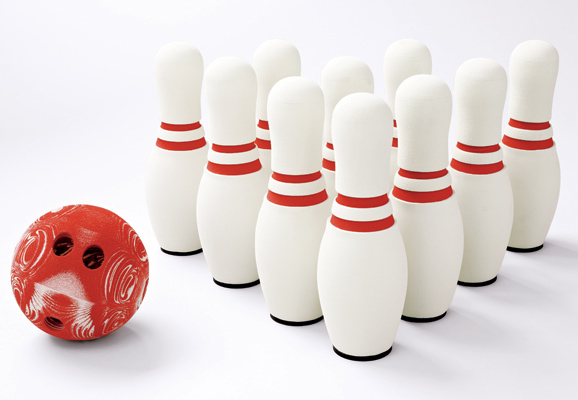
7. Bowling

Why? Because if your family doesn’t always have the time like my family to go to Pinstripes then you need the bowling set. It’s safer then using a ten pound ball and easy to play, but don’t play around breakable objects, I learned that the hard way.


Connor_9

8. Basketball Hoop

Why? Because I have it and it brings fun ,enjoyment and being able to dunk all in one thing. When you dunk try to make yourself as Michael Jordan then pretend that there’s a crowd that will cheer you up when you get a C on your math test.
Connor_11

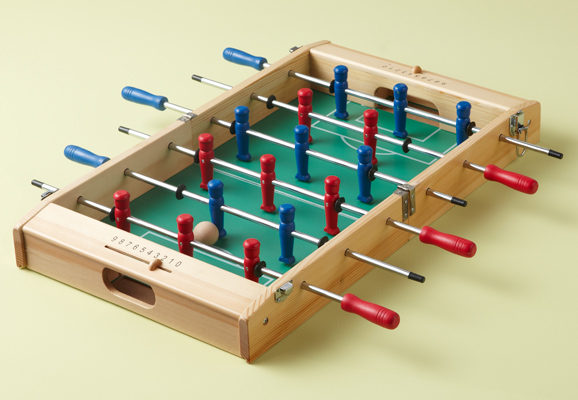
9. Foosball

Why? Because who isn’t a fan of the game, I mean who doesn’t like fake plastic guys in shorts attached to a sticks kicking around a plastic ball? Okay never mind that last comment. Now, as I was saying, if you’ve never played a good old fashion foosball game you should be arrested, I mean it’s like never eating a hotdog for crying out loud!!!
Connor_10

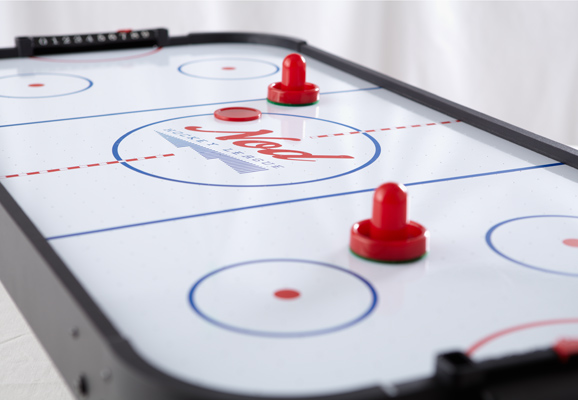
10. Air Hockey

Why? Because it’s air hockey. Everyone likes it. It’s like the miniature version of hockey and I bet $100 that if you ask anyone if they want an Air Hockey table, they will say yes and even I would want one if I didn’t already have one.
Connor_12

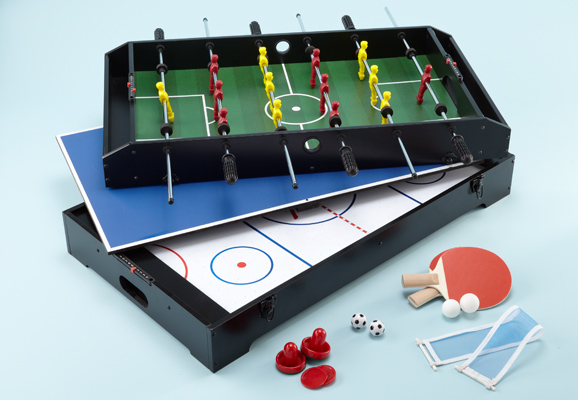
11. Three-In-One Table

Why? Because it combines three of my favorite things on this foosball, ping-pong, and air hockey and it’s all of those in one table so you can have three of the best things whereever you go.
Connor_13

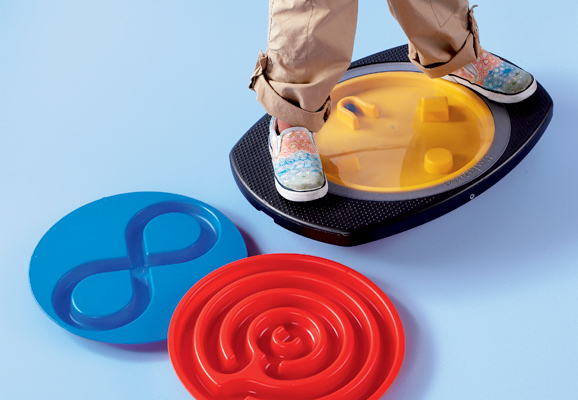
12. Balance Board

Why? Because it’s like surfing but inside and you also at the same time have to get a marble through the maze inside. It mixes strategy with balance and are you up to the test to conquer the balance board?
Connor_14

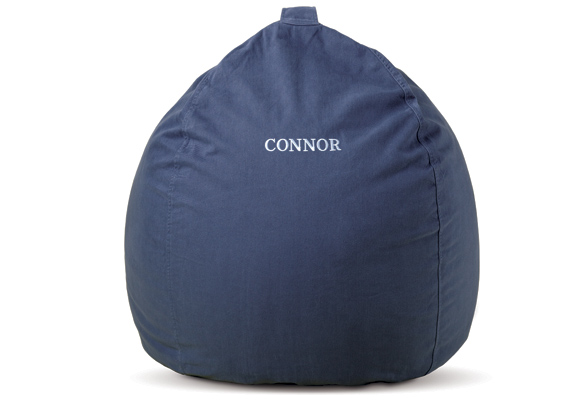
13. Blue Ginormous Beanbag with the name Connor on it

Why? Because it has my name on it and it’s a bean bag.
I’m Dreaming of a Red & White Christmas

Post by Anna Passadori, Nod’s resident trend expert
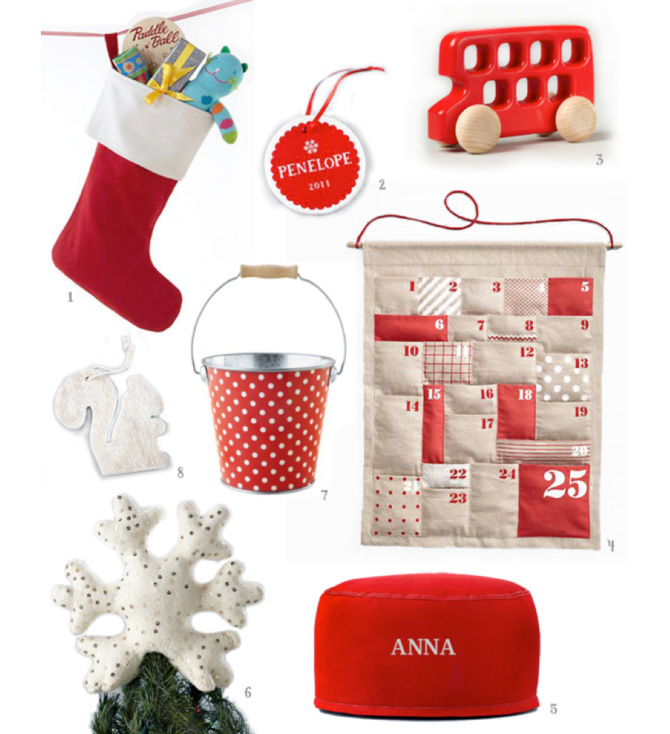
Red & White Christmas Decorations

There’s something about red and white Holiday dĂ©cor that is so classic and clean!  I also love to mix in materials such as wood, wool felt, galvanized metal and linen for a natural and contemporary feel.
1         In My Day, Stockings Only Came in Red, as shown $25

2         You Name It Ornaments, $14.95

3         Double Decker Bus, $14.95

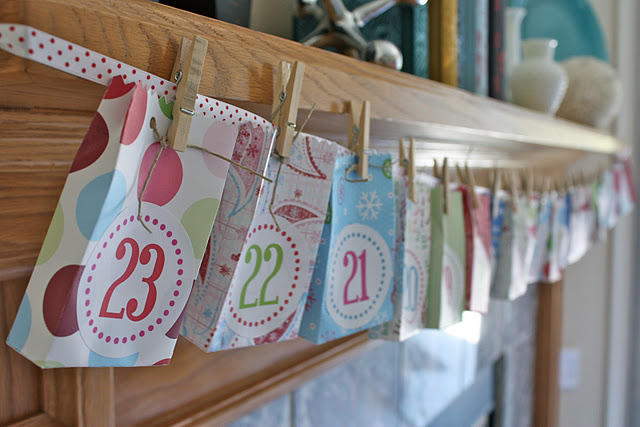
4         All Shapes and Sizes Countdown Calendar, $35

5         Red One-Seater, as shown $55

6         Up On The Tree Top, $39

7         Candy Dot Pail, $9.95

8         Out of the Woods Ornaments, $4.95

By Anna Passadori . Anna develops and designs exclusive product for The Land of Nod. She hails from the west coast and has traveled the world to source product. She loves anything Marc Jacobs, Sofia Coppola or stripes! (So, if anyone can get a photo of Sofia Coppola wearing a striped outfit by Marc Jacobs, please send it along.)

Cyber Monday Deal

November 28, 2011

Cyber monday

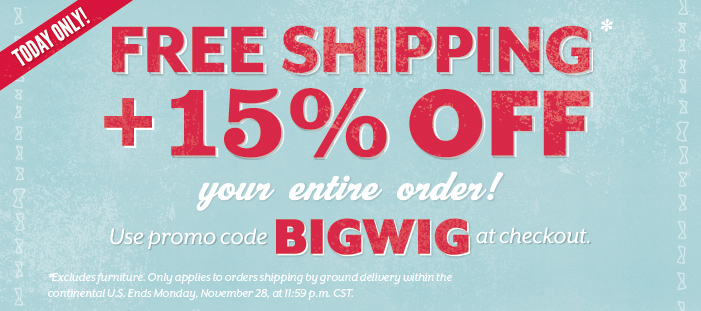
We have a special offer for TODAY only! FREE SHIPPING on your entire order* and 15% off EVERYTHING (yes this 15% off INCLUDES FURNITURE!) when you enter the promo code BIGWIG at checkout.

But this is for today only, so hurry over to landofnod.com.

*Free shipping excludes furniture.