Close

Blog

DIY Bandana Bib

November 28, 2011

Post by Taylor Urban of itstaylormade.com

The Bandit Bib. It might be the next big thing 🙂 I get bored with “regular” bibs so this is a little more exciting.

What you need:– 1 fat quarter for the front- 1 fat quarter for the back (I use flannel, jersey or terrycloth for the backs)- snap kit- TaylorMade Bandit Bib Pattern

Lets get started: Print a pattern for the Bandana Bib. Cut out a front and a back. I like to use an absorbent fabric for the backs of my bibs like terry cloth or flannel.

Put right sides together, pin and sew. Leave a small opening so you can flip it.

Don’t forget to clip the corners and the round tip.

Press and top stitch around the bib.

Time for snaps (which I love). If you have never used them, they are very simple and your kit will come with instructions on the back. Each snap has two parts and the fun part is hammering them together 🙂

Most importantly, make sure your snaps are facing opposite directions so you can snap them together correctly. The first time I did a snap, I made this mistake.

Admire your new and more exciting Bandit Bib. And make a few.

Look at my cute little Bandit 🙂

Post by Taylor Urban of www.itstaylormade.com

Arts & Crafts

November 25, 2011

1
I have been a big fan of the Land of Nod company for years.  I love their style and their products. For me they evoke classic childhood. So when I was asked if we'd like to play with some of their fun toys, we jumped at the chance.

2

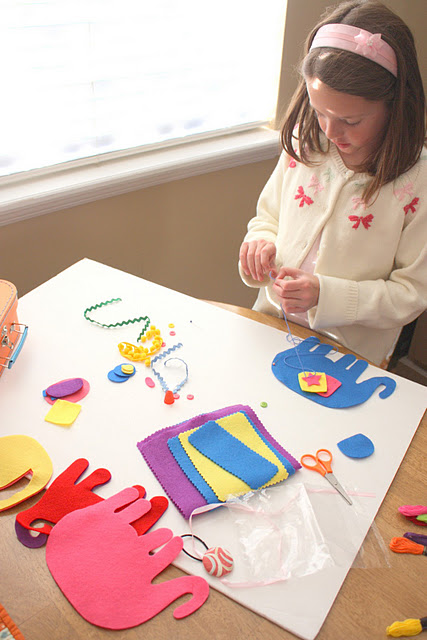
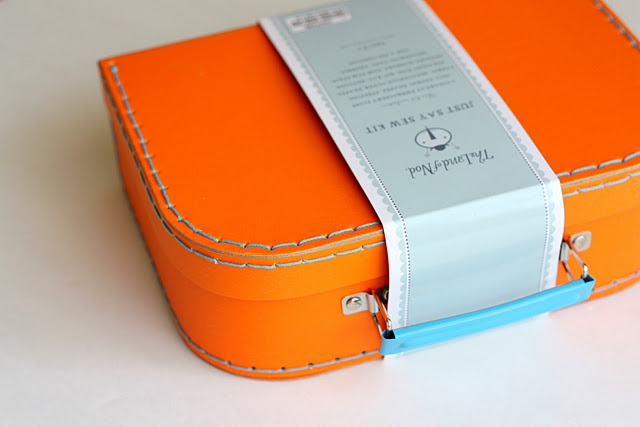
I thought it fitting that we were able to get up close and personal with this adorable Sewing Kit.  That cute little orange suitcase had me at Hello.

3

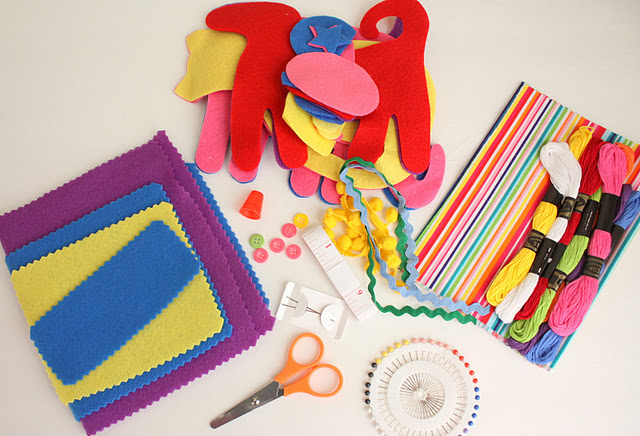
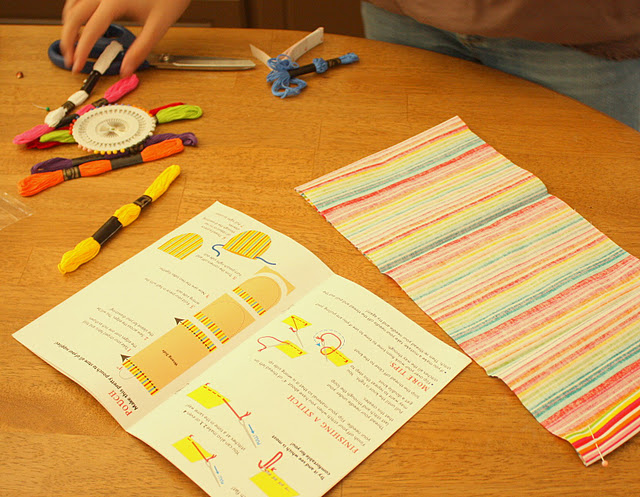
Inside are all the pieces to create 3 cute little felt animals, a drawstring bag and and felt notebook cover, plus reusable notions, floss, etc.  I loved that everything was pre-cut and ready to sew – especially for my short attention-span kids. 🙂

4
5

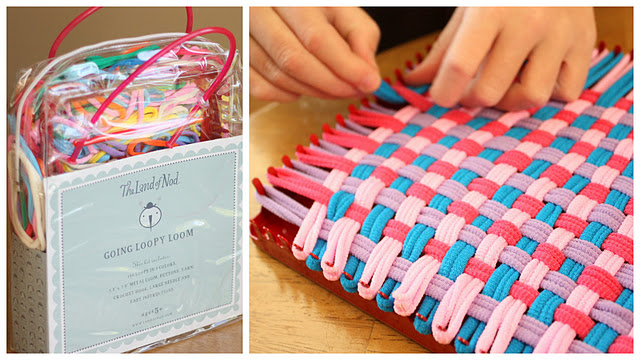
We also got to play with the Going Loopy Loom, which was another hit. I love to get my kids involved in hands-on creative projects but they don't always take the bait.

(Mainly because it has to be their idea, not mine.) This time these cute and colorful packages of goodies were instantly attractive to them and they dove right in. I love it! Both items would make adorable gifts and jump-start a whole new crafty generation. You can check out other great gifts in the Gift Guide.

Post by Amy Smart : www.diaryofaquilter.com

The Back Story on the Front Cover

November 23, 2011

Post by Danielle Kurtz, Creative Director at The Land of Nod
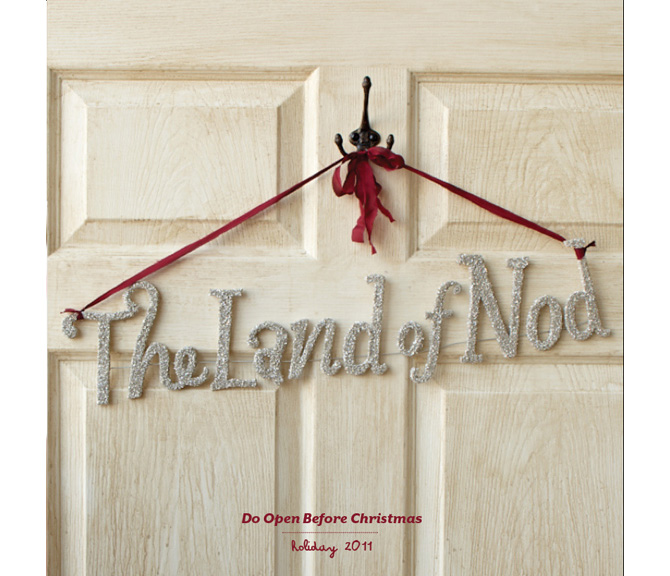
The Back Story on The Land of Nod Front CoverWhen it came time to design the concept for the front cover of our holiday catalog, we really wanted it to match the nostalgia of the classic toys found inside.  We worked through many ideas of what it could be….chalk drawing, cut paper collage, a photograph of a toy.

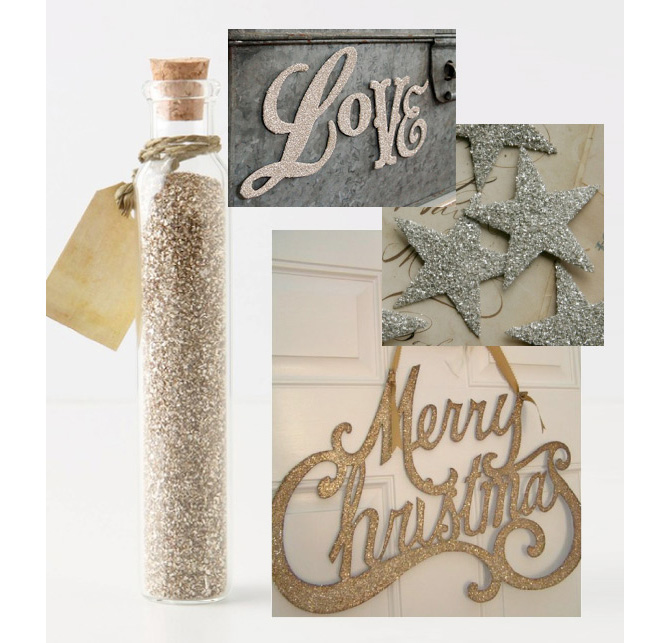
Problem was, for some reason, it took us a (REALLY) long time to come up with and reject all of those ideas. So, we found ourselves, days before the catalog was scheduled to print, with no cover.  We dug back through our inspiration and really fell in love with the images of vintage german glass glitter that one of our merchants, Jamie, had gathered.

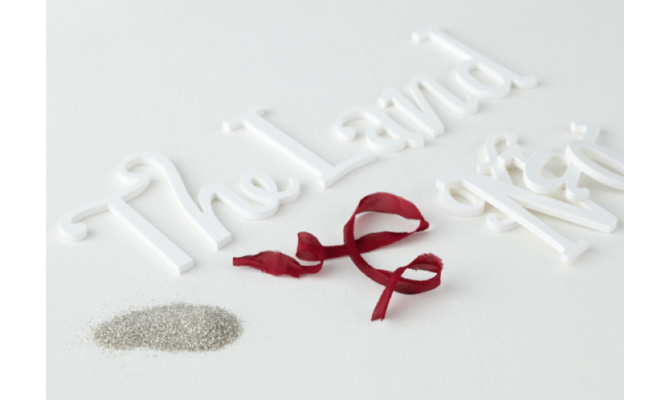
The Back Story on The Land of Nod Front Cover 2We had the idea of taking our logo and turning it into one of these signs. Now there was a new problem. How do we get one of these signs in 2 days, and get it photographed for the book. One of our designers, Tim, had the idea to order up a cut foam-core version of our logo from a signage vendor. While he tackled that, our art director, Cara, tracked down the glitter and had it overnighted.

We wanted to hang it from a door, so we sent our photographer, Nate, to Home Depot to buy a new door, as there just wasn’t time to track down a wonderful old door, but the door we bought was too new. So, while Cara sat on the loading dock of our office gluing glitter to the logo, Nate stained the door with a cup of coffee. (By the way, if you try this at home, please note the glitter is, in fact, made of glass. WEAR GLOVES! It will cut your fingers, Cara learned that the hard way.)

The Back Story on The Land of Nod Front Cover 3Cara wired the letters together and we were prepped to shoot the next day. But, how were we going to hang this thing? I went home and dug out some old hooks that had belonged to my great grandma. I also gathered up lengths of tons of different ribbon (thanks to all my friends for the beautifully wrapped packages that keep my ribbon drawer in constant supply). The next morning, we settled on one of the hooks and some silk ribbon and got it all set. But, we needed natural light for the photo. So, back to the loading dock with the door, camera and computer. We crossed our fingers we’d get a good shot of the ribbon despite the unusually high winds that day. Our copywriter, Tony, put the icing on the cake with a fun headline. And we got the book to the printer just in the nick of time.

In the end, it was a true team effort. And, we hope you enjoyed our nod to holidays past.

Happy Holiday Shopping

Post by Danielle Kurtz. Danielle is the Creative Director at Nod and an over-protective mother of two. She’s also completely obsessed with Pinterest, Twitter, Instagram and her Kindle, but not necessarily in that order. Danielle loves to craft, sew and crochet. Her current craft of choice is weaving tiny wall tapestries.

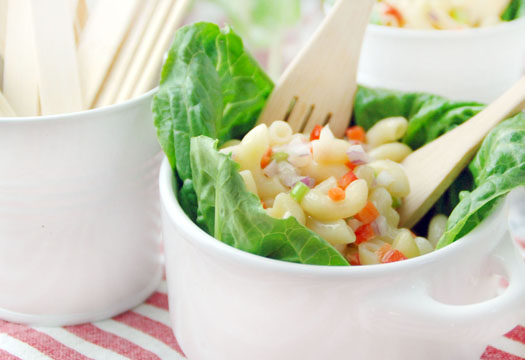
Classic Macaroni Salad

1

I was nine years old when I attended my first pot luck picnic that didn’t involve my family’s Italian cooking. My grammar school best friend was on her way to a summer bon fire and picnic, and as an honorary member of her family {which automatically happens when you’re nine and sleep over every weekend}, I was invited to join them.

Unlike our family picnics and reunions that consisted of all-day bocce games and mile-long tables of antipasti, this picnic was real. Real, just like I had seen on The Dukes of Hazard, with the promise of fried chicken, fruit pies, watermelon, corn on the cob, and elbow macaroni salad {whatever that was}.

Growing up we had penne, rigatoni or spaghetti. That’s it. Red gravy or butter. So as a kid, the thought of eating elbow macaroni with mayonnaise, especially if being served alongside a camp fire where I might have the chance to sit next to my friend’s {cute} older brother, was exciting.

As my cousins and I entered high school, our frequent  warm-weather family gatherings became few and far between, with summer jobs taking precedence. But there was one 1985 family reunion I remember well.

2
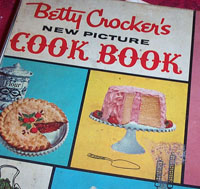
While moving into a new apartment over the winter, my Italian grandmother uncovered a Betty Crocker Cookbook she had been given in the 1950’s. And much like the Julie and Julia story, she cooked her way through that entire book, from December to August. And sitting on the picnic table that summer, in place of the marinated artichokes and fried peppers, was a heaping bowl of Betty's elbow macaroni salad.

While researching recipes, I found the dressing to be similar but the vegetables varied depending on the region. Some recipes called for red and green peppers, while others incorporated green peas, cucumbers or even sweet pickles. The recipe below incorporates my favorites; substitutions and additions are welcomed. What’s your favorite combo?

Classic Macaroni Salad

Yield: Serves 10
Prep time: 15 minutes
Cook time: 8 minutes
Allergy info: soy-free; contains wheat, gluten, eggs

Ingredients:
1 lb. dry elbow macaroni
1 cup homemade mayonnaise
3/4 cup minced red onion (about 1 medium)
3/4 cup diced carrot, 1/8-inch (about 3 carrots)
3/4 cup diced celery, 1/8-inch (about 2 large stalks)
1 tablespoon apple cider vinegar
2 tablespoons organic sugar
1/4 teaspoon celery salt
1/4 teaspoon cracked black pepper

Directions:
In a large pot of salted boiling water, cook macaroni 8 minutes. Transfer to a colander, rinse under cool running water 2 minutes. Drain and transfer macaroni to a large bowl. Add 1/4 cup of the mayonnaise, stir to combine. Cover, refrigerate 30 minutes.

Remove macaroni from refrigerator. In the same bowl add remaining mayonnaise, onion, carrot, celery, vinegar, sugar, salt and pepper. Using a large soon, gently mix to combine. Add salt and pepper to taste. Serve cold.

Food safety note:
Because this recipe contains mayonnaise, it should be kept cold at all times. If serving outdoors, place the bowl of macaroni salad in a larger bowl of ice, set on ice packs, or keep inside an ice-filled cooler.

Post by Dawn Viola : DawnViola.com

Last-Minute Thanksgiving Gift

November 22, 2011

Post by Aimee and Bettijo of www.supermomments.com
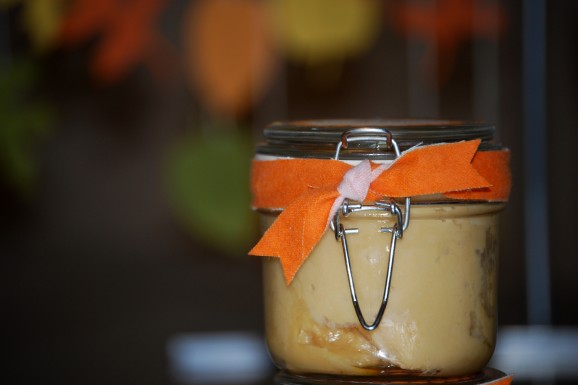
Last-Minute Thanksgiving GiftI love to give small gifts to enhance my friends’ holidays. Last year I brought my friends orange butter on Thanksgiving morning. While flavored butter sounds so random, I think it’s a great gift for a few reasons. First, it complements the customary rolls everyone serves at their Thanksgiving feast; second, it’s small so it won’t crowd the table; and third, if they decide not to use it for their dinner, it’s great on breakfast toast. All in all, it’s a small gift to let them know I’m thankful for their friendship!

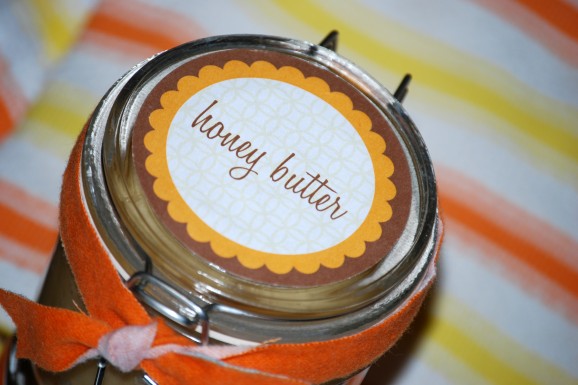
If you need a last-minute Thanksgiving gift for a neighbor, hostess or teacher, how about delivering some homemade honey butter! To help you out, here’s your short cut: a label. Mix together some honey butter, scoop it into a small serving bowl or glass jar, label and deliver.

After you’ve downloaded the labels, print the file on sticker paper. I used a 2.5” hole punch to cut out my label, yet scissors will work just as well. Ensure your jar is clean and dry, then adhere the label. If you don’t have sticker paper, simply print on what paper you have on hand, cut out label, punch a small hole on the top and tie onto the jar. Just as cute!

Last-Minute Thanksgiving Gift - Honey ButterOne more note, I was feeling in a rush, so rather than searching for the perfect coordinating ribbon, I used some fabric scraps I had laying out. I think I actually like it more!

Post by Aimee and Bettijo of www.supermomments.com

Things to Make – Teepees and Headbands

November 21, 2011

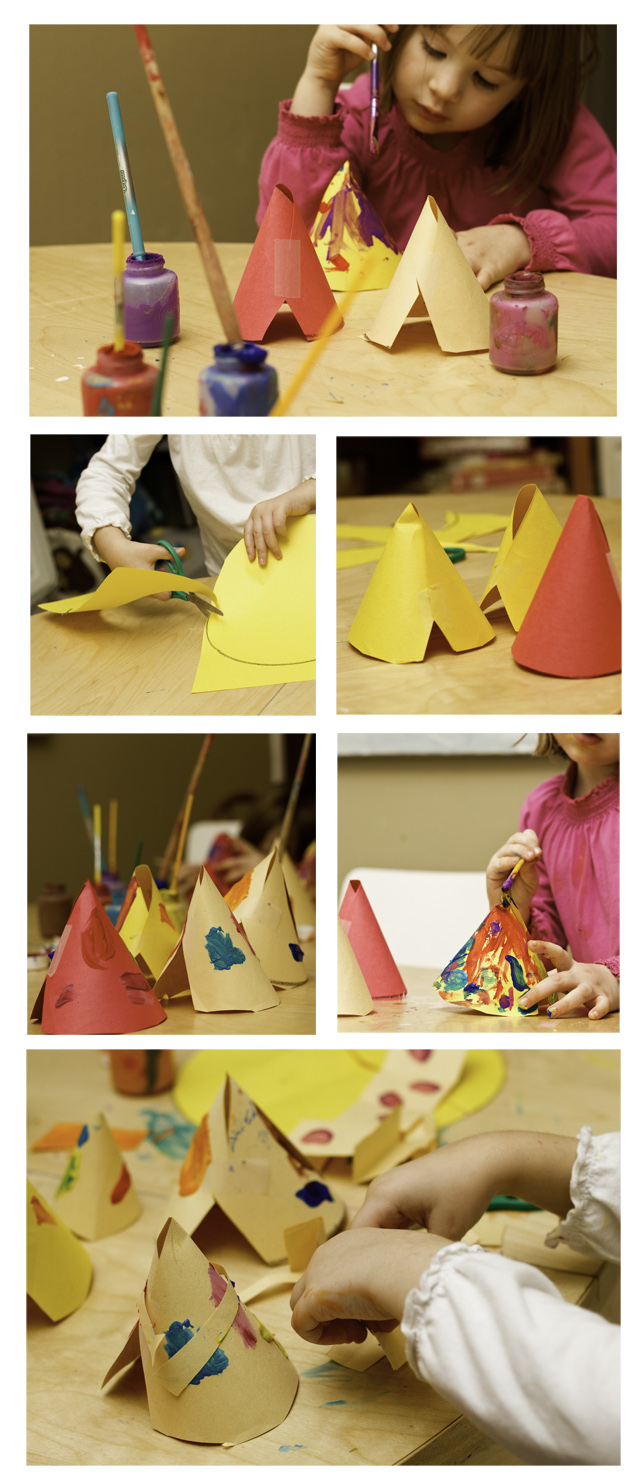
teepees Lately the girls have been asking a lot of questions about Native Americans, so I bought them a few books on the subject (click here for the post).

One of our favorites has been More Than Moccasins: A Kid's Activity Guide to Traditional North American Indian Life (A Kid's Guide series), which is really a great craft book. F's taken to browsing through it in the afternoons and picking out various art/craft projects she wants to try (why do kids always manage to gravitate towards the most complex projects?). So far, we've managed to make teepees and headbands, both of which are incredibly easy (and fun).

To make teepees:

1. Use a bowl to trace a large circle

2. Cut the circle in half

3. Role the half-circle into a cone and tape the ends together (cut out a door or fold back the paper's flaps to make a door)

4. Paint or color your teepee 

While crafting, we talked about how the Plains Indians used teepees as portable homes when they hunted buffalo. Our family eats a lot of buffalo, so the girls were excited to learn they had this in common with the Indians. Though P kept asking why daddy didn't kill our buffalo himself. And, of course, we also made paper dolls to live in the teepees, so this project lasted all afternoon. Not surprisingly, one of the first craft projects that F chose was to make a headband (F's already large headband collection continues to grow and grow).

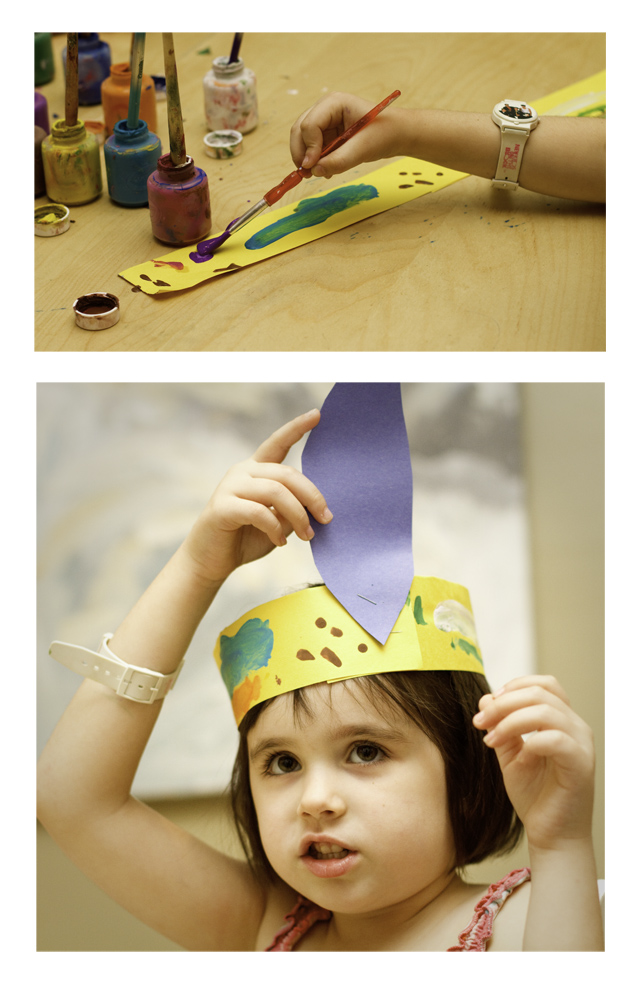
To make headbands:

1. Cut out a long strip of paper (you may need to staple two together) and fit it to your child's head

2. Paint or color the headband, you can also cut out and add other ornaments to the headband (F wanted a feather)headband

Post by Darcy : bedtimemonsters.blogspot.com

Truck Table

November 18, 2011

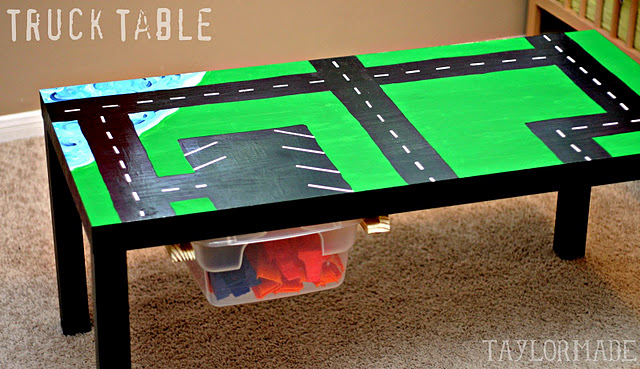
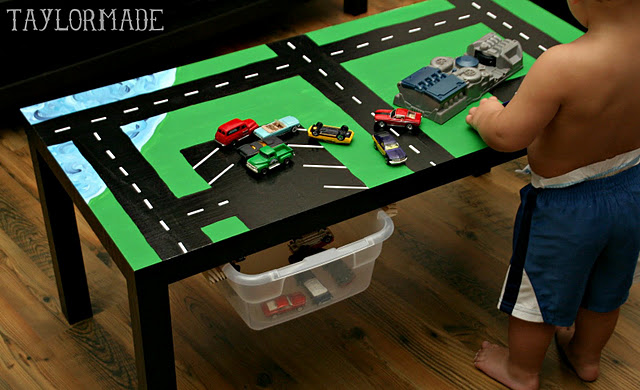
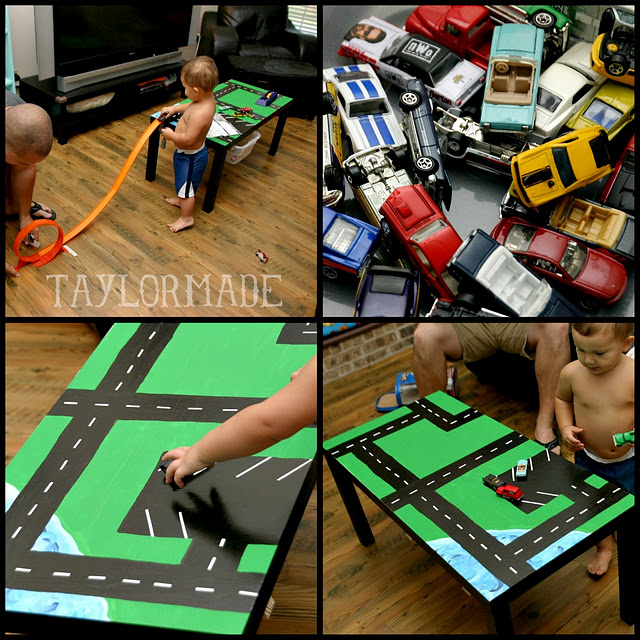
If you ask my son, "What do you want to do today?" you will get the same answer every single day. "Pway Twucks". So in order to have even more truck playing time in my life, I made him a truck table for his birthday. I actually started out looking to buy one but they were all so bulky and expensive… DIY to the rescue.

1
Here is how the truck table magic happened:

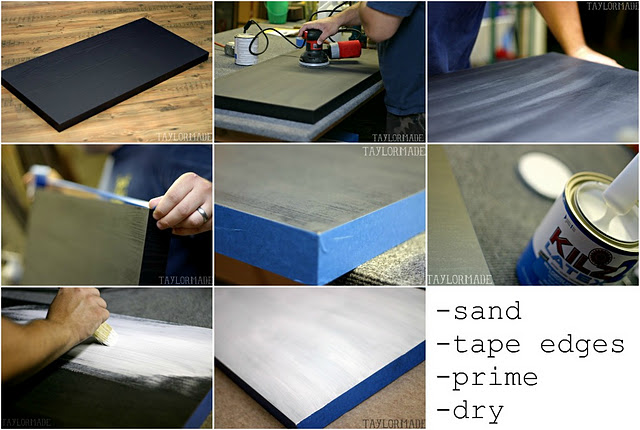
I started with a cheap coffee table from Walmart. First step is to prep the table top. I did most of this but I had my husband pose for the pictures. The man can build anything but can't take a picture to save his life.

2

Tips for the table prep:

– Don't attach the legs

- Brush off the extra dust after sanding

– Make sure the tape goes all the way to the edge

– Apply 2-3 thin coats of primer and let that dry overnight

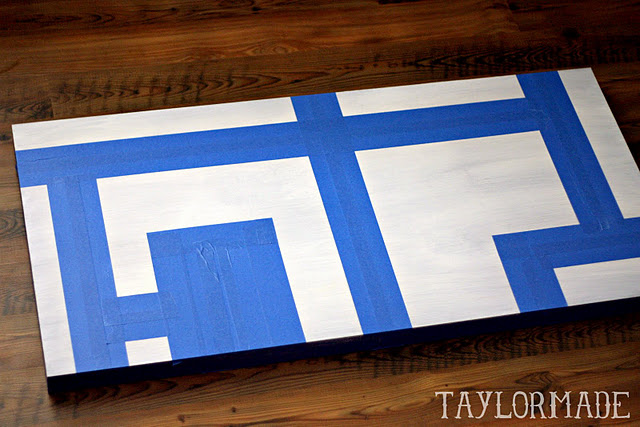
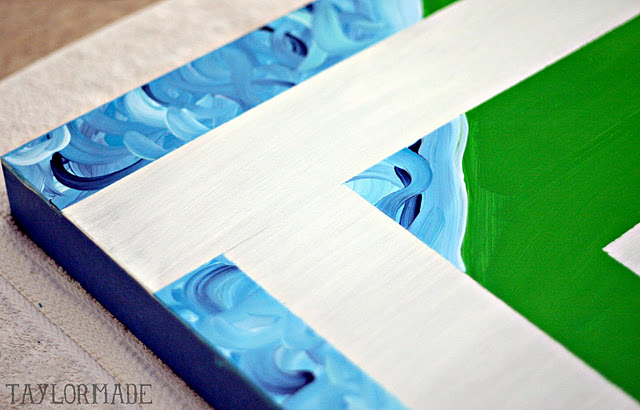
Now you want to tape off your "roads". Just get creative. I measured two matchbox cars side by side and figured 3" could be a good width for the cars to pass each other. So all of my roads are 3" wide. Use painters tape to cover where the roads will be. I made a big square for the parking lot.

3

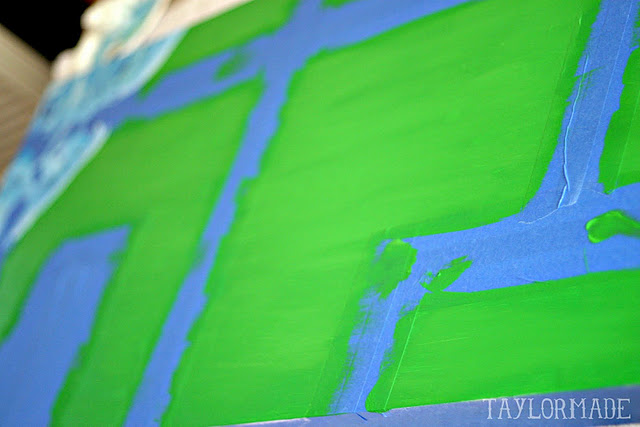
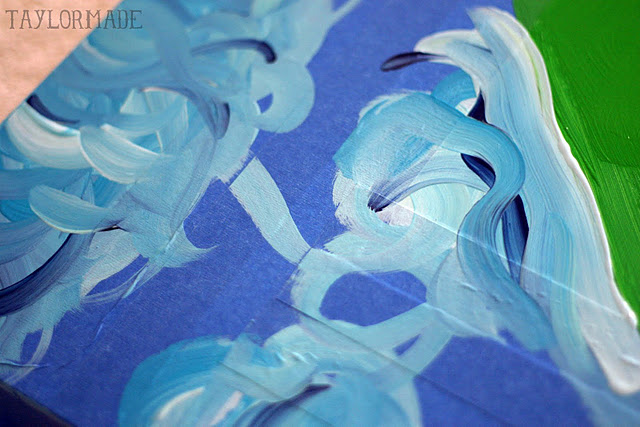
I painted green for the grass and added a lake in the corner.

4

5

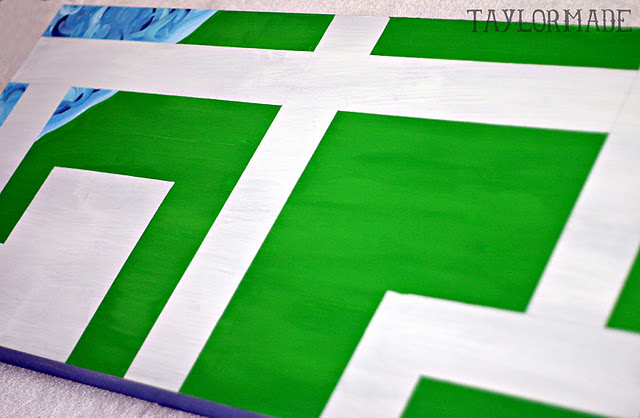
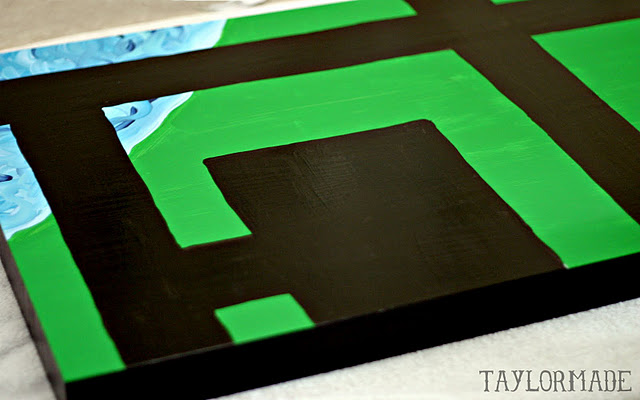
Remove the tape…

6

7

Paint your roads in with black paint.

8

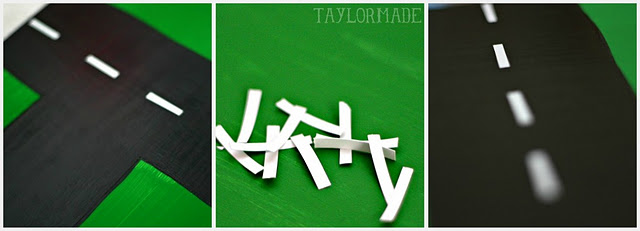
For the street lines, I used white vinyl and cut it into tiny strips.

9

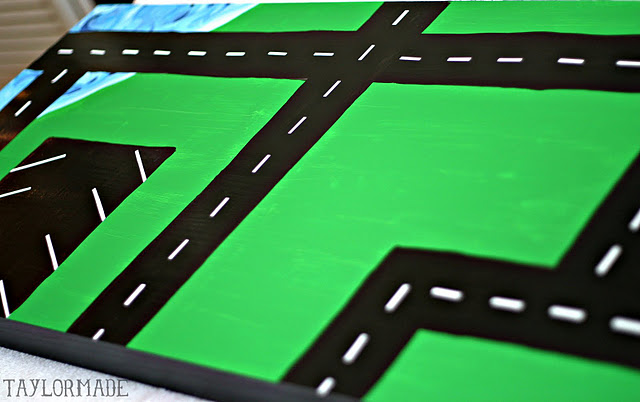
Cover the whole table with a clear coat.

10

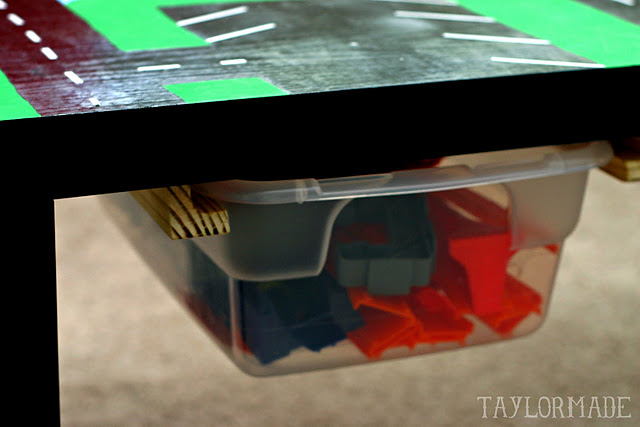
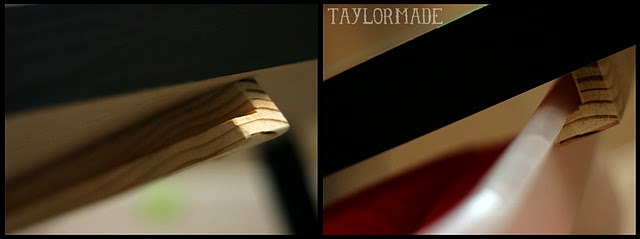
My favorite part is the drawer that I thought of  :) Pretty much just an "L" shaped rail that we screwed to the bottom of the table. Make sure to get a tupperware with a lip so it can slide in and out.

11

12

13

I would say it was a successful bday present! I knew about sports but no one warned me when I had boys I would play trucks every day 🙂 But I am ok with it.

14

Taylor signPost by Taylor Urban : www.itstaylormade.com

Rustic Caramel Apple Tart

November 17, 2011

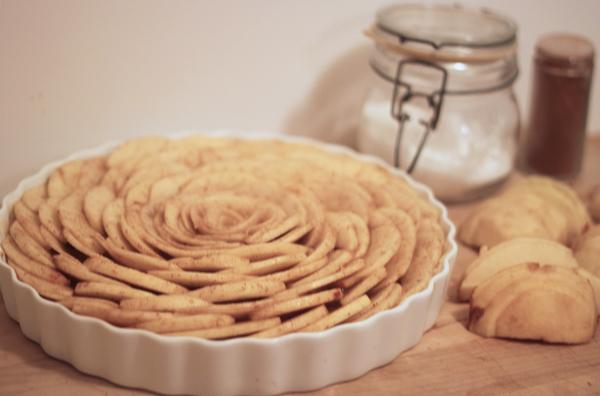
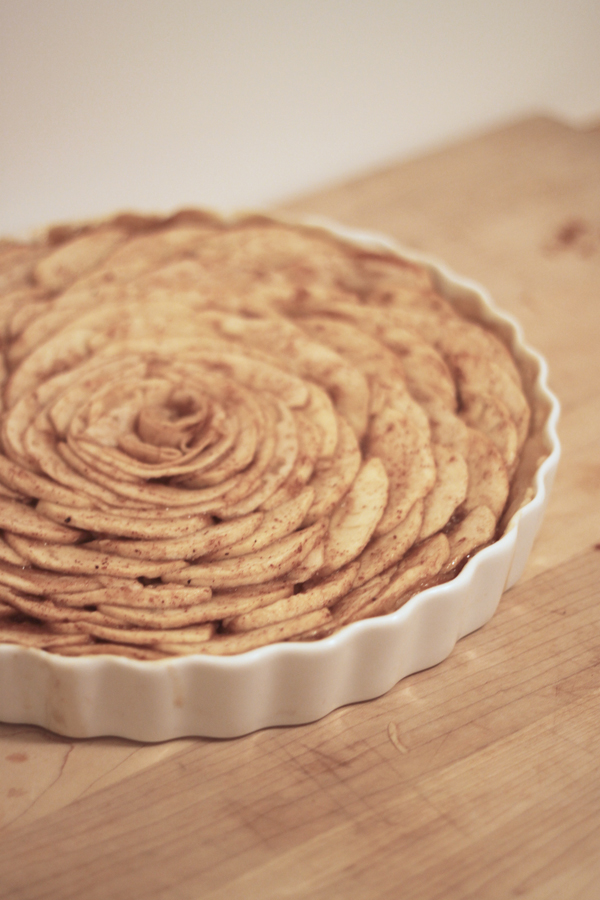
Thanks fall, for showing up and inspiring me to make this tart. With it’s shortbread crust, cinnamon apples and cream cheese filling, I’m sure it would have been delicious all on it’s own… but I went and added an extra layer of salted caramel. Oh yes. I did. Peeling and slicing all the apples can be time consuming. Luckily I had a few friends over who were happy to help in exchange for a sampling of the goods. Totally worth it because this thing is out of control good… plus it makes your house smell like sugar, spice + everything nice.

1

2

3

4

5
photos © cake. 2011

Caramel Apple Tart
adapted from Family Fun

Ingredients

Shortbread Crust:
1 1/4 cups all-purpose flour
3 tablespoons confectioners sugar
1/2 cup butter, cut into 1-inch pieces

Filling:
2 8-ounce packages cream cheese, softened
1 egg
1/3 cup brown sugar
1 teaspoon vanilla extract
1 cup salted caramel (recipe here or for convenience try Trader Joes salted caramel sauce)

Topping:
5 to 6 firm apples, peeled, cored,and thinly sliced
1/2 cup sugar
1 teaspoon cinnamon
1/2 teaspoon nutmeg
1 tablespoon all-purpose flour
1 tablespoon butter

Directions
To make the crust, stir the flour and confectioners’ sugar in a mixing bowl. Pinch and squeeze the butter into the flour until the butter pieces are pea-size. Transfer the crumbly mixture into an 11-inch tart pan and spread it evenly around the pan. Press the mixture into the bottom and sides of the pan. Cover with plastic wrap and freeze while you prepare the filling.

Next, make the cream cheese filling. Use an electric mixer to beat the cream cheese and egg until they are light and smooth. Beat in the brown sugar and vanilla extract. Refrigerate for 10 minutes.

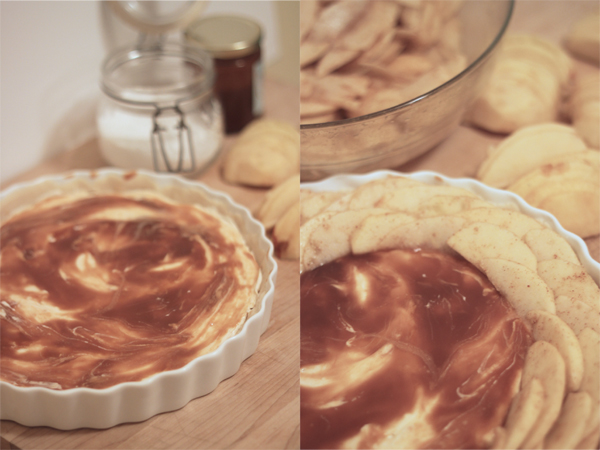
Warm caramel until soft enough to drizzle. Take the tart from the fridge and drizzle or spoon 3/4 cup of caramel over cream cheese mixture.

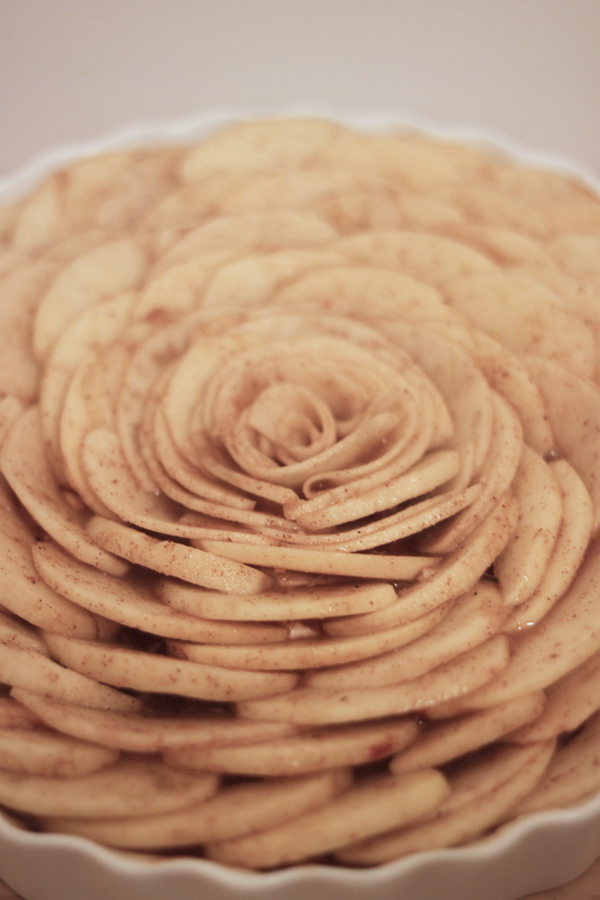
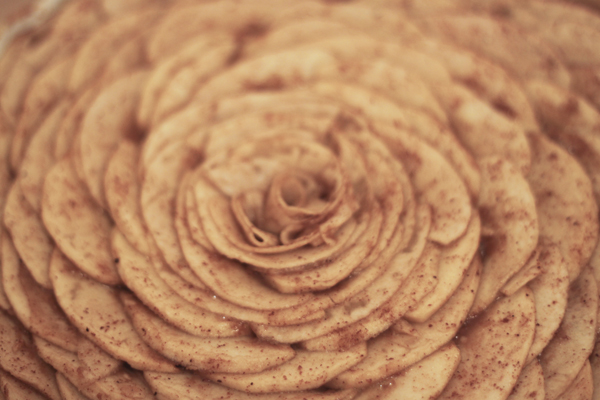
Heat the oven to 375°. In a mixing bowl, toss the apple slices with the sugar, cinnamon, nutmeg, and flour. Spread the cream cheese filling evenly over the chilled tart shell. Then, beginning on the outside edge, arrange the apples on top of the filling in overlapping circles. Pour any remaining juices from the bowl over the apples, then dot with the butter.

Bake the tart for about 1 hour or until the juices bubble and the apples turn tender. If the crust and apples begin to brown, cover the tart with the foil during the last 20 minutes of baking. Remove and cool.

Drizzle remaining 1/4 cup caramel over top of tart. Serve warm on its own — or with ice cream or whipped cream. Serves 8 to 10.

Need more tasty recipes and delicious bites? Check out our Let’s Eat Pinterest Board.

Post by Becca : www.cakeeventsblog.com

Color Me Thankful, Thanksgiving Banner

November 16, 2011

Post by Aimee and Bettijo of www.supermomments.com

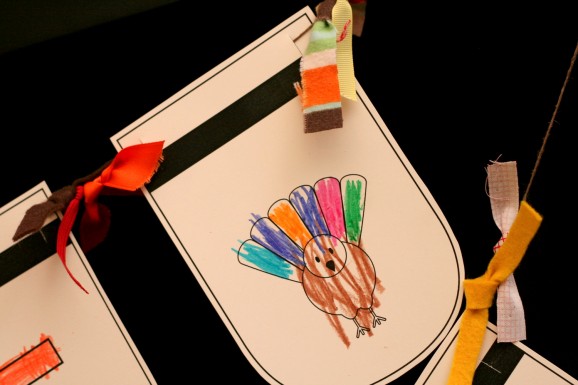
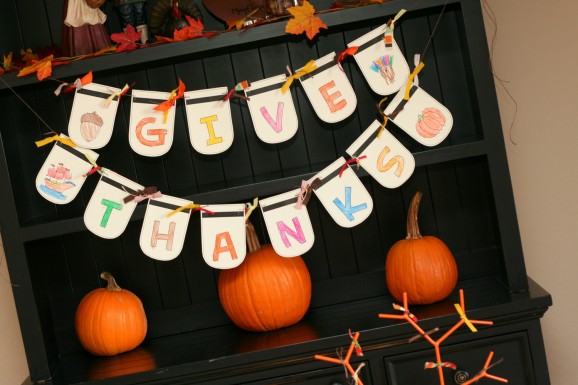
Color Me Thankful, Thanksgiving BannerMy girls are both still a bit too young to handle this project on their own, but if your kids are older they might be able to make this ‘color me thankful’, Thanksgiving banner with little or no help from you.

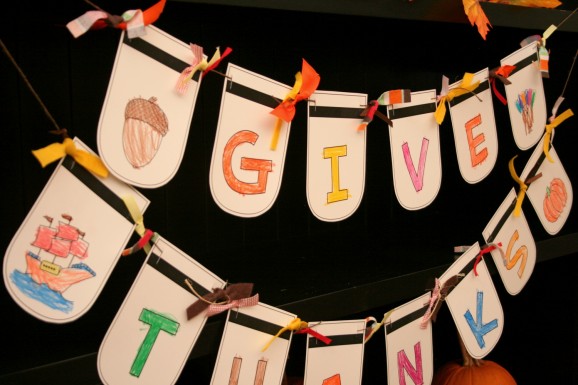
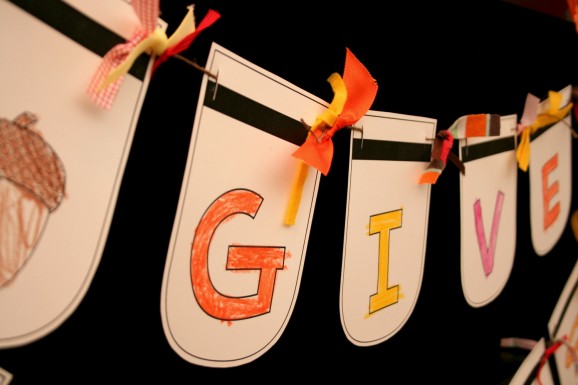
Color Me Thankful, Thanksgiving Banner - 2My girls love to color so after I printed out the banner template, I put them to work coloring. (A little Supermom Secret to making sure your little helper’s coloring turns out in the general vicinity of what you were envisioning is to limit the available crayon colors.) Together we picked out a bunch of crayons in colors that we all agreed would be good for Thanksgiving, and from that group I told them to color each letter a different color.

Color Me Thankful, Thanksgiving Banner - 3Then they colored the little pictures however they wanted. We ended up printing several of the picture pages because they both wanted to color more. When it was time to cutout I chose my favorite of each of the colored pictures to use in the actual banner. I was particularly proud of my three year old’s job on the turkey.

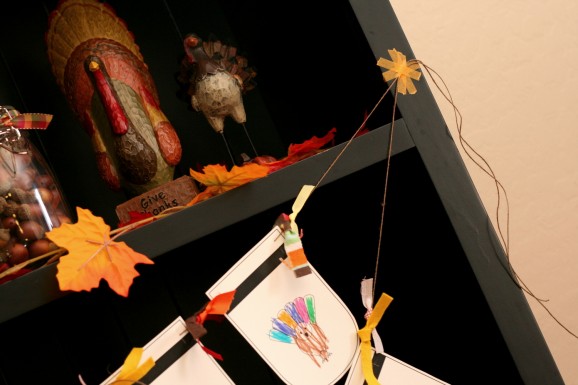
Color Me Thankful, Thanksgiving Banner - 4I cut out all the pieces, then slit the corners and threaded onto two pieces of brown string. Tying fabric scraps between each of the flags really ups the cuteness factor. If your kids can tie knots there is no reason they can’t be involved with this part of the project as well.

Color Me Thankful, Thanksgiving Banner - 5We secured the banner to Aimee’s hutch with the cutest colored masking tape. Normally we would have tried to hide the tape, but we’re always looking for excuses to use this fun tape!

Post by Aimee and Bettijo of www.supermomments.com

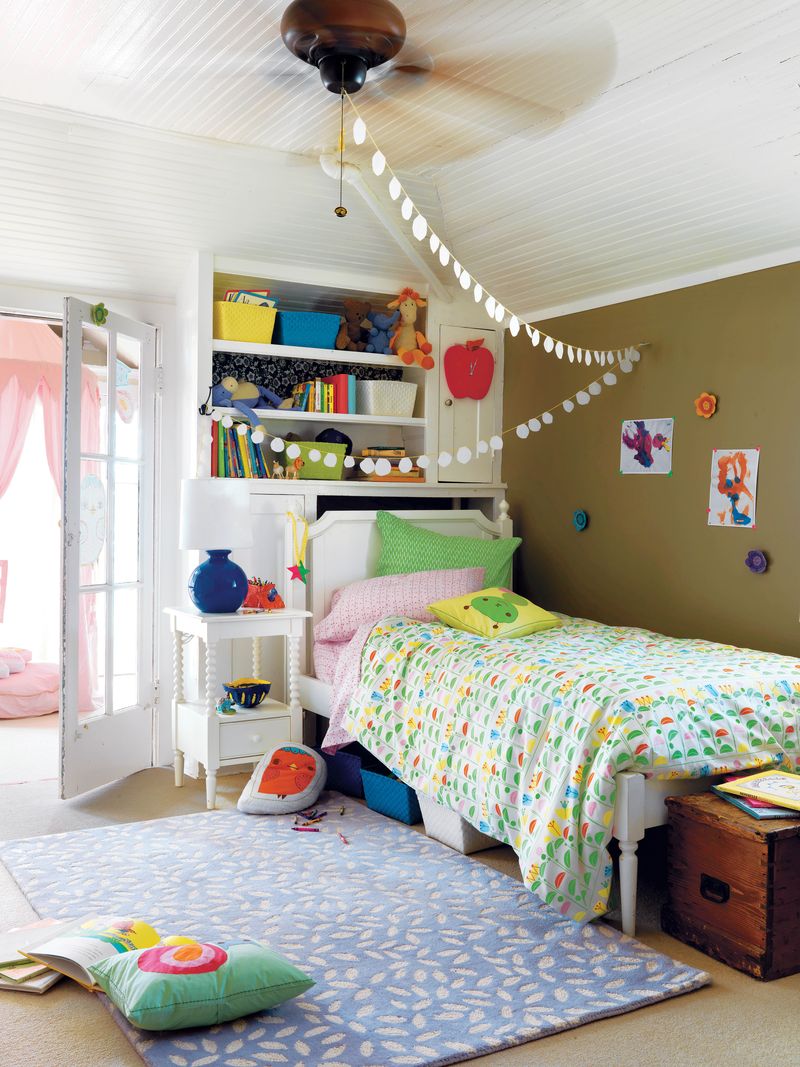
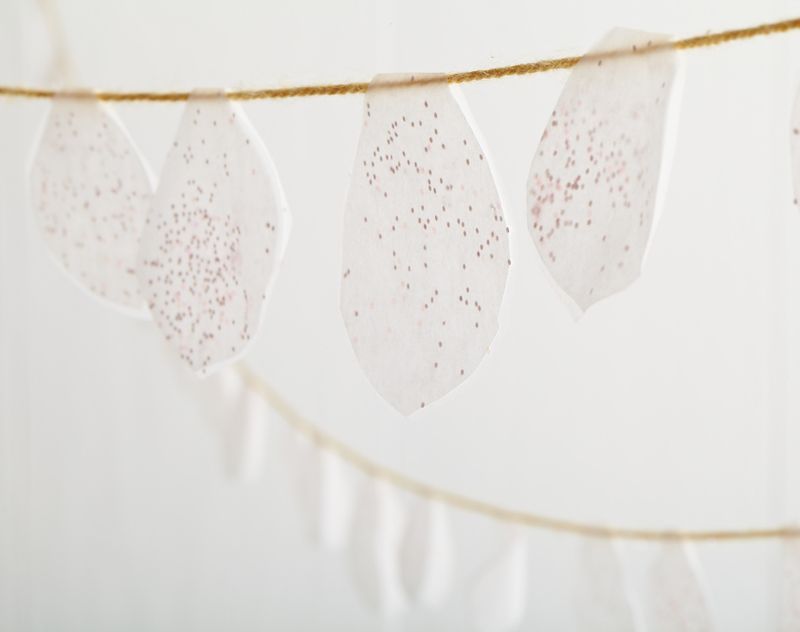
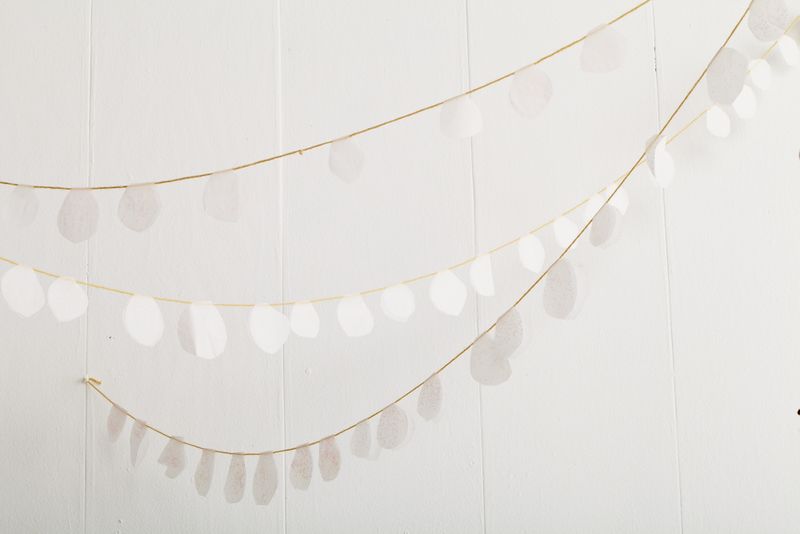
DIY Paper Garland Swag

November 15, 2011

D4355_TulipsBd_057E

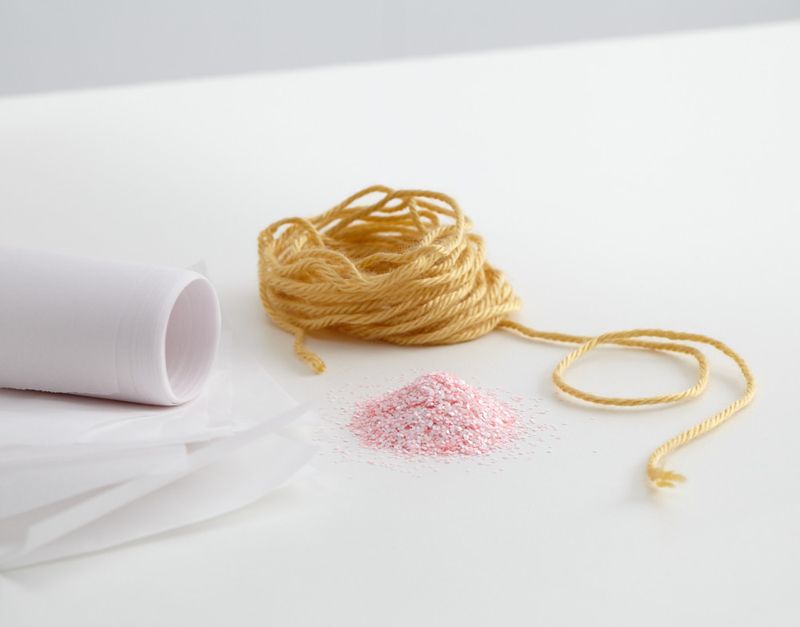
Whattya need?

  • Scissors
  • Glue or spray adhesive
  • Parchment paper
  • Yarn, string or clothing line
  • Glitter

PaperSwag_blog

How do I make the garland swag?

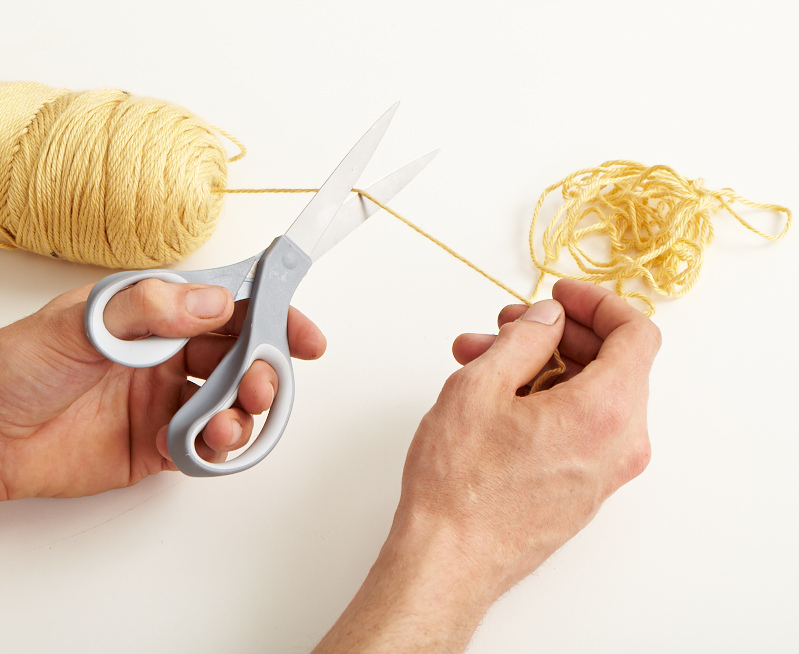
Step 1:  Cut string to your desired garland length.

Paper_garland_01

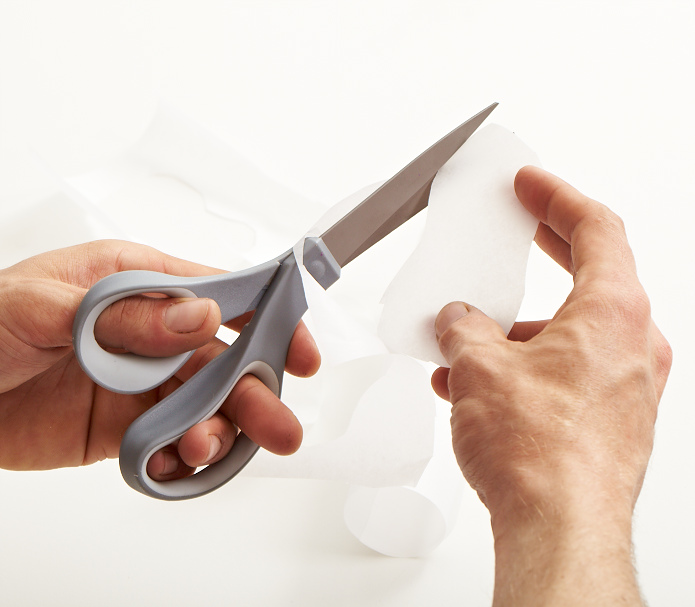
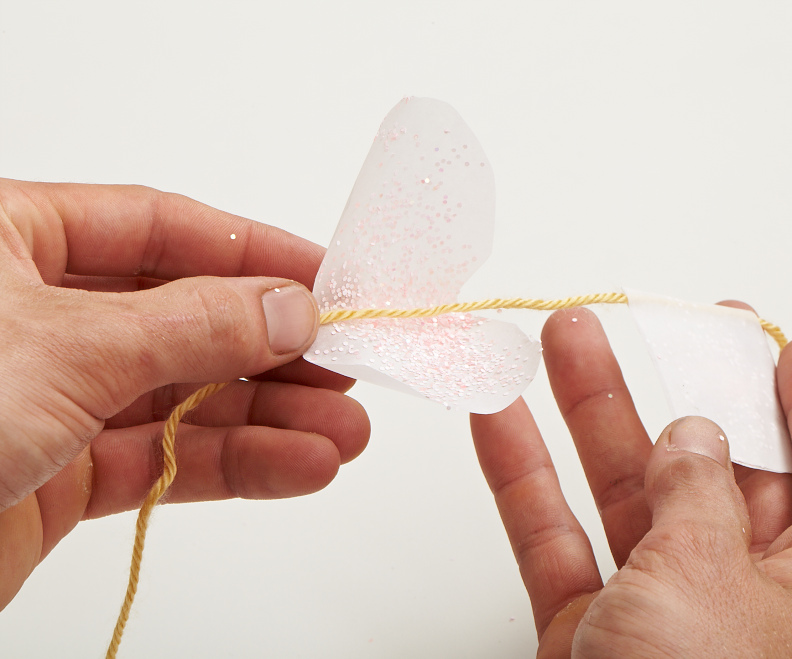
Step 2:  Cut shapes from parchment paper and fold in half.

Paper_garland_05

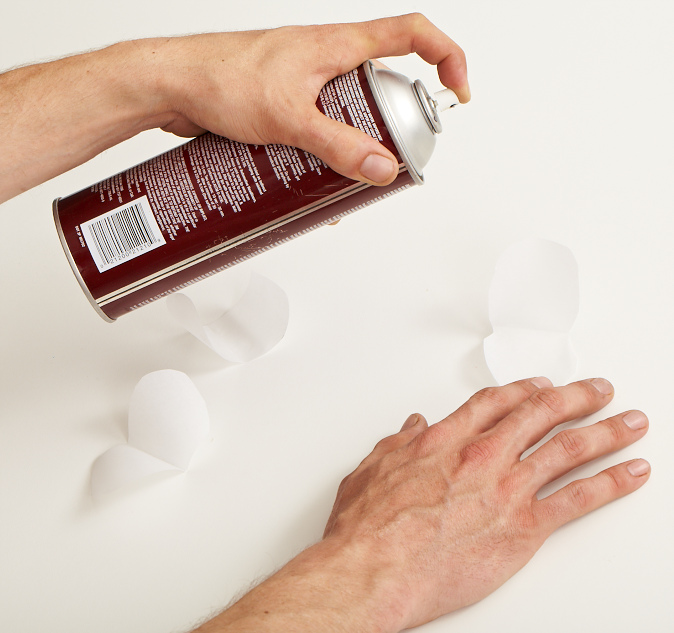
Step 3:  Apply glue or spray adhesive to the ”inside” of your shape.

Paper_garland_06

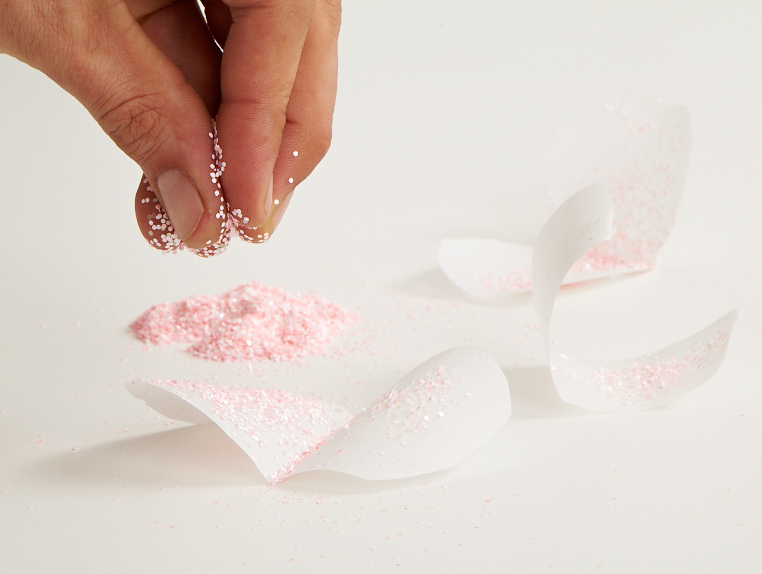
Step 4:  Apply glitter onto one side of glued shape.

Paper_garland_09

Step 5:  Fold shape over string, pressing glued sides together securely.

Paper_garland_16

Step 6:  Hang.

Paper_garland_24

Paper_garland_25

Created by Dane Holweger

Kids Thanksgiving Feast: Popcorn Filled Paper Bag Turkey

November 14, 2011

Post by Sara Westbrook & Brittany Egbert for One Charming Party: onecharmingparty.com
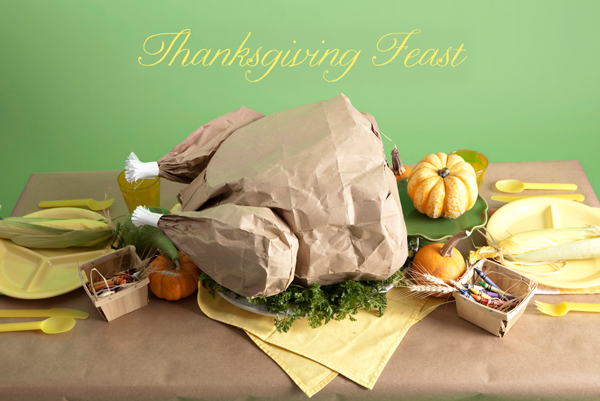
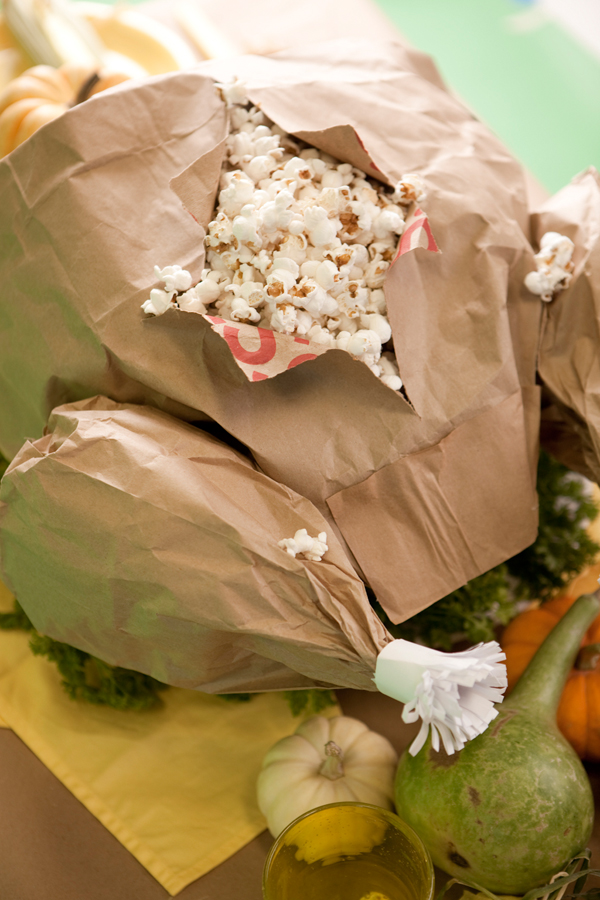
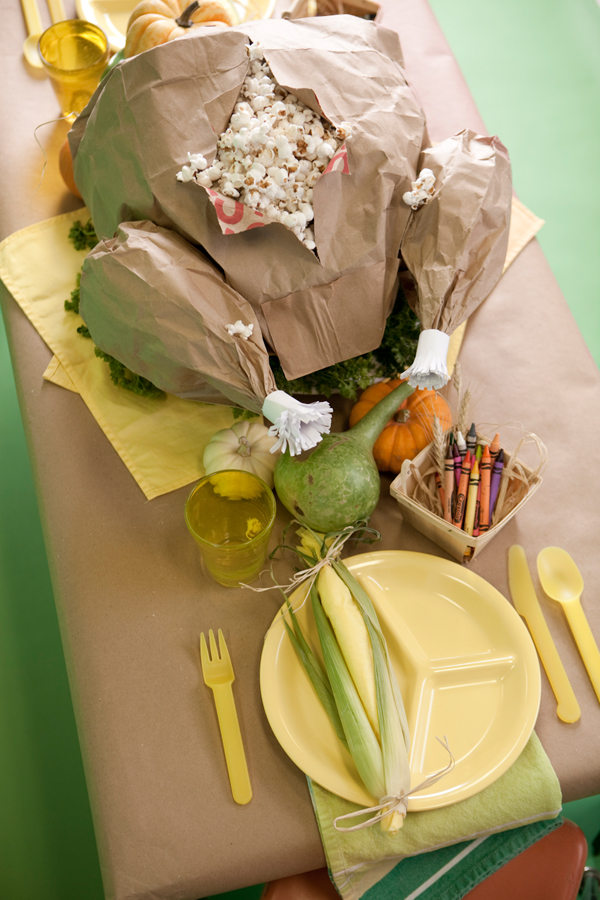
Kids Thanksgiving Feast: Popcorn Filled Paper Bag TurkeyWhether you call it the kids’ table at your family get together or a mini feast for a school classroom party, surprise little hands this year with an awesome kids Thanksgiving feast set just for them featuring this fun popcorn filled paper bag Thanksgiving turkey!

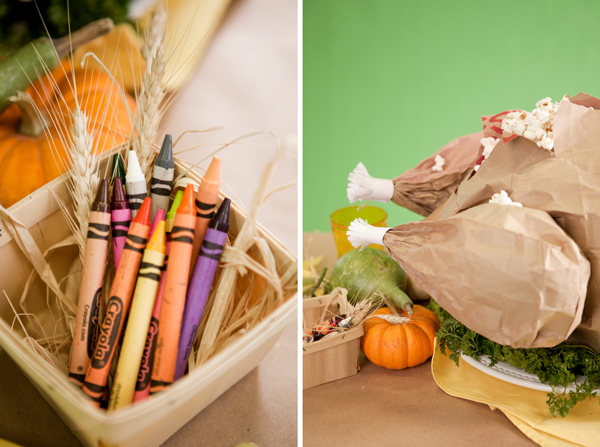
Cover the table in brown craft paper and provide little baskets of crayons so bored children can color. Use small items as part of your centerpiece that kids can touch–but not break–like mini pumpkins and gourds. And don’t forget to serve a turkey, a paper bag turkey full of popcorn of course.

Kids Thanksgiving Feast: Popcorn Filled Paper Bag Turkey - 2

Kids Thanksgiving Feast: Popcorn Filled Paper Bag Turkey - 3Invite an adult guest of honor to “carve” the turkey with a real knife or scissors. Then everyone can enjoy some popcorn while they wait for the Thanksgiving Feast to start.

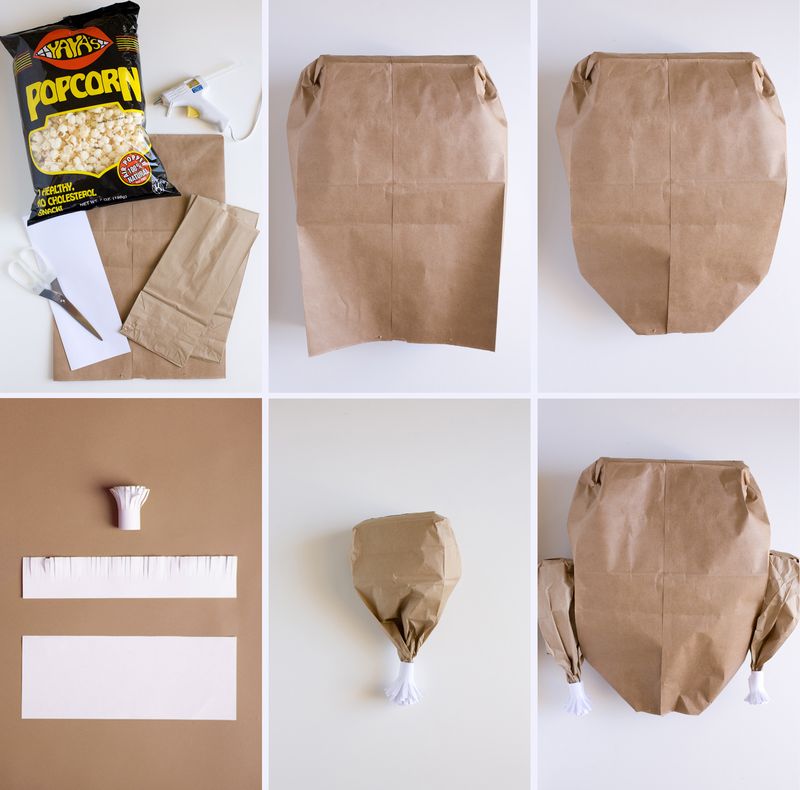
You will need: 3-4 bags of popcorn, a large brown grocery bag, 2 small brown lunch bags, a hot glue gun, scissors, white paper for the frills

Popcorn Filled Paper Bag Turkey Directions:

1. For the frill, take a sheet of 8 1/2 x 11″ white paper and cut it in half lengthwise. Fold the paper in half lengthwise and make small cuts with a pair of scissors on the folded half to create loops.

2. For the drumsticks, make one hand into a fist and stick it inside the lunch bag. With your other flat hand, press on the bag to mold and smash it down into a more rounded shape. Fill the bag 2/3 of the way with popcorn. Gather up the bottom of the bag and twist to keep it tight. Hot glue the beginning of the length of frill and wrap it around the bottom, twisted part of the lunch bag. Then hot glue the end of the white paper frill to keep it in place.

3. For the main bag, do the same thing as the drumstick to make the corners rounded. Fill the bag up full with popcorn. Fold the sides of the bag in and tuck the bottom edge under. Hot glue the edge shut. Hot glue the legs onto the sides of the “turkey.” It’s best to use a plain brown bag, but if you can only find one with writing on the outside, you can carefully turn the bag inside out and it will be just fine.

Kids Thanksgiving Feast: Popcorn Filled Paper Bag Turkey - Tutorial*If using buttered popcorn to fill the turkey, use parchment or wax paper to line the paper bag to avoid grease marks.

Kids Thanksgiving Feast: Popcorn Filled Paper Bag Turkey - 5Post by Sara Westbrook & Brittany Egbert for One Charming Party: onecharmingparty.com. Photos by Nicole Hill Gerulat of www.nicolephoto.com

A Dog Day Afternoon

November 11, 2011

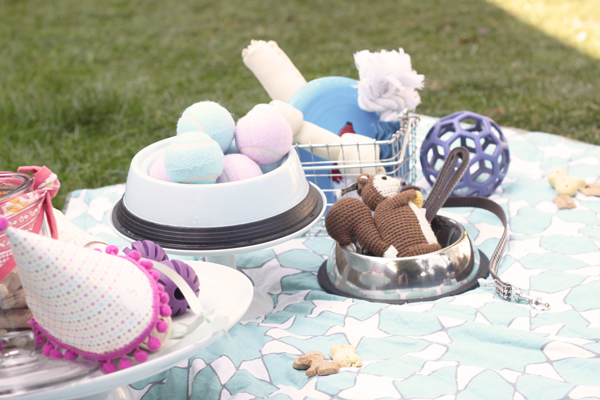
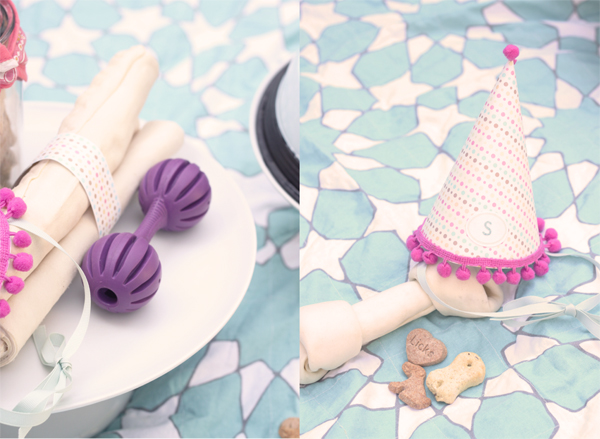
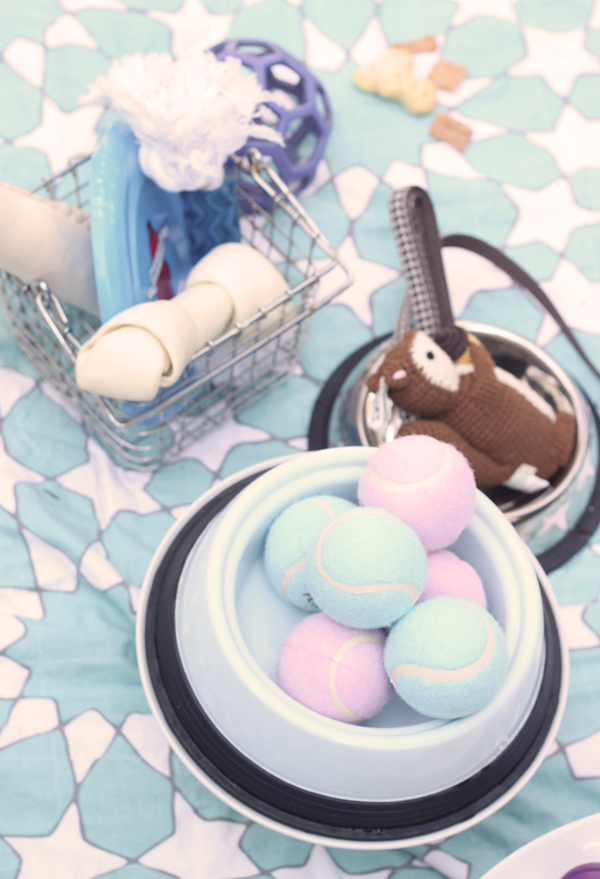
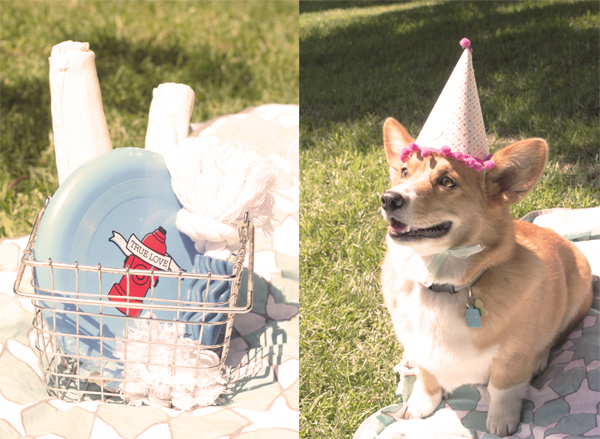
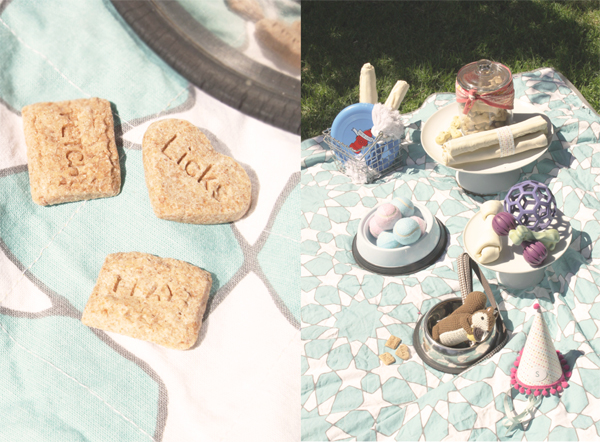
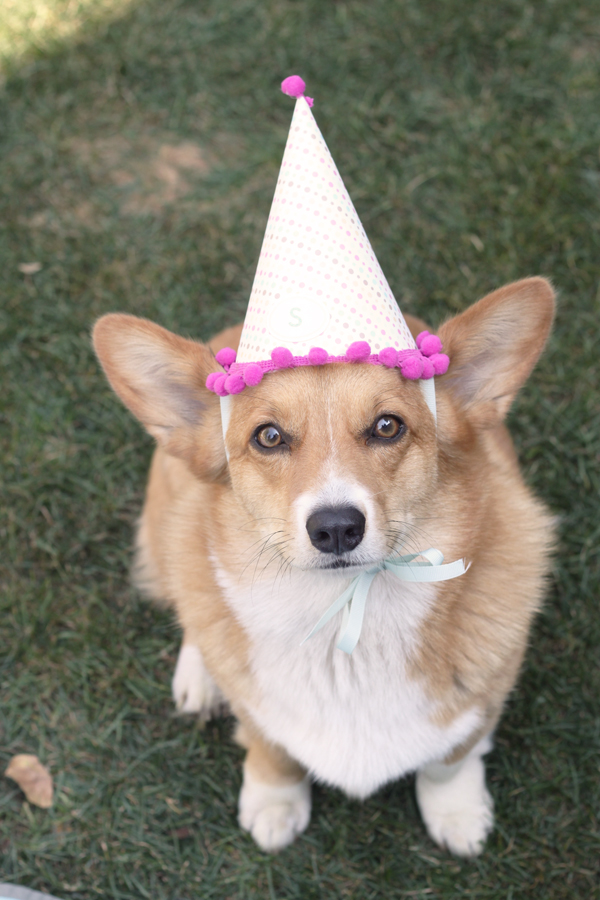
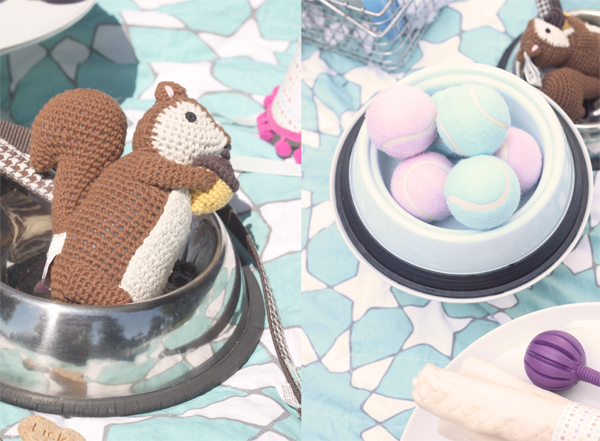
And now for some silliness. Our sweet Scout turned two a few weeks ago and we had ourselves a doggie picnic. Lots of toys, an obscene amount of bones… even a monogrammed canine party hat. In the interest of full disclosure, there may have been an element of guilt involved it this little shindig. We've been so wrapped up with our daughter lately that we've been neglecting the pets a bit. Corgis are known drama queens… sad eyes, big long sighs, expectant sidelong glances… and our Scout is a pro at laying it on thick. So maybe we went a little overboard with the doggie treats? Totally worth it though. She was so excited for the extra attention that she even wore the party hat.

1

2

3

4

5

6

7

8

DiY Party Hat Tutorial
Supplies: 1 pre-made party hat, 1 sheet Scrapbook Paper, 1 ft Pom Fringe, Scissors,            Hot Glue, 2-1ft lengths of grosgrain ribbon
Instructions: Trace outline of the pre-made hat onto scrapbook paper and cut out. Hot glue pom fringe along base of paper hat. Add hot glue along vertical seam and fold over into cone shape.

Add dots of glue on the inside of hat to secure ribbon ties and add a pom {or other accent} at the top of the point.

Tennis Balls, Squirrel + Leash: Martha Stewart Pets
Blue Water Bowl + Treats: Murphy's Paw
Picnic Blanket: Land of Nod

Post by Becca : www.cakeeventsblog.com

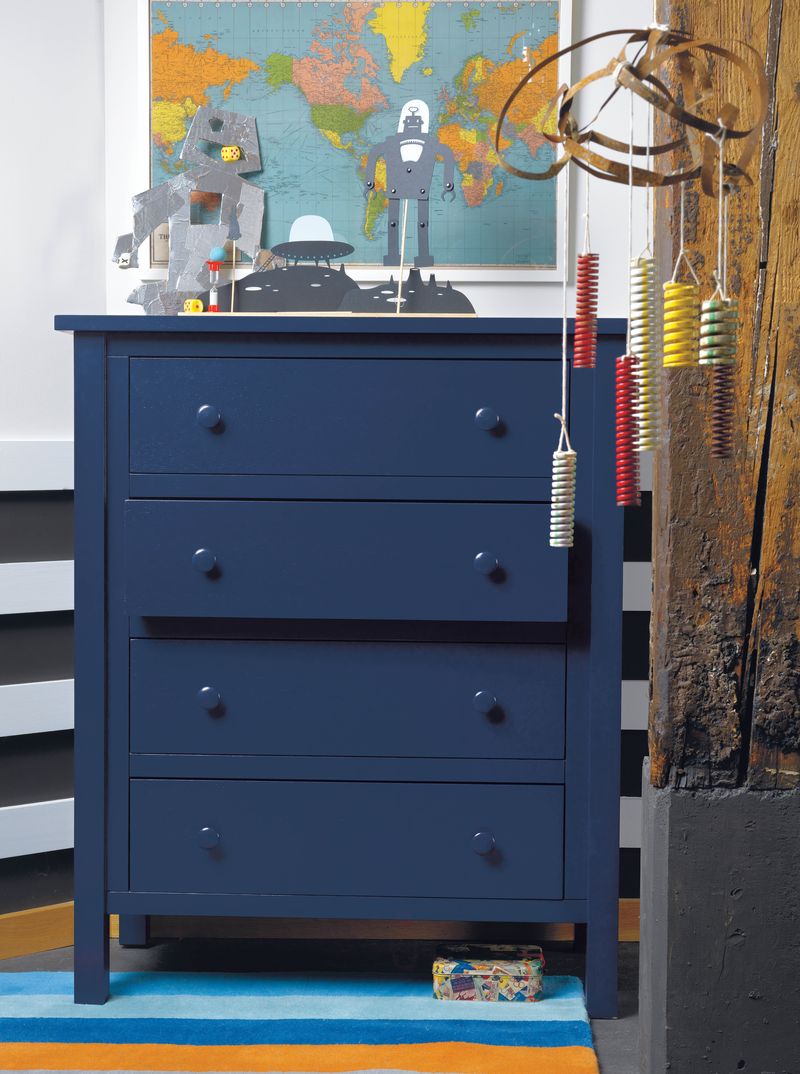
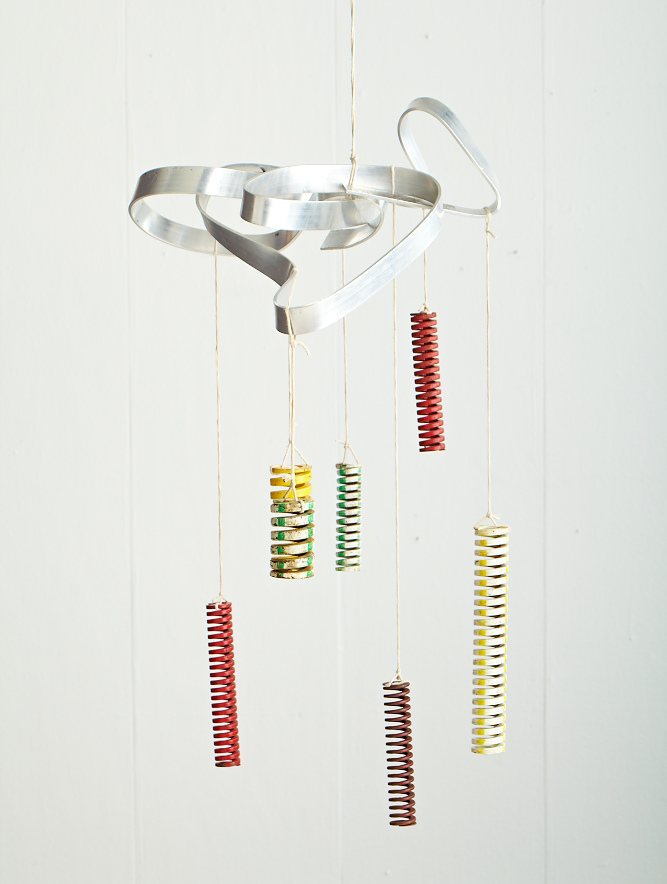
DIY Rusty Cloud/Spring Mobile

November 10, 2011

D4355_C&ADresser036

Whattya need?

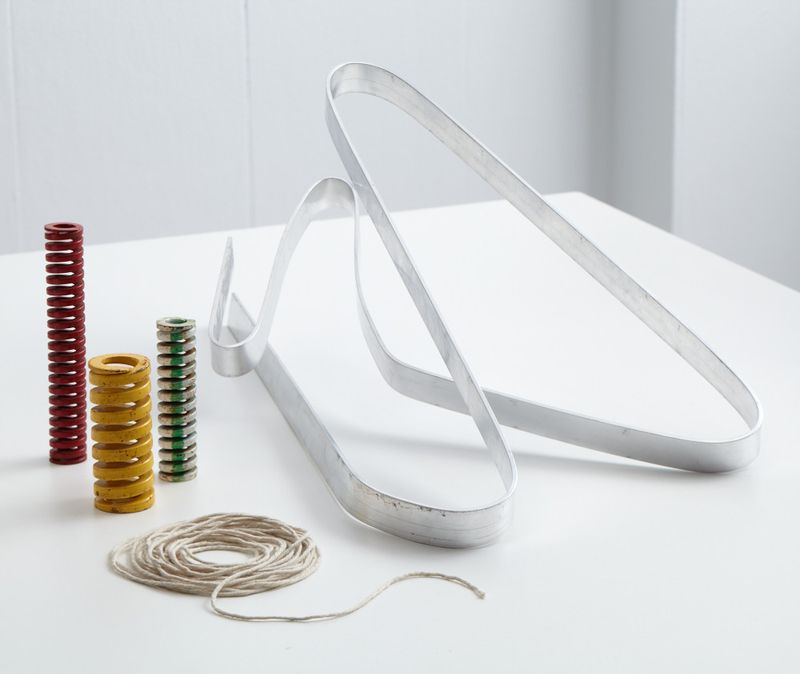
  • Strip of aluminum strapping (approx. 1/8" to desired length, 24-36")
  • String or yarn
  • Springs (vintage machine springs or any other types of springs)

Rusty_cloud

How do I make the mobile?

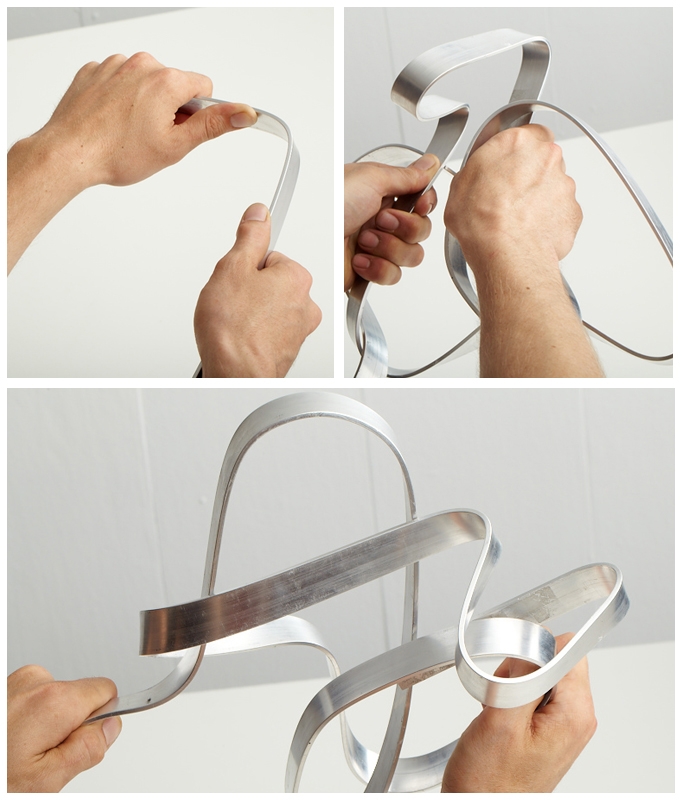
Step 1:  Bend aluminum strapping to desired shape.

1

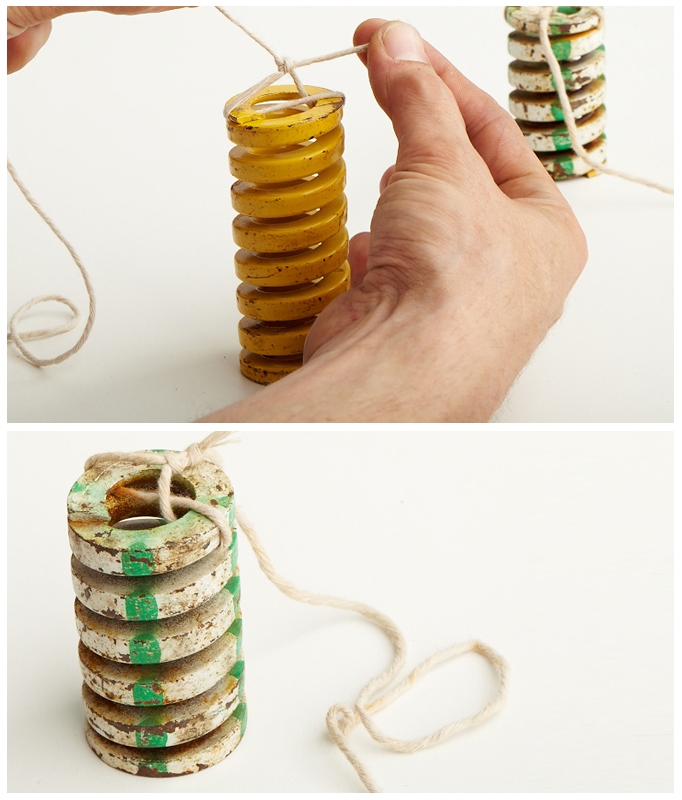
Step 2:  Tie springs to string.

3

Step 3: Try saying “springs to string” ten times fast.

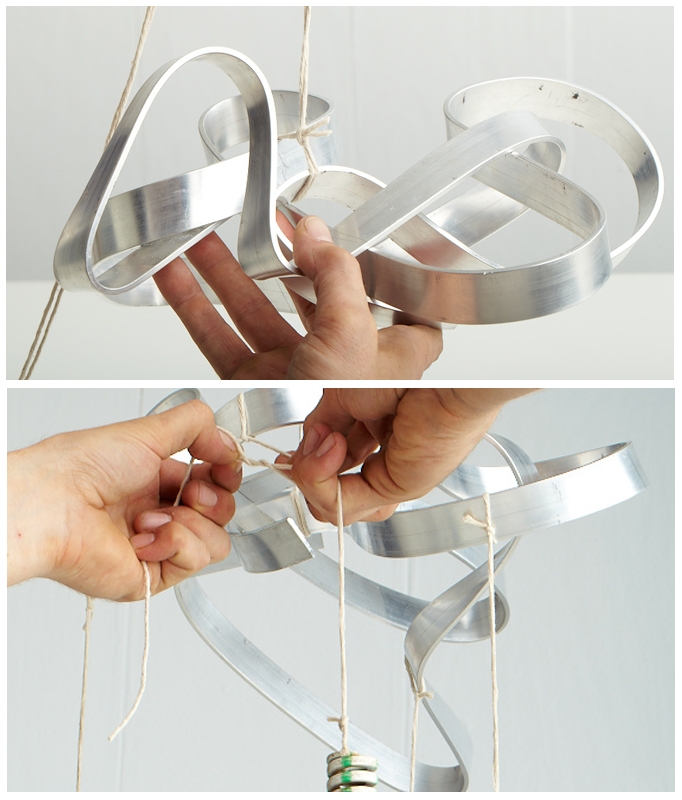
Step 4:  Tie opposite end of string to bent aluminum at desired lengths.

2

Step 5:  Cut a length of string and tie to top-center of mobile for hanging purposes.

Step 6:  Hang.

Rusty_cloud31

Created by Dane Holweger


Taro Gamoi’s Play All Day

November 9, 2011

train

I was nervous that the kids would become bored during our two week road trip this summer, so I purchased Taro Gomi's Play All Day (a book of over 100 punch out pieces).

Luckily, the kids self-entertained better than I expected (you never know), but still when fuss occurred, I'm glad we had this wonderful activity set. The book contains over a hundred punch out pieces, allowing kids to create: finger puppets (don't forget to bring tape), tons of little boxes (which also work well as blocks for toddlers), connecting monkeys, a whole town, and lots of other stuff. The paper toys are incredibly easy to put together and great for lots of ages.

A toy box in a book for under $20, how cool is that? monkeys

Post by Darcy : bedtimemonsters.blogspot.com

Simplicity of Simple Syrup

November 8, 2011
1

Simple syrup lives up to its name. Really. It’s simple to make, simple to use, simply delicious (chime in if you can think of more “simple” puns).

A simple recipe:
To create simple syrup, in a saucepan heat 1 cup sugar + 1 cup water over low heat. Cook 3 minutes or until the sugar dissolves, stirring occasionally. Remove from heat, let cool to room temperature. Transfer to a glass or ceramic container (do not use plastic), cover and refrigerate up to 7 days. Use in any recipe requiring a liquid sweetener such as cocktails, lemonade, coffee, tea, sauces, marinades or desserts.

A fancy simple syrup:
Infusing simple syrup with fruits, herbs and spices is just as simple as simple syrup itself.        As the water and sugar are dissolving over low heat, add your choice of orange, lemon or lime peel (without the bitter pith), sliced fennel bulb, fresh gingerroot, mint, basil, thyme, rosemary, peppercorns, toasted fennel or caraway seeds – you get the picture. How much should you add? It’s a matter of taste. For 1 cup of sugar/water, we recommend any of the following – feel free to mix and match to create endless flavor profiles:

Peel of 2 lemons (no white pith)
Peel of 3 limes
Peel of 2 oranges
Peel of 1 grapefruit
1/2 cup peeled, sliced fresh gingerroot
1 cup fresh sliced fennel bulb
1 cup fresh chopped basil, mint, cilantro or other herbaceous aromatics
2 tablespoons rosemary, thyme or other woody herbs
2 tablespoons toasted fennel seed, caraway seed or similar
1 teaspoon whole black peppercorns (use less for less heat)
1 chili pepper, sliced in half

Allow the aromatics to steep in the syrup until the syrup cools to room temperature.                Strain syrup, discard the aromatics. Transfer to a glass or ceramic container (do not use plastic), cover and refrigerate up to 7 days.

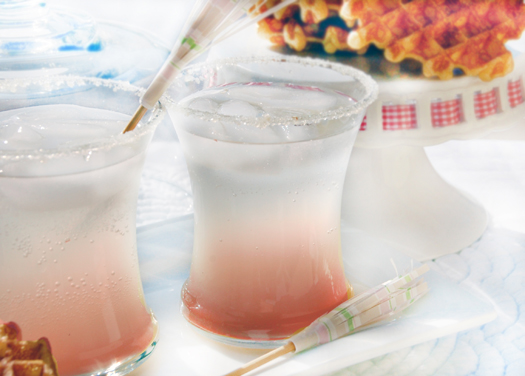
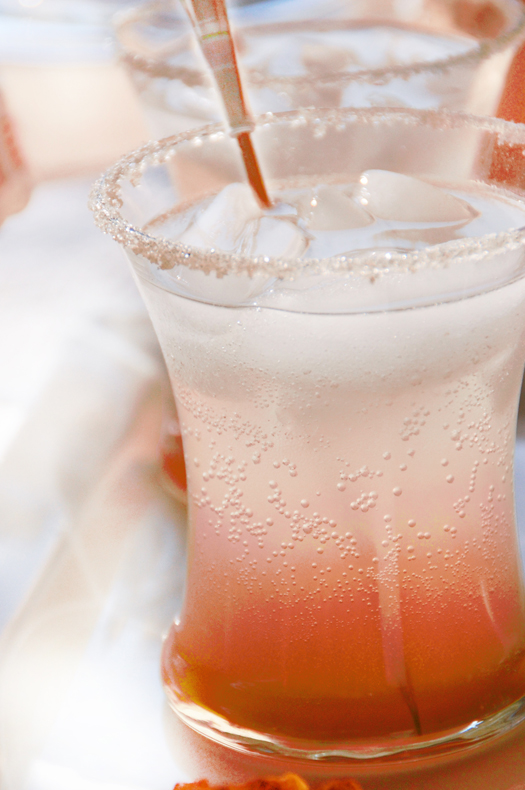
Our favorite {wicked good} way to use simple syrup is in homemade soda pop by mixing the syrup, fruit juice or pureed fruit and sparkling water.
2

Ginger-Grapefruit Soda Pop

Servings: makes 10 (8-oz.) servings
Allergy info: soy-free, gluten-free, dairy-free

For the ginger simple syrup:
1 cup organic sugar
Pinch of salt
1 cup water
1/2 cup peeled, sliced fresh gingerroot
1/2 teaspoon whole black peppercorns
1/4 teaspoon organic vanilla extract

For the soda:
2 1/2 cups fresh grapefruit juice (about 3 medium grapefruit)
5 cups sparkling water, ice cold
1/2 cup organic sugar
Ice cubes

Make the ginger simple syrup:
In a small saucepan heat sugar, salt, water, gingerroot, peppercorns and vanilla extract over low heat until sugar is dissolved, stirring occasionally, about 3 minutes. Remove from heat. Cover and let stand until room temperature, about 30 minutes. Strain syrup, discard aromatics.

Make the soda:
In a large pitcher stir together the ginger simple syrup and grapefruit juice, set aside. In a large dish spread organic sugar in a single layer. Moisten rim of each glass with water. Dip rim of each glass in sugar, set glasses aside, discard sugar. Fill each glass with large ice cubes.         Pour 4 oz. of grapefruit mixture into each glass; top with 4 oz. of sparkling water. Gently stir to mix, serve cold.

Post by Dawn Viola : www.DawnViola.com

Thanksgiving Tradition: Thankful Trees

November 7, 2011

Post by Aimee and Bettijo of www.supermomments.com
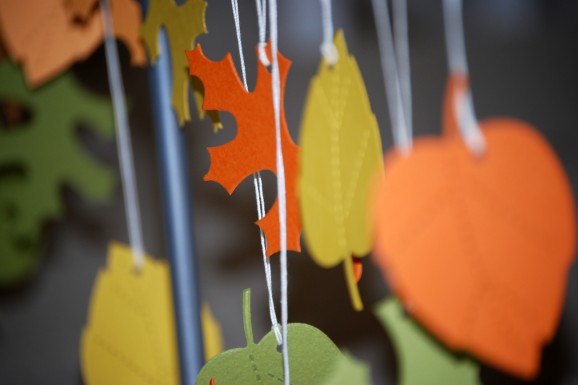
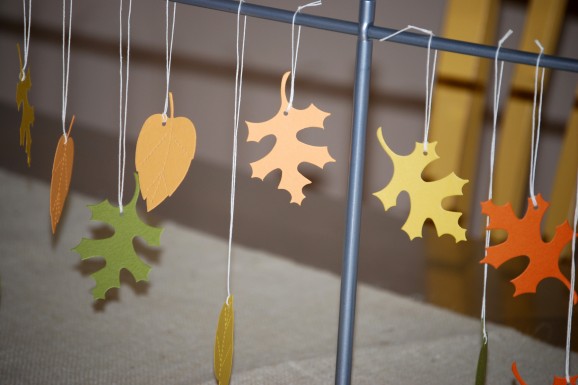
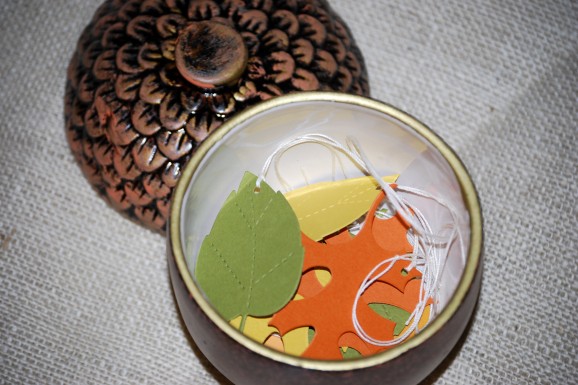
Thanksgiving Tradition: Thankful TreesThis week we pulled out our Thankful Tree, a Thanksgiving tradition we started last year. Each night at dinner we write on a paper leaf something we are thankful for. As the month continues the tree becomes full of leaves, so we are in constant remembrance of our blessings. Last year it helped Liam, then three, understand what being thankful means.

I’ve seen Thankful Trees done several ways. I especially love the idea of using a small fallen tree branch placed in a vase or pot. The simple look of the natural branch is inspiring to me. However, since we live in the desert, fallen branches are hard to come by (especially a fallen branch without thorns). So, I’ve resorted to other “branches”.

Thanksgiving Tradition: Thankful Trees 2Last year we used a metal orange IKEA tree; I’ve had this orange tree for several years, and I love it. However, this year IKEA introduced an ornament hanger in their holiday line that I opted to use instead. I love the sleek design!

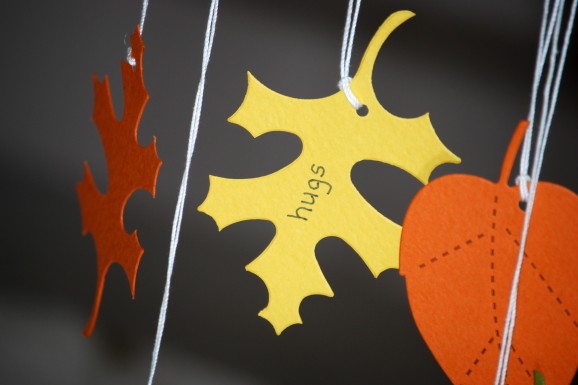
Thanksgiving Tradition: Thankful Trees 3We keep all the paper leaves strung and ready to write on in a small acorn jar. I simply punch a hole in a paper leaf, loop some string through the hole and drop in the jar. (You can find similar paper leaves here and here.) It took me one Glee show to prepare (slightly time consuming), but hearing the things my boys are thankful for makes it all worth the time. (Liam volunteered he was thankful for hugs for his first leaf.)

Thanksgiving Tradition: Thankful Trees 4Post by Aimee and Bettijo of www.supermomments.com
Preserving Fall Leaves

November 4, 2011

Post by Darcy of bedtimemonsters.blogspot.com
Preserving Fall Leaves

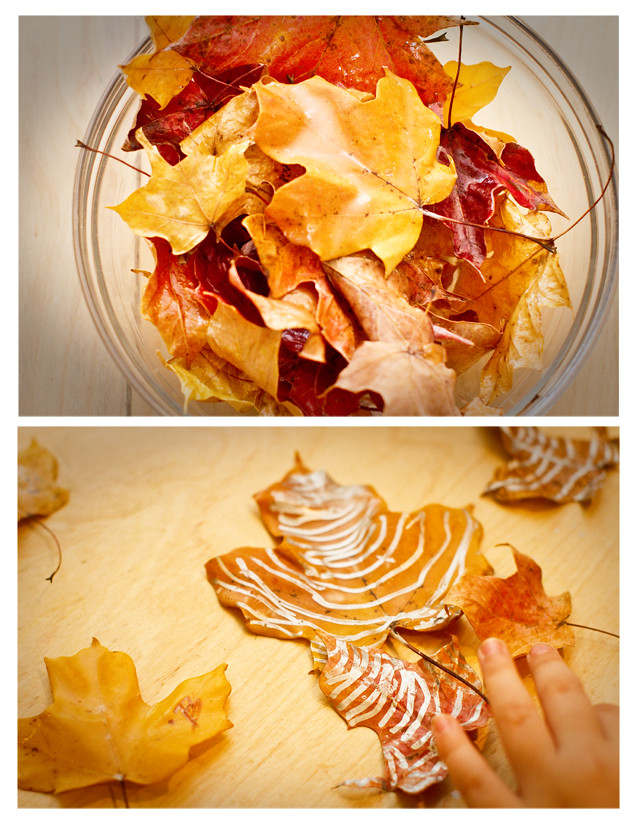
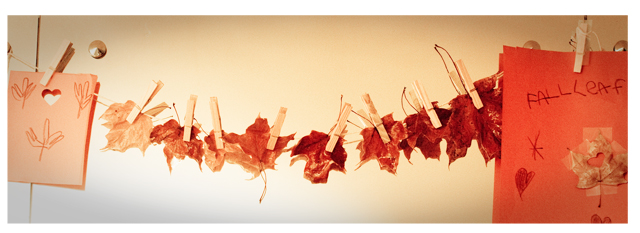
(the top leave was preserved with wax, the rest were mod podged)

Using wax as a way of preserving fall leaves has been all over the internet lately (click here for some info), so I thought I’d try it with the kids. First off, we went on a scavenger hunt for the best leaves. A huge tree resides on the corner of our block, it’s one of those things that you don’t really pay much attention to most of the year, but when fall comes that tree is the BOMB. The tree’s leaves always change color first and it reside on a slope, so the whole surrounding area quickly fills with fall foliage.

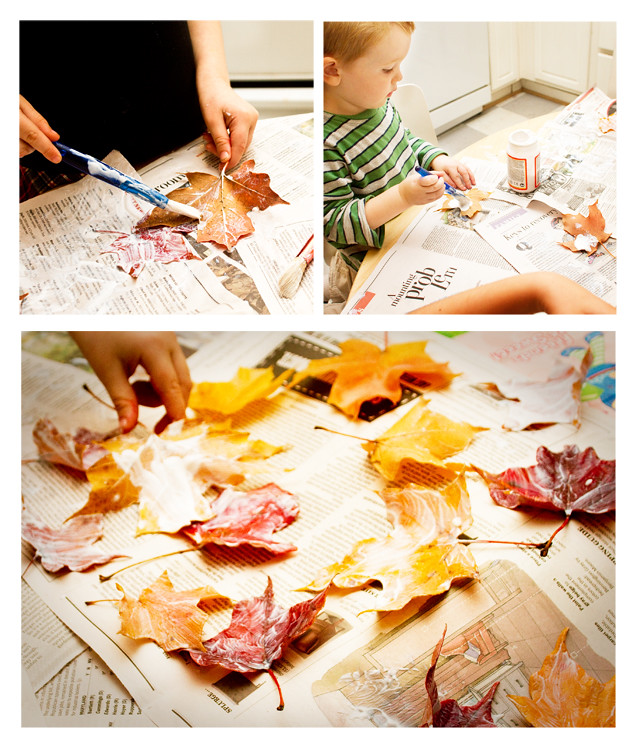
Anyways, for our scavenger hunt we took along buckets and gathered a LARGE amount of leaves. I then melted beeswax over the stove (double-broiler fashion, using clamps to hold an old beeswax-filled tin can in the boiling water), but the wax dried fast and it was hard to submerge the whole leaf (truthfully, I think you’d need a LOT of beeswax to make this work). So we moved to plan b – mod podge. I covered the table with newspaper, gave the kids paintbrushes and asked them to paint with the podge (we used glossy, but I think matte might have looked a little better when dry). The kids had a blast, though my husband complained that the smell  permeated the house throughout the night.
Preserving Fall Leaves - PaintingSo what to do with the leaves? At first I left them in a bowl by the door, simple and seasonal. But then F decided we needed more decorations throughout the house (holiday decorating is not my strong suit), so we used string and wooden clothespins to create a leaf banner and hung it in our front room (along with other banner-worthy paper decorations created by my 5 year old). We had a few leaves left over, which the girls chose to decorate with silver glitter pens.     All in all a nice fall project. And I like that years from now we can get the leaves out and remember autumn of 2011, as cheesy as that sounds. Preserving Fall Leaves - BannerI couldn’t get a good picture of the banner. The flash, the mirror, and the close proximity to the ceiling made it tricky. Plus I was pretty done with being creative by the time I picked up the camera. On the upside, it’s still hanging.

Post by Darcy of bedtimemonsters.blogspot.com

Feathers, Owls + Cocktails by the Fire

November 3, 2011

Post by Becca of CAKE

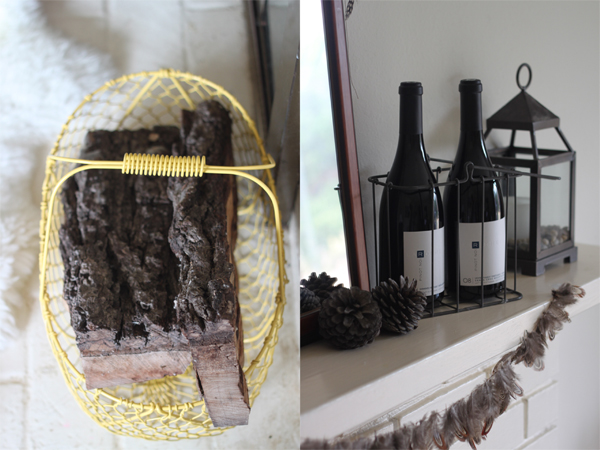
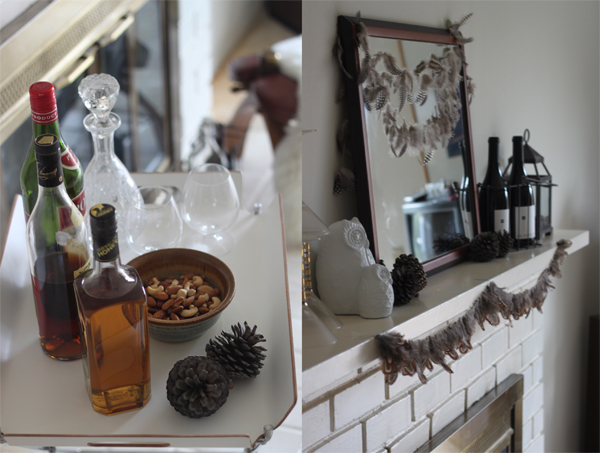
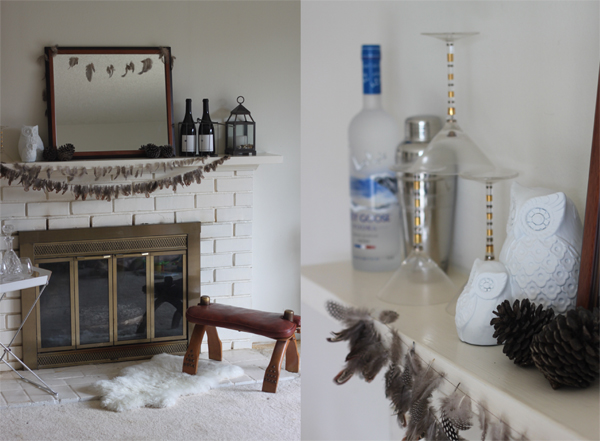
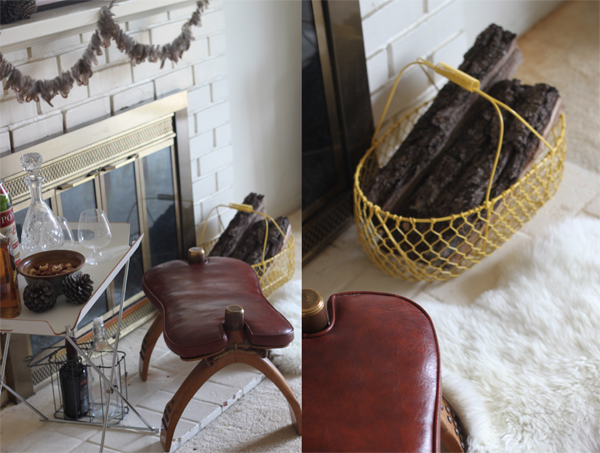
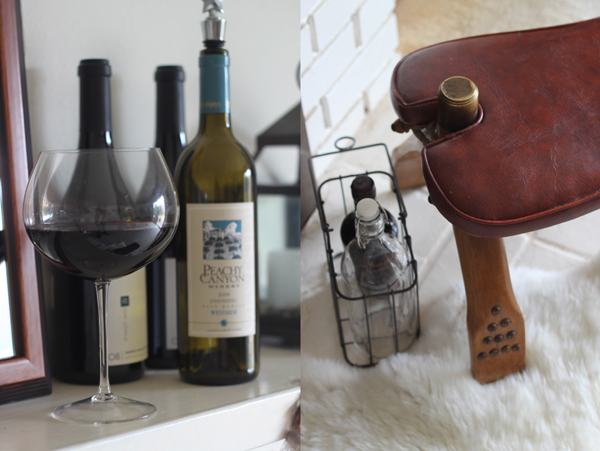
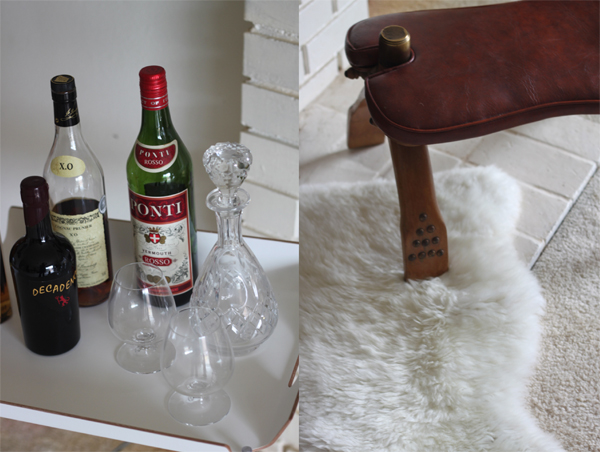
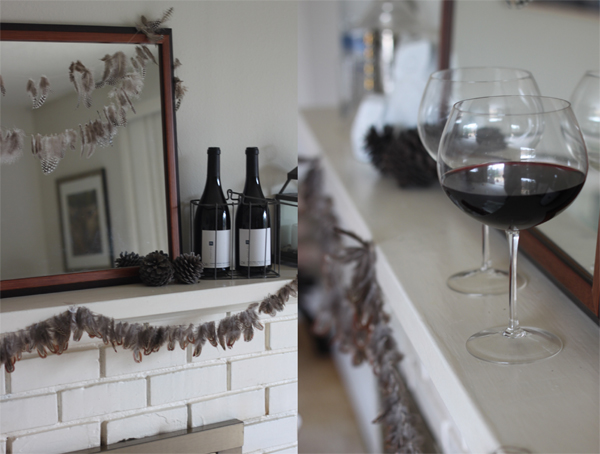
Welcome everyone! Cozy up around the fireplace and enjoy a glass of Pinot Noir… here are a few simple ideas to add ambiance to a fall dinner or cocktail party at home.

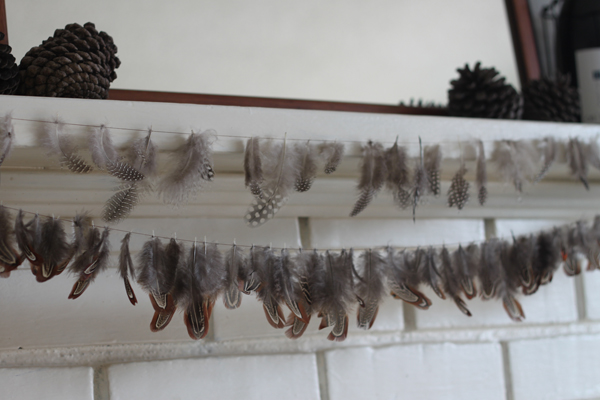
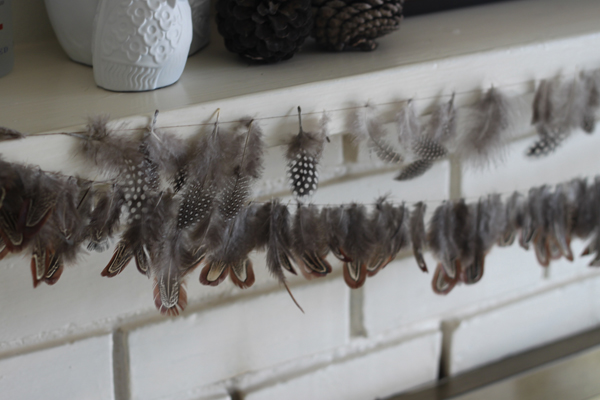
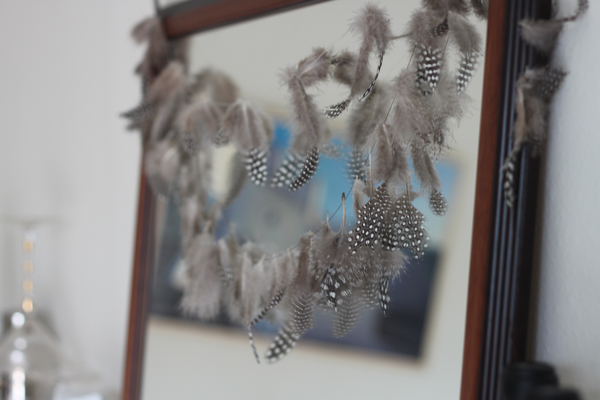
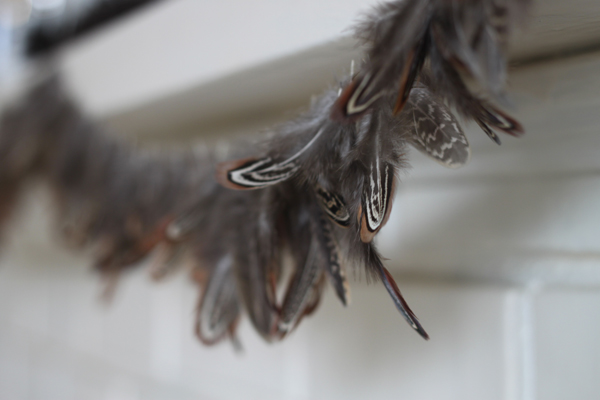
These soft and delicate feather garlands were easily created using a needle and thread to string quail and pheasant feathers in varying patterns (not to worry… no birds were harmed in the making of these garlands).

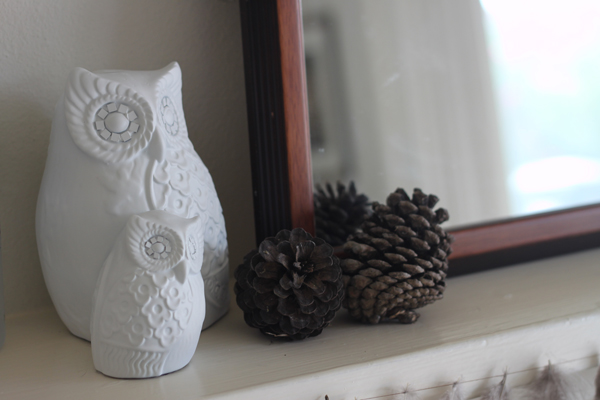
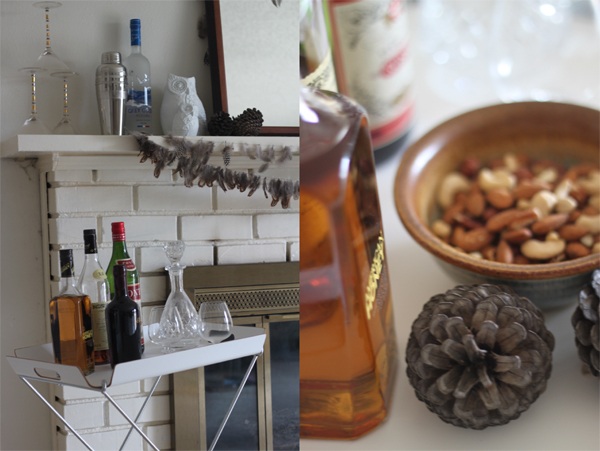
The owls were purchased at a discount store in an unattractive silver color.  A few coats of flat white spray paint immediately modernized them and gave them the appearence of porcelain.  It was such a simple fix that I’ve been resisting a strong urge to spray paint all of my household objects.

A mantle is always a natural home to display seasonal objects like these, but add a few bottles of wine and some cocktails to the mix and you have yourself a cozy party by the fire!

Halloween Decorations - DIY Feather Garland

Halloween Decorations - 2

Halloween Decorations - Fall Mantel Accents

Halloween Decorations - Fall Mantel Accents 2

Halloween Decorations - Fall Mantel Accents 3

Halloween Decorations - Fall Mantel Accents 4

Halloween Decorations - Fall Mantel Accents 7

Halloween Decorations - Fall Mantel Accents 8

Halloween Decorations - Fall Mantel Accents 9

Halloween Decorations - Fall Mantel Accents 10

Halloween Decorations - Fall Mantel Accents 11

Halloween Decorations - Fall Mantel Accents 12

Halloween Decorations - Fall Mantel Accents 13

Post by Becca of www.cakeeventsblog.com

City Autumn

November 2, 2011

1

The air breathes frost.  A thin wind beats

Old dust and papers down grey streets

And blows brown leaves with curled up edges

At frighened sparrows on window ledges.

A snowflake falls like an errant feather:

A vagabond draws his cloak together,

And an old man totters past with a cane

Wondering if he'll see spring again.

-joseph moncure march


I shot this feather photograph on a hike last week, not in the city but it made me think of this poem.

oxo

Post by Kerry MacLeod : www.snickerdoodles.ca