Close

Blog

DIY String-Wrapped Lampshade

November 1, 2011

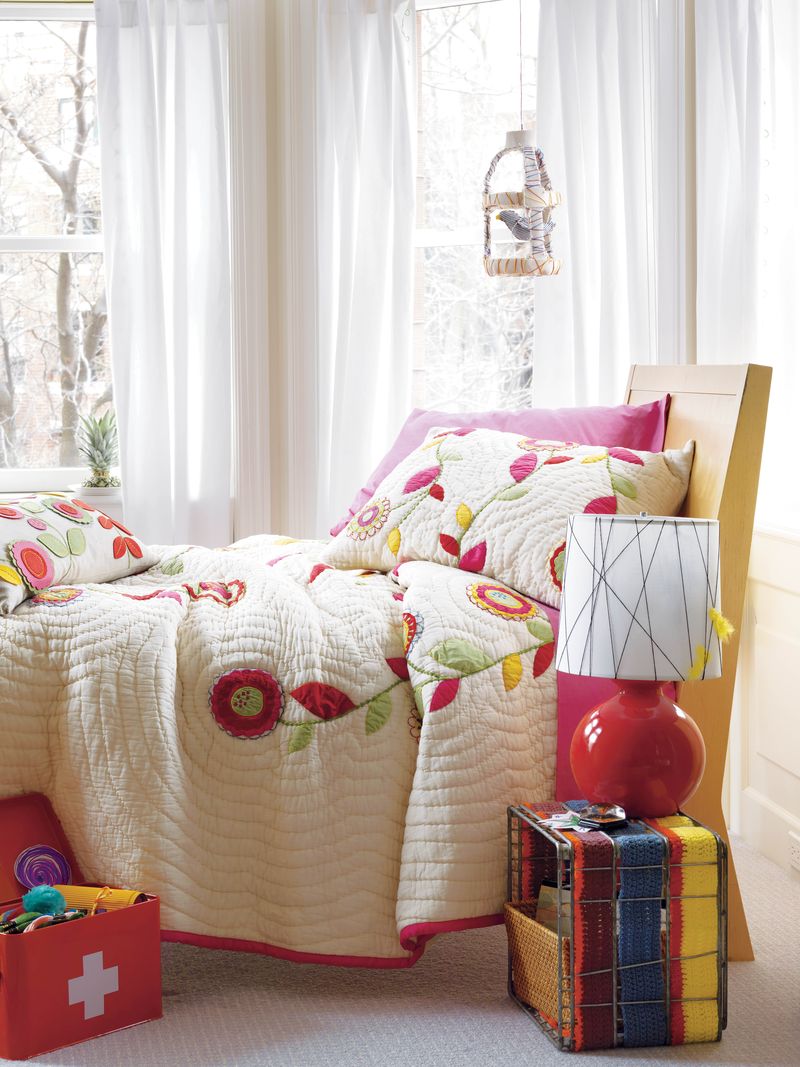
D4355_FreshCFlBed64

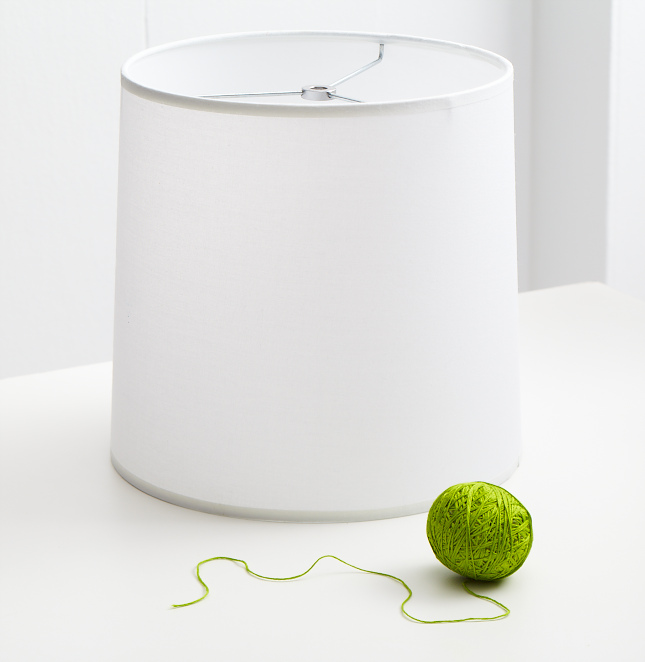
Whattya need?

  • Embroidery thread
  • Decorations (if desired)

Stringlamp_01

How do I make the lampshade?

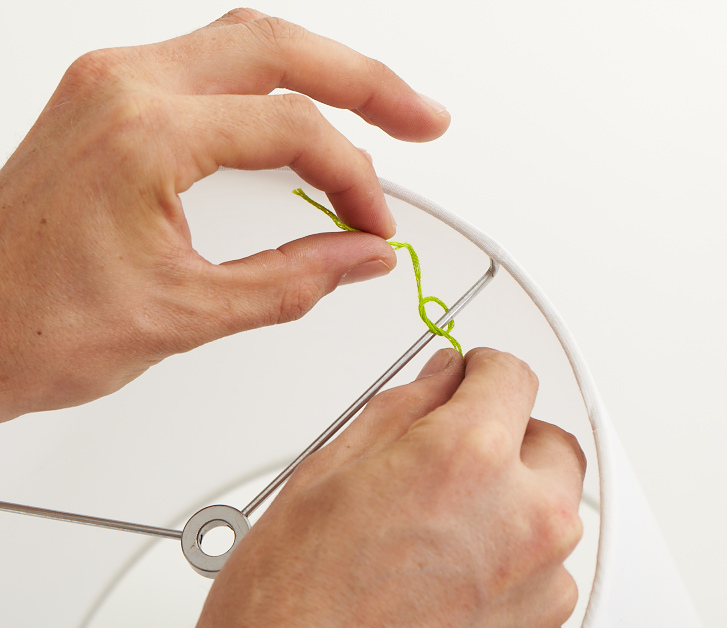
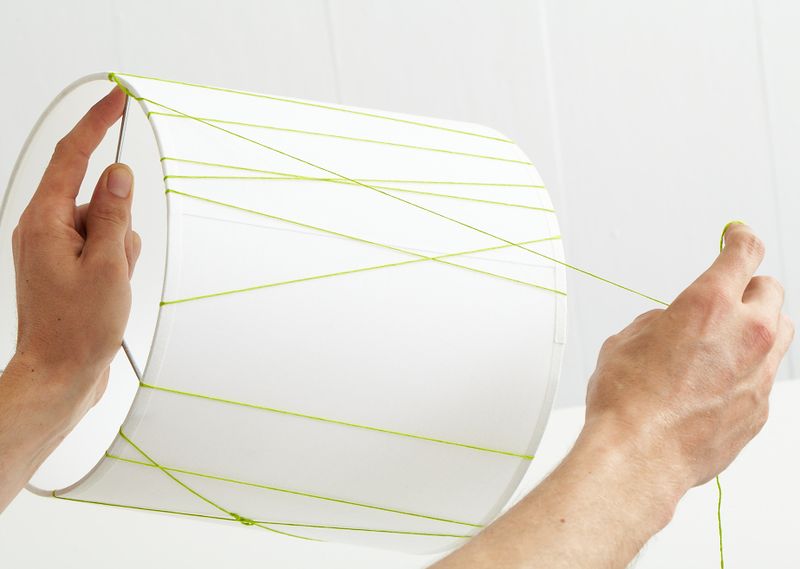
Step 1:  Tie the end of thread to the armature inside the shade.

Stringlamp_02

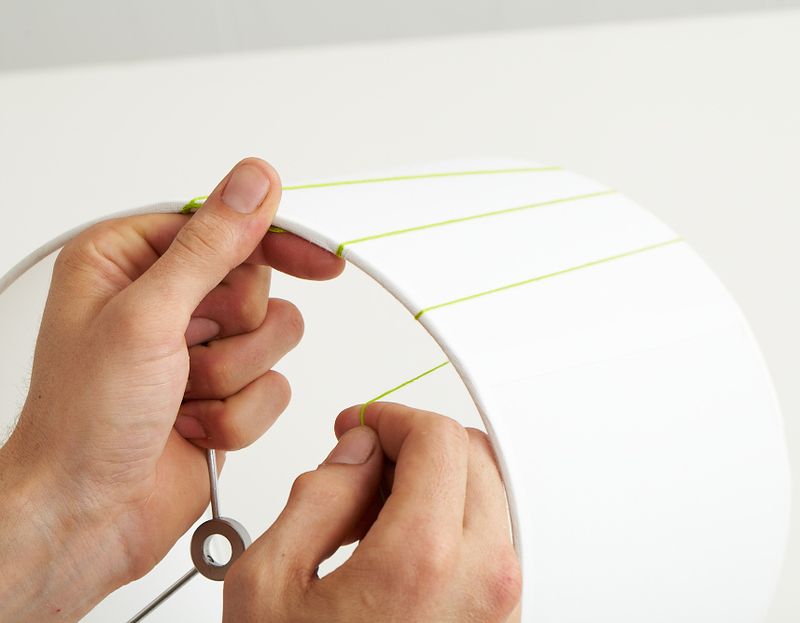
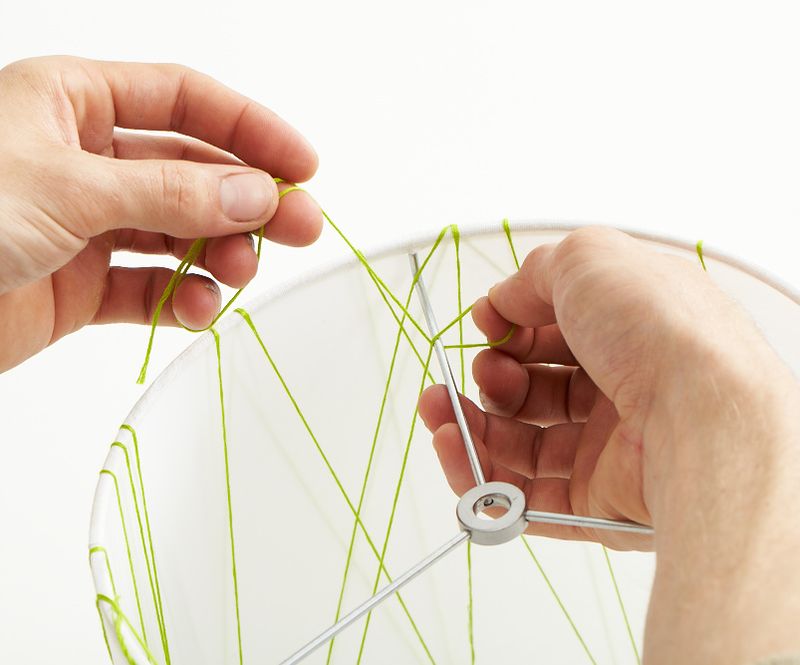
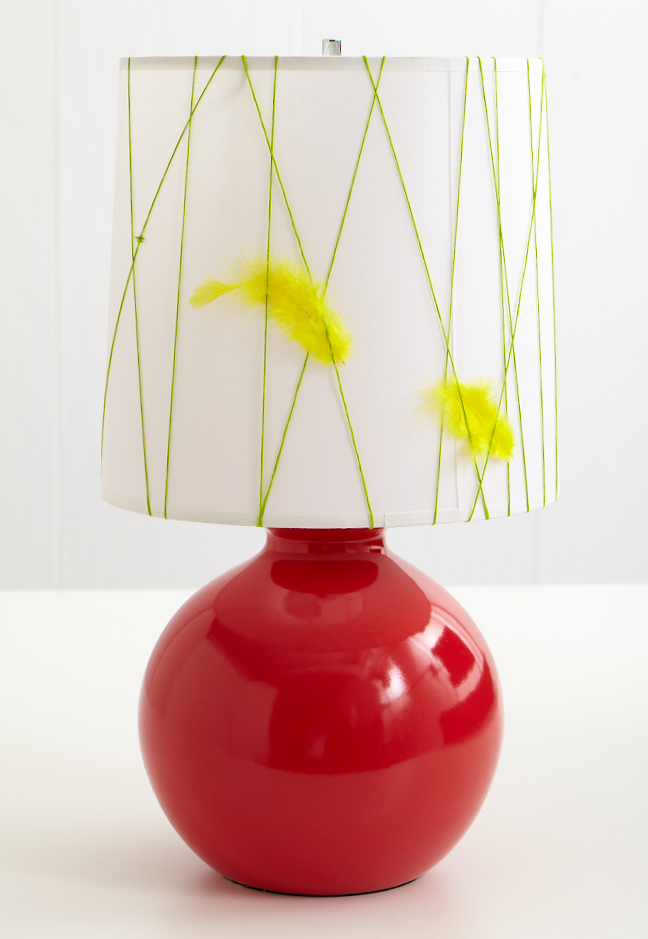
Step 2:  Wrap string repeatedly around shade in any desired pattern.

Stringlamp_05

Stringlamp_09

Step 3:  Tie off end to lampshade armature.

Stringlamp_10

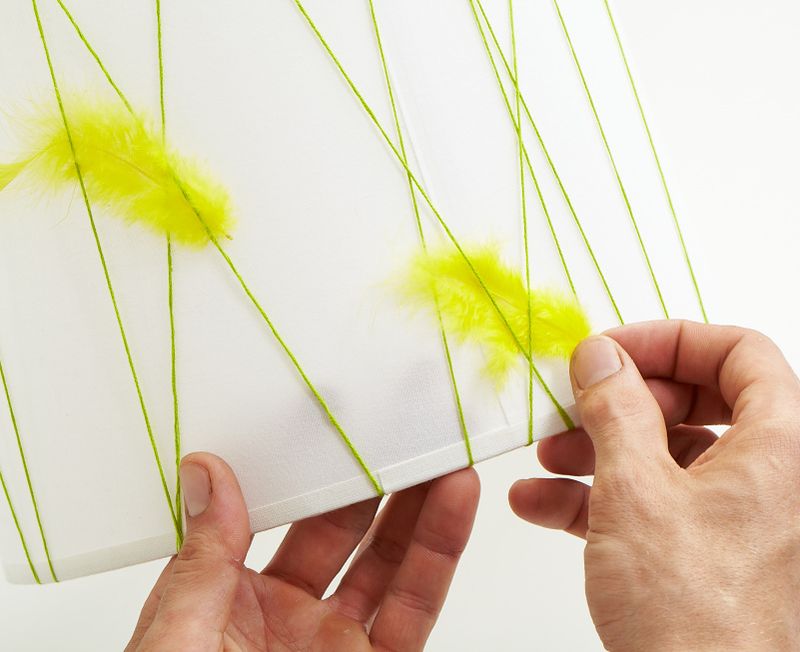
Step 4:  Apply any details if desired. (We used yellow feathers.)

Stringlamp_20

Stringlamp_23

Created by Dane Holweger

Halloween Flower Arrangement Ideas

October 31, 2011

Post by Sara Westbrook & Brittany Egbert for One Charming Party

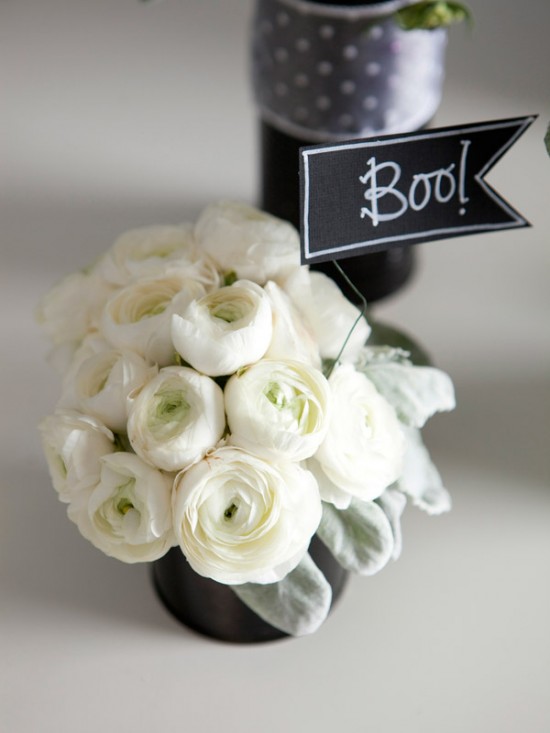
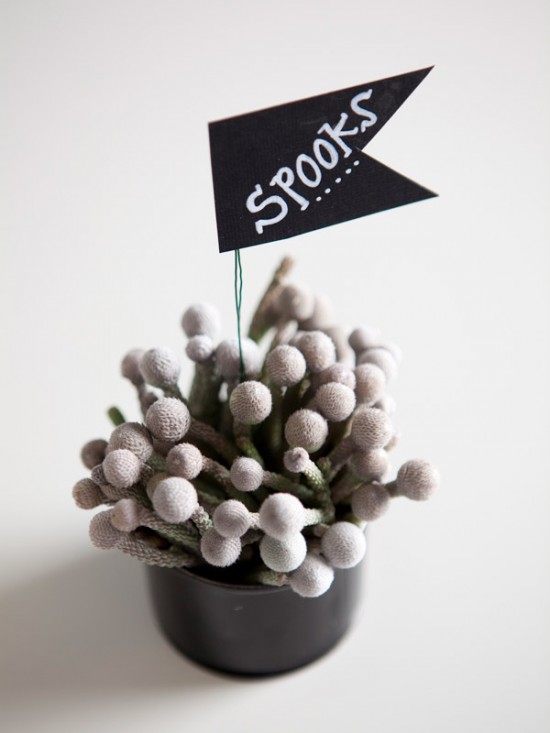
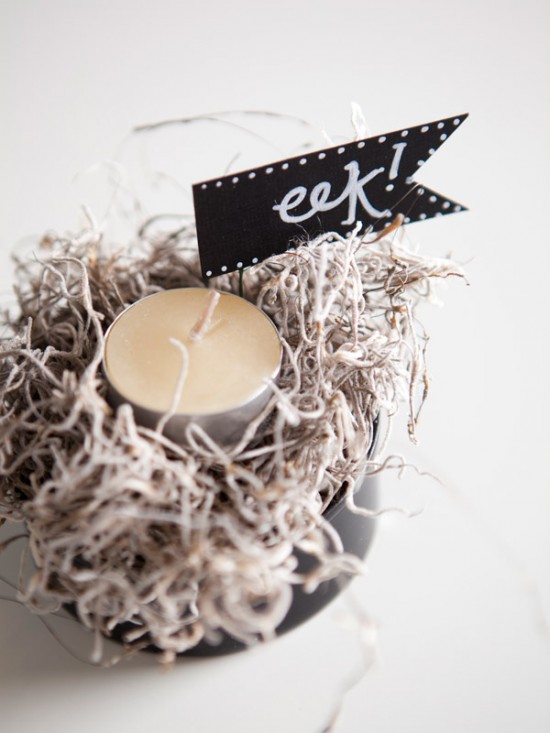
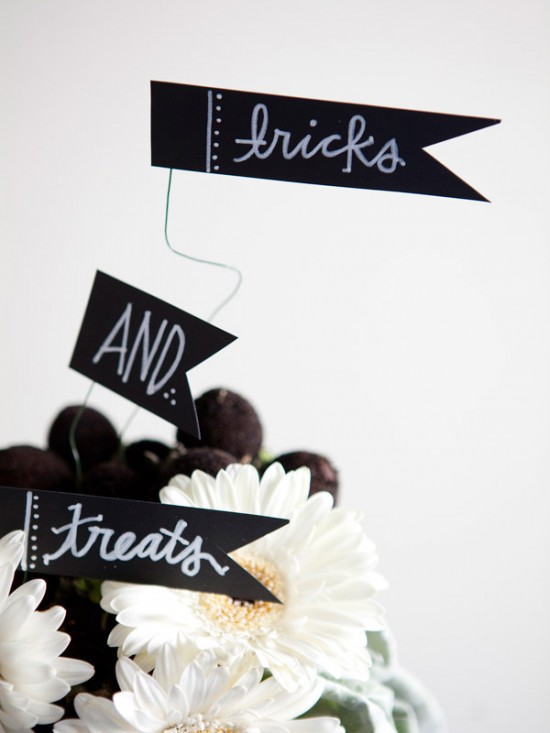
If you need some Halloween flower arrangement ideas, I have some cute ones to show you today.

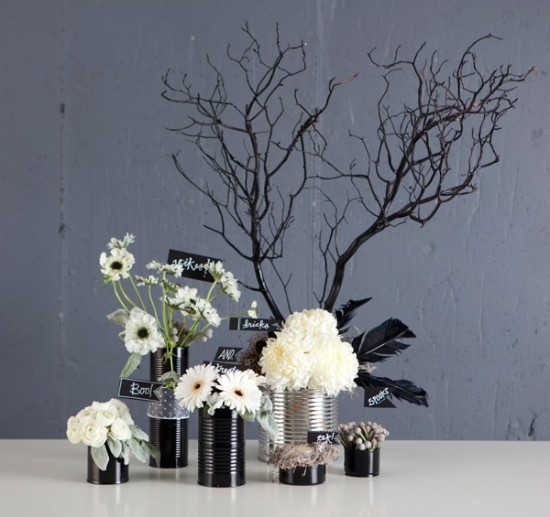
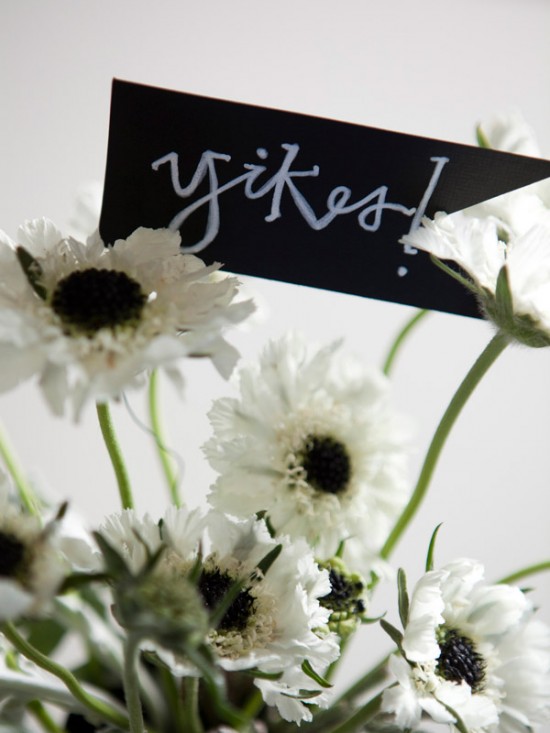
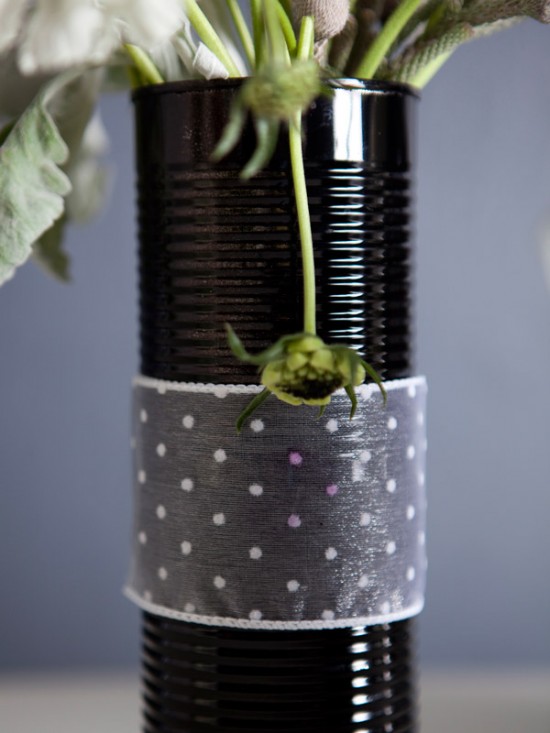
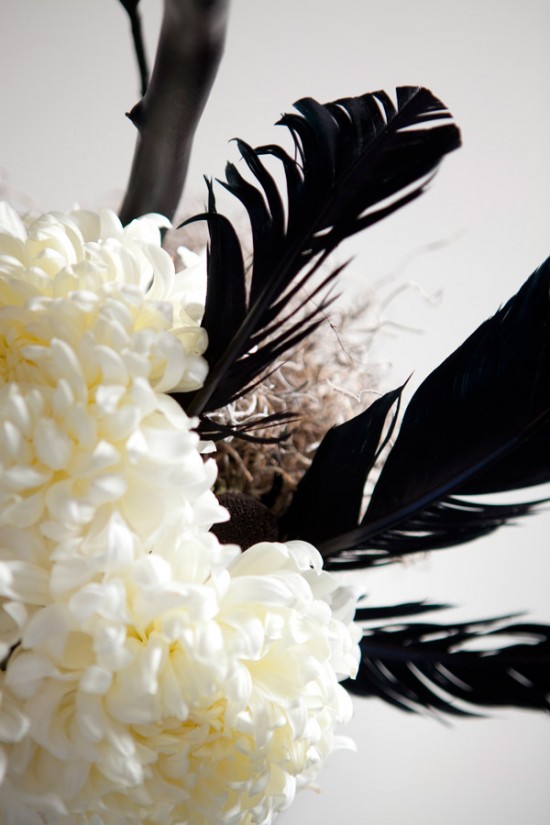
Using black and white flowers and incorporating hues of grey, you’re sure to instantly set a frightfully fun mood. And you don’t need to splurge on vases for these spooky decorations. Pull out your cans from the recycle bin and spray paint the cans black or leave them plain. You can even glue two cans on top of each other, just hide the seam with some ribbon (only the top can is used for flowers and water, but it gives the illusion of a taller vase). Then add feathers, mini signs, moss or painted branches to add interest to your Halloween floral arrangements. But most of all, have fun with it.

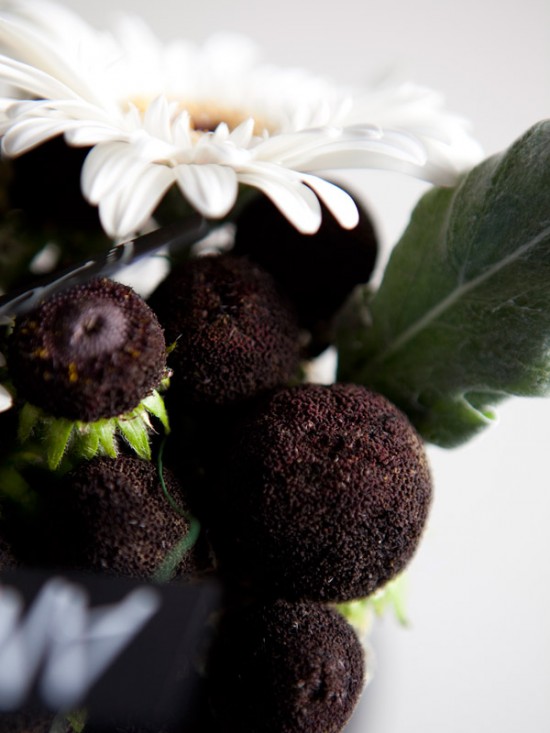
Here is a list of the flowers used in these arrangements: ranunculus, dusty miller, gerbera daisies, berzelia, scabiosa (with the centers painted black with acrylic paint), rudbeckia seed heads, football mums, spanish moss, and a manzanita branch. Halloween Flower Arrangement Ideas - 1 Halloween Flower Arrangement Ideas - 2 Halloween Flower Arrangement Ideas - 3 Halloween Flower Arrangement Ideas - 4 Halloween Flower Arrangement Ideas - 5 Halloween Flower Arrangement Ideas - 6 Halloween Flower Arrangement Ideas - 7 Halloween Flower Arrangement Ideas - 8 Halloween Flower Arrangement Ideas - 9

Find more Halloween decorations to style your space at The Land of Nod.

Post by Sara Westbrook & Brittany Egbert for One Charming Party: onecharmingparty.com. Floral Design by Megan Dunford of Persimmon Floral. Photos by Nicole Hill Gerulat : www.nicolephoto.com

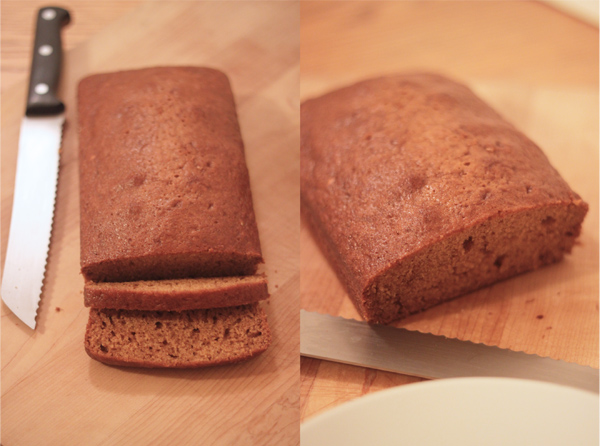
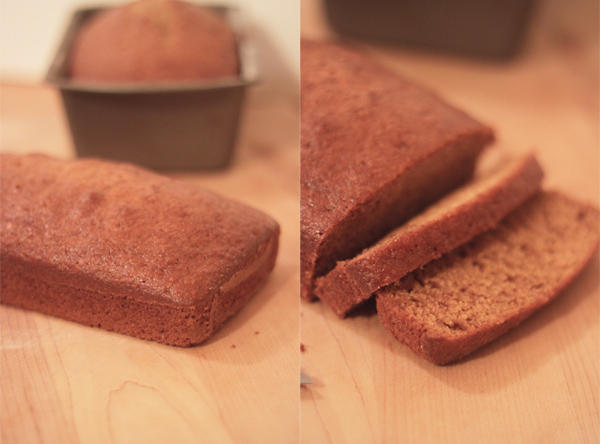
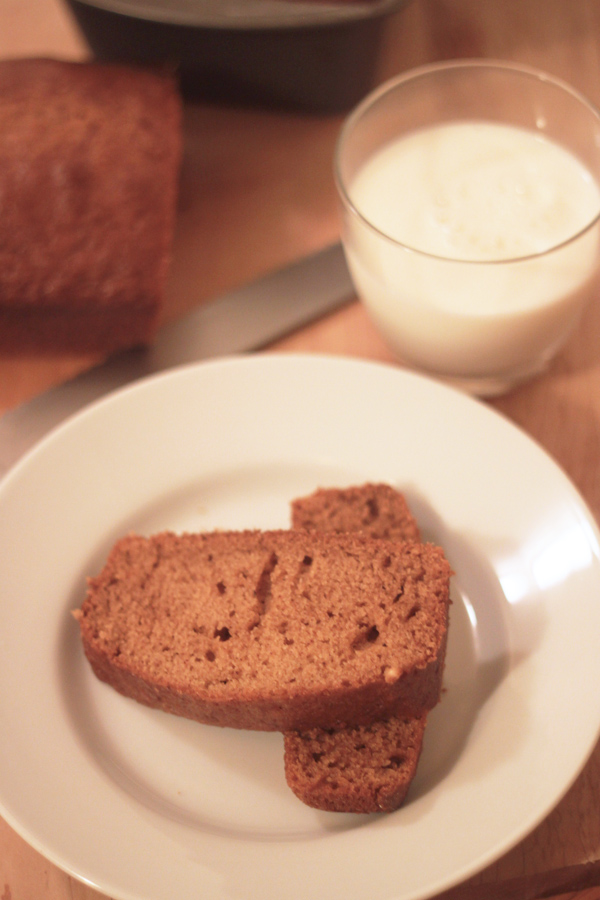
Good Old Fashioned Pumpkin Bread

October 28, 2011

This simple pumpkin bread is the perfect comfort food for a cool fall day.  It’s moist and sweet with just the right amount of spice.  The recipe makes two loaves, so you can serve one as a homemade treat for the family and wrap up the other as a seasonal hostess gift. Done and done!

1

2

3

Pumpkin Bread

Ingredients
1 (15 ounce) can pumpkin puree
4 eggs
1 cup vegetable oil
2/3 cup water
3 cups white sugar
3 1/2 cups all-purpose flour
2 teaspoons baking soda
1 1/2 teaspoons salt
1 teaspoon ground cinnamon
1 teaspoon ground nutmeg
1/2 teaspoon ground cloves
1/4 teaspoon ground ginger

Directions
1. Preheat oven to 350 degrees F (175 degrees C). Grease and flour two 9×5 inch loaf pans.
2. In a large bowl, mix together pumpkin puree, eggs, oil, water and sugar until well blended.   In a separate bowl, whisk together the flour, baking soda, salt, cinnamon, nutmeg, cloves and ginger.
3. Stir the dry ingredients into the pumpkin mixture until just blended. Pour into the prepared pans.
4. Bake for about 1 hour in the preheated oven. Loaves are done when toothpick inserted in center comes out clean.

Need more tasty recipes and delicious bites? Check out our Let’s Eat Pinterest Board.

Post by Becca : www.cakeeventsblog.com

Scared Silly Halloween Snack Mix

October 27, 2011

Post by Aimee and Bettijo of www.supermomments.com
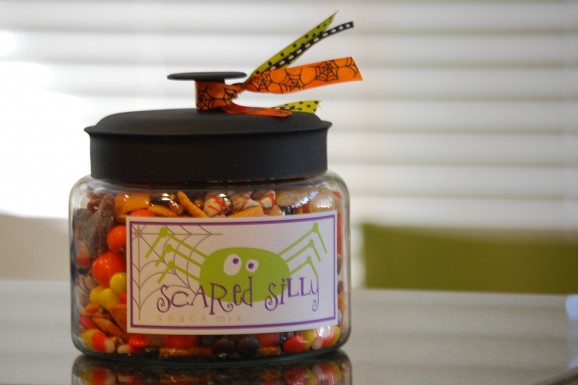
Scared Silly Halloween Snack Mix

With Halloween days away, I just finished making another batch of our Scared Silly Halloween Snack Mix. I find this treat not only frightfully delicious but a great last-minute hostess, teacher or neighbor gift as well. Simply combine your favorite seasonal treats (My favorites are listed below) in a large bowl, pour into glass jars (or cellophane bags), label and deliver.

To make it even easier, download our free Scared Silly Snack Mix label.

Cheese-it crackers
Chocolate or yogurt-dipped pretzels
White chocolate chips
Pretzel sticks
Candy Corn
Candy pumpkins
Candied orange slices (I found sugar-coated Halloween gummy bats at our local health food store.)
Reese’s pieces
Whoppers (I used a specialty orange-colored pumpkin variety.)
Peanuts

Post by Aimee and Bettijo of www.supermomments.com

Salty Watercolors

October 26, 2011

top

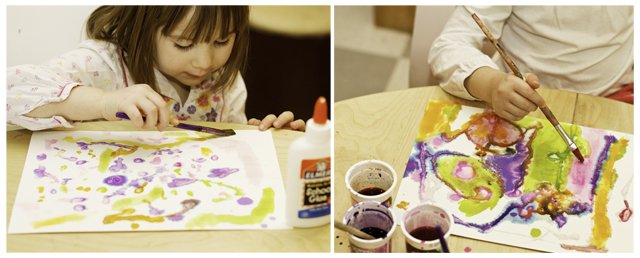
I learned about salty watercolors from this post in the Artful Parent's archives (wow, there's a wealth of information over there) and I have to say this was one of my favorite kid projects EVER. First of all, the mess factor isn't too bad. Second of all, set up is relatively easy.

And, finally, the project occupied the girls for long periods of time with very little parental involvement (YAY!!). If I had a ratings system, I'd give it the highest rating.

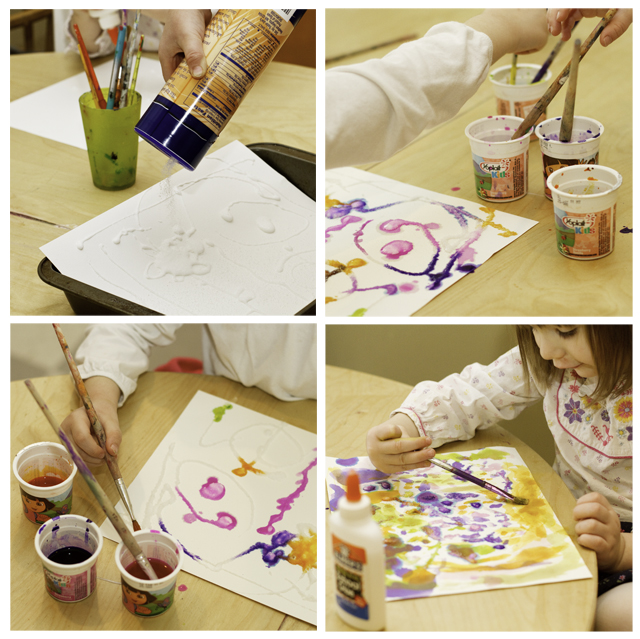
Here's the scoop: Materials – Liquid watercolors (or food coloring), Elmers glue (or an equivalent), table salt, a pan or platter (to pour the salt over), and thick paper or cardboard (ordinary paper will buckle from the salt).

1. First the girls drew pictures with glue on watercolor paper. 2. Then we poured salt over the still-wet glue. We used the pan to shake off the salt that didn't stick. 3. Finally the girls touched watercolor-dipped paintbrushes onto the still-wet glue/salt designs. The color slowly traveled through their designs, which was really fun to watch. four

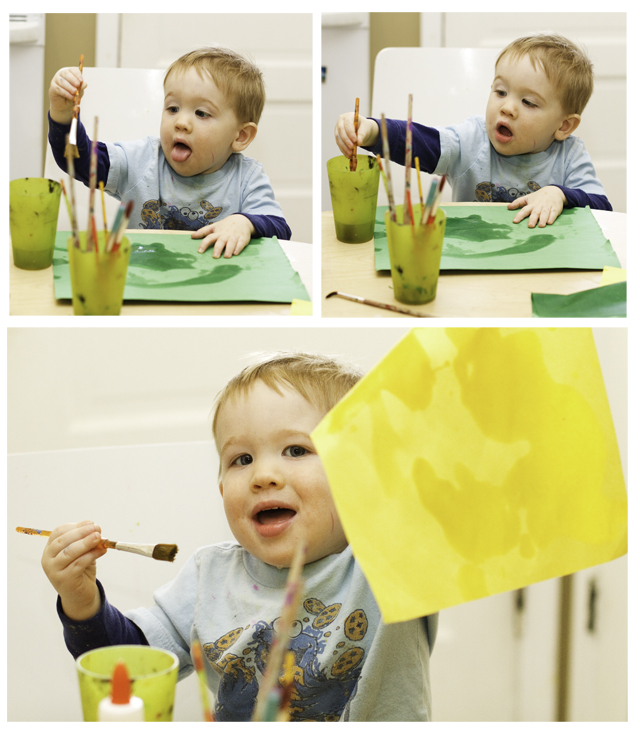
If you've ever wondered what the toddler does during craft-time usually he sleeps.                  But sometimes he doesn't. I probably should let him paint with real paint but it's just so messy, so for now I've tricked him into painting with water. And that works for awhile (until he realizes that his pictures don't look like the girls' pictures). babyart

Post by Darcy : bedtimemonsters.blogspot.com

DIY Pumpkin Bird Feeder

October 25, 2011

Post by Destri of www.themotherhuddle.com
DIY Pumpkin Bird Feeder

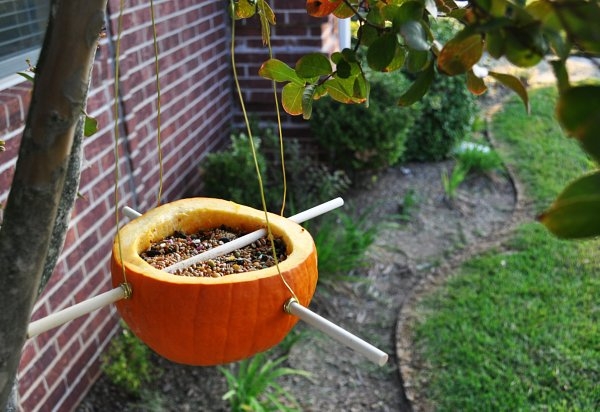
It’s the time of year when pumpkins are filling up the produce section at the market, and the birds are in need of a little help to get ready for the winter. Perfect excuse to make a pumpkin bird feeder. They are cute, easy, and you don’t have to store anything for next year! My kids helped me with this project too, and loved sitting in the window to see what birds came to dig in.

Supplies:

  • small pumpkin pie pumpkin, or an acorn squash, gourd….
  • wooden dowels
  • bird seed
  • wire

Cut off the top portion of the pumpkin. If you are using a squash, cut low enough to make sure the dish is not too deep. Now clean out the seeds, this is where the kids can help. I used a little paring knife to make the holes for the dowels by twisting through the side. But you could pull out a drill if you are feeling like using a power tool ;). Make two holes across from each other and then make two more a little lower so that one dowel will cross over the top.

DIY Pumpkin Bird Feeder 2

Wrap the wire around the dowels a few times and then once at the top to join them. Fill with birdseed.

DIY Pumpkin Bird Feeder 3

To hang mine I slid off two of the wires and strung over a branch, then just slid the wire back over the dowel ends.

DIY Pumpkin Bird Feeder 4

Cute and easy! It would be fun to hang from a garden hook too, or maybe a few hanging from the hooks where your flower baskets were hanging this summer.

Post by Destri of www.themotherhuddle.com

Spook-tacular Halloween Party Decorations

October 24, 2011

Post by Sara Westbrook & Brittany Egbert for One Charming Party: onecharmingparty.com
Spook-tacular Halloween Party - 1

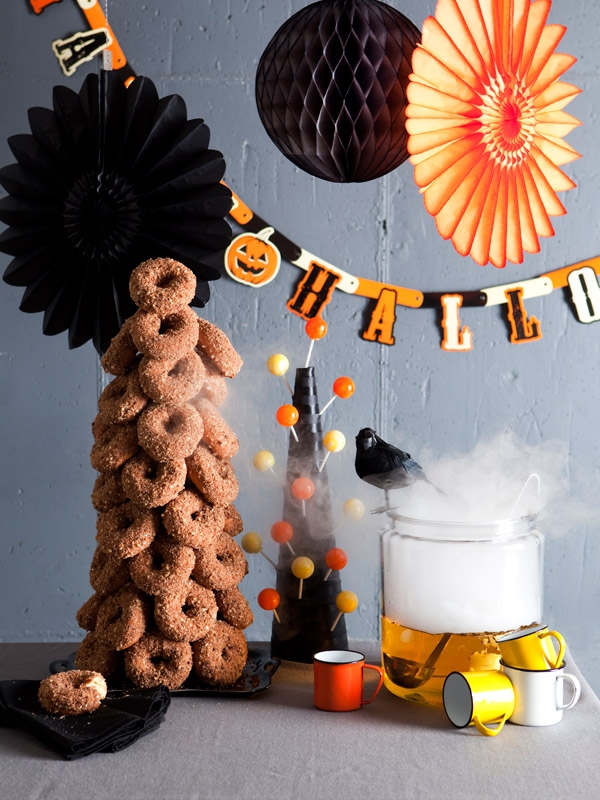
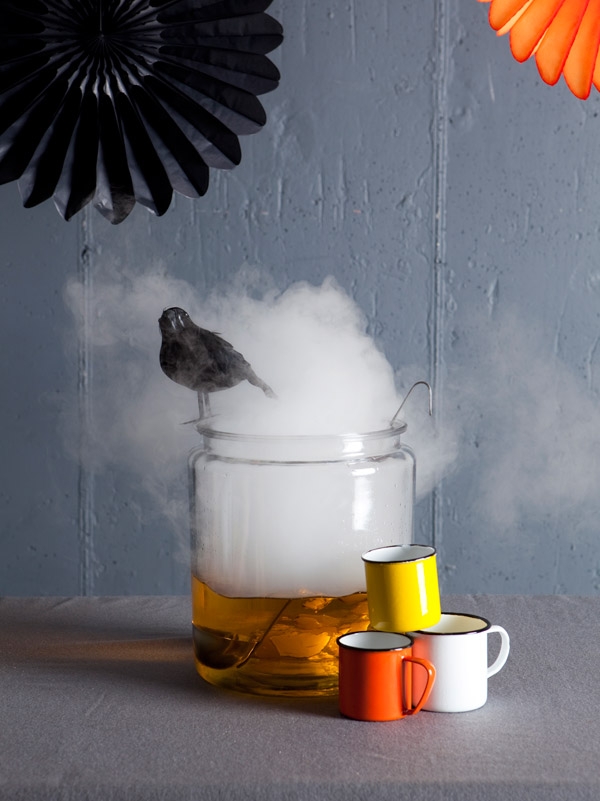
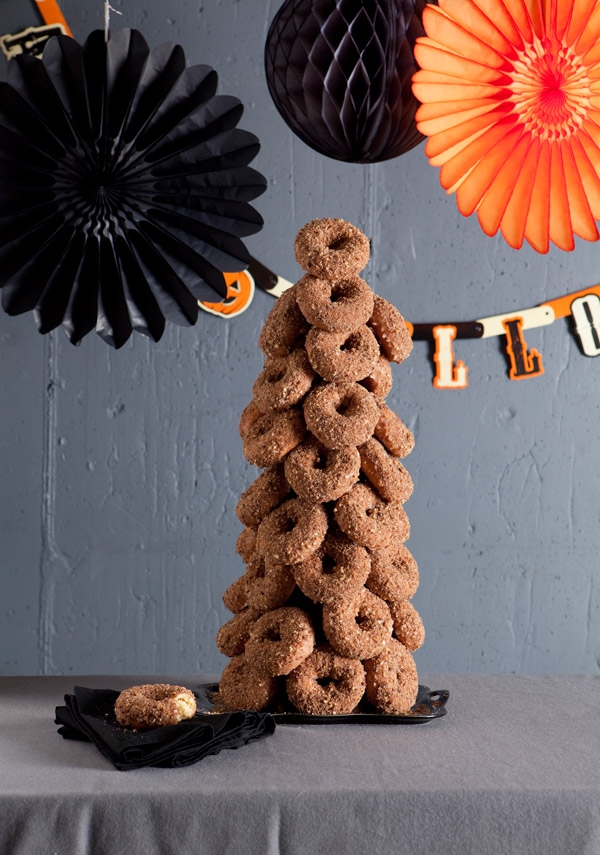
Throw a spook-tacular party this Halloween that’s easy and fun. Set up a simple table with a donut tree, a lollipop stand and some ghostly apple juice (just add some dry ice) for guests to eat at their leisure.

Spook-tacular Halloween Party Decorations - 2

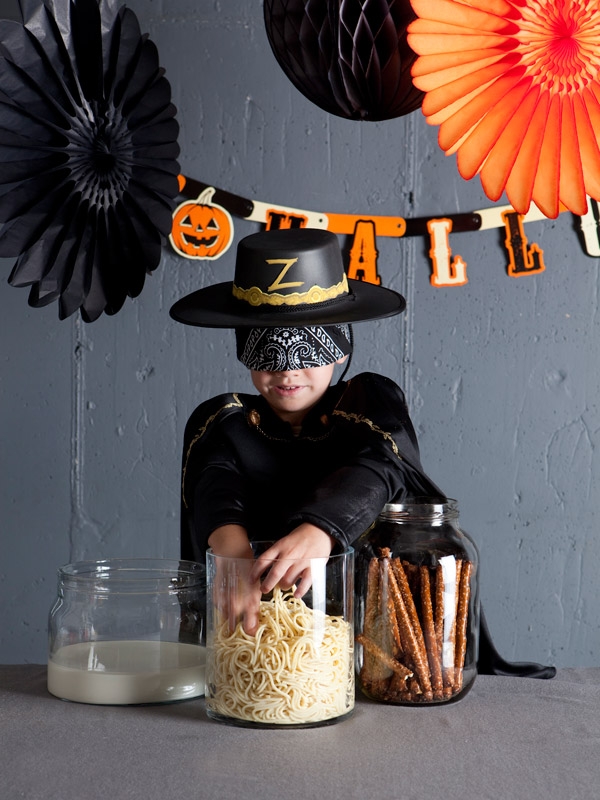
And for the party games, turn household ingredients into their spooky alter egos with large jars, some imagination, and a blindfold. Try cornstarch and water for goo, boiled spaghetti noodles for brains, and long pretzel sticks for dried up bones.

Spook-tacular Halloween Party Decorations - 3

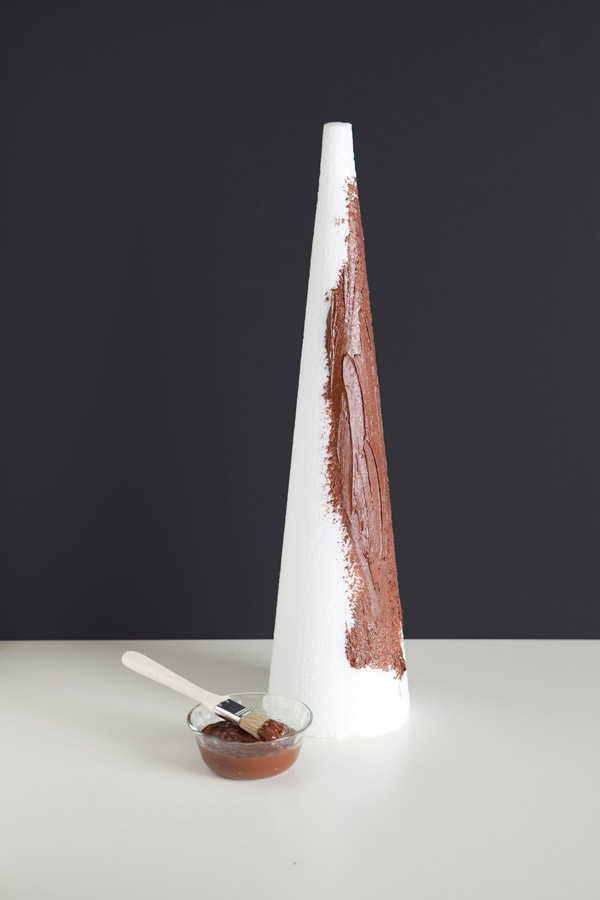
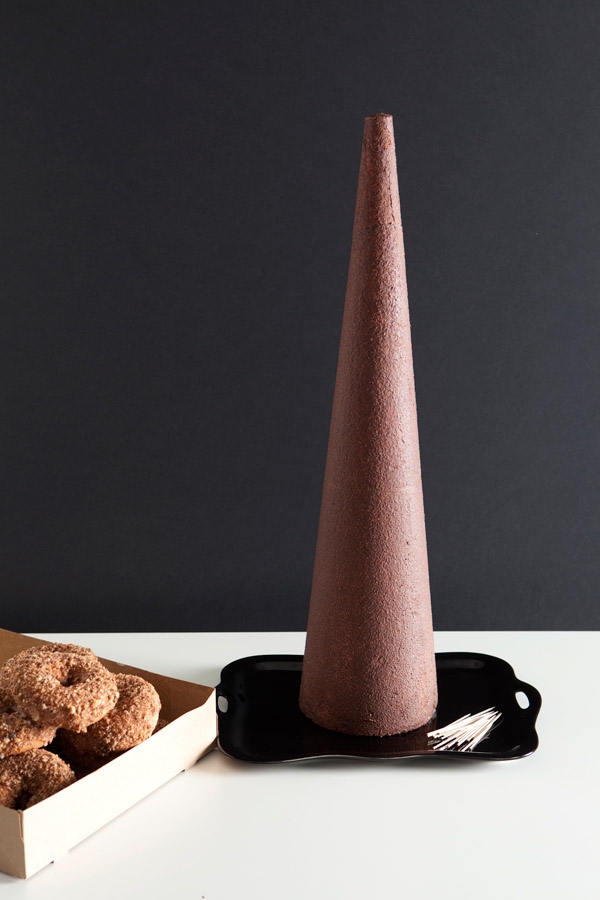
For the donut tree you’ll need: 24” Styrofoam cone, 12 ounce bag of semi-sweet chocolate chips, a basting brush, 45-50 donuts, and some toothpicks.

Directions: Melt the chocolate chips in a bowl in the microwave, stirring every 30 seconds. Once the chocolate is melted, apply it to the styrofoam cone using a basting brush.

Spook-tacular Halloween Party Decorations - 4

Once the whole cone is covered in chocolate, carefully smooth the chocolate with your fingers (make sure your fingers are clean). If you have freezer space, store the chocolate covered cone in your freezer until you are ready to attach the donuts.

Spook-tacular Halloween Party Decorations - 5

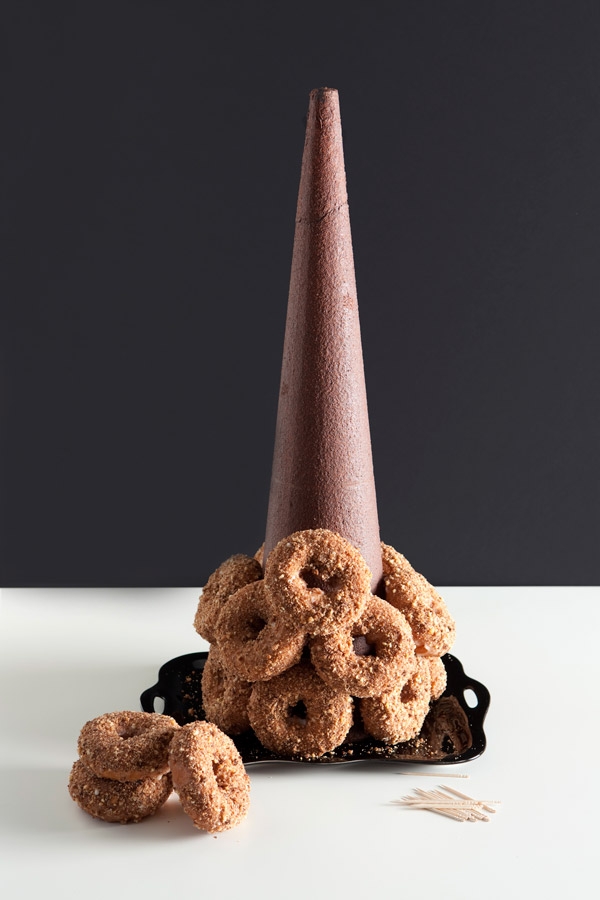
Starting at the bottom, use 2 toothpicks per donut to securely attach each donut to the cone. Work your way up the cone until the whole cone is covered in donuts and your donut tree is complete. You’ll need about 45 donuts, depending on their size. Secure any donuts that need a little extra support with additional toothpicks.

Spook-tacular Halloween Party Decorations - 6

Spook-tacular Halloween Party Decorations - 7

Find more fabulous Halloween decorations at The Land of Nod.

Post by Sara Westbrook & Brittany Egbert for One Charming Party: onecharmingparty.com. Photos by Nicole Hill Gerulat: www.nicolephoto.com

Mummy Shirt Tutorial

October 21, 2011

Post by Aimee and Bettijo at www.supermomments.com
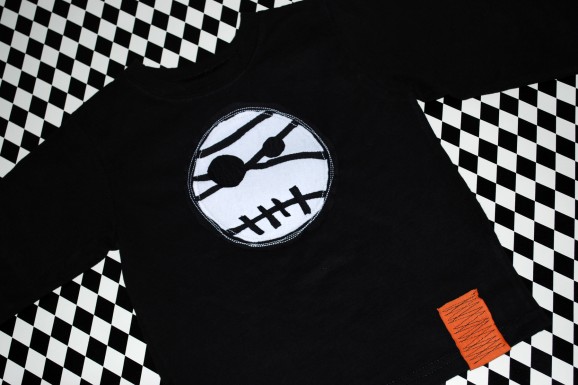
Mummy Shirt Tutorial - 1

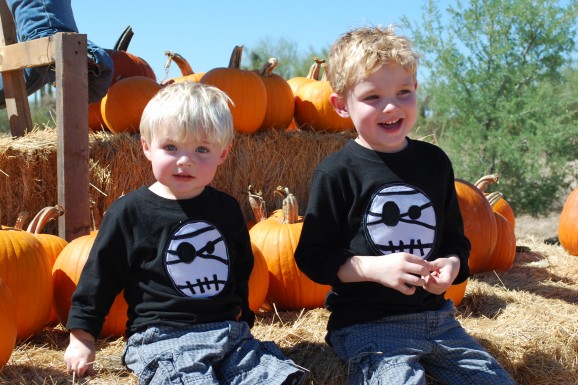
Download our free pattern and directions. If you want a little more help, the directions below include pictures.

Supplies you’ll need:
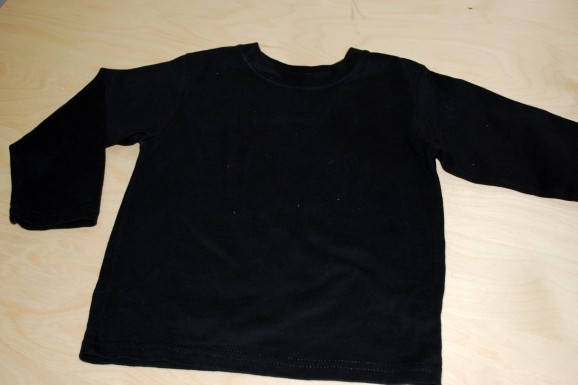
:: Black shirt
:: White knit fabric
:: Black knit fabric
:: Orange knit fabric scraps
:: Fusible webbing (such as Pellon Wonder Under)
:: Black thread
:: White thread
:: Scissors
:: Iron
:: Sewing machine
:: Mummy pattern

1 :: Wash and dry the shirt and fabric.

Mummy Shirt Tutorial - 2

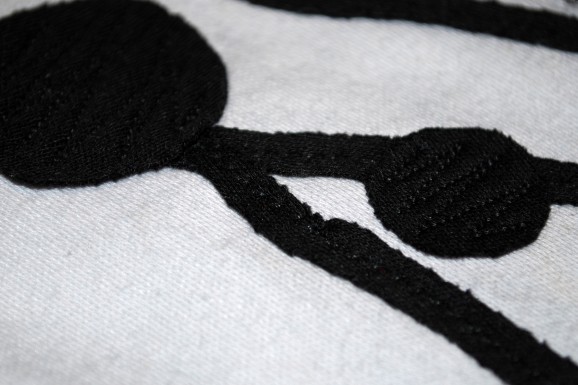
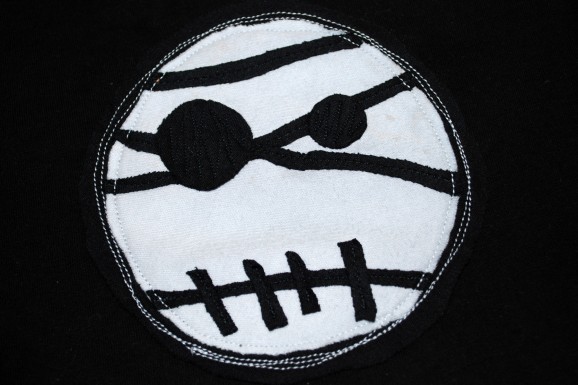
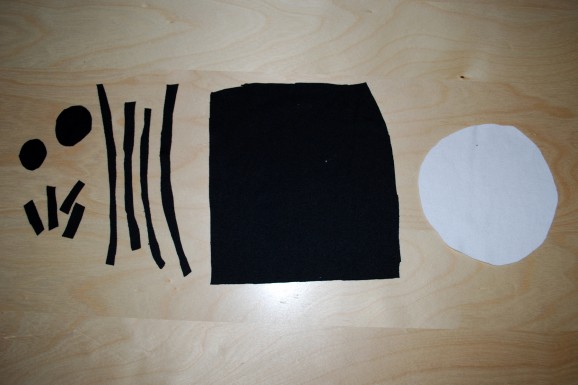
2 :: Cut out a white circle, black stripes and black circles. Also, cut yourself a large black square to appliqué the face onto.

Mummy Shirt Tutorial - 3

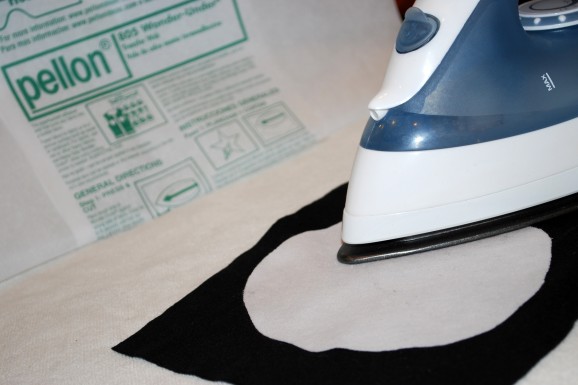
3 :: Cut out a circle of fusible webbing just smaller than the white mummy face circle. According to manufacturer directions, adhere the white circle to the black square.

Mummy Shirt Tutorial - 4

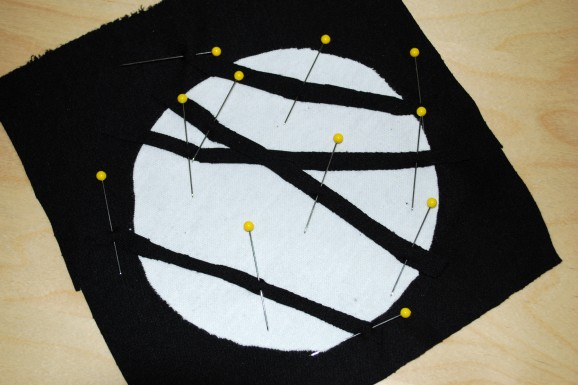
4 :: Layer all the mummy stripe pieces onto the white circle, as pictured. The stripes should hang off the edge of the white circle. (You’ll trim those in step 7.) Pin carefully to hold stripes in place as you sew.

Mummy Shirt Tutorial - 5

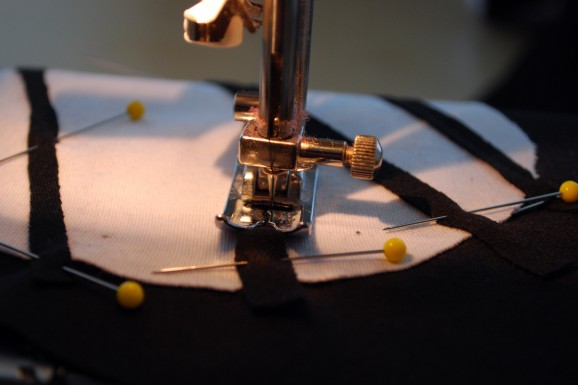
5 :: Using a tight straight stitch, sew down the middle of each black stripe beginning and ending on the edge of the white fabric. Be sure to double stitch the ends carefully, as you don’t want to accidentally sew the stripes onto the black background fabric.

Mummy Shirt Tutorial - 6

6 :: Add the eyes and mouth stripes. Straight-stitch large zig zags across the eyes for added texture.

Mummy Shirt Tutorial - 7

7 :: Once all the pieces are sewn onto the mummy face, carefully trim the black stripes to match the white circle. Also, trim the black square into a circle about ½” larger than the mummy’s face, all around.

8 :: From the fusible webbing, cut a circle just smaller than the black circle the mummy’s face has been appliquéd onto. Follow manufacturer directions to adhere entire mummy face to shirt. Using your white thread, sew 3 circles around the mummy’s face. The first circle should be on the white portion of the face, work your way out onto the black fabric for the remaining circles.

Mummy Shirt Tutorial - 8

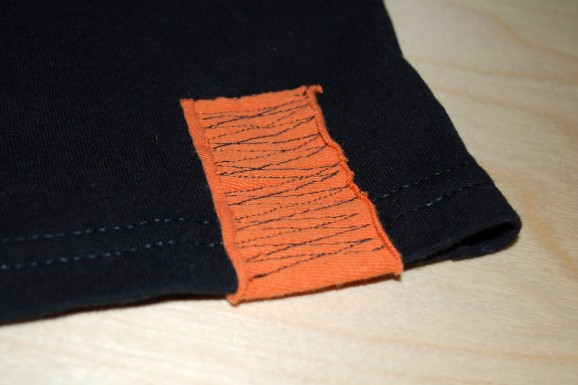
9 :: Using orange fabric scraps and your black thread, straight-stitch large zig-zags across the orange fabric to adhere it to the shirt. Repeat on the back center of the shirt, just under the neckline.

Mummy Shirt Tutorial - 9

10 :: Carefully clip all the loose threads. Wear.

Mummy Shirt Tutorial - 10

Post by Aimee and Bettijo at www.supermomments.com

Halloween Goody Bags

October 20, 2011

Post by Christina Williams of justcallmechris.blogspot.com
Halloween Goody Bags

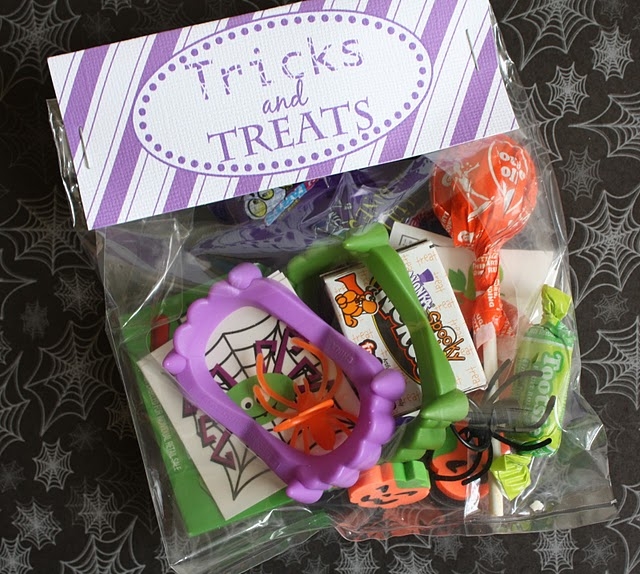
If you’re anything like us, some of your best buddies live waaay across town. Chances are pretty good that most of Hudson’s friends won’t be knocking on our door on Halloween night. So we’re taking the fun to them.

Hudson picked out all the tricks: colorful fangs, spider rings, spooky tattoos, and erasers. And what good is a trick without a few treats? If you want to make goody bags of your own, go here to download the bag toppers.

Next fill up some cellophane bags (mine are 5 x 11.5″) with all your favorite stuff. Cut off the excess cellophane from the top of the bag and staple the topper on each side. For more Halloween decorations, visit The Land of Nod.

Happy Haunting!

Post by Christina Williams of  justcallmechris.blogspot.com

Gluten-free Macaroni and Cheese

October 19, 2011
1

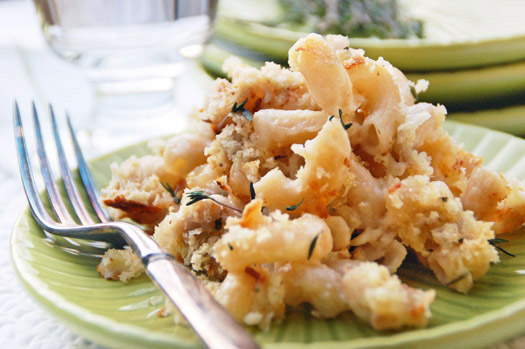
Last week we tested a classic macaroni and cheese recipe, trying out different roux methods that work best for folks who have to or prefer to eat gluten-free (like us). And we didn't want the macaroni and cheese making method to change, so that an easy substitution could be made within any recipe — AP flour for non-traditional (gluten-free) flours.

Although our main test focused on a roux for thickening the cheese sauce, we couldn't rule out the slurry as a possible winner. A slurry is a mixture of starch (usually cornstarch) and liquid, that when added to a recipe and brought to boiling, thickens the liquid in the recipe (think Chinese takeout sauces).

While the slurry in our tests produced a thick cheese sauce, we weren't excited about the glossy appearance, which made the cheese look like plastic; not to mention the slippery, slimy texture it left in our mouths. We quickly abandoned the slurry and went back to our regularly scheduled roux tests, using a traditional method with non-traditional (gluten-free) flours.

A traditional roux begins with equal parts of fat and all-purpose flour; typically 2 tablespoons of flour and fat will thicken 1 cup of liquid. The fat is heated, aromatics are sauteed within the fat, and then the flour is whisked in. The flour and fat form a paste (a roux), which is briefly cooked to remove the "raw" flour taste. The longer the roux is cooked, the darker and more caramelized it becomes. Rouxs range from white (barely cooked) to black, or cajun (the dark roux for dishes like gumbo). Liquid is then added to the roux and brought to boiling to form a thick sauce. When milk is added, the roux is called a "white sauce" or "Bechamel;" when broth is added, it's a "veloute."

Using the basic roux technique, we tested straight up arrowroot and tapioca flours, which worked like a dream, but the 1:1 ratios changed due to their more powerful thickening abilities — we were looking for a perfect 1:1 substitution. Potato flour also worked well as a thickener, but it made the cheese sauce taste like can of stew missing the beef.

We then turned to our go-to gluten-free flour mix: King Arthur Multi-Purpose Gluten-Free Flour. With this brand, we were able to swap out exact measurements, using a traditional roux method to achieve perfectly creamy cheese sauce without an ounce of gluten, and without changing ratios in the ingredient list — it was a straight 1:1 substitution.

We like King Arthur because this particular GF flour blend doesn't contain soy or bean flours. If you have a favorite GF brand or ratio you mix yourself, tell us about it in the comments section below.

Gluten-Free Classic Macaroni and Cheese

Prep time: 10 minutes
Cook time: 30 minutes
Servings: 6
Allergy info: soy-free, gluten-free, wheat-free; contains dairy

For the mac and cheese:
1 lb. GF elbow macaroni
1 teaspoon olive oil
1 small onion, minced
5 garlic cloves, minced
1 tablespoon fresh thyme
2 tablespoons butter
2 tablespoons King Arthur Multi-Purpose GF Flour
1/2 cup GF pale ale
1/2 cup chicken broth or stock 
1 cup whole milk
1 1/2 cups grated sharp Cheddar
1/4 grated Parmesan
1/2 cup heavy cream
1/4 teaspoon grated nutmeg
Salt and pepper to taste

For the topping:
3 tablespoons olive oil or butter
1 garlic clove, smashed
GF bread crumbs (we use yucca cheese bread – recipe coming soon!)
Salt and pepper to taste

Directions:
In a medium saucepan heat olive oil to over medium heat until shimmering. Add the onion; cook, stirring until translucent, about 4 minutes. Reduce heat. Stir in garlic, thyme and butter. When butter has melted, stir in flour – this will create a paste (a roux) that will thicken the cheese sauce. Cook 1 minute, stirring constantly.

Whisk in ale and stock – this will loosen the roux. Add milk, bring to boiling. Remove from heat; add cheeses, stir until smooth. Stir in cream and nutmeg, and season with salt and pepper to taste. Set aside, covered. Keep warm.

Preheat broiler. Cook macaroni according to package directions. Drain well; add to cheese sauce and stir until well mixed. Transfer macaroni to a baking dish; set aside.

For the topping, in a large skillet heat oil over medium heat. Add garlic; cook, stirring occasionally until caramelized, about 4 minutes. Remove garlic clove. Add bread crumbs. Cook, stirring until toasted, about 5 minutes. Season with salt and pepper to taste. Sprinkle seasoned bread crumbs evenly over macaroni and cheese.

Place baking dish under the broiler 3 minutes or until the macaroni and cheese is golden brown. Remove dish from oven, let stand 5 minutes before serving.

Post by Dawn Viola : DawnViola.com
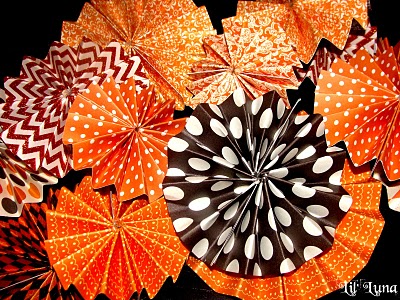
Halloween Paper Centerpiece

October 18, 2011

Post by Kristyn of lilluna.com
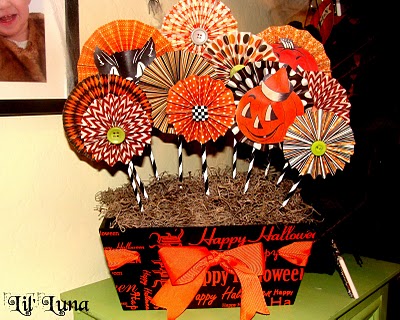
Halloween Paper Centerpiece  - 1

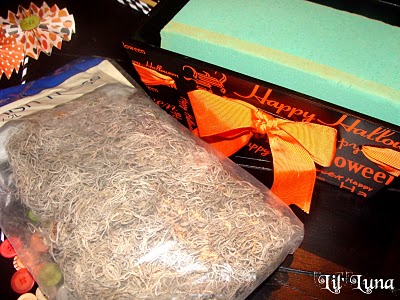
SUPPLIES:
– Box/Vase/Cart to use as Centerpiece Base
-Floral Foam (Found at the Dollar Store)
-Spanish Moss (Found at the Dollar Store)
-Skewers
-Paint
-Foam Brush
-Scrapbook Paper
-Hot Glue
-Embellishments

INSTRUCTIONS:

Halloween Paper Centerpiece  - 2

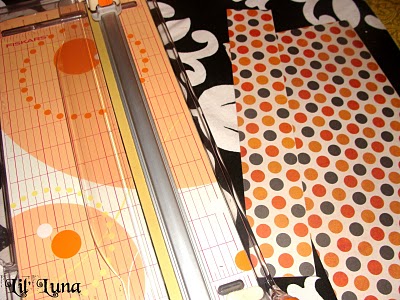
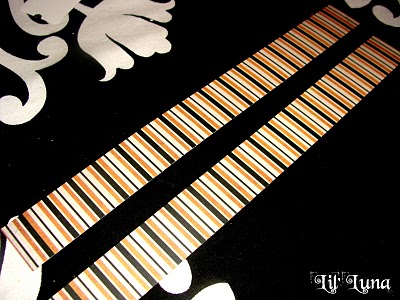
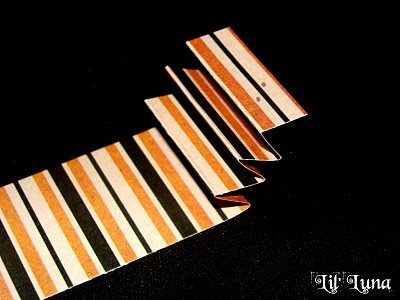
1. Begin by picking out your Halloween Paper (BEWARE: there are so many stinkin’ cute ones at the Scrapbook stores right now!!), and cut TWO 12 inch strips that are 1 inch – 2.5 inches wide (per accordion flower).

Halloween Paper Centerpiece  - 3

Halloween Paper Centerpiece  - 4

Halloween Paper Centerpiece  - 5

Halloween Paper Centerpiece  - 6

Halloween Paper Centerpiece  - 7

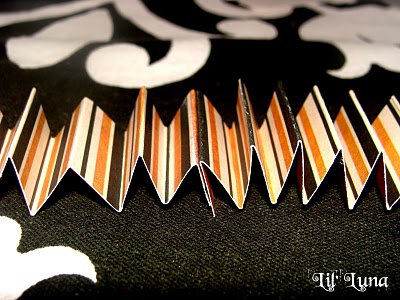
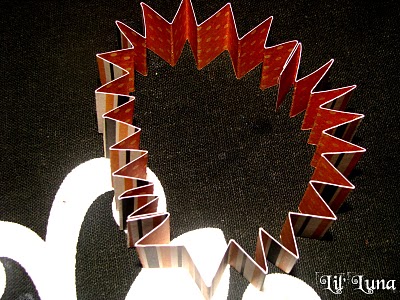
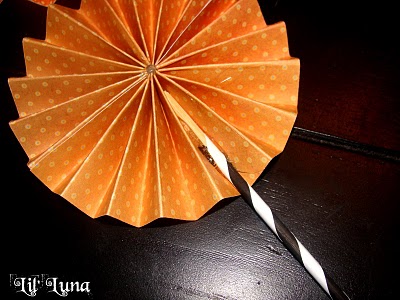
2. Put two strips together and fold back and forth until you are all the way through.               Then, hot glue the two ends together as well as the other ends so it makes a circle.

Halloween Paper Centerpiece  - 8

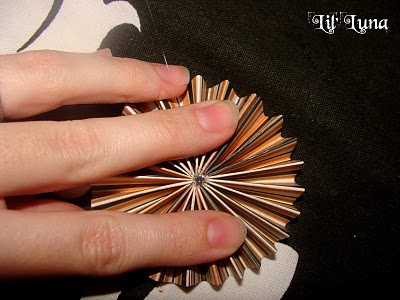
3. Push edges of strips IN to make an accordion flower. Hot glue center and hold, and do the same on back. For another tutorial on these flowers, I used one HERE.

Halloween Paper Centerpiece  - 9

Halloween Paper Centerpiece  - 10

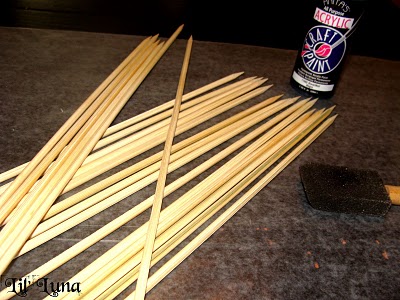
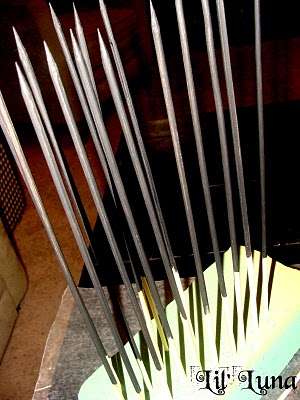
4. Paint skewers desired color you’d like and let dry. I stuck mine into the floral foam to dry.

Halloween Paper Centerpiece  - 11

Halloween Paper Centerpiece  - 12

Halloween Paper Centerpiece  - 13

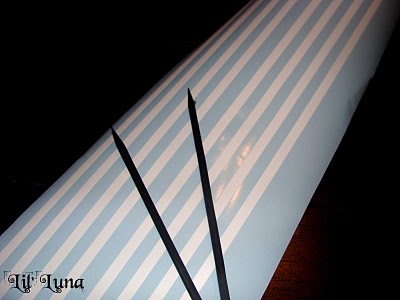
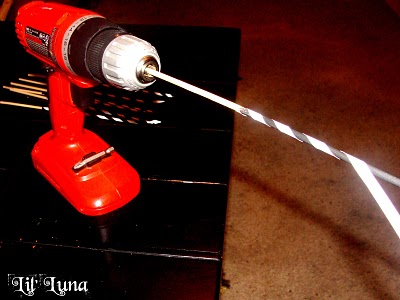
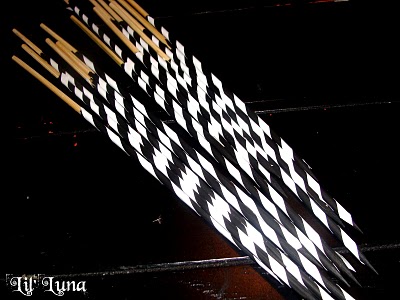
5. I wanted to add a little something to the skewers, so I cut out .2 inch white strips of vinyl and twisted them along the skewer. My hubby is super smart and suggested I stick them in his drill, turn it on, and let the drill do the twisting. It takes seconds (isn’t he smart?).

Halloween Paper Centerpiece  - 14

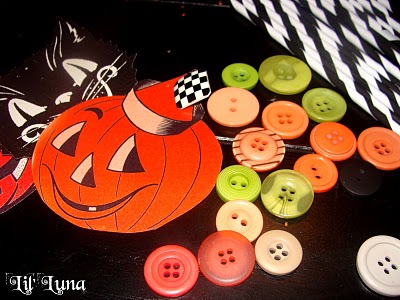
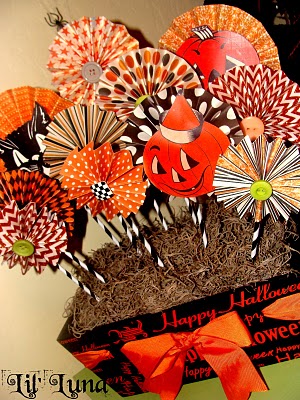
6. Add buttons or other embellishments to your flowers. I used some of these FREE vintage Halloween Prints from Matthew Mead found HERE.

Halloween Paper Centerpiece  - 15

7. Hot glue skewers to backs of flowers. Set aside.

Halloween Paper Centerpiece  - 16

8. Add floral foam and moss to your centerpiece base. I got my Halloween Box at Hobby Lobby for $7. Not too bad. 🙂

Halloween Paper Centerpiece  - 17

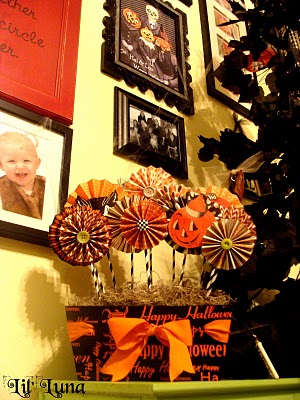
9. Stick skewers through the moss and foam into your base and arrange as desired.

Halloween Paper Centerpiece  - 18

So fun, huh? Plus, it’s easy to make, unique, and could be made very inexpensively! What more could you ask for? 🙂

Post by Kristyn of lilluna.com
Get Well Soon Care Package

October 17, 2011

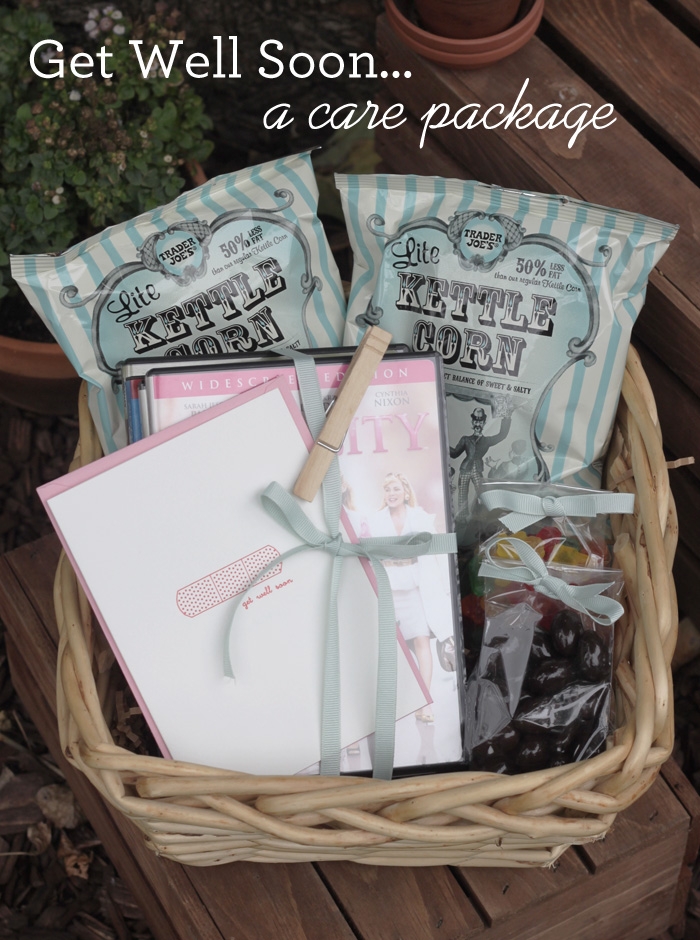
A friend was recently hospitalized for a brief stay and put on bed rest for a number of weeks.  Instead of the traditional flowers, I decided I'd cheer her up with a care package.  Since she'll be stuck at home in bed, I decided to bring the entertainment to her with a few classic chick flicks, some kettle corn, gummy bears and chocolates.  For a friend with the flu, include retro bottles of ginger ale {I'm partial to Boylan}, saltine crackers and a thermos of chicken soup.

Getwellsoon

Post by Becca : www.cakeeventsblog.com
fabric + frames = friends

October 14, 2011

1

Yesterday I shared a brief (and somewhat darkish) video on my Facebook Page of the kids room as it stands right now. I was cleaning their room Monday morning and as I shifted furniture around I was struck with the impulse to pull a quick rearrange before Ryan got home for lunch.
Oliver and Hazel loved getting to ride across the room on Oliver’s bed and, like most kids would be, were giddy to run around their room and it’s new spaces.

Anyway, all that time spent in their room reminded me that there was something in there that I’d been meaning to show y’all. Just a simple necessity-is-the-mother-of-invention idea that I thought might be nice to pass along.

I’ve been working over the past year or so to collect cool prints and frame favorite pictures for in their bedroom. Just a collection of things about them that make me glad. I wanted it to feel eclectic and sort of pulled together over time (which it was), and not have the uniform feeling that our stairway wall has.

So, There are lots of colors and different wood shades and various yard sale finds all nailed up on the wall.

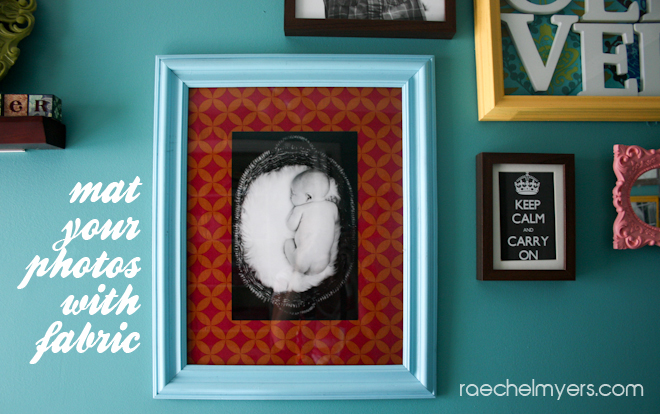
And since I wanted large frames (but didn’t want them to be filled to the edges with photos),      I needed mats. But white mats would feel too uniform (and would also cost money!).               (Yes, this is all my crazy thought process…) I wanted color and texture and before I knew it,      I was digging through the baskets in my sewing room to find it.

Fabric! Why had I not thought of this before!

I started pulling out colors and patterns I loved – some of which were already repeated in other places in the room. And I was suddenly very pleased.

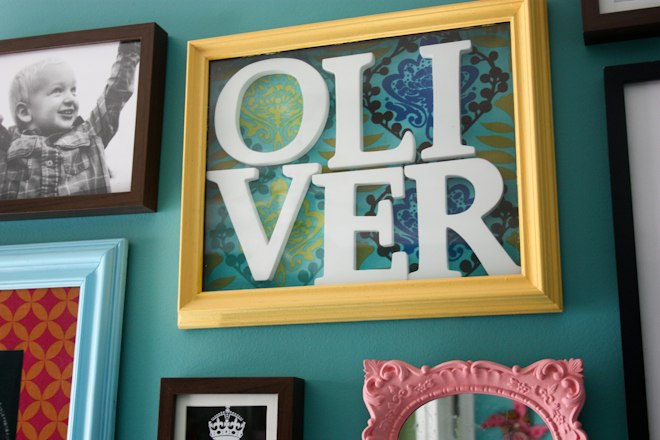
I even managed to take Oliver’s letters (which once sat on a shelf above his crib when he was a baby) and tack them into a yellow-painted shadow box with a favorite fabric as the background. So much more interesting that a solid color!

2

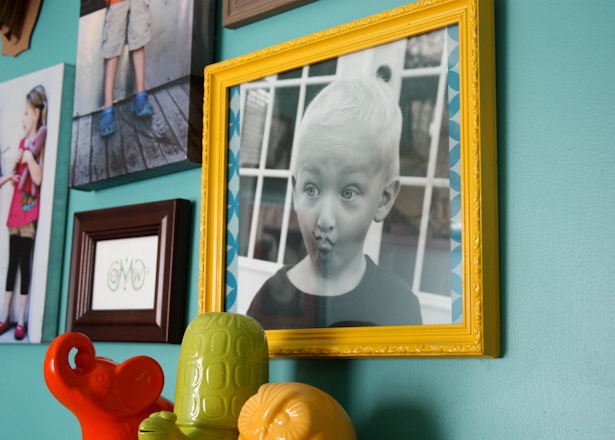
And one frame was just the wrong size for the photo I wanted to put in it, so a little (now out of print) Cathedral in Dusk did the trick perfectly. (Secret: since I loved that fabric so much and didn’t want to part with 11″x14″ of it, I just cut two strips to fill the gaps down the sides. Don’t tell the framing police!)

3

And that is my little solution to framing photos and adding color and interest.

See, I told you I could give you a fabric project that didn’t involve sewing! 

Post by Raechel : www.raechelmyers.com
Sneak Peek – The Land of Nod Holiday 2011

October 13, 2011

Let’s face it, the leaves are changing and before we know it we will be wrapping presents for the holiday season. And to gear those munchkins up for toys, toys and more toys, just show them this fabulous holiday book. Here is a sneak peek of what they will see… Holiday Preview 1

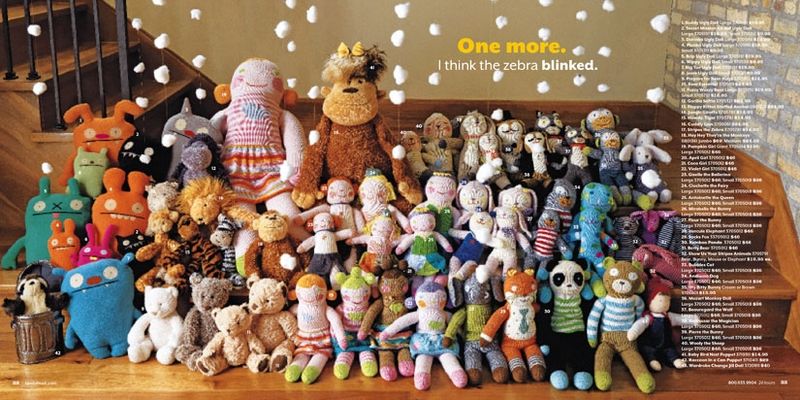
Plush Animals are here for the holidays! And, to commemorate the joyous occasion, we asked all 63 of our cute and squishy friends to pose for a family portrait! This was a tough shot…you tell me when the last time you had this many family members together at once. Our plush assortment this holiday season ranges from three inches to three feet in height! And there is certainly a character out there for everyone. But please…don’t pick on the Zebra. It’s not his fault he blinked!

HolidayPreview2

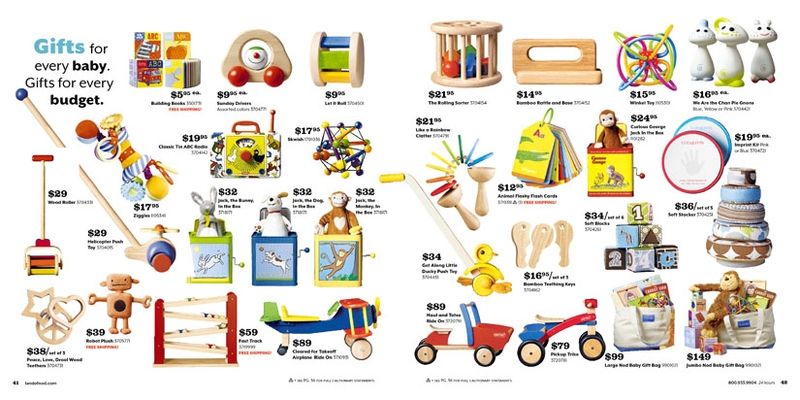
And who would have thought that your two year old was the hardest person in your life to shop for? Well not anymore. We have expanded our baby gifts to accommodate everyone; no matter what your budget is. From the hilarious Sunday Driver to our Jumbo Baby Gift Bag, there is even a gift for the baby who just happens to have everything!

Holiday Preview 3

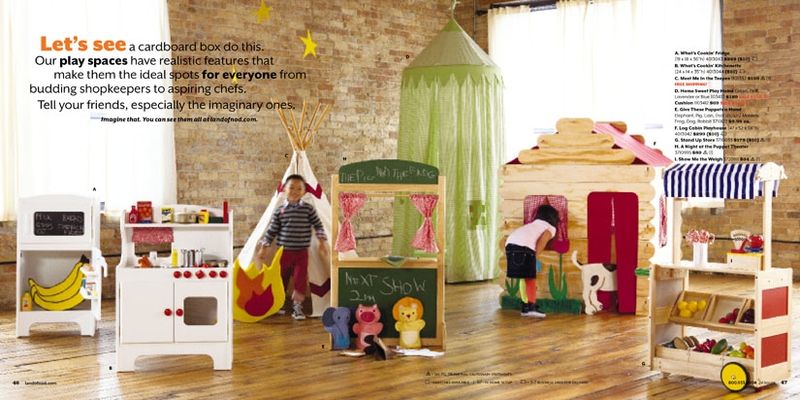
And check out our great big assortment of imaginary play. There is something here for any child, no matter their cup of tea. Tea you say? The kettle is on the kitchenette. Please keep reading while I run to the market to buy some sugar. Oh shucks…they are closed for the season. Maybe Mrs. Brown has some at her cabin? Well,  if worse comes to worse you can always ask the puppeteer, right?

Please note that objects in the catalog are larger than they appear.

Want to subscribe to The Land of Nod email list? Click here

Yarn-Wrapped Letters

October 12, 2011

Post by Christina Williams of justcallmechris.blogspot.com
1

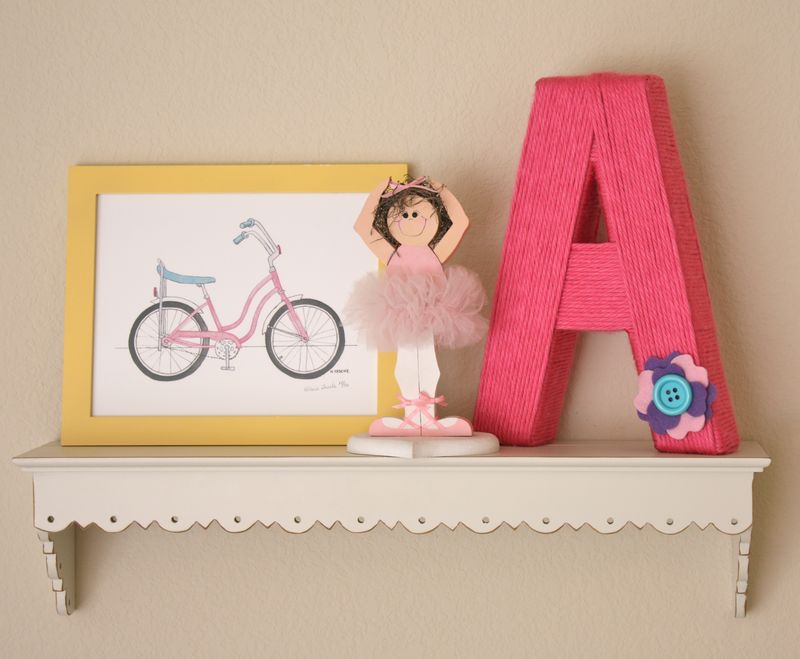
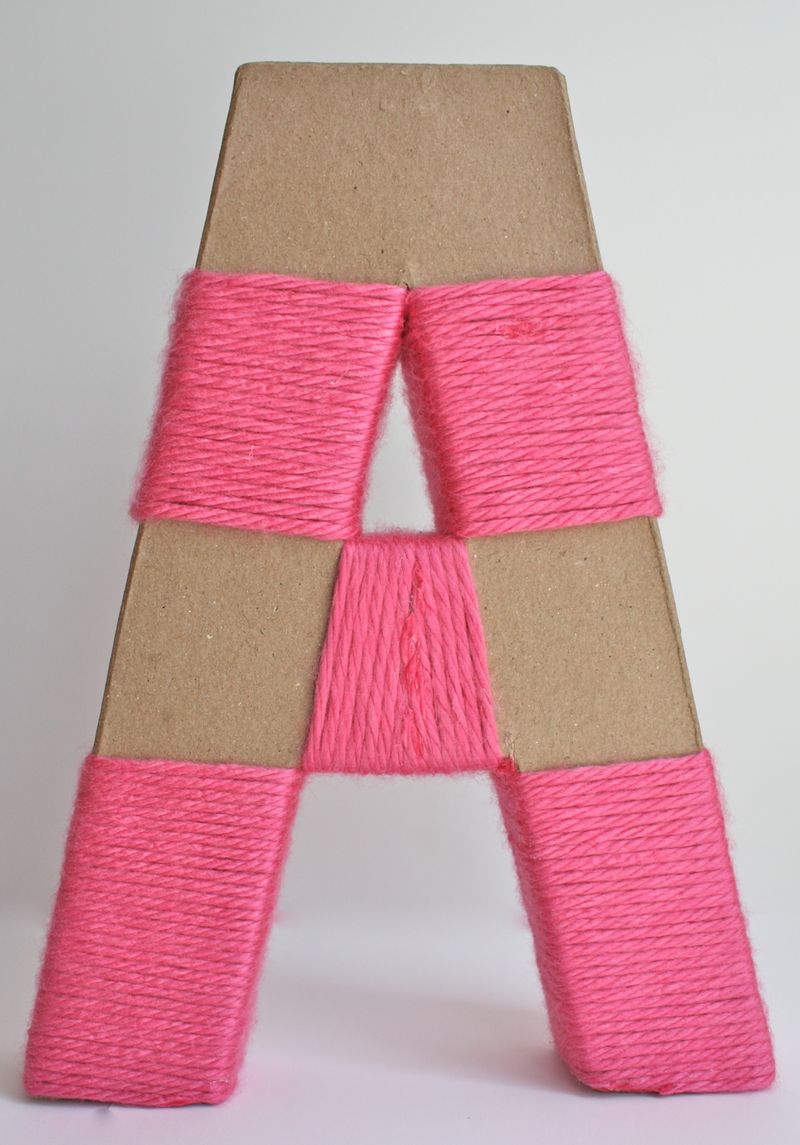
I love to make handmade gifts for friends and family, and since I’m not the best seamstress in town, I’ve had to come up with some other ideas for baby gifts. These yarn-wrapped letters are so quick and easy. I made this one for my new niece, Audrey. It will be the perfect addition to the bookshelf in her bedroom. Ready to get started?

Step One: Grab your supplies…

  • a large kraft letter, I bought mine locally, but you can get them online at CreateForLess
  • glue gun
  • your favorite yarn

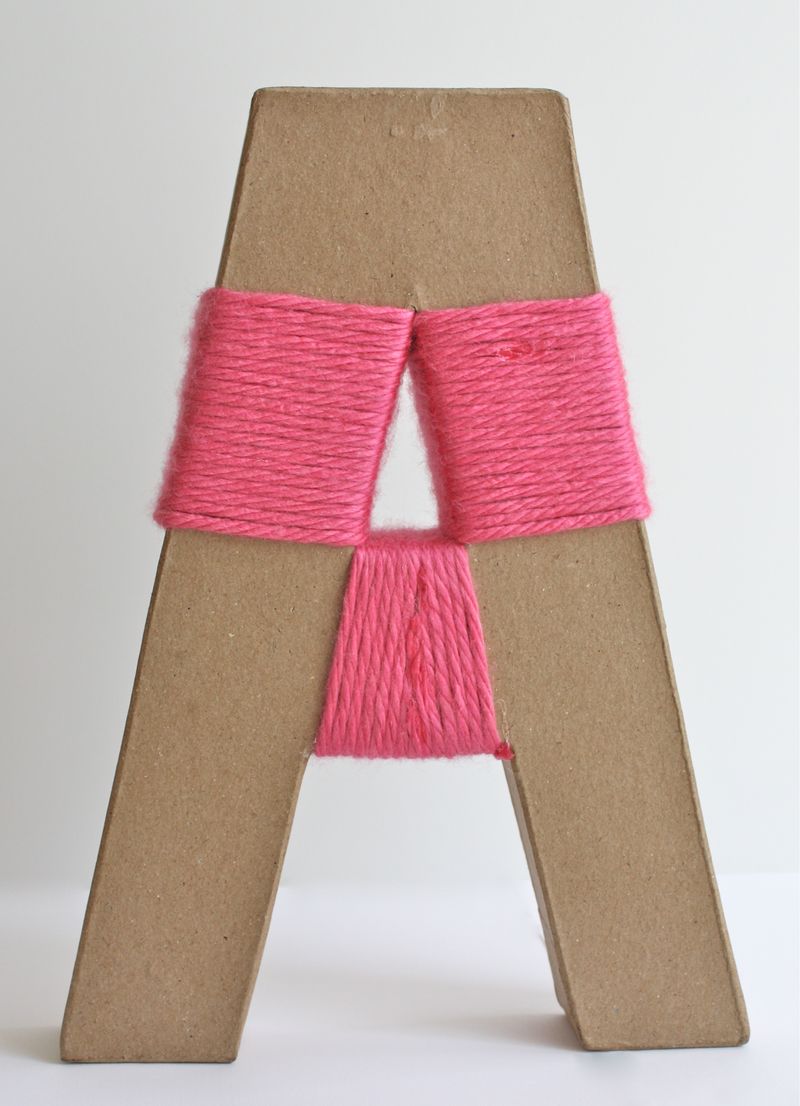
Start wrapping the closed-off areas of the letter. You’ll have to take a length of yarn and cut it from the skien, so you can wrap through the opening of the letter. Secure the ends of the yarn with hot glue and keep wrapping till the area is covered.
2

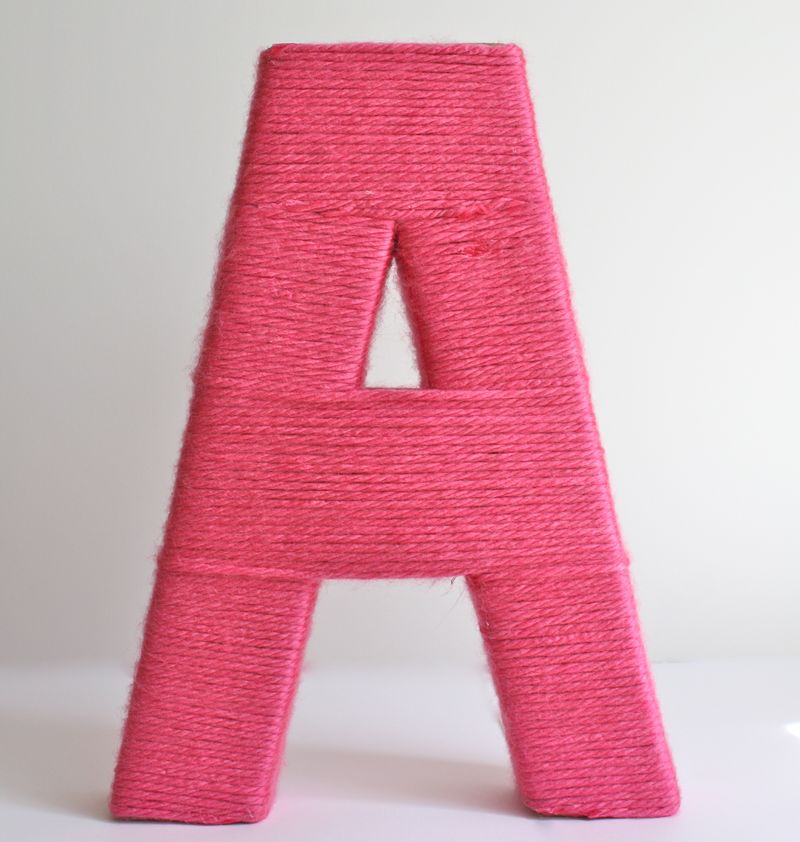
Step Two: Pick another spot and keep wrapping. The open “legs” of the letters are super easy, because you can leave the yarn attached to the skien and just wrap like crazy. The main purpose of this layer is to make sure the side-parts of the letter are fully covered.

3

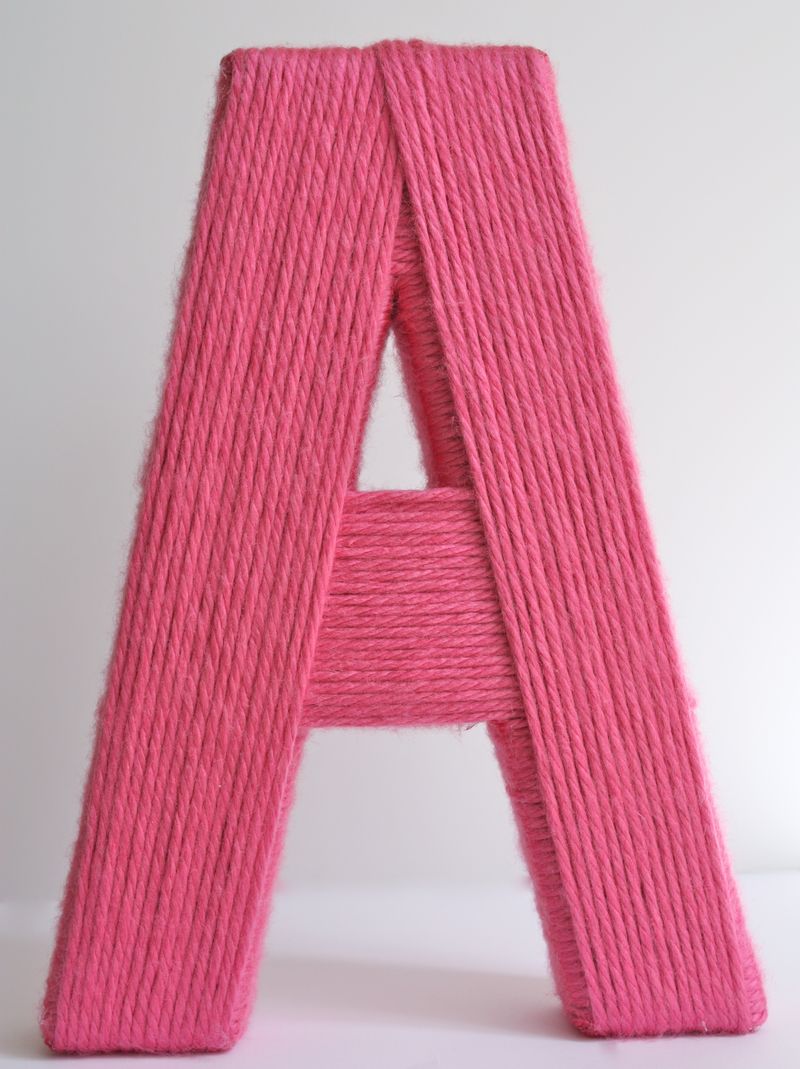
Step Three: Keep wrapping. I had a few bald spots, so I cut little pieces of yarn and glued them into those areas. I knew I’d be wrapping another layer, so I didn’t stress too much about it being totally perfect.
4

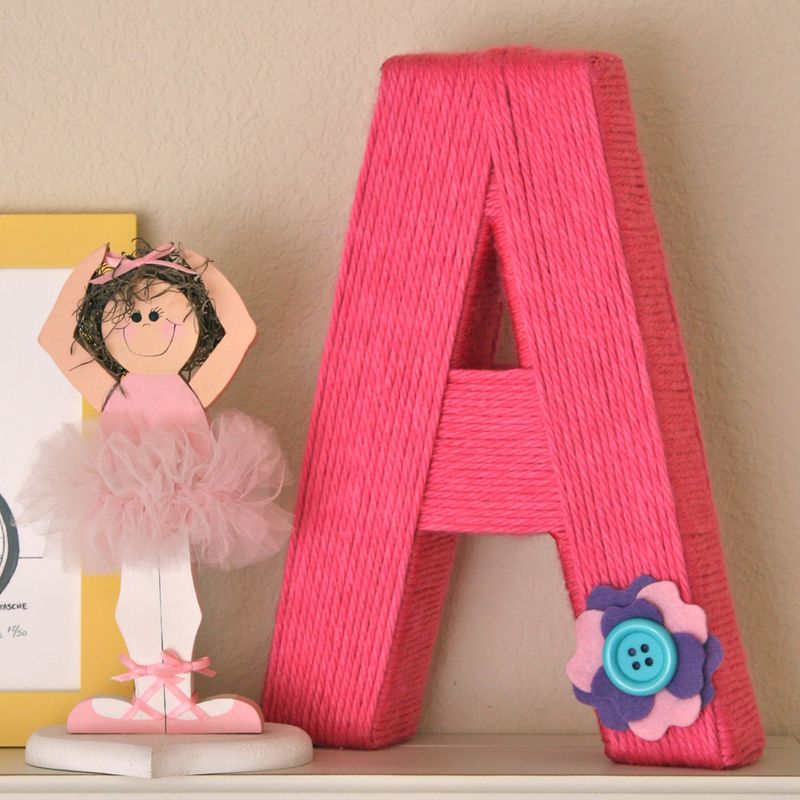
Step Four: Keep adding layers until you like it. The first one I made, I didn’t like at all, so I simply cut the yarn off and started over. Also, the thicker the yarn, the quicker the coverage.  I finished it off by cutting a little flower out of felt and gluing it onto the leg. Ta-Da! Quick, inexpensive, custom decoration!

5

6

Post by Christina Williams of justcallmechris.blogspot.com

Baby Onesie Refashion

October 11, 2011
Take plain onesies and turn them into a baby fashion statement.
Babies need a little refashion sometimes too. These onesies were originally embroidered with a little "baby saying"… cute but I thought the colors were a little too girly for my Clyde. He never wore them, I refashioned and re-gifted! I just used some fabric scraps and some imagination.
Before:
I made two; here is how I made the first one:
I started by embroidering the letter "f" on my fabric, I just penciled it freehand right on the fabric.
Next step is to iron interfacing to the back of the fabric. I went for the raw edge look and this way the fabric won't fray as much. 
Next, line the fabric up to the onesie and  mark with a pencil where you will cut. 
Sew around the new fabric that you are attaching. 
Onesie refashion number 2…
Add interfacing to the back of the fabric again and cut out some pieces of the pattern.
Pin the pieces on the onesie so you cover the old design.
And sew. I again went for a messy sewn look. If you like a neater look you could do a tight zig-zag stitch around the perimeter of the fabric. 
I added my fabric label…
and wrapped them up in a cute little package. Add some clips and you have a perfect baby gift.
There are more Onesie ideas HERE and HERE.

Post by Taylor Urban : www.itstaylormade.com

Making Cat and Rabbit Masks (and Tails)

October 10, 2011

Post by Helen Bird of www.curlybirds.typepad.com
DIY Cat and Rabbit Masks - 1

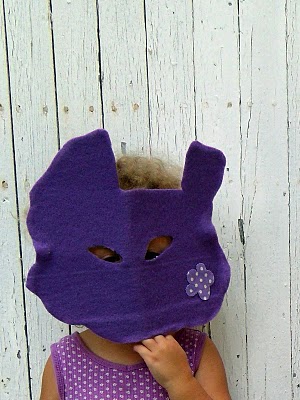
The girls are into playing dress-up these days. They especially like being animals – cats and rabbits are favorites in our house.

Materials:

Cardboard

Felt

Scrap material

Elastic

Pen

Scissors

Glue and brush

Needle and thread

DIY Cat and Rabbit Masks - 2

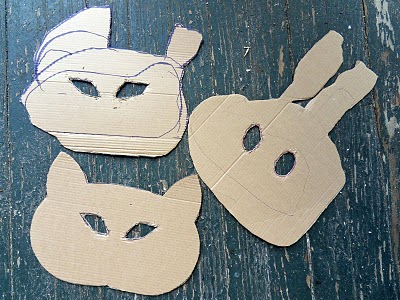
Step 1: Draw and cut animal shapes out of cardboard. To make the masks their own, let your child draw their own animal – Kira made a cat and Nola made a rabbit.

Step 2: Hold the mask up to your child and mark the eye holes. Cut out the eye holes.

DIY Cat and Rabbit Masks - 3

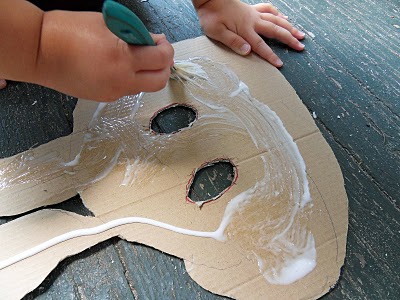
Step 3: Paint the glue onto the cardboard mask and attach it to the felt.

Step 4: Cut the felt around the outside of the cardboard.

DIY Cat and Rabbit Masks - 4

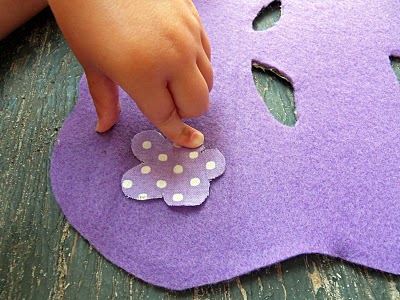
Step 5: Decorate with scrap material.

DIY Cat and Rabbit Masks - 5

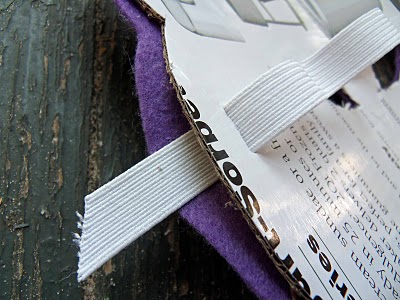
Step 6: Hold the mask up to your child so they can see through the eye holes. Mark where the elastic should fit. Make two slits in the cardboard and thread the elastic through the slits.

DIY Cat and Rabbit Masks - 6

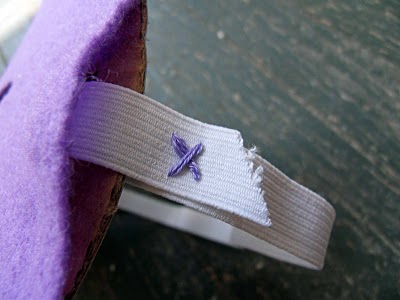
Step 7: Make sure the elastic is comfortable around your child’s head and finish off the elastic by stitching a little cross.

To Make the Tails…

DIY Cat and Rabbit Masks - 7

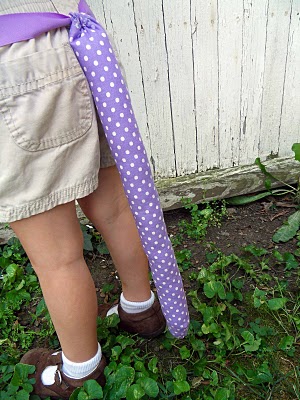
For the cat: cut out and sew a tail shape from scrap material, stuff and attach to ribbon.

DIY Cat and Rabbit Masks - 8

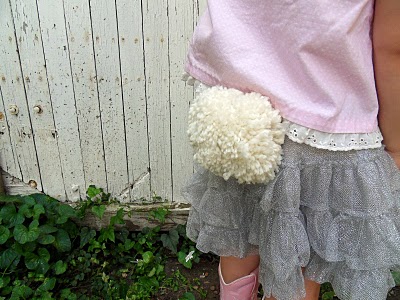
For the rabbit: Make a large pom pom, tie a piece of ribbon around the middle of the pom pom that is long enough to tie around your child…

DIY Cat and Rabbit Masks - 9
Post by Helen Bird  of www.curlybirds.typepad.com

Halloween Crayon Bats

October 7, 2011

Post by Taylor Urban of www.itstaylormade.com

Kids Craft - Halloween Crayon Bats

Are you in the Halloween spirit yet? Me either, could be because it is still in the high 90’s here in Texas. I usually look forward to the beginning of October because that is when I break out the Halloween Decor….It literally feels like the middle of summer 🙁  In hopes of feeling fall-ish, I turned to my trusty craft supplies. I remember doing this craft when I was little and making “stained glass”. Martha makes Valentines Hearts this way too. But today friends we are making Bats, or according to my 2 yr old son- “Batmans”. This is a great craft to do with the kids, actually- if my “active, just turned two, independent boy” can do it, then your dog can probably help you.
Supplies:
old crayons
wax paper
scissors
iron
paper towels
Kids Craft - Halloween Crayon Bats 1
(I would like to tell you that this is just my craft iron and I have another one for clothes but this is just my craft iron… I don’t iron clothes for real life). Break your crayons and remove the wrappers. This is the best job for kids, who doesn’t love to break stuff?
Kids Craft - Halloween Crayon Bats 2
Use the scissors and make shavings from the crayons. Place the shavings on a piece of wax paper. Let the kids arrange the shavings and pick the colors. Then cover it with another piece of wax paper.
Kids Craft - Halloween Crayon Bats 3

Make sure to use 2-3 paper towels under the wax paper and over it. The shavings kind of seeped through and I wouldn’t want your iron to look like mine. Melt the crayons for a few seconds. Here is what we came up with:

Kids Craft - Halloween Crayon Bats 4
Kids Craft - Halloween Crayon Bats 5
Kids Craft - Halloween Crayon Bats 6
Use the Taylor Made Bat Template found HERE and cut out a few bats from the paper.
Kids Craft - Halloween Crayon Bats 7
Kids Craft - Halloween Crayon Bats 8
You can hang them as is or make them fly. Use Bamboo skewers, fold the bat in half down the middle, then push the skewer through the ends of the wings.
Kids Craft - Halloween Crayon Bats 9
Kids Craft - Halloween Crayon Bats 10
Use thread or fishing line to hang them.
Kids Craft - Halloween Crayon Bats 11
Kids Craft - Halloween Crayon Bats 12
Kids Craft - Halloween Crayon Bats 13
Spooky Batman. Have you decorated for Halloween yet? And please give me some fall-ish details 🙂

Post by Taylor Urban of www.itstaylormade.com

Sweet Potato and Lentil Veggie Chili

October 6, 2011

I am totally back in the groove in the kitchen these days. In my earliest weeks (okay months) of pregnancy, cooking was a struggle. I’m sure you noticed. But I promised you if you’d just hold on, I would eventually make it up to you. And now week by week, meal by meal, I am trying to do just that.

I apologize to those of you who live in climates where you are still wearing shorts and sundresses. Fall has arrived in Seattle and I just can’t help myself. Maybe it’s the weather, maybe it’s nesting – either way, all I want to make are hearty meals that can be eaten on the couch under my favorite fuzzy blanket. I encourage you to do the same.

1

Print this recipe!

Ingredients: (makes 8 servings)

  • 1 large onion, diced
  • 2 large sweet potatoes, peeled and cubed
  • 4 medium carrots, peeled and sliced
  • 1 jalapeno pepper, seeded and minced
  • 4 cups vegetable broth
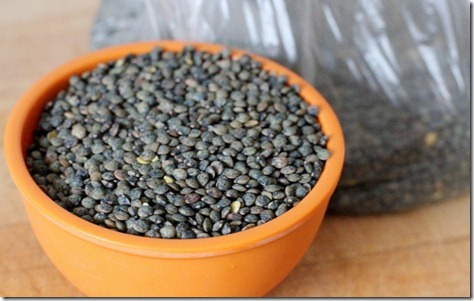
  • 1.5 cups green French lentils
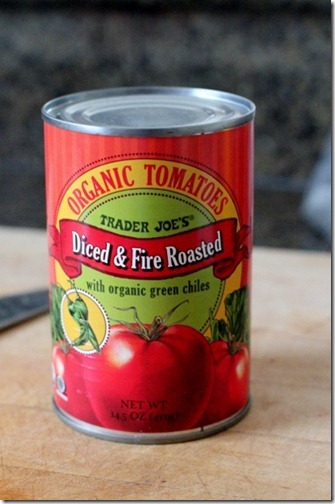
  • 1 can fire-roasted tomatoes
  • 2 tbsp chili powder
  • 1 tbsp smoked paprika
  • 1 tbsp ground cinnamon
  • salt to taste

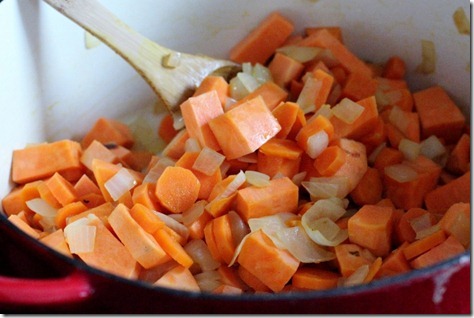
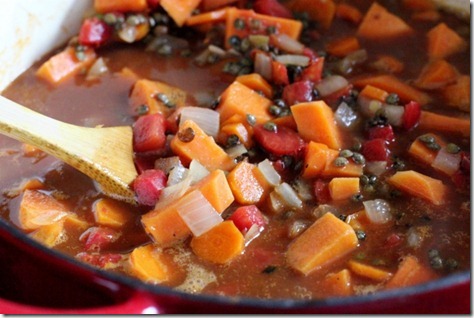
Instructions:  In order to make a proper chili, you’ll need to use a heavy-bottomed pot.       Add onions to the pot with a bit of olive oil, and sauté for 5 minutes until beginning to soften.       Add carrots and sweet potatoes, and continue to sauté and stir until partially cooked. 

2

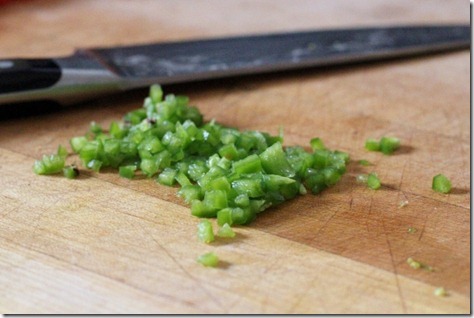
After allowing the vegetables to cook for about 15 minutes, add the jalapeno pepper. If you like a more spicy chili, you might want to consider adding an extra pepper as well.

3

Next add your tomatoes. Try to find a variety that is fire roasted or has a bit of extra flavor and kick. Don’t drain, just open and dump.

4

Finally, add the lentils, broth, and spices. Make sure to use green French lentils. Red lentils will turn to mush!

5

Bring chili up to a simmer and then turn the heat down to low and cover. Simmer for 45 minutes to an hour, until lentils are fully cooked and chili has thickened. If it becomes to thick (or you prefer a less hearty soup), you can also add an extra cup of water.

6

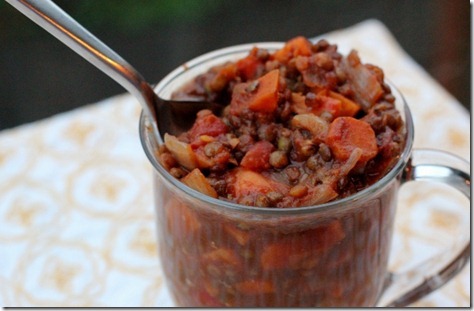
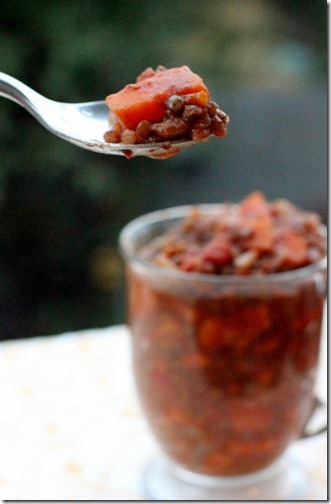
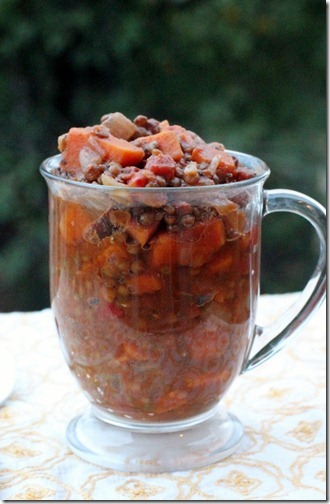
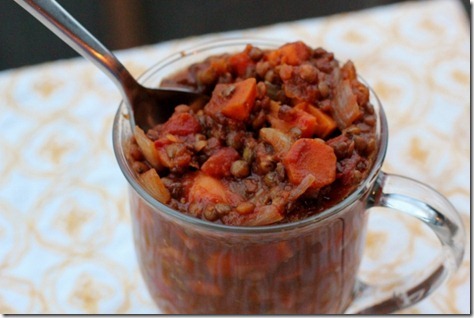
Season to taste with (lots of) salt. Serve piping hot in your favorite mug.

7

I made some delicious (gluten-free!) cornbread to go along with this soup too, but that recipe will have to wait until later in the week – still needs a bit of tweaking. 

Note to my slow-cooker friends, I definitely think this recipe could be made in a crock-pot too! Just add all the ingredients and cook until flavors have developed and lentils have softened. 

8

I told you guys I wasn’t kidding about being totally in fall mode now. This hearty lentil chili is so simple and tasty, and I’m sure the leftovers are even better. I can’t wait to pull them out of the freezer on a cool November day, when my baby is screaming and an easy, simple meal is more than needed.

9
I hope you like it as much as I do – enjoy!

Post by Emily Malone : www.dailygarnish.com

Underwater Felt Board

October 5, 2011

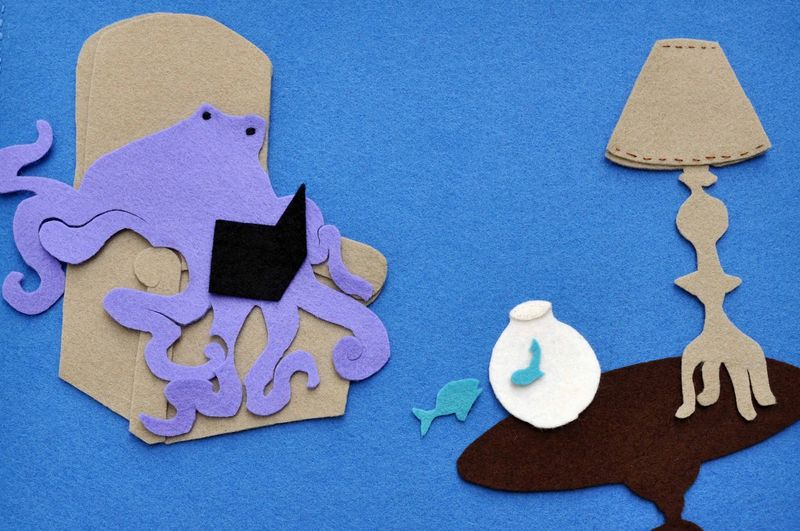
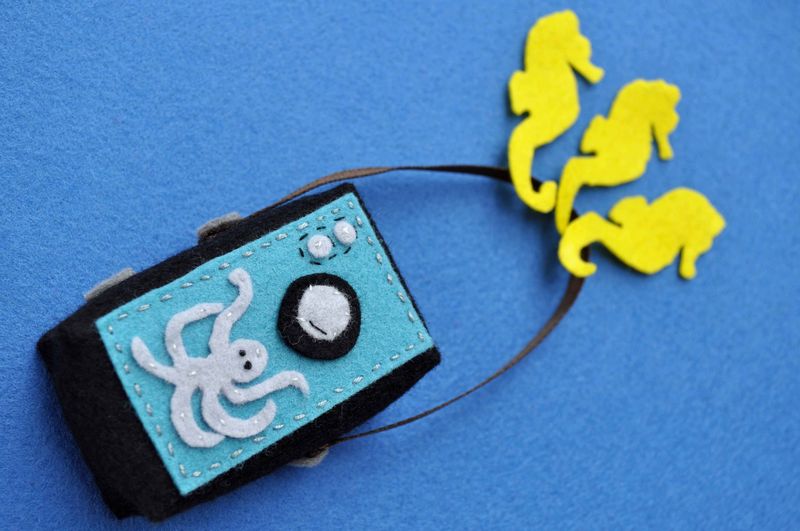
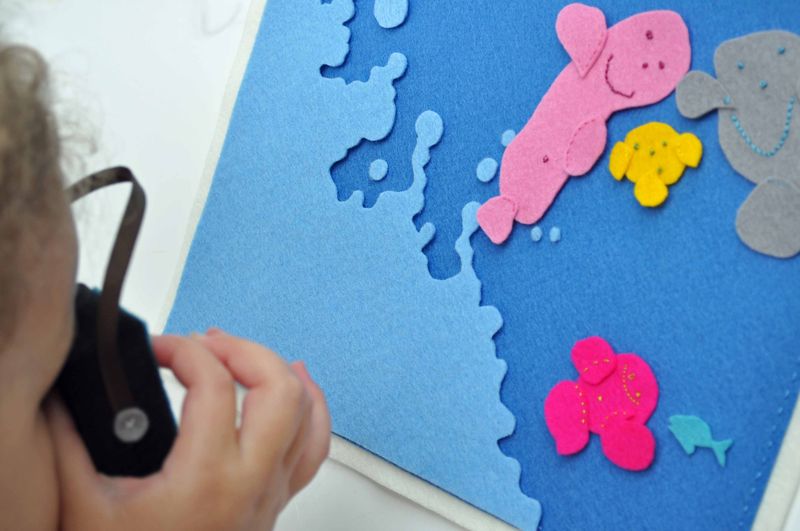
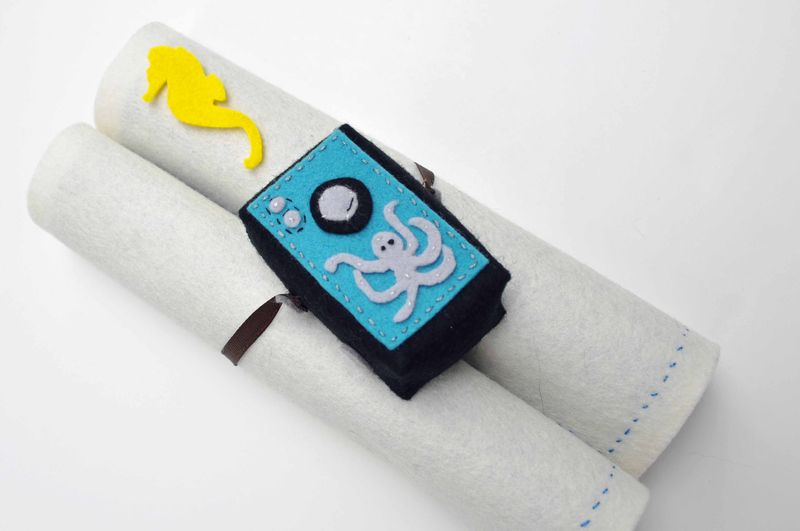
When Cassie from The Crafty Crow asked me to participate in her A Book A Craft series, I knew right away what I was going to make. This felt board, inspired by the book Flotsam, had been brewing in my head.

Flotsam, by David Weisner, is a wordless picture book that tells a fantastical story as captured by an old underwater camera.  A boy, who finds the camera washed ashore, develops the film and is amazed by what he sees…

1

2

3

4

5

6

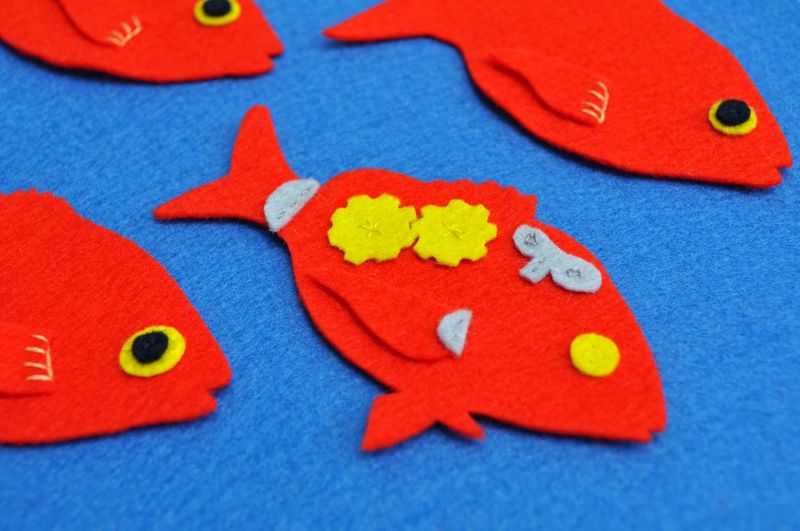
This feltboard is a surprisingly simple project that can produce beautiful result

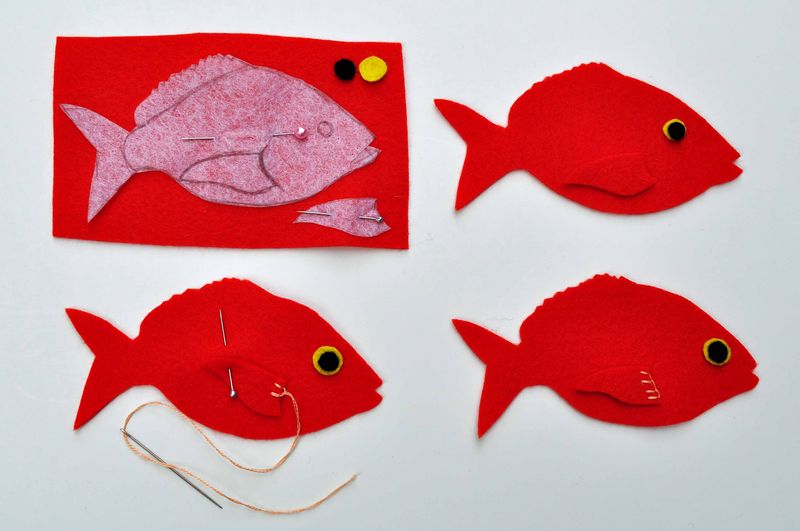
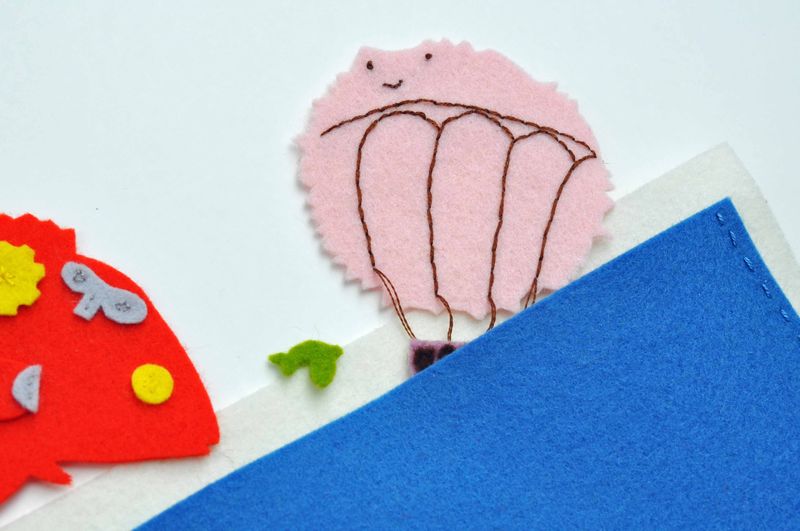
To make the underwater creatures:

1. Draw (or trace) the images onto paper,

2. Pin and cut out the designs out of felt

3. Sew or glue the pieces together

7

To make the felt board:

1. Cut two pieces of felt 11”x8.5” and 10”x7.5”

2. Pin and sew 3 sides – leave the top side open to create a pocket to put the pieces in when not being used.

8

This summer we created our own seashore adventures during a much anticipated drive up the California coast. And during the plane and car rides, my girls used their new felt boards to invent all kinds of stories.

Post by Helen Bird : www.curlybirds.typepad.com