Close

Blog

Pin the Heart on the Skeleton Halloween Kids Game

October 4, 2011

Post by Aimee and Bettijo of www.supermommoments.com
Pin the Heart on the Skeleton Halloween Kids Game

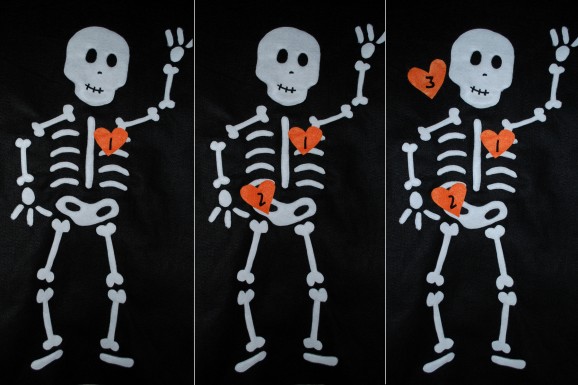
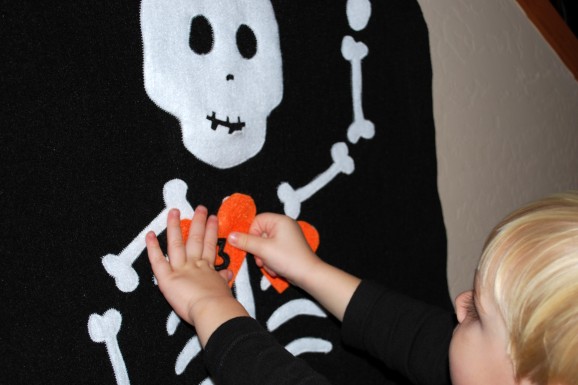
As I was scouring the net trying to find some party-friendly Halloween activities, I came across Pin the Heart on the Skeleton (essentially a Halloween version of the classic game Pin the Tail on the Donkey). Although I read about it several places, I couldn’t find anywhere to purchase it. So, I took matters into my own hands and appliquéd one with recycled felt.

Pin the Heart on the Skeleton Halloween Kids Game 2

If you’re looking for a fun Halloween kids game, be sure to try this Pin the Heart on the Skeleton game! Simply download our free skeleton pattern; print on white paper; cut out bones; paste on black butcher paper; play. Or use our printable pattern to trace bones onto white felt then cut and paste (or applique if you want a project) onto black felt. No matter which product you use, your kids will enjoy this fun Halloween kids game and the skeleton doubles as fun Halloween decor!

Post by Aimee and Bettijo of www.supermommoments.com

Canvas Silhouettes

October 3, 2011

1

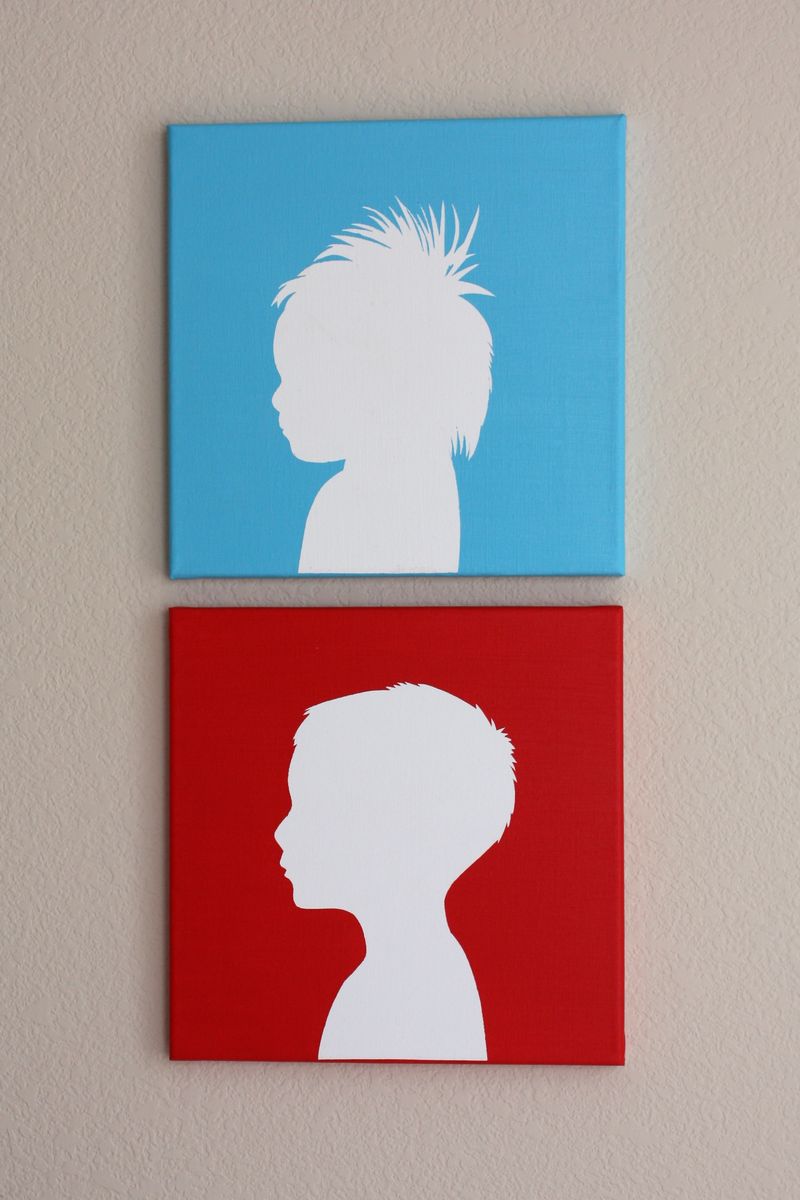
Last year, I made some canvas silhouette paintings of my kids, with the intention of updating them yearly. I just finished this year's version.

Want to make some of your own? They're super easy, and rather inexpensive to make. 

Here's what you'll need:

1. Canvas (I used 12"x12")

2. Acrylic Paints

3. Foam Brush or Roller

4. Vinyl sheet 

Here's how to do it:

1. Take photos of your subject(s) in profile. Just make sure you get down on the same level as the child, otherwise the proportions will be distorted.

2. Re-size the photo to fit your canvas. Any photo-editing software will work.

3. Print your photo on regular paper.

4. I used a Sharpie to trace the outline of the silhouette and then cut along the line.

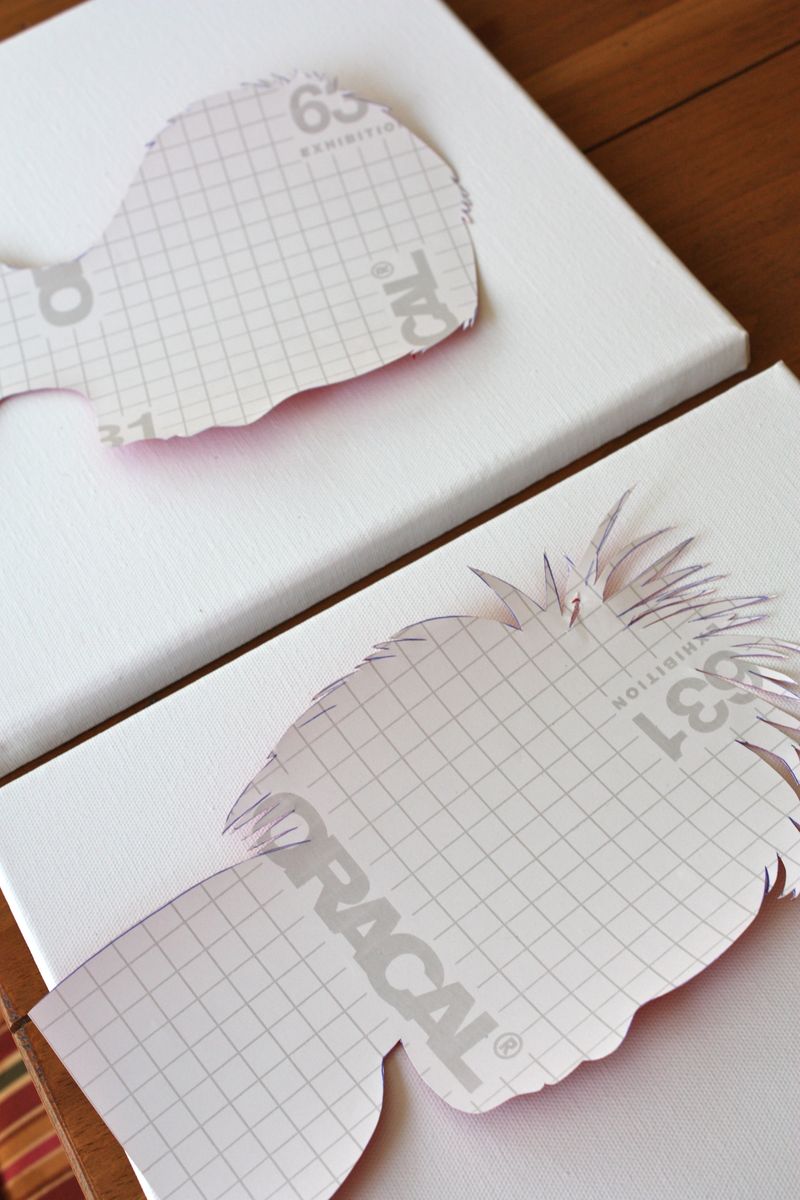
5. Use the paper silhouette you just cut out to trace onto the back of the vinyl sheet (this is an extra step I added since last year…but well worth the effort). 

6. Cut the silhouette out of the vinyl.

5

7. Paint the canvas white (or whatever color you want for the inside of the silhouette).              Do as many coats as you need to achieve desired coverage.

8. Once the paint dries, peel the back off the vinyl silhouette and stick it to the center of the canvas.

9. Paint over the vinyl with the color you want for the outside of the silhouette. You'll probably need a few coats of paint.

10. Once the paint has dried, peel the vinyl up and admire your new work of art. 

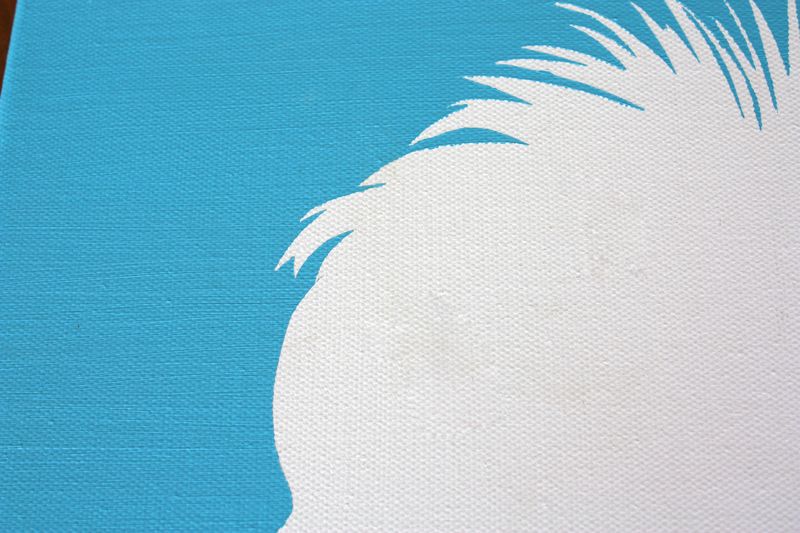
Last year, I used a label sheet, but when it got wet with paint, it started slipping around, making the paint line messy and undefined. The vinyl adheres firmly to the canvas, allowing for finer details (like Charlotte's crazy hair), and peels off cleanly when you're done. 

6

This technique could be used in so many ways. Use letters to spell out names, do a silhouette of your dog, or your house…anything you want. It's a great way to add a unique personal touch to your home. If you need more information or additional photos, you can find my original tutorial and the update on my blog. Or feel free to contact me with questions.

Happy Painting! 

Signature
Post by Christina Williams : justcallmechris.blogspot.com

Backyard Movie Night

September 30, 2011

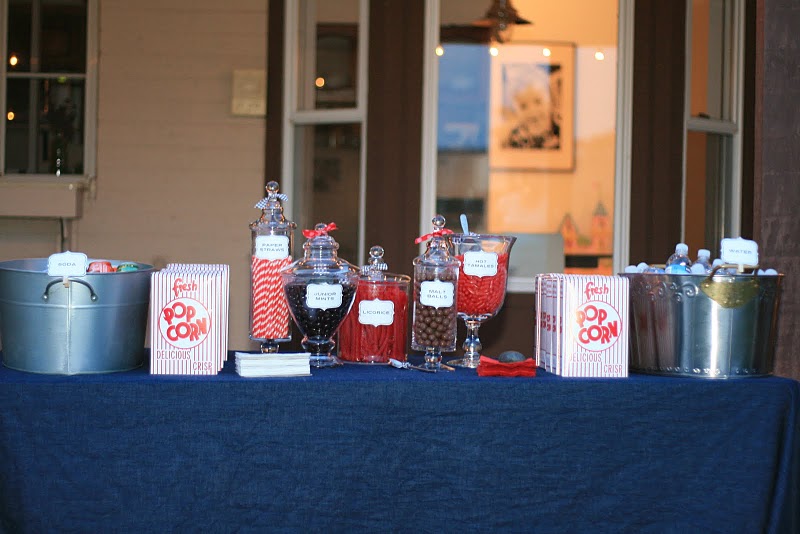
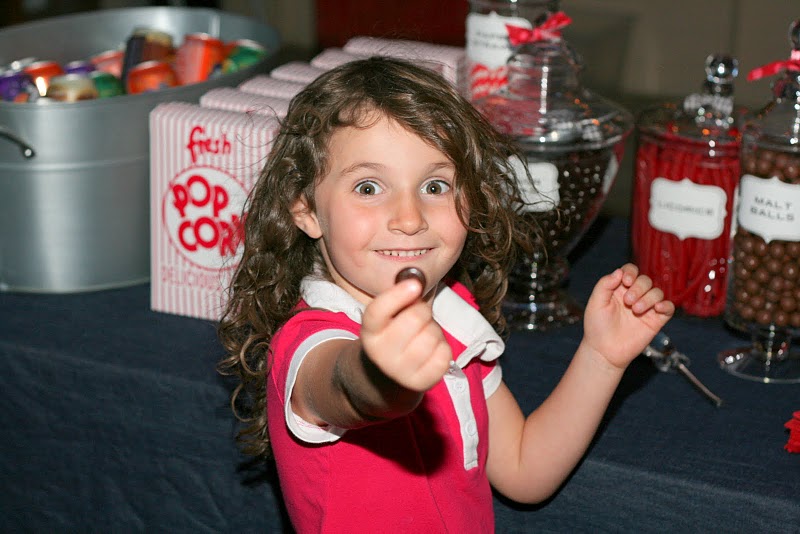
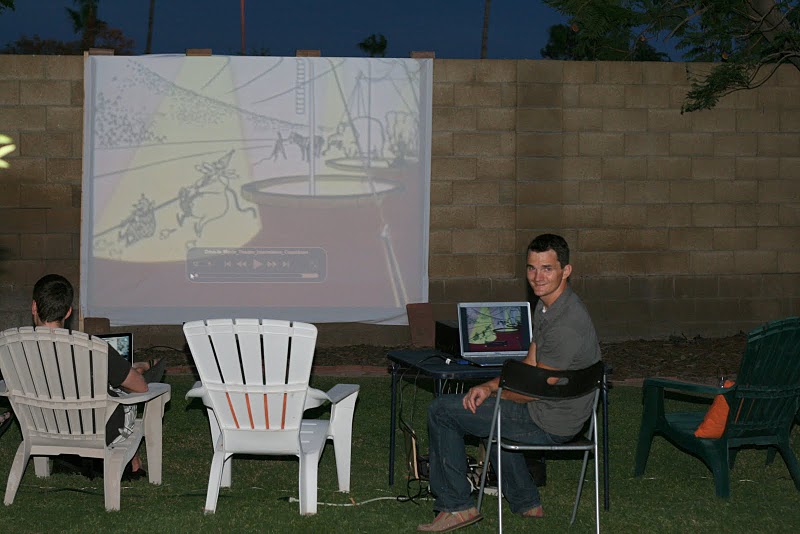
We hosted a “Movie Night Under the Stars” and showed one of my old favorites Charade, starring Audrey Hepburn & Cary Grant. We used a projector to show the movie on our makeshift screen — a white sheet held onto the block wall with bricks.

1

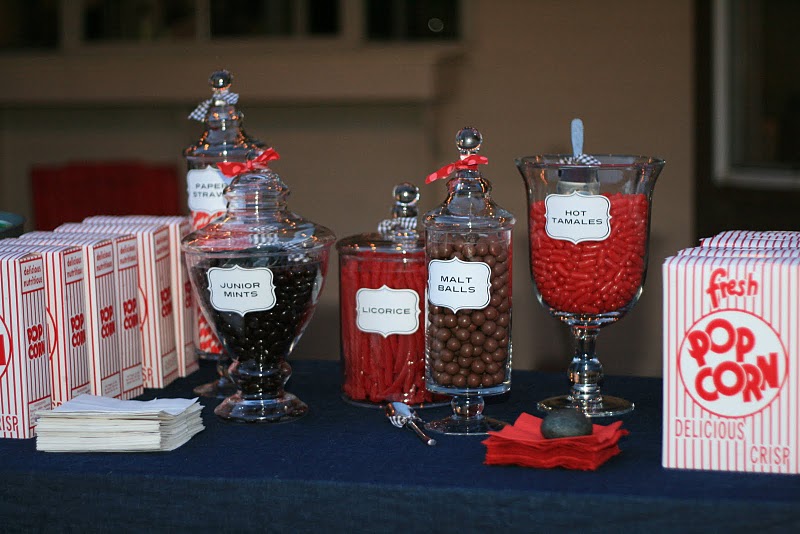
Our lovely concession stand stocked with lots of old-fashioned, movie theater favorites.

2

3

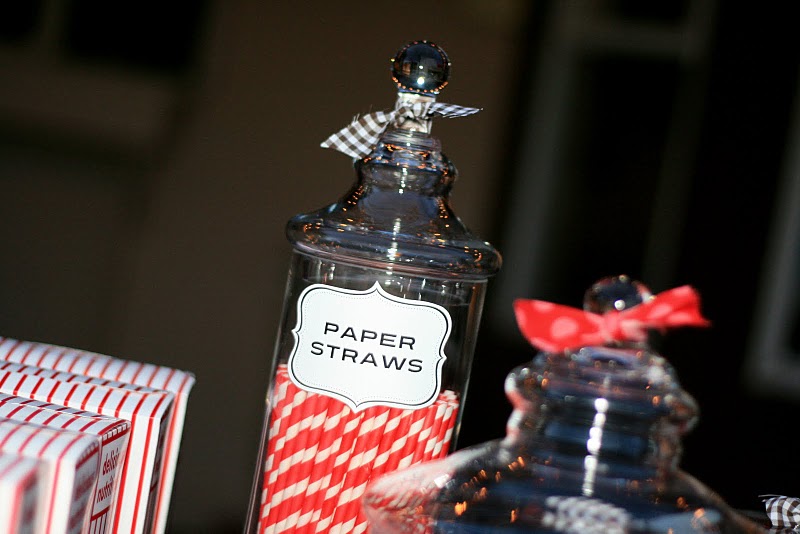
We even had authentic paper straws thanks to Aimee!

4

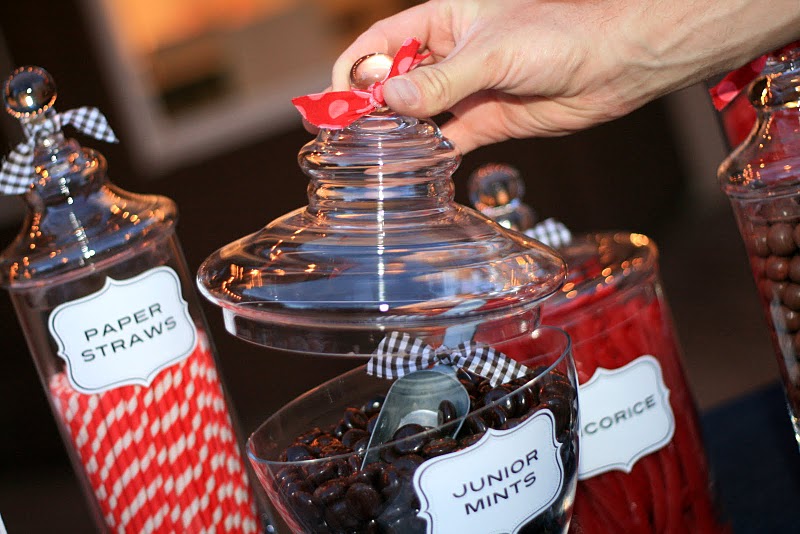
I think Junior Mints were the crowd favorite.

5

Our big screen. My husband Heath had the brilliant idea to download from YouTube a pre-movie reel (the kind that used to be played at old drive-ins) and we had it going on the big screen while guests found their seats.

6

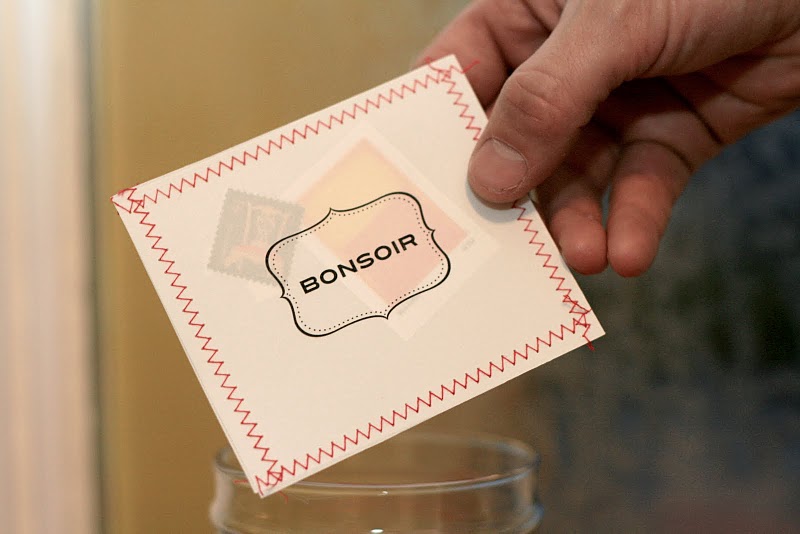
The party favors — stamps. If you’ve seen the movie this will make perfect sense. If not, you really should see it. By far my favorite Hepburn film.

7

Post by Aimee and Bettijo : www.supermommoments.com

DIY Lamp Shade Cut Outs

September 29, 2011

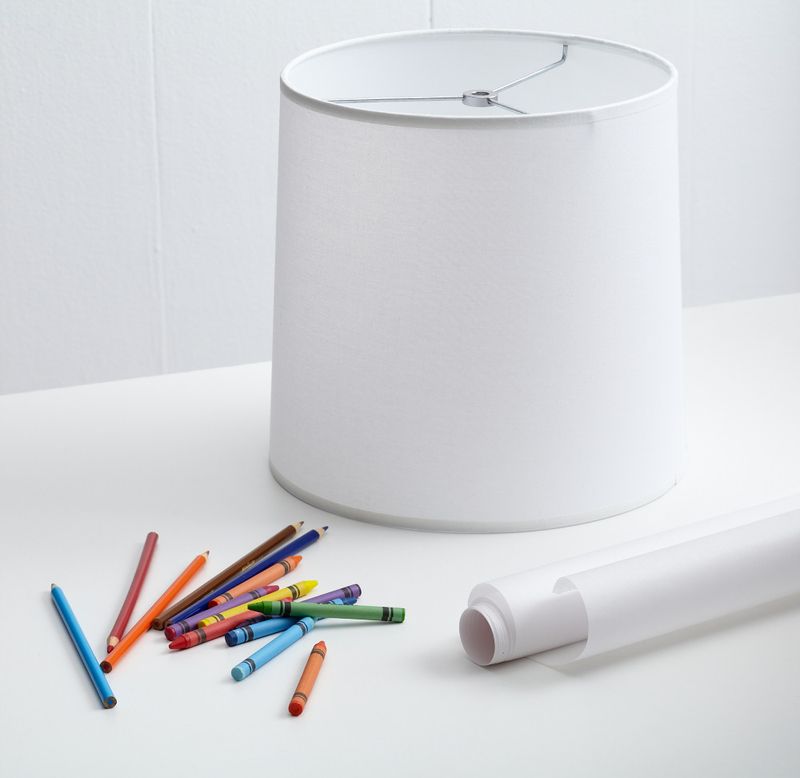
Whattya need?

  • Scissors
  • Glue or spray adhesive
  • Parchment paper
  • Markers, crayons or paint

Lampshade_cutouts

How do I make the lamp shade cut outs?

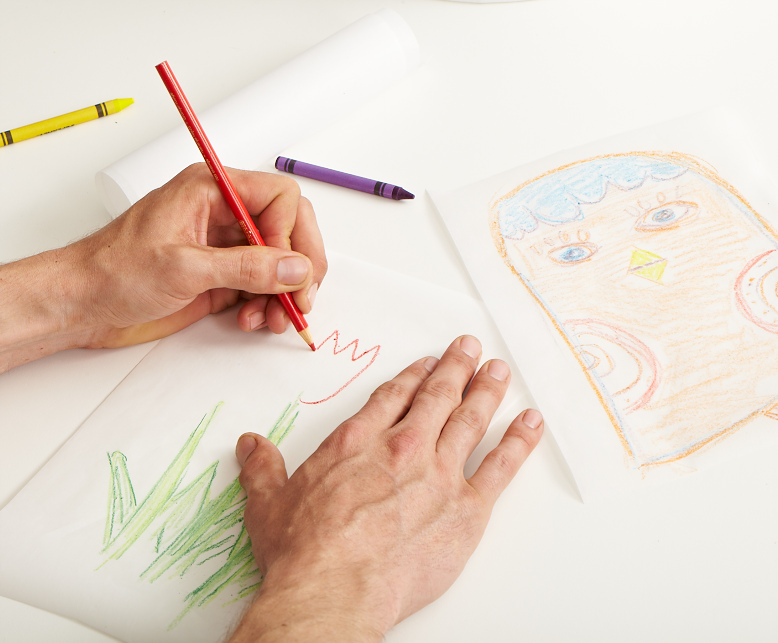
Step 1:  Draw and color shapes on parchment paper.

Shade_cutouts02

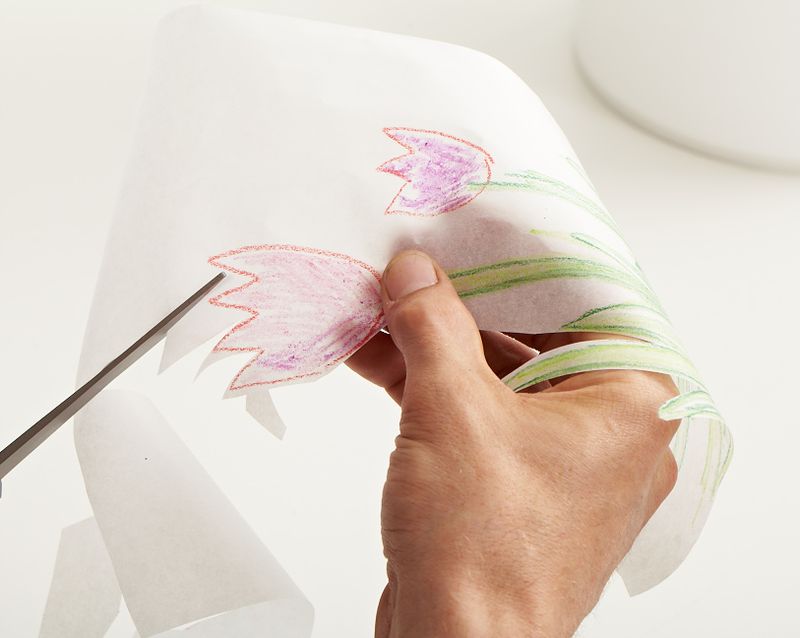
Step 2:  Cut out shapes.

Shade_cutouts05

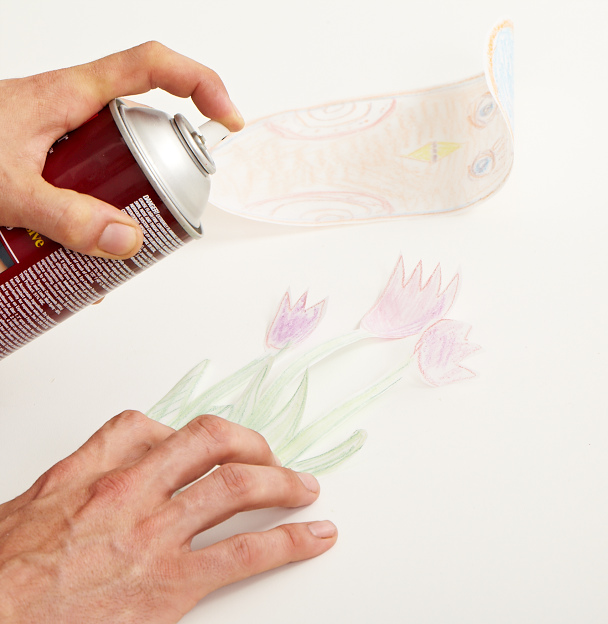
Step 3:  Apply glue or adhesive to shapes.

Shade_cutouts07

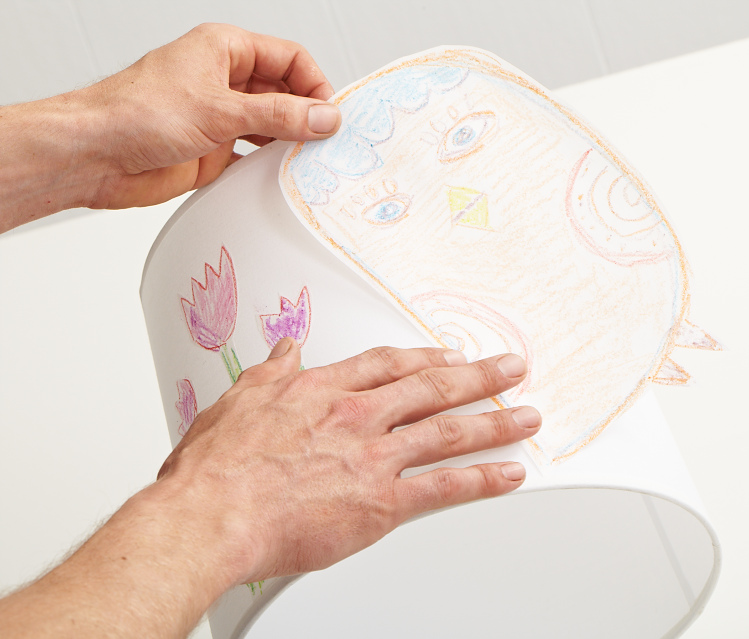
Step 4:  Press onto lampshade.

Shade_cutouts09

Shade_cutouts11

Created by Dane Holweger

Lettuce Wraps, the Underrated Sandwich

September 28, 2011
1

Lettuce wraps have lived a tough life, stereotyped as bad Thai food in chain restaurants, or categorized as unsubstantial rabbit food for practicing vegetarians and vegans.

We're here to change all that, because just about anything that would go between two pieces of bread {with the exception of peanut butter and jelly} can be wrapped in two pieces of lettuce and devoured.

Lettuce wraps offer a lighter way to enjoy your favorite sandwich, and for those with a gluten allergy or intolerance, lettuce wraps offer a way to keep sandwiches in your lunch box without a belly ache in sight.

To get you into a lettuce wrap Zen state of mind, we need to get you thinking about lettuce as bread. Repeat…lettuce is bread, lettuce is bread.

Size matters, sort of:
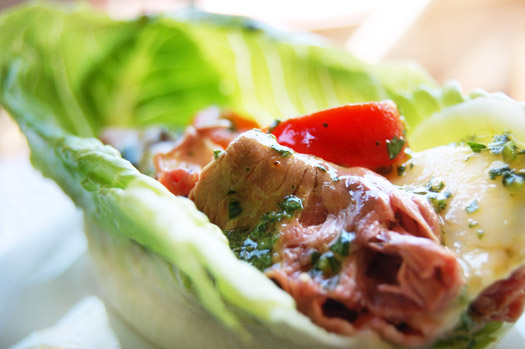
You'll want to choose lettuce leaves no smaller than a piece of endive. Smaller leaves, like endive, should be overlapped to make a larger leaf, as we've done in the photo above with Romaine lettuce. Larger leaves can be used as-is, to create a single wrap.

Construction is important, too:
Because lettuce blowout can sometimes happen, leaving small gaps and holes from which yummy things could escape when the lettuce is rolled or folded, lettuce wraps need to be constructed differently than a sandwich — you'll need a food barrier as your next layer, which will hold everything else in place. A slice of cheese, meat or another layer of lettuce will do the trick.

Pile it in:
Whether you're a garden veggie traditionalist, tuna or egg salad kind of person, baba ghanoush lover, steak and cheese with mushrooms and onions hound, or looking for a deli grinder, once your barrier is in place, you can pile on any filling {except the peanut butter and jelly}.

The secret sauce:
If you're into dry lettuce, you can skip this part. But, if you're looking for ways to infuse more flavor, mix up a batch of herbed aioli, a simple vinaigrette, or a honey mustard sauce and generously dribble over the filling until you've created a fine mess.

OK, so let's recap. Choose your lettuce, create a food barrier, pile on the fillings, sauce it. Easy!

Romaine Lettuce Wraps with Rosemary Roast Beef, Provolone and Roasted Red Pepper

Yields: 2 lettuce wraps
Allergy Info: soy-free, wheat-free, gluten-free

Ingredients:
1/4 cup olive oil
1 small clove garlic, minced
1 tablespoon red wine vinegar
1 tablespoon chopped fresh flat leaf parsley
2 teaspoons chopped fresh oregano
salt and pepper to taste
4 large Romaine lettuce leaves, trimmed, washed and dried
6 thin slices rosemary roast beef (deli roast beef is OK)
4 thin slices provolone
1 red pepper, roasted, peeled and seeded (jarred peppers are OK)

Directions:
In a medium bowl, add olive oil, garlic, red wine vinegar, parsley, oregano, salt and pepper, and whisk until emulsified (about 20 seconds). Set aside.

On a large plate, arrange two of the Romaine leaves (your bread) on a plate so the ribs are slightly overlapping and facing up, forming a shallow cup. Arrange two pieces of cheese (your barrier) across the length of the Romaine. Arrange three slices of roast beef and top with roasted red peppers (your filling). Drizzle the olive oil mixture over the top (your sauce). Roll or fold the lettuce around the filling and shove directly in your mouth. Repeat.

Post by Dawn Viola : www.wickedgooddinner.blogspot.com
Simple Fabric Swatch Hoops Decor

September 27, 2011

1

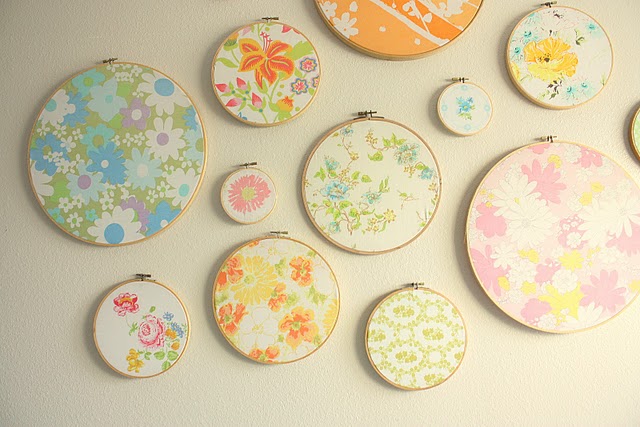
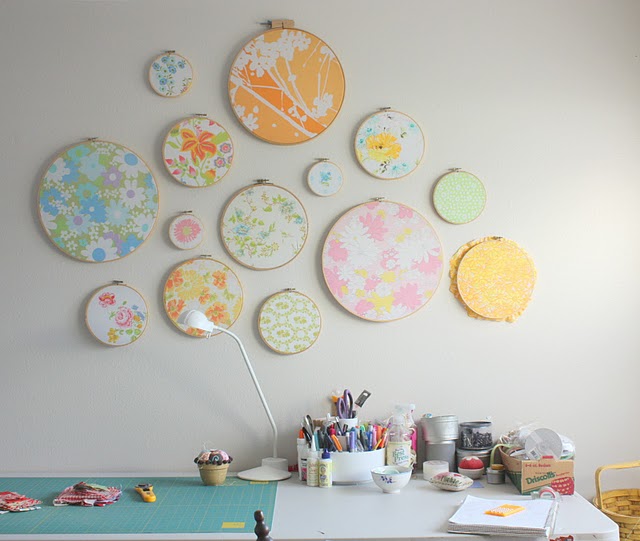
I realized I never shared pictures of the final hanging of the hoops. I love them. I was originally inspired the first time I visited Purl Patchwork and saw their swatch portraits. Only theirs are Liberty prints – and seeing as my Liberty collection is still pretty small (extremely small, like maybe one really small hoop's worth), and that Liberty prints are around $30 a yard, I never did anything about it. Until I saw Amanda's wonderful use of Vintage Sheets for such a purpose! Brilliant!

(The one on the bottom left was my Grandma's. It's my sentimental favorite. I still have a flat sheet to use as a quilt back some day . . .)

2

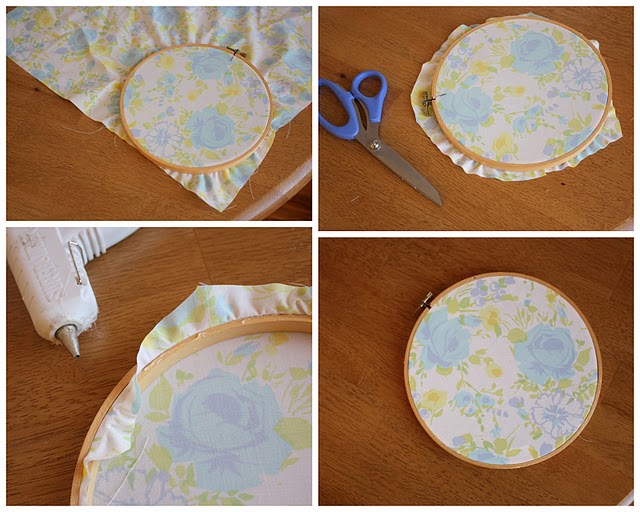
Here's a brief tutorial how I framed mine. I found all the hoops at thrift shops for really cheap. Most of the sheets in a likewise manner.  Use the hoop to frame the sheet portion you would like to focus on. Tighten that screw-thingy. Trim off the excess leaving about an inch of fabric all the way around. Carefully apply hot glue a couple inches at a time and then gently pull the fabric taught over the glue.

3

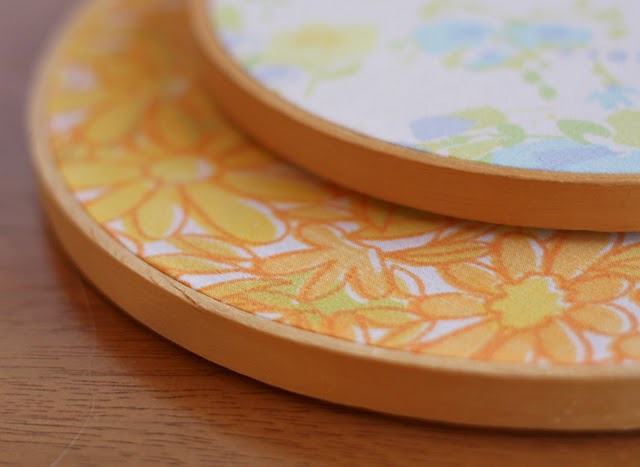
This should create a nice, tightly framed swatch.

4

I've hung mine over my cutting table where I can admire them. And here is a rare glimpse of my work space. (Notice the photo is strategically cropped to hide some serious piles of works-in-progress.) My goal this year is to have my whole sewing space aesthetically pleasing enough to be photographed.

Post by Amy Smart : www.diaryofaquilter.com

Halloween Kids Craft — Painted Pumpkins

September 26, 2011

Post by Darcy of bedtimemonsters.blogspot.com
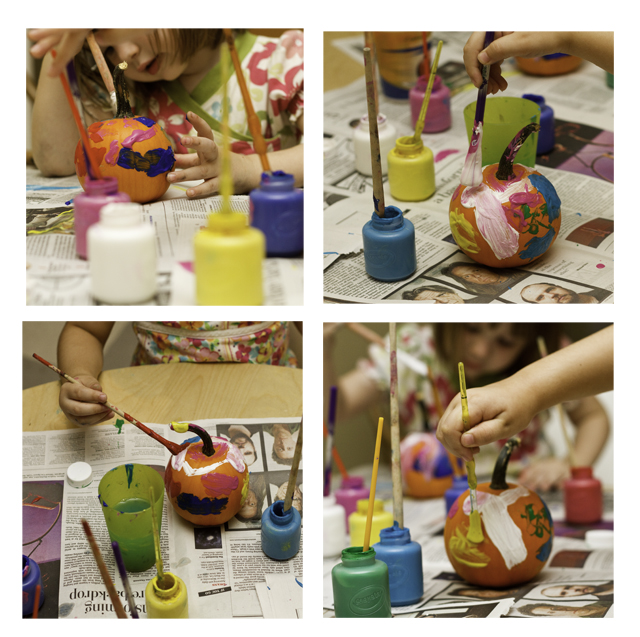
Halloween Kids Craft — Painted Pumpkins Halloween Kids Craft — Painted Pumpkins 2

I realize most people don’t paint pumpkins, they carve pumpkins. But in order to carve a pumpkin you need a knife (or a similar sharp utensil) and I have three children small children. And Knives are dangerous (remember The Outsiders?). So, all things considered, one day I would love love love to carve pumpkins with my children. But that day hasn’t come yet. Kudos to you who are more brave.

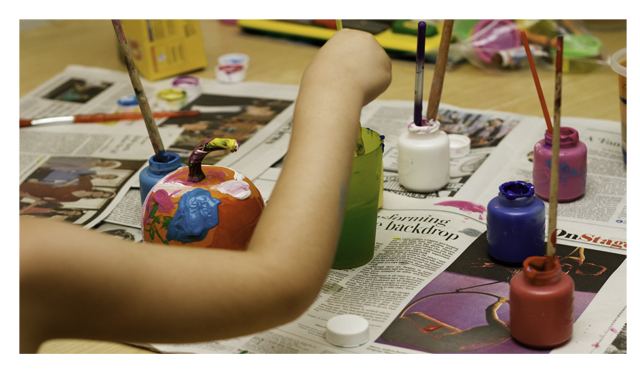
If you want to take the easy route, however, painting pumpkins with your kids is really fun. My kids loved it.

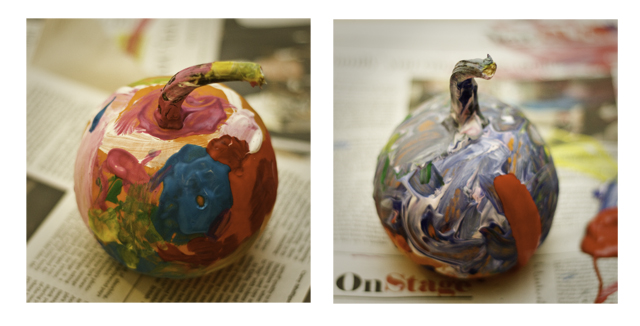
We used 10 ct. 2 oz. Bottles – Assorted Color Washable Kid’s Paint, which worked pretty well, but does rub off once dry, so be careful.

Now we’re ready for Halloween. And fall! Good times.
Halloween Kids Craft — Painted Pumpkins 3Behold the finished product! I think the stripe of red really adds something special. 🙂

Post by Darcy of bedtimemonsters.blogspot.com
Bubble Party

September 23, 2011

Post by Sara Westbrook & Brittany Egbert of One Charming Party

As parents we all have similar hopes for our children. We want them to be happy and healthy and reach their full, amazing potential. And on occasion, it sure would be nice if they could somehow get cleaner the messier they got. Well it’s possible with this great party idea that’s ‘POP’ular with kids of all ages.

Throw a Bubble Party! Bubble parties are great fun for kids, and any water activity is welcome on a hot summer day. And they’re convenient for parents because the main ingredient is sudsy water, so cleanup is a cinch.

1

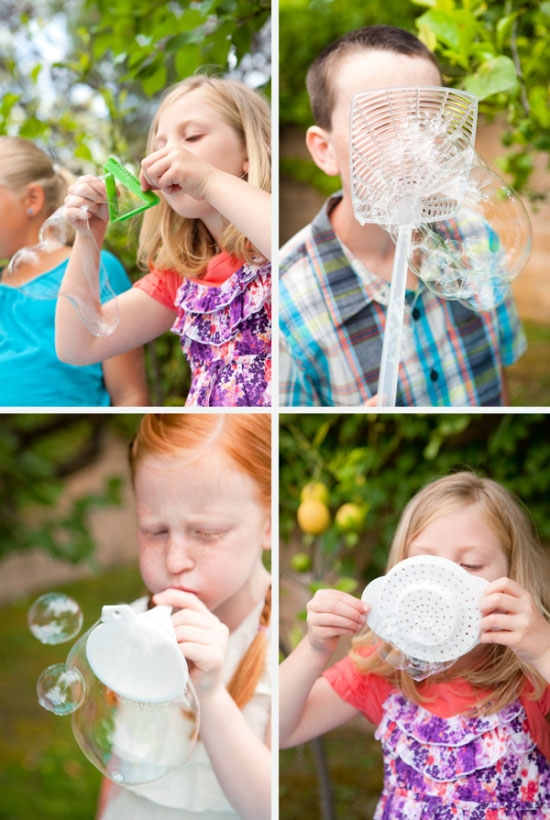
Set up your bubble party like an installation at a science museum, with various stations offering activities for different ages of kids.

At one station, have items from around the house that kids can experiment making bubbles with. Try to find things like rubber bands, cookie cutters and spatulas with holes.

2

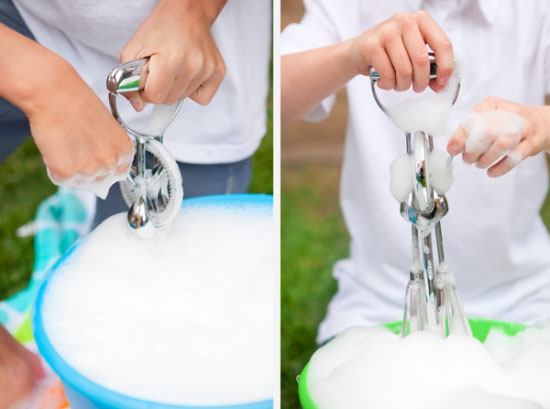
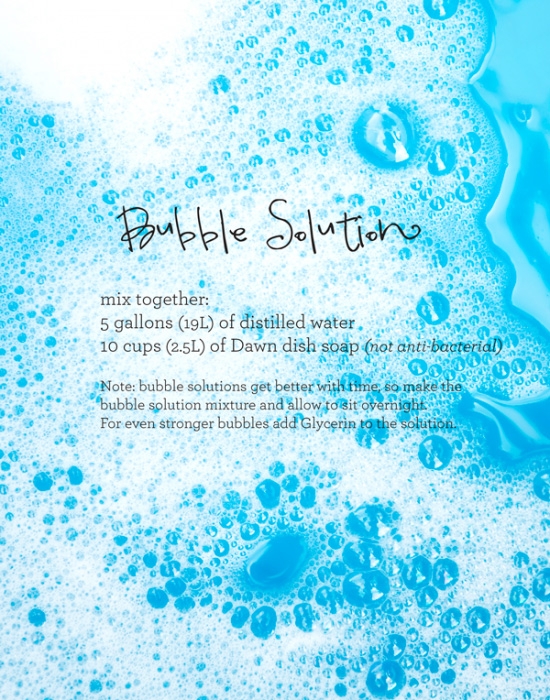
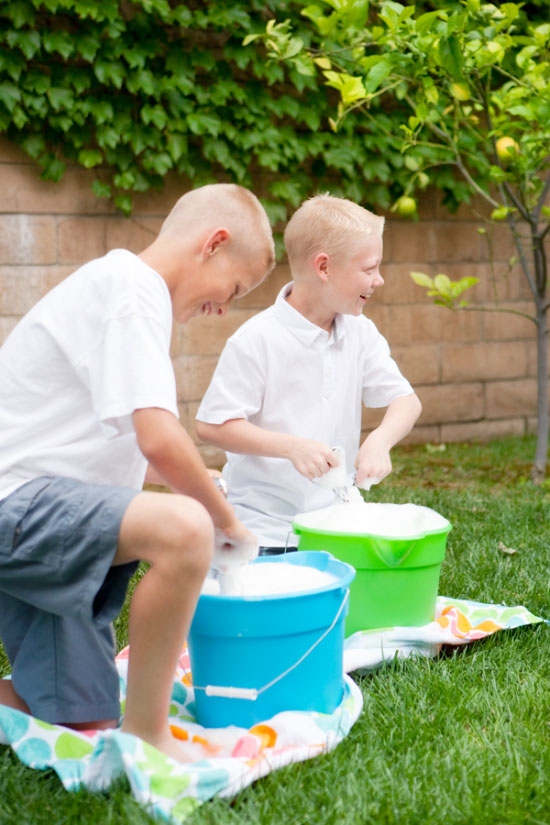
At another station, set up an egg beater race and watch as kids compete to see who can make the most foam. All you need are two buckets, two egg beaters, a bunch of bubble solution, and some young and energetic arms!

3

4

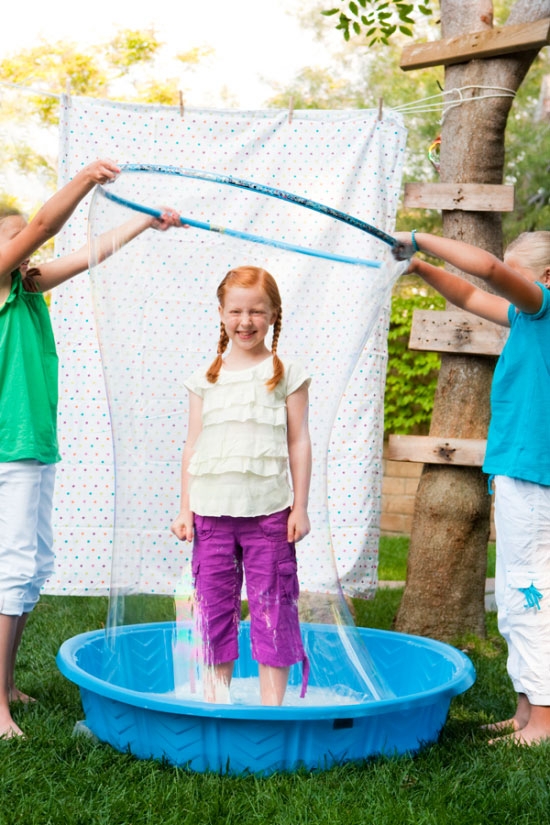
And the station with the most kids waiting their turn will no doubt be the Human Bubble station. With the help of a small plastic pool, a lot of bubble solution and a good ol’ hoola hoop, kids will be amazed and delighted as they get to stand inside of an actual bubble!

5

Post by Sara Westbrook & Brittany Egbert for One Charming Party, onecharmingparty.com 

Photos by Nicole Hill Gerulat of www.nicolephoto.com

How The Nursery Dresser Became A Bookshelf

September 22, 2011

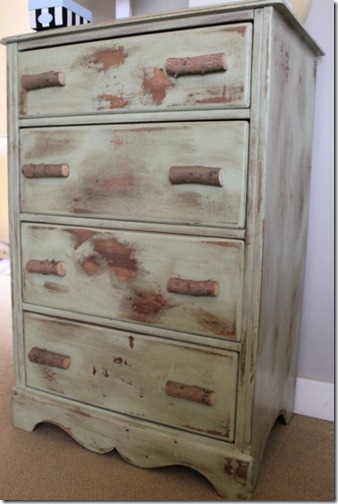
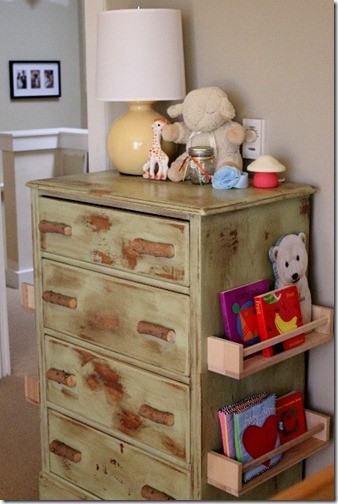
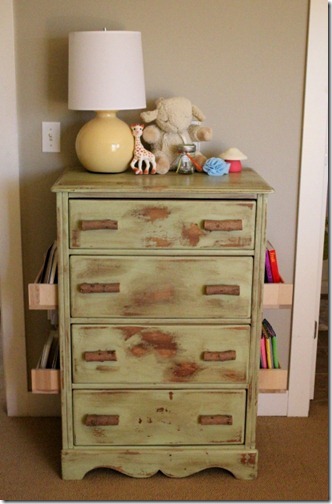
You may remember way back in June when I told you how I found this awesome antique dresser with birch branch handles at the farmer’s market.  And how even though I already had a dresser for the nursery, I couldn’t resist picking up this second one – it was just too perfect of a fit.

1

The dresser drawers were a little funky at first, but with an easy $4 makeover project, they quickly became good as new!  The only problem that remained was space.  I had originally hoped to have a bookshelf in the room to store – what else? – BOOKS, and other small toys and things.  But with two dressers in the room, I knew there would be no additional floor space for another piece of furniture.

And then I stumbled across this on Oh Dee Doh…

2

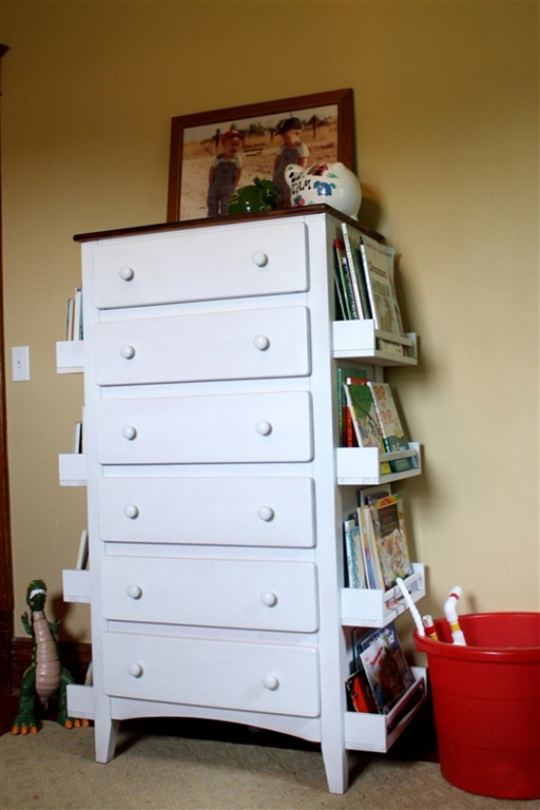
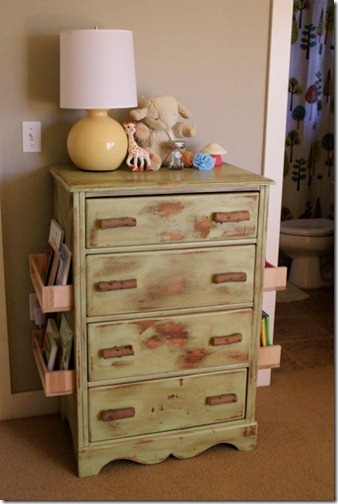
It was literally the perfect solution.  A dresser and a bookshelf all in one, and totally adorable if you ask me.  I made a note of exactly how the inspiration dresser was done, and planned to stop at my IKEA store the next time I headed down to south Seattle. 

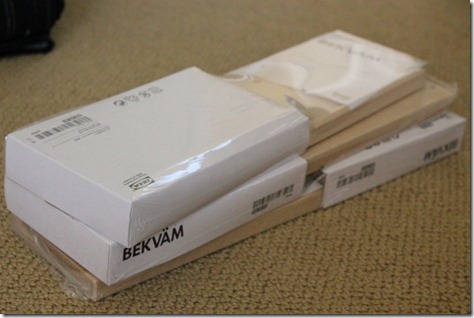
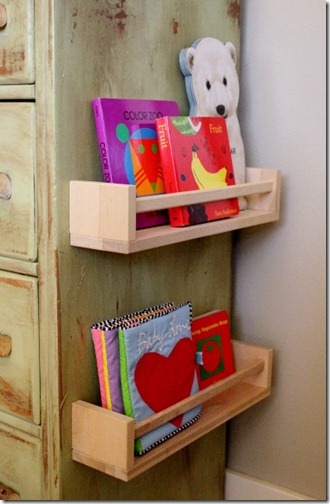
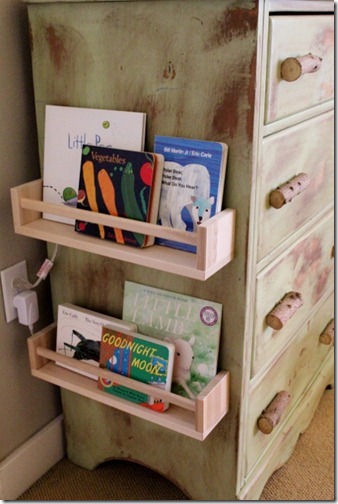
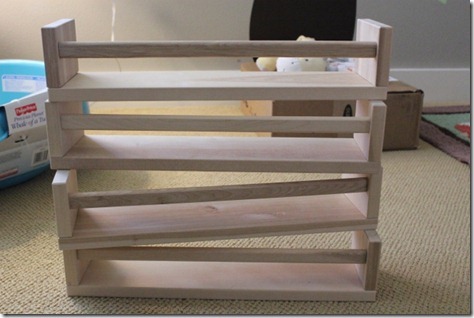
A few weeks later, I had four Bekvam spice racks sitting in the nursery, just waiting to be magically turned into bookshelves.

3

The best part?  They each cost $3.99, and with no other supplies needed, our bookshelf project cost a whopping $16.  Awesome.

4

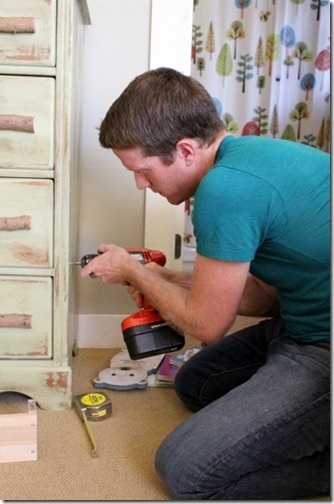
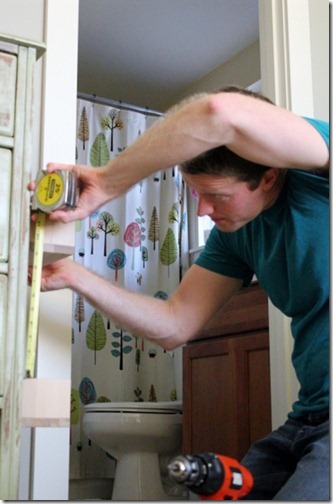
I did the shelf/spice rack assembling myself, and then enlisted some muscle for the logistics of actually hanging them so that they would be level and safe.  I’m pretty sure anything hung by me would end up being ripped straight off the shelf the first time Baby C tried to use them to pull himself up to standing.

5

Casey carefully calculated and measured to make sure that everything lined up evenly, fearing having to listen to me talk about the uneven bookshelves for the next ten years.

6

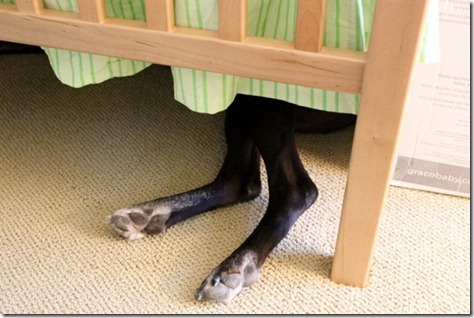
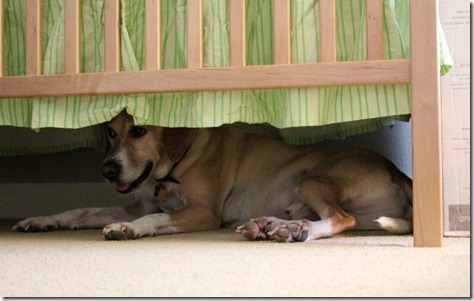
Meanwhile, the dogs tested out their new man cave, located under the crib.  Indy thought it was pretty exciting.

7

While Huey pretended to have no interest whatsoever.

8

Eventually, when he thought we weren’t looking, he climbed under too.

9

A few measurements and screws later, what were once spice racks became bookshelves filled with fabulous stories just waiting to be read.

10

I am already having so many goofy pregnant lady fantasies about sitting in the glider and reading bedtime stories to our little boy.  I wonder what his favorite book will be…

11

Can you believe that with only $16, our funky antique dresser became a gorgeous double-duty bookshelf?  The look is completed with our new gumball lamp from Land of Nod, and a few other important baby items.  (Apparently every baby needs a Sophie?)

12

It’s fun little touches like these that really make the nursery feel like a special place full of love.  I know every time I reach for a book now, I’ll think of Casey and I doing this simple project together.

13

All that’s left to do is hang the artwork on the wall above!  Other than that, we are just waiting for him to tell us he’s ready to enjoy his fun and colorful new space.

14

I remember so well when my mom would read to me at night, and I can’t wait to make those same memories with my son.  He will be here before we know it!

Post by Emily Malone : www.dailygarnish.com

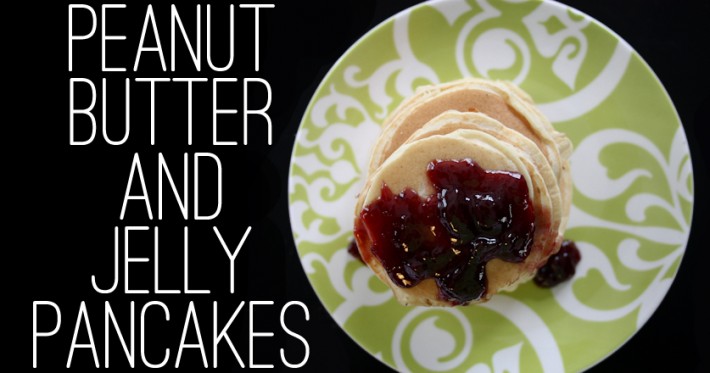
Peanut Butter & Jelly Pancakes

September 21, 2011

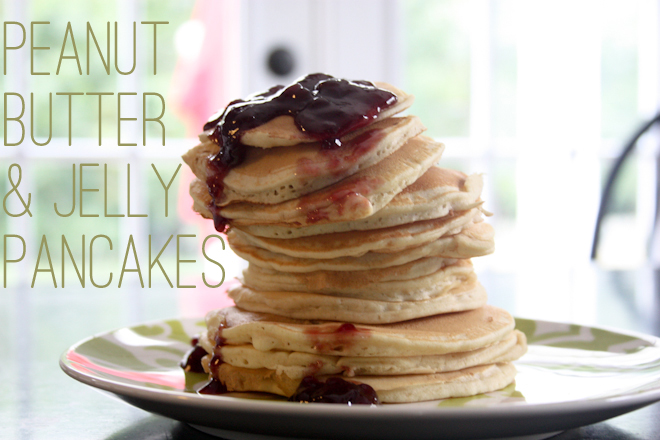
Hi, y’all! Wanna learn a fun and easy twist on breakfast pancakes? Something perfect to make these back-to-school mornings a little different and fun?

Friends, I give you:

1

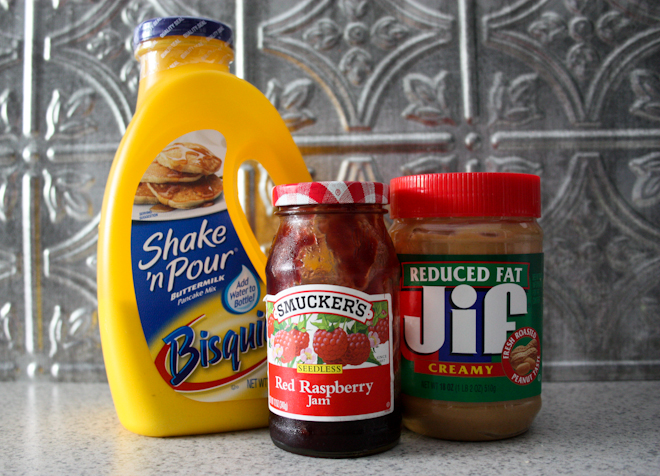
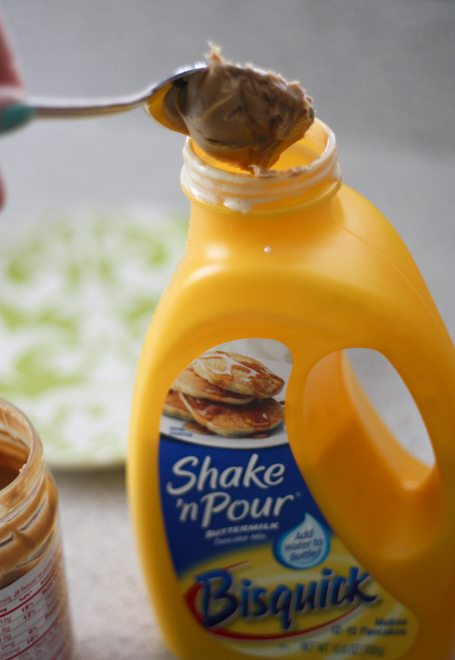
Pull together pancake batter (I go simple on this and buy the Shake ‘n Pour kind), creamy peanut butter (not sure how crunchy would do here) and jelly (I like red raspberry, but grape or strawberry would be yummy too!)

2

After adding water and giving your pancake mix a sufficient shake, add one good-sized dollop of peanut butter to the mix. No exact formula here – add or subtract depending on how peanut-buttery you want your pancakes to be. (And surprisingly, auto-correct had no problem with me writing “peanut buttery”. Awesome!)

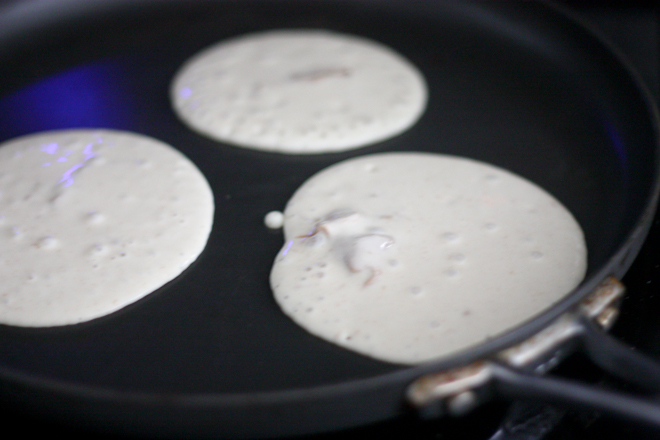
3

Now make your pancakes like you normally would. I usually add enough water for my mix to be on the thin side, but that’s just because I like a lot of flat pancakes. You can make yours however you like. (‘Cause I’m friendly like that.)

See the peanut butter lumps? That’s okay, it’s not going to blend in perfectly unless you warm it before you add it to the mix (which is totally an option!).

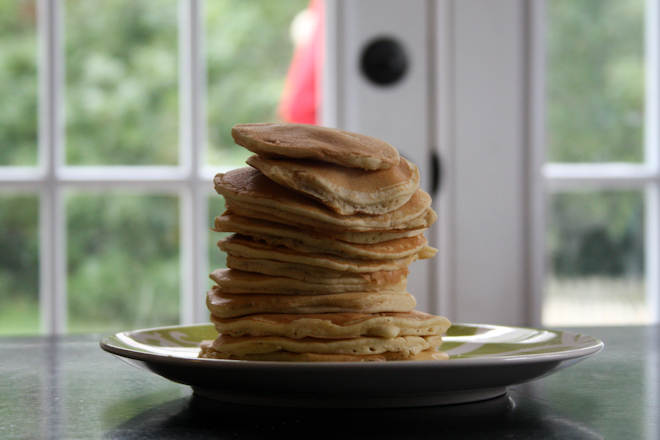
4

And as they are made, just stack them up. (Don’t worry, I’ve never tried to tackle a stack of pancakes this size all by myself. Though pancakes do sound really good right now…)

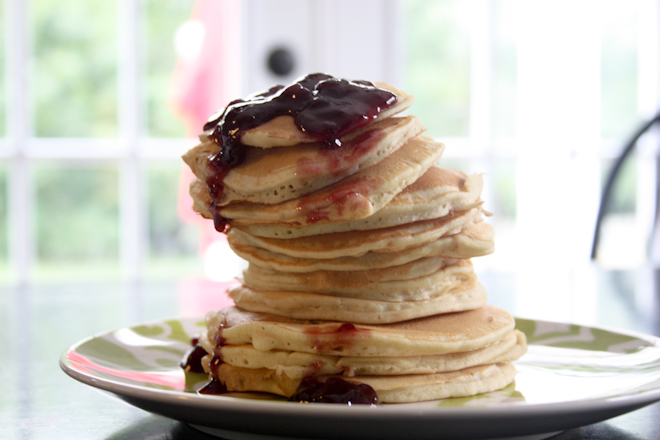
5

Now, while the pancakes look good there, they look GREAT when you add a dollop of jelly on top instead of syrup. (I’ve gotten away with saying “dollop” twice in this post! Excellent!)

6

And there you have them! Peanut butter and jelly pancakes! And they didn’t even take much more time than making regular pancakes.

7


Post by Raechel : www.raechelmyers.com

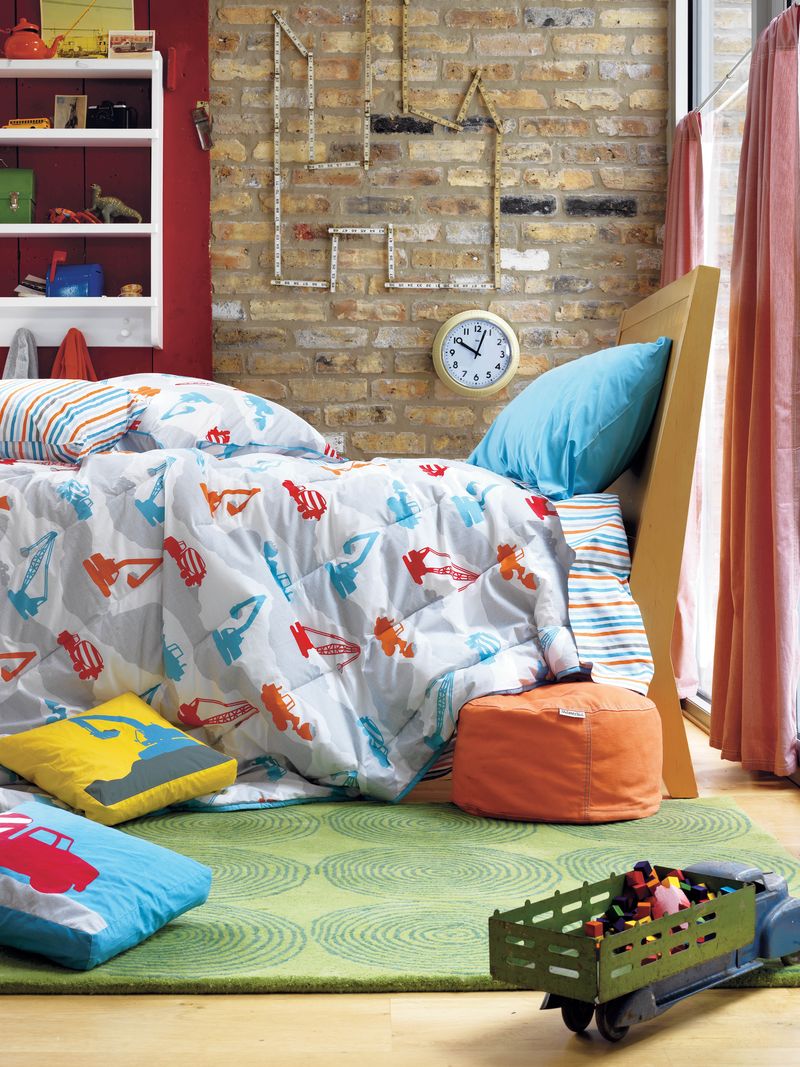
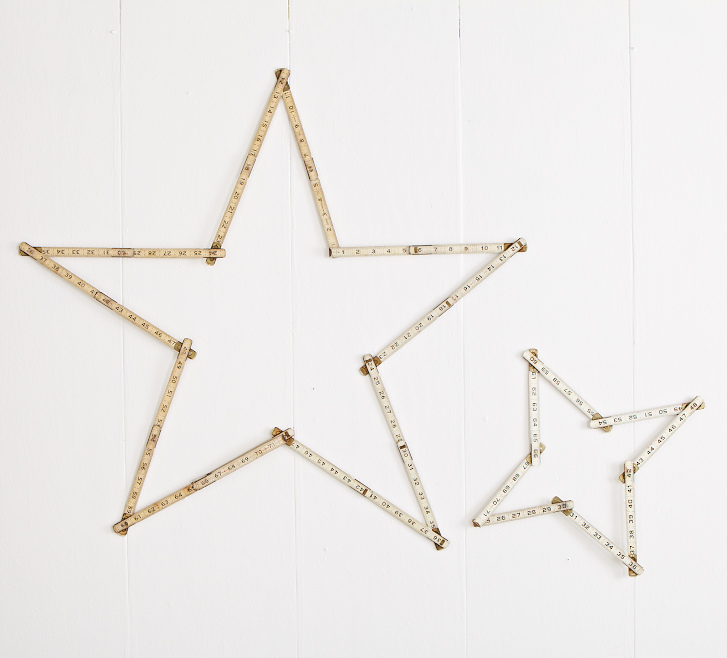
DIY Vintage Ruler Wall Decor

September 20, 2011

D4355_ConstBdg76C

Whattya need?

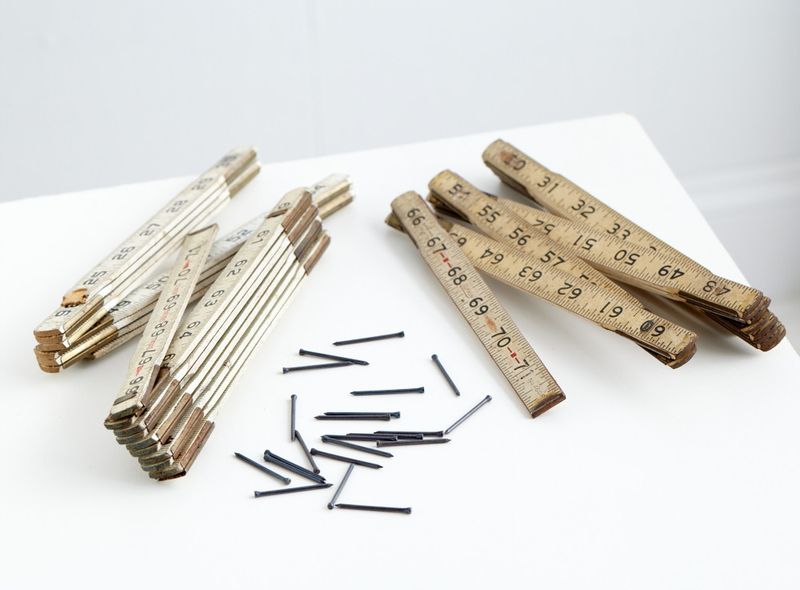
  • Folding rulers, new or vintage (as many as you want, depending on your space and desired design)
  • Double-sided tape
  • Hammer
  • Nails, tacks or something on which to hang rulers

RulerArt_blog

How do I make the ruler wall décor?

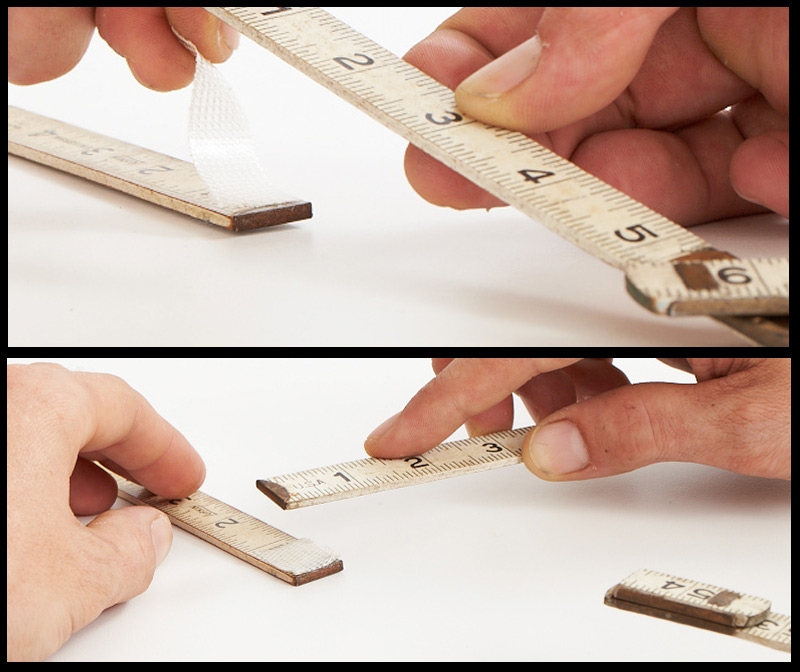
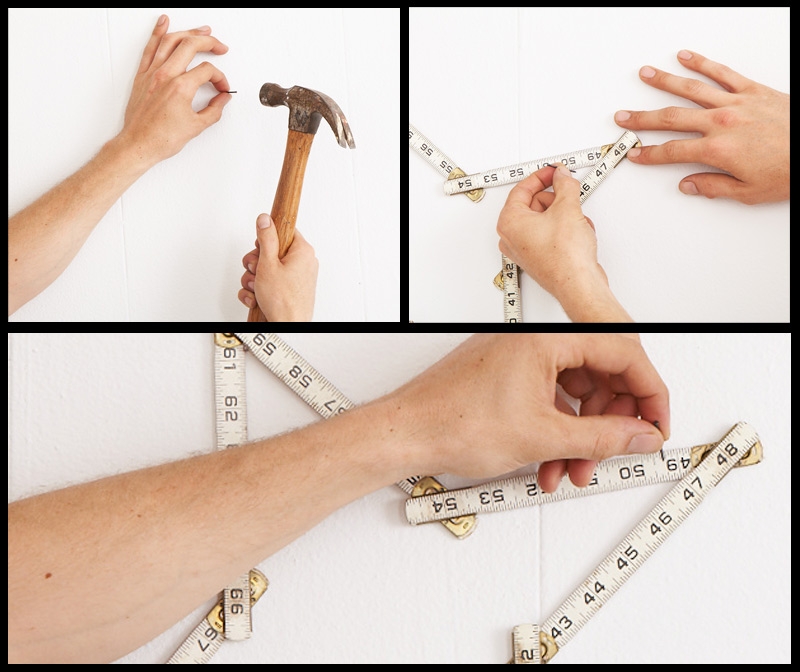
Step 1:  Bend rulers into desired shape, using double-sided tape to hold shapes in place and/or affix ends of rulers together.

1

Step 2:  Use nails, screws, tacks or hooks to hang the corners of your design on the wall.

2

Rulerwallart_17

Created by Dane Holweger

DiY Styled Ice Cream + Bon Bons

September 19, 2011

Hello again from Becca of CAKE.

Summer is drawing to a close much too quickly, but homemade ice cream is always in season. Here are a few unique ways to pretty up this favorite dessert, along with ice cream recipes worth serving at your next happy occasion…

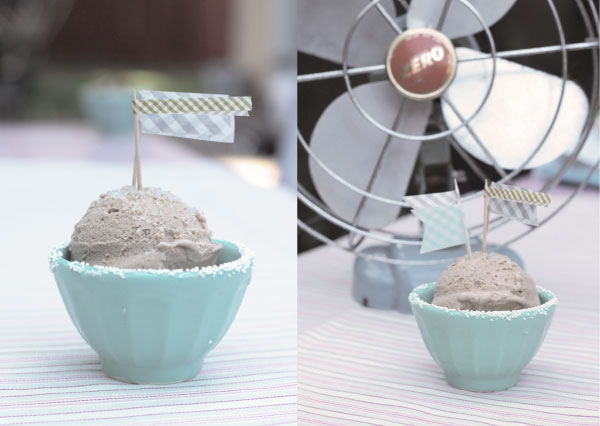
Salted Caramel Ice Cream:

1

– Rim your bowl with nonpareils. Brush on a bit of corn syrup to make them stick, then roll or sprinkle.
– Sanding sugar makes a lovely transparent garnish and comes in every color you can imagine.
– Make your mark. Washi tape and toothpicks make for a variety of simple flag toppers.

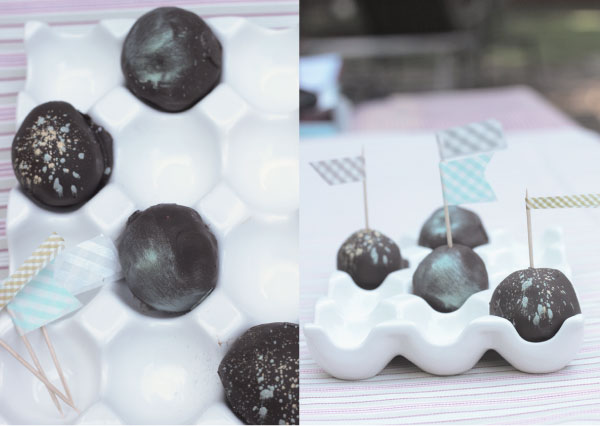
Dark Chocolate Bon Bons:

2

– An egg tray {ceramic or paper} is the the perfect size for displaying these frozen delicacies.
– Sparkle & Shine. Brush or tap luster dust {available at baking & craft stores} along the chocolate shell for an artful metallic sheen.

photos + styling © cake. 2011

via epicurious

Ingredients
1 1/4 cups sugar, divided
2 1/4 cups heavy cream, divided
1/2 teaspoon flaky sea salt
1/2 teaspoon pure vanilla extract
1 cup whole milk
3 large eggs

Directions
Heat 1 cup sugar in a dry 10-inch heavy skillet over medium heat, stirring with a fork to heat sugar evenly, until it starts to melt, then stop stirring and cook, swirling skillet occasionally so sugar melts evenly, until it is dark amber.
Add 1 1/4 cups cream (mixture will spatter) and cook, stirring, until all of caramel has dissolved. Transfer to a bowl and stir in sea salt and vanilla. Cool to room temperature.
Meanwhile, bring milk, remaining cup cream, and remaining 1/4 cup sugar just to a boil in a small heavy saucepan, stirring occasionally.
Lightly whisk eggs in a medium bowl, then add half of hot milk mixture in a slow stream, whisking constantly. Pour back into saucepan and cook over medium heat, stirring constantly with a wooden spoon, until custard coats back of spoon and registers 170°F on an instant-read thermometer (do not let boil). Pour custard through a fine-mesh sieve into a large bowl, then stir in cooled caramel.
Chill custard, stirring occasionally, until very cold, 3 to 6 hours. Freeze custard in ice cream maker (it will still be quite soft), then transfer to an airtight container and put in freezer to firm up.

Dark Chocolate Bon Bons

Ingredients
1 quart ice cream {any flavor} 
12oz semisweet chocolate
1/4 cup vegetable oil

Directions
Line a small baking sheet with parchment paper, and set aside.  Using an ice cream scoop, scoop ice cream out of the container and place onto the parchmented baking sheet, leaving room in between each scoop. Once all of the ice cream is scooped, place a toothpick or wooden skewer into the center of each scoop, about halfway through.  Place the pan in the freezer for at least an hour, overnight if possible.
Combine the chocolate chips and vegetable oil in a small metal bowl, and set this atop a saucepan with about an inch or so of water in the bottom. Place the saucepan over medium-high heat, and stir the chocolate mixture frequently until melted and smooth.  Remove from the heat.
Remove the frozen ice cream scoops from the freezer. Holding the scoops by the wooden skewer and over the bowl of melted chocolate, spoon melted chocolate over the top and sides of the ice cream scoop, coating completely. Dip the bottom of each scoop into the chocolate quickly, then place back on the parchmented baking sheet.
Repeat until all scoops are coated in chocolate. Remove the skewers from the top of each bon bon, and freeze at least 30 minutes before enjoying.

Post by Becca : www.cakeeventsblog.com

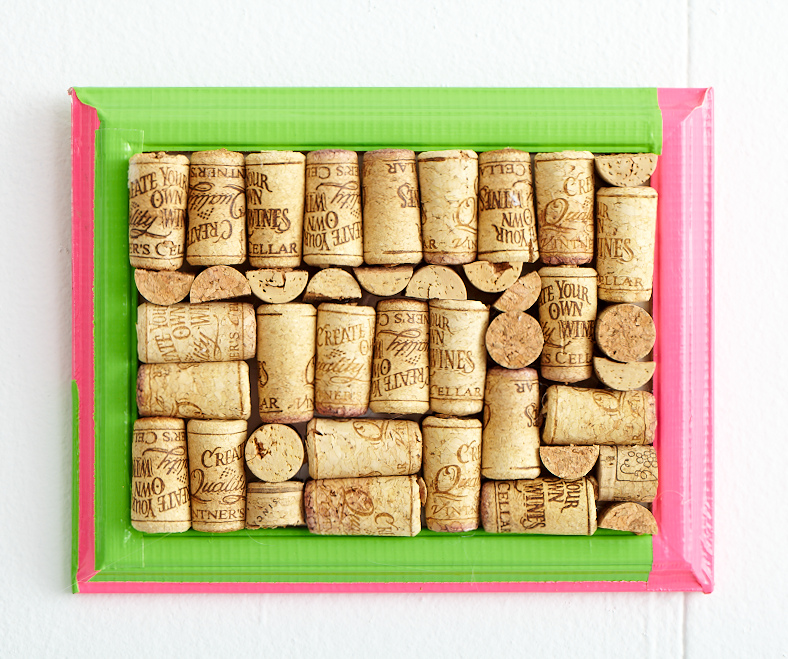
DIY Wine Cork Corkboard

September 16, 2011

1

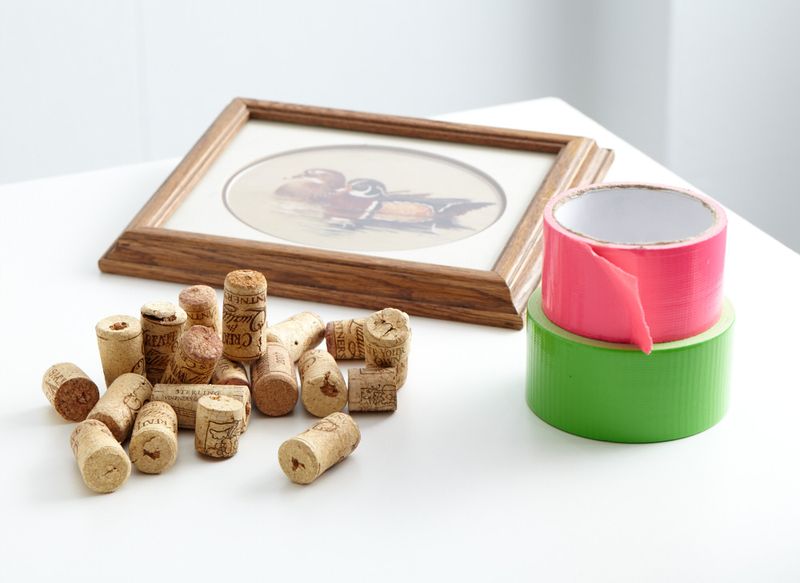
Whattya need?

  • Any picture frame, new or old
  • Hot glue gun or any strong adhesive
  • Corks (these can be purchased at craft stores)
  • Colored tape  

WineCorkboard_blog

How do I make the wine cork corkboard?

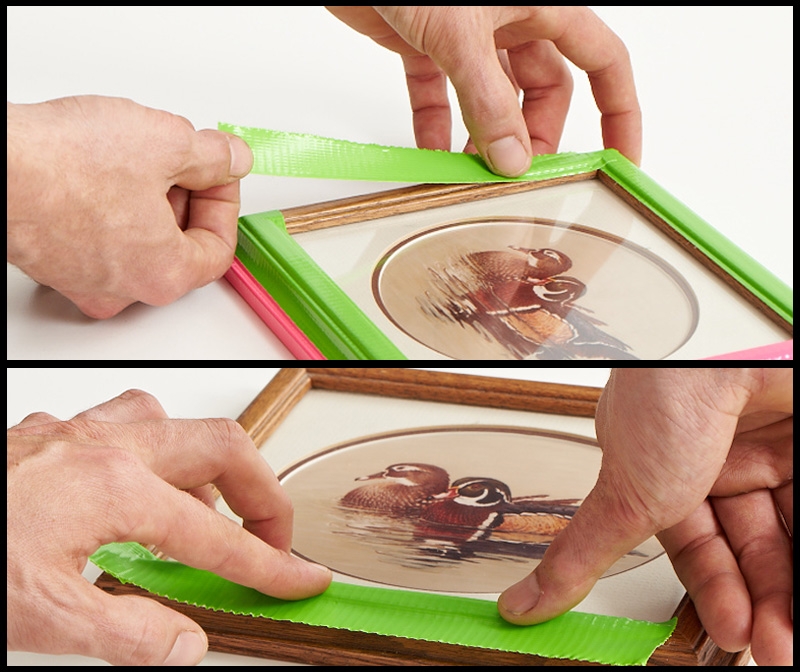
 Step 1:  Use colored tape to tape over edges of frame to give it a new look, if desired.             (We used colored duct tape.)

2

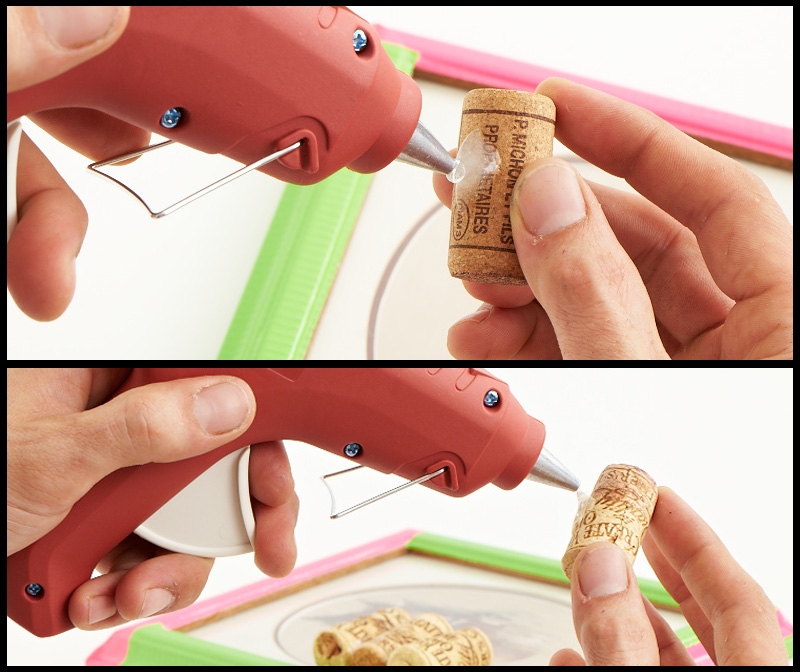
Step 2:  Glue corks onto picture area, covering frame. You may need to cut the corks to fit snugly together.

3

Step 3:  Hang.

Wine_corkboard_14

Created by Dane Holweger

Monster Vanishing Spray

September 15, 2011

Post by Aimee and Bettijo of  www.supermommoments.com

We’re Aimee and Bettijo the Sometimes Supermoms from the blog Paging Supermom. We love sharing ideas that help each Mom create and cherish more Supermom Moments.

We recently had a reader submit a Super-tip explaining how to rid your child’s room of scary monsters. After all, doesn’t every dark closet harbor a big, scary monster? Our reader’s solution is so simple and effective — use a squirt bottle to spray away those uninvited prowling creatures! Ingenious! Since we’re graphic designers, we couldn’t help but kick the packaging up a notch to make the spray more official. (And our kids have commented that this spray “works better” than the old spray!) We simply filled a classic squirt bottle with a secret, monster-vanishing spray (also known as H2O), then labeled the bottle, so even our youngest kids can be assured this bottle means business with any late-night intruders. Our label colors were inspired by Land of Nod’s adorable Robo-bedding.

Download the free Monster Spray Printable (available in blue and pink), and you’ll be armed and ready for tonight’s bedtime!

Hmmm… what kind of spray should Moms come up with next?

Post by Aimee and Bettijo of  www.supermommoments.com

Drawstring Bag

September 14, 2011

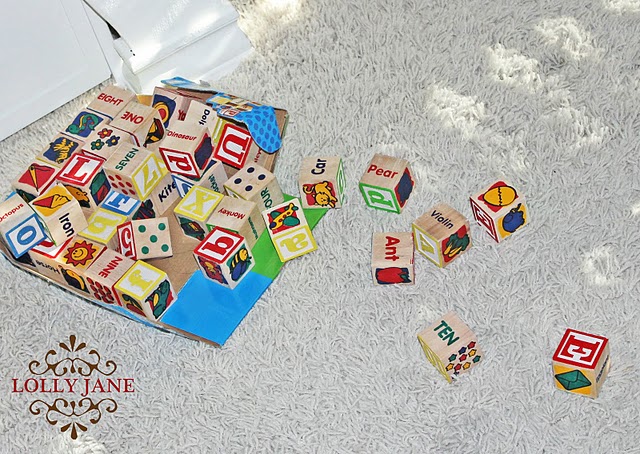
My little man received a fun block set for Christmas but, it came in a box. A dumb box that you can't flap shut and doesn't store well… plus, it's ugly and doesn't match his nursery so I knew I needed something else 😉

1

My solution? 

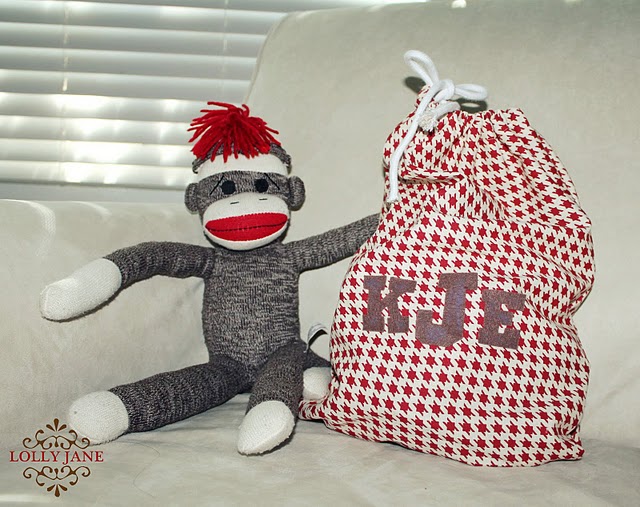
A drawstring bag!

2

I ♥ that I can simply suffocate those pesky blocks pull the cord tight and not worry about the too easy access while still having easy access to them. Ha! Does that even make sense? 😉
 
 
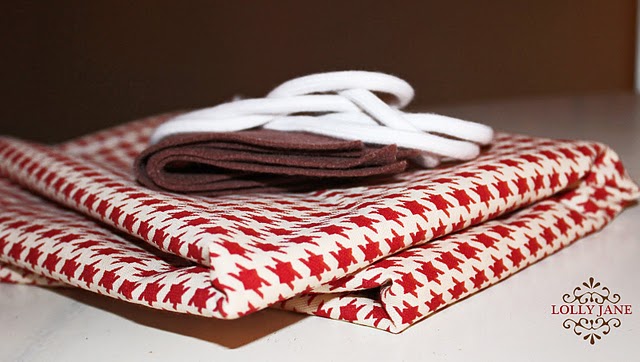
Here's what you'll need to get started:
3
Fabric* . Cord . Scrap felt . Sewing machine . Iron
*Measurements: 42L x 14W
 
 
Instructions:
4
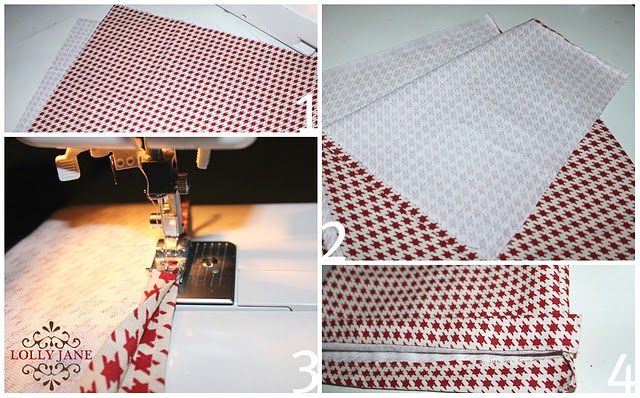
1. Fold fabric in half length-wise to see what your bag will look like, (this was necessary for me!) 
2. Turn each side under 1/4" and iron flat.
3. With right sides together, stitch sides together using a 1/2" seam, stopping 2" from the top.
4. Simply fold the remaining 2" fabric in half length-wise to form a tube for the cord to pull through and stitch.  
 
PS: I'm sure there's proper sewing terminology for my instructions but you won't find them on this here
blog 😉
 
From there you simply snake your cord through and you're done. Or are you? Mine looked kind of blah with nothing on it so I quickly added my son's initials then called it good.
                                                                                                                                                                                             
 
5

 
To make the initials I typed in the font I wanted, printed it off, cut out the letters in felt and fabric glued them on. I'm kickin' it old school since I don't own a Silhouette 🙁  
 
But didn't the bag turn out kinda cute? Much better than the box anyway!
 
 
                                                                                                                                                                        A {BIG} shout out to Skip To My Lou for the tutorial instructions that I modified a smidge. Thank you Cindy! 🙂
 
                                                                                                                                                            
Post by Kelli and Kristi  : www.lollyjaneboutique.blogspot.com
Cinnamon Chips & Fruit Salsa

September 13, 2011

1

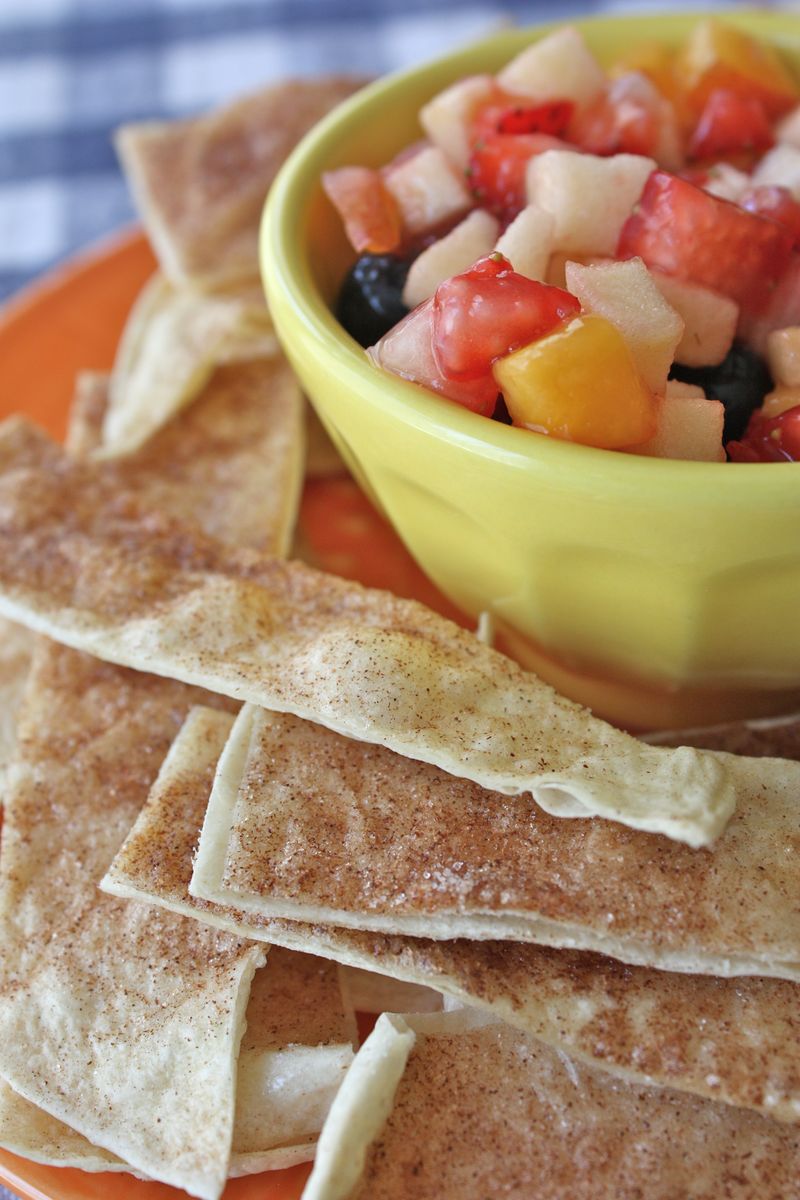
Cinnamon Chips & Fruit Salsa

When I was a kid, there was this Mexican place that had yummy tortilla strips that were sprinkled with cinnamon sugar. It was my favorite thing when we'd get an order for dessert.     I'd long forgotten about these tasty little morsels. But recently, I discovered a recipe that brought back all those old memories.

The three ingredients are things I always have on hand:

  1. Flour Tortillas
  2. Butter
  3. Cinnamon Sugar

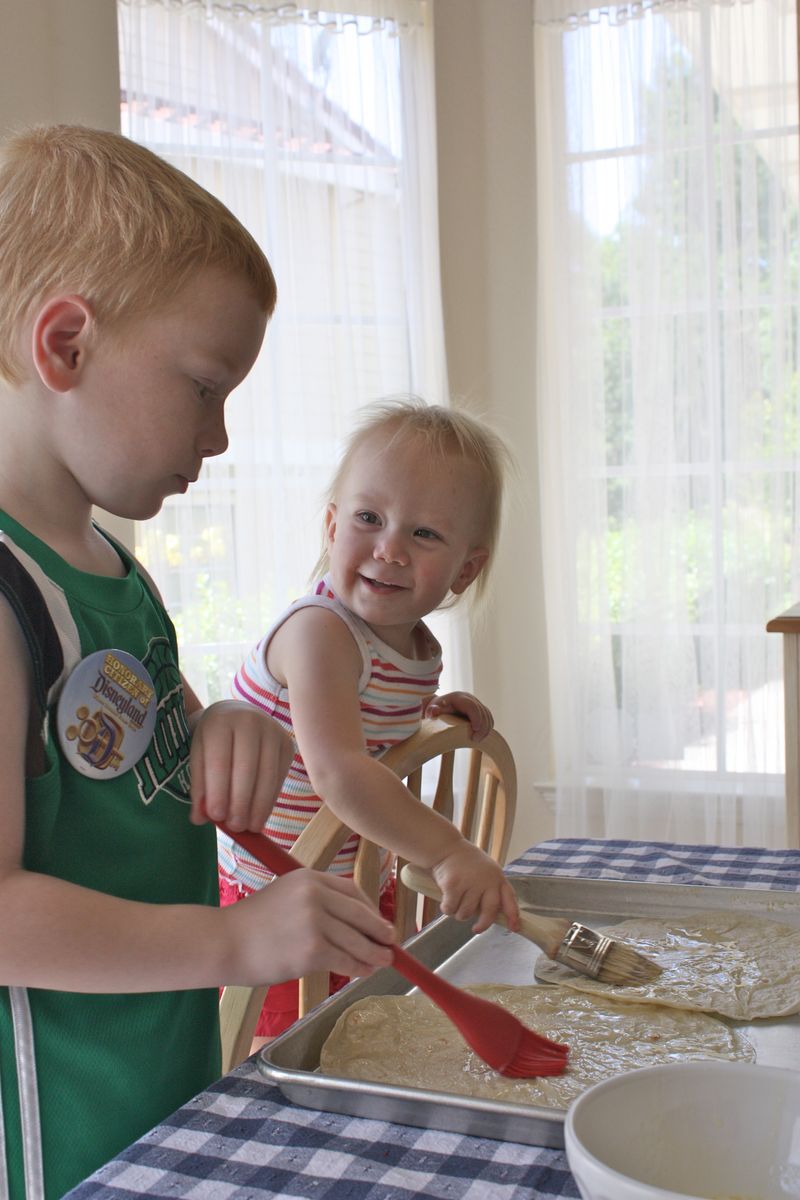
All you do is melt the butter, brush it on a tortilla, sprinkle with cinnamon sugar and cut it into strips or wedges (a pizza cutter comes in handy at this point). My kids love to help with spreading the butter and sprinkling the cinnamon sugar. Put the tortillas on a baking sheet, and bake at 350 for 10 minutes. Let them cool for another 10 minutes, and you're ready to get snacking!

2

So I probably won't win the World's Healthiest Mom Award for serving my children white flour topped with butter, sprinkled with sugar; but this is definitely a quick, easy "sometimes treat," that the kids love to help prepare. You do get bonus points, however, if you make fruit salsa to serve with the tortilla strips.

Here's a great recipe for fruit salsa. I kind of make up my own, though. I just dice up whatever fruit I have handy, sprinkle in a pinch of sugar, toss in a spoonful of my homemade strawberry jam and stir it up. Today's batch includes nectarines, strawberries, blueberries and a golden delicious apple.

Happy snacking!

Signature
Post by Christina Williams : justcallmechris.blogspot.com
DIY Doll Slides & Castles (from the Recycling Bin)

September 12, 2011

DIY Doll Slides and Castles

A few weekends ago, F had a fever and my husband was out of town, so I spent the weekend homebound with the kids. In order to move the day along I asked the girls' to peruse Look What You Can Make With Dozens of Household Items!: Over 500 Pictured Crafts and Dozens of More Ideas! and find some projects, preferably with cardboard rolls as I've been hoarding these lately (so many project uses). Regarding our newest craft book, on one hand, I love the plethora of projects described (there are thousands, all of which require very few materials). However, the book includes photographs of the finished projects, which can be nervewracking with kids because they want their results to look as good as the books' results and, in my experience, unless MAJOR parental intervention occurs such perfection rarely results.

Luckily, P and F picked two relatively simple projects – a slide for dolls and a "castle".

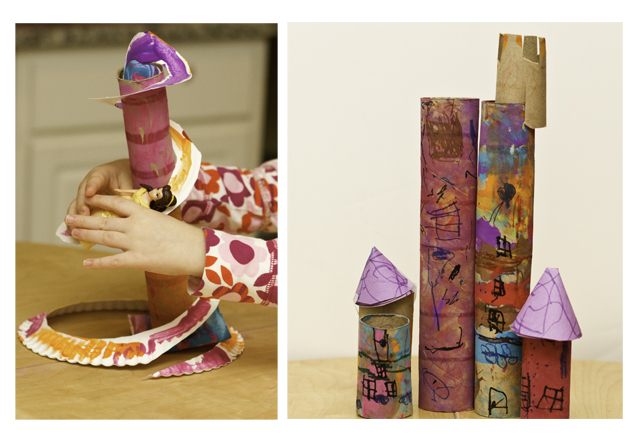
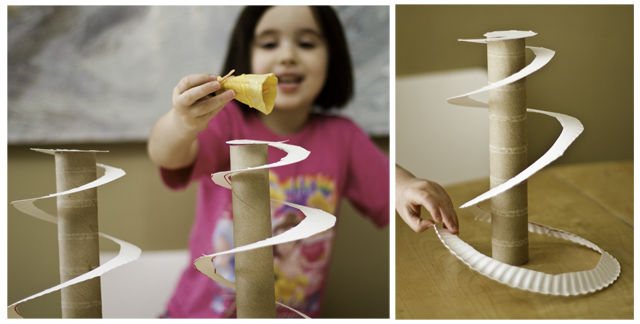
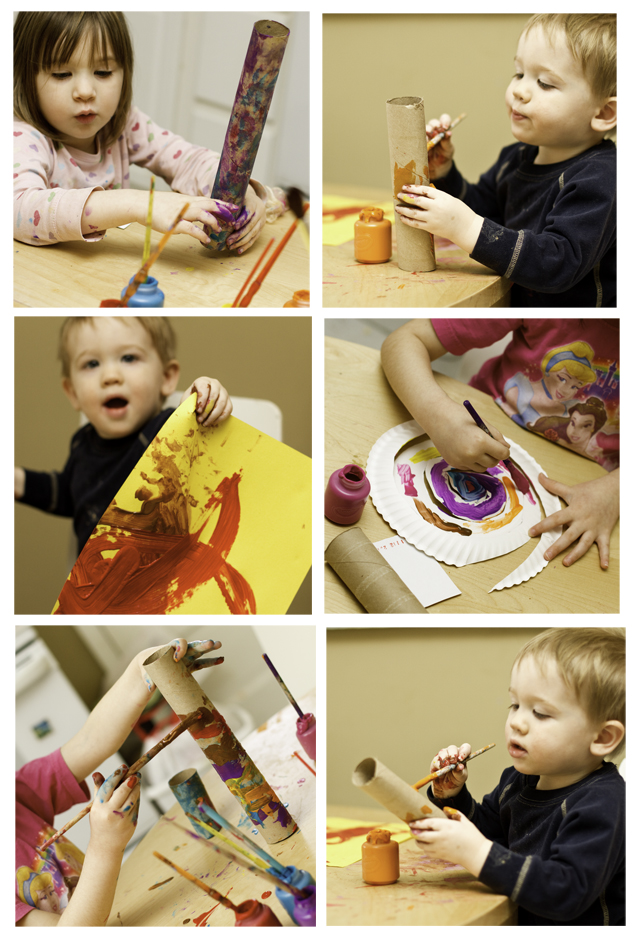
THE SLIDE: The slide proved super easy to make. All we needed was an old paper towel roll, a paper plate, and some scrap cardboard to glue the paper towel roll onto. I cut the plate into a spiral and, voila, a doll slide. The girls loved their slides as is but I really wanted to stretch out the afternoon, so I asked F & P to paint them. Unfortunately, once the projects dried, F complained that the paint made the slide too "bumpy" for princesses. Oh well, she had a fever, which means, in her eyes, I couldn't really get anything right. DIY Doll Slides and Castles - 1

(The prepainting pics on the "smooth" slide)

THE CASTLE: Basically we just painted rolls of different sizes (T, my toddler, loved this part) and once they dried the girls drew in windows and doors for a castle-tower effect. We made roofs by tracing circles onto construction paper and then taping them together teepee style.

I actually think the castle came out pretty cute. Plus, all three kids actively participated, which made me happy (well, until clean up started). DIY Doll Slides and Castles - 2

Post by Darcy : No Monsters in My Bed

Acorn Owls

September 9, 2011

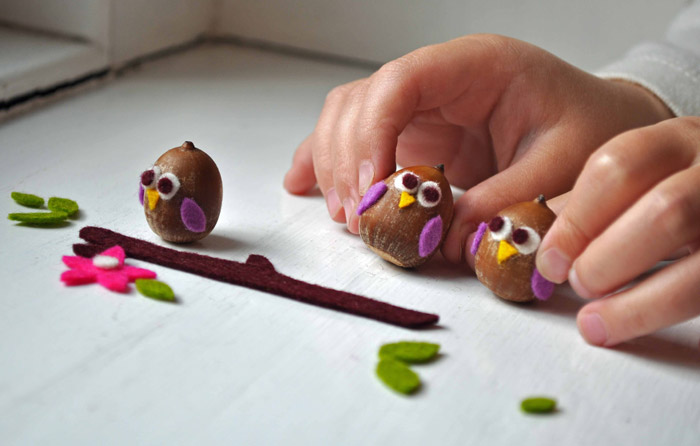
These humble acorn owls are small enough to pop in your bag and entertaining enough to provide plenty of fun at a restaurant.

1

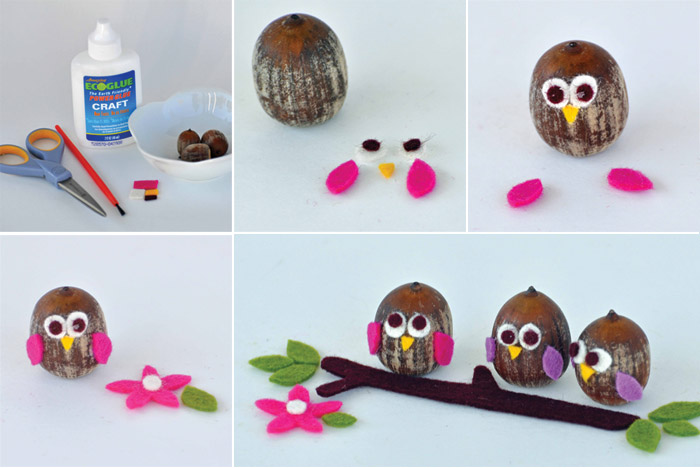
What you’ll need:
*Acorns
*Felt scraps (or colored paper)
*Glue and paintbrush
*Scissors

2

Step 1:
Cut out eyes, beak and wings

Step 2:
Glue body parts onto acorn

Step 3:
Cut out a branch, flower, leaves or other fun accessories

Step 4:
Step 4? You’re done!

3

What other animals can you make? Try a pig, cat or rabbit…

The little owls have taken up residence in our kitchen and may expand very soon…

Post by Helen Bird : www.curlybirds.typepad.com
Simple Ribbon Details

September 8, 2011

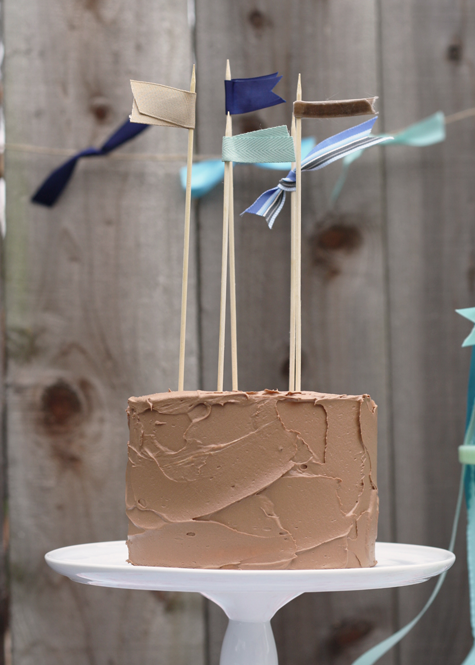
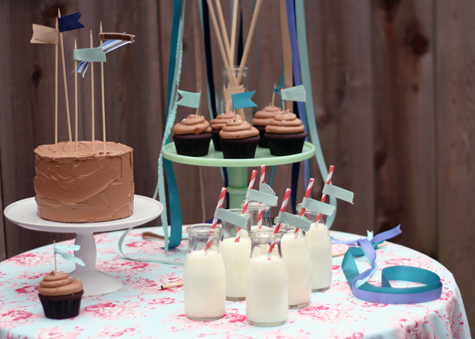
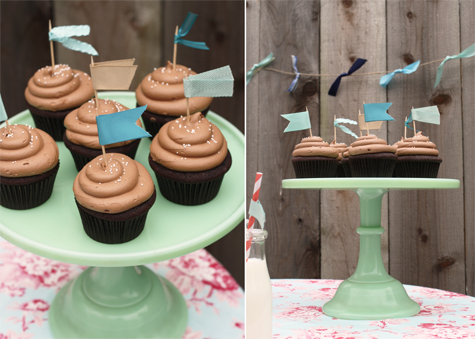
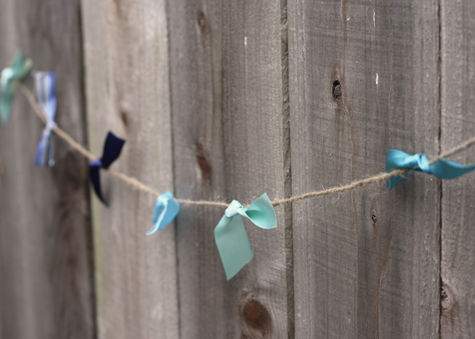
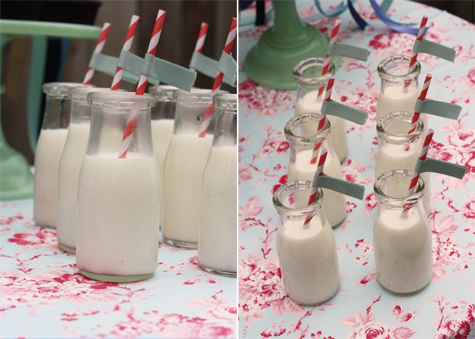
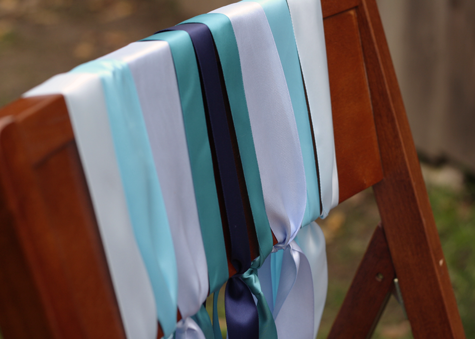
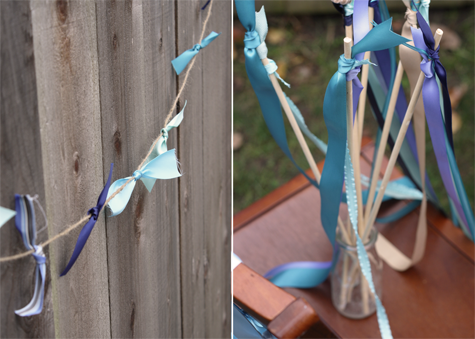
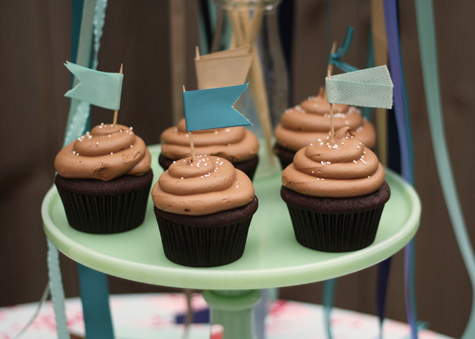
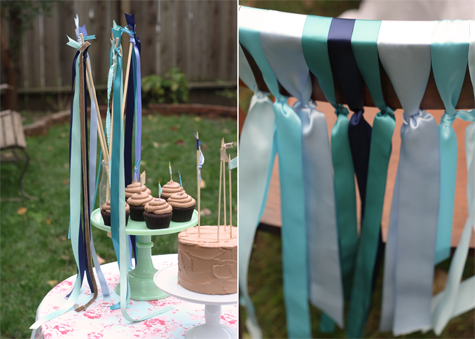
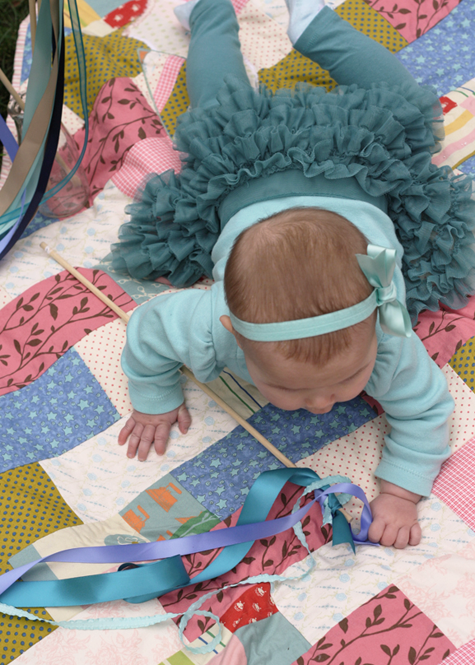
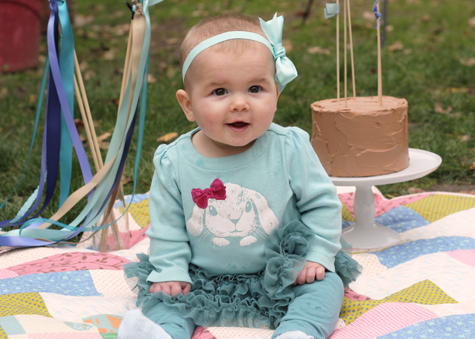
In case you missed the exciting news, HGTV recently featured a few images from a photoshoot I did, showcasing ways to use ribbon to create a simple birthday party theme. I put together this shoot on very short notice, so I used items I already had available and chose a color palette of vibrant blues to contrast the rustic look of my backyard in the winter. I did all the crafts, styling and photography myself, and Michele of Cakewalk Baking was kind enough to provide the delicious sweet treats {and some of the props}. Hope you enjoy the rest of the photos, and be sure to read on below for a few notes on how to create the elements included…

1

2

3

4

5

6

7

8

9

10

11

Chair Ties: Give your guest of honor the prettiest seat in the house. Choose a variety of satin ribbons, varying in color and width. Loop one ribbon at a time around the top of a garden chair into a pattern. Knot each ribbon in the center around the frame, so several feet of ribbon fall loose from each end of the knot. Trim ends to same length, or leave mis-matched for a layered look. 

Ribbon Wands: The perfect favor for guests to whirl and twirl. Cut round wooden dowels down to about 18 inches long. Select 3 pieces of ribbon for each dowel, varying in fabric and color.     Tie on each ribbon one at a time, leaving about an inch flag on the end.  Trim ends in a v-pattern.

Cake & Cupcake Flags:  Add a little homemade flair to your baked goods.  Select a variety of ribbons, varying in fabric and color.  Mix and match flags by wrapping or knotting around toothpicks (for cupcakes) or wooden skewers (for cake).  Trim ends on a diagonal, square or v-pattern.

Paper Straw Flags: Choose a 5/8" grosgrain ribbon and trim 3 inch pieces. Using a dot of hot glue or double stick tape in the center, wrap ribbon around straw and seal.  Square ends.

Garland:  With the excess ribbon from chair ties and wands, tie short pieces along a length of twine to make a rustic garland. Knot once and trim ends to about 2 inches on each end.

Hair Bow: I couldn't resist taking a few photos of my daughter Caitlin in her party best, including a satin ribbon bow tied to a headband. A darling party accessory for the birthday girl!

Post by Becca : www.cakeeventsblog.com
Making Magnetic Pin Dishes

September 7, 2011
I recently found this little tomato bowl that called my name. (Maybe because I love fresh summer tomatoes with a passion. The store-bought kind you get in the winter, make me gag. My husband thinks I'm crazy, but I know I'm not 🙂 I thought this would make a really sweet little pin-dish.
To keep those pins from sliding around and dumping out easily, I decided to magnetize the bowl.  I found these neodymium magnetic buttons in the craft aisle at Walmart. They're extra strong so that they'll attract through the porcelain. They're also really thin so that they'll lie comfortably under the dish. (Do you like this really professional, Martha-looking picture?? 🙂
I was too excited to try my project before I stopped to take fancy photos.)
I attached the magnets with more E6000. Because they were small, I used two magnets to strengthen the magnetic pull. I know these neodymium magnets come in bigger sizes, I was just too excited to try my idea so I grabbed the ones available at Walmart.
And voila – my happy little magnetic pin dish – so much more aesthetically pleasing than the royal blue plastic one I was using. This would be equally adorable with a great piece of thrift-store china. Let me know if you try it at home!
 
 
Post by Amy Smart : www.diaryofaquilter.com