Close

Blog

Sloppy Joes without the Manwich

September 6, 2011

1

Oh, Sloppy Joe, let's get married, I love you so.

Sounds like the makings of a bona fide country song, doesn't it? It's a food love affair our entire country can identify with — the Sloppy Joe is an American favorite.

Eat your history:
The original Sloppy Joe sandwich was invented at Sloppy Joe's Bar in Key West, and was popular enough to make its way across the U.S. in varied forms, including mass-produced processed foods. While we referred to Sloppy Joes as Dynamites and Whimpies growing up in Massachusetts and Rhode Island, each state adopted its own term of endearment for this favorite comfort food. Then, Manwich marketing mania came to town and embedded itself into pop culture history. From that point on, most of America made Sloppy Joes from a can.

I know! I'll give you a minute to get a tissue and dry your eyes.

Today, we're smarter than that. Today, we're getting back to basics, back to original recipes and back to real food. We figured out that somewhere within those cans of processed Sloppy Joe sauce lies the basis of real ingredients, and heck, we may even have some of those real ingredients in our fridge: tomatoes, peppers, onions, vinegar, sugar and seasonings. Yes! And if, for the sake of pop culture nostalgia, you're partial to the flavor of Manwich, it can be recreated exactly, using those simple ingredients, without the chemicals and thickeners.

Sloppy Joes

Yields: 4 Wicked huge servings or 6 regular
Method: pan frying, sauteeing
Allergy Info: soy-free, dairy-free; buns contain wheat/gluten

Ingredients:
1 pound ground beef, 80/20
1 tablespoon unsalted butter
1 tablespoon olive oil
1 onion, chopped, 1/4" pieces
1 green bell pepper, chopped, 1/4" pieces
1 small clove garlic, minced
1 tablespoon tomato paste
3 cups crushed tomatoes
2 tablespoons red wine vinegar
2 tablespoons organic sugar
1/4 teaspoon allspice
Kosher salt and freshly cracked black pepper to taste
4 – 6 buns (any kind)

Directions:
Melt butter in a large skillet over medium heat, add ground beef and brown. Remove the ground beef, set aside, and drain all but 1 teaspoon of beef fat from the pan. Add the olive oil, onion and peppers, sauté until the onions are soft and translucent. Adjust the heat as needed to prevent the vegetables from browning.

Add the garlic and stir to incorporate. Immediately add the tomato paste, stir to mix with the garlic, and allow to cook in the pan for 30 seconds. Add the crushed tomatoes, vinegar, sugar, allspice, salt and pepper. Simmer for 10 minutes on medium-low heat. Taste and adjust the seasonings.

This is the point where you become chef! Up until this point, you've followed a recipe. But now you need to taste and adjust the vinegar, sugar and spices to your liking — this is where you become chef! Taste the tomato mixture…if it's not tangy enough; add more vinegar, 1/4 teaspoon at a time. If it's not sweet enough, add sugar, one pinch at a time. If you want more garlic, salt, pepper, add it, but only a little at a time. You can always add more, but you can never take away. Allow the tomato mixture to cook for a few minutes before tasting again and readjust as needed.

Once you have it perfect, add the ground beef to the pan, stir to incorporate and allow the mixture to warm, on very low heat, for 10 – 15 minutes. This will allow the flavors to meld. Taste one more time before serving, adjust seasonings as needed, and serve on warm, toasty buns.

Tomato consistency:
The crushed tomatoes, depending on the brand you buy, can be chunky, completely pureed, or somewhere in between. Think about how you'd like the consistency of your Sloppy Joe sauce to be. If you don't mind it a little bit chunky, you can use your tomatoes, unadulterated, out of the can. If you prefer a super smooth puree, you'll need to whirl your tomatoes in a blender, food processor or hit them with an immersion blender for a few seconds to break up the flesh and pulp, until the desired consistency is reached, before adding them to the pan.

What kind of bun?
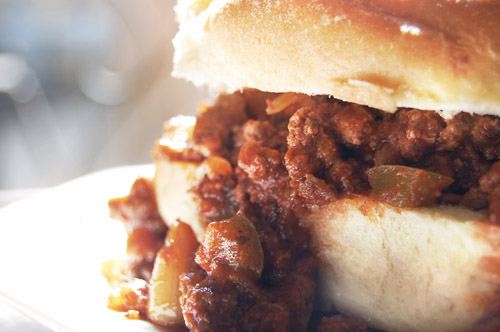
You can use any bun you'd like. The texture of soft, eggy buns works really well with the ground beef, vs. a crusty hard roll or French-style roll. I grew up with Sloppy Joes served on hamburger buns, but have since converted to Challah-style buns — I love the sweet, soft texture of them. The Sloppy Joe, pictured above, is on a Kaiser roll, which is my other favorite — it's in between a soft Challah and a crusty French-style bun.

Hey, what about the Manwhich flavors?
You've got it all there in the pan, all you have to do is adjust the sugar/vinegar ratio until it tastes like the store-bought saucy stuff you grew up with. It won't quite have the same cornstarchy-glossy-thick texture or appearance because we didn't add guar gum, xanthan gum, carob bean gum or a man-made glutamate, but the flavor will be spot on.

Your body will thank you later.

Post by Dawn Viola : DawnViola.com
Making Cabouchon Magnets

September 2, 2011

1

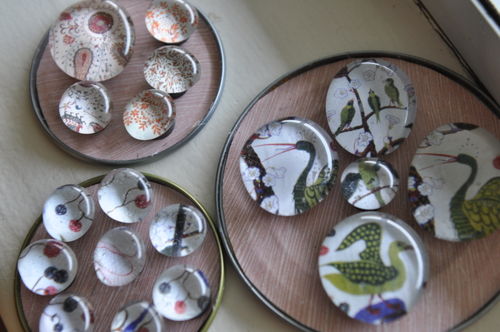
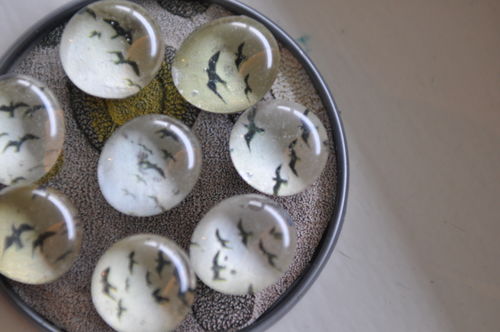
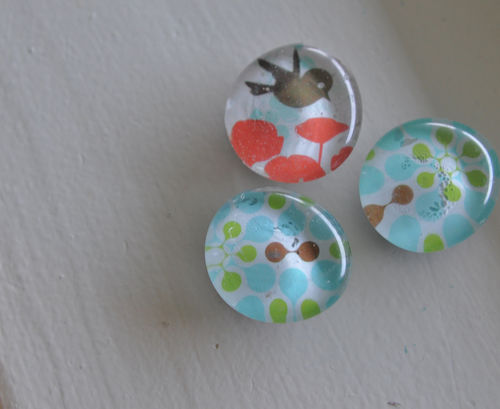
Here are some of the magnets I made during last week's Make & Take class. They are a simple project to make for yourself or for gifts. If you are organized you can make quite a whack in an evening and its fun to do with friends.

2

supplies list:

glass cabouchons or half marbles… you can buy them in the floral department of craft stores

good disc magnets or flat thumb tacks

high quality craft glue that dries clear

a small circle punch

glue gun

medal disc lids from juice tins

images from magazines, scrapbooking papers or photos that have been color copied

What to do:

Sort through your cabouchons and find ones without cracks or large bubbles, rinse them in a sink of warm water and vinegar, let dry

Punch out images you want to use from your papers or for the large cabouchons trace the glass over the image and cut with scissors

Brush a thin coat of white glue over the image and stick it to the glass so you can see the image when the glue dries

Trim any overhanging paper carefully

When that's all dry use a hot glue gun to affix the magnets or tacks. Place a nice plop of glue on so they really stick well…its okay if it goops around the sides of the disc magnet as it won't show from behind the image. For the larger cabouchons I like to buy bigger disc magnets.

Decorate the juice tin lids with some pretty papers that compliment your theme and arrange the magnets in sets.

3

Post by Kerry MacLeod : www.snickerdoodles.ca

Eating Charts

September 1, 2011
I recently participated in the Summer Reading Series over at my friend, Alison's blog,  
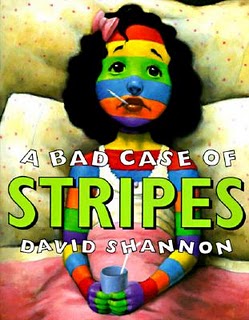
Oopsey Daisy. I was asked to create something (craft, recipe, etc.) in conjunction with a kids book. It was so much fun because I LOVE kids books! I decided to make something using one of my FAV kids authors' books: David Shannon's

A Bad Case of Stipes

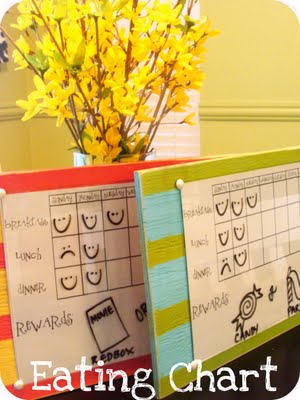
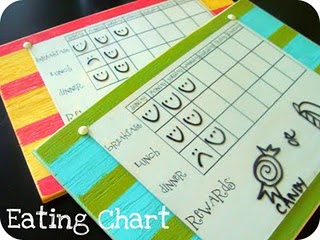
It's all about a little girl named Camilla who is so concerned about what others think that she ends up covered in stripes and everything else you can imagine because she doesn't want her classmates to know she loves LIMA BEANS!! Afraid she will be unpopular with her classmates for this secret of hers, Camilla only truly finds herself when she embraces her secret and no longer cares what others think of her. Reading this book made me realize "I wish my kid LOVE lima beans!!" That's definitely not the case since liking lima beans (or any veggies for that matter) is not super common, especially with my kiddos. In fact, they're pretty darn picky. The hubby and I are trying to encourage our kids to eat all sorts of foods and not just something with cheese in it (grilled cheese, quesadillas, mac and cheese, pizza – the kiddos favs). We decided to make EATING CHARTS to help with this… and of course made them with STRIPES!! 
 
Eatingchartvertical

STRIPED EATING CHARTS

SUPPLIES:
-Wood
-Paint or Spray Paint
-Glass
-8×10 Eating Chart Print
-Furniture Tacks
-Tape

DIRECTIONS:
1
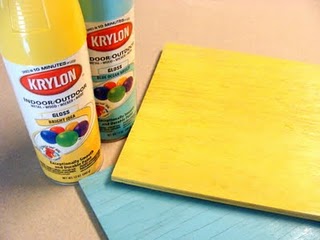
1. Paint wood the desired color. Let dry.
2 3
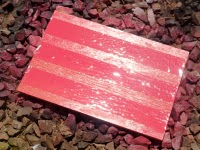
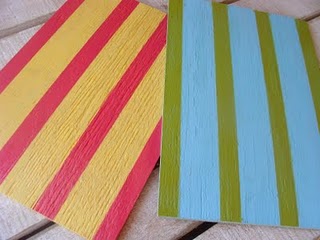
2. Add tape to make stripes. Spray paint and let dry.
  4
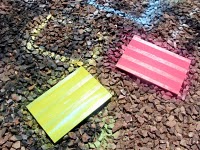
3. Take off paint and distress if desired.
5
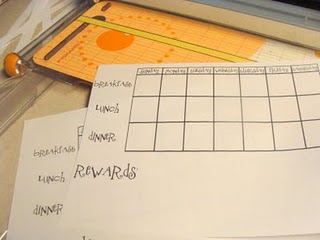
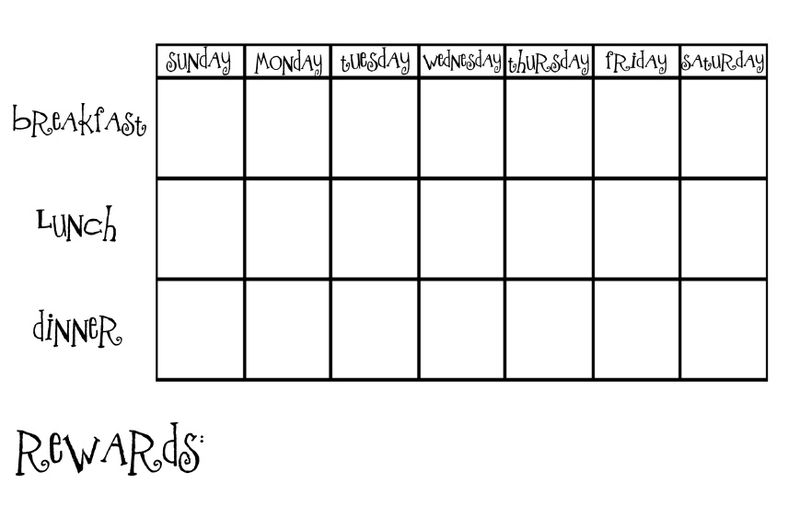
4. Print off Eating Chart Sheet and cut to 8×10 size.

Eating Chart

6
7 8

9

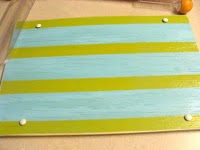
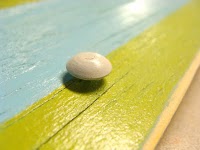
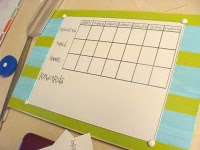
5. Hammer tacks in the corners of where the glass will be on the board {but not all the way}. Slide in the glass and paper and hammer in tacks a little more to secure glass. NOTE: If you don't want to use glass, then you can laminate the sheet and use Vis-a-Vis wet-erase markers (projector markers).

10

Hang with Ribbon or Voila!!
Now you can use Dry-Erase markers over the glass to draw in smiley or frowny faces and ERASE {just wipe with a paper towel} whenever! We didn't want to bribe our kids to eat each day, but we figured that if they get a certain amount of Smiley Faces then they can choose the prize for that week – Rent a movie at Redbox, Go to the Library, Go to the Park, Have a piece of candy {which is pretty much bribing, I know} 🙂
We hope this helps our kids to eat more foods, especially their veggies (like LIMA BEANS!!)
Be sure to check out Alison's blog for the rest of the projects from the Summer Reading Series!


ENJOY!!
Post by Kristyn : lilluna.com 
 

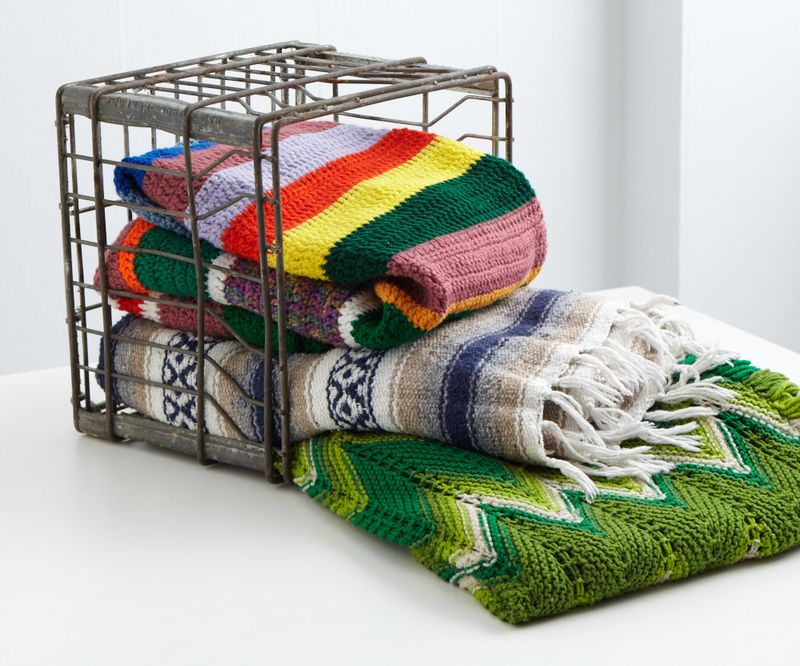
DIY Woven Milk Crate

August 31, 2011

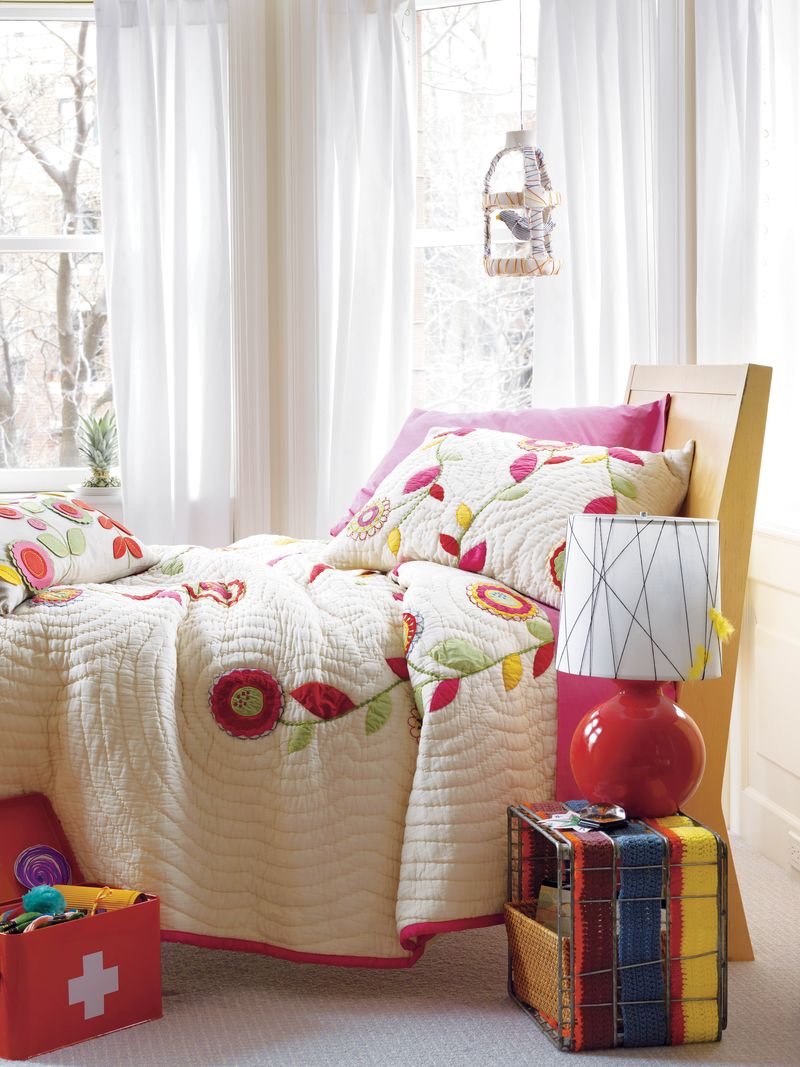
D4355_FreshCFlBed64

Whattya need?

  • Old blankets or afghans
  • Scissors
  • Milk crate box

WovenMilkcrate

How do I make the milk crate?

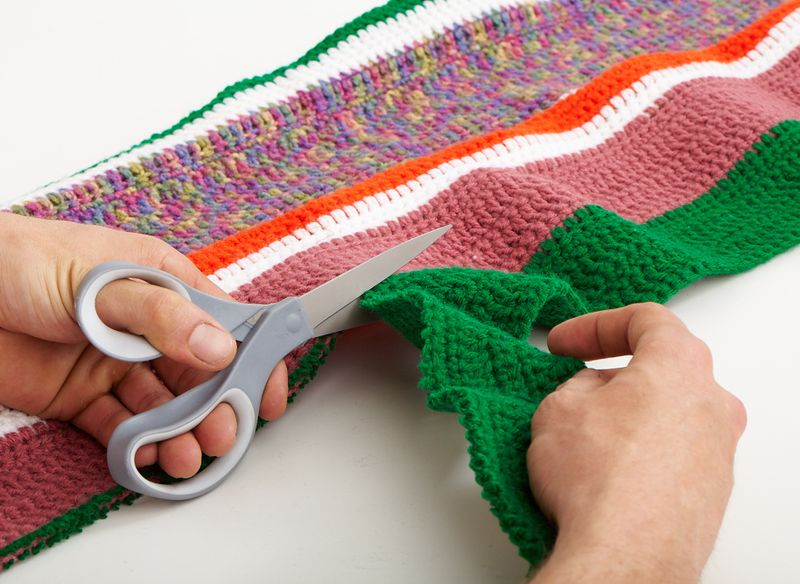
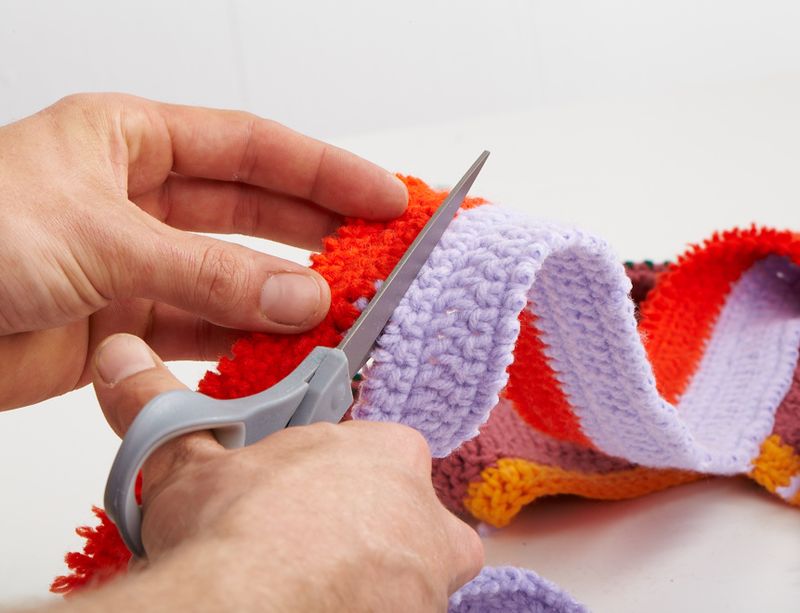
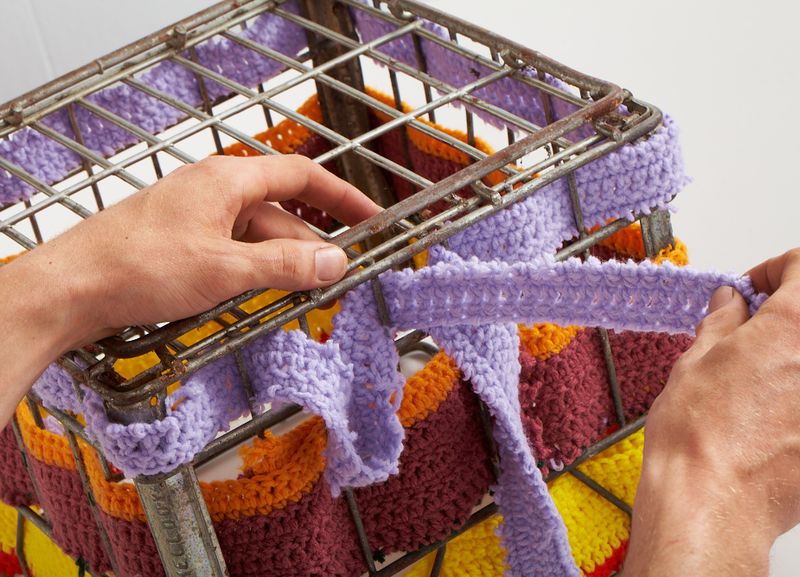
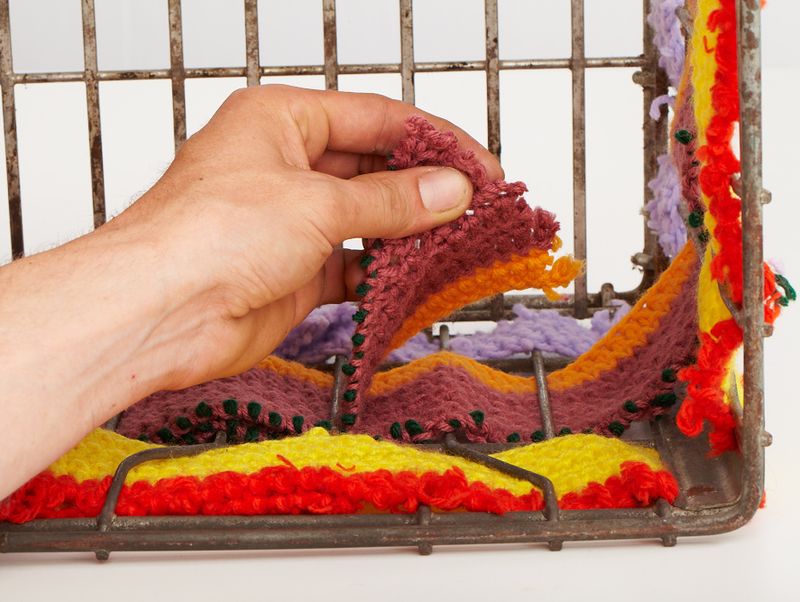
 Step 1:  Cut blankets in strips with same width as the openings in your milk crate.

Woven_crate_05

Woven_crate_10

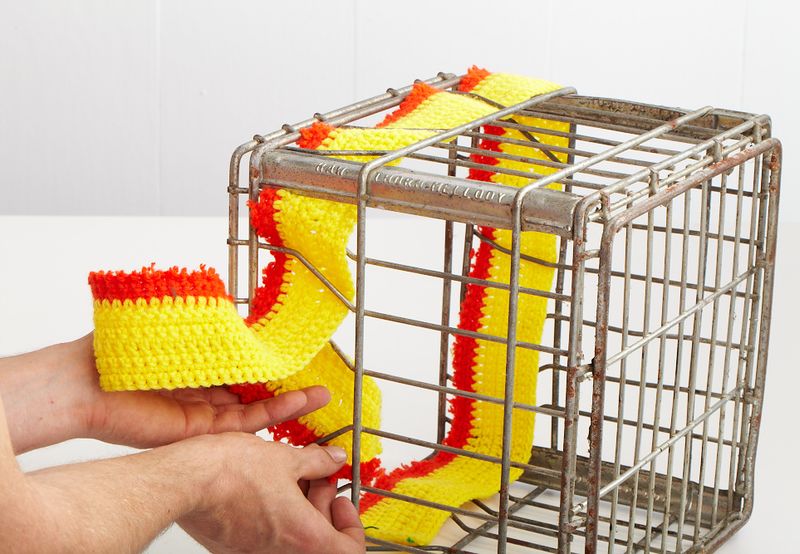
Step 2:  Weave strips through milk crate, ending on the bottom side.

Woven_crate_12

Woven_crate_14

Step 3:  Overlap the ends to keep in place.

Woven_crate_18

Created by Dane Holweger

Cold Summer Oatmeal Revisited

August 30, 2011

1

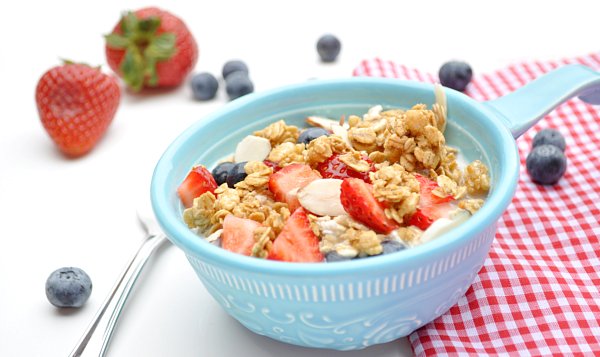
Hot oatmeal is so last winter. Its still summer, so let’s give our morning oatmeal a summertime makeover, shall we? I have made my oatmeal like this for a few years now – ever since Aubrey turned me onto it. It is the perfect cool, crunchy, chewy, yummy summertime breakfast.

And now that I have discovered vanilla coconut milk, oh my.  So so good. Plus the coconut milk only has 5 grams of sugar per cup verses the 9 grams 1 cup of 2% milk has, less sugar!

You can make this a bunch of different ways, the idea is to let your oatmeal soak for about 15 minutes in the milk of your choice (cow’s, almond, soy, coconut) and then add your favorite toppings. Here is how I made mine last year, but this is my newest favorite way to make it.

Summertime Oatmeal

Ingredients:

1/2 cup old fashioned oats

3/4 vanilla coconut milk

sliced strawberries

blueberries

2 Tbs granola

dash of cinnamon

Let the oatmeal soak in the milk for a little bit, and then add the rest of the ingredients. Enjoy!

You can use frozen fruit too, I just add it when I add the milk. Then you have a nice cold bite for those extra hot summer days!

Oh, and my 2 year old loves it too! She started asking for bites of mine, and now she would rather have it cold.

Happy Tuesday friends! I am off to envelope myself in what I hope to be the last of paint fumes.  And just a side note, when painting, books on disc are awesome. They have been a life saver.

Post by Destri : www.themotherhuddle.com

Painting with Squirt Guns

August 29, 2011

1

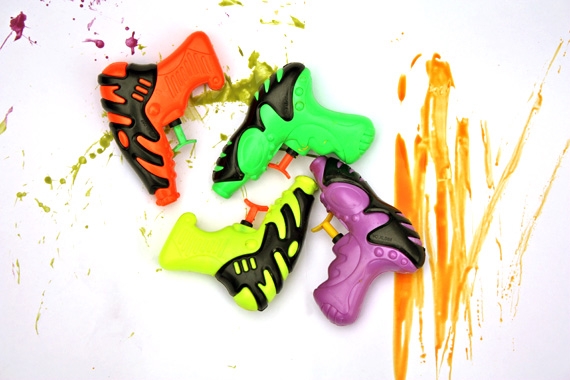
We're always up for a good painting project at our house. The other day, while perusing the dollar spot at Target I scored a couple packages of squirt guns. Three for $1. How could I resist? Anyway, on the drive home I had an idea to use squirt guns for painting. There are a million different ways you can approach this project. So do whatever you're comfortable with, and have fun.

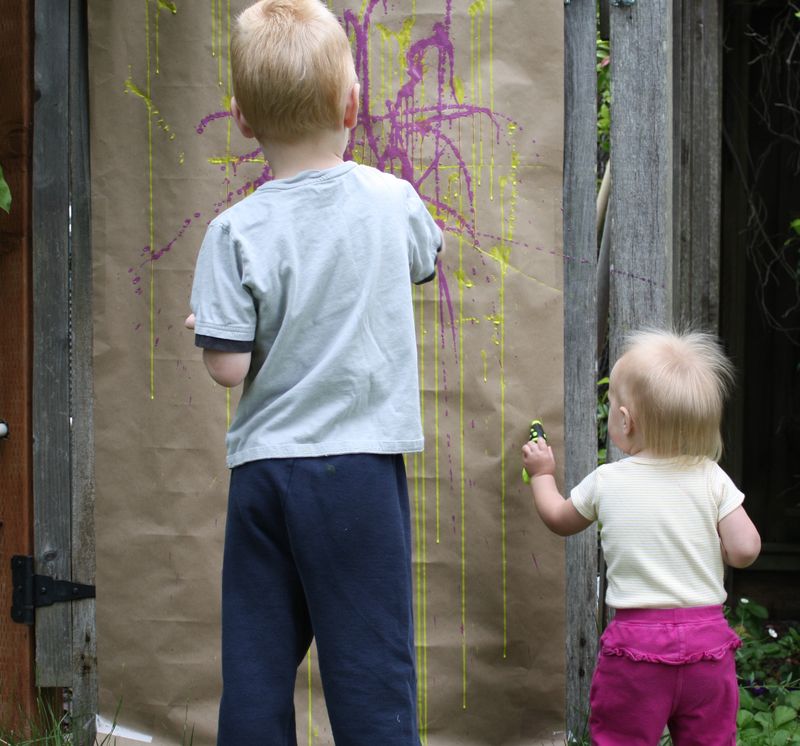
I simply taped a piece of kraft wrapping paper up on our fence. 

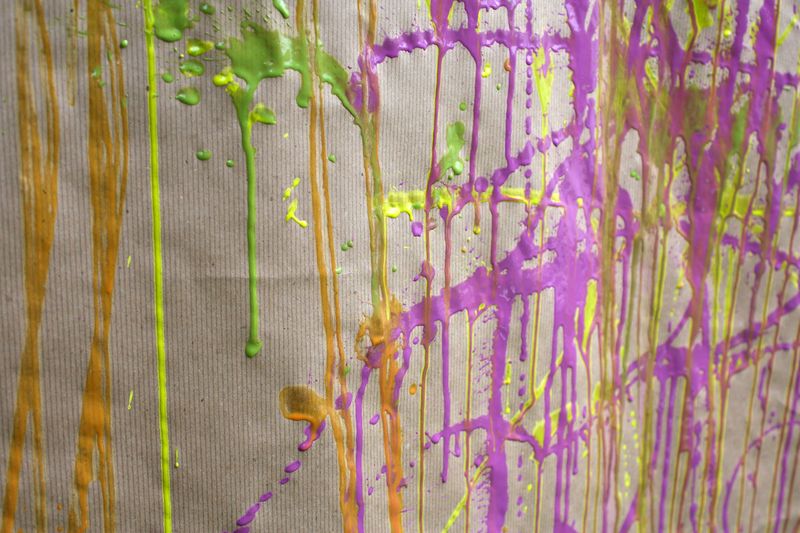
I thinned down some tempera paints with water, filled the squirt guns and we started making our masterpiece.

2

Here are a few helpful hints:

Wear old clothes. 

Have some paper towels handy for cleanup.

Put the kids in shoes you can hose off (crocs, jelly sandals…etc.)

Rather than cement, do the painting over grass. Even if you spill, the paint will disappear the next time you mow the lawn.

3

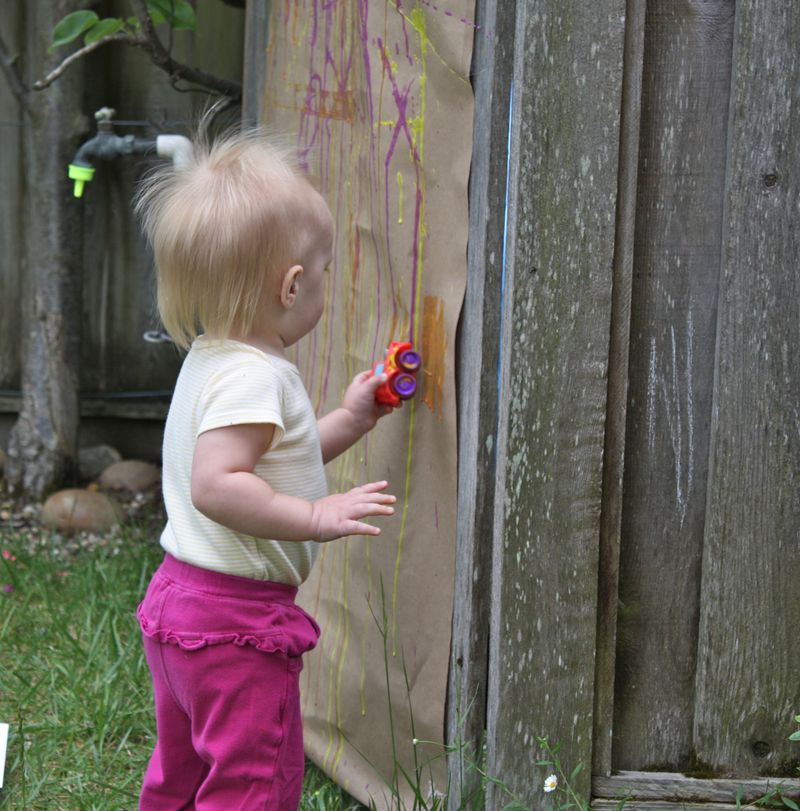
Baby Sister couldn't figure out the squirt guns, so I turned her loose with an old race car.        She dipped the wheels in paint and rolled it along the paper. She really loved participating in a 'big kid' art project.

4

The beauty of this project is you can just use stuff you have around the house. Butcher paper or cardboard boxes would make a great "canvas." Or if you want to make a game of it, make some targets out of paper plates and give points for hitting the target. If you're not thrilled about spraying paint, just use water and food coloring for more of a watercolor effect (and less mess).

Happy Painting!

Signature

Post by Christina Williams : justcallmechris.blogspot.com
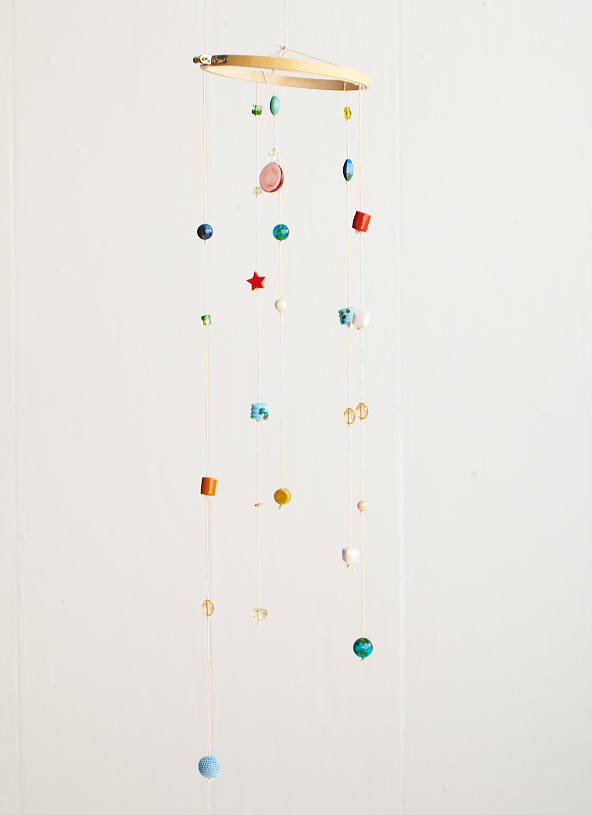
DIY Bead Mobile

August 26, 2011

D4355_DotBedding66C

Whattya need?

  • Scissors
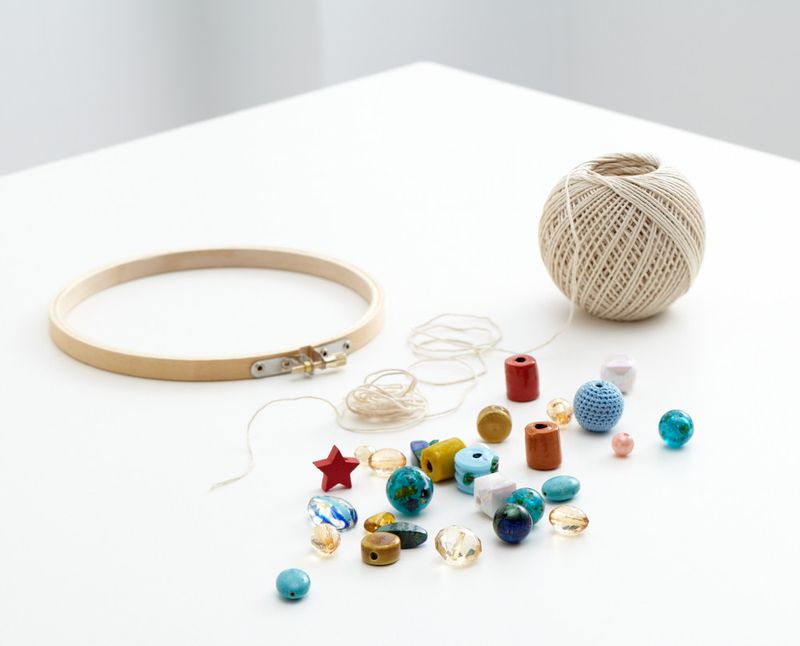
  • Various beads (large and medium sizes)
  • String (cut at various lengths)
  • Embroidery hoop

  Beaded_Mobile

How do I make the mobile?

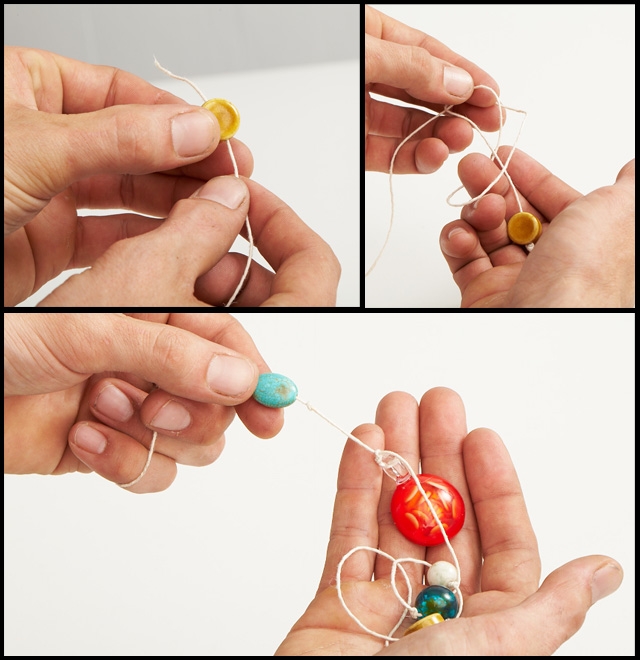
Step 1:  Thread beads onto string, tying off each bead with a knot intermittently.                    (Be sure to leave at least 12" at top of string without any beads.)

H2n-0826-1

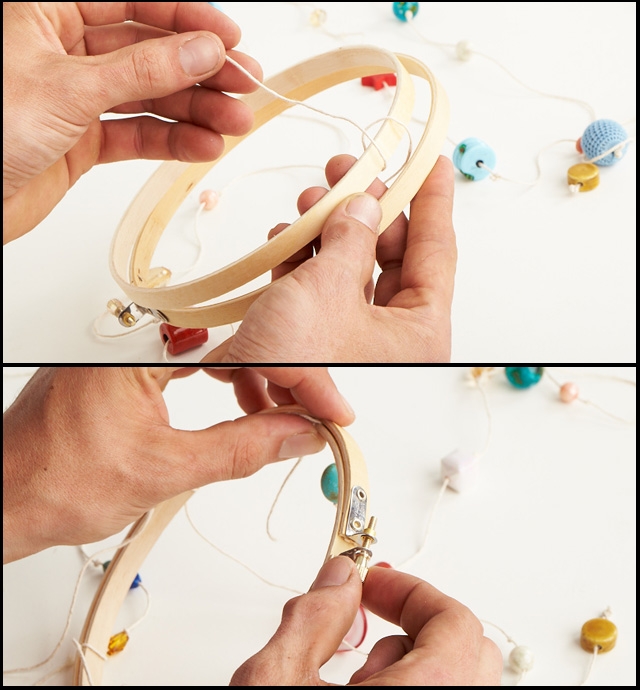
Step 2:  Run the top end of beaded string through embroidery hoop and tighten the hoop.

H2n-0826-2

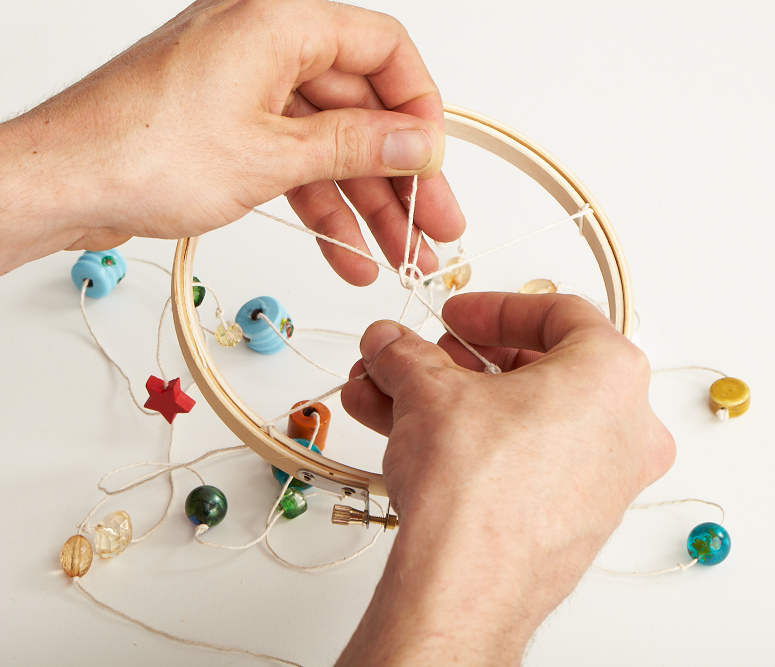
Step 3:  Tie ends of string together tightly in the center.

Beaded_mobile14

Step 4:  Use remaining length to hang.

Beaded_mobile17

Created by Dane Holweger

Repurposed Apron to Sundress

August 25, 2011
 Do you have an apron you no longer need? How about re-fashioning it to a child sized dress?
 
Supplies needed:
Tiered apron .
Sewing machine .
2" velcro .
Coordinating thread .
Scissors .
Buttons x2.
 
 
To make your own:
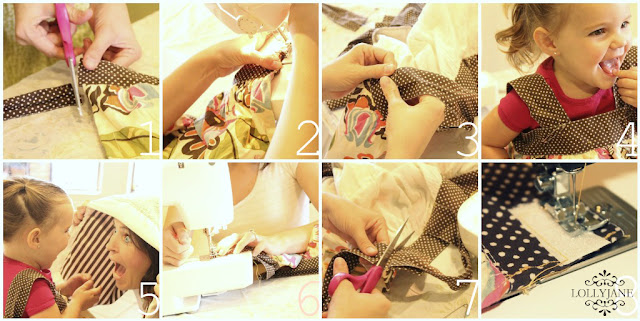
1. Snip off ties of aprons. 
{Note: These will be your dress straps}
2. Stitch up the ends of the apron.
3. Measure where you want the straps to be and…
4. Pin into place.
5. Take a break to play with your model 2-yr old :)

6. Stitch the straps in place. 
{Note: We sewed our straps underneath the top layer of the apron and followed the stitching of the fabric to hide our stitching}
7. Snip off the excess apron ties.
8. Sew a 2" velcro strip on each flap of the back of the dress to secure it.  
9. Sew 2 buttons on the front.
 
 
Now just let your little dolly run wild in her new dress!
Post by Kelli and Kristi  : www.lollyjaneboutique.blogspot.com

Counting Caterpillar

August 24, 2011

Post by Christina Williams of justcallmechris.blogspot.com

1

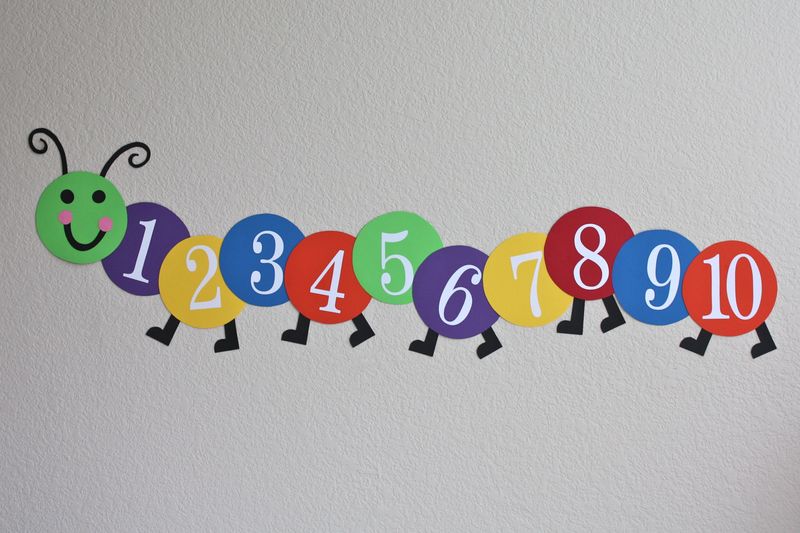
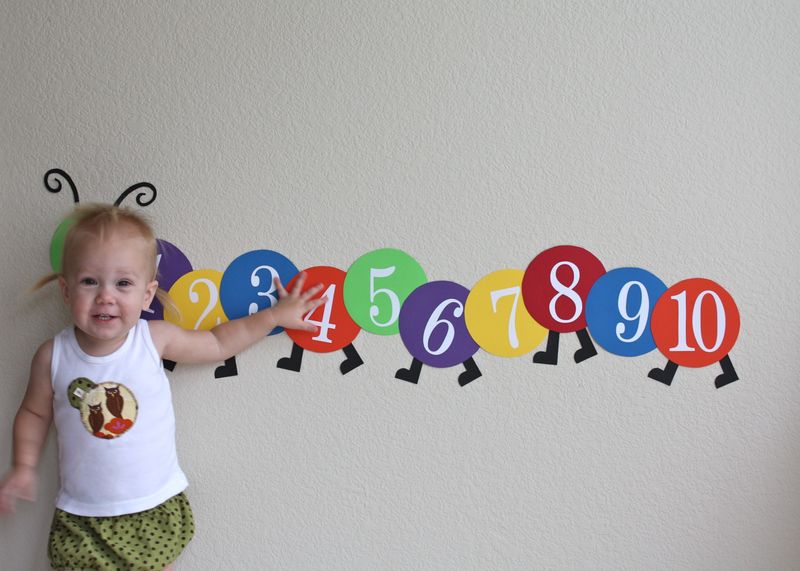
When my son was little, one of my brilliant friends (Hi Addi!) made a Counting Caterpillar for her son. Naturally, I had to make one, too. Now it’s Charlotte’s turn to have a caterpillar of her very own. While she might be a bit too young to learn her numbers, the early exposure can’t hurt anything, right?

2

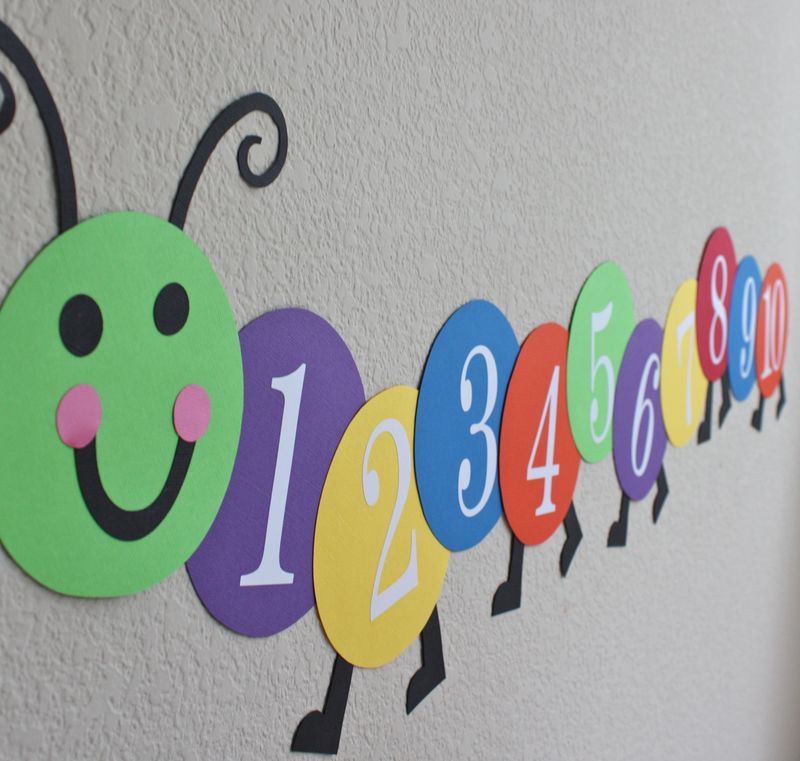
All you have to do is cut out some circles (I traced around a cereal bowl), add some numbers, feet and a face and you’re done. Simple as can be.

3

Happy Counting!
Post by Christina Williams of justcallmechris.blogspot.com

Affording Organics

August 23, 2011

1

For the longest time, up until oh, about 40 minutes ago, I didn't think we could afford to go completely organic. But we did it, today, and within our budget.

Groceries in Orlando aren't cheap, and the organic foods are often double the price of conventional. We're a multi-generation household with my parents here with us, and feed four adults and one child. Sometimes one of the adults eats enough for two (way to go, dad) which means we often plan meals for five adults and one child. We spend anywhere from $175 to $250 on groceries every week, depending on which staples are running low.

Slowly, over the last three months, we've managed to eliminate most every non-essential processed food item from our weekly shopping trip. We no longer buy packaged cookies, crackers, popsicles, chips, cake mixes, BBQ sauce or ketchup, to name a few, for a couple of reasons: (1) I have a soy allergy that prevents us from buying most anything that's been processed and (2) these foods are so easy and quick to make at home with ingredients we can actually pronounce.

For the first time this year, by process of elimination, we were able to go completely organic.      I spent $191.95 this afternoon at Whole Foods. I bought every vegetable, every fruit we normally buy, but this time, every single piece of produce was organic. I managed to find an organic, soy-free crackers that I could snack on, organic milk, cheese, sour cream and (drum roll) organic ricotta cheese with nothing but milk, culture and a trace of salt.

The only thing I didn't purchase was meat because our freezer was already stocked, but estimated it to cost another $50, which would bring us to our $250 budget. I'm so proud we did it!

What about all the foods we left on store shelves?
We haven't bought them since December and honestly, we don't really miss them. We've been eating more fruits and vegetables for snacks, and have been making our own cookies, cakes and popsicles from scratch. I've also been making my own BBQ sauce and ketchup in small batches.

You can do it, too!
For the next three weeks, pick three processed food products you normally buy — crackers, chips, snack mixes, packaged cookies, anything you did not make yourself, but could — and stop buying them. Add up the money, which I assume will be close to $16.00, and buy two pounds of grass-fed beef, or divy it up between organic vegetables and fruits of your choice. When your three weeks are up, do it again.

Post by Dawn Viola : www.wickedgooddinner.blogspot.com

Three Years Old

August 22, 2011

1

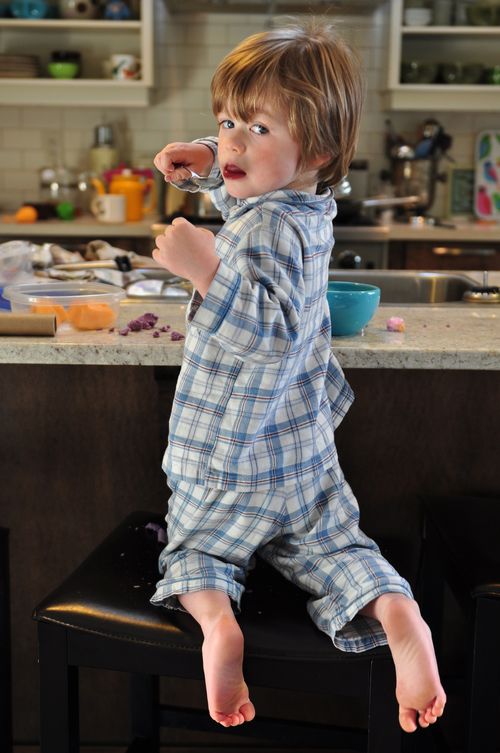
see the long feet?

the lack of diaper bulge in the back?

the spoon actually making it to the mouth?

the self-serve breakfast mess with a side of play clay? 

These are the undeniable signs that my baby is now three years old. Woe is me for I definitely cannot stop time.

For the past year I have carried a tattered receipt in my purse. On the back I have jotted down things Ryan said as we were out and about. To me it reads as the most beautiful poem in the world, here it is with the translations in italics:

Two Years Old

sebben dollars    

according to Ryan everything costs seven dollars

Broggy the Doggy- woof!    

his favorite game to play with his brothers

Poopey the Cat -meow   

a saucy cat he often morphs into when hurt or hungry or tired

last week    

just about everything happened last week

ruby juice in my ba ba    

75% H20, 25%  rio red Sunrype grapefruit juice,  served in a bottle

so booo-tiful   

the words that make me cry

the Germans are coming   

too many John Wayne war films with the boys,  gets a big "shuush"

no poo in my diaper Mom  

he definitely pooped his pants

can i watch a show?   

he loves to watch movies

Wufus , Wufus  

 Rufus, Rufus

you hold my hand?  

i'm nervous

me go to Winners?    

best kid in the world!

where's Poppa?!?   

poor Nana, he's obsessed with my crazy Dad

Dad take my nucky    

Mom, give Dad heck for snatching my soother

Wufus ate my cheesies  

Rufus is raiding his snack yet again

yay, my brodders  

yay, my brothers

i dunno…

this is how you start the answer to just about any question

me go shopping?   

these words bring Mommy great relief and bliss

Farewell two years old, I will miss you dearly. 

Three is generally a really fun age but it also means a big step away from babyhood and lots of tears from moi. With each boy this transition has been more heart wrenching as each time it becomes more and more clear just how fast the time with wee ones slips away. 

Perhaps that is why my boys are spaced around three years apart. Wish I knew I was done with babies….when I was a complete mess after my last c-section I swore I would remember when this time came upon me. I do, but in a rose-colored glasses kinda way. Not a drugged up, beached whale, overtired, cabbage on my engorged boobies kinda way. Except for all the needles, stomach staples and the dreaded epidural…I remember those things all too well.

Our God is surely a sneaky baby-loving power that be. It doesn't help that my boys are also dying to have another sibling and have been asking for a baby…except Ry who asked for a bird.

Happy Birthday my beloved Ry Ry. I am so blessed to be your Mama. You make me laugh, keep me on my toes, fill me with hope and wonder and warm my heart every single day. You'll always be my baby.

oxo

2

Post by Kerry MacLeod : www.snickerdoodles.ca

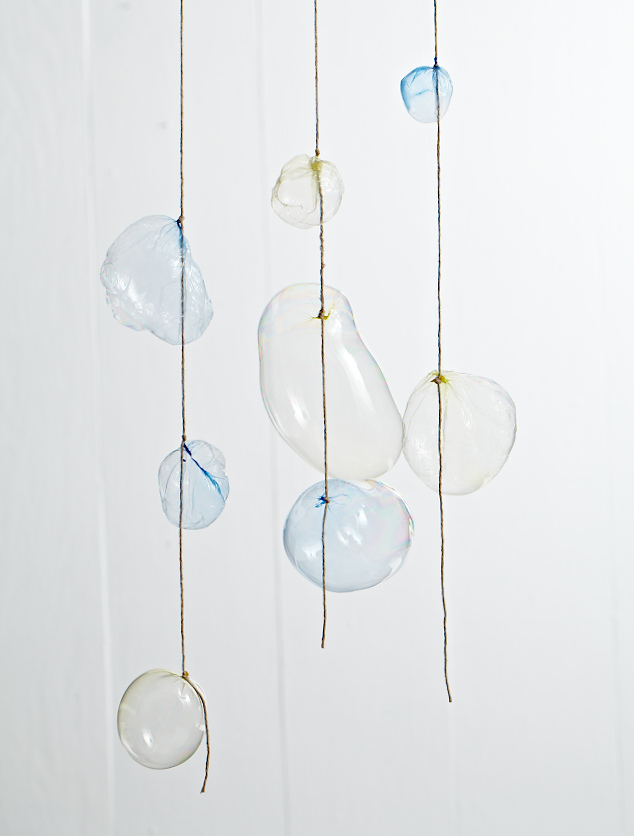
DIY Plastic-Bubbles-On-A-String

August 20, 2011

D4355_JenyLindBC37B

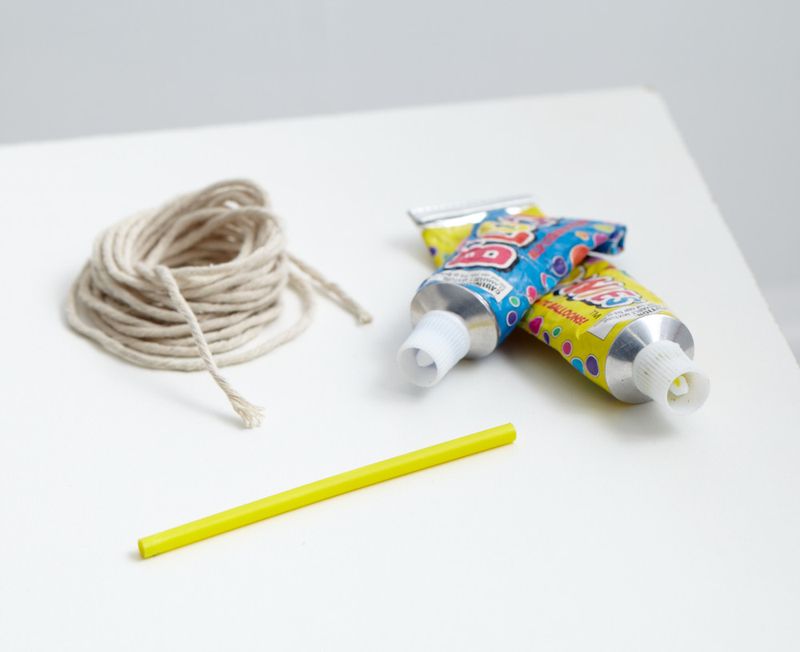
Whattya need?

  • Blow-up plastic bubbles kit from craft or grocery store
  • String

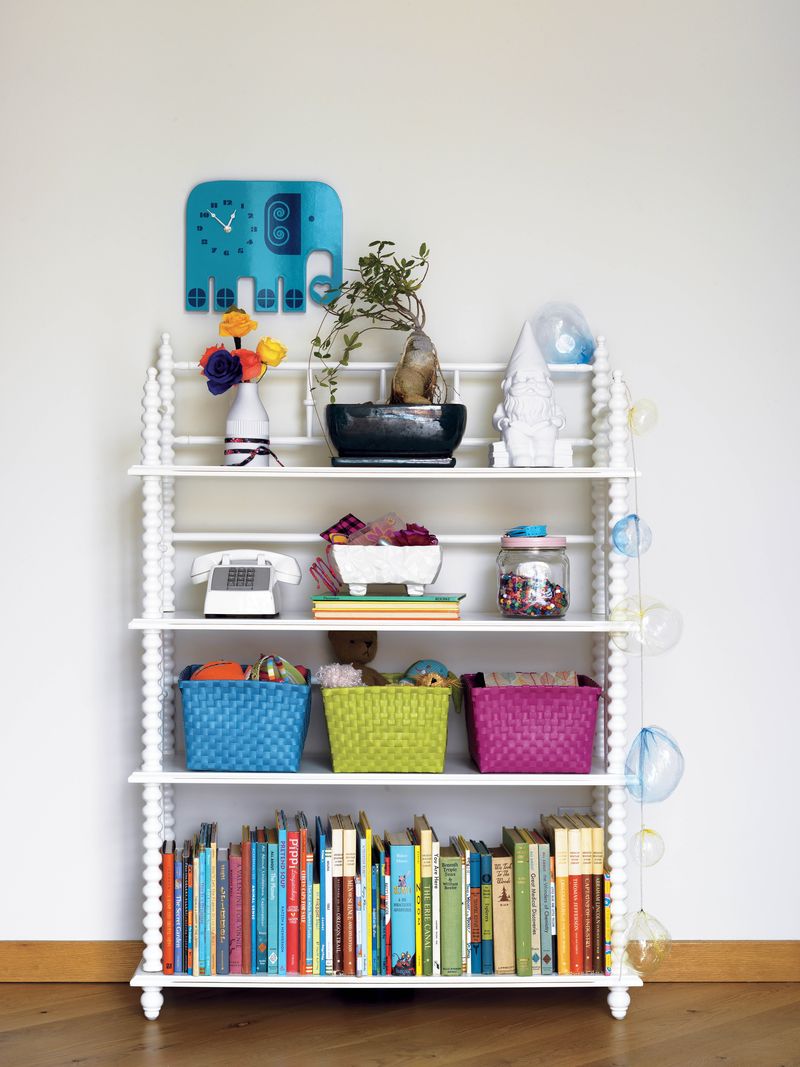
Bubbles_on_string

How do I make the bubbles-on-a-string?

 Step 1:  Determine length of string you want to hang.

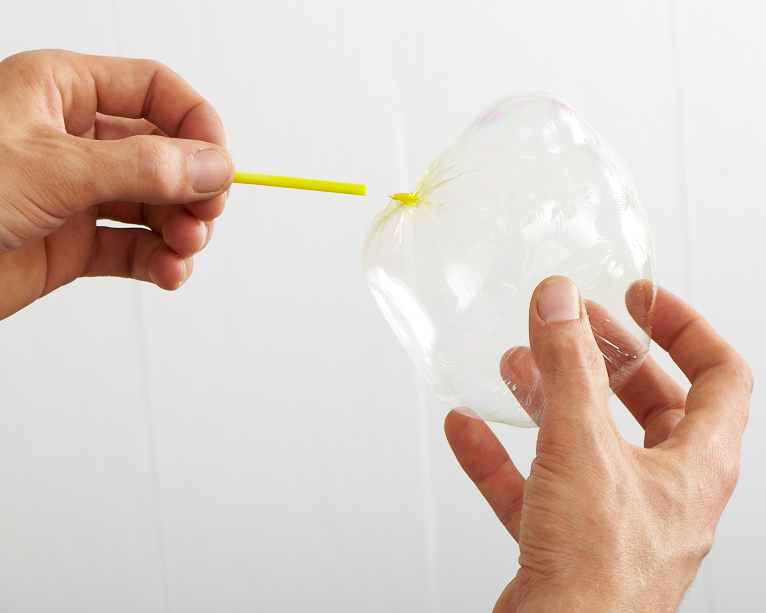
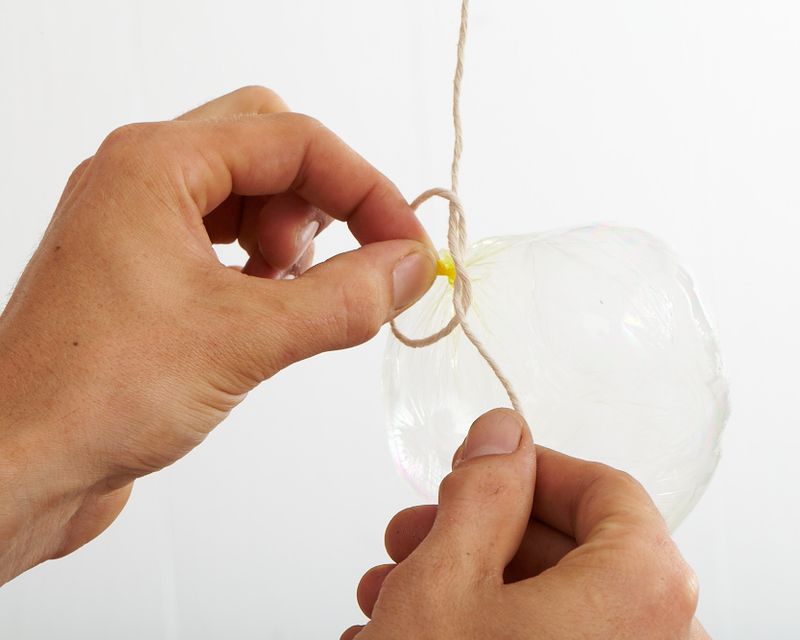
Step 2:  Blow bubble and carefully tie a knot around the end before twisting off straw to seal.

Bubblestring_02

Bubblestring_05

Step 3:  Repeat at desired lengths.

Step 4:  Hang.

Bubblestring_10

Created by Dane Holweger

A Fort I Can Live With

August 19, 2011

Post by Raechel of raechelmyers.com

A couple of weeks ago as the kids and I were wrapping up breakfast, I asked Oliver what he thought we should do with our morning. He suggested we build a fort in the living room and after a moment of consideration, I countered with an offer to build a fort under the kitchen table.

He accepted.

We spent the morning draping sheets and collecting pillows and books from upstairs. We even enjoyed our morning snack under there – some raisins and cheese with milk. Oliver and Hazel were giddy about their new accommodations and Oliver announced that we should never take it down ever – or at least until Daddy gets home from work.

So, yay – Mama gets 10 fun points for being all cool and laid back and embracing the mess and laying under the dining room table with the kids all morning!

Except that it just about killed me. The dining room was no longer a dining room. There were raisins everywhere and Hazel kept bonking her head and crying when she stood up under the table. As dreamy as the whole event sounded, it was less than ideal.

Plus, there was nowhere to eat lunch. And by dinnertime, I had had enough of ye olde fort and I wanted to put dinner on a real table without trying to tell myself that sheets were kind of like tablecloths.

That evening I cleaned up our dining room fort, not at all regretting the fun memories I’d made with the kids that day, but certainly evaluating in my mind how this could go more smoothly in the future.

I had an idea.

After tucking the kids in bed that night I hopped on online and ordered a retractable clothesline. Two days later I kissed Ryan goodbye as he headed out for work, then led the kids upstairs to the playroom, package under one arm, drill in the other.

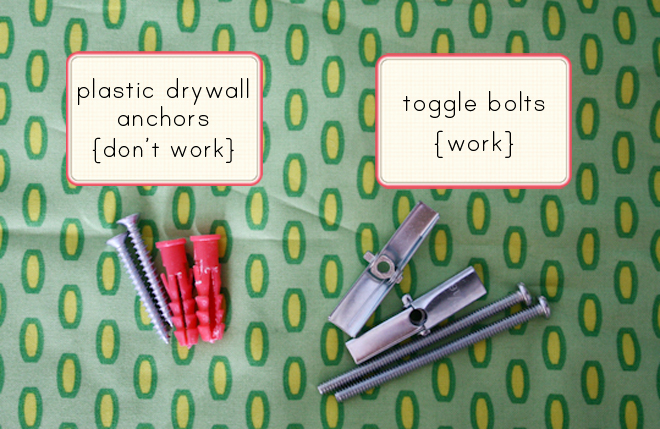
The installation took a bit of trial and error. The plastic anchors that came in the package pulled out of the drywall after just a few test tugs from me. Because I was expecting this clothesline to stand up to the yanks and flops of busy little people (not usually a job description for most clotheslines), I needed it to be extra sturdy and safe.

I pulled out the plastic anchors and fished around Ryan’s workbench for a pair of toggle bolts. Much better.
A Fort I Can Live With | Honest to Nod
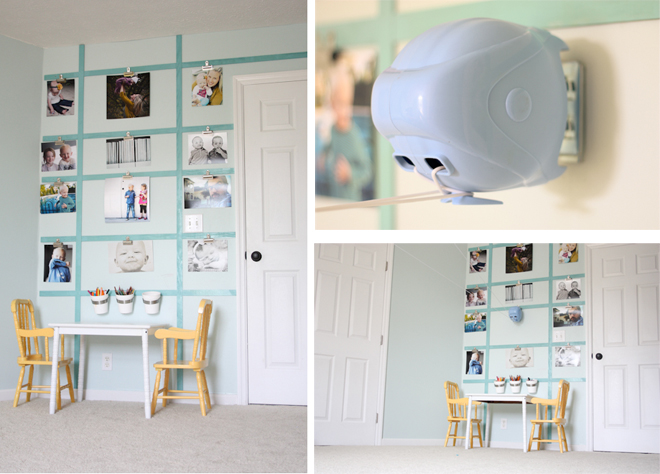
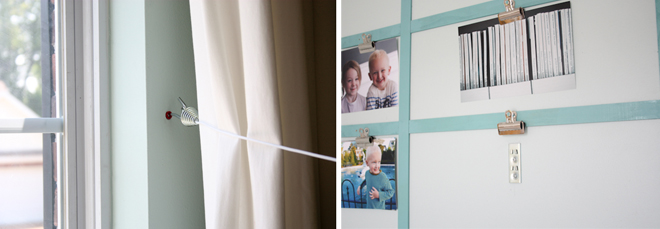
Another thing that was important to me in this installation process was commitment. Or, shall I say, lack thereof. I didn’t want to have to live with that big blue thing attached to my wall every day. It needed to be able to be tucked away in a basket or a cabinet, and pulled out only when we were feeling fort-y.

I just so happen to have one wall in my playroom that offers a perfect hiding place for a wall bracket. Our wall grid (made out of lattice boards) displays interchangeable photos with bulldog clips, so I installed the clothesline bracket below one clip that hangs about four feet off the ground.

A Fort I Can Live With | Honest to Nod

{ps – before you start thinking I’m too clever, I got the idea for the lattice boards and clips from an old Martha Stewart magazine last summer.}

I hung the hooks on either side of the window on the opposing wall behind the curtains.

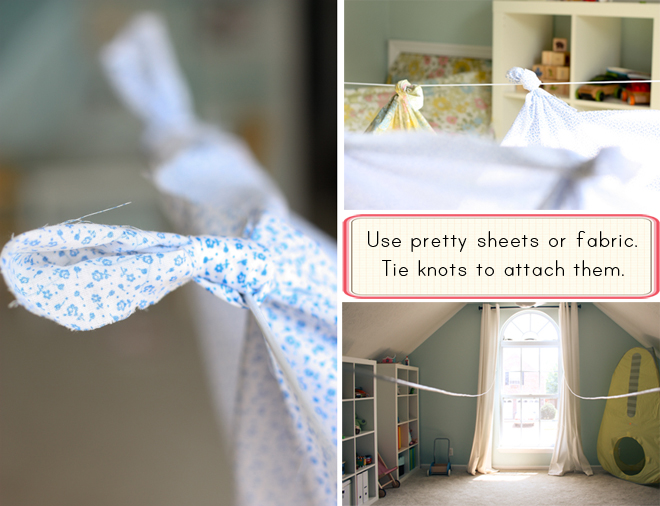
(I decided to buy a clothesline with two lines for the sake of options. Also, this way the forts we build will have a little bit of a roof and width to them for claustrophobic mommies.)

A Fort I Can Live With | Honest to Nod

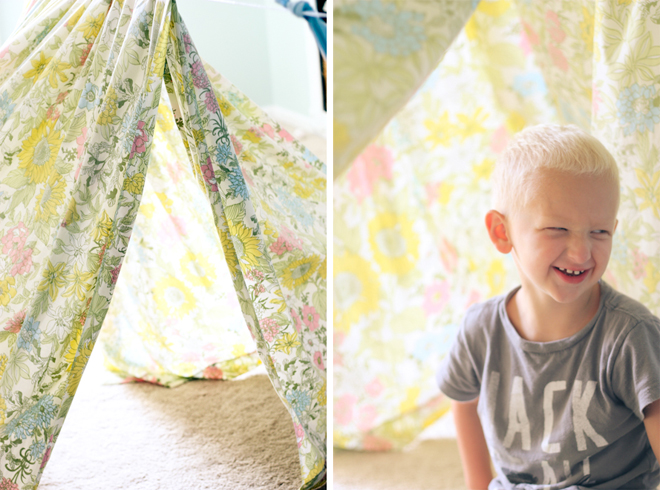
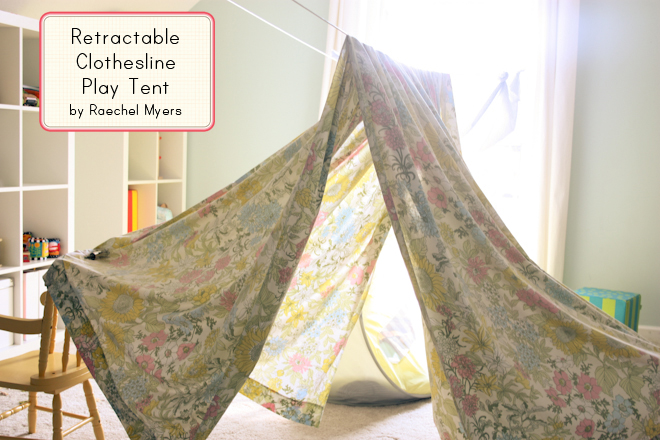
A couple of pretty old sheets (yard sale finds) and some fabric yardage (also from yard sales) and we had ourselves a little town of forts before lunchtime!

A Fort I Can Live With | Honest to Nod

This project was so quick and so cheap (under $20!), I can’t believe I didn’t think of this sooner. No playroom should be without a retractable fort option!

A Fort I Can Live With | Honest to Nod

And there you have it! My dining room table is now clear for dining and the kids can set up a fort whenever they like (though I did hang the hooks out of reach for safety, so they technically have to ask me first.)

A Fort I Can Live With | Honest to Nod

Happy fort-ing, friends!

Post by Raechel of www.raechelmyers.com

Looking for even more playroom inspiration? Check out our Playroom Board on Pinterest.

Binky Bag

August 18, 2011

Is it baby/wedding shower season for your too? Our calendar is packed over here with showers and weddings (and I like it).

A common phrase at my house is… “where is the binky?”. So, I actually though about making something like this months ago for Clyde and his Binky Love (more of an obsession that I will regret later). We were invited to a diaper shower a few weeks ago and I always like to add something handmade. So I made a Binky Bag.

It is so easy I can barely even call this a tutorial- but I will 🙂 

All you need is:

– a small piece of fabric (mine was 14″ x 10″)

– small piece of boning

-a ribbon

Basically all you do is create a pocket that is sewn on 3 sides and a 1″ hem on the 4th side so you can insert your boning inside and your bag will always be open. There are a ton of ways to modify it, here are the bare bones of the Binky Bag.

1. My piece of fabric was 14″x10″ and I folded it in half, right sides together, and stitched around 3 sides; leaving an entire side open

2. On the open side, serge around the top (or sew a hem)

3. With the bag still turned inside out, fold 1″ down

4. Sew around the fold leaving an opening

5. (the opening)

6. This is the boning that you will insert into that opening

7. Flip the bag right side out and pin a ribbon to the top of the bag

8. Make sure to leave a gap (about 1″) on the back of the bag so the ribbon doesn’t touch

9. Sew the ribbon to the bag

Lastly, insert the boning into the opening and stitch it closed.

Make sure to leave the gap in the ribbon so you can tie it to the side of the crib or changing table.

No more “where is the binky?” Happy Mommie, Happy Baby.

Post by Taylor Urban : www.itstaylormade.com

Mermaid Party

August 17, 2011

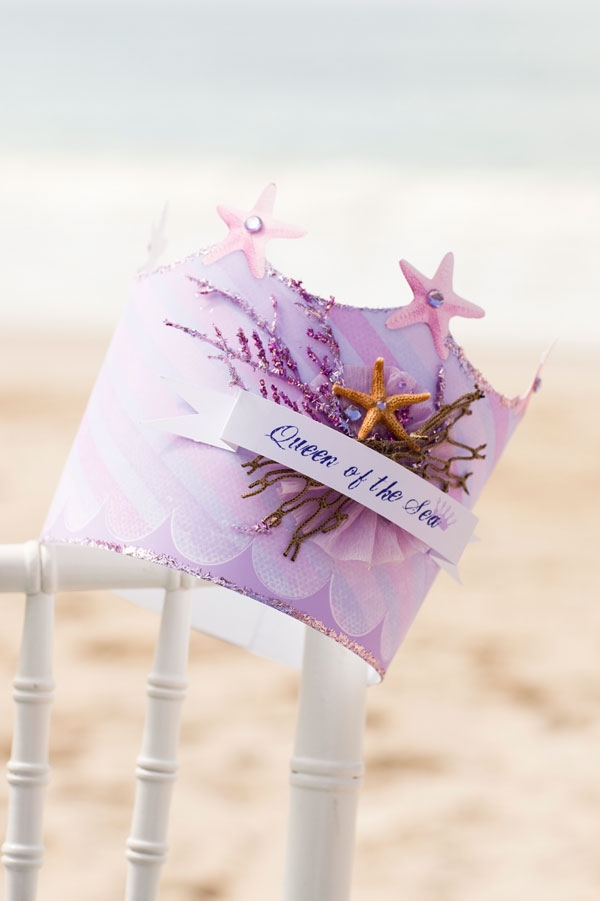
Psst. Are you aware that you may have a Mermaid living in your house? Contrary to popular wisdom, Mermaids can live anywhere their little hearts and tails desire, not just in the sea as some books and movies would have us believe. They can live in city apartments and suburban two stories, and everywhere in between. 

If you do suspect you’re sharing your home with a real live Mermaid, stay calm and immediately throw her a party! Mermaids are very social creatures and are naturally attracted to fun in the sun.

1

Now, a Mermaid party can be thrown anywhere, a beach is not mandatory. She’ll be just as pleased having it at the park down the street, in your backyard, or even in the living room if the weather refuses to cooperate. Just make sure to include these three things: Friends, Food and Fun.

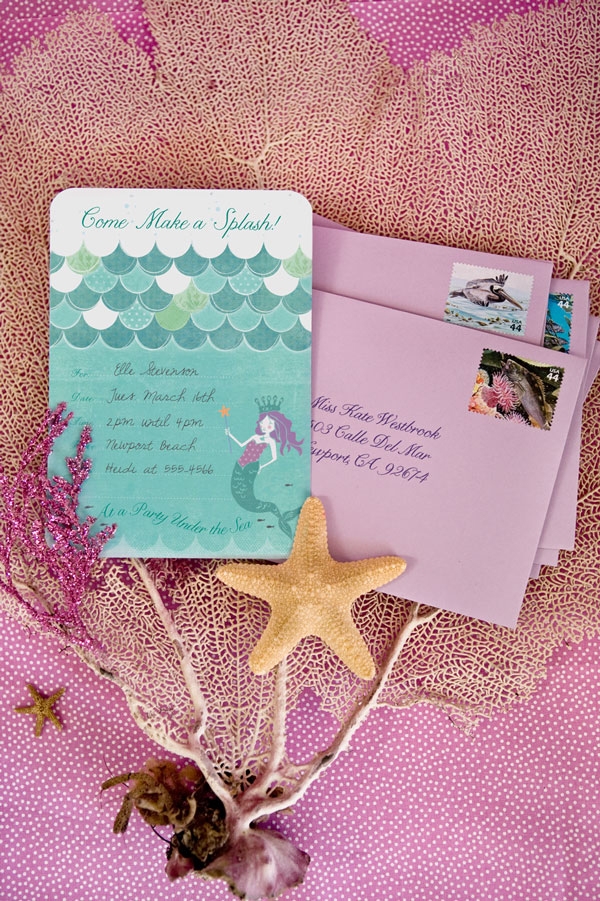
Invite her closest Mermaid friends with these adorable “Come Make a Splash” party invites that are sure to get her guests excited from the get go.

2

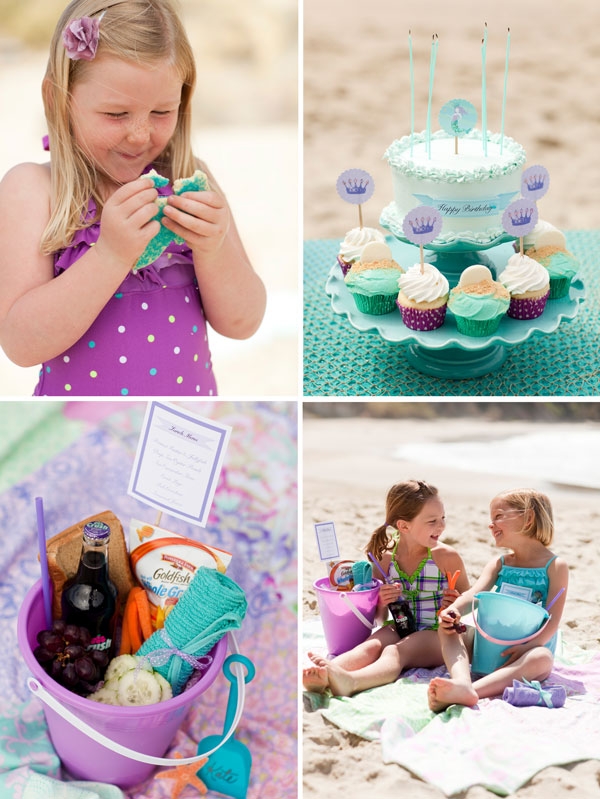
Next, serve sand dollar cupcakes, a magical birthday cake (don’t worry – it’s not complicated) and sand bucket lunches which should include, what else, gold fish crackers.

3

4

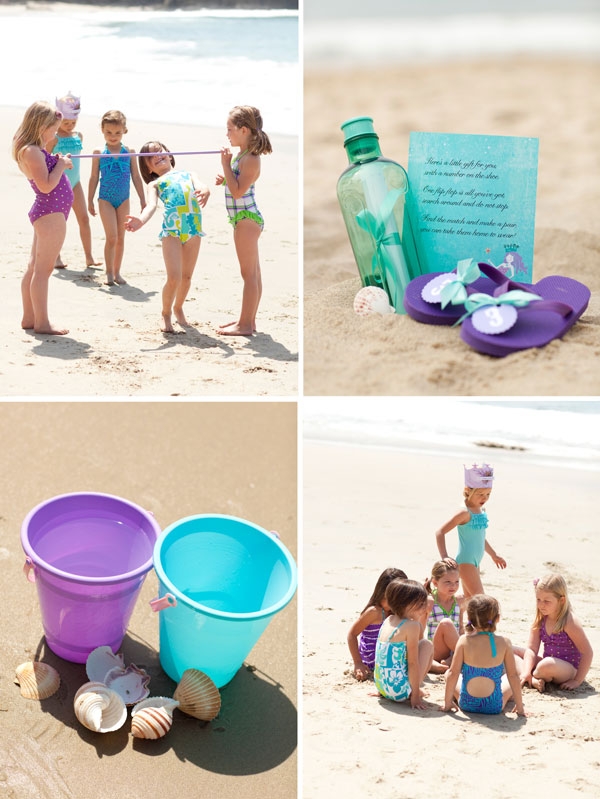
And finally the fun! What Mermaid doesn’t like a water relay, a seashell dig and a flip flop hunt? Hint: All Mermaids love these games and can play them for hours.

5

6

This Mermaid party is shore to be a big hit, and one she’ll remember for years to come!

7

Post by Sara Westbrook & Brittany Egbert for One Charming Party : onecharmingparty.com

Photos by Nicole Hill Gerulat : www.nicolephoto.com

DIY Branch Ribbon Decor

August 16, 2011

D4355_BdingPKPosies_0090E

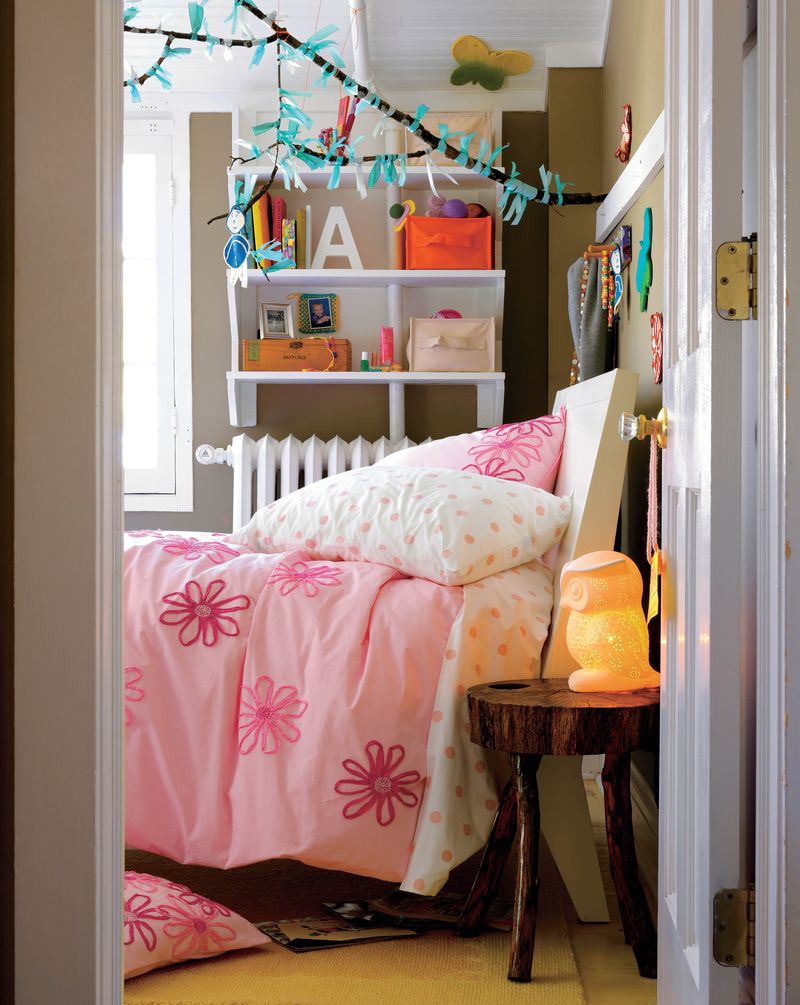
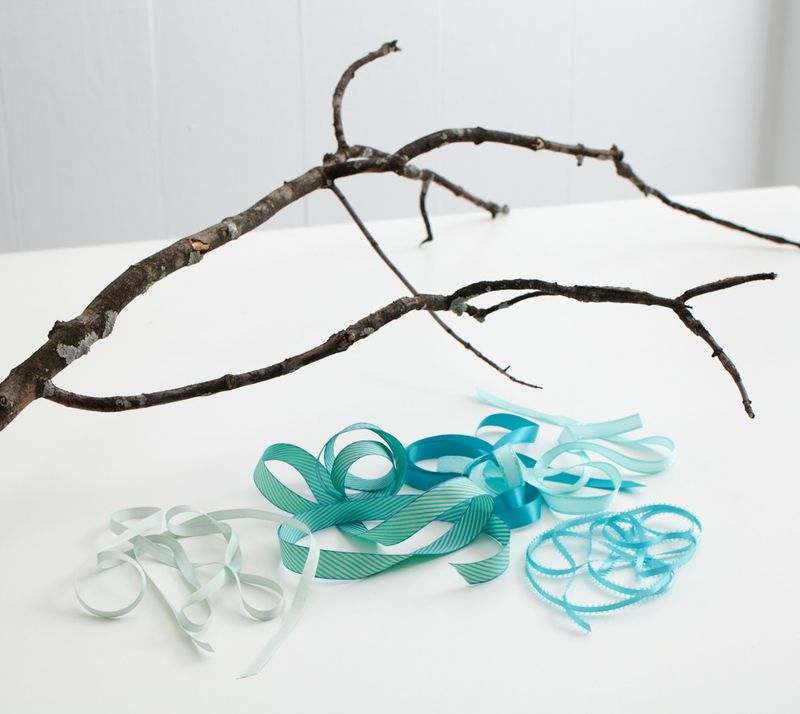
Whattya need?

  • Scissors
  • A Branch
  • Ribbon

RibbonBranch_blog_1446

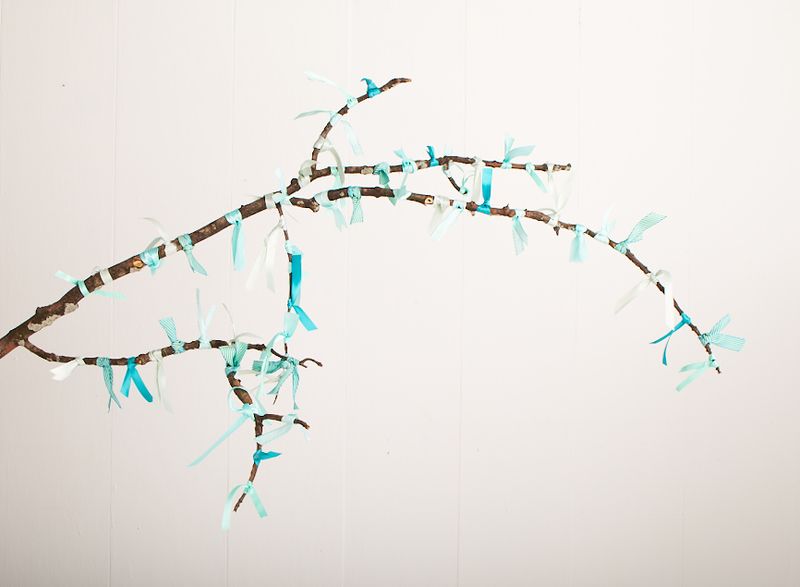
How do I make the branch ribbon?

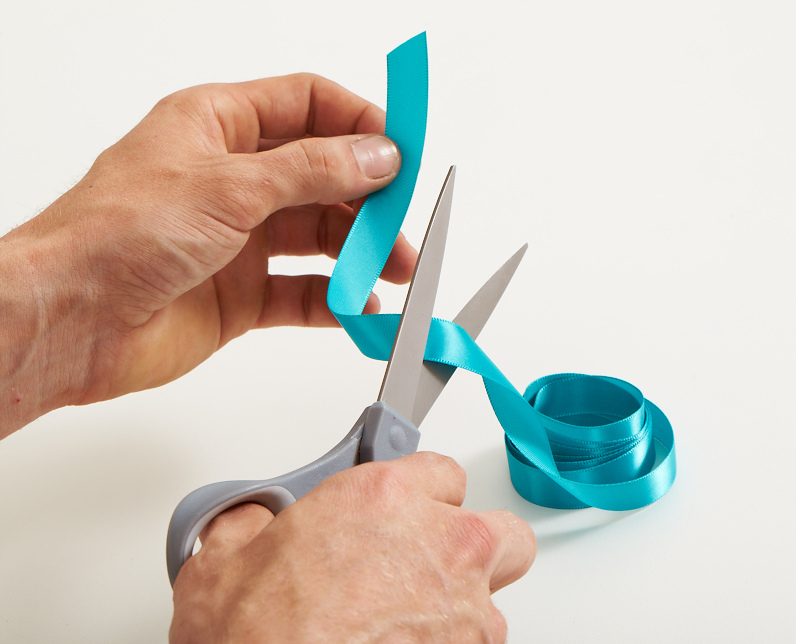
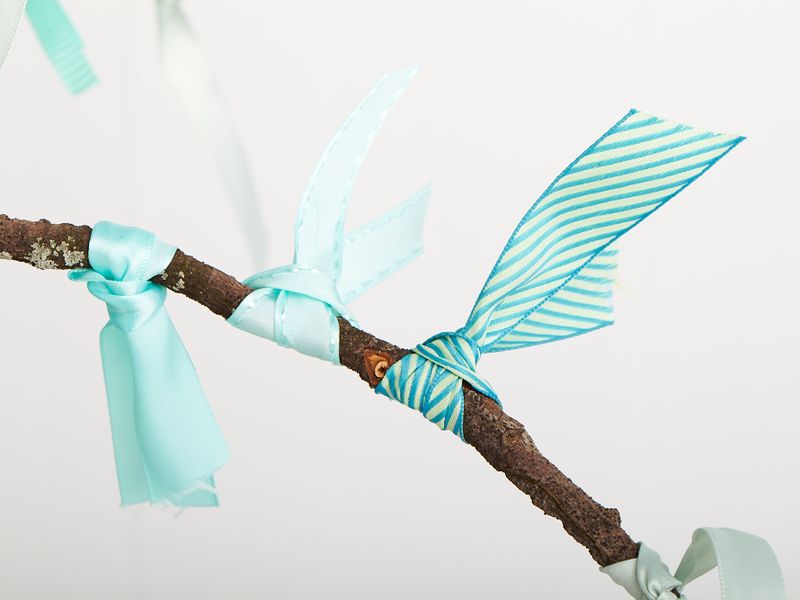
 Step 1:  Cut ribbons in 4-6" strips.

Ribbon_branch_05

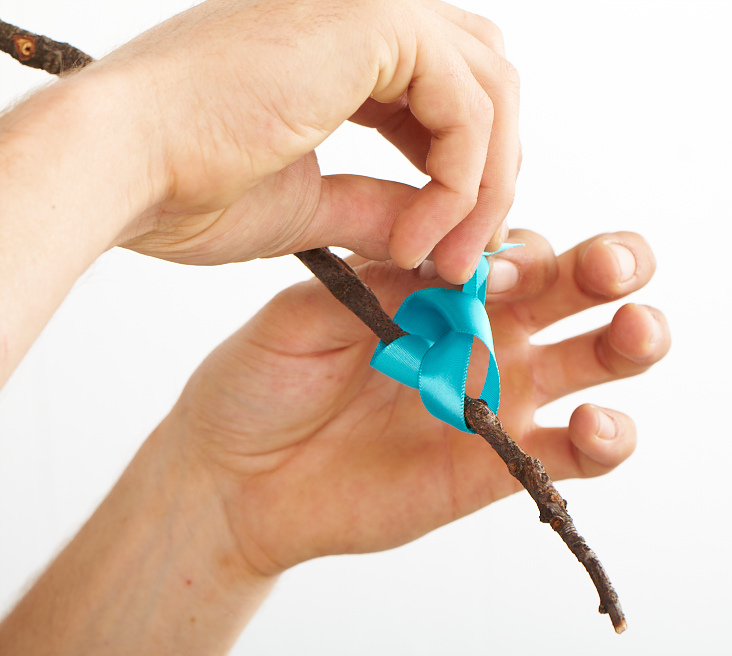
Step 2:  Tie ribbons to branch.

Ribbon_branch_09

Ribbon_branch_16

Step 3:  Hang.

Ribbon_branch_10

Created by Dane Holweger


How to Update a Vintage Suitcase

August 15, 2011

1

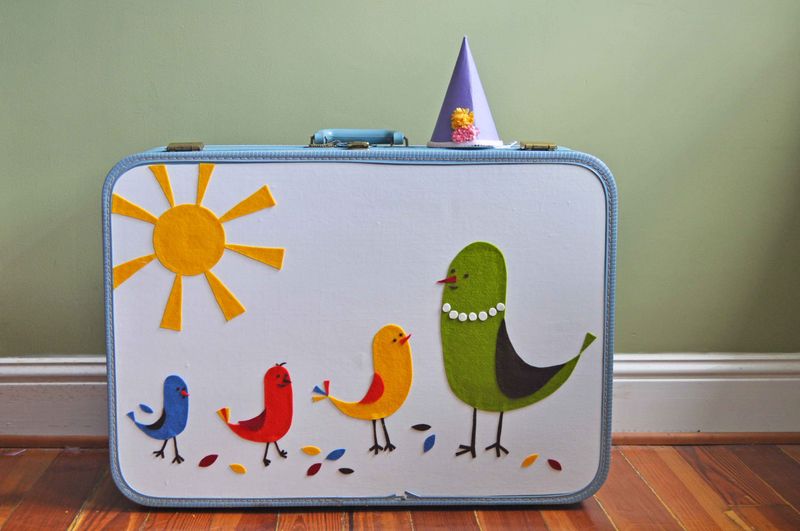
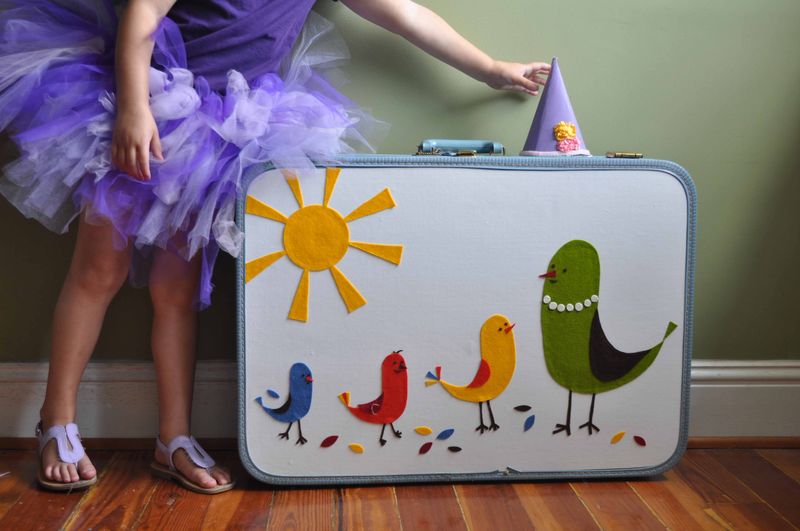
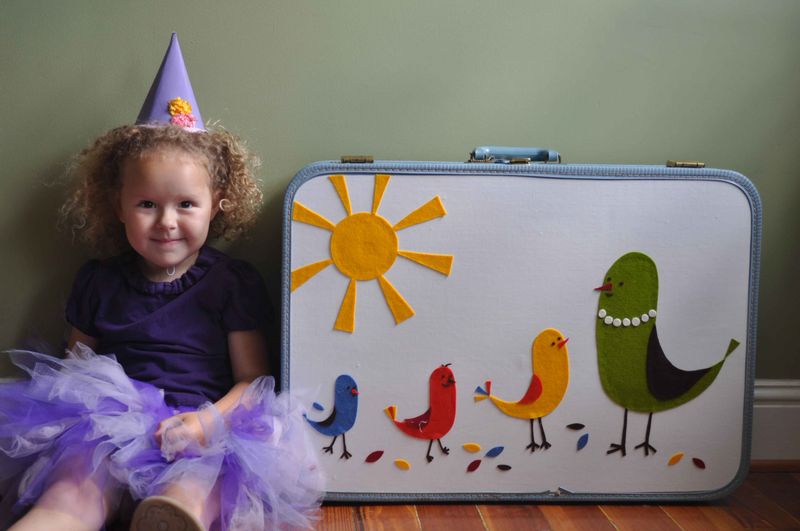
When I found this vintage suitcase, I knew it would be perfect for my girls' dress-up clothes. And thanks to a brilliant suggestion by Jude of Colour Giggles, I neutralized the musty smell of the case by pouring kitty litter in it and forgetting about it for several months.

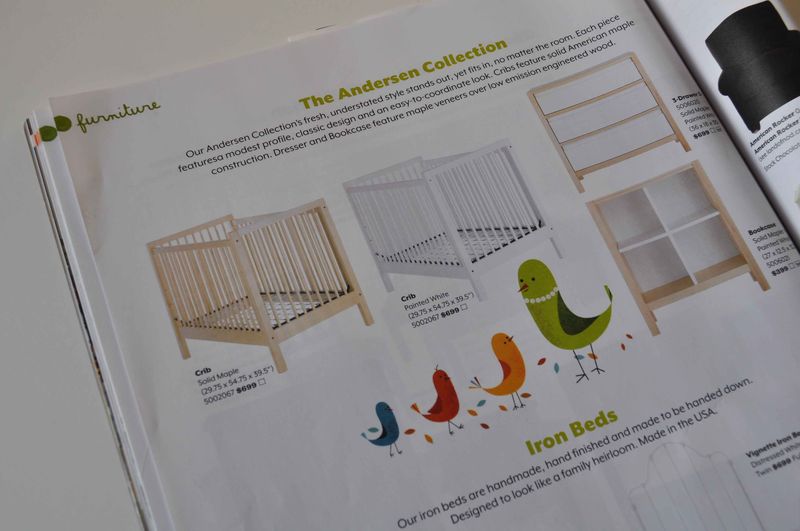
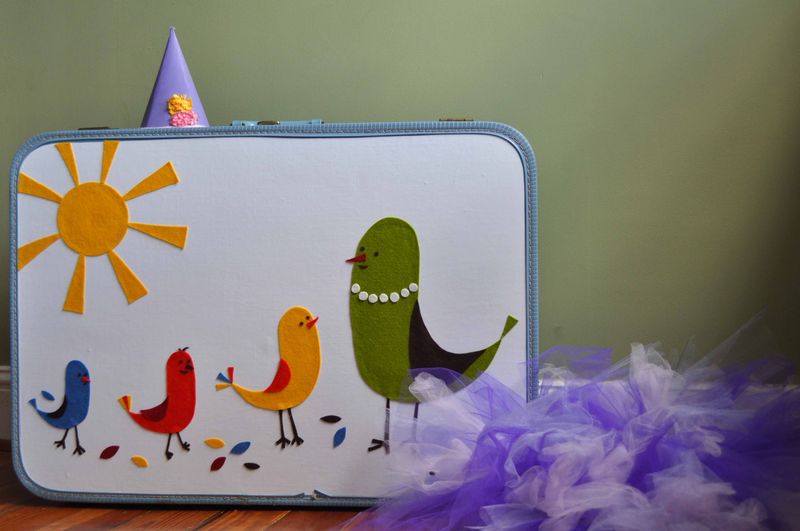
I recently received the new Land of Nod catalog and fell in love with all the quirky illustrations. I took my vintage suitcase and made a happy design from an image that I found in the catalog – and you can too!

2

Materials:

Vintage Suitcase

White Plastic Contact Liner 

Felt

Glue and brush

Pen

Pins

Scissors

3

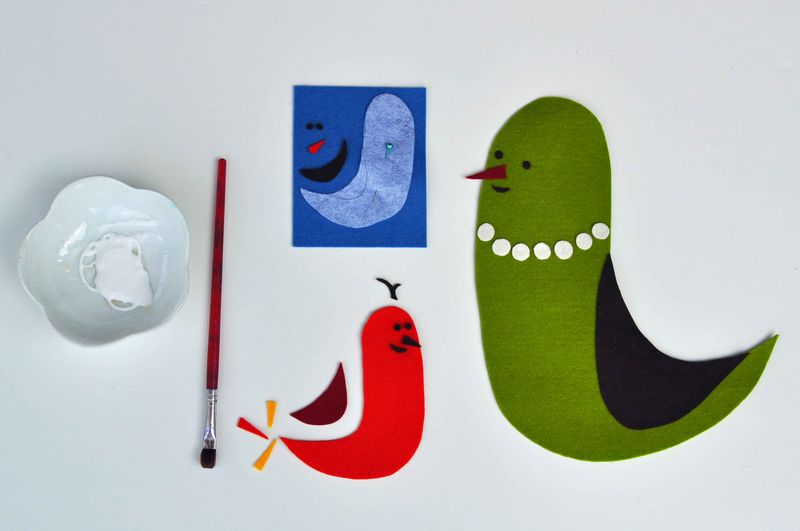
Draw or trace your pattern out of paper, pin it onto the felt and cut out your design. Glue pieces together.

4

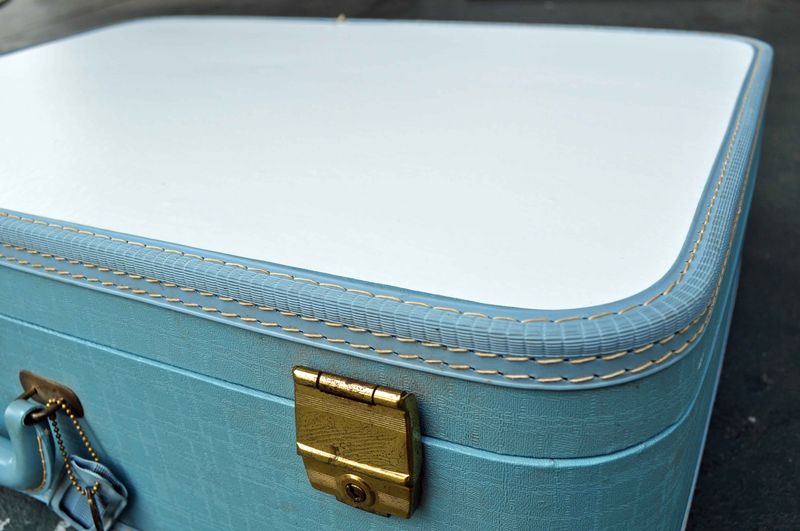
Cut contact paper to size, peel the backing and carefully stick to the top of the case.

5

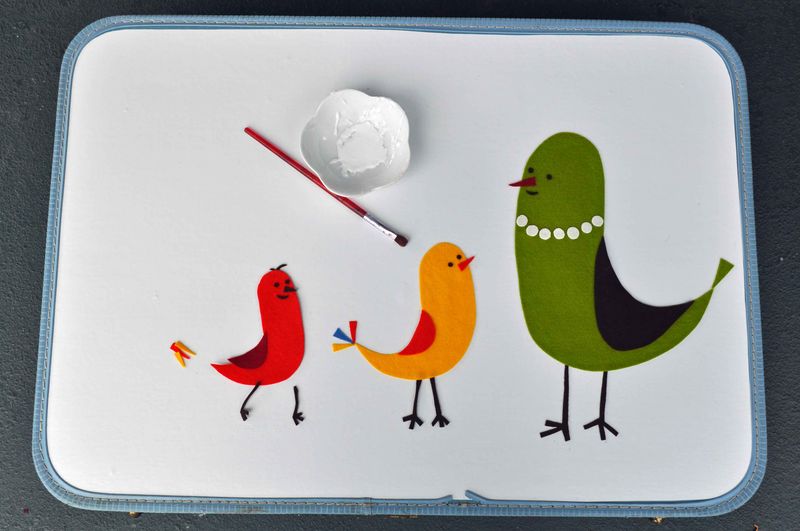
Glue the designs onto the case.

6

7

8

Post by Helen Bird : www.curlybirds.typepad.com

Checkout our talented illustrator, Blanca Gomez at cosasminimas.com

In Flight Airplane Favors

August 12, 2011

Hello again from Becca of CAKE.

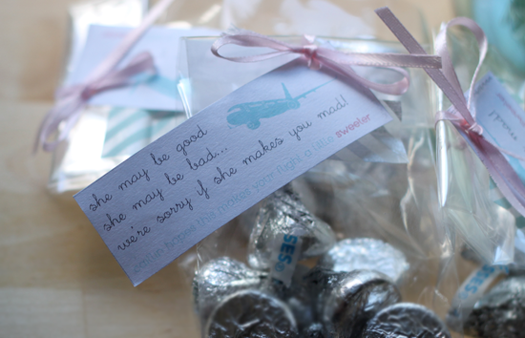
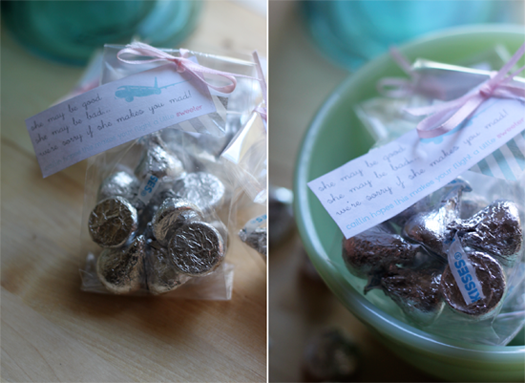
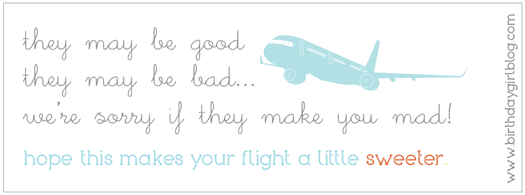
If you've ever been on a cross country flight with a wiggling, kicking, screaming baby… you're going to love me for this one.  As many of you know, I have a daughter who is turning one on Saturday {which is another story that involves a fab birthday party and the better part of my schedule this week}.  But the reason I bring it up is because last week we took her on vacation to the Carolinas to visit family and friends at the beach.  My husband and I were petrified of how she was going to handle the 5+ hour flight, and that sparked a brilliant idea.  Why not give the passengers around us a little something to… dare I say bribe them into submission?  So we bagged up some candy and I designed personalized labels and tied them into a sweet favor. 

Oh my were they a hit.  Everyone loved receiving them, and in return were incredibly gracious and helpful throughout the flight.  Consequently, Caitlin was charming as could be. Go figure, right.

I'm sure there are other parents who want in on this, so I modified the labels into a printable with both 'he' and 'she' versions.  You can download them HERE and check out the finished favors below.  Peaceful travels to one and all. 

1

2


6
5 

Download 'they' version HERE.
Download 'he/she' versions HERE.
Post by Becca : www.cakeeventsblog.com

Things to Make – Goo

August 11, 2011

62-365

My daughters' preschool offers wonderful science classes once a month. The results of which are often quite interesting. For example, after one class my oldest daughter came home talking about a "wonderful machine" that can make feet bigger. And, "can we get one so I can have REALLY big feet all the time?" It took over a month for me to figure out she was talking about a magnifying glass (I now read the class's take-home summaries for parents much more closely). Further, once at a dinner party she explained gravity to everyone present (and did a much better job than I could ever do). But her favorite lesson of all was about the distinction between liquids and solids, when they made goo. For those who've never played with goo, it's sort of like play dough, but it can be poured like a liquid. Not only is goo fascinating to play with (for both children and adults) it is incredibly easy to make.

Thus, goo has quickly become THE rainy day activity in our house, as pictured above (though we don't usually add paper towels into the mix). Warning, it is messy, but clean up is easy with soap and water.

Goo

1. Empty some cornstarch into a bowl (about half a box).

2. SLOWLY add water. If you add too much water the goo turns completely into a liquid, which is not what you want. So keep adding a little bit of water at a time and slowly mix with a spoon or your hands until it becomes "gooey" (for lack of a better word).

3. Add food coloring to make it more fun. This can also be a good opportunity to teach kids about the color wheel (yellow and blue make green, etc.).

So have fun!! What about everyone else? What's your favorite rainy day activity?

Post by Darcy : bedtimemonsters.blogspot.com

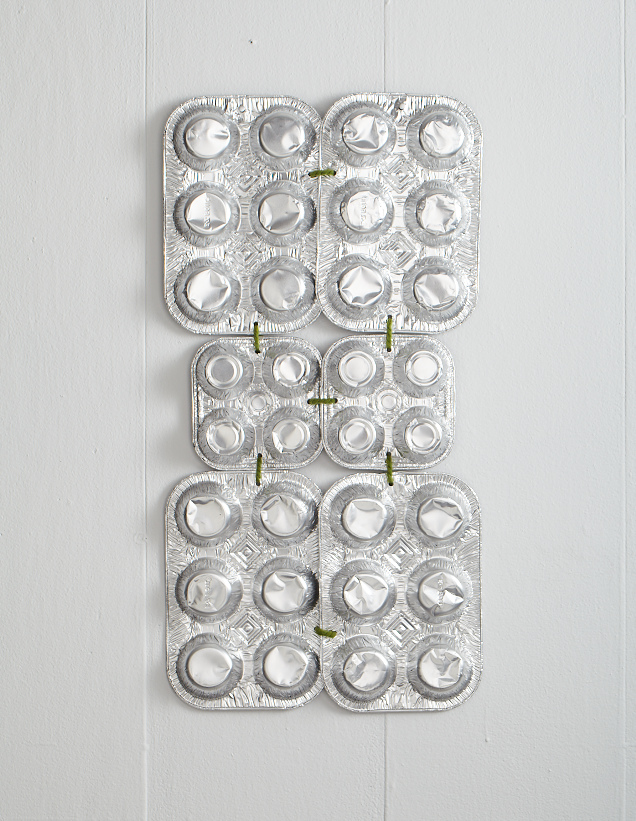
DIY Muffin Tin Wall Décor

August 10, 2011

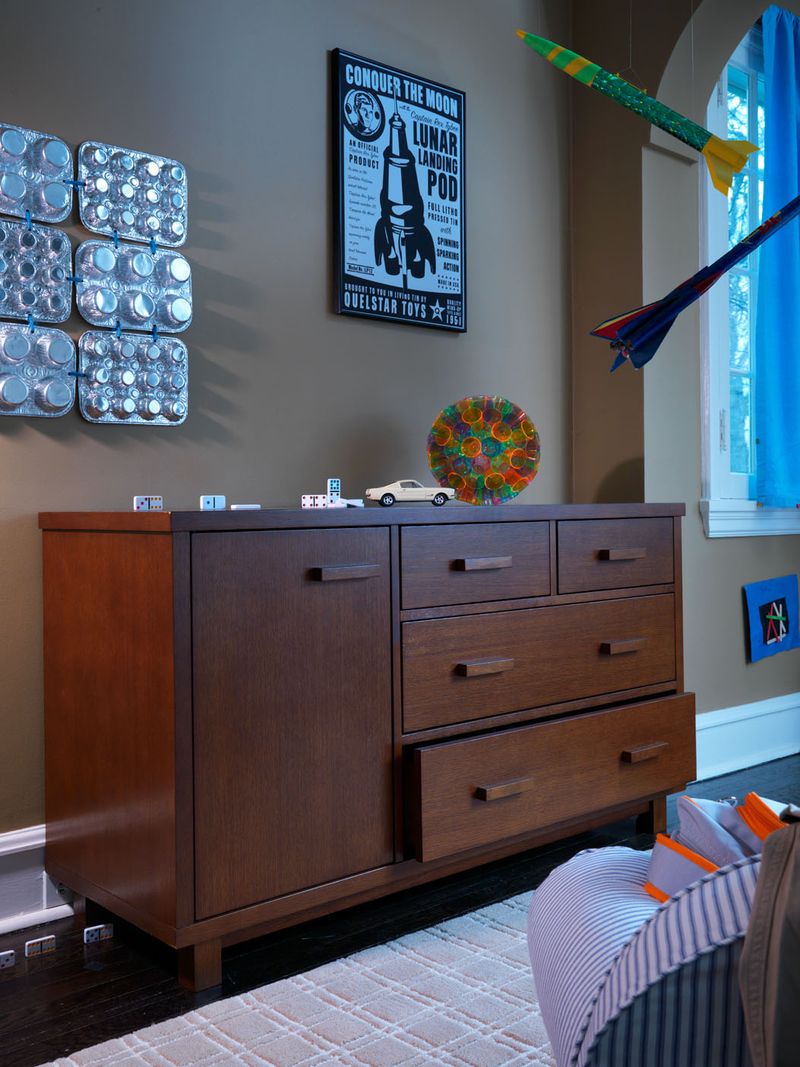
D4355.ParkDresser_0079

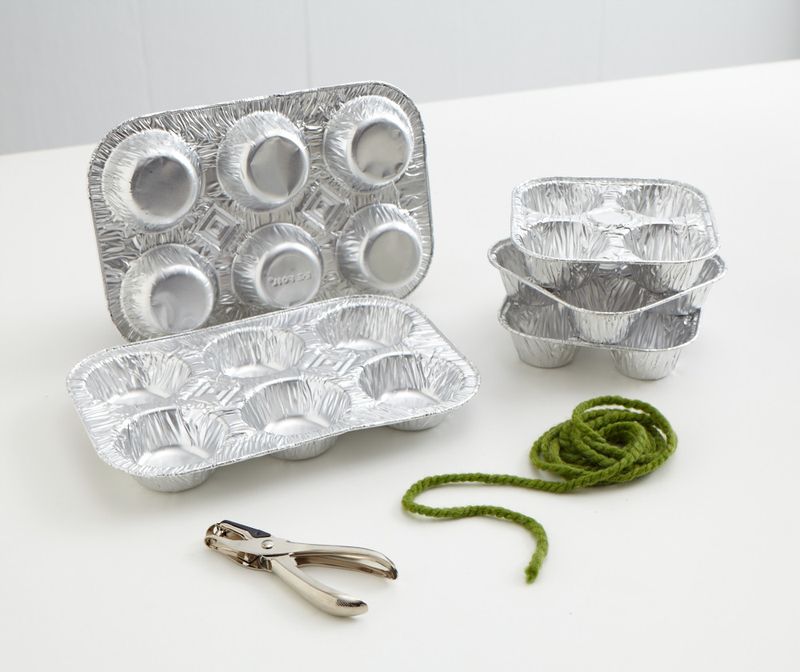
Whattya need?

  • Muffin tins of any size
  • Yarn
  • Hole puncher

Muffin_tin_art

How do I make the muffin tin?

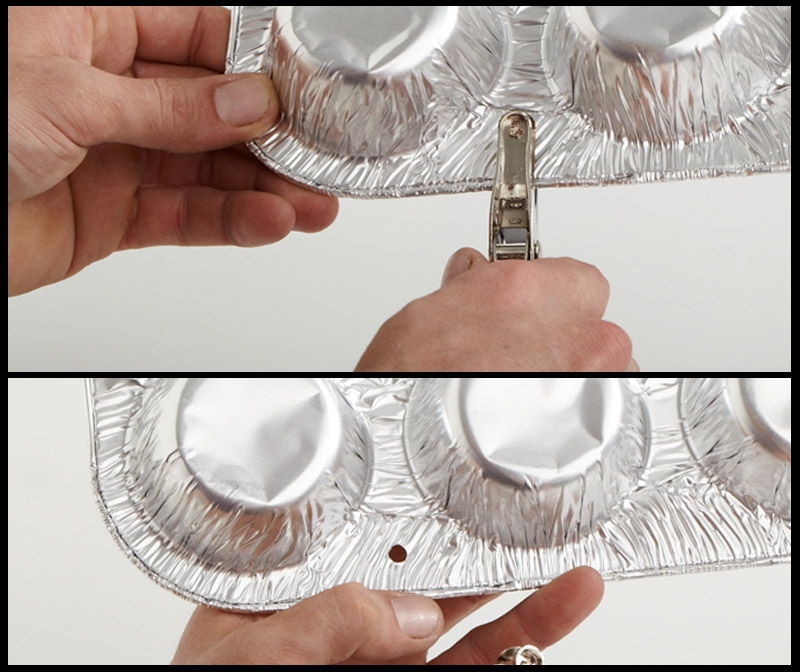
 Step 1:  Punch hole in the edges of muffin tins.

Honesttonod-1

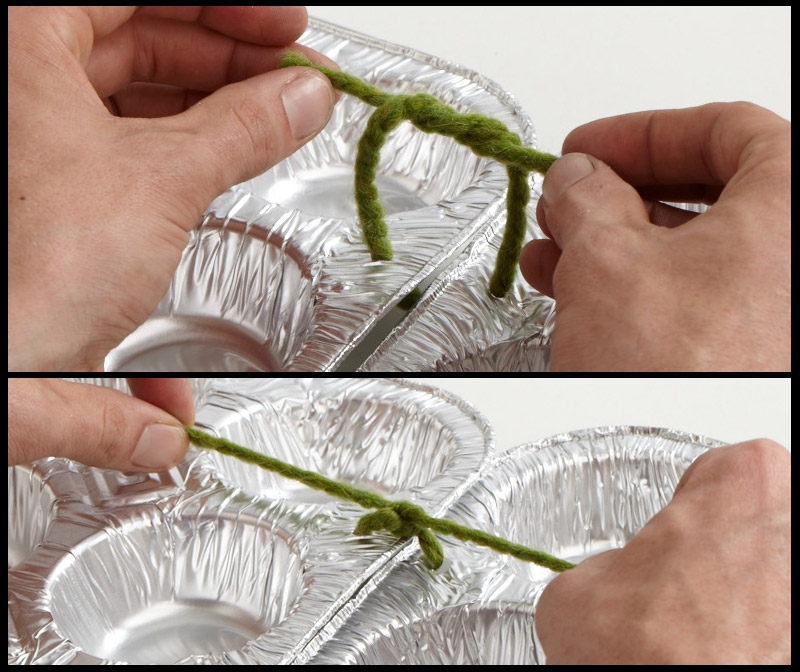
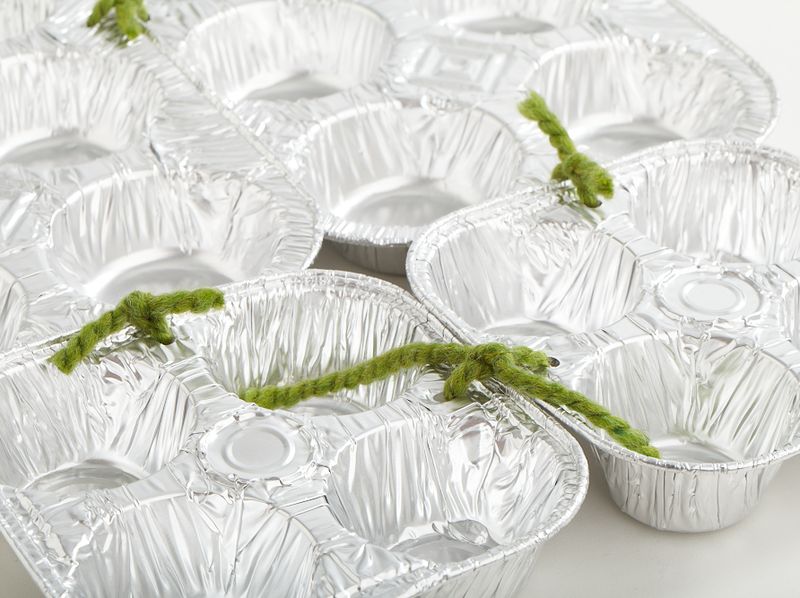
Step 2:  String tins together with yarn and securely tie together.

Honesttonod-2

Step 3:  Tie yarn at desired length to holes from the end of tin.

Muffin_tin_11

Step 4:  Hang.

Muffin_tin_16

Created by Dane Holweger