Close

Blog

Celestial Nursery

April 28, 2017

Post by Shawna of The Land of Nod’s Design Services Team

I recently had the pleasure of assisting an expectant mother with a design for her little girl’s nursery. The room itself was pretty small and the momma-to-be was looking for ideas to bring in a woodland feel. She shared a few of her favorite inspiration images and I immediately noticed a common “star” theme throughout, particularly this stunning Woods & Stars wallpaper that I instantly knew would be perfection in her space.

To complete her dreamy nursery design, I paired the celestial-inspired wallpaper with an ultra-modern crib and rocker. Gentle woodland creatures, like our Fox Table Lamp and Snail Throw Pillow, bring in added luxe and charm.

Celestial Nursery

Post by Shawna, Home Stylist from The Land of Nod’s Design Services Team. Our Design Services team offers free one-on-one design advice, mood boards and space planning. You have a room to decorate? They’d love to hear from you. Visit The Land of Nod’s Design Services page to get started today.


6 Things Every Parent Should Consider When Designing Their Little One’s Space

April 27, 2017

Post by WOLF + FRIENDS

As parents, we all know how tricky it can be to establish a bedtime routine that is effective in getting our little ones to sleep. It is common for children to experience feelings of uncertainty and anxiety at bedtime. (Monsters in the closet anyone?)

Having a consistent routine is key, but if you have a child who has extra difficulty winding down, has sensory issues, anxiety, or issues related to autism, it can be an extremely challenging part of the day. The first thing to consider is your child’s bedroom design…see if any tweaks could make bedtime a happier (and easier!) experience for everyone!


6 Parent Tips for Kids Space Design

1. A nightlight that you can write loving and inspiring messages on, like this letter light box marquee sign, can take some of the worry out of saying goodnight.

2.When it comes to style, it’s always fun to play on your child’s interests…and find objects and designs that are comforting to them. It can be helpful to establish this connection when they are infants. This Fox themed bedding looks great in a nursery and an older child’s room, and having a consistent theme can help their transition when they move into a larger bed.


3. Always consider the texture of fabrics. Does your child prefer flannel? cotton? sateen? Their favorite t-shirt will help clue you into what fabric they would probably like the best on their bed. Likewise, tune into what clothes and fabrics they dislike wearing, and make sure those are not mimicked in their bedding! Organic sheets are always a good option to try.


4. Children experience feelings of separation at bedtime. It’s important to find ways to support them in these moments of social and emotional development. Cuddly, plush items are soothing and calming to children. This fox is the perfect friend to accompany your little one to sleep!


5. When a child sleeps with a heavier comforter or down-filled duvet, it can have a relaxing effect because of the extra pressure. A sleeping bag is also helpful option because it can provide sensory input and can make a child feel secure.


6. If your child is sensitive to the noises or light outside their window, consider blackout curtains. When the curtains are closed, they signify that it’s bedtime. They also give you the ability to darken the bedroom in the summer when the days are longer, and in the winter when mornings always come too soon.

Keep in mind that it is most helpful to have a bedtime routine that is predictable for your child. No matter what you choose for a bedroom design, make choices that promote the positivity of sleep for them. Sweet dreams.

WOLF + FRIENDS is a new global lifestyle platform curated by a team of parents, kids, educators, and special needs experts to foster inclusion. Every product we feature can be used as a learning tool to support a child’s overall development. Our mission is to create a loving and informative destination for design-minded families to shop for children with intention and compassion.

Customizing Your Bedding

April 24, 2017

Post by Stephanie, Home Stylist & Event Designer from the Land of Nod’s Design Services Team

When it comes to a creating a completely styled bedding set (shams, sheets, duvet/quilt, throw pillows, etc.), there are two primary strategies: the quick and easy approach (buying exactly what you see in the picture) or a hands-on, custom creation.

There are certainly pros and cons to both strategies. A bedding set is a huge time-saver because it eliminates any guesswork when it comes to sourcing all the necessary components to a bedding design. Likely, the sham will be made in the same fabric and pattern as the duvet/quilt, so everything clearly goes together. Plus it’s easy assembly, no thinking required. But what if you’re having a hard time finding exactly the right bedding set to fit your kiddo’s tastes and aesthetic? You may prefer to dig in and do your own customizing.

Of course, the hands-on approach presents a much bigger challenge because it involves finding just the right combination of color and pattern for each bedding component. To help provide you with a little guidance in the customization process, I’ve put together a couple of examples for mixing and matching colors and patterns to come up with your own unique look.

Customizing Your Bedding


First, start by deciding on a clear overall color palette to work with. In the case of this shared girls bedroom, soft and bright hues are the prevailing theme. The Ahmaze Pastel quilt features a rainbow of color options to play off, so I selected the Half Moon sheet set to tie in with the purple stripes and the Mod Botanical sham to tie in with the teal tones. Pattern play is also a huge hurdle for coordinating bedding. Have no fear pairing stripes and polka dots and circles and half moons! Give one pattern the primary focus (in this case, the zigzagging Ahmaze quilt) and use smaller-scale patterns for the supporting elements.

Customizing Your Bedding


In a shared bedroom with fewer and more neutral color options, the principle is largely the same: pull from a complimentary gradient of colors and be mindful of pattern pairings. Pops of orange, green, and teal balance out a color pallete grounded in navy and tan. The predominate Plaid University pattern is represented in a sheet set for one bed and a duvet cover in another. In this way, each bed has its own personality, but shares a common unifying element to bring a sense of cohesion to the space.

Happy Styling!

Post by Stephanie, Home Stylist & Event Designer  from The Land of Nod’s Design Services Team. Our Design Services team offers free one-on-one design advice, mood boards and space planning. You have a room to decorate? They’d love to hear from you. Visit The Land of Nod’s Design Services page to get started today.

Charley Harper Printable Games

April 21, 2017

Designed for Nod by Michelle Romo

No one changed the way we look at the natural world more than wildlife artist Charley Harper. Our exclusive Charley Harper for Nod Collection will redefine the way you see his art. Using intricate embroidery, delicate applique and the finest materials available, we’ve created a way to experience his timeless body of work like never before.

To celebrate the new Charley Harper collection, we’re taking our #nodtourbus on the road. See the full list of tour stops HERE. If you aren’t close to one of our stops, make sure you download these free Charley Harper printable games for your kiddos. There’s nothing like a word search or a scavenger hunt you can do in your backyard.

Michelle Romo is our newest Nod illustrator, she’s a self-taught illustrator and designer fueled by cookies and naps. Her influences include Mid-Century, Japanese and Scandinavian design, along with pretty much anything cute. When she isn’t working she spends her time eating good food, hugging her friends, playing video games and crafting.

Outdoor Kids’ Play Space

April 19, 2017

Post by Stephanie, Home Stylist & Event Designer from The Land of Nod’s Design Services Team

With summer slowly creeping its way out of hibernation, the time for dusting off the patio furniture and refreshing the outdoor planters is finally here. I don’t know about you, but I couldn’t be more ready. Summer means flip-flops, ice cream cones, and longer days for outdoor play.

Outdoor Kids Play Space

If kiddos are part of your summer planning preparations, you may find yourself looking for a new activity to encourage outdoor fun in the sun. The Sand & Water Table is the perfect addition to any backyard retreat. Accessorize with a bright indoor/outdoor rug and modern play furniture to create a stylish play zone sure to be the envy of the neighborhood. Plus, with the kiddos busy digging and splashing, you’re free to sit back, relax, and soak in some precious moments of warmth and sunshine.

Happy Styling!

Post by Stephanie, Home Stylist & Event Designer  from The Land of Nod’s Design Services Team. Our Design Services team offers free one-on-one design advice, mood boards and space planning. You have a room to decorate? They’d love to hear from you. Visit The Land of Nod’s Design Services page to get started today.

Tween Boys Room Design

April 18, 2017

Post by KJ, Retail Home Stylist from The Land of Nod’s Design Services Team

You’ve tried putting it off, but the time is here. Your kids are growing up, and so is their style. Enter our tween boys room design. Ahh, the tween years – prepare yourselves!

When you initially think of The Land of Nod, you probably think of nurseries or kids rooms. Fear not! Just because your kids are getting older doesn’t mean you can’t still shop with Nod! Between bedding, decor, shelving, and even furniture, you are bound to find something that both you and your tween like. To help inspire your room design, we put together a moodboard that balances a bright, big kid personality with pieces that can transition into teenage years, college, and beyond.

For this design, we picked a reversible green and blue quilt and paired it with our Plaid University sheet set. We also chose a neutral rug with a clean striped pattern and bright sports prints to keep the overall look of the room feeling mature, but still fun and expressive. Shelving is also a great way for your kid to display any favorite keepsakes and add some personality to his new space.

Enjoy!

Post by KJ Burkland, Retail Home Stylist (Seattle),  from The Land of Nod’s Design Services Team. Our Design Services team offers free one-on-one design advice, mood boards and space planning. You have a room to decorate? They’d love to hear from you. Visit The Land of Nod’s Design Services page to get started today.

Kids Craft Area

April 17, 2017

Post by Rebecca of Not-So-SAHM

Kids Craft Area


Our main arts and crafts area is smack in the middle of our main kitchen and dining rooms. I’ve always loved having the kids be close by doing projects while I’m puttering about. But this past year, Cameron’s already prolific creating has gone next level. She’s become obsessed with sketching, designing, sewing, knitting, beading, and on and on and on. Trying to contain her projects while providing her with an area she could leave work out for multiple days was becoming a nightmare. So we decided to give her her very own craft maker area!

Adequate storage was the first item on my list. I wanted shelving that she could reach herself and was open to display her supplies and work. The Land of Nod’s On the Grid Bookcases were the perfect solution and provide ample storage without being bulky and heavy. I stacked fabric in color-coordinated piles and placed smaller items like beads and thread in their own smaller containers. And her idea books got their own shelf too.

Kids Craft Area

Next, I picked out a large work table that fit in with the shelves and her room’s current scheme (it seems like just yesterday I was posting on her new bedroom!). I went with a glossy white table with a good work surface. Cam loves our dining chairs so I picked up an extra one for her to use in her room. A little sheepskin throw and a back pillow help make the acrylic seat more comfy for her.

Kids Craft Area

I tried to keep a lot of her supplies right at the ready on her desk and organize them with Nod’s fabulous I Could’ve Bin desk accessories. Her sketching materials and note taking items went in one. Small sewing accessories like snaps, tape measures, and embroidery floss went in another.

To help her organize her ideas, I hung four cork boards over the desk. She’s already started filling it with sketches, shopping lists, and some of her creations. To keep her inspired, I hung Nod’s bright Pom Pom Garland topped by a customized “Makers Gonna Make” with Bold Flag Letters.

Kids Craft Area

Creating her own area has been such a wonderful way to support her creativity while preserving my sanity. She has already spent hours (HOURS!) in her new space brainstorming, sewing, and making away. She definitely goes through spurts of particular projects. She’s been through a weaving phase, a jewelry making phase, and an all things space phase. Right now she’s on a stuffed animal kick. She makes the animal and then makes all kinds of accessories for it — she’s sewing a neck pillow for her new stuffed giraffe at the moment.

If you have a little creator in your home, I highly recommend carving out a little space just for them. Thanks so much to The Land of Nod for helping me make it happen!

Kids Craft Area

Rebecca is a mom to two young kiddos and, in her spare time (ha!), likes to pretend she’s a back-up dancer, craft cocktails, and run long distances. A relatively recent SAHM, she blogs family-friendly activities, DIYs and celebration fun at Not-So-SAHM.

Rose Gold Nursery Accents

April 14, 2017

Post by KJ, Retail Home Stylist from The Land of Nod’s Design Services Team

Adding rose gold accents is a great way to jazz up any space! It’s one of those finishes that works well in pretty much every room in your home. For this nursery design, I paired rose gold accents with soft pink hues and darker shades of green.

The rose gold accents I picked are featured in the decor and smaller pieces of furniture, such as the Geometric Rose Gold Lamp, acrylic tray table, and rocking chair throw pillow. To compliment those items, I used soft pinks, whites and tans in the bedding, rug, and larger furniture items. If you want more of a whimsical look, try adding some of our rose gold Lottie Dots or cloud shaped garland to the walls!

I love adding pops of color for contrast, so I brought in darker green tones using plant print wall decor. If you really want to go bold, the leafy emerald green Genevive Gorder wallpaper is absolutely adorable! I would pair it with either light pink wall paint, or (depending on how much natural light you get in the room) a dusty shade of green. My favorites are Benjamin Moore’s Frosted Petal (2089-70) or Antique Jade (465). Just beware; wall colors can look very different in your actual space from what you see in pictures or in the paint fan. If you’re not sure what paint color to use, you can always buy sample sizes of various shades to try at home.

Enjoy!

Post by KJ Burkland, Retail Home Stylist (Seattle),  from The Land of Nod’s Design Services Team. Our Design Services team offers free one-on-one design advice, mood boards and space planning. You have a room to decorate? They’d love to hear from you. Visit The Land of Nod’s Design Services page to get started today.

Coconut Sugar Bunny Cupcakes

April 12, 2017

Post by Corri of Glitter and Bubbles


Coconut Sugar Bunny Cupcakes

Easter is right around the corner and we’re gearing up with egg hunts, Easter brunch and these adorable bunny bottom cupcakes! This Pinterest-worthy recipe is much easier than it looks (don’t be intimidated mamas and papas!). Grab your favorite sprinkles and your best Easter decor and hit the kitchen.

A little warning, your babe’s mouth is sure to turn green from the frosting, but that’s half the fun, right?! What do you make on Easter to celebrate?

[yumprint-recipe id=’1′]

INGREDIENTS

  • 1 Cup Organic Coconut Sugar
  • ½ Cup Melted Butter
  • 2 Eggs
  • 2 Teaspoons Vanilla Extract
  • 1 ½ Cups All Purpose Flour
  • 1 ¾ Teaspoons Baking Powder
  • ½ Cup Milk
  • 12 Mini Marshmallows
  • 0-15 Regular Marshmallows
  • White Pearl Sprinkles
  • Pink Candy Pearls
  • Pink Sprinkles Jimmies
  • 1 Tablespoon Corn Syrup
  • Vanilla Frosting
  • Green Gel Food Coloring

Coconut Sugar Bunny Cupcakes

DIRECTIONS

  1. Preheat the oven to 350 degrees and in a bowl, whisk together the butter and the coconut sugar. Add the eggs and vanilla.
  2. Using a spatula or electric mixer, combine the baking powder and slowly add in the flour, ½ a cup at a time, followed by the milk and mix together until smooth.
  3. Line a muffin pan with liners and spray with cooking spray. Pour the cake mix into each liner so that each is ¾ of the way full.
  4. Bake for 23-27 minutes or until golden brown.
  5. While the cupcakes are baking, mix together the vanilla frosting and 2-3 drops of food coloring. Remove the cupcakes from the oven and allow to cool.
  6. Place a piece of parchment paper on the counter and pour the corn syrup and the white pearls into two separate small bowls.
  7. Use a brush to apply a light but thorough layer of corn syrup to a mini marshmallow and then dip into the white pearl sprinkles until coated. Use a toothpick to remove any excess sprinkles and place on the parchment paper to dry (this is the bunny tail). Repeat this with each mini marshmallow.
  8. Cut the large marshmallows width-wise with scissors (approximately 1/8 inch thick). Arrange three of the pink jimmies sprinkles at the top (these are the claws) and three pearl candies at the bottom (these are the paw pads).
  9. Cut the top off a regular sized marshmallow and frost the cupcake. Place the cut marshmallow on top of the cupcake (with the cut side down). Brush the top center lightly with corn syrup and secure the tail.
  10. Place the feet on top of the cupcake so they lean on the large marshmallow. Repeat steps 12 and 13 until the cupcakes are all decorated. Serve to your family!

Coconut Sugar Bunny Cupcakes

Corri McFadden is the Owner/Founder of eDrop-Off luxury consignment and creator of Glitter and Bubbles, a modern-day moms guide for those looking for inspiration through fashion, décor and food.  The site was launched in honor of her daughter and muse, Zelda and gives daily doses of stylish “must haves”, easy recipes and unique décor that are suited to inspire even the busiest of Moms!

Ice Boat DIY Kids Craft

April 11, 2017

Post by Rebecca of Not-So-SAHM

Ice Boat DIY Kids Craft

Sometimes I find that I need to use a bit of persuasion to get our kids to partake in a new art or craft project. And, in our family, nothing is more persuasive than a little healthy competition. So when I told our kiddos that they were going to get a chance to design and race their own ice boats, they were all over it!

This is such a fun and adaptable craft project that is perfect for outdoors. It incorporates a smidge of science (why does water freeze? how can you design a faster boat?) with art, and has some sport thrown in too.

Ice Boat DIY Kids Craft

Supplies:

  • paper cups (we used 8 ounce party cups)
  • plastic straws (cut in proportional size to your “boat”)
  • water
  • white paper (cut into proportional size rectangles for your “boat” and punched with a hole puncher in the top and bottom)
  • art supplies to decorate your sails (we used our favorite gel crayons)
  •  smooth racing course (we used Nod’s Acrylic Desk Mat)

Ice Boat DIY Kids Craft

I filled each paper cup with a few inches of water and popped them in the freezer for about an hour. When the top of the water had just started to freeze, I inserted the cut plastic straw. I then let them freeze over night.

The next day, while our kids colored their sails, I snipped the paper cup a bit and peeled the paper off of the ice boat. Once they were satisfied with their art, the kids raised the sails on their boats. You can try out a variety of sail shapes, but we went with more of a spinnaker sail design (or, as the kids called them, Viking ships). We popped those back in the freezer while the kids designed and colored their own race course. Inspired by The Land of Nod’s Half Ship Banner, the kids included a bunch of fun details like waves, nice fish, motivational sayings, and some dangerous-looking sea dwellers as well.

Ice Boat DIY Kids Craft

We slanted the racing course outside on our front steps and they were off! They got a real kick out of trying to make their boats go faster while staying in their respective “lanes.” And Cam turned the whole thing into another art project once the boats started melting and really smearing the art work. We already have more boats in the works!

Ice Boat DIY Kids Craftp.s. if you can’t find an appropriate smooth racing course, try actually sailing them in water. I’d love to freeze a variety of different shapes to see which boats sail and which ones sink!

Rebecca is a mom to two young kiddos and, in her spare time (ha!), likes to pretend she’s a back-up dancer, craft cocktails, and run long distances. A relatively recent SAHM, she blogs family-friendly activities, DIYs and celebration fun at Not-So-SAHM.

Sports-Themed Kids Bedroom Ideas

April 10, 2017

Post by Stephanie, Home Stylist & Event Planner from the Land of Nod’s Design Services Team

If you’ve got a pint-sized sports-enthusiast in your home, giving them a bedroom that reflects their athletic interests is probably a winning strategy. Each of the four sports represented in the Nod Sports Bedding Collection offers a quilt designed to look like a playing field, as well as a coordinating throw pillow and a set of 100% organic cotton sheets. These sports-themed kids bedroom ideas are sure to be a home run.

The baseball bedding set is sure to be a home run for your little leaguer. The diamond-patterned quilt and coordinating sheets help set the tone for the space while bicycling animal friends and rocketship wallpaper create an approachable and well-rounded room design.

For the junior QB type, a football field quilt is sure to score a touchdown! Your all-stars can fall asleep to the imaginary sounds of a roaring crowd, cheering them on as they score another yard for the home team.

The monochromatic soccer-themed bedding set is the perfect base to balance a colorful striped rug, bright geology-themed wall art, and a rocket ship table lamp. Who knows? Maybe sleeping on a bed of soccer balls will lead your kiddo to become the next David Beckham!

If basketball is your kiddo’s game, they’re sure to love sleeping on a full court quilt and coordinating sham. Your aspiring Michael Jordan can even practice shooting free throws using a junior-sized basketball throw pillow.

Happy Styling!

Post by Stephanie Geurkink, Home Stylist & Event Planner  from The Land of Nod’s Design Services Team. Our Design Services team offers free one-on-one design advice, mood boards and space planning. You have a room to decorate? They’d love to hear from you. Visit The Land of Nod’s Design Services page to get started today.

DIY Easter Garland

April 7, 2017

Post by Sara Walk of Tell Love and Party

DIY Easter Garland

I sure do love Easter decor.  The colors are always so bright and cheery, making me fall in love with Spring all over again.  And this carrot garland does just that.  It’s such a fun and springy way to decorate for Easter. Your kids will love it!

DIY Easter Garland

Supplies

  • Orange Cardstock
  • Scissors
  • Tape
  • Bakers Twine
  • Green Tissue Paper
  • Small Hole punch

DIY Easter Garland

Directions

  1. Cut the card stock into 4 square shapes then curl each piece into a cone shape and tape it closed.
  2. Cut off the point of the cone then punch holes in two sides of the cone so you can string them onto the bakers twine.

    DIY Easter Garland

  3. Now cut two thin strips of tissue paper (I used two different green colors) then lay them on top of each other and fold them up.
  4. Cut fringe into the square but be sure not cut all the way through.
  5. Then take the part that you didn’t cut and start to twist making the fringe bunch together.
  6. Take the fringe and tape it to the inside of your already strung carrots.

Hang and you are done! Happy Easter decorating!

DIY Easter Garland

Sara is a stay at home mom who drools over anything chocolate and loves holidays, flamingos, and laughing. She lives with her husband and two beautiful boys, Rowe and Denny, in the sunny state of California. Join her as she shares her life and colorful crafts on Tell Love and Party.

Gone Camping Play Space

April 5, 2017

Post by Shawna of The Land of Nod’s Design Services Team

If you’re like me, you’ve been pining (pun intended) for activities to keep the kiddos busy on these rainy days.

For this playroom, I designed a space that brings the outdoors in. Set up our Explorer Playhouse and let strewn about outdoor string lights mimic the night stars. Grab a cozy sleeping bag and get plenty of rest! The next morning is sure to start early with a trip down the lazy river in the most darling plush canoe.

Gone Camping Play Space

Post by Shawna, Home Stylist from The Land of Nod’s Design Services Team. Our Design Services team offers free one-on-one design advice, mood boards and space planning. You have a room to decorate? They’d love to hear from you. Visit The Land of Nod’s Design Services page to get started today.

Homemade Peeps Recipe

April 4, 2017

Post by Katy Rexing of Grace in the Crumbs

Homemade Peeps Recipe

When it comes to my children’s Easter baskets (and let’s be honest, their Halloween bags and Christmas stockings too), I’ve been known to sneak a few treats here and there when they’re not looking. I’m pretty sure we’ve all done it. Just one little piece, they won’t notice, right?

Out of all the candy that has rotated through their baskets, the one that I’ve never had any interest in sneaking, is the “Peep”. To me, this store-bought treat is overly sweet, grainy and, probably worst of all, tastes stale. I always hoped we could find a way to make a better version. And now, I think we have.

This is what I like to think of as the kid approved, and adult steal worthy, Peep. It is honestly that good. It has a light airy consistency and is a great balance of sweet and creamy. This is the one treat in your children’s basket that you will have a hard time resisting, so my apologies in advance.

Homemade Peeps Recipe

Making these Peeps takes just a little bit of planning, but for the most part are simple and straightforward. And the best part, you probably already have the ingredients in your pantry! This is also a great recipe that can be customized for any holiday. I’m using a basic marshmallow recipe, and adapting it by using yellow and pink colored sugar for Easter. But you can easily swap out the colored sugar with powdered sugar, chocolate powder, or even shredded coconut. There are a lot of ways to play with this recipe and make it work for any occasion.

The thing that I love the most about this recipe though, is how easy it is to involve my children. They loved cutting out the Peeps with their cookie cutters and finishing them off with a dusting of sugar. It’s important to me that I not only find ways to involve my children in the kitchen, but also involve them in preparing for special holidays and events. This recipe was a great way to do both.

So have fun with this recipe, let your kids get their hands a little “sticky”, and enjoy time together doing something sweet.

Enjoy!

Homemade Peeps Recipe

Ingredients

  • 3 packets of gelatin (equivalent to three tablespoons)
  • ¼ cup of cold water
  • 3 cups of granulated sugar
  • 1 ½ cups of cold water
  • 1 tbsp. of vanilla extract
  • 1 cup of yellow or pink sugar
  • Cookie cutter of your choice
  • 1 cup of cornstarch or arrowroot powder (for dusting your cookie cutter)
  • Non-stick baking spray

Homemade Peeps Recipe

Directions

  1. In a small bowl mix gelatin and ¼ cup of cold water. Set aside.
  2. In a pot, over medium/low heat, dissolve the granulated sugar with 1 ½ cups of cold water. Once dissolved, add the gelatin. Stir to incorporate
  3. Turn the heat up to medium/high and let the sugar/gelatin mixture come to a low boil. (Be careful that the mixture does not boil over. This happens quickly, so you will want to keep an eye on your pot and lower the heat as necessary.) Let the sugar/gelatin mixture gently boil for 10-15 minutes. Set the mixture aside and let it cool slightly.
  4. Very carefully, pour the sugar/gelatin mixture into the bowl, add vanilla extract, and mix on low speed (work carefully as the sugar mixture will still be very hot). After 30 seconds, increase to medium speed, and finally to high speed after an additional 30 seconds. Mix on the highest setting for about 5 minutes or until the sugar/gelatin mixture has come to a thick glossy white consistency that forms soft peaks. (If your mixture is still a little “runny”, continue to let the mixer run for a few minutes.)
  5. Meanwhile, prepare a 9×13 baking dish by spraying all four sides with non-stick baking spray. Then, place a piece of parchment paper inside the pan with the paper extending past the dish. (I like to make sure the “sides” of my parchment paper extend well past my pan to give “handles” that I can use to help release the marshmallow).
  6. Cover the entire bottom of the pan (over parchment paper) with a ½ cup of colored sugar.
  7. Working quickly, pour the marshmallow mixture evenly over the colored sugar. Ensure that the marshmallow reaches all four corners. Sprinkle the remaining colored sugar on top of the marshmallow then fold the edges of the parchment paper over the sprinkled marshmallow and set in your fridge for 8-12 hours or overnight.
  8. Once the marshmallow has set, remove from the fridge and unfold the parchment paper. Using the parchment paper as handles, lift the marshmallow out of the pan and place on a cutting board.v
  9. This is the fun part! Grave the kiddos and use cookie cutters to cut out “Peeps”. I found that dipping the cookie cutter into corn starch helped the marshmallow release easier.
  10. Dust the freshly cut sides of each Peep with colored sugar then place on a drying rack to finish setting for 30 minutes.

Homemade Peeps Recipe

Katy is a chef, yogi, and a wrangler to four little people who call her mom.  When she’s not in the kitchen, you can find her over at Grace in the Crumbs sharing her stories of finding beauty and joy in the everyday, and often times messy, moments of our lives.  

Nursery Safety Tips from a Pediatrician

March 31, 2017

Post by Dr. Katie Friedman of Forever Freckled

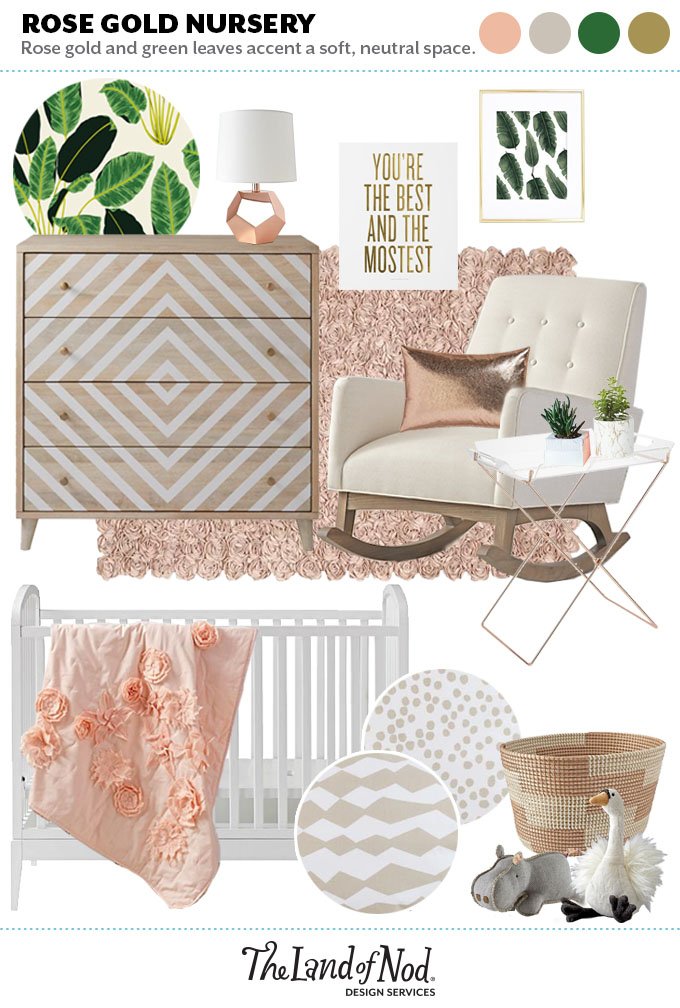
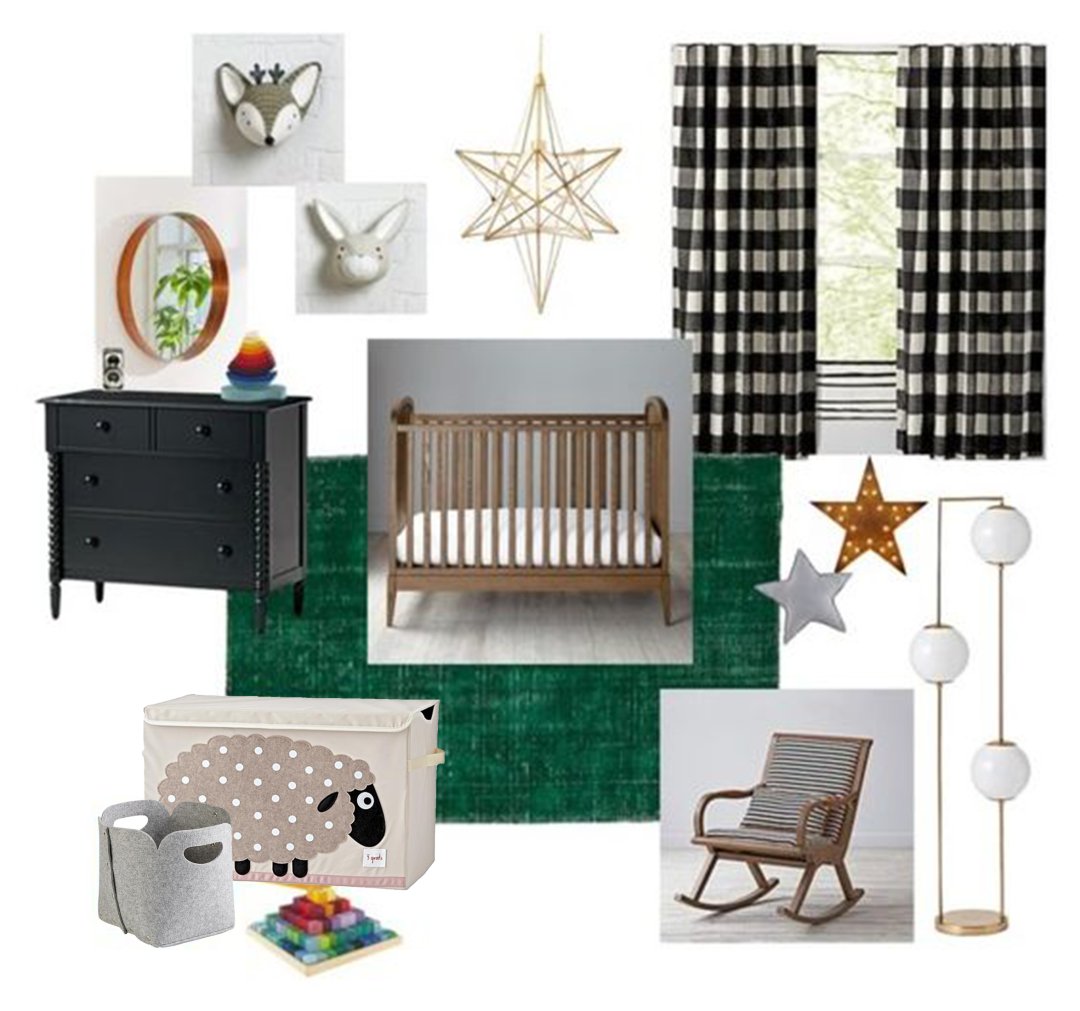
From the moment we find out that we are pregnant, we dream of creating the perfect nursery, a beautiful and inspiring space to watch our little one grow and learn. We immediately start to “pin” ideas, coordinate color schemes, and research nursery furniture.

Although nursery safety is incredibly important, the best rules and safety tips are not necessarily easy to find. Don’t worry, Land of Nod has you covered! Dr. Katie Friedman, a board certified pediatrician and co-founder of Forever Freckled, combines her love for home decor and her expertise in child safety to help achieve an adorable and safe nursery.
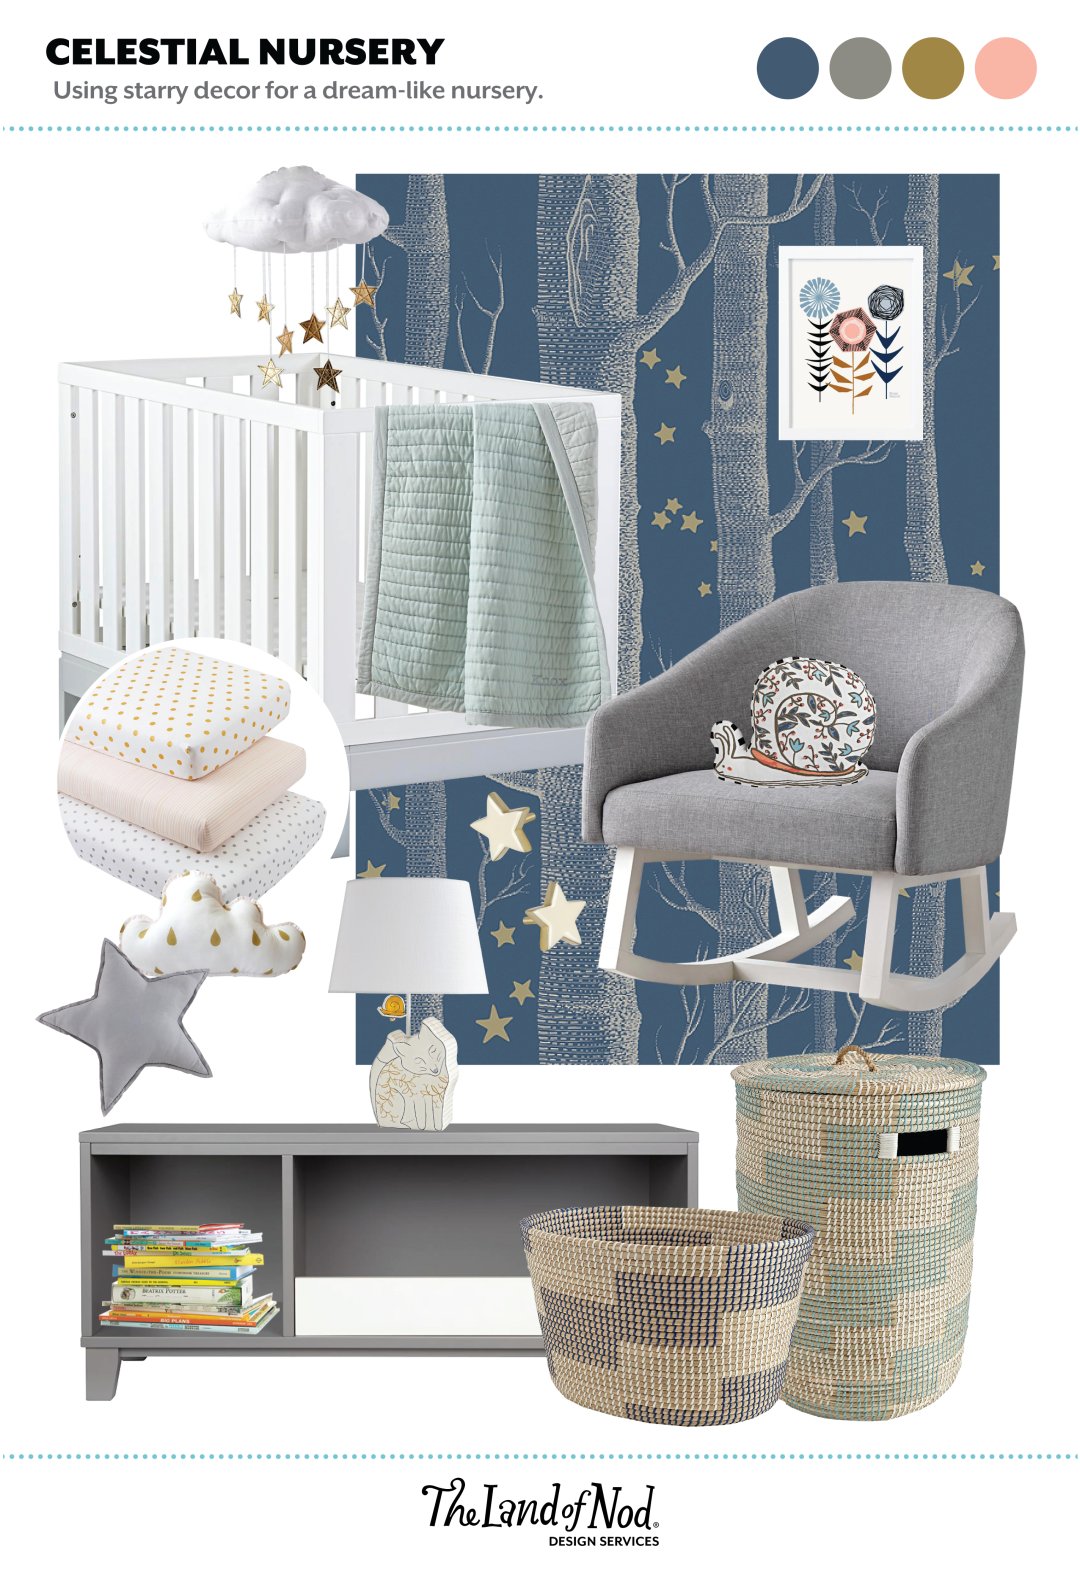
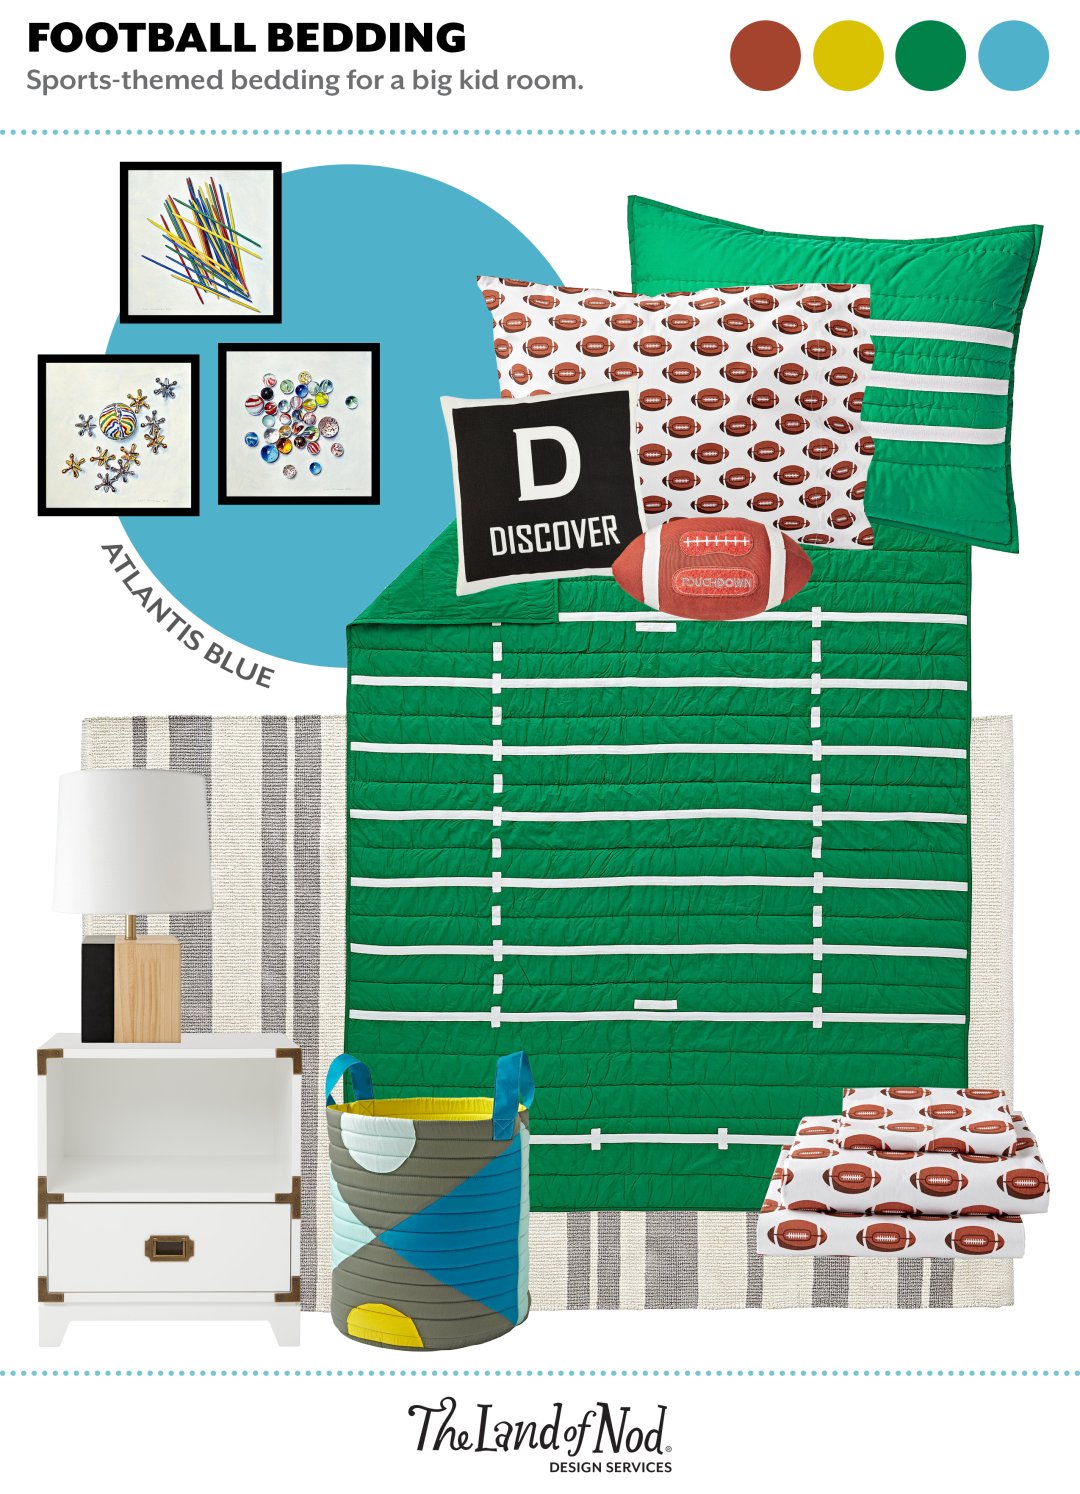
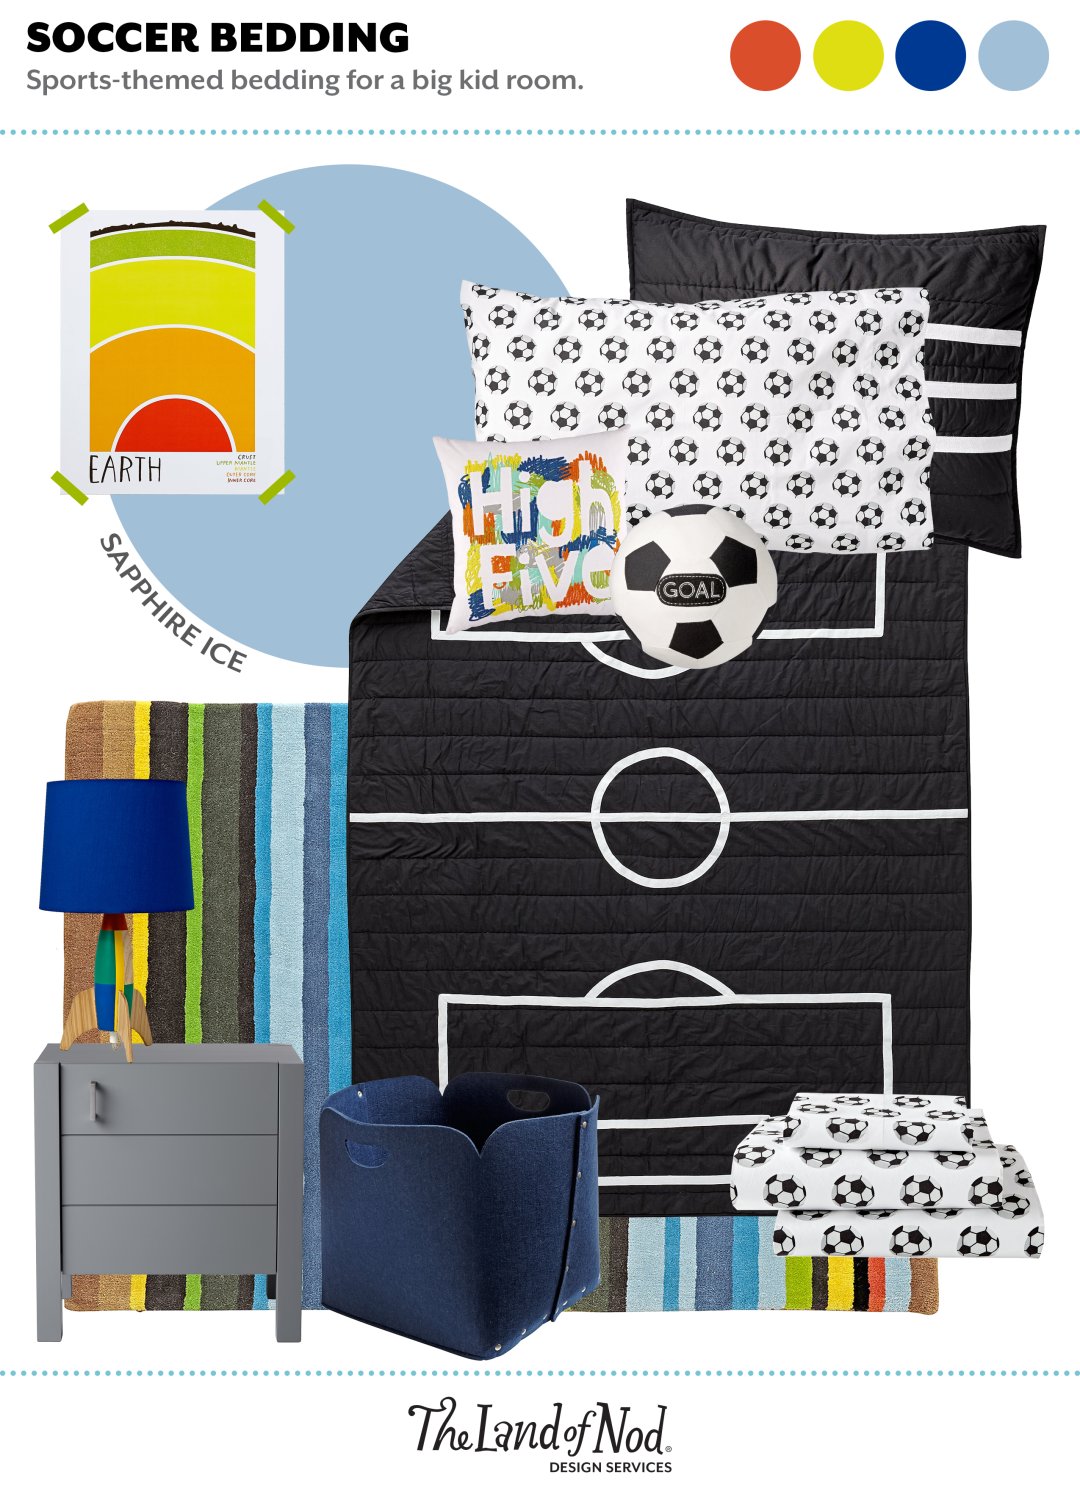
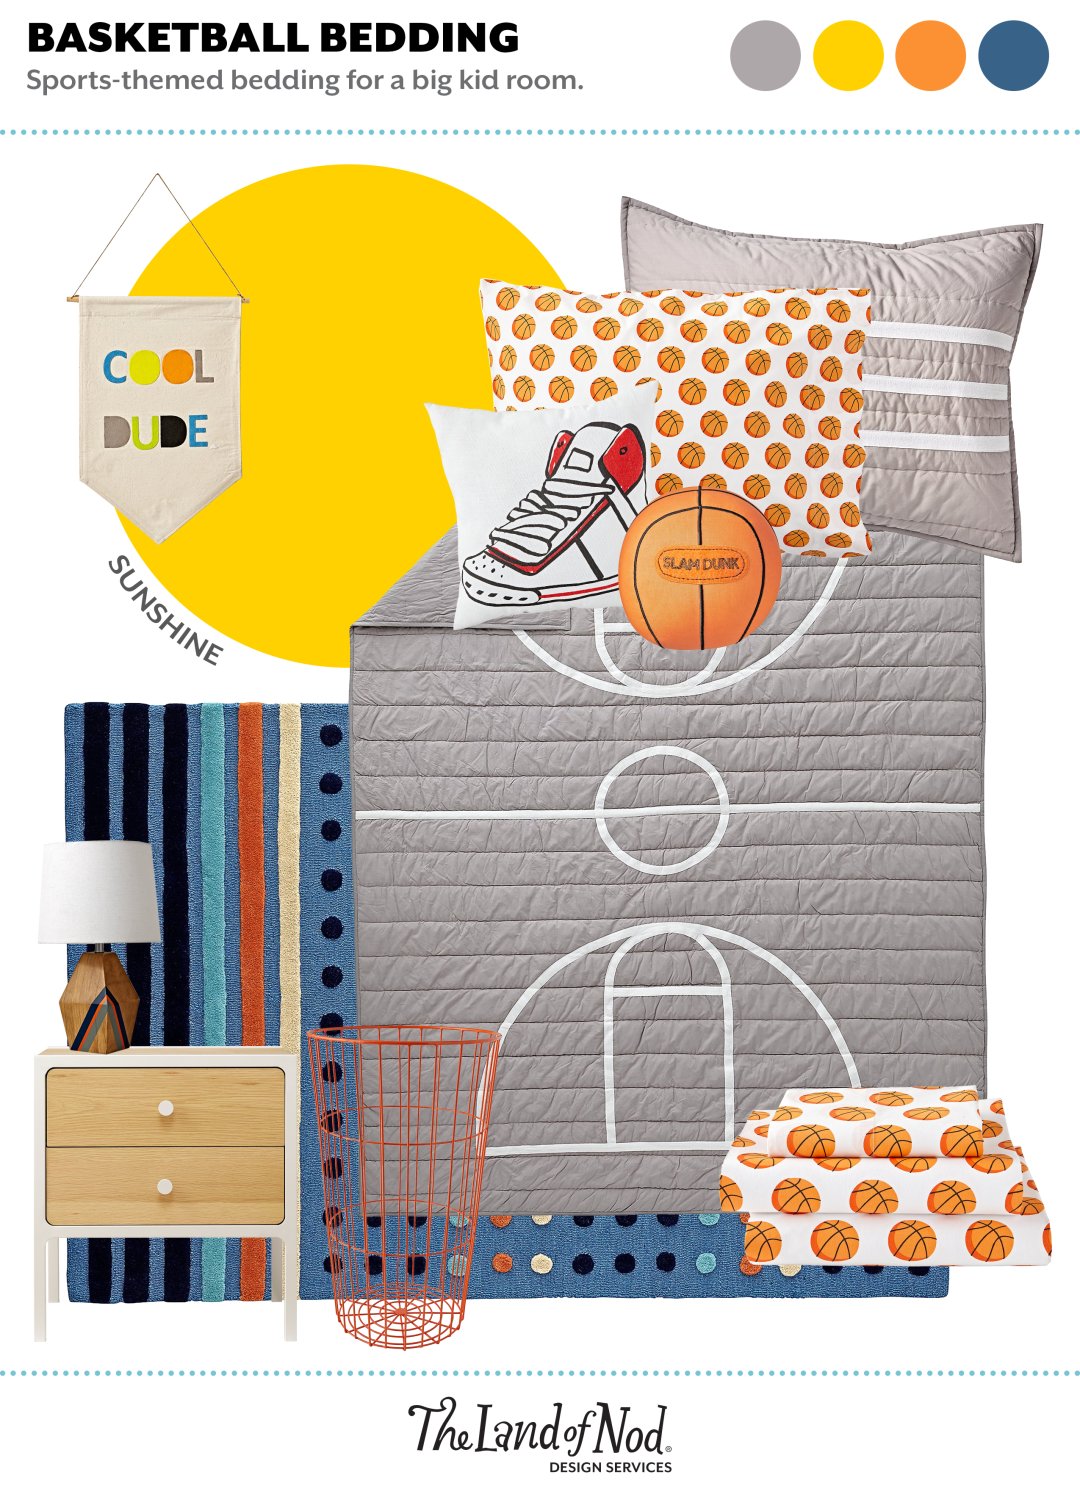
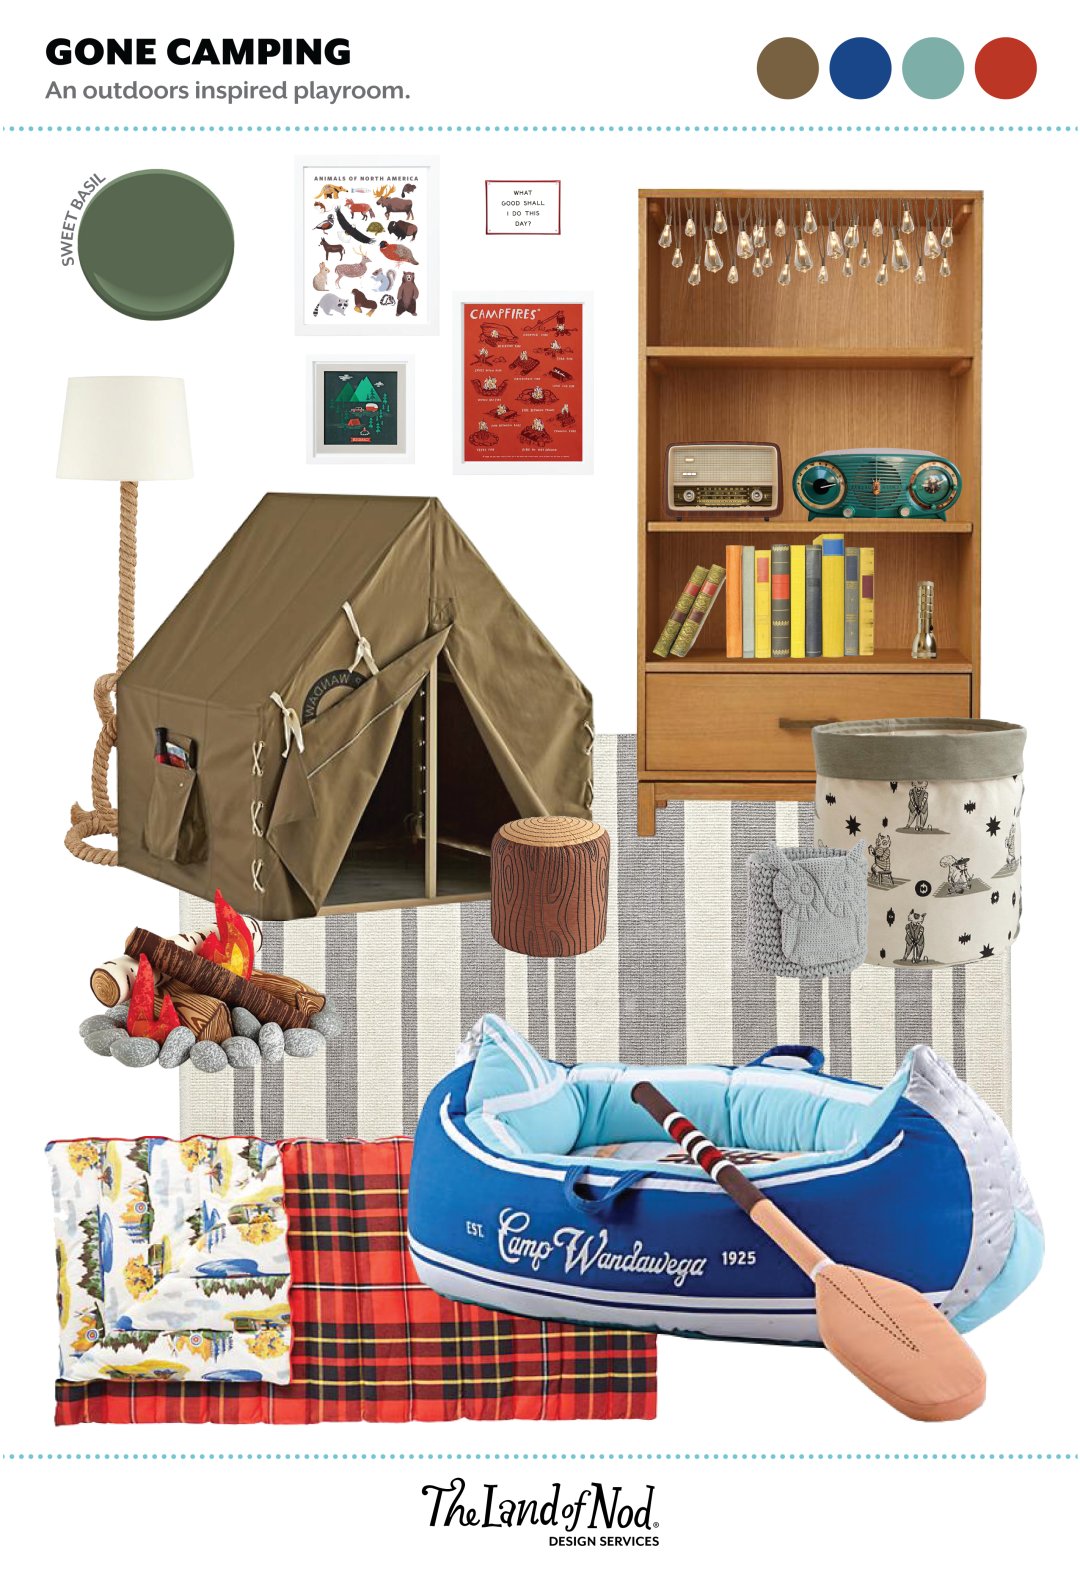
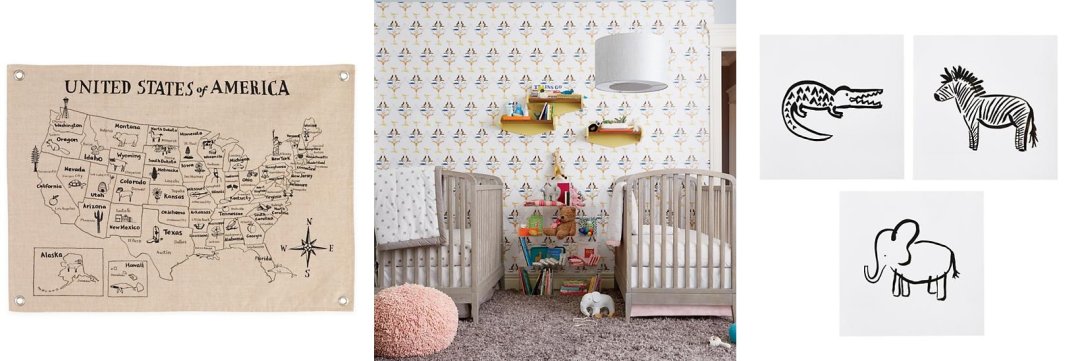
Nursery Safety Tips from a Pediatrician

Wall Art

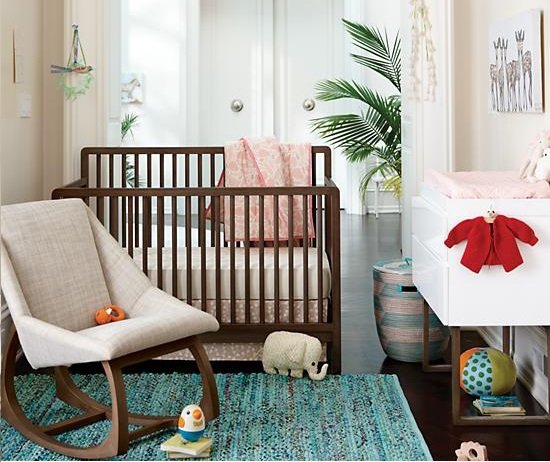
When picking out wall art, I suggest sticking to soft, lightweight art like banners. Obviously the last thing you want to think about is if it were to fall, but take some extra safety measures if including a heavier piece – like calling in a professional to hang, and placing items well out of reach – to keep your growing baby safe. In addition to wall art, I like to point out that baby mobiles are adorable, but they are designed for gazing, not touching; be sure to keep mobiles out of arms reach. Aside from wall décor, a great way to create a statement wall is to use paint, wallpaper, or wall decals.

Nursery Safety Tips from a Pediatrician

Doors and Windows.

For doors, it is important to install a baby gate or other device to prevent your growing toddler from opening the door and wandering out of the room. This is particularly important when you have a two-story house. To keep fingers away from door creases, prevent placement with easy to install door guards.

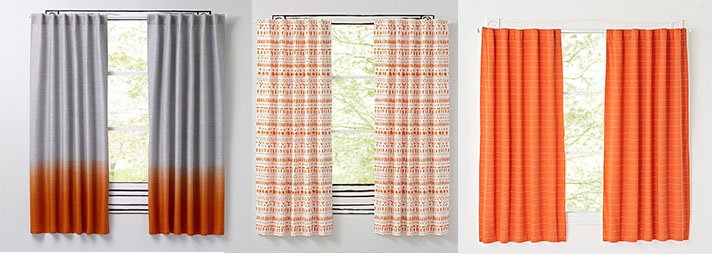
In the case of windows, I like to suggest using window coverings that do not have long exposed cords and ensure that all curtain hardware is either fixed directly to a wall stud or secured with the appropriate drywall anchors. It’s also a good idea to make sure the bottom of the curtains are out the reach of your curious infant.
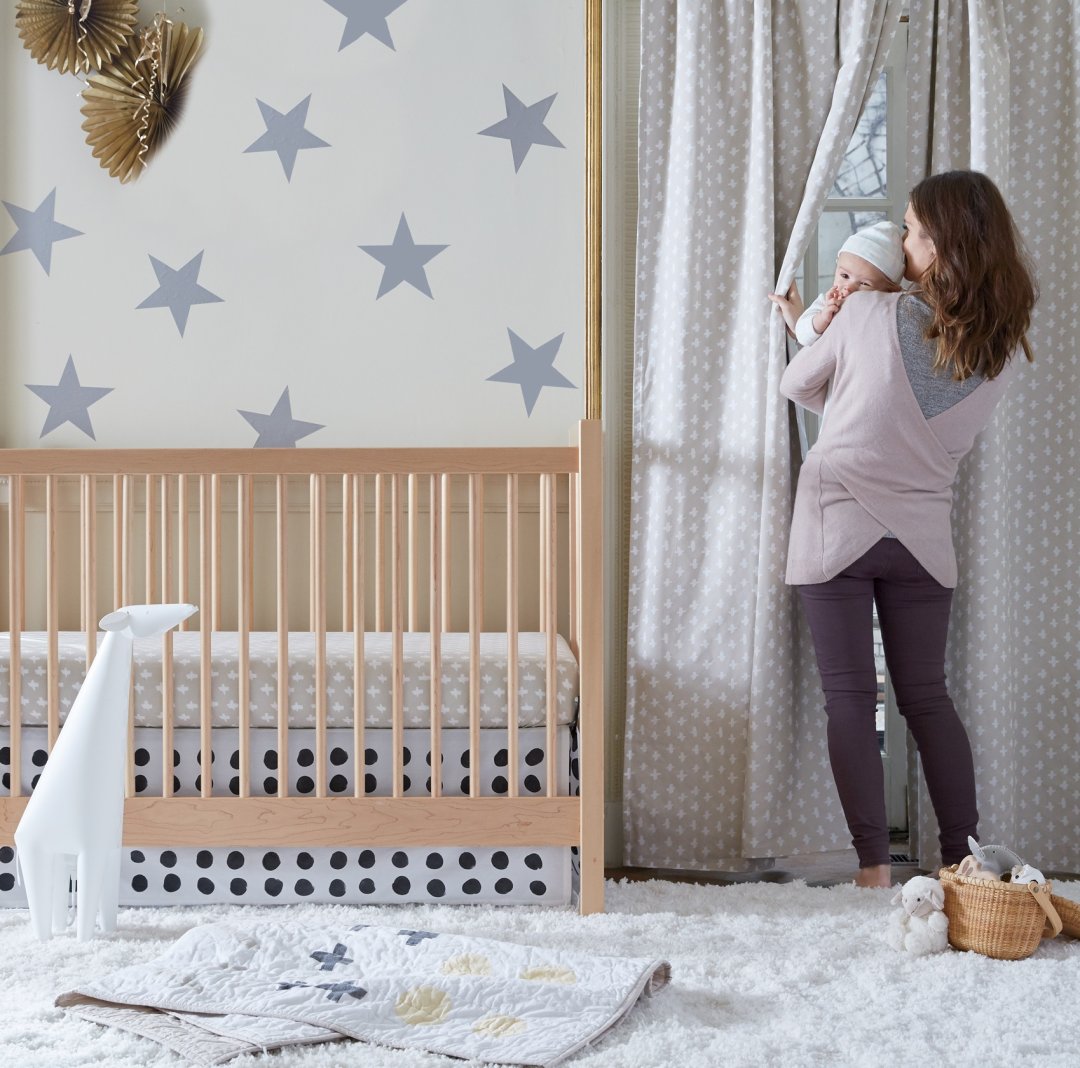
Nursery Safety Tips from a Pediatrician

Crib Safety.

Newborns sleep on average of 16 hours per day, so it is imperative that their sleeping environment is safe.

The American Board of Pediatrics recommends no bed bumpers, dolls, pillows, toys or sleep positioners in the crib while the baby sleeps. These all present risks and should never be in the crib while your infant is sleeping. Instead, it is recommended that the crib only has a fitted sheet and a one thin breathable blanket. Now, I know a lot of moms are uncomfortable with not having a bed bumper, as they feel it can prevent bruising and injury to their babies, however, the risk is much more severe than a bruise.

Nursery Safety Tips from a Pediatrician

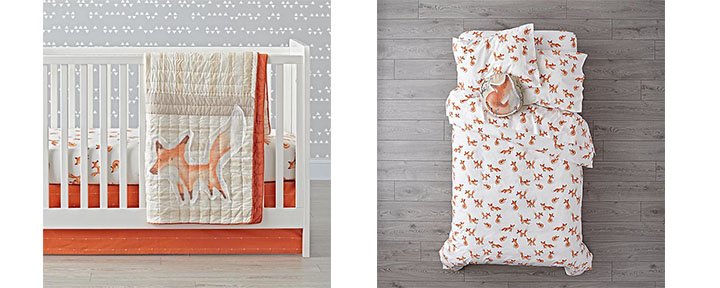
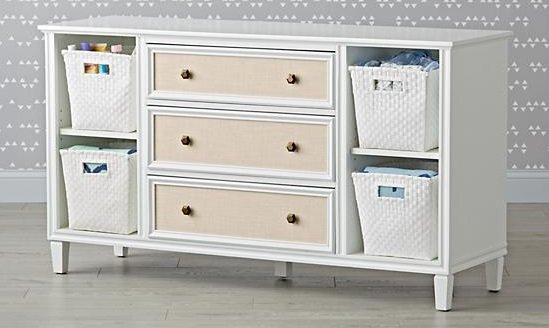
Furniture and Organization.

Please make sure that all furniture is anchored to the ground or a wall. As toddlers start to explore and become more independent, they love to start climbing on furniture so it is important that you eliminate the possibility of a furniture piece falling. An easy way to deter interest in climbing is to put toys close to the ground. Soft storage bins placed on the floor and toy boxes with child safe closure eliminates the child’s need to grab something up high.

I hope these tips and decor ideas help you in your journey to create an adorable and safe nursery.

Nursery Safety Tips from a Pediatrician

My name is Dr. Katie Friedman  and I am a board certified pediatrician, wife, mother of two, and a sister to my three siblings.  Along with my sisters (Alison, a veterinarian and Carrie, a fashion stylist), I am a co-founder of Forever Freckled, a website dedicated to helping people with pets, children, and everyday lifestyle.  It has been an incredible journey turning my passion for children into a career and nothing brings me more joy than to help children and their parents with wellness and healthy living.  For wellness and health tips for children, pets, and other lifestyle advice, please follow our journey on www.foreverfreckled.com.
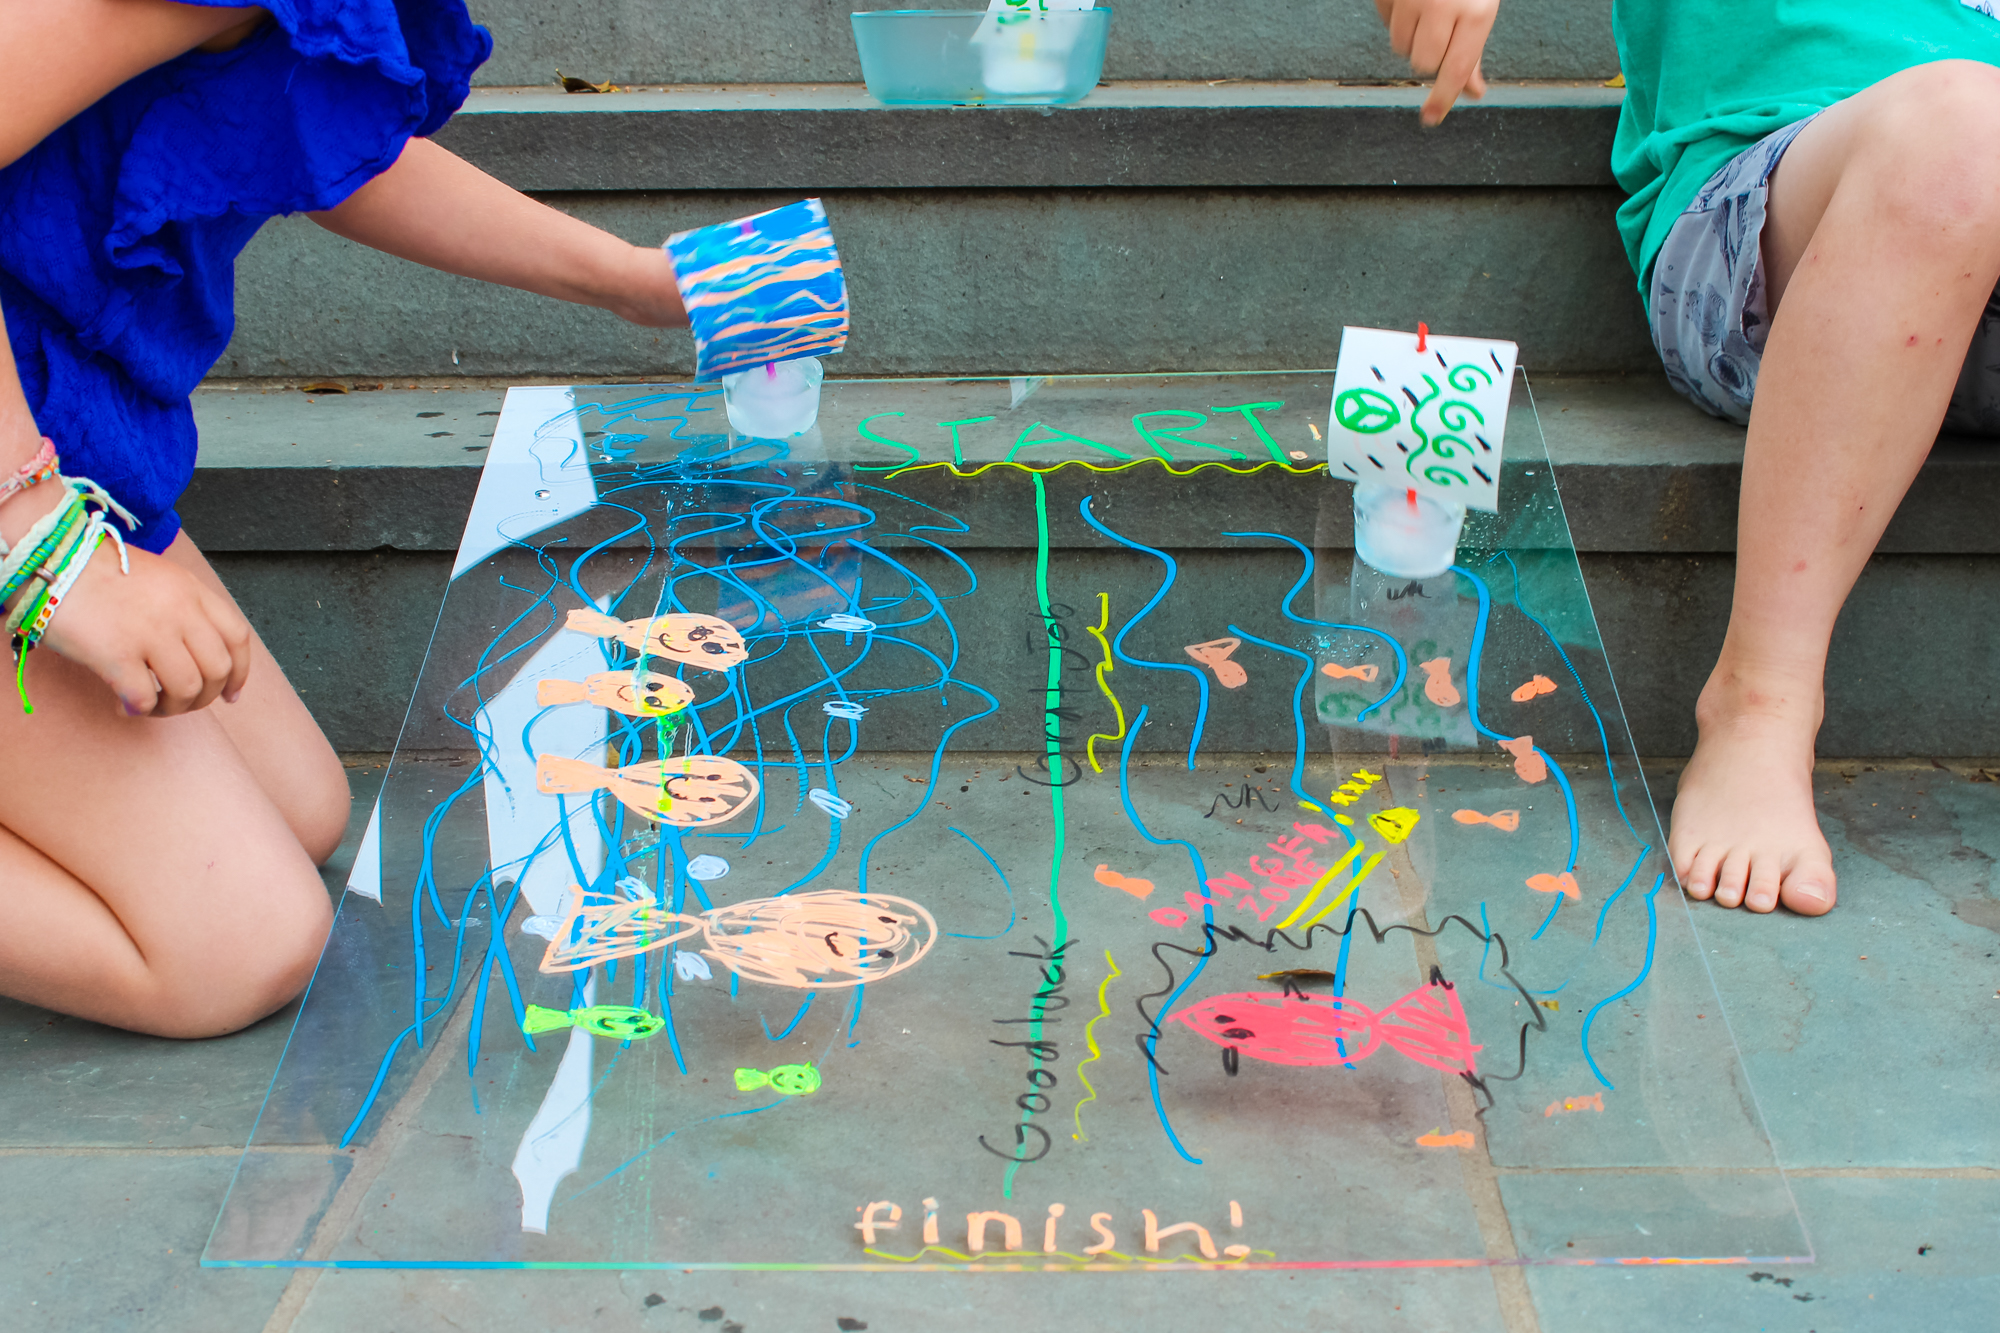
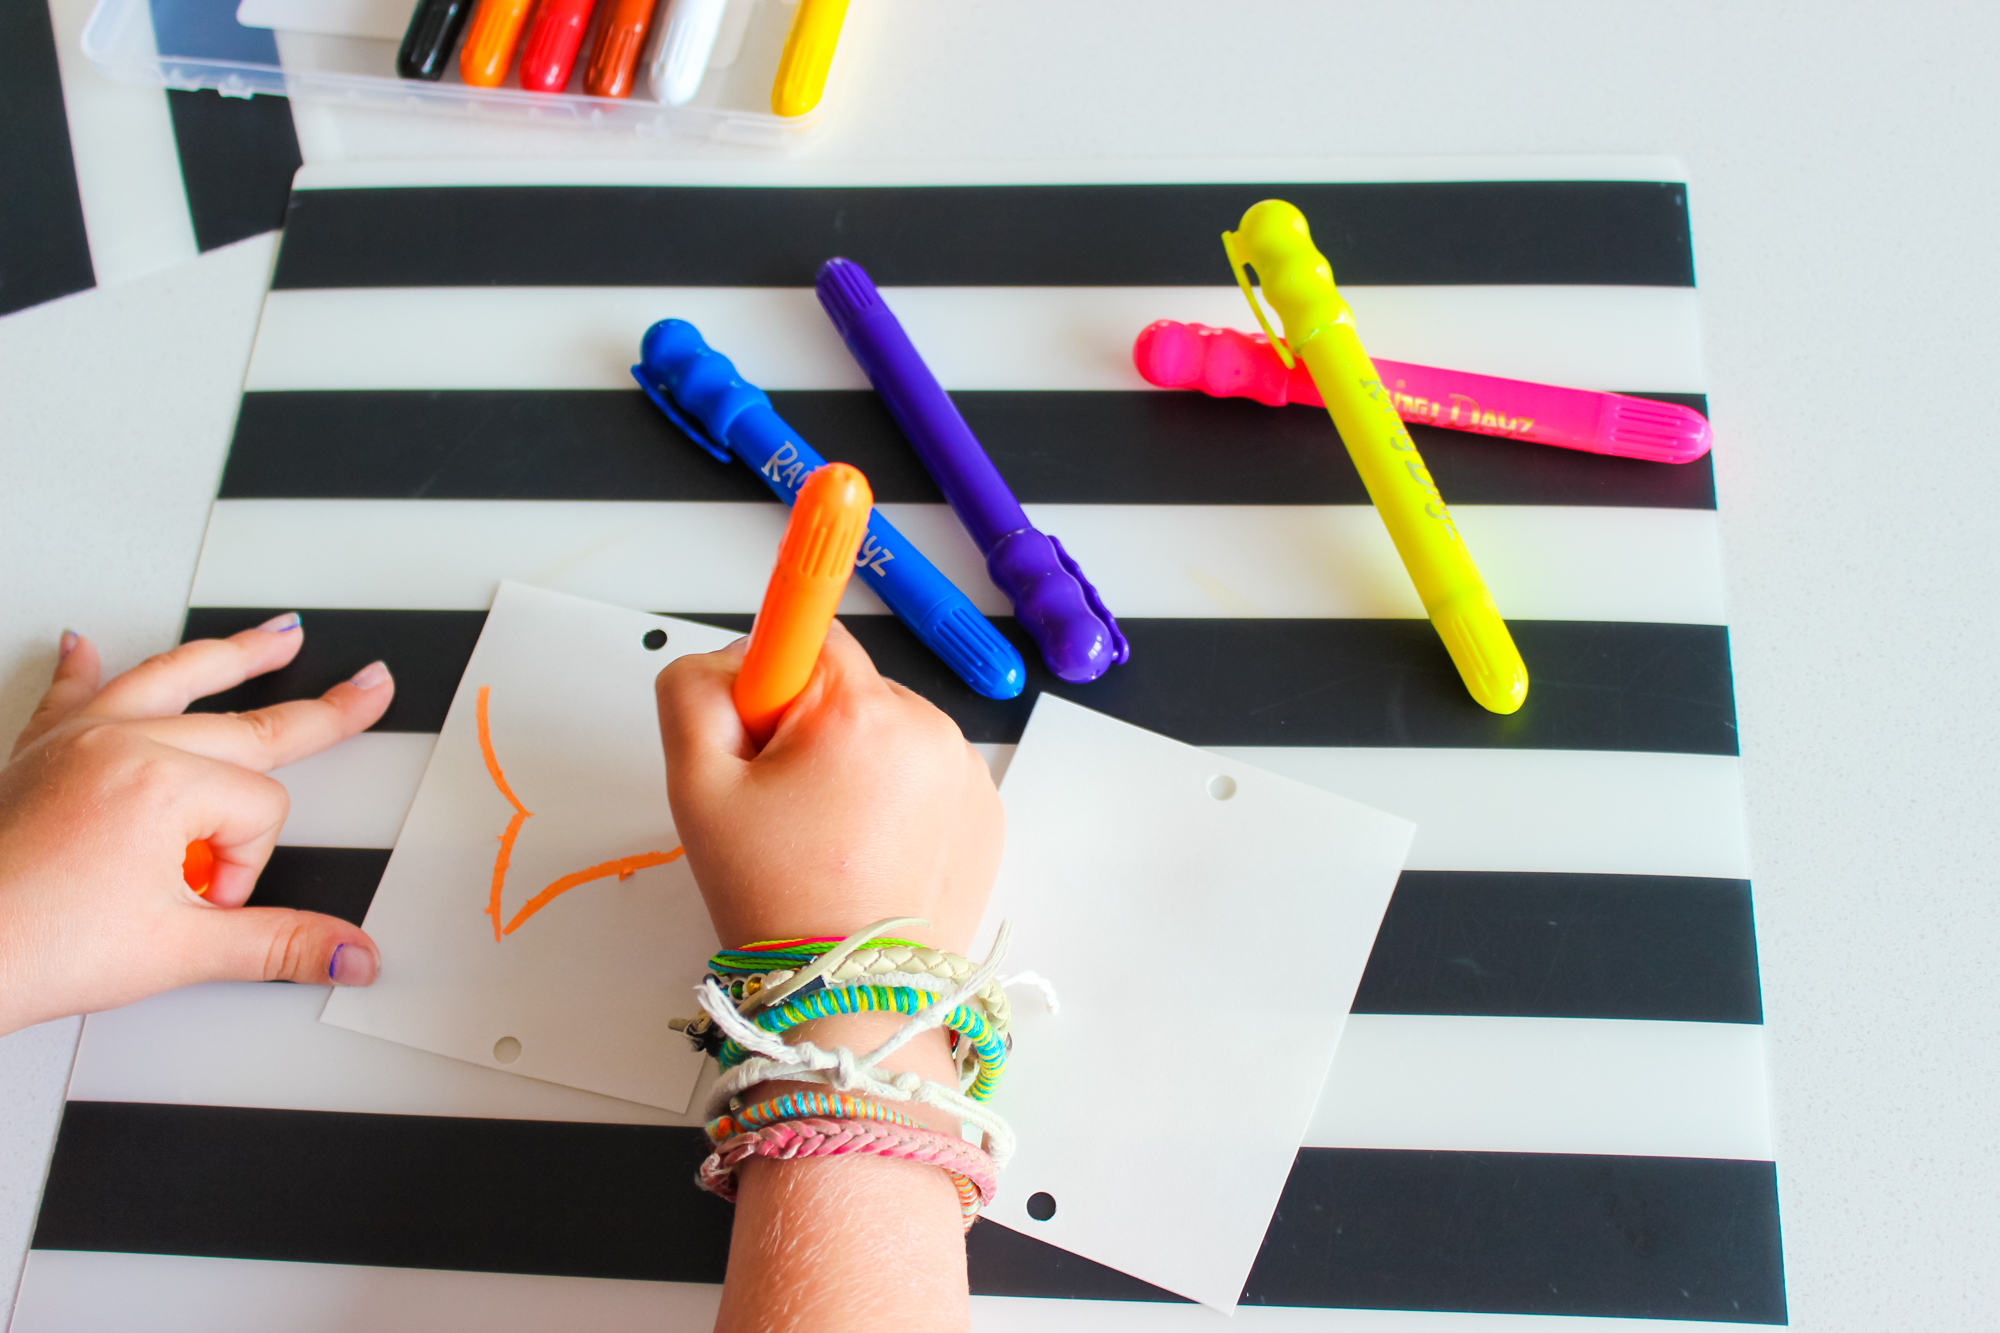
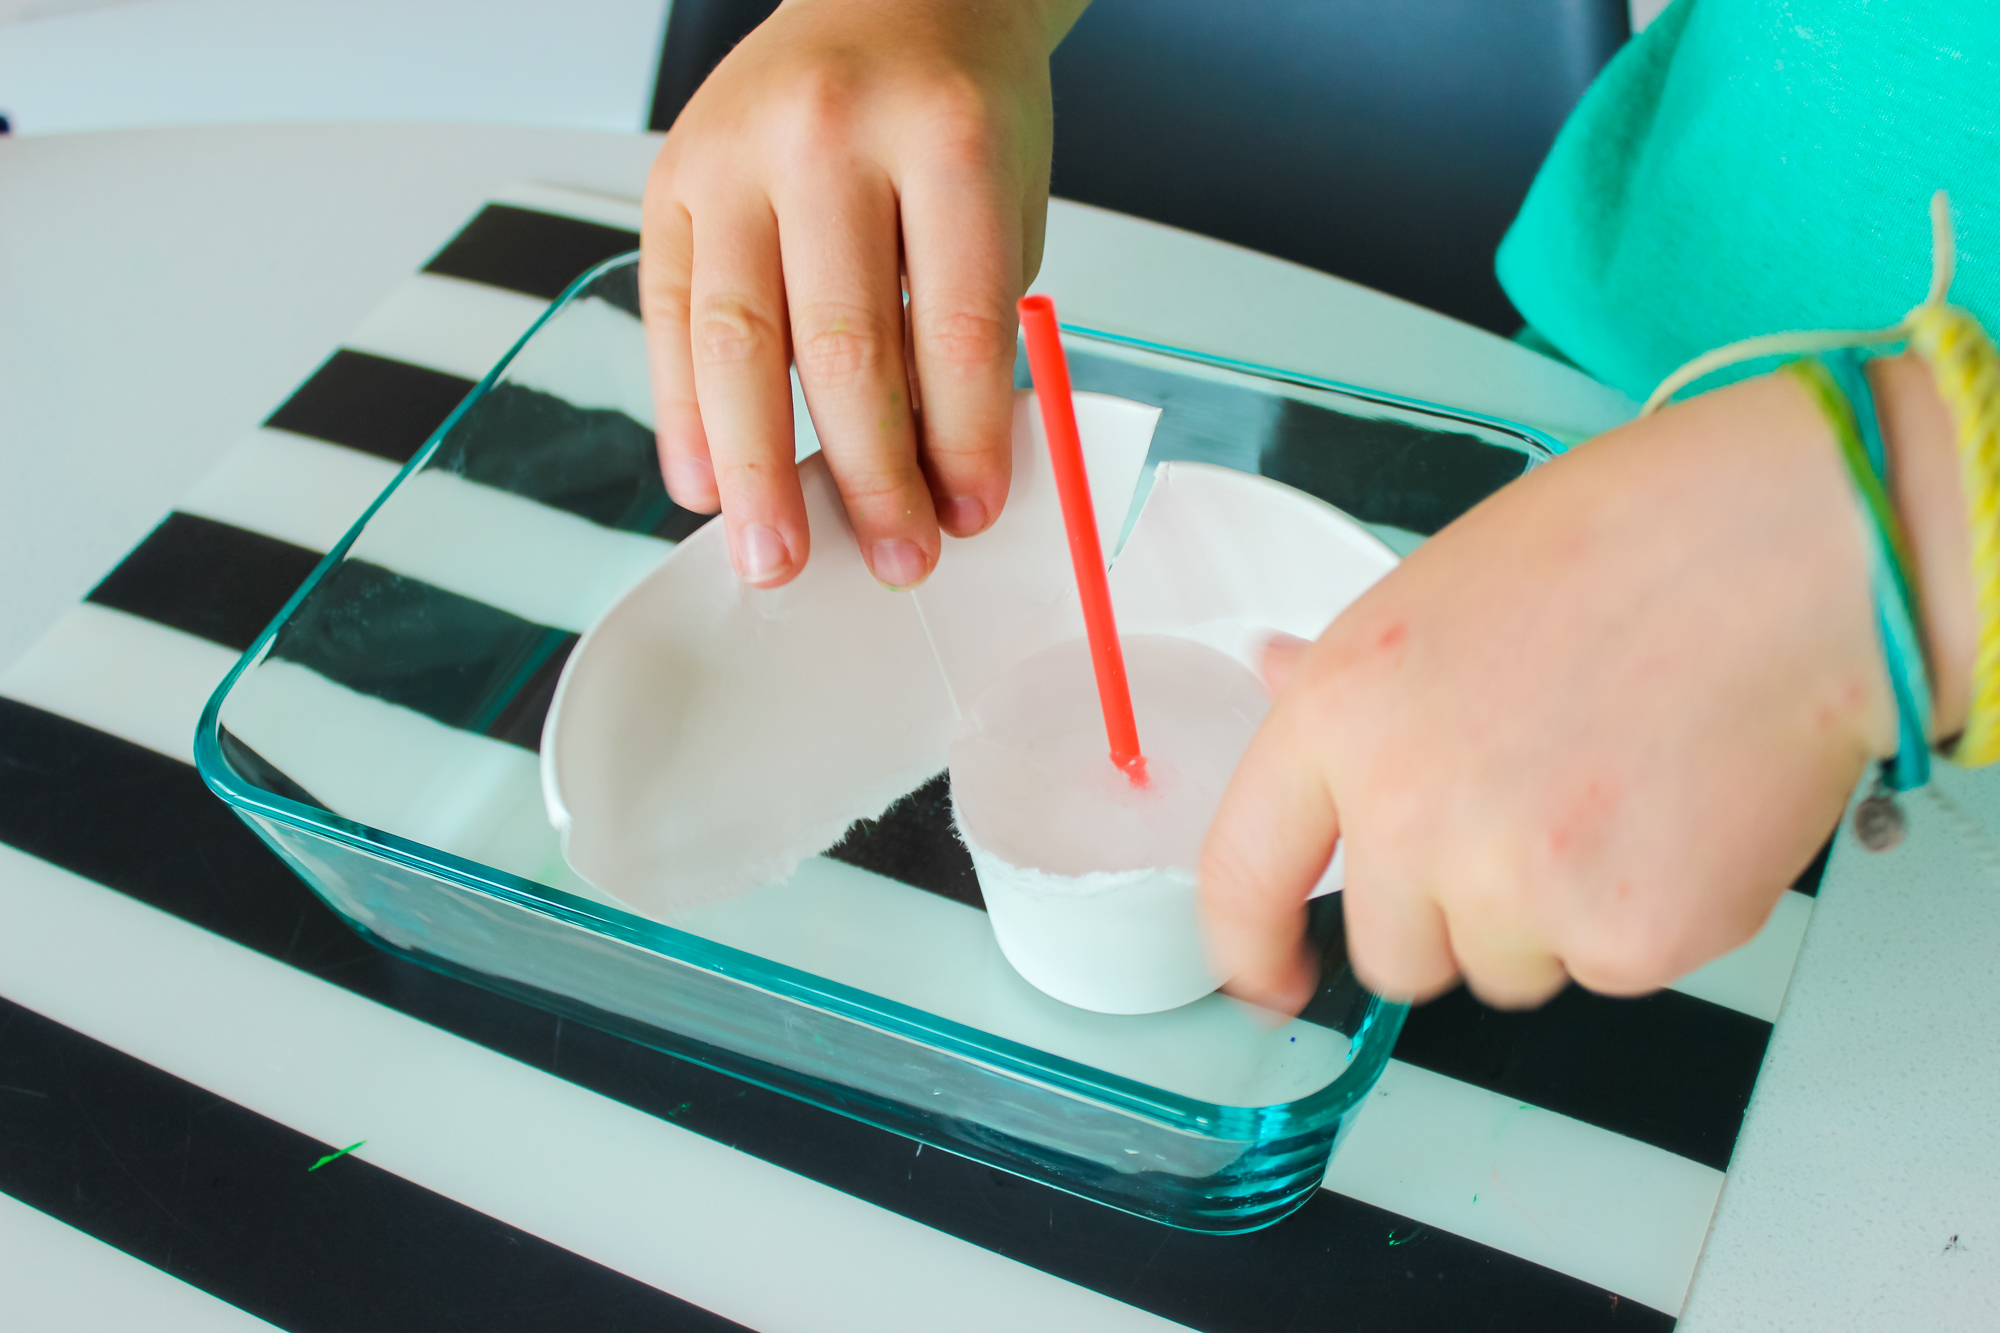
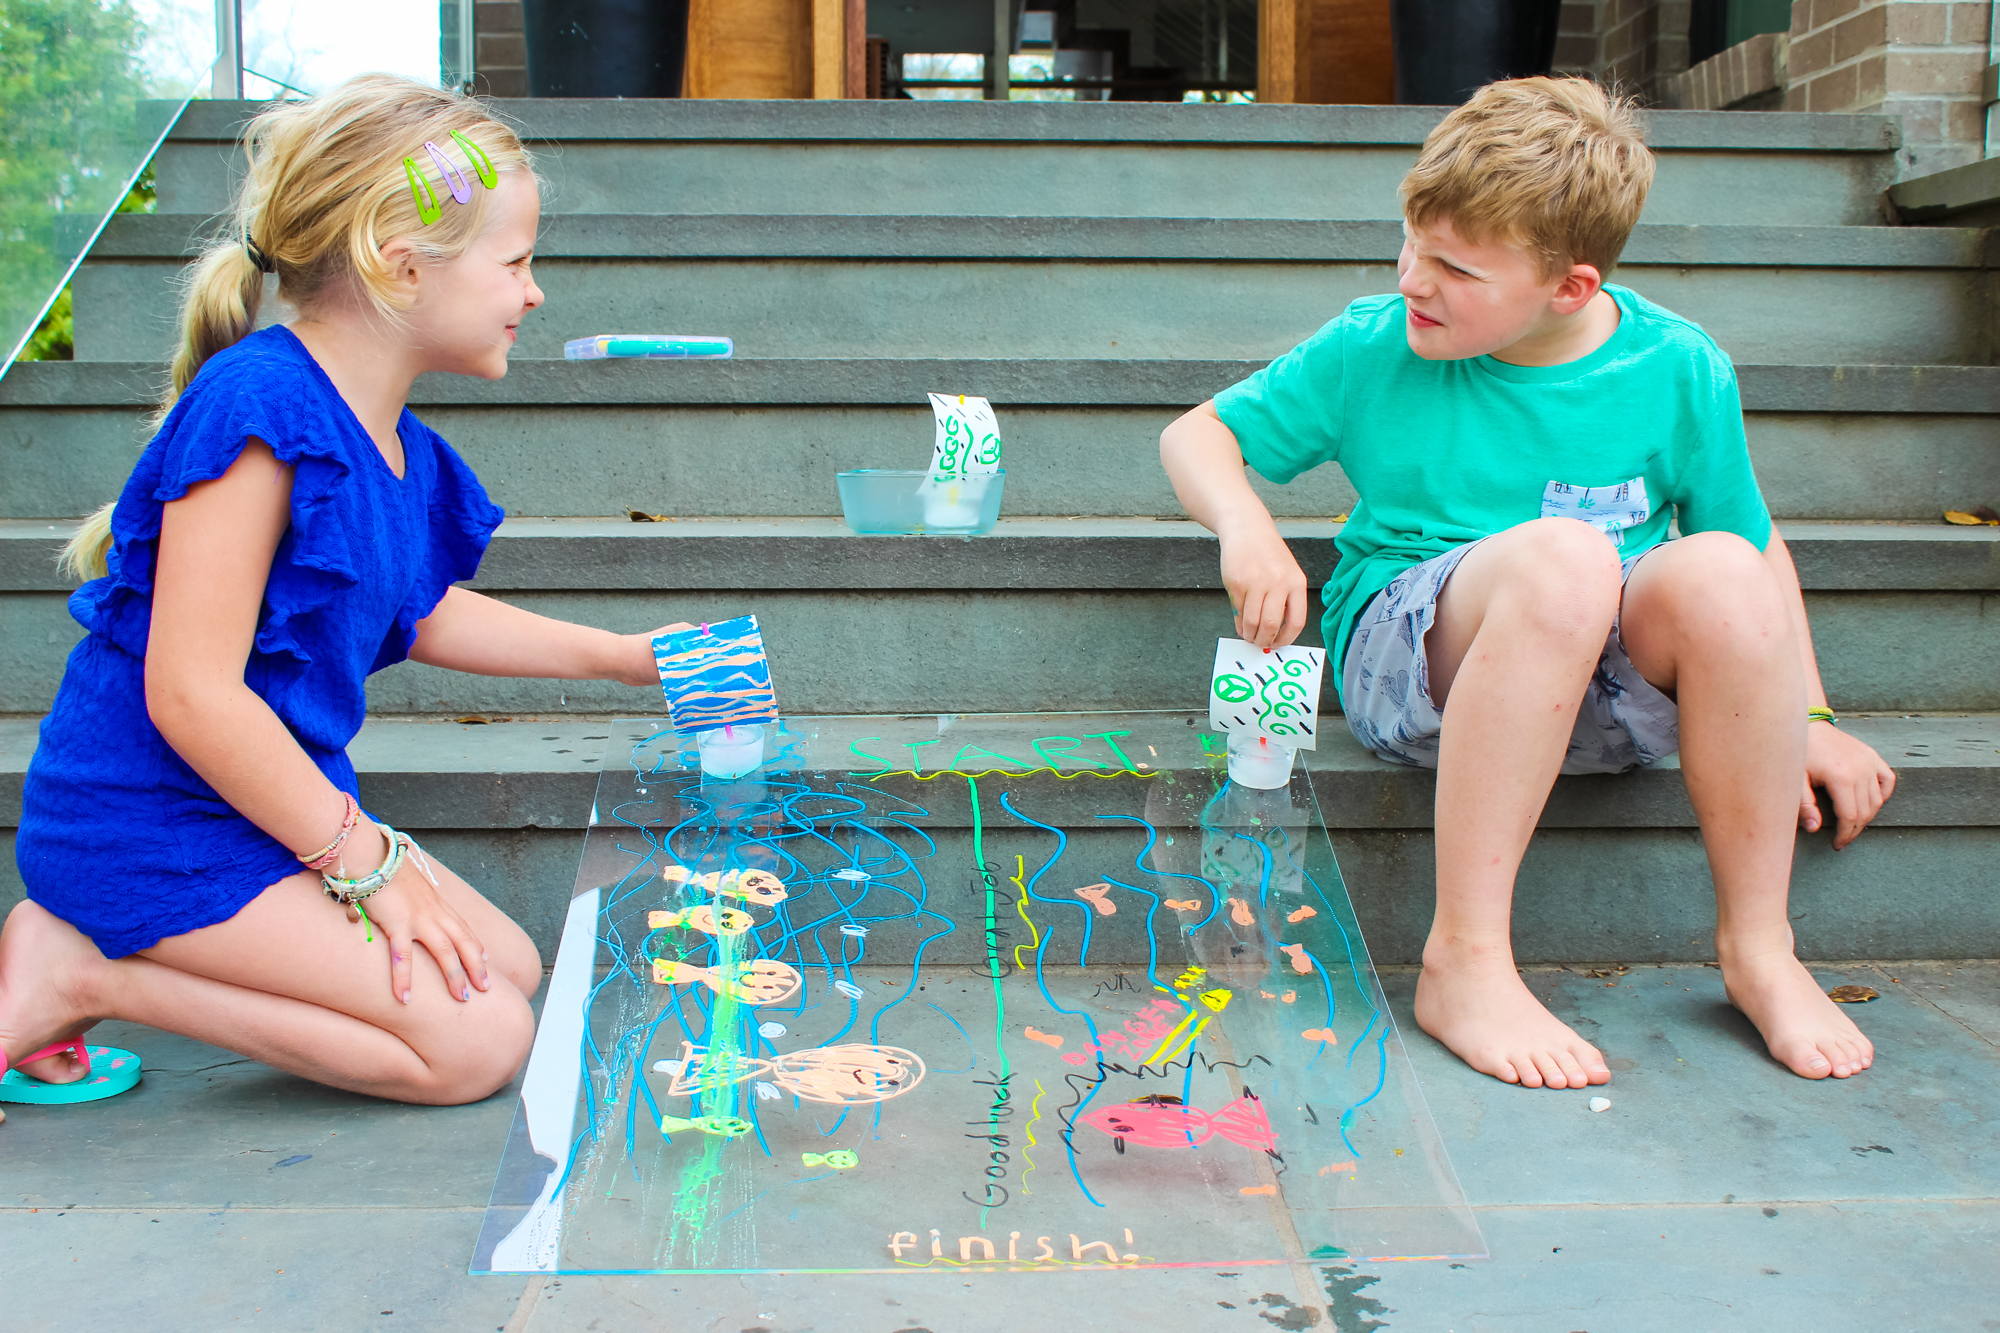
Free Printable Coloring Page: Mealtime Favorites

March 30, 2017

Nod Fun Pages designed by Michelle Romo

Make your meal prep a little less chaotic and preoccupy your kiddo with our printable coloring pages. We can’t guarantee that it will keep them busy for the whole duration it takes you to whip up dinner, but it will give them some time to calm down, unplug and, in the case of our taco & burger below, it will get them excited for chow-time!

Download the Mealtime Favorites coloring page and share a pic of your little one with the finished  product on Instagram (use hashtag #landofnod) or our Facebook page. We may feature your child’s masterpiece!

Free Printable Coloring Page: Mealtime Favorites

Looking for things to do with your little one?

Michelle Romo is our newest Nod illustrator, she’s a self-taught illustrator and designer fueled by cookies and naps. Her influences include Mid-Century, Japanese and Scandinavian design, along with pretty much anything cute. When she isn’t working she spends her time eating good food, hugging her friends, playing video games and crafting.

PRETEND PLAY + A TREAT YOU’LL WANT S’MORE OF

March 28, 2017

Post by Lunches + Littles

Lately I’ve been trying to be more purposeful in the types of activities that my children are engaging in. I have really been noticing how much my oldest son has grown over the last year, and I’m starting to recognize even more how important it can be to encourage my babes to engage in all types of play, especially pretend play.

All smiles, stories and fun; no electronic toys or apps needed; just their imaginations!


Now, I am not opposed to technology, in fact I believe the technology that our babes are growing up with can be a welcomed break for busy (and often weary!) parents. But when I think back to when I was younger, much of my time was spent creating imaginary friends, playing outside, building, and dreaming up scenarios that kept me busy for hours! Can’t you relate?

In our home, the times when we really see our babe’s imaginations soar are the times when my husband and I are actively encouraging open-ended play; the days when screen time is non-existent.

PRETEND PLAY + A TREAT YOU’LL WANT S’MORE OF


Open-ended play allows your little one to create their own narrative, and make their own fun. For example, this past weekend we went “camping”… again! It didn’t matter that the sun was shining and that it was mid-morning, our son was adamant it was night time and that he had to build a fire so that we could see in the dark and cook our snacks! …  I love being able to spend time with them doing just that, even if it means I am camping out at 9:00 a.m. and pretending to eat eggs one minute and roasting a marshmallow alongside my babes the next!

PRETEND PLAY + A TREAT YOU’LL WANT S’MORE OF

Sure, pretend play can take a little more intentional parenting and time, but my little one’s stories and smiles are so worth it and, pretend play not only stimulates the imagination, it is also a great learning opportunity and puts my children in control!

If all of this camping talk has got you craving a little campfire-inspired snack, scroll down for a kid-approved chocolate treat that your little ones will definitely want s’more of!

+++++++++++++++++++++++++++++++++++++++++++++++++++++++++++++++++++++++++++++++++++

S’mores Chocolate Thins Recipe

Ingredients

  • 2 Cups Milk Chocolate Chips
  • 1 Cup White Chocolate Chips
  • 1 Cup Mini Marshmallows, divided
  • 3-5 Graham Crackers
  • 1 -1/2 Hershey’s Chocolate Bar(s)
  • 1 Tbsp Mini Milk Chocolate Chips (optional)

PRETEND PLAY + A TREAT YOU’LL WANT S’MORE OF

Directions

  1. Line a shallow sheet pan with parchment paper and set aside. (I used an 11 x 17 inch pan).
  2. Break graham crackers into various sized pieces, and some crushed bits. Do the same with the chocolate bar(s); breaking into small
    pieces. Set both aside.
  3. Place white chocolate chips in a medium bowl and microwave for 30 seconds, then stir. Continue to microwave in 30 second
    intervals, stirring each time until smooth.
  4. While white chocolate chips are melting, take 1/4 of the mini marshmallows and melt on stove-top over low heat. Once melted,
    pour marshmallows into melted white chocolate and stir together until well-combined. Set aside.
  5. Next, place the semi-sweet chocolate chips in a medium bowl and microwave for 30 seconds, then stir. Continue to microwave
    in 30 second intervals, stirring each time, until smooth.
  6. Pour milk chocolate mixture onto prepared sheet pan, and smooth out with a spatula. Next, drizzle the marshmallow/ white
    chocolate mixture over the milk chocolate, using a spatula or toothpick to swirl throughout.
  7.  Sprinkle with broken graham cracker bits, chocolate bar pieces and the remaining mini marshmallows. Also sprinkle with mini milk
    chocolate chips, if desired (optional).
  8. Freeze for approximately 2-3 hours, or until chocolate is hard. Then remove from freezer, and break into pieces.
  9. If making in an 11 x 17 inch pan, the end results will be very thin chocolate pieces, which are perfect for giving your little ones just
    a tiny treat! Yum!

PRETEND PLAY + A TREAT YOU’LL WANT S’MORE OF

Lunches + Littles focuses on quick, healthy and fun meal options for little ones. One of the goals of Lunches + Littles is to share practical tips and tricks on how to make meals fun, all the while keeping things simple. A lover of colorful plates, and an advocate for getting kids in the kitchen, Lunches + Littles is also a great resource for parents of picky eaters, parents looking for healthy family and toddler recipes and those mamas (dads too!) who are short on time. A mantra of sorts: Making meals fun doesn’t have to be hard! With 3 little ones (3 and under) it can’t be! Follow @lunchesandlittles for all of the above… And more!

Green & Blue Kids Bedroom

March 27, 2017

Post by Shawna, Home Stylist from the Land of Nod’s Design Services Team

​Have you heard? Pantone’s color of the year is Greenery! Described as nature’s neutral,​ ​Greenery is a vibrant shade that evokes a sense of renewal and the fresh smells of grass in​ ​spring.​ It’s a very versatile color that can blend into color palettes or be the centerpiece. Here, we picked Pantone’s suggested color pairing, Fathomless, to inspire a space in rich,​ ​fresh greens, enhanced with sapphire blues and ocean-like aqua.​

This space is perfect for your older boy, who is looking for something a bit more sophisticated. Rejuvenate your walls with our charming paper mache dino head​ and our Under the Sea wall art​. With these pieces, you’re well on your way to creating a​ ​lively, land-meets- sea space for your little one!

Post by Shawna, Home Stylist from The Land of Nod’s Design Services Team. Our Design Services team offers free one-on-one design advice, mood boards and space planning. You have a room to decorate? They’d love to hear from you. Visit The Land of Nod’s Design Services page to get started today.

Candy Free Easter Basket Gifts

March 23, 2017

Post by Doreen Corrigan

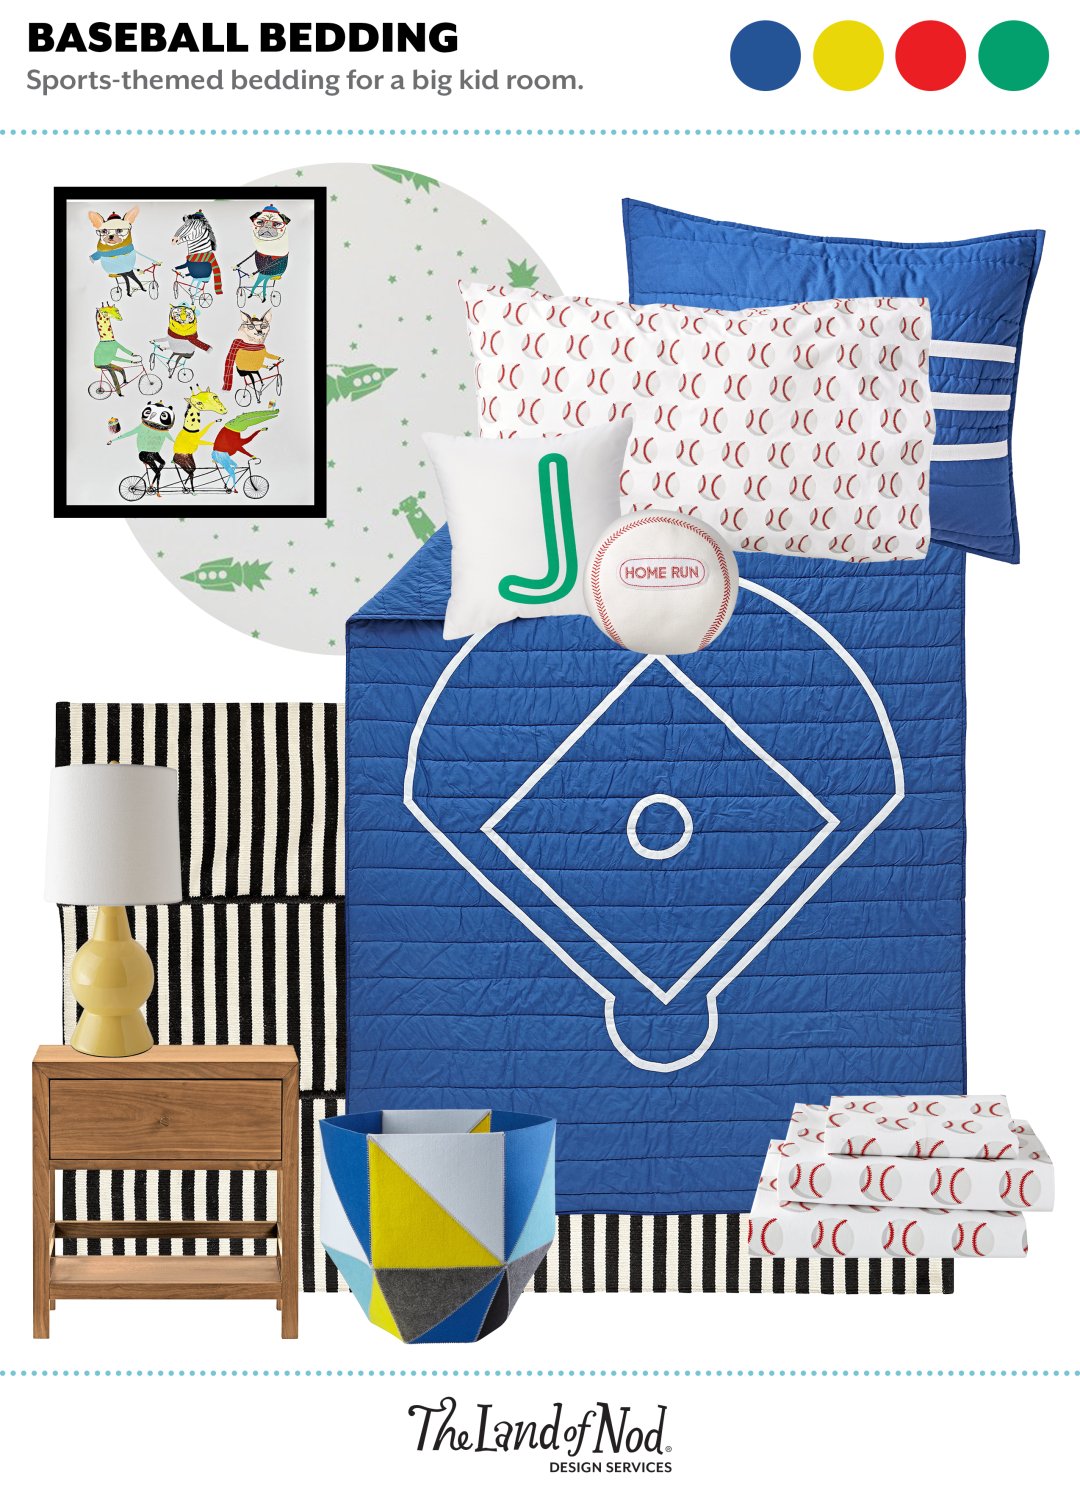
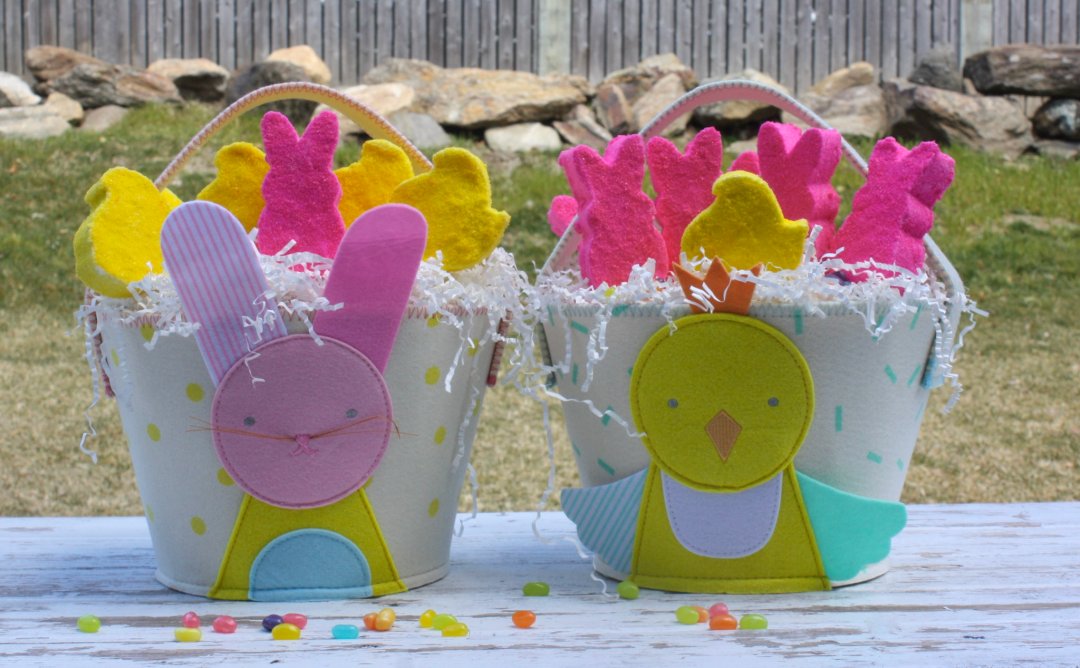
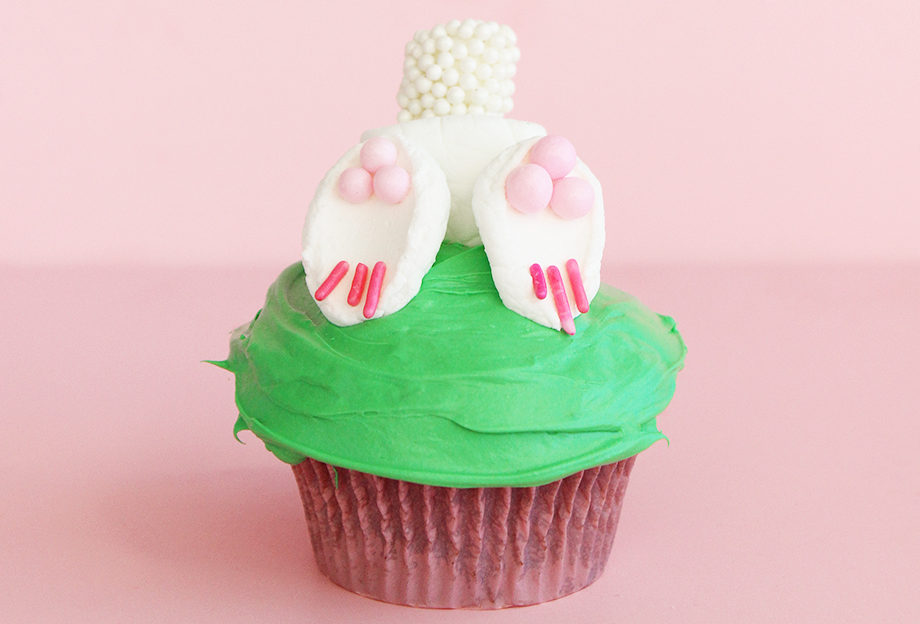
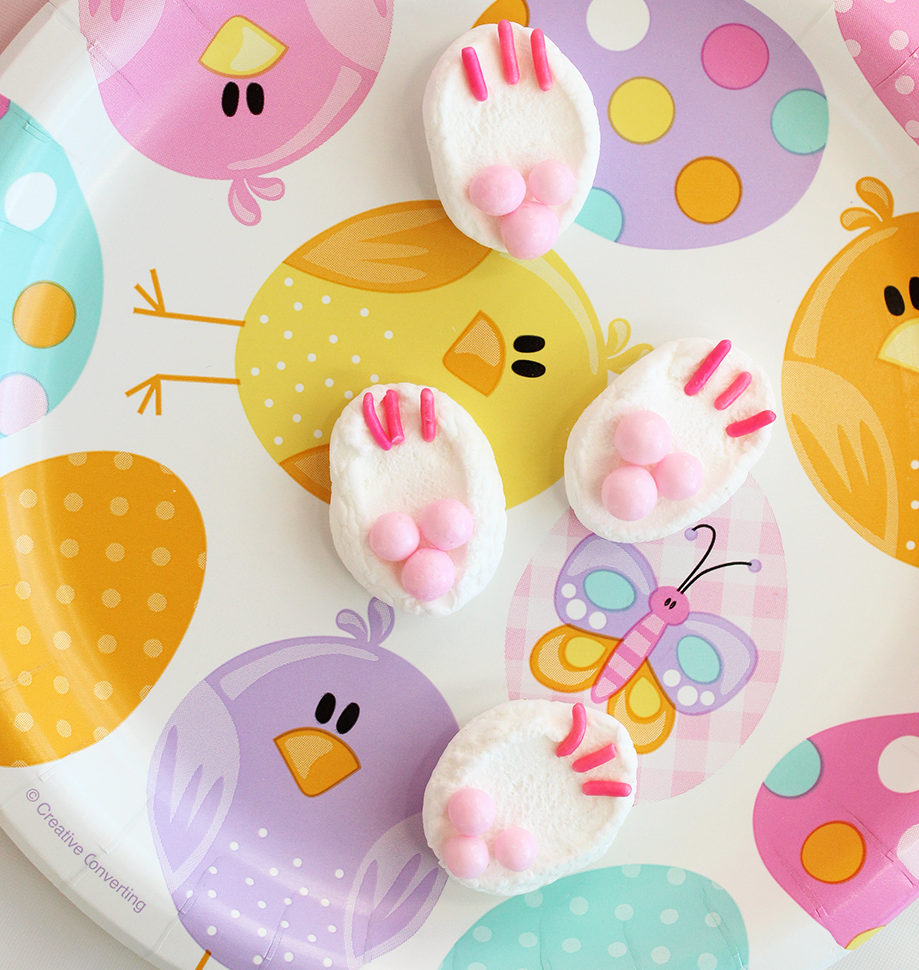
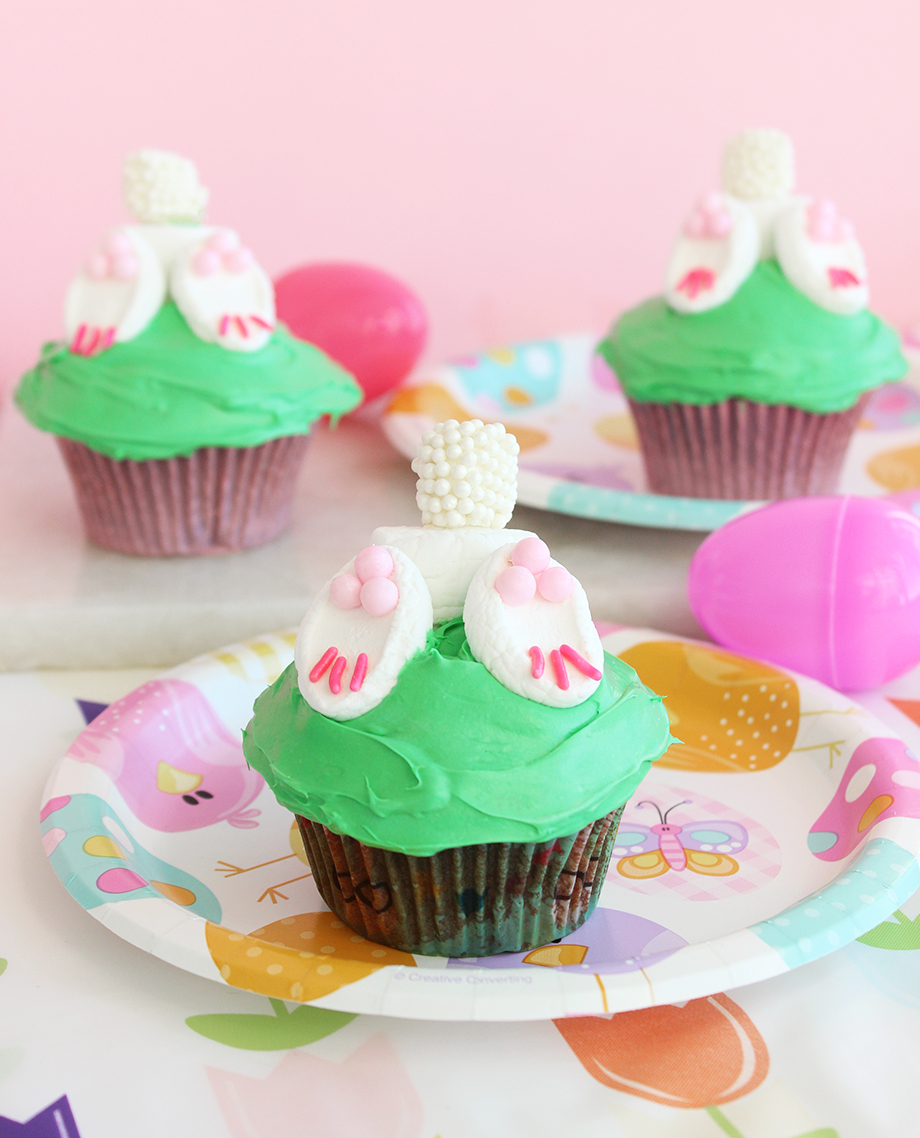
Here comes Peter Cottontail, hoppin’ down the bunny trail, hippity, hoppity, Easter’s on its way!

Christmas wasn’t over but two weeks and our little ones were already asking when the Easter bunny would be making his beloved appearance. Easter is such a special time of year as Spring is in the air, tulips and greenery start peeking out after the long winter months, and we finally get to venture outside enjoying the outdoors more.

Our children love all our family Easter traditions especially coloring eggs and going on a BIG egg hunt. One tradition that never seems to fail is the mounds of candy we all consume from jelly beans to Reese’s Peanut Butter cup eggs (my fav)! This year we won’t be completely candy-free but I want to save the sugar and focus on filling their Easter baskets with items they can actually use.

Here are five easy tips for Easter basket essentials that are foolproof for any age.

Arts and Crafts

Chalk, crayons, markers, colored pencils are always my go-to. After being inside all winter our craft supplies can use an update and by Spring the kids are begging to go outside and chalk away!

Books

Easter books are always fun but try a new book based on your child’s age. There are SO many amazing books out now and they double as decor in your little one’s room.

Games

We are learning our letters and numbers over here so The Land of Nod’s colorful flash cards are in our baskets. The beautiful images make it fun for the kids. We love games like Zingo, Memory, or puzzles that the whole family can enjoy.

Bath Toys

Who doesn’t love to spend time soaking in the tub? Here are a few toys your kiddos will love.

Outdoor Play

It’s hard to believe but pretty soon we’ll be spending more time outdoors then indoors. Get them something they can use all summer long like bubbles, an ancient treasure archaeology kit, gardening tools and gloves, croquet, and rainbow playground ball.

Happy Easter!

xo,
Doreen

Doreen Corrigan is the voice behind her lifestyle blog devoted to celebrating the “Art of Living.” Doreen believes even the ordinary can be made extraordinary and is passionate about Entertaining, Home Decor, and Fashion. Doreen and her husband Jim, are the proud parents of 4 year old twins. Follow her on Facebook, Twitter and Instagram.

Best Parenting Blogs and Instagrammers to Follow

March 21, 2017

Post by Rachel, Nod’s Brand Marketing Manager

Finding out you’re pregnant is overwhelming. And wonderful and scary all at the same time. For me, I turned to the internet. Which can easily take a scary (and even more overwhelming) turn if you click on the wrong article. So we figured we’d help all those newly-pregnant followers out there and put together a list of the best parenting blogs and Instagrammers to follow.

Best Parenting Blogs and Instagrammers to Follow

We asked our Instagram followers to share their favorites and here’s the (huge) list. We even discovered some new ones! Let us know if there are any we favorites we missed – we love hearing from you!

Ever wonder who’s behind The Land of Nod social media accounts? That’s Rachel! When she’s not telling anyone who will listen that she’s not meant to live in cold, snowy Chicago, you will find Rachel hanging out with her husband and new baby and binge-watching Netflix after baby’s bedtime. Or starting crafting projects that never get finished