Close

Blog

Watermelon Ice Pops with Mint

August 9, 2011

1

The charm of homemade ice pops is that there are no rules when it comes to containers — they can take any shape or form. The fruit puree and juice can be poured into paper cups, cupcake tins, mini cake tins, ice cube trays, or tall parfait glasses (like the ones we used for the pops pictured above). And with the short ingredient list, homemade ice pops are easy to make at a moment's notice and stored in the freezer, ready to savor when the weather gets hot.

Watermelon Ice Pops with Mint

Yields: approximately 10 ice pops (depending on the size of your cups, you may yield more or less)
Prep time: 10 minutes + 6 hrs. freeze
Allergy info: soy-free, dairy-free, gluten-free

For the puree:
1 (4 to 5-lb.) organic seedless watermelon
1/4 teaspoon kosher salt
1/4 cup organic sugar
10 whole fresh mint leaves, washed and dried

For the pops:
12 paper cups or tall parfait glasses (tall shot/dessert glasses)
Plastic wrap or foil
12 ice pop sticks

Directions:
Remove colored flesh from the watermelon rind. Discard seeds, dice watermelon flesh. In the bowl of a food processor add diced watermelon, salt and sugar; pulse until smooth. Place a fine mesh strainer over a large bowl. Pour watermelon mixture into strainer. Using a spoon or spatula, press watermelon mixture through strainer; discard any seed pieces and large pieces of pulp.

Place one mint leaf in the bottom of each cup. Pour fruit mixture evenly into cups; cover tightly with plastic wrap. Using a sharp paring knife, make a small slit in the middle of the plastic wrap. Poke ice pop sticks through plastic wrap.

Place cups in freezer. Freeze at least 6 hours; serve frozen. Store in the freezer, covered, up to 3 weeks.

Post by Dawn Viola : DawnViola.com

August’s Nursery

August 8, 2011
Dresser and Play Chair Provided by The Land of Nod

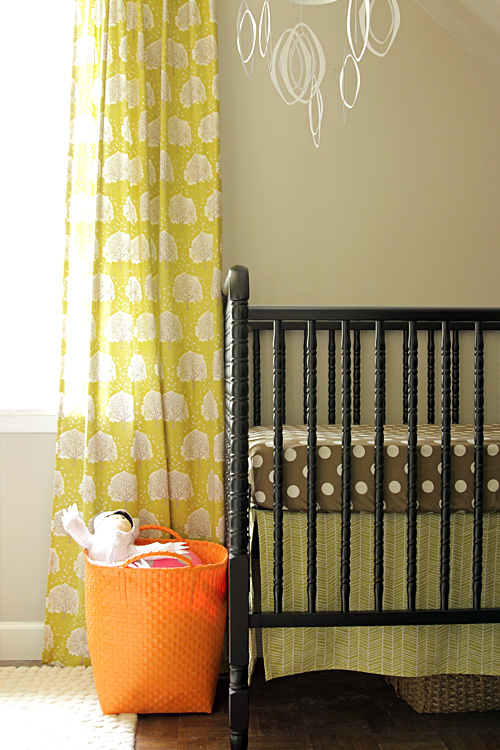
August’s nursery is finally ready for the little guy!

1

He slept in a cradle in our bedroom for the first few months, but Brandon and I started putting him to bed in the crib a couple of weeks ago. Until yesterday, the room was still in all of its former pink glory.

2

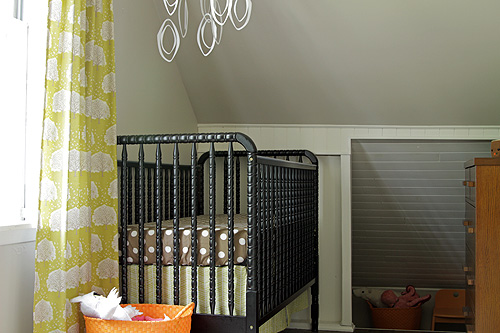
I sewed those curtains and crib skirt from fabric by Joel Dewberry, and the brown polka dot crib sheet (no longer available) was from the DwellStudio for Target line. To the right of the crib is the odd sunken end of the room, which continues to function well as a play space.

3

We moved in a fun rug and an orange play chair. Obviously, August is much too small to play down there, but Eleanor loves it.

4

There are more stuffed animals in a basket next to the crib.

5

Opposite the crib is August’s dresser. There was a vintage dresser that we painted pink for Eleanor when this was her nursery, but that’s now in her new bedroom. We replaced it with this wooden one. It’s more masculine, and I really like the addition of the warm wood tone in the room. Plus it’s named after our town, Oak Park! I think it’s funny that Eleanor has her namesake mirror, and August has his hometown dresser. And that zombie clock above it cracks me up.

6

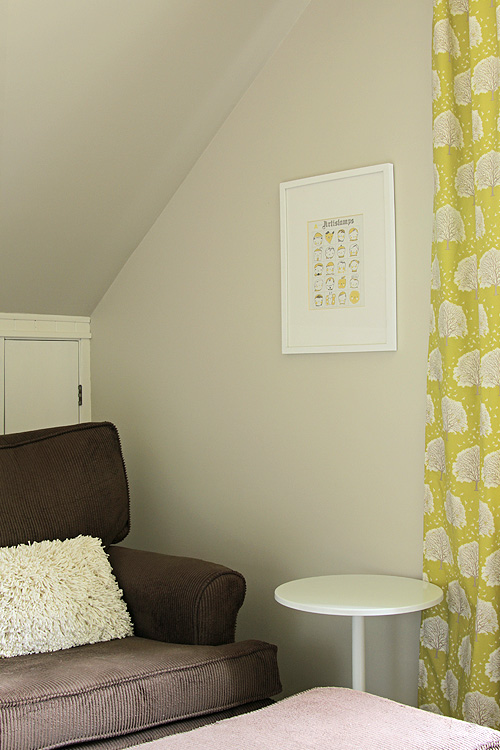
I’m still loving my glider and ottoman. I usually keep a water bottle and some books on the side table next to it, and it’s a nice spot for nursing. I also read to Eleanor and August in that chair, rock August to sleep, and occasionally fall asleep myself there. The Artistamps print above the table is by The Small Object, and it used to hang in my former studio.

7

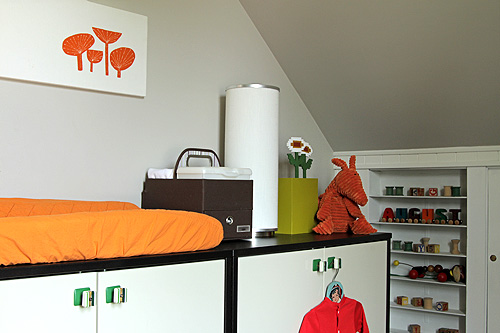
The changing table is still made up of two IKEA Effektiv bookcases. I love the setup because we have tons of storage for all of the necessary but unlovely to look at baby items.

8

I keep a basket for laundry at one end, and there is a diaper pail tucked away on the other side.

9

I linked to many of the items above, but there is also a separate page of sources, so take a look if you’d like to know where something specific came from. If there’s anything I missed that you’re curious about (I didn’t list every tiny little thing), I’d be happy to answer questions in the comments.

It’s amazing how just a few changes from Eleanor’s nursery make it feel so different for August.

Mending Made Fun – A Mini Tutorial

August 5, 2011
 As much as I enjoy sewing, I really don't like mending.

But recently we've had an epidemic of holes-in-knees, to the point where children we running out of jeans-options in their wardrobes.  I really didn't like the thought of buying replacements – especially for the youngest of each gender – just to get us through the last few months of pants-weather.

So here is what I came up with. Start with the iron-on Dritz patches.
I discovered if all you do is iron them on, they fall right off.
Plus, rectangles are kind of boring.
This is the solution.  I cut out some hearts.
Then ironed, then stitched. 
(Plus, stitching and embellishments on jeans are so 'in' right now.
Think how cool and chic your kids will be.)
I used a heavier-weight DMC thread, a heavy-duty needle and a thimble.

Because it's a little tricky stitching something in the middle of a pant leg, I suggest rolling the pants up to the knee first. (I know that sounds pretty obvious, but it took me three pant legs to figure that one out, so I thought I'd pass it on, just in case.)  It's also pretty hard to work from the inside of the pant leg, so stick your needle through and pull from the top. (See picture.)  It's tough stitching through that many layers, which is why I strongly suggest a thimble.  A little rubber grip to pull your needle, wouldn't be a bad idea either.

Here's another option.  (Actually this was the first one I tried.) This time I used the boring rectangle, but I embellished with a little wool heart.  The wool is easy to tack-down and came through the wash beautifully. Hope that helps anyone out there having an epidemic of their own! I will admit that these patches are kind of 'girly' and I haven't really come up with a good option for my boys. Feel free to share any favorite (or improved) mending tips of your own. My other hurdle is holes in knits (jersey) fabric. Any brilliant suggestions?

Post by Amy Smart : www.diaryofaquilter.com

Road Trip Bingo

August 4, 2011

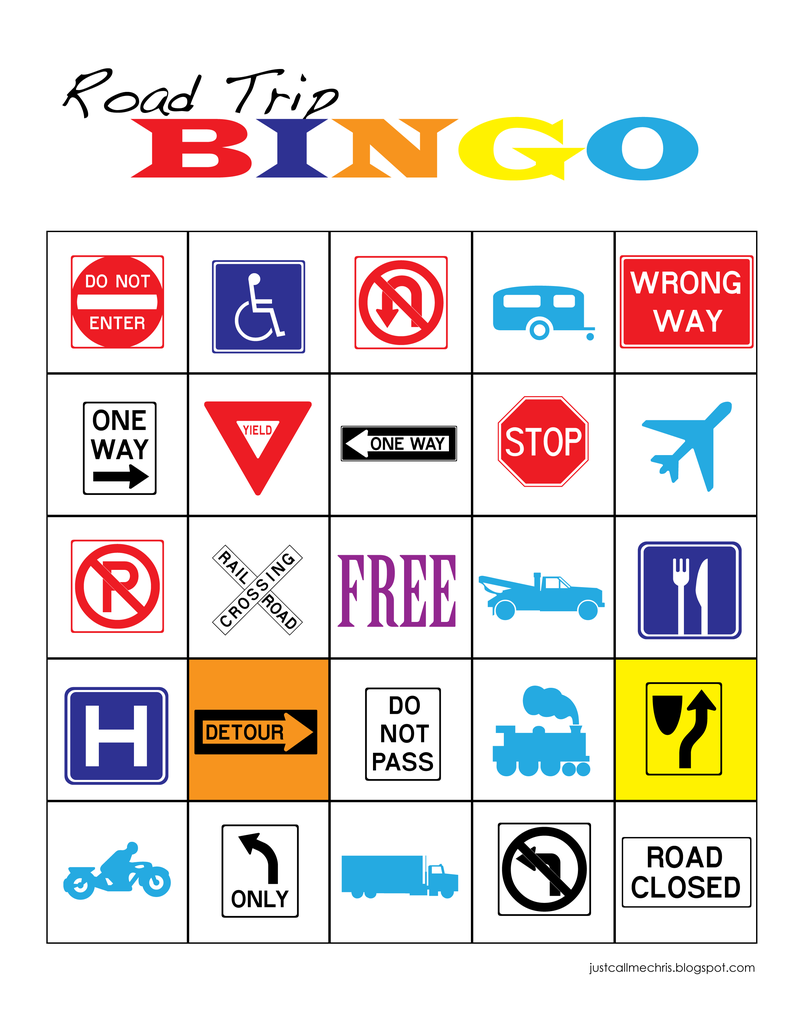
1 During my most recent getaway with the kids, I remembered all the fun travel games my mom used to have for us in the car. I wish I would have designed this one before our trip, but I'm sure it will come in handy for all those road trips in our future. And hopefully it's not too late for you! Here's the free printable that you can add to your summer survival kit. I've got four different game boards, so everyone will have a little different variation. And in case you're wondering, the little blue vehicles are actual vehicles that the kids have to spot along the way.

All you have to do is print out enough copies for your family, make sure everyone's had their final potty stop, and hit the road.

A little hint: it's much easier to use pencils to cross off squares, rather than trying to keep bingo chips in place during a bouncy car ride.

Happy Travels!

Signature
Post by Christina Williams : justcallmechris.blogspot.com

Homemade Raincoast Crackers

August 3, 2011

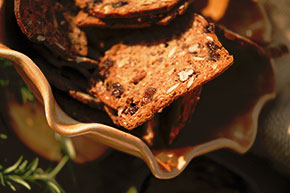
Nice crunchy artisan crackers are divine but can be very expensive. My friend Joy shared this delish recipe for a similar cracker that’s easy to make and waaay easier on the grocery bill.

1

Raincoast Crackers

2 cup flour

2 tsp baking soda

1 tsp salt

2 cups buttermilk (or *milk w/1 tbsp vinegar)

¼ cup brown sugar

¼ cup honey

1 cup raisins (or *dried cranberries/apricots)

½ cup chopped pecans or *walnuts

½ cup pumpkin seeds

¼ cup sesame seeds

*¼ cup sunflower seeds

*¼ cup poppy seeds

¼ cup ground flax

½ tsp dried rosemary

* indicates that the original recipe didn’t call for these but that’s what I generally use – also you can switch up the flavors by changing the rosemary for another herb that you like.

Last time I added Chia seeds as well. Preheat oven to 350.

Mix together dry ingredients, stir to combine. Add wet ingredients and stir only until blended. Pour batter into two 4 x 8 loaf pans that have parchment paper or are oiled and floured.  Bake about 40/45 min until golden and springy to the touch. Remove from pans and cool.

Put the loaves in the freezer as they are easier to slice when frozen. Slice as thin as you can and put slices on a cookie sheet in single layer (melba toast style).

Bake slices at 320 deg for about 10 min then flip them over and bake for another 10 min or so (watch closely as you can go from crispy to burnt in a very short time). If you make both loaves at once you will get about 8 doz crackers.

Thanks Joy!

Now, get out the goat cheese and try not to each the whole darn batch!

oxo

Post by Kerry MacLeod : www.snickerdoodles.ca

Need more tasty recipes and delicious bites? Check out our Let’s Eat Pinterest Board.

Lemonade Stand

August 2, 2011

2

Remember summers when you were a kid? The days were long and sweet and time seemed to stand still as you freely explored your imagination and the beauty of the world around you. Memories were made in the blink of an eye and life was simple and fun.

1

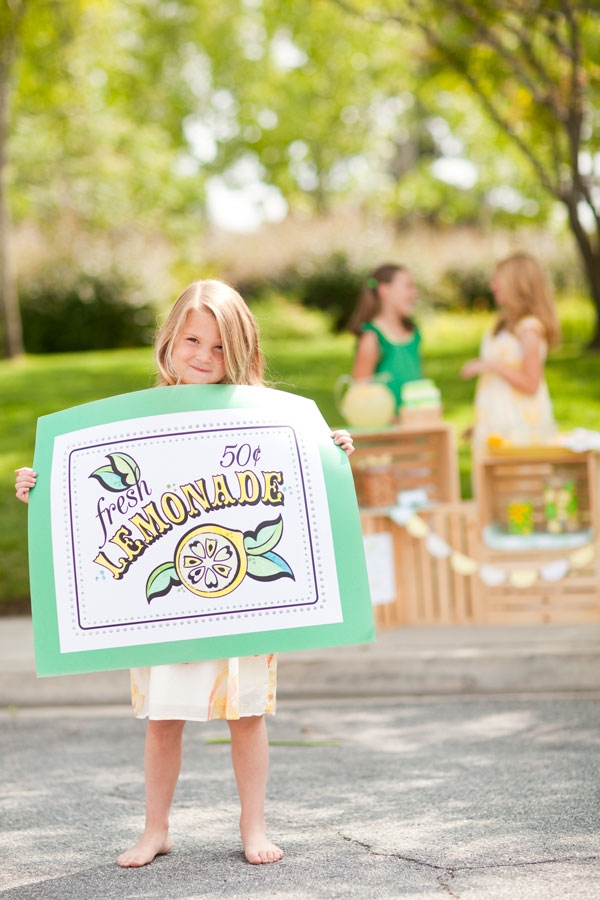
Summers also meant becoming an instant entrepreneur and opening up a lemonade stand. Remember daydreaming about all the cool stuff you’d buy with the profits while you stirred and stirred the sugar into the lemony water, hoping it would eventually dissolve?

3

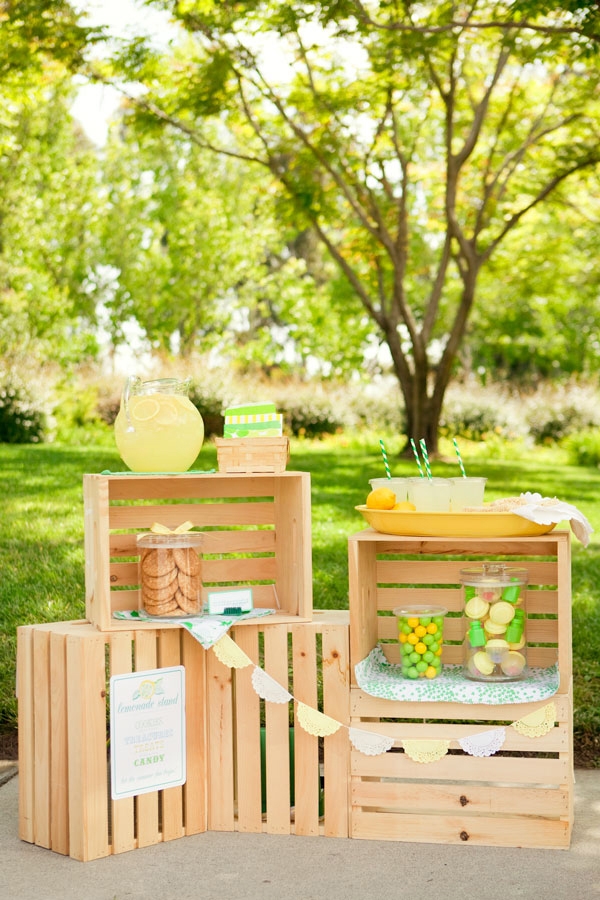
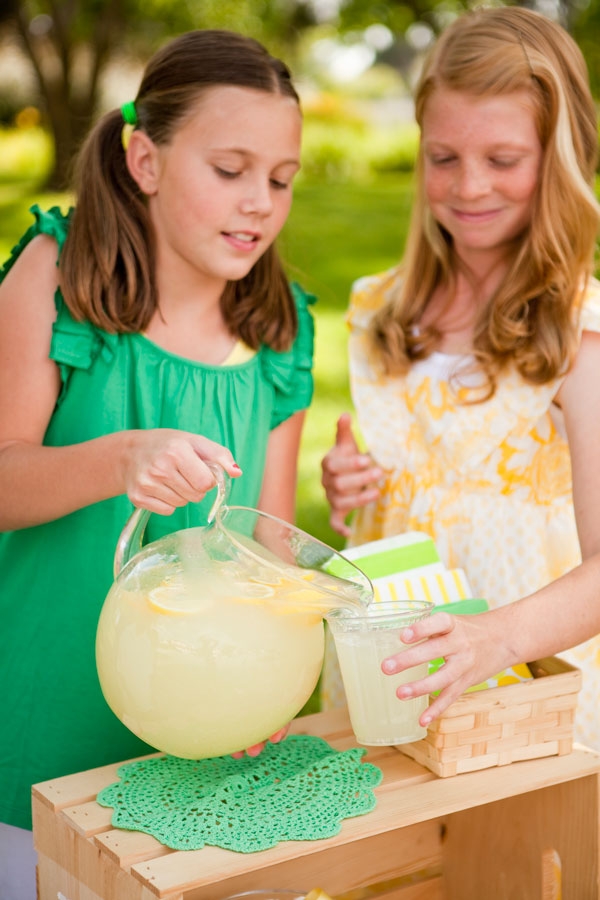
Why not help your kids cash in on this summertime classic by making their lemonade stand really stand out from the crowd? It’s easy to do and just requires you to think outside the glass. For example, why not give customers some goodies to go along with that lemonade?

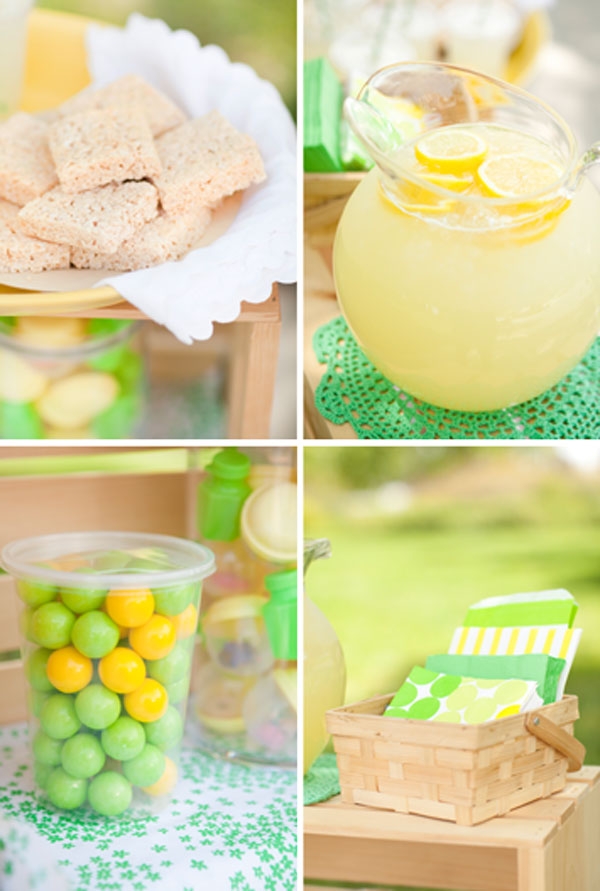
Bake up some fresh cookies or make some rice crispy treats that will entice kids and adults alike. And for the younger crowd, sell some colorful gumballs, small bottles of bubbles, and vending machine capsules filled with small prizes.

4

The stand itself could be easily updated by using wooden crates instead of a table.

The crates allow you to display your treats and you can add some simple summer decorations by stringing together small, folded doilies.

5

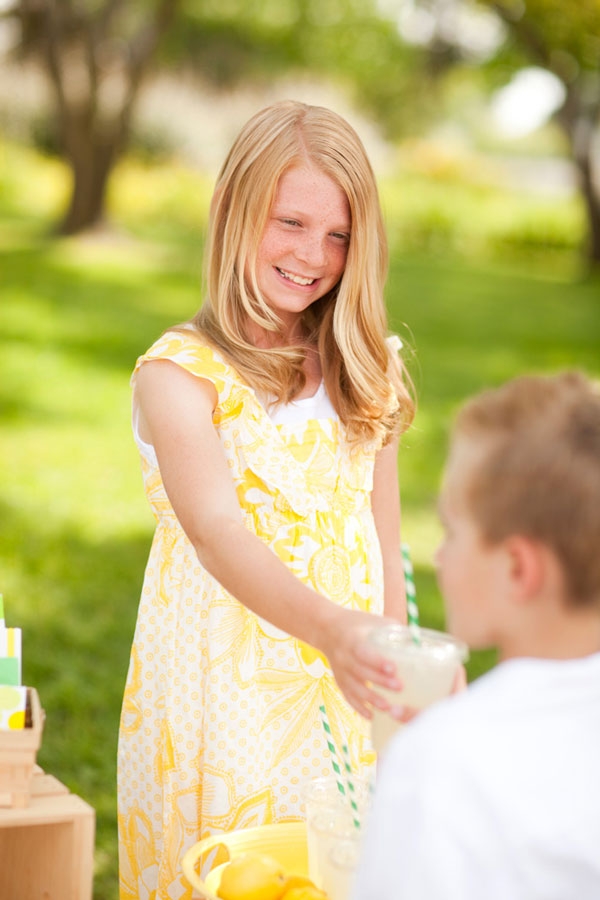
Finally, for a sophisticated look, serve the lemonade in 12 oz plastic cups with lids (from Smart and Final) and add green striped straws for the perfect finishing touch!

6

7

Post by Sara Westbrook & Brittany Egbert for One Charming Party : onecharmingparty.com

Photos by Nicole Hill Gerulat : www.nicolephoto.com

Cutting Through The Clutter of Toys

August 1, 2011

Bankable

A couple of years ago I was a mom sitting in a house overfilled with toys. They were everywhere. My kids weren't enjoying them, they were just too overwhelmed by the volume and chaos. I finally took action and came up with a process that has kept my home free of toy clutter since. Curious? Oh good, let's get started!

Check the Inventory (raid the house)

I started by going through my entire house. I checked every room; it's drawers, closets, under beds, behind couches, and under cushions – everything. I did this with a garbage sack in one hand, instantly throwing out the toys I knew were either broken or missing parts. I was amazed with what I found (or embarrassed, one of the two). At the time my oldest was three, so I chose to do this while my kids were asleep. If you have older ones you may want to involve them in the process. After I gathered up all the toys I put them in one place; a heap on my living room floor.

Sort and Classify (divide and conquer)

Start this next step with a goal in mind. Mine was to cut our toys by half. Look at your situation and decide what will be a reasonable goal for you. Sitting on the floor I began sorting; balls in one pile, cars and trucks in another, dolls, dishes, and so on. I not only sorted them but classified them. Which toys were of a higher quality; my son had two tractors, one very nice the other not so much. I also thought of their preference did they prefer the red car over the blue? Surely no boy needs twenty cars, and ten motorcycles. That is where the donate pile comes in. Really think about the toys and if your child has shown an interest in them for the last month. If the answer is no, it’s time to pass them on. I found that after I was done with this step some of the toys I saved were for my personal attachment, not my kids. I bit my lip and added those to the donate pile too. There were a few they had not played with that I knew if given a second chance and some assistance they would enjoy them, so I kept those.

Lose the Token ‘Happy Meal’ Toys

I don’t know about you but we had an insane amount of little toys. None of which went with anything or served a purpose. You know, the ones you get from a happy meal, out of the cereal box, or the ones grandma bought while standing in line at the grocery store just to make them happy. I took every single one of them and put them in the trash bag. I can’t tell you how many times I picked them up on a daily basis. Freedom….

Secure and Organize

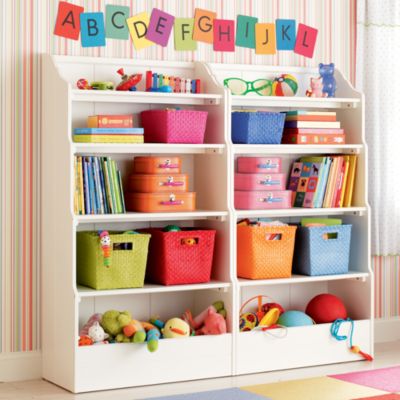
Find a place where you can organize all the toys you decided to keep. If everything has a place, it is much easier to clean up. I used baskets and buckets; with balls in one basket, cars in another and so on. Just use a system that works best for you. The important thing to remember is to keep like toys together. After I had finished, I showed my kids where everything went. How dragons had a bucket all their own, cars needed to go in the red basket, and books go on this shelf. After a few days of reminding them, they were able to pick up all their toys on their own, and they had a sense of pride in that.

Have a Plan

Depending on the age of your kids, you may decide to do things differently. When my kids were younger (2 and 1) I found it best to keep the toys they played with to one basket. I would fill it every morning with a variety of toys to take out for them to play with. At nap time I would put those toys back and bring out a fresh set when they woke up. Then we only had a few toys to throw in a basket and put away. Now that they are 4 and 3 I let them have free rein, but that never seems too overwhelming because I continue to edit the toys we keep. Clean up time never takes more than 15 minutes. Make sure to continue the editing process. I try to go through all of our toys on a monthly basis. I am always amazed that every time there is something to get rid of. They grow out of something, parts get lost or broken. Tossing those toys continually makes room for the new ones that make it into my house. I have to say that my kids have yet to miss a toy I have donated or tossed. On the contrary, they seem to just enjoy the ones they have without the over-stimulation of too many. So don't feel guilty!

I would love to know what tips and tricks you have for staying on top of toy clutter, please share!

Post by Destri : www.themotherhuddle.com

Things to Make – Seashell Jewelry and Sand Pictures

July 29, 2011

seashell jewelry 2 seashell jewelry 1

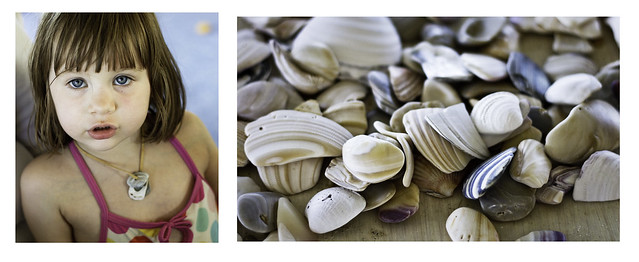
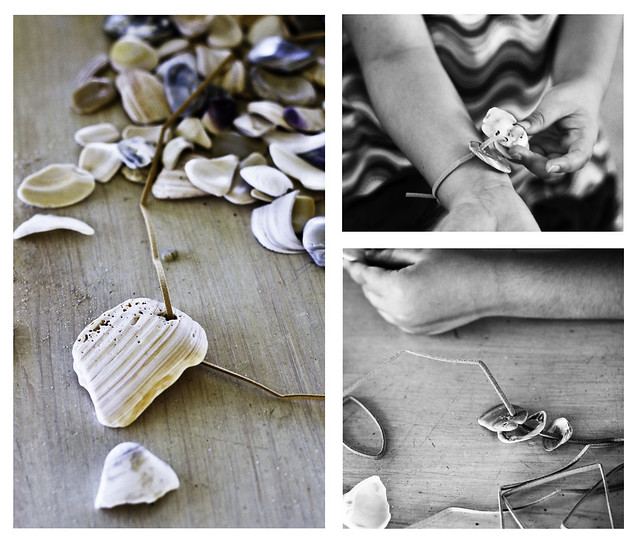
As much fun as a trip to the beach is, sometimes it helps to have some projects in mind before you go. For example, last year on our trip to the Outer Banks, we made seashell jewelry. I bought some leather cord (Natural Beige Faux Leather Suede Beading Cord 10 Feet Ultra Microfiber). So all we had to do was find seashells with holes in them. My daughters (age 4 and 3) proved themselves to be very bad at this task. On the upside, they were GREAT at finding seashells in general, so we dumped buckets of shells on the table with hopes that some would meet our criteria. And some did (YAY)!! P (my youngest daughter) had fun making her necklace, but soon tired of wearing it. F (my oldest daughter), on the other hand, continues to wear her bracelet everyday (she likes the "jangling" sound it makes). And I have a beautiful necklace that I've been wearing. Sort of a cool souvenir. Or so I like to think.

beach art

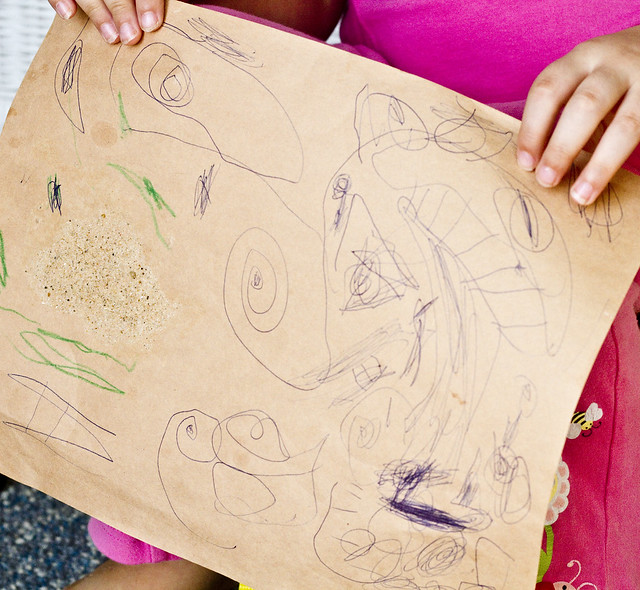
For another craft project (we were there for a whole week, after all), we made beach pictures on construction paper. All that this entailed was bringing blue and light-brown construction paper and saying "why don't you draw the beach?" Then, to make it "extra special", the girls used a glue stick to attach real sand. So easy.

Post by Darcy : http://bedtimemonsters.blogspot.com/

Car Seat Strap Covers

July 28, 2011
Don't you love an easy project that you can finish in just about an hour? I know I do, especially because I have problems a little trouble finishing projects in a timely fashion. I wanted to recover baby #2's car seat and realized that was going to lead me to my previous problem, an unfinished project. I just don't have enough time so I though I would spruce up his/her car seat straps! Not to mention, the old straps were looking a little rough. Does anyone have the Chicco Car seat? I LOVE it but the strap covers that came on it were sewn-on which made them super hard to wash. I decided to make my own with Velcro so I could wash them easier.
This project is really easy, all I did was use the existing strap covers as a template, a little quilt batting and used some existing fabric that I had. I did make my own bias tape (which is a little more time consuming) but you could just buy some for an even easier time.
Here are the original strap covers and the fabric I picked out, I wanted it to still match the carrier. I used the star fabric for the bias tape. I didn't include how to make your own bias tape in the tutorial, you can find it online or like I said you can buy it from any craft store.
Lay out the original strap covers as a template. Trace onto your fabric and cut 4 new pieces. Front and back for both.
Don't forget to cut the batting for the inside of the pieces like I almost did, oops!
Make (or buy) your bias tape, for the Chicco covers you need about 35"". By the way… I have made my fair share of bias tape and I just found out that there is a cheap tool that folds the fabric for you and makes it so much easier! Where have I been?
That is on the to-do list for this week.
Sew the "circles" of the strap covers with wrong sides together and the layer of batting in between. So it should be fabric facing down, batting and fabric facing up in your sewing machine.
Pin the bias tape all the say around on both covers and sew it on.
Lastly, I used a small strip of Velcro as the closure. Here is the before and after!
Not only will these be easier to take on and off, the original fabric was so scratchy and the new covers are soft fleece. I think baby 2 loves them already!
Taylor sign
Post by Taylor Urban : www.itstaylormade.com

Tuna Noodles with Crushed Potato Chips

July 27, 2011

1

I practically lived at my next door neighbor's house during the summer while growing up in Pembroke, Massachusetts. Kristen and I were best friends — Barbies, basketball, all-day bike rides, adventure hikes in the back woods and old gravel pit behind our houses. We were inseparable, second grade through fourth grade.

I especially loved eating dinner at her house. Her mom made the most unusual dinners — foreign and exciting compared to my Italian upbringing. At Kristen's house, I was introduced to Jello salads, meatloaf with ketchup, cinnamon-sugar doughnuts, birch beer and s'mores.

I remember belly laughing so hard at the kitchen table in their small-town, ranch-style house, for no other reason than being eight-years-old, barely being able to catch my breath, let alone eat. Anything could set us off on a soundless, red-faced, gasping for air, marathon. Except on tuna noodle nights.

Tuna noodle nights were serious business because they involved potato chips. And for an Italian girl like me, who grew up with red gravy, pasta, beans and the typical Italian-American menu, potato chips were like God; and tuna noodle nights were Heaven.

My family moved, and Kristen and I eventually lost touch, like childhood friends often do. But I think of her often, especially on tuna noodle nights.

2

Servings: 2 large or 4 small (side dish)
Cooking Method: Roux, veloute
Allergy info: soy-free

Ingredients:
1/2 pound spaghetti or fettuccine
1 tablespoons unsalted butter
1 tablespoon olive oil
1 medium onion, small dice (brunois)
2 stalks celery, small dice (brunois)
3 cloves garlic, crushed
2 tablespoons all purpose flour
1 cup chicken stock, plus more for thinning the sauce
1/4 cup heavy cream
2 (5 oz) cans tuna, packed in olive oil
1 1/2 cups crushed potato chips
1/2 cup roughly chopped flat leaf parsley
1/4 teaspoon celery salt and black pepper (or to taste)

Directions:

Prepare the spaghetti or fettuccine according to package directions.

As the pasta is cooking, melt butter and oil in a skillet over medium heat. Sweat onion and celery until soft, adjusting the heat to prevent browning. Add the garlic and stir to incorporate.

Immediately sprinkle flour over the onions and celery, mixing to create a loose paste (roux), and cook for 1 minute. Slowly whisk in the chicken stock to create a sauce (veloute). Turn the heat off and add the cream. Add additional chicken stock to thin the sauce to the desired consistency, if needed.

Add 1/2 cup of crushed potato chips and the tuna, including the oil and liquid from the can, and gently mix into the sauce. Add salt and pepper to taste.

Drain the pasta well, and add to the pan with the sauce. Using tongs, gently turn the pasta in the sauce until the tuna is flaked and the pasta is well coated in the sauce. Taste and add more salt and pepper if needed.

Top with crushed potato chips and fresh parsley.

Chef's Notes:
Place a serving portion of the tuna noodles in an oven-safe bowl, top with potato chips and place under the broiler to brown the chips. Top with fresh parsley.

Change the flavor profile by adding fresh thyme or rosemary to the roux.

Post by Dawn Viola : www.wickedgooddinner.blogspot.com

Exercising For Two

July 26, 2011

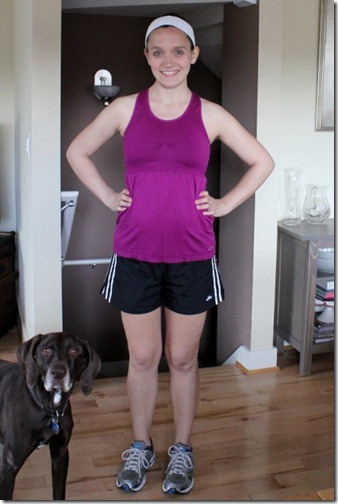
Now that my morning sickness has passed and my energy levels are back, I am finally feeling mostly like my old self again.  As soon as we got to Seattle, I knew that first on my list was re-establishing some sort of fitness routine.

We are lucky to live in an easily walkable area with great running trails and lots of sidewalks.  While I know that I could probably get in most of my cardio outside (hello summer!), I also feel really strongly about the importance of strength training and weight lifting.  So I did a bit of research, called around to a few local gyms, and joined one last week!

Yesterday was my first workout at the new gym and MAN oh man and I feeling it!  My body hurts as badly as it did when I first started weight lifting years ago.  My time off has definitely cost me a bit of fitness, but I was still pretty pleased with how well my body responded to being back on the weight machines.
1

I’ve done a lot of exercising throughout my journey to being healthier, but it all feels different and new now that I’m pregnant.  My body is different, and so I have to treat it differently. 

A lot of you have shown interest in hearing about my pregnancy fitness routine, so I thought I’d share my plans for the next 20 weeks with you.

What I’m Doing

My general plan is to lift weights and do strength training three times a week – two during the week, and one longer set on the weekends.  I’m trying to mainly focus on staying toned and building muscle, so I’m doing a rotation that typically includes the following:

  • Upper Body – chest press, pushups, rows, chin ups, shoulder press
  • Lower Body – leg press, hamstring curls, squats
  • Total Body – deadlifts, ab crunches (on a ball), and planks

I should note that I am doing most of my weight lifting on the guided machines now, rather than using free weights.  When not pregnant, I prefer to use the free weights for a better range of motion and increased difficulty.  But the guided machines are still a great workout, and are generally regarded as safer during pregnancy, so I am happy to oblige. 

In addition to the weekly weight lifting, I’m also trying to make sure I get some sort of cardio in every day.  I have a very HILLY 2-mile walking loop that I climb with the dogs each day, and also plan to hit the elliptical or stair climber for 30-45 minutes when I am at the gym. 

With my body feeling better and the sun starting to shine more often in Seattle, I’m also getting the itch to try to run again.  I’m not sure if it’s too late into my pregnancy to essentially “start” running again, but I’m considering at least giving it a slow and steady try.  I really miss running, and I’m curious to see if my body will respond better now that I am not quite so sick.

2

Adapting for Pregnancy

Even though the workout schedule I’ve shared probably sounds pretty similar to what I would normally do, I’m also quickly learning there are a lot of adaptations I need to make now that I’m exercising for two. 

In the past I have never been very good about hydrating, but now more than ever it is essential for me to make sure I’m getting enough water.  It doesn’t really take much reminding either – my body literally craves water all day long!  Taking plenty of water breaks and carrying a bottle with me is now a regular part of my fitness routine. 

I have also written plenty here before about how passionately I feel about lifting heavy weights, not the 5lb weights that are so frustratingly often recommended for women.  For some reason being pregnant is commonly associated with the understanding that there should be “no heavy lifting.”  While I am by no means doing anything dangerous, I’m also not going to give up my strength training completely for nine (ten!) months.

I have bumped all of my weight sets down a bit so that they are still quite challenging, but don’t give me the “if I do one more of these I might die” feeling that I used to get when lifting at full capacity.  It feels good to continue to challenge my muscles, but know that I’m making safe adaptations that should benefit both me and Baby G.

Cardio is really where I have noticed the biggest difference from my pre-pregnancy days.  My stamina is basically non-existent and I find myself out of breath much more easily now.  I have to make sure to take plenty of breaks and not be tempted to push myself like I used to. 

What I’m Wearing

I have been a huge fan of the Champion Empire Womens Tops for over a year now, and I have always joked that they would be great for pregnancy too.  Guess what?  I was right!

3

The tanks have a built in sports bra with a loose, flowy bottom – perfect for fitting around the growing bump.  I am so excited to already have some built in pregnancy workout gear!

I also have one pair of maternity yoga pants (from Gap), and plan to pick up a few pairs of larger shorts and pants in the coming weeks.  I’m also thinking it might finally be time to invest in some larger sports bras…

So that’s what I’ve been doing so far, on my continuing journey to keeping myself and my baby active and fit!  I’m hoping to start incorporating a weekly pre-natal yoga class to my routine soon too, but other than that, I feel good about how much I’m moving and staying active.

Its funny how many preconceived ideas I had about what type of “pregnant athlete” I would be before getting pregnant.  If pregnancy has taught me anything, it is that you can never really plan for how you will feel, or how things will go.  Some days I feel amazing and get in my full scheduled workout.  Other days I am lucky to have the dogs drag me around the block a few times.

I hope I can continue to feel good and stay active for the next 20 weeks!

Post by Emily Malone : www.dailygarnish.com

Preserving Childhood Vacation Memories

July 25, 2011

1
The girls each made a special photograph album that is just for them. I printed out a selection of photographs from our trip and they each chose their favorites. Next, they stuck the pictures in the album using photo mount squares. They then decorated the pictures with pretty beach stickers. Each girl dictated their memories of the beach and we attached the page into the books. 

2

3

4

5

6


Post by Helen Bird : www.curlybirds.typepad.com

Things to Make – Tissue Paper Tie-Dye

July 22, 2011

Post by Darcy of bedtimemonsters.blogspot.com

howto

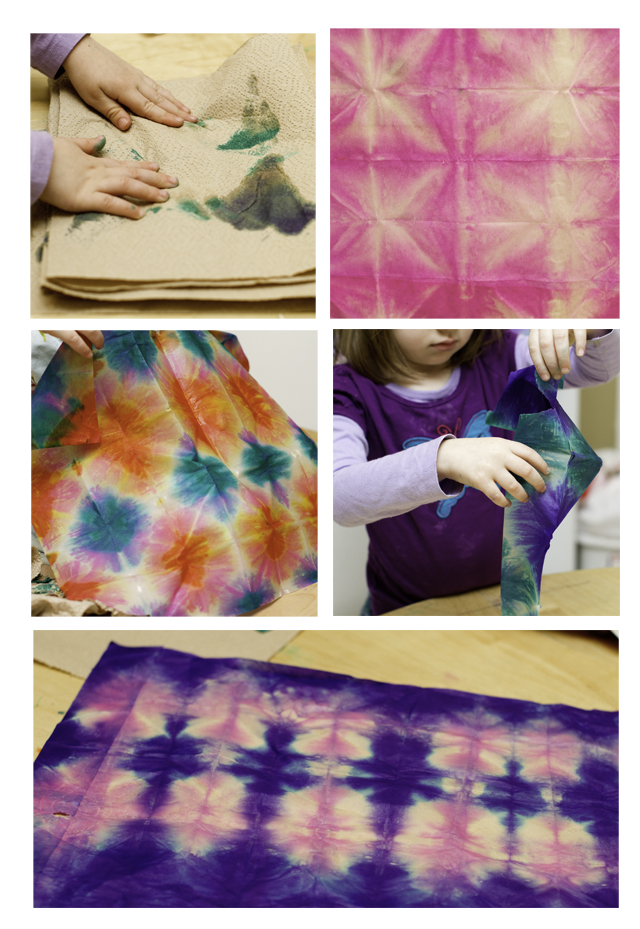
For the last few months I’ve been saving the tissue-paper wrapping that comes in boxes (Amazon uses it frequently), I didn’t really have a plan for what to do with it, it just seemed worthy of keeping. Well, I finally found the perfect rainy day project for using it on this site – tissue paper tie-dye. The results of this project were quite beautiful, as evidenced by the fact that the girls hung their creations all over the walls of their room.

Here’s the scoop: You’ll need – tissue paper, rubber bands, and liquid watercolors or food coloring.

1. Cut the tissue paper into large rectangles (about 16×20 inches).

2. Accordion fold the paper back and forth into one long rectangle.

3. Then fold the bottom right corner to the left edge to make a triangle. Continue turning and pressing until you have one large triangle.

4. Place rubber bands on the paper triangle.

5. Dip in different colors of food coloring or liquid watercolors

6. We then patted the triangle-paper down with paper towels to get rid of some of the excess liquid.

7. CAREFULLY unwrap. This would probably work best if you waited until the paper was dry, but we were too impatient. result

Post by Darcy of bedtimemonsters.blogspot.com
Peach Crumble Cobbler

July 21, 2011

1

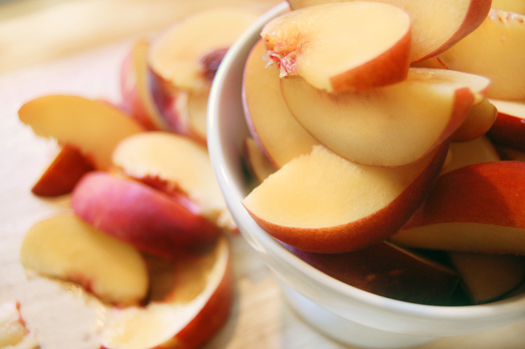
There were just seven luscious, organic Georgia peaches left in my favorite white ceramic bowl. I could have easily devoured every one of them, as-is. I could have grilled them until caramelized and then poured warm cream over the top with lavender, toasted pecans and a light drizzle of maple syrup.

But I wanted a crumble. I also wanted a cobbler, and I didn't have enough peaches to make both.

A trip to the store would have been no match for the roadside peaches I picked up at the border, floral and perfectly ripe, plucked from the tree that morning.

I settled on cobbler, and as I was plopping the biscuit dough onto the sugared peaches, I noticed quite a lot of unused real estate. There were large gaps between biscuit dough plops, creating pathways of unpaved cobblestone peach roads.

I wanted to pave those roads with something — fruit, more biscuit dough, something. As I mulled over the options, I nibbled the leftover bits of butter, sugar and flour used to coat the peach slices. I think you know what's coming next…

2

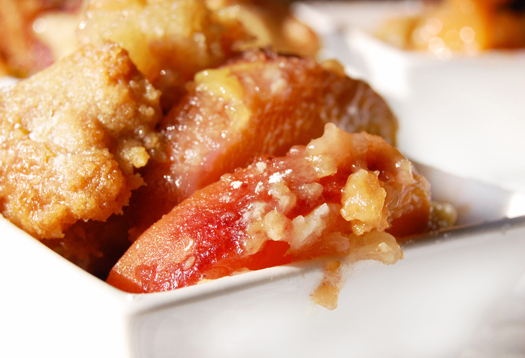
I mixed up a quick crumble topping, sprinkled the exposed peaches with the sugary nubs of butter and flour, popped the dish into the oven and waited patiently.

3

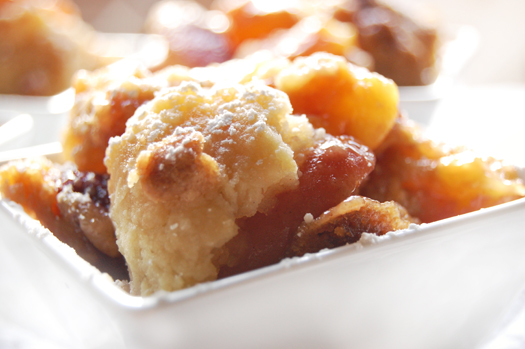
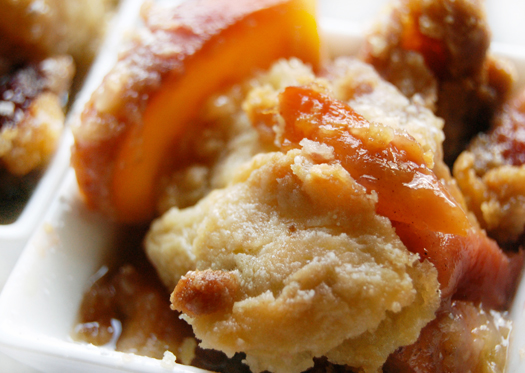
Fluffy, buttery biscuits, saturated with intense peach nectar, generously made room for the crispy, sweet crumbles clinging to the warm fruit; definitely worth the drive, and worthy of the beautiful fruit.

4

For the peaches:
7 ripe organic peaches, 1/2" slices
1/2 cup organic sugar
1 vanilla bean pod, split, seeds scraped
2 tablespoons butter, cut into small cubes
1 tablespoon all-purpose flour
1/2 teaspoon Kosher salt
1 teaspoon freshly cracked black pepper
1/4 teaspoon fresh lemon juice
1 tablespoon peach brandy (optional)

For the crumble:
1/2 cup brown sugar
2 tablespoons organic cane sugar
1 cup all-purpose flour
1/4 teaspoon Kosher salt
4 tablespoons butter, diced

For the biscuit dough:
2 cups all-purpose flour
3 tablespoons sugar
1 tablespoon baking powder
1 teaspoon Kosher salt
12 tablespoons unsalted butter, cold, diced
2 eggs
1/2 cup heavy cream

Prepare the peaches:
Preheat oven to 400 degrees Fahrenheit.

In a large bowl, add sliced peaches, sugar, vanilla bean seeds, butter, flour, salt, pepper, lemon and brandy. Gently toss to coat.

Make the crumble:
In a small bowl, add sugar, butter, flour and salt. Using your fingers, work the butter into the other ingredients to form small clumps, ranging in sizes from a dime to a nickel. Refrigerate until ready to use.

Make the biscuit dough:
Sift the flour, sugar, baking powder and salt into a large bowl. Using a pastry blender, cut in the butter until the mixture resembles a course meal with pea-sized pieces of fat. In a separate bowl, lightly whisk the eggs and heavy cream. Add to the flour and mix until just blended. The dough should be sticky, but not wet.

Assemble and bake:
Pour the fruit and accumulated juices into a large shallow baking dish. Divide the biscuit dough into 5 equal pieces and plop onto the fruit, equally spaced. Sprinkle the crumble mixture between the biscuits, over the exposed fruit.

Bake for 35 minutes, or until the biscuits are golden brown and the fruit is just starting to bubble. Remove from oven and cool on the stove top for 30 minutes before serving.

Post by Dawn Viola : DawnViola.com

Playful Chocolate Cupcakes & A Charming Birthday Gift

July 20, 2011

A friend recently asked me to bake some chocolate cupcakes with cream cheese frosting for her brother's birthday.  She was open on how to decorate, which finally gave me a chance to play with the goodies in my birthday gift from Michele of Cakewalk Baking… a paper suitcase filled to the brim with fabulous baking supplies including cupcake liners, pastry tips and sprinkles galore! My favorites were the chocolate stars, so I used a few on white frosting coupled with blue sprinkles, and the more traditional chocolate sprinkles with pale blue frosting.  I think they turned out quite cute, don't you?

1

2

3

4

5

Post by Becca : www.cakeeventsblog.com

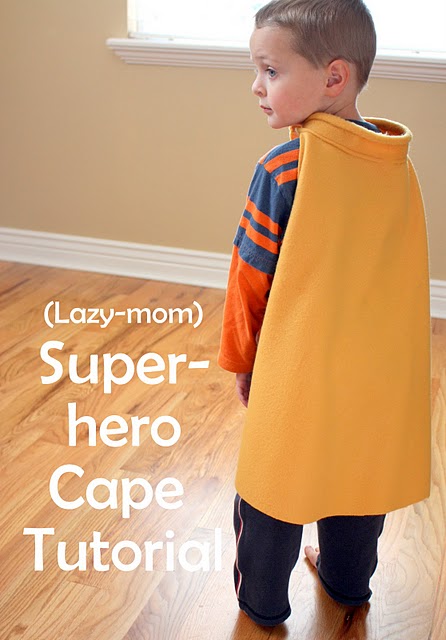
Super Easy Superhero Cape Tutorial

July 19, 2011

1

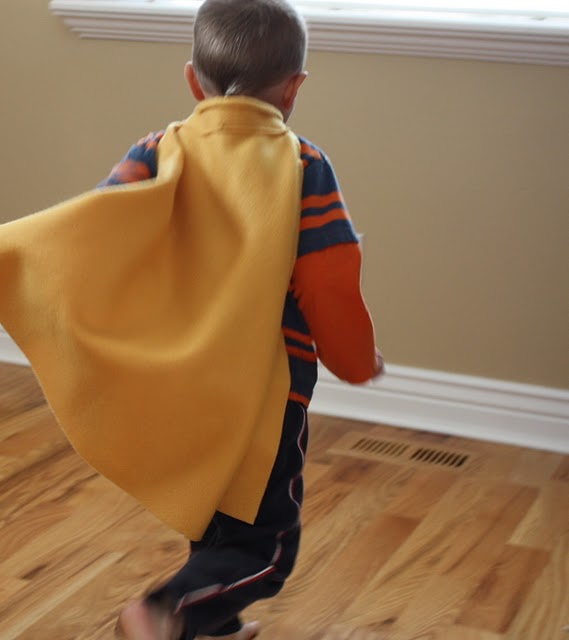
Today's idea is an EASY (and cheap!) almost no-sew (just one easy seam) Superhero Cape. You could make a bunch of these as gifts for friends or party-favors in an hour.

The inspiration for this tutorial came at the beginning of November. My 6-yr-old came home from school saying he needed a cape for "Superhero Day" at school.  Because he puts up with me sewing all kinds of other "un-useful" things I figured I owed it to him to at least make a superhero cape. But since the last thing any mom wants to hear the week after Halloween is "I need a costume" I wanted to make it as simple as possible.  When it worked I figured it was worth sharing and so the Lazy Mom Superhero Cape tutorial was born. 

2

Because I don't have a serger and I felt strongly opposed to the idea of lots of pressing and hemming something that would only be dragged heaven-knows-where I went with the world’s easiest fabric. Fleece. I let my boys each pick out their own color – this was the first time they have EVER been excited to go to the fabric store.  

I used 3/4 yard. (You may want to get a yard for a longer cape on a bigger child.) Because the fleece is usually 60" wide, you will get two capes out of each piece of yardage. (I found it on sale for $3.99 a yard. That means each cape is between $1.50-$2!)

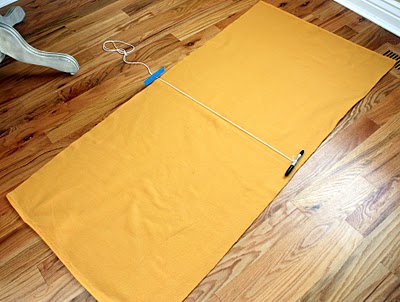
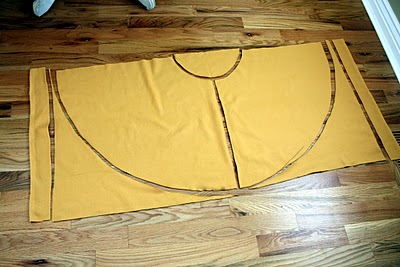
Open up the fabric. Measure a piece of string the length of the yardage (in this case 27") and tie the string to a marking pen. Tape the string at the center of the yardage.

3

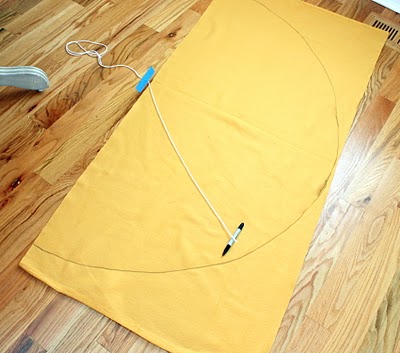
Using the pen as a compass (or protractor or something) draw a large half circle.

4

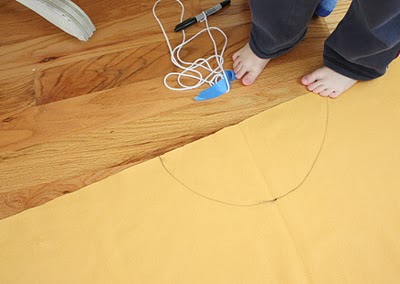
Shorten the string to 6" and draw a similar half circle at the top for the neck line.

5

Use scissors to cut on both drawn lines.

Also cut on fold line (to end up with two capes. Or keep it one piece to make a cloak.)

Finally, cut about 2" off both selvage edges.

6

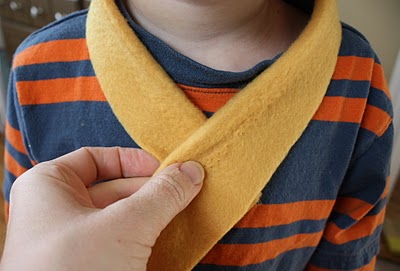
Take a selvage edge, wrap around neck and measure for length
(you want it to be loose.)

Trim unnecessary end. 

7

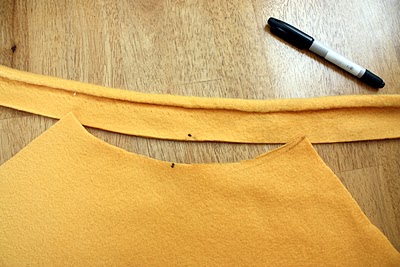
Mark center of selvage collar and the neck end of one of the capes.

8

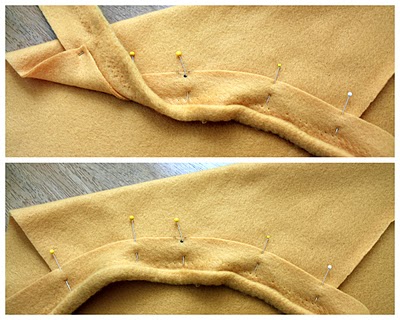
Match centers and pin collar overlapping the neck of the cape by about 1/2".

9

Sew one seam to attach collar to the cape.

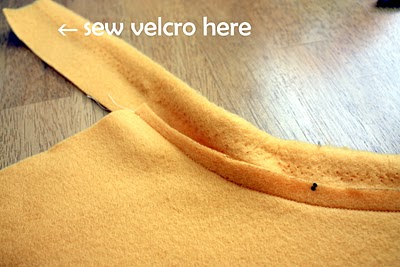
Attach velcro to the ends of the collar.

And yeah, you're done.

When I stop being lazy, I promised to sew a felt letter to the back of the capes, but I haven't got that far yet. 

10

In a short time, success. And I don't worry for a half a second about what happens to this superhero accessory because I can make another one in a snap.

Can I just say here how much I enjoy 4-year-olds? Especially this one. (He's particularly lucky because he gets Mom all to himself most days – none of my other previous 4-year-olds had it so good.) While sharing a particularly cozy, sentimental moment in front of the Christmas tree one morning he looked up at me with those charming blue eyes and responded, "Mom. I see tiny hairs in your nose." Not the response I was anticipating.

I honestly wish I could freeze him this way forever.

Post by Amy Smart : www.diaryofaquilter.com

DIY Bobby Pins

July 18, 2011

1

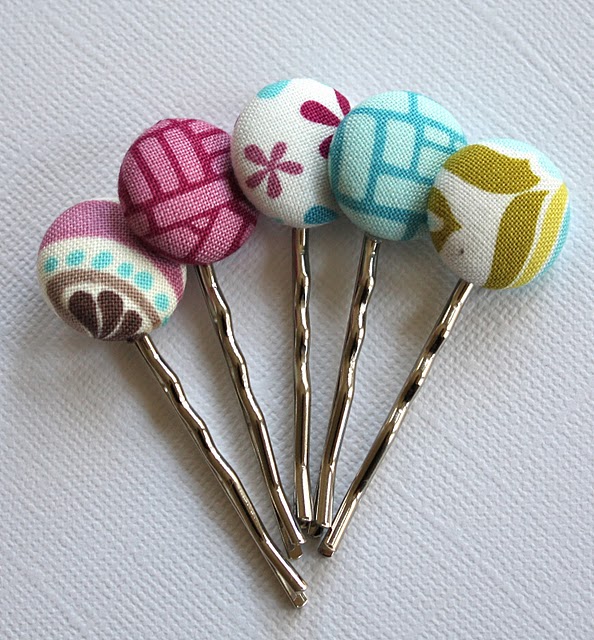
This year, I'd really like to stay on top of birthday gifts. It seems like I'm always making a last-minute run to the toy store on the way to the birthday party. Not this year. I'm going to stay ahead of the game by making birthday gifts ahead of time so they're ready to go well before the party arrives. I've given these bobby pins to several of my friends' daughters and they're always a hit. I've seen these selling online for as much as $2.50 each. But if you buy the supplies and take all of 10 minutes to make them, they'll cost a whopping .25 each. Convinced? Here's how:

2

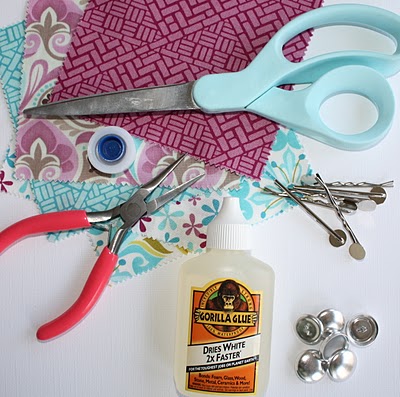
Step 1: Gather your supplies: bobby pins with padscovered button kit, covered button mold (included in kit), fabric scraps, scissors, needle-nose pliers and Gorilla Glue.

3

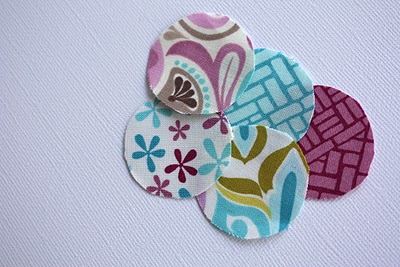
Step 2: Cut circles of fabric to fit the button form. (There's a pattern on the back of the button package).

4

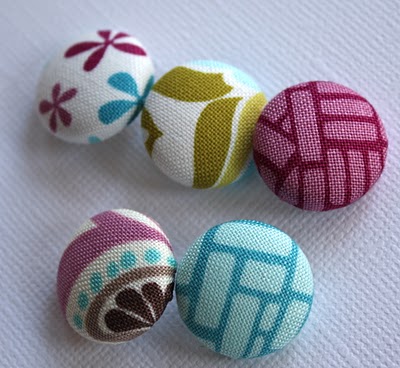
Step 3: Cover the buttons according to package directions.

5

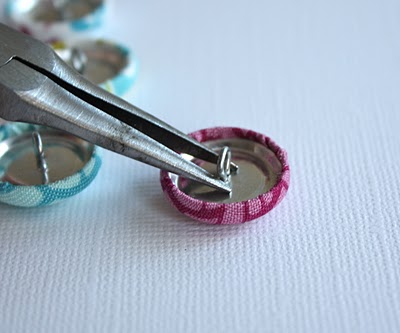
Step 4: Using needle-nose pliers, gently remove the shanks from the buttons.

6

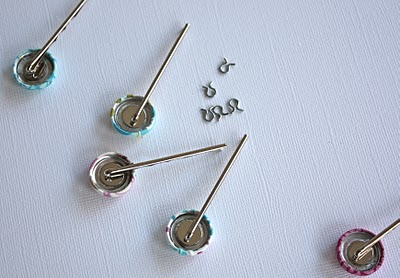
Step 5: Use a small amount of glue to to adhere the buttons to the bobby pins. I used Gorilla Glue. (Tip: The glue expands as it dries, so take it easy on the glue.) Leave the pins face-down for 30-60 minutes while the glue dries.

All done. See, wasn't that easy? A quick project and a jump-start on the year's birthdays all in one. Have a great day!

Signature
Post by Christina Williams : justcallmechris.blogspot.com

Eleanor’s New Bedroom

July 15, 2011

Partially Furnished by The Land of Nod

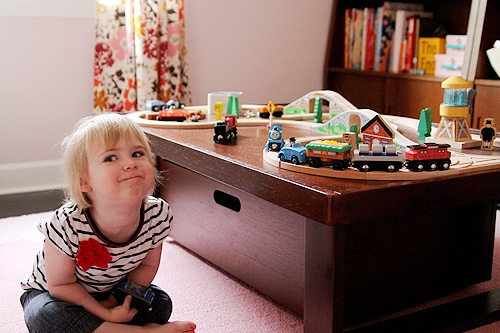
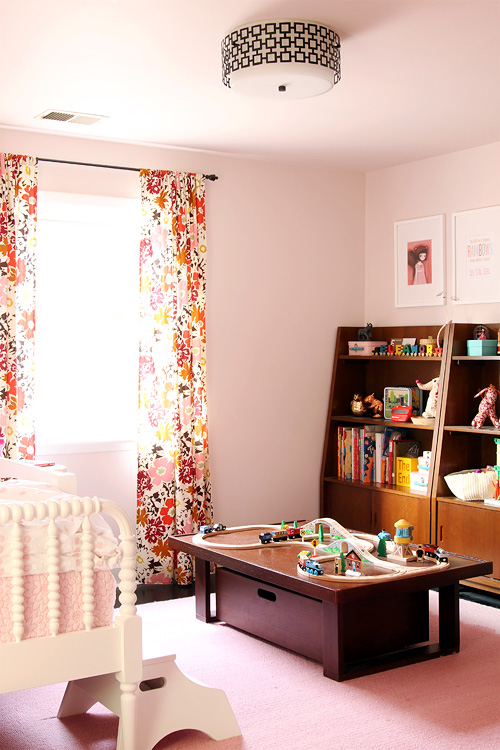
Eleanor’s room is done! She’s a fan.

1

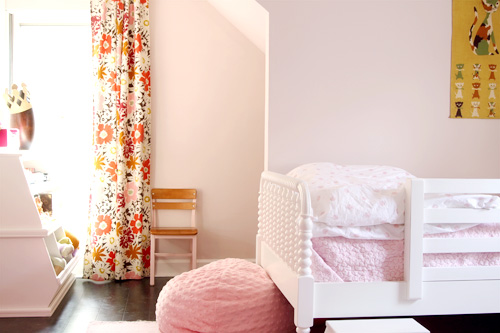
The pink walls, lighting fixture, and curtains that I made are still in the room from when it used to be my studio. There is a detailed list of sources on a separate page, so do take a look if you’d like to know where something specific came from.

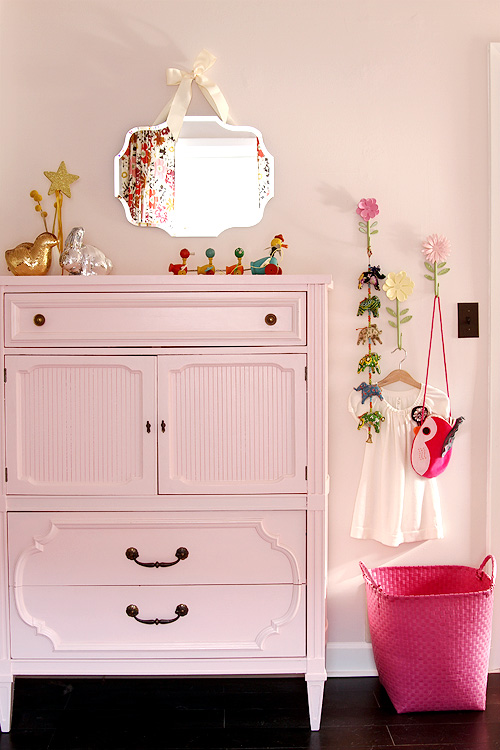
2

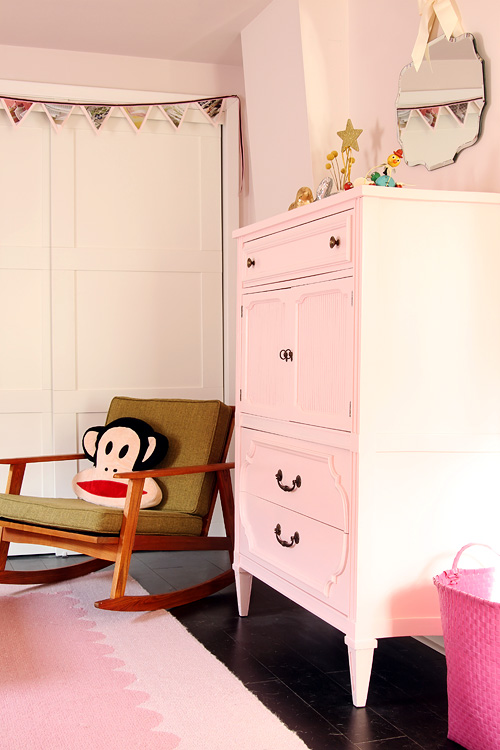
Here’s the vintage dresser from her nursery that we painted pink. I hung a mirror (it’s named the Eleanor Mirror!) above to reflect light from the window on the opposite wall, and the basket on the floor is for Eleanor’s laundry.

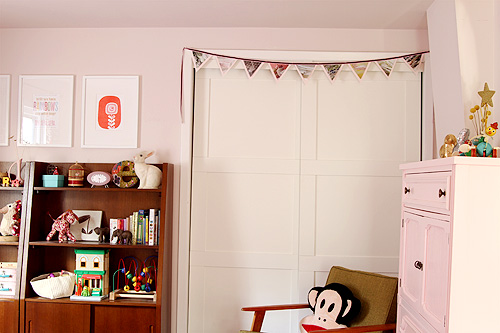
3

To the left of the dresser is a rocking chair and her closet. To the left of that are her bookshelves.

4

She loves grabbing toys from them.

5

6

7

8

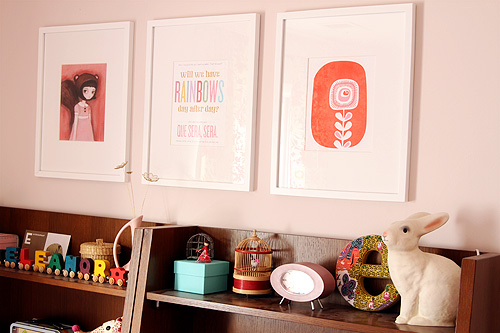
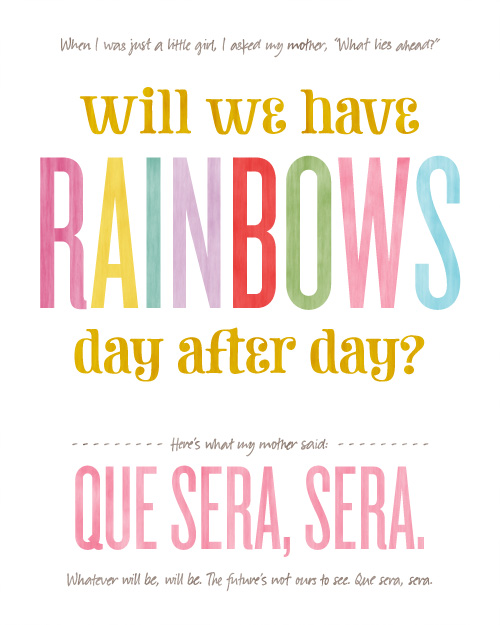
There are three framed prints above the bookshelves. I made the Que Sera, Sera print in the middle (download it for free here!), and the other two are by The Black Appleand Lulu Dee. The frames are from Target.

9

10

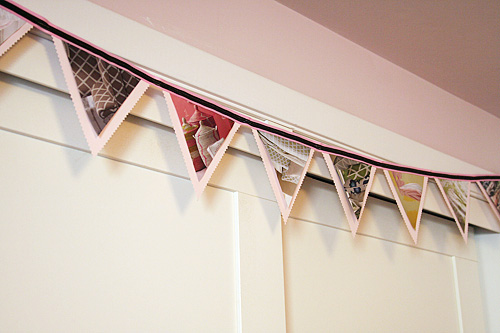
I also made the recycled paper banner that hangs above her closet.

11

12

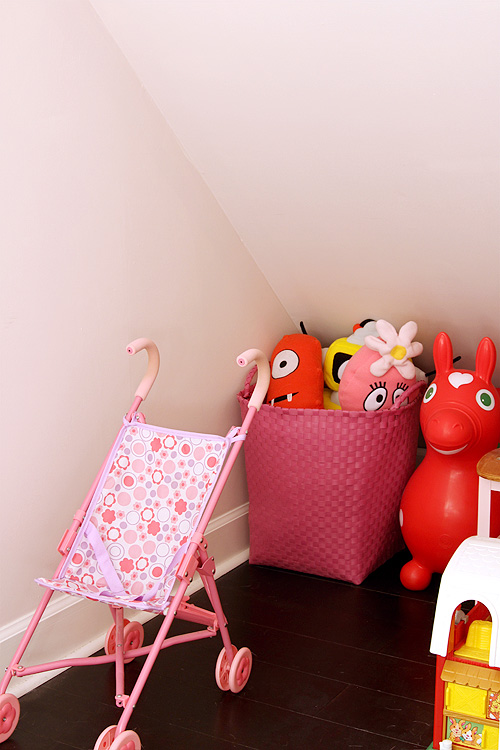
There are more toys on the other side of the room, behind the door. The smaller things are in toy boxes, and the larger toys are tucked away in a little alcove.

13

14

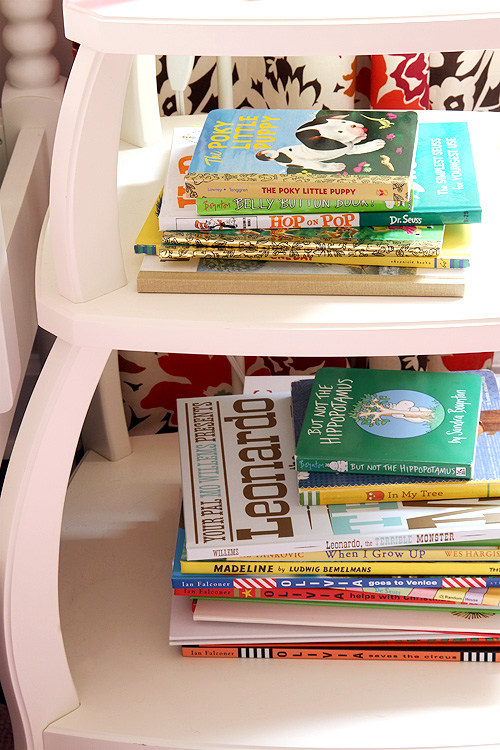
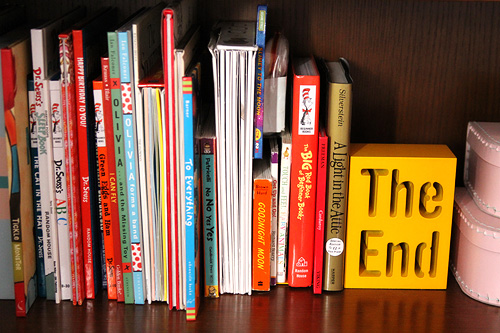
And then there are the books…

15

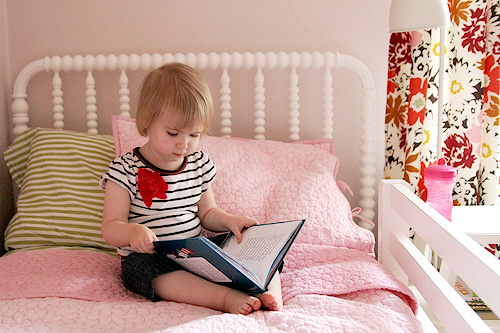
The girl loves to read.

16

Post by Nicole : http://makingitlovely.com/

There’s a Unicorn on the Toilet…

July 14, 2011

A little voice called out from upstairs:

"There's a unicorn on the toilet!"

Of course my curiosity was tweaked enough to head up and check it out.

What I found was a naked little dude who started laughing his head off once he saw me and realized one of his fresh little four year old jokes worked on someone. 

1

(find this image by Sugarboo right now onHaute Look, I LOVE it!)

I love being a Mom, especially when I see little senses of humor developing in my boys. Today we had a great consult on parenting from a child psychologist and realized we aren't failing as miserably as we sometimes feel…our challenges are normal and all and all we've got it pretty easy around here with three healthy, happy kiddos. He also gave us some amazing tips on dealing with protests and sibling fighting that I can't wait to try out. 

Nights like this when everyone is singing silly songs, cracking jokes, gratefully gobbling up what I cooked for dinner, chatting about their days and my twelve year old breaks out in a jig wearing a fedora bring me back to being so grateful for having my life right now…even if it does mean cleaning up messy unicorn pees and flushing forgotten unicorn poops on a daily basis. 

oxo

Post by Kerry MacLeod : www.snickerdoodles.ca

DIY Cardboard Box Houses

July 13, 2011

Post by Dane Holweger

DIY Cardboard Box Houses

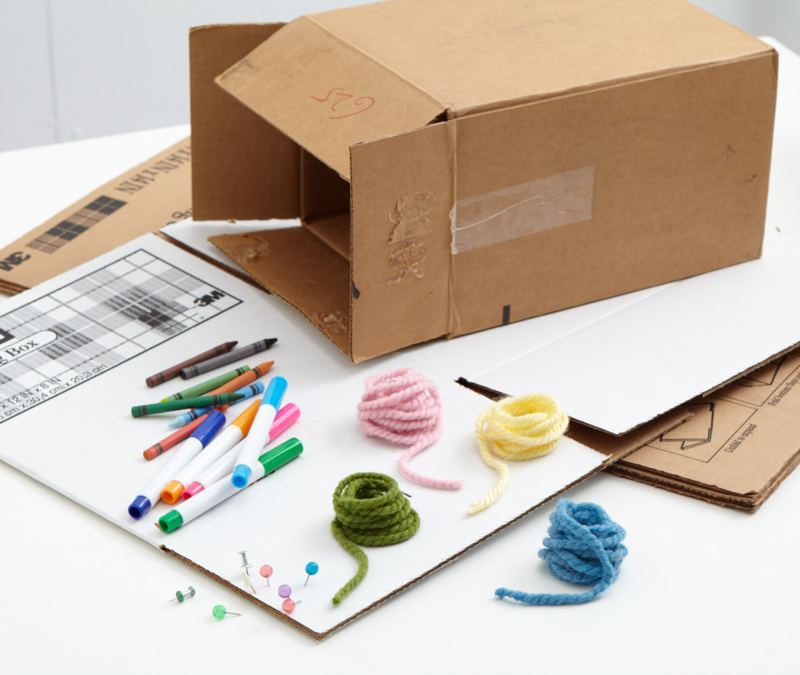
Whattya need?

  • Utility knife
  • Hot glue gun
  • Cardboard box
  • Yarn
  • Ribbon
  • Buttons
  • Other decorations
  • Markers and/or crayons
  • A city cardboard building permit

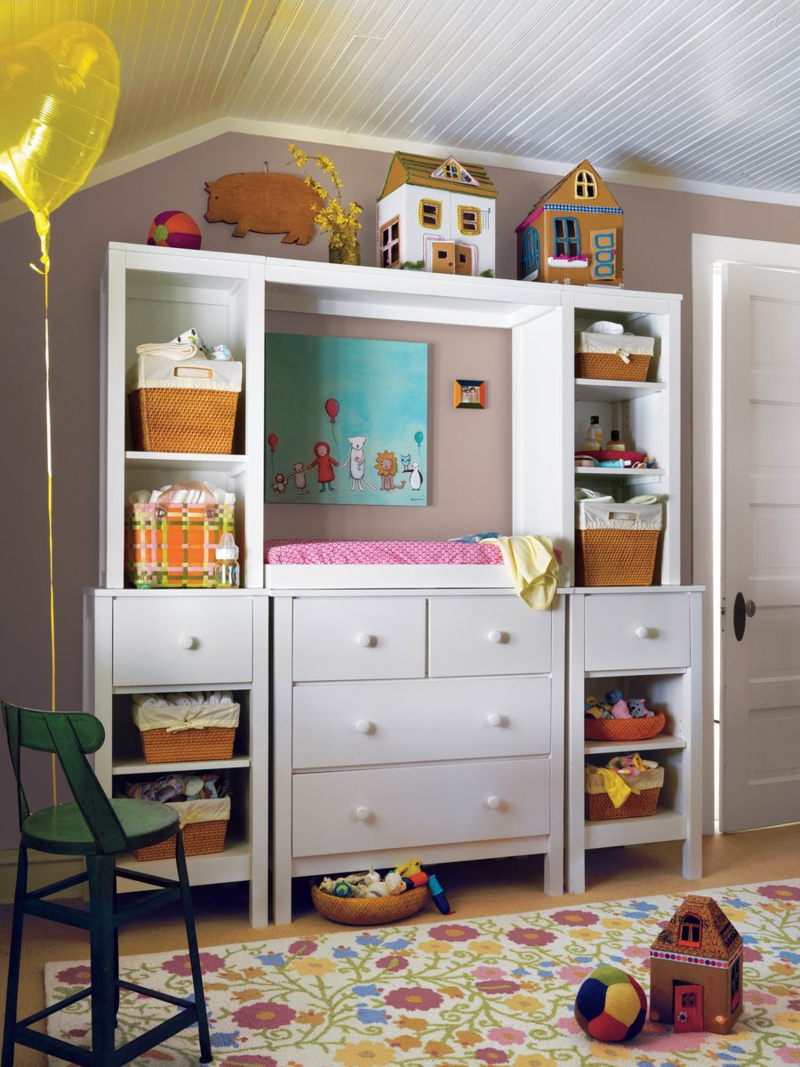
DIY Cardboard Box Houses - 1

How do I make the house?

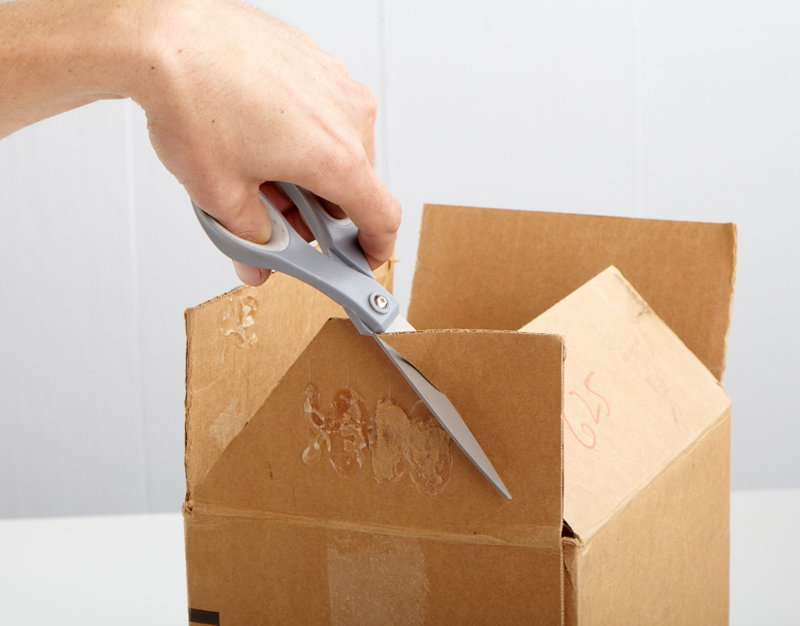
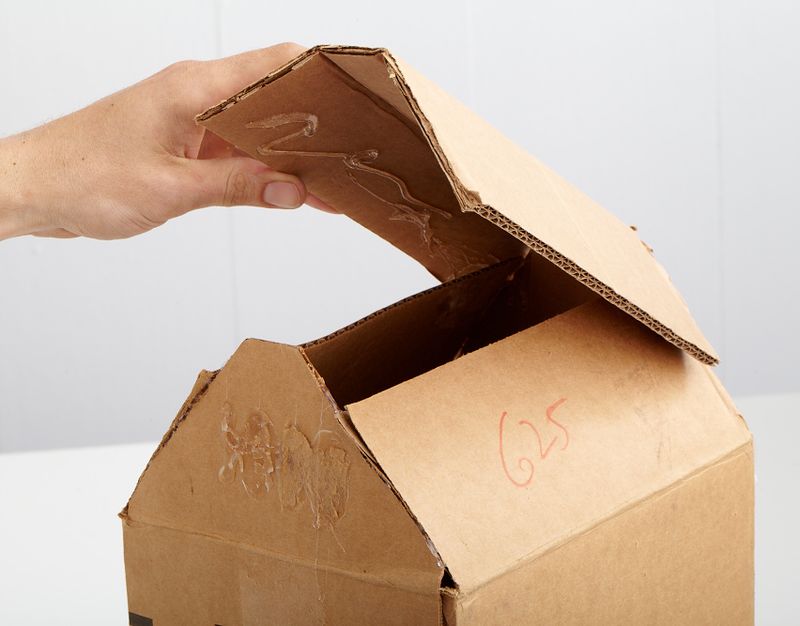
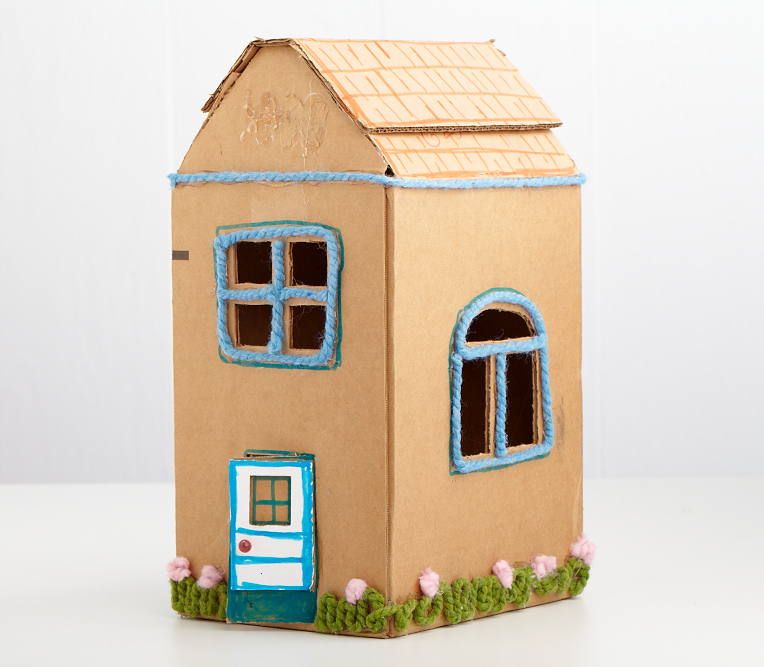
Step 1:  Cut the flaps on the open end of the box to create the roof.

DIY Cardboard Box Houses - 2

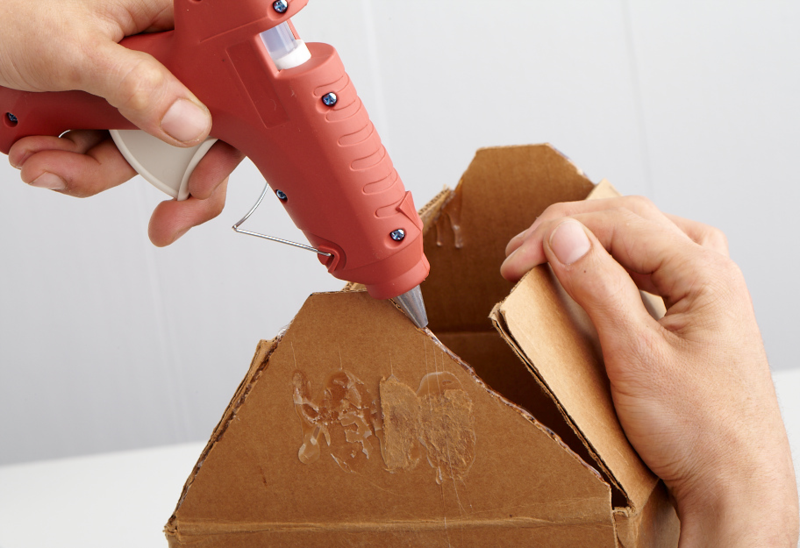
Step 2:  Cut another piece of cardboard to fit the peak of the roof.

Step 3:  Assemble roof pieces together with hot glue.

DIY Cardboard Box Houses - 3

Step 4:  Using utility knife, cut a flap at the ‘front’ of box and fold it back to create the door.

Box_house_05

Step 5:  Cut windows into the box.

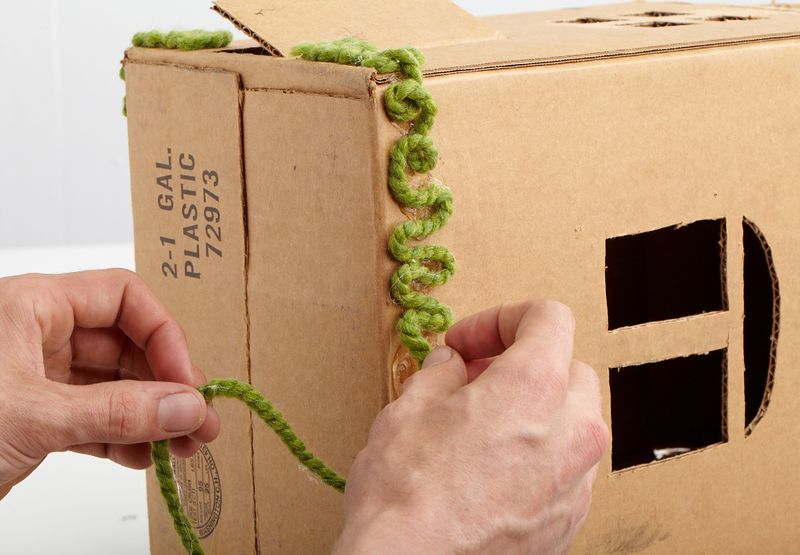
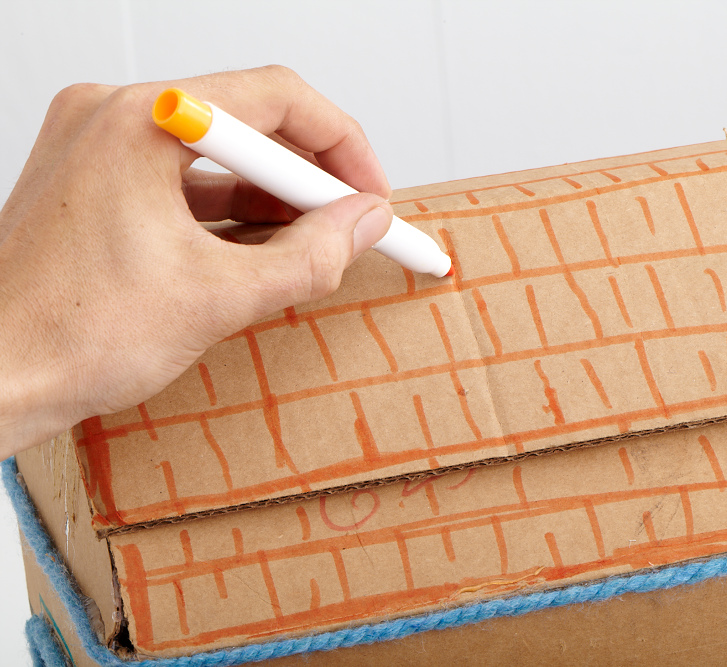
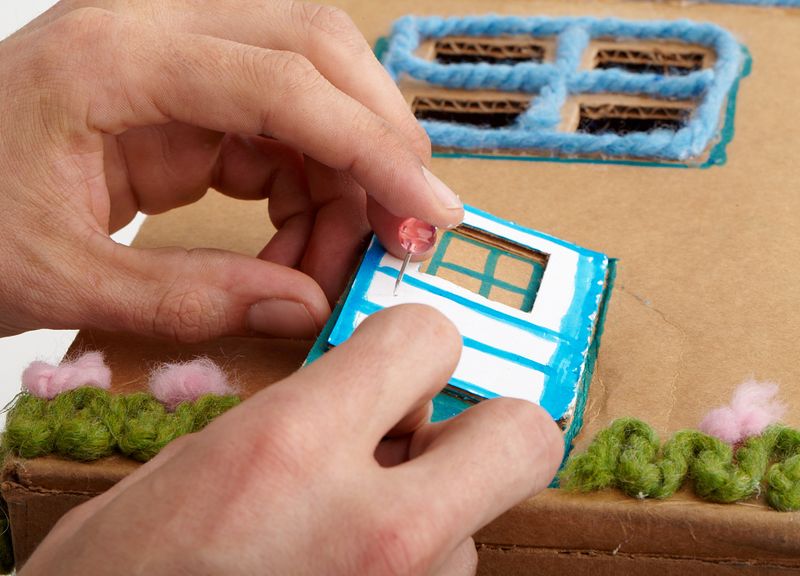
Step 6:  Decorate the house by drawing, coloring, or gluing on ribbon, yarn and other decorations.

Box_house_07

Box_house_09

Box_house_11

Box_house_13

Post by Dane Holweger