Chuck Close Self-Portrait Kids Craft
Post by Rebecca of Not-So-SAHM
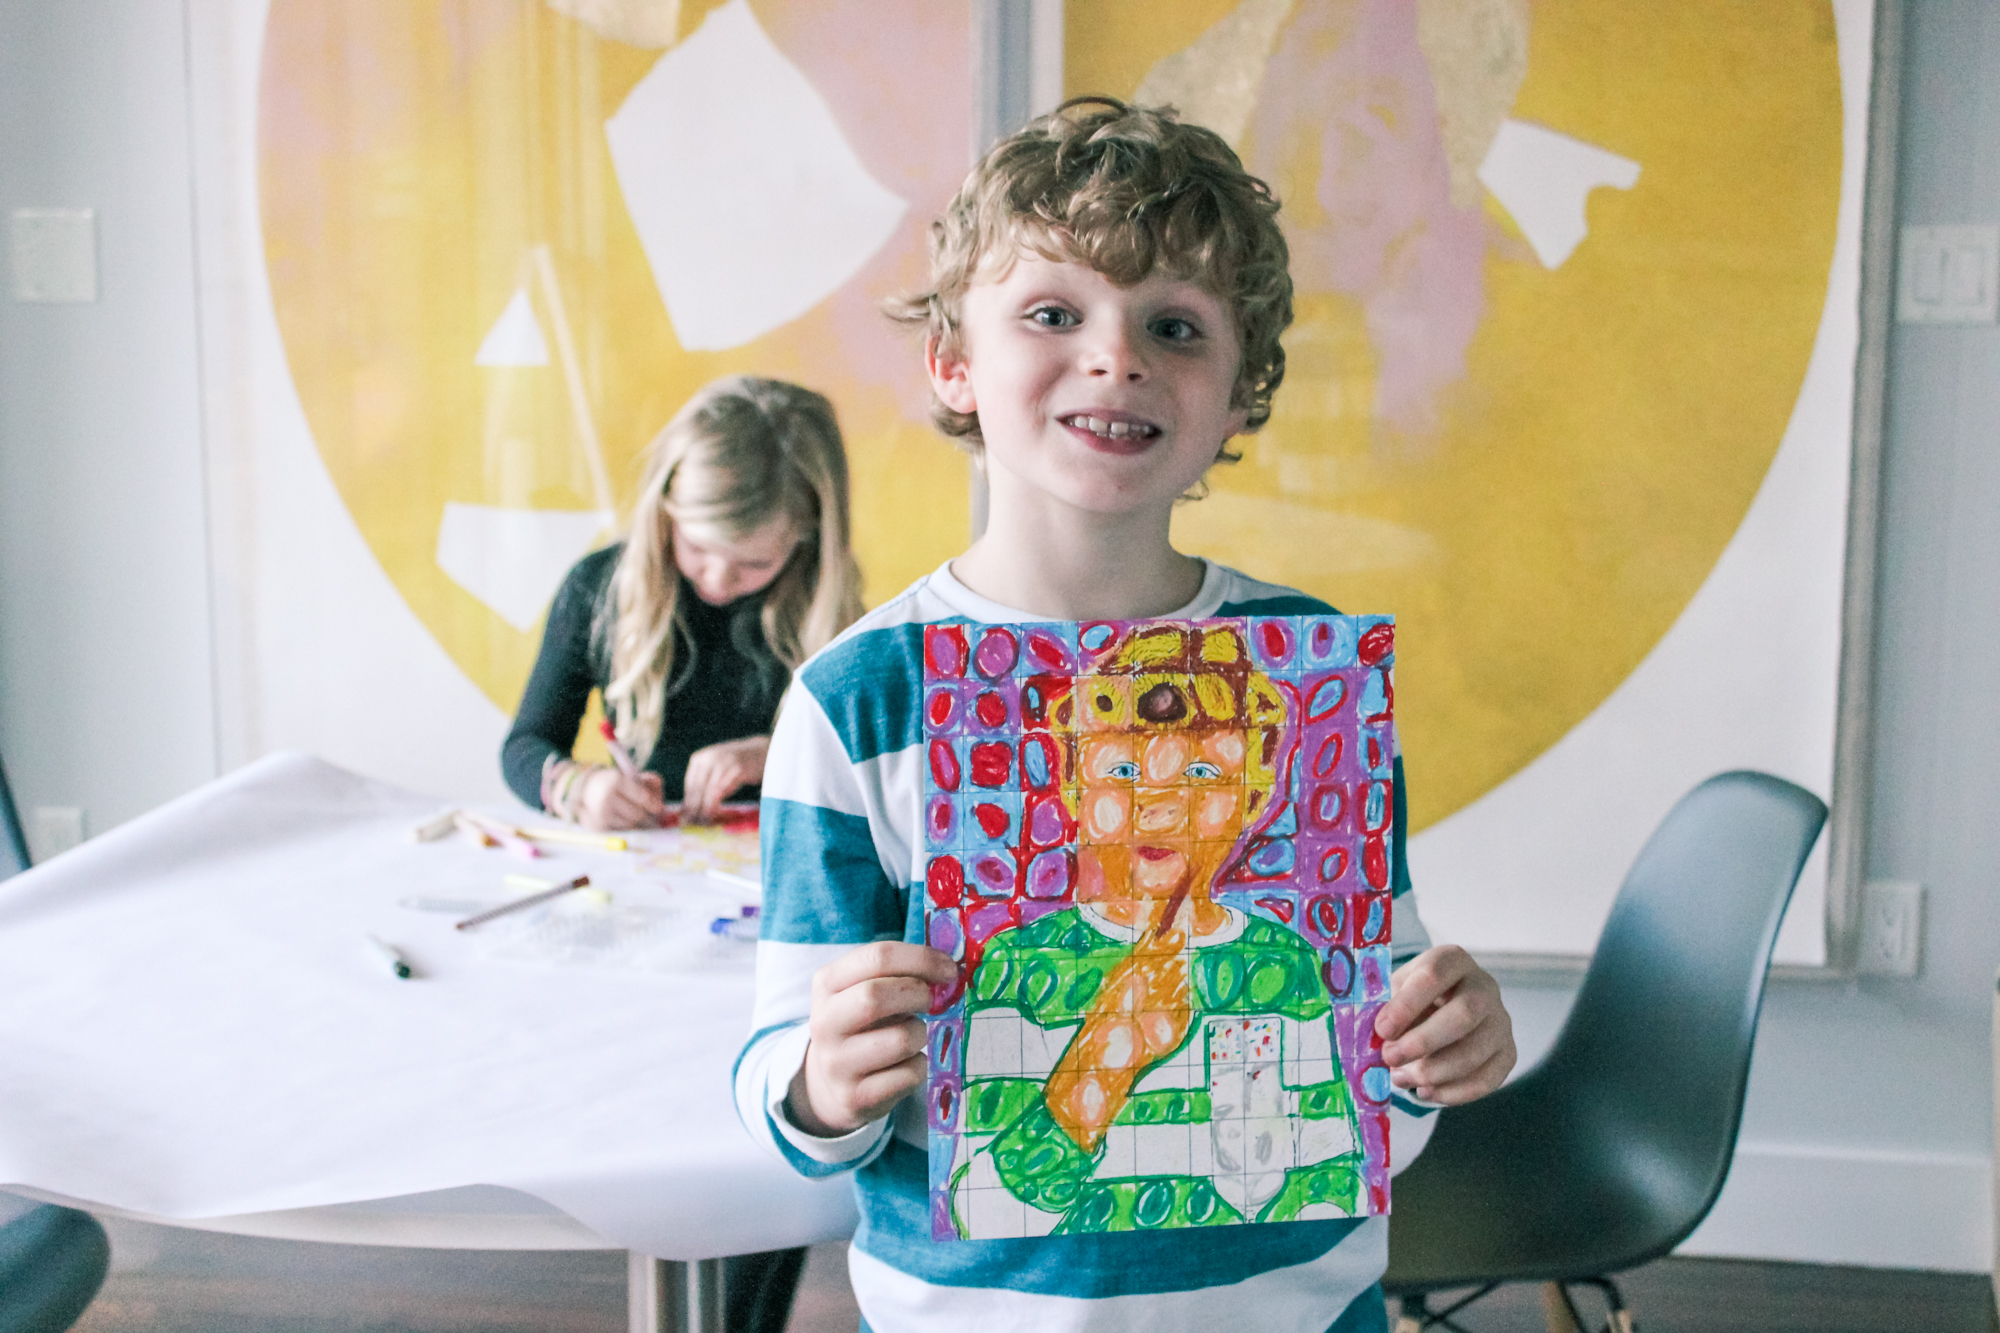
One of our most favorite art museums in D.C. is the National Portrait Gallery—I’ve mentioned before in our Food Face Collage project just how much we love the great family programming. So when I was talking with the kids recently about self-portraits, Kane brought up how much he liked the portraits at the America’s Presidents exhibit there, particularly the “swirly one.” It took me a while to figure out what he was talking about, but when I showed him Chuck Close’s portrait of Bill Clinton, he confirmed that was it! So we decided to take a go at making our own Chuck Close style self-portraits with the awesome Oil Pastel Twisty Stix, which have just enough range of colors to make skin tones work and keep fingers from getting messy!
We started out by reading a bit about Chuck Close and his art online. And then we looked at many examples of his photorealist works and I pointed out how he used different colors to create shades inside a grid. Up close, you see a grid filled with blobs of color, but when you step back, you see the portrait emerge. Cami said it reminded her of what pool tiles look like under water. I agree! We discovered a whole other layer of interestingness when we read that Chuck Close suffers from face blindness and painting portraits helps him remember faces.
I have to say, this was a little bit of a challenging project for the kids. We rarely do an art project following another artist’s technique, so they aren’t used to not just doing whatever they want. Kane really caught on quickly, but it took Cameron a little longer. And I helped both of them out, following their directions of course. But we all loved the project!
Materials
-
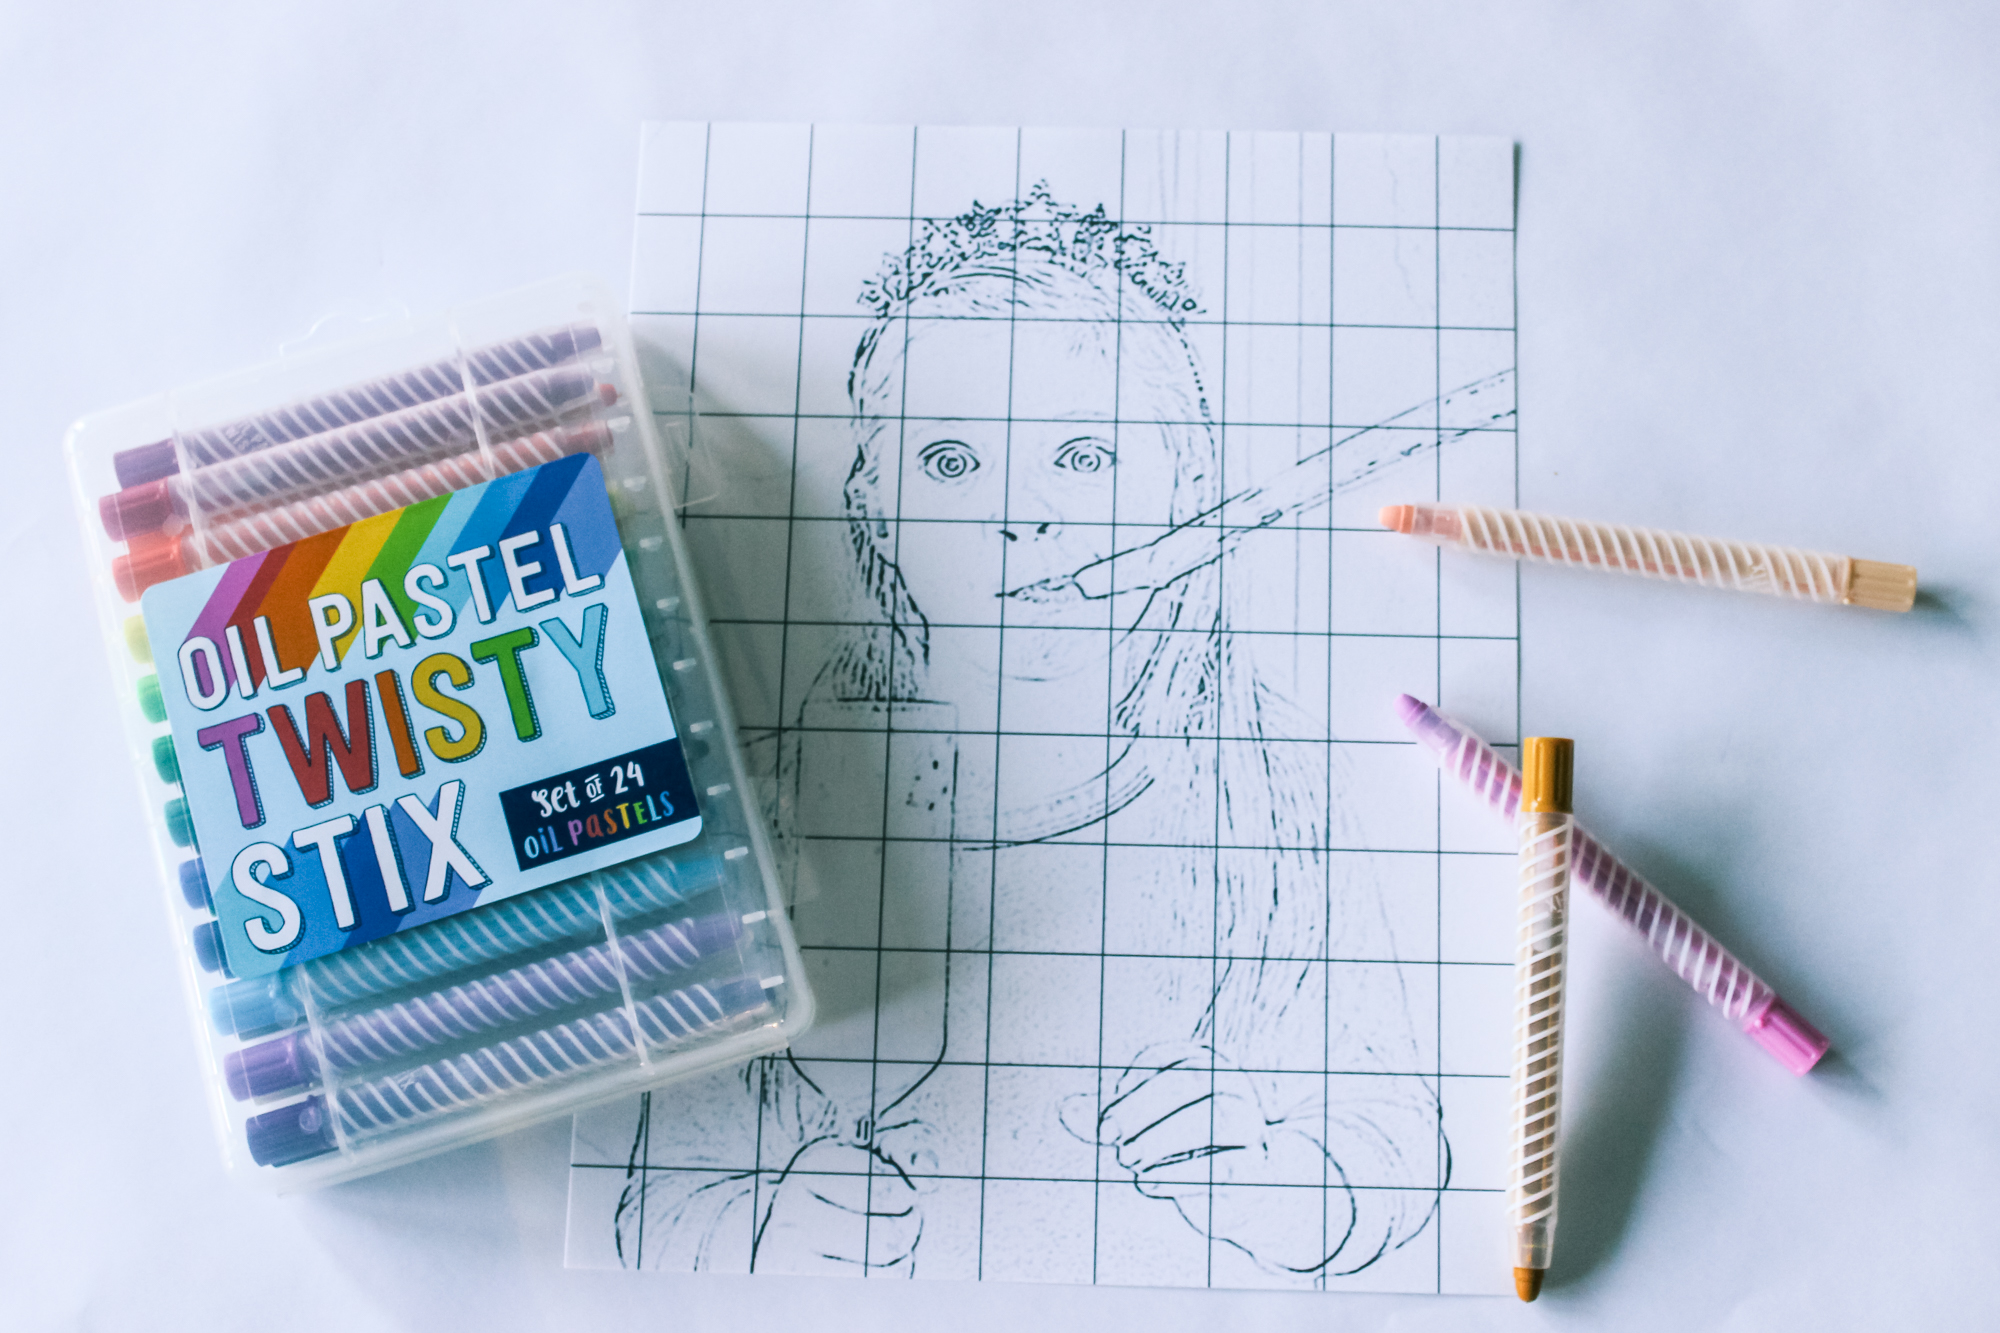
A close-up portrait photo—you can convert this to a sketch outline with a free online program like Snaptouch (what I did) or another photo editing program like Photoshop if you have it.
-
Gridded paper—you can print onto graph paper or download are grid design HERE.
-
Oil pastels
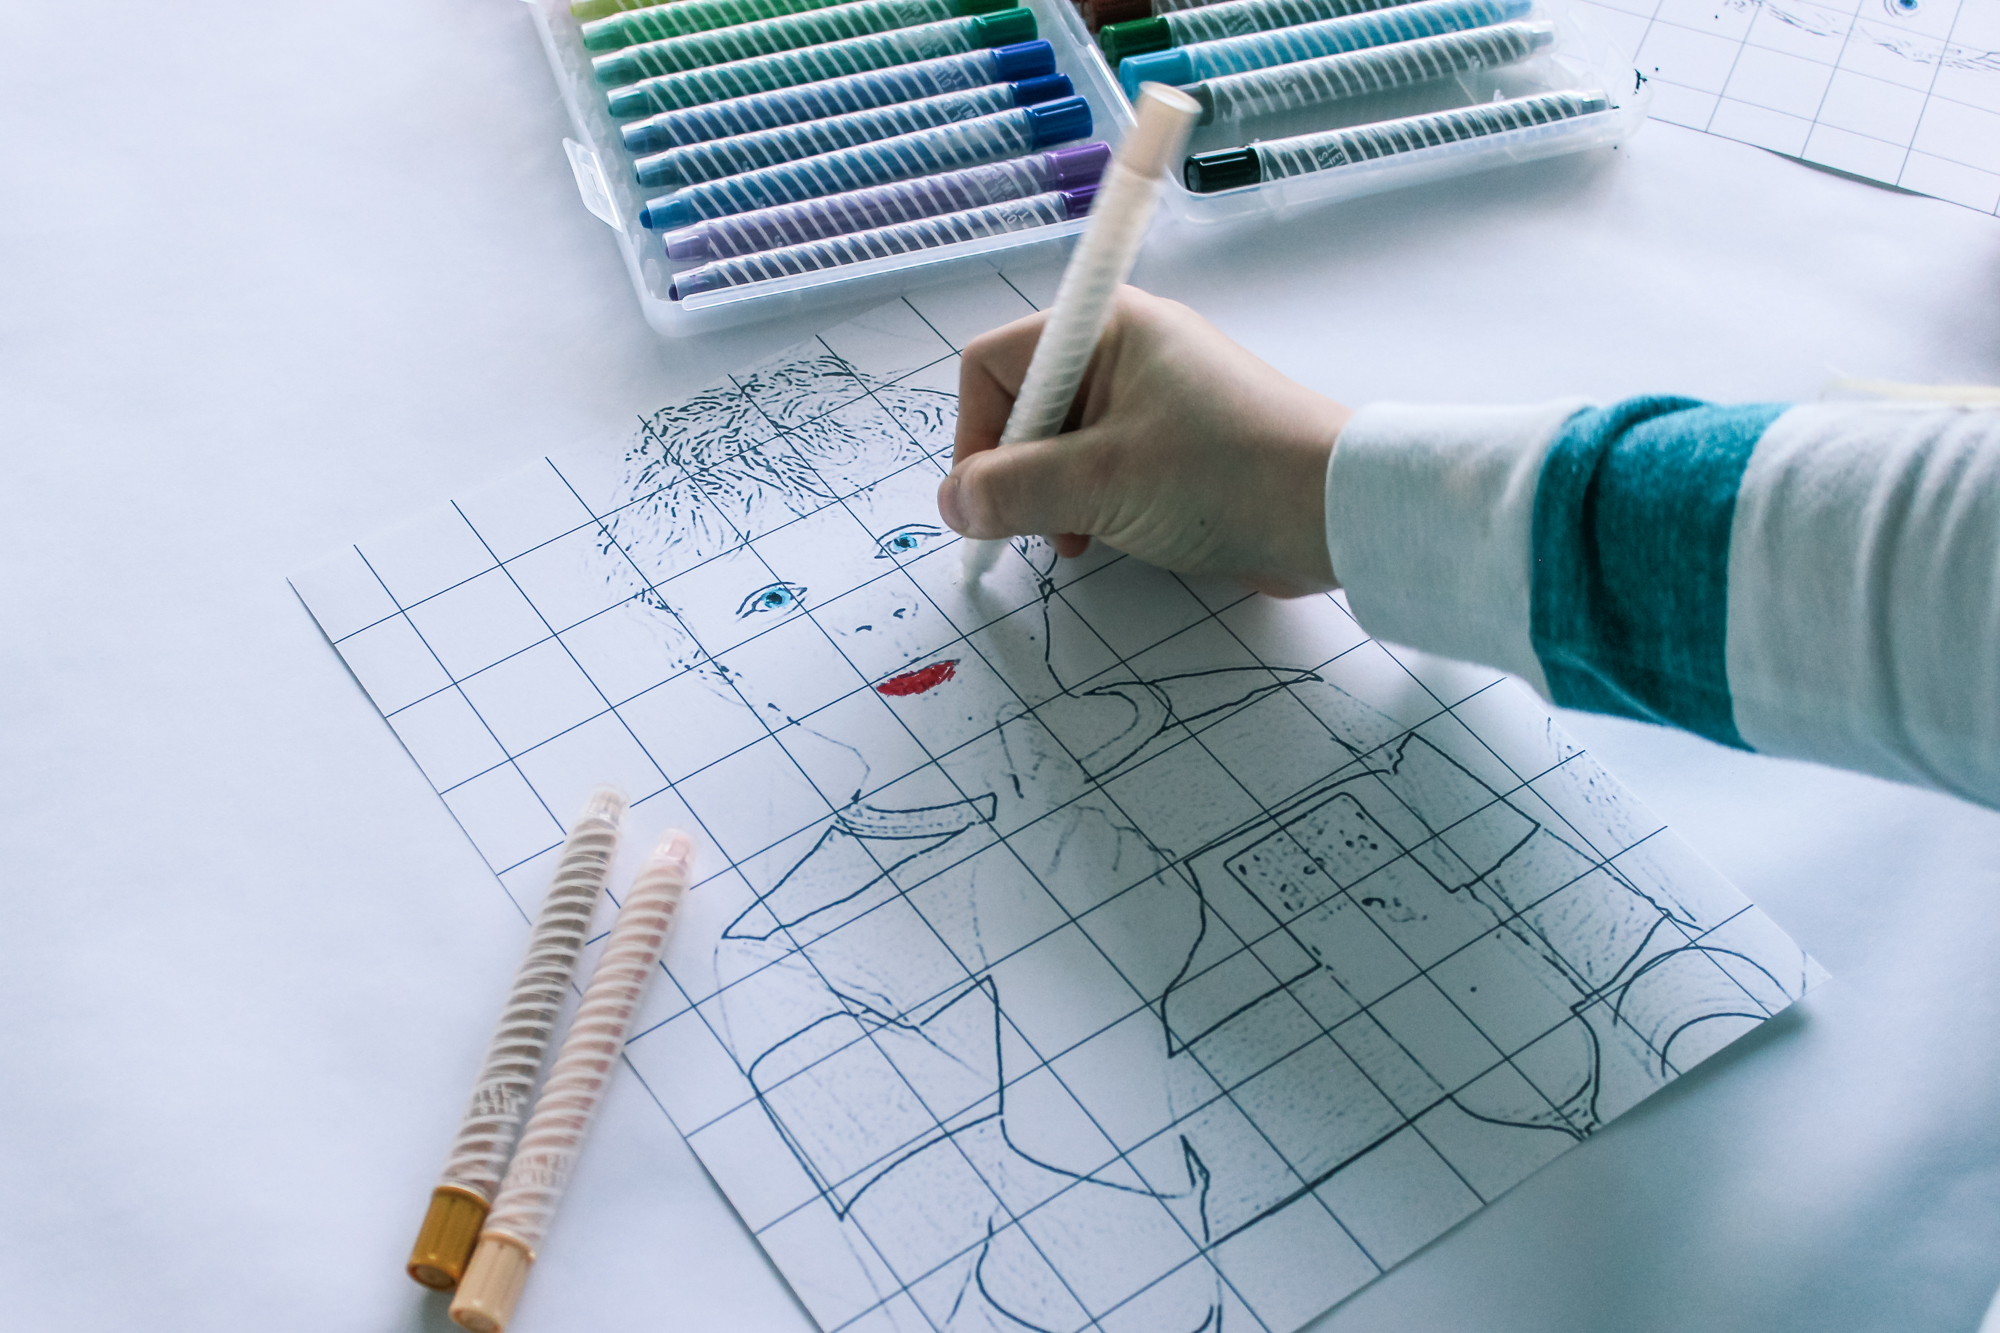
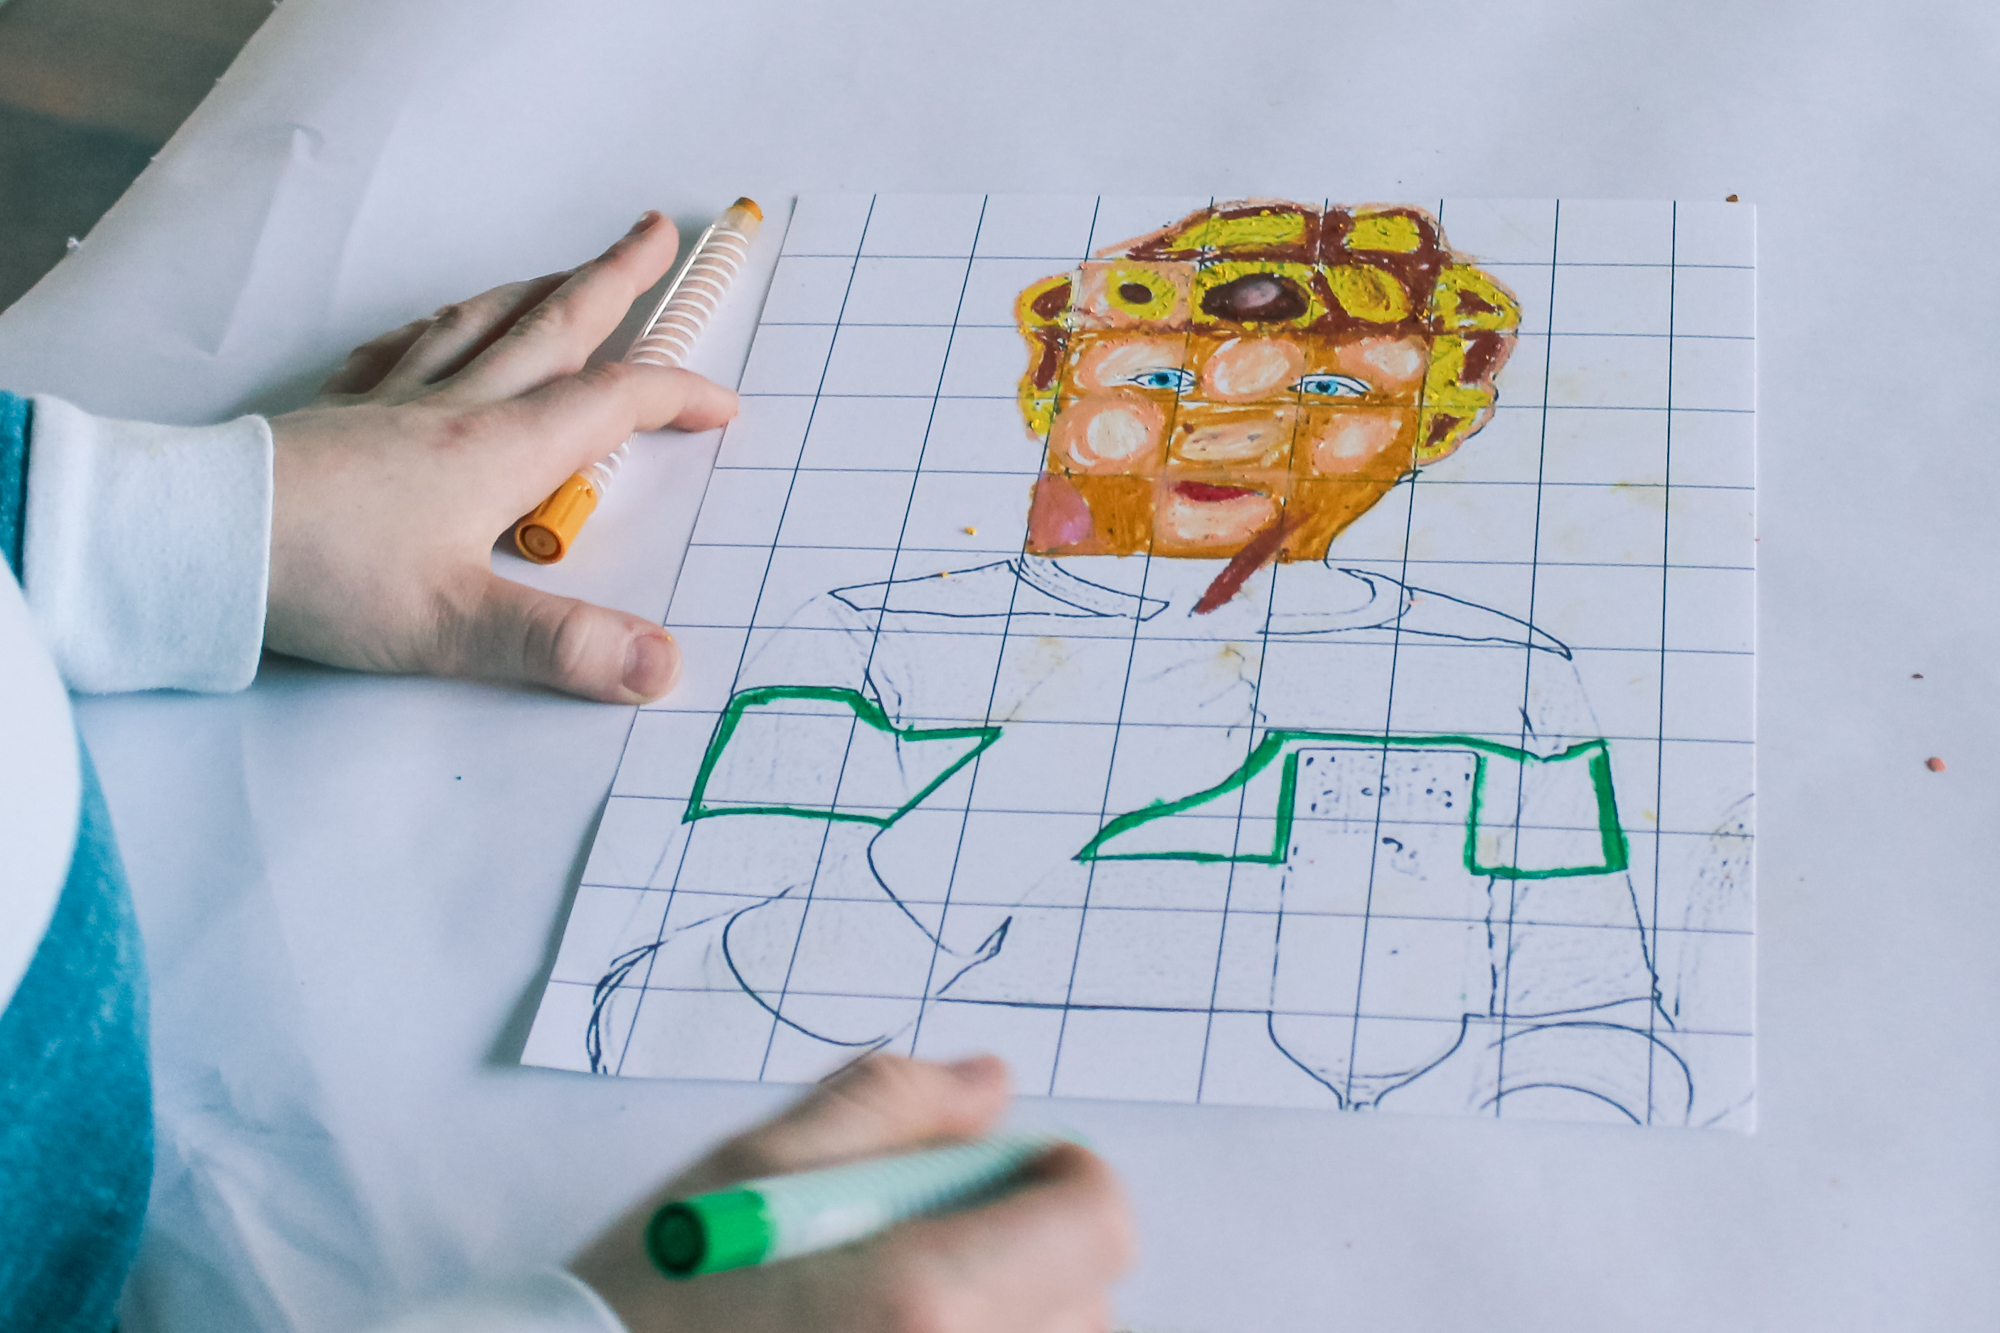
Once you’ve converted your photo to a sketch outline, print it out onto gridded paper. I used some of the photos I snapped of the kids for our Kiddie Mocktail post. We started out by coloring in some of the more important face details and accessories (eyes, mouth, tiaras). Then we outlined the different parts of the body just to help keep track of where we needed to change colors. The kids picked between 2 and 3 colors to use for each object (e.g., three greens for the stripes on Kane’s shirt; tan, brown, and white for skin areas, etc.). And then we got to coloring.
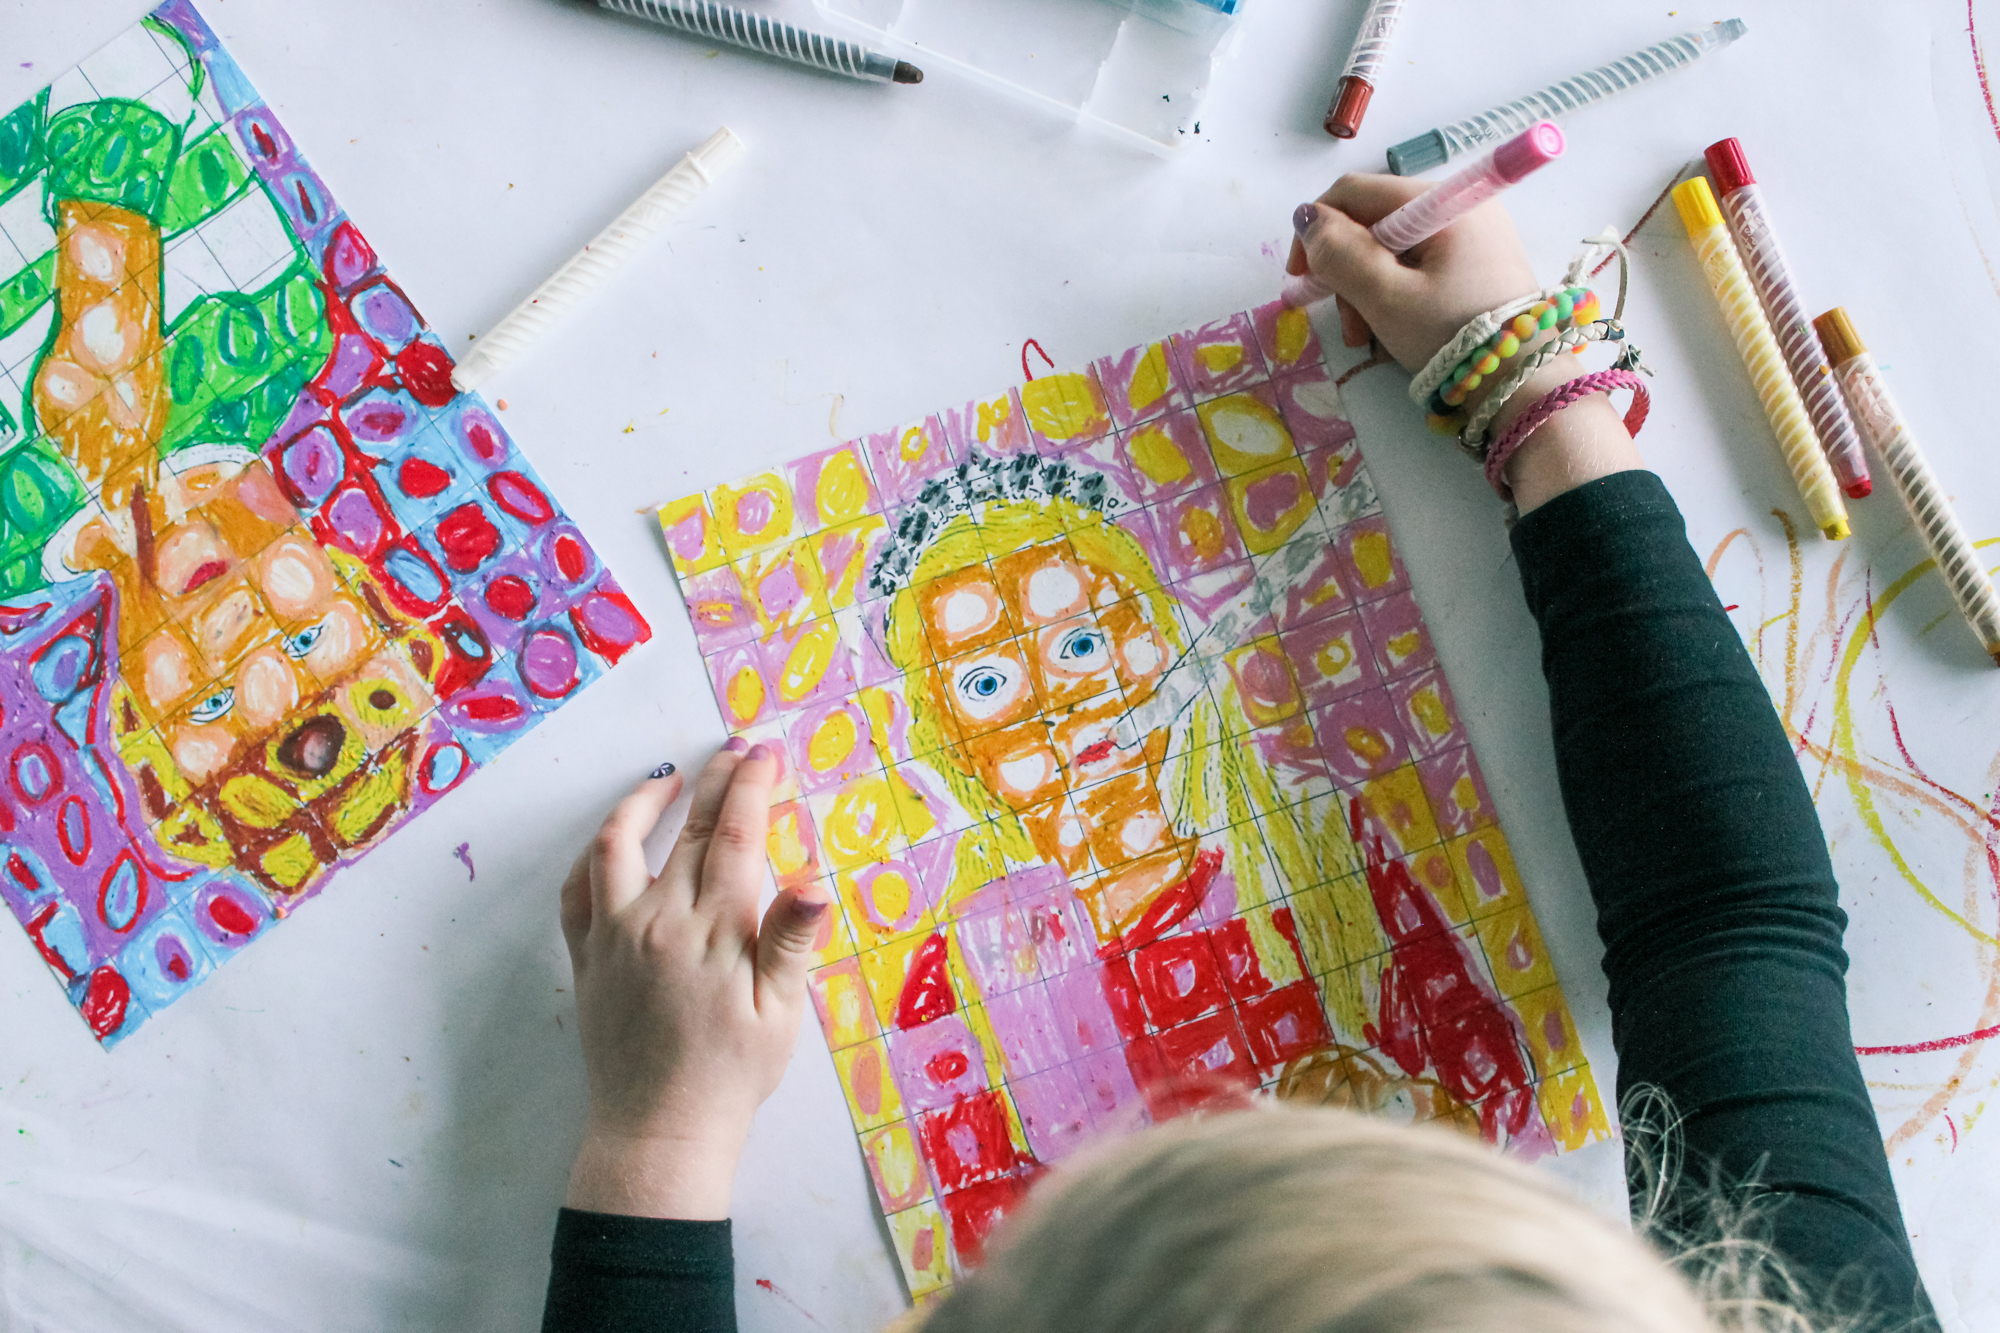
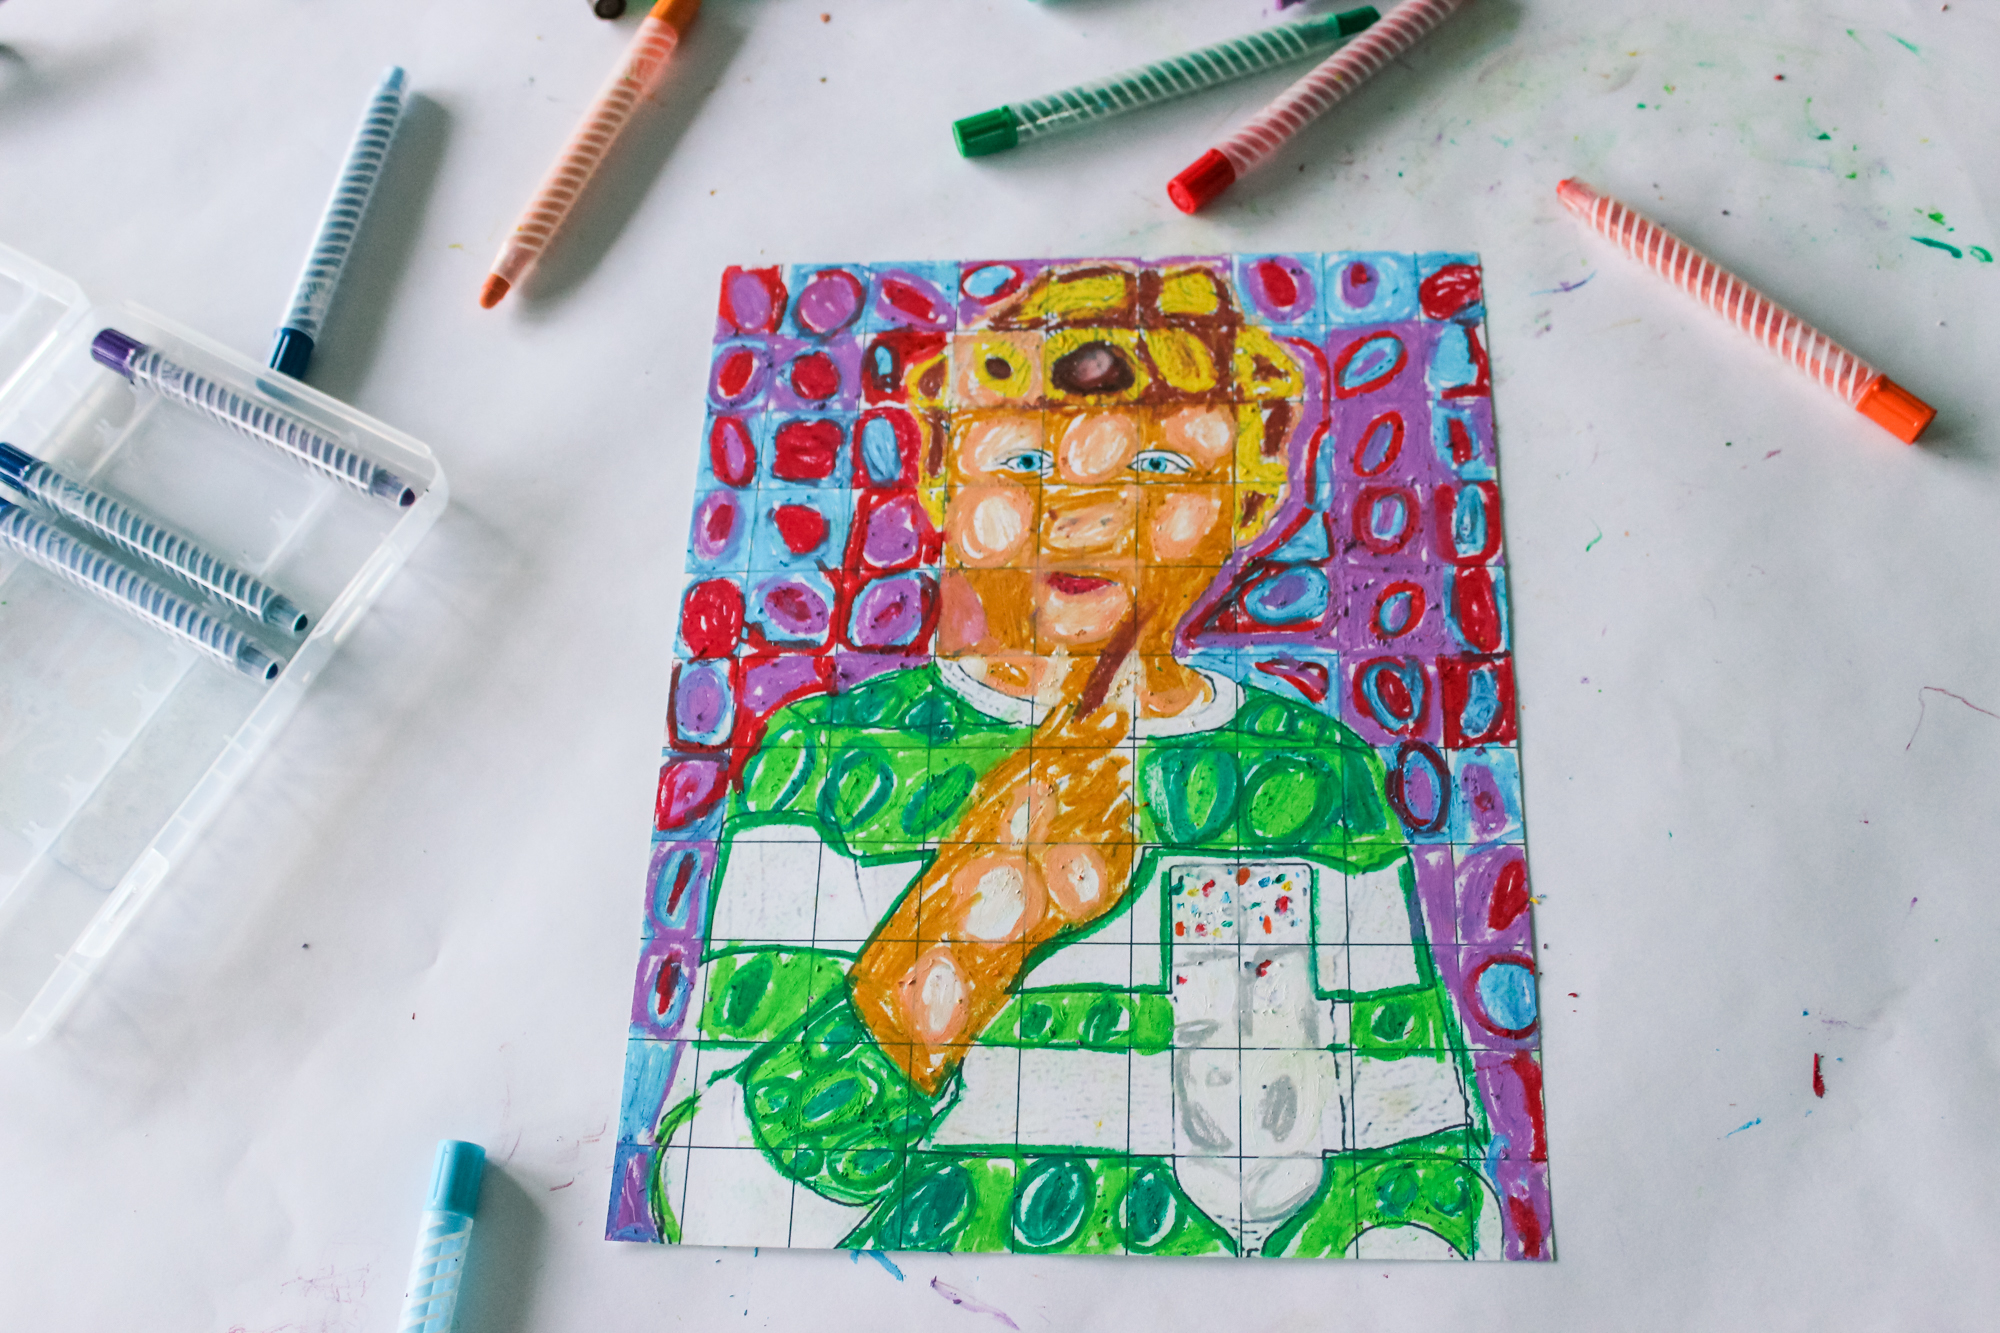
Cameron wanted to stay true to the actual photo whereas Kane wanted to change up what he was wearing and what the background color was. Both turned out amazing!
Rebecca is a mom to two young kiddos and, in her spare time (ha!), likes to pretend she’s a back-up dancer, craft cocktails, and run long distances. A relatively recent SAHM, she blogs family-friendly activities, DIYs and celebration fun at Not-So-SAHM.