Coffee Filter Roses
Post by Niki of Papery & Cakery
I’ve been dying to try my hand at paper flower making, but wasn’t sure where to begin. My friend Thuy told me about these gorgeous coffee filter roses she made for a party last year, so my mind was made up! I won’t lie. These flowers don’t take 20 seconds to make. But the results are worth the effort. They look so realistic and gorgeous. Plus, you’ll have them forever!
Coffee filters are a really resilient paper, so these are pretty difficult to mess up. Don’t be afraid. Dig in!
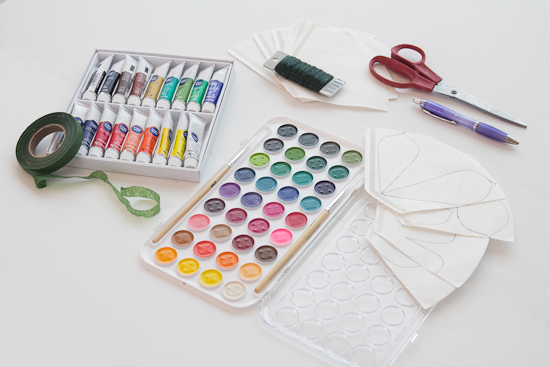
You’ll need:
+ 4 coffee filters per rose
+ scissors
+ floral wire – 1 stick per rose
+ floral tape {approximately 8 to 10 pieces per rose}
+ water colors {I prefer the this set} & a paintbrush
Assembling the Roses
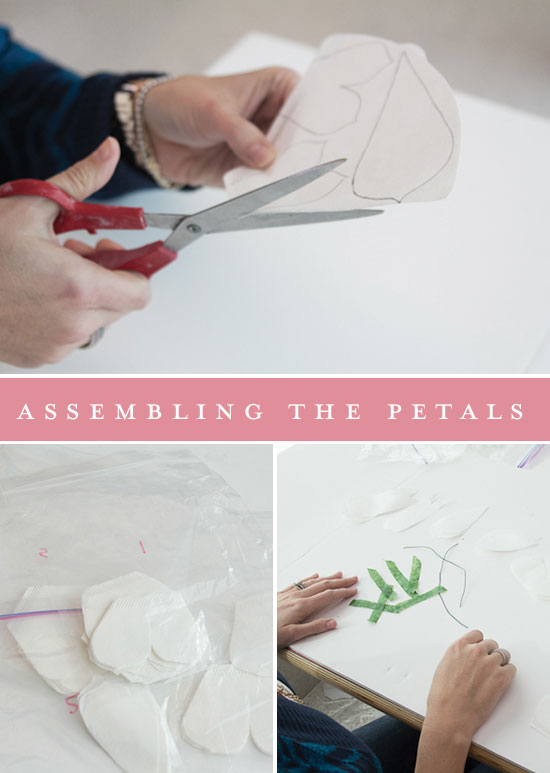
Start out by downloading and printing this template. Trace and cut out the petals. If you are making multiple roses place them in ziplock bags or cups corresponding to their number {which is the order you’ll assemble them in}. You can cut about 4 filters per shape.
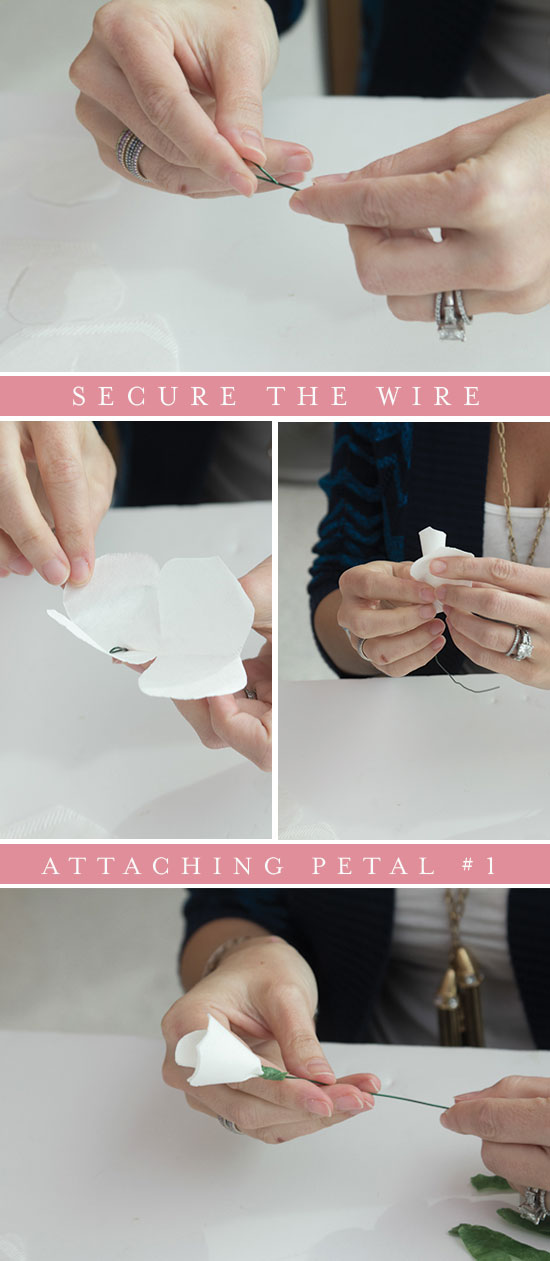
Stick the wire through the right hand of #1 petal. Bend the top of the floral wire creating a small oval, closing it on top. The “clasp” will ensure that the wire doesn’t go through the entire petal and will keep it from sliding around. Make sure it pushes down so it “hooks.” Fold the petal inward and roll to coil around the wire. Then wrap a piece of floral tape {about 4-6 inches long} the base of the petal to secure.
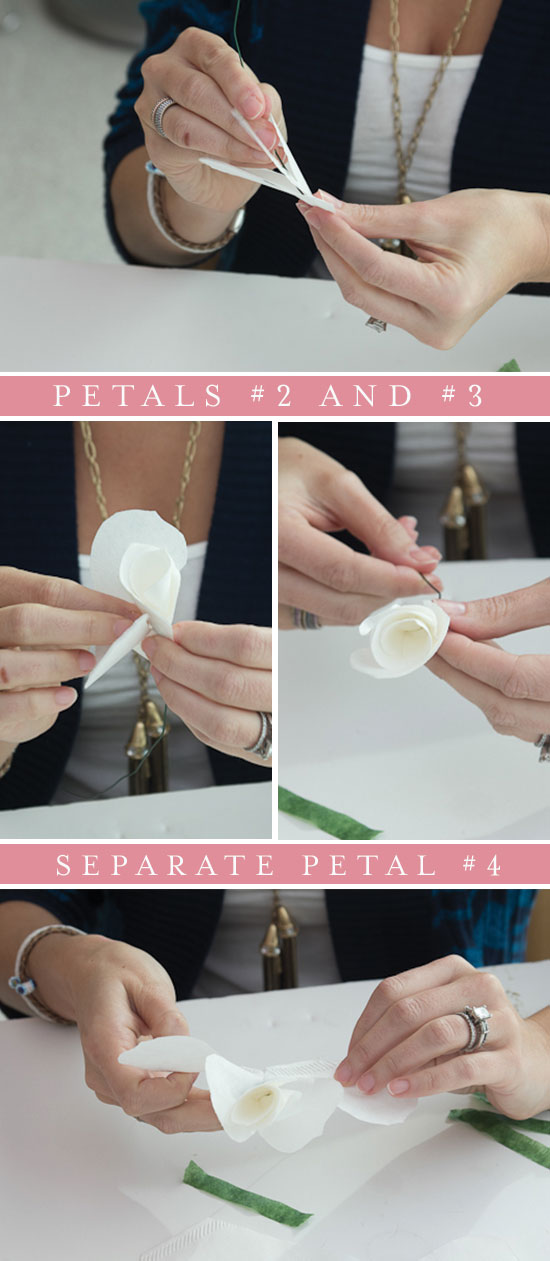
Petals #2 and #3 are added just like #1. Poke the wire down between the right petals. Arrange the petal so that it fills in empty spaces between the first petal. Roll and secure with a piece of floral tape. Pull and stretch the tape to get a good, tight hold around the base.
Petal #4 needs to be separated first. Gently tear along the bottom of the petal to make a flat strip.
Then wrap this around the rose and secure with tape.
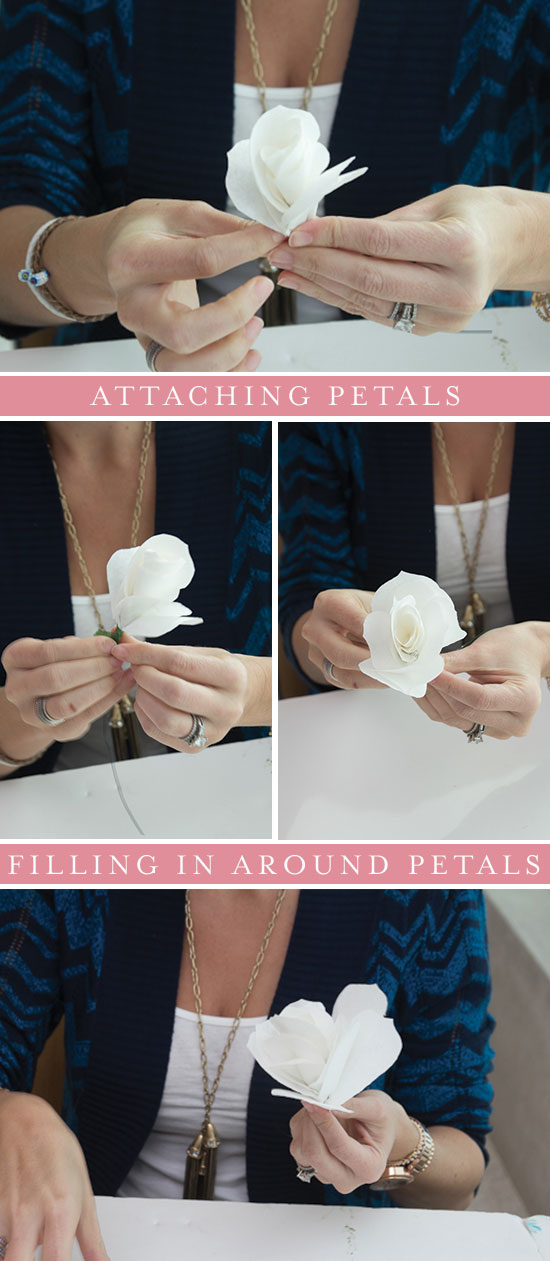
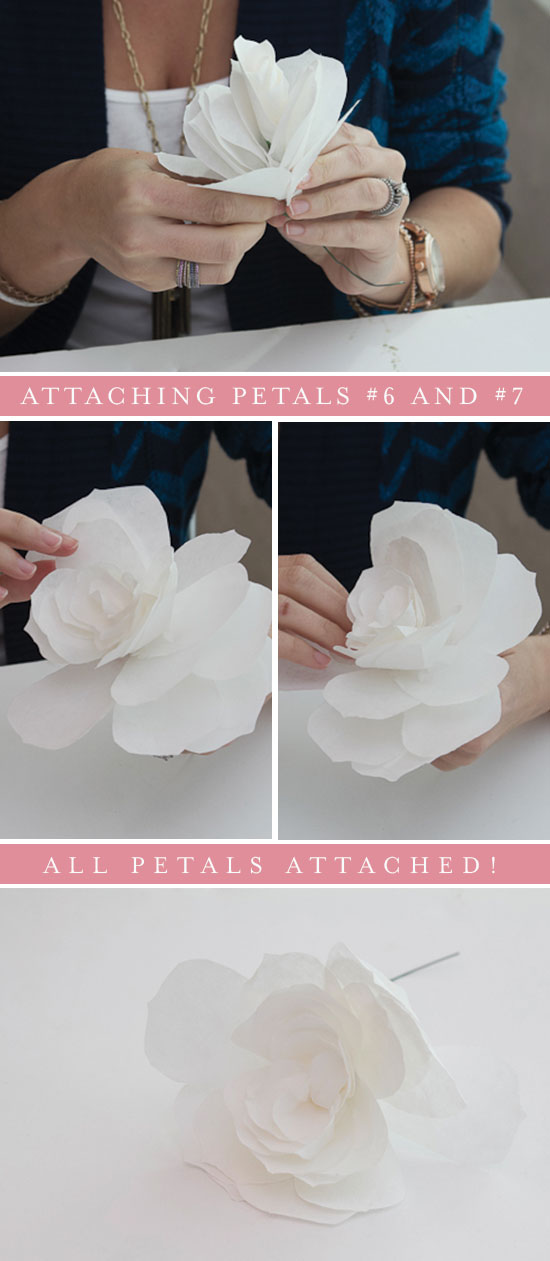
Next get two #5 petals and two #6 petals (since these petals weren’t cut on the fold, you’ll have double the amount of these). Fan out the four petals like you would a hand of cards. Place the rose in the center and wrap the petals around the rose. Secure tightly with floral tape.
Repeat with two #7 petals and two #8 petals.
Then wrap the entire stem in tape for a more realistic look, or to help secure it together.
Fan out the petals, bending gently backward from the base.
Painting the Roses
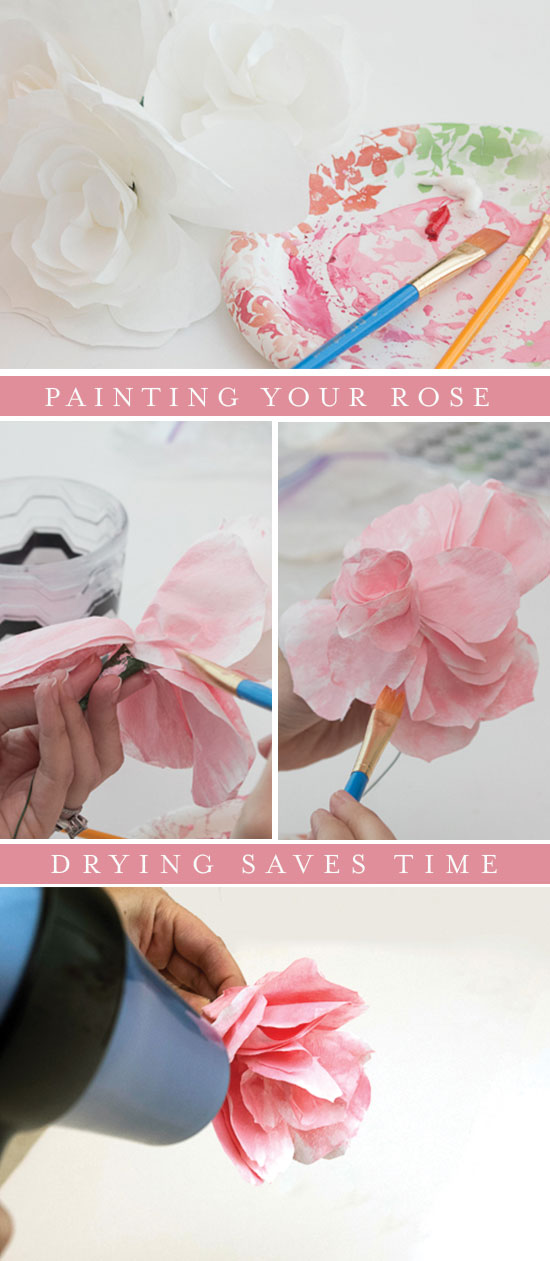
Mix your color using tube watercolors {I found that their density and thickness works best}. I like this set.
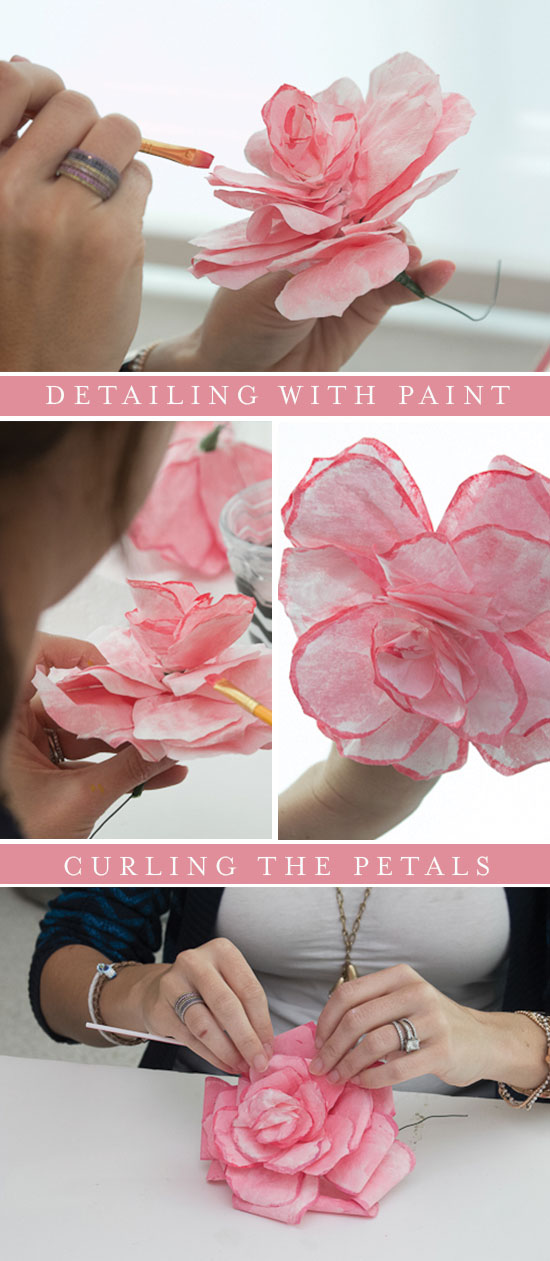
A little color goes a long way when you mix with water. Paint the petals, starting from the center and working outward. If you use enough water the color will bleed through. Let the petals dry {or expedite with a blowdryer}. You’ll notice the coffee filters almost harden as they dry with paint.
Use a second, deeper version of your initial color for contrast and shaping. Run the tip of your brush along the edge of each petal. I edges each outside petal completely, while really onto edging the top of the inner petals.
Again dry or turn upside down and wait about three hours.
Once your rose is dry, shape the petals. I used a small plastic straw, but you could use a pen/pencil or something small and round. Roll each petal around it to curl backwards and “open” your rose.
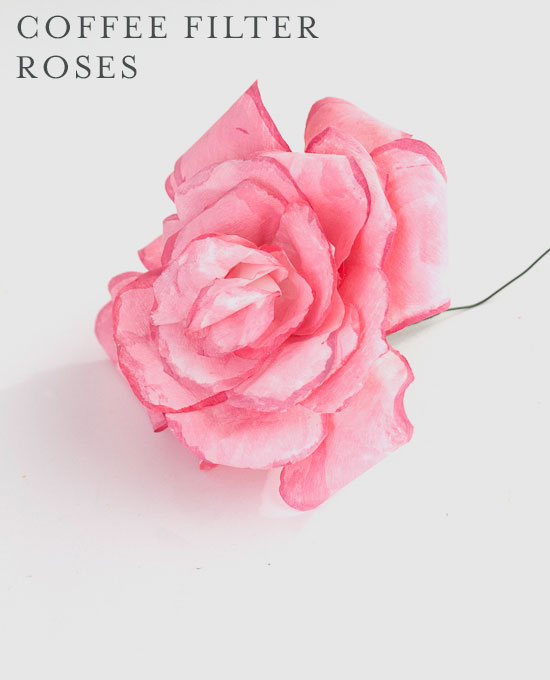
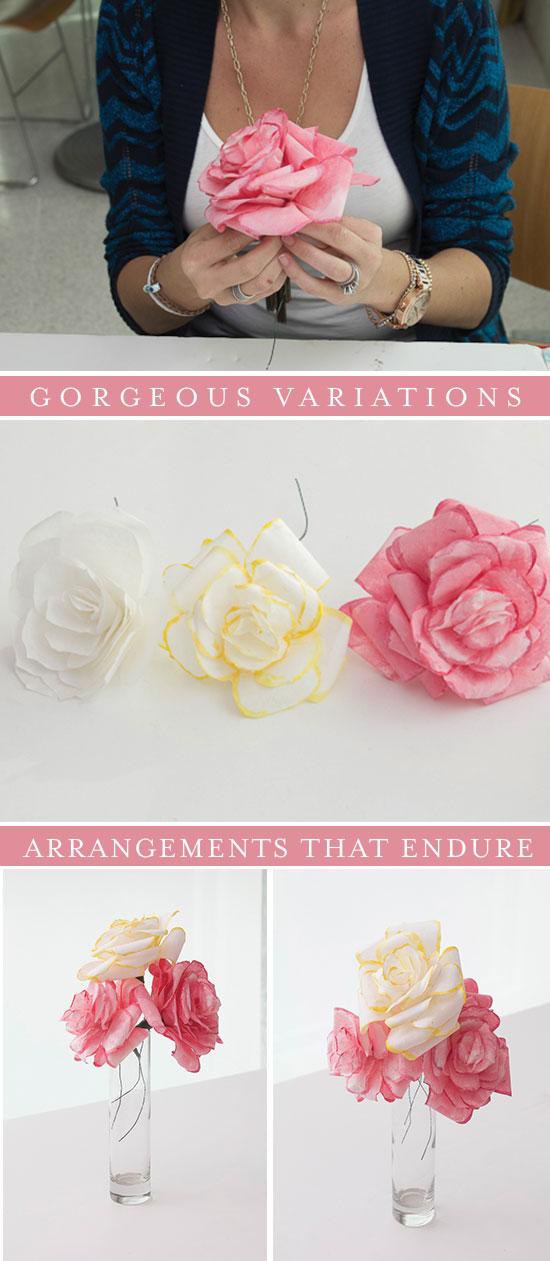
Arrange into a bouquet, vase or as a single lovely rose!
xoxo,
Post by Niki of Papery & Cakery
