DIY Color Blocked Advent Calendar

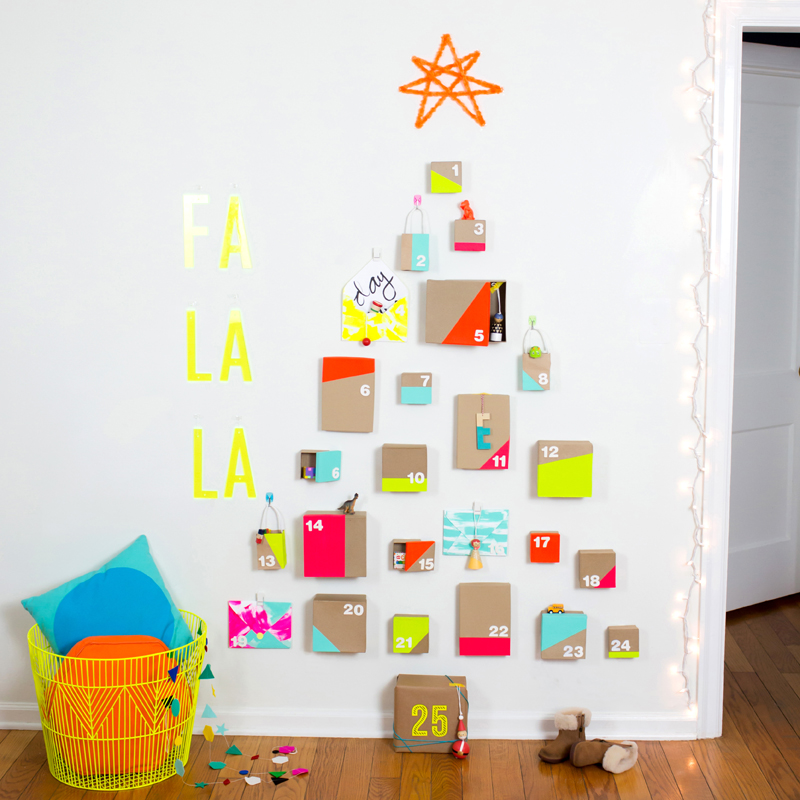
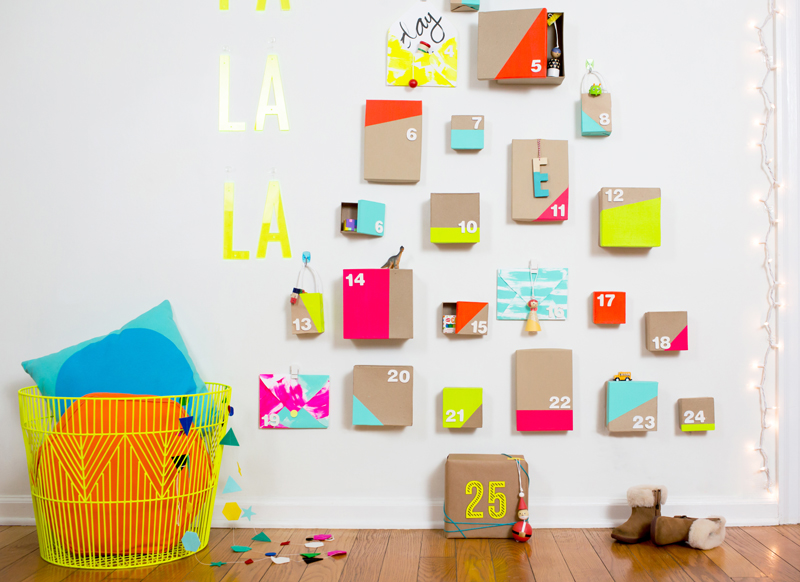
Come December, kids and adults alike begin the exciting countdown to Christmas Day and a DIY color blocked advent calendar is such a fun way to bring the countdown to life! We created this life-size version to accommodate all the various sizes of little gifties you might want to include! It’s bright and fun and so easy to create!
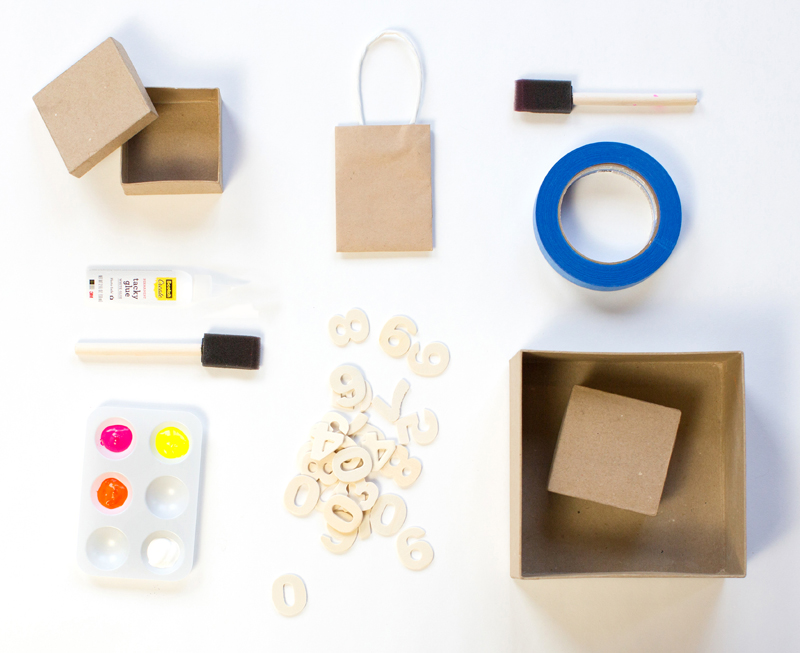
Materials Needed:
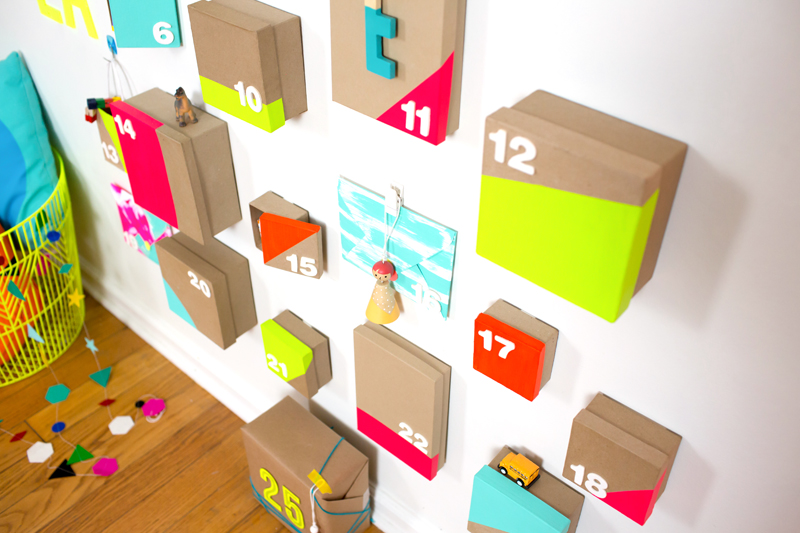
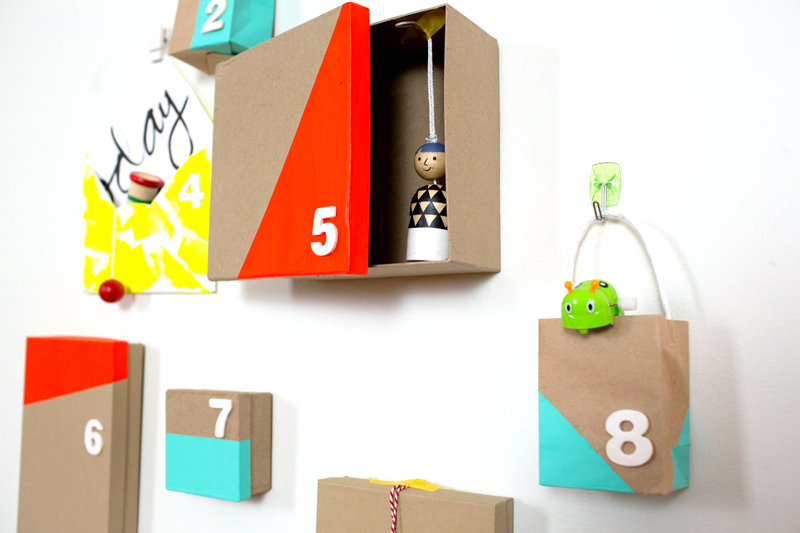
- various sizes of kraft boxes with removable lids
- small kraft bags
- (optional: large envelopes)
- (make sure your bags and boxes add up to 25)
- 3M painter’s tape
- small foam brushes
- neon paint
- mall wooden craft numbers
- white paint
To Prepare:
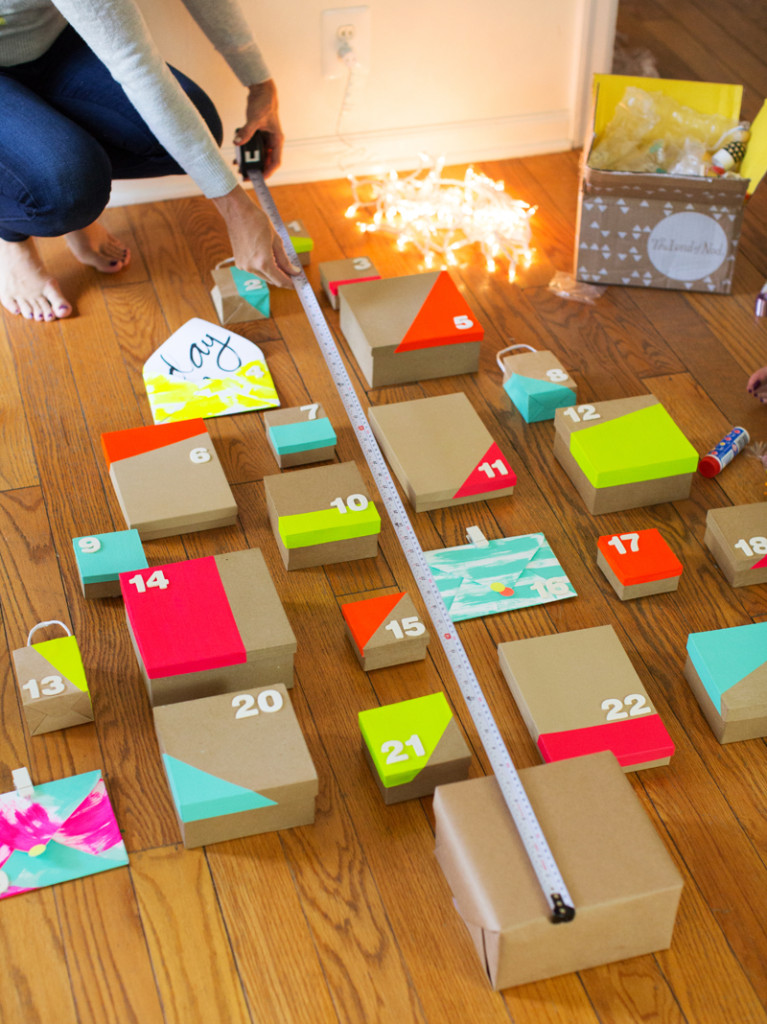
To create the DIY color blocked advent calendar, we first laid the bags and boxes out on the floor in a tree (triangle) shape. It might take some moving around to get it just how you like it. Once we landed on a layout that would work nicely, we used post-it notes on the back to number the boxes and mark which colors we wanted to paint. Then, once the arrangement is dismantled for painting and applying numbers, you won’t lose track of what goes where. We even took a picture of it to refer to.
Ok, now lets get started!
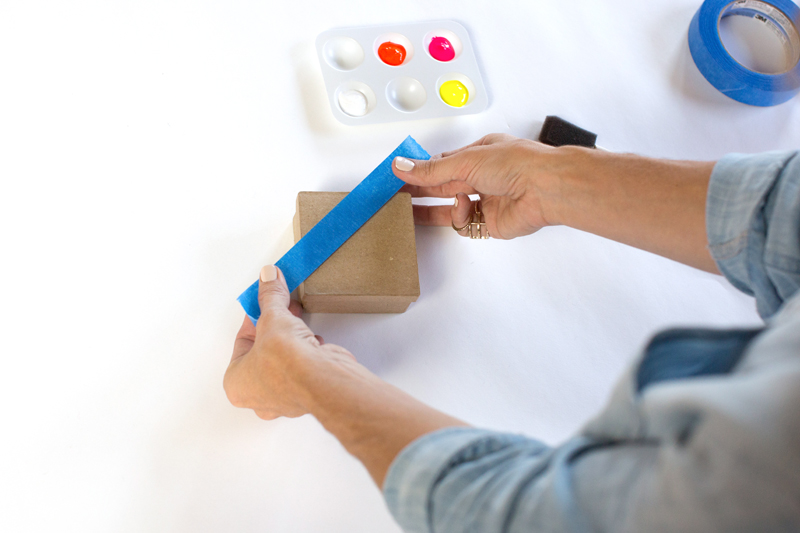
- Tape off various angles on your bags and boxes, including some straight lines, and these will form your color blocking. Make sure to wrap the tape around the top edges of the boxes, as well.
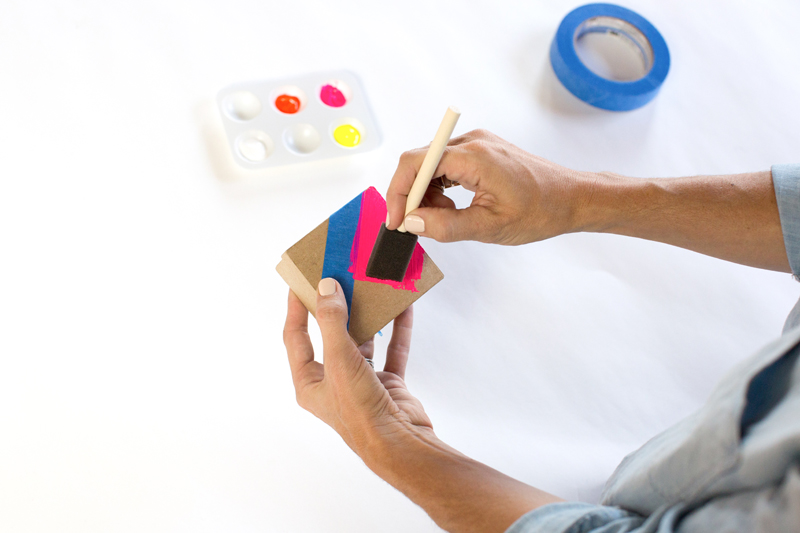
- With a foam brush, begin painting in the area you have left clear. Be sure to paint the edges of the box lid, as well.
- Expert tip: Be sure to divide up the colors among your boxes and bags. We did about one third of the bags and boxes in each of our neon colors.
- Expert tip: Be sure to divide up the colors among your boxes and bags. We did about one third of the bags and boxes in each of our neon colors.
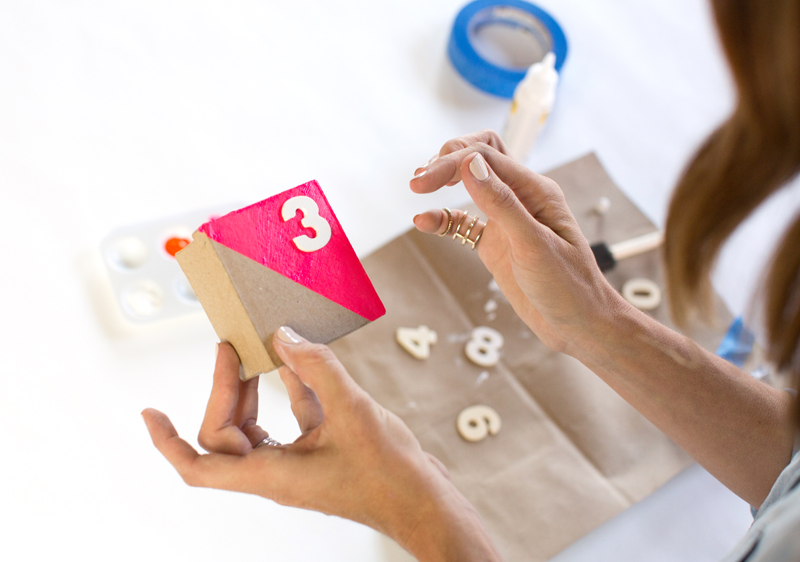
- While the paint on the boxes and bags dries, use this time to paint the wooden numbers. With another foam brush, paint a light coat of white paint evenly across the face of the numbers. Let them dry.

- Remove tape from the bags and boxes.

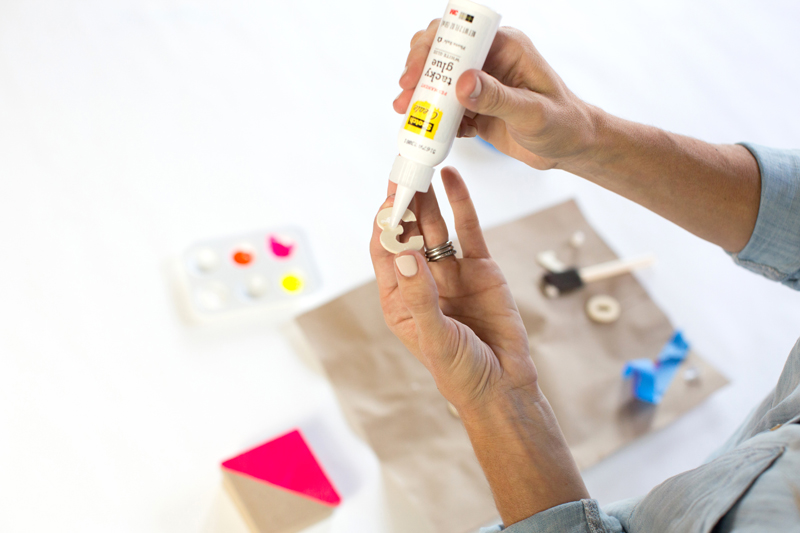
- After they have dried, glue the wooden numbers on the boxes in consecutive order – 1 through 25 on each box.
- Once all of the containers have been painted and numbered, now it’s time to hang the advent calendar on the wall. Start by arranging all of the pieces on the floor first. After accounting for the height of the gift on Christmas Day, which will act as your tree trunk, start in the bottom center and build your pieces outward and upward.
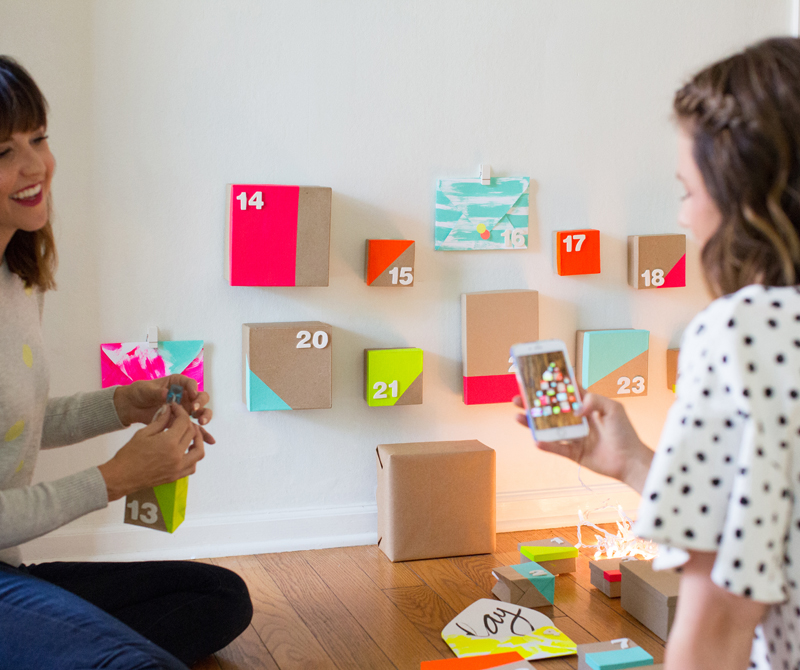
Your advent calendar is ready to be filled with all kinds of fun gifts. The best part about this calendar is that it can accommodate so many different sizes and shapes of presents. On our tree, we used the Countdown Calendar Stuffers (of course!), along with the Christmas Company ornaments and Color Dipped Letter Ornaments.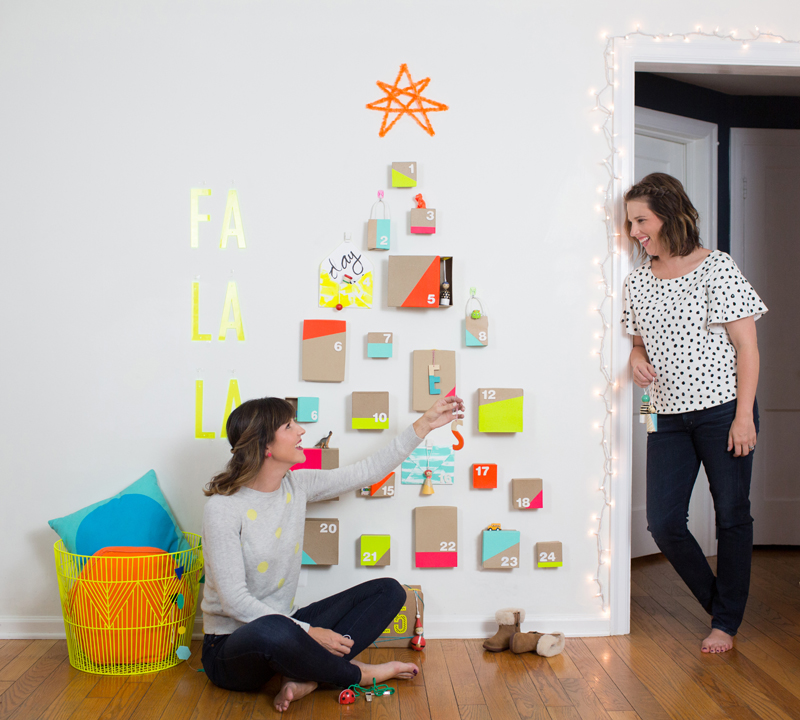
Check out more of Ampersand Design Studio’s holiday how-to’s HERE.