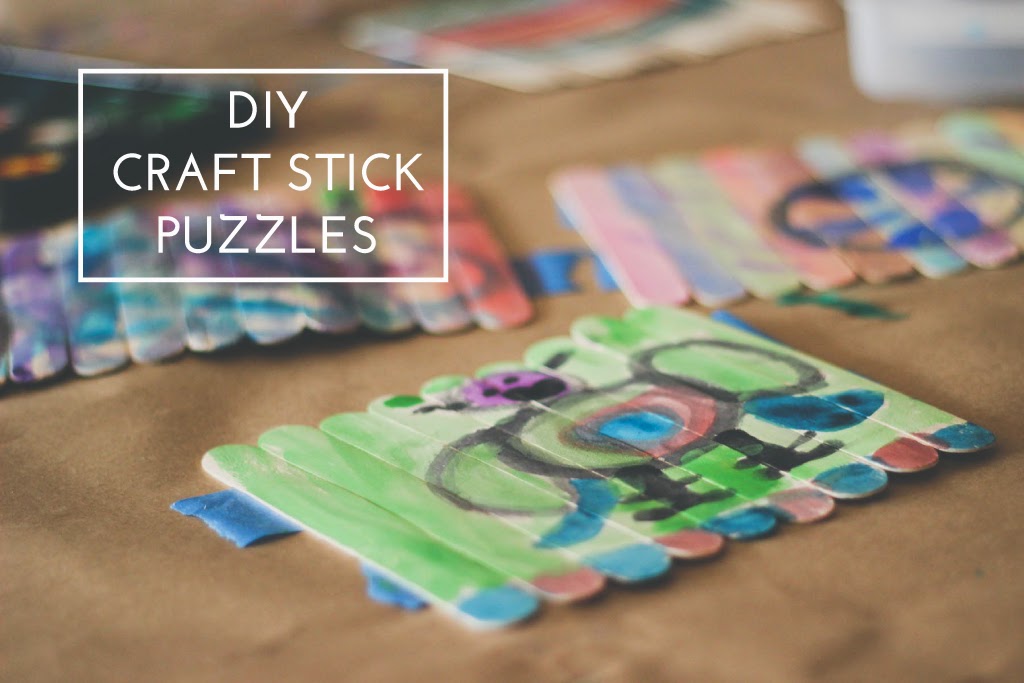
DIY Craft Stick Puzzle
Post by Rebecca of Not-So-SAHM
 My guys have been on a mad painting streak lately and we’re constantly on the hunt for new project ideas. If I had to guess, I’d say it’s going to be a winter of prolific painting. I’ve seen several different DIY puzzle crafts floating about and thought it would be fun to try and incorporate their painting obsession into puzzle-making. They loved it!
With just a few supplies, I was able to get them set up and making their own puzzles in no time. And neither one realized I snuck in a little handwriting and math as well (I love when I get to do that!). The idea is to paint a scene or abstract picture across the width of the craft sticks, which can then be reassembled as a puzzle. My guys had their own ideas, of course, but by the third puzzle, they had caught on and realized it was more fun to put back together one entire image.
Here’s how to make your own craft stick puzzle! You’ll need:
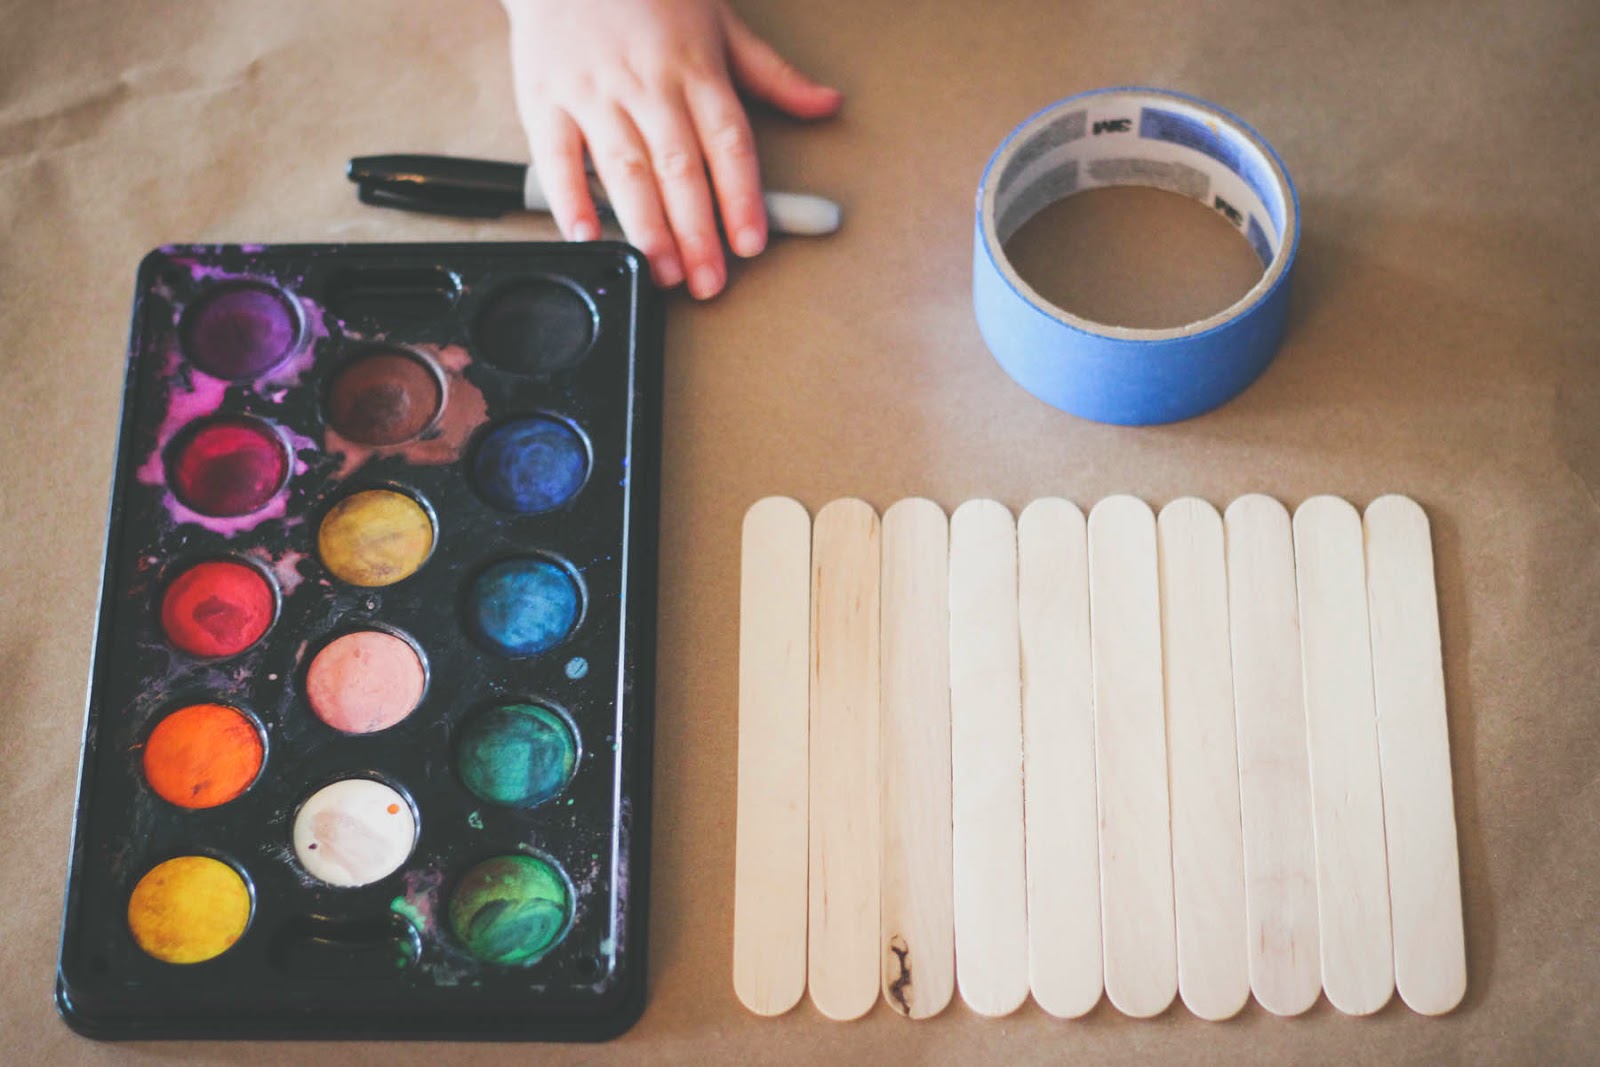
- Paint (concentrated watercolors or tempera paint will do)
- Craft sticks
- A permanent marker
- Painter’s tape
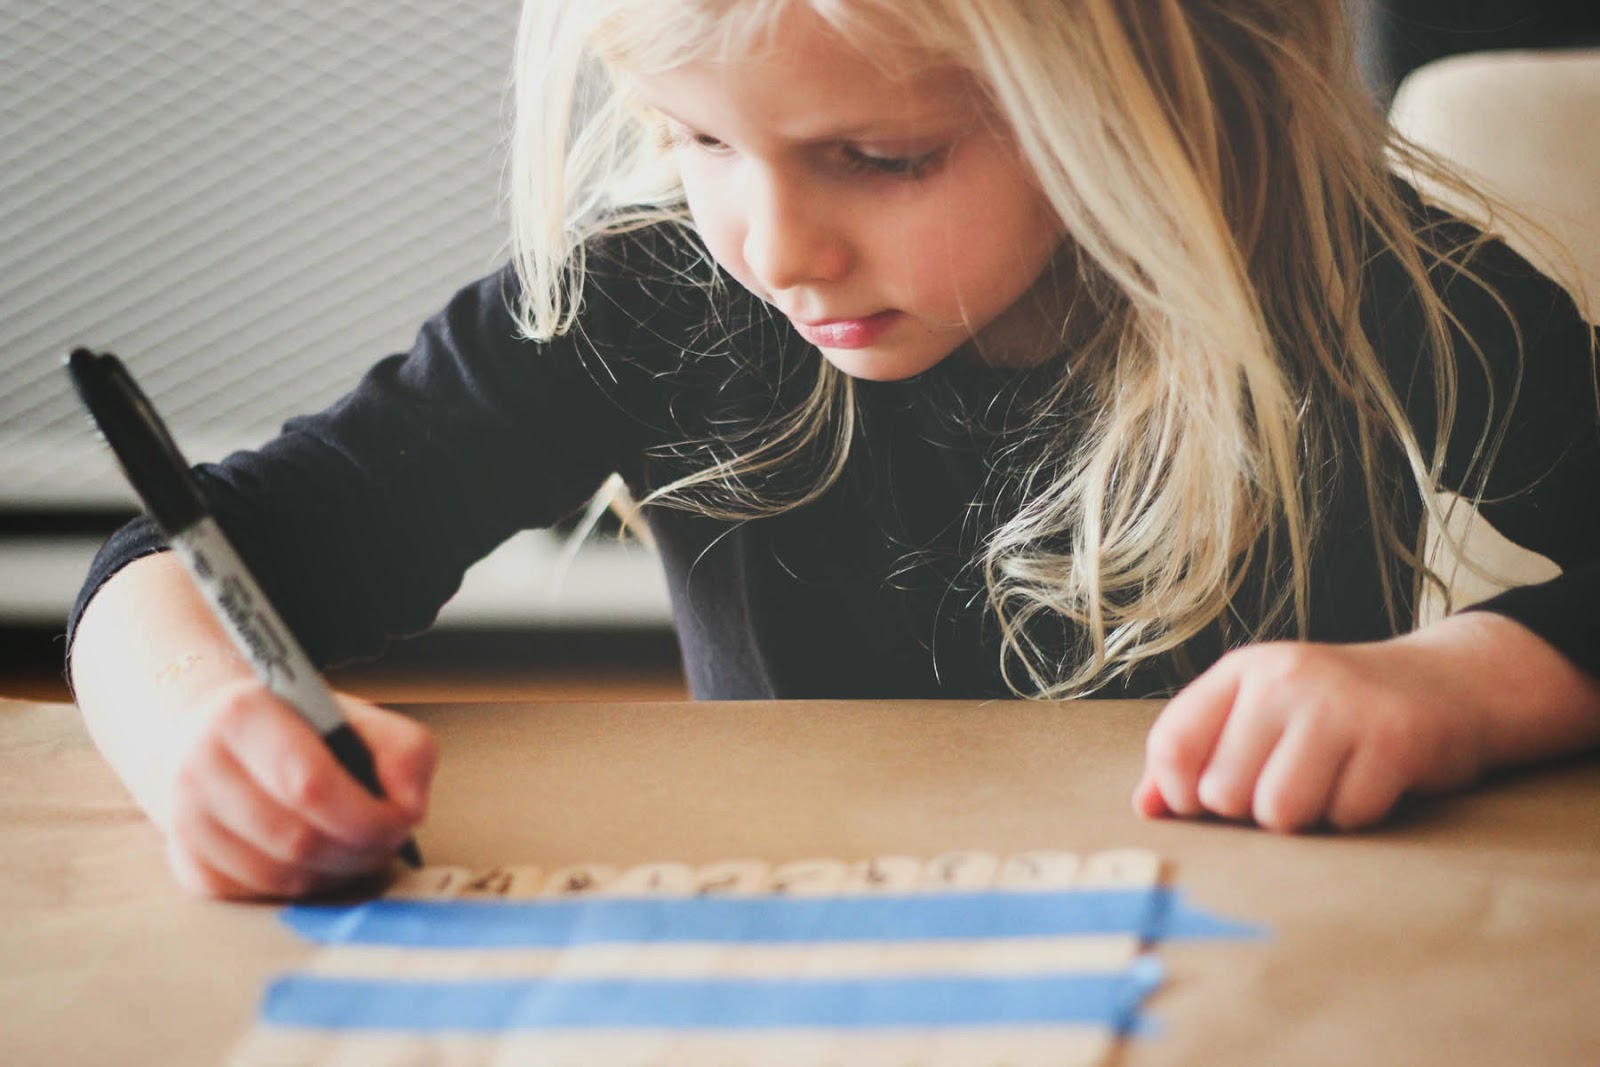
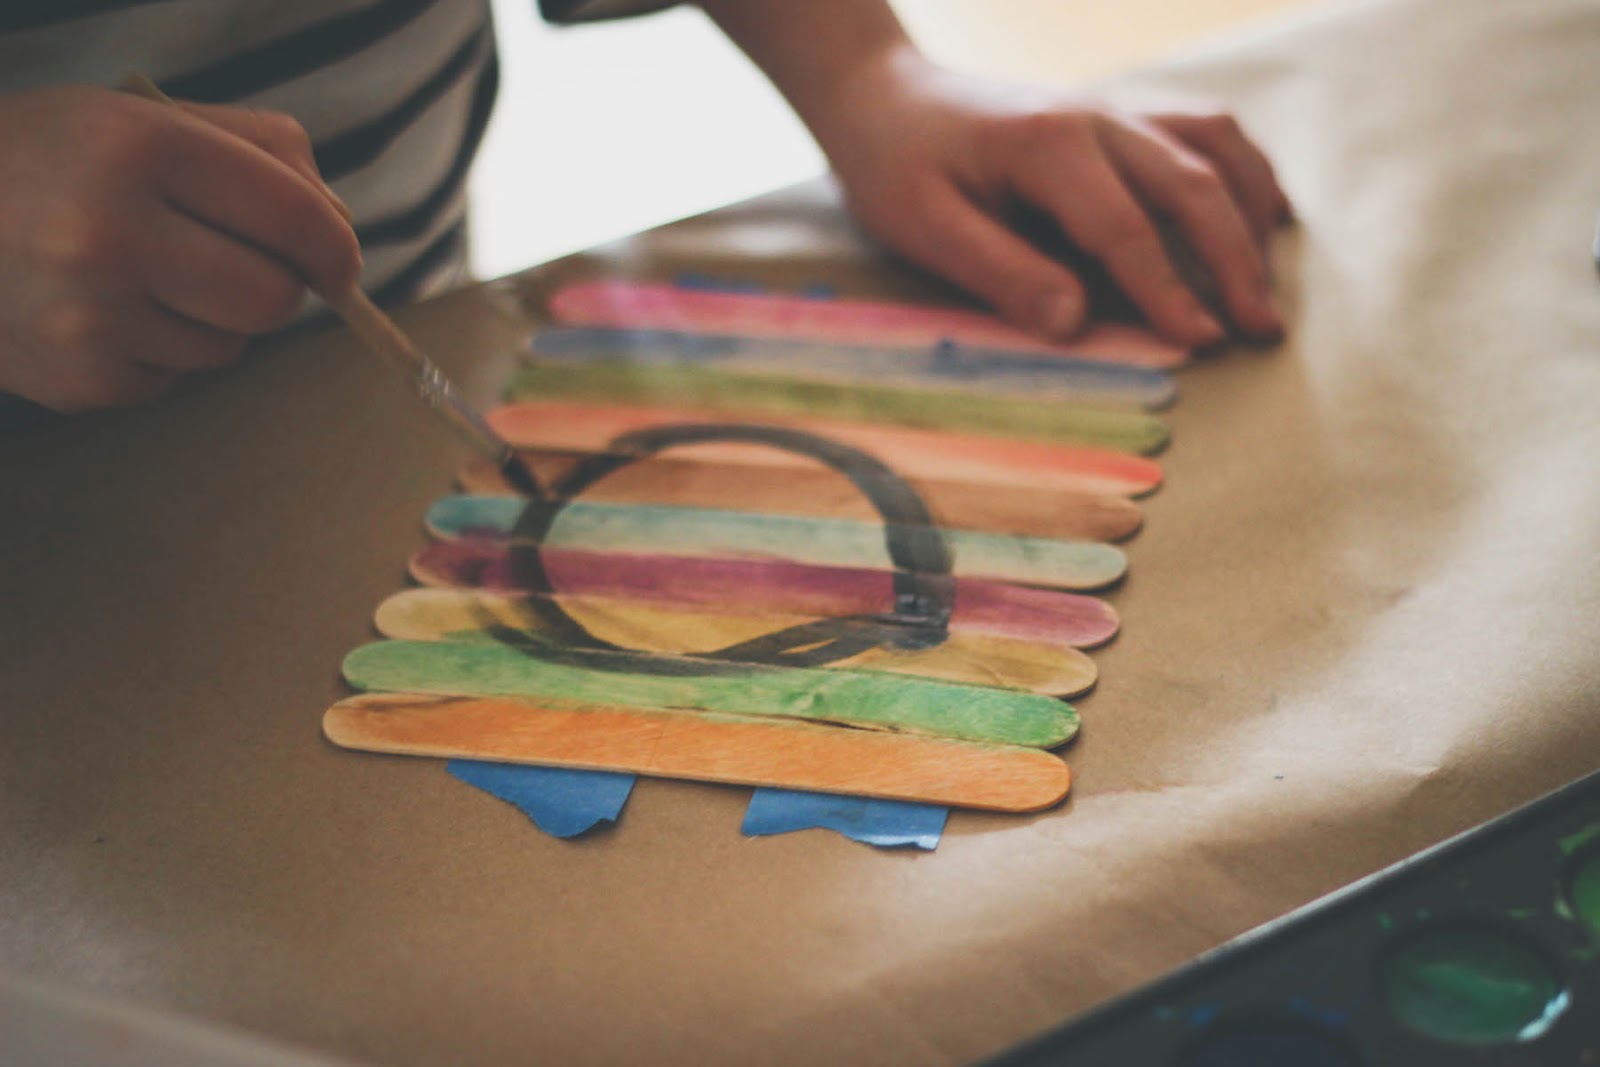
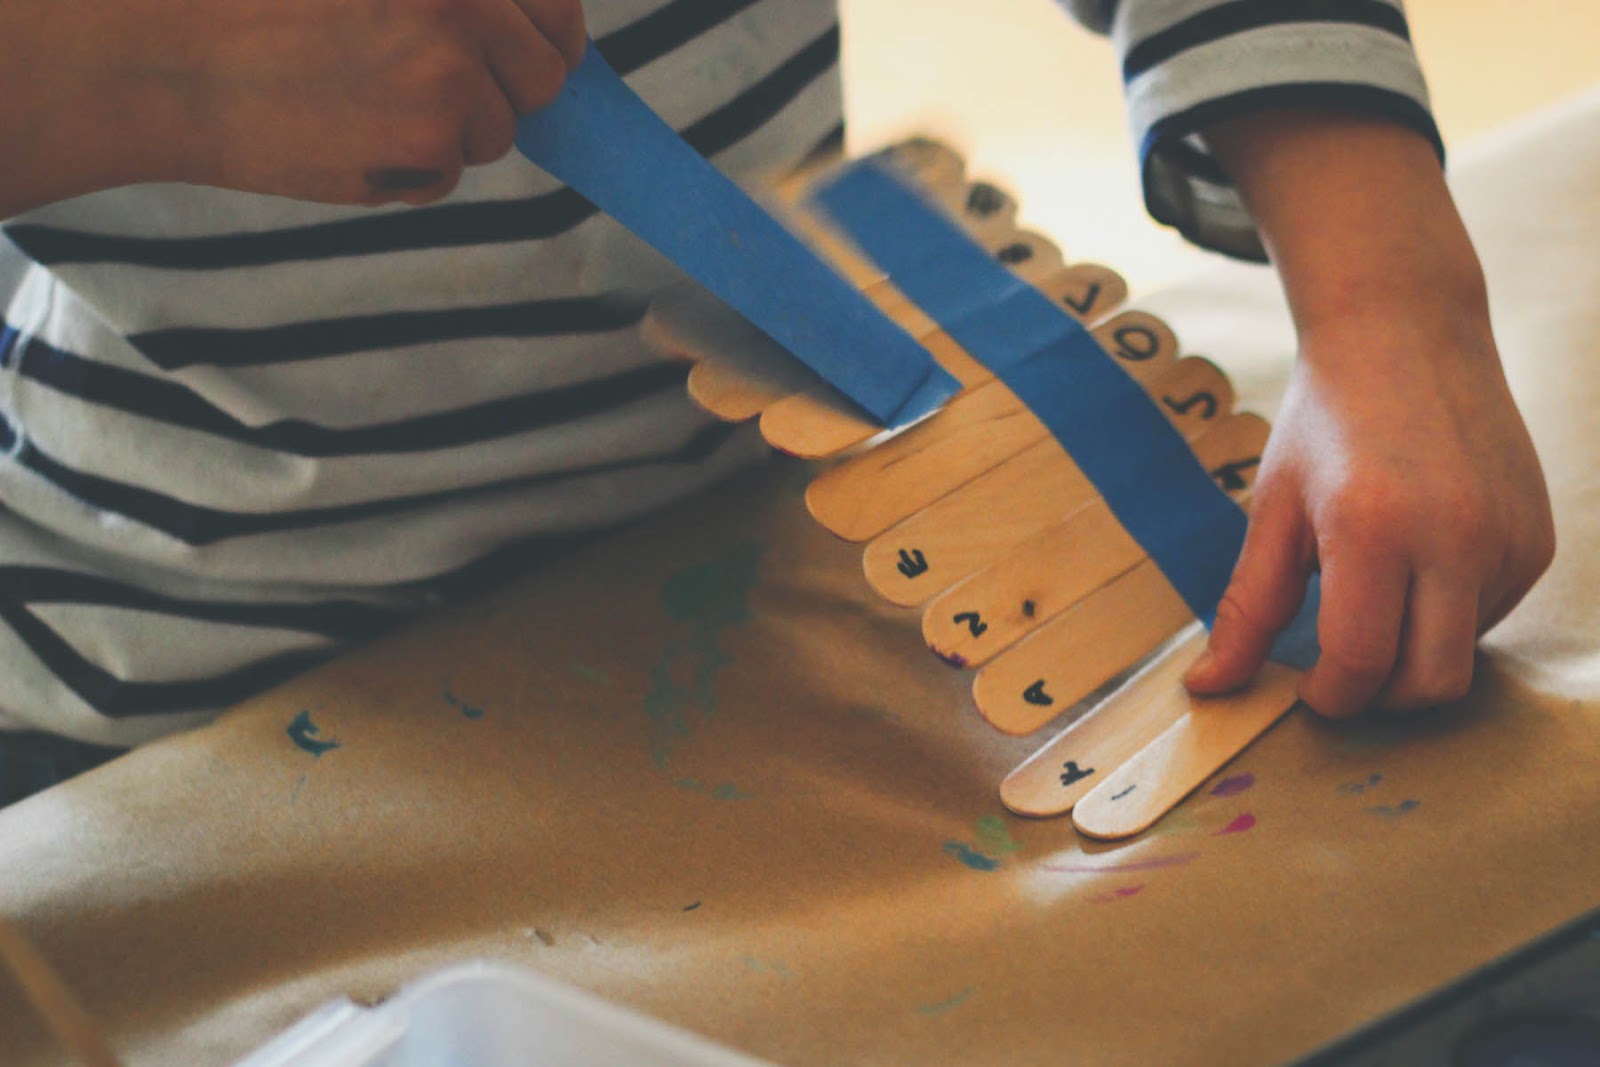
Lay out desired number of craft sticks (we found 10 worked best) and tape together with painter’s tape. Using the permanent marker, label the bottom of each craft stick in numbered order. Flip over and paint whatever design you’d like. Either realistic scenes or abstract images work well, but painting across the craft sticks to make a complete and integrated image makes for a more fun puzzle to reassemble.
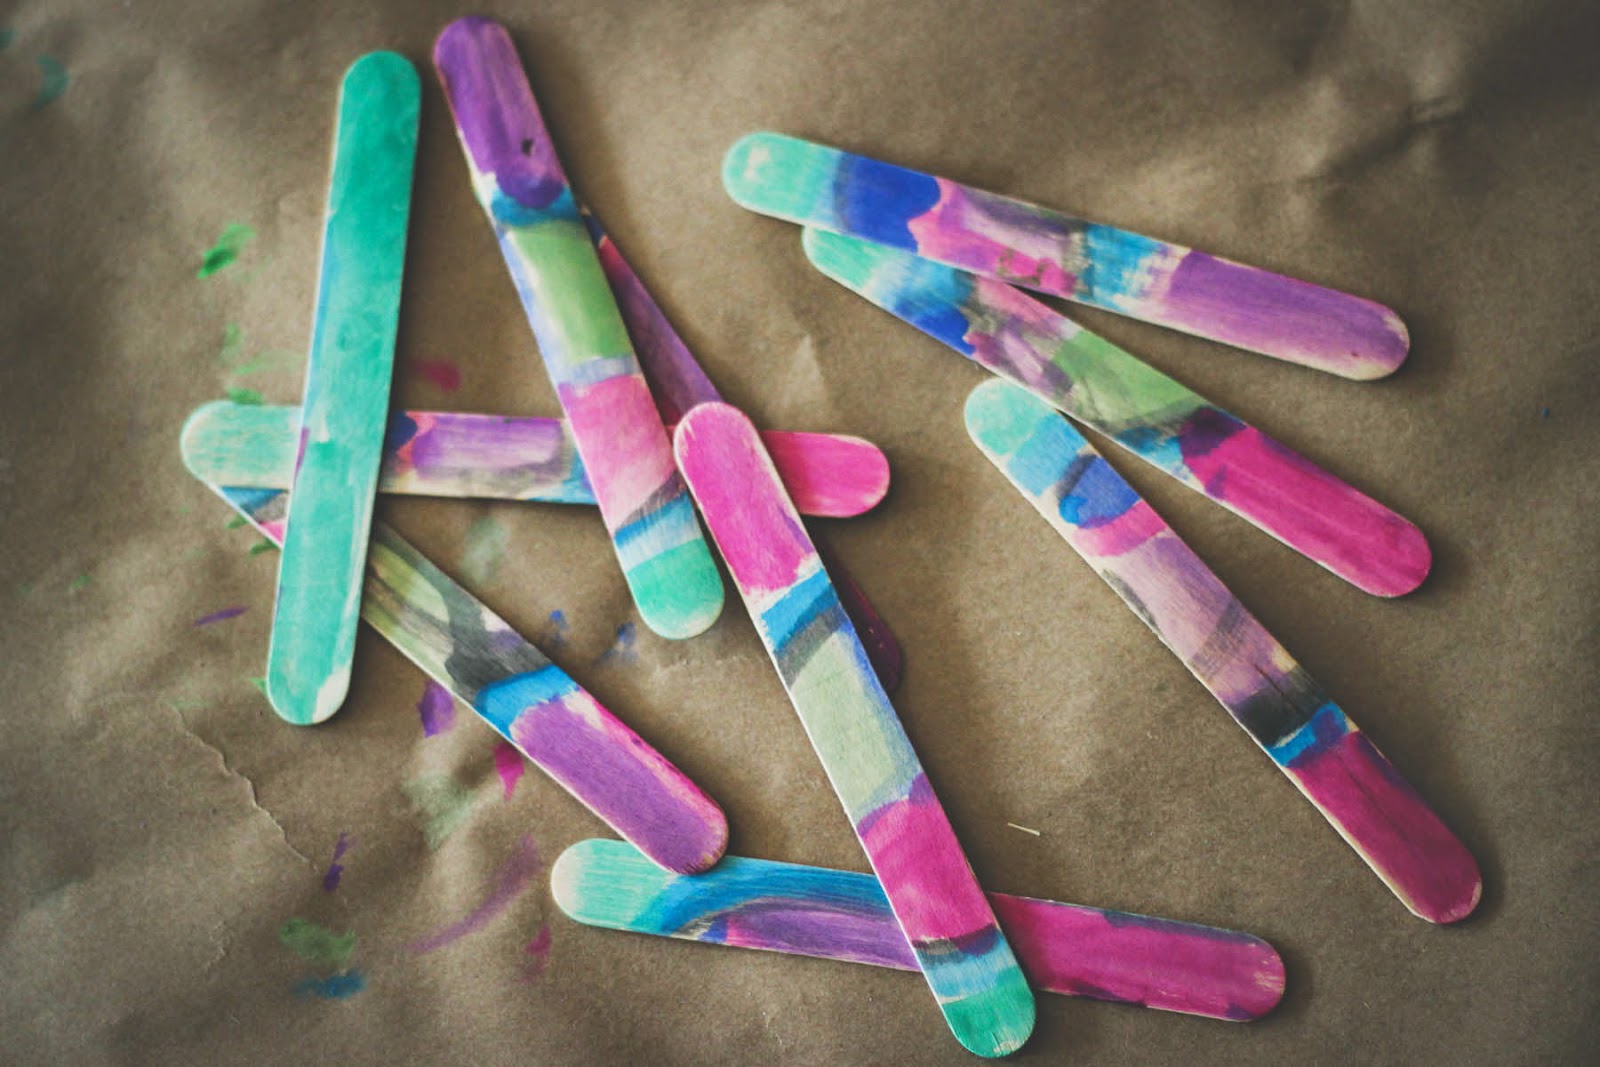
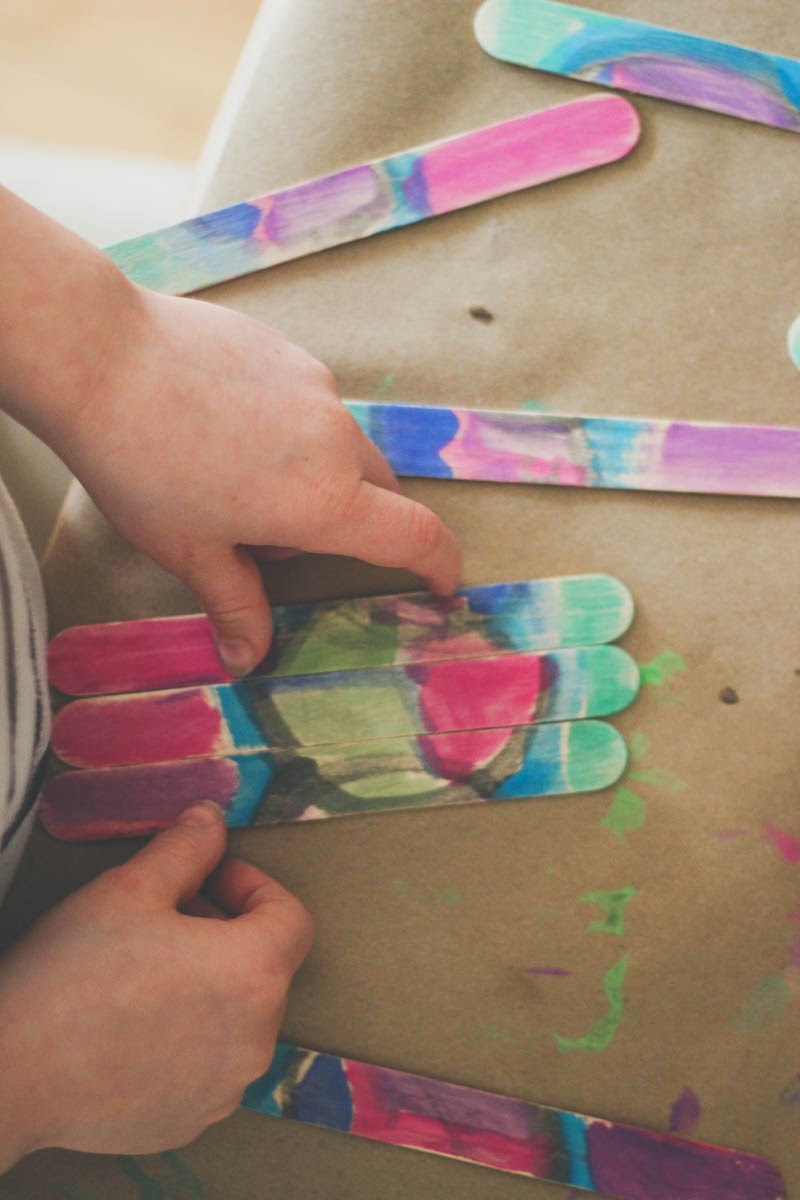
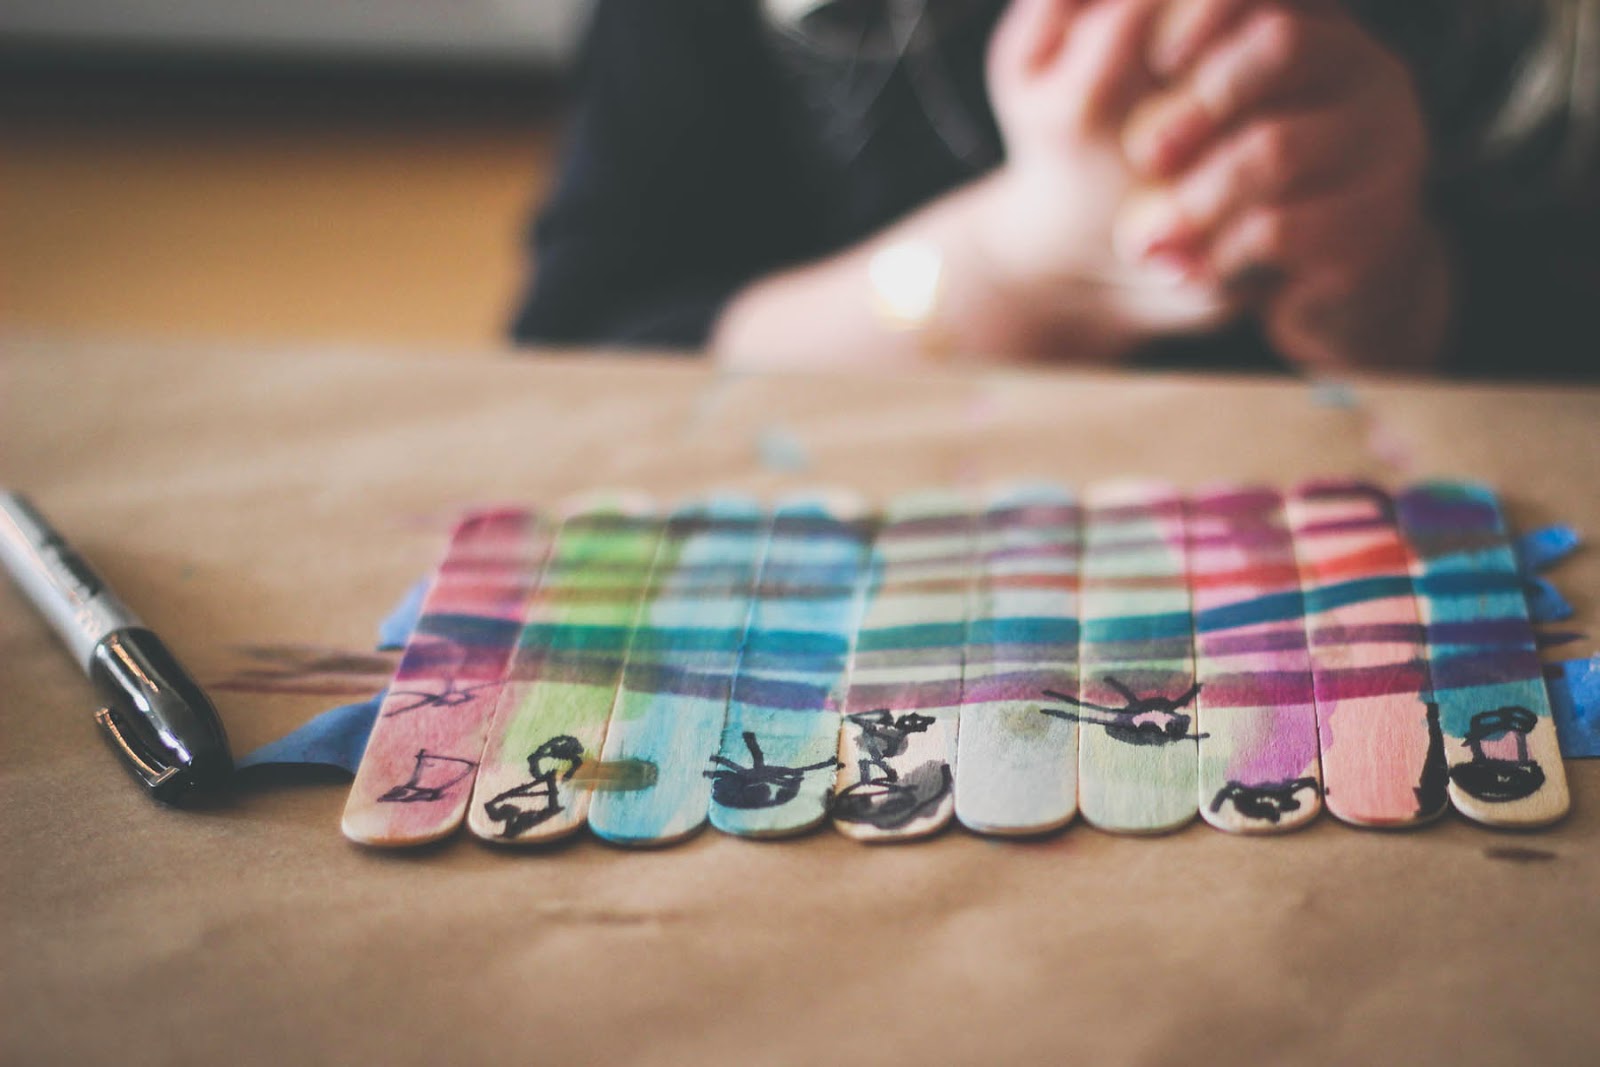 Once your painting is dry, remove the painter’s tape and jumble up the sticks. Try to put the craft stick puzzle back together without looking at the numbers on the back! Then check and see if you’ve got it.
 Rebecca is a mom to two young kiddos and, in her spare time (ha!), likes to pretend she’s a back-up dancer, craft cocktails, and run long distances. A relatively recent SAHM, she blogs family-friendly activities, DIYs and celebration fun at Not-So-SAHM.