How to Make Ice Candles
Candle making was one of my favorite pre-kids arts and crafts projects. But little kiddos plus hot wax just didn’t seem like a good fit, so my candle supplies have all been packed away for years. Our kids have recently begun cooking a lot more with me though and it occurred to me that they are probably old enough now to dabble in candle making. So I pulled out all my old supplies, got a fresh slab of wax, and they went to town!
I think it goes without saying that this is not a project to let young kids do unsupervised — you’ll be heating wax up to almost 200 F. But it is a great activity to do with kids and help them learn how to be cautious in the kitchen.
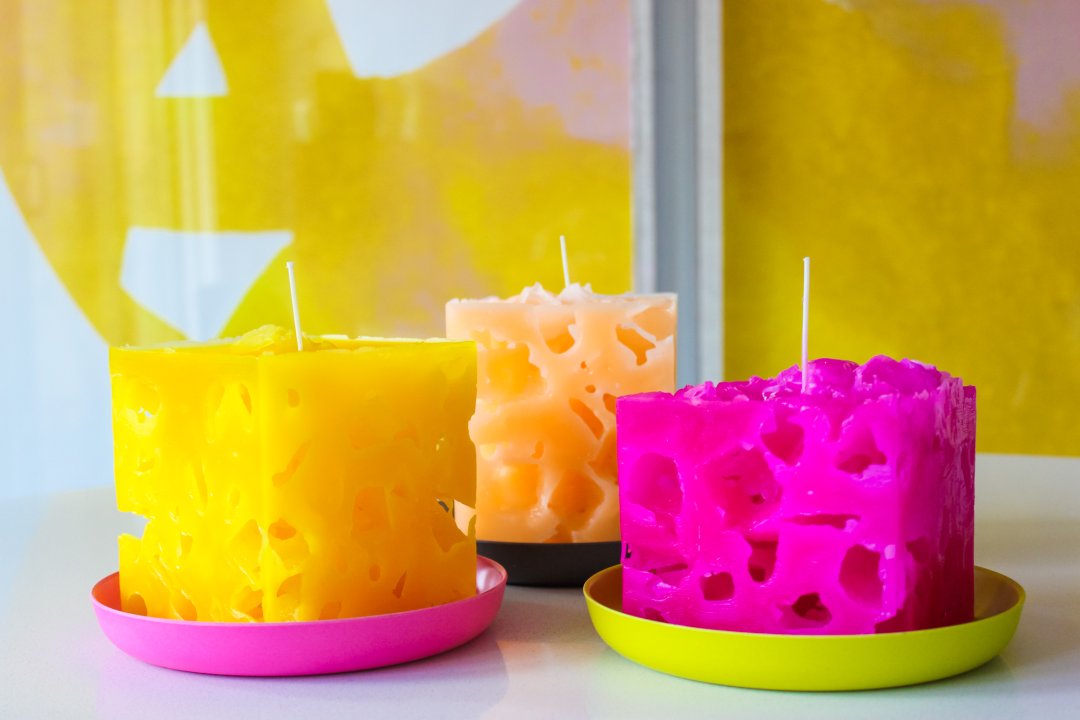
Traditional candle making requires a lot of trial and error plus patience. It takes a bit to get colors right, heat the wax to optimal temperatures, and wait for the candles to dry. None of those things goes well with children. So I turned to one of my favorite candle making shortcuts: ice! Not only are ice candles incredibly cool looking, they dry in a very short time. We decided to make ice candles for end-of-the-year teacher presents and the kids loved it.
SUPPLIES
- Ice
- A small metal rod or skewer
- A mold (you can purchase an aluminum mold or recycle any wax-coated cardboard container such as a milk or OJ carton — just cut off the top to create a flat, open space. I like to use sealed molds for the ice candles so that ice doesn’t melt out the bottom);
- Candle wax
- Pre-tabbed wicks (you’ll be sticking them to the bottom of the mold, so you need pre-tabbed)
- Mold sealer (to stick the wick to your mold)
- Candle making pitcher
- Thermometer
- Wax color chips
DIRECTIONS
1. Start by having your kiddos break up the slab of candle wax into small chunks (the kids loved this part!).
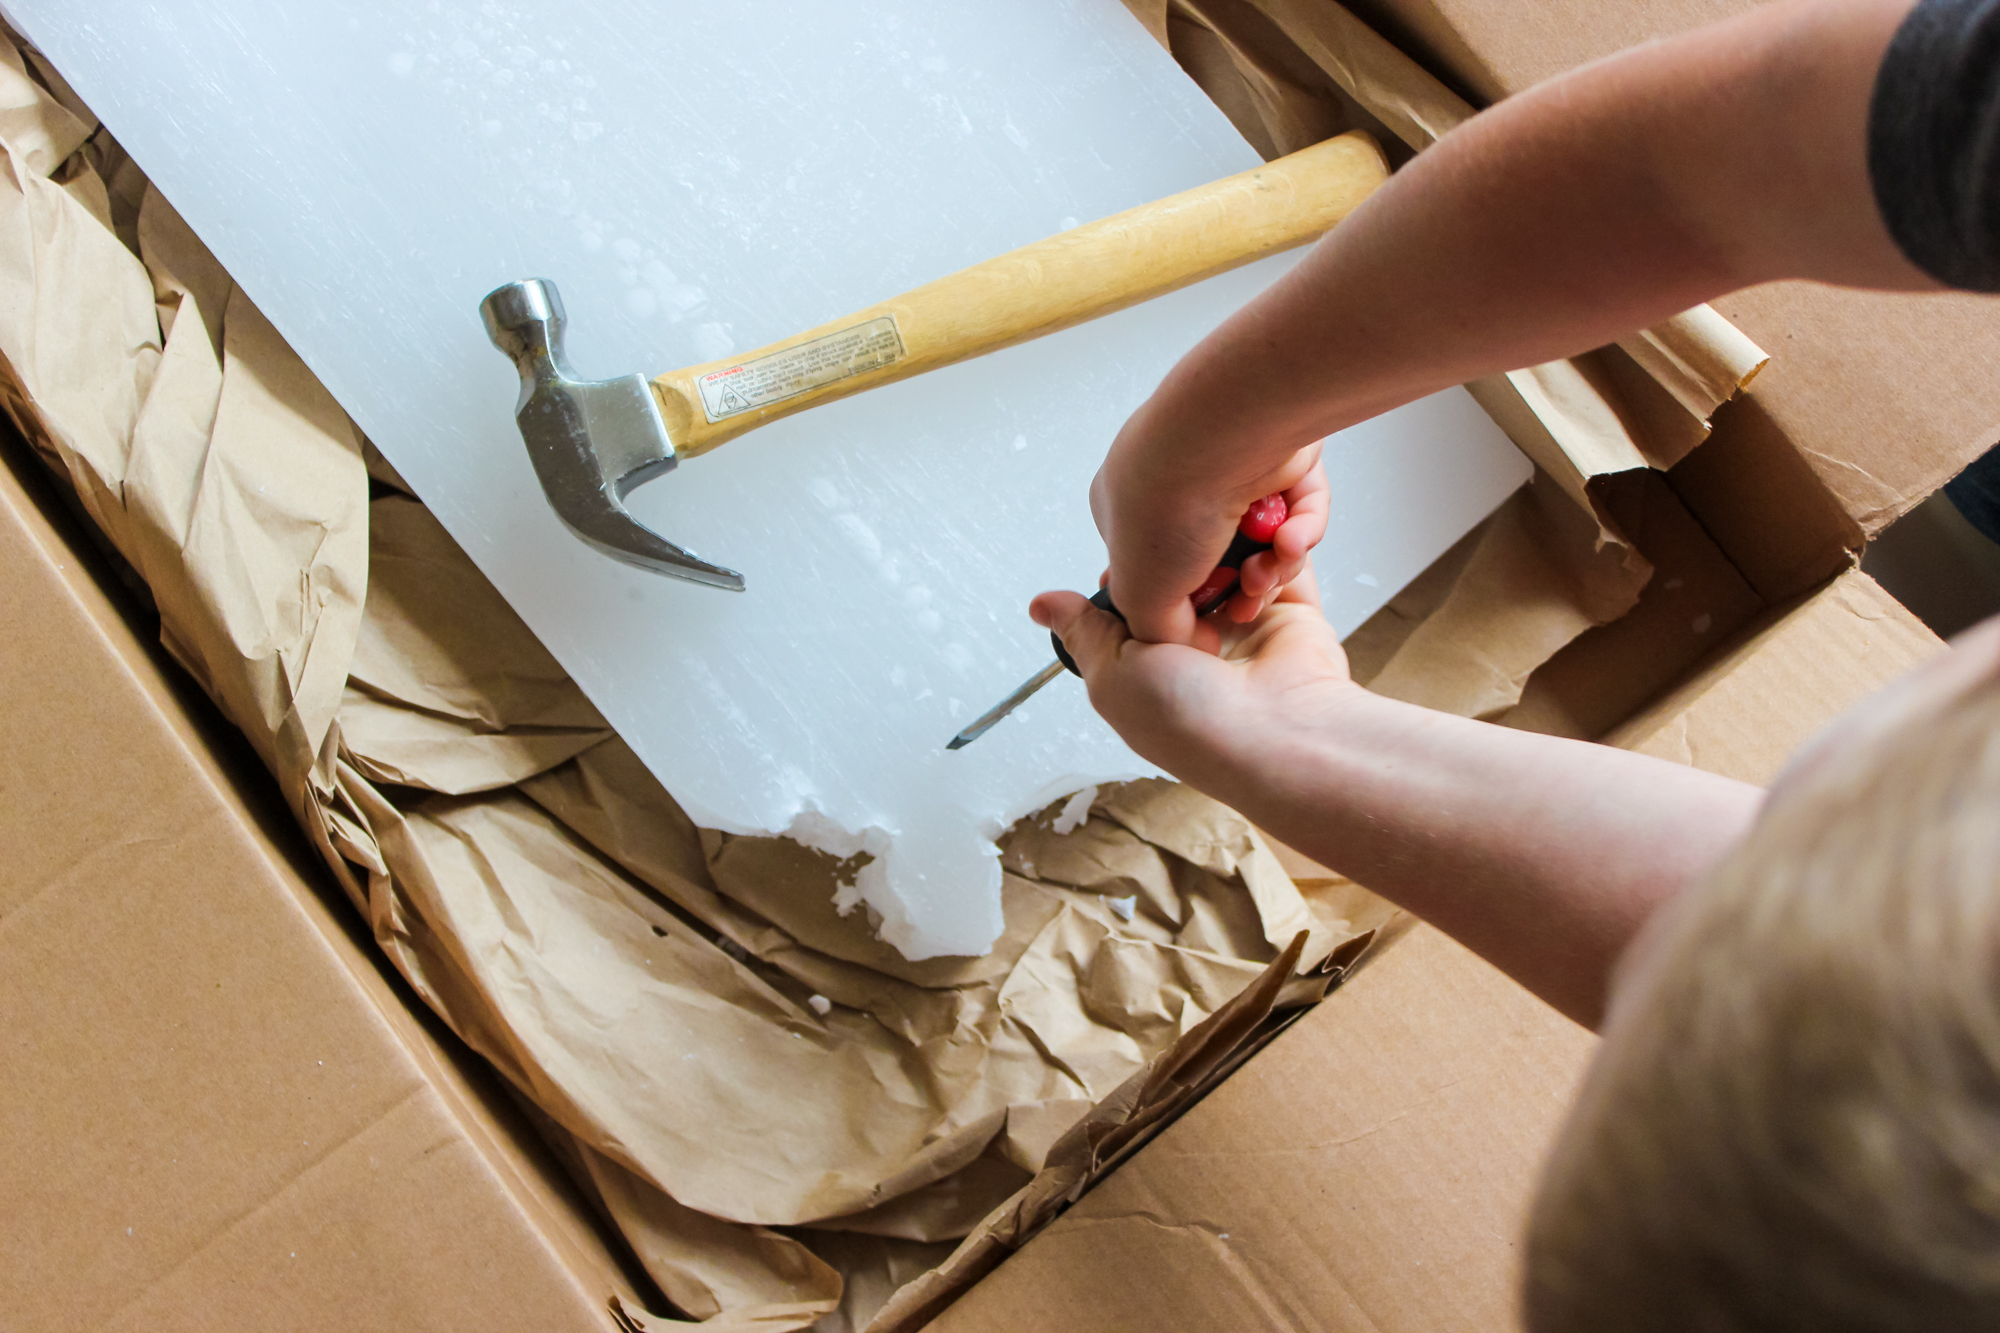
2. Help your child dab a little mold sealer onto the bottom of your pre-tabbed wick then stick it to the bottom center of your mold. Place the metal skewer across the top of the mold and wind the wick around it to hold. Let that sit while you prepare the wax.
3. Add a few chunks of wax to your candle making pitcher and heat on very low heat until it melts. Keep checking the temperature to make sure it doesn’t overheat — you’ll want to pour the wax at about 150 – 175 F. Melt enough to fill your mold about 3/4 of the way. Then add your wax color chips and stir to dissolve completely.
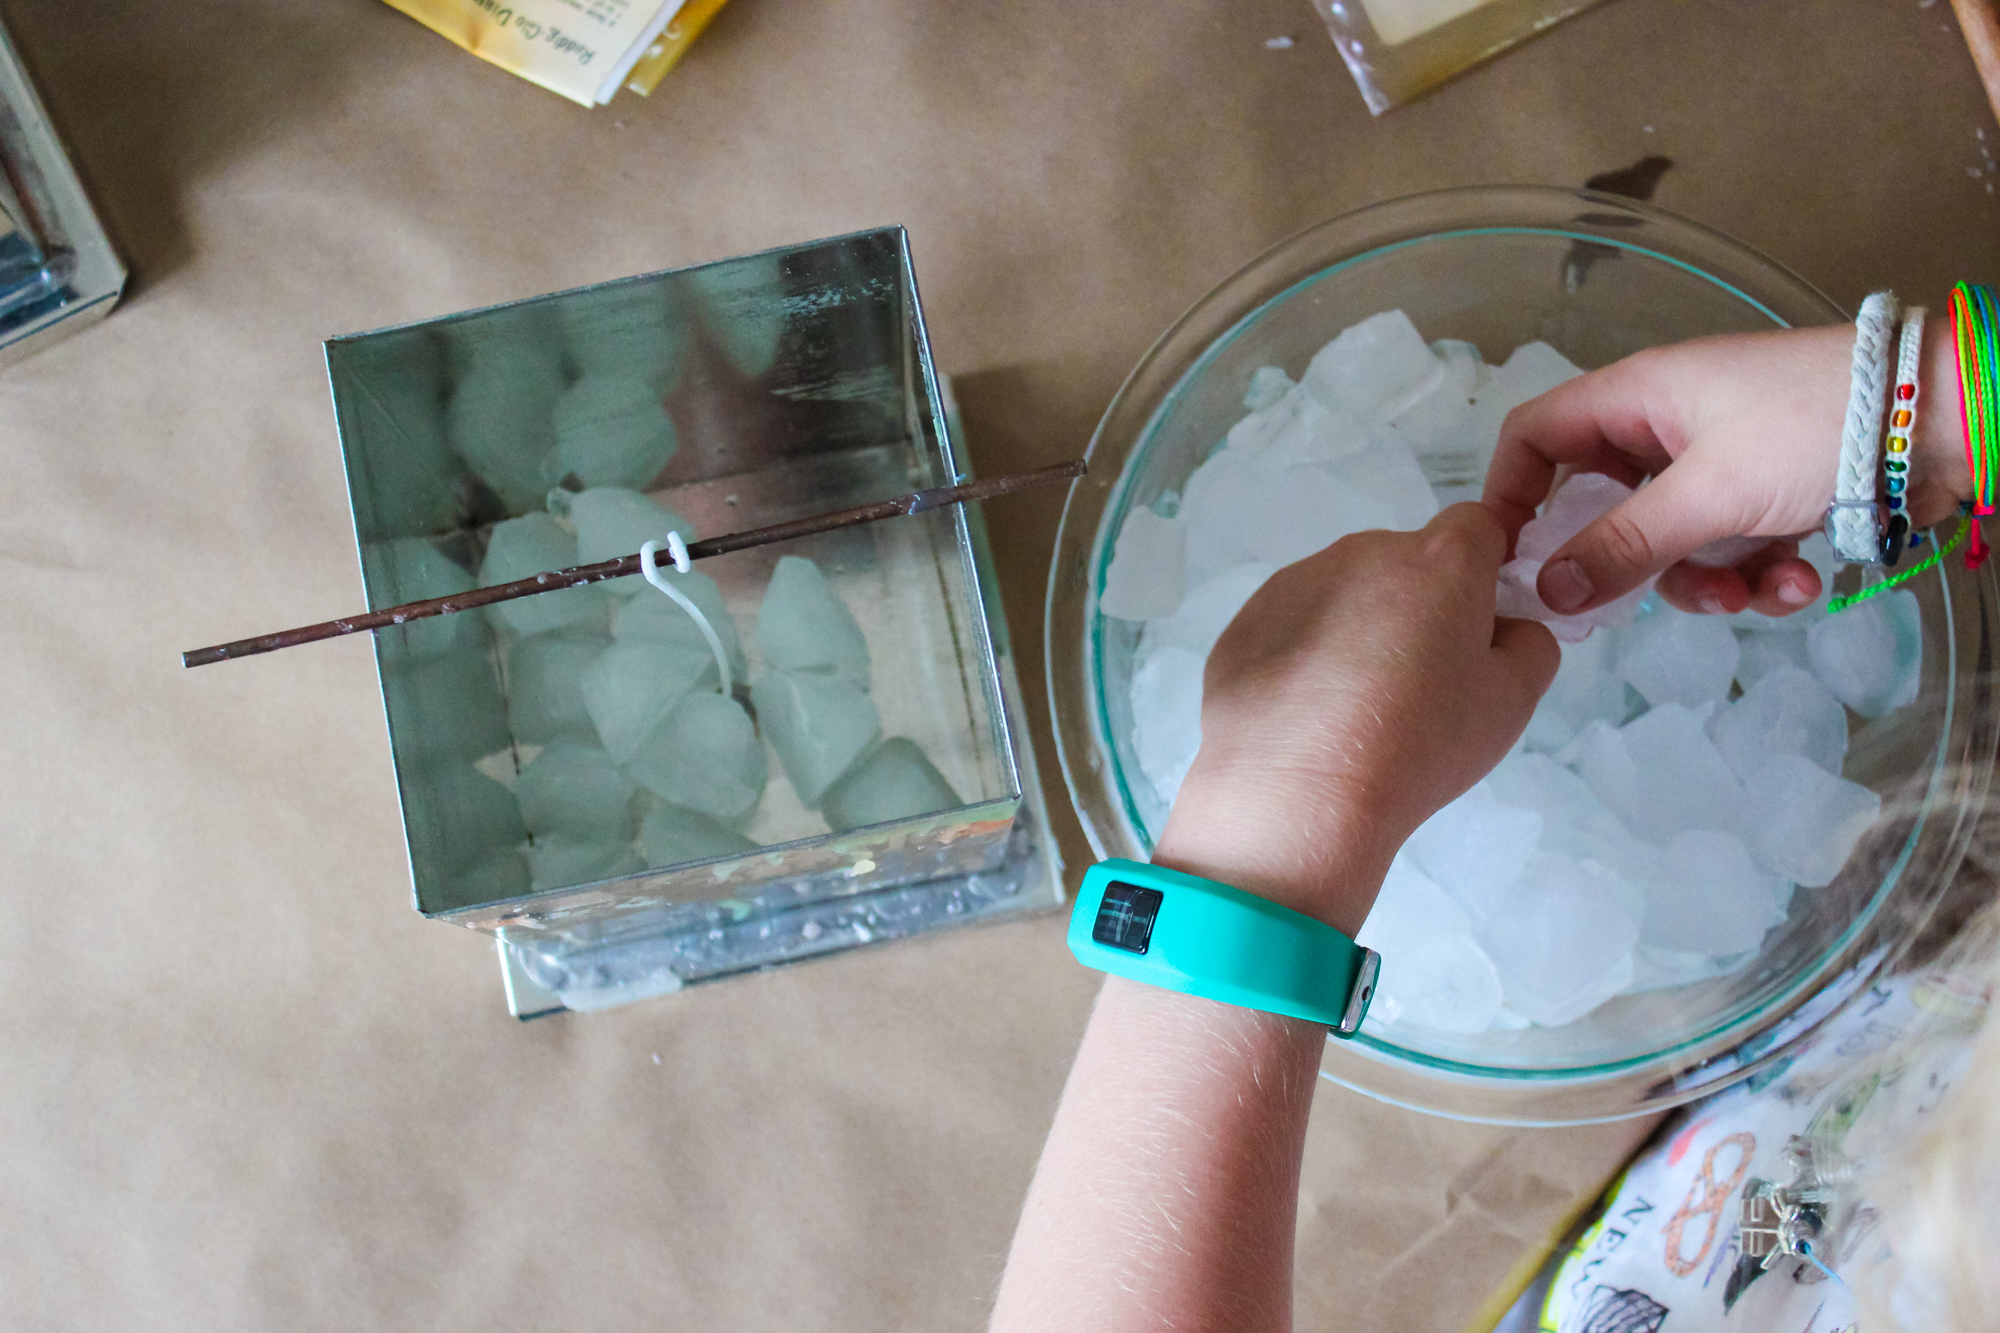
4. While you’re melting the wax, have your child fill the wicked mold to the top with ice, making sure to keep the wick centered.
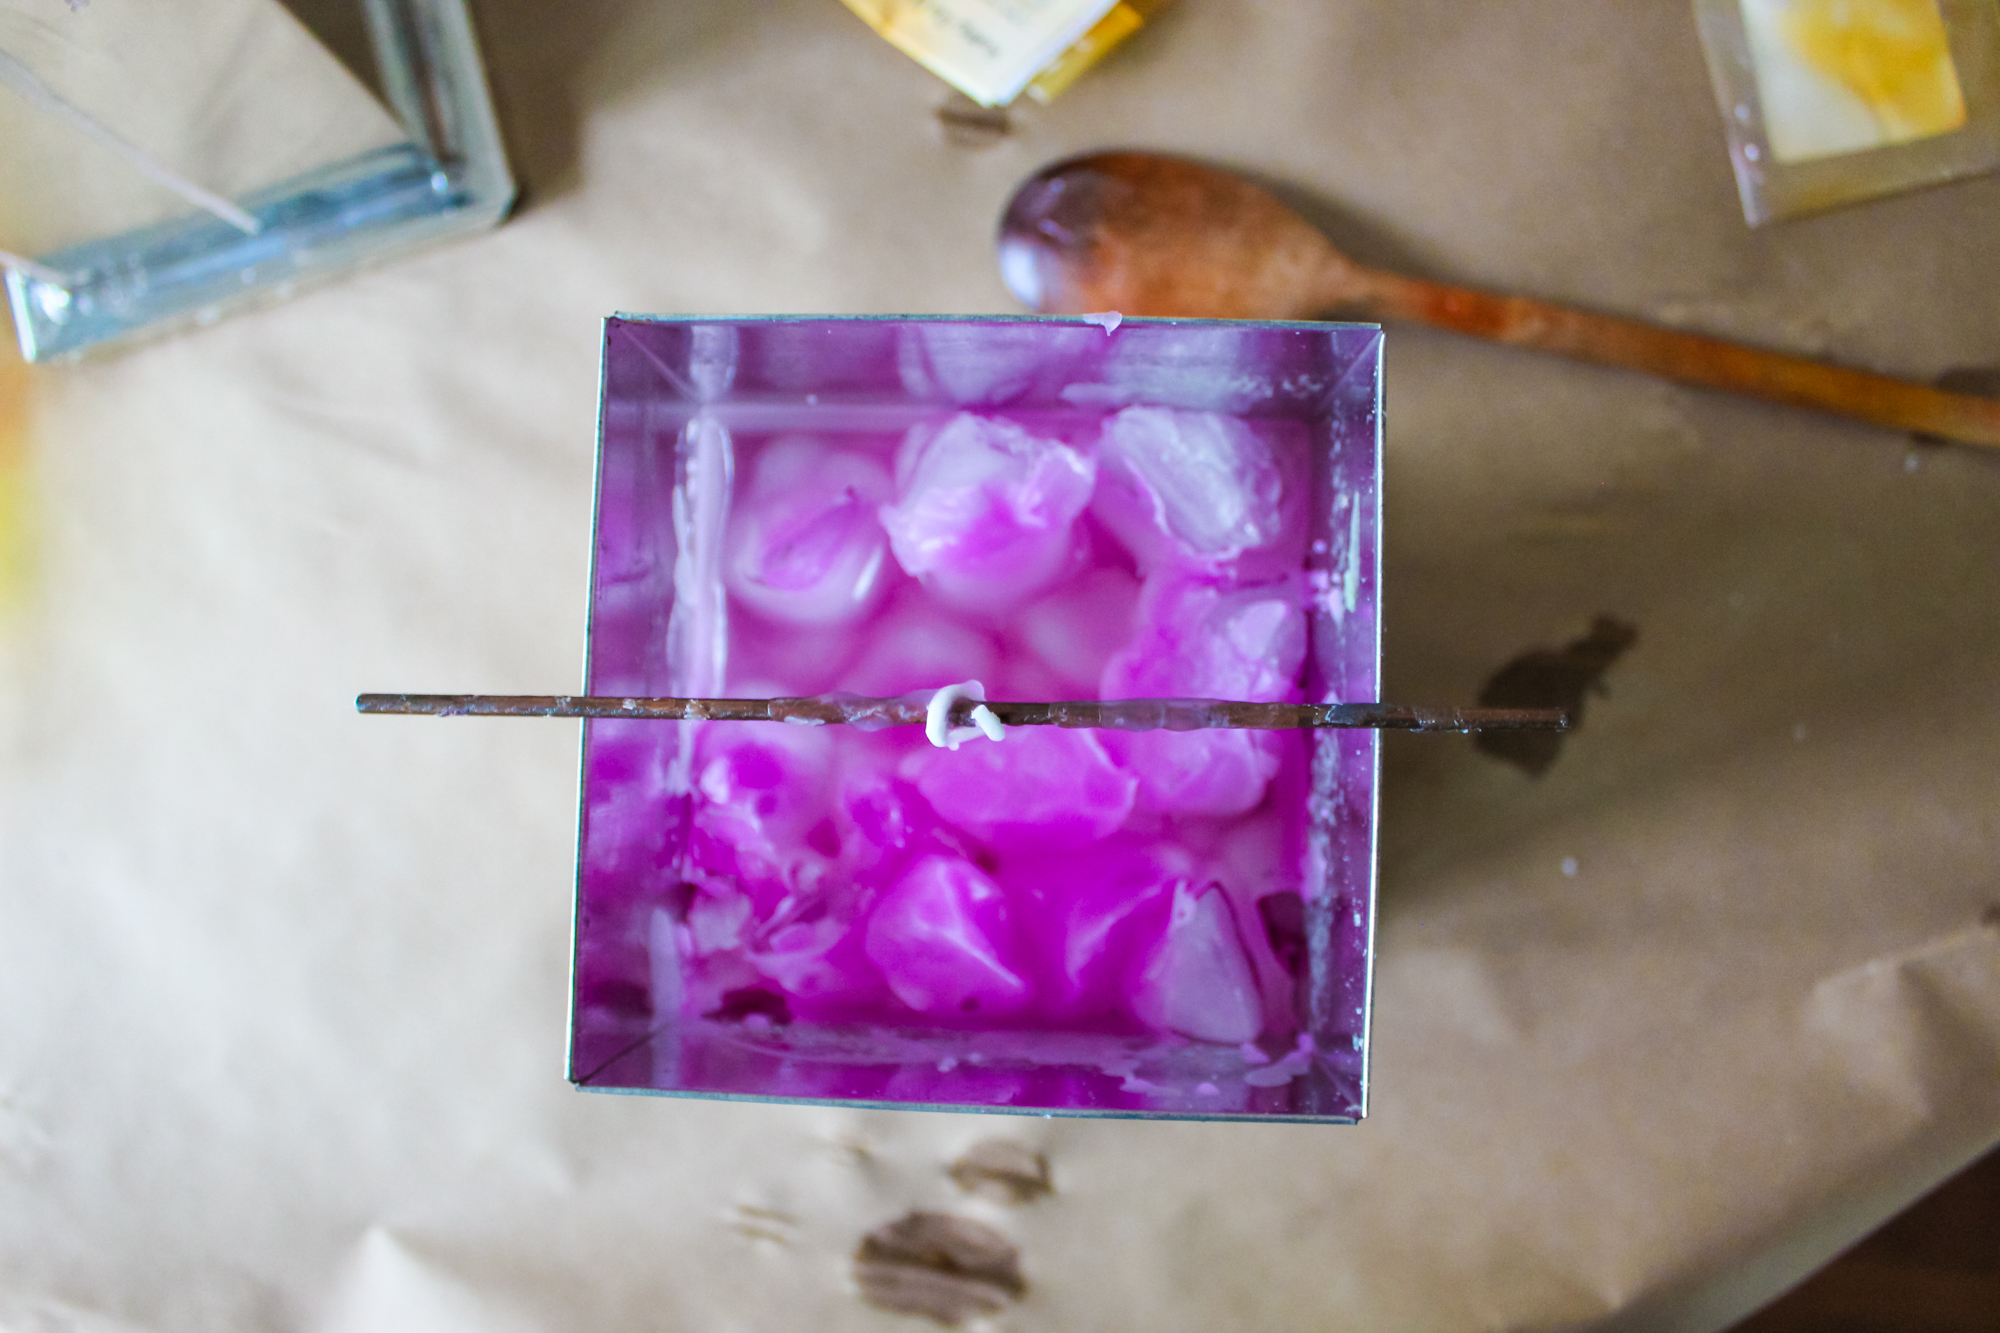
5. Once the wax is ready, an adult should then carefully pour the wax over the ice and into the mold.
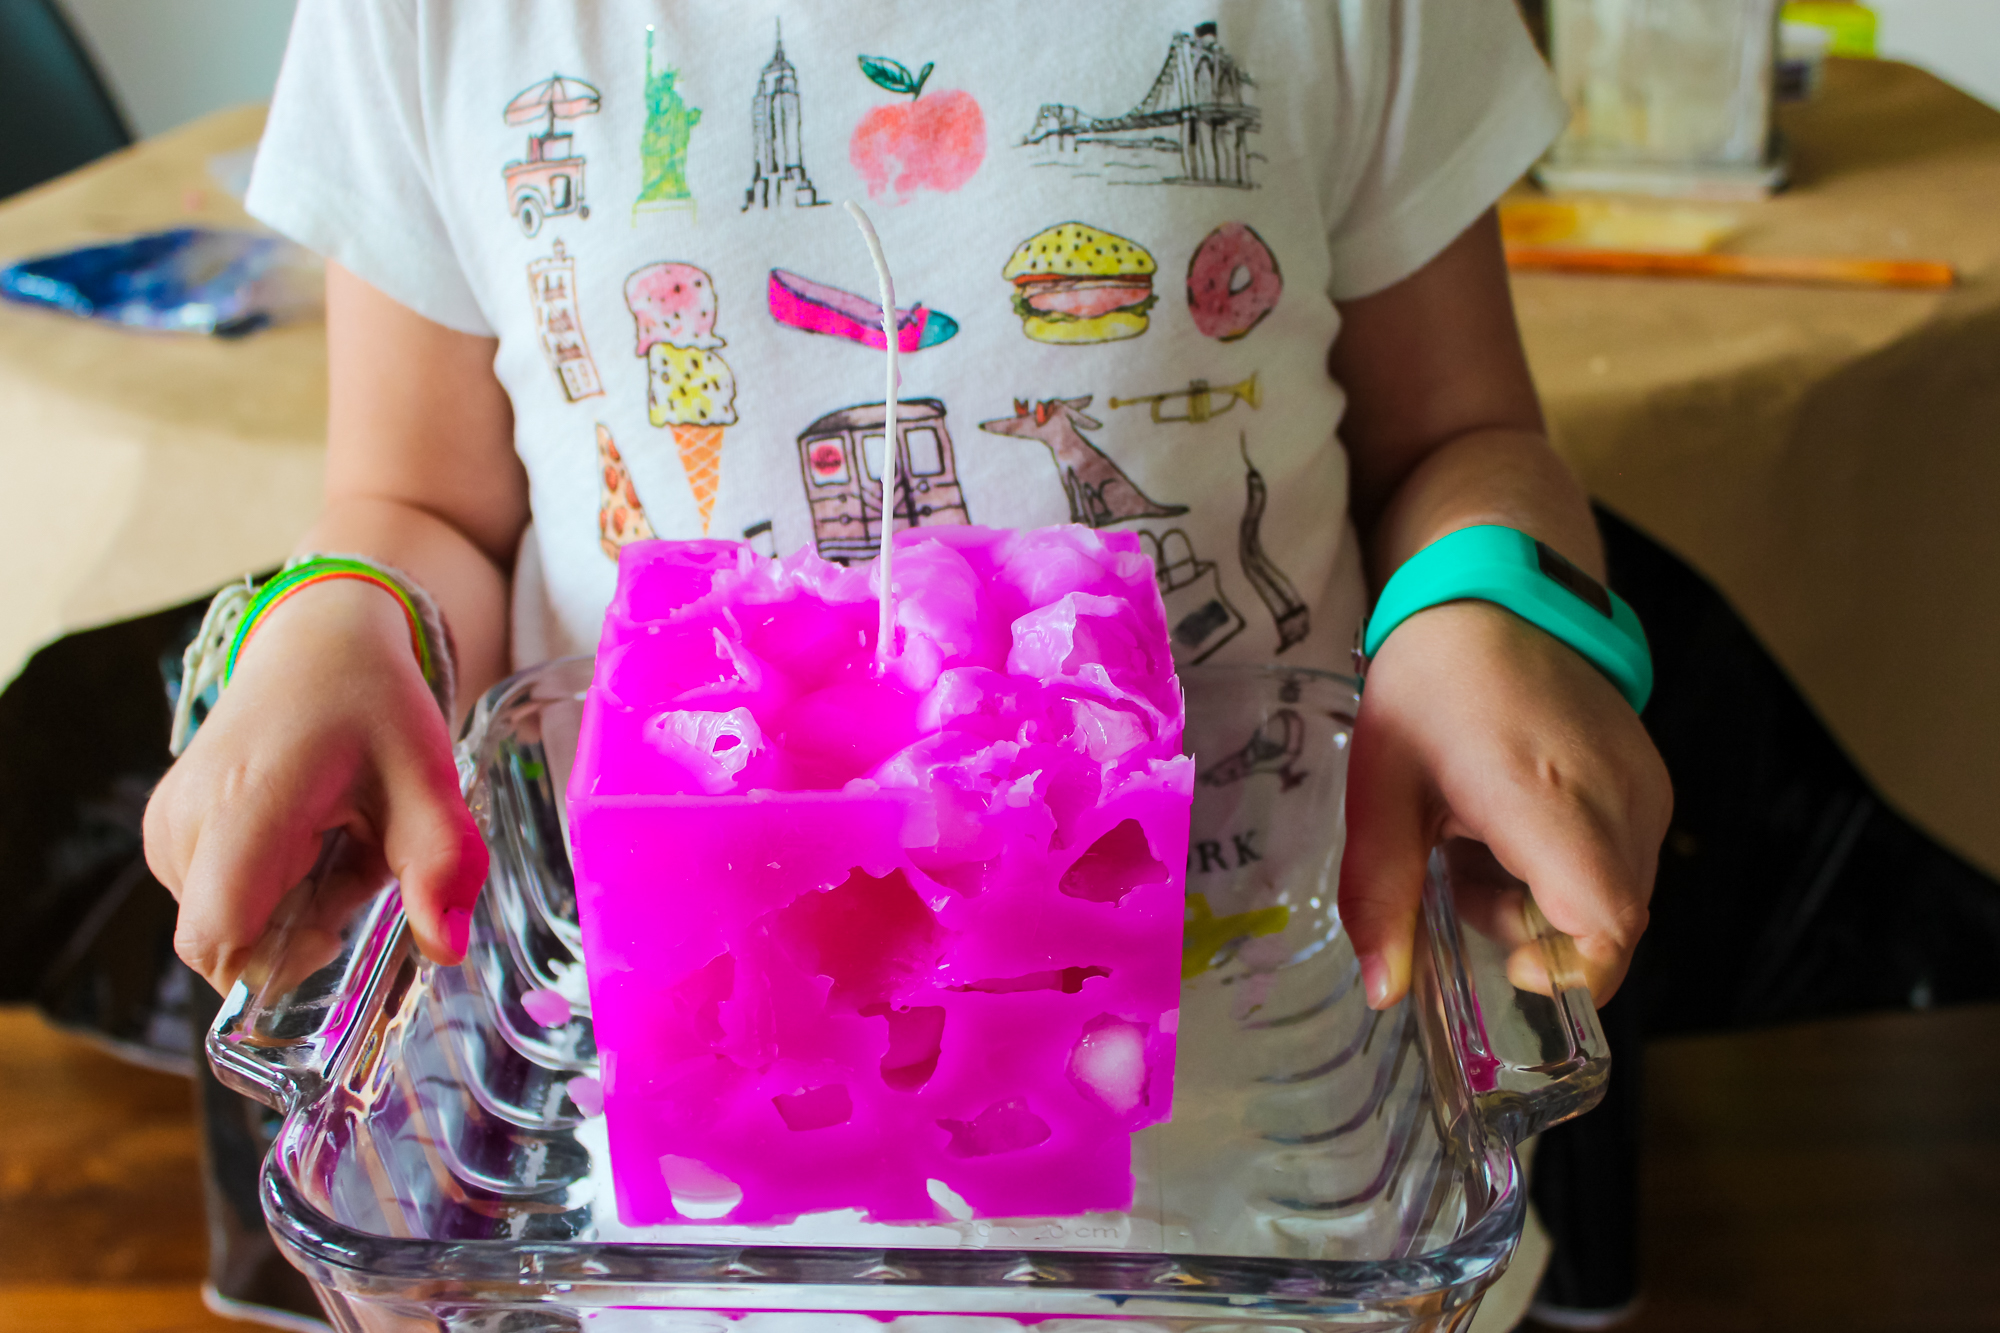
6. Let it cool for at least 20-30 minutes and then check to see if the candle has dried by turning the mold over and carefully removing the candle. Set the candle in a shallow pan or plate while the remaining ice melts.
7. Dry candle completely overnight, trim the wick to a few inches, and then it will be ready to use!

p.s. the Land of Nod Bambino plates make perfect candle holders!
Rebecca is a mom to two young kiddos and, in her spare time (ha!), likes to pretend she’s a back-up dancer, craft cocktails, and run long distances. A relatively recent SAHM, she blogs family-friendly activities, DIYs and celebration fun at Not-So-SAHM.