Rainbow Spring Roll Recipe
I have been seeing fresh spring rolls popping up all over the internet this summer. And, as a lover of all things colorful, I knew I wanted to try out some rainbow ones. So, one afternoon last week my husband suggested that we stop over at a local Asian supermarket with our little ones to find some of the things we would need. I didn’t really expect it, but our oldest two loved the experience. It was fun to take them to a grocery store that had some different items and share with them a little about another culture. If you have some different markets in your area this is something I highly recommend doing.
Anyways, much to my four-year old’s dismay, we did not leave the Asian market with a blue crab (he wanted to bring one home as a pet!), but we did pick up some rice noodles and rice paper for our rolls, as well as some other fun finds. Combined with local produce we already had at home we were all set to test out our spring roll making skills! See below for the recipe/ instructions!
Ingredients:
- 8-10 rice spring roll papers
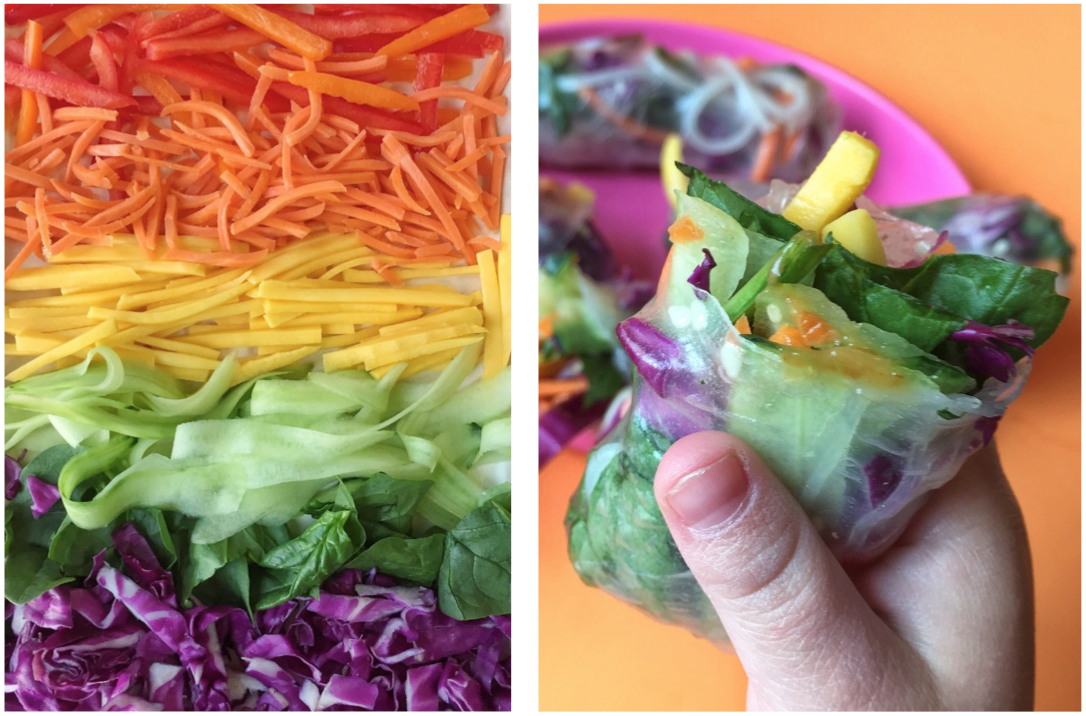
- 1 large red pepper, seeds removed, thinly sliced into sticks (I used two small peppers; 1 orange, 1 red)
- 1 large carrot, thinly sliced, or about 3/4 cup matchstick cut carrots from the store
- 1 ripe mango, thinly sliced into sticks
- 1 cucumber, peeled, then thinly sliced into sticks, or peeled into ribbons (as shown above)
- A large handful of greens of choice (we used spinach because that is what we had on hand)
- 1 cup thinly sliced cabbage
- 1 – 2 cups rice noodles
- Sesame seeds (optional)
- Anything else you would like to include!
Here is the really cool thing about these rolls: they are totally versatile! If you have something else on hand, add it in! If you are missing one of the things above, don’t stress; you can totally make them without it. With these rolls almost anything goes, so get adventurous and make them your own! Other great options/ add ins for these include: avocado, mint, yellow pepper, scallions, basil, cilantro, and shrimp! Yum!
Directions:
- Wash, peel, cut, prep, etc. all your produce as detailed above.
- Then, cook your rice noodles per package directions. Once cooked, run under cold water, drain, and set aside.
- On a large tray or in a large bowl combine all your ingredients, minus the rice papers (produce, cooked noodles, sesame seeds, etc.), mixing everything up so that it is all ready to go for your filling.
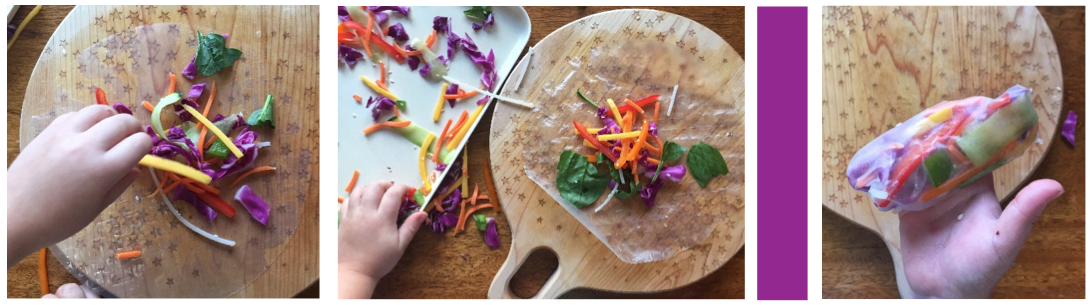
- Next, fill a large shallow dish with warm water and set wherever you will be working on the rolls. We set our water dish, and our produce tray on the table right where we were working. Yes – We! I made these rolls with the help of my four-year-old son!
- Once you are ready to start making your rolls, submerge your rice paper in the water for 8-10 seconds. (Note: This part can be a little tricky: you don’t want the paper to get too fragile by oversoaking, etc. so this may take a bit of practice!) Then, quickly remove from water and lay your rice paper on a flat surface and smooth out. We used a cutting board for this part.
- Next, put a small amount of your filling on your rice paper. Fold the bottom up and over the filling, then gently roll over once and fold in the side to seal, then roll until fully sealed.
- Repeat process above until all your filling is used up. For us, this made approximately 8 spring rolls. But, this will all depend on the size of your produce, how full you pack your rolls, etc.
- These are best when fresh, so I recommend that you serve immediately, but if you need to, you could store them, or any leftovers covered in the fridge for a couple of days.
- I also recommend serving these rolls up with a dipping sauce or two. Yum! And we all know that little ones just love to dip!
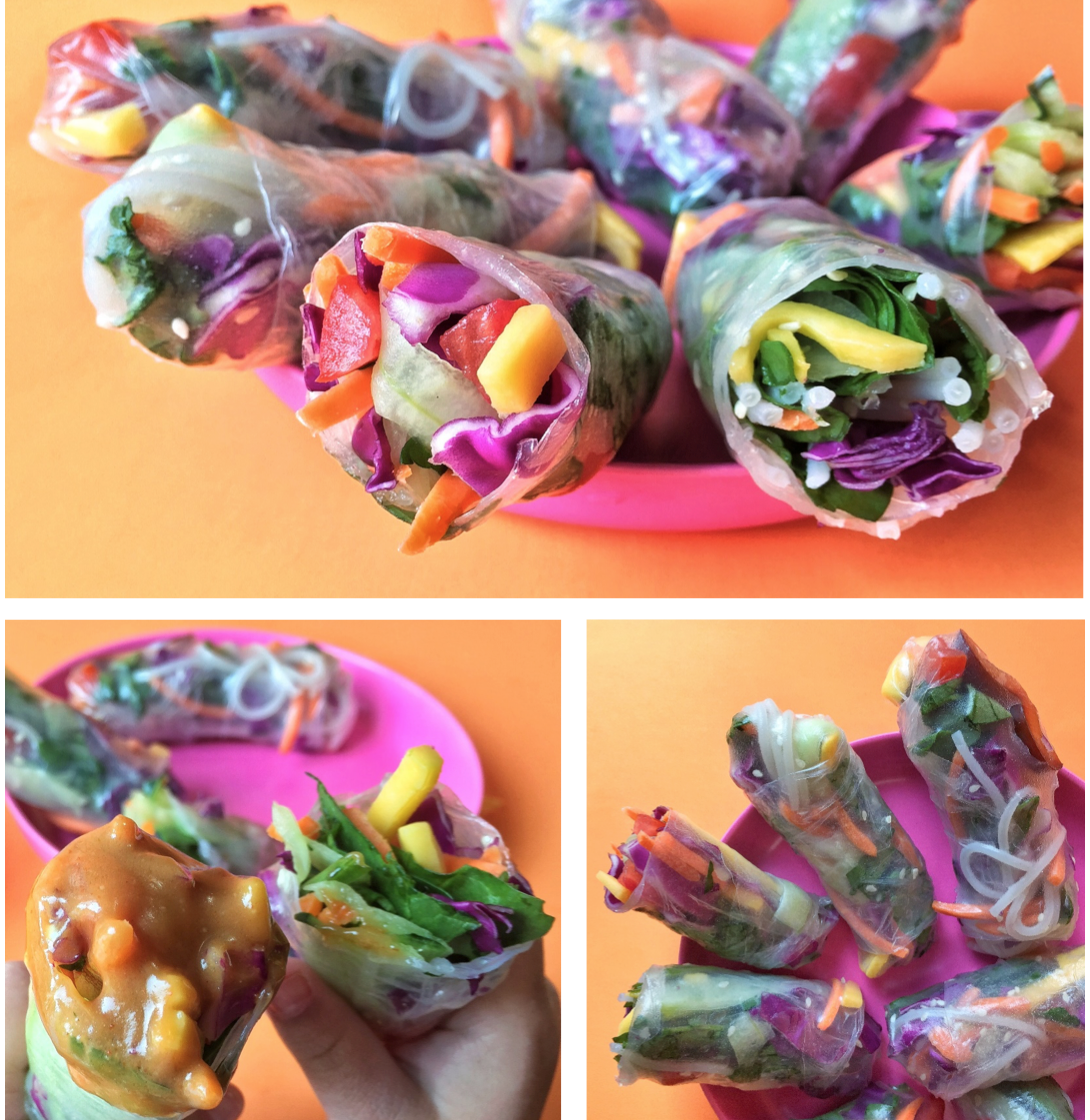
Aren’t these beautiful? They’re delicious too! When I set out to make them with my oldest son, I didn’t expect him to be too excited about eating them up. I was just hopeful that he would be willing to try them. However, him making them with me and my allowing him to be such a part of that process really won him over. He was so excited to roll them up “like tacos” as he said, and when we were about halfway through rolling, he was already asking, “Can I try them yet Mom?” Of course, my answer was YES! Packed with fruits and veggies, I loved that he was so excited to eat up such a healthy dish!
Healthy food really can be beautiful, fun and kid-approved.
POST BY LUNCHES + LITTLES
Lunches + Littles focuses on quick, healthy and fun meal options for little ones while sharing practical tips & tricks on how to make meals enjoyable, all the while keeping things simple. A lover of colorful plates, and an advocate for getting kids in the kitchen, Lunches + Littles is also a great resource for parents of picky eaters, parents looking for healthy family and toddler recipes and those mamas (dads too!) who are short on time. A mantra of sorts: Making meals fun doesn’t have to be hard! With 3 little ones (3 and under) it can’t be! Follow @lunchesandlittles for all of the above… And more!