Account Account Back to Top Cart Chat Chat Crate and Barrel Crate and Barrel CB2 Crate and kids Crate and kids Crate and kids Crate and kids Crate and Kids Hudson Grace Hudson Grace Menu Search

How-To Hang Lighting by DIY Playbook

Do you get hung up when it comes to lighting fixtures? Let DIY Playbook show you how to easily install a pendant light.

Dining room featuring pendant light fixture

Lighting is an important part of every home and I like to think of it as the “jewelry” in a room. It just instantly upgrades any space! When it comes to installing a new light fixture, I know it can seem pretty intimidating. But I promise that it’s actually very simple to change out a light fixture in your home. As long as you follow all of the correct safety precautions, there’s no need to call an electrician. This is a DIY project that anyone can do!

Today, I’m showing you how to install a pendant light fixture into an empty junction box. However, the same steps apply if you’re removing an old fixture and want to replace it with something new. And it doesn’t matter what kind of new fixture you’re adding…whether it’s a pendant light, a flushmount, or a chandelier, you’ll follow these same steps!

Step 1: Turn off the power. I always turn off the power to the entire home, just to be certain that it’s off in the area where I’m working. Test the light switch a few times to double-check too.

Step 2: Remove your junction box cover and pull out the wires. Or if you’re removing an old fixture, unscrew the mounting plate and take a picture of the wiring setup (you’ll want to recreate the same with your new fixture). You can then unscrew the wire nuts by hand and remove the old fixture.

In the junction box, you should find three wires. A black wire (hot), a white wire (neutral), and a green or copper wire (ground). You’ll see these same wires on the end of your new light fixture.

Step 3: Grab the mounting bracket that comes with your new light fixture. It should contain a copper wire that you’ll connect to the green wire on the new light fixture and the copper wire in the junction box. Twist all three wires together and secure with a wire nut. Wrap the base of the wire nut and the wires together with electrical tape.

Step 4: Secure the mounting bracket to the junction box using the screws that come with your new fixture.

Step 5: Connect the two white wires, secure with a nut, and wrap with electrical tape. Repeat with the two black wires. Tuck all of the wires into the junction box.

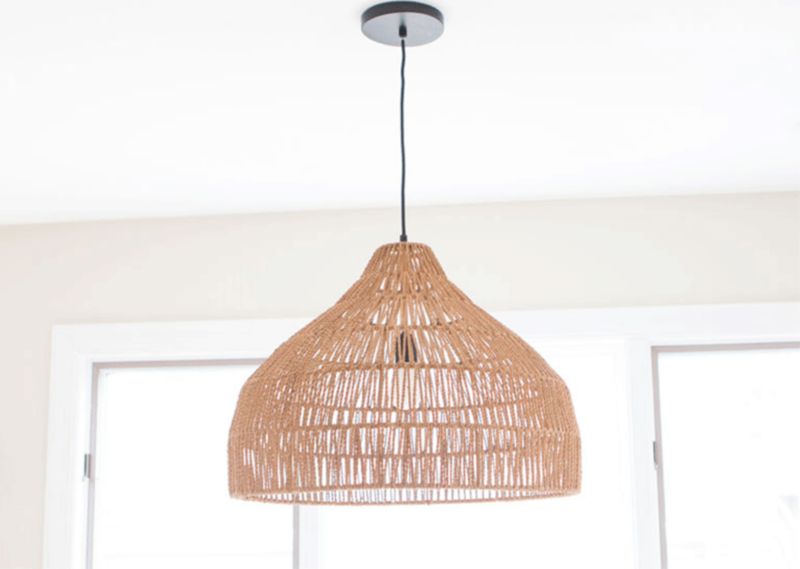
Step 6: Figure out the height for your new light fixture and wrap any additional cord into the mounting plate.

Step 7: Place the mounting plate over the bracket and secure with screws. You may need two people for this step. One to hold up the fixture and the other to screw it into the ceiling. Teamwork makes the dream work.

Step 8: Screw in a lightbulb, turn on the power, and flip the switch. Your light should go on!

I told you that wasn’t that difficult! This project should take 15-30 minutes to complete and it’s always nice to have a buddy to help. I’m always dropping screws and it’s great to have an extra set of arms to hold up your fixture. Or else it will be quite the arm workout!

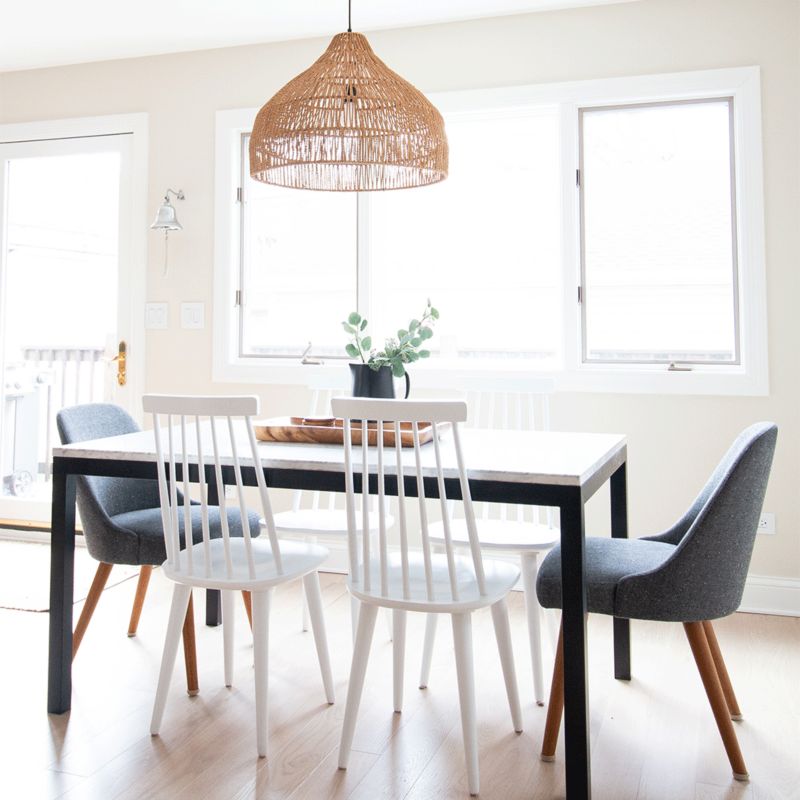
Now, find a new light fixture that you love (we added the large Cabo pendant over our dining room table) and add it to your home. I promise, you’ll enjoy the soft glow of your new lighting.

Pendant light
Shop pendant lighting
360 Spin App Store Go Previous Next Previous Next Down Previous Next Up Down Left Right Up Submit Bar Code Bar Code Yes Yes Down Left Right Up Close Close Copy Credit Card Crib Curbside Pickup Custom Blue to Teal Grey to Black Off White Orange to Red Purple Tan to Brown Yellow to Green Design Services Crate Design Services Dimensions Edit Edit Email Error Expand Expand Best Sellers Best Sellers Easy Care Easy Care Family Friendly Family Friendly Genuine Leather Genuine Leather Highly Durable Highly Durable Linen Look Linen Look Stain Resistant Stain-Resistant Textured Textured UV Resistant UV Resistant Velvet Velvet Woven in USA Woven in USA Filter Gift Gift Card Gifting Group Gifting Help Home Delivery Layout Column Layout Grid The Design Desk at Crate The Design Desk at Crate The Design Desk at Crate The Design Desk at Crate and Kids Doodlepad Handy Hudson Grace Crate and Barrel - The Wedding Registry Crate and Barrel - The Wedding Registry The Frame Location location Location Minus Move Down Move Up Pause Play Phone Play Play Plus Price Tag Print Begin Quote End Quote Receipt Registry Registry Returns and Exchanges Rotate Counter Clockwise Rotate Clockwise Warning Sectional Sectional Security - Locked Security - Unlocked Share Shipping Show More Start Over Facebook Houzz Instagram Pinterest TikTok Twitter Youtube Success Swatch Text Message Thank You Manager Venmo Venmo Verified Reviews Pause Play Replay Pause Play Replay Hide Show Zoom In Zoom Out Zoom Out